
Sofirn SC31 PRO — отличный компактный фонарик для ежедневного использования дома или на открытом воздухе, кемпинге, рыбалке, охоте.
Особенности фонаря:
- функция плавной регулировки яркости, от минимального до максимального режима, простым удержанием кнопки;
- уникальные режимы мигания: имитация грозы, имитация свечи, мигалка для велосипеда, дезориентирующий стробоскоп, стробоскоп для вечеринок и другие;
- точная диагностика заряда аккумулятора в Вольтах;
- компактные размеры и очень мощный (3800 лм, 220 метров) широкий заливной свет;
- встроенное USB-С зарядное устройство, можно зарядить от любого USB порта;
- в комплекте литиевый аккумулятор 18650 повышенной емкости 3000мАч;
- качественный анодированный алюминиевый корпус, пыле- и влаго- защищенность, не боится воды;
Технические характеристики:
- Источник света — светодиод Luminus SST-40, нейтральный белый свет 5000К, срок службы диодов 50 000 часов (≈5 лет непрерывной работы).
- Максимальная мощность светового потока — 2000 люмен.
- Максимальная дальность — 200 метров.
- Возможность регулировать яркость ступенчато или плавно.
- Питание: 1×18650 (в комплекте аккумулятор Sofirn 18650 3000 мАч).
- Корпус — авиационный алюминий марки T6061 с защитным анодированием высшей твердости (Type III), которое уберегает фонарь от царапин.
- Водонепроницаемость фонаря по стандарту IPX8 (погружение до 2-х метров).
- Размеры: длина 118 мм x диаметр головы 25,4 мм.
- Вес: 99 грамм (без батарей).
- Гарантия — 12 месяцев.
Комплектация. Фонарь, съемная клипса, запасные уплотнительные кольца, аккумулятор 18650 Sofirn 3000мАч, кабель micro-USB для зарядки.
Управление фонарем осуществляется единственной кнопкой, расположенной в хвостовой части.
Фонарь имеет множество режимов и настроек, для ознакомления с ними изучите инструкцию.
.jpg "Свет фонаря Sofirn-SC31B")
Управление фонарем
Боковой переключатель контролирует все функции: включение/выключение, смена яркости, индикатор уровня заряда батареи, LED — маяк.
Зарядка аккумулятора. Подключите фонарь при помощи micro-USB кабеля к порту USB. Включите фонарь. В процессе зарядки кнопка будет мигать синим светом, по окончанию — гореть непрерывно.
Индикация низкого заряда аккумулятора. В кнопку, расположенную в головной части фонаря, встроен светодиод. Светодиод может гореть постоянно, медленно мигать, мигать быстро. Быстрое мигание означает критически низкий заряд батареи — необходима подзарядка.
Фотографии фонаря
.jpg)
.jpg)
Инструкция для фонаря Sofirn SC31 PRO — стр. 1, стр. 2, стр. 3.
| Назначение | Ручной фонарь |
| Светодиод | Luminus SST-40 |
| Количество светодиодов | 1 |
| Оттенок светодиода | Теплый белый |
| Максимальная яркость, люмен | 2000 |
| Максимальная дальность, метров | 200 |
| Отражатель | Гладкий алюминиевый параболический отражатель. |
| Число режимов | Множество режимов, плавная регулировка яркости. Смотри инструкцию. |
| Время работы мин. — макс. режимы | |
| Аккумулятор/батарея в комплекте | Да |
| Встроенное ЗУ | Да |
| Тип элементов питания | 18650 |
| Водонепроницаемость | IPX8, погружение до 2 м |
| Ударопрочность | до 1 м (при падении на бетон) |
| Материал корпуса | Авиационный алюминий, анодированное покрытие. |
| Габаритные размеры | Длина 118мм x диаметр 25,4 |
| Вес без элементов питания | 99 грамм |
| Гарантия | 12 месяцев |
| Комплектация | Фонарь, съемная клипса, запасные уплотнительные кольца, аккумулятор 18650 Sofirn 3000мАч, кабель micro-USB для зарядки. |
Написать отзыв
Ваше имя:
Ваш отзыв:
Примечание: HTML разметка не поддерживается! Используйте обычный текст.
Введите код, указанный на картинке:

Всем доброго времени суток!
Давненько не было обзоров на фонарики Sofirn, надо это исправить тем более попался фонарик SC31, который тут еще не обозревали.
А раз так значит стоит это сделать.
Всем, кому интересно милости прошу под кат.
Для начала технические характеристики от производителя.
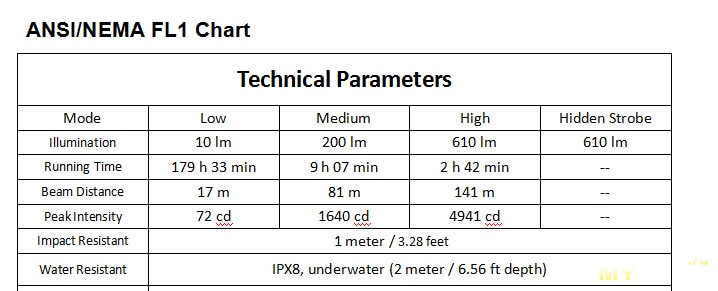
Характеристики:
- Светодиод: CREE XPG3
- Рабочее напряжение: 2,8 В-4,2 В
- Размер: 117,5 мм (длина) * 25,4 мм (диаметр головки)
- Вес: 60 г (без батареек)
- Корпус фонарика: авиационный алюминиевый сплав класса 6061, анодированный, антиабразивное покрытие.
- Закаленное минеральное стекло объектива
- Отражатель: Апельсиновая корка
Фонарик приехал в стандартной коробке Sofirn, в комплект производитель положил сам фонарик, аккумулятор, инструкцию, в том числе на русском языке, кабель для зарядки и набор уплотнительных колец с темляком.
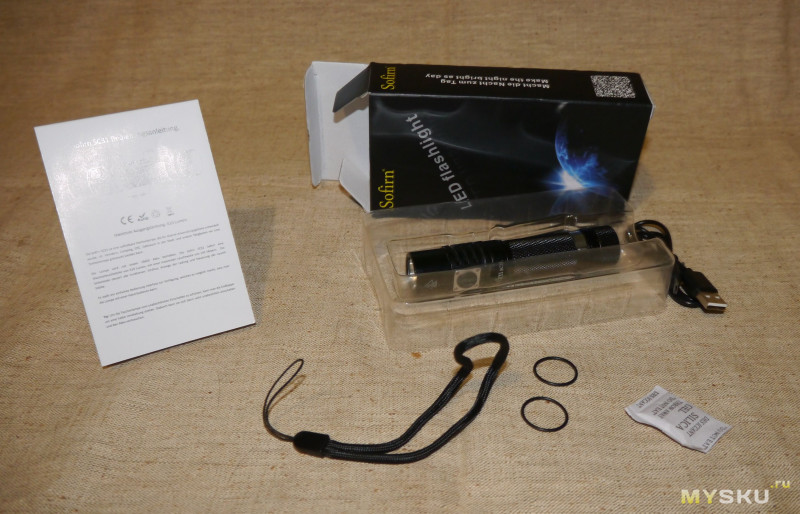
Как не искал так и не смог понять, зачем в комплект положили темляк, места для его крепления на корпусе нет, разве что за прищепку привязать, но это как то странно.
Про внешность
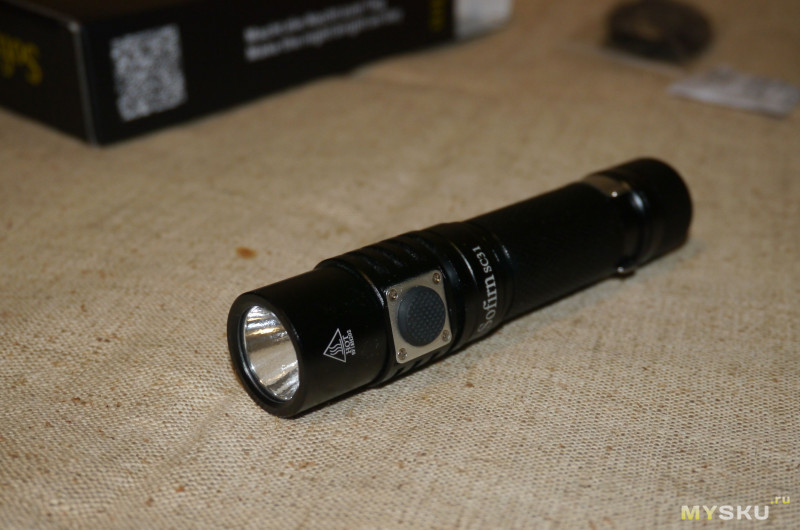
Внешность у фонаря вполне себе обычная, несколько непривычно выглядит разве что большая резиновая кнопка управления.
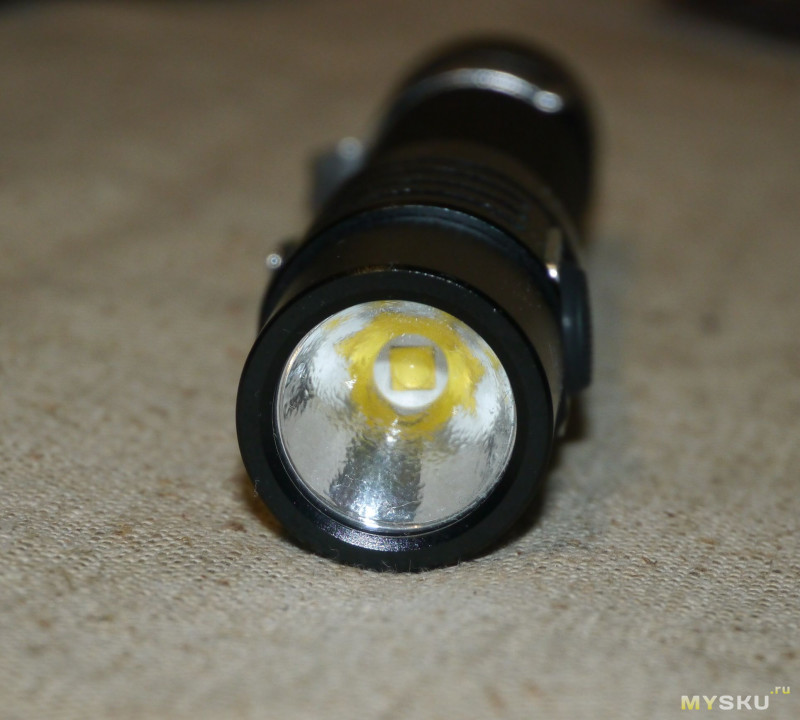
Отражатель, как и обещал производитель в виде апельсиновой корки.
С обратной стороны от кнопки управления за резиновой заглушкой находиться usb порт. Резинка входит в гнездо очень туго, приходиться обжимать пальцами по периметру при закрытии, Сидит в гнезде хорошо, хвостик маленький, но если взяться за него и потрясти фонарь то заглушка не выпадает.
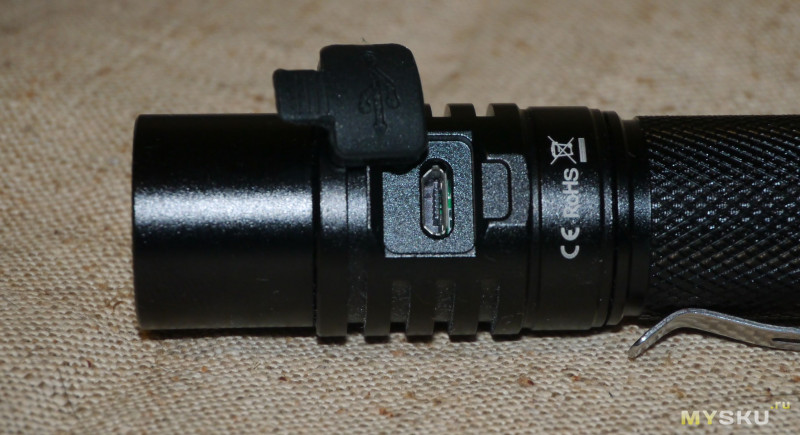
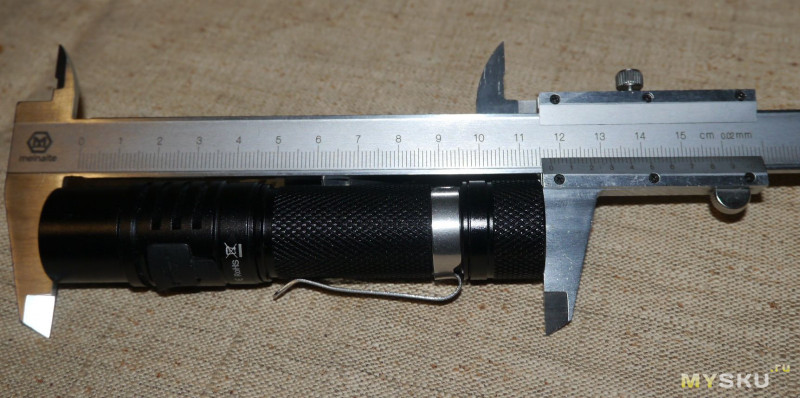
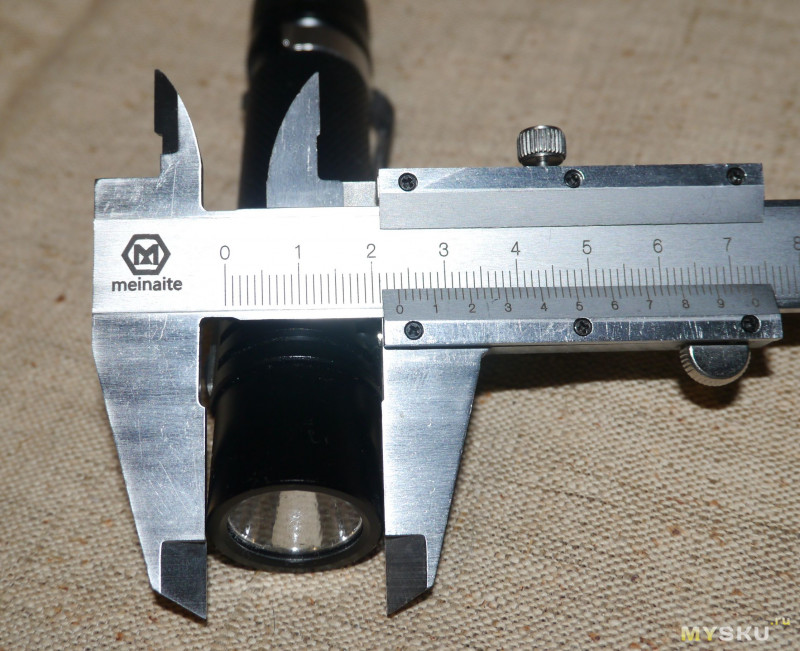
Длина корпуса 117.5 мм, как и в описании, диаметр головы 23.5 мм, но я измерял в районе стекла, а дальше корпус немного расширяется за счет ребер радиатора.
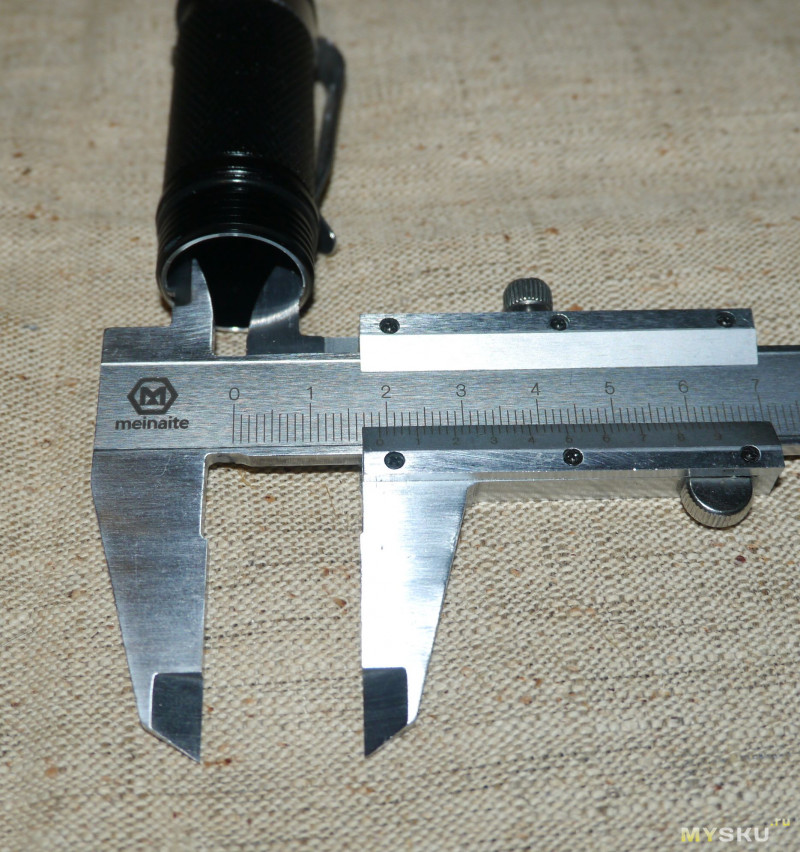
Внутренний диаметр отсека для аккумулятора 19 мм.
Вес тоже соответствует описанию.
Про управление
Для управления фонариком служит одна единственная кнопка, она же выполняет роль индикатора уровня заряда.
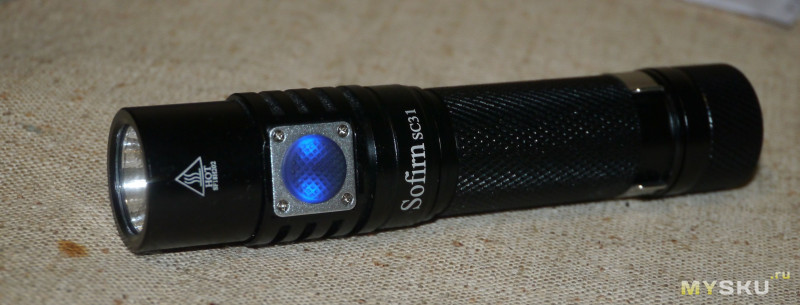
При включении фонаря кнопка светится синим светом, и гаснет при нормальном уровне заряда аккумулятора. Если аккумулятор разряжен кнопка плавно мигает три раза и выключается, когда аккумулятор находиться на очень низком уровне заряда кнопка начинает мигать быстро двойными вспышками. Во время зарядки кнопка непрерывно мигает, при достижении полного заряда начинает просто светиться.
Помимо датчика заряда индикатор в кнопке может использовать в качестве маячка, если при выключенном фонаре нажать и удерживать кнопку она начнет постоянного мигать до тех пока не будет нажата еще раз.
На мой взгляд с режимом маячка конструкторы немного недодумали, с одной стороны фишка прикольная и реально помогает найти фонарь в темноте, но для того что бы маячок работал его сначала нужно включить. И тут все логично кроме одного момента, чтобы фонарь включить нужно нажать на кнопку, а нажатие на кнопку выключает маячок и после того как вы попользовались фонарем вы должны опять не забыть включить маячок что бы опять найти фонарь в будущем. Вот такой вот странный режим получается.
Зато с остальными режимами все просто.
Короткое нажатие кнопки включает или выключает фонарь. Длительное нажатие переключает по кругу три уровня яркости.
Быстрый двойной клик включает режим SOS, который в инструкции, почему-то зовется стробоскоп.
При работе более пяти минут на максимальной яркости фонарь автоматически начинает постепенно (именно постепенно) снижать яркость до какого-то промежуточного уровня между средним и ярким.
Порядок переключение режима: минимум, средний, максимум, затем опять минимум и по кругу.
Есть память последнего режима, так что на каком уровне яркости выключили, на том и включите.
Режима блокировки от случайного включения нет, производитель в инструкции рекомендует хранить и носить с открученной по пол оборота крышкой.
Про внутренний мир и режимы работы
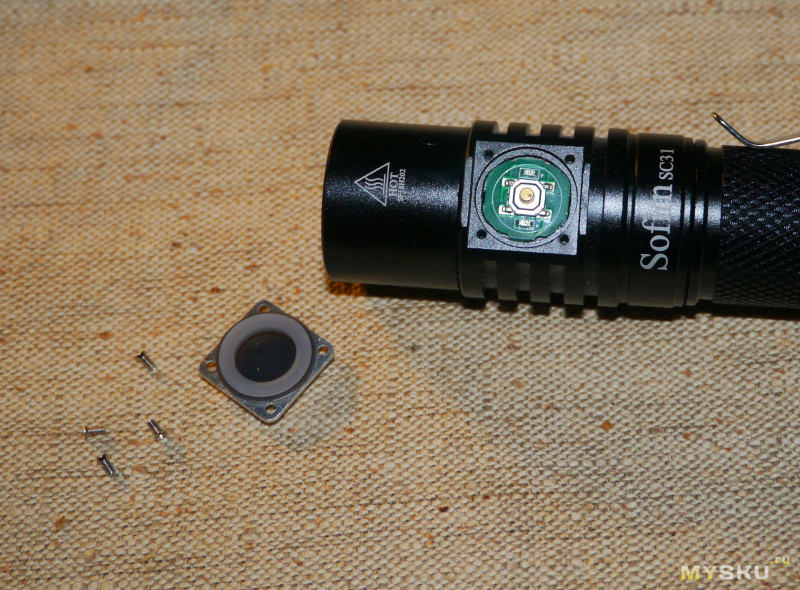
К сожалению, посмотреть, что там внутри в голове у фонаря мешает странная тенденция компании заливать головы в новых фонарях клеем.
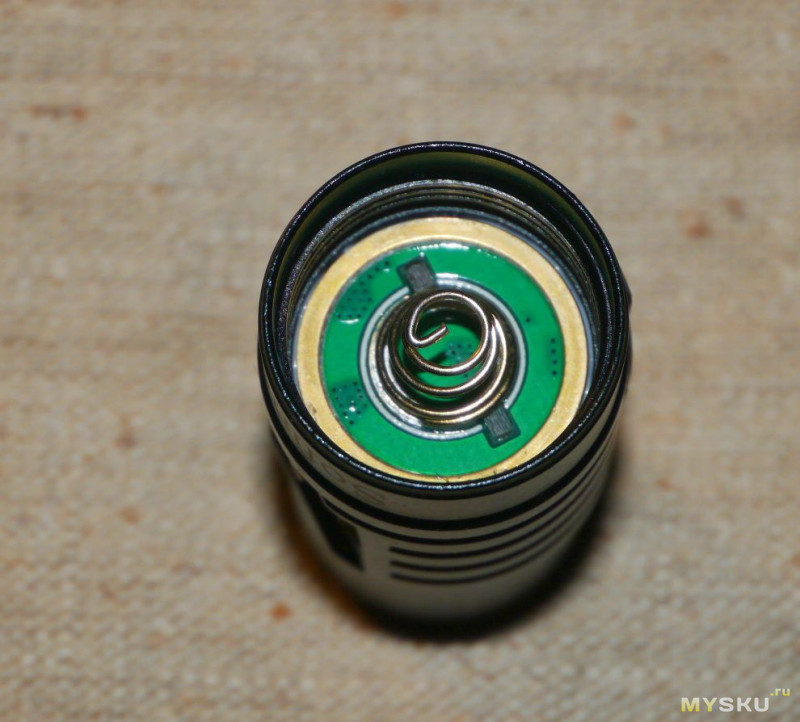
Единственного что можно разобрать это четыре винтика вокруг кнопки включения.
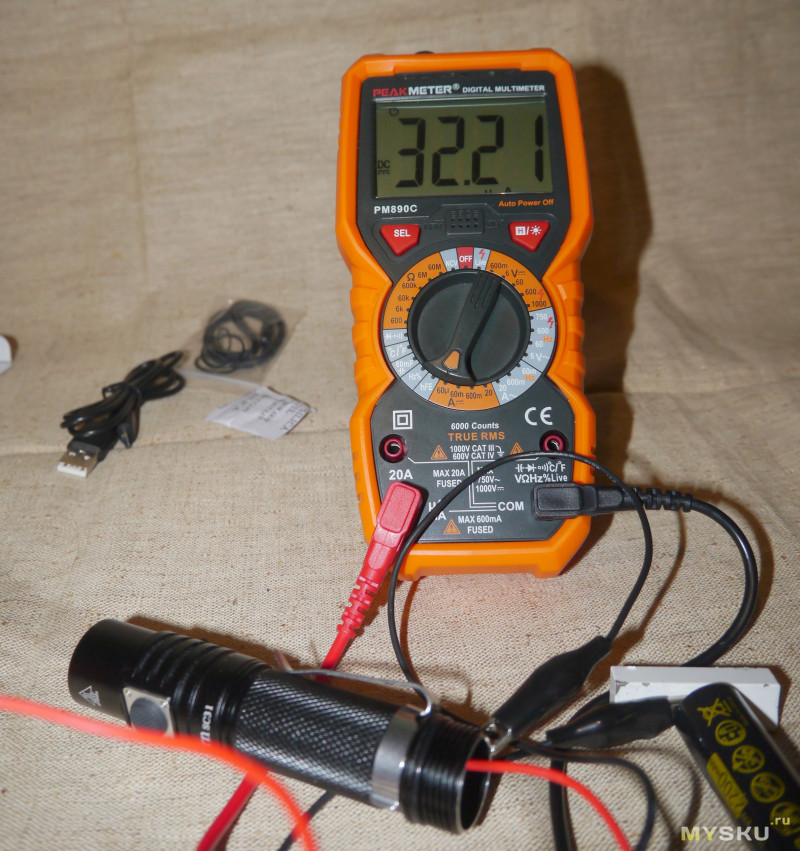
Измерение тока.
В режиме ожидания фонарь потребляет 32 мкА.
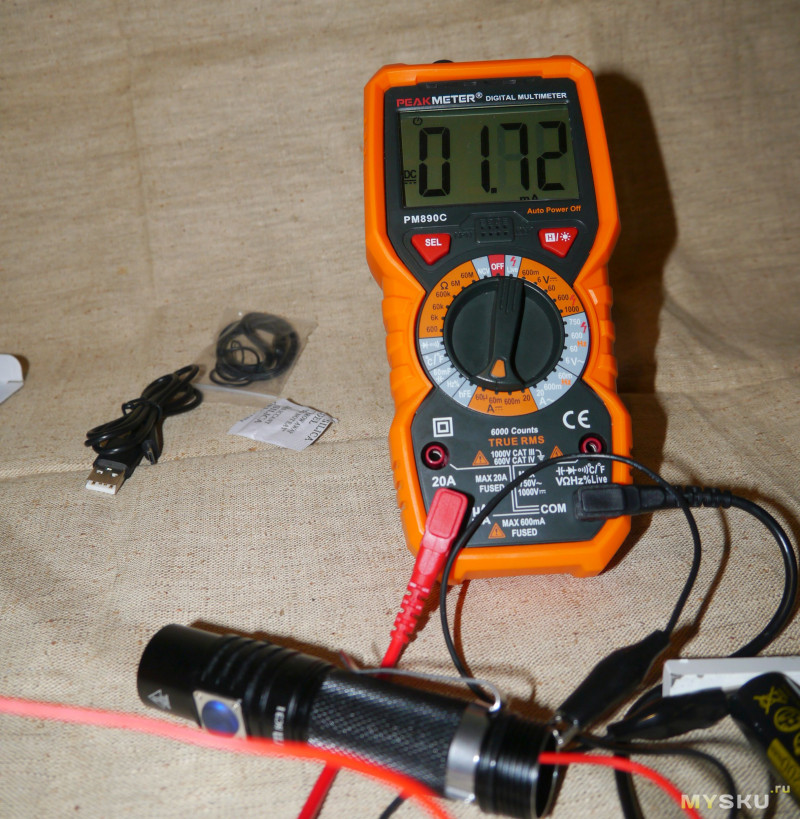
В режиме маячка 1.7 мА
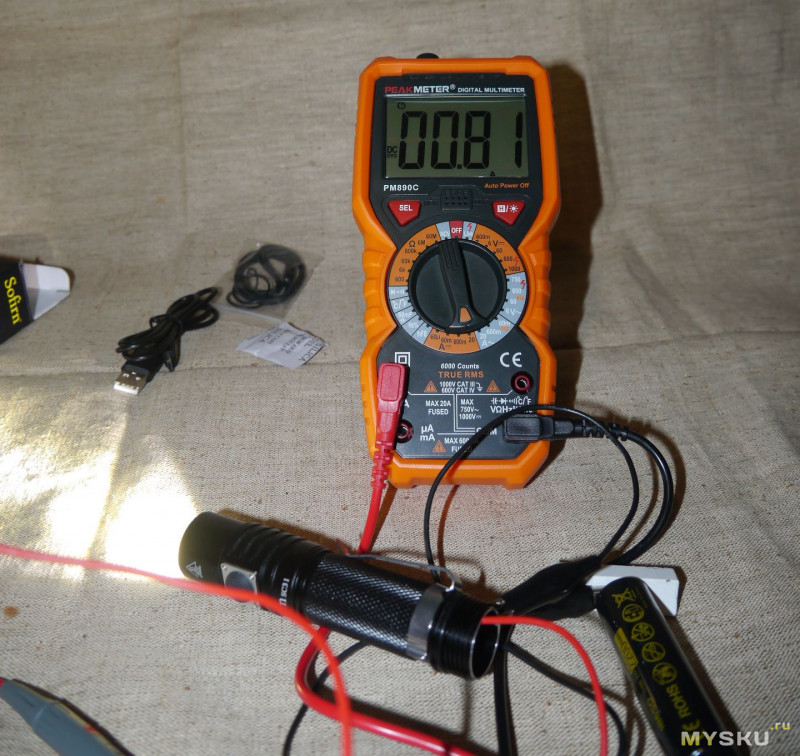
Максимальная яркость 0.8 А
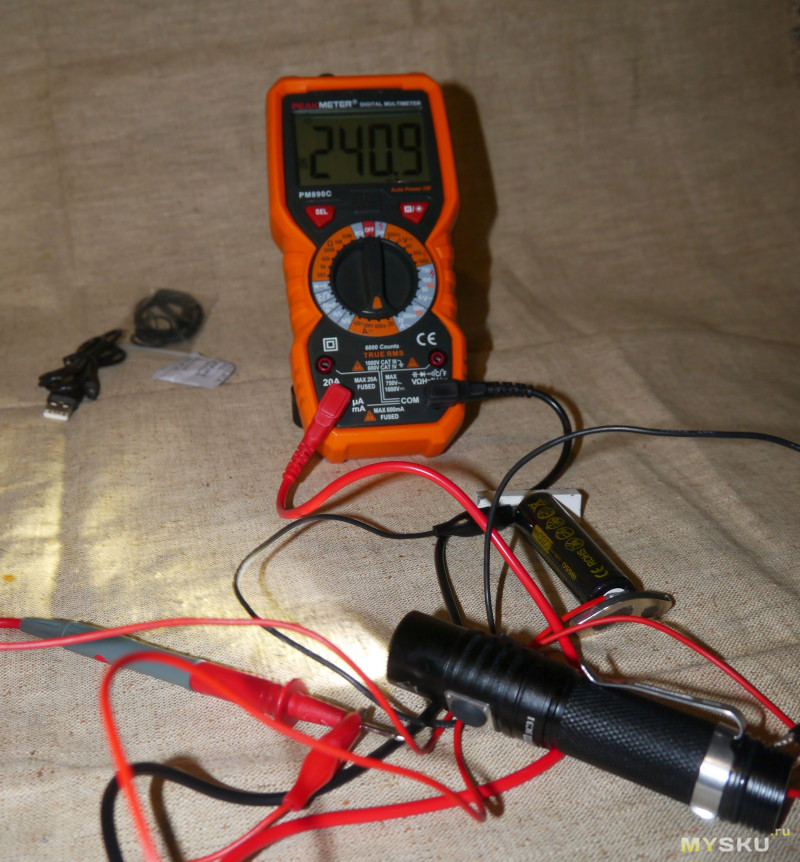
Средний уровень яркости 0,24 А
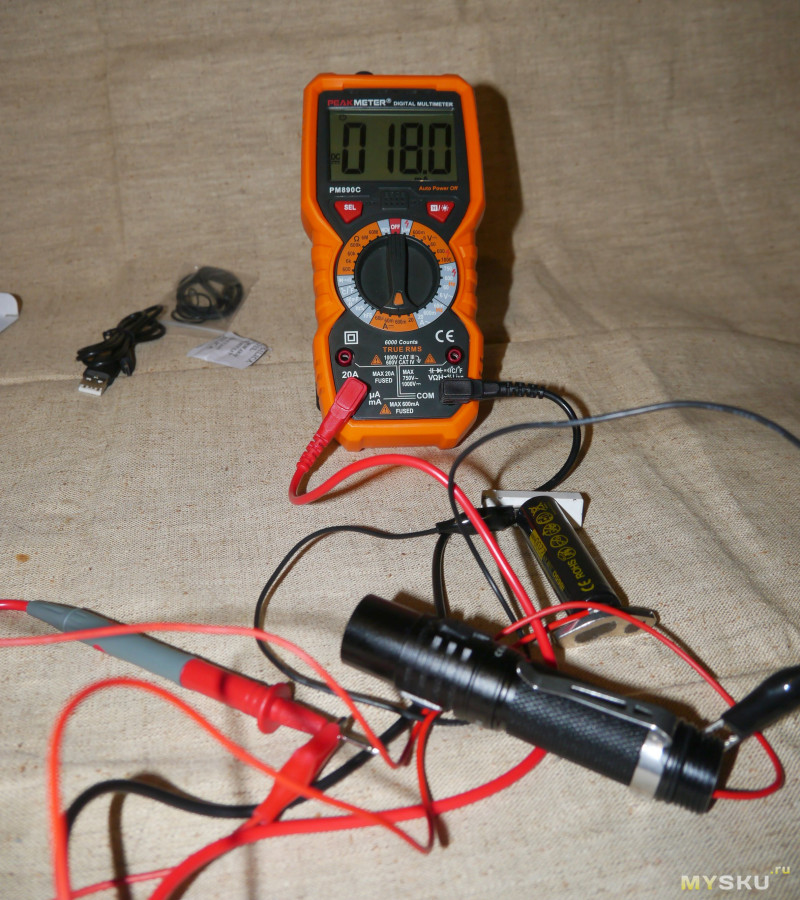
Минимальная яркость 0,02 А
Как писал выше если оставить фонарь на максимальной яркости на 5 минут он сам начнет плавно снижать яркость, остановившись в неком промежуточном положении, в таком режиме он потребляет примерно 0.5 А.
Щупы
На всякий случай сопротивление проводов, через которые проводил измерение.
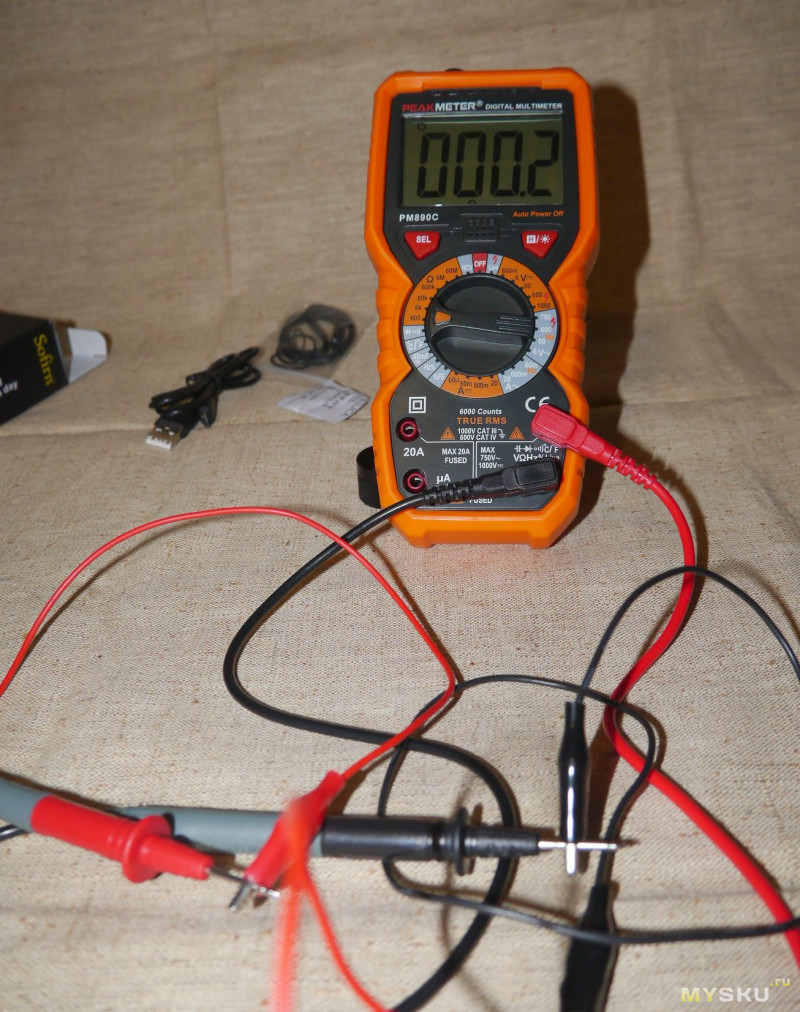
В связи с тем, что голова у фонаря не разборная подключить щупы осциллографа прямо к светодиоду не получиться, так что мерцание буду смотреть в режиме измерения потребляемого тока на аккумуляторе, в качестве шунта используется мультиметр.
Развертка 10 микросекунд/дел множитель х1
Минимальная яркость.
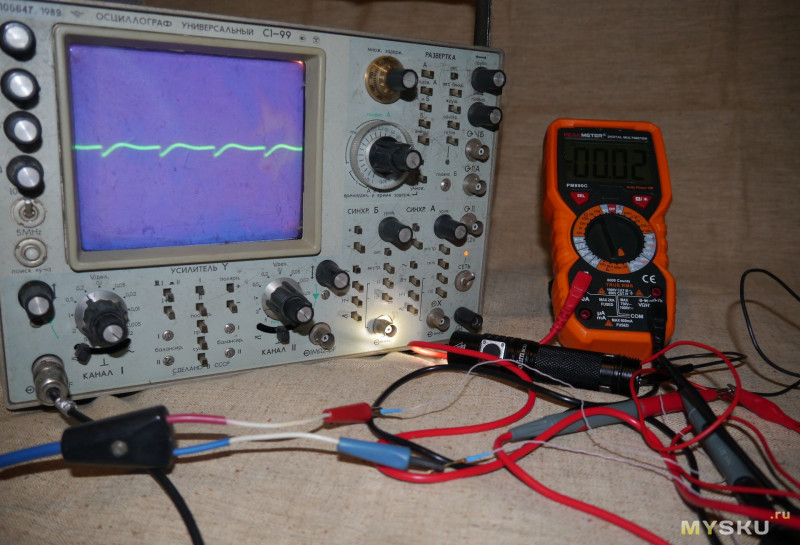
Средняя яркость.
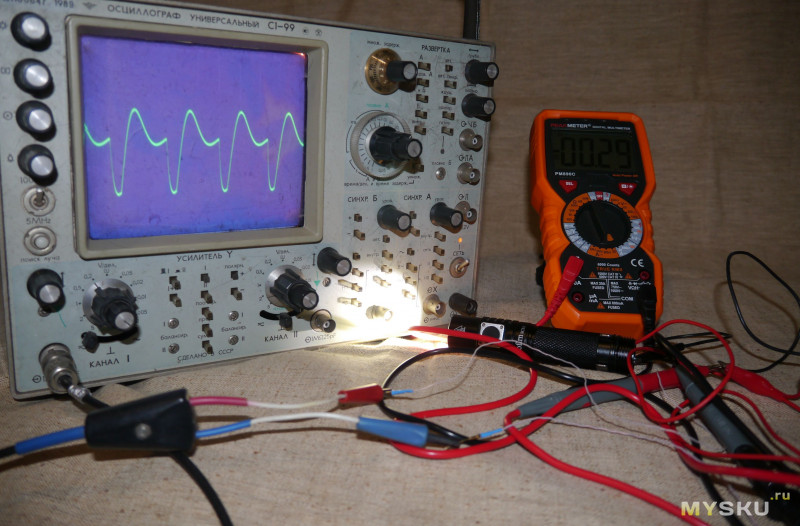
Максимальная яркость.
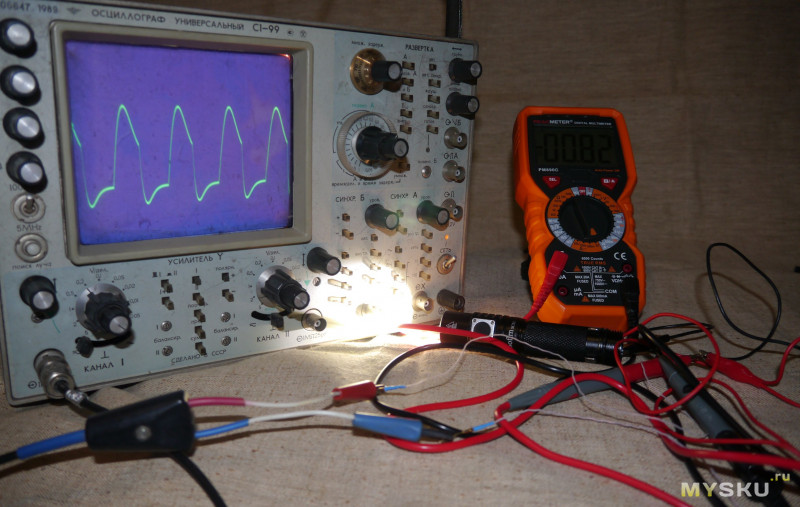
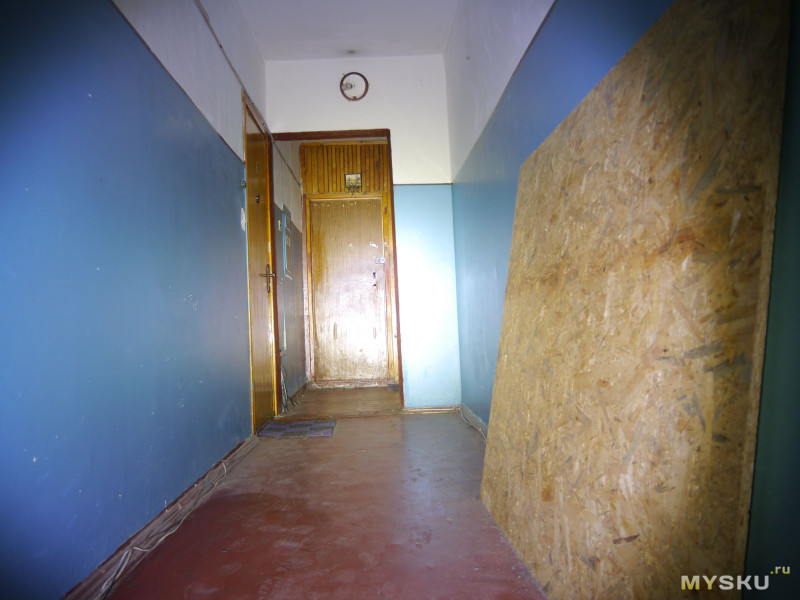
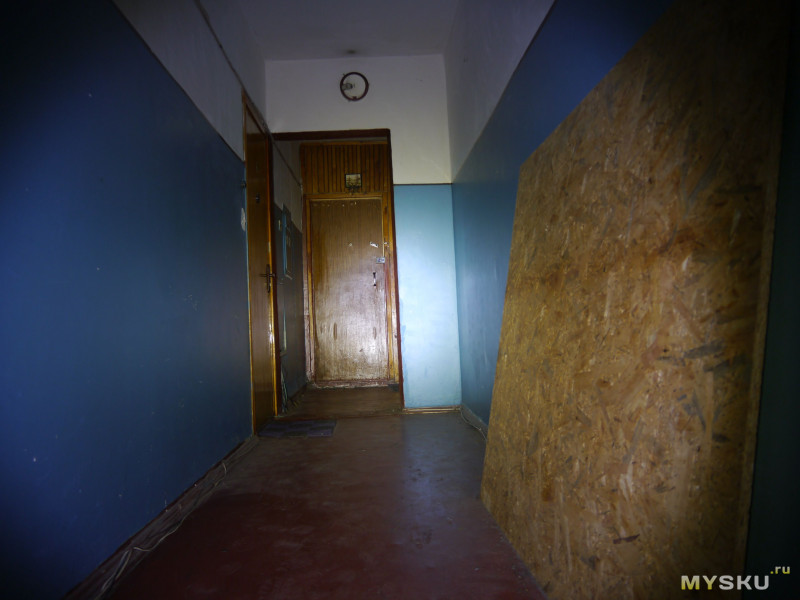
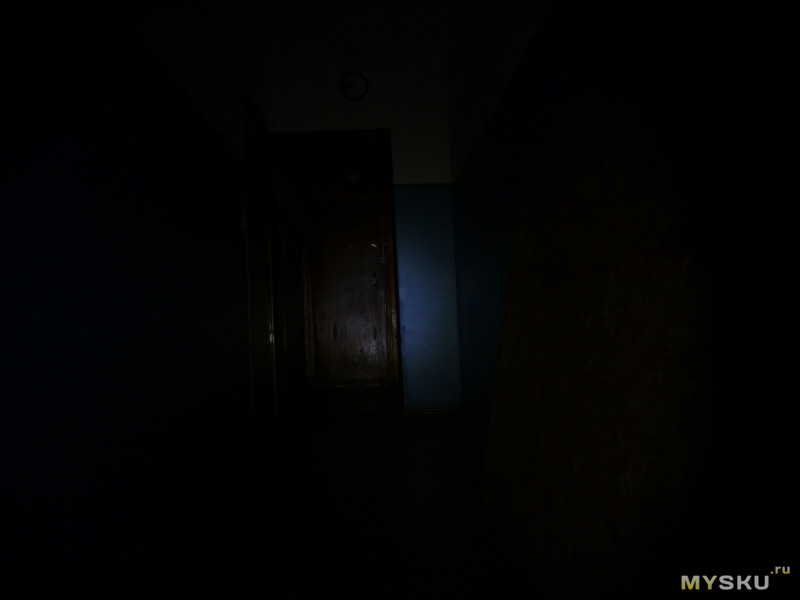
Яркость
Все фото делал на мануальном режиме, выдержка 1 с, iso 160, диафрагма 3.5
Максимальная яркость.
Средняя яркость.
Минимальная яркость.
И небольшой вывод
В целом вполне нормальный фонарик получился, немного расстраивает отсутствие блокировки выключателя, немного странная работы маяка и не знаю почему, но раздражает неразборная голова фонаря. Радует аккумулятор 18650, компактный размер и встроенная зарядка. Кстати заряжать можно любым кабелем порт расположен очень близко к краю корпуса и штекеру ничего не мешает.
Заранее приношу свои извинения за орфографию и грамматику текста, все допущенные ошибки сделаны не специально, а только по незнанию и в связи с несовершенством программ автоматической проверки текстов.

Похожие видео 💥
🔥 Дополнительные видео 💥
Производитель:Sofirn
Модель: Sofirn SC31 PRO (SST40)
Код товара: 2001
В наличии: 6
Цена: 3200 р.
Sofirn SC31 PRO — это мощный фонарик для использования в помещениях или для активного отдыха на природе : кемпинг, походы , рыбалка, охота и т.д.
Фонарь работает от одного аккумулятора 18650 или две батареи CR123A
Фонарь оснащен сверх ярким светодиодом CREE SST40 и активным термоконтролем (ATR)
ОСОБЕННОСТИ
- Сверх яркий светодиод CREE SST40
- Яркость 2000Lm
- Активный термоконтроль
- Защита от переполюсовки
- Анодированный корпус CNC PREMIUM из авиационного алюминия 6061
- Антиабразивное покрытие
- Индикатор заряда батареи
- Память последнего режима
- Удобное управление режимами
- Влаго защита IPX8
- Усиленная линза из минерального стекла с просветлением
- Защита аккумлятора от переразряда
- Блокировка от случайного включения
Управление режимами
Включение/выключение — нажмите кнопку однократно
Регулировка яркости — при включенном свете удерживайте кнопку, яркость начнет плавно прибавляться и убавляться, отпустите кнопку что бы зафиксировать нужный вам режим яркости.
Активация режима турбо — двойное нажатие кнопки из любого режима
Комплектация
Уплотнительные кольца 2шт.
Ремешок
USB кабель
| Питание | |
| Кол-во элементов питания | 1 |
| Питания фонаря | аккумулятор |
| Размер элементов питания | 18650 |
| Тип | |
| Тип фонаря | ручной |
| Светодиоды | |
| Кол-во светодиодов в фонаре | 1 |
| Модель светодиода | SST40 |
| Мощность света (Lumen) | 2000 |
| Свет | белый |
| Оптика | |
| Фокусировка луча | нет |
| Комплектация | |
| Комплектация | не полная |
Написать отзыв
Ваше Имя:
Ваш отзыв:
Используйте обычный текст.
Оценка: Плохо
Хорошо
Введите код, указанный на картинке:
Click for Table of Contents
Sofirn dropped the SC31 Pro 18650 Andúril flashlight not long ago, and I finally got my hands on one. It’s notable because it’s a very low-cost Andúril light! Read on for some thoughts and testing.
Official Specs and Features
Here’s a link to the official product page.
Versions of the Sofirn SC31 Pro Flashlight
There’s just one body of the Sofirn SC31 Pro, but it’s available for purchase in two emitter temperatures: 6500K (seen here) and 5000K.
Price
Without a cell, this light clocks in at $28 (sale price). Looks like it’s $31.99 right now on Amazon (referral link). The Amazon price with the cell is $40.
Short Review
I’d consider this one a good beater light. Inexpensive, Andúril user interface, lighted switch. It’s a good light, especially for the price.
Sofirn SC31 Pro Flashlight Long Review
The Big Table
| Sofirn SC31 Pro | |
|---|---|
| Emitter: | Luminus SST-40 (CW) |
| Price in USD at publication time: | $31.99 on Amazon (referral link) |
| Cell: | 1×18650 |
| Turbo Runtime | High Runtime |
| LVP? | |
| Switch Type: | E-Switch |
| Quiescent Current (mA): | Switch off: 0.05 Switch Low: 0.11 Switch High: 1.57 |
| On-Board Charging? | Yes |
| Charge Port Type: | USB-C |
| Chargetime | |
| Power off Charge Port | With Cell: All modes Without Cell: 6 stepped modes |
| Claimed Lumens (lm) | 2000 |
| Measured Lumens (at 30s) | 1526 (76.3% of claim)^ |
| Candela per Lumen | 7.8 |
| Claimed Throw (m) | 200 |
| Candela (Calculated) in cd (at 30s) | 1000lux @ 3.624m = 13133cd |
| Throw (Calculated) (m) | 229.2 (114.6% of claim)^ |
| All my Sofirn reviews! |
^ Measurement disclaimer: Testing flashlights is my hobby. I use hobbyist-level equipment for testing, including some I made myself. Try not to get buried in the details of manufacturer specifications versus measurements recorded here; A certain amount of difference (say, 10 or 15%) is perfectly reasonable.
What’s Included

- Sofirn SC31 Pro Flashlight
- Sofirn 3000mAh 18650 (button top, standard)
- Spare o-rings (2)
- Lanyard
- Charge cable (USB to USB-C)
- Manual
Package and Manual


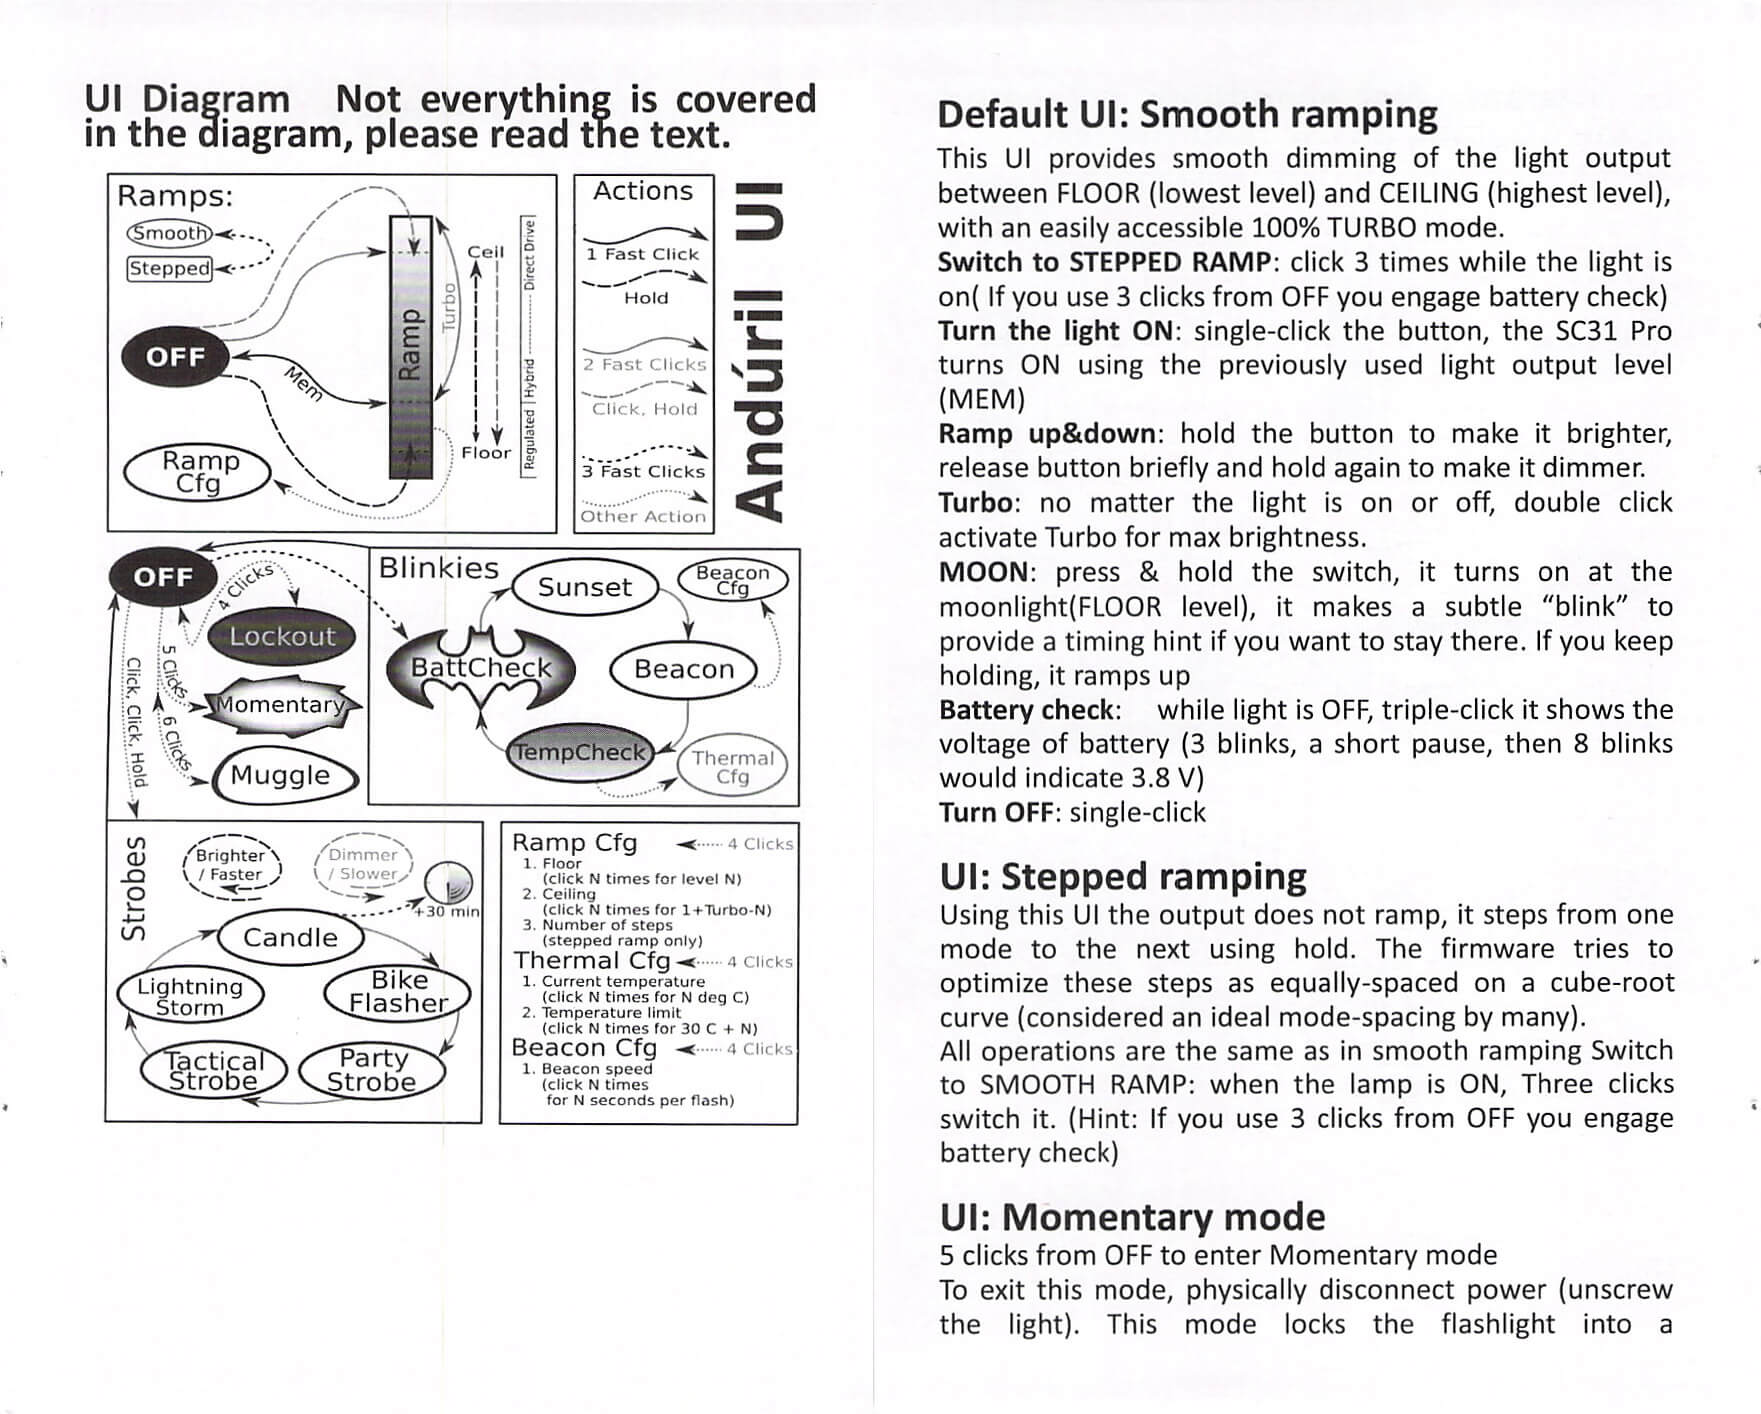
I couldn’t find the manual anywhere else, so here’s a pretty solid copy of all the English pages.




Build Quality and Disassembly

The build quality of the Sofirn SC31 Pro is commensurate with the price. It’s around a $30 light – seems about right. That’s for simply build quality though. The actual guts of this light (discussed later) put it in a separate (and higher) category.
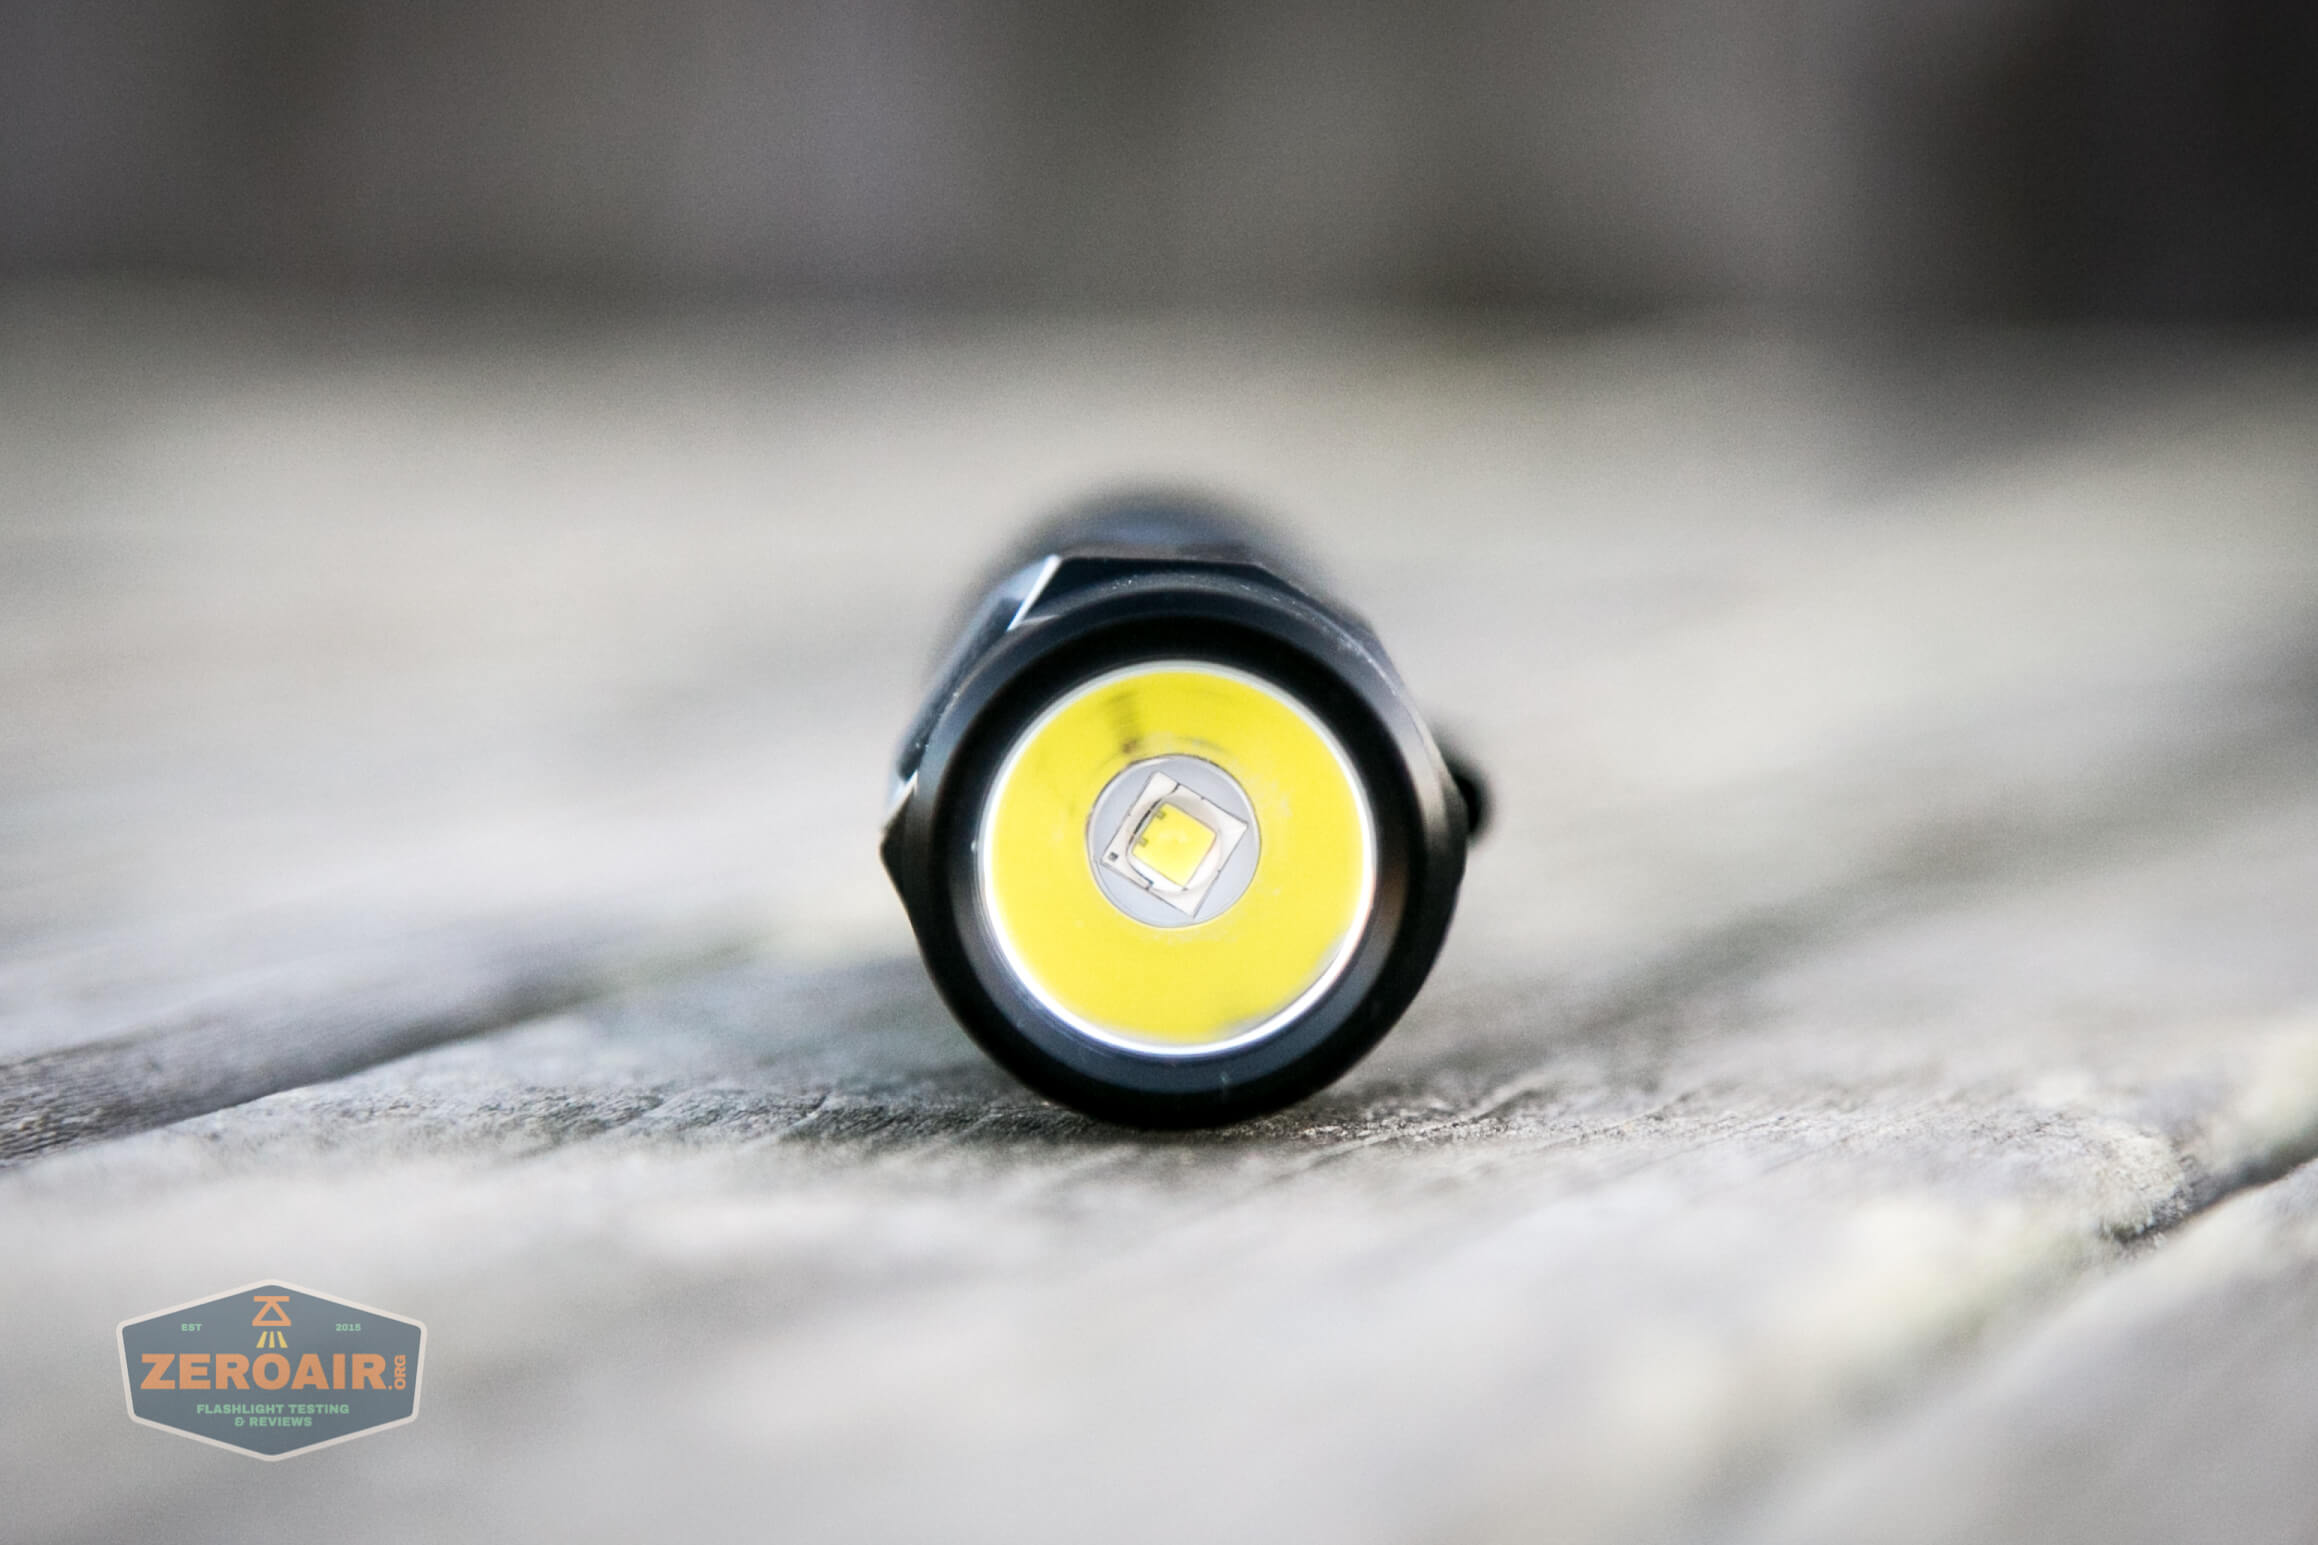
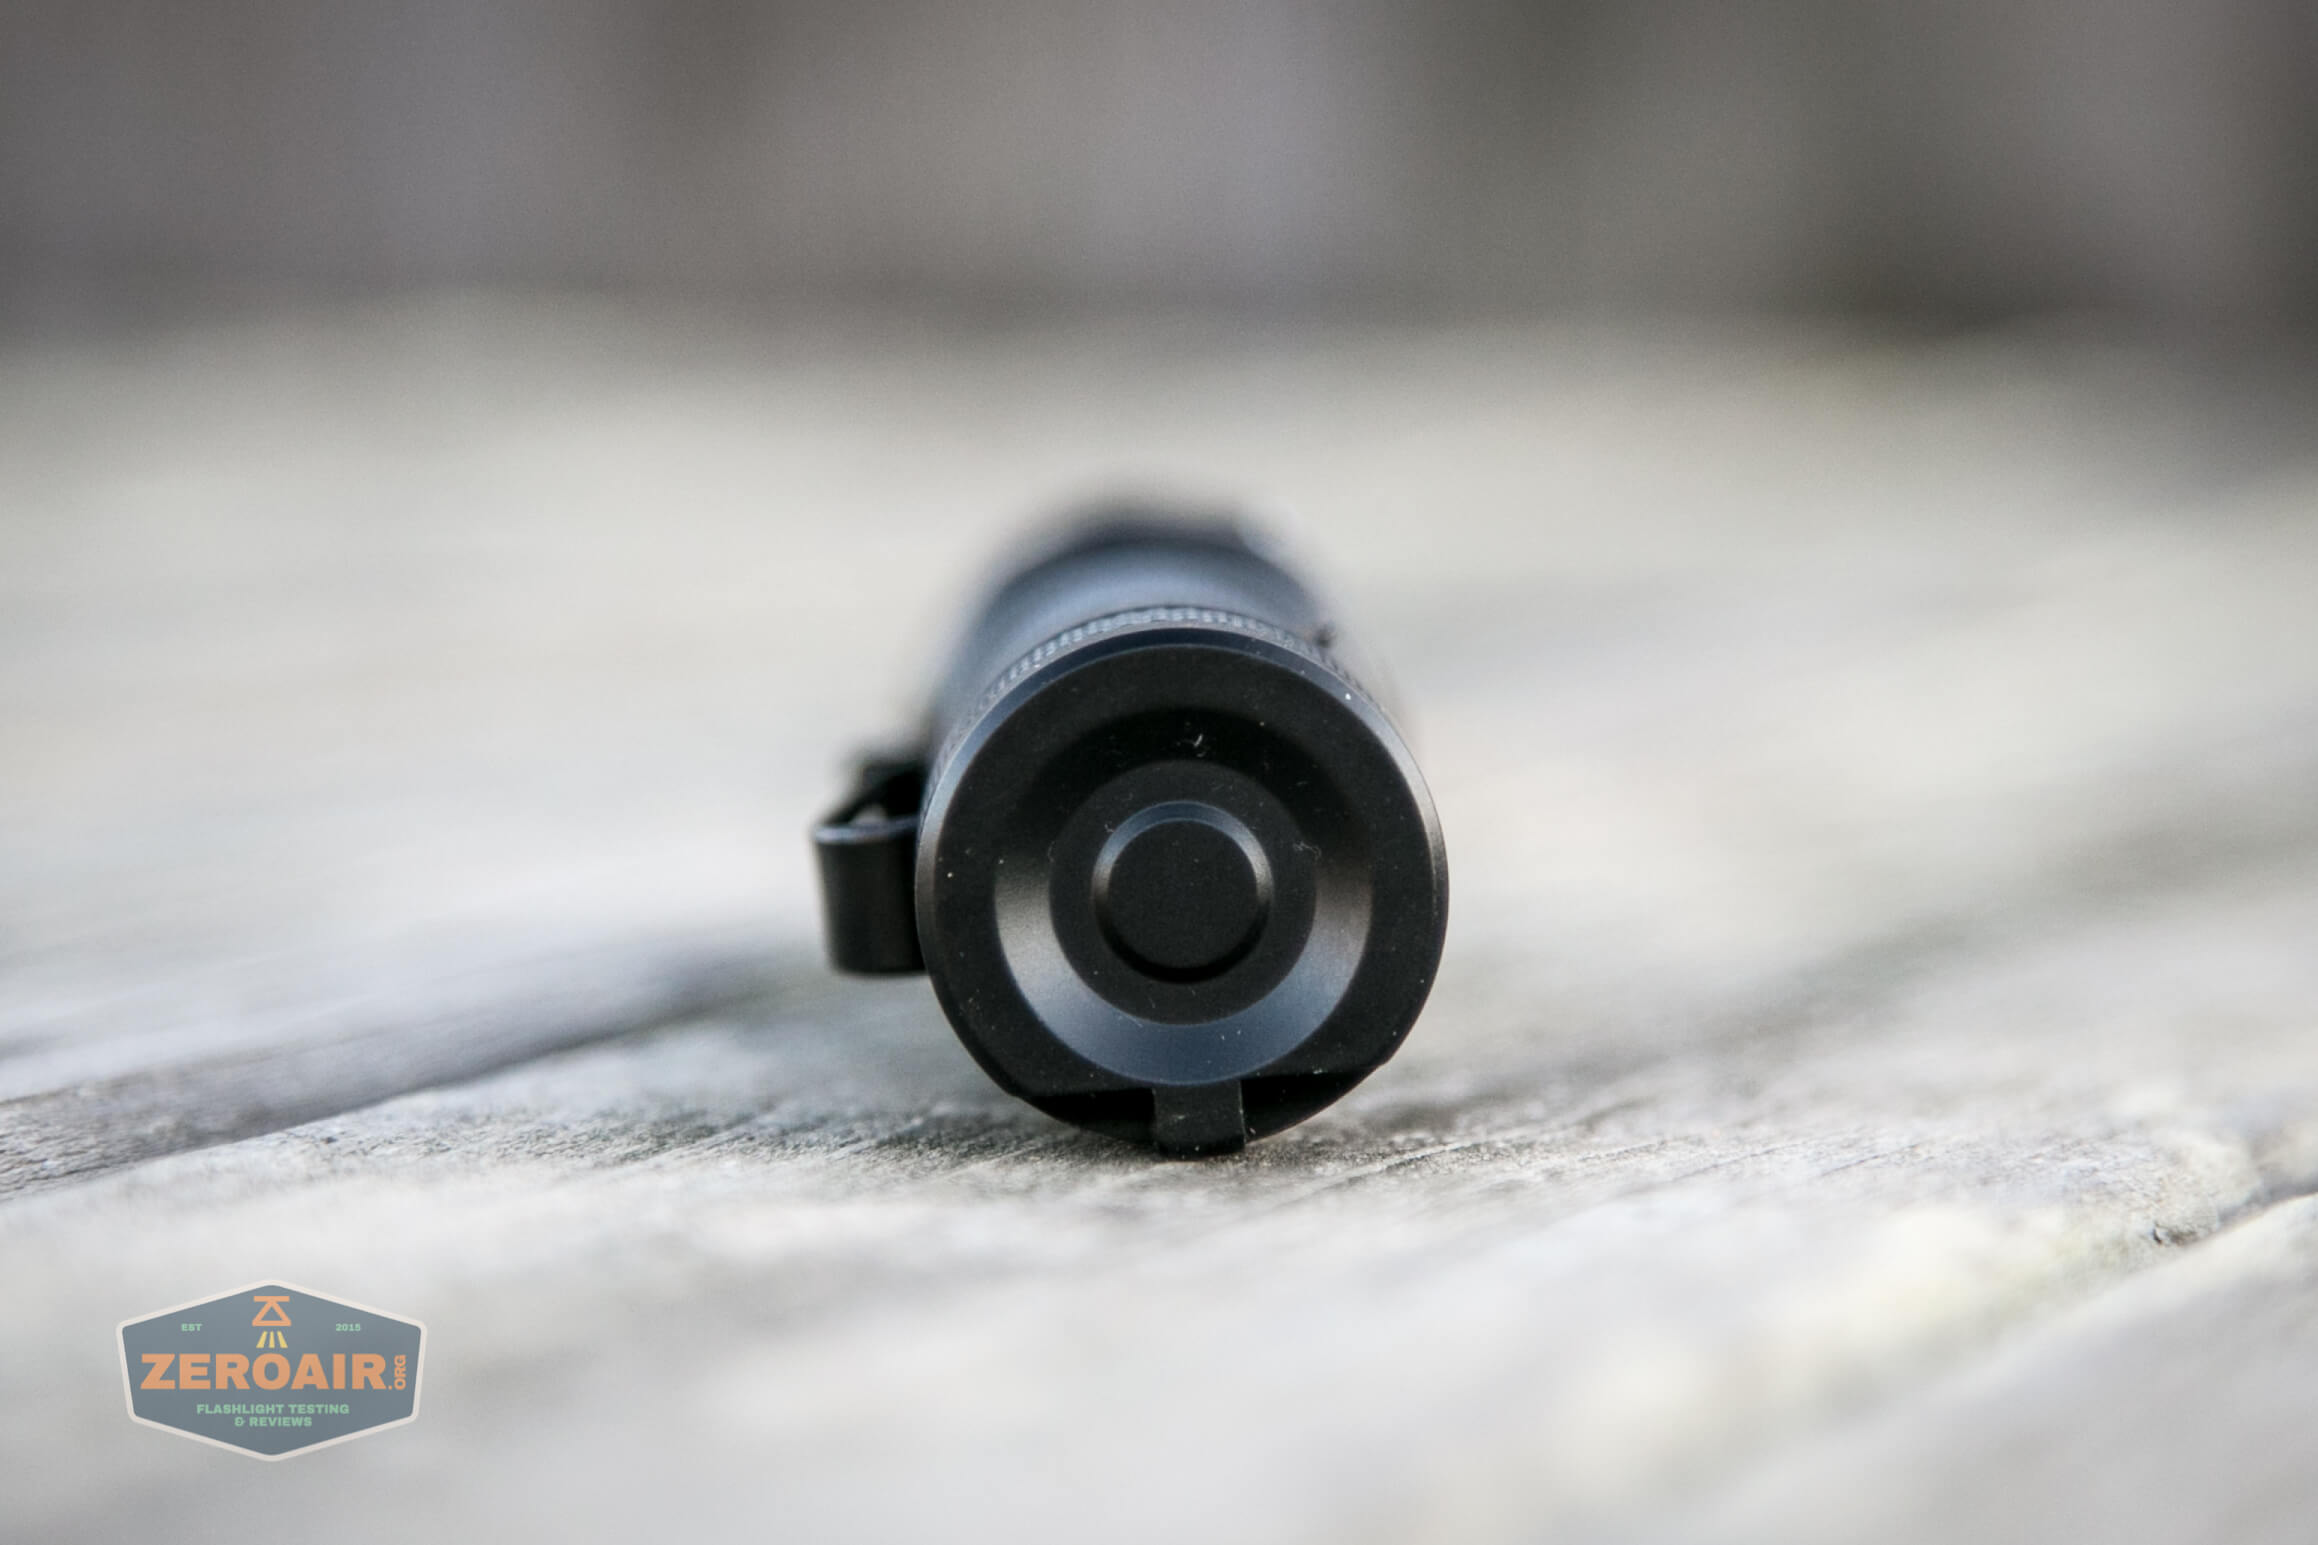
The head has minimal cooling fins, and overall retains the “tube light” nature.


The body has ample knurling, and it’s sharpish.

Even the tailcap smartly has knurling too. This makes it very easy to unscrew.

More on this clip later.



The threads on this light are very smooth. They’re square-cut, sort of long, anodized, and again… very smooth.

The head end has a nice thick spring.
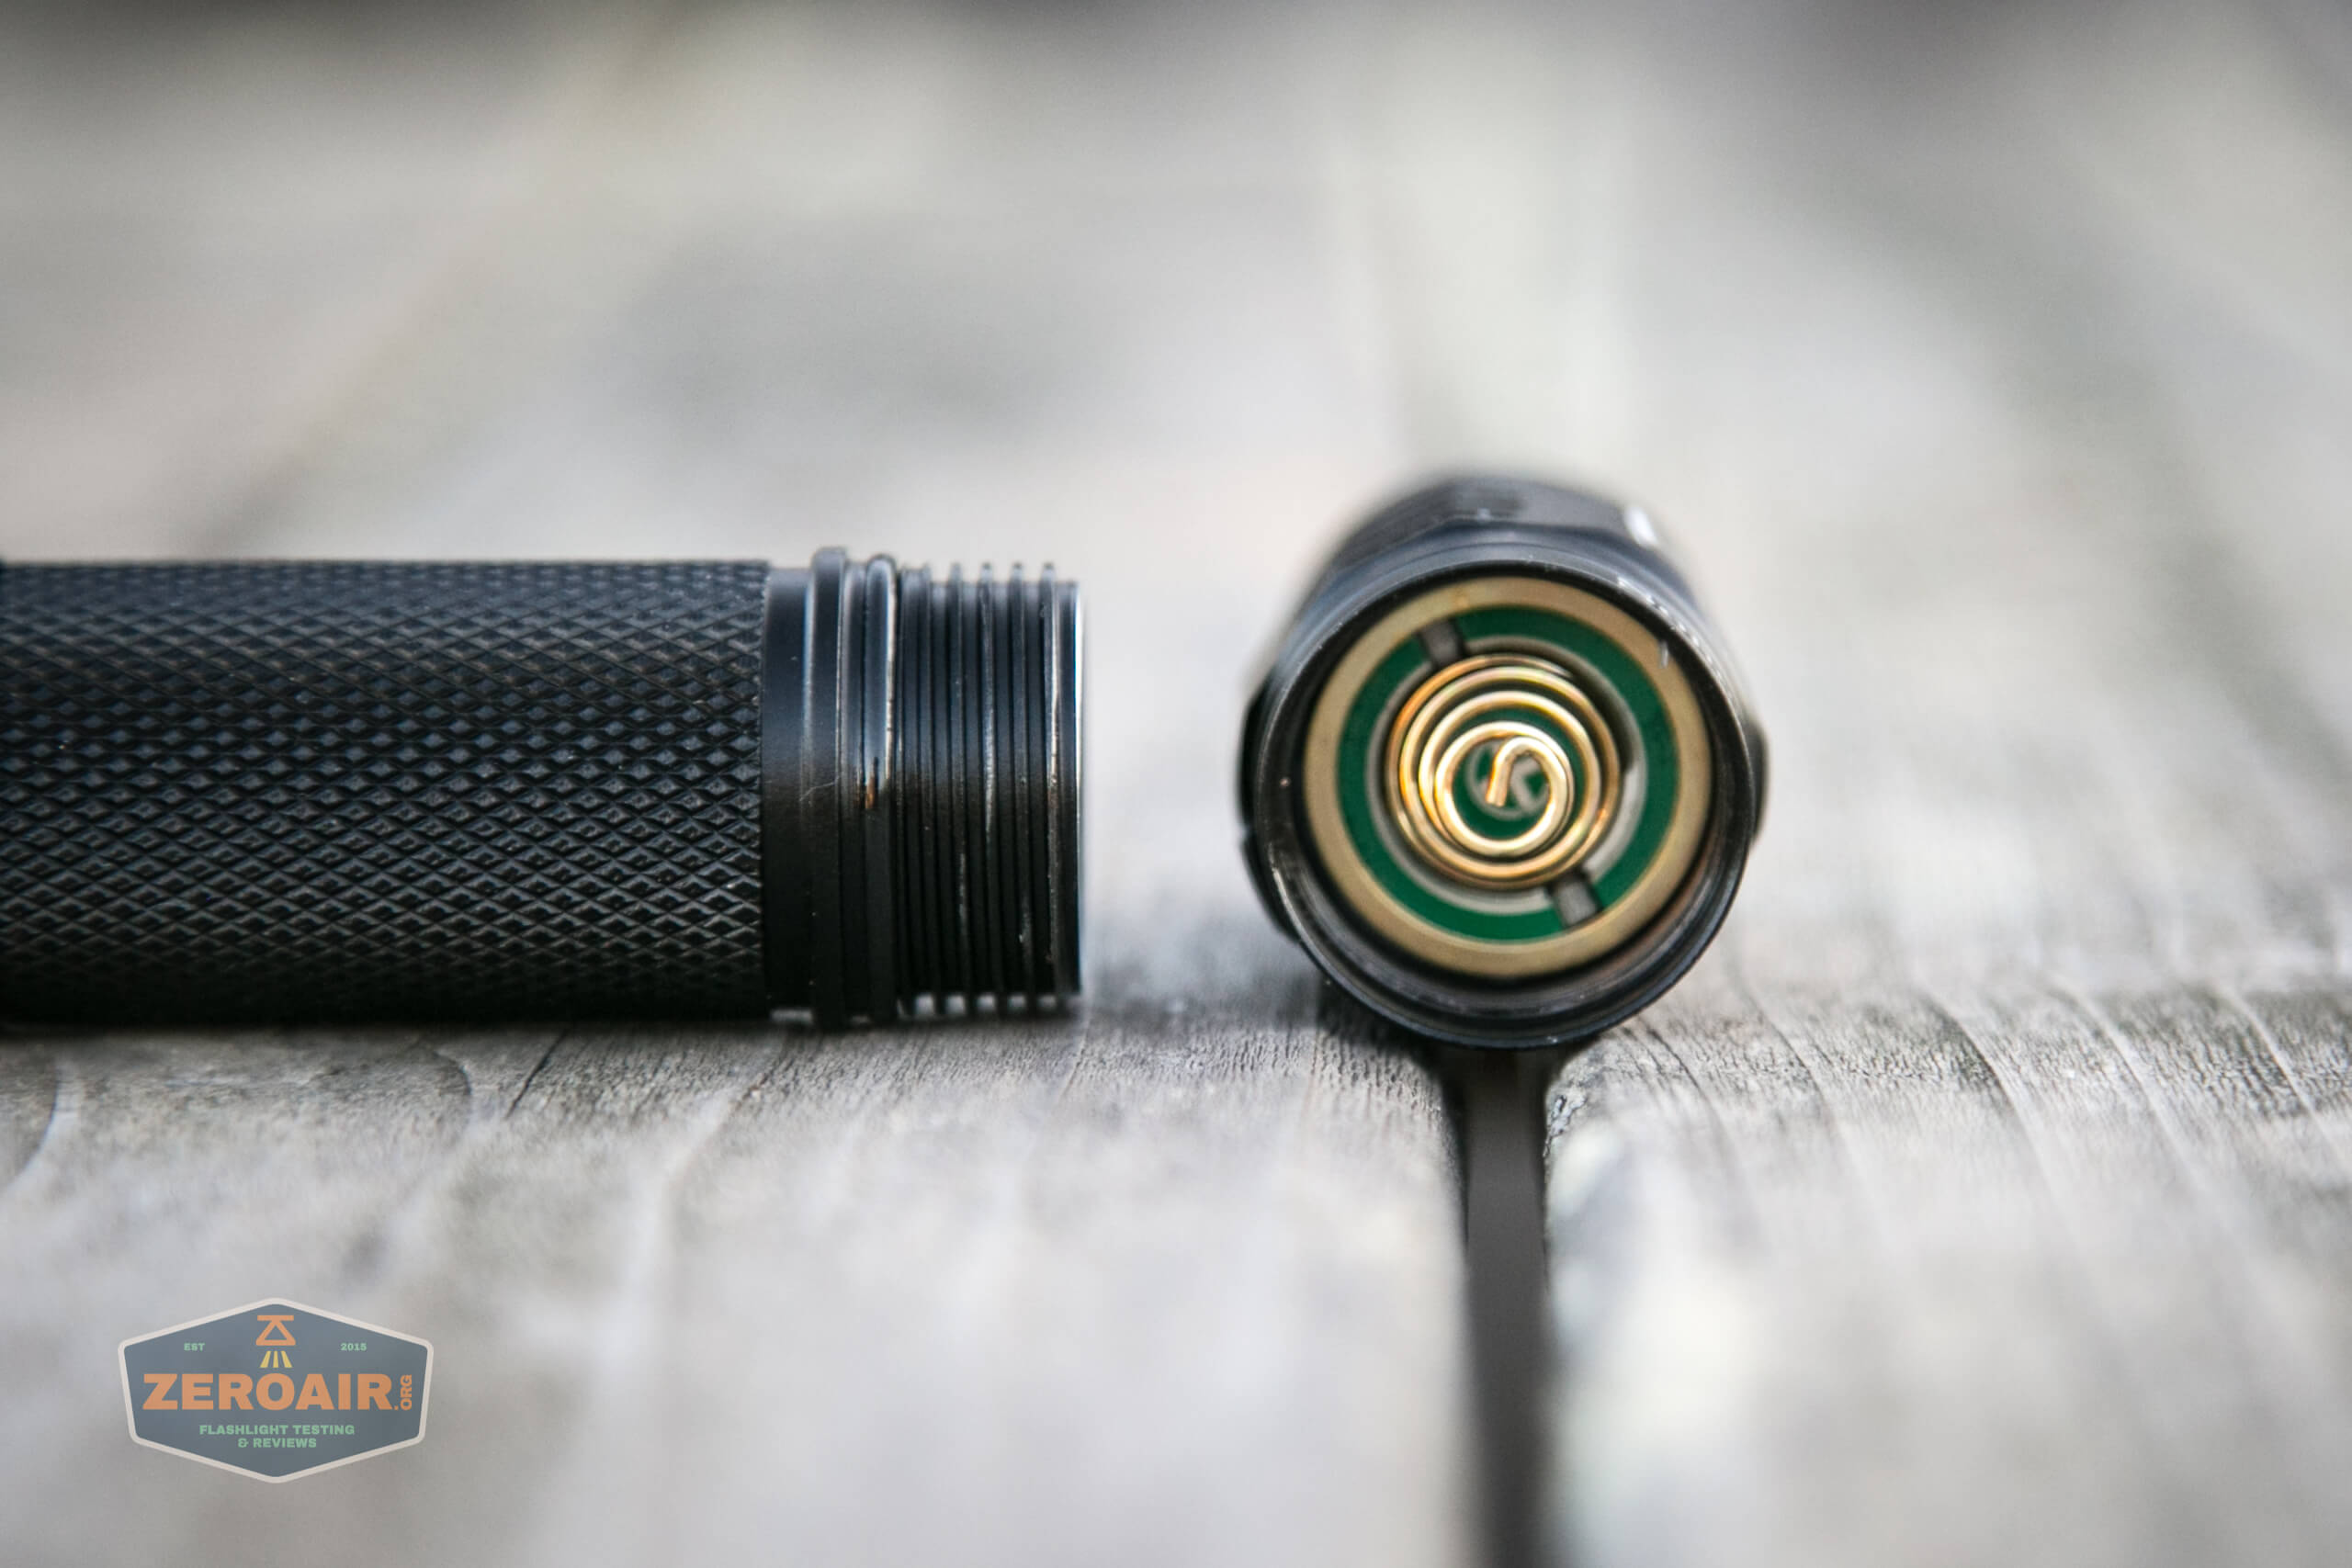
The tail end also has a nice spring.
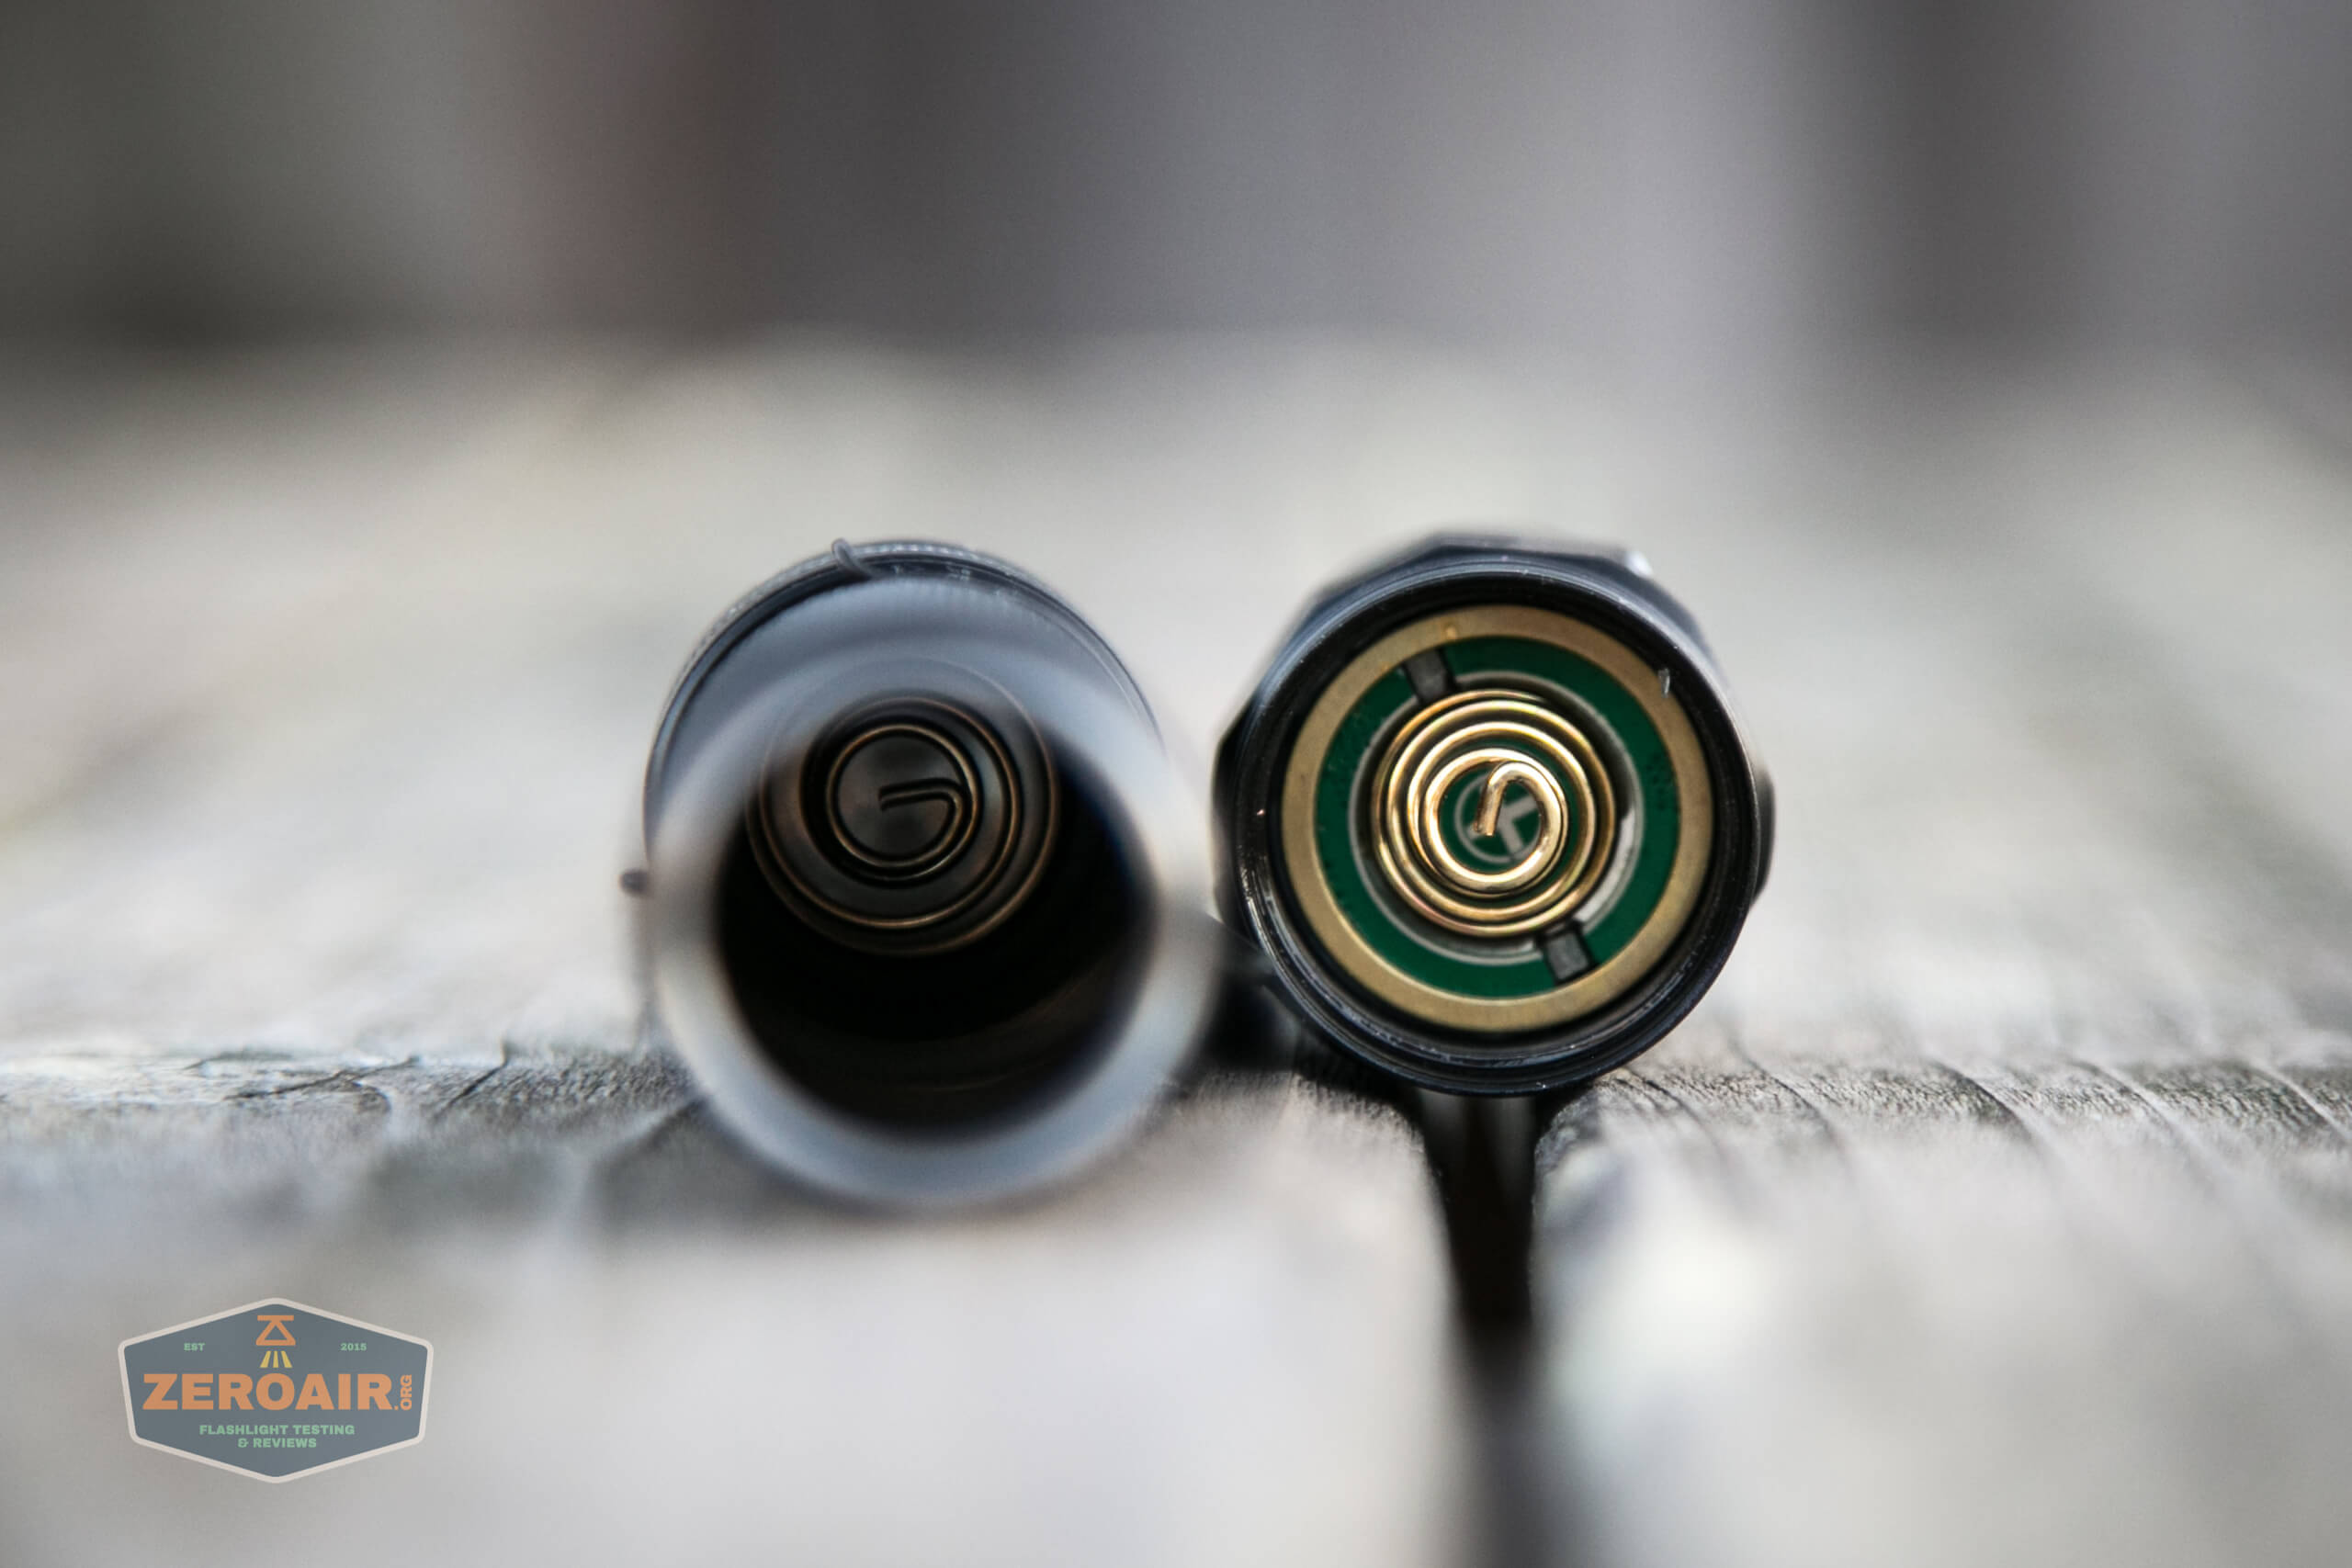
And the cell tube removes fully too, so here’s a better shot of both springs.

The cell tube is removable fully, and also reversible.


I think this alignment of the switch LEDs is pretty normal… if you’re expecting them to be on… some… other axis, then this might not be the light for you.


Not sure whatever else you thought about those square anodized threads above, but the first thing I thought was “hey that’s like a new S2+ threading!” I have only one new S2+, and it’s a copper one. And yes it threads on perfectly. And also YES it works fully! Sort of a bonus is that you now also have a mechanical tailswitch! (You’ll ask so: No it doesn’t really work the other way. Yes, it connects electrically BUT notice that you’ve taken out all the switches. So no good way to modulate the modes.)

Size and Comps
Dimension: 117.5 mm (length) x 25.4mm (head diameter)
Weight: 59±1 gram (without batteries)
If the flashlight will headstand, I’ll show it here (usually the third photo). If the flashlight will tailstand, I’ll show that here, too (usually the fourth photo).
Here’s the test light with the venerable Convoy S2+. Mine’s a custom “baked” edition Nichia 219b triple. A very nice 18650 light.


And here’s the light beside my custom engraved TorchLAB BOSS 35, an 18350 light. I reviewed the aluminum version of that light in both 35 and 70 formats.

Retention and Carry
A pocket clip comes already attached. It’s the lowest kind of pocket clip (and leads heavily to my opinion of the build quality). It’s a friction fit clip, and mine is bent all crooked. I could fix it but really, let’s just get it right the first time! This is not the biggest deal and doesn’t affect functionality.
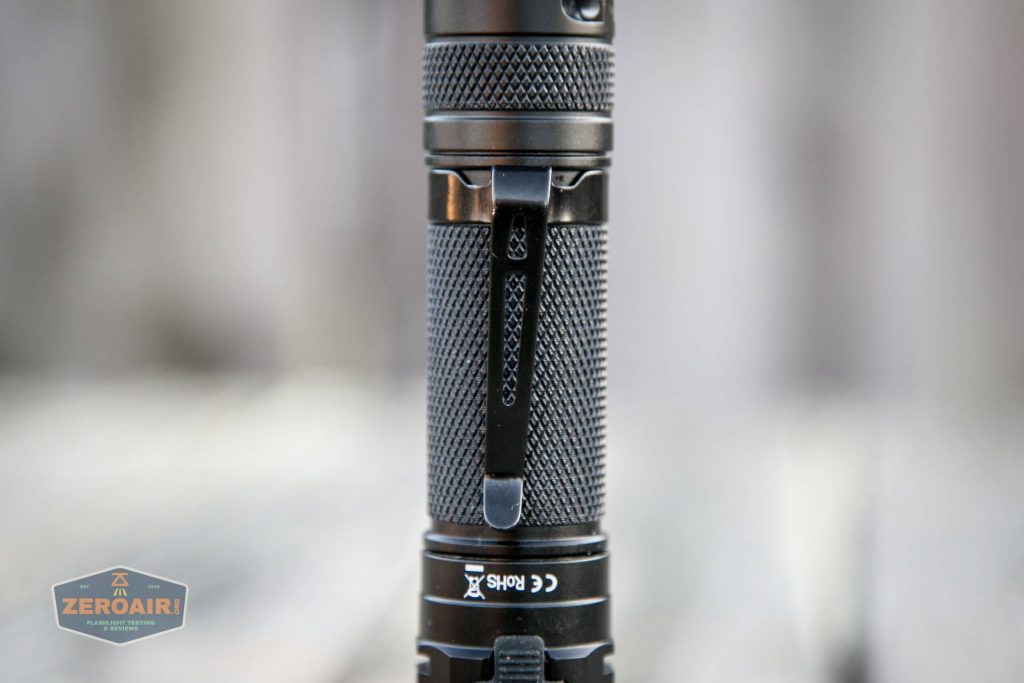

As I said above, the clip only goes in one spot, but the cell tube is reversible, so the clip can end up on the head or tail end per your preference.
A lanyard is also included and attaches to the tailcap.
The light will also headstand, and there are no “reliefs” to let light out when doing so.
With the reversible cell tube, the light can technically reasonably be used as a hat light.
There is also a magnet tail cap option, but my package did not include that.
Power and Runtime
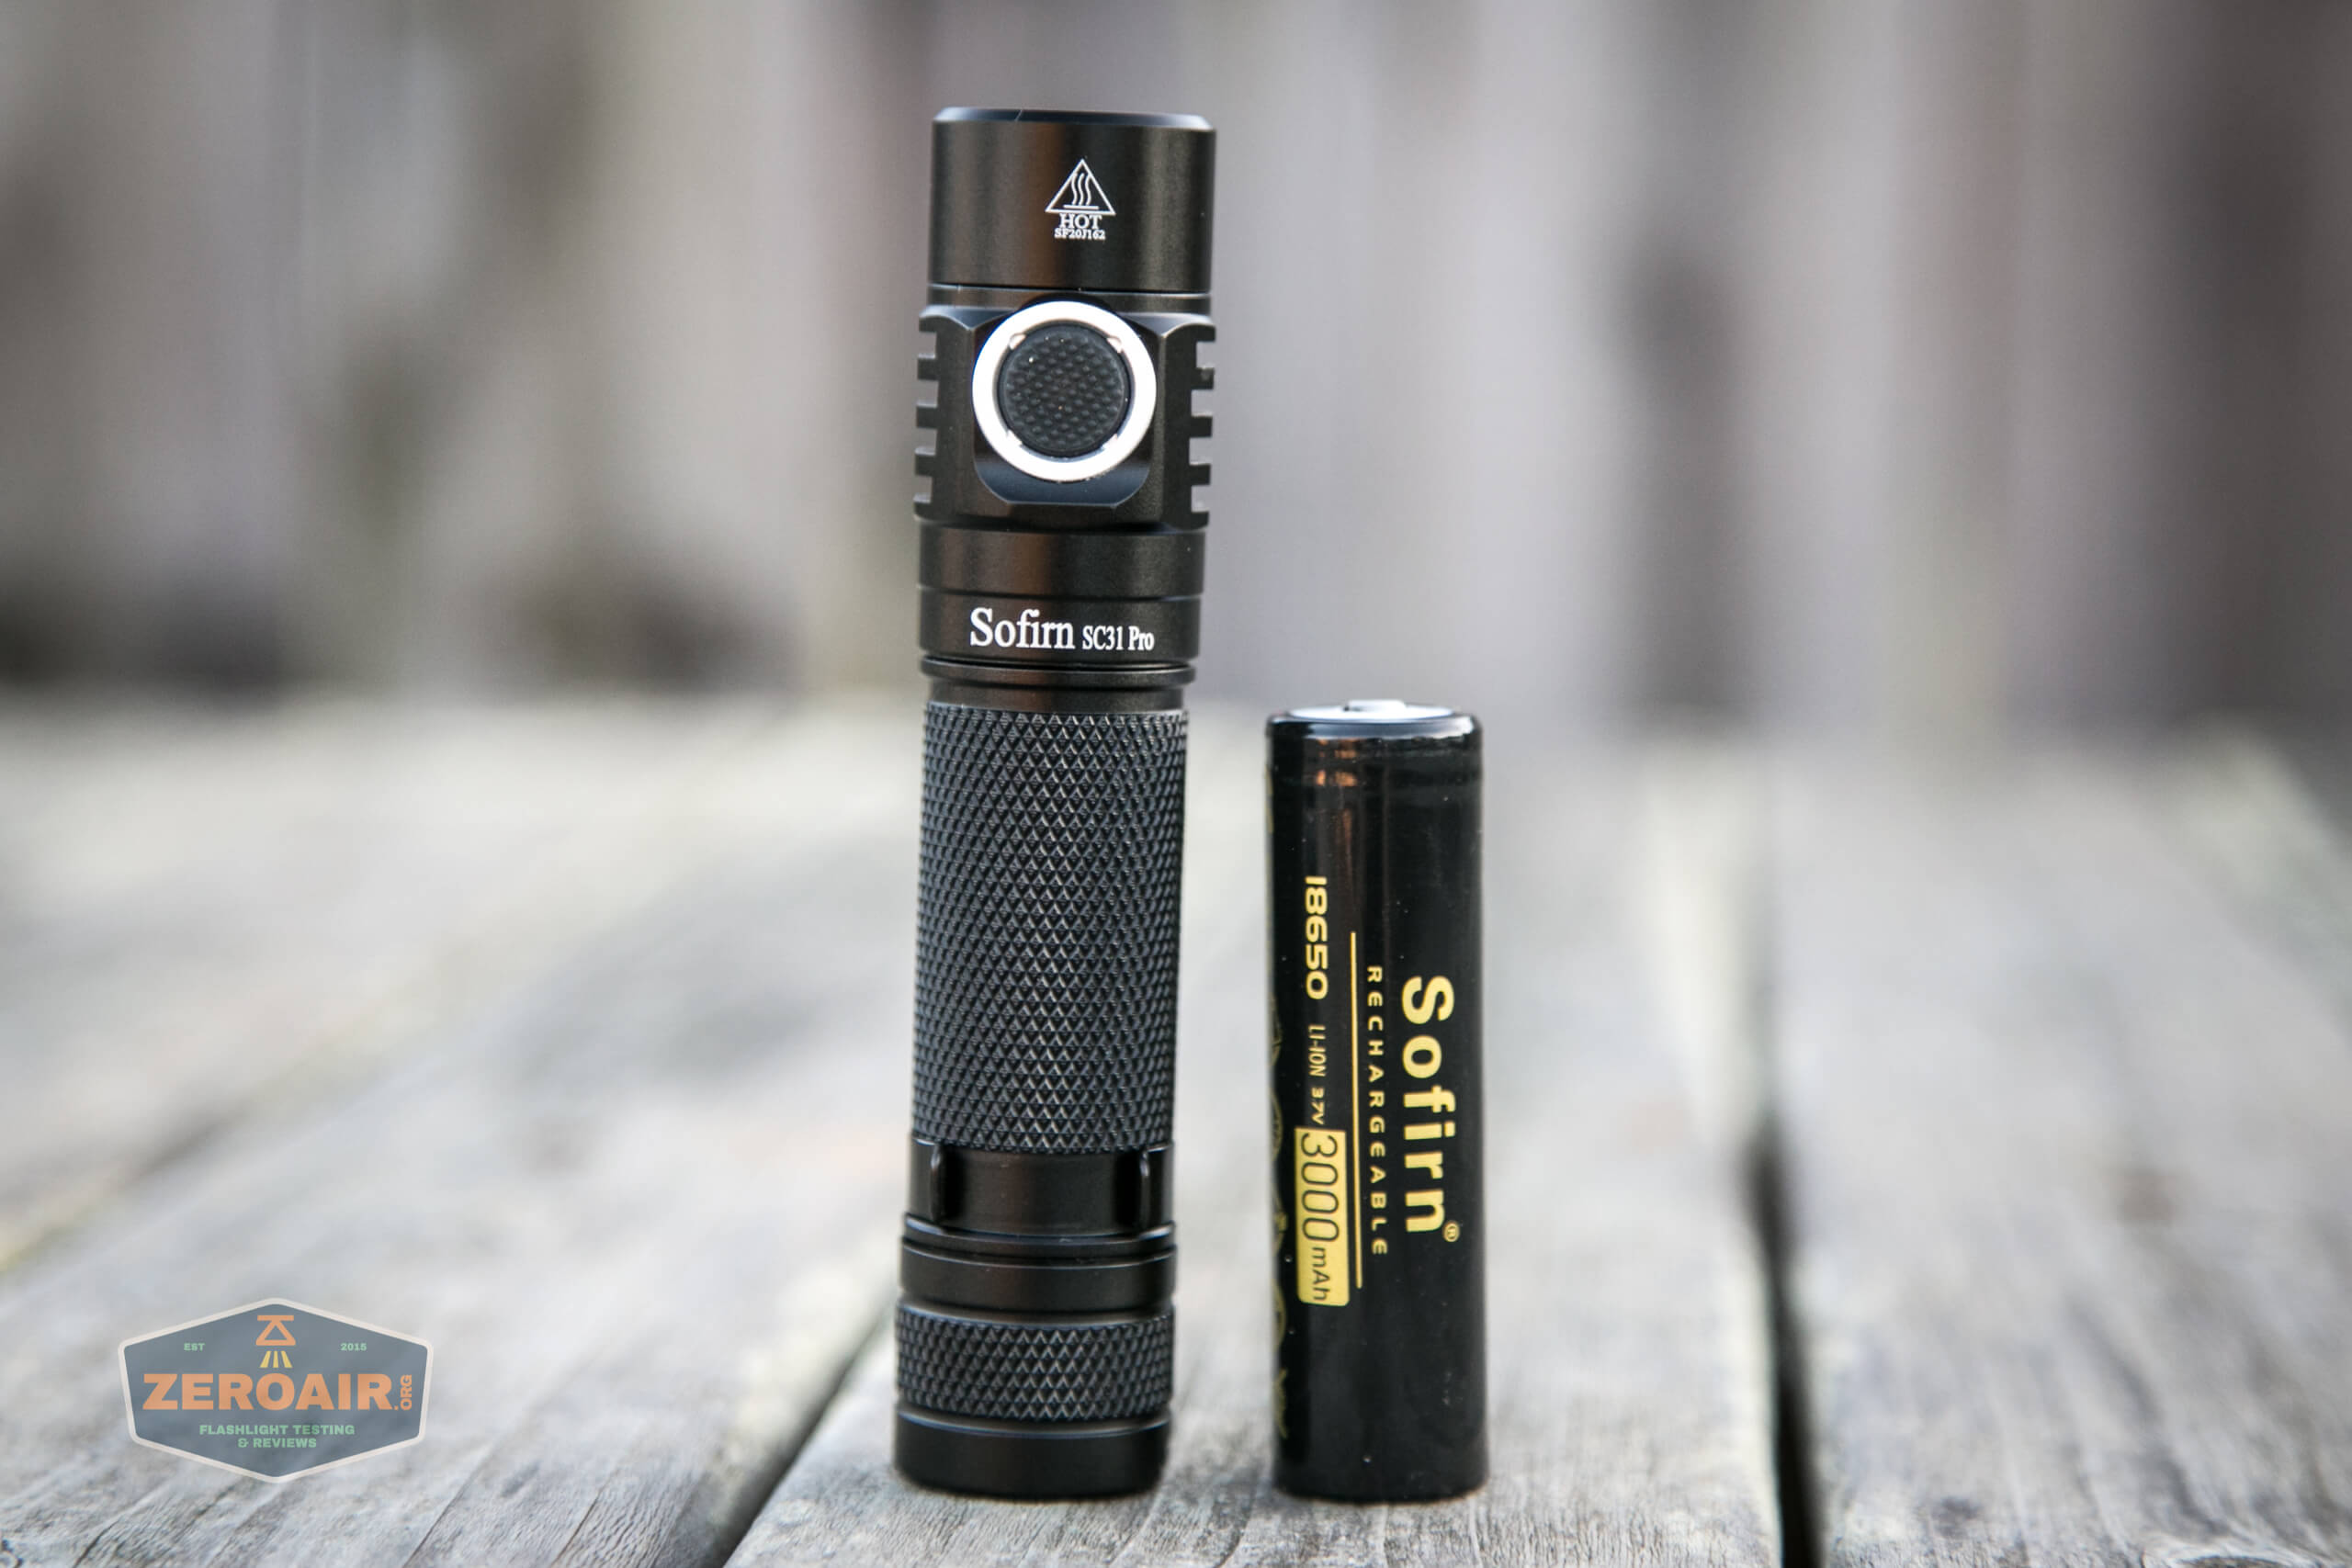
The SC31 Pro operates on a single lithium-ion cell. I have a package that had a cell included. It’s a 3000mAh button top and is a completely standard cell.
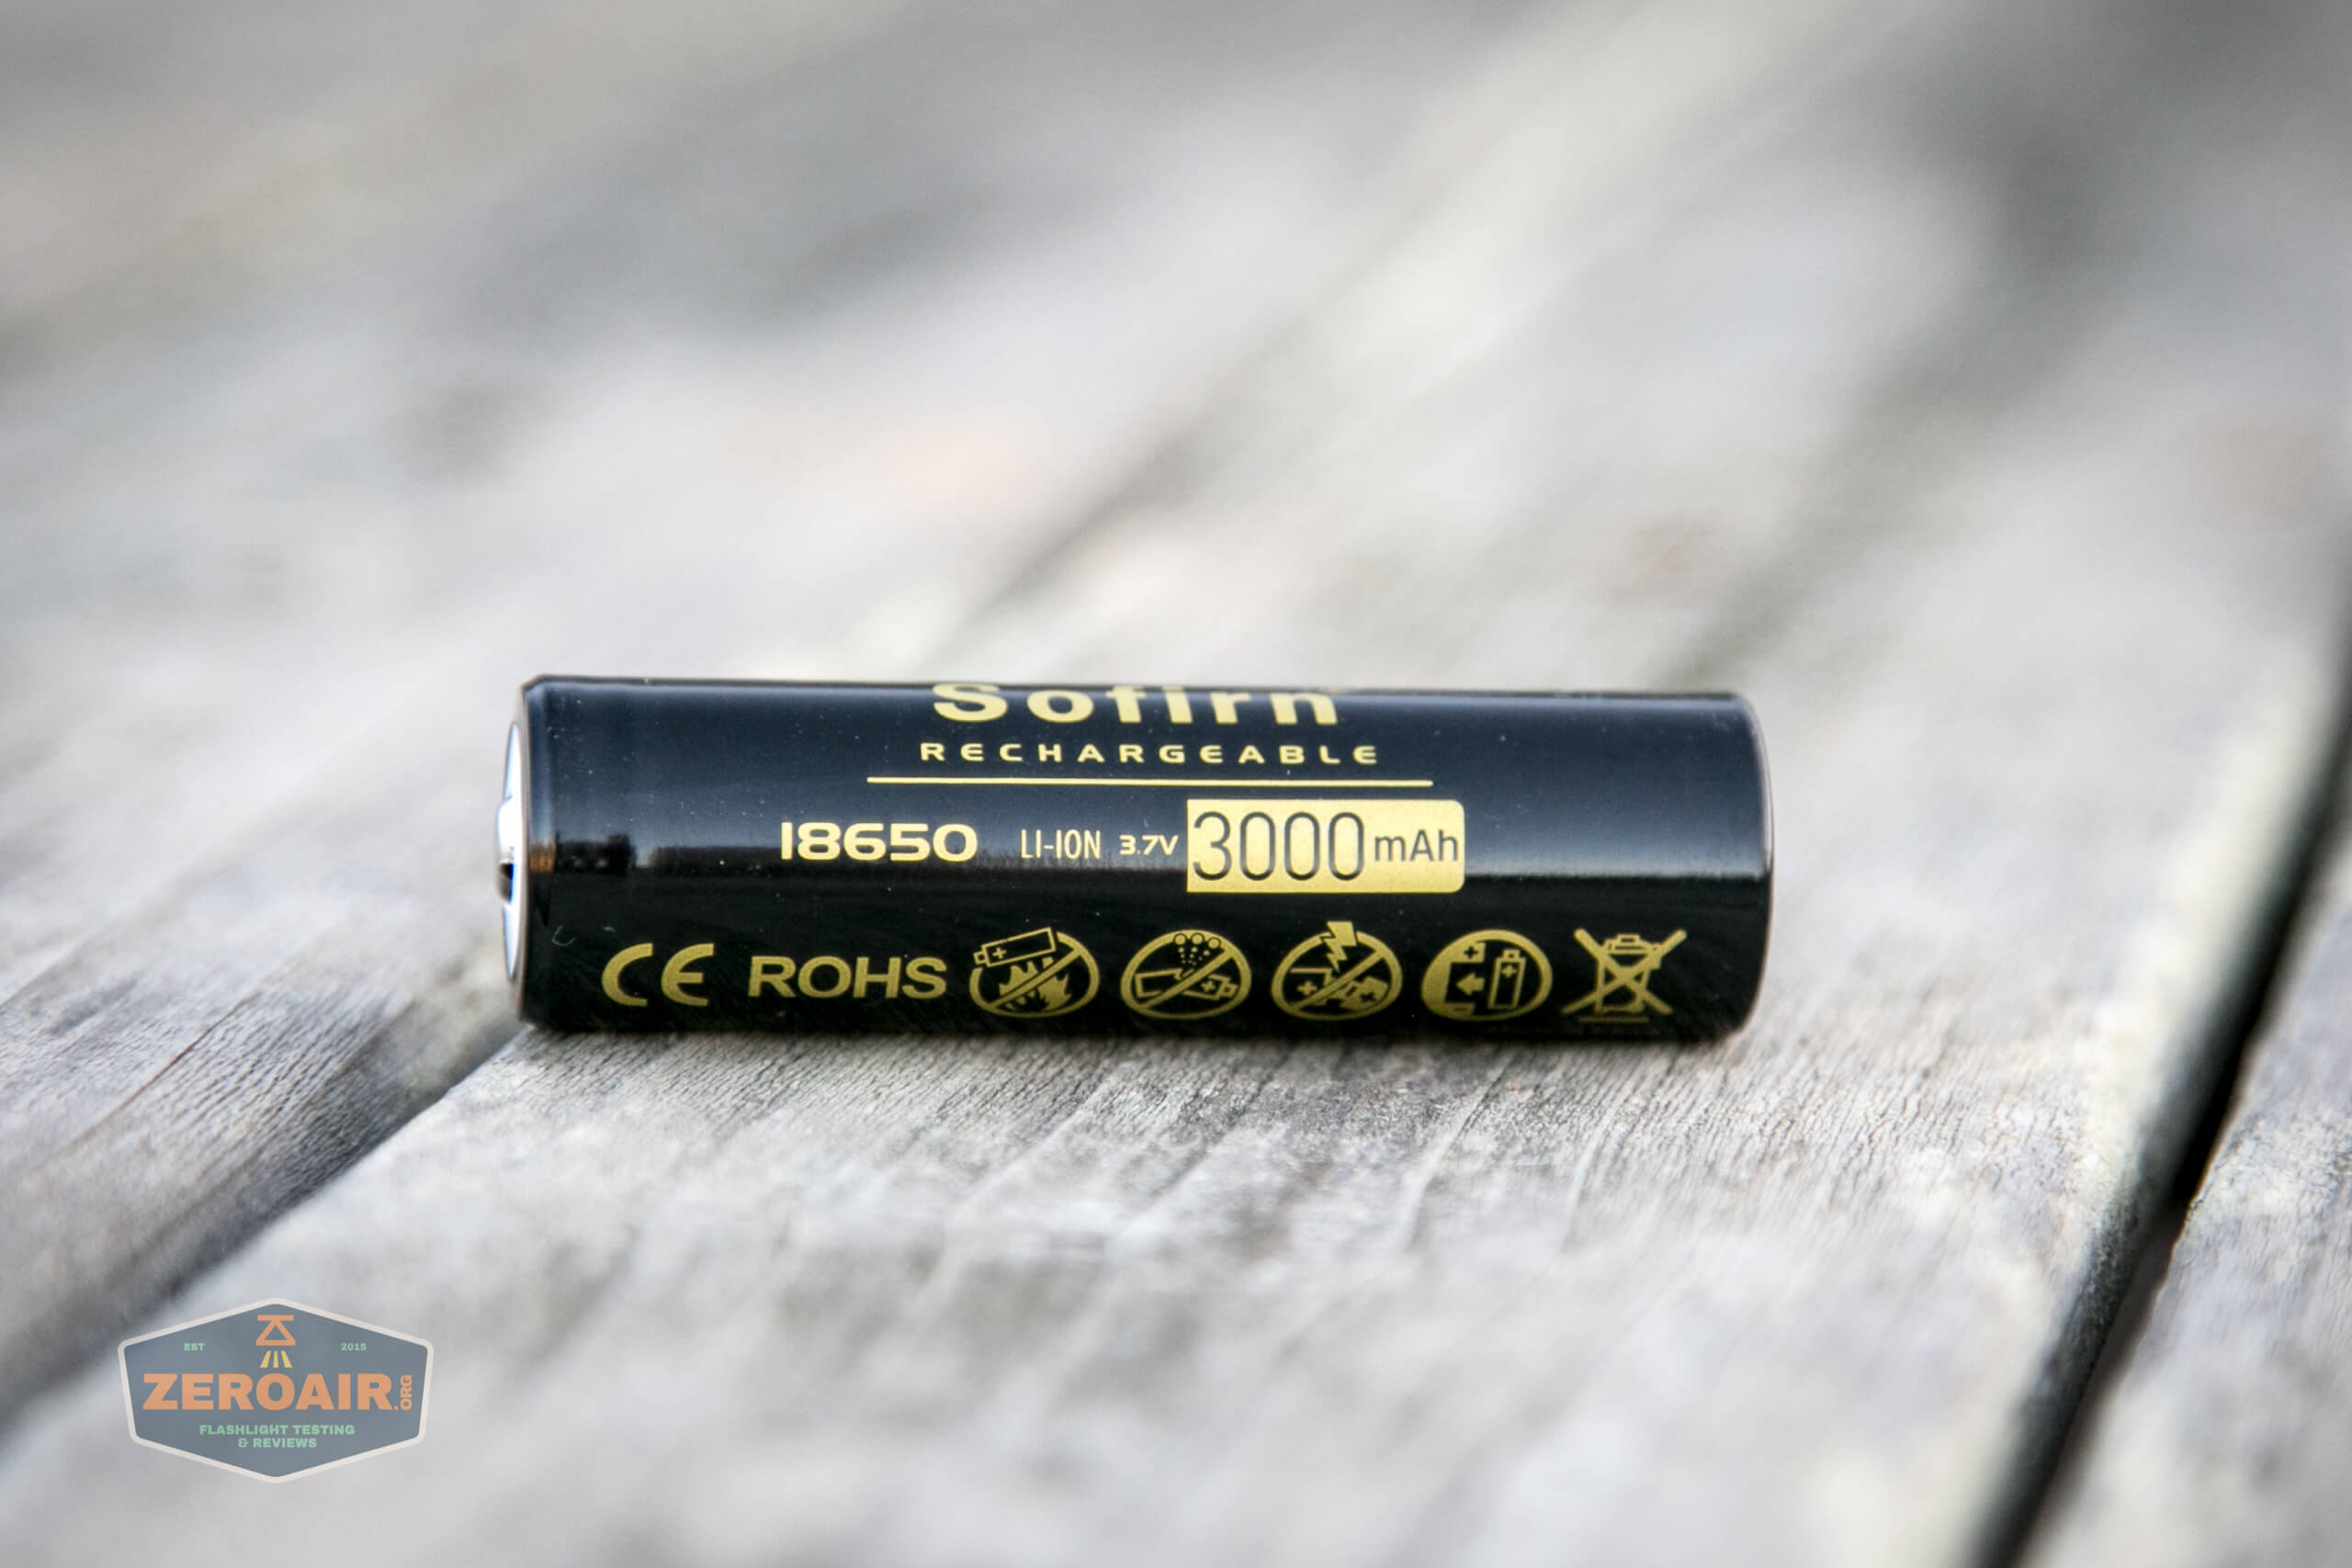
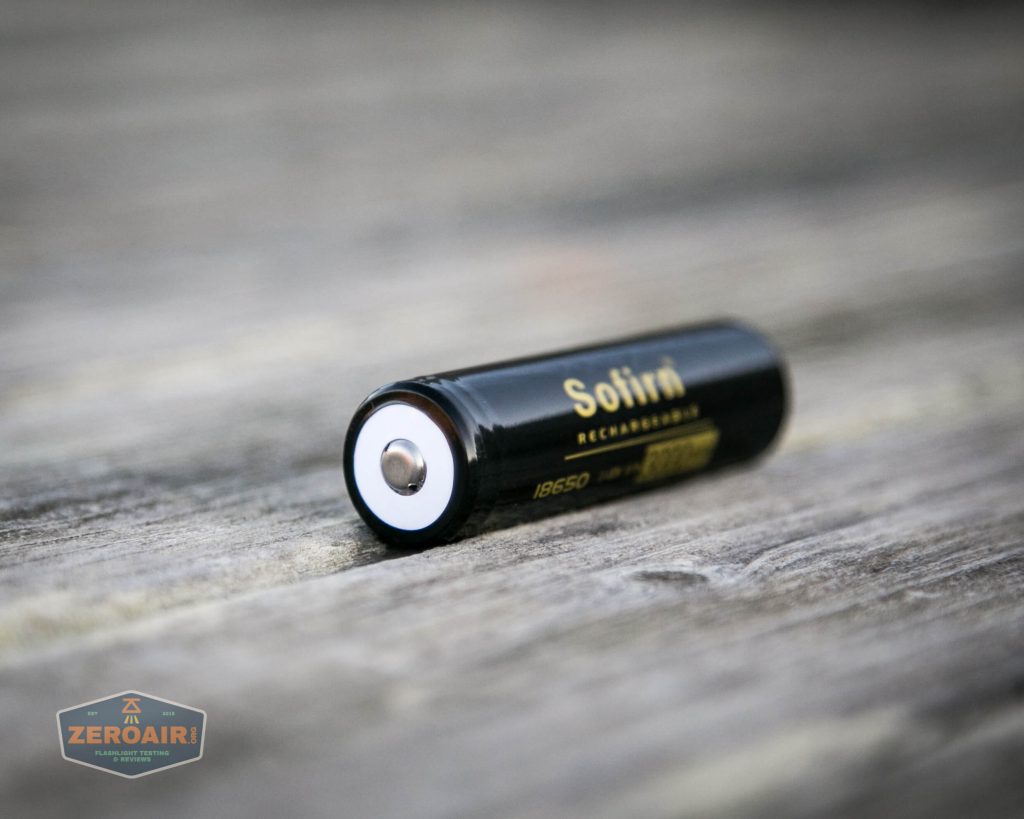

The cell goes into the light in the usual way – positive terminal toward the head.
Here are a couple of runtimes. As with most Andúril lights I test, I set the light to the stepped modes, and test the two highest modes. First is Turbo (that is, double click when the light is on). The light reaches around 1800 lumens and steps down at ~30s pretty heavily.


Interestingly the Highest of the stepped modes also steps down pretty heavily, again to around 200 lumens. I don’t observe low voltage protection when testing with the bench power, but I’m assured Andúril has it!
EDIT: Many people have reminded me that often Andúril needs to be calibrated to allow the light to function properly. I don’t disagree, but I also think the light should function correctly out of the box. If it doesn’t, then this isn’t a light suited to beginners, or people unwilling to calibrate. Calibration isn’t hard, but it’s very specific.
So I calibrated the light. Here’s the graphic that should help with temperature calibration.

Start with the light off.
Click 3x – this puts you in battery check. Feel free to confirm this by waiting for the battery check output.
Click 2x – this puts you in Sunset.
Click 2x – this puts you in Beacon. I pause here to confirm I’m in beacon.
Click 2x – this puts you in the Temp check mode.
At this point wait and see what the calibration is. The light will blink a number of times (the tens number), then blink a number of times to reveal the ones number of the thermal setting – in degrees Celsius. For example, when I checked temperature calibration, the light blinked 4x, then paused, then blinked 1x. But pay attention…. it could have also been 1 blink followed by 4 blinks. Forty one, or onety four… no… 41°C or 14°C. The latter is more reasonable, so let’s assume it’s 14°C. Even at 14, that’s too low for my room temp, so I’ll need to calibrate the light.
What does that mean though? It means that the light thinks my room temperature is 14°C or 41°C. That’s far (or very far) off – my room temperature is around 22°C. It also means that there’s only a tiny window of operation before the light hits the thermal ceiling as programmed (probably 50°C but I’m not sure).
This light definitely needs thermal recalibration. I set the room temperature to [accurate] – 22°C. Then I set the temperature limit to around 55°C. That means there’s a broad range of operating temperatures for the light to work – from room temp 22°C, all the way to 55°C.
Once you’re in temperature check (covered above), do the following:
Click 4x. The light will blink 1x and then blink very quickly as an indicating it is willing to accept your input. You can do nothing (aka “wait”) or click the number of times of degrees C of your room – 1 degree per click. This means that while the light is blinking for my input, I clicked 22x. Now the light knows that this temperature is 22°C. Important!
Click 4x. The light will blink 2x and then blink very quickly as an indicating it is willing to accept your input. You can do nothing (aka “wait”) or click the number of times you wish for the thermal ceiling minus 30. For example, if you wish to set the ceiling to 55°C (as I did), then you click 55-30, or 25x. Now thermal calibration is complete.
After doing all this, I reran two output tests, which can be seen below.


Charging
The SC31 Pro also has built-in charging, by way of a USB-C port in the head. The charge port cover is thick and fits in very firmly, and is quite nice.

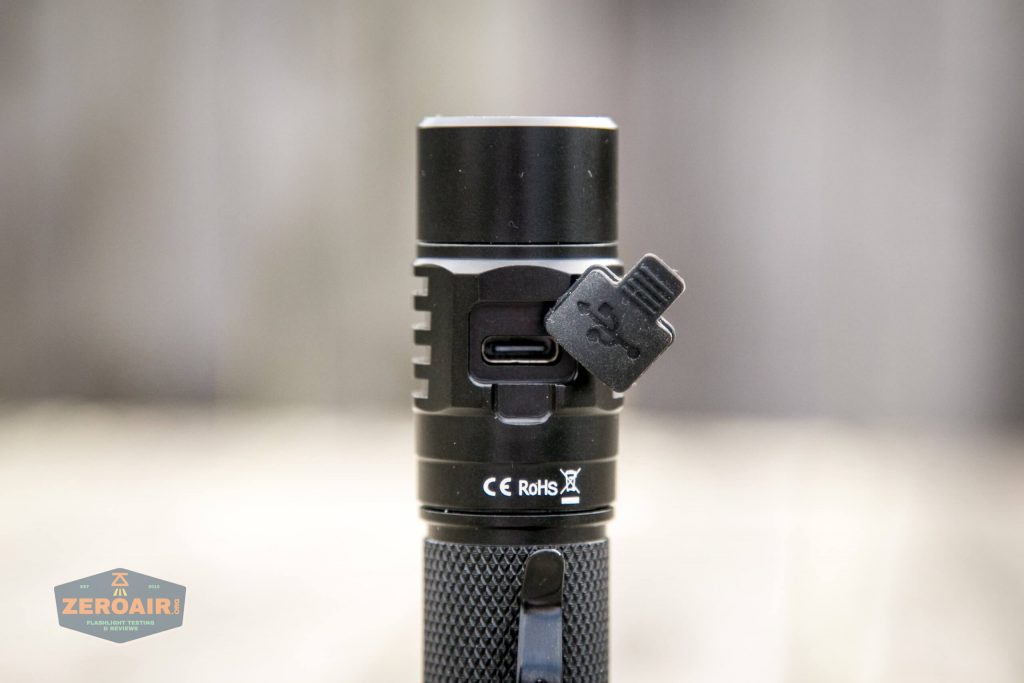
An appropriate cable is included. USB to USB-C.


Charging is a respectable ~2A, and, and takes just over 2 hours.

Modes and Currents
| Mode | Mode Claimed Output (lm) | Claimed Runtime | Measured Lumens | Tailcap Amps |
|---|---|---|---|---|
| 9 | 2000 | – | 1691 | 6.80 (and rapidly declining) |
| 8 | – | – | 922 | 2.40 (and rapidly declining) |
| 7 | – | – | 648 | 1.34 |
| 6 | – | – | 371 | 0.73 |
| 5 | – | – | 214 | 0.44 |
| 4 | – | – | 103 | 0.20 |
| 3 | – | – | 41 | 0.08 |
| 2 | – | – | 5 | 0.02 |
| 1 | – | – | ~ | ~ |
Pulse Width Modulation
Andúril lights (that aren’t the linear drive as the Emisar D4V2 with E21A is) have PWM, we know this. It’s not bad enough that I notice it though (surprisingly; it’s pretty slow on low!)
You’ll note 9 test modes below (while there are only 7 stepped modes). Since the ramped low is much lower than the stepped mode’s low, I’ve included it. The right-most is the “double click turbo.”
For reference, here’s a baseline shot, with all the room lights off and almost nothing hitting the sensor. Also, here’s the light with the worst PWM I could find. I’m adding multiple timescales, so it’ll be easier to compare to the test light. Unfortunately, the PWM on this light is so bad that it doesn’t even work with my normal scale, which is 50 microseconds (50us). 10ms. 5ms. 2ms. 1ms. 0.5ms. 0.2ms. In a display faster than 0.2ms or so, the on/off cycle is more than one screen, so it’d just (very incorrectly) look like a flat line. I wrote more about this Ultrafire WF-602C flashlight and explained a little about PWM too.
User Interface and Operation
A single switch controls the SC31 Pro. This switch is an indicating e-switch and bigger than is typical on this type of light. It’s also very textured, and quite easy to differentiate from the charge port cover (which is on the opposite side of the head.)
This light ships with Andúril by ToyKeeper. Andúril is a fantastic UI, and extremely versatile! The product page even specifies the Andúril version: 2020-03-18. That’s pretty good attention to detail!
The switch has brightness settings, and can also do some “breathing” type features. It does seem to be green only, so the Andúril features used to change the switch color don’t do anything here.
First off, here’s the UI chart made by ToyKeeper.

Here’s my UI table! This table doesn’t cover the aux and switch LEDs, but they’re somewhat configurable too.
| State | Action | Result |
|---|---|---|
| Off | Hold | On (Low) |
| Off | Click | On (Mode Memory) |
| Off | Click 2x | Highest Hybrid Mode |
| Off | Click 3x | Blinkie Mode Group |
| Off | Click 4x | Lockout |
| Off | Click 5x | Momentary |
| Off | Click 6x | Muggle |
| Off | Click, Click, Hold | Strobe Group (Mode Memory Strobe) |
| Strobe Group | Click 2x | Strobe Cycle (Candle > Bike Flasher > Party Strobe > Tactical Strobe > Lightning Storm) |
| Blinkie Mode Group | Click 2x | Blinke Cycle (Sunset > Beacon > TempCheck > BattCheck) |
| On | Click 3x | Switch between Stepped and Smooth Ramp |
| On | Click 4x | Ramp Configuration |
| TempCheck | Click 4x | Thermal Configuration |
| Beacon | Click 4x | Beacon Configuration |
| Lockout | Click 4x | Off |
| Strobe Group | Click | Off |
| (Basically) On | Click | Off |
| Candle | Click 3x | 30-minute timer to off |
| Strobe Group | Hold | Heighten selected mode (Make faster or brighter) |
| Strobe Group | Click, Hold | Lessen selected mode (Make slower or dimmer) |
| On | Click 2x | FET Turbo |
| Ramp Configuration | [Wait for Single flash] Click N time for level N. | Selection of the “Low” you like best by clicking 1, 2, 3, etc. where 1, 2, 3, etc are different levels of low. |
| Ramp Configuration | [Wait for the Second flash] Click N time for 1+Turbo-N. | Selection of the “Ceiling” you like best by clicking 1, 2, 3, etc. where 1, 2, 3, etc are different Ceiling levels. |
| Ramp Configuration | [Wait for the Third flash] Click for how many steps you want in Stepped mode. | Sets Number of Steps. |
| Thermal Configuration | [Wait for the First flash] Click for N times for N degrees C. | Displays Current Temperature. |
| Thermal Configuration | [Wait for the Second flash] Click for N times for 30C + N. | Sets Temperature Limit. |
| Beacon Configuration | [Wait for the First flash] Click for N times N seconds per flash | Sets Beacon Speed. |
LED and Beam
The emitter used here is a Luminus SST-40, and my sample is 6500K temperature. There’s also a 5000K version, which I recommend you buy unless you hate everything about life.
The reflector used is a smooth, moderate depth reflector.


These beamshots are always with the following settings: f8, ISO100, 0.3s shutter, and manual 5000K exposure.
I normally test only in stepped mode. However, the ramped output offers a much lower low, so the first mode below is actually the lowest of the ramped. Then the next 7 modes are the stepped options, and the rightmost is the [double click to] Turbo.
Tint vs BLF-348 (KillzoneFlashlights.com 219b version) (affiliate link)
I keep the test flashlight on the left, and the BLF-348 reference flashlight on the right. As stated above: I normally test only in stepped mode. However, the ramped output offers a much lower low, so the first mode below is actually the lowest of the ramped. Then the next 7 modes are the stepped options, and the rightmost is the [double click to] Turbo.
I compare everything to the KillzoneFlashlights.com 219b BLF-348 because it’s inexpensive and has the best tint!
Conclusion on the Sofirn SC31 Pro Flashlight
What I like
- Very low price for solid build quality and Andúril!
- Versatile lighted side switch
- 5000K SST-40 option
- Cell is included
- Utilizes USB-C charging (and cable is included)
What I don’t like
- Mine’s 6500K
- The pocket clip needs to be adjusted
Notes
- This light was provided by Sofirn for review. I was not paid to write this review.
- This content originally appeared at zeroair.org. Please visit there for the best experience!
- For flashlight-related patches, stickers, and gear, head over to PhotonPhreaks.com!
- Use my amazon.com referral link if you’re willing to help support making more reviews like this one!
- Please support me on Patreon! Feeding flashlights is expensive! And funding Fun Fund Friday even more so. I deeply appreciate your support!
Liked it? Take a second to support zeroair on Patreon!
