
Boss GT-6 — это мощный и гибкий процессор доступных эффектов, который может быть использован как гитаристами в студии, так и на сцене. Это идеальное решение для тех, кто ищет многофункциональное устройство, которое позволяет настроить свой собственный уникальный звук.
В этой статье мы предлагаем подробное руководство, которое поможет начинающим гитаристам настроить Boss GT-6 и получить максимум от этого инструмента. Мы расскажем о базовых настройках, настройке эффектов, сохранении и переключении пресетов, а также о том, как использовать expression-педаль для добавления выразительности в исполнение.
Мы начнем с рассмотрения основных параметров настройки, таких как входной уровень сигнала, настройки выхода, параметры тембра и атаки. Затем мы перейдем к настройке эффектов, таких как дисторшн, фазер, хорус и т.д. Мы также поговорим о том, как использовать эти эффекты совместно и как создать свой собственный уникальный звук.
Если вы только начинаете изучение гитары или использование эффектов, этот процессор станет идеальным партнером для вас. Он предлагает широкий выбор эффектов и настроек, которые могут быть адаптированы под ваши музыкальные потребности. Наше подробное руководство поможет вам разобраться во всех возможностях Boss GT-6 и настроить его согласно вашим предпочтениям и стилю игры.
Содержание
- Подключение Boss GT-6 к гитаре и усилителю
- Основные настройки эффектов и предусилителя GT-6
- 1. Выбор предусилителя
- 2. Настройка уровней
- 3. Выбор эффектов
- 4. Настройка параметров эффектов
- 5. Сохранение настроек
- Создание пользовательского звука на Boss GT-6
- Программирование MIDI-функций на Boss GT-6
Для полноценного использования всех функций и эффектов Boss GT-6 необходимо правильно подключить этот мультиэффект к гитаре и усилителю. В этом разделе мы расскажем, как это сделать.
Шаг 1: Подключите гитару к входному разъему «Input» на задней панели Boss GT-6 при помощи гитарного кабеля. Убедитесь, что кабель надежно подключен и не вызывает помех при игре.
Шаг 2: Подключите выход «Output» на Boss GT-6 к входу усилителя или микшера при помощи гитарного кабеля. Если вы используете усилитель, убедитесь, что он включен и настроен на правильный канал для работы с Boss GT-6.
Шаг 3: Рекомендуется использовать стереовход усилителя или микшера для подключения Boss GT-6. Для этого вам потребуется специальный стерео кабель (TRS-TRS), который позволит передавать сигнал в стереоформате и использовать эффекты Boss GT-6 с максимальной эффективностью.
Шаг 4: Если вы используете эффекты Boss GT-6 только для записи звука, вы можете подключить его непосредственно к звуковой карте компьютера или аудиоинтерфейсу при помощи USB-кабеля. Проверьте настройки звуковой карты, чтобы использовать Boss GT-6 как аудиоинтерфейс.
Важно отметить, что Boss GT-6 имеет множество разъемов и настроек, которые могут меняться в зависимости от ваших потребностей и особенностей подключения. Рекомендуется ознакомиться с руководством пользователя и инструкциями Boss GT-6 для получения более подробной информации.
Основные настройки эффектов и предусилителя GT-6
Для достижения желаемого звука с помощью Boss GT-6, необходимо осуществить несколько основных настроек эффектов и предусилителя. В этом разделе мы рассмотрим их подробнее:
1. Выбор предусилителя
Первым шагом в настройке GT-6 является выбор предусилителя, который будет использоваться в вашем звучании. Нажмите на кнопку «Preamp» на панели управления и выберите желаемый предусилитель, используя регуляторы на панели управления. У GT-6 есть большой выбор предусилителей, от классических до современных моделей, поэтому у вас будет возможность найти идеальный звук для вашей игры.
2. Настройка уровней
После выбора предусилителя необходимо настроить уровни сигнала для каждого эффекта. В GT-6 вы можете настроить уровни отдельно для каждого элемента эффекта, чтобы создать идеальное балансирование звука. Нажмите на кнопку «Level» на панели управления и используйте регуляторы для настройки уровней в соответствии с вашими предпочтениями.
3. Выбор эффектов
GT-6 может предложить вам большой выбор различных эффектов для настройки звука. Нажмите на кнопку «Effect» на панели управления и выберите желаемый эффект, используя регуляторы на панели. GT-6 предлагает такие эффекты, как дисторшн, фазер, хорус, задержка и многое другое. Выбирайте те эффекты, которые подходят вашим музыкальным предпочтениям и добавляют интересные звуковые эффекты к вашей игре.
4. Настройка параметров эффектов
После выбора эффекта необходимо настроить его параметры для достижения желаемого звучания. Нажмите на кнопку «Edit» на панели управления и используйте регуляторы для настройки параметров, таких как уровень эффекта, частоты, глубина и другие. Экспериментируйте с различными настройками, чтобы найти идеальное звучание для вашей игры.
5. Сохранение настроек
После того, как вы настроили все эффекты и предусилитель, вы можете сохранить их в памяти GT-6, чтобы в дальнейшем легко восстановить свой звук. Нажмите на кнопку «Store» на панели управления и выберите слот памяти, в который вы хотите сохранить настройки. При следующем использовании GT-6 вы сможете быстро восстановить свой звук, нажав на кнопку «Recall» и выбрав сохраненные настройки.
Следуя этим основным настройкам, вы сможете легко настроить GT-6 в соответствии с вашими музыкальными предпочтениями и достичь желаемого звучания. Не бойтесь экспериментировать и настраивать различные эффекты и параметры, чтобы найти уникальный звук, который подходит именно вам.
Создание пользовательского звука на Boss GT-6
Шаг 1: Выберите пустой слот пользовательского звука, который вы хотите настроить. Нажмите на кнопку «USER» на панели управления, чтобы перейти в режим работы с пользовательскими звуками.
Шаг 2: Используйте регуляторы на панели управления, чтобы настроить основные параметры звука, такие как уровень громкости (LEVEL), тональность (TONE), эффекты (EFFECTS) и прочие. Обратите внимание на дисплей на панели управления, он показывает текущие значения настроек.
Шаг 3: Используйте кнопки на панели управления, чтобы выбрать тип и настройки эффектов, которые вы хотите добавить в свой пользовательский звук. Например, вы можете выбрать тип дисторшн (DIST), модуляцию (MODULATION), реверберацию (REVERB) и т. д.
Шаг 4: Настройте параметры выбранных эффектов с помощью регуляторов на панели управления. Настройки могут варьироваться в зависимости от типа эффекта. Например, для дисторшна вы можете регулировать уровень и насыщенность, а для реверберации — длительность и отражение.
Шаг 5: Проверьте звук, который вы создали, играя на синтезаторе. Если вам не нравится результат, вернитесь к предыдущим шагам и внесите необходимые изменения. При необходимости вы также можете сохранить текущий звук в пользовательском слоте, чтобы использовать его позже.
Создание пользовательского звука на Boss GT-6 может потребовать некоторого времени и терпения, но благодаря широкому набору настроек и эффектов вы сможете создать уникальный и индивидуальный звук, который будет соответствовать вашим музыкальным предпочтениям.
Программирование MIDI-функций на Boss GT-6
Boss GT-6 предлагает обширные возможности в использовании MIDI-контроллера для управления различными функциями процессора. Программирование MIDI-функций позволяет настроить индивидуальные команды для управления эффектами, переключением патчей, регулировкой громкости и многими другими параметрами.
Для начала программирования MIDI-функций на Boss GT-6 необходимо выполнить следующие шаги:
- Подключите Boss GT-6 к компьютеру с помощью MIDI-кабеля.
- Установите и запустите программу управления MIDI на компьютере.
- В программе управления MIDI выберите Boss GT-6 как устройство для отправки команд.
- Получите список доступных MIDI-команд, поддерживаемых Boss GT-6.
- Назначьте необходимые MIDI-команды для каждой функции, которую вы хотите программировать.
- Сохраните настройки MIDI в памяти Boss GT-6.
После того, как вы выполните эти шаги, вы сможете использовать MIDI-контроллер для управления различными функциями Boss GT-6. Например, вы можете настроить MIDI-команду для переключения патчей, изменения громкости или активации конкретного эффекта.
Важно отметить, что программирование MIDI-функций на Boss GT-6 требует некоторого времени и понимания MIDI-протокола. Если у вас нет опыта в программировании MIDI, рекомендуется обратиться к руководству пользователя Boss GT-6 и изучить соответствующую информацию.
В целом, программирование MIDI-функций на Boss GT-6 предоставляет большие возможности для индивидуальной настройки процессора под конкретные потребности. С помощью MIDI-контроллера вы сможете управлять эффектами, переключать патчи и создавать уникальные звуки, делая игру на гитаре еще более интересной и разнообразной.
-
Страница 1
Owner’s Manual ■ Printing Conventions in This Manual • Text or numerals enclosed in square brackets [ ] indicate buttons. [WRITE] WRITE button [UTILITY] UTILITY button • Reference such as (p. **) indicate pages in this manual to which you can refer. * All product names mentioned in this document are trademarks or registered trademarks of th[…]
-
Страница 2
2 USING THE UNIT SAFELY 001 • Before using this unit, make sure to read the instructions below, and the Owner’s Manual. ……………………………………………………………………………………………. 002c • Do not open (or modify in any way) the unit or its AC adaptor. ………………………………………..[…]
-
Страница 3
3 013 • In households with small children, an adult should provide supervision until the child is capable of following all the rules essential for the safe operation of the unit. ……………………………………………………………………………………………. 014 • Protect the unit from strong impact. (Do not drop it!)[…]
-
Страница 4
4 IMPORTANT NOTES 291a In addition to the items listed under “ USING THE UNIT SAFELY ” on page 2 – 3, please read and observe the following: Power Supply 301 • Do not use this unit on the same power circuit with any device that will generate line noise (such as an electric motor or variable lighting system). 302 • The AC adaptor will begi[…]
-
Страница 5
5 Contents USING THE UNIT SAFELY ………………………… 2 IMPORTANT NOTES……………………………….. 4 Main Features ……………………………………… 7 Panel Descriptions ………………………………… 8 Front Panel ……………………………………………………………….. 8 Rear Panel …..[…]
-
Страница 6
6 Contents Controlling Effects with the GT-6B Pedals, External Pedals, and External MIDI Devices ……………… 48 Making the Assign On/Off Setting ……………………………………….. 48 Making Settings Instantly (Quick Settings) ……………………………. 48 Making the Parameter Settings ………………………………[…]
-
Страница 7
7 Main Features Powerful COSM Modeling Effects Built-In Features internal high-quality modeled effects, including bass amp, overdrive/distortion, compressor/limiter, touch wah, pedal wah, and more. Internal Analog Bypass Circuitry When bypass is activated, signals can be output without passing through the AD/DA converter. Moreover, analog signals a[…]
-
Страница 8
8 Panel Descriptions Front Panel fig.00-01 1 Display A variety of information about the GT-6B appears here. The left display shows the bank number. The right display indicates patch names, parameters, and a variety of other information. 2 EFFECT LEVEL Knob Adjust the overall volume. * When the Bypass EXP Mode (p. 55) and Noise Suppressor (p. 44) is[…]
-
Страница 9
9 Panel Descriptions 6 COMP/LIMITER ON/OFF Button Press this to switch the compressor/limiter on and off and when changing other settings. 7 TYPE VARIATION Button Selects the compressor or limiter type. ■ OVERDRIVE/DISTORTION (p. 26) 8 DRIVE Knob Adjusts the distortion effect from the overdrive or distortion. 9 LEVEL Knob Adjusts the volume of th[…]
-
Страница 10
10 Panel Descriptions ■ WAH (p. 31) 27 WAH ON/OFF Button Press this to switch the wah on and off and when changing other settings. ■ FX-1 (p. 33) 28 FX-1 ON/OFF Button Press this to switch FX-1 on and off and when changing other settings. ■ FX-2 (p. 35) 29 FX-2 ON/OFF Button Press this to switch FX-2 on and off and when changing other setting[…]
-
Страница 11
11 Panel Descriptions Rear Panel fig.00-02 1 INPUT Jack The bass guitar is connected here. 2 OUTPUT LEVEL Knob Adjusts the volume level of the output from the output (1/4 ” phone) jack and headphone jacks. 3 OUTPUT R/L (MONO) Jacks These are standard jacks that output unbalanced signals. Connect to amps, mixers, or other such devices. 4 PHONES Ja[…]
-
Страница 12
12 Chapter 1 Playing Sounds Making Connections * To prevent malfunction and/or damage to speakers or other devices, always turn down the volume, and turn off the power on all devices before making any connections. * Raise the amp volume only after turning on the power to all connected devices. * When using mono output, connect the cable only to the[…]
-
Страница 13
13 Chapter 1 Playing Sounds Chapter 1 * When using the GT-6B with a foot switch (the optional FS- 5U) connected to the SUB EXP PEDAL/SUB CTL 1,2 jack, set the polarity switch as shown in the following. fig.01-03 * You can use the special (optional Roland) PCS-31 connector cord to connect two foot switches. fig.01-04 Turning On the Power Once the co[…]
-
Страница 14
14 Chapter 1 Playing Sounds What is a Patch? When performing on your bass, you may select a variety of different tones according to what and where you are playing. The effects you want to use and the parameter settings (knob positions) will vary depending on the tone. You can store combinations, or “ sets, ” of volume level and other of these p[…]
-
Страница 15
15 Chapter 1 Playing Sounds Chapter 1 Turning Each of the Effects in a Patch On and Off You can use pedals 1 – 4 to switch on and off the individual effects that are used in a patch. Each pedal shows the names of two effects; the effect that you are currently able to switch on and off is indicated in the lower row of the right display. You can al[…]
-
Страница 16
16 Chapter 2 Creating You Own Favorite Tones (Patches) Getting the Tones You Want- Fast (EZ Tone) In addition to tones (patches) that you can actually use in performances, the GT-6B also features internal sample settings that are very useful when you want to create such tones on your own. This feature is called “ EZ Tone. ” Using the EZ Tone fu[…]
-
Страница 17
17 Chapter 2 Creating You Own Favorite Tones (Patches) Chapter 2 COMP/LIMITER LEVEL Adjusts the compressor/limiter volume level. The volume increases as the knob is turned to the right. OD/DIST DRIVE (Overdrive/Distortion Drive) Adjusts the degree of distortion in the overdrive or distortion sound. The distortion gets stronger as the knob is turned[…]
-
Страница 18
18 Chapter 2 Creating You Own Favorite Tones (Patches) Adding and Omitting Effects You can switch the internal effects on and off, which lets you change tones by adding and omitting effects. Using the Buttons to Switch Effects On and Off You can switch each of the internal effects on and off with the respective effect ON/OFF button. fig.02-04 1. Pr[…]
-
Страница 19
19 Chapter 2 Creating You Own Favorite Tones (Patches) Chapter 2 Setting the Effect Tones (Quick Settings) Quick Settings are preprogrammed effect settings. Each effect in the GT-6B has some available quick settings. You can easily create new effect sounds, without having to make any detailed adjustments, just by selecting and combining these Quick[…]
-
Страница 20
20 Chapter 2 Creating You Own Favorite Tones (Patches) Using the Pedal Effects (Wah, Pedal Bend, Ring Modulator) You can use the GT-6B ’ s expression pedal to obtain wah, pedal bend (pedal-controlled pitch bend), and ring modulator effects. Wah fig.02-11 1. Press [WAH]. 2. Turn on the wah effect (“Adding Effects”; p. 18). * This step is not r[…]
-
Страница 21
21 Chapter 2 Creating You Own Favorite Tones (Patches) Chapter 2 Ring Modulator fig.02-13 1. Press [FX-1]. 2. Turn on the FX-1 effect (“Adding Effects”; p. 18). * This step is not required if the effect is already on. 3. Press PARAMETER [ ] [ ] to select the FX Select parameter. 4. Rotate the VALUE dial to change the setting value to “R.M.”[…]
-
Страница 22
22 Chapter 2 Creating You Own Favorite Tones (Patches) Changing the Order of the Effects (Effect Chain) You can freely change the order in which the effects are connected. fig.02-16 1. Press [NAME/NS/MASTER] until “Effect Chain” appears in the display. * Each time [NAME/NS/MASTER] is pressed, the item that can be set is changed, following this […]
-
Страница 23
23 Chapter 3 Chapter 3 Saving the Tones You Have Created Write When you want to save a tone created, or a tone for which changes have been made, use the Write procedure to save the tone to a User patch. * The newly created tone will be discarded if the power is turned off, or if the tone is switched (“How to Switch Patches’; p. 14) before you?[…]
-
Страница 24
24 Chapter 3 Saving the Tones You Have Created Exchanging Patches On the GT-6B, you can exchange the positions of two User patches. fig.03-05 1. Select the exchange-source patch (refer to “How to Switch Patches”; p. 14). 2. Press [WRITE]. 3. Press PARAMETER [ ]. The content of the display changes, and the GT-6B is ready for a User patch to be s[…]
-
Страница 25
25 Chapter 4 Chapter 4 The Effects Explained This chapter describes the particular qualities of each of the GT-6B ’ s internal effects, as well as the parameters used to control them. The sound that is input to each effect is called the “ direct sound , ” and the sound modified by the effect is called the “ effect sound . ” COMP/LIMITER ([…]
-
Страница 26
26 Chapter 4 The Effects Explained OD/DIST (Overdrive/Distortion) This effect distorts the sound to create long sustain. The GT- 6B provides nine types of distortion with two different custom settings. ■ OD: Overdrive This provides the warm, natural type of distortion that occurs naturally when you turn up the volume on a tube amp. This effect is[…]
-
Страница 27
27 Chapter 4 The Effects Explained Chapter 4 CHORUS This is an effect that adds a slightly detuned sound to the original bass sound, resulting in a beautiful sound with greater depth and breadth. Developed by BOSS, this is one effect that is popular the world over. * When the Bypass EXP Mode (p. 55) and Noise Suppressor (p. 44 ) is set to “Off”[…]
-
Страница 28
28 Chapter 4 The Effects Explained * When Sound On Sound is selected, Pedal 4 and the BYPASS/ CTL pedal function as Sound On Sound controls. For more detailed information, refer to “Using Sound On Sound” (p. 54). ■ REV: Reverb Parameter Value Type Room1, Room2, Hall1, Hall2, Plate Reverb Time 0.1 s – 10.0 s (0.1 s step) Pre Delay 0 ms – 1[…]
-
Страница 29
29 Chapter 4 The Effects Explained Chapter 4 Delay Time Fine Makes fine adjustments (in units of 1 ms) to the delay time. Tap Time (Used Only with Pan) Adjusts the delay time of the right channel delay. This setting adjusts the right channel delay time relative to the left channel delay time, which is referenced as 100%. Feedback “ Feedback ” r[…]
-
Страница 30
30 Chapter 4 The Effects Explained Treble Adjusts the tone of the upper range. Middle Adjusts the tone of the midrange. * While some amps do not feature a middle control, this control still functions even when simulating such amps. If you want to recreate the sound as output by the original amp, set Middle to “0.” Middle Freq (Middle Frequency)[…]
-
Страница 31
31 Chapter 4 The Effects Explained Chapter 4 Direct Level Adjusts the volume of the direct sound. 3 BAND PARAMETRIC EQ This is a 3-band parametric equalizer allowing EQ for the lower range, midrange, and upper range. * Each press of [SELECT] takes you to the next available selection for the band, in this order: Lo → Mid → High → Lo. Parameter[…]
-
Страница 32
32 Chapter 4 The Effects Explained ● When Type is Set to Custom 1–3 You can make settings for the following parameters when TYPE is set to Custom 1 – 3. Making “ Custom ” Pedal Wah Settings (p. 53) Parameter Value Type (1 – 3) CRY WAH, VO WAH, Bass WAH Q (1 – 3) -50 – +50 Range Low (1 – 3) -50 – +50 Range High (1 – 3) -50 – […]
-
Страница 33
33 Chapter 4 The Effects Explained Chapter 4 Rate This selects the auto wah cycle. * When set to BPM, the value of each parameter is set according to the value of the Master BPM (p. 44) specified for each patch. This makes it easy to achieve effect sound settings that match the tempo of the song (synchronizing the cycle to one-half or one-fourth of[…]
-
Страница 34
34 Chapter 4 The Effects Explained Sens This adjusts the Enhancer sensitivity. The more the value is increased, the more softly you can play and still have the effect applied. Freq (Frequency) Sets the frequency range for the enhanced sound. Mix Level Adjusts the amount of enhanced sound added to the mix. ■ SG: Slow Gear This produces a volume-sw[…]
-
Страница 35
35 Chapter 4 The Effects Explained Chapter 4 FX-2 With FX-2, you can select the effect to be used from the following. • PHASER • FLANGER • HARMONIST • PITCH SHIFTER • PEDAL BEND • 2×2 CHORUS • AUTO SLAP • SHORT DELAY • VIBRATO • HUMANIZER • TREMOLO/PAN • BASS SYNTH Parameter Value On/Off Off, On FX Select Phaser, Flanger, Ha[…]
-
Страница 36
36 Chapter 4 The Effects Explained ■ FL: Flanger This produces a flanging effect that gives a sort of “ twisting ” character to the sound. Although it resembles the phaser effect, the flanger yields a colder, more metallic twisting effect. Parameter Value Rate 0 – 100, BPM – BPM Depth 0 – 100 Manual 0 – 100 Resonance 0 – 100 Separat[…]
-
Страница 37
37 Chapter 4 The Effects Explained Chapter 4 Feedback This adjusts the feedback amount of the harmonist sound. * Only PS1 can be selected when this is set to 2-Mono or 2- Stereo. Level This adjusts the volume of the harmonist sound. Key This specifies the key of the song you are playing. By specifying the key, you can create harmonies that fit the […]
-
Страница 38
38 Chapter 4 The Effects Explained Mono: This mode is for the input of individual notes. Select this setting when you want to obtain a pedal bend effect using an external expression pedal. * Because of the need to analyze the pitch, chords (two or more sounds played simultaneously) cannot be played. Pitch Adjusts the amount of pitch shift (the amou[…]
-
Страница 39
39 Chapter 4 The Effects Explained Chapter 4 Lo PreDly (Low Pre Delay) Adjusts the time from when the direct sound in the lower range is output until the effect sound is output. Extending the pre-delay produces the sensation of multiple sounds being played (doubling effect). Lo Level (Low Level) Adjusts the volume of the lower range. Hi Rate (High […]
-
Страница 40
40 Chapter 4 The Effects Explained 4. Press PARAMETER [ ] a number of times until the User Phrase settings screen is displayed. fig.04-04 5. Press PARAMETER [ ] [ ] to move the cursor, then rotate the PATCH/VALUE dial to set the User phrase. fig.04-50 * When you want to place the currently set step at the very end, turn the PATCH/VALUE dial clockwi[…]
-
Страница 41
41 Chapter 4 The Effects Explained Chapter 4 ■ VIB: Vibrato The vibrato effect is created by slightly modulating the pitch. Parameter Value Rate 0 – 100, BPM – BPM Depth 0 – 100 Trigger Off, On Rise Time 0 – 100 Rate This adjusts the period of the vibrato. * When set to BPM, the value of each parameter is set according to the value of the[…]
-
Страница 42
42 Chapter 4 The Effects Explained Manual (with Auto) Sets the point at which the two vowels will be switched. When set to “ 50, ” an equal length of time is used to switch Vowel 1 and Vowel 2. When it is set to lower than “ 50, ” the time for Vowel 1 is shorter. When it is set to higher than “ 50, ” the time for Vowel 1 is longer. Leve[…]
-
Страница 43
43 Chapter 4 The Effects Explained Chapter 4 Bow: Waveform shaping outputs a soft sound with no attack. Octave Shift (with Square and Saw) This outputs sound one octave below the original sound. PWM Rate (Pulse Width Modulation Rate) (with Square) Modulation is applied to the waveform (Square wave only) to create a broader, fatter sound. Higher val[…]
-
Страница 44
44 Chapter 4 The Effects Explained NS: Noise Suppressor This effect reduces the noise and hum picked up by the bass. Use this when noise that occurs when you are not playing the bass becomes noticeable. Since it suppresses the noise by monitoring the volume level of the actual bass sound being input, it always gives a natural effect. Parameter Valu[…]
-
Страница 45
45 Chapter 5 Chapter 5 Setting the Pedal Functions (Pedal Assign) These settings can be saved separately to individual patches. Selecting Each Effect to Be Turned On and Off with the Number Pedals You can change the effects that are turned on and off with the number pedals 1 – 4. 1. Press PARAMETER [ ] [ ] in the Play screen to display the follow[…]
-
Страница 46
46 Chapter 5 Setting the Pedal Functions (Pedal Assign) If You Don’t Want to Use the Expression Pedal as a “Volume Pedal” Use the procedure below to turn the expression pedal off. 1. Press [PEDAL ASSIGN]. 2. Press PARAMETER [ ] [ ] a number of times until you have one of the following screens displayed. fig.05-04 3. Press [PEDAL ASSIGN] once […]
-
Страница 47
47 Chapter 5 Setting the Pedal Functions (Pedal Assign) Chapter 5 (Expression pedal switch) fig.05-05 (CTL pedal) fig.05-06 Holding down [ ] (or [ ]) and pressing [ ] (or [ ]) causes the GT-6B to jump to the main screen, allowing you to reduce the number of times you need to press the buttons. 3. Rotate the PATCH/VALUE dial to select the pedal sett[…]
-
Страница 48
48 Chapter 5 Setting the Pedal Functions (Pedal Assign) Controlling Effects with the GT-6B Pedals, External Pedals, and External MIDI Devices Make these settings when controlling effects with the GT- 6B ’ s expression pedal, expression pedal switch, or CTL pedal, or with external pedals or external MIDI devices connected to the GT-6B. You can mak[…]
-
Страница 49
49 Chapter 5 Setting the Pedal Functions (Pedal Assign) Chapter 5 Making the Parameter Settings This sets the parameters to be controlled with Assign. Target fig.05-11 This sets the parameter to be affected. You can make adjustments to more parameters than those available in the Quick Settings. The parameters that you can select as the target are s[…]
-
Страница 50
50 Chapter 5 Setting the Pedal Functions (Pedal Assign) When controlling an On/Off target with the expression pedal fig.05-15 * The range that can be selected changes according to the target setting. * When the “minimum” is set to a higher value than the “maximum,” the change in the parameter is reversed. * The values of settings may change[…]
-
Страница 51
51 Chapter 5 Setting the Pedal Functions (Pedal Assign) Chapter 5 Active Range fig.05-18 When an expression pedal or other controller that changes the value consecutively is used as the source, this sets the operational range within which the value of the setting changes. If the controller is moved outside the operational range, the value does not […]
-
Страница 52
52 Chapter 6 Using the Customize Function With the GT-6 ’ s Customize function, you can rely on your own sensibilities and create a totally new effect by tweaking the settings for the “ Preamp/Speaker Simulator, ” “ Overdrive/Distortion, ” and “ Pedal Wah. ” The result can then be saved on the GT-6 as “ Custom ” settings. You can […]
-
Страница 53
53 Chapter 6 Using the Customize Function Chapter 6 Making “Custom” Pedal Wah Settings Here, you can make three different sets of settings, Custom 1, Custom 2, and Custom 3. * Editing the Custom 1, 2, or 3 settings alters all tones in patches that use these custom settings. 1. Press [WAH]. The WAH edit screen appears. 2. Press PARAMETER [ ] [ ][…]
-
Страница 54
54 Chapter 7 Using Sound On Sound You can use the “ Sound On Sound function ” by selecting “ SOS ” with the REV/DLY Fx Select (p. 27). Here, the Number 4 pedal and the BYPASS/CTL pedal automatically function as Sound On Sound controls. fig.07-01 Number 4 pedal: Stop, Erase CTL pedal: Record, Play, Overdub * The Number 4 pedal won’t functi[…]
-
Страница 55
55 Chapter 7 Chapter 8 Chapter 8 Convenient Features of the GT-6B Outputting Sounds Without Effects Applied (Bypass) The GT-6B features bypass circuitry. By using the bypass, the signal path, from input to output, consists entirely of analog circuitry. To switch to bypass, carry out the following procedure. Using the Expression Pedal Even When Bypa[…]
-
Страница 56
56 Chapter 8 Convenient Features of the GT-6B DIRECT/MONO: Direct/Mono Output Output from one of the connectors is the GT-6B ’ s stereo output mixed to mono; the direct bass direct sound (the analog bypass sound from the input jack) is output from the other connector. This switch setting determines whether the signals output from the XLR output j[…]
-
Страница 57
57 Chapter 8 Convenient Features of the GT-6B Chapter 8 At this time, the indicators of the PATCH and PATCH pedals light, indicating that the instrument is precisely in tune. fig.08-06 How to Tune 1. Play a single open note on the string being tuned. The name of the note closest to the pitch of the string that was played appears in the display. * O[…]
-
Страница 58
58 Chapter 8 Convenient Features of the GT-6B Adjusting the Overall Sound to Match the Usage Environment (Global) The GT-6B includes a feature that allows you to change all of the patch settings temporarily. This is called the “ Global function. ” With the Global function, you can temporarily change your settings to match those of your equipmen[…]
-
Страница 59
59 Chapter 8 Convenient Features of the GT-6B Chapter 8 Checking the Effect Output Level with the Level Meter You can meter the output level of each effect. This is handy for checking the effects ’ output levels. 1. Press [UTILITY] a number of times until “METER” is displayed. * You can also select this by pressing [UTILITY], and then pressin[…]
-
Страница 60
60 Chapter 9 Other Functions Adjusting the Display Contrast (LCD Contrast) Depending on where the GT-6B is placed the display may become hard to read. If this occurs, adjust the display contrast. 1. Press [UTILITY] a number of times until “LCD Contrast” is displayed. * You can also select this by pressing [UTILITY], and then pressing PARAMETER […]
-
Страница 61
61 Chapter 9 Other Functions Chapter 9 Switching the Bank and Number fig.09-05 1. Press the BANK or BANK pedal to select the desired bank. When you switch banks, the indicator for number pedal last pressed before pressing the BANK pedal flashes, and the GT-6B is ready for the patch number to be specified (the patch cannot yet be switched in this co[…]
-
Страница 62
62 Chapter 9 Other Functions Setting “Expression Pedal Hold” This setting determines whether or not the Pedal Assign ’ s (p. 45) operational status is carried over to the next patch when patches are switched. * Expression Pedal Hold does not function if the Assign Source mode is set to Toggle (whereby the value is toggled between Min and Max […]
-
Страница 63
63 Chapter 9 Other Functions Chapter 9 Setting the Knob Functions (Knob Mode) This sets the way the values of settings are changed when the control knobs are turned. 1. Press [UTILITY], then press PARAMETER [ ] [ ] so that “Knob Mode” is displayed. fig.09-07 2. Rotate the PATCH/VALUE dial to set the Knob mode. Immediate: Turning the knobs immed[…]
-
Страница 64
64 Chapter 10 Using MIDI What Can You Do with MIDI? You can perform the following operations using MIDI with the GT-6B. * The use of MIDI requires that the MIDI channels of the connected devices match. If the MIDI channel settings are not correct, the GT-6B will be unable to exchange data with other MIDI devices. Operating From the GT-6B Outputting[…]
-
Страница 65
65 Chapter 10 Using MIDI Chapter 10 Making the Settings for MIDI Functions Here is a description of the GT-6B ’ s MIDI functions. Set them as needed, depending on the intended use. 1. Press [UTILITY] a number of times until the following screen appears. fig.10-03 2. Press PARAMETER [ ] [ ] so that the parameter that you want to set appears in the[…]
-
Страница 66
66 Chapter 10 Using MIDI MIDI PC OUT (MIDI Program Change Out) Off, On fig.10-09 This setting determines whether or not Program Change messages are output when patches are switched on the GT- 6B. Off: Program Change messages are not output, even when patches are switched. On: Program Change messages are simultaneously output when patches are switch[…]
-
Страница 67
67 Chapter 10 Using MIDI Chapter 10 Transmitting and Receiving MIDI Data On the GT-6B, you can use Exclusive messages to provide another GT-6B with identical settings, and save effect settings on a sequencer or other device. This transmission of data is called “ Bulk Dump, ” while receiving such data is referred to as “ Bulk Load. ” Transmi[…]
-
Страница 68
68 Chapter 10 Using MIDI fig.10-19 When the transmission is completed, the screen prior to transmission returns to the display. 4. Press [EXIT] to return to the Play screen. Receiving Data from an External MIDI Device (Bulk Load) Making the Connections When Receiving Data Saved on a MIDI Sequencer Connect as shown below. Set the GT-6B ’ s Device […]
-
Страница 69
69 Chapter 10 Using MIDI Chapter 10 Setting the Program Change Map When switching patches using Program Change messages transmitted by an external MIDI device, you can freely set the correspondence between Program Change messages received by the GT-6B and the patches to be switched to in the “ Program Change Map. ” Initial Program Change Map Se[…]
-
Страница 70
70 Chapter 10 Using MIDI Enabling/Disabling the Program Change Map Settings (MIDI Map Select) This setting determines whether patches are switched according to the Program Change Map settings, or to the default settings when the GT-6B receives Program Change messages. 1. Press [UTILITY], then press PARAMETER [ ] [ ] so that “MIDI Map Select” is[…]
-
Страница 71
71 Appendices Appendices About MIDI MIDI is an acronym for Musical Instrument Digital Interface, and is a world-wide standard for allowing electronic musical equipment to communicate by transmitting messages such as performance information and sound selections. Any MIDI equipped device is able to transmit applicable types of data to another MIDI eq[…]
-
Страница 72
72 Appendices System messages System messages include exclusive messages, messages used for synchronization, and messages used to keep a MIDI system running correctly. Exclusive messages Exclusive messages handle information related to a unit ’ s own unique sounds, or other device-specific information. Generally, such messages can only be exchang[…]
-
Страница 73
73 Appendices Appendices Restoring the Factory Settings (Factory Reset) Restoring the GT-6B to the settings made at the factory is referred to as “ Factory Reset. ” Not only can you return all of the settings to the values in effect when the GT-6B was shipped from the factory, you can also specify the range of settings to be reset. fig.11-201 1[…]
-
Страница 74
74 Appendices Troubleshooting If there is no sound, or if the GT-6B does not function as you expect, first check the following points. If the measures in this checklist do not resolve your problem, you should contact your dealer or the nearest Roland Service Center. No sound / Volume is weak ❍ Are the connection cables broken? → Try exchanging […]
-
Страница 75
75 Appendices Appendices MIDI messages are not transmitted/ received ❍ Is the MIDI cable broken? → Try using a different MIDI cable. ❍ Is the GT-6B correctly connected to the external MIDI device? → Check connections with the other MIDI device. ❍ Do the MIDI channel settings of both devices match? → Make sure that the MIDI channels on b[…]
-
Страница 76
76 Appendices MIDI Implementation Chart fig.11-401 Function… Basic Channel Mode Note Number : Velocity After Touch Pitch Bend Control Change Prog Change System Exclusive System Common System Real Time Aux Message Notes Transmitted Recognized Remarks Default Changed Default Messages Altered True Voice Note ON Note OFF Key’s Ch’s 1 – 31[…]
-
Страница 77
77 Appendices Appendices Main Specifications GT-6B: Bass Effects Processor AD Conversion 24-bit + AF method DA Conversion 24-bit Sampling frequency 44.1 kHz Program Memories 120: 80 (User) + 40 (Preset) Nominal Input Level INPUT: -10 dBu Input Impedance INPUT: 1 M Ω Nominal Output Level OUTPUT: -10 dBu (Standard jack, at OUTPUT LEVEL marking posi[…]
-
Страница 78
78 Index Numerics 12Stage …………………………………………………………………. 35 2CE ………………………………………………………………………. 38 2×2 Chorus ……………………………………………………………. 38 3 BAND PARAMETRIC EQ ……………………………. 17, 31 4Stage[…]
-
Страница 79
79 Index Level Meter ………………………………………………………….. 59 LIMITER ………………………………………………………………. 25 LongTime …………………………………………………………….. 29 Loop …………………………………………………………………….. 39[…]
-
Страница 80
80 Index T T/P ………………………………………………………………………. 42 Tap Time ………………………………………………………………. 29 Target ……………………………………………………………… 47, 49 Target Range ………………………………………………………[…]
-
Страница 81
81 MEMO[…]
-
Страница 82
82 MEMO[…]
-
Страница 83
This product complies with the requirements of European Directive 89/336/EEC. For EU Countries For EU Countries Apparatus containing Lithium batteries ADVARSEL! Lithiumbatteri — Eksplosionsfare ved fejlagtig h å ndtering. Udskiftning m å kun ske med batteri af samme fabrikat og type. Lev é r det brugte batteri tilbage til leverand ø ren. VARNIN[…]
-
Страница 84
G601744601 ’ 00-xx-xx-xxx[…]
-
Boss GT-6B — page 1
Owner’s Manual ■ Printing Conventions in This Manual • Text or numerals enclosed in square brackets [ ] indicate buttons. [WRITE] WRITE button [UTILITY] UTILITY button • Reference such as (p. **) indicate pages in this manual to which you can refer. * All product names mentioned in this document are trademarks or registered trademarks of th …
-
Boss GT-6B — page 2
2 USING THE UNIT SAFELY 001 • Before using this unit, make sure to read the instructions below, and the Owner’s Manual. ……………………………………………………………………………………………. 002c • Do not open (or modify in any way) the unit or its AC adaptor. ……………………………………….. …
-
Boss GT-6B — page 3
3 013 • In households with small children, an adult should provide supervision until the child is capable of following all the rules essential for the safe operation of the unit. ……………………………………………………………………………………………. 014 • Protect the unit from strong impact. (Do not drop it!) …
-
Boss GT-6B — page 4
4 IMPORTANT NOTES 291a In addition to the items listed under “ USING THE UNIT SAFELY ” on page 2 – 3, please read and observe the following: Power Supply 301 • Do not use this unit on the same power circuit with any device that will generate line noise (such as an electric motor or variable lighting system). 302 • The AC adaptor will begi …
-
Boss GT-6B — page 5
5 Contents USING THE UNIT SAFELY ………………………… 2 IMPORTANT NOTES……………………………….. 4 Main Features ……………………………………… 7 Panel Descriptions ………………………………… 8 Front Panel ……………………………………………………………….. 8 Rear Panel ….. …
-
Boss GT-6B — page 6
6 Contents Controlling Effects with the GT-6B Pedals, External Pedals, and External MIDI Devices ……………… 48 Making the Assign On/Off Setting ……………………………………….. 48 Making Settings Instantly (Quick Settings) ……………………………. 48 Making the Parameter Settings ……………………………… …
-
Boss GT-6B — page 7
7 Main Features Powerful COSM Modeling Effects Built-In Features internal high-quality modeled effects, including bass amp, overdrive/distortion, compressor/limiter, touch wah, pedal wah, and more. Internal Analog Bypass Circuitry When bypass is activated, signals can be output without passing through the AD/DA converter. Moreover, analog signals a …
-
Boss GT-6B — page 8
8 Panel Descriptions Front Panel fig.00-01 1 Display A variety of information about the GT-6B appears here. The left display shows the bank number. The right display indicates patch names, parameters, and a variety of other information. 2 EFFECT LEVEL Knob Adjust the overall volume. * When the Bypass EXP Mode (p. 55) and Noise Suppressor (p. 44) is …
-
Boss GT-6B — page 9
9 Panel Descriptions 6 COMP/LIMITER ON/OFF Button Press this to switch the compressor/limiter on and off and when changing other settings. 7 TYPE VARIATION Button Selects the compressor or limiter type. ■ OVERDRIVE/DISTORTION (p. 26) 8 DRIVE Knob Adjusts the distortion effect from the overdrive or distortion. 9 LEVEL Knob Adjusts the volume of th …
-
Boss GT-6B — page 10
10 Panel Descriptions ■ WAH (p. 31) 27 WAH ON/OFF Button Press this to switch the wah on and off and when changing other settings. ■ FX-1 (p. 33) 28 FX-1 ON/OFF Button Press this to switch FX-1 on and off and when changing other settings. ■ FX-2 (p. 35) 29 FX-2 ON/OFF Button Press this to switch FX-2 on and off and when changing other setting …
-
Boss GT-6B — page 11
11 Panel Descriptions Rear Panel fig.00-02 1 INPUT Jack The bass guitar is connected here. 2 OUTPUT LEVEL Knob Adjusts the volume level of the output from the output (1/4 ” phone) jack and headphone jacks. 3 OUTPUT R/L (MONO) Jacks These are standard jacks that output unbalanced signals. Connect to amps, mixers, or other such devices. 4 PHONES Ja …
-
Boss GT-6B — page 12
12 Chapter 1 Playing Sounds Making Connections * To prevent malfunction and/or damage to speakers or other devices, always turn down the volume, and turn off the power on all devices before making any connections. * Raise the amp volume only after turning on the power to all connected devices. * When using mono output, connect the cable only to the …
-
Boss GT-6B — page 13
13 Chapter 1 Playing Sounds Chapter 1 * When using the GT-6B with a foot switch (the optional FS- 5U) connected to the SUB EXP PEDAL/SUB CTL 1,2 jack, set the polarity switch as shown in the following. fig.01-03 * You can use the special (optional Roland) PCS-31 connector cord to connect two foot switches. fig.01-04 Turning On the Power Once the co …
-
Boss GT-6B — page 14
14 Chapter 1 Playing Sounds What is a Patch? When performing on your bass, you may select a variety of different tones according to what and where you are playing. The effects you want to use and the parameter settings (knob positions) will vary depending on the tone. You can store combinations, or “ sets, ” of volume level and other of these p …
-
Boss GT-6B — page 15
15 Chapter 1 Playing Sounds Chapter 1 Turning Each of the Effects in a Patch On and Off You can use pedals 1 – 4 to switch on and off the individual effects that are used in a patch. Each pedal shows the names of two effects; the effect that you are currently able to switch on and off is indicated in the lower row of the right display. You can al …
-
Boss GT-6B — page 16
16 Chapter 2 Creating You Own Favorite Tones (Patches) Getting the Tones You Want- Fast (EZ Tone) In addition to tones (patches) that you can actually use in performances, the GT-6B also features internal sample settings that are very useful when you want to create such tones on your own. This feature is called “ EZ Tone. ” Using the EZ Tone fu …
-
Boss GT-6B — page 17
17 Chapter 2 Creating You Own Favorite Tones (Patches) Chapter 2 COMP/LIMITER LEVEL Adjusts the compressor/limiter volume level. The volume increases as the knob is turned to the right. OD/DIST DRIVE (Overdrive/Distortion Drive) Adjusts the degree of distortion in the overdrive or distortion sound. The distortion gets stronger as the knob is turned …
-
Boss GT-6B — page 18
18 Chapter 2 Creating You Own Favorite Tones (Patches) Adding and Omitting Effects You can switch the internal effects on and off, which lets you change tones by adding and omitting effects. Using the Buttons to Switch Effects On and Off You can switch each of the internal effects on and off with the respective effect ON/OFF button. fig.02-04 1. Pr …
-
Boss GT-6B — page 19
19 Chapter 2 Creating You Own Favorite Tones (Patches) Chapter 2 Setting the Effect Tones (Quick Settings) Quick Settings are preprogrammed effect settings. Each effect in the GT-6B has some available quick settings. You can easily create new effect sounds, without having to make any detailed adjustments, just by selecting and combining these Quick …
-
Boss GT-6B — page 20
20 Chapter 2 Creating You Own Favorite Tones (Patches) Using the Pedal Effects (Wah, Pedal Bend, Ring Modulator) You can use the GT-6B ’ s expression pedal to obtain wah, pedal bend (pedal-controlled pitch bend), and ring modulator effects. Wah fig.02-11 1. Press [WAH]. 2. Turn on the wah effect (“Adding Effects”; p. 18). * This step is not r …
-
Boss GT-6B — page 21
21 Chapter 2 Creating You Own Favorite Tones (Patches) Chapter 2 Ring Modulator fig.02-13 1. Press [FX-1]. 2. Turn on the FX-1 effect (“Adding Effects”; p. 18). * This step is not required if the effect is already on. 3. Press PARAMETER [ ] [ ] to select the FX Select parameter. 4. Rotate the VALUE dial to change the setting value to “R.M.” …
-
Boss GT-6B — page 22
22 Chapter 2 Creating You Own Favorite Tones (Patches) Changing the Order of the Effects (Effect Chain) You can freely change the order in which the effects are connected. fig.02-16 1. Press [NAME/NS/MASTER] until “Effect Chain” appears in the display. * Each time [NAME/NS/MASTER] is pressed, the item that can be set is changed, following this …
-
Boss GT-6B — page 23
23 Chapter 3 Chapter 3 Saving the Tones You Have Created Write When you want to save a tone created, or a tone for which changes have been made, use the Write procedure to save the tone to a User patch. * The newly created tone will be discarded if the power is turned off, or if the tone is switched (“How to Switch Patches’; p. 14) before you? …
-
Boss GT-6B — page 24
24 Chapter 3 Saving the Tones You Have Created Exchanging Patches On the GT-6B, you can exchange the positions of two User patches. fig.03-05 1. Select the exchange-source patch (refer to “How to Switch Patches”; p. 14). 2. Press [WRITE]. 3. Press PARAMETER [ ]. The content of the display changes, and the GT-6B is ready for a User patch to be s …
-
Boss GT-6B — page 25
25 Chapter 4 Chapter 4 The Effects Explained This chapter describes the particular qualities of each of the GT-6B ’ s internal effects, as well as the parameters used to control them. The sound that is input to each effect is called the “ direct sound , ” and the sound modified by the effect is called the “ effect sound . ” COMP/LIMITER ( …
-
Boss GT-6B — page 26
26 Chapter 4 The Effects Explained OD/DIST (Overdrive/Distortion) This effect distorts the sound to create long sustain. The GT- 6B provides nine types of distortion with two different custom settings. ■ OD: Overdrive This provides the warm, natural type of distortion that occurs naturally when you turn up the volume on a tube amp. This effect is …
-
Boss GT-6B — page 27
27 Chapter 4 The Effects Explained Chapter 4 CHORUS This is an effect that adds a slightly detuned sound to the original bass sound, resulting in a beautiful sound with greater depth and breadth. Developed by BOSS, this is one effect that is popular the world over. * When the Bypass EXP Mode (p. 55) and Noise Suppressor (p. 44 ) is set to “Off” …
-
Boss GT-6B — page 28
28 Chapter 4 The Effects Explained * When Sound On Sound is selected, Pedal 4 and the BYPASS/ CTL pedal function as Sound On Sound controls. For more detailed information, refer to “Using Sound On Sound” (p. 54). ■ REV: Reverb Parameter Value Type Room1, Room2, Hall1, Hall2, Plate Reverb Time 0.1 s – 10.0 s (0.1 s step) Pre Delay 0 ms – 1 …
-
Boss GT-6B — page 29
29 Chapter 4 The Effects Explained Chapter 4 Delay Time Fine Makes fine adjustments (in units of 1 ms) to the delay time. Tap Time (Used Only with Pan) Adjusts the delay time of the right channel delay. This setting adjusts the right channel delay time relative to the left channel delay time, which is referenced as 100%. Feedback “ Feedback ” r …
-
Boss GT-6B — page 30
30 Chapter 4 The Effects Explained Treble Adjusts the tone of the upper range. Middle Adjusts the tone of the midrange. * While some amps do not feature a middle control, this control still functions even when simulating such amps. If you want to recreate the sound as output by the original amp, set Middle to “0.” Middle Freq (Middle Frequency) …
-
Boss GT-6B — page 31
31 Chapter 4 The Effects Explained Chapter 4 Direct Level Adjusts the volume of the direct sound. 3 BAND PARAMETRIC EQ This is a 3-band parametric equalizer allowing EQ for the lower range, midrange, and upper range. * Each press of [SELECT] takes you to the next available selection for the band, in this order: Lo → Mid → High → Lo. Parameter …
-
Boss GT-6B — page 32
32 Chapter 4 The Effects Explained ● When Type is Set to Custom 1–3 You can make settings for the following parameters when TYPE is set to Custom 1 – 3. Making “ Custom ” Pedal Wah Settings (p. 53) Parameter Value Type (1 – 3) CRY WAH, VO WAH, Bass WAH Q (1 – 3) -50 – +50 Range Low (1 – 3) -50 – +50 Range High (1 – 3) -50 – …
-
Boss GT-6B — page 33
33 Chapter 4 The Effects Explained Chapter 4 Rate This selects the auto wah cycle. * When set to BPM, the value of each parameter is set according to the value of the Master BPM (p. 44) specified for each patch. This makes it easy to achieve effect sound settings that match the tempo of the song (synchronizing the cycle to one-half or one-fourth of …
-
Boss GT-6B — page 34
34 Chapter 4 The Effects Explained Sens This adjusts the Enhancer sensitivity. The more the value is increased, the more softly you can play and still have the effect applied. Freq (Frequency) Sets the frequency range for the enhanced sound. Mix Level Adjusts the amount of enhanced sound added to the mix. ■ SG: Slow Gear This produces a volume-sw …
-
Boss GT-6B — page 35
35 Chapter 4 The Effects Explained Chapter 4 FX-2 With FX-2, you can select the effect to be used from the following. • PHASER • FLANGER • HARMONIST • PITCH SHIFTER • PEDAL BEND • 2×2 CHORUS • AUTO SLAP • SHORT DELAY • VIBRATO • HUMANIZER • TREMOLO/PAN • BASS SYNTH Parameter Value On/Off Off, On FX Select Phaser, Flanger, Ha …
-
Boss GT-6B — page 36
36 Chapter 4 The Effects Explained ■ FL: Flanger This produces a flanging effect that gives a sort of “ twisting ” character to the sound. Although it resembles the phaser effect, the flanger yields a colder, more metallic twisting effect. Parameter Value Rate 0 – 100, BPM – BPM Depth 0 – 100 Manual 0 – 100 Resonance 0 – 100 Separat …
-
Boss GT-6B — page 37
37 Chapter 4 The Effects Explained Chapter 4 Feedback This adjusts the feedback amount of the harmonist sound. * Only PS1 can be selected when this is set to 2-Mono or 2- Stereo. Level This adjusts the volume of the harmonist sound. Key This specifies the key of the song you are playing. By specifying the key, you can create harmonies that fit the …
-
Boss GT-6B — page 38
38 Chapter 4 The Effects Explained Mono: This mode is for the input of individual notes. Select this setting when you want to obtain a pedal bend effect using an external expression pedal. * Because of the need to analyze the pitch, chords (two or more sounds played simultaneously) cannot be played. Pitch Adjusts the amount of pitch shift (the amou …
-
Boss GT-6B — page 39
39 Chapter 4 The Effects Explained Chapter 4 Lo PreDly (Low Pre Delay) Adjusts the time from when the direct sound in the lower range is output until the effect sound is output. Extending the pre-delay produces the sensation of multiple sounds being played (doubling effect). Lo Level (Low Level) Adjusts the volume of the lower range. Hi Rate (High …
-
Boss GT-6B — page 40
40 Chapter 4 The Effects Explained 4. Press PARAMETER [ ] a number of times until the User Phrase settings screen is displayed. fig.04-04 5. Press PARAMETER [ ] [ ] to move the cursor, then rotate the PATCH/VALUE dial to set the User phrase. fig.04-50 * When you want to place the currently set step at the very end, turn the PATCH/VALUE dial clockwi …
-
Boss GT-6B — page 41
41 Chapter 4 The Effects Explained Chapter 4 ■ VIB: Vibrato The vibrato effect is created by slightly modulating the pitch. Parameter Value Rate 0 – 100, BPM – BPM Depth 0 – 100 Trigger Off, On Rise Time 0 – 100 Rate This adjusts the period of the vibrato. * When set to BPM, the value of each parameter is set according to the value of the …
-
Boss GT-6B — page 42
42 Chapter 4 The Effects Explained Manual (with Auto) Sets the point at which the two vowels will be switched. When set to “ 50, ” an equal length of time is used to switch Vowel 1 and Vowel 2. When it is set to lower than “ 50, ” the time for Vowel 1 is shorter. When it is set to higher than “ 50, ” the time for Vowel 1 is longer. Leve …
-
Boss GT-6B — page 43
43 Chapter 4 The Effects Explained Chapter 4 Bow: Waveform shaping outputs a soft sound with no attack. Octave Shift (with Square and Saw) This outputs sound one octave below the original sound. PWM Rate (Pulse Width Modulation Rate) (with Square) Modulation is applied to the waveform (Square wave only) to create a broader, fatter sound. Higher val …
-
Boss GT-6B — page 44
44 Chapter 4 The Effects Explained NS: Noise Suppressor This effect reduces the noise and hum picked up by the bass. Use this when noise that occurs when you are not playing the bass becomes noticeable. Since it suppresses the noise by monitoring the volume level of the actual bass sound being input, it always gives a natural effect. Parameter Valu …
-
Boss GT-6B — page 45
45 Chapter 5 Chapter 5 Setting the Pedal Functions (Pedal Assign) These settings can be saved separately to individual patches. Selecting Each Effect to Be Turned On and Off with the Number Pedals You can change the effects that are turned on and off with the number pedals 1 – 4. 1. Press PARAMETER [ ] [ ] in the Play screen to display the follow …
-
Boss GT-6B — page 46
46 Chapter 5 Setting the Pedal Functions (Pedal Assign) If You Don’t Want to Use the Expression Pedal as a “Volume Pedal” Use the procedure below to turn the expression pedal off. 1. Press [PEDAL ASSIGN]. 2. Press PARAMETER [ ] [ ] a number of times until you have one of the following screens displayed. fig.05-04 3. Press [PEDAL ASSIGN] once …
-
Boss GT-6B — page 47
47 Chapter 5 Setting the Pedal Functions (Pedal Assign) Chapter 5 (Expression pedal switch) fig.05-05 (CTL pedal) fig.05-06 Holding down [ ] (or [ ]) and pressing [ ] (or [ ]) causes the GT-6B to jump to the main screen, allowing you to reduce the number of times you need to press the buttons. 3. Rotate the PATCH/VALUE dial to select the pedal sett …
-
Boss GT-6B — page 48
48 Chapter 5 Setting the Pedal Functions (Pedal Assign) Controlling Effects with the GT-6B Pedals, External Pedals, and External MIDI Devices Make these settings when controlling effects with the GT- 6B ’ s expression pedal, expression pedal switch, or CTL pedal, or with external pedals or external MIDI devices connected to the GT-6B. You can mak …
-
Boss GT-6B — page 49
49 Chapter 5 Setting the Pedal Functions (Pedal Assign) Chapter 5 Making the Parameter Settings This sets the parameters to be controlled with Assign. Target fig.05-11 This sets the parameter to be affected. You can make adjustments to more parameters than those available in the Quick Settings. The parameters that you can select as the target are s …
-
Boss GT-6B — page 50
50 Chapter 5 Setting the Pedal Functions (Pedal Assign) When controlling an On/Off target with the expression pedal fig.05-15 * The range that can be selected changes according to the target setting. * When the “minimum” is set to a higher value than the “maximum,” the change in the parameter is reversed. * The values of settings may change …
-
Boss GT-6B — page 51
51 Chapter 5 Setting the Pedal Functions (Pedal Assign) Chapter 5 Active Range fig.05-18 When an expression pedal or other controller that changes the value consecutively is used as the source, this sets the operational range within which the value of the setting changes. If the controller is moved outside the operational range, the value does not …
-
Boss GT-6B — page 52
52 Chapter 6 Using the Customize Function With the GT-6 ’ s Customize function, you can rely on your own sensibilities and create a totally new effect by tweaking the settings for the “ Preamp/Speaker Simulator, ” “ Overdrive/Distortion, ” and “ Pedal Wah. ” The result can then be saved on the GT-6 as “ Custom ” settings. You can …
-
Boss GT-6B — page 53
53 Chapter 6 Using the Customize Function Chapter 6 Making “Custom” Pedal Wah Settings Here, you can make three different sets of settings, Custom 1, Custom 2, and Custom 3. * Editing the Custom 1, 2, or 3 settings alters all tones in patches that use these custom settings. 1. Press [WAH]. The WAH edit screen appears. 2. Press PARAMETER [ ] [ ] …
-
Boss GT-6B — page 54
54 Chapter 7 Using Sound On Sound You can use the “ Sound On Sound function ” by selecting “ SOS ” with the REV/DLY Fx Select (p. 27). Here, the Number 4 pedal and the BYPASS/CTL pedal automatically function as Sound On Sound controls. fig.07-01 Number 4 pedal: Stop, Erase CTL pedal: Record, Play, Overdub * The Number 4 pedal won’t functi …
-
Boss GT-6B — page 55
55 Chapter 7 Chapter 8 Chapter 8 Convenient Features of the GT-6B Outputting Sounds Without Effects Applied (Bypass) The GT-6B features bypass circuitry. By using the bypass, the signal path, from input to output, consists entirely of analog circuitry. To switch to bypass, carry out the following procedure. Using the Expression Pedal Even When Bypa …
-
Boss GT-6B — page 56
56 Chapter 8 Convenient Features of the GT-6B DIRECT/MONO: Direct/Mono Output Output from one of the connectors is the GT-6B ’ s stereo output mixed to mono; the direct bass direct sound (the analog bypass sound from the input jack) is output from the other connector. This switch setting determines whether the signals output from the XLR output j …
-
Boss GT-6B — page 57
57 Chapter 8 Convenient Features of the GT-6B Chapter 8 At this time, the indicators of the PATCH and PATCH pedals light, indicating that the instrument is precisely in tune. fig.08-06 How to Tune 1. Play a single open note on the string being tuned. The name of the note closest to the pitch of the string that was played appears in the display. * O …
-
Boss GT-6B — page 58
58 Chapter 8 Convenient Features of the GT-6B Adjusting the Overall Sound to Match the Usage Environment (Global) The GT-6B includes a feature that allows you to change all of the patch settings temporarily. This is called the “ Global function. ” With the Global function, you can temporarily change your settings to match those of your equipmen …
-
Boss GT-6B — page 59
59 Chapter 8 Convenient Features of the GT-6B Chapter 8 Checking the Effect Output Level with the Level Meter You can meter the output level of each effect. This is handy for checking the effects ’ output levels. 1. Press [UTILITY] a number of times until “METER” is displayed. * You can also select this by pressing [UTILITY], and then pressin …
-
Boss GT-6B — page 60
60 Chapter 9 Other Functions Adjusting the Display Contrast (LCD Contrast) Depending on where the GT-6B is placed the display may become hard to read. If this occurs, adjust the display contrast. 1. Press [UTILITY] a number of times until “LCD Contrast” is displayed. * You can also select this by pressing [UTILITY], and then pressing PARAMETER …
-
Boss GT-6B — page 61
61 Chapter 9 Other Functions Chapter 9 Switching the Bank and Number fig.09-05 1. Press the BANK or BANK pedal to select the desired bank. When you switch banks, the indicator for number pedal last pressed before pressing the BANK pedal flashes, and the GT-6B is ready for the patch number to be specified (the patch cannot yet be switched in this co …
-
Boss GT-6B — page 62
62 Chapter 9 Other Functions Setting “Expression Pedal Hold” This setting determines whether or not the Pedal Assign ’ s (p. 45) operational status is carried over to the next patch when patches are switched. * Expression Pedal Hold does not function if the Assign Source mode is set to Toggle (whereby the value is toggled between Min and Max …
-
Boss GT-6B — page 63
63 Chapter 9 Other Functions Chapter 9 Setting the Knob Functions (Knob Mode) This sets the way the values of settings are changed when the control knobs are turned. 1. Press [UTILITY], then press PARAMETER [ ] [ ] so that “Knob Mode” is displayed. fig.09-07 2. Rotate the PATCH/VALUE dial to set the Knob mode. Immediate: Turning the knobs immed …
-
Boss GT-6B — page 64
64 Chapter 10 Using MIDI What Can You Do with MIDI? You can perform the following operations using MIDI with the GT-6B. * The use of MIDI requires that the MIDI channels of the connected devices match. If the MIDI channel settings are not correct, the GT-6B will be unable to exchange data with other MIDI devices. Operating From the GT-6B Outputting …
-
Boss GT-6B — page 65
65 Chapter 10 Using MIDI Chapter 10 Making the Settings for MIDI Functions Here is a description of the GT-6B ’ s MIDI functions. Set them as needed, depending on the intended use. 1. Press [UTILITY] a number of times until the following screen appears. fig.10-03 2. Press PARAMETER [ ] [ ] so that the parameter that you want to set appears in the …
-
Boss GT-6B — page 66
66 Chapter 10 Using MIDI MIDI PC OUT (MIDI Program Change Out) Off, On fig.10-09 This setting determines whether or not Program Change messages are output when patches are switched on the GT- 6B. Off: Program Change messages are not output, even when patches are switched. On: Program Change messages are simultaneously output when patches are switch …
-
Boss GT-6B — page 67
67 Chapter 10 Using MIDI Chapter 10 Transmitting and Receiving MIDI Data On the GT-6B, you can use Exclusive messages to provide another GT-6B with identical settings, and save effect settings on a sequencer or other device. This transmission of data is called “ Bulk Dump, ” while receiving such data is referred to as “ Bulk Load. ” Transmi …
-
Boss GT-6B — page 68
68 Chapter 10 Using MIDI fig.10-19 When the transmission is completed, the screen prior to transmission returns to the display. 4. Press [EXIT] to return to the Play screen. Receiving Data from an External MIDI Device (Bulk Load) Making the Connections When Receiving Data Saved on a MIDI Sequencer Connect as shown below. Set the GT-6B ’ s Device …
-
Boss GT-6B — page 69
69 Chapter 10 Using MIDI Chapter 10 Setting the Program Change Map When switching patches using Program Change messages transmitted by an external MIDI device, you can freely set the correspondence between Program Change messages received by the GT-6B and the patches to be switched to in the “ Program Change Map. ” Initial Program Change Map Se …
-
Boss GT-6B — page 70
70 Chapter 10 Using MIDI Enabling/Disabling the Program Change Map Settings (MIDI Map Select) This setting determines whether patches are switched according to the Program Change Map settings, or to the default settings when the GT-6B receives Program Change messages. 1. Press [UTILITY], then press PARAMETER [ ] [ ] so that “MIDI Map Select” is …
-
Boss GT-6B — page 71
71 Appendices Appendices About MIDI MIDI is an acronym for Musical Instrument Digital Interface, and is a world-wide standard for allowing electronic musical equipment to communicate by transmitting messages such as performance information and sound selections. Any MIDI equipped device is able to transmit applicable types of data to another MIDI eq …
-
Boss GT-6B — page 72
72 Appendices System messages System messages include exclusive messages, messages used for synchronization, and messages used to keep a MIDI system running correctly. Exclusive messages Exclusive messages handle information related to a unit ’ s own unique sounds, or other device-specific information. Generally, such messages can only be exchang …
-
Boss GT-6B — page 73
73 Appendices Appendices Restoring the Factory Settings (Factory Reset) Restoring the GT-6B to the settings made at the factory is referred to as “ Factory Reset. ” Not only can you return all of the settings to the values in effect when the GT-6B was shipped from the factory, you can also specify the range of settings to be reset. fig.11-201 1 …
-
Boss GT-6B — page 74
74 Appendices Troubleshooting If there is no sound, or if the GT-6B does not function as you expect, first check the following points. If the measures in this checklist do not resolve your problem, you should contact your dealer or the nearest Roland Service Center. No sound / Volume is weak ❍ Are the connection cables broken? → Try exchanging …
-
Boss GT-6B — page 75
75 Appendices Appendices MIDI messages are not transmitted/ received ❍ Is the MIDI cable broken? → Try using a different MIDI cable. ❍ Is the GT-6B correctly connected to the external MIDI device? → Check connections with the other MIDI device. ❍ Do the MIDI channel settings of both devices match? → Make sure that the MIDI channels on b …
-
Boss GT-6B — page 76
76 Appendices MIDI Implementation Chart fig.11-401 Function… Basic Channel Mode Note Number : Velocity After Touch Pitch Bend Control Change Prog Change System Exclusive System Common System Real Time Aux Message Notes Transmitted Recognized Remarks Default Changed Default Messages Altered True Voice Note ON Note OFF Key’s Ch’s 1 – 31 …
-
Boss GT-6B — page 77
77 Appendices Appendices Main Specifications GT-6B: Bass Effects Processor AD Conversion 24-bit + AF method DA Conversion 24-bit Sampling frequency 44.1 kHz Program Memories 120: 80 (User) + 40 (Preset) Nominal Input Level INPUT: -10 dBu Input Impedance INPUT: 1 M Ω Nominal Output Level OUTPUT: -10 dBu (Standard jack, at OUTPUT LEVEL marking posi …
-
Boss GT-6B — page 78
78 Index Numerics 12Stage …………………………………………………………………. 35 2CE ………………………………………………………………………. 38 2×2 Chorus ……………………………………………………………. 38 3 BAND PARAMETRIC EQ ……………………………. 17, 31 4Stage …
-
Boss GT-6B — page 79
79 Index Level Meter ………………………………………………………….. 59 LIMITER ………………………………………………………………. 25 LongTime …………………………………………………………….. 29 Loop …………………………………………………………………….. 39 …
-
Boss GT-6B — page 80
80 Index T T/P ………………………………………………………………………. 42 Tap Time ………………………………………………………………. 29 Target ……………………………………………………………… 47, 49 Target Range ……………………………………………………… …
-
Boss GT-6B — page 81
81 MEMO …
-
Boss GT-6B — page 82
82 MEMO …
-
Boss GT-6B — page 83
This product complies with the requirements of European Directive 89/336/EEC. For EU Countries For EU Countries Apparatus containing Lithium batteries ADVARSEL! Lithiumbatteri — Eksplosionsfare ved fejlagtig h å ndtering. Udskiftning m å kun ske med batteri af samme fabrikat og type. Lev é r det brugte batteri tilbage til leverand ø ren. VARNIN …
-
Boss GT-6B — page 84
G601744601 ’ 00-xx-xx-xxx …

Содержание
- направления
- чаевые
- предупреждение
- Что вам нужно
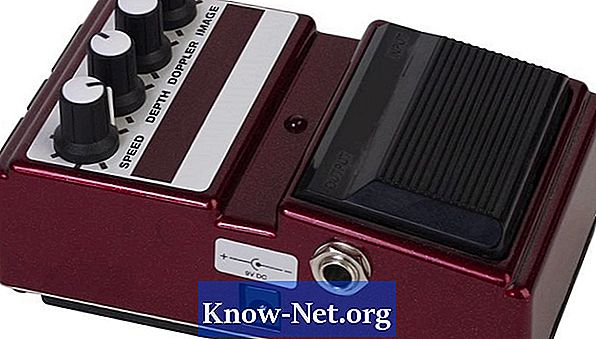
Гитарная педаль Boss GT-6 имеет несколько процессоров эффектов, которые предлагают целый ряд эффектов, чтобы помочь гитаристу, поэтому ему не нужно носить несколько педалей по отдельности. Boss GT-6 поставляется с генератором моделирования COSM, который точно имитирует хорошо известные на рынке тоны усилителя. GT-6 имеет четыре педали для включения заданных звуковых эффектов, педаль экспрессии для громкости и вау-вау. Педали с несколькими эффектами часто немного сложнее, чем отдельные педали, потому что они имеют больше элементов управления и опций.
направления
Педали не требуют использования нескольких отдельных педалей (Hemera Technologies / PhotoObjects.net / Getty Images)
-
Подключите один конец одного из кабелей к гитаре, а другой конец — к входному разъему педали. Затем подключите один конец второго кабеля к розетке, а другой конец — к входу усилителя. Вставьте вилку переменного тока в розетку на задней панели подставки и включите ее. Кнопка питания расположена в верхней части задней панели. Используйте левый выходной разъем, если усилитель имеет динамик, или правый, если он стереофонический.
-
Перед включением усилителя уменьшите громкость. После включения постепенно увеличивайте звук. Никогда не включайте усилитель на большой громкости, так как это может вызвать внезапные, потенциально опасные всплывающие окна.
-
Выберите опцию «Выбор выхода», чтобы открыть меню типов усилителей на дисплее. Выберите тип, который лучше всего подходит для используемого вами усилителя. Это позволяет педалью интуитивно находить звуки, которые она создает, в соответствии с вашим звуковым оборудованием. Найдены следующие варианты: «маленький усилитель», «комбинированный усилитель» и «усиленный усилитель».

GT-6 может эмулировать широкий спектр усилителей (Jupiterimages / Photos.com / Getty Images)
-
Выберите первый запрограммированный эффект в меню и нажмите. Протестируйте эффекты, которые уже есть на педали, и запишите некоторые из них, которые вас интересуют.
-
Настройте патчи. GT-6 может хранить 340 пользовательских патчей отдельно. Нажмите кнопку «EZ Tone», чтобы открыть меню настроек патча. Поверните кнопку набора номера, чтобы найти настройку для начала звонка. Эта опция открывает список выбора звуков, включая тон, модуляцию и искажение. Выберите нейтральный эффект, такой как усилитель с чистым звуком. Выключите нежелательные эффекты нажатием кнопки «Выкл.». Установите желаемые параметры эффекта, нажимая кнопки параметров. Нажмите кнопку «запись», чтобы сохранить патч и отметить его местоположение численно.
-
Назовите патч, чтобы его можно было легко найти. Нажмите «имя» и с помощью кнопки набора номера выберите буквы. Используйте кнопку «параметр», чтобы перейти к следующей букве. После присвоения имени патчу нажмите «написать».

чаевые
- Поверните педаль экспрессии назад, чтобы уменьшить громкость звука.
предупреждение
- Отсоединяйте аккумулятор, когда он не используется.
Что вам нужно
- гитара
- 2 гитарных кабеля для штекера 12,5 мм
- усилитель