

Summary of Content for Hilti C 7/24 Charger Operating Instructions V4 PDF
37 84
37
Bedienungsanleitung de Operating instructions en Mode demploi fr Istruzioni duso it Gebruiksaanwijzing nl Manual de instrues pt Manual de instrucciones es Brugsanvisning da Kyttohje fi Bruksanvisning no Bruksanvisning sv el Kasutusjuhend et Lietoanas pamcba lv Instrukcija lt
ar kk
C7/24, C7/36-ACS
Printed: 07.07.2013 | Doc-Nr: PUB / 5140018 / 000 / 00
Printed: 07.07.2013 | Doc-Nr: PUB / 5140018 / 000 / 00
Printed: 07.07.2013 | Doc-Nr: PUB / 5140018 / 000 / 00
9
en
It is essential that the operating instructions are read before the appliance is operated for the first time.
Always keep these operating instructions together with the appliance.
Ensure that the operating instructions are with the appliance when it is given to other persons.
ORIGINAL OPERATING INSTRUCTIONS
C 7/24 and C 7/36-ACS chargers 1. General information 1.1 Signal words and their meaning
-CAUTION- Used to draw attention to a potentially dangerous situa- tion which could lead to minor personal injury or dam- age to the equipment or other property.
-NOTE- Used to draw attention to an instruction or other useful information.
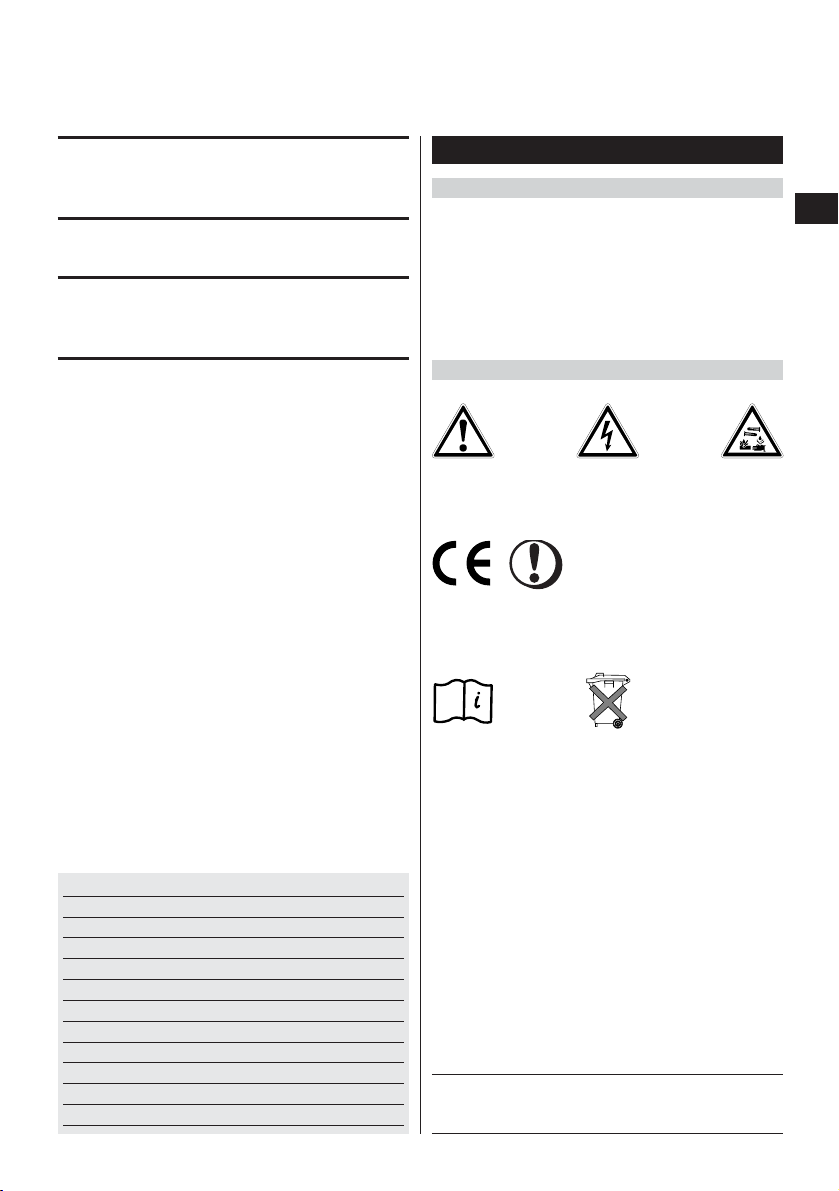
1.2 Pictograms
Contents Page 1. General information 9 2. Description 10 3. Accessories 10 4. Technical data 10 5. Safety precautions 11 6. Before use 12 7. Operation 12 8. Care and maintenance 13 9. Disposal 14
10. Manufacturer’s warranty tools 14 11. Declaration of conformity (original) 15
Operating controls and component parts C 7/24 and C 7/36-ACS chargers Supply cord Plug Battery compartment Indicator lamps Refresh button (only C 7/24) CA 7/36 adaptor for BP 12, BP 40, BP 72 and
RB 10* * Only the charger is supplied.
Batteries and adaptors are available as accessories.
These numbers refer to the corresponding illustra- tions. The illustrations can be found on the fold-out cover pages. Keep these pages open while studying the oper- ating instructions. In these operating instructions, the designation appli- ance refers to the C 7/24 and C 7/36-ACS chargers.
Location of identification data on the appliance The type designation and serial number can be found on the rating plate on the appliance. Make a note of this data in your operating instructions and always refer to it when making an enquiry to your Hilti representative or service department.
Type:
Serial no.:
Warning signs
General warning
Warning: electricity
Warning: caustic
substances
Alert sign
Alert sign in addition to CE mark. Mandatory for all radio appliances to which special regulations or restrictions apply somewhere in Europe.
Read the operating
instructions before use
Symbols
Do not dispose of batteries with general refuse.
Return waste material for recycling
Printed: 07.07.2013 | Doc-Nr: PUB / 5140018 / 000 / 00
10
en
3. Accessories
CA 7/36 adaptor for BP 12, BP 40, BP 72 and RB 10
Voltage Designation Battery type Charging time Charging time Examples of tools with C7/24 with C7/36-ACS using this battery
9.6 V SFB 105 NiMH 45 min. 30 min. SF 100-A, SB 10, HIT-BD 2000 9.6 V SBP 10 NiCd 30 min. 20 min. SF 100-A, SB 10, HIT-BD 2000 9.6 V RB 10 NiCd 20 min. 15 min. FS 10 Ferroscan (with adaptor) 12 V SFB 125 NiMH 45 min. 30 min. SF 120-A, SB 12 12 V SBP 12 NiCd 30 min. 20 min. SF 120-A, SB 12 12 V SFB 121 NiCd 30 min. 20 min. SF 121-A 12 V SFB 126 NiMH 45 min. 30 min. SF 121-A 12 V BP 12 NiCd 20 min. 15 min. TCI 12 (with adaptor) 15.6 V SFB 150 NiCd 30 min. 20 min. SF 150-A 15.6 V SFB 155 NiMH 45 min. 45 min. SF 150-A 18 V SFB 180 NiCd 34 min. 20 min. SF 4000-A, SF 180-A 18 V SFB 185 NiMH 51 min. 45 min. SF 4000-A, SF 180-A 24 V B24/2.0 NiCd 48 min. 20 min. UH 240-A, TE 2-A, WSR 650-A 24 V B24/2.4 NiCd 48 min. 24 min. UH 240-A, TE 2-A, WSR 650 A 24 V B24/3.0 NiMH 72 min. 30 min. UH 240-A, TE 2-A, WSR 650-A 24 V BP 40,
BP 72 NiCd 4172 min. 2036 min. TE 5-A (with adaptor) 36 V BP 6-86 NiCd 34 min. TE 6-A (only C 7/36-ACS!) 36 V B 36 /2.4 NiCd 34 min. TE 6-A (only C 7/36-ACS!)
2. Description The charger is designed for charging Hilti batteries with a nominal voltage of 7.2 36 volts (C 7/36-ACS charg- er) or 7.2 24 volts (C 7/24 charger).
Items supplied C 7/24 standard charger or C 7/36-ACS top charger Operating instructions
4. Technical data
Charger C 7/24 C 7/36-ACS Refresh function Manual refresh function Automatic refresh function
(Refresh button)* (Refresh function)* Cooling By convection Active cooling system Mains voltage 100127 V and 220240 V 100127 V and 220240 V Mains frequency 50/60 Hz 50/60 Hz Battery types NiCd, NiMH NiCd, NiMH Output voltage 7.2 24 V 7.2 36 V Output power 90 W 200 W Charging times See table in section 2. Weight Approx. 1.0 kg approx. 1.0 kg Supply cord length Approx. 2 m approx. 2 m Dimensions (LBH) 17016588 mm 17016588 mm Charging control Electronic charging control (microcontroller) Protection class Electrical protection class II (double insulated) Z Right of technical changes reserved * See section 7.3 for further information.
Printed: 07.07.2013 | Doc-Nr: PUB / 5140018 / 000 / 00
11
en
5. Safety precautions
5.1 Basic information concerning safety In addition to the information relevant to safety given in each of the sections of these operating instructions, the following points must be strictly observed at all times. Read all instructions! Failure to observe the following instructions may lead to a risk of electric shock, fire and/or serious personal injury.
5.2 Correct use
The appliance is designed to charge Hilti batteries with a nominal voltage of 7.2 36 volts (C 7/36-ACS charg- er) or 7.2 24 volts (C 7/24 charger).
Use the appliance to charge Hilti batteries listed in these operating instructions only.
The appliance must not be used in areas where there is a risk of explosion.
Manipulation or modification of the appliance is not permissible.
Do not render any safety devices ineffective and do not remove any information or warning plates.
Do not use the appliance if the plug pins are bent or damaged (do not use force when plugging in).
Follow the instructions concerning care and mainte- nance.
The appliance and its ancillary equipment may pre- sent hazards when used incorrectly by untrained per- sonnel or not as directed.
The C 7/36-ACS features radio interference suppres- sion and is thus intended for use worldwide and in EU and EFTA countries in particular.
5.3 Take the necessary precautions to make the workplace safe
Ensure that the workplace is well lit. Keep the working area tidy. Objects which could cause
injury should be removed from the working area. Untidi- ness at the workplace may lead to accidents.
Keep children away from the appliance. Do not permit other persons to touch the appliance or its extension cord.
5.4 General safety precautions
Use the correct appliance for the job. Do not use the appliance for purposes for which it was not designed. Use it only as directed and when in faultless condition.
Take the surrounding conditions into account. Do not
expose the appliance to rain or snow and do not use it in damp or wet areas. Do not use the appliance where there is a risk of fire or explosion.
Appliances should be stored in a secure place when not in use. When not in use, the appliance should be stored in a dry place, locked up or out of reach of children.
This appliance is not intended for use by persons (including children) with reduced physical, senso- ry or mental capabilities, or lack of experience and knowledge, unless they have been given supervi- sion or instruction concerning use of the appliance by a person responsible for their safety.
Children must be instructed not to play with the appli- ance.
5.4.1 Electrical hazards
Protect yourself from electric shocks. Avoid body con- tact with earthed objects, e.g. pipes and radiators.
Check the condition of the supply cord at regular inter- vals and have it replaced by a trained electrical spe- cialist if found to be damaged. Check the condition of extension cords at regular intervals and replace these if damaged.
Check the condition of the appliance including the sup- ply cord and extension cord as well as the plug con- nections. Do not operate the appliance if damage is found, if the appliance is not complete or if its con- trols cannot be operated faultlessly.
Do not cover the appliance. Keep the ventilation slots free.
Do not touch the supply cord in the event of it suffer- ing damage while working. Disconnect the supply cord plug from the socket.
The appliance should be repaired by a trained electri- cal specialist (Hilti service center), using original Hilti spare parts. Failure to observe this point may result in a risk of accident to the user.
Do not use the supply cord for purposes for which it was not intended. Never carry the appliance by the supply cord. Do not unplug the appliance by pulling the supply cord.
Do not expose the supply cord to heat, oil or sharp edges.
When working outdoors, use only extension cords approved and correspondingly marked as suitable for outdoor use.
Avoid using extension cords with multiple sockets and simultaneous operation of several tools or appli- ances.
Never operate the appliance when it is dirty or wet. Dust or dampness on the surface of the appliance make it difficult to hold and, under unfavorable condi- tions, may lead to electric shocks.
Printed: 07.07.2013 | Doc-Nr: PUB / 5140018 / 000 / 00
12
en
Ensure that the outer surface of the battery is clean and dry before inserting the battery in the appropri- ate charger for charging.
Avoid short-circuiting the battery. A short circuit may present a fire hazard.
Avoid touching the contacts. Use only the batteries listed in these operating instructions. Batteries must be disposed of correctly and safely on
reaching the end of their life. When not in use, keep the battery and the charger
away from paper clips, coins, keys, nails, screws or other small metal objects that could cause a short circuit at the battery terminals or the charging con- tacts. A short circuit at the battery terminals or charg- ing contacts could result in personal injury (burns) or fire.
5.4.2 Liquids
Caustic liquids may leak from defective batteries. Avoid contact with these liquids. In the event of contact with the skin, wash the area affected with soap and plenty of water. Should the liquid come into contact with the eyes, flush the eyes with water immediately and subsequent- ly consult a doctor.
5.5 Requirements to be met by users The appliance is intended for professional use. The appliance may be operated, serviced and repaired
only by authorized, trained personnel. This personnel must be informed of any special hazards that may be encountered.
Stay alert.
6. Before use
The electric supply voltage must comply with the spec- ification given on the rating plate.
6.1 Operate the charger only at a suitable place The charger should be operated only at a dry, clean,
cool place but where it is protected from frost. The charger must be able to give off heat during the
charging operation. Accordingly, ensure that the ven- tilation slots remain unobstructed.
Accordingly, remove the charger from the toolbox. Do not operate the charger inside a closed container.
6.2 Switching on the charger Plug the supply cord into the electric socket.
-NOTE- All 3 indicator lamps light briefly while the self-test is being carried out. Subsequently, only the green lamp should light. The green lamp blinks if the self-test was unsuccessful. Should the green lamp continue to blink after the sup- ply cord has been unplugged and then reconnected to the mains supply, the charger should be returned to a Hilti service center for repair.
7. Operation
7.1 Inserting the battery Insert the battery in the appropriate compartment or interface, depending on the type of Hilti battery to be charged. Please use the Hilti CA 7/36 adaptor when charging BP 40, BP 72, RB 10 and BP 12, batteries (not supplied with the charger). Ensure that the shape of the battery terminal section and the adaptor correspond. The charging procedure starts automatically after the battery has been fully inserted in the charger.
-NOTE- The battery will not suffer damage even when left in the charger for long periods (with the charger in operation).
-CAUTION- The charger is designed for use with the Hilti batteries listed. Charging other batteries is not permissible as this
may result in personal injury or serious damage to the battery. Corrosive liquids may leak from defective batteries. Avoid contact with such liquids.
7.2 Indicators Green lamp lights constantly The charger is connect-
ed to the mains supply and is ready for use.
blinks A malfunction in the charger or battery was detected during the self- test.
Red lamp lights constantly The battery is being charged.
blinks Battery charging is complete.
Printed: 07.07.2013 | Doc-Nr: PUB / 5140018 / 000 / 00
13
en
Yellow lights constantly The battery is being lamp charged in refresh mode
(see section 7.3). blinks The battery is too cold
(< 0C) or too warm (> 60C). Charging does not start. Charging be — gins automatically (incl. refresh mode, if applica- ble) as soon as battery temperature is within the specified range.
7.3 Refresh mode The individual cells of a battery are subject to self-dis- charge. With older batteries, some of the cells may lose their charge more quickly than others. As conventional chargers switch off when the first cells have reached full charge, the other partly-charged cells never receive the full charge. The user becomes aware of this effect in the form of inadequate battery capacity. This effect can be eliminated by charging the battery in refresh mode.
7.3.1 C 7/24 Start charging in refresh mode by pressing and holding your finger on the «Refresh button as the battery is inserted into the charger. Release the button when the yellow lamp lights (constantly). The yellow lamp lights as long as charging in refresh mode is taking place.
The battery should be conditioned by charging in refresh mode at regular intervals, after approx. every 3050 stan dard charging cycles, but not more than once a month, as frequent refreshing may weaken the battery. Conditioning the battery by charging in refresh mode is, so to speak, a kind of «training for the battery. Just as excessive training can be harmful to the human body,
use of refresh mode too frequently may also weaken the battery.
7.3.2 C 7/36-ACS The function described above is controlled automatically by the C 7/36-ACS charger. Charging in refresh mode starts automatically, according to battery type, when nec- essary. When a new battery is charged for the first time, refresh mode is activated immediately in order to ensure that the battery cells «form» correctly. If charging in refresh mode is interrupted, the charger begins charging in refresh mode when the next charging cycle is started.
-NOTE- Regular charging in refresh mode ensures maximum battery performance and long battery life. The normal charging time may vary (increase) depend- ing on the state of the battery.
7.4 Battery A new battery must be charged in normal mode (with- out refresh function) for at least 1224 hours or charged once in refresh mode before being used for the first time in order to ensure that the cells can «form» optimally. Never use a battery until it becomes fully discharged. Recharge the battery as soon as its performance drops noticeably. When a battery is drained until totally dis- charged, the cells that become discharged first are dam- aged by the current still being drawn from the other cells.
-NOTE- At low temperatures, battery performance drops. Bat-
teries should be stored at room temperature when not in use.
At high temperatures, batteries suffer damage. Nev- er charge or store batteries where they are exposed to the heat of the sun, e.g. at a window or behind a motor vehicle windscreen, or on top of a radiator etc.
8. Care and maintenance Unplug the supply cord from the mains socket.
8.1 Care of the appliance CAUTION Always keep the grip surfaces of the appliance free from oil and grease. Do not use cleaning agents which contain silicone.
The outer casing of the appliance is made from impact- resistant plastic. Never operate the appliance when the ventilation slots are blocked. Clean the ventilation slots carefully using a dry brush. Do not permit foreign objects to enter the interior of the appliance. Clean the outside of the appli- ance at regular intervals with a slightly damp cloth. Do not use a spray, steam pressure cleaning equipment or running water for cleaning. This may negatively affect the electrical safety of the appliance.
8.2 Maintenance WARNING Repairs to electrical parts and replacement of the sup- ply cord may be carried out only by trained electrical specialists.
Check all external parts of the appliance for damage at regular intervals and check that all controls operate fault- lessly. Do not operate the appliance when parts are dam- aged or when the controls do not function correctly. If necessary, the appliance should be repaired by Hilti Ser- vice.
8.3 Care of the battery Keep the electrical contacts free from dust, oil and
grease. If necessary, use a clean cloth to clean the contact surfaces.
Printed: 07.07.2013 | Doc-Nr: PUB / 5140018 / 000 / 00
14
en 9. Disposal -CAUTION- The following may occur if the equipment is disposed of incorrectly: Toxic fumes, which may present a health hazard, are released when plastic parts are burned. Batteries may leak when damaged or heated significantly, resulting in poisoning, burns, acid burns or envi-
ronmental pollution. Incorrect disposal may permit unauthorized persons to use the equipment in ways other than as directed. In
doing so, they may injure themselves or third parties, or cause environmental pollution.
Most of the materials from which Hilti appliances are manufactured can be recycled. The materials must be cor- rectly separated before they can be recycled. In many countries, Hilti has already made arrangements for taking back your old appliances for recycling. Please ask your Hilti customer service department or Hilti sales repre- sentative for further information.
10. Manufacturer’s warranty tools Hilti warrants that the tool supplied is free of defects in material and workmanship. This warranty is valid so long as the tool is operated and handled correctly, cleaned and serviced properly and in accordance with the Hilti Operating Instructions, and the technical sys- tem is maintained. This means that only original Hilti consumables, components and spare parts may be used in the tool.
This warranty provides the free-of-charge repair or replacement of defective parts only over the entire lifes- pan of the tool. Parts requiring repair or replacement as a result of normal wear and tear are not covered by this warranty.
Additional claims are excluded, unless stringent national rules prohibit such exclusion. In particular,
Hilti is not obligated for direct, indirect, incidental or consequential damages, losses or expenses in connection with, or by reason of, the use of, or inabil- ity to use the tool for any purpose. Implied warranties of merchantability or fitness for a particular purpose are specifically excluded.
For repair or replacement, send tool or related parts immediately upon discovery of the defect to the address of the local Hilti marketing organization provided.
This constitutes Hilti’s entire obligation with regard to warranty and supersedes all prior or contemporane- ous comments and oral or written agreements con- cerning warranties.
Dispose of batteries in accordance with national regulations or return them to Hilti for disposal.
Only for EU countries Do not dispose of electric tools together with household waste material! In observance of European Directive on waste electrical and electronic equipment and its implemen- tation in accordance with national law, electric tools that have reached the end of their life must be collected separately and returned to an environmentally compatible recycling facility.
In the event of battery capacity dropping below an acceptable level after a long period of use, we rec- ommend that the battery is returned to Hilti for a diag- nostic check.
Printed: 07.07.2013 | Doc-Nr: PUB / 5140018 / 000 / 00
15
en
11. EC declaration of conformity (original)
We declare, on our sole responsibility, that this product complies with the following standards or standardisation documents: 2006/95/EG, 2004/108/EG, EN 60335-1, EN 60335-2-29, EN ISO 12100, 2011/65/EU.
The C 7/36-ACS also complies with the following stan- dards or standardization documents: 1999/5/EG, EN 300330, EN 301489.
Designation: Battery charger Type: C 7/24 or C 7/36-ACS Year of design: 2003
Hilti Corporation, Feldkircherstrasse 100, FL-9494 Schaan
Paolo Luccini Jan Doongaji Head of BA Ececutive Vice President Quality & Process Management BU Power Tools & Accessories BA Electric Tools & Accessories 01/2012 01/2012
Technical documentation filed at: Hilti Entwicklungsgesellschaft mbH Zulassung Elektrowerkzeuge Hiltistrasse 6 86916 Kaufering Deutschland
Printed: 07.07.2013 | Doc-Nr: PUB / 5140018 / 000 / 00
16 Printed: 07.07.2013 | Doc-Nr: PUB / 5140018 / 000 / 00
* 3 7 8 4 3 7 *
37 84
37
Hilti Corporation LI-9494 Schaan Tel.: +423 / 234 21 11 Fax:+423 / 234 29 65 www.hilti.com
Hilti = registered trademark of Hilti Corp., Schaan W 2816 | 0113 | 10-Pos. 1 | 1 Printed in L
Manualsnet FAQs
If you want to find out how the C 7/24 Hilti works, you can view and download the Hilti C 7/24 Charger Operating Instructions V4 on the Manualsnet website.
Yes, we have the Operating Instructions for Hilti C 7/24 as well as other Hilti manuals. All you need to do is to use our search bar and find the user manual that you are looking for.
The Operating Instructions should include all the details that are needed to use a Hilti C 7/24. Full manuals and user guide PDFs can be downloaded from Manualsnet.com.
The best way to navigate the Hilti C 7/24 Charger Operating Instructions V4 is by checking the Table of Contents at the top of the page where available. This allows you to navigate a manual by jumping to the section you are looking for.
This Hilti C 7/24 Charger Operating Instructions V4 consists of sections like Table of Contents, to name a few. For easier navigation, use the Table of Contents in the upper left corner.
You can download Hilti C 7/24 Charger Operating Instructions V4 free of charge simply by clicking the “download” button in the upper right corner of any manuals page. This feature allows you to download any manual in a couple of seconds and is generally in PDF format. You can also save a manual for later by adding it to your saved documents in the user profile.
To be able to print Hilti C 7/24 Charger Operating Instructions V4, simply download the document to your computer. Once downloaded, open the PDF file and print the Hilti C 7/24 Charger Operating Instructions V4 as you would any other document. This can usually be achieved by clicking on “File” and then “Print” from the menu bar.
3.0
Rated 3.0 out of 5
3.0 out of 5 stars (based on 1 review)
Your overall rating
HILTI C 7-24 (01) PDF MANUAL
Click here to download HILTI C 7-24 (01) PDF MANUAL
HILTI C 7-24 (01) PDF MANUAL
FREE ENGLISH PDF
OPERATING INSTRUCTIONS
USER GUIDE – USER MANUAL
OWNER GUIDE – OWNER MANUAL
REFERENCE GUIDE – REFERENCE MANUAL
INSTRUCTION GUIDE – INSTRUCTION MANUAL
Your overall rating
- YouTube
HILTI C 7-24 (01) PDF MANUAL
HILTI C 7-24 (01) PDF MANUAL
Download or browse on-line these Operating Instructions Manual for Hilti C 7/24 Battery Charger, Power Tool.
Summary of Contents:
 |
[Page 1] Hilti C 7/24 Bedienungsanleitung de Operating instructions en Mode d’emploi fr Ръководство за обслужване bg Upute za uporabu hr Instrukcja obsługi pl Инструкция по зксплуатации ru Návod na obsluhu sk Navodi… |
 |
[Page 2] Hilti C 7/24 Printed: 07.07.2013 | Doc-Nr: PUB / 5140049 / 000 / 00 |
 |
[Page 3] Hilti C 7/24 Printed: 07.07.2013 | Doc-Nr: PUB / 5140049 / 000 / 00 |
 |
[Page 4] Hilti C 7/24 41 pl Przeczytaj koniecznie tę instrukcję obsługi przed uruchomieniem urządzenia. Przechowuj tę instrukcję obsługi zawsze wraz z urządzeniem. W razie przekazywania urządzenia innej osobie nie zapomnij dołączyć tej instrukcji. ORYGINALNA… |
 |
[Page 5] Hilti C 7/24 42 pl 3. Osprzęt Adapter CA 7/36 dla BP 12, BP 40, BP 72 oraz RB 10 Ć Woltaż Typ akumulator Czas Czas Na przykład dla ładowania ładowania przez urządzeń przez C7/24 C7/36-ACS 9,6 V SFB 105 NiMH Akku-Pack 45 min 30 min SF 100-A, SB 10, HIT-B… |
 |
[Page 6] Hilti C 7/24 43 pl 5. Informacje dot. bezpieczeństwa 5.1 Podstawowe informacje dotyczące bezpieczeństwa Oprócz wskazówek dotyczących bezpieczeństwa zamiesz- czonych w poszczególnych rozdziałach niniejszej instrukcji obsługi należy zawsze bezwzględnie… |
 |
[Page 7] Hilti C 7/24 44 pl ste i suche, zanim wprowadzisz go do właściwego urzą — dzenia w celu naładowania. ● Unikaj zwarć przy akumulatorze. Zwarcie może prowa — dzić do powstania zagrożenia pożarowego. ● Unikaj dotykania styków. ● Używaj wyłącznie… |
 |
[Page 8] Hilti C 7/24 45 pl Żółta lampka świeci Akumulator jest łado- wany w trybie odświeża- nia. (patrz rozdz. 7.3) miga Akumulator jest za zimny (< 0 °C) bądź za gorący (> 60 °C), nie będzie ładowany. Jak tylko aku- mulator osiągnie odpo- wiednią … |
 |
[Page 9] Hilti C 7/24 46 pl 9. Utylizacja -OSTROŻNIE- W razie niewłaściwej utylizacji wyposażenia mogą wystąpić następujące efekty: ● Przy spalaniu tworzyw sztucznych powstają trujące gazy, które mogą być przyczyną chorób u ludzi. ● Uszkodzone lub si… |
 |
[Page 10] Hilti C 7/24 47 pl 11. Deklaracja zgodności WE (oryginał) Oświadczamy na własną odpowiedzialność, że niniej — szy produkt jest zgodny z następującymi dyrektywami i normami: 2006/95/EG, 2004/108/EG, EN 60335-1, EN 60335-2-29, EN ISO 12100, 2011/65/EU. U… |
 |
[Page 11] Hilti C 7/24 Printed: 07.07.2013 | Doc-Nr: PUB / 5140049 / 000 / 00 |
 |
[Page 12] Hilti C 7/24 *378440* 378440 Hilti Corporation LI-9494 Schaan Tel.: +423 /234 21 11 Fax:+423 / 234 29 65 www.hilti.com Hilti = registered trademark of Hilti Corp., Schaan W 2816 | 0113 | 30-Pos. 8 | 1 Printed in Liechtenstein © 2013 Right of techn… |

C7/24,
C7/36-ACS
*378437*
378437
Hilti Corporation
FL-9494 Schaan
Tel.: +423/ 2342111
Fax: +423 /2342965
www.hilti.com
Hilti = registered trademark of Hilti Corp., Schaan W 2816 0803 1-Pos. 1 1 Printed in Liechtenstein © 2003
Right of technical and programme changes reserved S. E. & O.
378437/B
Bedienungsanleitung de
Operating instructions en
Mode d’emploi fr
Istruzioni d’uso it
Gebruiksaanwijzing nl
Manual de instruções pt
Manual de instrucciones es
Brugsanvisning da
Käyttöohje fi
Bruksanvisning no
Bruksanvisning sv
Οδηγιες χρησεως
el
Kasutusjuhend et
Lietoßanas pamåcîba lv
Instrukcija lt
9
en
It is essential that the operating instructions
are read before the appliance is operated
for the first time.
Always keep these operating instructions
together with the appliance.
Ensure that the operating instructions are
with the appliance when it is given to other
persons.
C7/24 and C7/36-ACS chargers
1. General information
1.1 Signal words and their meaning
-CAUTION-
Used to draw attention to a potentially dangerous situation which could lead to minor personal injury or damage to the equipment or other property.
-NOTE-
Used to draw attention to an instruction or other useful
information.
1.2 Pictograms
Contents Page
1. General information 9
2. Description 10
3. Accessories 10
4. Technical data 10
5. Safety precautions 11
6. Before use 12
7. Operation 12
8. Care and maintenance 13
9. Disposal 14
10. Warranty 14
11. Declaration of conformity 15
Operating controls and component parts
C 7/24 and C 7/36-ACS chargers
Supply cord
Plug
Battery compartment
Indicator lamps
“Refresh” button (only C 7/24)
CA 7/36 adaptor for BP 12, BP 40, BP 72 and
RB 10*
* Only the charger is supplied.
Batteries and adaptors are available as accessories.
These numbers refer to the corresponding illustrations. The illustrations can be found on the fold-out cover
pages. Keep these pages open while studying the operating instructions.
In these operating instructions, the designation “appliance” refers to the C 7/24 and C7/36-ACS chargers.
Location of identification data on the appliance
The type designation and serial number can be found on
the rating plate on the appliance. Make a note of this data
in your operating instructions and always refer to it when
making an enquiry to your Hilti representative or service
department.
Type:
Serial no.:
Warning signs
General
warning
Warning:
electricity
Warning:
caustic
substances
Alert sign
“Alert sign” in addition to CE mark.
Mandatory for all radio appliances to which special regulations or restrictions
apply somewhere in Europe.
Read the
operating
instructions
before use
Symbols
Do not dispose of batteries
with general refuse.
| Document’s Content and Additional Information | Share Manual |
|---|---|
|
Hilti C 7/24 Operating instructions manual
Pages Preview: Document Transcription:
See Details |
|
|
Hilti C 7/24 Operating instructions manual
See Details |
|
|
Hilti C 7/24 Operating instructions manual
See Details |
|
|
Hilti C 7/24 Operating instructions manual
See Details |
|
|
Hilti C 7/24 Operating instructions manual
See Details |
|
|
Hilti C 7/24 Operating instructions manual
See Details |
|
|
Hilti C 7/24 Operating instructions manual
See Details |


