

______________________________________________________________________________ ACM3000
@
ИНСТРУКЦИИ ПО ЭКСПЛУАТАЦИИ
33
ОГЛАВЛЕНИЕ
ОБОЗНАЧЕНИЯ 35
ОБЩАЯ ИНФОРМАЦИЯ ДЛЯ ПОЛЬЗОВАТЕЛЯ 36
Утилизация прибора 36
Утилизация аккумуляторов 36
1.0 —
ДЛЯ БЕЗОПАСНОЙ ЭКСПЛУАТАЦИИ АППАРАТА ACM3000
37
1.1 —
Для безопасной эксплуатации 37
1.2 —
Устройства для обеспечения безопасности 38
1.3 —
Рабочее окружение 39
2.0 —
ВВЕДЕНИЕ К АППАРАТУ 40
3.0 —
ОПИСАНИЕ АППАРАТА 41
3.1 —
Клавиатура 41
4.0 —
УСТАНОВКА АППАРАТА 42
4.1 —
Распаковка и проверка компонентов 42
4.2 —
Перемещение и хранение аппарата 42
4.3 —
Подготовка к эксплуатации 42
4.4 —
Заполнение баллона 44
5.0 —
ЭКСПЛУАТАЦИЯ АППАРАТА 45
5.1 —
Извлечение хладагента 45
5.2 —
Создание вакуума в системе кондиционера воздуха 46
5.3 —
Впрыск масла и заправка системы кондиционера воздуха 47
5.4 —
Отсоединение от системы кондиционирования 48
5.5 —
Автоматическая функция 48
5.6 —
Функция восстановления 50
5.7 —
Неполная заправка 50
6.0 —
ПОКАЗЫВАЕМЫЕ НА ДИСПЛЕЕ СООБЩЕНИЯ 51
6.1 —
Сообщения о техническом обслуживании 51
6.2 —
Сообщения об ошибках 51
http://www.otctools.ru/
- EnDrY
- Сообщения:8
- Зарегистрирован:26 июн 2012, 22:48
- Откуда:Смоленск
Robinair ACM 3000
Здравствуйте! Не где не могу найти темы по обслуживанию и использованию станций по заправке кондиционеров. Сам использую ACM 3000. Инструкция к ней переведена не совсем точно и имеются странности в её работе. Знаю, что такой агрегат многие пользуют. Предлагаю здесь задавать по ней вопросы.
- EnDrY
- Сообщения:8
- Зарегистрирован:26 июн 2012, 22:48
- Откуда:Смоленск
Re: Robinair ACM 3000
Сообщение
EnDrY » 26 июн 2013, 13:42
Вот у меня на первом месте есть вопрос. Можно ли в вакуумный насос станции залить вместо масла для вакуумных насосов, обычное компрессорное масло PAG для кондеев которое льём. Просто пока я был в отпуске, станция выдала надпись: замените масло и ей залили PAG, ссылаясь на то что типа разница то какая…
- Den174
- Сообщения:24
- Зарегистрирован:19 июл 2012, 21:39
- Откуда:Челябинск
Re: Robinair ACM 3000
Сообщение
Den174 » 26 июн 2013, 15:19
ну вы буржуи! Дорогущее масло лить в вак-насос, при этом для такого не предназначенный- это что-то.
- EnDrY
- Сообщения:8
- Зарегистрирован:26 июн 2012, 22:48
- Откуда:Смоленск
Re: Robinair ACM 3000
Сообщение
EnDrY » 26 июн 2013, 17:04
Его лучше слить от туда поскорей, что ли, или до следующей замены можно и с этим?
Теперь ещё и сервис не скидывается. Здесь же сразу следует странность: когда выполняю пункт 7.2 инструкции (Установка на начало счётчика вакуумного насоса), счётчик обнуляется. Но при следующем включении питания установки перед загрузкой её программы, появляется надпись «ЗАМЕНИТЕ МАСЛО» . При повторном сбрасывании видно, что счётчик ещё ничего не насчитал или немного (если поработал на ней). Так вот я и думаю, это у меня одного глюк со станцией такой? Если кто знает как сбросить, подскажите пожалуйста. (Приложил свою инструкцию)
- Вложения
-
- ACM3000.pdf
- (753.84КБ)735 скачиваний
- Den174
- Сообщения:24
- Зарегистрирован:19 июл 2012, 21:39
- Откуда:Челябинск
Re: Robinair ACM 3000
Сообщение
Den174 » 26 июн 2013, 23:03
имхо надо слить и залить масло для вак-насоса. PAG гигроскопично, влаги наберет, и будет смесь в насосе.
Там обнуление вроде через выключение делается. Когда включаешь- появляется надпись- «замените масло». Щелкаешь выключателем, выключаешь, потом включаешь и там должно появиться подтверждение обнуления. Нажимаешь «да».
- EnDrY
- Сообщения:8
- Зарегистрирован:26 июн 2012, 22:48
- Откуда:Смоленск
Re: Robinair ACM 3000
Сообщение
EnDrY » 27 июн 2013, 22:47
Ясно, спасибо. Получается это масло контактирует с внешней средой или со сливаемым хладагентом… Надпись уже пропала, после того как я от отчаяния зашел в раздел обнуления счётчика фильтра-влагоотделителя и сбросил его  (перевод в том меню корявый, так ещё и по смыслу напутали похоже)
- Den174
- Сообщения:24
- Зарегистрирован:19 июл 2012, 21:39
- Откуда:Челябинск
Re: Robinair ACM 3000
Сообщение
Den174 » 28 июн 2013, 06:40
Погоди, а фильтр ты менял? Его ведь тоже менять надо и тоже обнулять. Сколько на счетчике кг фреона было?
- EnDrY
- Сообщения:8
- Зарегистрирован:26 июн 2012, 22:48
- Откуда:Смоленск
Re: Robinair ACM 3000
Сообщение
EnDrY » 28 июн 2013, 14:32
52 кг. примерно
Robinair ACM 3000 – это универсальная система профессионального обслуживания автомобильных кондиционеров, которые работают на хладагенте R134a. Основное преимущества аппарата – это база данных 4000 автомобилей, в которой запрограммированы нормы заправки для легкового, грузового и коммерческого транспорта.
Автоматическое обслуживание
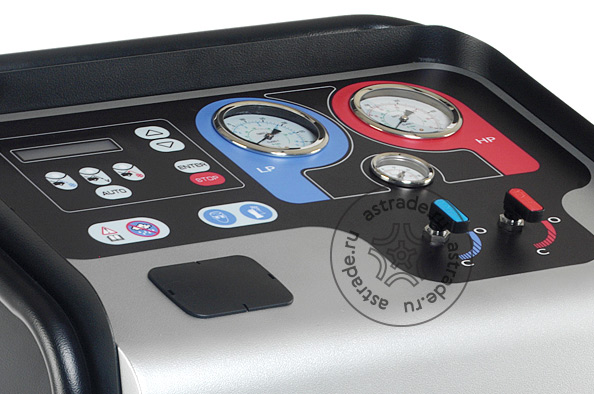
Установка ACM3000 поддерживает два режима работы: автоматический и ручной (экспертный). В автоматическом режиме установка предлагает выбрать автомобиль из базы или ввести заправочный объем самостоятельно. После запуска обслуживания в автоматическом режиме от оператора потребуется только ввести в определённый момент необходимое количество масла, нажатием на кнопку. После чего установка продолжит работу в автоматическом режиме. Работа в автоматическом режиме минимизирует вероятность ошибок со стороны пользователя.
Поддержка русского языка
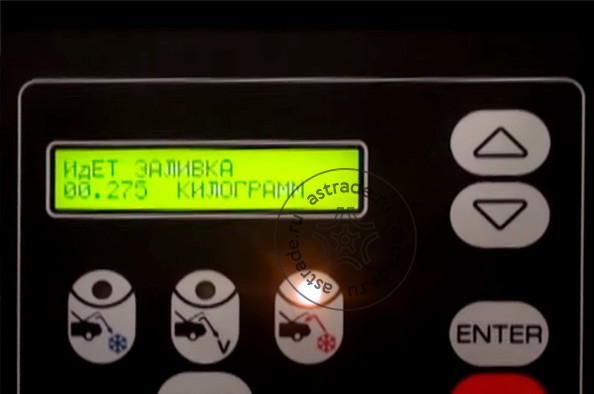
Меню установки полностью переведено на русский язык, что делает ее эксплуатацию максимально комфортной и удобной. Наличие русского языка позволит за минимальное время обучить нового пользователя основам работы с ней.
Оптимальные характеристики
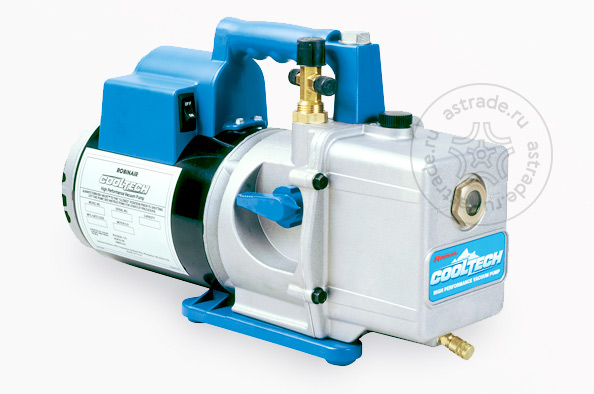
Характеристики установки подобраны таким образом, чтобы удовлетворить потребности большинства малых и средних СТО. Установка позволит комфортно заправлять более 10 автомобилей в день без дозаправки внутреннего баллона.
База данных
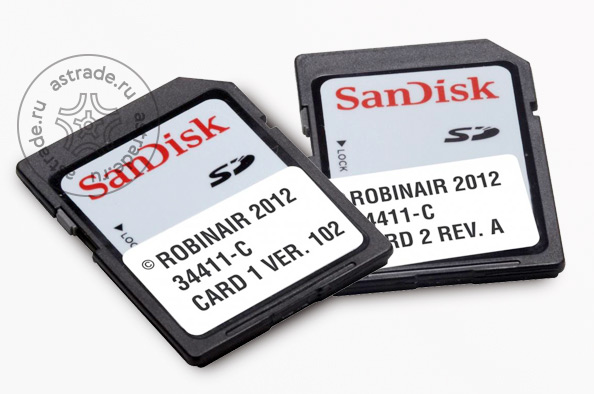
Встроенная база данных на 4 000 автомобилей, позволит максимально комфортно и быстро проводить работы по обслуживанию автомобилей. Для обновления базы данных установка оборудована специальным портом.
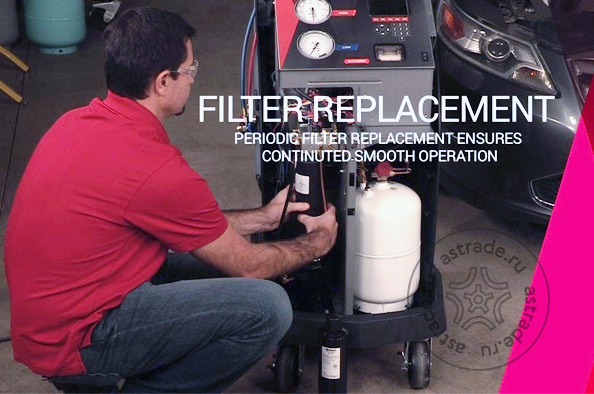
Самодиагностика и счетчики ТО
Robinair ACM3000 оснащена внутренней системой самодиагностики. В случае обнаружения неисправности система проинформирует об этом на ЖК дисплее. Система позволит исключить работу на установке при наличии неисправностей, а также ускорить процесс диагностики и ремонта сервисной службой. Установка также оснащена счетчиками наработки масла в вакуумном насосе и фильтре. Система вовремя проинформирует о необходимости проведения технического обслуживания.
Преимущества использования:
- Ускорение процесса обслуживания систем кондиционирования автомобилей.
- Быстрое восстановление эффективности работы системы.
- Уменьшение стоимости повторного проведения операции.
- Снижение риска неточности и неаккуратности проведения работ.
- Гарантия качественной работы и полного удовлетворения клиента.
- Увеличение рентабельности работ за счет широкого спектра услуг.
- К установке можно подключить принтер для автоматической печати полного отчета о проделанной работе.
С установкой для заправки кондиционеров ACM 3000 вы существенно расширите возможности вашего сервиса, повысите эффективность работы и лояльность клиентов. Программное обеспечение ACM 3000 полностью русифицировано, а удобный графический интерфейс сделает работу быстрой и приятной.
Основные функции
- Возможность выбора автоматического или мануального режима управления процессом.
- Автоматическое восстановление, заправка и отбор хладагента.
- Автоматизированная диагностика утечек в системе автомобиля.
- Программируемый вакуум насоса.
- Автоматическая заправка и отделение масла.
- Интегрированная система самодиагностики выводит всю информацию на дисплей.
- Полностью русифицированное меню.
- Интегрированная база на 4000 автомобилей.
Комплектация
| Переходник 1/4 на 5/8 | 1 шт. |
| Переходник с золотником для подключения к малому баллону фреона | 1 шт. |
| Емкости для масла | 2 шт. |
| Шланг высокого давления | 1 шт. |
| Шланг низкого давления | 1 шт. |
| Прокладка | 1 шт. |
| Медный уплотнитель | 1 шт. |
ACM3000 |
AC590Pro |
AC690Pro |
AC790Pro |
AC1234-3Р |
|
|---|---|---|---|---|---|
|
Тип транспорта |
Легковые, коммерческие ТС |
Легковые, коммерческие ТС |
Легковые, коммерческие, автобусы, спецтехника |
Спецтехника, автобусы, легковые и коммерческие ТС. Все типы ТС. |
Легковые, коммерческие ТС |
|
Язык меню |
Русский |
Русский |
Русский |
Русский |
Русский |
|
Функции диагностики AC |
Да |
Да |
Да |
Да |
Да |
|
Подача UV-красителя |
Нет |
Нет |
Да |
Да |
Да |
|
Система очистки хладагентом |
Нет |
Да (опция) |
Да (опция) |
Да (опция) |
Нет |
|
Компенсация длины шлангов |
Нет |
Да |
Да |
Да |
Нет |
|
Самодиагностика внутренняя |
Да |
Да |
Да |
Да |
Да |
|
Счетчики ТО масла и фильтра |
Да |
Да |
Да |
Да |
Да |
|
Учет хладагента |
Да |
Да |
Да |
Да |
Да |
|
Ввод данных СТО в отчет |
Да |
Да |
Да |
Да |
Да |
|
Страна бренда |
США |
США |
США |
США |
США |
|
Страна производтсва |
Италия |
Италия |
Италия |
Италия |
Италия |
|
Омолагации |
Нет |
Нет |
Mercedes Benz, VW, Audi, Renault, Opel, Ford |
MAN, Mercedes Benz, Renault, AirBUS, Chevrolet, Opel |
Opel, Chevrolet, Nissan, Ford |
|
Технические характеристики |
|||||
|
ACM3000 |
AC590Pro |
AC690Pro |
AC790Pro |
AC1234-3p |
|
|
Тип фреона |
R134A |
R134A |
R134A |
R134A |
R1234yf |
|
Тип установки |
Полуавтомат |
Полуавтомат |
Полный автомат |
Полный автомат |
Автомат |
|
Вакуумный насос, л/мин |
70 |
170 |
180 |
283 |
70 |
|
Объем баллона, кг |
8 |
20 |
20 |
35 |
8,5 |
|
Подача масла |
Ручная |
Ручная |
Автоматическая |
Автоматическая |
Автоматическая |
|
Способ и точность дозирования масла, % |
Нет |
Нет |
Весы, 3% |
Весы, 3% |
По времени |
|
Компрессор, HP |
1/4 |
1/4 |
1/3 |
5/8 |
1/4 |
|
База данных |
Да |
Да |
Да |
Да |
Да |
|
Длина шлангов, м |
2,5 |
2,5 |
2,5 |
5 |
2,5 |
|
Принтер |
Нет |
Нет |
Да |
Да |
Да |
|
Вес, кг |
60 |
60 |
105 |
120 |
67 |
|
Габариты |
55 см x 52 см x 95 см |
55 см x 52 см x 95 см |
128 см x 69 см x 69 см |
128 см x 69 см x 69 см |
107 см x 61 см x 76 см |
Характеристики
| Тип используемого хладагента | R134a |
| Производительность вакуумного насоса | 84л/мин (3CFM) |
| Максимальное давление | 18 бар |
| Рабочая температура | 10 – 50 °C |
| Емкость бака для хладагента | 8 кг. |
| Емкость для отработанного масла | 250 мл. |
| Емкость для заправки масла | 250 мл |
| Производительность компрессора | 300 гр./мин |
| Манометры |
класс точности 1 (диаметр 80 мм) |
| Рабочие шланги | 244 см / SAE-J2196 |
| Наличие принтера | опция |
| Питание | 230В 50-60Гц |
| Габариты | 550 x 520 x 950 мм |
| Вес | 60 Кг |

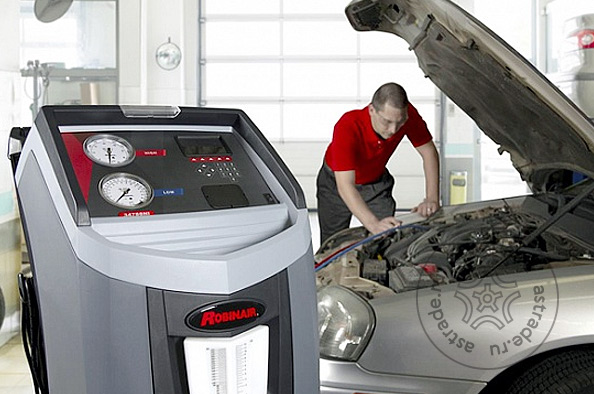
Robinair 60 лет
Путь компании начался в городе Уоррен (штат Мичиган, США) с выпуска инструментов для ремонта систем кондиционирования.
С ростом популярности систем AC на автомобилях, компания сделала приоритет в сторону разработки оборудования для их обслуживания.
Уже 1960 Robinair представили широкую линейку для обслуживания автомобильных кондиционеров. И вот уже более 50 лет компания остается мировым лидером в данном направлении.
Пионер в AC инновациях
Robinair уже более 50 лет является главным новатором в разработке оборудования для обслуживания AC.
- В 70-х годах первая установка для заправки автокондиционера была изобретена именно Robinair.
- В 1979 году компания запатентовала первую установку для восстановления хладагента и его закачки в систему.
- В 1992 году Robinair представил первый стенд выполняющий полный цикл обслуживания систем AC, прародитель всех современных установок.
- В 2010 году компания разработала первую установку для заправки газа R-1234yf.
- В 2016 году Robinair разработал первый стенд отвечающий требованиям стандарта SAE J2788 по точности восстановления и заправки хладагента R134.
И наконец, в 2016 году Robinair побил свой же рекорд процента восстановления хладагента из системы, доведя его до уровня 99%.
Омологации автопроизводителей
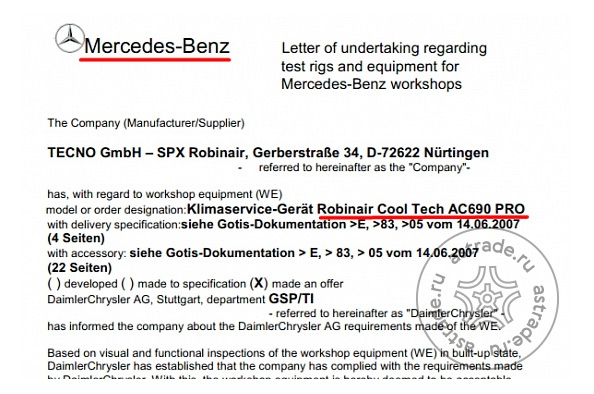
Находясь более 50 лет на вершине развития оборудования для заправки автокондиционеров, Robinair имеет многочисленные омологации со стороны ведущих мировых автопроизводителей. Омологация, подтверждает, что модель оборудования прошла проверку и соответствует требованиям, предъявляемым автопроизводителем.
Только омологированное оборудование может использоваться в дилерской сети марки.
Нижеперечисленные модели Robinair имеет следующие омологации:
- Robinair AC690Pro — Mercedes Benz, VW, Audi, Renault, Opel, Ford.
- Robinair AC790 Pro — MAN, Mercedes Benz, Renault, Airbus, Chevrolet, Opel
- Robinair AC1234-3Р — Opel, Chevrolet, Nissan, Ford
- Robinair AC1234-7 Jaguar, Land Rover, Opel, Chevrolet, Ford, Subaru, KIA, Hyundai, Toyota, Mitsubishi, Renault, Ferrari, Maserati, Nissan, Honda, Tesla.
«Живые» фото
Видео
В моем случае речь о станции Robinair ACM3000
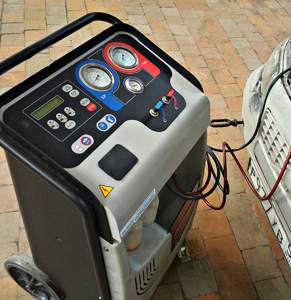
Пытаюсь оживить станцию. Сделал дисплей, установил новый компрессор(приобретен подобный в магазине холодильного оборудования), новый фильтр-осушитель. Балон фреона и ПАГ-масло есть.
Теперь нужно наполнить балон станции, и тут есть вопросы:
— Масло в установленном компрессоре наверное ПАО? Нужно ли его заменить?
— Балон станции пустой, магистрали станции после работ должно быть заполнены воздухом, как быть с этим?
— Из инструкции мало понятно как осуществляется заполнение?
Поделитесь пожалуйста опытом. Если форум чем-то не удобен для этого скажите как мне с вами связаться. Приложил инструкцию(на русском с 31ой страницы), и она вероятно кривая. Процедура сброса счетчиков компрессора и вакуумника описана немного не верно.
Заполнение баллона
Перед тем, как начать пользоваться аппаратом после его персонализации,
необходимо ввести некоторое количество хладагента во внутренний баллон.
Произведите следующие действия:
Подсоедините шланг для обслуживания к внешней ёмкости, заполненной
хладагентом (используйте поставленные соединительные детали).
ПРИМЕЧАНИЕ:
Имеется два типа ёмкостей с хладагентом: один с выходом для жидкого
хладагента и один без такого выхода. Ёмкость с выходом для жидкого
хладагента должна оставаться в нормальном вертикальном положении для того,
чтобы переместить жидкий хладагент. Для такого типа ёмкости используйте
соединение с клапаном LIQUID (для жидкости). Баки без выхода для
жидкого хладагента, обычно, имеют только один клапан и, следовательно,
должны переворачиваться для передачи жидкого хладагента.
Откройте вентиль внешней ёмкости и вентиль на шланге обслуживания.
Откройте вентили высокого и низкого давления на аппарате.
В течение нескольких секунд нажимайте на кнопки перевода курсора вверх
(34) и вниз (33).
На дисплее будет показано меню функций.
Нажимайте клавиши перевода курсора вверх (34) или вниз (33) для избрания
функции ЗАПОЛНЕНИЕ БАЛЛОНА и нажмите ENTER для подтверждения.
На дисплее будет показан размер имеющейся в баке ёмкости для заполнения.
Нажмите клавишу ENTER для продолжения.
Установите количество хладагента, которое вы (рекомендуется около 4 кг).
Нажмите клавишу ENTER для начала операции.
Аппарат автоматически остановится после того, как будет введено
настроенное количество хладагента.
Закройте клапан на внешнем баке, из которого производилось
перекачивание.
Нажмите клавишу ENTER для завершения операции и опорожните шланги и
сепаратор отстоя.
ПРИМЕЧАНИЕ:
Обычно конечное количество извлечённого хладагента превышает заданное
количество, так как опорожняются трубы и отстойник.
Функция останавливается автоматически, когда давление в системе падает.
Начинает показываться страница STAND-BY (режим ожидания).
Закройте вентили на аппарате.
0%

Пытаюсь оживить станцию. Сделал дисплей, установил новый компрессор(приобретен подобный в магазине холодильного оборудования), новый фильтр-осушитель. Балон фреона и ПАГ-масло есть.
Теперь нужно наполнить балон станции, и тут есть вопросы:
— Масло в установленном компрессоре наверное ПАО? Нужно ли его заменить?
— Балон станции пустой, магистрали станции после работ должно быть заполнены воздухом, как быть с этим?
— Из инструкции мало понятно как осуществляется заполнение?
Поделитесь пожалуйста опытом. Если форум чем-то не удобен для этого скажите как мне с вами связаться. Приложил инструкцию(на русском с 31ой страницы), и она вероятно кривая. Процедура сброса счетчиков компрессора и вакуумника описана немного не верно.
Заполнение баллона
Перед тем, как начать пользоваться аппаратом после его персонализации,
необходимо ввести некоторое количество хладагента во внутренний баллон.
Произведите следующие действия:
Подсоедините шланг для обслуживания к внешней ёмкости, заполненной
хладагентом (используйте поставленные соединительные детали).
ПРИМЕЧАНИЕ:
Имеется два типа ёмкостей с хладагентом: один с выходом для жидкого
хладагента и один без такого выхода. Ёмкость с выходом для жидкого
хладагента должна оставаться в нормальном вертикальном положении для того,
чтобы переместить жидкий хладагент. Для такого типа ёмкости используйте
соединение с клапаном LIQUID (для жидкости). Баки без выхода для
жидкого хладагента, обычно, имеют только один клапан и, следовательно,
должны переворачиваться для передачи жидкого хладагента.
Откройте вентиль внешней ёмкости и вентиль на шланге обслуживания.
Откройте вентили высокого и низкого давления на аппарате.
В течение нескольких секунд нажимайте на кнопки перевода курсора вверх
(34) и вниз (33).
На дисплее будет показано меню функций.
Нажимайте клавиши перевода курсора вверх (34) или вниз (33) для избрания
функции ЗАПОЛНЕНИЕ БАЛЛОНА и нажмите ENTER для подтверждения.
На дисплее будет показан размер имеющейся в баке ёмкости для заполнения.
Нажмите клавишу ENTER для продолжения.
Установите количество хладагента, которое вы (рекомендуется около 4 кг).
Нажмите клавишу ENTER для начала операции.
Аппарат автоматически остановится после того, как будет введено
настроенное количество хладагента.
Закройте клапан на внешнем баке, из которого производилось
перекачивание.
Нажмите клавишу ENTER для завершения операции и опорожните шланги и
сепаратор отстоя.
ПРИМЕЧАНИЕ:
Обычно конечное количество извлечённого хладагента превышает заданное
количество, так как опорожняются трубы и отстойник.
Функция останавливается автоматически, когда давление в системе падает.
Начинает показываться страница STAND-BY (режим ожидания).
Закройте вентили на аппарате.
Артикул: SP01000023
Температурный диапазон работы, °C
10-50
Частота тока в сети, Гц
50
Описание
Robinair ACM3000 Полуавтоматическая установка, предназначенная для проведения полного спектра работ по техническому обслуживанию автомобильных систем кондиционирования воздуха с хладагентом марки R134A. Отличительными особенностями данной установки является надежность, многофункциональность и оптимальное соотношение «цена-качество».
Высокопроизводительный и надежный одноступенчатый вакуумный насос Robinar обеспечивает быстрое и эффективное вакуумирование систем кондиционирования автомобиля. Оптимальный объем заполнения бака установки контролируется с помощью электронных весов.
Встроенная информационная база включает информацию о более чем 4 000 автомобилей на русском языке. База позволит Вам быстро и точно определить заправочный объем хладагента и масла для обслуживаемой системы.
Функциональные возможности ACM 3000:
- В автоматическом режиме производятся: отбор и восстановление хладагента, отделение масла, программируемое вакуумирование, проверка на утечки, заправка хладагента, отделение не конденсируемых газов.
- Управление восстановлением и автоматический повторный цикл.
- Тест давления в установке A/C «интегрированный» и «ведомый».
- Подача масла с ручным управлением электроклапаном.
- База данных установки содержит технические характеристики по кондиционерам более 4000 марок автомобилей.
- Система сигнализации неисправностей с выводом информации на дисплей.
- Программируемое техническое обслуживание.
- Встроенная программа мойки.
- Обновление банка данных автоматической станции с помощью электронного ключа.
- Мультиязыковой дисплей.
- Интегрированный термопринтер для печати технических данных кондиционеров и результатов проведенных работ.
Технические характеристики:
- Тип используемого хладагента: R134a
- Производительность вакуумного насоса: 84л/мин (3CFM)
- Максимальное давление: 18 бар
- Рабочая температура: 10 – 50 °C
- Емкость бака для хладагента: 8 кг.
- Емкость для отработанного масла: 250 мл.
- Емкость для заправки масла: 250 мл
- Производительность компрессора: 300 гр./мин
- Манометры: класс точности 1 (диаметр 80 мм)
- Рабочие шланги:244 см / SAE-J2196
- Питание: 230В 50-60Гц
- Габариты в см.: 55x52x95 см
- Вес:60 Кг
Характеристики
Производительность л/мин
70
Максимальное давление атм.
18
Габариты в мм.
550x520x950
Температурный диапазон работы, °C
10-50
Частота тока в сети, Гц
50
Robinair ACM3000 Полуавтоматическая установка для заправки автокондиционеров
Добавить к сравнению
Наличный и безналичный расчет, банковские карты
Отзывы
Хотите оставить отзыв?Поставьте свою оценку!
Сделайте выбор!
| Document Information: | Share in Social: |
|---|---|
Robinair ACM3000 Original instructions manual (250 pages)
|


-
E!_E!t
E60lTT- Z’teu
n{uo>g;zgl ls?lollouozn —
;6npqo e[c>;ru1su1og5eredo ap lenuehl
-onglelado lenuehl -6unlalues6unue!peguolleslllln,p lenuelr;
— suollJnrpu! EuReredg
— ollleredo e1enue6l
E=-
Y
.EEEEEEEEEEEEEEEAE=4E!
EFFeFEEEEE
))
t0t9006
_»-\i\—\\\—_-\\\\\\\\:NN\\
Rflr\l\[t\ 1\\\\1t\11\\\
uuuuU[
ffiffi+a7\J i -=- I
^v^K /> K /’> V \!7 l-l
@@@@@@@c
000l,tlf,VoNvus xds NV*!EE.: effiffiffi w wwffiwwffifl
ee
-
!!I
!
;
;I
;I
;
!a
!
I
!a
!
!
;
:
!
i
It
!
t
ooooooooooooooo
ooooooooooooooo
il:
ffiffi\:- 7 \:7
t E—tIEEEILEJj
-
LTsiltorrf nu.$NI 9N lr\fdldo
9S9S9S
s99S9eszsIS0s6V6V
Bb9V9V9V9′
sv9V
ttEEEEEEEEEE-
I
-lI
E=
E=
frEjCaGCC=
Iaa-LE
EtrEE
w
w
zvwtv
0v0vov
6
sa6Psseul Jollf —
z’9sabesseul ef,hlas
—
I’9
s:lgvss:lH ql^\ndsro —
0’9ebreql alelduolul
—
B’Suoqf,unJ butpl(leX
—
L’SuorpunJ llleuolnv
—
9’suals{s f/V aq} uorJ peuuo)slp ol MoH
—
S’Sa6.reqr ualsls f/V pue uolpa[ut 1tg
—
V’9uals{s f,/V eqf 6ullenren3
—
‘Sfuanoral luela6!.uau
—
Z’Saseqelec
—
I’s
rrNn lHr Jo lsn —
0’96ulilU apog
—
V’basn roJ uoqeledel6
—
E’babelols pue 6u1lPueq eulqleh
—
Z’bquauodtuor 6urlraqr pue burlredu1
—
T’V
IINN ]HI JO NOIIIrI]VISNI —
O’V
preoq{ay eql —
I’E
uNn lHr JO Norrdruf,slo —
0’lINn ]Hl or NorrfnoourNr
‘o’z
Jueuuoll^ue uoM aql —
‘Isef,r^ap ,QaJes
—
z’Iesn aJes e lol
—
T’I
000hlf,V lsn IJVS V UOJ —
0’T
seuaneq;o 6utsodstq
luaudrnba;o 6utsodstq
UlSn IHI UOJ NOIM,IUOJNI ‘lVUf NfD
sNorrdvS
Xf ONI
@ oooer,,nv
-
@r ssM3sss
7.O —
7 .1 —
7.2 —
7.3 —
7.4 —
7.5 —
8.0 —
9.0 —
9 . 1 —
9.2 —
10.0 —
11.0 —
12.0 —
MAINTENAilCEVacuum pump oil changeReset oil counter vacuum
pumpFilter dryer changeReset counter filter dryerRefrigerant scale
calibrationSTOPPAGE FOR LONG PERIODS
DEMOLTTTON/ DTSPOSALDisposal of the equipmentDisposal of the
recycled materialsTECHNICAL SPECIFICATIONS
SPARE PARTS
GLOSSARY OF TERMS
5757
58596061
trtrEEEEtrEEEEEEEEEEEEEEEEEEEEEEEEEEE
62
626262
63
53
64
38 OPEMTING INSTRUCNONS
-
6sr{olrlnu6Nr 9NIIVuSdo
r.{l}rMs ernssard q6rHJalnpsuerl arnssard
apoq abrnd ;rgelef,s lluoJ]f,elf
1ue1 aberol5rosserdtuo3
1ro .rossarduol JoJ ;;r1s-rolereda5
lro perenof,ar roJ ;;r1s-rolereda5rapnlpe ernssald
dund unnfenellloq 6urqsrualder llO
enle^ prouelos a1r{ra6/fu e^of,e;elleA proualos abreq3
enlen proualos a6rnd ;rga^le^ prouelos uolllppe llo
e^le^ prouelos eurl unnlenra1;11 6urlerpAqa6
JellU lrueqferu eurl fuanorayellen leuoqf,arprun eurl
fuanota6e^le^ Ileql 1;r1s-rolereda5e^le^ leuorpejrprun lelur eHoge^leA
urejp alqesuapuo) uoNe^le^ ,qaJesa^le^ aprs prnbr; IueI
anlen eprs rnodel )ue1e^le^ esoq aprs prnbrlluel
enlen asoq eprs rnoden 1ue1a^le^ ernssard q6rq 1as
ploJlueh1e^le^ arnssard Mol las plolue6esoq elrrues arnssord tl6tt-tasoq ef,rruas arnssard mo1raleu
arnssard )uel eptsula6neb elnssald qbrpla6ne6 arnsserd nnol
zdTd
68L9sn
zT
snftnlA:lznlIAl
ZJTJ
nnznAINA
9nsnTAnZAIN
HOIHtnol
ZLTI
hlZlllTW
EEEEEEEEEEEEEEEEEt-
—
F=
C=
G-
E-
—
]E-
]E]E-
@ oooer,ov
sNorrdvf,
-
@ ncru:ooo
GENERAL INFORMATION FOR THE USER
Disposing of equipment
Do not dispose of this equipment as miscellaneous solid
municipal waste butarrange to have collected separately.The re-use or correct recycling of the electronic equipment
(EEE) is important inorder to protect the environment and the
wellbeing of humans.In accordance with European Directive WEEE 20021961EC, special
collection pointsare available to witch to deliver waste electrical
and electronic equipment.The public administration and producers of electrical and
electronic equipment areinvolved in facilitating the processes of
the re-use and recovery of waste electricaland electronic equipment
through the organisation of collection activities and theuse of
appropriate planning arrangements.Unauthorised disposal of waste electrical and electronic
equipment is punishable bylaw with appropriate penalties.Disposing of batteries
o Batteries must be recycled or disposed of properly. Do not
throw batteriesaway as part of normal refuse disposal.o Do no throw batteries into open flame!f,i
ItI
tI
laF
aaF
f_tr
II
EFEEEtrFFEtEEEEEEE.EEEEEE.GGGG
40 OPEMTING INSTRUCIIONS
-
tvSNOIT.f NU.ISN I 9N I.IVd]dO
‘pesoll ere se4e^ aL{l lle arns e)eu’1ue1 leuraya ue ol ro
urapAs f/V ue ol lun 000ehfv aq1 6ulpauuol eloJeg‘serunJ sese6 6urle.rabu;er elequr ]ou 06’6urzaa.rl alonord
{eu (3o gg- poqe) a;nleradual 6u1g1oq Mol aql ‘uqs aq1 qIM
peluol eql plo^V‘sa166o6 uorpelord asl
‘sano;6 as6
‘AIptunq q61q ro urer Jo esef, ur re uado esn lou oC
‘suotJf,ruJsul aql pear 11;n1ale3
:Moleq s;oqtu{s eql ot eluareJel elpu aseald ‘loleledo
arll ol saun[ur Jeqlo se lleM se sseupurlq esne] uer luelabpJel
eqt qllM ]f,eluolaq1‘sano;6 pue sag66o6 se qf,ns suoqtalo.td alqeltns leeM ol
fuessarau st 11asn ales e tol —
T’I
‘luaurdrnbaeqt Jo esn eJes pue perrol e JoJ lenueu slql
{;;n;alef, peel ol seq lasn fuen3 ‘lueurdrnbapazunssard Iq pasner eq lqbtut qllqM sabeuepa;qrssod eql pue
saseb pue sr-uep{s 6ur1era6ular‘uoqerebltlar Jo sa;dtruud aq}Mou1 ol eneq oqM $olelado paurerl
llgeuorssa;ord Iq pasn r(;anrsnllxe aq uel ltun stql:ltNfg vroN
‘luaudrnba eql Jo elupualureu pue asn lado.td qltM peMolloJ
eleMoleq payodar salnr fia;es geraua6 aql Jt Islr {ue o1 pasodxa
lou st tesn eql‘ato;alaq1’salnparord lle Jo af,ueruro#ed aH ur elqerlal pue
a;duuts llaura.rya luaudtnba stqle)eu 000t1/{fv eql Jo uorpnpo.rd
pue ubrsap al1B u! paldope Abo;ouqrel pelue^pe aqfaJI
a/I
aJ’GGaGa-
—
GjCjIl.Il.I)1jaaaaaaaaaaaCE
@WV
@ oooer,,ov
oooH)v fsn ltJvs v uoJ —
o’T
-
GE) ncru:ooo
Ensure that the phase has been completed and that all valves are
closed beforedisconnecting the unit ACM3000. This will prevent
release of the refrigerant intothe atmosphere.Do not change the safety valve or control system settings.
Do not use external tanks or other storage tanks that have not
beentype-approved or that lack safety valves.Never leave the unit live if an immediate use is not scheduled,
stop the electricalsupply before a long period of unit inactivity
or before internal maintenanceinteryentions.Be careful while servicing the unit since connecting hoses may
contain pressurizedrefrigerant.Do not use the unit in explosive environments.
Extraordinary maintenance interyentions have to be performed by
authorized staff only.Pressure of leaks of the HCF-134a service equipment or of the
air conditioningsystems of the vehicle must not be tested by using
compressed air.Some air/HCF-134a mixtures can burn at high
pressures. These mixtures can bedangerous and may cause fires or
explosions and subsequent injuries or damages.Fufther information on the operators’ health and safety can be
obtained from therefrigerant producers.I.2 — Safety devices
The ACM3000 is equipped with the following safety devices:
o Overpressune valves.o Besides the overpressure valve a maximum
pressure switch has been fittedwhich stops the compressor in case of excessive pressure.
ATTENTION:Any type of tampering with the safety devices
mentioned above ishereby prohibited.lrI
il_I
-rtrfa
.I
Er-
_I
a.r
FF-tr-tr_,trFF,tr.trE.E-EEEEEGEEGEEE’rIEEE
42 OPEMTING INSTRUCTIONS
-
SNOIT.f NUTSNI 9NIIVU:IdO
‘uns eql ol pasodxe {;palp 1ou 6utaqIun aql ol laJal peleltpu!
sarnleradural 6uq.rop1‘6uruorpunJprlt pue salnleladtlalelrssef,xa asnef, ue) ernsodxa
uns ls{eluns }lellp lepun }tun eql asn lou oC .burr.unser eroJeq eare IroM eql etelquan ‘alaqdsoulle aql olut
pesea,», ^,,n ut#31sr luerabu;ar aql JI ‘etEIU .ro; slrun-6ur1r{ral letrads aq1 {uo
asn ‘ua1s{s 3/yaql LuorJ etEIU a^ouer oI ‘llpll fuoleltdsal eLl] pue sa{a o}
uotleltJll asnPf{eur ernsodx3 ‘sruep{s O/V eq} u! slto pue s1uela6t.4el eql Jo
uotlelequl p!o^V o6unqb1 ]uaouJns q1M sluauuoltnua ut)106 o
‘$leel ag;ssod palep ol ilnfu[lp1 6u;1eru uorJ lueuuoJlnua
6uqrol aql ug 1uera6!{at Io eluasatdelq;ssod aql lue^erd ol
fuesseceu s!‘uollralo.td luautudllue aql JoJsalnr Ieuolleualul aql {q
par;nbar 6ugaq saplseq‘uoglnecald e qlng’lueuuor!^ua aqt ug 1ue.ra6!{at oql esradslp
lou op 6ulleredo allqtn fl7:NOITNilT; \T
‘uotlelqt^ ol llun 000!{fV aql palqns lou oC .’ll e)eqs lou op
6u1lpueqyoqs 6uunp iaregns uene ue uo lloM ol sel{ llun aql FutuotpunJ
pellof, e lol .‘lueuuor!^ue aql pue rasn aql roJ snolxou ale q)lqrnsa)uelsqns
angssar66e pue tlxol 6u;aan3 sasodruotap 1uela6lr;areql
sernle.radural q6!q fe lseteJltns loq pue $tuteu aarl uoJJ leJ
lrorl !F.]7:NOIIN]fi \!/’lueuruorlue palplrluan l;luatrg;ns e ut lloM ol
seLl llun eq1 oEEEEE-
G-
—
EEEEG-
3r-
=
=
=
]s]E=
]F=
=
]trE=
=
=
=
E
w
@ oooer,lrv
luauruoJl^ua lrorn eql — g’T
-
@ nocmo
2.O . INTRODUCTION TO THE UNIT
The ACM3000 unit fits all of the air-conditioners functioning
with R134a refrigerantlocated on cars, trucks and industrial
vehicles.The ACM3000 unit microprocessor allows the managing of all
functions by means of anelectronic scale, a LCD to display the
weight or minute values and the help messages ofthe various
procedures which can be set, a control board with keyboard.By connecting the ACM3000 unit to an A/C system the
refrigerating gas can berecovered and recycled to enter the system
itself again after a correct vacuum.EEEEEEEEEEEFEEFEEEEEEEEEC’EEctCTCIEIGtG
The amount of lubricant taken from the A/C system during
themeasured and, afterwards, reintegrated in the system.The unit is
equipped with a one-stage pump for high vacuum andcontinuously
monitor the operations in process.Tightness test on the A/C units
is carried out through the manometers the unit isequipped with.The unit is equipped with special connectors to avoid
cross-mixing with systems usingRl2.ATTENTION:Do not try to adapt this unit for air conditioning
systems using R12.recovery can be
a manifold set to
44 OPEMTING INSIRUCTIONS
-
sv/
sr.loltf nursNl 9Ntt\fdldo
‘{etdstC ‘Sg’Aa1 6ury1qs loslnl splerurdl ‘gg
‘Aa1 6ug1qs loilnf spreMuMoq ‘E
.r(a>l Ulttrt: .Z'{ar aots ‘t
‘{e1 uoqrunJ lgUVHf, ‘0’{a1 uorpunJ f[tVNOInV ’62
‘{a1 uorpunJ NnnJV ’82′{e1 uo;punJ UIAOfIU ‘ZZ’pet uorpunJ
Aul^oflu ’92‘pel uorllunJ Nnnfv^ ‘sz
‘pat uorlrunJ l9uvHf, ‘tz
preoqAay aq1 —
I’
‘sse16 ulelp llo ‘Z
‘ssel6 ropelu] ll1 ‘ZZ’asoq uoqleuuor epp q0u ‘tz
‘asoq uo[]euuof, apF Mol ’02’salepdn eleMuos loJ Uod ’57
‘qlllMs rarnod ule6 ‘8I
‘(leuoRdo) raluud ‘ZT’enlen arnssald Mol ‘9I
‘e^le^ a;nssald q6tg ‘St
‘lelau alnssald Iuel aptsul ‘VT
‘e6ne6 arnssatd q6tH ‘gf
‘a6ne6 arnssald Mol ‘ZT
‘preoqAey ’11
lINn :lHI JO NOIIdIUf,S:lO —
O’
EEEEEEEEEEEEEEEEEEEEEt-
lr-
—
—
F
FEEEtEEEE
@ oooer,lrv
-
@rt-,8EEE»EEE.E.EEE.EEtEEEEEEEEEGEECIC’a_
I.I
CI-raI
E
4.O — INSTALLATION OF THE UNIT
Please find below operations to perform to start the unit.
4.L — Unpacking and checking components
o Remove the machine packaging.
e Check to ensure that all of the accessory components are
present:’/ Operating instructions../ 2 cylinder connectors.,/
Bottle safety valve conformity certificate.4.2 — Machine handling and storage
Remove the unit from the base pallet of the packaging.The unit
is moved on the four wheels. The two front wheels have brakes.On
rough terrain, the ACM3000 can be moved by tilting it and balancing
the weight onthe two rear wheels.In spite of the fact that the
heaviest components have been assembled on the base inorder to
lower the centre of gravity, it has not been possible to eliminate
therisk of ovefturning completely.4.3 — Preparation for use
Before starting to use the ACM3000 unit, it is possible to
personalize it.These settings are not compulsory on the standard
models.To personalize the A/C unit comply with the following
procedure:o Turn on the unit and wait until the STAND-BY page is displayed
(date and time).o Simultaneously press the cursor shifting keys
upwards (34) and downwards (33)for some seconds.
o A menu is displayed containing the operations that may be
carried out.o Press the upwards cursor shifting key (3a) or the downwards
cursor shifting key(33) to scroll the menu.o Select the wished function and press ENTER (32) to enter.o
Press STOP (31) to go back to the STAND-BY page.46 OPEMTING INSTRUCTIONS
-
Lbsr.lolrf nu.rsNl 9N[\nd]do’6ur1epdn aq1 6uunp lun f/V aLll JJo
qlllMs lou 06l:lNfg vroN’Aay aql pe4x:l o
‘{;errler.uolne slasar pleoq aql uoqerado aql Jo pua aql }V
odllNl sseld pue uorlf,un; fMdn gO aql peles o‘apls luolJ pleoq eql olul {a1 alepdn aqt Uesul o’eseqelep
,slelnlf,eJnueu lef, aql alepdn ol pesn sl nuau sltlllrvodn lsvgvrvo’ute6e pe{eldqp st nueu uleu aql uaql o
‘urguof, ol 1:IINI sseld pue 1se4uol aq1l{;lpot! ol (E){a>l
$ugtqs losnf, splemumop eq} lo (m) ^a>l 6ury1qs losrnl sp.remdn
eql sseld .‘U3IN1 ssald pue uoqf,unJ ISVUINO) eql peps orsvurNof,
‘ute6e pa{e;ds1p sl nueu uleul eq} ueql o.elnseeu Jo trun
papalas eql les ol uflN:l ssald pue nuau aql llolls ol (){a) $uryqs losnl spleMuMop eql lo (lg) IaI 6ug1qs loilnf,
sp.reandn eq} ssald o.pe{e1ds1p sr fuouraur ut elqelte^e 6u1aq
ernseau Jo sllun Jo lsll aql o‘dllNl ssald pue uoqlunJ funsvlltl JO SIIN1 aql pales o
lunsvll.l JO SIINfl
‘ute6e paAeldslp sl nueu uleul eql uaql o.spuofes auos to; Aal
ullNl eql uMop ploll pue ssald ‘aurt1 aql laluf o‘eutl eql uo suolllsod ‘toslnr aql o’spuof,es auos ro; {a1 UIINI
eq} uMop ploq puP ssald ‘e1ep aql leluf o‘elep eql uo suotllsod .toslnr eLll puP pa{e1ds1p ele eull pue
elep lueJnf, aql .’UlINl ssald pue uonf,unJ ly,lll ONV ]M eql pelas
o]]'{il ONV llVO’ute6e pa{e;ds1p st nueu uletu eql uaql o
‘abenbue; palf,ales eql les ol UflNil ssald pue nuau eLll llolls
ol (){e>1 6up11qs loslnf, spleMuMop eq} lo (US) Aal 6urg;qs
loilnf spleandn eq} ssald o‘pe{e;dsrp st fuoulaul ul alqelle^e sa6en6ue;Jo lsll eql
o’U;lINl ssald pue uoqf,unJ fDNVHf, l9VngNV] eql peles oEEEGGGG-
E-af
-a-
—
I
-a-
-tlD-
I
=
—
l!
EEtFFFIFFFtttFEFEE
@ oooewrv
f9NVH3 f9vn9N\n
-
@r s6M3so9
4.4 — Bottle filling
Before being able to use the unit, after personalizing it, it is
necessary to inject somecoolant in the inner bottle. Comply with
the following procedure:o Connect the service pipe to an external container full of
coolant(use the supplied unions).NOTA BENE:There are two types of source tanks: one with a liquid
outlet and one without.Tanks with liquid outlets must remain in an
upright position in order to transfer theliquid refrigerant. Use
the LIQUID valve connection for this type of tank.Tanks without
liquid outlets are usually equipped with only one valve and have to
beovefturned to transfer the liquid refrigerant. \o Open the valve on the external bottle and on the seruice
pipe.o Open the high and low pressure valves on the unit.o
Simultaneously press the cursor shifting keys upwards (3a) and
downwards (33)for some seconds.o The functions menu is displayed.o Press the
upwards cursor shifting key (3a) or the downwards cursor shifting
key(33) to select the BOTTLE FILLING and press ENTER to confirm.o
The display shows the tank available capacity.o Press the ENTER key
to continue.o Set the amount of coolant that you wish to inject (it
is advisable to inject about4 kg).o Press ENTER to start the operation.o The unit
automatically stops once reached the set value.o Close the valve on
the source tank.o Press ENTER to complete the operation and empty
the pipes and the stillseparator.
NOTA BENE:Usually the final amount of coolant recovered is
greater than the set quantity, since alsothe still separator and
the hoses are emptied.o The function stops automatically when pressure is over in the
system.o The STAND-BY page is displayed.o Close the valves on the
unit.EEEEEEEEFEEEEEEEEEEEEEEEEEEEEEEIEG,E
48 OPEMTING INSTRUCTIONS
-
6bSI,IOIIJ0UjSNI 9NIlVdldO
‘nuaur tsv8vfvc eql ol lreq 06 ot dols sseld ,^'({uo raluud q}ru
qlun roJ) tugd ol ^el UfINf er.lt sseld ,r’‘allrqa^ ar.D 6uruJeluol elep eqlllorls ot s^al rosrnf, uMoO pue
dn eql asn‘e1ep {epdqp ot :A\ndSIO VIVO /’1no-1uud
aql u! (ppotu pue eleu) etep alltqa^ aq1 slupd ‘laluud q1m
padd;nbasuoqe$ ro; ‘pue uoqerado aEreqrar Uau eLll loJ pasn eq ol enlel
luela6p;e.taql speol uorpeles s1q1 ‘u1e6e abed 1g-qNVIS aq1 s{eldstp
ulelbo.td aqt uaql‘afrrues ueu eql 6uunp uaql asn pue elep alo$ ol :l’tlullNoS
vlvo ,^:ur4uof, ol UIINf ssard pue s{a1 Joslnf, uMoC pue d1eLll esn uorpalas .ro; lsuorldo uorpetes oMl smoqs {e;ds1p aql
elep 6ut1;olrs lagy .’uuuuof,ot UiIIN:I ssard pue lopolu le paFel eql peles o1 s{a>;
rosrnf, uMoC pue dp asp o’tuluuof,ol UflN:l ssard pue aleu rel palsal aql peles o1 s{a1 losrn)
uMoC pue dq as1 o’turuuof, ot UltNit ssard pue uolllunJ fSVSVIVO
NVldOUniI eqt peps .‘rlruuol ol U:IIN:I sseld pue ;ISVSVIVO laqila palaso1 {a1
6ug1qs rosrnf, spleMumop aLll lo {e) Euryqs losnf, splemdn eql
ssald o‘pa{eldsrp sr nueu suotpunJ eql .’spuof,as
euos roJ spJeMuMop pue sprenndn s{a1 6ug1qs losJnf, eq1 ssald
{snoauellnutt5 .'(s.ra1ur.rd qlrM slrun rol) paluudro pa{e1dslp eq {eu 1eq1 uoqeuroJul 1o saratd leqpnJ suteluof,
osle aseqetep aql ‘eseqelep leurelur aql uorJ Aparlp uelpl eq uef,
elep e6leq3aseqeleo —
T’s
‘suorpunJ lrun eql;o uorldr.nsap aql Moleq purl
EEEEEEEEEEEEEEEEEtEtFFFIFFFEttEtEEE
@ oooer,,nv
rrNn rHr Jo rsn —
o’s
-
5.2 —
A@ ncu:ooo
Refrigerant recovety
ATTENTION:Always wear protection goggles and gloves when working
withrefrigerant. Read and comply with warnings at the beginning of
thismanual before using the unit.In order to recover the coolant present in the A/C system, carry
out the followingprocedure:o Connect the T1 low pressure and T2 high pressure hoses of the
A/C system.o Open the valves on the hose quick couplers T1 and T2.
o Open the high and low pressure valves on the unit.
o Press the RECOVERY key (27), the maximum amount of coolant
that may berecovered is displayed.o The function is not started in case of lack of pressure in the
system; in this case amessage is displayed to inform the
operator.o Press ENTER to start the function; the self-cleaning function
is thus stafted.NOTA BENE:This function is useful to ensure a correct weighing
of the recovered coolant.The self-cleaning function can be
by-passed by holding down the RECOVERY key forsome seconds.o When the self-cleaning is over, the refrigerant recovery
stafts.NOTA BENE:The function stops automatically when the pressure
inside the system drops below0 bar.o At the end of recovery the oil is automatically drained and
the pressure values arechecked.o When the waiting time is over:,/ The function restarts
automatically, if pressure has increased.,/ The display shows the
amount of recovered refrigerant, if the pressure valuehas not changed.
o Close the valves on the unit.
o Press STOP to go back to the STAND-BY page.
EEF»EEEEEEEEEEFEEEEEEEEEEEEEEEEEEEE
50 OPEMTING INSTRUCTIONS
-
aadCaGGGG]EG]E-
]EEttr]E]EE]Ettrttrttr]FGttrttrc]EttrttraE=
ISsr.lotlf nu.$NI 9Nllvuldo
‘ilxa ol Aa>l aOtS eL;1 sseld ,^’lulrd ol Aa1 Ultttl eql
sseld /:arnperold bupvrolgol aql lno fuler o1 a;qtssodst I lsal eql Jo
ilnsar aq1 buyteldstp laue‘(leuogdo) laluud qyn paddlnba qtun eql lol:f Nfg vroN
‘a6ed AS-ONVI-S eql ol lreq o6 ol dOIS sserd .
‘Iun aql uo saAleA aLn asop o
‘uep{s eql uopepalep ueaq a^eq qeel leqlaqrvr $urrvroqs
pa{elds;p sl }lnsel lf,aLl) aql eufl slqlJo pua eql lV‘silep euq llarll senle1 elnssald aql le1o sl euq unnf,e1 eql
ueqM .‘uolpunJ aql Uels pue uluuol ol Uflfif ssald .
‘r(a>lburglqs spleMuMop/sp.rervrdn loslnf aq1 6utsn {q aug
unn)en peqslM eqt lelu:l o‘loleJedo eql uloJul o1 paleldstp st aoesseu eesel stt{} ut
luta1s{s eLl} ul aouasald alnssald Jo esef, ul peuep lou sl uolpunJ
eql o‘(eZ) ^eI 5tnnf,V1 oql sserd o’ltun eql uo se^le^ alnsseld Mol
pue L{qq eql uadg .‘uolpes lue^elelaqt ul pequlsep salnparold aLll ol burprorre
ef,ueualuteu eql 1no fu.re3‘sleadde’lIO lgNV;43 abessau et$ ilnoL{ 0S ueq} elou loJ unl seq
dund unnf,el eq} JI::lN!lg VION
uelsAs f,/V aqf Eullencenf —
‘9
‘lrxe ol r(al aOtS eql ssald /’1ut.td o1 ,(a) Ultttl eql ssald
/‘tuluuol o] UillNf ssald uaq] pue {e1 6ug1qsspleMumop/sp.rervrdn
Joslnf, aq1 6utsn Aq lto pala^ofel Jo enle^ eL;1 lalu] .r’: aln parotd 6uttvto;;o1eql LlllM {lduror
‘e1ep;o {e1ds;p eql laue ‘(leuondo) laluud qryn peddtnba sltun
aql rol:fNf8 vroN@ oooenrv
-
rl.I
EEEEEEEFtEEEFFEEEEEEFEEEEEEEEEEEE
@
5.4 —
AOil injection and A/C system charge
ATTENTION:This function must be performed only on A/C systems
under vacuum(following a system evacuation function). At the end of
the oilinjection function, following a filling function.Charge the
oil from the high side only. In case of systems equippedwith low
side fitting only (LOW), wait at least 10 minutes beforestarting
the A/C system after the charge.o Check that the seruice pipes are connected and that their
valves are open.o Press the CHARGE key (30).o Enter the amount of
coolant to be charged by using the cursor upwards /downwards shifting key and press ENTER to go on.
NOTA BENE:If vehicles are selected through the Database, the
display shows automatically theamount of coolant to be charged for
the selected vehicle.r The display prompts to fill in the oil.,/ If you wish to fill
in the oil, press the AUTO key and check on the oil bottle thecharged amount. Press ENTER to staft charging the oil.,/ If you
do not wish to charge the oil, press ENTER to staft the charge.o The unit carries out the coolant charge and at the end
displays the value of thecharged coolant.o To verify if the circuit is efficient, you need to check the
functioning pressures.o Close the valves on the unit.ATTENTION:Failure to close the valves may cause errors,
malfunction or damageof the internal components.o Switch On the car and the A/C system.o Check pressure values.o
Switch Off the A/C system and the car.NOTA BENE:For the units equipped with printer (optional), after
the display of the charged coolantcarry out the following
procedure:,/ Enter the charged oil value by using the cursor upwards /
downwards shiftingkey and press ENTER to confirm../ Press the ENTER key to print.
./ Press the STOP key to exit.OPEMTING INSTRUCTIONS
-
aAAdAAAAAAaaGGGGaGttrGGGGaaaGGGGGcGG
essr{otllnu.IsNl 9N[tvd]do
‘(g’9 raldeqr u1pequlsep alnperold eql qIM {;dggor) ruruuof, ol
dflNf ssald pue anle^ eq} lelu:l o‘euq unnf,P^ aql Jo fulua aq1 saltnbal {e1ds1p aq1 .'(oz) ,(al
uorpunJ f,Ilvl’tlolnv aql ssald .‘Iun aqt uo senle^ alnssald Mol pue qbtq aW uad6 o
‘Zl pue 11s.ra;dnor lrtnb esoq eqt uo se^te^ aq1 uadg o
‘ualsis f,/V eql Jo sesoq alnssald qbtq Zt pue arnsserd mo; II
aql pauuo3 o:uotpunJ lqeuolne aql tno fuler o1
‘JeltnpeJnueu aql Aqpa1se66ns arnpeoord eq1 6u;rno1p1 Aq {lenueu
lno pa!ilec aq plnoqsuolpunl eEreqc aqt 6ulUU af,!rues a16u1s e
qiltn paddlnba srs) rol \T7:NOIINfIIV V’uorpunJ
f,tleuolne ut suotllun; a6.reqr pue ‘urnnlen ‘{renoler Uo
Outfuler sMolle uonf,unJ slL{fuolpun, f,neuolnv —
9’9
‘luelool lenptseJ uo4 sesoq aq1fiduua ol fuanoral e lno fule3
.‘ura1s{s f/V eq} utolJ sasoq aql peuuolsl6l o’rel eql pue uels{s
f,/V aq1 JJO t{11!MS o‘elltqa^ eLlt uo pateld la;dnol >1rrnb elnssald Mol eql uo
e^le^ eql esolf .‘sleq Z-I lnoqe ol seztltqep sJeleuoueu aql uo alnsseld «,ll
eJns ele6 o‘uep{s f/V aq1 pue ref, aLll uO qlllMs .’lrun aql uo senle^
alnssald Mol pue qqq aql uadg o‘elltqa^ eql uo pere;d ;aldnor >1rlnb alnssald qqq aql uo
a^le^ eql asolf, o:arnparord6urrvro;go1 eql qilM {;durot alltqe^ aql Jo tua}sAs
f/V eql uol; peuuolslp ol laplo uIuralsAs t/V atn uorJ lf,auuooslp ol ^ oH —
S’S
@ oooenrv
-
@ ncN:ooo
o The display requires the entry of the amount of refrigerant to
be charged(comply with the procedure described in chapter 5.4) and
press ENTER toconfirm.NOTA BENE:If vehicles are selected through the Database, the
display shows automatically theamount of coolant to be charged for
the selected vehicle.o The function is started and goes on automatically until the
vacuum function isended.o The display prompts to fill in the oil../ If you wish to fill
in the oil, press the AUTO key and check on the oil bottle thecharged amount. Press ENTER to start charging the oil’,/ If you
do not wish to charge the oil, press ENTER to start the charge.NOTA BENE:In case of errors, the station stops and displays the
relevant error message.o To verify if the circuit is efficient, you need to check the
functioning pressures.o Close the valves on the unit.
ATTENTION:Failure to close the valves may cause errors’
malfunction or damageof the internal comPonents.o Switch On the car and the A/C system.
o Check pressure values.
o Switch Off the A/C system and the car.
o Carry out the disconnection procedure as described in chapter
5.5.NOTA BENE:For the units equipped with printer (optional), after
the display of data, comply with thefollowing procedure:,/ Enter the value of recovered oil by using the cursor
upwards/downwardsshifting key and then press ENTER to confirm../ Enter the charged oil value by using the cursor upwards /
downwards shiftingkey and press ENTER to confirm.,/ Press the ENTER key to print.’/ Press the STOP key to
exit.AAEEEEEEEEEEEEEEEEFGj=
aEE=
EEEEEtr
oeEMTTNG rNSTRUcnoNt E
F54
-
sNolr.f nu.rsNr 9Nllvdrdo
‘lenuetu slql Jo6u;uu;6aq erll le suolpnl1su! aql filn4anec lr
olloJ pue peat lueutdlnbaeq1 6u;sn aroJeg‘alnssald rapun luera6lrJar p;nb;1 ulslu(rr uq, sasoqelqlxeg aql
to lly‘uopnec autorD
-
@ ncN:ooo
6.0 . DISPLAYED MESSAGES
6.1 — Seruice messages
CHANGE OILVacuum pump oil change (see chapter 7.1)’CHANGE
FILTERChange filter dryer (see chapter 7.3).6.2 — Error messages
HIGH PRESSUREOut feed pressure from compressor is excessively
high. Switch off the unit and wait forabout 30 minutes. If the
problem persists, apply to the Technical Service.SOFTWARE ERRORError in the softrryare, apply to the Technical
Service.FULL BOTTLECoolant level in the bottle reached the maximum
capacity level, carry out some chargesto reduce the amount of
coolant inside.SCALE RECALIBRATIONError in scale calibration, reset it. If the
error persists, apply to the Technical Seryice.HIGH RECOVERY TIMEThe recovery time exceeds the set safety
limit. Make sure there are no leaks in the A/Csystem. If no leaks
are detected, apply to the Technical seruice.EMPTY SYSTEMThere is no refrigerant in the A/C system.
FULL SYSTEMThe A/C system is charged with refrigerant.
INCOMPLETE CHARGEExcessive charge time; this proves that the
pressure inside the bottle is equal to thepressure inside the A/c
system (see chapter 5.8).srue Lrrs uuLLrtr r> Et{ucrr Lv Lrrs EFEEEEEEE
EEEEEEE-
-a
EFEEEEEE=
EEcE=
EEE
-
sr’rolrf nusNl 9N[vu3do
‘(9g) dec raddn eqt esoll ‘pallg sr dund eqt uaqM o’aull
alpplr.u sse161qbp alll t{lear ol seq 1anal 1(49) sse;6 uorpadsur
aq1 qbnolqldund eq] ul le^el lro eql )leLlf, ‘a1oq raddn aq1 qbnorql llo
eL1} qltnn dtund eq1 lllj o‘(gg) der aql ul Marf,s’I1dr.ue st dund aqt uaq6 o’dund unnf,en
eLllur peureluol llo eLll ebreqrsrp pue dec aq1 uado ‘(gg) der aq1
lapun relpeq e lnd .‘(ge) der raddn aq1 uadg o'{ddns raanod aql uro4 }run etl}
}f,auuof,src o:suorpnrlsur aseql A;;n;erer MolloJ ‘1o aq] abueqr og
‘-lIO lgNVHS sMor.ls {eldsrp aq1 ‘pebuep eq ol seLl llo eql
uaq6’ilun eql Jo sefueuroyadreq61q ernsse ol rapro ur {puanba.4 pabueqr eq 1snu dund
urnnf,en aql Jo llo eqla6ueqr ;p dund unnre1 —
T’L
‘retup ralgg e6ueq3 Ull’t11 tgNVt{J'(srnoq 0S) llo dund tunnlel
a6ueq3’lIO:IDNVH)‘aulrl peqursard eql le pa;;eubrs eresernparord e)ueuelureu
rrpoued p1e‘uralsIs lorluol lruorpele eql ol butnno ‘uotltppe u1
‘uorlueruelur ;o fuuenbar;mol fuan e {q pa4reur pue unurunu e o}
pefnpel sr ef,upua}ureu‘suoseer esalll JoJ
‘sanbruqral uoefnpoJd paruenpe 1sou s,{epo1Jo esn eql qIM
slueuodr.nor fi1;enb-dol qilM llrnq 1un alqeller {qbtq e q 000t/{3V
aq.lltEEEEE-
GGEEEGG-
]E-
JE]E]EG]E]E]FGI-.
]EG]E3]EalGG
LS
@ oooer,,ov
If,NVN:llNMtl ‘O’L
-
rtEEEEEEEEEEEIEIEIEttrIEjtGEEIFEEGGGGGGEGEj
@ ncu:ooo
7.2 — Reset oil counter Yacuum pump
After having changed the oil of the vacuum pump, reset the
counter.To reset the counter follow carefully these
instructions:o Simultaneously press the cursor upwards shifting keys (34) and
AUTO (29) forsome seconds.o The display shows the message OO00.
o By using the cursor upwards /downwards shifting keys enter the
value 5555 andpress ENTER to confirm every single value that has
been entered.o After setting the code 5555, press and hold down the ENTER key
for someseconds.o The functions menu is displayed.
o Press the upwards cursor shifting key (3a) or the downwards
cursor shifting key(33) to select either OIL CHANGE and press ENTER
to confirm.The display shows a value which corresponds to the working hours
of the vacuumpump.o Press the ENTER key and keep it pressed.
o When the display shows 0000 release the ENTER key.
o The display displays the functions menu again.
o Press STOP to go back to the STAND-BY page.
58 OPEMTING INSTRUCTIONS
-
6SsNou-f nu.6N I 9Nll\td3do
‘urp6e uorpelord l[seld aL{l dn las .
‘uolrlsod rq6u eqr ut ere s6up 6u;lees «T,Hi^ll:l? V
‘euo Meu e qIM 1 areldar pup uorilel qilM reilU eLll peuuorsr6
o‘saao;6 pue sal66o6 rearn ?!un aql Jo llnf,r!)lueraEg;ar eql
uado ol Aressaf,eu aq lllrn il aseqd 6u;nnolpl eq1 6u;rno t-17:NOIINId \I/
‘1auedluorJ JeMol aql enourel pue {lddns reanod lelupela eql
uor; lrun aLl} peuuof,srq .‘llun eql uo seAleA eql esolf o
‘{gerrleuolne sdop uolpunJ eql o’enle^ req (orez) 0 eLll rapun
peseaDap louseq ileleuoueu eql uo pelerpur ernssard aql l[un alerado
.rossarduror aq1 lal o’6uruee1o-;les Jo pue eql JoJ IeM .‘lrun erll uo se^le^ arnssard Mol pue qqq aL{l uadg .’spuo)as
euos JoJAa>l tUlnO)lU eql uMop plor.{ pue ssard lramod lupela eql ol
}run eql peuuo3 o’suorlf,ru1sur asaql I;;n;arer Mollo; ‘rafup reilU
eql r{;paror a6ueqr o1‘ufl’lH lgNVHf, ebessau oql sMor1s {eps1p aq} uaqM pa6ueqr eq ol
seq reilU aql’etIU luerabular eql Jo lueluol relem q6lq eLltpue sanprser pne llp aleururla ol repJo ur pau6tsap ueeq seq
lrun srql lo rafup reIU eqlEEEEEEEEEEEEEEEGEG=
=
—
]EE]FGGIEGEGGEGE
@ oooer,,nv
a6ueqe latup railll —
E’L
-
@ ncru:ooo
7.4 — Reset counter filter dlYer
After the change of the filter dryer, reset the counter.To reset
the counter follow carefully these instructions:o Simultaneously press the cursor upwards shifting keys and AUTO
for someseconds.o The display shows the message O000.
. By using the cursor upwards /downwards shifting keys enter the
value 5555 andpress ENTER to confirm every single value that has
been entered.o After setting the code 5555, press and hold down the ENTER key
for someseconds.o The functions menu is displayed.
o Press the upwards cursor shifting key (3a) or the downwards
cursor shifting key(33) to select either FILTER CHANGE and press
ENTER to confirm.The display displays a value, either in kg or in Pounds,
corresponding to the amount ofcoolant that has been filtered.o Press the ENTER key and keep it pressed.
o When the display shows 0000 release the ENTER key.
r The display displays the functions menu again.
o Press STOP to go back to the STAND-BY page.
EEEErtEEf,EEf ijjjCE-
EEEfra]Ea-
j-
EEtEE
oeEMTING INSTRUCTIONt _
a60
-
T9stJouJnusNl 9Nl_t\rdldo
‘a6ed AS-CNVIS aqt ol lreq o6 ol dOIS sseld
‘ure6e nuau suorpunJ aql sAepstp {eldstp aq1′(Aa1 6ugqs
spreMuMop/splemdn roslnf, aql asn enle^pa{eldsrp aqt fuen o1) {a1 UflNf eq1 ssa.rd pue enle^ lqblam
aldues aql lalul'(6>t Ot 1q61enn pa1sa66ns eql) aleld alels eql
uo lq6tam a;dues eLll uotllsod‘IHgIltn l]d]’,lvs sMoqs s{e1ds;p eq1′({e1 6ug;qs
spremuMop/splemdnrosrnf, oLlt asn anle^ pa{eldsrp eql fuen o}) ,(a>l Ullhll
eqt ssaldpue OO’00 enle^ lef,uerunu eql uesur‘Ildua {a1alduor 6u1eq ued a;ers aql qIM’IHgIltn Oufz smoqs
s{e;dstp aql‘urguof, ol UfINf ssard pue NOIIVUSITVf, :lTItOg laqile peles ot
(){a1 Eurgrqs rosrnf, spreMuMop aql ro (Ug) ,(aI 6uq1qs loslnf,
splemdn eq} sserdo
o\
a
EEEEEEEEEEEEEEEEEEtEEEE=
FEE=
EflrIl.fI.-ttIr
E
‘pa{eldqp sr nuau suorpunJ eql o’spuof,es
auos ro; ia>; U:llNil eql uMop plotl pue ssard ‘TITI epol aql
6uq1as lagy‘paralua ueaq seq leql enle^ a;6us fuana utuuof, ol UfINf
ssaldpue IIII anle^ aL11 ra]ua s{a>; 6urgrLls spremunnop/
sprenndn rosrnr eq1 6utsn {g‘OOOO ebessau aql smoqs {e;ds1p aq1 .’spuof,es
euos roJ OI1V pue sla>1 6u!U!tls sprealdn rosrns aq1 ssald
A;snoauel;nut5 o‘apoq aql uo pue sedrd aql uo sanlen eql asoll ‘,rraql
pauuofstpol qsrM no{ 11‘po}lauuorslp aq o} e^eq }ou op leuteluof, leurelut eql uolJ
sasoq aq1:f Nf8 vloN‘a1e;d alels eLll ol raureluof, eql anoulel ‘lelof, luolJ eql
bulnoutal lagy‘s1q6ram a1due5 7 /
:luaudrnbe parlnba6
uoseqlls’ als)s luera6plea — g’L
@ oooeunv
-
AAAAAtAAAAIjjajjrFlEEGGaaaajGjCG1Gja
@ ncu:ooo
8.0 . STOPPAGE FOR LONG PERIODS
o The unit must be kept in a safe place
o Ensure that the valves on the internal tank are closed.
o To resume use, follow the activation process only after
reopening the internal tankvalves.9.0 — DEMOLTTTON/DTSPOSAL
9.1 — Disposal of the equiPment
At the end of the equipment’s lifetime, the following procedures
must be pedormed:o Detach and vent the gas from the unit circuit: be sure the
refrigerant tank too iscompletely discharged, in compliance with
the rules in force.o Deliver the unit to a disposal center.
9.2 — Disposal of the recycled materials
o The refrigerants recovered from A/C systems and which cannot
be reused, must bedelivered to gas suppliers for disposal as
required.o The lubricants extracted from systems must be delivered to
used oil collectioncentres.62 OPEMTING INSTRUCTIONS
-
SIIOIJJnUTSNI 9NIlVUldO
690209Szs0r09sgSVLITS
(ua1u;rd qltm qtun loJ) rellor laded leuleqfenloq llo duind
unnf,en IoNa1g buqerp{qaq’afueueluteu ounnol JoJ fuesselau esoLll ele Molaq
pelellpul sluauodulo3sruvd luvds —
0’TT
(v) ep oz>:as!oN
1ue1fidr-ua qYn xo.tdde 6) 09:1q6;a1y1
029x089x0t6:suo!sueu!o
J»09++JoSZ-:alnleradrual a6eroF pue +lodsuell
o/oSL + 0Z :&tptunHfo0S +
—
J»0I:alnletadual ouHJon t
M 05S:Jarnod
zH09l0s-40z:e6sllo^ Alddn5
.rafup.ra1;g uo-utds 1:uollep 6u;1a11;1
6re:patoF aq us) teql il6larn utnulxel^l
l0I:A1;cedec taulsluo3)
s’z’t):a6ne6 g14
0’I ‘l)
:sa6ne6 Zy,l Tltl6s+
:uollnlositr als)s f,luollf,ala lueloo3)’IU
:1uela6p;aa
SNOIIVf,IJIf,:ldS 1V3INHf,]I —
O’07
ECCGEGG]EJE]E-
—
—
]E-
]E]EIE]E]EI-
II
aI
JI
]FII
—
l.
EGa=
a=
=
@ oooewrv
-
EAEEEEGEEEEEJTGIEEErEGIE]EaGaGaajGGGjGG
@ ncm:ooo
12.O . GLOSSARY OF TERMS
o Refrigerant: A refrigerant solely of the type for which the
unit has been created(ex. R134a).o AIC system: Air-conditioning system in the motor vehicle.
o Unit or Station: ACM3000 equipment for the recovery,
recycling, evacuation andfilling of the A/C system.o External tank: Non-refillable fresh refrigerant (ex. R134a)
rylinder, used to fillthe refrigerant tank.o Refrigerant tank: The tank specifically designed for the
unit.o Function: Execution of an individual function.
o Recovery/Recycling: Function in which the refrigerant is
recovered by anA/C system and stored in the internal container.o Evacuation: Function in which incondensables and moisture are
evacuated froman A/C system solely by means of a vacuum pump.o Oil injection: Introduction of oil inside an A/C system for
the purpose ofmaintaining the amount of oil specified by the
manufacturer.o Filling: Function during which refrigerant is introduced into
an A/C system in theamount specified by the manufacturer.64 OPEMTING INSTRUCTIONS
-
(800?) a’8rt N3 iNn:,
,,1:3491,;X*te-o*rer 0s-t{t-${{l l:001e1
S r!ftrji{n
I-fsz$$ $J[9:0fl#19-]Fe-?;.fB0ig.iI
,, ,,,,r*role’,!li{dJf4rY+lffiogg»l
{sso.4ltirna) {rooa}
{*66r)tr00el{sooa) ,(teoet{f00r)
IaaI-
I-
IGGJl-
—
G-
JE-
JE-
—
G]E]E]E-
—
]E]E]Eaa=
EG
:srtrJou Eu-r,r,ro11o1 aqt olsrHro$ro? p{rE: pfit$ol uffiq
$q{, ::::: , (a.rr)Guaunlvl4r ro Im.{vs) (clra)
gJ/56/900eflfifiJtr?/g0oe gfl
gr)/80T/p00s flc{s)alpna.rlq uradorng alqergddu aln Jo
sluaurerJnbor aql ol rtrroJuol‘sraJal uopurulrep s$t qrlqar or
[titrISAS SNIIDUVHJ{IU ONV AUflAOJflU J/V :nosdHrsaqlr npo.rd
eqilBqr'»0′:T:::::»Ti:= ra p u n’s nuvr:
EOOi0S?Og.IO JJ JYA.{p11
— (uureg) uzue8eg uPg
‘7 1 o;g alct-Ju;.tord 8lAlseloEcel auor.slAl(
-‘l’r’s BllBtt xds
ruosiaif,pa4 oqlas]{tr dru63
FileFile0001File0002File0003File0004File0005File0006File0007File0008File0009File0010File0011File0012File0013File0014File0015File0016File0017File0018File0019File0020File0021File0022File0023File0024File0025File0026File0027File0028File0029File0030
| Document’s Content and Additional Information | Share Manual |
|---|---|
|
Robinair ACM3000 Original instructions manual
Pages Preview: Document Transcription:
See Details |


Download Original instructions manual of Robinair ACM3000 Test Equipment for Free or View it Online on All-Guides.com.

1

2

3

4

5

6

7

8

9

10

11

12

13

14

15

16

17

18

19

20

21

22

23

24

25

26

27

28

29

30

31

32

33

34

35

36

37

38

39

40

41

42

43

44

45

46

47

48

49

50

51

52

53

54

55

56

57

58

59

60

61

62

63

64

65

66

67

68

69

70

71

72

73

74

75

76

77

78

79

80

81

82

83

84

85

86

87

88

89

90

91

92

93

94

95

96

97

98

99

100

101

102

103

104

105

106

107

108

109

110

111

112

113

114

115

116

117

118

119

120

121

122

123

124

125

126

127

128

129

130

131

132

133

134

135

136

137

138

139

140

141

142

143

144

145

146

147

148

149

150

151

152

153

154

155

156

157

158

159

160

161

162

163

164

165

166

167

168

169

170

171

172

173

174

175

176

177

178

179

180

181

182

183

184

185

186

187

188

189

190

191

192

193

194

195

196

197

198

199

200

201

202

203

204

205

206

207

208

209

210

211

212

213

214

215

216

217

218

219

220

221

222

223

224

225

226

227

228

229

230

231

232

233

234

235

236

237

238

239

240

241

242

243

244

245

246

247

248

249

250

ACM3000 & variants
de
Originalbetriebsanleitung
Klimaservicegerät
en
Original instructions
AC service units
fr
Notice originale
Appareil SAV pour la climatisation
es
Manual original
Aparato de servicios de
aire acondicionado
it
Istruzioni originali
Attrezzatura per assistenza
climatizzatore
pl
Instrukcja obsługi
Jednostki usługowe AC
pt
Manual original
Aparelho de manutencao de sistemas
de ar condicionado
hu
Üzemeltetési kézikönyv
AC kiszolgáló egységek
M2
HIGH
LOW
P1
T1
T2
EV2
1
2
P
EV1
EV5
EV4
3 F1
C
P2
HP
5
VU2
6
F2
9
4
EV3
7
V1
8
V3 V2V4
V6V5
M1
M3
VU3
VU1
10
______________________________________________________________________________ ACM3000
@
ИНСТРУКЦИИ ПО ЭКСПЛУАТАЦИИ
33
ОГЛАВЛЕНИЕ
ОБОЗНАЧЕНИЯ 35
ОБЩАЯ ИНФОРМАЦИЯ ДЛЯ ПОЛЬЗОВАТЕЛЯ 36
Утилизация прибора 36
Утилизация аккумуляторов 36
1.0 —
ДЛЯ БЕЗОПАСНОЙ ЭКСПЛУАТАЦИИ АППАРАТА ACM3000
37
1.1 —
Для безопасной эксплуатации 37
1.2 —
Устройства для обеспечения безопасности 38
1.3 —
Рабочее окружение 39
2.0 —
ВВЕДЕНИЕ К АППАРАТУ 40
3.0 —
ОПИСАНИЕ АППАРАТА 41
3.1 —
Клавиатура 41
4.0 —
УСТАНОВКА АППАРАТА 42
4.1 —
Распаковка и проверка компонентов 42
4.2 —
Перемещение и хранение аппарата 42
4.3 —
Подготовка к эксплуатации 42
4.4 —
Заполнение баллона 44
5.0 —
ЭКСПЛУАТАЦИЯ АППАРАТА 45
5.1 —
Извлечение хладагента 45
5.2 —
Создание вакуума в системе кондиционера воздуха 46
5.3 —
Впрыск масла и заправка системы кондиционера воздуха 47
5.4 —
Отсоединение от системы кондиционирования 48
5.5 —
Автоматическая функция 48
5.6 —
Функция восстановления 50
5.7 —
Неполная заправка 50
6.0 —
ПОКАЗЫВАЕМЫЕ НА ДИСПЛЕЕ СООБЩЕНИЯ 51
6.1 —
Сообщения о техническом обслуживании 51
6.2 —
Сообщения об ошибках 51
http://www.otctools.ru/