
![]()
|
Contents |
Connections |
Playback |
Settings |
Tips |
Appendix |
Network Audio
Receiver
NR1200
Owner’s Manual
|
Front panel |
Display |
Rear panel |
1 |
Remote |
Index |

|
Contents |
Connections |
Playback |
Settings |
Tips |
Appendix |
|
Accessories |
8 |
||
|
Inserting the batteries |
9 |
||
|
Operating range of the remote control unit |
9 |
||
|
Features |
10 |
||
|
High quality sound |
10 |
||
|
High performance |
10 |
||
|
Easy operation |
14 |
||
|
Part names and functions |
15 |
||
|
Front panel |
15 |
||
|
Display |
18 |
||
|
Rear panel |
19 |
||
|
Remote control unit |
22 |
||
|
Connections |
|||
|
Speaker installation |
26 |
||
|
Connecting speakers |
27 |
||
|
Before connecting speakers |
27 |
||
|
Connecting 2.1-channel speakers |
29 |
||
|
Second pair of speaker |
30 |
||
|
Bi-wiring connection |
31 |
|
Connecting a TV |
33 |
||
|
Connection 1 : TV equipped with an HDMI connector and |
34 |
||
|
compatible with the ARC (Audio Return Channel) |
|||
|
Connection 2 : TV equipped with an HDMI connector and |
35 |
||
|
incompatible with the ARC (Audio Return Channel) |
|||
|
Connecting a playback device |
36 |
||
|
Connecting a set-top box (Satellite tuner/cable TV) |
37 |
||
|
Connecting a DVD player or Blu-ray Disc player |
38 |
||
|
Connecting a turntable |
39 |
||
|
Connecting a USB memory device to the USB port |
40 |
||
|
Connecting a DAB/FM antenna |
41 |
||
|
Connecting to a home network (LAN) |
42 |
||
|
Wired LAN |
42 |
||
|
Wireless LAN |
43 |
||
|
Connecting an external control device |
44 |
||
|
REMOTE CONTROL jacks |
44 |
||
|
Connecting the power cord |
45 |
|
Front panel |
Display |
Rear panel |
2 |
Remote |
Index |

|
Contents |
Connections |
Playback |
Settings |
Tips |
Appendix |
Playback
|
Basic operation |
47 |
|
|
Turning the power on |
47 |
|
|
Selecting the input source |
47 |
|
|
Adjusting the volume |
48 |
|
|
Turning off the sound temporarily (Muting) |
48 |
|
|
Playback a DVD player/Blu-ray Disc player |
48 |
|
|
Playing a USB memory device |
49 |
|
|
Playing files stored on USB memory devices |
50 |
|
|
Listening to music on a Bluetooth device |
53 |
|
|
Playing music from Bluetooth device |
54 |
|
|
Pairing with other Bluetooth devices |
55 |
|
|
Reconnecting to this unit from a Bluetooth device |
56 |
|
Listening to FM/DAB broadcasts |
57 |
||
|
Listening to FM broadcasts |
58 |
||
|
Tuning in by entering the frequency (Direct Tune) |
60 |
||
|
RDS Search |
60 |
||
|
PTY Search |
61 |
||
|
TP Search |
62 |
||
|
Radio text |
62 |
||
|
Changing the tune mode (Tune Mode) |
63 |
||
|
Tuning in to stations and presetting them automatically (Auto |
63 |
||
|
Preset) |
|||
|
Listening to DAB broadcasts |
64 |
||
|
Auto scanning DAB broadcast stations (Auto Scan) |
65 |
||
|
Checking the reception intensity of stations (Tuning Aid) |
66 |
||
|
Setting the order of broadcasting station (Station Order) |
66 |
||
|
Compressing the dynamic range (DRC) |
67 |
||
|
Resetting the DAB settings (DAB Initialize) |
67 |
||
|
Checking the current DAB version (DAB Version) |
68 |
||
|
Presetting the current FM/DAB broadcast station (Preset Memory) |
69 |
||
|
Listening to preset stations |
70 |
||
|
Specify a name for the preset broadcast station (Preset Name) |
70 |
||
|
Skipping preset broadcast stations (Preset Skip) |
71 |
||
|
Cancelling Preset Skip |
72 |
|
Front panel |
Display |
Rear panel |
3 |
Remote |
Index |

|
Contents |
Connections |
Playback |
Settings |
Tips |
Appendix |
|
Listening to Internet Radio |
73 |
|
|
Listening to Internet Radio |
74 |
|
|
Playing back files stored on a PC or NAS |
75 |
|
|
Playing back files stored on a PC or NAS |
76 |
|
|
Getting the HEOS App |
79 |
|
|
HEOS Account |
80 |
|
|
Playing from streaming music services |
81 |
|
|
Listening to the same music in multiple rooms |
84 |
|
|
AirPlay function |
88 |
|
|
Playing songs from your iPhone, iPod touch or iPad |
89 |
|
|
Playing iTunes music with this unit |
89 |
|
|
Play a song from your iPhone, iPod touch or iPad on multiple |
90 |
|
|
synced devices (AirPlay 2) |
||
|
Spotify Connect function |
91 |
|
|
Playing Spotify music with this unit |
91 |
|
|
Convenience functions |
92 |
|
|
Adding to HEOS Favorites |
93 |
|
|
Playing back HEOS Favorites |
93 |
|
|
Deleting a HEOS Favorites |
94 |
|
|
Adjust the sound output balance of left and right speakers |
94 |
|
|
(Balance) |
||
|
Adjust the subwoofer output (Subwoofer) |
95 |
|
|
Adjusting the tone (Tone) |
96 |
|
|
Displaying your desired video during audio playback (Video |
97 |
|
|
Select) |
||
|
Playing the same music in all zones (All Zone Stereo) |
98 |
|
Selecting a sound mode |
99 |
||
|
Selecting a sound mode |
99 |
||
|
Description of sound mode types |
100 |
||
|
HDMI Control function |
101 |
||
|
Setting procedure |
101 |
||
|
Smart Menu function |
102 |
||
|
Sleep timer function |
104 |
||
|
Using the sleep timer |
105 |
||
|
Smart select function |
106 |
||
|
Calling up the settings |
107 |
||
|
Changing the settings |
108 |
||
|
Panel lock function |
109 |
||
|
Disabling all key button operations |
109 |
||
|
Disabling all button operations except VOLUME |
109 |
||
|
Canceling the Panel lock function |
110 |
||
|
Remote lock function |
111 |
||
|
Disabling the sensor function of the remote control unit |
111 |
||
|
Enabling the remote sensor function |
111 |
||
|
Web control function |
112 |
||
|
Controlling the unit from a web control |
112 |
||
|
Playback in ZONE2 (Another room) |
114 |
||
|
Connecting ZONE2 |
114 |
||
|
Playback in ZONE2 |
115 |
|
Front panel |
Display |
Rear panel |
4 |
Remote |
Index |

|
Contents |
Connections |
Playback |
Settings |
Tips |
Appendix |
Settings
|
Menu map |
117 |
|
|
Menu operations |
121 |
|
|
Audio |
122 |
|
|
M-DAX |
122 |
|
|
Audio Delay |
123 |
|
|
Volume |
124 |
|
|
Video |
125 |
|
|
HDMI Setup |
125 |
|
|
On Screen Disp. |
130 |
|
|
4K Signal Format |
131 |
|
|
TV Format |
132 |
|
|
Inputs |
133 |
|
|
Input Assign |
133 |
|
|
Source Rename |
136 |
|
|
Hide Sources |
136 |
|
|
Source Level |
136 |
|
|
Speakers |
137 |
|
|
Subwoofer |
137 |
|
|
Distances |
137 |
|
|
Levels |
138 |
|
|
Speaker Select |
139 |
|
Network |
140 |
||
|
Information |
140 |
||
|
Connection |
140 |
||
|
Wi-Fi Setup |
141 |
||
|
Settings |
142 |
||
|
Network Control |
144 |
||
|
Friendly Name |
144 |
||
|
Diagnostics |
145 |
||
|
AirPlay |
145 |
||
|
HEOS Account |
146 |
||
|
You have not signed in |
146 |
||
|
You have already signed in |
146 |
|
Front panel |
Display |
Rear panel |
5 |
Remote |
Index |

|
Contents |
Connections |
Playback |
Settings |
Tips |
Appendix |
|
General |
147 |
|
|
Language |
147 |
|
|
ECO |
147 |
|
|
ZONE2 Setup |
151 |
|
|
Zone Rename |
152 |
|
|
Smart Sel.Names |
152 |
|
|
Front Display |
152 |
|
|
Firmware |
153 |
|
|
Information |
156 |
|
|
Usage Data |
157 |
|
|
Save & Load |
158 |
|
|
Setup Lock |
158 |
|
|
Reset |
159 |
|
|
Operating CD player with the remote control unit |
160 |
|
|
Limiting the operating zone with the remote control |
161 |
Tips
|
Tips |
163 |
||
|
Troubleshooting |
164 |
||
|
Power does not turn on / Power is turned off |
165 |
||
|
Operations cannot be performed through the remote control unit |
166 |
||
|
Display on this unit shows nothing |
166 |
||
|
No sound comes out |
167 |
||
|
Desired sound does not come out |
168 |
||
|
Sound is interrupted or noise occurs |
169 |
||
|
No video is shown on the TV |
170 |
||
|
The menu screen is not displayed on the TV |
171 |
||
|
The color of the menu screen and operations content displayed |
171 |
||
|
on the television is different from normal |
|||
|
AirPlay cannot be played back |
172 |
||
|
USB memory devices cannot be played back |
173 |
||
|
Bluetooth cannot be played back |
174 |
||
|
The Internet radio cannot be played back |
175 |
||
|
Music files on PC or NAS cannot be played back |
176 |
||
|
Various online services cannot be played |
177 |
||
|
The HDMI Control function does not work |
177 |
||
|
Cannot connect to a wireless LAN network |
178 |
||
|
Update/upgrade error messages |
179 |
||
|
Resetting factory settings |
180 |
||
|
Resetting network settings |
181 |
|
Front panel |
Display |
Rear panel |
6 |
Remote |
Index |

Contents Connections Playback Settings Tips Appendix
Appendix
|
About HDMI |
182 |
|
Playing back a USB memory devices |
185 |
|
Playing back a Bluetooth device |
186 |
|
Playing back a file saved on a PC or NAS |
187 |
|
Playing back Internet Radio |
188 |
|
Personal memory plus function |
188 |
|
Last function memory |
188 |
|
Explanation of terms |
189 |
|
Trademark information |
192 |
|
Specifications |
193 |
|
Index |
198 |
|
License |
200 |
|
Front panel |
Display |
Rear panel |
7 |
Remote |
Index |

|
Contents |
Connections |
Playback |
Settings |
Tips |
Appendix |
Thank you for purchasing this Marantz product.
To ensure proper operation, please read this owner’s manual carefully before using the product.
After reading this manual, be sure to keep it for future reference.
Accessories
Check that the following parts are supplied with the product.
|
Quick Start Guide |
Safety Instructions |
Cautions on Using Batteries |
Notes on radio |
Power cord |
|
DAB/FM indoor antenna |
Remote control unit |
R03/AAA batteries |
External antennas for |
|
|
(RC041SR) |
Bluetooth/wireless |
|||
|
connectivity |
|
Front panel |
Display |
Rear panel |
8 |
Remote |
Index |

|
Contents |
Connections |
Playback |
Settings |
Tips |
Appendix |
Inserting the batteries
1Remove the rear lid in the direction of the arrow and remove it.
2Insert two batteries correctly into the battery compartment as indicated.
Batteries
NOTE
0 To prevent damage or leakage of battery fluid:
0Do not use a new battery together with an old one.
0Do not use two different types of batteries.
0Remove the batteries from the remote control unit if it will not be in use for long periods.
0If the battery fluid should leak, carefully wipe the fluid off the inside of the battery compartment and insert new batteries.
Operating range of the remote control unit
Point the remote control unit at the remote sensor when operating it.
Approx. 7 m
30° 30°
3Put the rear cover back on.
|
Front panel |
Display |
Rear panel |
9 |
Remote |
Index |

|
Contents |
Connections |
Playback |
Settings |
Tips |
Appendix |
Features
High quality sound
0High-power amplifier (100 Watts x 2-channels)
The power amplifier circuit is made with a power transformer and power supply capacitors designed for stereo receivers and uses a discrete part structure, achieving powerful, high-quality sound reproduction.
0Double-differential D/A converter circuit
A double-differential circuit is used to reduce noise, achieving clearer audio playback.
High performance
04K 60Hz input/output supported
When 4K Ultra HD (High Definition) is used, an input/output speed of 60 frames per second (60p) is achieved for video signals. When connected to 4K Ultra HD and 60p video signal input compatible TV, you can enjoy the sense of realism only available from high-definition images, even when viewing fast-moving video.
This unit also supports image processing for 4K 60p, 4:4:4 and 24-bit videos. By processing the video at the original resolution, this unit lets you enjoy flawless, high-definition picture quality.
This unit also supports HDR (High Dynamic Range) and BT.2020 wide color gamut.
0HDCP 2.3
This unit is compatible with HDCP 2.3 copyright protection standard.
|
Front panel |
Display |
Rear panel |
10 |
Remote |
Index |
![]()
|
Contents |
Connections |
Playback |
Settings |
Tips |
Appendix |
0HDMI connections enable connection to various digital AV devices (5 inputs, 1 output)
5  1
1
In Out
This unit is equipped with 5 HDMI inputs and 1 HDMI output enabling connection to various HDMI compatible devices such as Blu-ray Disc players, game consoles and HD video camcorders.
0The device is equipped with a AirPlay® function in addition to network functions such as Internet radio etc. (v p. 88)
You can enjoy a wide variety of content, including listening to Internet Radio, playing audio files stored on your PC.
This unit also supports Apple AirPlay which lets you stream your music library from an iPhone®, iPad®, iPod touch® or iTunes®.
0Supports AirPlay 2® wireless audio
Sync multiple AirPlay 2 compatible devices/speakers for simultaneous playback.
This unit supports AirPlay 2 and requires iOS 11.4 or later.
|
Front panel |
Display |
Rear panel |
11 |
Remote |
Index |

|
Contents |
Connections |
Playback |
Settings |
Tips |
Appendix |
0Playback of DSD and FLAC files via USB and networks
This unit supports the playback of high resolution audio formats such as DSD (5.6 MHz) and FLAC 192 kHz files. It provides high quality playback of high resolution files.
0Wireless connection with Bluetooth devices can be carried out easily (v p. 53)
0 Multi-Room audio (v p. 98)
You can enjoy music simply by connecting wirelessly with your smartphone, tablet, PC, etc.
You can select and play back the respective inputs in MAIN ZONE and ZONE2.
In addition, when the All Zone Stereo function is used, the music being played back in MAIN ZONE can be enjoyed in all the zones at the same time. This is useful when you want to let the BGM propagate throughout the whole house.
0Energy-saving design
This unit is equipped with an ECO Mode function that allows you to enjoy music and movies while reducing the power consumption during use, and also an auto-standby function that automatically turns off the power supply when the unit is not in use. This helps reduce unnecessary power use.
|
Front panel |
Display |
Rear panel |
12 |
Remote |
Index |

|
Contents |
Connections |
Playback |
Settings |
Tips |
Appendix |
0Compatible with the “Marantz 2016 AVR Remote” Appz for performing basic operations of the unit with an iPad, iPhone or Android™ devices (Google, Amazon Kindle Fire)
Along with many new features, the graphics and user interface have been completely overhauled. The new app gives you full control of this unit as well as access to its setup menu for detailed adjustments from your phones or tablets. “Marantz 2016 AVR Remote” App also gives you quick access to the receiver’s status display, option menus, Marantz Blu-ray Disc player control, and online owner’s manual for your convenience.
zDownload the appropriate “Marantz 2016 AVR Remote” App for your iOS or Android devices. This unit needs to be connected to the same LAN or Wi-Fi (wireless LAN) network that the iPad, iPhone or Android™ is connected to.
0HEOS provides streaming music from your favorite online music sources
HEOS wireless multi-room sound system that enables you to enjoy your favorite music anywhere and everywhere around your home. By utilizing your existing home network and the HEOS App (available for iOS, Android and Amazon devices), you can explore, browse, and play music from your own music library or from many online streaming music services.
When multiple HEOS devices are connected to the same network, HEOS devices can be grouped to play back the same music on all devices simultaneously, or different music can be played on each separate HEOS device.
|
Front panel |
Display |
Rear panel |
13 |
Remote |
Index |

|
Contents |
Connections |
Playback |
Settings |
Tips |
Appendix |
Easy operation
0“Setup Assistant” provides easy-to-follow setup instructions
First select the language when prompted. Then simply follow the instructions displayed on the TV screen to set up the speakers, network, etc.
0Easy to use Graphical User Interface
This unit is equipped with a Graphical User Interface for improved operability.
|
Front panel |
Display |
Rear panel |
14 |
Remote |
Index |

|
Contents |
Connections |
Playback |
Settings |
Tips |
Appendix |
Part names and functions
Front panel
|
q w e |
r t |
y |
u |
i |
|
o |
Q0Q1Q2Q3 Q4Q5Q6Q7Q8Q9 W0 |
For details, see the next page.
|
Front panel |
Display |
Rear panel |
15 |
Remote |
Index |

|
Contents |
Connections |
Playback |
Settings |
Tips |
Appendix |
||||
|
qw e |
r t |
y |
u |
i |
C INPUT SELECTOR knob |
||||
|
This selects the input source. (v p. 47) |
|||||||||
|
D M-DAX indicator |
|||||||||
|
This lights when the M-DAX mode is selected. (v p. 122) |
|||||||||
|
E Remote control sensor |
|||||||||
|
This receives signals from the remote control unit. (v p. 9) |
|||||||||
|
o |
F Display |
||||||||
|
This displays various pieces of information. (v p. 18) |
|||||||||
|
A Power operation button (X) |
G PURE DIRECT indicator |
||||||||
|
Used to turn the power of the MAIN ZONE (room where this unit is |
This lights when the “Pure Direct” mode is selected as the sound mode. |
||||||||
|
located) on/off (standby). (v p. 47) |
(v p. 99) |
||||||||
|
B Power indicator |
H VOLUME knob |
||||||||
|
This is lit as follows according to the power status: |
This adjusts the volume level. (v p. 48) |
||||||||
|
0 |
Off: Power on |
I Headphones jack (PHONES) |
|||||||
|
0 |
Red: Normal standby |
This is used to connect headphones. |
|||||||
|
0 |
Orange: |
When the headphones are plugged into this jack, audio will no longer |
|||||||
|
0 |
When “HDMI PassThrough” is set to “On” (v p. 126) |
be output from the connected speakers or from the PRE OUT |
|||||||
|
connectors. |
|||||||||
|
0 |
When “HDMI Control” is set to “On” (v p. 127) |
||||||||
|
NOTE |
|||||||||
|
0 |
When “Network Control” is set to “Always On” (v p. 144) |
||||||||
|
0 To prevent hearing loss, do not raise the volume level excessively when using |
|||||||||
|
headphones. |
|
Front panel |
Display |
Rear panel |
16 |
Remote |
Index |

|
Contents |
Connections |
Playback |
Settings |
Tips |
Appendix |
Q2 Q4 Q7
Q0Q1Q3 Q5Q6Q8Q9W0
J ZONE2 ON/OFF button
This turns the power of ZONE2 (another room) on/off. (v p. 115)
K ZONE2 SOURCE button
This selects the input source for ZONE2. (v p. 115)
L Bass control knob (BASS)
This setting adjusts the volume level for the bass.
M Tuner preset channel buttons
(TUNER PRESET CH +, –)
These select preset broadcast stations. (v p. 70)
N Treble control knob (TREBLE)
This setting adjusts the volume level for the treble.
O DIMMER button
Each press of this switches the brightness of the display. (v p. 152)
P STATUS button
Each press of this switches the status information that is shown on the display.
Q Balance knob (BALANCE)
This adjusts the balance of the volume output from the left and right speakers.
R Speaker switching button (SPEAKERS)
These select the speaker for audio output.
S SOUND MODE button
Switching the sound mode. (v p. 99)
TUSB port (T)
This is used to connect USB storages (such as USB memory devices). (v p. 40)
|
Front panel |
Display |
Rear panel |
17 |
Remote |
Index |

|
Contents |
Connections |
Playback |
Settings |
Tips |
Appendix |
Display
A Input mode indicators
These light according to the audio input mode settings of each input source. (v p. 135)
B Tuner reception mode indicators
These light up according to the reception conditions when the input source is set to “Tuner”.
TUNED: Lights up when the broadcast is properly tuned in. STEREO: Lights up when receiving FM stereo broadcasts. RDS: Lights up when receiving RDS broadcasts.
C Sleep timer indicator
This lights when the sleep mode is selected. (v p. 104)
D Volume indicator
E MUTE indicator
This blinks while the sound is muted. (v p. 48)
F Information display
The input source name, sound mode, setting values and other information are displayed here.
G Input signal indicators
The respective indicator will light corresponding to the input signal. (v p. 135)
H ZONE2 indicator
This lights up when ZONE2 (another room) power is turned on. (v p. 115)
|
Front panel |
Display |
Rear panel |
18 |
Remote |
Index |

|
Contents |
Connections |
Playback |
Settings |
Tips |
Appendix |
Rear panel
|
q w e r |
t |
q |
||||||||||||||||||||||||||||||||||||||||||
|
y |
u |
i |
o |
Q0 |
Q1 |
Q2 |
For details, see the next page.
|
Front panel |
Display |
Rear panel |
19 |
Remote |
Index |

|
Contents |
Connections |
Playback |
Settings |
Tips |
Appendix |
|
q we r |
t |
q |
|||||||||||||||||||||||||||||||||||||
A Bluetooth/wireless LAN antenna connectors
Used to connect the included external antennas for Bluetooth/wireless connectivity when connecting to a network via wireless LAN, or when connecting to a handheld device via Bluetooth. (v p. 43)
A Place the external antennas for Bluetooth/wireless connectivity evenly over the screw terminal of rear.
B Turn clockwise until the antennas is fully connected. C Rotate the antenna upwards for best reception.
q w e
B FLASHER IN jack
Used when using a control BOX or other such control devices to control this unit.
C Digital audio connectors (DIGITAL AUDIO)
Used to connect devices equipped with digital audio connectors.
0“Connection 2 : TV equipped with an HDMI connector and incompatible with the ARC (Audio Return Channel)” (v p. 35)
D NETWORK connector
Used to connect to a LAN cable when connecting to a wired LAN network. (v p. 42)
E HDMI connectors
Used to connect devices equipped with HDMI connectors.
0“Connection 1 : TV equipped with an HDMI connector and compatible with the ARC (Audio Return Channel)” (v p. 34)
0“Connection 2 : TV equipped with an HDMI connector and incompatible with the ARC (Audio Return Channel)” (v p. 35)
0“Connecting a set-top box (Satellite tuner/cable TV)” (v p. 37)
0“Connecting a DVD player or Blu-ray Disc player” (v p. 38)
|
20 |
|||||||||||||||||||||||
|
Front panel |
Display |
Rear panel |
Remote |
Index |
![]()
|
Contents |
Connections |
Playback |
Settings |
Tips |
Appendix |
|
Q2 |
||||||||||||||||||||||||||||||||||
|
y u i oQ0 |
Q1 |
F SIGNAL GND terminal
Used to connect a ground wire for the turntable. (v p. 39)
G DAB/FM antenna terminal (ANTENNA)
Used to connect a DAB/FM antenna. (v p. 41)
H Analog audio connectors (AUDIO)
Used to connect devices equipped with analog audio connectors.
0“Connecting a set-top box (Satellite tuner/cable TV)” (v p. 37)
0“Connecting a DVD player or Blu-ray Disc player” (v p. 38)
0“Connecting a turntable” (v p. 39)
I PRE OUT connectors
Used to connect a subwoofer with built-in amplifier or a power amplifier for ZONE2.
0“Connecting the subwoofer” (v p. 28)
0“Connecting ZONE2” (v p. 114)
J REMOTE CONTROL jacks
Used to connect infrared receivers/transmitters in order to operate this unit and external devices from a different room. (v p. 44)
K Speaker terminals (SPEAKERS)
Used to connect speakers. (v p. 27)
L AC inlet (AC IN)
Used to connect the power cord. (v p. 45)
NOTE
0Do not touch the inner pins of the connectors on the rear panel. Electrostatic discharge may cause permanent damage to the unit.
|
Front panel |
Display |
Rear panel |
21 |
Remote |
Index |

|
Contents |
Connections |
Playback |
Settings |
Tips |
Appendix |
A ZONE SELECT buttons
These switch the zone (MAIN ZONE, ZONE2) that is operated through the remote control unit.
0“Playback in ZONE2” (v p. 115)
0“Menu operations” (v p. 121)
B Input source select buttons
These selects the input source.
0“Selecting the input source” (v p. 47)
0“Playback in ZONE2” (v p. 115)
C Channel/page search buttons (CH/PAGE df)
These select radio stations registered to presets or switch pages. (v p. 70)
D MUTE button (:)
This mutes the output audio.
0“Turning off the sound temporarily (Muting)” (v p. 48)
0“Turning off the sound temporarily (Muting) (ZONE2)” (v p. 116)
E Information button (INFO)
This displays the status information on the TV screen. (v p. 157)
F Cursor buttons (uio p)
These select items.
|
Front panel |
Display |
Rear panel |
22 |
Remote |
Index |

|
Contents |
Connections |
Playback |
Settings |
Tips |
Appendix |
G BACK button
This returns to the previous screen.
H System buttons
These perform playback related operations.
Tuning up / Tuning down buttons (TUNE +, –)
These operate the tuner. (v p. 58)
Reception band select button (BAND)
This switches the reception band. (v p. 59, 64)
Tune mode select button (MODE)
This switches the tuning mode. (v p. 63)
Preset memory button (MEMORY)
The current broadcast station that is preset. (v p. 69) Operating CD player. (v p. 160)
I SMART SELECT buttons (1 – 4)
These call up settings registered to each button, such as input source, volume level and sound mode settings. (v p. 106)
J Speaker switching button (SPEAKERS)
These select the speaker for audio output.
K SLEEP button
This sets the sleep timer. (v p. 104)
L Remote control signal transmitter
This transmits signals from the remote control unit. (v p. 9)
|
Front panel |
Display |
Rear panel |
23 |
Remote |
Index |

|
Contents |
Connections |
Playback |
Settings |
Tips |
Appendix |
M POWER button (X)
This turns the power on/off.
0“Turning the power on” (v p. 47)
0“Playback in ZONE2” (v p. 115)
NECO Mode button (G)
This switches to ECO Mode. (v p. 147)
O VOLUME buttons (df)
These adjusts the volume level.
0“Adjusting the volume” (v p. 48)
0“Adjusting the volume (ZONE2)” (v p. 116)
P OPTION button
This displays the option menu on the TV screen.
Q ENTER button
This determines the selection.
R SETUP button
This displays the menu on the TV screen. (v p. 121)
S SOUND MODE button
These select the sound mode. (v p. 99)
T DIMMER button
Each press of this switches the brightness of the display. (v p. 152)
|
Front panel |
Display |
Rear panel |
24 |
Remote |
Index |

|
Contents |
Connections |
Playback |
Settings |
Tips |
Appendix |
o Contents
|
Speaker installation |
26 |
|
Connecting speakers |
27 |
|
Connecting a TV |
33 |
|
Connecting a playback device |
36 |
|
Connecting a USB memory device to the USB port |
40 |
|
Connecting a DAB/FM antenna |
41 |
|
Connecting to a home network (LAN) |
42 |
|
Connecting an external control device |
44 |
|
Connecting the power cord |
45 |
NOTE
0Do not plug in the power cord until all connections have been completed. However, when the “Setup Assistant” is running, follow the instructions in the “Setup Assistant” (page 9 in the separate “Quick Start Guide”) screen for making connections. (During “Setup Assistant” operation, the input/output connectors do not conduct current.)
0Do not bundle power cords together with connection cables. Doing so can result in noise.
o Cables used for connections
Provide necessary cables according to the devices you want to connect.
Speaker cable
Subwoofer cable
HDMI cable
Coaxial digital cable
Optical cable
|
Audio cable |
L |
L |
|
|
R |
R |
||
LAN cable
|
Front panel |
Display |
Rear panel |
25 |
Remote |
Index |

|
Contents |
Connections |
Playback |
Settings |
Tips |
Appendix |
Speaker installation
Determine the speaker system depending on the number of speakers you are using and install each speaker and subwoofer in the room.
Speaker installation is explained using this example of a typical installation.
 SW2
SW2
SW1
|
L/R |
Place the LEFT and RIGHT speakers an equal |
|
|
distance from the main listening position. The |
||
|
(LEFT/RIGHT |
||
|
distance between each speaker and your TV |
||
|
speaker): |
||
|
should also be the same. |
||
|
SW 1/2 |
Place the SUBWOOFER at a convenient location |
|
|
near the speakers. If you have two subwoofers, |
||
|
(Subwoofer): |
place them asymmetrically across the front of |
|
|
your room. |
|
Front panel |
Display |
Rear panel |
26 |
Remote |
Index |

|
Contents |
Connections |
Playback |
Settings |
Tips |
Appendix |
Connecting speakers
Here we connect the speakers in the room to this unit.
Before connecting speakers
NOTE
0Disconnect this unit’s power plug from the power outlet before connecting the speakers. Also, turn off the subwoofer.
0Connect so that the speaker cable core wires do not protrude from the speaker terminal. The protection circuit may be activated if the core wires touch the rear panel or if the + and — sides touch each other. (“Protection circuit” (v p. 191))
0Never touch the speaker terminals while the power cord is connected. Doing so could result in electric shock. When the “Setup Assistant” (page 9 in the separate “Quick Start Guide”) is running, follow the instructions in the “Setup Assistant” screen for making connections. (Power is not supplied to the speaker terminals while the “Setup Assistant” is running.)
0Use speakers with an impedance of 4 – 16 Ω/ohms.
NOTE
0Carry out the following settings when using a speaker with an impedance of 4 – 6 Ω/ohms.
1.Press and hold the main unit’s ZONE2 SOURCE and STATUS at the same time for at least 3 seconds.
“V.Format:< PAL>” appears on the display.
2.Press DIMMER on the main unit three times. “Sp.Imp.:<8ohms>” appears on the display.
3.Press ZONE2 SOURCE or TUNER PRESET CH — on the main unit to select the impedance.
|
8ohms |
Select when the impedance for all of the |
||
|
(Default): |
connected speakers is 8 |
Ω/ohms or over. |
|
|
6ohms: |
Select when the impedance for any of the |
||
|
connected speakers is 6 |
Ω/ohms. |
||
|
4ohms: |
Select when the impedance for any of the |
||
|
connected speakers is 4 |
Ω/ohms. |
||
4. Press the main unit’s STATUS to complete the setting.
|
Front panel |
Display |
Rear panel |
27 |
Remote |
Index |

|
Contents |
Connections |
Playback |
Settings |
Tips |
Appendix |
o Connecting the speaker cables
Carefully check the left (L) and right (R) channels and + (red) and – (black) polarities on the speakers being connected to this unit, and be sure to connect the channels and polarities correctly.
1Peel off about 10 mm of sheathing from the tip of the speaker cable, then either twist the core wire tightly or terminate it.
o Connecting the subwoofer
Use a subwoofer cable to connect the subwoofer. Two subwoofers can be connected to this unit.
The same signal is output from the respective subwoofer terminals.
|
2 Turn the speaker terminal counterclockwise to loosen it. |
SW1 |
SW2 |
3Insert the speaker cable’s core wire to the hilt into the speaker terminal.
4Turn the speaker terminal clockwise to tighten it.
|
Front panel |
Display |
Rear panel |
28 |
Remote |
Index |

|
Contents |
Connections |
Playback |
Settings |
Tips |
Appendix |
Connecting 2.1-channel speakers
This serves as a basic 2.1-channel surround system.
L  R
R
SW
|
Front panel |
Display |
Rear panel |
29 |
Remote |
Index |

|
Contents |
Connections |
Playback |
Settings |
Tips |
Appendix |
Second pair of speaker
This system enables switching playback between speakers A and B as desired.
|
L |
L |
R |
R |
||||||||||||||||||||||||||||||||||||||
|
(B) |
(A) |
(A) |
(B) |
||||||||||||||||||||||||||||||||||||||
SW
|
SW |
R (A) |
L (A) |
R (B) |
L (B) |
CAUTION:
0Set speaker impedance to “4ohms” before performing simultaneous playback from speakers A and B. (v p. 27)
|
Front panel |
Display |
Rear panel |
30 |
Remote |
Index |
![]()
|
Contents |
Connections |
Playback |
Settings |
Tips |
Appendix |
Bi-wiring connection
This connection limits the effects of signal interference between the high range speakers (tweeters) and low range speakers (woofers), allowing you to enjoy high quality playback.
When bi-wiring with bi-wireable speakers, connect the mid and high range terminals to SPEAKERS A (or B), the low range terminals to SPEAKERS B (or A).
|
Speaker |
Speaker |
||||||||||||||||||
|
(R) |
(L) |
|
Remove shorting bar |
Remove shorting bar |
Remove shorting bar |
Remove shorting bar |
0 |
When using bi-wiring connections, set the speaker to |
|
“A+B” to output audio from both SPEAKERS A and |
SPEAKERS B speaker terminals. (v p. 139)
|
Front panel |
Display |
Rear panel |
31 |
Remote |
Index |

|
Contents |
Connections |
Playback |
Settings |
Tips |
Appendix |
o Connecting a front speaker that uses a power amplifier
This unit supports connection of a front speaker that uses an external power amplifier to increase its output. Connect a separately sold power amplifier to the PRE OUT (FL/FR) connector of this unit.
Power amplifier
AUDIO
FRONT
L R
L R
L R
|
32 |
|||||||||||||||||||||||||||||||||||||||||||
|
Front panel |
Display |
Rear panel |
Remote |
Index |

|
Contents |
Connections |
Playback |
Settings |
Tips |
Appendix |
Connecting a TV
Connect a TV to this unit so that the input video is output to the TV. You can also enjoy audio from the TV on this unit. How to connect a TV depends on the connectors and functions equipped on the TV.
ARC (Audio Return Channel) function plays TV audio on this unit by sending the TV audio signal to this unit via HDMI cable.
Is the TV equipped with an HDMI connector?
Yes
Is the TV compatible with the ARC (Audio Return Channel) ?
“Connection 1 : TV equipped with an HDMI connector and compatible with the ARC (Audio Return Channel)” (v p. 34)
“Connection 2 : TV equipped with an HDMI connector and incompatible with the ARC (Audio Return Channel)” (v p. 35)
You cannot connect the TV to this unit.
|
Front panel |
Display |
Rear panel |
33 |
Remote |
Index |

|
Contents |
Connections |
Playback |
Settings |
Tips |
Appendix |
Connection 1 : TV equipped with an HDMI connector and compatible with the ARC (Audio Return Channel)
Use an HDMI cable to connect a TV that is compatible with the ARC function to this unit.
Set “HDMI Control” to “On” when using a TV that supports the ARC function. (v p. 127)
TV
HDMI
IN
(ARC)
0 Only the PCM 2-channel setting can be used to play sound from a TV via the ARC function. Set “PCM 2ch” as the audio format in the TV settings.
|
Front panel |
Display |
Rear panel |
34 |
Remote |
Index |

|
Contents |
Connections |
Playback |
Settings |
Tips |
Appendix |
Connection 2 : TV equipped with an HDMI connector and incompatible with the ARC (Audio Return Channel)
Use an HDMI cable to connect the TV to this unit.
To listen to audio from TV on this unit, use an optical cable to connect the TV to this unit.
TV
OUT IN
OPTICAL HDMI
OUT IN
0 Only the PCM 2-channel setting can be used to play sound from a TV via a digital signal. Set “PCM 2ch” as the audio format in the TV settings.
|
Front panel |
Display |
Rear panel |
35 |
Remote |
Index |

|
Contents |
Connections |
Playback |
Settings |
Tips |
Appendix |
Connecting a playback device
This unit is equipped with one type of video input connectors (HDMI) and three types of audio input connectors (HDMI, digital audio and audio). Select input connectors on this unit according to the connectors equipped on the device you want to connect.
If the device connected to this unit is equipped with an HDMI connector, it is recommended to use HDMI connections. In the HDMI connection, audio and video signals can be transmitted through a single HDMI cable.
0“Connecting a set-top box (Satellite tuner/cable TV)” (v p. 37)
0“Connecting a DVD player or Blu-ray Disc player” (v p. 38)
0“Connecting a turntable” (v p. 39)
0Connect devices to this unit as indicated by the input sources printed on the audio/video input connectors of this unit.
0The source that is assigned to the HDMI IN, DIGITAL AUDIO IN and AUDIO IN connectors can be changed. See “Input Assign” on how to change the input source assigned to the input connectors. (v p. 133)
0To play back audio signals that are input to this unit on a TV connected via HDMI, set in the menu “HDMI Audio Out” to “TV”. (v p. 125)
0To enjoy content that is copyright protected by HDCP 2.2 or HDCP 2.3, use a playback device and TV compatible with HDCP 2.2 or HDCP 2.3.
|
Front panel |
Display |
Rear panel |
36 |
Remote |
Index |

|
Contents |
Connections |
Playback |
Settings |
Tips |
Appendix |
Connecting a set-top box (Satellite tuner/cable TV)
This explanation uses the connection with a satellite tuner/cable TV STB as an example.
Select the input connectors on this unit to match the connectors on the device that you want to connect to.
|
(HDMI incompatible device) |
Satellite tuner / |
|||||||||||||||||||||||||||||||||||||||
|
Satellite tuner / |
||||||||||||||||||||||||||||||||||||||||
|
Cable TV |
Cable TV |
|||||||||||||||||||||||||||||||||||||||
|
AUDIO |
||||||||||||||||||||||||||||||||||||||||
|
AUDIO |
||||||||||||||||||||||||||||||||||||||||
|
OUT |
HDMI |
|||||||||||||||||||||||||||||||||||||||
|
R |
L |
OUT |
||||||||||||||||||||||||||||||||||||||
|
R |
L |
|||||||||||||||||||||||||||||||||||||||
|
R |
L |
|||||||||||||||||||||||||||||||||||||||
|
Front panel |
Display |
Rear panel |
37 |
Remote |
Index |

|
Contents |
Connections |
Playback |
Settings |
Tips |
Appendix |
Connecting a DVD player or Blu-ray Disc player
This explanation uses the connection with a DVD player or Blu-ray Disc player as an example.
|
(HDMI incompatible device) |
DVD player / |
|||||||||||||||||||||||||||||||||||||||||
|
DVD player / |
||||||||||||||||||||||||||||||||||||||||||
|
Blu-ray Disc player |
Blu-ray Disc player |
|||||||||||||||||||||||||||||||||||||||||
|
AUDIO |
||||||||||||||||||||||||||||||||||||||||||
|
AUDIO |
||||||||||||||||||||||||||||||||||||||||||
|
OUT |
HDMI |
|||||||||||||||||||||||||||||||||||||||||
|
R |
L |
OUT |
||||||||||||||||||||||||||||||||||||||||
|
R |
L |
|||||||||||||||||||||||||||||||||||||||||
|
R |
L |
|||||||||||||||||||||||||||||||||||||||||
|
Front panel |
Display |
Rear panel |
38 |
Remote |
Index |

|
Contents |
Connections |
Playback |
Settings |
Tips |
Appendix |
Connecting a turntable
This unit is compatible with turntables equipped with a moving magnet (MM) phono cartridge. When you connect to a turntable with a low output moving coil (MC) cartridge, use a commercially available MC head amp or a step-up transformer.
If you set this unit’s input source to “Phono” and you accidentally increase the volume without having a turntable connected, you may hear a hum noise from the speakers.
Turntable (MM cartridge)
|
GND |
AUDIO |
|||||||||||
|
OUT |
||||||||||||
|
L |
R |
|||||||||||
NOTE
0 The earth terminal (SIGNAL GND) of this unit is not for safety grounding purposes. If this terminal is connected when there is a lot of noise, the noise can be reduced. Note that depending on the turntable, connecting the ground line may have the reverse effect of increasing noise. In this case, it is not necessary to connect the ground line.
|
Front panel |
Display |
Rear panel |
39 |
Remote |
Index |

|
Contents |
Connections |
Playback |
Settings |
Tips |
Appendix |
Connecting a USB memory device to the USB port
For operating instructions see “Playing a USB memory device” (v p. 49).
USB memory device
0Marantz does not guarantee that all USB memory devices will operate or receive power. When using a portable USB hard disk drive (HDD) which came with an AC adapter, use that device’s supplied AC adapter.
NOTE
0USB memory devices will not work via a USB hub.
0It is not possible to use this unit by connecting the unit’s USB port to a PC via a USB cable.
0Do not use an extension cable when connecting a USB memory device. This may cause radio interference with other devices.
|
Front panel |
Display |
Rear panel |
40 |
Remote |
Index |
![]()
|
Contents |
Connections |
Playback |
Settings |
Tips |
Appendix |
Connecting a DAB/FM antenna
After connecting the antenna and receiving a DAB signal, find the position at which the reception is best using the “Tuning Aid” function, then fix the antenna with tape at that position. Please follow the instruction “Checking the reception intensity of stations (Tuning Aid)” (v p. 66) to achieve the best result.
DAB/FM indoor antenna (supplied)
0For best results with the supplied indoor antenna, orient the antenna along a wall such that it is stretched out horizontally and parallel to the floor (but above the floor), and then fasten the two end tabs to the wall. This type of antenna is directional and best results will be obtained when it is correctly oriented toward the transmitting location.
0For example, if the transmission tower is to the north, then the two ends of the antenna (with the tabs) should be stretched toward west and east.
0If you are unable to receive a good broadcast signal, we recommend installing an outdoor antenna. For details, inquire at the retail store where you purchased the unit.
|
41 |
|||||||||||||||||||||
|
Front panel |
Display |
Rear panel |
Remote |
Index |

|
Contents |
Connections |
Playback |
Settings |
Tips |
Appendix |
Connecting to a home network (LAN)
This unit can connect to a network using a wired LAN or wireless LAN.
You can connect this unit to your home network (LAN) to enable various types of playback and operations as described below.
0Playback of network audio such as Internet Radio and from your media server(s)
0Playback of streaming music services
0Using the Apple AirPlay function
0Operation on this unit via the network
0Operation with the HEOS wireless multi-room sound system
0Firmware Update
For connections to the Internet, contact an ISP (Internet Service Provider) or a computer shop.
Wired LAN
To make connections via wired LAN, use a LAN cable to connect the router to this unit as shown in the figure below.
|
NAS |
|
|
PC |
(Network Attached |
|
Storage) |
 Modem
Modem
Internet
|
To WAN side |
||
|
To LAN port |
LAN port / |
LAN port / |
|
To LAN port |
||
|
Ethernet |
Ethernet |
|
|
connector |
connector |
Router
|
42 |
||||||||||||||||||||||||||||||
|
Front panel |
Display |
Rear panel |
Remote |
Index |

|
Contents |
Connections |
Playback |
Settings |
Tips |
Appendix |
Wireless LAN
When connecting to the network via wireless LAN, connect the external antennas for Bluetooth/wireless connectivity connection to the rear panel and stand them upright.
See “Wi-Fi Setup” on how to connect to a wireless LAN router. (v p. 141)
Internet
 Modem
Modem
To WAN side
Router with access point
0When using this unit, we recommend you use a router equipped with the following functions:
0Built-in DHCP server
This function automatically assigns IP addresses on the LAN.
0Built-in 100BASE-TX switch
When connecting multiple devices, we recommend a switching hub with a speed of 100 Mbps or greater.
0Only use a shielded STP or ScTP LAN cable (readily available at electronics stores). (CAT-5 or greater recommended)
0The normal shielded-type LAN cable is recommended.
If a flat-type cable or unshielded-type cable is used, other devices could be affected by noise.
0When using this unit connected to a network with no DHCP function, configure the IP address, etc. in “Network”. (v p. 140)
NOTE
0The types of routers that can be used depend on the ISP. Contact your ISP or a computer shop for details.
0This unit is not compatible with PPPoE. A PPPoE compatible router is required if your contracted line is not set using PPPoE.
0Do not connect a NETWORK connector directly to the LAN port / Ethernet connector on your computer.
0Various online services may be discontinued without prior notice.
|
43 |
|||||||||||||||||||||||||
|
Front panel |
Display |
Rear panel |
Remote |
Index |

|
Contents |
Connections |
Playback |
Settings |
Tips |
Appendix |
Connecting an external control device
REMOTE CONTROL jacks
oPerforming operations by RC on this unit without visual contact
You can connect an external IR receiver to the REMOTE CONTROL connectors to perform operations on this unit with the supplied remote control unit without visual contact. This might be necessary if the unit is hidden in a cupboard or corner, so you can’t directly point with the remote control unit to the device.
To do this, disable the remote control signal receiving function (“Remote lock function” (v p. 111)).
IR receiver
RC OUT
o Remotely connecting Marantz devices
When you are using a Marantz device other than this unit that supports remote connection, you can transmit remote control signals just by connecting the device to the REMOTE CONTROL IN/OUT connector with a monaural cable.
Set the remote control switch located on the rear panel of the connected audio component to “EXTERNAL” or “EXT.” to use this feature.
NOTE
0When the remote control signal receiving function is disabled, you can not perform operations with the remote control unit.
|
Front panel |
Display |
Rear panel |
44 |
Remote |
Index |

|
Contents |
Connections |
Playback |
Settings |
Tips |
Appendix |
Connecting the power cord
After completing all the connections, insert the power plug into the power outlet.
Power cord (supplied)
To household power outlet (AC 230 V, 50/60 Hz)
|
Front panel |
Display |
Rear panel |
45 |
Remote |
Index |

|
Contents |
Connections |
Playback |
Settings |
Tips |
Appendix |
o Contents
Basic operation
|
Turning the power on |
47 |
|
Selecting the input source |
47 |
|
Adjusting the volume |
48 |
|
Turning off the sound temporarily (Muting) |
48 |
|
Selecting a sound mode |
99 |
Playback a device
|
Playing a DVD player/Blu-ray Disc player |
48 |
|
Playing a USB memory device |
49 |
|
Listening to music on a Bluetooth device |
53 |
|
Listening to FM/DAB broadcasts |
57 |
Playback network audio/service
|
Listening to Internet Radio |
73 |
|
Playing back files stored on a PC or NAS |
75 |
|
Getting the HEOS App |
79 |
|
AirPlay function |
88 |
|
Spotify Connect function |
91 |
Convenience functions
|
Convenience functions |
92 |
|
HDMI Control function |
101 |
|
Smart Menu function |
102 |
|
Sleep timer function |
104 |
|
Smart select function |
106 |
|
Panel lock function |
109 |
|
Remote lock function |
111 |
Other functions
|
Web control function |
112 |
|
Playback in ZONE2 (Another room) |
114 |
|
Front panel |
Display |
Rear panel |
46 |
Remote |
Index |

|
Contents |
Connections |
Playback |
Settings |
Tips |
Appendix |
Basic operation
Turning the power on
1Press POWER X to turn on power to the unit.
0You can press the input source select button when the unit is in standby mode to turn on the power.
0You can also switch the power to standby by pressing X on the main unit.
Selecting the input source
1Press the input source select button to be played back.
The desired input source can be selected directly.
0You can also select the input source by turning INPUT SELECTOR on the main unit.
|
Front panel |
Display |
Rear panel |
47 |
Remote |
Index |

|
Contents |
Connections |
Playback |
Settings |
Tips |
Appendix |
Adjusting the volume
1Use VOLUME df to adjust the volume.
0The variable range differs according to the input signal and channel level setting.
0You can also adjust the master volume by turning VOLUME on the main unit.
Turning off the sound temporarily (Muting)
|
1 |
Press MUTE :. |
|
|
0 |
MUTE indicator on the display flashes. |
|
|
0 |
: appears on the TV screen. |
0The sound is reduced to the level set at “Mute Level” in the menu. (v p. 124)
0To cancel mute, either adjust the sound volume or press MUTE : again.
Playback a DVD player/Blu-ray Disc player
The following describes the procedure for playing DVD player/Blu-ray Disc player.
1Prepare for playback.
A Turn on the power of the TV, subwoofer and player. B Change the TV input to the input of this unit.
2Press POWER X to turn on power to the unit.
3Press Blu-ray/DVD to switch an input source for a player used for playback.
4Play the DVD player or Blu-ray Disc player.
0This unit supports analog audio signals and PCM 2-channel signals. To play DVDs and Blu-ray Discs, set “PCM 2ch” as the audio format in the audio device settings.
|
Front panel |
Display |
Rear panel |
48 |
Remote |
Index |

|
Contents |
Connections |
Playback |
Settings |
Tips |
Appendix |
Playing a USB memory device
0Playing back music files stored on a USB memory device.
0Only USB memory devices conforming to mass storage class standards can be played on this unit.
0This unit is compatible with USB memory devices in “FAT32” or “NTFS” format.
0The audio format types and specifications supported by this unit for playback are as follows.
See “Playing back a USB memory devices” (v p. 185) for details.
0WMA
0MP3
0WAV
0MPEG-4 AAC
0FLAC
0Apple Lossless
0DSD
|
Front panel |
Display |
Rear panel |
49 |
Remote |
Index |

|
Contents |
Connections |
Playback |
Settings |
Tips |
Appendix |
Playing files stored on USB memory devices
1Insert a “FAT32” or “NTFS” formatted USB memory device into the USB port.
2Press USB to switch the input source to “USB”.
3Select the name of this unit.
4Browse the music on your USB memory device and select something to play.
0When you select something to play you will be asked how you want to queue up your music.
|
Play Now: |
Inserts the item into the queue after the |
|
currently playing track and plays the |
|
|
selected item immediately. |
|
|
Play Now & Replace |
Clears the queue and plays the |
|
Queue: |
selected item immediately. |
|
Play Next: |
Inserts the item into the queue after the |
|
current song and plays it when the |
|
|
current song ends. |
|
|
Add to End of Queue: |
Adds the item to the end of the queue. |
USB Music — Nature
Naure 01
Play Now
Artists
Play Now & Replace Queue
|
Artists |
|||
|
Play Next |
|||
|
Artists |
|||
|
Add to End of Queue |
|||
|
Cancel |
Artists |
||
Nature 05
Various Artists
|
Front panel |
Display |
Rear panel |
50 |
Remote |
Index |
![]()
Русский
- Bedienungsanleitung Marantz NR1200
- Marantz NR1200 User Manual
- Manual Usuario Marantz NR1200
- Mode d’emploi Marantz NR1200
- Istruzioni Marantz NR1200
- инструкция Marantz NR1200
- Marantz NR1200の取扱説明書
- Handleiding Marantz NR1200
- Manual de uso Marantz NR1200
Вам нужна инструкция? Мы поможем Вам ее найти и сэкономить Ваше время.
- 211 stron
- 11.43 mb
Изделие Marantz NR1200, а также другие, которыми Вы пользуетесь ежедневно, наверняка вы получили в комплекте с инструкцией обслуживания. Из опыта наших пользователей мы знаем, что большинство из Вас не уделили этому особого внимания. Большая часть инструкций, сразу же после покупки попадает в корзину для мусора вместе с коробкой — это ошибка. Ознакомьтесь с информацией, касающейся инструкции Marantz NR1200, которая поможет Вам в будущем сэкономить нервы и избежать головной боли.
Важная подсказка — не забывайте хотя бы раз прочитать инструкцию Marantz NR1200
Если вы не хотите каждый раз читать информационные брошюры, касающиеся, тех или Marantz NR1200 иных изделий, достаточно, прочитать их раз — сразу же после покупки устройства. Вы получите основное знания, касающиеся поддержания изделия Marantz NR1200 в хорошем эксплуатационном состоянии, так, чтобы без проблем достигнуть его планируемого цикла работы. Затем инструкцию можно отложить на полку и вернуться к ней только в случае, если вы не уверены, правильно ли проводится техобслуживание изделия. Правильный уход является необходимым элементом Вашего удовольствия Marantz NR1200.
Раз в году пересмотрите шкафчик, в котором держите инструкции для всех устройств, — выбросите те, которыми вы уже не пользуетесься. Это поможет Вам сохранять порядок в своей домашней базе инструкций обслуживания.
Summary of Contents for Marantz NR1200
Что находится в инструкции Marantz NR1200? Почему стоит ее прочитать?
- Гарантия и подробности, касающиеся техобслуживания изделия
Хорошей идеей будет прикрепить чек к странице инструкции. Если что-то плохое случится во время использования Marantz NR1200, у вас будет комплект документов, необходимый для гарантийного ремонта. В этой части инструкции вы найдете информацию об авторизованных сервисных центрахMarantz NR1200 а также, как самостоятельно правильно ухаживать за оборудованием — так, чтобы не потерять гарантийных прав. - Указания по монтажу и Setup
Не терять нервов и времени на самостоятельную попытку установки и первого запуска изделия. Воспользуйтесь рекомендациями производителя Marantz NR1200 чтобы правильно запустить изделие, без лишнего риска повреждения оборудования. - Информация, касающаяся дополнительных запчастей (входящих в комплект а также являющихся опцией)
Пересматривая эту часть документа вы сможете проверить, доставлен ли ваш Marantz NR1200 с полним комплектом аксессуаров. Вы также сможете узнать, какие дополнительные запчасти или аксессуары для Marantz NR1200 Вы сможете найти и докупить к своему устройству. - Troubleshooting
Самые частые проблемы, касающиеся Marantz NR1200 и методы их решения. Это очень полезная часть руководства по обслуживанию — она позволит Вам сэкономить много времени на поиск решений. 90% проблем с Marantz NR1200 повторяется у многих пользователей. - Требования, касающиеся питания и энергетический класс
Информация, касающаяся количества потребляемой энергии, а также рекомендации, касающиеся установки и питания Marantz NR1200. Прочитайте, чтобы оптимально пользоваться Marantz NR1200 и не использовать большего количества ресурсов, нежели это необходимо для правильной работы изделия. - Специальные функции Marantz NR1200
Здесь вы можешь узнать, как персонализировать изделие Marantz NR1200. Вы узнаете, какие дополнительные функции могут помочь Вам удобно использовать продукт Marantz NR1200 а также, какие функции Вашего устройства оптимальны для выполнения конкретной деятельности.
Как видите в инструкции вы найдете информацию, которая реально поможет Вам в использовании Вашего изделия. Стоит с ней ознакомиться, чтобы избежать разочарований, возникающих из более короткого, нежели предусматривалось, периода исправности изделия Marantz NR1200. Если все же вы не хотите копить инструкции в своем доме, наш сайт поможет Вам в этом — вы должны найти у нас руководство по обслуживанию большинства из своих устройств, а также Marantz NR1200.
Комментарии (0)
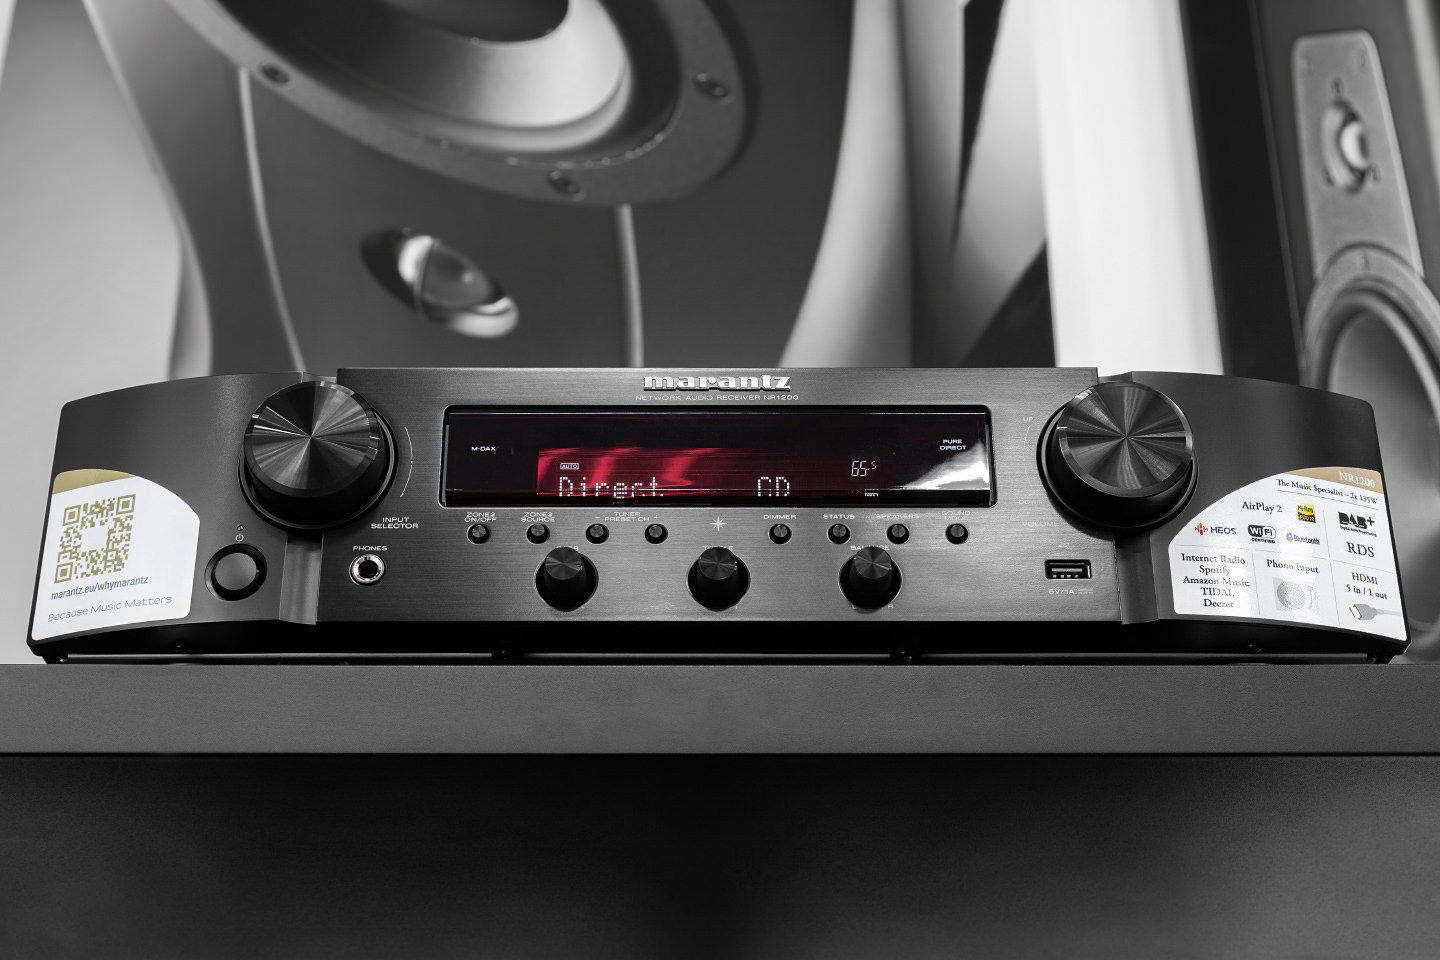
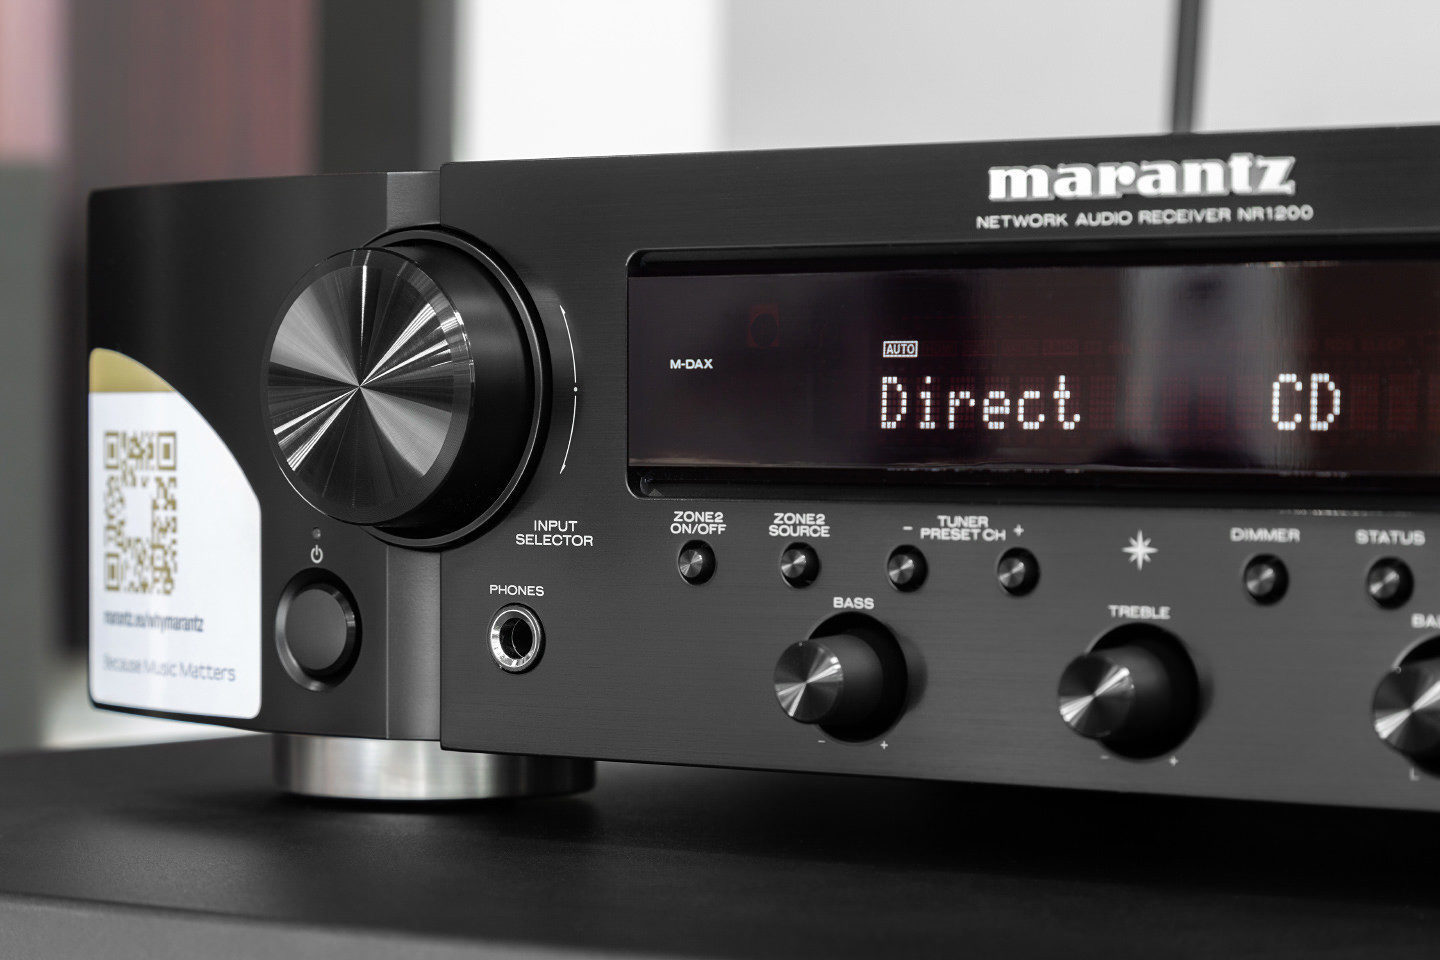
Так уж повелось, что в центре стереосистемы многих современных квартир часто находится место телевизору. Между прочим, если посмотреть качественный блокбастер с выводом звука на хорошие колонки через приличный усилитель, результат получится очень даже впечатляющий! Посему мысль снабдить интегральный стереоусилитель функциями AV-ресивера или, проще говоря, создать двухканальный ресивер — вполне логична. На вопрос, каким должен быть такой аппарат, компания Marantz отвечает не впервые.
Так уж совпало, что накануне непосредственного знакомства с Marantz NR1200, мне удалось пообщаться на эту тему с Жюлем Гийсберсом (Juul Gijsbers). Он работает руководителем учебной группы D&M BV — головной организации Marantz Europe. Жюль рассказал, что лет десять назад у Marantz была аналогичная модель (очевидно, он имел ввиду SR5023). Вполне успешная, ведь на самом деле многие любители посмотреть дома кино с приличным звуком предпочитают ограничиться классическим стерео.
Теперь, спустя 10 лет, стереоресивер от Marantz вернулся на рынок. Корпус с тонким профилем снова обеспечил позитивный wife-фактор — и это немаловажно. Дизайн был пересмотрен в сторону увеличения количества органов управления на передней панели. Добавим к этому 10-летнее развитие используемых технологий — и готово. Встречайте: стереофонический AV-ресивер Marantz NR1200.
Форма и содержание
Грубо говоря, перед нами развитой интегральный усилитель — в них нынче встречается даже HDMI. Хотя на борту есть еще и AM/FM/DAB-приемник, так что все-таки ресивер. Любопытно, что по внутренней классификации Marantz модель NR1200 относится к классу «connected amplifiers» (пер. с англ. — «подключенные усилители»). Судя по всему, подразумеваются сетевые возможности аппарата. В частности, технология HEOS, концентрирующая эти возможности в единой системе под руководством понятного и удобного приложения для смартфона.
NR1200 коммутирует пять входов HDMI, причем каждый (и это пока далеко не рядовой параметр) поддерживает HDCP 2.3, 4K Ultra HD 60 Гц видео, HLG и прочие актуальные дополнения. В системе доступен автоматический режим низкой задержки (ALLM) для подключенных Xbox One с моделями телевизоров, которые также поддерживают ALLM. Задержку звука можно подстроить под видео.
Шестой разъем HDMI, промаркированный белым по черному «MONITOR ARC», позволит устройству полностью подменить звуковую систему вашего телевизора с управлением от штатного «телевизионного» пульта ДУ. Отметим, что остальные пять HDMI-разъемов на задней панели размечены надписями: 1 CBL/SAT, 2 Blu-ray/DVD, 3 GAME, 4 MEDIA PLAYER, 5 AUX. И сделано это не зря.
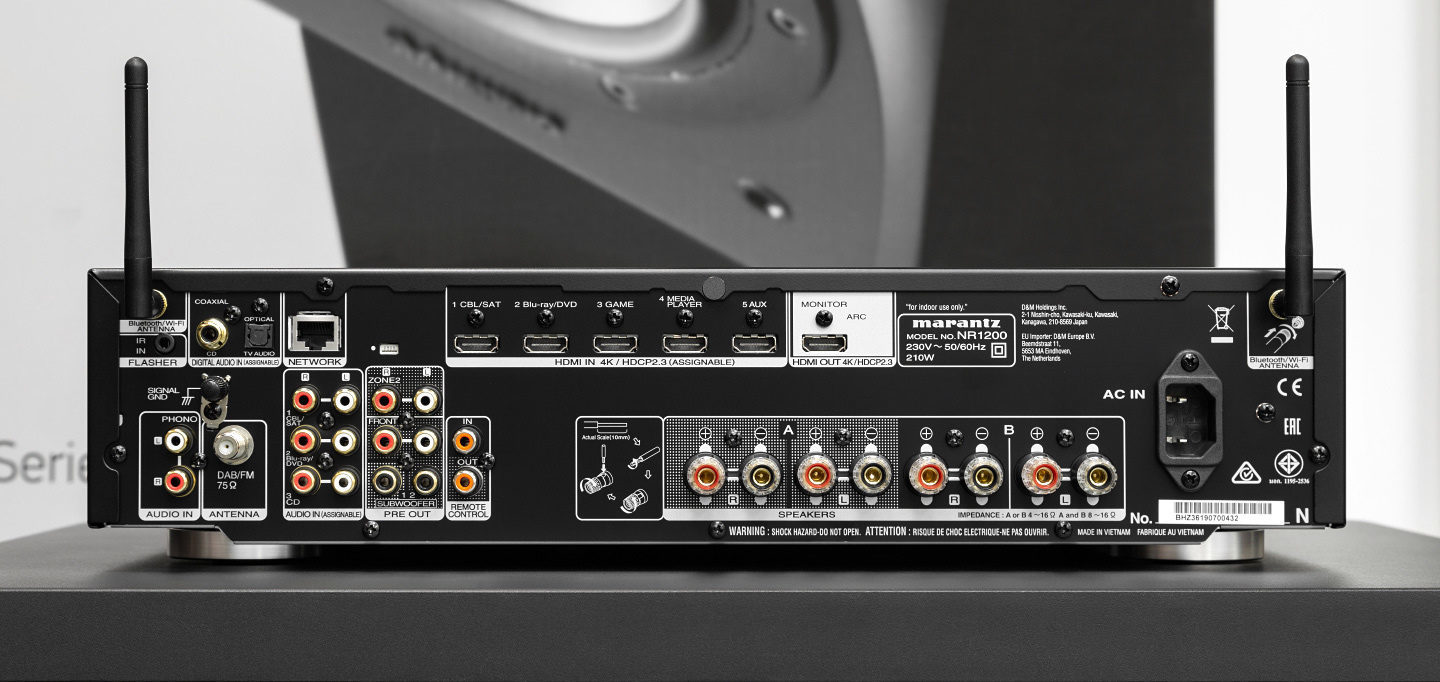
Цифровая коммутация представлена коаксиальным и оптическим входами. Предусмотрено кабельное подключение к сети. Беспроводной вариант, естественно, присутствует во всей красе — два антенных разъема по верхним углам задней панели, маркированные «Bluetooth/Wi-Fi ANTENNA».
Другими словами, если владелец не использует сетевые возможности модели или применяет кабельное подключение, а вид торчащих в стороны антенн Wi-Fi ему не по нутру, и он их проигнорирует, то с Bluetooth возникнут проблемы. То есть он все равно будет работать, но с расстояния не более метра и как-то неуверенно, в чем ваш покорный слуга сумел убедиться лично. Так что антенны нужно подсоединить в любом случае. Кстати, их запросто можно расположить так, чтобы они были скрыты за корпусом. Встроенный Wi-Fi поддерживает два диапазона: 2,4 ГГц/5 ГГц.
Среди имеющихся на задней панели классических аналоговых разъемов RCA, несомненно, радует пара, промаркированная «PHONO», с обязательной клеммой заземления. Любители винила, благодаря встроенному фонокорректору, получили в NR1200 верного союзника с неплохим фирменным звуком. Кроме того, присутствуют три линейных входа RCA, а также стереовыходы: ZONE 2 и FRONT.
Под ними расположилась пара выходов на сабвуфер — и сразу возникает логичный вопрос о наличии между ними стереоразделения. В этом случае мог бы сложиться интересный вариант поканального подключения для двух широкополосных колонок и двух активных сабов, работающих раздельно на правый и левый канал. Увы, такая функция не предусмотрена, хотя представитель Marantz после заданного ему вопроса на эту тему, похоже, задумался.
Если говорить о сервисной коммутации, NR1200 оснащен вряд ли сильно востребованным в наших краях разъемом штекера IR IN FLASHER. Есть также RCA-вход/выход дистанционного управления для подключения инфракрасных приемников/передатчиков для управления самим NR1200 и внешними устройствами из другого помещения. Еще один миниатюрный нестандартный четырехканальный разъем на задней панели назван сервисным и пользователя интересовать не должен. Что касается удаленного сервисного управления, то системой, в частности, поддерживается технология «Domotz Pro» с выделенным веб-интерфейсом.
Ресивер предлагает режим экономии электроэнергии ECO, ограничивающий энергопотребление. При этом уменьшается максимальная мощность усилителя, а в режиме ожидания, скажем, может стать недоступным включение устройства по сети — за все надо платить.
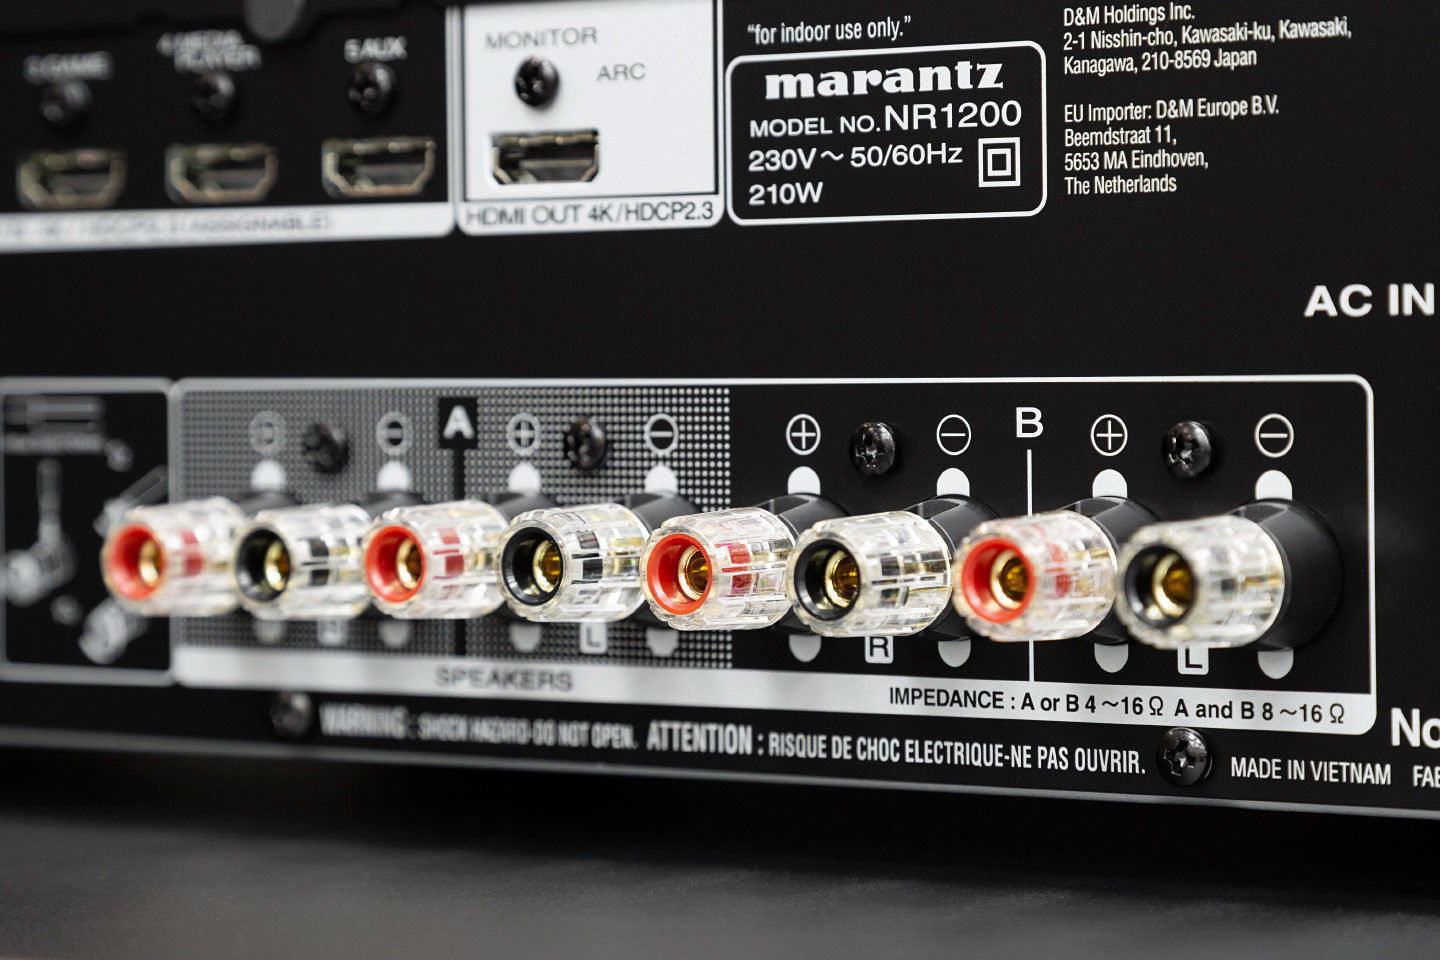
Одно маленькое замечание. Для подсоединения акустического кабеля с наконечниками «банан» необходимо вынуть из разъемов ресивера пылезащитные колпачки — например, из двух пар клемм используемой нами зоны A (в системе предусмотрено и переключение усилителей на вторую пару подключенных к системе колонок — зону B). Если ваша акустика предусматривает двухполосное подключение, то оно также обеспечивается NR1200 в режиме A+B — с задействованием всех имеющихся на задней панели клемм акустического кабеля.
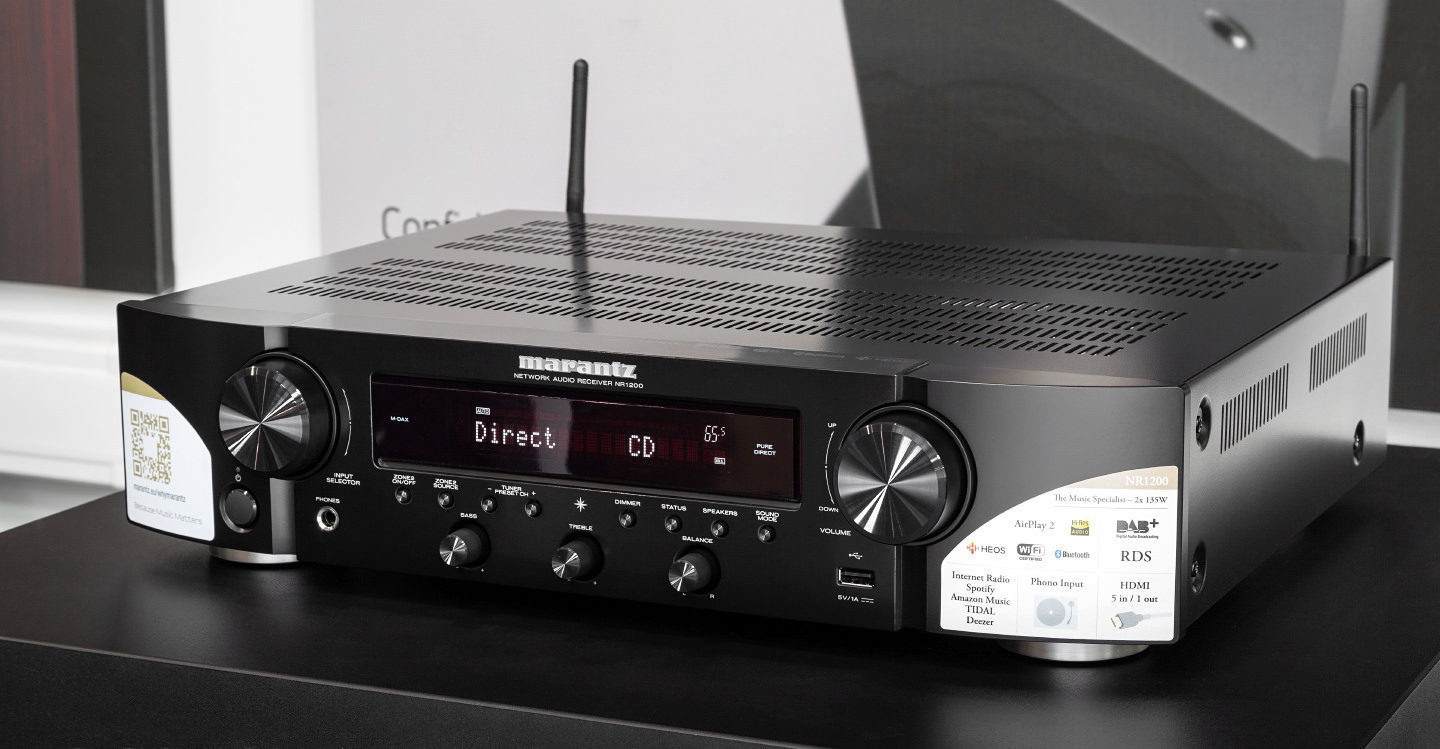
Все что нужно — перед нами
Пришла пора скоммутировать все это и развернуть NR1200 «к себе передом». Теперь тонкий стереоресивер Marantz NR1200 предстал перед нами во всей красе. Модель действительно изящна, и это впечатление лишь усиливается от осознания ее возможностей. Ситуация вроде «если вы отчаялись запустить этот аппарат, возможно, следует прочесть инструкцию» в данном случае исключена. Устройство работает сразу, все необходимое — на поверхности. При подключении к телевизору NR1200 выдает экранное меню, по которому нас ведет Setup assistant. Для начала он предлагает выбрать язык. В списке есть русский.
Управлять моделью удобно с помощью штатного пульта ДУ. На нем предусмотрены четыре кнопки Smart Select, на которые можно завести четыре же варианта настроек, включающих источник, режимы и прочее. Удобно. Функции HDMI CEC (нужно выбрать «ON» в пункте «HDMI Control») позволяют управлять ресивером с пульта телевизора.
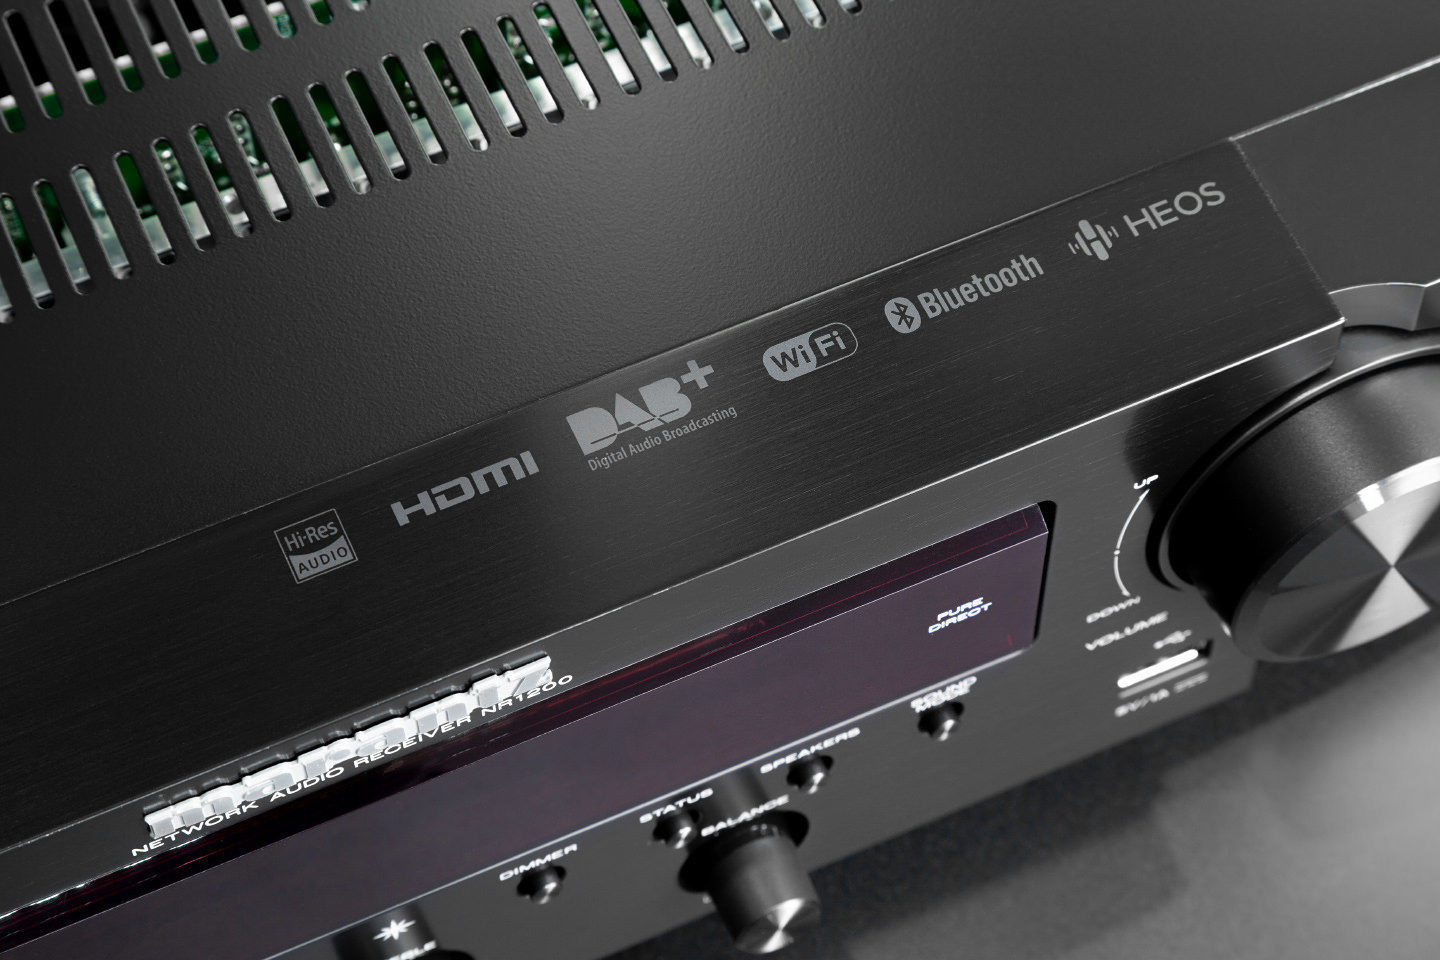
Заменить пульт способен мобильный гаджет с универсальным приложением Marantz 2016 AVR Remote. Его легко скачать по QR-коду из прилагаемого в комплекте «Краткого руководства пользователя». Еще одно универсальное приложение — HEOS (также по QR-коду) — пригодится при работе с удаленными подключениями и сетевыми функциями устройства, а также для организации фирменной системы мультирум, AirPlay 2, Bluetooth (в том числе с поддержкой Bluetooth-наушников) и других потоковых вариантов передачи аудио. Кроме того, есть QR-код для скачивания 100-мегабайтного руководства пользователя на русском языке.
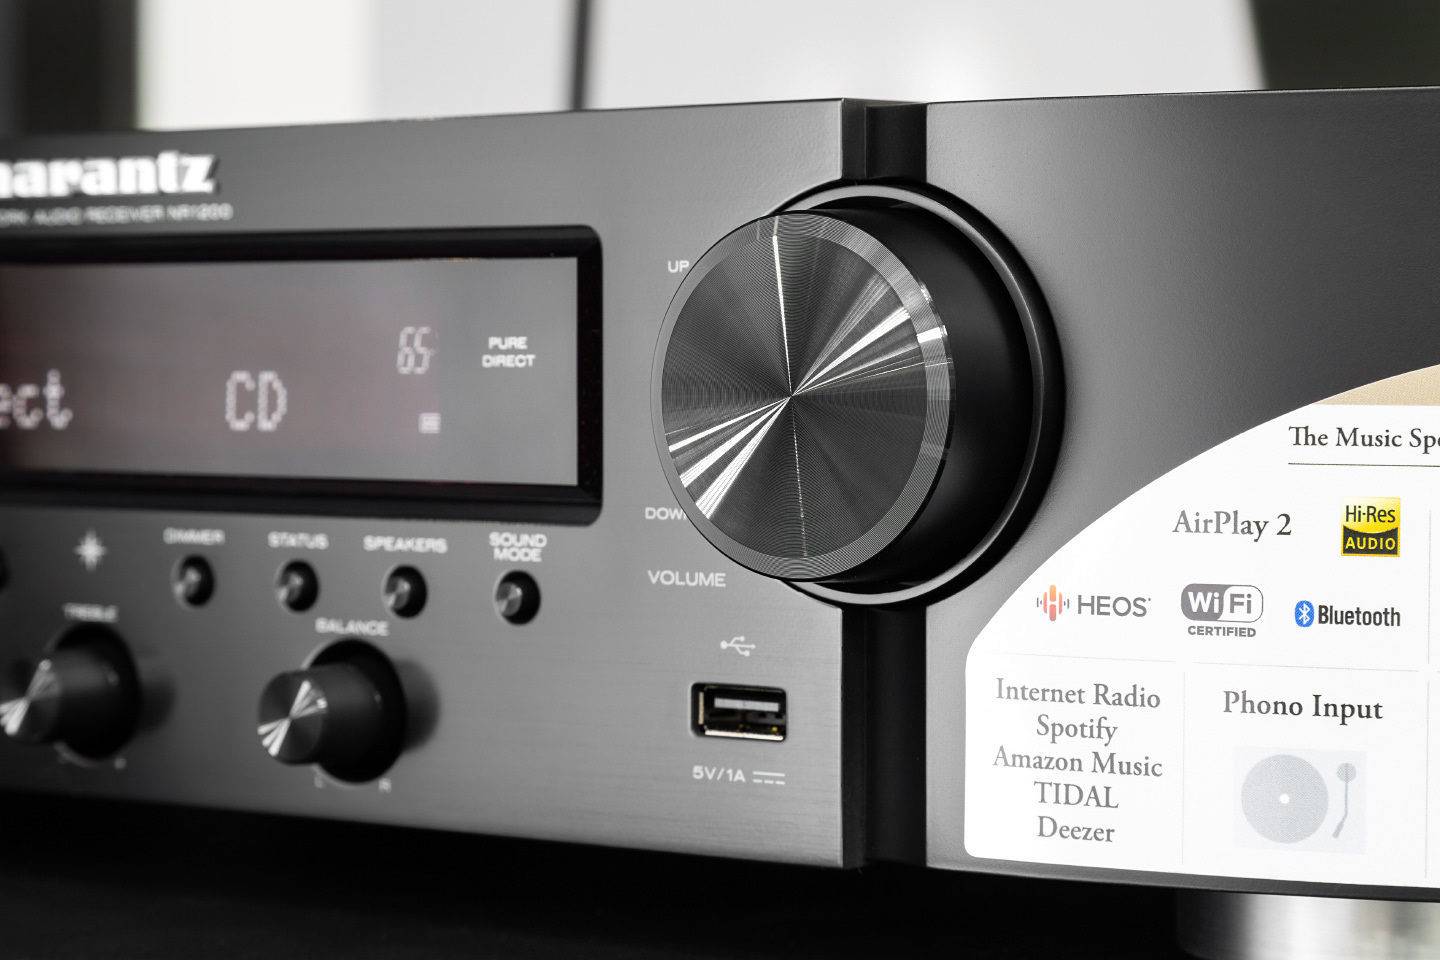
Управление аппаратом с лицевой панели — ситуация скорее эпизодическая. Занятно, что правый крупный энкодер, отвечающий за громкость, вращается с достаточным усилием. Зато левый «ступенчатый» селектор входов поддается мягко и легко. Процессорная электроника отличается небольшой задержкой между командой и ее исполнением. Минут через пять к этому привыкаешь.
Всё, что хотелось бы послушать
Подключившись по кабелю к сети с выходом в интернет, мы тут же отыскали интернет-радио. Станции подкачиваются с базы данных TuneIn, а на штатном пульте под это выделена специальная кнопка. Ресивер NR1200 также поддерживает голосовое управление Amazon Alexa, Google Assistant и Apple Siri — на выбор, хотя и с оглядкой на региональные особенности. Естественно, доступны стриминги со Spotify, Pandora, TuneIn, Deezer и множество других сервисов через Bluetooth со смартфона, AirPlay 2 или встроенное приложение HEOS.
Heos позволил отыскать сетевой NAS и тут же запустить воспроизведение первого попавшегося FLAC-файла. Еще немного покопавшись на диске, отыскали файл DSF и… да, все заработало! Так и должно быть: модель декодирует ALAC-, FLAC- и WAV-файлы с битрейтом вплоть до 24 бит/192 кГц, а также дорожки DSD 2,8 МГц и 5,6 МГц. Причем для тестирования звука гораздо проще использовать USB-порт справа на передней панели. Для него установлена максимальная иерархия: восемь уровней, 500 папок, 5 000 файлов. На первое время должно хватить. А вот воспроизведение видео в NR1200 не задокументировано.
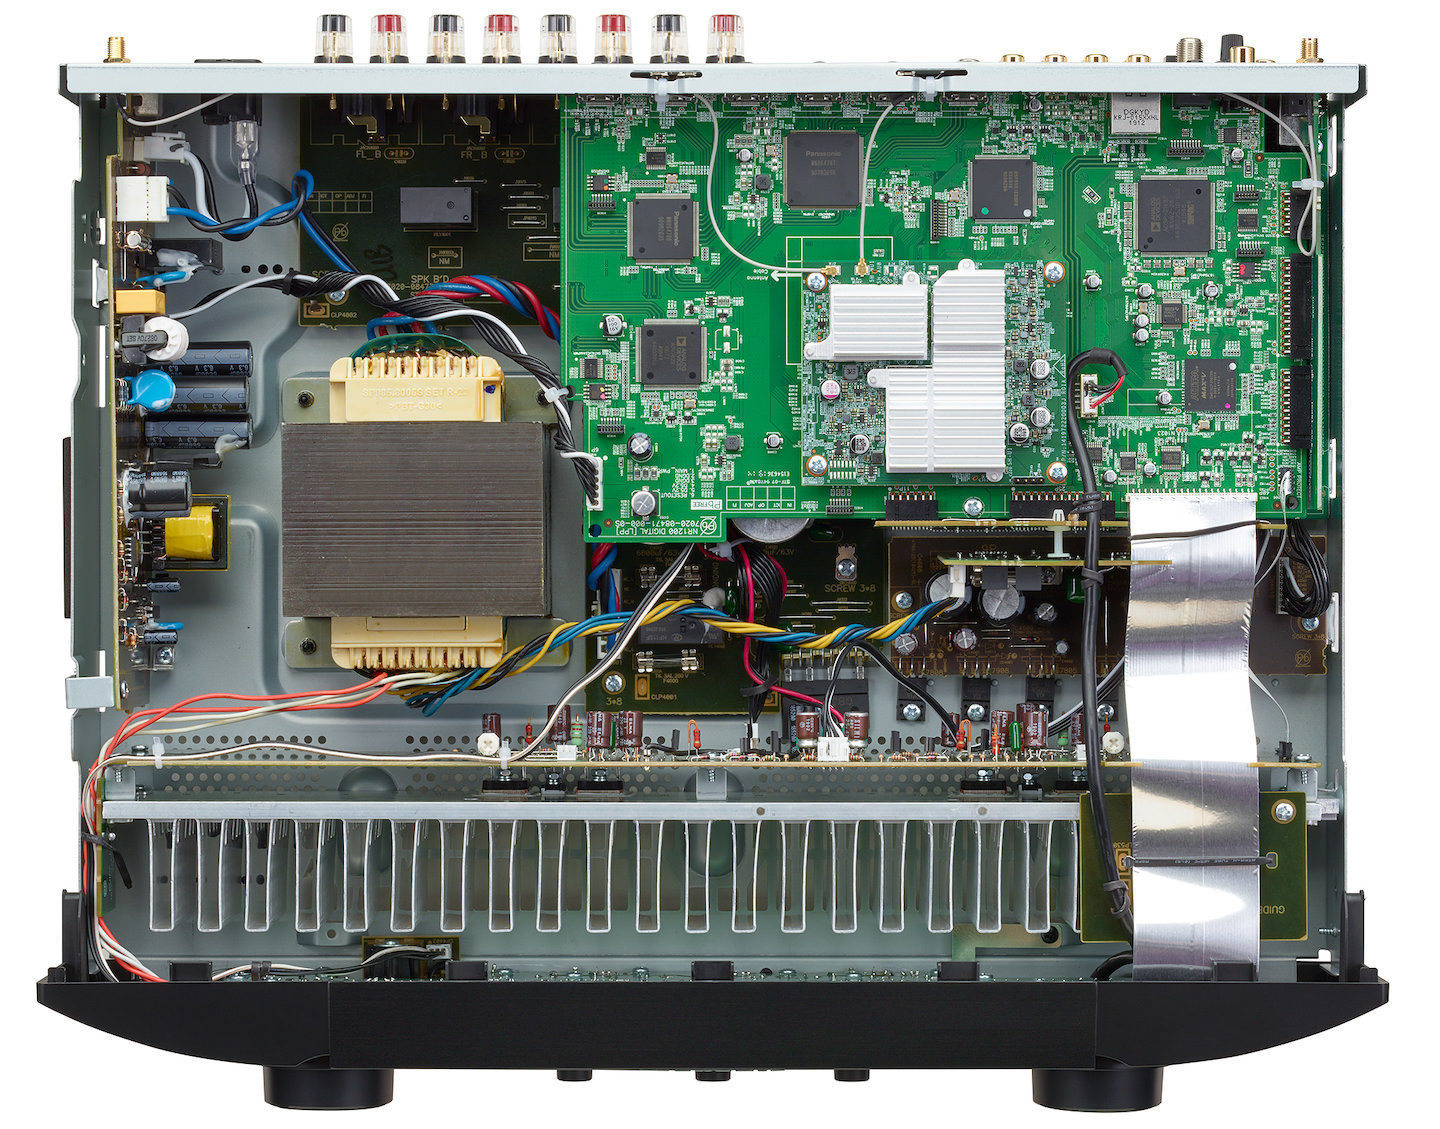
В каждом из двух каналов устройства установлен двойной ЦАП AK4458. Для улучшения работы аудиотракта сетевой трансформатор постарались механически развязать с шасси. Что касается питания: в NR1200 установлены специально разработанные фирменные конденсаторы. Встроенный дискретный усилитель мощности, по данным изготовителя, выдает 2 по 75 Вт на восьмиомную акустику при 0,08% искажений. А на 6 Ом и при одном проценте он способен отдать все 135 Вт. Кстати, оконечники получили симметричную топологию с центральным распределением питания.
Да будет музыка!
Перед началом прослушивания был выбран режим Pure Direct — вариант, максимально исключающий влияния на звуковой тракт (еще есть обыкновенный режим Stereo и чуть более строгий — Direct). В Pure Direct, в частности, не работают регулировки тембра и баланса, выведенные на переднюю панель. Режим обозначается синим светодиодом на панели справа. С другой стороны панели есть индикатор противоположного режима M-DAX, компенсирующего недостатки компрессированного аудио. Забегая вперед, скажу, что испытания этого режима дали определенное улучшение — тем не менее, разница между MP3 и DSD остается, мягко говоря, весомой.
В условиях достаточно большого открытого пространства прослушивание NR1200 проходило на уровне 65 единиц по бортовому индикатору громкости, имеющему пределы от 0 до 98. Если говорить о качестве воспроизведения, аппарат оставляет весьма позитивные впечатления. Это фирменное звучание со сбалансированным и точным нижним диапазоном, кристальной верхней перкуссией и очень жизненным вокалом. Можно отметить, что наш стереосетап звучал очень эмоционально, выявляя множество ранее незамеченных нюансов в давно знакомых фонограммах.
Мне повезло послушать ресивер с разной акустикой — в том числе и с превосходящей используемый усилитель по допустимой мощности. И в последнем случае был соблазн услышать недостаток динамики на больших уровнях звукового давления, ведь «громкость в упор» приводит к определенному ухудшению качества (смысла, однако, такой вариант не имеет — прослушивание некомфортно).
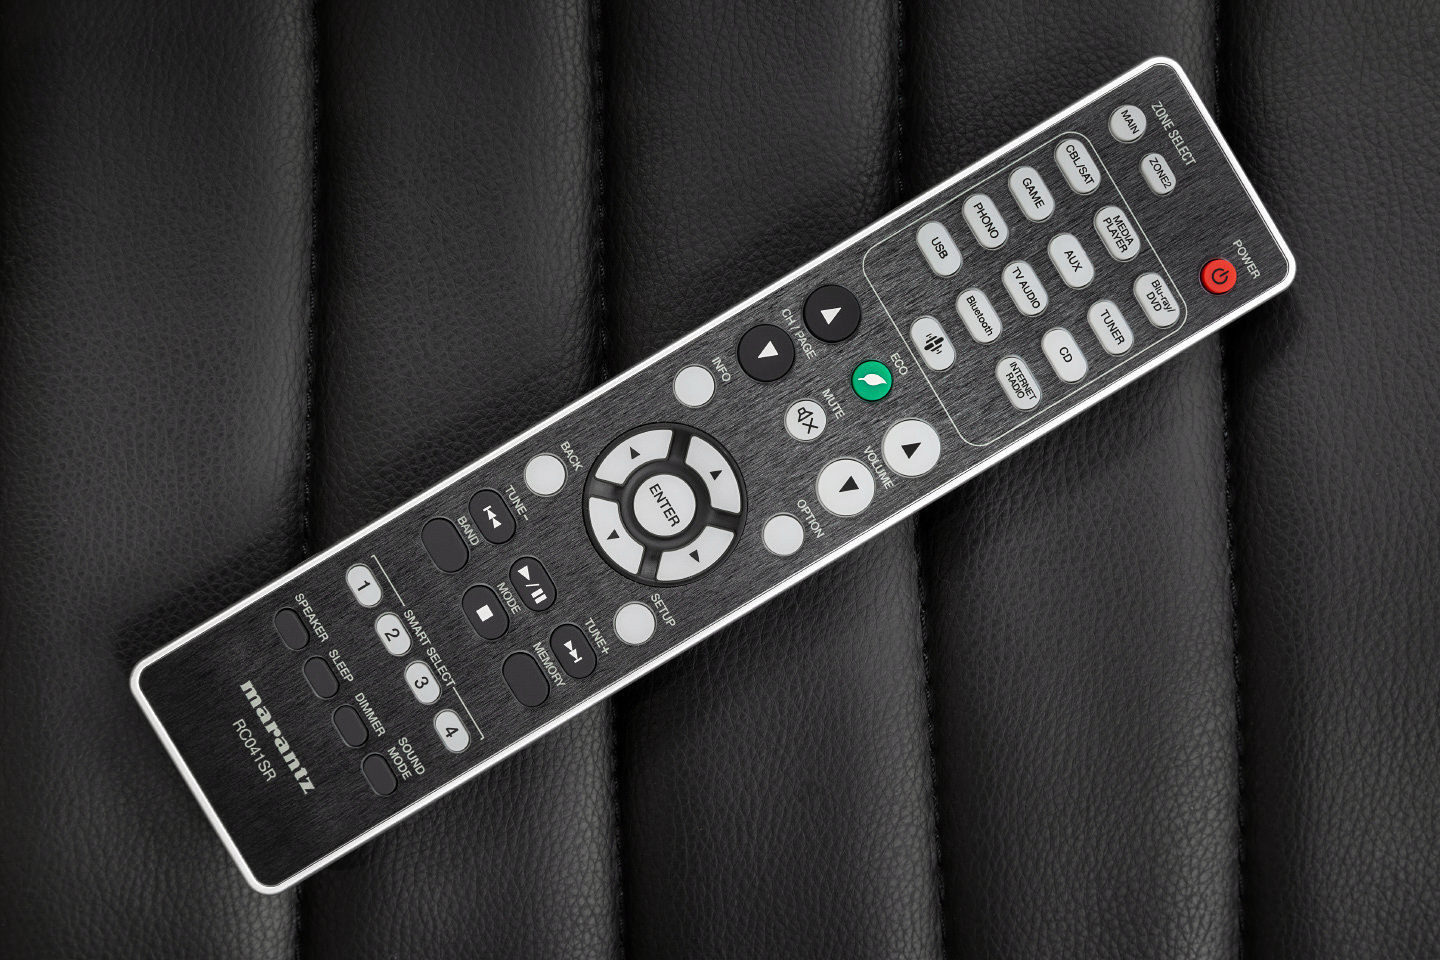
Однако в итоге NR1200 оставил впечатление устройства, способного потянуть хороший динамический диапазон — система играла непринужденно и вполне естественно. Я ставил экстремальные фонограммы типа «меандровых» гитарных соло Billy Gibbons или синтезированного на компьютере звучания Царь-колокола (как если бы этот гигант был отремонтирован и висел на колокольне). Звучание системы без серьезного запаса на таких треках обычно «разваливается», усугубляя некомфортность звука, делая его неестественным и мертвым. Но NR1200 выдержал и этот краш-тест.
Возвращаясь к режимам Stereo, Direct и Pure Direct, отмечу, что последний вариант имеет реальные преимущества перед первым в прозрачности и чистоте звучания. Direct, естественно, находится между ними, хотя иногда кажется, что Direct и Pure Direct слишком близки по качеству — даже практически неотличимы.
Естественно, сравнение Hi-Res с битрейтом даже 24/96 продемонстрировало серьезные преимущества над стандартным вариантом «CD-разрешения». Здесь ощущается «породистость» оконечных усилителей модели, которые способны сохранить и передать мягкое, «бархатное» звучание, формируемое ЦАПом линейки New Generation от Asahi Kasei Microdevices Corporation. Здесь я признаюсь в своих субъективных пристрастиях, но звучание этих компонентов в сравнении с «одноклассниками» мне представляется наиболее живым, человечным и искренним.
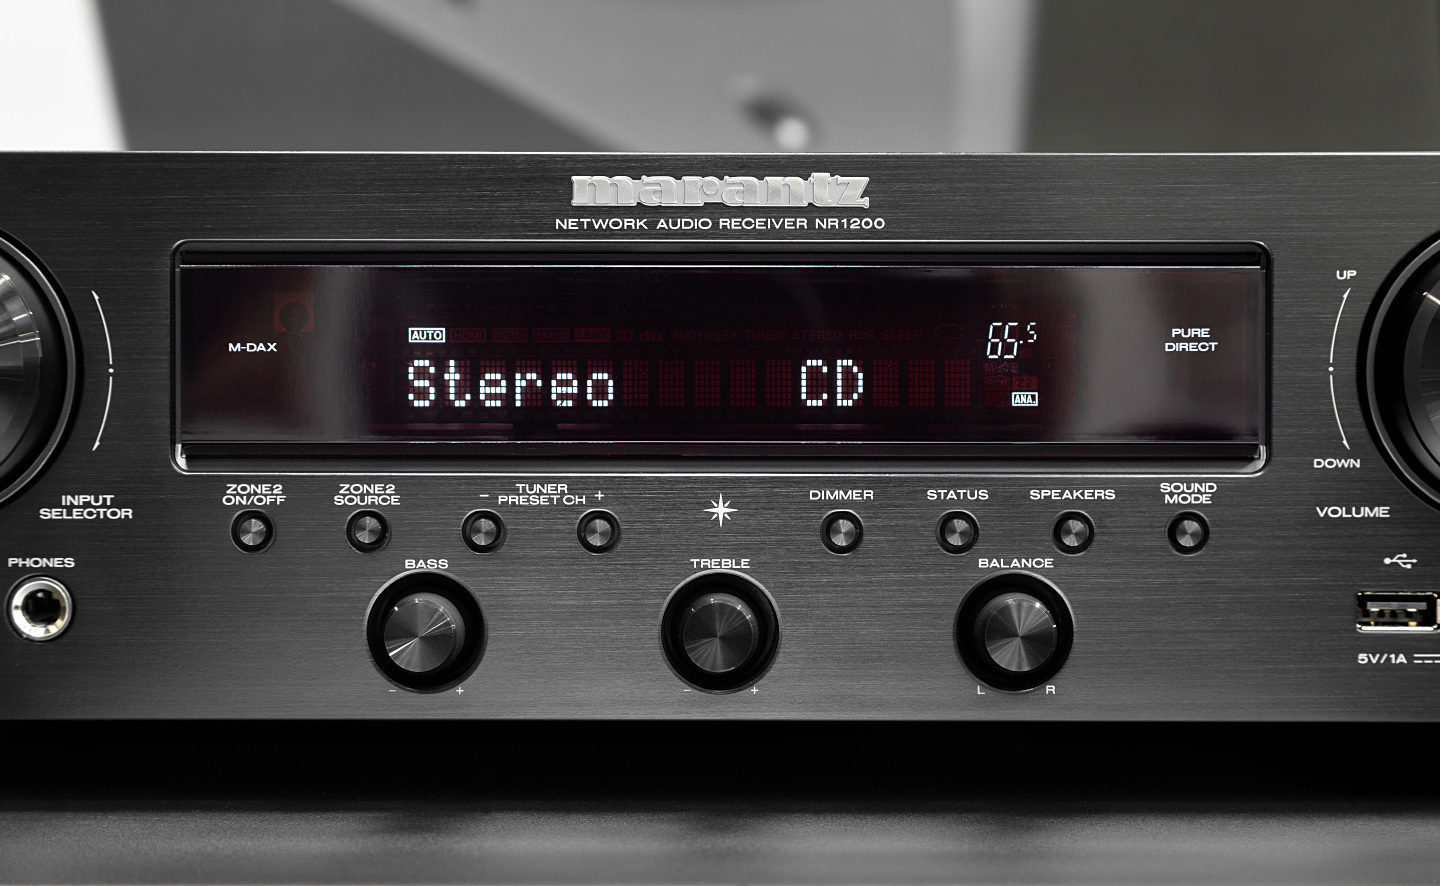
Именно эти эпитеты хочется добавить и в описание саунда NR1200. Не стоит ждать от этого аппарата мониторности и бесстрастия. Он имеет собственный характер. Отстроившись слухом на звучании проверенного сетапа с удесятеренным ценником усилительного звена, понимаешь, что NR1200 многое меняет.
Причем делает он это мягко и неуловимо. В характере звучания женского вокала, в приподнятой отчетливости верхней перкуссии, в очертаниях нижней середины, в «мясе» и дыхании панча. Но до чего деликатно все это происходит! Аудиофилы-пуристы, возможно, и найдут поводы для критики. Что касается меня, то я внимательно прослушал «В пещере горного короля» Грига от начала и до конца, поймав себя на мысли, что инстинктивно оставил время на финальный поклон дирижера.
Еще один вариант подключения — по Bluetoooth — заставил прийти к выводу, что качество звучания файлов с CD-битрейтом, если сравнивать с USB, остается практически неизменным. Учитывая емкость памяти современных смартфонов, такой метод эксплуатации NR1200, наверное, будет востребован.
Вывод
Судя по всему, Marantz NR1200 появился на рынке вовремя. Система на базе этой модели станет альтернативой любому продвинутому саундбару с упором на возможность получить классическое стерео от весьма достойного источника с развитыми возможностями доступа к контенту.
Система может быть дополнена CD-плеером и (или) проигрывателем винила, образовав аккуратную невысокую стойку. По соотношению цена/функционал/качество/дизайн Marantz NR1200, очевидно, обречен на популярность, поскольку оказывается привлекательней ближайших аналогов.

Владелец этого аппарата будет иметь огромную свободу выбора источников, режимов и способов управления. И этот выбор придется делать — на то, чтобы как следует воспользоваться всем, что «умеет» Marantz NR1200, потребуется, пожалуй, слишком много времени. Впрочем, базовое управление предельно простое.
Достоинства
Дизайн и формфактор, универсальность в работе с видео и аудио, простота настроек и удобство использования, привлекательная цена
Недостатки
Несколько несбалансированное усилие при работе c органами управления
Паспортные данные
Усилитель мощности:
Номинальная мощность: 75 Вт + 75 Вт (8 Ом, 20 Гц — 20 кГц при общем коэффициенте гармоник 0,08 %)
100 Вт + 100 Вт (6 Ом, 1 кГц при общем коэффициенте гармоник 0,7 %)
Выходные разъемы: 4 – 16 Ω/Ом
Входная чувствительность: 130 мВ
Частотная характеристика: 10 Гц — 100 кГц: +1, –3 дБ (режим Direct)
Отношение сигнал/шум: 98 дБ (IHF–A средневзвешенное, режим Direct)
Фонокорректор:
Входная чувствительность: 2,5 мВ
Отклонение от характеристики RIAA: ±1 дБ (20 Гц — 20 кГц)
Отношение сигнал/шум: 74 дБ (IHF-A)
Коэффициент нелинейных искажений: 0,03 % (1 кГц, 3 В)
Потребление:
Обычный режим ожидания: 0,1 Вт
Управление сетью (Bluetooth): 3,0 Вт
Управление сетью (Ethernet): 3,1 Вт
Управление сетью (Wi-Fi): 3,5 Вт
Спящий режим: 0,5 Вт
Габариты: 440x378x105 мм
Масса: 7,9 кг
![]()
|
Contents |
Connections |
Playback |
Settings |
Tips |
Appendix |
Network Audio
Receiver
NR1200
Owner’s Manual
|
Front panel |
Display |
Rear panel |
1 |
Remote |
Index |

|
Contents |
Connections |
Playback |
Settings |
Tips |
Appendix |
|
Accessories |
7 |
||
|
Inserting the batteries |
8 |
||
|
Operating range of the remote control unit |
8 |
||
|
Features |
9 |
||
|
High quality sound |
9 |
||
|
High performance |
9 |
||
|
Easy operation |
13 |
||
|
Part names and functions |
14 |
||
|
Front panel |
14 |
||
|
Display |
17 |
||
|
Rear panel |
18 |
||
|
Remote control unit |
21 |
||
|
Connections |
|||
|
Speaker installation |
25 |
||
|
Connecting speakers |
26 |
||
|
Before connecting speakers |
26 |
||
|
Connecting 2.1-channel speakers |
28 |
||
|
Second pair of speaker |
29 |
||
|
Bi-wiring connection |
30 |
|
Connecting a TV |
32 |
||
|
Connection 1 : TV equipped with an HDMI connector and |
33 |
||
|
compatible with the ARC (Audio Return Channel) |
|||
|
Connection 2 : TV equipped with an HDMI connector and |
34 |
||
|
incompatible with the ARC (Audio Return Channel) |
|||
|
Connecting a playback device |
35 |
||
|
Connecting a set-top box (Satellite tuner/cable TV) |
36 |
||
|
Connecting a DVD player or Blu-ray Disc player |
37 |
||
|
Connecting a turntable |
38 |
||
|
Connecting a USB memory device to the USB port |
39 |
||
|
Connecting FM/AM antennas |
40 |
||
|
Connecting to a home network (LAN) |
42 |
||
|
Wired LAN |
42 |
||
|
Wireless LAN |
43 |
||
|
Connecting an external control device |
44 |
||
|
REMOTE CONTROL jacks |
44 |
||
|
Connecting the power cord |
45 |
|
Front panel |
Display |
Rear panel |
2 |
Remote |
Index |

|
Contents |
Connections |
Playback |
Settings |
Tips |
Appendix |
Playback
|
Basic operation |
47 |
||
|
Turning the power on |
47 |
||
|
Selecting the input source |
47 |
||
|
Adjusting the volume |
48 |
||
|
Turning off the sound temporarily (Muting) |
48 |
||
|
Playback a DVD player/Blu-ray Disc player |
48 |
||
|
Playing a USB memory device |
49 |
||
|
Playing files stored on USB memory devices |
50 |
||
|
Listening to music on a Bluetooth device |
53 |
||
|
Playing music from Bluetooth device |
54 |
||
|
Pairing with other Bluetooth devices |
55 |
||
|
Reconnecting to this unit from a Bluetooth device |
56 |
||
|
Listening to FM/AM broadcasts |
57 |
||
|
Listening to FM/AM broadcasts |
58 |
||
|
Tuning in by entering the frequency (Direct Tune) |
59 |
||
|
Changing the tune mode (Tune Mode) |
60 |
||
|
Tuning in to stations and presetting them automatically (Auto |
60 |
||
|
Preset) |
|||
|
Presetting the current broadcast station (Preset Memory) |
61 |
||
|
Listening to preset stations |
61 |
||
|
Specify a name for the preset broadcast station (Preset Name) |
62 |
||
|
Skipping preset broadcast stations (Preset Skip) |
63 |
||
|
Cancelling Preset Skip |
64 |
|
Listening to Internet Radio |
65 |
||
|
Listening to Internet Radio |
66 |
||
|
Playing back files stored on a PC or NAS |
67 |
||
|
Playing back files stored on a PC or NAS |
68 |
||
|
Getting the HEOS App |
71 |
||
|
HEOS Account |
72 |
||
|
Playing from streaming music services |
73 |
||
|
Listening to the same music in multiple rooms |
76 |
||
|
AirPlay function |
80 |
||
|
Playing songs from your iPhone, iPod touch or iPad |
81 |
||
|
Playing iTunes music with this unit |
81 |
||
|
Play a song from your iPhone, iPod touch or iPad on multiple |
82 |
||
|
synced devices (AirPlay 2) |
|||
|
Spotify Connect function |
83 |
||
|
Playing Spotify music with this unit |
83 |
||
|
Convenience functions |
84 |
||
|
Adding to HEOS Favorites |
85 |
||
|
Playing back HEOS Favorites |
85 |
||
|
Deleting a HEOS Favorites |
86 |
||
|
Adjust the sound output balance of left and right speakers |
86 |
||
|
(Balance) |
|||
|
Adjust the subwoofer output (Subwoofer) |
87 |
||
|
Adjusting the tone (Tone) |
88 |
||
|
Displaying your desired video during audio playback (Video |
89 |
||
|
Select) |
|||
|
Playing the same music in all zones (All Zone Stereo) |
90 |
|
Front panel |
Display |
Rear panel |
3 |
Remote |
Index |

|
Contents |
Connections |
Playback |
Settings |
Tips |
Appendix |
|
Selecting a sound mode |
91 |
|
|
Selecting a sound mode |
91 |
|
|
Description of sound mode types |
92 |
|
|
HDMI Control function |
93 |
|
|
Setting procedure |
93 |
|
|
Smart Menu function |
94 |
|
|
Sleep timer function |
96 |
|
|
Using the sleep timer |
97 |
|
|
Smart select function |
98 |
|
|
Calling up the settings |
99 |
|
|
Changing the settings |
100 |
|
|
Panel lock function |
101 |
|
|
Disabling all key button operations |
101 |
|
|
Disabling all button operations except VOLUME |
101 |
|
|
Canceling the Panel lock function |
102 |
|
|
Remote lock function |
103 |
|
|
Disabling the sensor function of the remote control unit |
103 |
|
|
Enabling the remote sensor function |
103 |
|
|
Web control function |
104 |
|
|
Controlling the unit from a web control |
104 |
|
|
Playback in ZONE2 (Another room) |
106 |
|
|
Connecting ZONE2 |
106 |
|
|
Playback in ZONE2 |
107 |
Settings
|
Menu map |
109 |
||
|
Menu operations |
113 |
||
|
Audio |
114 |
||
|
M-DAX |
114 |
||
|
Audio Delay |
115 |
||
|
Volume |
116 |
||
|
Video |
117 |
||
|
HDMI Setup |
117 |
||
|
On Screen Disp. |
122 |
||
|
4K Signal Format |
123 |
||
|
TV Format |
124 |
||
|
Inputs |
125 |
||
|
Input Assign |
125 |
||
|
Source Rename |
128 |
||
|
Hide Sources |
128 |
||
|
Source Level |
128 |
||
|
Speakers |
129 |
||
|
Subwoofer |
129 |
||
|
Distances |
129 |
||
|
Levels |
130 |
||
|
Speaker Select |
131 |
|
Front panel |
Display |
Rear panel |
4 |
Remote |
Index |

|
Contents |
Connections |
Playback |
Settings |
Tips |
Appendix |
|
Network |
132 |
|
|
Information |
132 |
|
|
Connection |
132 |
|
|
Wi-Fi Setup |
133 |
|
|
Settings |
134 |
|
|
Network Control |
136 |
|
|
Friendly Name |
136 |
|
|
Diagnostics |
137 |
|
|
AirPlay |
137 |
|
|
HEOS Account |
138 |
|
|
You have not signed in |
138 |
|
|
You have already signed in |
138 |
|
General |
139 |
||
|
Language |
139 |
||
|
ECO |
139 |
||
|
ZONE2 Setup |
143 |
||
|
Zone Rename |
144 |
||
|
Smart Sel.Names |
144 |
||
|
Front Display |
144 |
||
|
Firmware |
145 |
||
|
Information |
148 |
||
|
Usage Data |
149 |
||
|
Save & Load |
150 |
||
|
Setup Lock |
150 |
||
|
Reset |
151 |
||
|
Operating CD player with the remote control unit |
152 |
||
|
Limiting the operating zone with the remote control |
153 |
|
Front panel |
Display |
Rear panel |
5 |
Remote |
Index |

|
Contents |
Connections |
Playback |
Settings |
Tips |
Appendix |
Tips
|
Tips |
155 |
|
|
Troubleshooting |
156 |
|
|
Power does not turn on / Power is turned off |
157 |
|
|
Operations cannot be performed through the remote control unit |
158 |
|
|
Display on this unit shows nothing |
158 |
|
|
No sound comes out |
159 |
|
|
Desired sound does not come out |
160 |
|
|
Sound is interrupted or noise occurs |
161 |
|
|
No video is shown on the TV |
162 |
|
|
The menu screen is not displayed on the TV |
163 |
|
|
The color of the menu screen and operations content displayed |
163 |
|
|
on the television is different from normal |
||
|
AirPlay cannot be played back |
164 |
|
|
USB memory devices cannot be played back |
165 |
|
|
Bluetooth cannot be played back |
166 |
|
|
The Internet radio cannot be played back |
167 |
|
|
Music files on PC or NAS cannot be played back |
168 |
|
|
Various online services cannot be played |
169 |
|
|
The HDMI Control function does not work |
169 |
|
|
Cannot connect to a wireless LAN network |
170 |
|
|
Update/upgrade error messages |
171 |
|
|
Resetting factory settings |
172 |
|
|
Resetting network settings |
173 |
Appendix
|
About HDMI |
174 |
|
|
Playing back a USB memory devices |
177 |
|
|
Playing back a Bluetooth device |
178 |
|
|
Playing back a file saved on a PC or NAS |
179 |
|
|
Playing back Internet Radio |
180 |
|
|
Personal memory plus function |
180 |
|
|
Last function memory |
180 |
|
|
Explanation of terms |
181 |
|
|
Trademark information |
184 |
|
|
Specifications |
185 |
|
|
Index |
189 |
|
|
License |
191 |
|
Front panel |
Display |
Rear panel |
6 |
Remote |
Index |
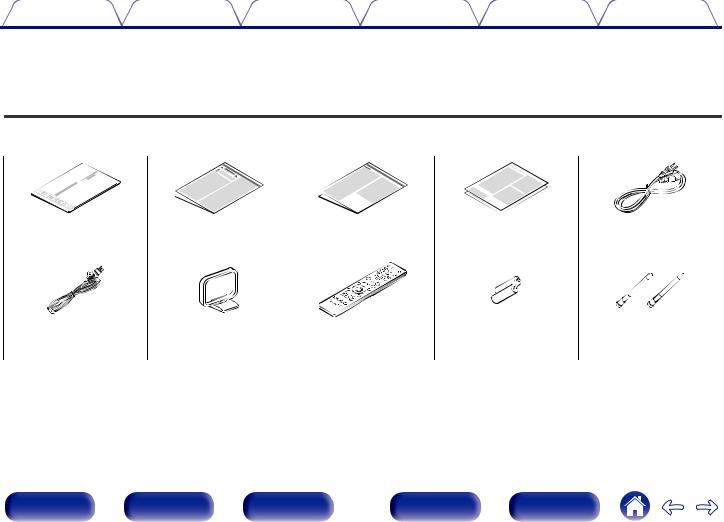
|
Contents |
Connections |
Playback |
Settings |
Tips |
Appendix |
Thank you for purchasing this Marantz product.
To ensure proper operation, please read this owner’s manual carefully before using the product.
After reading this manual, be sure to keep it for future reference.
Accessories
Check that the following parts are supplied with the product.
|
Quick Start Guide |
Safety Instructions |
Notes on radio |
Warranty |
Power cord |
||
|
(for USA/for CANADA) |
|
FM indoor antenna |
AM loop antenna |
Remote control unit |
R03/AAA batteries |
External antennas for |
|
(RC041SR) |
Bluetooth/wireless |
|||
|
connectivity |
|
Front panel |
Display |
Rear panel |
7 |
Remote |
Index |

|
Contents |
Connections |
Playback |
Settings |
Tips |
Appendix |
Inserting the batteries
1Remove the rear lid in the direction of the arrow and remove it.
2Insert two batteries correctly into the battery compartment as indicated.
Batteries
NOTE
0 To prevent damage or leakage of battery fluid:
0Do not use a new battery together with an old one.
0Do not use two different types of batteries.
0Remove the batteries from the remote control unit if it will not be in use for long periods.
0If the battery fluid should leak, carefully wipe the fluid off the inside of the battery compartment and insert new batteries.
Operating range of the remote control unit
Point the remote control unit at the remote sensor when operating it.
Approx. 23 ft/7 m
30° 30°
3Put the rear cover back on.
|
Front panel |
Display |
Rear panel |
8 |
Remote |
Index |

|
Contents |
Connections |
Playback |
Settings |
Tips |
Appendix |
Features
High quality sound
0High-power amplifier (100 Watts x 2-channels)
The power amplifier circuit is made with a power transformer and power supply capacitors designed for stereo receivers and uses a discrete part structure, achieving powerful, high-quality sound reproduction.
0Double-differential D/A converter circuit
A double-differential circuit is used to reduce noise, achieving clearer audio playback.
High performance
04K 60Hz input/output supported
When 4K Ultra HD (High Definition) is used, an input/output speed of 60 frames per second (60p) is achieved for video signals. When connected to 4K Ultra HD and 60p video signal input compatible TV, you can enjoy the sense of realism only available from high-definition images, even when viewing fast-moving video.
This unit also supports image processing for 4K 60p, 4:4:4 and 24-bit videos. By processing the video at the original resolution, this unit lets you enjoy flawless, high-definition picture quality.
This unit also supports HDR (High Dynamic Range) and BT.2020 wide color gamut.
0HDCP 2.3
This unit is compatible with HDCP 2.3 copyright protection standard.
|
Front panel |
Display |
Rear panel |
9 |
Remote |
Index |
|
Contents |
Connections |
Playback |
Settings |
Tips |
Appendix |
0HDMI connections enable connection to various digital AV devices (5 inputs, 1 output)
5  1
1
In Out
This unit is equipped with 5 HDMI inputs and 1 HDMI output enabling connection to various HDMI compatible devices such as Blu-ray Disc players, game consoles and HD video camcorders.
0The device is equipped with a AirPlay® function in addition to network functions such as Internet radio etc. (v p. 80)
You can enjoy a wide variety of content, including listening to Internet Radio, playing audio files stored on your PC.
This unit also supports Apple AirPlay which lets you stream your music library from an iPhone®, iPad®, iPod touch® or iTunes®.
0Supports AirPlay 2® wireless audio
Sync multiple AirPlay 2 compatible devices/speakers for simultaneous playback.
This unit supports AirPlay 2 and requires iOS 11.4 or later.
|
Front panel |
Display |
Rear panel |
10 |
Remote |
Index |
![]()
|
Contents |
Connections |
Playback |
Settings |
Tips |
Appendix |
0Playback of DSD and FLAC files via USB and networks
This unit supports the playback of high resolution audio formats such as DSD (5.6 MHz) and FLAC 192 kHz files. It provides high quality playback of high resolution files.
0Wireless connection with Bluetooth devices can be carried out easily (v p. 53)
0 Multi-Room audio (v p. 90)
You can enjoy music simply by connecting wirelessly with your smartphone, tablet, PC, etc.
You can select and play back the respective inputs in MAIN ZONE and ZONE2.
In addition, when the All Zone Stereo function is used, the music being played back in MAIN ZONE can be enjoyed in all the zones at the same time. This is useful when you want to let the BGM propagate throughout the whole house.
0Energy-saving design
This unit is equipped with an ECO Mode function that allows you to enjoy music and movies while reducing the power consumption during use, and also an auto-standby function that automatically turns off the power supply when the unit is not in use. This helps reduce unnecessary power use.
|
Front panel |
Display |
Rear panel |
11 |
Remote |
Index |

|
Contents |
Connections |
Playback |
Settings |
Tips |
Appendix |
0Compatible with the “Marantz 2016 AVR Remote” Appz for performing basic operations of the unit with an iPad, iPhone or Android™ devices (Google, Amazon Kindle Fire)
Along with many new features, the graphics and user interface have been completely overhauled. The new app gives you full control of this unit as well as access to its setup menu for detailed adjustments from your phones or tablets. “Marantz 2016 AVR Remote” App also gives you quick access to the receiver’s status display, option menus, Marantz Blu-ray Disc player control, and online owner’s manual for your convenience.
zDownload the appropriate “Marantz 2016 AVR Remote” App for your iOS or Android devices. This unit needs to be connected to the same LAN or Wi-Fi (wireless LAN) network that the iPad, iPhone or Android™ is connected to.
0HEOS provides streaming music from your favorite online music sources
HEOS wireless multi-room sound system that enables you to enjoy your favorite music anywhere and everywhere around your home. By utilizing your existing home network and the HEOS App (available for iOS, Android and Amazon devices), you can explore, browse, and play music from your own music library or from many online streaming music services.
When multiple HEOS devices are connected to the same network, HEOS devices can be grouped to play back the same music on all devices simultaneously, or different music can be played on each separate HEOS device.
|
Front panel |
Display |
Rear panel |
12 |
Remote |
Index |

|
Contents |
Connections |
Playback |
Settings |
Tips |
Appendix |
Easy operation
0“Setup Assistant” provides easy-to-follow setup instructions
First select the language when prompted. Then simply follow the instructions displayed on the TV screen to set up the speakers, network, etc.
0Easy to use Graphical User Interface
This unit is equipped with a Graphical User Interface for improved operability.
|
Front panel |
Display |
Rear panel |
13 |
Remote |
Index |
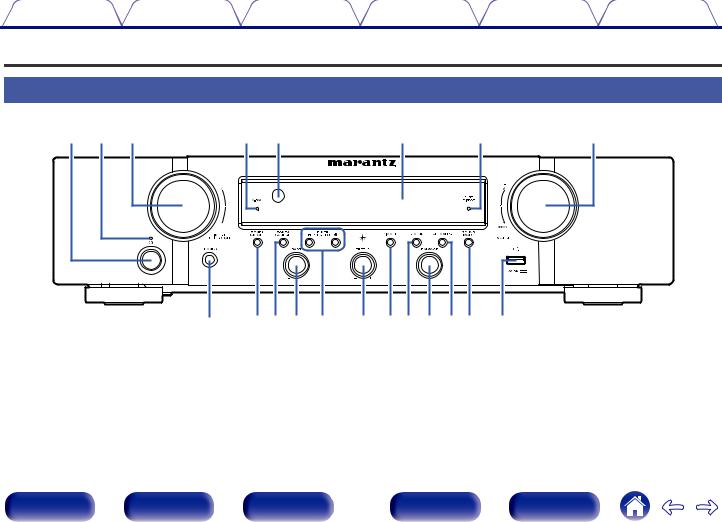
|
Contents |
Connections |
Playback |
Settings |
Tips |
Appendix |
Part names and functions
Front panel
|
q w e |
r t |
y |
u |
i |
|
o |
Q0Q1Q2Q3 Q4Q5Q6Q7Q8Q9 W0 |
For details, see the next page.
|
Front panel |
Display |
Rear panel |
14 |
Remote |
Index |

|
Contents |
Connections |
Playback |
Settings |
Tips |
Appendix |
||||
|
qw e |
r t |
y |
u |
i |
C INPUT SELECTOR knob |
||||
|
This selects the input source. (v p. 47) |
|||||||||
|
D M-DAX indicator |
|||||||||
|
This lights when the M-DAX mode is selected. (v p. 114) |
|||||||||
|
E Remote control sensor |
|||||||||
|
This receives signals from the remote control unit. (v p. |
|||||||||
|
o |
F Display |
||||||||
|
This displays various pieces of information. (v p. 17) |
|||||||||
|
A Power operation button (X) |
G PURE DIRECT indicator |
||||||||
|
Used to turn the power of the MAIN ZONE (room where this unit is |
This lights when the “Pure Direct” mode is selected as the sound mode. |
||||||||
|
located) on/off (standby). (v p. 47) |
(v p. 91) |
||||||||
|
B Power indicator |
H VOLUME knob |
||||||||
|
This is lit as follows according to the power status: |
This adjusts the volume level. (v p. 48) |
||||||||
|
0 |
Off: Power on |
I Headphones jack (PHONES) |
|||||||
|
0 |
Red: Normal standby |
This is used to connect headphones. |
|||||||
|
0 |
Orange: |
When the headphones are plugged into this jack, audio will no longer |
|||||||
|
0 |
When “HDMI PassThrough” is set to “On” (v p. 118) |
be output from the connected speakers or from the PRE OUT |
|||||||
|
connectors. |
|||||||||
|
0 |
When “HDMI Control” is set to “On” (v p. 119) |
||||||||
|
NOTE |
|||||||||
|
0 |
When “Network Control” is set to “Always On” (v p. 136) |
||||||||
|
0 To prevent hearing loss, do not raise the volume level excessively when using |
|||||||||
|
headphones. |
|
Front panel |
Display |
Rear panel |
15 |
Remote |
Index |

|
Contents |
Connections |
Playback |
Settings |
Tips |
Appendix |
Q2 Q4 Q7
Q0Q1Q3 Q5Q6Q8Q9W0
J ZONE2 ON/OFF button
This turns the power of ZONE2 (another room) on/off. (v p. 107)
K ZONE2 SOURCE button
This selects the input source for ZONE2. (v p. 107)
L Bass control knob (BASS)
This setting adjusts the volume level for the bass.
M Tuner preset channel buttons
(TUNER PRESET CH +, –)
These select preset broadcast stations. (v p. 61)
N Treble control knob (TREBLE)
This setting adjusts the volume level for the treble.
O DIMMER button
Each press of this switches the brightness of the display. (v p. 144)
P STATUS button
Each press of this switches the status information that is shown on the display.
Q Balance knob (BALANCE)
This adjusts the balance of the volume output from the left and right speakers.
R Speaker switching button (SPEAKERS)
These select the speaker for audio output.
S SOUND MODE button
Switching the sound mode. (v p. 91)
TUSB port (T)
This is used to connect USB storages (such as USB memory devices). (v p. 39)
|
Front panel |
Display |
Rear panel |
16 |
Remote |
Index |

|
Contents |
Connections |
Playback |
Settings |
Tips |
Appendix |
Display
A Input mode indicators
These light according to the audio input mode settings of each input source. (v p. 127)
B Tuner reception mode indicators
These light up according to the reception conditions when the input source is set to “Tuner”.
TUNED: Lights up when the broadcast is properly tuned in. STEREO: Lights up when receiving FM stereo broadcasts.
C Sleep timer indicator
This lights when the sleep mode is selected. (v p. 96)
D Volume indicator
E MUTE indicator
This blinks while the sound is muted. (v p. 48)
F Information display
The input source name, sound mode, setting values and other information are displayed here.
G Input signal indicators
The respective indicator will light corresponding to the input signal. (v p. 127)
H ZONE2 indicator
This lights up when ZONE2 (another room) power is turned on. (v p. 107)
|
Front panel |
Display |
Rear panel |
17 |
Remote |
Index |
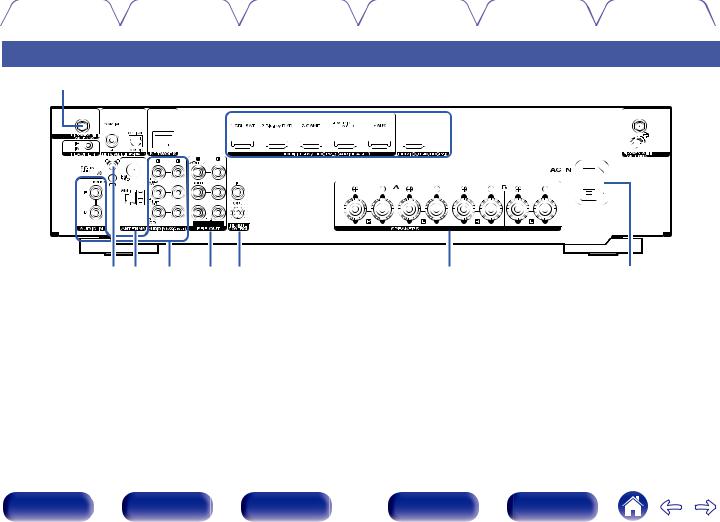
|
Contents |
Connections |
Playback |
Settings |
Tips |
Appendix |
Rear panel
|
q w e r |
t |
q |
||||||||||||||||||||||||||||||||||||||||||
|
y u |
i |
o |
Q0 |
Q1 |
Q2 |
For details, see the next page.
|
Front panel |
Display |
Rear panel |
18 |
Remote |
Index |
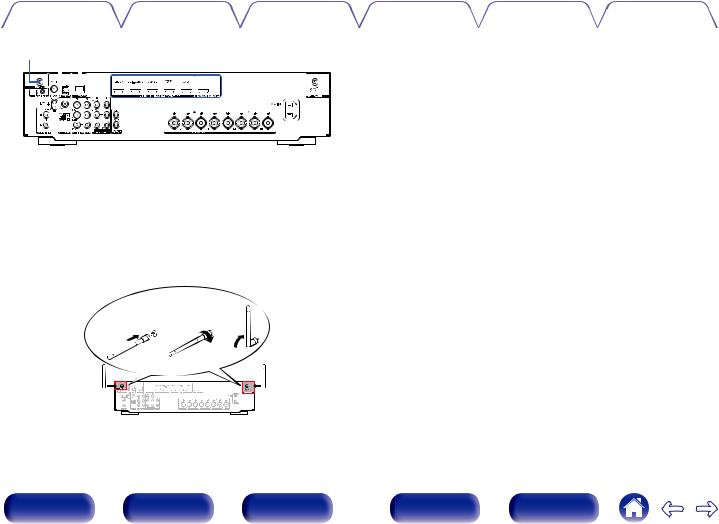
|
Contents |
Connections |
Playback |
Settings |
Tips |
Appendix |
|
q we r |
t |
q |
|||||||||||||||||||||||||||||||||||||
A Bluetooth/wireless LAN antenna connectors
Used to connect the included external antennas for Bluetooth/wireless connectivity when connecting to a network via wireless LAN, or when connecting to a handheld device via Bluetooth. (v p. 43)
A Place the external antennas for Bluetooth/wireless connectivity evenly over the screw terminal of rear.
B Turn clockwise until the antennas is fully connected. C Rotate the antenna upwards for best reception.
q w e
B FLASHER IN jack
Used when using a control BOX or other such control devices to control this unit.
C Digital audio connectors (DIGITAL AUDIO)
Used to connect devices equipped with digital audio connectors.
0“Connection 2 : TV equipped with an HDMI connector and incompatible with the ARC (Audio Return Channel)” (v p. 34)
D NETWORK connector
Used to connect to a LAN cable when connecting to a wired LAN network. (v p. 42)
E HDMI connectors
Used to connect devices equipped with HDMI connectors.
0“Connection 1 : TV equipped with an HDMI connector and compatible with the ARC (Audio Return Channel)” (v p. 33)
0“Connection 2 : TV equipped with an HDMI connector and incompatible with the ARC (Audio Return Channel)” (v p. 34)
0“Connecting a set-top box (Satellite tuner/cable TV)” (v p. 36)
0“Connecting a DVD player or Blu-ray Disc player” (v p. 37)
|
19 |
||||||||||||||||||||||||
|
Front panel |
Display |
Rear panel |
Remote |
Index |

|
Contents |
Connections |
Playback |
Settings |
Tips |
Appendix |
F SIGNAL GND terminal
Used to connect a ground wire for the turntable. (v p. 38)
G FM/AM antenna terminals (ANTENNA)
Used to connect FM antennas and AM loop antennas. (v p. 40)
H Analog audio connectors (AUDIO)
Used to connect devices equipped with analog audio connectors.
0“Connecting a set-top box (Satellite tuner/cable TV)” (v p. 36)
0“Connecting a DVD player or Blu-ray Disc player” (v p. 37)
0“Connecting a turntable” (v p. 38)
I PRE OUT connectors
Used to connect a subwoofer with built-in amplifier or a power amplifier for ZONE2.
0“Connecting the subwoofer” (v p. 27)
0“Connecting ZONE2” (v p. 106)
J REMOTE CONTROL jacks
Used to connect infrared receivers/transmitters in order to operate this unit and external devices from a different room. (v p. 44)
K Speaker terminals (SPEAKERS)
Used to connect speakers. (v p. 26)
L AC inlet (AC IN)
Used to connect the power cord. (v p. 45)
NOTE
0Do not touch the inner pins of the connectors on the rear panel. Electrostatic discharge may cause permanent damage to the unit.
|
Front panel |
Display |
Rear panel |
20 |
Remote |
Index |
![]()
|
Contents |
Connections |
Playback |
Settings |
Tips |
Appendix |
A ZONE SELECT buttons
These switch the zone (MAIN ZONE, ZONE2) that is operated through the remote control unit.
0“Playback in ZONE2” (v p. 107)
0“Menu operations” (v p. 113)
B Input source select buttons
These selects the input source.
0“Selecting the input source” (v p. 47)
0“Playback in ZONE2” (v p. 107)
C Channel/page search buttons (CH/PAGE df)
These select radio stations registered to presets or switch pages. (v p. 61)
D MUTE button (:)
This mutes the output audio.
0“Turning off the sound temporarily (Muting)” (v p. 48)
0“Turning off the sound temporarily (Muting) (ZONE2)” (v p. 108)
E Information button (INFO)
This displays the status information on the TV screen. (v p. 149)
F Cursor buttons (uio p)
These select items.
|
Front panel |
Display |
Rear panel |
21 |
Remote |
Index |
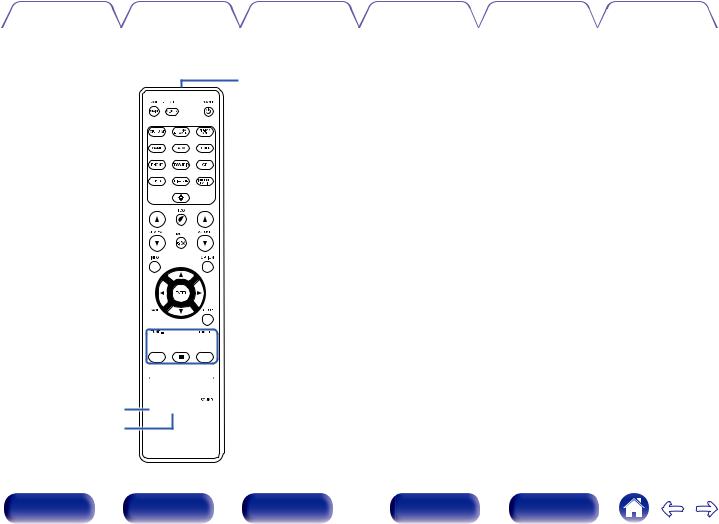
|
Contents |
Connections |
Playback |
Settings |
Tips |
Appendix |
G BACK button
This returns to the previous screen.
H System buttons
These perform playback related operations.
Tuning up / Tuning down buttons (TUNE +, –)
These select either FM broadcast or AM broadcast. (v p. 58)
Reception band select button (BAND)
This switches the reception band. (v p. 58)
Tune mode select button (MODE)
This switches the tuning mode. (v p. 60)
Preset memory button (MEMORY)
The current broadcast station that is preset. (v p. 61) Operating CD player. (v p. 152)
I SMART SELECT buttons (1 – 4)
These call up settings registered to each button, such as input source, volume level and sound mode settings. (v p. 98)
J Speaker switching button (SPEAKERS)
These select the speaker for audio output.
K SLEEP button
This sets the sleep timer. (v p. 96)
L Remote control signal transmitter
This transmits signals from the remote control unit. (v p. 
|
Front panel |
Display |
Rear panel |
22 |
Remote |
Index |
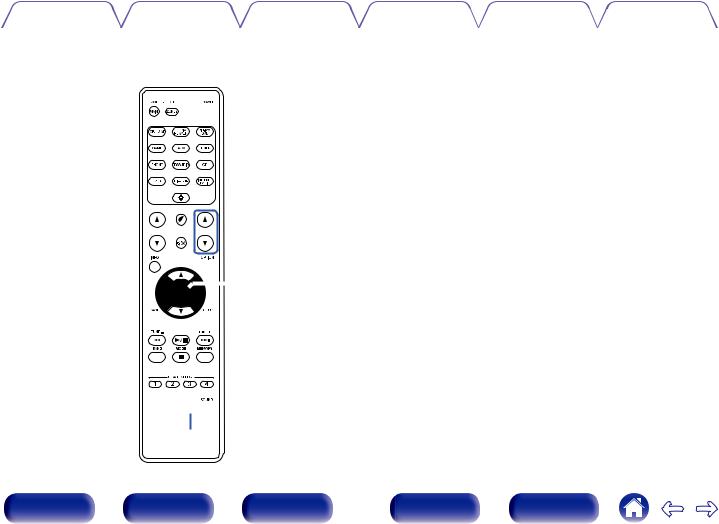
|
Contents |
Connections |
Playback |
Settings |
Tips |
Appendix |
M POWER button (X)
This turns the power on/off.
0“Turning the power on” (v p. 47)
0“Playback in ZONE2” (v p. 107)
NECO Mode button (G)
This switches to ECO Mode. (v p. 139)
O VOLUME buttons (df)
These adjusts the volume level.
0“Adjusting the volume” (v p. 48)
0“Adjusting the volume (ZONE2)” (v p. 108)
P OPTION button
This displays the option menu on the TV screen.
Q ENTER button
This determines the selection.
R SETUP button
This displays the menu on the TV screen. (v p. 113)
S SOUND MODE button
These select the sound mode. (v p. 91)
T DIMMER button
Each press of this switches the brightness of the display. (v p. 144)
|
Front panel |
Display |
Rear panel |
23 |
Remote |
Index |

|
Contents |
Connections |
Playback |
Settings |
Tips |
Appendix |
o Contents
|
Speaker installation |
25 |
|
Connecting speakers |
26 |
|
Connecting a TV |
32 |
|
Connecting a playback device |
35 |
|
Connecting a USB memory device to the USB port |
39 |
|
Connecting FM/AM antennas |
40 |
|
Connecting to a home network (LAN) |
42 |
|
Connecting an external control device |
44 |
|
Connecting the power cord |
45 |
NOTE
0Do not plug in the power cord until all connections have been completed. However, when the “Setup Assistant” is running, follow the instructions in the “Setup Assistant” (page 9 in the separate “Quick Start Guide”) screen for making connections. (During “Setup Assistant” operation, the input/output connectors do not conduct current.)
0Do not bundle power cords together with connection cables. Doing so can result in noise.
o Cables used for connections
Provide necessary cables according to the devices you want to connect.
Speaker cable
Subwoofer cable
HDMI cable
Coaxial digital cable
Optical cable
|
Audio cable |
L |
L |
|
|
R |
R |
||
LAN cable
|
Front panel |
Display |
Rear panel |
24 |
Remote |
Index |

|
Contents |
Connections |
Playback |
Settings |
Tips |
Appendix |
Speaker installation
Determine the speaker system depending on the number of speakers you are using and install each speaker and subwoofer in the room.
Speaker installation is explained using this example of a typical installation.
 SW2
SW2
SW1
|
L/R |
Place the LEFT and RIGHT speakers an equal |
|
|
distance from the main listening position. The |
||
|
(LEFT/RIGHT |
||
|
distance between each speaker and your TV |
||
|
speaker): |
||
|
should also be the same. |
||
|
SW 1/2 |
Place the SUBWOOFER at a convenient location |
|
|
near the speakers. If you have two subwoofers, |
||
|
(Subwoofer): |
place them asymmetrically across the front of |
|
|
your room. |
|
Front panel |
Display |
Rear panel |
25 |
Remote |
Index |

|
Contents |
Connections |
Playback |
Settings |
Tips |
Appendix |
Connecting speakers
Here we connect the speakers in the room to this unit.
Before connecting speakers
NOTE
0Disconnect this unit’s power plug from the power outlet before connecting the speakers. Also, turn off the subwoofer.
0Connect so that the speaker cable core wires do not protrude from the speaker terminal. The protection circuit may be activated if the core wires touch the rear panel or if the + and — sides touch each other. (“Protection circuit” (v p. 183))
0Never touch the speaker terminals while the power cord is connected. Doing so could result in electric shock. When the “Setup Assistant” (page 9 in the separate “Quick Start Guide”) is running, follow the instructions in the “Setup Assistant” screen for making connections. (Power is not supplied to the speaker terminals while the “Setup Assistant” is running.)
0Use speakers with an impedance of 4 – 16 Ω/ohms.
NOTE
0Carry out the following settings when using a speaker with an impedance of 4 – 6 Ω/ohms.
1.Press and hold the main unit’s ZONE2 SOURCE and STATUS at the same time for at least 3 seconds.
“V.Format:< NTSC>” appears on the display.
2.Press DIMMER on the main unit three times. “Sp.Imp.:<8ohms>” appears on the display.
3.Press ZONE2 SOURCE or TUNER PRESET CH — on the main unit to select the impedance.
|
8ohms |
Select when the impedance for all of the |
||
|
(Default): |
connected speakers is 8 |
Ω/ohms or over. |
|
|
6ohms: |
Select when the impedance for any of the |
||
|
connected speakers is 6 |
Ω/ohms. |
||
|
4ohms: |
Select when the impedance for any of the |
||
|
connected speakers is 4 |
Ω/ohms. |
||
4. Press the main unit’s STATUS to complete the setting.
|
Front panel |
Display |
Rear panel |
26 |
Remote |
Index |

|
Contents |
Connections |
Playback |
Settings |
Tips |
Appendix |
o Connecting the speaker cables
Carefully check the left (L) and right (R) channels and + (red) and – (black) polarities on the speakers being connected to this unit, and be sure to connect the channels and polarities correctly.
1Peel off about 3/8 inch (10 mm) of sheathing from the tip of the speaker cable, then either twist the core wire tightly or terminate it.
2Turn the speaker terminal counterclockwise to loosen it.
3Insert the speaker cable’s core wire to the hilt into the speaker terminal.
o Connecting the subwoofer
Use a subwoofer cable to connect the subwoofer. Two subwoofers can be connected to this unit.
The same signal is output from the respective subwoofer terminals.
|
SW1 |
SW2 |
4Turn the speaker terminal clockwise to tighten it.
|
Front panel |
Display |
Rear panel |
27 |
Remote |
Index |

|
Contents |
Connections |
Playback |
Settings |
Tips |
Appendix |
Connecting 2.1-channel speakers
This serves as a basic 2.1-channel surround system.
L  R
R
SW
|
Front panel |
Display |
Rear panel |
28 |
Remote |
Index |

|
Contents |
Connections |
Playback |
Settings |
Tips |
Appendix |
Second pair of speaker
This system enables switching playback between speakers A and B as desired.
|
L |
L |
R |
R |
|||||||||||||||||||||||||||||||||||||
|
(B) |
(A) |
(A) |
(B) |
|||||||||||||||||||||||||||||||||||||
SW
|
SW |
R (A) |
L (A) |
R (B) |
L (B) |
CAUTION:
0Set speaker impedance to “4ohms” before performing simultaneous playback from speakers A and B. (v p. 26)
|
Front panel |
Display |
Rear panel |
29 |
Remote |
Index |
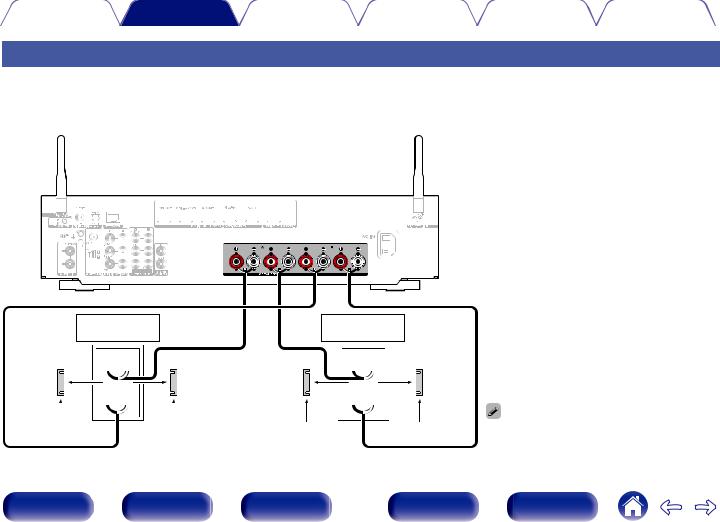
|
Contents |
Connections |
Playback |
Settings |
Tips |
Appendix |
Bi-wiring connection
This connection limits the effects of signal interference between the high range speakers (tweeters) and low range speakers (woofers), allowing you to enjoy high quality playback.
When bi-wiring with bi-wireable speakers, connect the mid and high range terminals to SPEAKERS A (or B), the low range terminals to SPEAKERS B (or A).
|
Speaker |
Speaker |
|||||||||||||||||||
|
(R) |
(L) |
|
Remove shorting bar |
Remove shorting bar |
Remove shorting bar |
Remove shorting bar |
0 |
When using bi-wiring connections, set the speaker to |
|
“A+B” to output audio from both SPEAKERS A and |
SPEAKERS B speaker terminals. (v p. 131)
|
Front panel |
Display |
Rear panel |
30 |
Remote |
Index |
![]()
|
Contents |
Connections |
Playback |
Settings |
Tips |
Appendix |
o Connecting a front speaker that uses a power amplifier
This unit supports connection of a front speaker that uses an external power amplifier to increase its output. Connect a separately sold power amplifier to the PRE OUT (FL/FR) connector of this unit.
Power amplifier
AUDIO
FRONT
L R
L R
L R
|
31 |
|||||||||||||||||||||||||||||||||||||||||||
|
Front panel |
Display |
Rear panel |
Remote |
Index |

|
Contents |
Connections |
Playback |
Settings |
Tips |
Appendix |
Connecting a TV
Connect a TV to this unit so that the input video is output to the TV. You can also enjoy audio from the TV on this unit. How to connect a TV depends on the connectors and functions equipped on the TV.
ARC (Audio Return Channel) function plays TV audio on this unit by sending the TV audio signal to this unit via HDMI cable.
Is the TV equipped with an HDMI connector?
Yes
Is the TV compatible with the ARC (Audio Return Channel) ?
“Connection 1 : TV equipped with an HDMI connector and compatible with the ARC (Audio Return Channel)” (v p. 33)
“Connection 2 : TV equipped with an HDMI connector and incompatible with the ARC (Audio Return Channel)” (v p. 34)
You cannot connect the TV to this unit.
|
Front panel |
Display |
Rear panel |
32 |
Remote |
Index |

|
Contents |
Connections |
Playback |
Settings |
Tips |
Appendix |
Connection 1 : TV equipped with an HDMI connector and compatible with the ARC (Audio Return Channel)
Use an HDMI cable to connect a TV that is compatible with the ARC function to this unit.
Set “HDMI Control” to “On” when using a TV that supports the ARC function. (v p. 119)
TV
HDMI
IN
(ARC)
0 Only the PCM 2-channel setting can be used to play sound from a TV via the ARC function. Set “PCM 2ch” as the audio format in the TV settings.
|
Front panel |
Display |
Rear panel |
33 |
Remote |
Index |

|
Contents |
Connections |
Playback |
Settings |
Tips |
Appendix |
Connection 2 : TV equipped with an HDMI connector and incompatible with the ARC (Audio Return Channel)
Use an HDMI cable to connect the TV to this unit.
To listen to audio from TV on this unit, use an optical cable to connect the TV to this unit.
TV
OUT IN
OPTICAL HDMI
OUT IN
0 Only the PCM 2-channel setting can be used to play sound from a TV via a digital signal. Set “PCM 2ch” as the audio format in the TV settings.
|
Front panel |
Display |
Rear panel |
34 |
Remote |
Index |

|
Contents |
Connections |
Playback |
Settings |
Tips |
Appendix |
Connecting a playback device
This unit is equipped with one type of video input connectors (HDMI) and three types of audio input connectors (HDMI, digital audio and audio). Select input connectors on this unit according to the connectors equipped on the device you want to connect.
If the device connected to this unit is equipped with an HDMI connector, it is recommended to use HDMI connections. In the HDMI connection, audio and video signals can be transmitted through a single HDMI cable.
0“Connecting a set-top box (Satellite tuner/cable TV)” (v p. 36)
0“Connecting a DVD player or Blu-ray Disc player” (v p. 37)
0“Connecting a turntable” (v p. 38)
0Connect devices to this unit as indicated by the input sources printed on the audio/video input connectors of this unit.
0The source that is assigned to the HDMI IN, DIGITAL AUDIO IN and AUDIO IN connectors can be changed. See “Input Assign” on how to change the input source assigned to the input connectors. (v p. 125)
0To play back audio signals that are input to this unit on a TV connected via HDMI, set in the menu “HDMI Audio Out” to “TV”. (v p. 117)
0To enjoy content that is copyright protected by HDCP 2.2 or HDCP 2.3, use a playback device and TV compatible with HDCP 2.2 or HDCP 2.3.
|
Front panel |
Display |
Rear panel |
35 |
Remote |
Index |

|
Contents |
Connections |
Playback |
Settings |
Tips |
Appendix |
Connecting a set-top box (Satellite tuner/cable TV)
This explanation uses the connection with a satellite tuner/cable TV STB as an example.
Select the input connectors on this unit to match the connectors on the device that you want to connect to.
|
(HDMI incompatible device) |
Satellite tuner / |
||||||||||||||||||||||||||||||||||||||||
|
Satellite tuner / |
|||||||||||||||||||||||||||||||||||||||||
|
Cable TV |
Cable TV |
||||||||||||||||||||||||||||||||||||||||
|
AUDIO |
|||||||||||||||||||||||||||||||||||||||||
|
AUDIO |
|||||||||||||||||||||||||||||||||||||||||
|
OUT |
HDMI |
||||||||||||||||||||||||||||||||||||||||
|
R |
L |
OUT |
|||||||||||||||||||||||||||||||||||||||
|
R |
L |
||||||||||||||||||||||||||||||||||||||||
|
R |
L |
||||||||||||||||||||||||||||||||||||||||
|
Front panel |
Display |
Rear panel |
36 |
Remote |
Index |

|
Contents |
Connections |
Playback |
Settings |
Tips |
Appendix |
Connecting a DVD player or Blu-ray Disc player
This explanation uses the connection with a DVD player or Blu-ray Disc player as an example.
|
(HDMI incompatible device) |
DVD player / |
|||||||||||||||||||||||||||||||||||||||||||
|
DVD player / |
||||||||||||||||||||||||||||||||||||||||||||
|
Blu-ray Disc player |
Blu-ray Disc player |
|||||||||||||||||||||||||||||||||||||||||||
|
AUDIO |
||||||||||||||||||||||||||||||||||||||||||||
|
AUDIO |
||||||||||||||||||||||||||||||||||||||||||||
|
OUT |
HDMI |
|||||||||||||||||||||||||||||||||||||||||||
|
R |
L |
OUT |
||||||||||||||||||||||||||||||||||||||||||
|
R |
L |
|||||||||||||||||||||||||||||||||||||||||||
|
R |
L |
|||||||||||||||||||||||||||||||||||||||||||
|
Front panel |
Display |
Rear panel |
37 |
Remote |
Index |

|
Contents |
Connections |
Playback |
Settings |
Tips |
Appendix |
Connecting a turntable
This unit is compatible with turntables equipped with a moving magnet (MM) phono cartridge. When you connect to a turntable with a low output moving coil (MC) cartridge, use a commercially available MC head amp or a step-up transformer.
If you set this unit’s input source to “Phono” and you accidentally increase the volume without having a turntable connected, you may hear a hum noise from the speakers.
Turntable (MM cartridge)
|
GND |
AUDIO |
|||||||||||
|
OUT |
||||||||||||
|
L |
R |
|||||||||||
NOTE
0 The earth terminal (SIGNAL GND) of this unit is not for safety grounding purposes. If this terminal is connected when there is a lot of noise, the noise can be reduced. Note that depending on the turntable, connecting the ground line may have the reverse effect of increasing noise. In this case, it is not necessary to connect the ground line.
|
Front panel |
Display |
Rear panel |
38 |
Remote |
Index |

|
Contents |
Connections |
Playback |
Settings |
Tips |
Appendix |
Connecting a USB memory device to the USB port
For operating instructions see “Playing a USB memory device” (v p. 49).
USB memory device
0Marantz does not guarantee that all USB memory devices will operate or receive power. When using a portable USB hard disk drive (HDD) which came with an AC adapter, use that device’s supplied AC adapter.
NOTE
0USB memory devices will not work via a USB hub.
0It is not possible to use this unit by connecting the unit’s USB port to a PC via a USB cable.
0Do not use an extension cable when connecting a USB memory device. This may cause radio interference with other devices.
|
Front panel |
Display |
Rear panel |
39 |
Remote |
Index |

|
Contents |
Connections |
Playback |
Settings |
Tips |
Appendix |
Connecting FM/AM antennas
Connect the antenna, tune in to a broadcast and then move the antenna to the location where there is least noise. Then use tape, etc. to fix the antenna in this location. (“Listening to FM/AM broadcasts” (v p. 57))
0If you are unable to receive a good broadcast signal, we recommend installing an outdoor antenna. For details, inquire at the retail store where you purchased the unit.
AM loop antenna (supplied)
NOTE
0Make sure the AM loop antenna lead terminals do not touch metal parts of the panel.
q w e
FM indoor antenna (supplied)
|
Front panel |
Display |
Rear panel |
40 |
Remote |
Index |
![]()
|
Contents |
Connections |
Playback |
Settings |
Tips |
Appendix |
o Using the AM loop antenna
Suspending on a wall
Suspend directly on a wall without assembling.
Nail, tack, etc.
Standing alone
Use the procedure shown above to assemble.
When assembling, refer to “AM loop antenna assembly”.
o AM loop antenna assembly
1Put the stand section through the bottom of the loop antenna from the rear and bend it forward.
2Insertstand.the projecting part into the square hole in the

 Stand
Stand


 Square hole
Loop antenna
 Projecting part
|
Front panel |
Display |
Rear panel |
41 |
Remote |
Index |

|
Contents |
Connections |
Playback |
Settings |
Tips |
Appendix |
Connecting to a home network (LAN)
This unit can connect to a network using a wired LAN or wireless LAN.
You can connect this unit to your home network (LAN) to enable various types of playback and operations as described below.
0Playback of network audio such as Internet Radio and from your media server(s)
0Playback of streaming music services
0Using the Apple AirPlay function
0Operation on this unit via the network
0Operation with the HEOS wireless multi-room sound system
0Firmware Update
For connections to the Internet, contact an ISP (Internet Service Provider) or a computer shop.
Wired LAN
To make connections via wired LAN, use a LAN cable to connect the router to this unit as shown in the figure below.
|
NAS |
|
|
PC |
(Network Attached |
|
Storage) |
 Modem
Modem
Internet
|
To WAN side |
||
|
To LAN port |
LAN port / |
LAN port / |
|
To LAN port |
||
|
Ethernet |
Ethernet |
|
|
connector |
connector |
Router
|
42 |
||||||||||||||||||||||||||||||||
|
Front panel |
Display |
Rear panel |
Remote |
Index |

|
Contents |
Connections |
Playback |
Settings |
Tips |
Appendix |
Wireless LAN
When connecting to the network via wireless LAN, connect the external antennas for Bluetooth/wireless connectivity connection to the rear panel and stand them upright.
See “Wi-Fi Setup” on how to connect to a wireless LAN router. (v p. 133)
Internet
 Modem
Modem
To WAN side
Router with access point
0When using this unit, we recommend you use a router equipped with the following functions:
0Built-in DHCP server
This function automatically assigns IP addresses on the LAN.
0Built-in 100BASE-TX switch
When connecting multiple devices, we recommend a switching hub with a speed of 100 Mbps or greater.
0Only use a shielded STP or ScTP LAN cable (readily available at electronics stores). (CAT-5 or greater recommended)
0The normal shielded-type LAN cable is recommended.
If a flat-type cable or unshielded-type cable is used, other devices could be affected by noise.
0When using this unit connected to a network with no DHCP function, configure the IP address, etc. in “Network”. (v p. 132)
NOTE
0The types of routers that can be used depend on the ISP. Contact your ISP or a computer shop for details.
0This unit is not compatible with PPPoE. A PPPoE compatible router is required if your contracted line is not set using PPPoE.
0Do not connect a NETWORK connector directly to the LAN port / Ethernet connector on your computer.
0Various online services may be discontinued without prior notice.
|
43 |
|||||||||||||||||||||||||||
|
Front panel |
Display |
Rear panel |
Remote |
Index |

|
Contents |
Connections |
Playback |
Settings |
Tips |
Appendix |
Connecting an external control device
REMOTE CONTROL jacks
oPerforming operations by RC on this unit without visual contact
You can connect an external IR receiver to the REMOTE CONTROL connectors to perform operations on this unit with the supplied remote control unit without visual contact. This might be necessary if the unit is hidden in a cupboard or corner, so you can’t directly point with the remote control unit to the device.
To do this, disable the remote control signal receiving function (“Remote lock function” (v p. 103)).
IR receiver
RC OUT
o Remotely connecting Marantz devices
When you are using a Marantz device other than this unit that supports remote connection, you can transmit remote control signals just by connecting the device to the REMOTE CONTROL IN/OUT connector with a monaural cable.
Set the remote control switch located on the rear panel of the connected audio component to “EXTERNAL” or “EXT.” to use this feature.
NOTE
0When the remote control signal receiving function is disabled, you can not perform operations with the remote control unit.
|
Front panel |
Display |
Rear panel |
44 |
Remote |
Index |

|
Contents |
Connections |
Playback |
Settings |
Tips |
Appendix |
Connecting the power cord
After completing all the connections, insert the power plug into the power outlet.
 Power cord (supplied) To household power outlet
(AC 120 V, 60 Hz)
|
Front panel |
Display |
Rear panel |
45 |
Remote |
Index |

|
Contents |
Connections |
Playback |
Settings |
Tips |
Appendix |
o Contents
Basic operation
|
Turning the power on |
47 |
|
Selecting the input source |
47 |
|
Adjusting the volume |
48 |
|
Turning off the sound temporarily (Muting) |
48 |
|
Selecting a sound mode |
91 |
Playback a device
|
Playing a DVD player/Blu-ray Disc player |
48 |
|
Playing a USB memory device |
49 |
|
Listening to music on a Bluetooth device |
53 |
|
Listening to FM/AM broadcasts |
57 |
Playback network audio/service
|
Listening to Internet Radio |
65 |
|
Playing back files stored on a PC or NAS |
67 |
|
Getting the HEOS App |
71 |
|
AirPlay function |
80 |
|
Spotify Connect function |
83 |
Convenience functions
|
Convenience functions |
84 |
|
HDMI Control function |
93 |
|
Smart Menu function |
94 |
|
Sleep timer function |
96 |
|
Smart select function |
98 |
|
Panel lock function |
101 |
|
Remote lock function |
103 |
Other functions
|
Web control function |
104 |
|
Playback in ZONE2 (Another room) |
106 |
|
Front panel |
Display |
Rear panel |
46 |
Remote |
Index |

|
Contents |
Connections |
Playback |
Settings |
Tips |
Appendix |
Basic operation
Turning the power on
1Press POWER X to turn on power to the unit.
0You can press the input source select button when the unit is in standby mode to turn on the power.
0You can also switch the power to standby by pressing X on the main unit.
Selecting the input source
1Press the input source select button to be played back.
The desired input source can be selected directly.
0You can also select the input source by turning INPUT SELECTOR on the main unit.
|
Front panel |
Display |
Rear panel |
47 |
Remote |
Index |

|
Contents |
Connections |
Playback |
Settings |
Tips |
Appendix |
Adjusting the volume
1Use VOLUME df to adjust the volume.
0The variable range differs according to the input signal and channel level setting.
0You can also adjust the master volume by turning VOLUME on the main unit.
Turning off the sound temporarily (Muting)
|
1 |
Press MUTE :. |
|
|
0 |
MUTE indicator on the display flashes. |
|
|
0 |
: appears on the TV screen. |
0The sound is reduced to the level set at “Mute Level” in the menu. (v p. 116)
0To cancel mute, either adjust the sound volume or press MUTE : again.
Playback a DVD player/Blu-ray Disc player
The following describes the procedure for playing DVD player/Blu-ray Disc player.
1Prepare for playback.
A Turn on the power of the TV, subwoofer and player. B Change the TV input to the input of this unit.
2Press POWER X to turn on power to the unit.
3Press Blu-ray/DVD to switch an input source for a player used for playback.
4Play the DVD player or Blu-ray Disc player.
0This unit supports analog audio signals and PCM 2-channel signals. To play DVDs and Blu-ray Discs, set “PCM 2ch” as the audio format in the audio device settings.
|
Front panel |
Display |
Rear panel |
48 |
Remote |
Index |

|
Contents |
Connections |
Playback |
Settings |
Tips |
Appendix |
Playing a USB memory device
0Playing back music files stored on a USB memory device.
0Only USB memory devices conforming to mass storage class standards can be played on this unit.
0This unit is compatible with USB memory devices in “FAT32” or “NTFS” format.
0The audio format types and specifications supported by this unit for playback are as follows.
See “Playing back a USB memory devices” (v p. 177) for details.
0WMA
0MP3
0WAV
0MPEG-4 AAC
0FLAC
0Apple Lossless
0DSD
|
Front panel |
Display |
Rear panel |
49 |
Remote |
Index |

|
Contents |
Connections |
Playback |
Settings |
Tips |
Appendix |
Playing files stored on USB memory devices
1Insert a “FAT32” or “NTFS” formatted USB memory device into the USB port.
2Press USB to switch the input source to “USB”.
3Select the name of this unit.
4Browse the music on your USB memory device and select something to play.
0When you select something to play you will be asked how you want to queue up your music.
|
Play Now: |
Inserts the item into the queue after the |
|
currently playing track and plays the |
|
|
selected item immediately. |
|
|
Play Now & Replace |
Clears the queue and plays the |
|
Queue: |
selected item immediately. |
|
Play Next: |
Inserts the item into the queue after the |
|
current song and plays it when the |
|
|
current song ends. |
|
|
Add to End of Queue: |
Adds the item to the end of the queue. |
USB Music — Nature
Naure 01
Play Now
Artists
Play Now & Replace Queue
|
Artists |
|||
|
Play Next |
|||
|
Artists |
|||
|
Add to End of Queue |
|||
|
Cancel |
Artists |
||
Nature 05
Various Artists
|
Front panel |
Display |
Rear panel |
50 |
Remote |
Index |
 Loading…
| Производитель | Marantz |
| Количество каналов | 2.2 |
| Тип | Дискретный сильноточный стереоусилитель |
| Выходная мощность | 75 Вт на канал (8 Ом, 20 Гц – 20 кГц, КНИ: 0,08%), 135 Вт на канал (6 Ом, 1 кГц, КНИ: 0,7%) |
| Входная чувствительность/импеданс | 200 мВ/47 кОм (линейный вход), 2,5 мВ/47 кОм (MM-фонокорректор) |
| Диапазон частот | 10 Гц – 100 кГц (+ 1, — 3 дБ, режим Direct, аналоговые разъемы) |
| Отношение сигнал/шум | 98 дБ (аналоговые линейные разъемы, режим Direct), 74 дБ (фонокорректор) |
| Коэффициент гармоник | 0,01% |
| Режимы Direct и Pure Direct | поддерживаются |
| Регулировка тембров | ВЧ: ± 6 дБ (20 кГц), НЧ: ± 6 дБ (20 Гц) |
| FM-тюнер/тюнер DAB+ | есть |
| Поддержка беспроводной мультирум-сети HEOS | да |
| ЦАП | 32-битный AKM AK4458 |
| Поддерживаемые аудиоформаты (по локальной сети и USB) | MP3, WMA, AAC, FLAC, FLAC HD (до 24 бит/192 кГц), ALAC (до 24 бит/192 кГц), WAV (до 24 бит/192 кГц), DSD (до 5,6 МГц) |
| Восстановление сжатого аудио | поддерживается |
| Режим воспроизведения | без пауз для FLAC, WAV, ALAC, DSD |
| Веб-сервисы | TuneIn, Spotify Connect, Tidal, Deezer, Amazon Prime Music и др. |
| Wi-Fi | IEEE 802.11a/b/g/n, 2,4/5 ГГц |
| Bluetooth версия | 4.1, максимальный радиус действия: до 30 м |
| Поддержка AirPlay/AirPlay 2 | есть |
| Поддержка 4K Ultra | HD 4K (60 Гц, 4:4:4 Pure Color) |
| Сквозной пропуск сигнала по HDMI в режиме standby | есть |
| Сквозной пропуск сигнала в 4K-разрешении | есть |
| Сквозной пропуск 3D-видео | есть |
| Управление по IP-адресу | да |
| Голосовое управление | поддерживается с помощью Amazon Alexa, Google Assistant, Apple Siri |
| Система настройки Setup Assistant | есть |
| Количество доп. зон | 1 |
| 4 кнопки быстрого прямого выбора (quick select) специально настроенных режимов прослушивания для определенных источников | есть |
| Входы | 5 x HDMI (4K/60 Гц, HDCP 2.3, HDR10, Dolby Vision, HLG, BT.2020), 2 линейных RCA, вход MM-фонокорректора (RCA), коаксиальный, 2 оптических, USB для внешних накопителей (на фронтальной панели), LAN-интерфейс |
| Выходы | HDMI (4K/60 Гц, HDCP 2.3, ARC, CEC), Pre Out для двух активных сабвуферов (2 разъема RCA), Pre Out для зоны 2 (RCA), 6,3 мм гнездо для наушников |
| Прочая коммутация | входной разъем системной шины, гнезда для AM/FM-антенн, 2 гнезда для Wi-Fi/Bluetooth-антенн, заземляющая клемма |
| Поддержка игрового автоматического режима с низкой задержкой ALLM (Auto Low Latency Mode) для приставок Xbox One | да |
| Поддержка протокола управления CEC для работы со Smart TV | да |
| Импеданс акустических систем A или B | 4–16 Ом |
| Потребляемая мощность | 180 Вт, standby: 0,1 Вт |
| Габариты (ШхВхГ) | 440x100x367 мм |
| Вес | 7,9 кг |
В цепи Marantz NR1200 интегрированы дискретные усилительные модули HDAM SA2 и HDAM SA3. Модель использует обратную связь по току, с помощью которой удается минимизировать искажения, расширить частотный диапазон, получить отличные переходные характеристики и в комбинации с мощным БП обеспечить уверенную работу даже с капризными в плане импеданса АС. Мощность Marantz NR1200 составляет 2 х 75 Вт на канал при 8 Ом.
На борту имеется полный набор линейных и цифровых входов. Благодаря встроенному конвертеру AKM AK4458 (24 бит/192 кГц) стерео-ресивер Marantz NR1200 можно использовать в качестве внешнего ЦАПа. Для этого на его тыльной панели имеется коаксиальный и оптический вход, причем вся печатная плата цифрового контура находится в металлическом футляре-экране и не оказывает негативное влияние на аналоговые цепи, также предусмотрены 5 HDMI-входов и один HDMI-выход (с поддержкой возвратного канала, что удобно при работе в связке с ТВ). Все порты относятся к версии 2.0a и поддерживают протокол HDCP 2.3, видео в разрешении 4K (60 Гц), 3D, HDR, Dolby Vision, передачу файлов в DSD-формате и другие функции. Модель имеет USB-порт для внешних накопительных устройств и два разъема для сабвуферов. Для подключения АС служат четыре пары винтовых терминалов.. Для подсоединения к спикерам используются четыре пары позолоченных винтовых клемм, что удобно для организации бивайринга. Есть Pre Out для пары активных сабвуферов и отдельный Pre Out для второй зоны.
В стерео-ресивере Marantz NR1200 установлены аудиофильские конденсаторы, резисторы с минимальными допусками и другие качественные комплектующие, а его схемотехника обеспечивает кратчайшие пути прохождения аудиосигнала. Применяется технология Marantz Musical Digital Filtering (MMDF), которая использует DSP и дает возможность задействовать один из двух цифровых фильтров, позволяющих получить чистое детальное звучание. Marantz NR1200 имеет встроенный усилитель для наушников, оснащенный регулятором громкости, модулем HDAM-SA2 и обеспечивающий возможность выбора коэффициента усиления.
Модель Marantz NR1200 обладает Bluetooth, двухдиапазонным Wi-Fi для надежного беспроводного соединения даже в перегруженной wireless-среде, поддерживает протокол AirPlay 2 для iOS-устройств и работает с мультирум-технологией HEOS. Экосистема HEOS обеспечивает трансляцию Hi-Res-аудио по воздуху в любое помещение без каких-либо задержек и потерь, а также позволяет управлять через приложение громкостью стримера и проигрыванием всего доступного аудиоконтента (в т.ч. online-контента сетевых сервисов) на всех поддерживающих HEOS устройствах, включая колонки.
При этом открывается доступ к Spotify Connect, Pandora, SiriusXM, Amazon Music, TIDAL, Deezer и прочим веб-сервисам, в т.ч. к веб-радио TuneIn. Помимо штатного пульта и HEOS-приложения отправлять команды Marantz NR1200 можно посредством голоса с использованием помощника Amazon Alexa. Для реализации данной функции требуется наличие установленного приложения HEOS Home Entertainment Skill и устройства Amazon Echo. По локальной сети и через USB Marantz NR1200 может проигрывать PCM (до 24 бит/192 кГц) и DSD вплоть до 5,6 МГц.