
В какие сроки происходит доставка техники Miele?
Товар из наличия доставят завтра в удобное для вас время или передадут в транспортную компанию, в случае отправки товара в другие регионы России. При наличии свободного транспорта возможна доставка в течение 2-5 часов, необходимо уточнить у оператора. Товар под заказ согласовывается дополнительно и в некоторых случаях требует частичную предоплату, обычно срок поставки занимает 1-4 недели.
Мы непрерывно работаем с 2010 года, наш магазин был среди первых официальных фирменных интернет магазинов Miele в России
Откуда бытовая техника? Это оригинал?
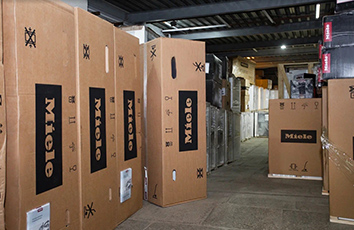
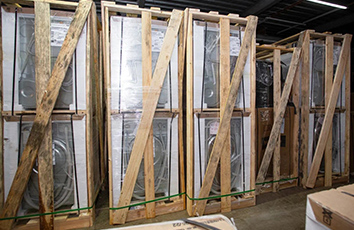
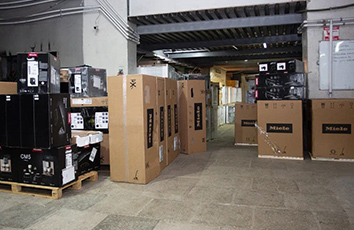
Вся техника оригинальная, привозится из Евросоюза и стран СНГ в заводской упаковке и обрешетке для большей безопасности ее сохранности.
Возможны установка и подключение техники?
Да. Техника будет установлена и подключена специалистами сервисного центра, тарифы подразумевают установку на готовые коммуникации. Все необходимые дополнительные работы согласовываются на месте с мастером.
Где можно посмотреть товары? Есть ли самовывоз?
Ознакомиться с товаром вы можете в нашем магазине на Рублевке, там же находится наш склад, который мы с радостью покажем. Посетив склад, вы сможете лично убедиться в широком ассортименте, качестве товара и его происхождении. При желании можно забрать товар со склада самостоятельно.
Действует ли гарантия на товар?
На все приборы действует гарантия 1 год. При желании за дополнительную плату +5% к стоимости товара, можно приобрести продленную гарантию общим сроком в 2 года. В этот период мы ремонтируем технику Miele за свой счет или меняем ее на новую в случае, если она не подлежит ремонту.
Как можно оплатить товар, и когда внести оплату?
После доставки и приема товара оплату можно совершить наличным средствами или банковской картой (предварительно требуется уведомить оператора для выделения экипажа с терминалом).Так же можно произвести оплату по выставленному банковскому счету (отправка товаров в регионы России осуществляется после полной предоплаты).
Техника в наличии в России или это предзаказ?
На складе в Москве хранится около 1500 — 2500 ед техники Miele в наличии. Это позволяет оперативно собирать полноценные комплекты для покупателей. При необходимости так же возможна поставка практически любого товара из ЕС в максимально короткие сроки, 1-4 недели.
-
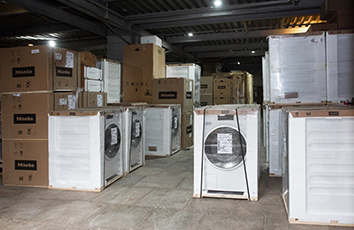
Кофемашина Miele CM 5310 OBSW
- Инструкция к кофемашине
Miele CM 5310 OBSW — инструкция к кофемашине к кофемашине на русском языке на Hausdorf
Сохранить файл: Инструкция к кофемашине Miele CM 5310 OBSW.PDF, 2.2 Мб
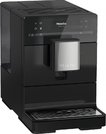
В наличии
143 000 руб.
Цена на 29.11.2023
Быстрая доставка
Доставка до подъезда в оговоренные сроки после предварительного согласования с оператором.
Подробнее
Профессиональная установка
Подключение на готовые коммуникации мастерами авторизованного сервисного центра.
Подробнее
Вернуться на страницу товара
Инструкция по эксплуатации и
гарантия качества
Кофемашина
До установки, подключения и подготовки прибора к работе обя-
зательно прочитайте инструкцию по эксплуатации. Вы обезопа-
сите себя и предотвратите материальный ущерб.
|
ru – RU, UA, KZ |
M.-Nr. 11 557 680 |
Ваш вклад в охрану окружающей среды
|
Транспортная упаковка |
Утилизация прибора |
|||||||
|
Упаковка защищает кофемашину от |
Электрические и электронные прибо- |
|||||||
|
повреждений при транспортировке. |
ры часто содержат ценные матери- |
|||||||
|
Сохраняйте оригинальную картонную |
алы. В их состав также входят опре- |
|||||||
|
коробку и части из стиропора для то- |
деленные вещества, смешанные ком- |
|||||||
|
го, чтобы позднее вы могли безопас- |
поненты и детали, необходимые для |
|||||||
|
но транспортировать прибор. |
функционирования и безопасности |
|||||||
|
приборов. При попадании в бытовой |
||||||||
|
мусор, а также при ненадлежащем |
||||||||
|
обращении они могут причинить вред |
||||||||
|
здоровью людей и окружающей сре- |
||||||||
|
де. В связи с этим никогда не выбра- |
||||||||
|
сывайте отслуживший прибор вместе |
||||||||
|
с бытовым мусором. |
||||||||
Рекомендуем Вам сдать отслужив-
ший прибор в организацию по при-
ему и утилизации электрических и электронных приборов в Вашем на-
селенном пункте. Если в утилизируе-
мом приборе сохранены какие-либо персональные данные, то за их уда-
ление Вы несете личную ответствен-
ность. Необходимо проследить, что-
бы до отправления прибора на утили-
зацию он хранился в недоступном для детей месте.
2

|
Содержание |
|
|
Ваш вклад в охрану окружающей среды ……………………………………………. |
2 |
|
Указания по безопасности и предупреждения …………………………………… |
6 |
|
Описание прибора ……………………………………………………………………………… |
16 |
|
Элементы управления и индикаторы………………………………………………….. |
17 |
|
Принадлежности…………………………………………………………………………………. |
18 |
|
Принцип управления …………………………………………………………………………… |
19 |
|
Ввод в эксплуатацию ………………………………………………………………………….. |
20 |
|
Жёсткость воды………………………………………………………………………………….. |
22 |
|
Наполнение ёмкости для воды …………………………………………………………… |
23 |
|
Наполнение контейнера для кофейных зерен ……………………………………. |
24 |
|
Включение и выключение…………………………………………………………………… |
25 |
|
Настройка центральной насадки на высоту чашек ……………………………. |
26 |
|
Приготовление напитков…………………………………………………………………….. |
27 |
|
Приготовление кофейных напитков с молоком и без него ……………………… |
27 |
|
Использование молока …………………………………………………………………………. |
27 |
|
Использование молока из картонных и других упаковок……………………. |
28 |
|
Приготовление кофейного напитка ……………………………………………………….. |
29 |
|
Прерывание приготовления ………………………………………………………………….. |
29 |
|
Две порции (сенсорная кнопка ) ………………………………………………………… |
29 |
|
Кофейник …………………………………………………………………………………………….. |
29 |
|
Приготовление напитков из молотого кофе …………………………………………… |
30 |
|
Загрузка молотого кофе…………………………………………………………………… |
30 |
|
Приготовление горячей воды (CM 5410, CM 5510, CM 5710) |
…………………… 31 |
|
Настройка степени помола…………………………………………………………………. |
32 |
|
Настройка количества молотого кофе, температуры заваривания и |
|
|
предварительного заваривания………………………………………………………….. |
33 |
|
Количество молотого кофе …………………………………………………………………… |
33 |
|
Температура заваривания …………………………………………………………………….. |
33 |
|
Предварительное заваривание молотого кофе………………………………………. |
34 |
|
Размер порции напитка………………………………………………………………………. |
35 |
3

|
Содержание |
|
|
Профили ……………………………………………………………………………………………… |
37 |
|
Создание профилей ……………………………………………………………………………… |
37 |
|
Изменение напитков в профиле ……………………………………………………………. |
37 |
|
Профили: приготовление напитков ……………………………………………………….. |
37 |
|
Изменить название……………………………………………………………………………….. |
37 |
|
Удалить профиль ………………………………………………………………………………….. |
38 |
|
Настроить смену профиля (Сменить профиль) ………………………………………. |
38 |
|
Установки ……………………………………………………………………………………………. |
39 |
|
Установки: отображение на дисплее и изменение ………………………………….. |
39 |
|
Язык…………………………………………………………………………………………………….. |
39 |
|
Выключение таймера через ………………………………………………………………….. |
39 |
|
Режим Eco……………………………………………………………………………………………. |
39 |
|
Информация (отображение информации на дисплее)…………………………….. |
39 |
|
Блокировка запуска ………………………………………………………………………….. |
39 |
|
Жесткость воды …………………………………………………………………………………… |
39 |
|
Яркость дисплея…………………………………………………………………………………… |
39 |
|
Громкость звука……………………………………………………………………………………. |
39 |
|
Заводские настройки……………………………………………………………………………. |
40 |
|
Демонстрационный режим……………………………………………………………………. |
40 |
|
Чистка и уход………………………………………………………………………………………. |
41 |
|
Обзор интервалов очистки……………………………………………………………………. |
41 |
|
Чистить вручную или в посудомоечной машине …………………………………….. |
42 |
|
Неподходящие чистящие средства ……………………………………………………….. |
43 |
|
Поддон для жидкости, сборный контейнер и декоративная пластина …….. |
44 |
|
Очистка ёмкости для воды ……………………………………………………………………. |
45 |
|
Снятие и очистка фильтра ёмкости для воды ………………………………………… |
45 |
|
Центральная насадка……………………………………………………………………………. |
46 |
|
Трубку подачи молока …………………………………………………………………………… |
48 |
|
Контейнер для кофейных зёрен и отсек для молотого кофе …………………… |
49 |
|
Чистка корпуса …………………………………………………………………………………….. |
49 |
|
Вызов меню Чистка и уход ……………………………………………………………………. |
50 |
|
Промывание прибора……………………………………………………………………………. |
50 |
|
Промывание трубки подачи молока ………………………………………………………. |
50 |
|
Обезжиривание заварного механизма и очистка внутреннего |
|
|
пространства ……………………………………………………………………………………….. |
52 |
|
Очистка прибора от накипи…………………………………………………………………… |
54 |
|
Транспортировка ………………………………………………………………………………… |
57 |
|
Выпаривание воды из кофемашины………………………………………………………. |
57 |
|
Упаковка………………………………………………………………………………………………. |
57 |
4

|
Содержание |
|
|
Что делать, если …………………………………………………………………………………. |
58 |
|
Сообщения на дисплее …………………………………………………………………………. |
58 |
|
Некорректная работа кофемашины ………………………………………………………. |
61 |
|
Неудовлетворительный результат …………………………………………………………. |
68 |
|
Сервисная служба и гарантия качества……………………………………………… |
70 |
|
Контактная информация для обращений в случае неисправностей………… |
70 |
|
Гарантия ………………………………………………………………………………………………. |
70 |
|
Документы соответствия ………………………………………………………………………. |
70 |
|
Условия транспортировки …………………………………………………………………….. |
71 |
|
Условия хранения…………………………………………………………………………………. |
71 |
|
Дата изготовления………………………………………………………………………………… |
71 |
|
Экономия электроэнергии………………………………………………………………….. |
72 |
|
Подключение к электросети ………………………………………………………………. |
73 |
|
Указания по установке………………………………………………………………………… |
74 |
|
Размеры прибора ……………………………………………………………………………….. |
75 |
|
Технические данные……………………………………………………………………………. |
76 |
|
Гарантия качества товара …………………………………………………………………… |
77 |
|
Контактная информация о Miele…………………………………………………………. |
79 |
5
Указания по безопасности и предупреждения
Данная кофемашина отвечает нормам технической безопас-
ности. Тем не менее, её ненадлежащая эксплуатация может привести к травмам и материальному ущербу.
Прежде чем начать эксплуатировать прибор, внимательно прочитайте данную инструкцию по эксплуатации. В ней содер-
жатся важные указания по установке, технике безопасности,
эксплуатации и техобслуживанию. Вы обезопасите себя и пре-
дотвратите повреждения вашей кофемашины.
В соответствии со нормой IEC 60335-1 компания Miele насто-
ятельно рекомендует ознакомиться с главой об установке и подключении кофемашины и следовать указаниям и преду-
преждениям по безопасности.
Компания Miele не несёт ответственности за повреждения,
вызванные несоблюдением данных указаний и рекомендаций.
Сохраните инструкцию по эксплуатации и по возможности пе-
редайте её следующему владельцу прибора.
6

Указания по безопасности и предупреждения
Надлежащее использование
Эта кофемашина предназначена для использования в домаш-
нем хозяйстве и подобных бытовых условиях исключительно для личных, семейных, домашних и иных нужд, не связанных с осу-
ществлением предпринимательской деятельности.
Кофемашина рассчитана на использование исключительно до высоты 2 000 м над уровнем моря.
Кофемашина не предназначена для эксплуатации вне поме-
щений. Эксплуатация машины допускается только в условиях,
которые соответствуют требованиям, предъявляемым к жилым помещениям.
Лица, которые в силу своих физических способностей или из-
за отсутствия опыта и соответствующих знаний не способны уверенно управлять кофемашиной, должны находиться при ее использовании под присмотром.
Такие лица могут управлять кофемашиной без надзора лишь в том случае, если они получили все необходимые для этого разъ-
яснения. Они также должны понимать и осознавать возможную опасность, связанную с неправильной эксплуатацией прибора.
7
Указания по безопасности и предупреждения
Если у Вас есть дети
Опасность получения ожогов и ошпаривания вблизи наса-
док.
Кожа детей чувствительнее реагирует на высокие темпера-
туры, чем кожа взрослых.
Не позволяйте детям дотрагиваться до горячих деталей кофе-
машины или находиться очень близко к выпускным насадкам.
Устанавливайте кофемашину в зоне, недоступной для детей.
Детей младше 8 лет не следует допускать близко к кофема-
шине и шнуру электропитания.
Дети старше 8 лет могут пользоваться кофемашиной без над-
зора взрослых, если они настолько освоили управление прибо-
ром, что могут это делать c уверенностью.
Дети старше 8 лет должны осознавать возможную опасность,
связанную с неправильной эксплуатацией прибора.
Не оставляйте без надзора детей, если они находятся вблизи кофемашины. Не позволяйте детям играть с кофемашиной.
Дети могут проводить чистку кофемашины при условии, что они старше 8 лет и находятся под присмотром.
Помните, что такие напитки, как эспрессо и кофе, не подходят для детей.
Опасность удушья. При игре с упаковкой (например плёнкой)
дети могут завернуться в неё или натянуть её на голову, что при-
ведёт к удушью. Храните упаковочный материал в недоступном для детей месте.
8

Указания по безопасности и предупреждения
Техническая безопасность
Повреждения кофемашины могут представлять собой угрозу Вашей безопасности. Проверяйте отсутствие на приборе види-
мых повреждений, прежде чем его устанавливать. Никогда не пользуйтесь поврежденной кофемашиной.
Перед подключением кофемашины обязательно сравните па-
раметры подключения (автоматический включатель, частота,
напряжение) на типовой табличке кофемашины с параметрами электросети.
Эти параметры должны соответствовать во избежание повреж-
дений прибора. В случае сомнений проконсультируйтесь со спе-
циалистом по электромонтажу.
Электробезопасность кофемашины гарантирована только в том случае, если она подключена к системе защитного заземле-
ния, выполненной в соответствии с предписаниями. Очень важ-
но проверить соблюдение этого основополагающего условия обеспечения электробезопасности. В случае сомнения поручите специалисту-электрику проверить домашнюю электропроводку.
Надежная и безопасная работа кофемашины гарантирована лишь в том случае, если она подключена к централизованной электросети.
Многоместные розетки или удлинители не обеспечивают не-
обходимую безопасность (опасность пожара). Не подключайте кофемашину к электросети с помощью данных устройств.
Эта кофемашина не может использоваться на нестационар-
ных объектах (например, судах).
Сразу же выньте вилку из розетки, если вы почувствуете запах гари или увидите повреждения.
Следите за тем, чтобы сетевой шнур не защемлялся и не тер-
ся об острые края.
9

Указания по безопасности и предупреждения
Следите за тем, чтобы сетевой кабель не свисал, т.к. о него
можно споткнуться. При этом возможны повреждения кофема-
шины.
Используйте кофемашину исключительно при окружающей температуре от +10 °C до +38 °C.
Устанавливайте кофемашину на высоте не менее 850 мм от пола.
Опасность перегрева. Убедитесь в достаточной вентиляции кофемашины. Не накрывайте кофемашину во время работы сал-
фетками или чем-либо подобным.
Если кофемашина установлена за закрытой мебельной двер-
цей, то используйте ее только при открытой дверце. За закры-
той мебельной дверцей скапливаются тепло и влага. Это может привести к повреждению прибора или/и окружающей мебели.
Не закрывайте мебельную дверцу во время работы прибора. За-
крывайте дверцу только после того, как кофемашина полностью остынет.
Защищайте прибор от попадания воды или водяных брызг. Не погружайте кофемашину в воду.
Ремонт, в том числе ремонт сетевого кабеля, имеют право производить только авторизованные фирмой Miele специалисты.
Вследствие неправильно выполненных ремонтных работ может возникнуть серьезная опасность для пользователя.
Право на гарантийное обслуживание теряется, если ремонт кофемашины выполняет специалист сервисной службы, не авто-
ризованной фирмой Miele.
Только при использовании оригинальных запчастей фирма
Miele гарантирует, что будут выполнены требования к безопас-
ности. Вышедшие из строя детали должны заменяться только на оригинальные запчасти Miele.
10

Указания по безопасности и предупреждения
При проведении ремонтных работ прибор должен быть от-
ключен от электросети.
Кофемашина считается отключенной от электросети, если
—отсоединена сетевая вилка кофемашины.
Тяните только за вилку, но не за сетевой кабель.
—выключен автомат защиты на распределительном щите,
—полностью вывернуты резьбовые предохранители на распре-
делительном щите.
Никогда не открывайте корпус прибора. Прикасание к разъ-
емам, находящимся под напряжением, а также внесение изме-
нений в электрическое и механическое устройство прибора,
опасно для Вас и может привести к нарушениям работы кофе-
машины.
Используйте исключительно оригинальные принадлежности
Miele. При использовании других принадлежностей теряется право на гарантийное обслуживание.
11
Указания по безопасности и предупреждения
Правильная эксплуатация
Опасность получения ожогов и ошпаривания вблизи наса-
док.
Выходящие жидкость и пар очень горячие.
Не держите никакие части тела под центральной насадкой и насадкой для горячей воды, когда из них выходят горячие жидкости или пар.
Не касайтесь никаких горячих деталей.
Насадки могут разбрызгивать горячую жидкость или пар. По-
этому следите за чистотой и правильностью монтажа цен-
тральной насадки.
Вода в поддоне для жидкости также может быть очень горя-
чей. Выливайте воду из поддона осторожно.
При использовании воды обратите внимание на следующее:
—Качество воды должно соответствовать действующим в стра-
не, где эксплуатируется кофемашина, требованиям к пить-
евой воде.
—Наполняйте ёмкость только холодной и свежей питьевой во-
дой. Горячая вода и другие жидкости могут повредить кофе-
машину.
—Меняйте воду ежедневно во избежание появления в ней мик-
робов.
—Не используйте воду, насыщенную углекислым газом.
Наполняйте контейнер для кофейных зерен исключительно обжаренными зернами кофе. Не наполняйте его обработанными кофейными зернами с содержанием добавок (например, кара-
мели) или молотым кофе.
Не наливайте в контейнер для кофейных зерен никакие жид-
кости.
12

Указания по безопасности и предупреждения
Не используйте сырой кофе (зелёные необжаренные кофей-
ные зёрна) или смешанный кофе с содержанием сырого кофе.
Сырые кофейные зёрна очень твёрдые и содержат остаточную влагу. Мельница кофемашины может получить повреждения уже при первом помоле таких зёрен.
Не заполняйте кофемашину кофейными зернами, обработан-
ными сахаром или карамелью, а также сахаросодержащими жидкостями. Сахар вызывает повреждения прибора.
Заполняйте отсек для молотого кофе исключительно молотым кофе со степенью помола не меньше среднего.
Не используйте карамелизированный зерновой и раствори-
мый кофе. Содержащийся в нем сахар склеивается и закупори-
вает заварной механизм у кофемашины. Таблетки для обезжи-
ривания заварного механизма не растворяют такие загрязнения.
Используйте исключительно молоко без каких-либо добавок.
Добавки чаще всего содержат сахар и закупоривают трубку по-
дачи молока.
При использовании натурального молока отдавайте предпоч-
тение только пастеризованному коровьему молоку.
Не помещайте напитки, содержащие алкоголь, после их под-
жигания под центральную выпускную насадку. Это может при-
вести к возгоранию и оплавлению пластиковых деталей кофема-
шины.
Не размещайте источники открытого огня, например, свечи,
на кофемашине или рядом с ней. Кофемашина может воспламе-
ниться, и затем огонь может распространиться дальше.
Не очищайте никакие предметы с помощью кофемашины.
13

Указания по безопасности и предупреждения
Чистка и уход
Перед чисткой отключите кофемашину от сети.
Ежедневно очищайте кофемашину после использования, осо-
бенно перед первым использованием (см. главу «Чистка и уход»).
Следите за тем, чтобы детали системы подачи молока тща-
тельно и регулярно очищались. Молоко содержит естественные микроорганизмы, число которых может сильно увеличиться при недостаточной очистке деталей.
Не применяйте для чистки пароструйные очистители. Пар мо-
жет попасть на токопроводящие детали и вызвать короткое за-
мыкание.
Регулярно, в зависимости от жесткости воды, очищайте кофе-
машину от накипи. Очищайте прибор более часто, если Ваша во-
да содержит много извести. Фирма Miele не несет ответствен-
ности за повреждения и неисправности, которые возникают в случае недостаточной очистки от накипи, использования непра-
вильных средств или неподходящей концентрации средств уда-
ления накипи.
Регулярно проводите обезжиривание заварного механизма с помощью таблеток для очистки от кофейных масел. В зависи-
мости от содержания жира в используемом сорте кофе завар-
ной механизм может засоряться быстрее, поэтому обезжирива-
ние заварного механизма рекомендуется проводить чаще, не дожидаясь напоминания системы.
Кофейную гущу следует утилизировать как биомусор или компост, но не сливать в систему канализации, так как может произойти ее засор.
14

Указания по безопасности и предупреждения
Для приборов с поверхностями из нержавеющей стали:
Не приклеивайте к стальной поверхности никакие записки,
скотч, клейкую ленту и другие клеящиеся предметы.
На покрытии стальных поверхностей могут легко возникать царапины. Их образование могут вызвать даже магниты.
15
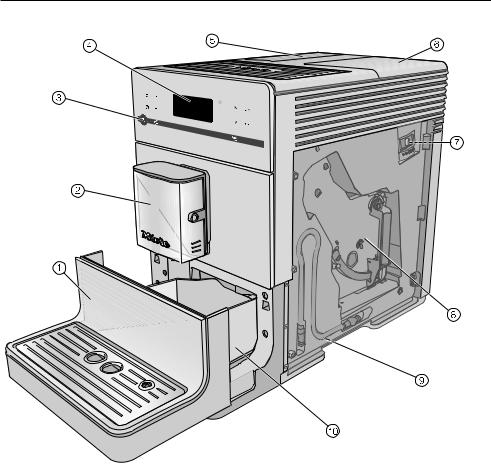
Описание прибора
a Нижняя панель с декоративной пластиной
b Центральная насадка с капучина-
тором и насадкой для горячей во-
ды
c Сенсорная кнопка Вкл/Выкл
d Панель управления
e Ёмкость для воды
f Контейнер для кофейных зёрен и отсек для молотого кофе
g Регулятор степени помола (за дверцей прибора)
h Заварной механизм (за дверцей прибора)
i Место хранения трубки подачи молока
j Поддон для сбора жидкости с крышкой и сборным контейнером
16
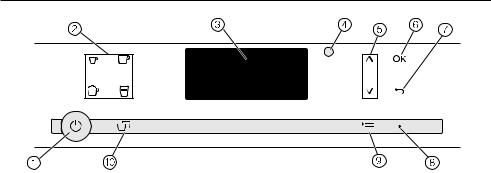
Элементы управления и индикаторы
a Сенсорная кнопка Вкл/Выкл
Включение и выключение кофема-
шины
b Сенсорные кнопки выбора на-
питков
Приготовление напитков
–Эспрессо
–Кофе
–Капучино
–Латте макиато
cДисплей
Для отображения информации о выполняемом действии или стату-
се
dМесто подключения оптического интерфейса
(только для сервисной службы
Miele)
eСенсорные кнопки
Пролистывание списков, выбор пунктов меню или изменение зна-
чений
f Сенсорная кнопка ОК
Для подтверждения сообщений на дисплее и для сохранения уста-
новок
g Сенсорная кнопка «Назад»
Для возврата в предыдущее меню и прерывания нежелательного дей-
ствия
hИндикатор
Горит пульсирующим светом, когда прибор включён, но дисплей нахо-
дится в энергосберегающем режи-
ме
iСенсорная кнопка
Для выбора:
Другие напитки
Профили (CM 5410, CM 5510, CM 5710)
Чистка и уход
Параметры
Установки
j Сенсорная кнопка «2 порции»
Для приготовления 2 порций одно-
го вида напитка сразу
17

Принадлежности
Вы можете приобрести эту продук-
цию и другие принадлежности в ин-
тернет-магазине www.miele-shop.ru,
сервисной службе Miele или в точках продаж Miele.
Принадлежности, входящие в
комплект
—Стартовый набор «Уход за техни-
кой Miele»
В зависимости от модели в комп-
лектацию прибора могут входить разные чистящие средства.
—Щёточка
для очистки трубки подачи молока
Дополнительно приобрета-
емые принадлежности
В ассортименте компании Miele име-
ются полезные принадлежности, а
также чистящие средства и средства по уходу, созданные для кофемашин.
—Универсальная салфетка из ми-
крофибры
для удаления следов от пальцев и легких загрязнений
—Чистящее средство для трубок подачи молока
для очистки системы подачи моло-
ка
—Таблетки Miele для очистки от кофейных масел
для обезжиривания заварного ме-
ханизма
—Таблетки Miele от накипи
для очистки от накипи трубок по-
дачи воды
—Кофейник CJ JUG
Термос-кофейник для кофе или чая
(объём 1 л)
—Ёмкость для молока с крышкой
для хранения молока и приготов-
ления молочной пены
18
Принцип управления
Сенсорные кнопки
Чтобы управлять кофемашиной, ка-
сайтесь пальцем сенсорных кнопок.
При прикосновении к любой кнопке раздаётся звуковой сигнал. Можно отрегулировать громкость звука ка-
сания кнопок или выключить его совсем (см. главу «Установки», раз-
дел «Громкость звука»).
Меню приготовления напит-
ков
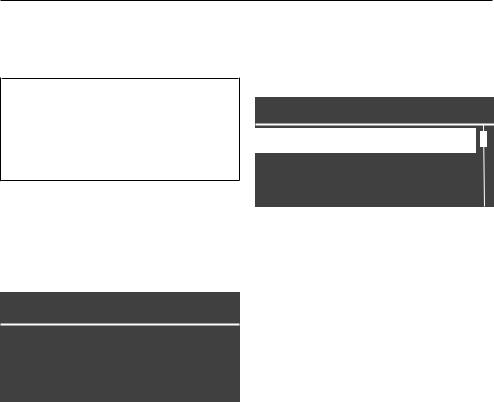
Вы находитесь в меню приготовления
напитков, если на дисплее отобража-
ется Выбрать напиток.
Miele
Выбрать напиток
Другие напитки вы найдёте в меню
Другие напитки (сенсорная кнопка ).
Вызов меню и навигация в
нём
Для вызова меню коснитесь соответ-
ствующей сенсорной кнопки .
Установки
Язык
Текущее время
Таймер
В открывшемся меню вы можете вы-
брать действия или изменить уста-
новки. Расположенная справа инди-
каторная полоса на дисплее указыва-
ет на то, что следуют другие опции или другой текст.
Если вы хотите выбрать какую-либо опцию, касайтесь кнопок со стрелка-
ми и , чтобы нужный пункт меню выделился светлым фоном.
Для подтверждения выбора косни-
тесь сенсорной кнопки OK.
В списке для выбора вы узнаете по символу , какая установка выбрана в данный момент.
Выход из меню или прерыва-
ние действия
Для выхода из текущего меню косни-
тесь сенсорной кнопки .
19
Ввод в эксплуатацию
Перед первым использова-
нием
Удалите листки-вкладыши с указа-
ниями, если они имеются.
Удалите защитную плёнку с деко-
ративной пластины и вставьте её в нижнюю панель.
Поставьте кофемашину на ровную поверхность, нечувствительную к воздействию воды (см. главу «Ука-
зания по установке»).
Тщательно очистите кофемашину
(см. главу «Чистка и уход»), прежде чем наполнить её водой и кофей-
ными зёрнами.
Вставьте сетевую вилку кофемаши-
ны в розетку.
Выньте ёмкость для воды и напол-
ните её свежей холодной водой.
Проследите, чтобы не была превы-
шена отметка «max.», и снова вставьте ёмкость в прибор.
Снимите крышку контейнера для зёрен, наполните его обжаренными зёрнами кофе и установите крышку обратно.
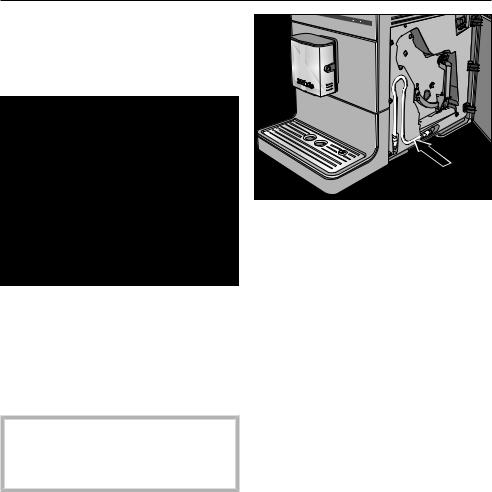
Совет: Если трубка подачи молока не
используется, можно разместить её
за дверцей прибора.
Первое включение
Коснитесь кнопки Вкл/Выкл .
На дисплее на короткое время появ-
ляется приветственное сообщение
Miele – Willkommen.
Касайтесь кнопок со стрелка-
ми , пока нужный язык не по-
явится на светлом фоне. Коснитесь кнопки OK.
Теперь при необходимости выбери-
те нужную страну и коснитесь по-
сле этого кнопки ОК.
Установка сохраняется.
На этом ввод прибора в эксплуата-
цию успешно завершён.
Подтвердите нажатием OK.
Начинается нагрев кофемашины и промывание трубок. Из центральной насадки при промывании прибора вытекает вода.
20
Ввод в эксплуатацию
Промойте трубку подачи молока
(см. «Промывание трубки подачи молока»), прежде чем в первый раз готовить напиток с молоком.
Примите во внимание, что полный аромат кофе и типичная кофейная пенка проявляются только после не-
скольких приготовлений кофе.
При первом использовании вылей-
те первые 2 напитка, чтобы из сис-
темы были удалены все остатки кофе после заводской проверки.
При приготовлении первых порций напитков перемалывается большее количество кофейных зёрен. Поэто-
му на крышке поддона для жидкос-
ти может оставаться некоторое ко-
личество молотого кофе.
21

Жёсткость воды
Жёсткость воды указывает на то,
сколько извести растворено в воде.
Чем больше извести содержится в воде, тем жёстче вода. Чем жёстче вода, тем чаще нужно очищать кофе-
машину от накипи.
Кофемашина измеряет количество израсходованной воды и пара. В за-
висимости от установленной жёстко-
сти воды можно приготовить мень-
шее или большее количество напит-
ков до того, как прибор необходимо будет очистить от накипи.
Настройте кофемашину на жёсткость местной воды, чтобы прибор мог без-
упречно работать и не получил по-
вреждения. После этого в определён-
ное время на дисплее появится напо-
минание о необходимости запуска очистки от накипи.
Вы можете получить информацию о жёсткости местной воды в организа-
ции водоснабжения вашего дома.
Предварительная заводская настрой-
ка прибора – уровень жёсткости 3.
Для прибора можно задать 4 степени жёсткости:
|
°dH |
ммоль/л |
ppm |
Уста- |
|
(мг/л CaCO3) |
новка * |
||
|
0–8,4 |
0–1,5 |
0–150 |
мягкая 1 |
|
8,4–14 |
1,5–2,5 |
150–250 |
средняя 2 |
|
14–21 |
2,5–3,8 |
250–375 |
жёсткая 3 |
|
> 21 |
> 3,8 |
> 375 |
очень |
|
жёсткая 4 |
|||
* В некоторых случаях степени жёсткости во-
ды, указанные на дисплее, могут отличаться от обозначения жёсткости, принятого в вашей стране. Чтобы настроить кофемашину на жёсткость используемой вами воды, обяза-
тельно ориентируйтесь на данные в таблице.
Установка жёсткости воды
Коснитесь сенсорной кнопки .
Выберите Установки | Жесткость
воды и подтвердите нажатием OK.
Выберите степень жёсткости и подтвердите выбор нажатием OK.
Установка сохраняется.
22
Наполнение ёмкости для воды
Опасность для здоровья вследствие использования несве-
жей воды.
Вода, находившаяся длительное время в ёмкости для воды, может содержать микроорганизмы и представлять угрозу для вашего здоровья.
Меняйте воду в ёмкости ежеднев-
но.
Опасность повреждения вследствие неправильной эксплуа-
тации.
Неподходящие жидкости, напри-
мер, минеральная, горячая или тёплая вода, а также другие жид-
кости могут повредить кофемаши-
ну.
Вода, обогащённая углекислым га-
зом, может вызвать образование в кофемашине сильного известково-
го налёта.
Заполняйте ёмкость для воды только свежей, холодной питьевой водой.
Откройте крышку с левой стороны кофемашины.
Вытяните ёмкость для воды за руч-
ку вверх.
Залейте холодную, свежую пить-
евую воду до отметки «max.» в ём-
кость для воды.
Вставьте ёмкость для воды снова в прибор и закройте крышку.
Обратите внимание на то, что ручка ёмкости должна быть направлена вправо, чтобы крышка хорошо за-
крывалась.
Если ёмкость установлена немного выше или наклонена, проверьте,
правильно ли она вставлена, воз-
можно также загрязнение поверх-
ности ёмкости. Вода может вы-
течь. При необходимости очистите поверхность ёмкости.
23

Наполнение контейнера для кофейных зерен
Вы можете приготовить кофе или эс-
прессо из цельных обжаренных ко-
фейных зёрен, которые кофемашина мелет для каждой порции кофе. Для этого наполните контейнер для ко-
фейных зёрен в кофемашине.
В качестве альтернативы вы можете готовить кофейные напитки из уже молотого кофе.
Опасность повреждения мель-
ницы вследствие неправильной эксплуатации.
При наполнении контейнера для кофейных зёрен неподходящими продуктами, например жидкостя-
ми, молотым кофе или обработан-
ным зерновым кофе с содержа-
нием сахара, карамели и т. п., ко-
фемашина будет повреждена.
Сырой кофе (зелёные необжарен-
ные кофейные зёрна) или смешан-
ный кофе с содержанием сырого кофе может также вызвать по-
вреждение мельницы. Сырые ко-
фейные зёрна очень твёрдые и со-
держат остаточную влагу. Мельни-
ца кофемашины может получить повреждения уже при первом по-
моле таких зёрен.
Засыпайте в контейнер исключи-
тельно обжаренные кофейные зёрна.
Совет: Сырые кофейные зёрна мож-
но смолоть с помощью мельницы для орехов и семечек. Такие мельницы имеют, как правило, вращающийся нож из нержавеющей стали. Затем засыпьте молотый сырой кофе пор-
циями в отсек для молотого кофе и приготовьте нужный кофейный напи-
ток.
Снимите крышку контейнера для зёрен.
Наполните контейнер зёрнами ко-
фе.
Снова установите крышку.
24

Включение и выключение
Включение кофемашины
Коснитесь кнопки Вкл/Выкл .
Прибор нагревается, и выполняется промывание трубок. Из центральной насадки течёт горячая вода.
Если на дисплее появляется Выбрать напиток, вы можете начать приготов-
ление напитков.
Если кофемашина уже включалась и прогрелась до нужной темпера-
туры, то при повторном включении промывание трубок не выполняется.
Если не будет нажата ни одна кнопка или не будет выполнятся ни одна программа чистки и ухода, дисплей выключается примерно через 7 ми-
нут для экономии электроэнергии.
Индикатор справа горит пульсирую-
щим светом, пока кофемашина вклю-
чена.
Чтобы вывести кофемашину из ре-
жима ожидания и снова готовить напитки, коснитесь одной из сен-
сорных кнопок.
Выключение кофемашины
Коснитесь кнопки Вкл/Выкл .
Если был приготовлен какой-либо на-
питок, то, прежде чем выключиться,
кофемашина промывает кофейные трубки.
Если вы приготовили напиток с моло-
ком, то на дисплее появится сообще-
ние Вставьте молочную трубку в решетку
поддона для жидкости.
Когда вы вставите трубку подачи молока в декоративную пластину,
коснитесь кнопки OK.
При длительном отсутствии
Если вы некоторое время не будете пользоваться кофемашиной, напри-
мер во время отпуска, обратите вни-
мание на следующее:
Очистите от содержимого поддон для сбора жидкости, сборный контейнер и ёмкость для воды.
Тщательно очистите все детали, в
том числе заварной механизм.
При необходимости выньте сете-
вую вилку из розетки, чтобы отсое-
динить кофемашину от электросе-
ти.
25

Настройка центральной насадки на высоту чашек
Вы можете установить центральную насадку по высоте используемых ча-
шек или бокалов. Таким образом, ко-
фе или эспрессо будут не так быстро остывать, и пенка будет сохраняться более длительное время.
Потяните центральную насадку вниз до края емкости.
Или подвиньте центральную насад-
ку выше, пока используемая ем-
кость не будет проходить под ней.
26
 Loading…
Operating Instructions Countertop Coffee Machine
To prevent accidents and machine damage, you must read these instructions before installation or use.
en-US M.-Nr. 11 675 680
Caring for the environment
2
Packaging material The packaging material used protects the machine during transportation. Please retain the original box and polystyrene pieces so that you can pack the appliance securely, should you need to transport it in the future.
Disposal of your old appliance Electrical and electronic appliances contain valuable materials. They also contain certain substances, compounds and components which were essential for the proper functioning and safe use of the equipment. Handling these materials improperly by disposing of them in your household waste can be harmful to your health and the environment. Therefore, please do not dispose of your old appliance with regular household waste and follow local regulations on proper disposal.
Consult with local authorities, dealers or Miele in order to dispose of and recycle electrical and electronic appliances. Miele assumes no responsibility for deleting any personal data left on the appliance being disposed. Please ensure that your old appliance is kept away from children until removal. Observe safety requirements for appliances that may tip over or pose an entrapment hazard.
Contents
3
Caring for the environment …………………………………………………………………… 2
IMPORTANT SAFETY INSTRUCTIONS …………………………………………………… 6
Machine description …………………………………………………………………………….. 16
Controls and indicators ………………………………………………………………………… 17
Accessories …………………………………………………………………………………………. 18
Operation……………………………………………………………………………………………… 19
Before first use …………………………………………………………………………………….. 20
Water hardness…………………………………………………………………………………….. 22
Filling the water tank…………………………………………………………………………….. 23
Filling the coffee bean container …………………………………………………………… 24
Switching on and off …………………………………………………………………………….. 25
Adjusting the coffee dispensers to the cup height …………………………………. 26
Preparing beverages …………………………………………………………………………….. 27 Making coffee with and without milk…………………………………………………………. 27 Milk preparation……………………………………………………………………………………… 27
Using milk from milk cartons or other suitable containers ……………………….. 28 Making a coffee drink……………………………………………………………………………… 28 Canceling a drink……………………………………………………………………………………. 28 2 portions ( sensor button) …………………………………………………………………… 29 Coffee pot……………………………………………………………………………………………… 29 Making coffee drinks from ground coffee ………………………………………………….. 30
Adding ground coffee…………………………………………………………………………. 30 Dispensing hot water (CM 5410, CM 5510, CM 5710)…………………………………. 31
Grinder setting ……………………………………………………………………………………… 32
Amount of coffee, brew temperature, and pre-brewing ………………………….. 33 Amount of coffee……………………………………………………………………………………. 33 Brewing temperature ………………………………………………………………………………. 33 Pre-brewing ground coffee………………………………………………………………………. 33
Portion size ………………………………………………………………………………………….. 34
Profiles…………………………………………………………………………………………………. 36 Creating profiles …………………………………………………………………………………….. 36
Contents
4
Changing drinks within a profile ……………………………………………………………….. 36 Making drinks stored in a profile ………………………………………………………………. 36 Changing the name ………………………………………………………………………………… 36 Delete profile …………………………………………………………………………………………. 37 Setting when the profile should change (Change profile) …………………………….. 37
Settings ……………………………………………………………………………………………….. 38 Displaying and changing Settings…………………………………………………………….. 38 Language………………………………………………………………………………………………. 38 Timer: switch off after……………………………………………………………………………… 38 Eco mode ……………………………………………………………………………………………… 38 Info (display information) …………………………………………………………………………. 38 System lock ………………………………………………………………………………………. 38 Water hardness ……………………………………………………………………………………… 38 Display brightness………………………………………………………………………………….. 38 Volume………………………………………………………………………………………………….. 38 Factory default settings …………………………………………………………………………… 38 Demo mode (showroom program) ……………………………………………………………. 39
Cleaning and care ………………………………………………………………………………… 40 Overview of cleaning intervals………………………………………………………………….. 40 Clean by hand or in dishwasher……………………………………………………………….. 41 Unsuitable cleaning agents ……………………………………………………………………… 42 Grounds container, drip tray, and drip tray cover ……………………………………….. 43 Cleaning the water container …………………………………………………………………… 44 Removing and cleaning the water container filter ……………………………………….. 44 Main dispenser ………………………………………………………………………………………. 44 Milk pipe……………………………………………………………………………………………….. 46 Bean container and ground coffee chute…………………………………………………… 47 Cleaning the casing………………………………………………………………………………… 47 Opening the Maintenance menu ………………………………………………………………. 48 Rinsing the machine……………………………………………………………………………….. 48 Rinsing the milk pipe ………………………………………………………………………………. 48 Degreasing the brew unit and cleaning the interior……………………………………… 50 Descaling the appliance ………………………………………………………………………….. 52
Transport ……………………………………………………………………………………………… 55 Evaporating the coffee machine……………………………………………………………….. 55 Packaging……………………………………………………………………………………………… 55
Frequently Asked Questions …………………………………………………………………. 56 Messages in the display………………………………………………………………………….. 56 Unusual performance of the coffee system ……………………………………………….. 59 Unsatisfactory results……………………………………………………………………………… 65
Contents
5
Service and warranty ……………………………………………………………………………. 67 Contact in the event of a fault ………………………………………………………………….. 67 Appliance warranty and product registration ……………………………………………… 67
Saving energy ………………………………………………………………………………………. 68
Electrical connection ……………………………………………………………………………. 69
Installation……………………………………………………………………………………………. 70
Appliance dimensions…………………………………………………………………………… 71
Technical data………………………………………………………………………………………. 72
IMPORTANT SAFETY INSTRUCTIONS
6
This coffee machine complies with all current safety requirements. Inappropriate use can, however, lead to personal injury and material damage.
Read the operating instructions carefully before using the coffee machine. They contain important information on the installation, safety, use and maintenance of the appliance. This prevents both personal injury and damage to the coffee machine. Miele strongly advises you to read and follow the instructions in the chapter on installing and connecting the coffee machine as well as the IMPORTANT SAFETY INSTRUCTIONS.
Miele cannot be held liable for injury or damage caused by non- compliance with these instructions.
Keep these operating instructions in a safe place and pass them on to any future owner.
IMPORTANT SAFETY INSTRUCTIONS
7
Intended use
This coffee machine is intended for household use.
Do not use the coffee machine outdoors.
This coffee machine must not be used at altitudes above 6560 ft (2000 m).
The machine is intended only for the preparation of coffee-based drinks such as espresso, cappuccino, latte macchiato etc. Any other usage is not supported.
Persons who lack physical, sensory or mental abilities or experience with the machine should not use it without supervision or instruction by a responsible person.
IMPORTANT SAFETY INSTRUCTIONS
8
Safety with children
Danger of burning and scalding at the dispensers.
Children’s skin is far more sensitive to high temperatures than that of adults.
Ensure children do not touch hot surfaces of the coffee machine or place parts of their body under the dispensers.
Keep the coffee system out of reach of children.
Keep children away from the coffee machine and the power cord.
Children may only use the coffee machine if they have been shown how to use it in a safe manner. Children must be aware of the potential dangers caused by incorrect operation.
Children should be supervised when they are near the coffee system. Do not allow them to play with it or to use the controls.
Young children must not be allowed to clean the coffee machine.
Remember that coffee and espresso are not suitable drinks for children.
Danger of suffocation. While playing, children may become entangled in packaging material (such as plastic wrapping) or pull the packaging material over their head, presenting the risk of suffocation. Keep packaging material away from children.
IMPORTANT SAFETY INSTRUCTIONS
9
Technical safety
Before installing the coffee system, check for externally visible damage. If the coffee system is damaged, it may pose a safety hazard and must not be used under any circumstances.
Before connecting the coffee system, check the voltage and frequency indicated on the data plate against the voltage and frequency of the household electrical supply. This data must correspond in order to prevent damage to the coffee system. If in doubt, consult a qualified electrician.
Be certain your appliance is properly installed and grounded by a qualified technician. To guarantee the electrical safety of this appliance, continuity must exist between the appliance and an effective grounding system. It is imperative that this basic safety requirement be met. If there is any doubt, have the electrical system of the house checked by a qualified electrician.
Reliable and safe operation of the coffee system can only be guaranteed if it is connected to the electrical supply.
Do not connect the machine to the electrical supply using an extension cord or power bar.
The coffee machine may not be used in mobile installations such as ships.
Unplug the coffee machine from the power supply immediately if you notice any damage or smell burning, for example.
Do not operate any appliance with a damaged cord or plug or after the appliance malfunctions, or has been damaged in any manner. Return appliance to the nearest authorized service facility for examination, repair or adjustment.
Ensure that the power cord will not be pinched or damaged by any sharp edges.
IMPORTANT SAFETY INSTRUCTIONS
10
The power cord should not hang down. Someone could trip over it with the risk of injury and the appliance could be damaged.
Do not let cord hang over edge of table or counter, or touch hot surfaces.
Do not place on or near a hot gas or electric burner, or in a heated oven.
Only use the coffee system in rooms where the ambient temperature is between +50F (10C) and +100F (38C).
Position the coffee machine at a height of at least 34″ (850 mm) from the floor.
Danger of overheating. Please ensure that there is adequate ventilation around the coffee machine. Do not cover the coffee machine with dish towels, etc. while it is in use.
If the coffee machine is installed behind a closed cabinet front, it may only be used with the cabinet door open (see Installation for the minimum niche size). Heat and moisture can build up behind the cabinet front when closed. This can result in damage to the machine and/or cabinetry. Do not close the cabinet door while the coffee machine is in use. Leave the cabinet door open until the coffee machine has cooled down completely.
Protect the coffee system from water and water spray. Do not immerse the appliance in water.
Repairs and other work by unqualified persons to the appliance and the power cord could be dangerous. The manufacturer cannot be held liable for unauthorized work. Repairs may only be carried out by a Miele-authorized service technician.
The manufacturer’s warranty will be invalidated if the appliance is not repaired by a Miele approved service technician from Technical Service.
IMPORTANT SAFETY INSTRUCTIONS
11
For repairs, the coffee system must be disconnected from the electrical power supply. The coffee system is only disconnected from the power supply if
— The power cord has been unplugged. Unplug the cord by pulling on the plug, not on the cord.
— The fuses to the household power supply are turned off.
— Any screw-in fuses in the household supply are fully unscrewed.
Never open the outer casing of the machine. Tampering with electrical connections or components and mechanical parts is highly dangerous to the user and can cause operational faults or electric shock.
To protect against fire, electric shock and injury to persons do not immerse cord, plugs, or coffee machine in water or other liquid.
Disconnect the coffee system from the power supply if it is not going to be used for some time.
Only use genuine Miele accessories. If other parts are used, warranty, performance, and/or product liability claims will be invalidated.
IMPORTANT SAFETY INSTRUCTIONS
12
Proper use
Danger of burning and scalding at the dispensers. The liquids and steam dispensed are very hot.
Keep away from the area underneath the dispensers when hot liquids and steam are being dispensed.
Do not touch hot components.
Hot liquid or steam could spatter from the spouts. Ensure that the main dispenser is clean and installed correctly.
Water in the drip tray can also be very hot. Take care when emptying it.
Please note the following regarding water:
— The water quality must conform to the requirements for drinking water in the country in which the coffee machine is being used.
— Only use cold, fresh tap water to fill the water container. Hot or warm water or other liquids can damage the coffee machine.
— Change the water every day to prevent a build-up of bacteria.
— Do not use sparkling water.
Only fill the bean container with roasted espresso or coffee beans. Do not fill the bean container with coffee beans that have been treated with additives or with ground coffee.
Do not pour liquids into the bean container.
Do not use green (unroasted) coffee beans or mixtures of coffee beans which contain green coffee beans. Green coffee beans are very hard and still contain residual moisture. These can damage the coffee machine grinder as soon as grinding begins.
Do not use oily beans or beans that have been treated with caramel, sugar, or other substances. Sugar and oil will damage the coffee system.
Only fill the coffee chute with ground coffee beans.
IMPORTANT SAFETY INSTRUCTIONS
13
Do not use any flavored ground coffee. The sugar in the coffee will stick to and block the brew unit of the coffee system. The cleaning tablets for degreasing the brew unit will not remove this type of deposit.
Only use plain milk. Most sugary additives can clog the milk lines and damage the machine.
If using dairy milk make sure that it has been pasteurized.
Do not place flaming alcohol mixtures underneath the main dispenser. The flames could ignite plastic components and cause them to melt.
Do not use open flames, such as a candle, on or near the coffee machine. The coffee machine could catch fire with the risk of the fire spreading.
Do not use the coffee system to clean objects.
IMPORTANT SAFETY INSTRUCTIONS
14
Accessories and parts
Miele can only guarantee the safety of the appliance when genuine Miele replacement parts are used. Faulty components must only be replaced by genuine Miele replacement parts.
Only use genuine Miele accessories. If other parts are used, warranty, performance, and/or product liability claims will be invalidated.
Miele will guarantee to supply functional spare parts for a minimum of 10 years and up to 15 years following the discontinuation of your coffee machine.
Cleaning and care
Turn the coffee system off at the main switch before cleaning.
Clean the coffee machine daily, particularly before using for the first time (see Cleaning and care).
All parts of the milk system need to be cleaned thoroughly and regularly.
Do not use a steam cleaner to clean this machine. Steam could reach electrical components and cause a short circuit.
Descale the coffee system regularly depending on the water hardness level in your area. Descale the machine more frequently in areas with very hard water. Miele cannot be held liable for damage arising from insufficient descaling, the use of incorrect descaling agent or the use of descaling agent that is not of the appropriate concentration.
Degrease the brew unit regularly with Miele cleaning tablets. Depending on the natural oil content of the coffee used, the brew unit can become blocked quite quickly.
Rinsing coffee grounds down the drain can cause the sink to clog. Instead, dispose of your coffee grounds appropriately as biodegradable waste (where facilities exist) or by composting.
IMPORTANT SAFETY INSTRUCTIONS
15
For machines with stainless steel surfaces:
Do not use sticky notes, transparent adhesive tape, masking tape, or other types of adhesive on the stainless steel surfaces.
Stainless-steel surfaces are susceptible to scratching. Even magnets can cause scratches.
SAVE THESE INSTRUCTIONS
Machine description
16
a Lower panel with drip tray cover
b Main dispenser with Cappuccinatore and hot water dispenser
c On/Off button
d Control panel
e Water container
f Bean container and ground coffee chute
g Grinder setting (behind the service panel)
h Brew unit (behind the service panel)
i Park position for milk pipework
j Drip tray with lid and grounds container
Controls and indicators
17
a On/Off button For switching coffee machine on and off
b Drink buttons For making drinks Espresso Coffee Capuccino Latte macchiato
c Display For showing information about the current action or status
d Optical interface (for Miele Technical Service only)
e Arrow buttons For scrolling through lists, selecting entries, or changing values
f OK sensor button For confirming display messages and saving settings
g Back sensor button For returning to the previous menu and canceling unwanted actions
h LED Flashes when the appliance is switched on and the display is in energy saving mode
i sensor button Additional drinks Profiles (CM 5410, CM 5510, CM 5710) Maintenance Parameters Settings
j 2 portions sensor button For dispensing 2 portions of a drink at once
Accessories
18
These products and other useful accessories can be ordered via the Miele Webstore, from Miele Service or from your Miele dealer.
Included accessories — Miele Welcome Pack
Different cleaning products are supplied depending on model.
— Cleaning brush for cleaning the milk pipework, for example.
Optional accessories Miele also offers a range of optional accessories, as well as cleaning and conditioning products for your coffee system.
— Cleaning agent for milk pipework for cleaning the milk system
— Cleaning tablets for degreasing the brew unit
— Descaling tablets for descaling the water pipework
— CJ Jug 1.0 l Insulated flask for coffee or tea (pot function)
— Milk flask with lid For storing and preparing milk
Operation
19
Sensor buttons To operate the coffee machine, tap the sensor buttons with your finger.
An audible signal is generated each time a button is tapped. You can adjust the volume of the signal tones or switch the tones off (see Settings Volume).
Drinks menu When the following appears in the display, you are in the drinks menu: Select drink.
Miele
Select drink
You can find more drinks in the Additional drinks menu ( sensor button).
Selecting a menu and navigating within a menu To select a menu, tap the sensor button.
Settings
Time Timer
Language
You will then be able to start an action or change settings in the menu. A scroll bar at the right of the display shows that additional options or text are available.
To select an option, tap the arrow buttons and until the option you want is highlighted.
Tap OK to confirm your selection.
The setting which is currently selected in a list will have a checkmark beside it.
Exiting a menu or canceling an action To exit the current menu, tap the sensor button.
Before first use
20
Before using for the first time Remove any notices from the
machine.
Remove the protective film from the drip tray cover and place it into the lower panel.
Place the coffee machine on a level flat surface that is not sensitive to water (see Installation).
Clean the coffee machine thoroughly (see Cleaning and care) before filling it with water and coffee beans.
Insert the plug of the coffee machine into the socket.
Remove the water container and fill it with fresh, cold tap water. Only fill the container up to the max. mark and then reinsert the water container.
Take the lid off the coffee bean container, fill it with roasted coffee beans, and replace the lid.
Tip: The milk pipe can be stored behind the service panel when not in use.
Turning on for the first time Tap the On/Off button .
Miele — Willkommen appears briefly in the display.
Use the arrow buttons to highlight the required language. Tap OK.
You might also be asked for your location.
Your machine has been successfully set up and is ready for use.
Confirm with OK.
The coffee machine heats up and rinses the pipework. The water used for rinsing will run out of the main dispenser.
Before preparing milk for the first time, rinse the milk pipework (see Cleaning and care Rinsing the milk pipework).
Before first use
21
Please note that the coffee aroma and the characteristic crema only develops after the first few coffees have been made.
To ensure that any coffee residues from the factory testing process are removed from the brewing system, please throw away the first 2 cups of coffee when using the coffee machine for the first time.
A larger quantity of coffee beans is ground for the first coffee drinks. Powder from the coffee grounds may adhere to the lid of the drip tray.
Water hardness
22
Water hardness is an indication of the amount of minerals dissolved in water. The more minerals in the water, the higher the water hardness. The harder the water is, the more frequently the coffee machine needs to be descaled.
The coffee machine measures the amount of water used and steam made. Depending on the level of water hardness set, more or fewer drinks can be dispensed before the appliance needs to be descaled.
Program the coffee machine to the water hardness level of your area so that it functions correctly and does not get damaged. A prompt to descale the machine will then appear in the display at the correct time.
Your local water authority will be able to tell you the hardness of the water in your area.
The water hardness level is set to 3 at the factory.
The appliance has 4 programmable hardness levels:
dH gr/gal ppm (mg/l CaCO3)
Set- ting*
08.4 08.7 0150 Soft 1
8.414 8.714.6 150250 Medium 2
1421 14.621.9 250375 Hard 3
> 21 > 21.9 > 375 Very hard 4
* The hardness levels shown in the display may differ from the hardness level designations in your area. You must follow the values in the chart to set the correct water hardness level for your area.
Setting water hardness Tap the sensor button.
Select Settings | Water hardness and confirm with OK.
Select the hardness level and confirm with OK.
The setting is now saved.
Filling the water tank
23
Risk to health due to contaminated water. Bacteria can develop in water which has been sitting in the water container for too long and is a risk to your health. Change the water in the water container every day.
Risk of damage due to incorrect operation. Unsuitable liquids such as hot or warm water or other liquids can damage the coffee machine. Carbonated water leaves too much limescale in the coffee machine. Only use cold, fresh tap water to fill the water container.
Open the lid on the left-hand side of the coffee machine.
Pull the water container up and out of the appliance.
Fill the water container with fresh, cold tap water up to the max. mark.
Replace the water container and close the lid.
Make sure that the water container handle is on the right so that the lid can close properly.
If the water container sits a little too high or at an angle, check that it is fitted correctly or whether the surface that it is sitting on is soiled. Water could leak. If necessary, clean the surface that the water container sits on.
Filling the coffee bean container
24
Coffee or espresso can be made from whole roasted coffee beans which are freshly ground for each cup. This requires the coffee bean container to be filled with coffee beans.
Alternatively, you can make coffee drinks with ready ground coffee.
Risk of damage to the grinder due to incorrect operation. The coffee machine will be damaged if the bean container is filled with unsuitable substances such as liquids, ground coffee, or coffee beans treated with sugar, caramel, or similar. In addition, green (unroasted) coffee beans or mixtures of coffee beans which contain green coffee beans can damage the grinder. Green coffee beans are very hard and still contain residual moisture. These can damage the coffee machine grinder as soon as grinding begins. Only put roasted coffee beans in the bean container.
Tip: You can use a nut or seed grinder to grind green coffee beans. These grinders generally have a rotating stainless steel blade. You can then add the ground green coffee one portion at a time to the ground coffee chute and make the desired coffee drink.
Take the lid off the coffee bean container.
Fill the bean container with roasted coffee beans.
Replace the lid.
Switching on and off
25
Switching the coffee machine on Tap the On/Off button .
The appliance heats up and rinses the pipework. Hot water will run out of the main dispenser.
When Select drink appears in the display, you can make drinks.
If the coffee machine is already at operating temperature, rinsing will not take place when the appliance is switched on.
If no buttons are touched or maintenance programs carried out, the display will turn off after approx. 7 minutes to save energy. The LED on the right flashes as long as the machine is switched on.
Tap any one of the sensor buttons to wake the appliance up again to make a drink.
Switching the coffee machine off Tap the On/Off button .
If coffee has been dispensed, the coffee machine will rinse the pipework automatically before switching off.
If you have made a drink using milk, Place milk pipe in drip tray will appear in the display.
Insert the end of the milk pipe into the aperture in the drip tray, and then tap OK.
Switching off for longer periods of time If the coffee machine is not going to be used for a while, e.g., if you are going on vacation, remember to do the following:
Empty the drip tray, the grounds container, and the water container.
Clean all parts thoroughly, including the brew unit.
If necessary, switch off the machine and remove the plug from the electrical outlet to disconnect the appliance from the power supply.
Adjusting the coffee dispensers to the cup height
26
You can adjust the main dispenser to suit the height of the cup you are using so that the coffee or espresso will not cool down as quickly and the crema will have a better consistency.
Pull the main dispenser down until it is at the same level as the rim of the cup. Alternatively, push the main dispenser up until there is enough room to fit a larger cup or mug underneath.
Preparing beverages
27
Danger of burning and scalding at the dispensers. The liquids and steam dispensed are very hot and can cause scalding. Keep away from the area underneath the dispensers when hot liquids and steam are being dispensed. Do not touch hot components.
Making coffee with and without milk The following drinks can be made:
— Ristretto is a concentrated, stronger espresso. It is prepared with the same amount of coffee as for an espresso but with a lot less water.
— Espresso is a strong aromatic coffee with a thick hazelnut-brown colored froth known as the crema on top. We recommend using espresso- roasted coffee beans to make an espresso.
— Coffee differs from espresso by the increased amount of water and the roast of the beans. We recommend using coffee beans of the correct roast to make the coffee.
— Lungo is a coffee with significantly more water.
— Capuccino consists of approx. 2 thirds milk froth and 1 third espresso.
— Latte macchiato consists of 1 third each of hot milk, milk froth, and espresso.
— Caff latte consists of espresso and hot milk.
Hot milk and milk froth can also be made.
Milk preparation
Milk or milk alternatives (e.g., soy milk) containing added sugar can clog up the milk pipe and the rest of the milk pipework. Residues from unsuitable liquids can interfere with milk preparation. The milk used must not contain any additives. Only use pasteurized cow’s milk.
If you have not made any milk drinks for a while, rinse the milk pipework thoroughly before making the first drink.
Tip: Using cold cow’s milk (< 50F/10C) with a protein content of at least 3% will produce the perfect milk froth. You can select milk with a fat content according to your personal preference. With whole milk (at least 3.5% fat), the milk froth will be slightly creamier than with low-fat milk.
Preparing beverages
28
Using milk from milk cartons or other suitable containers
The milk pipe is located behind the service panel.
Connect the milk pipe to the aperture in the main dispenser.
Place a container with sufficient milk next to the coffee machine.
Place the end of the milk pipe in the container. Make sure that it is sufficiently immersed in the milk.
Tip: The Miele milk flask is the perfect addition to Miele coffee machines if you make a lot of coffees with milk. The milk flask is dishwasher-safe and easy to store in the fridge after preparing. Good milk froth can only be made with cold milk (< 50F/10C). The Miele milk flask is available to order from the Miele online shop, from Miele Service, or from your Miele dealer.
Making a coffee drink
Place a cup under the main dispenser.
Select a drink: Tap the sensor button for the drink you want. Or select a drink from the Additional drinks menu ( sensor button).
Dispensing will start.
Canceling a drink To cancel making a drink, tap the
drinks sensor or the sensor button for drinks from Additional drinks again.
Drink preparation will be canceled.
Tip: You can also cancel making a drink by tapping the OK sensor button as soon as Stop appears in the display.
Preparing beverages
29
When making coffee with milk or 2 portions of a drink you can cancel each stage individually by tapping the OK sensor button.
2 portions ( sensor button) You can dispense 2 portions of a drink into 1 large cup or into 2 cups at the same time.
Place a cup under each of the main coffee dispenser spouts.
Tap the sensor button immediately before or after you start making a drink.
The dispensing starts and 2 portions of the desired drink will be dispensed.
If, after a while, you have not tapped any of the drink buttons, the 2 portions option will revert back to single portions.
Coffee pot You can make several cups of coffee one after the other automatically with the Coffee pot function (max. 0.75 liter) to fill a coffee pot, for example. Up to 6 cups can be made in this way.
You can use the Coffee pot function twice in a row. After this, the coffee machine needs to cool down for one hour in order to prevent it from being damaged.
Make sure that the bean container and the water container have enough beans and water inside them before starting the Coffee pot function.
Place a sufficiently large container under the main dispenser.
Tap the sensor button.
Select Additional drinks | Coffee pot and confirm with OK.
Select the number of cups you want (3 through 6) and confirm with OK.
Follow the instructions given in the display.
Each portion of coffee will be ground, brewed, and dispensed individually. You can follow the process on the display.
Canceling Coffee pot
Tap the sensor button.
Coffee pot dispensing will stop.
Tip: A stainless steel coffee pot is available as an optional accessory from Miele for the Coffee pot function. The CJ JUG coffee pot is available to order from the Miele online shop, from Miele Technical Service, or from your Miele dealer.
Preparing beverages
30
Making coffee drinks from ground coffee To make drinks using ready ground coffee, add a portion of ground coffee to the ground coffee chute. This allows you to make a decaffeinated coffee even if the bean container is already filled with regular coffee beans, for example.
Only 1 portion of coffee or espresso can be made at a time when using ready ground coffee.
Place a maximum of 0.4 oz (12 g) g in the ground coffee chute. If too much ground coffee is added, the brew unit will not be able to process the coffee.
Adding ground coffee
The coffee machine will use all the ground coffee that has been added to make the next coffee.
Tap the sensor button.
Select Additional drinks | Ground coffee and confirm with OK.
Add ground coffee and select drink will appear in the display.
First take the lid off of the coffee bean container and then take the cover off the ground coffee chute.
Place a maximum of 0.4 oz (12 g) in the ground coffee chute.
Replace the cover to the ground coffee chute after adding the ground coffee.
Replace the lid on the coffee bean container.
Place a cup under the main dispenser.
Select a drink.
The coffee will now be made.
Preparing beverages
31
Dispensing hot water (CM 5410, CM 5510, CM 5710)
Please note that the water dispensed is not hot enough for making black tea.
Place a suitable container centrally underneath the main dispenser.
Tap the sensor button.
Select Additional drinks | Hot water and confirm with OK.
Hot water will run into the container under the main dispenser.
Grinder setting
32
When the beans are ground correctly, the coffee or espresso will flow evenly into the cup with a good crema. The perfect crema should have a hazelnut-brown color.
The grinder setting you select will be used for all coffee drinks.
There are various ways to tell whether the coffee grinder is set correctly.
The coffee has been too coarsely ground if:
— The espresso or coffee flows into the cup too quickly.
— The crema is very pale and uneven.
Set a finer grinder setting.
The coffee has been too finely ground if:
— The espresso or coffee flows into the cup very slowly.
— The crema is dark brown.
Set a coarser grinder setting.
Only adjust the grinder one setting at a time. Start making a new drink to grind beans again. Adjust the grinder setting one setting at a time again.
Open the service panel.
Push the slide control one setting to the left (for finer grinding) or one setting to the right (for coarser grinding).
Close the service panel.
Make one cup of coffee.
After this, you can adjust the grinder setting again.
The altered grinder setting will not be used until after the second coffee has been dispensed.
Amount of coffee, brew temperature, and pre-brewing
33
You can set the amount of coffee, the brewing temperature, and pre-brewing for each drink individually. To do this, first select the drink from the Parameters menu and then adjust the drink parameters.
Tap the sensor button and select Parameters.
Select a drink and confirm with OK.
The current settings for the amount of coffee, brewing temperature, and pre- brewing will be displayed for this drink.
Select Amount of coffee, Brew temperature, or Pre-brewing.
Select the setting you want and confirm with OK.
The setting is now saved.
CM 5410, CM 5510, CM 5710: The changed parameter is always saved in the current profile. The name of the current profile is shown in the top left of the display.
Amount of coffee The coffee machine can grind and brew 614 g of coffee beans per cup. The greater the quantity, the stronger the coffee.
There are various ways to tell whether the amount of coffee is set correctly:
The amount of coffee is too low if:
— the espresso or coffee flows into the cup too quickly
— the crema is very pale and uneven
— the espresso or coffee lacks body
Increase the amount of coffee so that more ground coffee is brewed.
The amount of coffee is too high if:
— the espresso or coffee flows into the cup very slowly
— the crema is dark brown
— the espresso or coffee tastes bitter
Decrease the amount of coffee so that less ground coffee is brewed.
Tip: If the coffee is too strong for you or it tastes bitter, try a different type of bean.
Brewing temperature The brewing temperature must be adapted to the roast of the beans you are using. This is crucial whether you are making espresso or coffee.
Several types are sensitive to high brewing temperatures, resulting in an impaired taste. If your coffee tastes bitter, the brewing temperature you have selected might be too high.
Espresso is usually brewed at higher temperatures.
Pre-brewing ground coffee When the pre-brewing function is turned on, the freshly ground coffee is first moistened with a little hot water. Then the remaining water is forced through the moistened coffee at high pressure. This helps release the flavor of the coffee.
You can set a short or long duration for pre-brewing or turn the Pre-brewing function off completely.
Portion size
34
The flavor of the coffee produced depends not only on the type of coffee, but also on the amount of water used. You can program the amount of water for all coffee drinks and hot water to suit the size of your cups and the type of coffee you are using. This does not alter the amount of coffee used.
For coffee drinks that use milk, you can also set the amount of milk or milk froth to be dispensed with these drinks, as well as the amount of coffee or espresso. Additionally, you can set the portion sizes for hot milk and milk froth alone.
A maximum portion size can be programmed for each type of drink. Dispensing stops once this has been reached. The maximum possible portion size is then saved by the appliance for this type of drink.
If the water container becomes empty while making a drink, the coffee machine will stop programming the portion size. The portion size will not be saved.
There are two ways of initiating the programming of the portion size:
— by touching the drink button when you are making a coffee, or
— by selecting Portion size in the Parameters menu.
CM 5410, CM 5510, CM 5710: The changed portion size is always saved in the current profile. The name of the current profile is shown in the top left of the display.
Canceling portion size programming
Tap the drinks button again or the sensor button for drinks from Additional drinks.
Changing the portion size while making a drink You can change and save the portion size for espresso , coffee , cappuccino , and latte macchiato while making these drinks.
Place a cup under the main dispenser.
Tap the sensor button for the desired drink until Change appears in the display.
An audible tone will sound as soon as portion size programming starts. (As long as the volume has been set for the audible signals see Volume.)
The desired drink will be made and Save will appear in the display.
When the cup is filled up to the level you want, confirm with OK.
If you want to change the portion size for coffee with milk, the ingredients of the drink are saved one after the other during preparation.
When the quantity for each ingredient reaches the level you want, confirm with OK.
The programmed mix of ingredients and the portion size will now be dispensed every time that particular drink is selected.
Portion size
35
Changing the portion sizes in the Parameters menu
You can only change the portion sizes for lungo, caff latte, hot milk, and milk froth via the Parameters menu.
Place a suitable container under the main dispenser.
Tap the sensor button and select Parameters.
Select the drink you want.
Select Portion size and confirm with OK.
Now proceed as for changing the portion size while making a drink.
Profiles
36
(CM 5410, CM 5510, CM 5710)
In addition to the Miele drinks menu (Miele profile), you can create individual profiles to cater for different tastes and preferences.
Within the profile, you can adjust the portion sizes and parameters individually for all drinks.
The name of the current profile is shown in the top left of the display.
Creating profiles Tap the sensor button and select
Profiles. Confirm with OK.
The Profiles menu opens.
Select Create profile.
The editor will open in the display.
Enter the profile name:
— To enter a character, highlight the one you want and confirm your choice with OK.
— To delete a character, tap the sensor button.
— To save the name, select the checkmark and confirm with OK.
The profile is created.
Changing drinks within a profile When you change the parameters of a drink within a profile, these settings only apply to the active profile. The settings for drinks contained within other profiles remain unaffected.
Select the profile you want.
The name of the selected profile is shown in the top left of the display.
You can now change the drinks individually.
Making drinks stored in a profile Place a suitable container under the
main dispenser.
Tap the sensor button and select Profiles.
Select the profile you want and confirm with OK.
Select the drink you want.
The machine starts dispensing the drink.
Changing the name
This selection is only possible if a profile has been allocated in addition to the Miele standard user profile.
Use the arrow buttons to select Change name and tap OK.
Proceed the same as with Create profile:
— Select to delete a character.
— To enter new characters, highlight the relevant character and confirm with OK,
— Save the new name by selecting in the display and tapping OK.
Profiles
37
Delete profile
This selection is only possible if a user profile has been allocated in addition to the Miele standard user profile.
Select Delete profile and confirm with OK.
Select the profile you wish to delete.
Select Yes and confirm with OK.
The profile will be deleted.
Setting when the profile should change (Change profile) You can choose between the following options:
— Manually: The selected profile will remain active until you select another one.
— After each use: The machine will revert to the Miele profile whenever a drink is dispensed.
— When turned on: The Miele profile will be displayed whenever the coffee machine is switched on, regardless of which profile was selected before the machine was last switched off.
Select Change profile and confirm with OK.
Select the option you want and confirm with OK.
Settings
38
Displaying and changing Settings The drinks menu is displayed.
Tap the sensor button.
Select Settings and confirm with OK.
Select the menu option that you want to display or change.
Confirm with OK.
Change the setting as required and confirm with OK.
Language You can select the language and, if applicable, your location for all display text.
Tip: If you select the wrong language by mistake, you can find the Language option again via the symbol.
Timer: switch off after If none of the keys have been pressed or no drink has been prepared, the coffee machine will turn itself off after 30 minutes to save energy.
You can change this pre-setting using the arrow buttons to a time between 15 minutes and 9 hours.
Eco mode Eco Mode is an energy-saving mode. The system does not heat up until someone starts making a drink.
Eco mode is activated by default.
Info (display information) You can display the number of drinks dispensed so far and how many more can be dispensed until the maintenance programs have to be run.
System lock You can lock the coffee machine to prevent it from being used by unauthorized persons, such as children.
Temporarily deactivating the system lock
Press and hold OK for 6 seconds.
The system lock is reactivated when the coffee machine is next switched off.
Water hardness See Water hardness for more information.
Display brightness Change the display brightness using the arrow keys .
Volume The volume of the alarm and the sensor buttons can be set using the arrow buttons .
Tip: To switch off the tones, touch the arrow buttons until no more segments are filled in and Turned off appears.
Factory default settings You can reset the coffee machine to its factory default settings.
Settings
39
The following will not be reset:
— The number of drinks dispensed and the appliance status (No. of portions until appliance needs descaling, … brew unit needs degreasing)
— Language
— Profiles and the associated drinks (CM 5410, CM 5510, CM 5710)
Demo mode (showroom program)
Do not activate this setting for domestic use.
The Showroom program function enables the coffee machine to be demonstrated in stores or showrooms. Although the sensor buttons and display seem to be working, the thermo block is not being heated. The appliance does not dispense any drinks, run maintenance programs, or save any settings.
You can activate demo mode without commissioning the appliance. The water container is empty or not inserted. Switch the coffee machine on. As soon as the Fill and replace the water container message appears, touch the button for 5 seconds. Demo mode is activated.
Cleaning and care
40
Risk to health due to inadequate cleaning. Heat and moisture inside the coffee machine can cause coffee residues to become moldy and/or milk residues to go off and pose a risk to health. Carefully clean the coffee machine regularly.
Overview of cleaning intervals
Recommended frequency What do I have to clean/maintain?
Daily (at the end of the day)
Water container
Grounds container
Drip tray and drip-tray cover
Once a week (more often if heavily soiled)
Main dispenser with integrated Cappuccinatore
Brew unit
Area underneath the brew unit and the drip tray
Housing (particularly important immediately after descaling the appliance)
Milk pipe
Once a month Bean container and ground coffee chute
Water container filter
When prompted Degrease the brew unit (with 1 cleaning tablet)
Descale the appliance (with 1 descaling tablet)
Cleaning and care
41
Clean by hand or in dishwasher
The brew unit is not dishwasher safe. Only clean the brew unit by hand with warm water. Do not use any cleaning agents.
The following components must be cleaned by hand only:
— Main dispenser stainless steel cover
— Brew unit
— Bean container lid
— Lower panel
Risk of damage as a result of excessively high dishwasher temperatures. Components may be ruined (e.g., may become warped) if washed in a dishwasher at temperatures higher than 130F (55C). For dishwasher-safe components, always select dishwasher programs with a maximum temperature of 130F (55C).
Contact with natural dyes, such as those found in carrots, tomatoes, and ketchup, may discolor the plastic parts in the dishwasher. This discoloration does not affect the stability of the parts.
The following parts are dishwasher- safe:
— Drip tray and lid
— Drip tray cover
— Waste unit
— Water container
— Main dispenser (without stainless steel cover)
— Ground coffee chute cover
Cleaning and care
42
Danger of burning and scalding on hot components or by hot liquids. Components can become very hot during operation. Touching hot components can cause burning. The liquids and steam dispensed are very hot and can cause scalding. Keep away from the area underneath the dispensers when hot liquids and steam are being dispensed. Always allow the coffee machine to cool down before cleaning it. Please be aware that water in the drip tray can also be very hot.
Risk of damage due to moisture ingress. The steam from a steam cleaning appliance could reach electrical components and cause a short circuit. Do not use a steam cleaner to clean the coffee machine.
It is important to clean the appliance regularly. Milk residues can go off and can block the milk pipe.
Unsuitable cleaning agents
Contact with unsuitable cleaning agents can alter or discolor all surfaces. All surfaces are susceptible to scratching. Scratches on glass can in some circumstances lead to breakage. Remove any residual cleaning agent immediately. Make sure you remove any spillages or splashes of descaling agent immediately.
To avoid damaging the surfaces of your appliance, do not use:
— cleaning agents containing soda, ammonia, acids, or chlorides
— solvent-based cleaning agents
— cleaning agents containing descaling agents (unsuitable for cleaning the housing)
— stainless steel cleaning agents
— dishwasher cleaners (unsuitable for cleaning the housing)
— glass cleaners
— cleaning agents for ceramic cooktops
— oven cleaners
— abrasive cleaning agents, such as scouring powder, scouring liquid, or pumice stones
— hard abrasive brushes or sponges, such as pot scourers or sponges which have been previously used with abrasive cleaning agents
— eraser sponges
— sharp metal scrapers
— steel wool or stainless-steel wire scourers
Cleaning and care
43
Grounds container, drip tray, and drip tray cover
Clean the drip tray and grounds container every day to avoid unpleasant smells and mildew.
The grounds container is located in the drip tray. Water from rinsing also collects in the grounds container.
A prompt will appear in the display when the drip tray and/or the grounds container is full and needs to be emptied. Empty the drip tray and the grounds container.
Danger of burning! If the rinsing process has just finished, wait a while before removing the drip tray from the appliance. The water used for rinsing will continue to run out of the coffee spouts for a while.
Pull the drip tray carefully out of the coffee machine. Take the lid off.
Empty the drip tray and grounds container.
Remove the drip tray cover and the lower panel .
Clean all parts thoroughly.
Clean the lower panel by hand only using warm water and liquid dish soap. All other parts are dishwasher-safe.
Clean the inside of the appliance underneath the drip tray.
Reassemble all parts and place the drip tray back in the coffee machine.
Make sure the drip tray has been pushed into its niche as far as it will go.
Make sure that the drip tray cover is correctly fitted (see illustration).
Clean the area under the coffee machine. Water can get under the appliance when the drip tray is removed.
Cleaning and care
44
Cleaning the water container Clean the water container every day. You can clean the water container in the dishwasher once a week.
Make sure that the valve, the underside of the water container, and the surface the water container sits on are clean. Otherwise, the water container will not sit correctly.
Remove the water container.
The water container can be cleaned in the dishwasher, or by hand using warm water and liquid dish soap. Dry the water container after cleaning.
Carefully clean and dry the surface the water container sits on in the coffee machine, particularly the recesses.
Reinsert the water container.
Removing and cleaning the water container filter Clean the water container filter once a month.
The water container filter is located under the water container.
Remove the water container.
Unscrew the cap. Remove the seal and the filter.
Rinse all parts carefully under running water.
Then replace the water container filter (with the cross facing upward) and then the seal. Finally screw the cap back on tightly.
Replace the water container.
Main dispenser
Clean the main dispensers stainless steel cover by hand only, using warm water and liquid dish soap.
All other parts are dishwasher-safe.
Pull the stainless steel cover off.
Cleaning and care
45
Pull the dispensing unit down to remove it.
Release the upper section with the holder for the milk pipe from the dispensing spouts.
Clean all parts thoroughly.
Clean the surfaces of the main dispenser and the dispensing spouts with a damp cloth.
If the milk pipe connecting pieces are blocked, clean them under running water with the brush supplied:
Insert the brush into the pipe connecting piece. Move it back and forth until all milk residue has been removed.
If you have released the connecting piece from the milk pipe: when reassembling, ensure that the smaller, thinner end of the connecting piece is pushed into the hose.
Cleaning and care
46
Reassembling the main dispenser
The dispensing unit is easier to reassemble if the individual parts are dampened with water beforehand.
Reassemble the dispensing unit.
Refit the dispensing unit onto the main dispenser. Press firmly to ensure the dispensing unit is securely fitted without any gaps.
Replace the stainless steel cover and connect the milk pipe if required.
Milk pipe
Risk to health due to inadequate cleaning. Milk naturally contains bacteria. Heat and moisture inside the coffee machine can cause these bacteria to multiply, e.g., milk residues can go off and pose a risk to health. Clean all components in which milk is transported thoroughly on a regular basis.
The milk pipe must be cleaned approx. every 5 days.
There are two options for cleaning the milk pipework:
— You can remove and dismantle the main dispenser with its integrated Cappuccinatore and either wash it in the dishwasher or by hand with warm water and liquid dish soap (see Main dispenser with integrated Cappuccinatore).
— Or you can clean the milk pipework using the Clean milk pipework maintenance program together with a cleaning agent for milk pipework (see Maintenance programs Cleaning the milk pipework).
Tip: In addition to your weekly cleaning routine, we recommend carrying out the alternative cleaning procedure once a month. For example, if you manually clean the machine once a week, then you should run the Clean milk pipework maintenance program once a month. This combination will ensure that the milk pipework is cleaned optimally.
Cleaning and care
47
Bean container and ground coffee chute
Danger of injury from the grinder! Switch off the machine and remove the plug to disconnect the machine from the power supply before cleaning the bean container.
Coffee beans contain oils which can deposit on the walls of the bean container and hinder the flow of the beans. Therefore, clean the bean container regularly with a soft cloth.
Open the bean container.
Remove any coffee beans.
Clean the bean container with a dry, soft cloth.
The coffee bean container can now be refilled.
If necessary, clean the ground coffee chute:
Open the ground coffee chute and remove any ground coffee residue.
Tip: Use a vacuum cleaner to remove any coffee residues from the bean container and the ground coffee chute.
Cleaning the casing
If soiling is allowed to stay for a long time or there is contact with unsuitable cleaning agents, surfaces can alter or discolor. Remove any soiling immediately. Ensure that any splashes of descaling solution are wiped up immediately.
Switch the coffee machine off.
Clean the appliance front with a clean soft sponge and a solution of warm water and liquid dish soap. Then dry with a soft cloth.
Cleaning and care
48
Opening the Maintenance menu You can find the maintenance programs in the Maintenance menu. Carry out the relevant maintenance program when the prompt to do so appears in the display.
Tap the sensor button.
Select Maintenance and confirm with OK.
You can now select a maintenance program.
Rinsing the machine If you have made a coffee drink, the coffee machine will rinse the coffee pipework automatically before switching off. You can also start the Rinse appliance function manually.
Rinsing the milk pipe Milk residues can block the milk pipe. The milk pipe should therefore be rinsed regularly. If a drink has been made using milk, the prompt to insert the end of the milk pipe into the drip tray will appear at the latest when you switch the machine off.
You can also rinse the milk pipe manually.
Tap the sensor button.
Select Maintenance | Rinse milk pipework and confirm with OK.
When prompted, place the end of the milk pipe into the right-hand aperture in the drip tray.
Confirm with OK.
The milk pipe will now be rinsed.
Cleaning the milk pipe with the maintenance program For optimum cleaning results, it is recommended to use the Miele Cleaning Agent for milk pipes. The cleaning agent for milk pipes has been specially developed for use with Miele Coffee Machines and prevents subsequent damage.
It is available to order from the Miele online shop, from Miele Service, or from your Miele dealer.
The Clean milk pipework maintenance program lasts for approx. 10 minutes.
You need 1 stick of cleaning agent for milk pipes to clean the milk pipe.
Tap the sensor button.
Select Maintenance | Clean milk pipework.
Cleaning and care
49
The cleaning process cannot be canceled. It must be completed through to the end.
Confirm with OK.
The process will start.
Follow the instructions in the display.
Place milk pipe in cleaning agent will appear in the display.
Making a cleaning solution:
Dissolve the cleaning agent in a container with approx. 1 cup (200 ml) of lukewarm water. Stir the solution with a spoon until the powder has fully dissolved.
Carrying out the cleaning process:
Place the container next to the machine and hang the milk pipe in the cleaning solution. Make sure that it is sufficiently immersed in the cleaning solution.
Confirm with OK.
Follow the additional instructions given in the display.
The cleaning process is complete when rinsing has finished.
Tip: Rinse any residual cleaning agent out of the milk pipe with running water.
Cleaning and care
50
Degreasing the brew unit and cleaning the interior Depending on the natural oil content of the coffee used, the brew unit can become blocked quite quickly. It must be degreased regularly in order to ensure aromatic coffee and trouble-free operation of the coffee machine.
It is recommended to use Miele Cleaning Tablets to clean the brew unit. These have been specially developed for degreasing the brew unit in Miele Coffee Machines and prevent subsequent damage. The cleaning tablets are available to order from the Miele online shop, from Miele Customer Service, or from your Miele dealer.
The maintenance program for degreasing the brew unit lasts for approx. 15 minutes.
You need 1 cleaning tablet for the maintenance program.
After 200 portions have been dispensed, a message prompting you to degrease the brew unit will appear in the display.
Confirm the message with OK.
The message will appear at regular intervals. Once the maximum possible number of portions has been reached, the coffee machine will lock.
Degreasing the brew unit
No drinks can be made and Degrease the brew unit and clean inside of the machine appears in the display.
The cleaning process cannot be canceled. It must be completed through to the end.
Confirm with OK.
The maintenance program will then start.
Follow the instructions in the display.
Cleaning the brew unit and interior
Only clean the brew unit by hand with warm water. Do not use any cleaning agents. The moving parts of the brew unit are lubricated. Cleaning agents will damage the brew unit. To ensure good tasting coffee and to prevent a build-up of bacteria in the machine, remove and clean the brew unit under running water once a week.
Rinse the brew unit by hand and clean inside the machine will appear in the display.
Open the appliance door.
Press and hold the button under the brew unit handle and, while doing so, turn the handle to the left .
Cleaning and care
51
Carefully pull the brew unit out of the coffee machine.
Once you have removed the brew unit, do not change the position of the handle on the brew unit.
Clean the brew unit by hand under warm running water without using cleaning agent or liquid dish soap.
Wipe any remaining coffee off the two filters (see arrows).
Dry the funnel to prevent ground coffee from sticking to it the next time a coffee is made.
Risk to health due to inadequate cleaning. Damp coffee residues in the interior of the machine can become moldy and pose a risk to health. Remove coffee residues regularly and clean the interior of the machine.
Clean the interior of the coffee machine. Make sure that the areas highlighted in the illustration are cleaned especially well.
Tip: Use your vacuum cleaner to remove dry coffee grounds.
Place a cleaning tablet into the brew unit
Place a cleaning tablet in the brew unit, place it in the machine and close the machine door. will appear in the display.
Drop a cleaning tablet into the top of the brew unit (arrow).
Push the brew unit containing the cleaning tablet back into the coffee machine.
Cleaning and care
52
Press the button on the end of the handle of the brew unit and while doing so turn the handle clockwise .
Close the appliance door.
Follow the additional instructions given in the display.
The cleaning process is complete when the drinks menu appears.
Descaling the appliance
Risk of damage from splashes from the descaling solution. Sensitive surfaces and/or natural floors can suffer damage. Wipe up any spillages immediately when descaling.
Limescale builds up in the coffee machine through use. How often the machine needs to be descaled will depend on the water hardness level in your area. Limescale must be removed regularly.
The machine will guide you through the descaling process. Various messages will appear in the display, e.g., you will be prompted to empty the drip tray or fill the water container.
Descaling must be carried out. The process takes approx. 15 minutes.
The coffee machine prompts you in the display when it needs to be descaled. No. of uses until appliance needs descaling: 50 will appear in the display. The remaining number of drinks that can be made before descaling will show in the display after each drink.
Confirm the message with OK.
When the number of remaining portions reaches 0, the coffee machine will lock out.
You can switch the coffee machine off if you do not want to carry out the descaling program at this point. You cannot make any drinks until the machine has been descaled.
Cleaning and care
53
Descaling after prompt appears in the display
Descale the appliance will appear in the display.
Descaling cannot be canceled once it has started. It must be completed through to the end.
Confirm with OK.
The process will start.
Follow the instructions in the display.
When Fill the water container with descaling agent and lukewarm water up to the descaling symbol and place in appliance appears in the display, proceed as follows.
Preparing the descaling solution
For optimum descaling results, it is recommended to use the Miele Descaling Tablets. The descaling tablets have been specially developed for Miele Coffee Machines.
Other descaling agents, which contain other acids besides citric acid and/or other undesirable substances, such as chlorides, may cause damage to the product. Moreover, the descaling result required cannot be guaranteed if the descaling solution was not of the appropriate concentration.
The descaling tablets are available to order from the Miele online shop, from Miele Customer Service, or from your Miele dealer.
You will need 1 descaling tablet to descale the machine.
Add 1 descaling tablet to the water container.
Fill the water container to the mark with lukewarm water.
Follow the instructions for the mixing ratio carefully. Fill the water container with the specified amount of water. Otherwise, descaling will be incomplete.
Carrying out descaling
Reinsert the water container.
Follow the additional instructions given in the display.
When Rinse the water container and fill with fresh tap water up to the descaling symbol appears in the display:
Remove the water container and rinse it thoroughly with clean water. Ensure that no descaling solution residue remains in the water container. Fill the water container to the mark with fresh tap water.
Cleaning and care
54
The descaling process is complete when the drinks menu appears.
Transport
55
If the coffee system will not be used for an extended period of time, e.g. vacation, or will be transported over a long distance, the appliance should be prepared as follows.
— Empty and clean the coffee bean container
— Empty and clean the water reservoir
— Evaporating the coffee system
— Clean the interior of the machine
— Pack the machine securely
Evaporating the coffee machine The coffee machine should be evaporated before it is stored for a long period of time or transported any distance particularly at temperatures below freezing.
Evaporating the machine involves removing all traces of water from the system to prevent the risk of water and frost damage.
Switch the coffee machine on with the On/Off sensor button.
Tap the sensor button.
Tap the sensor button twice.
Empty the system? will appear in the display.
Select Yes and confirm with OK.
Follow the instructions in the display.
Danger of burning and scalding at the dispensers. Hot steam can cause scalding. Keep away from the area underneath the dispensers when steam or hot liquids are being dispensed. Do not touch hot components.
The evaporation process is finished when Program finished appears in the display and the display then goes out.
Switch off the machine and remove the plug from the electrical outlet to disconnect the appliance from the power supply.
Clean the drip tray and grounds container.
Packaging The coffee system should only be packed when it is clean and dry. Residues of coffee grounds can cause scratches on surfaces. Coffee and milk residues or water can cause a build-up of bacteria.
Use the original packaging including Styrofoam to pack the coffee system.
Also pack the operating instructions so that they are available when the coffee system is next used.
Frequently Asked Questions
56
With the help of the following guide minor faults in the performance of the machine, some of which may result from incorrect operation, can be remedied without contacting the Service Department.
This guide may help you to find the reason for the fault, and how to correct it.
Messages in the display
Error messages must be confirmed with OK, otherwise the message may reappear in the display even though the problem has been remedied.
To address the fault, follow the instructions on the display.
If the error message appears in the display again, contact Miele Technical Service.
Problem Possible cause and solution
F1, F2, F80, F82
There is an internal fault. Switch the coffee machine off with the On/
Off button . Wait for approximately one hour before switching the machine back on again.
F41, F42, F74, F77, F235, F236
There is an internal fault. Switch the coffee machine off with the On/
Off button . Wait for approximately 2 minutes before switching the machine back on again.
F10, F17 No water or very little water is being drawn in. Remove the water container. Fill the water
container with fresh tap water and reinsert the water container.
Remove and clean the water container filter (see Cleaning and care Removing and cleaning the water container filter).
Frequently Asked Questions
57
Problem Possible cause and solution
F73 or Check the brew unit
The brew unit cannot be positioned correctly. Switch the coffee machine off with the On/
Off button . Unplug the coffee machine. Wait for two minutes
before inserting the electrical plug back in the socket.
Remove the brew unit and rinse under running water.
Push the coffee ejector of the brew unit into the correct position.
Do not insert the brew unit. Close the service panel and switch the coffee machine on with the On/Off button .
This will initialize the brew unit motor and put it back into the start position. When Insert the brew unit appears in the display, put
the brew unit back in the appliance. Close the service panel.
Frequently Asked Questions
58
Problem Possible cause and solution
Too much ground coffee There is too much ground coffee in the ground coffee chute. The brew unit cannot compact ground coffee if more than two level spoonfuls of ground coffee are added to the coffee chute. The ground coffee will be emptied into the grounds container and the error message will appear in the display. Switch the coffee machine off with the On/
Off button . Remove and clean the brew unit by hand (see
Degreasing the brew unit and cleaning the interior).
Remove the ground coffee inside the coffee machine, e.g., with a vacuum cleaner.
Place a maximum of 12 g of coffee in the ground coffee chute.
Frequently Asked Questions
59
Unusual performance of the coffee system
Problem Possible cause and solution
The display remains dark when the coffee machine is turned on using the On/Off but- ton .
The On/Off button was not held for long enough. Tap and hold the On/Off button for at least
3 seconds.
The electrical plug is not properly plugged into the socket. Insert the electrical plug into the socket.
The breaker has tripped because the coffee machine, voltage, or another appliance is defective. Unplug the coffee machine. Contact a qualified electrician or Miele Service.
The coffee machine turns off suddenly.
The factory-set switch-off time (20 minutes) or the switch-off time you have programmed has been reached. If required, you can select a new switch-off time
(see Settings Timer).
The plug is not properly plugged into the electrical socket. Insert the plug into the electrical socket.
The sensor buttons do not respond. The machine can no longer be operated.
There is an internal fault. Disconnect power by unplugging the power cord
from the electrical outlet and or switching off the circuit breaker.
The display is hard to see or not legible.
The display brightness has been set too low. Change this setting (see Settings).
Frequently Asked Questions
60
Problem Possible cause and solution
The water container is empty. Fill and replace the water container has not appeared in the display.
Droplets of water have settled between the water container and the side walls of the housing, or this area is damp (see illustration).
Dry the surfaces. Take the water container out to refill it with water.
There is too much residual water on the inside walls of the water container, e.g., a biofilm has developed. Or the water container has a build-up of limescale. Clean the water container every day.
Fill and replace the water container appears in the display even though the water container is full and in the machine.
The water container is not in the correct position. Remove the water container and push it back in
again.
The water container was not correctly filled up and inserted during descaling. Fill the water container to the descaling mark
and restart the descaling program.
Fill and replace the water container appears after switching on even though the container is filled and installed in the machine. The appliance does not rinse.
The coffee machine needs descaling. Switch the coffee machine off with the On/
Off button . Wait approx. one hour. Switch the appliance back on again. As soon as
PreHeating appears, tap the sensor button and then select Descale the appliance.
Descale the coffee machine.
Frequently Asked Questions
61
Problem Possible cause and solution
After switching on the machine, the message Empty the drip tray and the waste container appears even though they are both empty.
This is not a fault. When the drip tray and grounds container are emptied, the internal counter is not reset after the coffee machine has been switched off. Empty the drip tray and the waste container appears in the display even though the drip tray and the grounds container are not filled to the maximum.
Neither milk nor milk froth comes out of the main dispenser.
The milk pipework is blocked. Clean the main dispenser, taking particular care to
clean the Cappuccinatore and milk pipework carefully with the cleaning brush.
Empty the drip tray and the waste container appears in the display, even though the drip tray has been emptied.
This is not a fault. The drip tray was not properly removed and/or replaced too quickly.
Insert the drip tray and the waste container appears in the display even though both are fitted.
The drip tray is not correctly fitted and is therefore not detected. Empty the drip tray and grounds container.
Reassemble all parts and push the drip tray back as far as it will go in the coffee machine.
The drip tray or the grounds container is too full or runs over al- though the drip tray and the grounds container were emptied after each message on the display.
This is not a fault. The drip tray and grounds container were probably removed or the appliance was opened without the drip tray and grounds container being emptied. When the drip tray is removed or the appliance opened, the internal counter for emptying the drip tray and grounds container is automatically reset. Remove the drip tray and grounds container from
the appliance and empty them.
Frequently Asked Questions
62
Problem Possible cause and solution
Fill the bean container ap- pears in the display even though the bean container has just been filled.
This is not a fault. Confirm the message with OK.
Insufficient coffee beans are getting into the grinder. Have you used a dark roast? This type of coffee bean is often oily. These oils can cling to the inside of the coffee bean container and hinder the flow of beans. Make a coffee and observe whether the coffee
beans drop into the coffee bean container. Clean the coffee bean container more often if you
are using a darker, more oily bean.
Try other types of coffee bean which are less oily.
The coffee machine does not rinse itself when turned on.
This is not a fault. If the coffee machine is already at operating temperature, rinsing will not take place when the appliance is switched on.
Coffee dispensing is re- peatedly interrupted and the message Fill the bean container appears in the display.
This is not a fault. The brew unit has not detected the ground coffee. Certain types of coffee produce a small amount of coffee when they are ground. Usually the grinder is set too fine and the amount is set to minimum. Confirm the message with OK.
If the coffee is too strong for you or tastes bitter, try a different type of coffee bean.
If the display appears with all types of coffee: Set the grinder to a coarser setting (see Grinder
setting). Select a larger amount of coffee.
Don’t forget to check any drinks changed in User profiles.
If the message only appears when dispensing certain drinks: Check the amount of coffee set for this drink (see
Amount of coffee). Select a larger amount of coffee.
You may also need to set a coarser grinder setting.
Frequently Asked Questions
63
Problem Possible cause and solution
The descaling process was started inadver- tently.
The descaling program cannot be stopped once OK has been tapped. It must now be completed through to the end. This is a security setting to fully descale the coffee machine. It ensure a long service life and that your coffee machine is functioning correctly. Descale the coffee machine (see Descaling the
machine).
The milk sputters when it is dispensed. Hissing noises can be heard when milk is being heated up or frothed. Although the milk should be frothed, only hot milk comes out of the main dispenser.
The milk temperature is too high. Good milk froth can only be achieved when cold milk (below 50F/10C) is used. Check the temperature of the milk.
The main dispenser with integrated Cappuccinatore is not correctly fitted and is taking in air. Or the spouts are blocked. Check whether the main dispenser is correctly
assembled. Make sure that all parts are tightly connected to one another.
If necessary, clean the main dispenser.
The milk pipework, connections, or the intake tube on the milk flask are blocked. Clean all parts thoroughly.
The steam jet on the main dispenser has a blockage.
Push the cleaning brush a maximum of 1 cm into the steam jet.
Clean the steam jet with the cleaning brush.
Frequently Asked Questions
64
Problem Possible cause and solution
Coffee grounds have settled on the lid of the drip tray and in the inte- rior around the brew unit.
This is not a fault. The movement of the brew unit during the brewing process can cause some ground coffee to fall around it. The type of beans used, the fineness of the ground coffee, and the amount of coffee ground also affect the amount. Important! Clean the interior of the coffee machine regularly to prevent bacteria, etc. Check whether the amount of coffee is set too high.
The underside of the coffee bean container cover is very damp. Drops of water are visi- ble.
A large number of drinks have been made one after the other and the ground coffee chute is not closed or not properly closed. Steam has risen up from the brew unit via the ground coffee chute and condensed under the cover. Replace the lid on the ground coffee chute making
sure it is properly sealed.
Water from making cof- fee has collected on the benchtop underneath the coffee machine.
This is not a fault. Water can get under the appliance when the drip tray is removed. Clean the surface underneath the coffee machine regularly.
The display lights up but the coffee machine does not heat up and no drinks are made. The coffee machine cannot be turned off.
The Demo mode for demonstrating the coffee machine in stores and showrooms has been activated. Deactivate Demo mode.
Frequently Asked Questions
65
Unsatisfactory results
Problem Possible cause and solution
The coffee is not hot enough.
The cup has not been pre-heated. The smaller the cup and the thicker its walls, the more important it is to pre-heat it. Pre-heat the cup with hot water, for example.
The brewing temperature is set too low. Set a higher brewing temperature.
The filters in the brew unit are blocked. Remove the brew unit and clean it by hand. Degrease the brew unit.
Heating-up is taking longer. The amount of water is no longer cor- rect and the coffee ma- chine is not performing properly. Coffee flows into the cup very slowly.
The coffee machine needs to be descaled. Descale the coffee machine.
Coffee is not flowing out of the main dis- penser. Or coffee is only being dispensed via one spout.
The main dispenser has a blockage. Rinse the coffee pipework (see Cleaning and care
Rinsing the appliance). If there is still no coffee coming out, or coffee is
only coming out of one side, clean the dispensing spouts with the cleaning brush.
The consistency of the milk froth is unsatisfac- tory.
The milk temperature is too high. Good milk froth can only be achieved when cold milk (below 50F/10C) is used. Check the temperature of the milk in the milk flask.
The milk pipe is blocked. Clean the main dispenser and milk pipework with
the brush.
Frequently Asked Questions
66
Problem Possible cause and solution
The coffee grinder makes a louder noise than usual.
The coffee bean container has become empty during the grinding process. Fill the coffee bean container with fresh beans.
There may be foreign objects such as plastic or stones in amongst the coffee beans. Switch the coffee machine off immediately.
Contact the Technical Service department.
The coffee flows too quickly into the cup.
The grind level is too coarse. Set the grinder to a finer setting (see Setting the
coffee grinder).
The coffee is dispensed too slowly into the cup.
The coffee is too finely ground. Set the grinder to a coarser setting (see Grinder
setting).
The brew unit is blocked. Degrease the brew unit (see Cleaning and care
Degreasing the brew unit and cleaning the interior).
The crema on the cof- fee or espresso is not as it should be.
The grinder setting is not correct. Set the grinder to a finer or coarser setting.
The brew temperature is too high for the type of coffee being used. Set a lower brewing temperature.
The coffee beans are no longer fresh. Add fresh beans to the coffee bean container.
Service and warranty
67
Contact in the event of a fault In the event of a fault which you cannot remedy yourself, please contact your Miele dealer or Miele Customer Service.
You can book a Miele Service Call online at www.miele.com/service.
Contact information for Miele Customer Service can be found at the end of this document.
Please quote the model identifier and serial number of your appliance (SN) when contacting Miele Customer Service. Both pieces of information can be found on the data plate.
Appliance warranty and product registration You can register your product and/or view the manufacturers warranty terms and conditions for Miele appliances and vacuum cleaners at www.mieleusa.com.
Saving energy
68
The following tips can help you save energy and money as well as help the environment:
— Operate the coffee machine in Eco mode (default setting).
— Energy consumption may increase if you change the factory default settings for the timer.
This setting uses more energy will appear in the display.
— Switch the coffee machine off with the On/Off sensor button when it is not in use.
— Change the setting for the Switch off after timer to 15 minutes. Then the coffee machine will switch off 15 minutes after the last drink has been made or a sensor button has been tapped.
Electrical connection
69
Before connecting the coffee machine, make sure that the connection data on the data plate (voltage and frequency) matches the domestic electrical supply. This data must match to prevent the coffee machine from being damaged. If in any doubt, consult a qualified electrician.
The connection data is provided on the data plate. The data plate can be found on the left-hand side of the appliance when the drip tray is pulled out.
The socket should be next to the appliance and easily accessible where possible.
Do not connect the coffee machine to the power supply using a multi-socket adapter or an extension lead. These do not guarantee the required safety of the appliance (risk of fire).
Do not connect the coffee machine to a stand-alone inverter. These devices are used for autonomous power supply, such as a solar power system. Power surges could cause a safety shutdown. This can damage the electronics.
The coffee machine must not be used with energy saving plugs. These reduce the energy supply to the appliance, which could generate excessive heat.
If the power cord is faulty, it must only be replaced by a qualified electrician.
Installation
*INSTALLATION*
70
Danger of overheating due to insufficient ventilation. If the coffee machine is not sufficiently ventilated, the appliance can overheat. Please ensure that there is adequate ventilation around the coffee machine. Do not cover the coffee machine with dish towels, etc. while it is in use.
If the coffee machine is installed behind a closed cabinet front, heat and moisture can build up behind the cabinet front when closed. This can result in damage to the coffee machine and/or cabinetry. Do not close the cabinet door while the coffee machine is in use.
Please observe the following installation instructions:
— The location of the appliance must be dry and well ventilated.
— The ambient temperature of the room in which the appliance is used must be between +50F and +100F (+10C and +38C).
— The coffee system must be set up on a level surface. The surface must be water resistant.
If the coffee machine is installed in a niche, the niche must provide the following minimum dimensions:
Height 20 1/16″ (510 mm)
Width 17 11/16″ (450 mm)
Depth 22 5/8″ (575 mm)
When setting up the appliance: Make sure that the service panel can be fully opened so that the brew unit can be removed with ease when required.
The coffee machine must be set up in the niche such that it sits flush with the front edge of the niche.
Appliance dimensions
*INSTALLATION*
71
a = 9 1/2″ (241 mm)
b = 14 3/16″ (360 mm)
c = 18 1/8″ (460 mm)
Technical data
72
Current draw in standby mode (default setting):
< 0.5 W
Pump pressure: max. 15 bar
Through-flow heater: 1 stainless steel thermo block
Dimensions (W x H x D): 9 1/2″ x 14 3/16″» x 18 1/8″ (241 x 360 x 460 mm)
Net weight: 21 lb (9.48 kg)
Power cord length: 3′ 11 1/4″ (120 cm)
Water container capacity:
4 1/4 c (1.3 l)
Bean container capacity:
0.44 lb (200 g)
Grounds container capacity:
Max. 6 portions of coffee grounds
Main dispenser: Height adjustable between 3 1/8″-5 5/16″ (80135 mm)
Grinder: Conical steel grinder
Grinder setting: Adjustable in 5 settings
Ground coffee amount: Max. 0.4 oz (12 g)
9 Independence Way Princeton, NJ 08540
U.S.A. Miele, Inc.
National Headquarters
Please have the model and serial number of your appliance available when contacting Customer Service.
Canada Importer Miele Limited
Headquarters and Miele Centre
Customer Service & Support Phone: 888-99-MIELE(64353) info@mieleusa.com www.mieleusa.com
161 Four Valley Drive Vaughan, ON L4K 4V8 www.miele.ca
Customer Care Centre Phone:
customercare@miele.ca
800-565-6435 905-532-2272
International Headquarters Miele & Cie. KG Carl-Miele-Strae 29 33332 Gtersloh Germany
M.-Nr. 11 675 680 / 00en-US
CM 53
Operating Instructions
Countertop Coffee Machine
To prevent accidents and machine damage, you must read these
instructions before installation or use.
en-US M.-Nr. 11 675 680
File type: PDF
File name: 18086273_miele-cm-5310-silence-tayberry-red-coffee-machines.pdf
File size: 2.13 MB
File Language: English
Pages: 76
Author: Miele
File created: 2021-03-24