

Widetrak LX
Snowmobile Owner’s Manual
for Maintenance and Safety

 WARNING
Read, understand, and follow all of the instructions and safety precautions in this manual and on all product labels.
Failure to follow the safety precautions could result in serious injury or death.
 WARNING
The engine exhaust from this product contains chemicals known to the State of California to cause cancer, birth defects or other reproductive harm.

The text is printed on 100% recycled with 40% post-consumer waste (PCW).

For your nearest Polaris dealer, call 1-800-POLARIS
or visit www.polarisindustries.com Polaris Sales Inc.,
2100 Hwy. 55, Medina, MN 55340 Phone 1-888-704-5290
Part No. 9922897 Rev 02 Printed in USA
*9922897 *

WELCOME
Thank you for purchasing a POLARIS vehicle, and welcome to our world-wide family of POLARIS owners. We proudly produce an exciting line of utility and recreational products.
•Snowmobiles
•All-terrain vehicles (ATVs)
•RANGER® utility vehicles
•Victory Motorcycles®
•Low emission vehicles (LEVs)
We believe POLARIS sets a standard of excellence for all utility and recreational vehicles manufactured in the world today. Many years of experience have gone into the engineering, design, and development of your POLARIS vehicle, making it the finest machine we’ve ever produced.
For safe and enjoyable operation of your vehicle, be sure to follow the instructions and recommendations in this owner’s manual. Your manual contains instructions for minor maintenance, but information about major repairs is outlined in the POLARIS Service Manual and should be performed only by a factory certified Master Service Dealer® (MSD) technician.
Your POLARIS dealer knows your vehicle best and is interested in your total satisfaction. Be sure to return to your dealership for all of your service needs during, and after, the warranty period.
We also take great pride in our complete line of apparel, parts and accessories, available through our online store at www.purepolaris.com. Have your accessories and clothing delivered right to your door!
1
POLARIS and THE WAY OUT are registered trademarks of POLARIS Industries Inc.
Copyright 2010 POLARIS Sales Inc. All information contained within this publication is based on the latest product information at the time of publication. Due to constant improvements in the design and quality of production components, some minor discrepancies may result between the actual vehicle and the information presented in this publication. Depictions and/or procedures in this publication are intended for reference use only. No liability can be accepted for omissions or inaccuracies. Any reprinting or reuse of the depictions and/or procedures contained within, whether whole or in part, is expressly prohibited.
The original instructions for this vehicle are in English. Other languages are provided as translations of the original instructions.
Printed in U.S.A.
2011 Widetrak LX Owner’s Manual P/N 9922897
2
TABLE OF CONTENTS
Introduction . . . . . . . . . . . . . . . . . . . . . . . . . . . . 4
This section contains helpful information for owners and drivers and illustrates the location of important identification numbers that should be recorded in the owner’s manual.
Safety . . . . . . . . . . . . . . . . . . . . . . . . . . . . . . . . . 7
This section describes safe vehicle operation and identifies warning labels and their locations.
Features and Controls . . . . . . . . . . . . . . . . . . . 26
This section identifies the locations of your snowmobile’s controls and features.
The Perfect Fit . . . . . . . . . . . . . . . . . . . . . . . . . 30
This section explains how to tailor the suspension and other features for an optimum riding experience.
Pre-Ride Inspections . . . . . . . . . . . . . . . . . . . . 38
This section explains procedures that must be performed before riding.
Operation . . . . . . . . . . . . . . . . . . . . . . . . . . . . . 45
This section explains proper engine break-in, operation of features and general operating procedures.
Maintenance . . . . . . . . . . . . . . . . . . . . . . . . . . . 59
This section defines your role, and your dealer’s role, in your snowmobile’s regular maintenance.
POLARIS Products. . . . . . . . . . . . . . . . . . . . . 103 Troubleshooting . . . . . . . . . . . . . . . . . . . . . . . 104
This section is a quick reference guide to solving general problems.
Warranty . . . . . . . . . . . . . . . . . . . . . . . . . . . . . 109 Maintenance Log . . . . . . . . . . . . . . . . . . . . . . 118
Record maintenance and service in the log for your reference and for future owners of the vehicle.
Index . . . . . . . . . . . . . . . . . . . . . . . . . . . . . . . . 122
3
INTRODUCTION
Important Notes for Owners and Drivers
After reading this manual, store it in the snowmobile for convenient reference. It should remain with the snowmobile when the snowmobile is sold.
When teaching inexperienced operators to ride, set up a predetermined course for practice. Make sure they know how to drive and control the snowmobile before allowing them to make longer trips. Teach them proper snowmobile courtesy, and enroll them in driver’s training and safety courses sponsored by local or state organizations.
Follow the maintenance program outlined in this manual. Preventive maintenance ensures that critical components of the snowmobile are inspected by your dealer at specific mileage intervals.
You and your dealer must complete the registration form included with your snowmobile and forward it to us. This completed form is necessary to ensure warranty coverage.
Protect and preserve your right to ride by joining your local trail riding clubs.
Some of the illustrations and photos used in this manual are general representations. Your model may differ.
4
INTRODUCTION
Preservation of the Environment
POLARIS is committed to supporting an environmental education campaign. We encourage state and provincial governments across the snowbelt to adopt rigorous safety training programs that encourage protection of our environment, including wildlife and vegetation.
Snowmobile clubs and other organizations are working together to protect our environment. Please support their efforts and operate your snowmobile with consideration for the protection and preservation of our environment.
Noise Level
One of the most publicized issues about snowmobiles is noise. The Society of Automotive Engineers (SAE), the standard-setting body for snowmobile development, recommends that snowmobiles conform to prescribed sound levels.
POLARIS snowmobiles are engineered to conform to these SAE standards. Our muffler systems are designed to reduce noise levels and must not be altered or removed. The sound of your snowmobile may not be welcome to non-snowmobilers, so you have a responsibility to operate your snowmobile with concern for others. We do our part by manufacturing quieter snowmobiles; we ask your help to further reduce the impact of noise by operating your snowmobile safely and responsibly.
Air Pollution
POLARIS engineers continuously investigate ways to reduce emission levels of two-stroke engines. We expect our efforts to lead to the reduction of potential air pollution.
In addition to our technological research, we encourage government agencies, manufacturers, distributors, dealers, ecologists, and other interested parties to work together to develop data on environmental topics.
5
INTRODUCTION
Vehicle Identification Numbers
Record your snowmobile’s identification numbers and key number in the spaces provided. Remove the spare key and store it in a safe place. Your key can be duplicated only by mating a POLARIS key blank with one of your existing keys, so if both keys are lost, the ignition switch must be replaced.
Vehicle Model Number: ___________________________________________________
Tunnel VIN: ____________________________________________________________
(lower right side of the tunnel)
Engine Serial Number: ___________________________________________________
(right front side of engine crankcase)
Key Number: ___________________________________________________________
6

SAFETY
Operator Safety
The following signal words and symbols appear throughout this manual and on your vehicle. Your safety is involved when these words and symbols are used. Become familiar with their meanings before reading the manual.
The safety alert symbol indicates a potential personal injury hazard.
WARNING
A WARNING indicates a hazardous situation which, if not avoided, may result in death or serious injury.
CAUTION
A CAUTION indicates a hazardous situation which, if not avoided, may result in minor or moderate injury.
NOTICE
A NOTICE indicates a situation that may result in property damage.
7

SAFETY
Operator Safety
Follow the recommended maintenance program outlined beginning on page 60 of this manual to ensure that all critical components on the snowmobile are thoroughly inspected by your dealer at specific mileage intervals.
 WARNING
Driving a snowmobile requires your full attention. DO NOT drink alcohol or use drugs or medications before or while driving or riding as a passenger. They will reduce your alertness and slow your reaction time.
Snowmobiles are capable of traveling at high speeds. Use extra caution to ensure operator safety. Make sure your snowmobile is in excellent operating condition at all times. Always check major and vital safety components before every ride.
All POLARIS snowmobiles are designed and tested to provide safe operation when used as directed. Failure of critical machine components may result from operation with any modifications, especially those that increase speed or power. DO NOT MODIFY YOUR SNOWMOBILE. The snowmobile may become aerodynamically unstable at speeds higher than those for which it is designed. Loss of control may occur at higher speeds. Modifications may also create a safety hazard and lead to bodily injury.
The warranty on your entire machine is terminated if any equipment has been added, or any modifications have been made, to increase the speed or power of the snowmobile.
8
SAFETY
Operator Safety
Stay Clear of Track
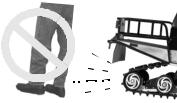
Your snowmobile is propelled by a revolving track that must be partially exposed for proper operation.
WARNING! Serious injuries may result if hands, feet, or clothing become entangled in the track. Be alert when riding, and remain properly seated to stay clear of the
track. Never hold the snowmobile up or stand behind it while warming up the track. A loose track or flying debris could cause serious injury or death. We recommend having your dealer perform all track service
and alignment procedures.
Stay Clear of Engine
Never attempt adjustments with the engine running. Turn off the ignition, raise the hood, make the adjustment, secure shields and guards, secure the hood, and then restart the engine to check its operation.
WARNING! Serious injury can occur if fingers or clothing contact the moving parts of an engine. Always stop the engine before attempting adjustments.
9
SAFETY
Operator Safety
Survival Preparation
For your safety, always ride in a group of other snowmobilers. Always tell someone where you’re going and how long you expect to be gone. If it isn’t possible to ride with others, and you must travel into remote areas, always carry survival equipment that’s appropriate to the conditions you may encounter. Such equipment may include, but is not limited to: extra clothing, a sleeping bag, a flashlight, food and water, a signaling mirror, a means of building a fire, and a two-way radio or cellular telephone.
Always carry the owner’s manual on your snowmobile. For added protection, purchase and carry the following items on your snowmobile as
well:
|
• |
Spare Drive Belt |
• |
Winter Survival Kit |
|
• |
Extra Set of Spark Plugs |
• |
Trail Map |
|
• |
Tow Rope |
• |
First Aid Kit |
|
• |
Extra Oil |
• |
Tool Kit |
|
• |
Fuel Deicer |
Riding Position
Operating a snowmobile requires skill and balance for proper control. Rider positions may vary with experience; but under many conditions, the proper position is to be seated with both feet on the running boards and both hands on the handlebar grips for proper throttle, brake and steering control.
WARNING! Improper riding position may reduce control and could result in serious injury or death. Always ride in a position that allows for control of your vehicle.
10

SAFETY
Operator Safety
Riding Apparel
Helmet
Wearing a helmet can prevent a severe head injury. Whenever riding a POLARIS vehicle, always wear a helmet that meets or exceeds established safety standards.
Approved helmets in the USA and Canada bear a U.S. Department of Transportation (DOT) label.
Approved helmets in Europe, Asia and Oceania bear the ECE 22.05 label. The ECE mark consists of a circle surrounding the letter E, followed by the distinguishing number of the country which has granted approval. The approval number and serial number will also be displayed on the label.
Eye Protection
Do not depend on eyeglasses or sunglasses for eye protection. Whenever riding a POLARIS vehicle, always wear shatterproof goggles or use a shatterproof helmet face shield. POLARIS recommends wearing approved Personal Protective Equipment (PPE) bearing markings such as VESC 8, V-8, Z87.1, or CE. Make sure protective eye wear is kept clean.
Clothing
Be prepared, be warm and be comfortable when riding. Be aware of the weather forecast, especially the windchill, and dress accordingly. See the chart on page 22.
WARNING! Avoid wearing loose clothing or long scarves, which can become entangled in moving parts and cause serious injury. Always wear an approved helmet and eye protection.
11
SAFETY
Operator Safety
Cargo Overload
Too much weight on the rear of the snowmobile may reduce your ability to steer. Do not exceed carrier and rack weight limits, and do not allow a passenger to sit on the seat back or the cargo carrier.
Disabled Operators
Safe operation of this rider-active vehicle requires good judgement and physical skills.
WARNING! Operators with cognitive or physical disabilities have an increased risk of loss of control, which could result in serious injury or death. Do not allow disabled persons to operate this vehicle.
Rider Capacity
Driving 1-Up — Some POLARIS snowmobiles are designed for a single rider only. A label on the console of these models indicates single rider operation.
Driving 2-Up — Some POLARIS snowmobiles are designed for up to two riders. A label on the hood of these models indicates that the vehicle is designed for one operator and one passenger only. See page 23 for label location.
Snowmobiles designed for two riders should never be operated with more than two people on board. When traveling with a passenger, it’s the driver’s responsibility to operate the snowmobile safely.
Slow down! Control becomes more difficult with two people on board. More space is required to make turns, and longer distances are necessary for stopping.
12
SAFETY
Operator Safety
Excessive Speed
WARNING! High speed driving, especially at night, could result in serious injury or death. Always reduce speed when driving at night or in inclement weather.
Observe all state and local laws governing snowmobile operation. They’ve been established for your protection.
Always be alert and pay attention to the trail ahead. Multiplying speed (MPH) by 1.5 will equal the approximate number of feet per second your snowmobile travels. If your speed is 40 MPH, your snowmobile is traveling about 60 feet per second. If you look back for only two seconds, your snowmobile will travel about 120 feet. If your speed is 60 MPH, your snowmobile will travel about 180 feet in two seconds.
Traveling at night requires extra caution. Check headlight and taillight to ensure proper operation, and don’t over-drive your headlight beam. Always be able to bring your snowmobile to a stop in the distance illuminated by the headlight.
13
SAFETY
Operator Safety
Driver Awareness
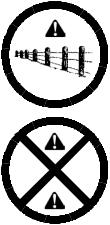
Slow down when traveling near poles, posts, or other obstacles. Be especially alert if you’re snowmobiling after dark. Always be on the alert for wire fences. Single strands are especially dangerous, since there may be a great distance between posts. Guy wires on utility poles are also difficult to distinguish.
|
Make sure the way is clear before crossing |
||
|
railroads and other roads and highways. |
||
|
The noise of your snowmobile will drown |
R |
R |
|
out the sound of approaching vehicles. |
||
|
Look ahead, behind, and to both sides |
||
|
before turning or crossing railroad tracks |
||
|
or highways. Steep embankments may |
||
|
also hide your view. Always leave yourself |
||
|
a way out. |
Variances in snow depth and/or water currents may result in uneven ice thickness. Always check with local residents or authorities for general information on conditions when traveling on lakes and streams that are strange to you. Before riding your snowmobile on a frozen body of water, be sure the ice is thick enough to support the snowmobile and its operator, as well as the force created by a moving vehicle. You may drown if you and the snowmobile break through the ice.
When teaching inexperienced operators to ride, set up a predetermined course for practice. Make sure they know how to drive and control the snowmobile before allowing them to make longer trips. Teach them proper snowmobile courtesy, and enroll them in driver’s training and safety courses sponsored by local or state organizations.
14

SAFETY
Operator Safety
Avalanches
Snowmobilers should always be properly trained and equipped before traveling in mountainous terrain:
•Take an avalanche class
•Travel with experienced people
•Travel on designated trails
•Make sure each person is equipped with a shovel, probe and avalanche beacon.
You don’t have to be snowmobiling on a slope for an avalanche to occur. Be aware that all of the snow is connected. You may be riding on a flat slope or snow covered road, but if the snowpack above is unstable enough you can trigger an avalanche on a steeper slope above you. Always be aware of snow conditions above you as you travel in mountainous terrain.
Before riding in mountainous terrain, call or log on to your local avalanche advisory to get current weather and snow stability information.
For more information about avalanche training and avalanche conditions, contact local law enforcement in your area, or visit the American and Canadian online avalanche centers at www.avalanche.org.
15
SAFETY
Operator Safety
Ice and Snow Build-up
WARNING! Ice and snow build-up may interfere with the steering of your snowmobile, resulting in serious injury or death. Keep the underhood area free of snow and ice.
Before driving, manually turn the skis to the left and right to be sure ice and snow are not interfering with full left and right steering. If difficulty is encountered, check for ice and snow build-up that may be obstructing the steering linkage. Snow screens and bib kits are available through your dealer to help reduce snow and ice build-up.
Driving on Slippery Surfaces
WARNING! Never attempt an abrupt change of direction when operating on slippery surfaces. Proceed slowly and use extra caution. Driving on ice or hardpacked snow reduces steering and braking control, which may result in loss of control and serious injury or death. Slow down and use extra caution when operating on slippery surfaces.
16
SAFETY
Operator Safety
Driving on Slopes
WARNING! Climbing a hill or crossing the face of a slope may result in loss of balance and snowmobile rollover, causing serious injury or death. Use caution and good judgement when driving in hilly terrain.
Use extra caution when operating in hilly terrain. If climbing a hill is unavoidable, keep your weight low and forward. If you must cross the face of a slope, keep your weight on the uphill side of the snowmobile to maintain proper balance and avoid possible rollover.
Slow down when reaching the crest of a hill. Be prepared to react to obstacles, sharp drops, or other people or vehicles that may be on the other side of the hill.
If you’re unable to continue up a hill, turn the snowmobile downhill before it loses momentum. If this isn’t possible, spin the track just enough to dig in to prevent it from rolling back down the hill. Stop the engine and set the parking brake (if equipped). Keeping away from the downhill side of the snowmobile, pull the rear of the snowmobile around and point the front end and skis downhill. Remount the snowmobile, restart the engine, release the parking brake, and descend the hill carefully.
17
SAFETY
Operator Safety
Driving Downhill
When riding downhill, shift your weight to the rear of the snowmobile and reduce your speed to a minimum. Apply just enough throttle to keep the clutch engaged, allowing the engine’s compression to help slow the snowmobile and keep it from rolling freely downhill.
WARNING! When driving on long downhill stretches, pump the brakes. Riding the brakes may cause the brake system to overheat, which may result in brake failure. Excessive or repetitive use of the brakes for high speed stops will also cause an overheated brake system. This condition may lead to a sudden loss of brakes and/or fire and may result in serious injury or death.
Clutch Guard
Do not operate the engine with the clutch guard removed.
The clutch guard is designed to protect the operator from metal parts if the clutch should fail. Although the chance of failure is extremely remote, don’t defeat the purpose of the guard by removing it. It’s provided for your safety.
Drive Belt
Do not operate the engine with the drive belt removed.
Any servicing that requires operation without a belt must be performed by your dealer.
CAUTION! Operation of the engine with the belt removed may result in personal injury or damage to the engine.
18
SAFETY
Operator Safety
Intake Silencer
Do not operate the engine with the intake silencer or filter removed.
NOTICE: Damage to the engine may occur if the intake silencer or filter are removed.
Clutches
Do not attempt to service the clutches.
All clutch service must be performed by your dealer. The clutch is a complex mechanism that rotates at high speeds. Each clutch is dynamically balanced before installation. Any tampering may disrupt this precision balancing and create an unstable condition.
Cold Weather Drive-Away
Whenever your snowmobile has been parked for a length of time, especially overnight, always make sure the skis and track are loosened from ice and snow before attempting to drive. Apply the throttle with enough authority to put the snowmobile into motion, but always operate within safety limits and, on 2-up snowmobiles, with respect for a passenger.
Maneuverability
While much control and maneuverability is achieved through the steering system and skis, maximum control is achieved by the shifting of your body weight. Maneuverability will change for lighter operators or snowmobiles designed to carry a load or a passenger.
19
SAFETY
Operator Safety
Inadequate Snow Conditions
Since snow provides the only lubrication for the power slide suspension and, on liquid cooled models, cooling for the engine, adequate snow cover is a requirement for operation of your snowmobile.
WARNING! Inadequate cooling and lubrication will lead to overheating of the slide rail and track, causing premature wear, damage and failure, which can result in serious injury. Reduce speeds and frequently drive into fresh snow to allow adequate cooling and polishing of the slide rail and track surfaces. Avoid operating for prolonged periods on ice, hard-packed surfaces or roads.
Operating in Deep Snow
If the snowmobile becomes stuck in snow, clear the running board area of snow, then step down the snow in front of the snowmobile so that when the throttle is opened, the snowmobile will be able to climb up and over the snow.
20
SAFETY
Operator Safety
Driving Responsibly
Every snowmobile handles differently, and even the most docile conditions may become dangerous if operators drive improperly. If you’re new to snowmobiling, acquaint yourself with the snowmobile and with what it will and won’t do under various conditions. Even seasoned drivers should spend some time getting the feel for a snowmobile before attempting ambitious maneuvers.
•A snowmobile depends on the rider’s body position for proper balance in executing turns, traversing hills, etc. Always start on a smooth, level area to begin building your operating experience.
•Before allowing someone else to use your snowmobile, know the extent of their operating skills. Check to see if they’ve taken a snowmobile safety course and have an operator’s certificate. For their protection, as well as yours, make sure they take a snowmobile safety course. Everyone can benefit from the course.
•Don’t «jump» your snowmobile over large drifts or similar terrain. Jumping may injure your back because of spinal compression that could occur when the snowmobile impacts the ground. The seat and suspension of your snowmobile have been designed to provide protection under normal riding conditions. Your snowmobile is not intended for this kind of use.
•Be courteous to oncoming traffic by dimming your headlights and reducing your speed.
•When traveling in a group of snowmobiles, don’t tailgate (follow too closely). Leave enough distance between snowmobiles to provide ample stopping room and to provide protection from flying snow and debris. Allow even more distance when driving on slippery surfaces or when driving in darkness or other low visibility conditions. Be aware of any snowmobile traffic around your vehicle. Drive defensively to avoid accidents.
•Remove the key from the ignition when you leave the snowmobile unattended.
21
SAFETY
Operator Safety
Windchill/Temperature Charts
The following information is provided to help you determine when temperatures become dangerous for riding.
WIND CHILL CHART (°F)
|
Wind |
Actual Thermometer Reading (_F) |
|||||||||||||||||
|
Speed |
||||||||||||||||||
|
in |
40 |
35 |
30 |
25 |
20 |
15 |
10 |
5 |
0 |
-5 |
-10 |
-15 |
-20 |
-25 |
-30 |
-35 |
-40 |
-45 |
|
MPH |
Equivalent Temperature (_F) |
|||||||||||||||||
|
Calm |
40 |
35 |
30 |
25 |
20 |
15 |
10 |
5 |
0 |
-5 |
-10 |
-15 |
-20 |
-25 |
-30 |
-35 |
-40 |
-45 |
|
5 |
36 |
31 |
25 |
19 |
13 |
7 |
1 |
-5 |
-11 |
-16 |
-22 |
-28 |
-34 |
-40 |
-46 |
-52 |
-57 |
-63 |
|
10 |
34 |
27 |
21 |
15 |
9 |
3 |
-4 |
-10 |
-16 |
-22 |
-28 |
-35 |
-41 |
-47 |
-53 |
-59 |
-66 |
-72 |
|
15 |
32 |
25 |
19 |
13 |
6 |
0 |
-7 |
-13 |
-19 |
-26 |
-32 |
-39 |
-45 |
-51 |
-58 |
-64 |
-71 |
-77 |
|
20 |
30 |
24 |
17 |
11 |
4 |
-2 |
-9 |
-15 |
-22 |
-29 |
-35 |
-42 |
-48 |
-55 |
-61 |
-68 |
-74 |
-81 |
|
25 |
29 |
23 |
16 |
9 |
3 |
-4 |
-11 |
-17 |
-24 |
-31 |
-37 |
-44 |
-51 |
-58 |
-64 |
-71 |
-78 |
-84 |
|
30 |
28 |
22 |
15 |
8 |
1 |
-5 |
-12 |
-19 |
-26 |
-33 |
-39 |
-46 |
-53 |
-60 |
-67 |
-73 |
-80 |
-87 |
|
35 |
28 |
21 |
14 |
7 |
0 |
-7 |
-14 |
-21 |
-27 |
-34 |
-41 |
-48 |
-55 |
-62 |
-69 |
-76 |
-82 |
-89 |
|
40 |
27 |
20 |
13 |
6 |
-1 |
-8 |
-15 |
-22 |
-29 |
-36 |
-43 |
-50 |
-57 |
-64 |
-71 |
-78 |
-84 |
-91 |
|
45 |
26 |
19 |
12 |
5 |
-2 |
-9 |
-16 |
-23 |
-30 |
-37 |
-44 |
-51 |
-58 |
-65 |
-72 |
-79 |
-86 |
-93 |
|
50 |
26 |
19 |
12 |
4 |
-3 |
-10 |
-17 |
-24 |
-31 |
-38 |
-45 |
-52 |
-60 |
-67 |
-74 |
-81 |
-88 |
-95 |
|
55 |
25 |
18 |
11 |
4 |
-3 |
-11 |
-18 |
-25 |
-32 |
-39 |
-46 |
-54 |
-61 |
-68 |
-75 |
-82 |
-89 |
-97 |
|
60 |
25 |
17 |
10 |
3 |
-4 |
-11 |
-19 |
-26 |
-33 |
-40 |
-48 |
-55 |
-62 |
-69 |
-76 |
-84 |
-91 |
-98 |
|
Frostbite in >> |
30 min. |
10 min. |
5 min. |
|||||||||||||||
WIND CHILL CHART (°C)
|
Wind |
Actual Thermometer Reading (_C) |
|||||||||||||||||
|
Speed |
||||||||||||||||||
|
in |
5 |
2 |
-1 |
-4 |
-7 |
-10 |
-13 |
-16 |
-19 |
-22 |
-25 |
-28 |
-31 |
-34 |
-37 |
-40 |
-43 |
-46 |
|
KPH |
Equivalent Temperature (_C) |
|||||||||||||||||
|
Calm |
5 |
2 |
-1 |
-4 |
-7 |
-10 |
-13 |
-16 |
-19 |
-22 |
-25 |
-28 |
-31 |
-34 |
-37 |
-40 |
-43 |
-46 |
|
8 |
3 |
0 |
-4 |
-7 |
-11 |
-14 |
-18 |
-22 |
-25 |
-29 |
-32 |
-36 |
-39 |
-43 |
-46 |
-50 |
-53 |
-57 |
|
16 |
2 |
-2 |
-6 |
-10 |
-13 |
-17 |
-21 |
-24 |
-28 |
-32 |
-36 |
-39 |
-43 |
-47 |
-50 |
-54 |
-58 |
-62 |
|
24 |
1 |
-3 |
-7 |
-11 |
-15 |
-19 |
-22 |
-26 |
-30 |
-34 |
-38 |
-42 |
-45 |
-49 |
-53 |
-57 |
-61 |
-65 |
|
32 |
0 |
-4 |
-8 |
-12 |
-16 |
-20 |
-24 |
-28 |
-32 |
-36 |
-39 |
-43 |
-47 |
-51 |
-55 |
-59 |
-63 |
-67 |
|
40 |
-1 |
-5 |
-9 |
-13 |
-17 |
-21 |
-25 |
-29 |
-33 |
-37 |
-41 |
-45 |
-49 |
-53 |
-57 |
-61 |
-65 |
-69 |
|
48 |
-1 |
-5 |
-9 |
-13 |
-18 |
-22 |
-26 |
-30 |
-34 |
-38 |
-42 |
-46 |
-50 |
-54 |
-58 |
-62 |
-66 |
-70 |
|
56 |
-2 |
-6 |
-10 |
-14 |
-18 |
-22 |
-26 |
-31 |
-35 |
-39 |
-43 |
-47 |
-51 |
-55 |
-59 |
-64 |
-68 |
-72 |
|
64 |
-2 |
-6 |
-10 |
-15 |
-19 |
-23 |
-27 |
-31 |
-35 |
-40 |
-44 |
-48 |
-52 |
-56 |
-61 |
-65 |
-69 |
-73 |
|
72 |
-2 |
-7 |
-11 |
-15 |
-19 |
-23 |
-28 |
-32 |
-36 |
-40 |
-45 |
-49 |
-53 |
-57 |
-61 |
-66 |
-70 |
-74 |
|
80 |
-3 |
-7 |
-11 |
-15 |
-20 |
-24 |
-28 |
-33 |
-37 |
-41 |
-45 |
-50 |
-54 |
-58 |
-62 |
-67 |
-71 |
-75 |
|
88 |
-3 |
-7 |
-12 |
-16 |
-20 |
-24 |
-29 |
-33 |
-37 |
-42 |
-46 |
-50 |
-55 |
-59 |
-63 |
-67 |
-72 |
-76 |
|
96 |
-3 |
-8 |
-12 |
-16 |
-21 |
-25 |
-29 |
-34 |
-38 |
-42 |
-47 |
-51 |
-55 |
-60 |
-64 |
-68 |
-73 |
-77 |
|
Frostbite in >> |
30 min. |
10 min. |
5 min. |
|||||||||||||||
22

SAFETY
Safety Labels and Locations
Warning labels have been placed on the snowmobile for your protection. Read and follow the instructions of the labels and other warnings on the snowmobile carefully. If any of the labels depicted in this manual differ from the labels on your snowmobile, always read and follow the instructions of the labels on the snowmobile.
If any label becomes illegible or comes off, contact your POLARIS dealer to purchase a replacement. Replacement safety labels are provided by POLARIS at no charge. The part number is printed on the label.
Clutch Cover Warning
This warning label is found under the hood on the clutch cover:
WARNING
Do not operate engine with hood open.
Do not attempt adjustment with engine running. Do not operate engine with this guard open. Never run engine with drive belt removed.
Never service clutches yourself — see your dealer.
Air Box Warning
This warning label is found under the hood on applicable models:
CAUTION
Do not operate above 40 mph with hood-to-air box foam removed or engine failure will result.
Your POLARIS Widetrak snowmobile is designed for the operator and one passenger. For more information on operating with a passenger, see Page 12.
WARNING
This vehicle is designed for operator and ONE passenger
23
SAFETY
Safety Labels and Locations
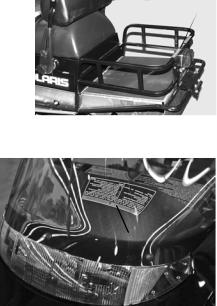
The track/seat warning label is on the rear of the tunnel:
WARNING
Stay clear of track. Do not sit on seat back. Entanglement with the track or a fall from seat back may result in severe injury or death.
Reverse Warning
POLARIS Widetrak snowmobile is equipped with standard reverse. The reverse warning label is located above the instrument housing.
Reverse operation, even at low speeds, can cause loss of control resulting in serious injury or death. To avoid loss of control, always:
•Look behind before and while backing up.
•Avoid sharp turns.
•Shift to or from reverse only when stopped.
•Apply throttle slowly.
NOTE: For more information, see Owner’s Manual.
24
SAFETY
Safety Labels and Locations
Operation Warning
An operation warning label is present on the console of all POLARIS snowmobiles:
WARNING
•To avoid serious injury or death, read and understand all warnings and the Owner’s Manual before operation. If manual is missing, contact a POLARIS dealer for a replacement.
•This vehicle is capable of high speeds. Buried objects or uneven terrain can cause loss of control. Reduce speed and use extreme caution when operating in unfamiliar terrain.
•Excessive speed, especially at night or with limited visibility, can result in insufficient time for you to react to terrain changes, to avoid unexpected obstacles, or to stop safely.
•Never consume alcohol or drugs before or while operating this vehicle.
•In an emergency, push down the Auxiliary Shut-Off Switch, located on the top of the throttle control assembly, to stop the engine. Then pull the brake lever to stop.
•Always wear an approved helmet, eye protection, and adequate clothing while operating this vehicle.
•This vehicle is designed for adult use only. Check local laws for age requirements.
•When operating with a passenger (on approved models only), reduce speed and allow extra space for steering and stopping. A passenger reduces your ability to control the vehicle.
•When operating on hard-packed snow, ice, or when crossing roads, steering and braking ability are greatly reduced. Reduce speed and allow extra space to turn or stop.
•To maintain vehicle control on ice or hard-packed surfaces, you should have a proper balance of ski carbides to track studs. See Owner’s Manual for proper use of traction products.
•Repeated stops from high speed may cause fading or sudden loss of braking ability.
•Parking brake may relax when used for long periods. Do not leave brake engaged for more than five minutes.
•Before starting the engine, check throttle, brake, and steering for proper operation. Make sure hood is latched. Be seated and in position to control the vehicle.
Oil injection system: Use unmixed fuel only. Check oil level when refueling.
25
FEATURES AND CONTROLS
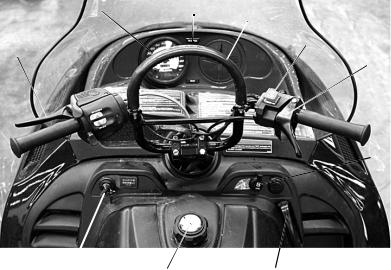
General Representation
7
3
1.Fuel Filler Cap (may include a fuel gauge)
2.Ignition Switch
3.Brake Lever
4.Speedometer (may include indicator/warning lights)
5.Reverse Indicator
6.Mountain Bar
7.Engine Stop Switch (see page 54)
8.Throttle Control
9.Choke
10.Recoil Starter Handle
 8
8
 9
9
26

FEATURES AND CONTROLS
Some POLARIS snowmobiles are equipped with special features. Controls for these features are illustrated on this page. Not all models come with these features.
Refer to your Owner’s Manual Supplement.
1.Headlight Dimmer Switch
2.Parking Brake Lock
3.Handlebar Grip Warmer Switch
4.Thumbwarmer Switch
5.Electronic Reverse Button
1
Fuel Valve
The fuel valve is located under the hood. Turn the fuel valve off whenever the snowmobile is stored or parked.
|
1. |
Turn the valve clockwise to |
||
|
turn off the fuel supply. |
|||
|
2. |
Turn the valve counter-clock- |
OFF |
ON |
|
wise to turn on the fuel supply. |
|||
27

FEATURES AND CONTROLS
2
8 7
1
9 
10
11
12
1.Hood
2.Headlight
3.Windshield
4.Handlebar
5.Operator Seat
6.Passenger Hand Hold Strap
7.Cargo Rack
8.Taillights
9.Snow Flap
10.Track
11.Suspension
12.Trailing Arm
13.Nosepan
14.Front Bumper (do not use for pulling or dragging the snowmobile)
15.Skis
28

FEATURES AND CONTROLS
Backrest |
|
|
The backrest is adjustable |
|
|
for either operator or pas- |
|
|
senger use. |
Raise/Lower |
1. Loosen the upper adjustment knobs to raise or lower the backrest.
2. Loosen the lower adjustment knobs to move the backrest forward for operator use or rearward for passenger use.
|
3. Always tighten the |
Operator/Passenger |
|
|
knobs. |
||
Cargo Rack
Always secure cargo before operating. Do not exceed the rack weight limit specified on the cargo rack label. Do not allow a passenger to sit on the seat back or the cargo rack.
29

THE PERFECT FIT
Front Suspension Adjustments
Break in the suspension for approximately 150 miles (240 km) and regrease all suspension parts before making any fine-tuning adjustments.
Settings will vary from rider to rider, depending on rider weight, vehicle speed, riding style, and trail conditions. We recommend starting with factory settings and then customizing each adjustment individually to suit rider preference. The snowmobile should be methodically tested under the same conditions after each adjustment (trail and snow conditions, vehicle speed, riding position, etc.) until the best ride is achieved. Adjustments should be made to one area at a time in order to properly evaluate the change.
IFS Components
1.Skis
2.Front shocks and springs
3. Rod ends
IFS Adjustment Options
•Front shock spring preload
•Optional springs
1
3
30

THE PERFECT FIT
Front Suspension Adjustments
Always verify ski alignment before making adjustments to the IFS. See page 92 to check alignment. If the skis are misaligned, see your dealer, as the camber adjustment may also be affected.
The tension at which the shock coil spring is set is called spring preload. For the best ride, the spring preload should be set as low as possible to use the full travel of the ski shock, with occasional light bottoming. To determine if your snowmobile is using full travel of the ski shock, push the jounce bumper down as far as it will go on the shock rod and test ride the snowmobile. The bumper will move up on the rod in direct relation to the amount of travel. If the shock travel is full, the bumper will be seated at the top of the shock.
Shock Components
|
1. |
Retainer |
1 |
|
|
2. |
Shock Rod |
||
|
3. |
Jounce Bumper |
2 |
|
|
4. |
Body |
3 |
|
|
5. |
Spring Preload Adjuster Nut |
||
|
4 |
 5
5
31

THE PERFECT FIT
Front Suspension Adjustments
Shock Spring Preload
Increasing spring preload will increase ski-to-ground pressure. Decreasing spring preload will decrease ski- to-ground pressure.
Front Springs
For models without externally adjustable or revalvable shocks, the front springs can be changed if spring preload alone isn’t sufficient and further adjustment is desired to control suspension stiffness. Special tools are required to adjust front springs. If you feel that your front suspension needs
adjustment see your Front Shock Washers POLARIS dealer for more
information.
32
THE PERFECT FIT
Rear Suspension Adjustments
Rider weight, riding style, trail conditions, and vehicle speed all affect suspension action. Each rear suspension can be adjusted to suit rider preference and deliver excellent performance for a given set of conditions. However, all suspension designs and adjustments involve a compromise, or trade-off. For example, a suspension set up for snow-cross racing would provide a very stiff ride on the trail. A suspension set up for trail riding would bottom out harshly on a snow-cross course.
See your POLARIS dealer for initial suspension setup information. Additional adjustments can be made after initial setup. Make adjustments to one area at a time so you can evaluate the change. For further assistance, see your dealer.
Suspension Performance Tips
•Rider weight usually determines the position at which the spring preload should be set. However, this may vary with riding style. With a little experimentation, each rider can find a preferred set-up. These adjustments are easy to make, involve very little time or effort, and greatly affect the ride.
•In deep snow, a new rail slide will offer improved performance over a worn rail slide. It can also improve top speed.
•When riding on ice or hard-packed snow, adding a set of bogie wheels to the rail may enhance the snowmobile’s performance. Bogie wheel kits are available from your dealer.
•POLARIS offers track kits for improved flotation in deep snow. See your dealer for assistance.
Tip: Keep the suspension pivot points lubricated. This will reduce moisture and rust build-up and ensure proper function of the suspension components. Grease rear suspension pivots before adjusting the rear suspension. See page 65.
Track Tension
Track adjustment is critical for proper handling. Always maintain correct tension and alignment. Refer to the track tension maintenance section beginning on page 88.
33

THE PERFECT FIT
WideTrak Rear Suspension Adjustments
Suspension Coupling
1.On level ground, turn the adjuster knob clockwise to align the arrow markers. This setting is suitable for most riding conditions.
2.If more ski pressure is preferred
(for riding in hilly terrain on hard surfaces with a high vehicle load), turn the adjuster knob clockwise. Ski pressure will increase as vehicle load increases.
Tip: For maximum comfort, set the suspension to bottom out occasionally.
3.If less ski pressure is preferred, turn the adjuster knob counterclockwise. Ski pressure will decrease as vehicle load increases.
4.Turn the knob fully counter-clockwise (minimum setting) for riding in deep snow without a passenger and with a low vehicle load.
Tip: Do not exaggerate adjustments. A couple of turns on the adjuster knob will usually give the desired effect.
Rear Spring Settings
1.To check for the recommended rear spring settings, lift the rear of the snowmobile, then slowly lower it. Measure the distance between the ground and the running board.
2.Without letting the suspension settle, the rider should carefully mount the snowmobile. Measure the distance between the ground and the same spot on the running board.
3.The difference between the two measurements should be approximately 1.5 inches (3.8 cm). If the difference is greater, adjust the rear spring equally on both sides and repeat steps 1-3.
4.Compensate for heavy or light drivers or cargo loads by adjusting the rear spring eye bolt length. Adjust spring tension so there is equal tension on the long leg of each spring.
Tip: Rear spring settings affect ski-to-ground pressure. If ski pressure is too light, tighten the rear springs.
Eye  Bolt
Bolt
34

THE PERFECT FIT
Handlebar Adjustments
Standard Handlebar
Follow these steps to adjust handlebar angle at the handlebar block.
1.Remove the mountain bar by removing nuts.
2.Using a 7/16-inch wrench, loosen the four nuts on the bottom of the adjuster block (turn the handlebar either left or right for access to the rear nuts). If necessary, pry the blocks apart with a screwdriver.
3.Adjust the handlebar to the desired angle. Be sure the handlebar, brake lever and throttle lever operate smoothly and do not hit the gas tank, windshield or any other part of the snowmobile when the handlebar is turned fully to the left or right.
4.Torque the front bolts first, then torque the rear bolts. Torque the bolts to 11-13 ft. lbs. (15-18 Nm).
5.Reinstall the mountain bar.
35
 Loading…
- Инструкции и руководства
- Бренды
- Polaris
- widetrak lx
- Справочник Пользователя
Page 2
7SAFETYOperator SafetyThe following signal words and symbols appear throughout this manual and on your vehicle. Your safety is involved when these wor
Page 3
97MAINTENANCEBatteryBattery FluidA poorly maintained battery will deteriorate rapidly. Check the battery fluid level often. The fluid level should be
Page 4
98MAINTENANCEBatteryBattery ConnectionsAlways keep battery terminals and connections free of corrosion. If cleaning is necessary, remove the corrosion
Page 5
99MAINTENANCEBatteryBattery InstallationUsing a new battery that has not been fully charged can damage the bat-tery and result in a shorter life. It c
Page 6 — TABLE OF CONTENTS
100MAINTENANCEBatteryBattery StorageWhen your snowmobile is placed in storage for one month or more (in summer or in winter):• Remove the battery.• Ch
Page 7 — INTRODUCTION
101MAINTENANCEDaily StorageAt the end of each ride, park the snowmobile on a level surface and support it at the rear with an appropriate track stand.
Page 8
102MAINTENANCEExtended StorageOff-season or extended storage of your snowmobile requires preventive measures to aid against deterioration and to prolo
Page 9
103MAINTENANCEExtended StorageEngine and Carburetor ProtectionUsing a fuel stabilizer and topping off the fuel tank eliminates the need to drain the f
Page 10 — Operator Safety
104MAINTENANCEExtended StorageElectrical ConnectionsSeparate electrical connector blocks and clean corrosive build-up from connectors. Lubricate or pa
Page 11
105POLARIS PRODUCTSPart No.DescriptionEngine Lubricants2870791 Fogging Oil (12 oz. Aerosol)2871098 Premium 2-Cycle Engine Oil (qt.)2871097 Premium 2-C
Page 12
106SUSPENSION TROUBLESHOOTINGProblem Solution (perform only one change at a time)Rear suspension bot-toms too easily• Verify sag dimension (see page 9
Page 13
8SAFETYOperator SafetyYour Polaris snowmobile is a well-engineered and well-constructed rec-reational vehicle. Follow the recommended maintenance prog
Page 14
107TROUBLESHOOTINGBelt Wear/Burn TroubleshootingBelt Wear/Burn DiagnosisCauses SolutionsDriving at low RPM Drive at higher RPMs. Gear the machine down
Page 15
108TROUBLESHOOTINGEngine TroubleshootingNOTE: Unless you have experience and training in two-cycle engine repair, see your dealer if technical problem
Page 16 — Excessive Speed
109TROUBLESHOOTINGEngine TroubleshootingProblem Probable Cause SolutionNoise in drive systemBroken drive clutch components• SEE YOUR DEALER.Bearing fa
Page 17
110TROUBLESHOOTINGEngine TroubleshootingProblem Probable Cause SolutionEngine turns but fails to startFaulty ignition • Remove spark plug(s) and repla
Page 18
111WARRANTYService And Warranty InformationObtaining Service and Warranty AssistanceRead and understand the service data and the Polaris warranty info
Page 19
112WARRANTYService And Warranty InformationPolaris Anti-Theft SystemThe Polaris anti-theft system (PATS) monitoring program is designed to aid owners
Page 20
113WARRANTYLimited WarrantyPolaris Sales Inc., 2100 Highway 55, Medina, MN 55340, provides a ONE YEAR LIM-ITED WARRANTY on all components of the Polar
Page 21
114WARRANTYLimitations of warranties and remediesALL IMPLIED WARRANTIES (INCLUDING BUT NOT LIMITED TO THE IMPLIED WARRANTIES OF MERCHANTABILITY AND FI
Page 22
115WARRANTYConditions and ExclusionsIn order to qualify for warranty, the product must have been properly set up and tested by a Polaris Dealer (if ap
Page 23
116WARRANTYPolaris Second Year Engine Service ContractSecond Year Engine Service Contract is standard on all eligible new and unused snow-mobiles that
Page 24
9SAFETYOperator SafetyStay Clear of TrackYour snowmobile is propelled by a revolving track that must be partially exposed for proper operation.Stay Cl
Page 25
117WARRANTYExported VehiclesEXCEPT WHERE SPECIFICALLY REQUIRED BY LAW, THERE IS NO WAR-RANTY OR SERVICE BULLETIN COVERAGE ON THIS VEHICLE IF IT IS SOL
Page 26 — Safety Decals and Locations
118WARRANTYSnowmobile Engine Emissions Limited WarrantyThis snowmobile engine emissions limited warranty is in addition to the Polaris standard limite
Page 27
119WARRANTYSnowmobile Engine Emissions Limited WarrantyThis limited warranty excludes failures not caused by a defect in material or workmanship. This
Page 28
120MAINTENANCE LOGPresent this section of your manual to your dealer each time your snow-mobile is serviced. This will provide you and future owners w
Page 30
122MAINTENANCE LOGDATE MILES(KM)TECHNICIAN SERVICE PERFORMED / COMMENTS
Page 31
123MAINTENANCE LOGDATE MILES(KM)TECHNICIAN SERVICE PERFORMED / COMMENTS
Page 32
124INDEXAAccessories . . . . . . . . . . . . . . . . . . . 37Air Box Warning . . . . . . . . . . . . . . . 23Air Pollution . . . . . . . . . . .
Page 33 — THE PERFECT FIT
125INDEXLLever, Shift (Mechanical Reverse) . . 57Lights . . . . . . . . . . . . . . . . . . . . . 80-81Headlight Adjustment . . . . . . . . 80Lubr
Page 34
126INDEXTThrottle Lever . . . . . . . . . . . . . . 39, 55Throttle Safety Switch . . . . . . . . 39, 54Tool Kit . . . . . . . . . . . . . . . . .
Page 35
10SAFETYOperator SafetySurvival PreparationFor your safety, always ride in a group of other snowmobilers. Always tell someone where you’re going and h
Page 36
11SAFETYOperator SafetyRiding ApparelBe prepared, be warm and be com-fortable when riding. Be aware of the weather forecast, especially the windchill,
Page 37
12SAFETYOperator SafetyCargo OverloadToo much weight on the rear of the machine may reduce your ability to steer. Do not exceed carrier and rack weigh
Page 38
13SAFETYExcessive SpeedObserve all state and local laws governing snowmobile operation. They’ve been established for your protection.Always be alert a
Page 39
14SAFETYOperator SafetyDriver AwarenessSlow down when traveling near poles, posts, or other obstacles. Be especially alert if you’re snowmobiling afte
Page 40
15SAFETYOperator SafetyAvalanchesSnowmobilers should always be properly trained and equipped before traveling in mountainous terrain:• Take an avalanc
Page 41 — PRE-RIDE INSPECTIONS
16SAFETYOperator SafetyIce and Snow Build-upBefore driving, manually turn the skis to the left and right to be sure ice and snow are not interfering w
Page 43
17SAFETYOperator SafetyDriving in Hilly TerrainOperating in hilly terrain requires extreme caution to maintain balance and avoid roll-over. If climbin
Page 44
18SAFETYOperator SafetyDriving DownhillWhen riding downhill, shift your weight to the rear of the machine and reduce your speed to a minimum. Apply ju
Page 45
19SAFETYOperator SafetyIntake SilencerDo not operate the engine with the intake silencer or filter removed.Damage to the engine may occur if the intak
Page 46
20SAFETYOperator SafetyInadequate Snow ConditionsSince snow provides the only lubrication for the power slide suspension and, on liquid cooled models,
Page 47
21SAFETYOperator SafetyDriving ResponsiblyEvery snowmobile handles differently, and even the most docile condi-tions may become dangerous if operators
Page 48 — OPERATION
22SAFETYOperator SafetyWindchill/Temperature ChartsThe following information is provided to help you determine when tem-peratures become dangerous for
Page 49
23SAFETYSafety Decals and LocationsWarning decals have been placed on the snowmobile for your protec-tion. Read and follow the instructions of the dec
Page 50
24SAFETYSafety Decals and LocationsTrack/Seat WarningThe track/seat warning decal is on the rear of the tunnel:WARNINGStay clear of track. Do not sit
Page 51
25SAFETYSafety Decals and LocationsOperation WarningAn operation warning decal is present on the console of all Polaris snowmobiles:WARNING• To avoid
Page 52
26FEATURES AND CONTROLS1. Fuel Filler Cap (may include a fuel gauge)2. Ignition Switch3. Brake Lever4. Speedometer (may include indicator/warning ligh
Page 53
WARNINGRead, understand, and follow all of the instructions and safety precautions in this manual and on all product labels.Failure to follow the safe
Page 54
27FEATURES AND CONTROLSSome Polaris snowmobiles are equipped with special features. Controls for these features are illustrated on this page. Not all
Page 55
28FEATURES AND CONTROLS1. Hood2. Headlight3. Windshield4. Handlebar5. Operator Seat6. Passenger Hand Hold Strap7. Cargo Rack8. Taillights9. Snow Flap1
Page 56
29FEATURES AND CONTROLSBackrestThe backrest is adjust-able for either operator or passenger use.1. Loosen the upper adjustment knobs to raise or lower
Page 57
30THE PERFECT FITFront Suspension AdjustmentsBreak in the suspension for approximately 150 miles (240 km) and re-grease all suspension parts before ma
Page 58
31THE PERFECT FITFront Suspension AdjustmentsThe tension at which the shock coil spring is set is called spring preload. For the best ride, the spring
Page 59
32THE PERFECT FITFront Suspension AdjustmentsShock Spring PreloadIncreasing spring preload will increase ski-to-ground pressure. Decreasing spring pre
Page 60
33THE PERFECT FITRear Suspension AdjustmentsRider weight, riding style, trail conditions, and vehicle speed all affect suspension action. Each rear su
Page 61
34THE PERFECT FITWideTrak Rear Suspension AdjustmentsRear Spring SettingsRear spring adjustment is primarily a control for riding comfort. To check fo
Page 62
35THE PERFECT FITHandlebar AdjustmentsStandard HandlebarFollow these steps to adjust handlebar angle at the handlebar block.1. Remove the mountain bar
Page 63
36THE PERFECT FITTraction ProductsnCarbide SkagsA skag is a replaceable bar attached to the underside of the ski to assist in turning the snowmobile a
Page 64
1WELCOMEThank you for purchasing a Polaris vehicle, and welcome to our world-wide family of Polaris owners. We proudly produce an exciting line of uti
Page 65
37THE PERFECT FITAccessoriesPolaris offers a wide range of accessories for your snowmobile. From map light to electric start, Polaris has the accessor
Page 66
38PRE-RIDE INSPECTIONSPre-Ride ChecklistInspect all items on the checklist for proper operation or condition before each use of the snowmobile. Proced
Page 67
39PRE-RIDE INSPECTIONSBefore Starting the EngineBefore starting the engine, always refer to all safety warnings pertaining to snowmobile operation. Ne
Page 68
40PRE-RIDE INSPECTIONSBefore Starting the Enginen Hydraulic BrakesProperly functioning brakes are critical to your safety. Always check the following
Page 69
41PRE-RIDE INSPECTIONSBefore Starting the Enginen Parking Brake Lever LockYour snowmobile may have a parking brake lever lock located over the brake l
Page 70
42PRE-RIDE INSPECTIONSBefore Starting the Enginen Steering SystemManually turn the skis completely to the right and to the left. If any dif-ficulty is
Page 71
43PRE-RIDE INSPECTIONSBefore Starting the Enginen Hood LatchesThe hood of the snowmobile protects the operator from moving parts as well as aiding in
Page 72
44PRE-RIDE INSPECTIONSStart the Engine and Checkn Engine Stop SwitchCheck the auxiliary shut-off switch for proper operation. Push the switch down t
Page 73
45OPERATIONStarting the EngineNOTICE: Engaging the starter when the engine is running WILL result in serious engine damage, especially if the transmis
Page 74
46OPERATIONEngine Break-InNo single action on your part is as important to long, trouble-free machine life as proper break-in of a new or rebuilt engi
Page 75
2POLARIS and POLARIS THE WAY OUT are registered trademarks of Polaris Indus-tries Inc.Copyright 2008 Polaris Sales Inc. All information contained with
Page 76
47OPERATIONEngine Break-InOil Injection SystemAlways check and fill the oil tank when refueling. See page 50.NOTICE: Serious engine damage can occur w
Page 77
48OPERATIONTrack Warm-UpFollow these steps to ensure proper warm-up of the engine, drive train and track.1. Use an appropriate stand to securely sup-p
Page 78
49OPERATIONFuel Your Polaris engine is designed to run on 87 octane non-oxygenated or 89 octane oxygenated pump gasoline. There’s a great deal of vari
Page 79
50OPERATIONFuel Reserve Capacity (Mechanical Gauge)There are approximately two gallons of fuel left in the tank when the mechanical fuel gauge reads R
Page 80
51OPERATIONn OilLow Oil Indicator LightThe low oil indicator light will indicate when to add oil. See page 47 for oil recommendations.When the low oil
Page 81
52OPERATIONn OilLow Oil LevelAlways do a visual check of the oil level when refueling. When the oil reaches the low level mark, add one U.S. quart of
Page 82
53OPERATIONCarburetionJetting GuidelinesChanges in altitude and temperature affect air density, which is the amount of oxygen available for combustion
Page 83
54OPERATIONn Engine Stop SwitchPush down on the engine stop switch to stop the engine in an emergency. This will ground out the ignition and bring the
Page 84
55OPERATIONn Throttle LeverIf the engine stops abruptly when the throttle lever is released:1. Turn the ignition switch to OFF.2. Visually inspect the
Page 85
56OPERATIONEmergency StoppingThe following chart lists methods for stopping the snowmobile in the event of an emergency. Refer to page 54 for more inf
Page 86
3TABLE OF CONTENTSIntroduction . . . . . . . . . . . . . . . . . . . . . . . . . . . . 4This section contains helpful information for owners and dri
Page 87
57OPERATIONEmergency StartingYour machine is equipped with a tool kit containing essential tools for emergency use. Snowmobiles equipped with electric
Page 88
58OPERATIONTo w i n gDo not use the front bumper to pull or drag the snowmobile. The front bumper is not designed for this type of use and may detach
Page 89
59MAINTENANCEEmission Control InformationAny qualified repair shop or qualified person may maintain, replace, or repair the emission control devices o
Page 90
60MAINTENANCEEmission Control InformationOwner’s ResponsibilitiesPlease read the Snowmobile Engine Emissions Limited Warranty, and read the maint
Page 91
61MAINTENANCEPolaris Recommended Maintenance ProgramTo ensure many trouble-free miles of snowmobiling enjoyment, follow recommended regular maintenanc
Page 92
62MAINTENANCEPeriodic Maintenance Interval TableThe following chart is a guide based on average riding conditions. You may need to increase frequency
Page 93
63MAINTENANCEPeriodic Maintenance Interval TableI — Inspect (clean, adjust, tighten, lubricate, replace if necessary)C — Clean R — Replace L — Lubrica
Page 94
64MAINTENANCEPeriodic Maintenance Interval TableI — Inspect (clean, adjust, tighten, lubricate, replace if necessary)C — Clean R — Replace L — Lubrica
Page 95
65MAINTENANCEPeriodic Maintenance Interval TableI — Inspect (clean, adjust, tighten, lubricate, replace if necessary)C — Clean R — Replace L — Lubrica
Page 96
66MAINTENANCELubricationSuspension and SteeringLubricate the suspension and steering components with Polaris Pre-mium All-Season Grease at 500 miles (
Page 97
4INTRODUCTIONImportant Notes for Owners and DriversAfter reading this manual, store it in the snowmobile for convenient ref-erence. It should remain w
Page 98
67MAINTENANCELubricationRear SuspensionWideTrak Rear Suspension+++++
Page 99
68MAINTENANCELubricationJackshaft BearingThe jackshaft bearing on your model may be equipped with a grease fit-ting, but this component is greased for
Page 100 — MAINTENANCE
69MAINTENANCELubricationn Gearcase Oil Level (WideTrak)Check the gearcase oil level at the intervals outlined in the maintenance charts beginning on p
Page 101
70MAINTENANCESpark PlugsIt’s very important to use the correct spark plug for your machine. A spark plug with a heat range too high will cause engine
Page 102
71MAINTENANCESpark PlugsSpark plug condition is indicative of engine operation. The spark plug firing end condition should be read after the engine ha
Page 103
72MAINTENANCEIntake FilterThe intake foam filter and screen limits snow ingestion into the intake system. When operating in loose powder snow, check t
Page 104
73MAINTENANCECarburetorWater/Sediment Trap ServiceMost Polaris snowmobiles contain patented carburetor bowl water/sedi-ment traps located at the botto
Page 105
74MAINTENANCECarburetorThe number stamped in the end of the main jet indicates the jet size. The jet installed at the time of manufacture is not neces
Page 106
75MAINTENANCEFuel Filter/Fuel LinesThe fuel filter is located inside the fuel tank. This component requires no maintenance.Inspect the fuel lines regu
Page 107
76MAINTENANCEExhaust SystemCheck the exhaust system for wear or damage at approximately 1000 miles (1600 km). To inspect, allow the engine and exhaust
Page 108 — POLARIS PRODUCTS
5INTRODUCTIONPreservation of the EnvironmentPolaris is committed to supporting an environmental education cam-paign. We encourage state and provincial
Page 109 — SUSPENSION TROUBLESHOOTING
77MAINTENANCEBrakesn Hydraulic Brake InspectionInspect the brake lever reserve before each use of the snowmobile. See page 40.Brake pads must be repla
Page 110 — TROUBLESHOOTING
78MAINTENANCEBrakesBrake FluidNOTICE: Brake fluid will damage decals, paint and some plastics. Always wipe up spills immediately.The brake fluid level
Page 111
79MAINTENANCEBrakesBleeding the Hydraulic Brake SystemAir in the hydraulic brake system will cause spongy brake lever action. Bleed the system before
Page 112
80MAINTENANCELightsHeadlight AdjustmentThe headlight may be adjusted for vertical aim using the following pro-cedure:1. Place the snowmobile on a leve
Page 113
81MAINTENANCELightsNOTE: Avoid touching a halogen bulb with bare fingers. Oil from skin leaves a residue, causing a hot spot that will shorten the lif
Page 114 — WARRANTY
82MAINTENANCEClutch SystemPeriodically inspect the clutch sheaves for damage, wear, or belt resi-due. To maintain optimum performance, clean with non-
Page 115
83MAINTENANCEClutch Systemn Drive Belt ConditionBelt width and length must match the center distance of the clutches and sheave width of the drive clu
Page 116
84MAINTENANCEClutch SystemDrive Belt Removal1. Stop the engine after operating in a forward motion.2. Turn the ignition key off. Wait for the engine t
Page 117
85MAINTENANCEClutch SystemDrive Belt Installation1. Drop the drive belt over the drive clutch and pull back the slack.NOTE: To ensure satisfactory bel
Page 118
86MAINTENANCEClutch Systemn Drive Belt DeflectionMeasure belt deflection with both clutches at rest and in their full neutral position.Place a straigh
Page 119
6INTRODUCTIONVehicle Identification NumbersRecord your snowmobile’s identification numbers and key number in the spaces provided. Remove the spare key
Page 120
87MAINTENANCEClutch SystemTo r q u e S t o pPeriodically check torque stop clearance. With clutches in proper alignment, the torque stop clearance sh
Page 121
88MAINTENANCETr a ckTrack Inspection1. Using a hoist, safely lift and support the rear of the snowmobile off the ground.2. Rotate the track by hand to
Page 122
89MAINTENANCETr a ckTrack LubricationThe slide rail requires adequate snow cover for sufficient lubrication. Excessive wear indicates insufficient lub
Page 123 — MAINTENANCE LOG
90MAINTENANCETr a ckTrack TensionTrack adjustment is critical for proper handling. Always maintain cor-rect tension and alignment. Tension adjustments
Page 124
91MAINTENANCETr a ckTrack TensionIf the track needs adjustment:5. Loosen the rear idler shaft bolt.6. Loosen the locknuts.7. Tighten or loosen the tra
Page 125
92MAINTENANCETr a ckn Track AlignmentPeriodically check that the track is centered and running evenly on the slide rails. Misalignment will cause exce
Page 126
93MAINTENANCESteering SystemSteering InspectionEach week, or before a long ride, check fasteners and tighten if neces-sary. Specific fasteners that sh
Page 127
94MAINTENANCESteering SystemSki AlignmentWith the handlebars in a straight-ahead position, and with vehicle weight compressing the suspension, measure
Page 128
95MAINTENANCESteering Systemn Ski SkagsCheck skags weekly to maintain positive steering characteristics. Skags must be replaced when worn to half thei
Page 129
96MAINTENANCESuspension Maintenancen Rail Slide WearFor ease of inspection, all Polaris rail slides have a wear limit indicator groove to indicate the
-
#1
-
1,8 MB
Просмотры: 7.610
-
#2
-
84,5 KB
Просмотры: 978
-
#3
mservis написал(а):
ftp://chadt.us
username: snowmobile@chadt.us
password: manual
заходить через оперу или тотал командер, эксплоер не пойдет.
Кстати, там и на ямахи, кошки и скидушки есть много.
-
#4
-
22,9 MB
Просмотры: 5.369 -
22,9 MB
Просмотры: 2.956 -
22,9 MB
Просмотры: 2.637 -
8 MB
Просмотры: 2.606 -

210,7 KB
Просмотры: 18.140
-
#5
Может кому пригодится выкладываю сервис мануал IQ 2007-2008 
-
13,3 MB
Просмотры: 3.887
-
#6
некоторая информация по двигателям MPE 750 FS/FST
-
1.010,8 KB
Просмотры: 1.003 -
1,6 MB
Просмотры: 875
-
#7
polaris transport 550 юзерский
-
2,5 MB
Просмотры: 1.327
-
#8
POLARIS SWITCHBACK 2012 модельный. Инструкция пользователя
-
3,4 MB
Просмотры: 1.226

ГАД
Активный участник
-
#9
2010-2012 PRO-RIDE RUSH/Switchback/RMK Service Manual
-
18 MB
Просмотры: 2.059
-
#10
может кому пригодится
-
4,5 MB
Просмотры: 2.969
-
#11
Service manual 2007-2008.
-
13,3 MB
Просмотры: 1.968
-
#12
Polaris 2006-2007 FS/FST service manual
Имеется полное описание 4-х тактного двигателя 750куб. см, в том числе с турбиной.
-
20,9 MB
Просмотры: 1.590
-
#13
WarMan написал(а):
Где взять мануал на polaris EDGE touring 550 выпуск 2004г заранее благодарен
Тут с 2007 г. Может он не сильно отличается?
-
7,3 MB
Просмотры: 1.331
-
#14
Доброго времени суток. Не могу найти литературу на Polaris switchback 800. 2004 юбилейный. Ткните, может плохо ищу.
-
#15
Есть у кого мануал на IQ 750 2008г
-
#17
У кого есть нормальная книжка на поларис вт лх 500 с моментами затяжек гаек, болтов, размерами итд, поделитесь
Американская машиностроительная компания Polaris известна на весь мир как производитель качественной мотовездеходной техники. Хотя с конвейера завода сходят мотоциклы и гидроциклы, основной специализацией все же являются снегоходы. Первый снегоход компании появился спустя два года после ее основания. Модель имела ошеломительный успех, поэтому производитель решил сосредоточить все свои силы именно на выпуске снегоходной техники.
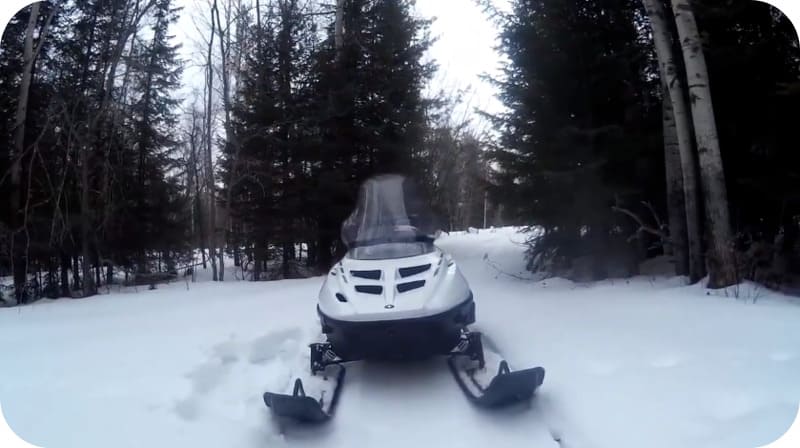
Снегоход «Поларис Вайдтрак 500» представляет классический утилитарный мотовездеход с широкой гусеницей. Модель отличает простота и надежность конструкции. Машина довольно маневренна, одинаково хорошо ведет себя как на укатанной трассе, так и на пухляке. Манера управления в чем-то схожа с вождением полноприводного автомобиля. Благодаря хорошим техническим характеристикам и надежности всех важных узлов, данный трак пользуется большой популярностью у жителей нашей страны.
Трак имеет особую конструкцию шасси, которая позволяет с легкостью передвигаться по глубокому снегу. Каждая модель линейки «Вайдтрак» отлично справляется с тяжелой работой. Однако вездеход вполне может выполнять функции туристического трака. Вездеход оснащен вместительным топливным баком, что позволяет ездить на большие расстояния и не тратить время на дозаправку. Комфорта добавляет регулируемая задняя подвеска, встроенный источник питания для подключения внешних приборов и обогрев рукояток.
Содержание
- Инструкция по эксплуатации
- Основные органы управления
- Регулировки
- Проверки перед поездкой
- Технические характеристики
- Размеры и вес
- Двигатель
- Трансмиссия
- Передняя и задняя подвеска
- Размеры гусеницы
- Топливная система
- Электроника
- Рекомендуемая цена
- Отзывы владельцев
Инструкция по эксплуатации
К каждому снегоходу прилагается руководство по использованью. Мануал «Полариса» содержит подробную информацию о техническом обслуживание основных элементов и узлов трака, правила безопасного вождения, а также указания по обкатке и дальнейшей эксплуатации. В конце инструкции расположен журнал ТО, данные о гарантийном обслуживании.
Основные органы управления
Все главные органы управления данным траком расположены на руле и контрольной панели.
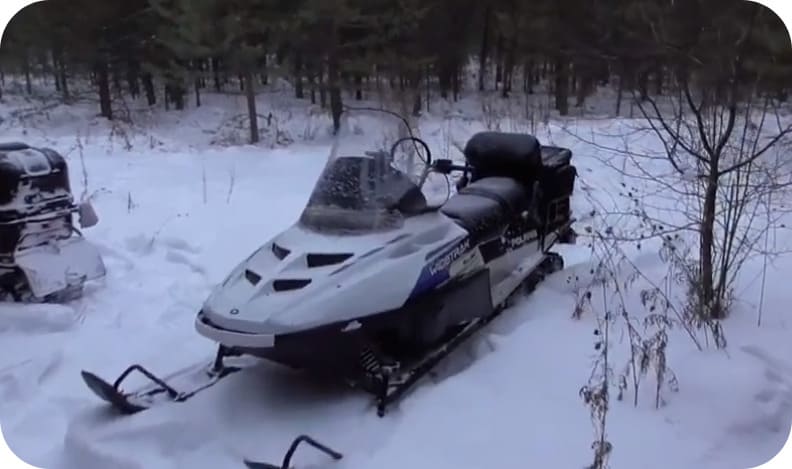
Цифрами на рисунке обозначены следующие элементы:
- крышка бака;
- замок зажигания;
- тормозной рычаг;
- спидометр;
- контрольная лампочка включения реверса;
- специальный захват;
- кнопка экстренного выключения двигателя;
- рычаг газа;
- ручной стартер;
- кнопка обогатителя.
Регулировки
В данном мануале также помещены пошаговые рекомендации по регулировке следующих элементов:
- сидения;
- руля;
- передней и задней подвески;
- натяжения гусеницы;
- торсионных пружин.
Все инструкции дополнены понятными иллюстрациями. В разделе технического обслуживания производитель поместил руководство по ТО, которое должен проводить владелец снегохода, а также дополнительно указал операции, для выполнения которых следует обратиться в сервисный центр.
Проверки перед поездкой
Перед каждым выездом на вездеходе следует выполнять ряд обязательных процедур. Необходимо проверять:
- состояние ремня привода;
- руль;
- зажигание, ручной стартер;
- тормозную систему (включая стояночный и экстренный для остановки мотора);
- крепления (подвески, капота);
- натяжение и центровку гусеницы;
- работу светотехники;
- коньки лыж;
- рычаг дросселя;
- состояние сменных направляющих гусеницы.
Также необходимо проверять уровень моторного масла в коробке передач и в двигателе. В мануале в соответствующем разделе помещена таблица с перечнем основных операций. Рядом с каждым пунктом указаны номера страниц, в которых можно посмотреть последовательность проведения работ, а также расположение соответствующих элементов конструкции.
Технические характеристики
Снегоход Polaris Widetrak lx 500 имеет хорошие технические характеристики и привлекательный внешний вид. Это не просто надежная «рабочая лошадка», но и настоящий туристический байк.
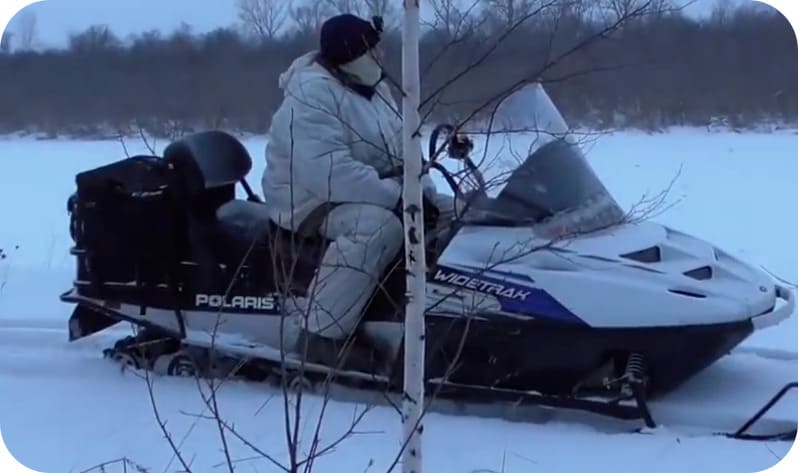
Базовая комплектация данной модели весьма впечатлительная:
- электростартер;
- багажный отсек и дополнительная полка (для крепления кофра);
- фаркоп и буксировочное устройство;
- спидометр (аналоговый);
- обогрев курка газа и рулевых рукояток;
- розетка для внешних приборов (12 вольт);
- двухместное сидение;
- высокое ветровое стекло;
- датчики топлива и температуры.

Специалист по снегоходу «Буран». Занимаюсь рыболовством в свободное время.
Задать вопрос
Зеркала заднего вида не входят в базовую комплектацию, но владелец может установить их при желании опционно.
Размеры и вес
Размеры и вес снегохода «Поларис Вайдтрак ЛХ 500» вполне внушают доверие, ставят трак в один ряд с более мощными утилитарными машинами. Сухая масса мотовездехода составляет 278.1 кг. Благодаря встроенному заднему фаркопу, трак может тянуть грузовые сани. Их вес может достигать 300 кг при глубине снега 30 – 60 см.
Габариты:
| Длина | 3.25 м |
| Ширина | 1.105 м |
| Высота | 1.295 м |
| База лыж | 96.5 см |
Емкость топливного бака составляет 46.1 л.
Двигатель
Под капотом данного снегоходного трака установлена двухтактная силовая установка Fuji Heavy японского производства. Система жидкостного охлаждения обеспечивает надежную защиту от перегрева даже при продолжительной эксплуатации мотора на высоких оборотах.
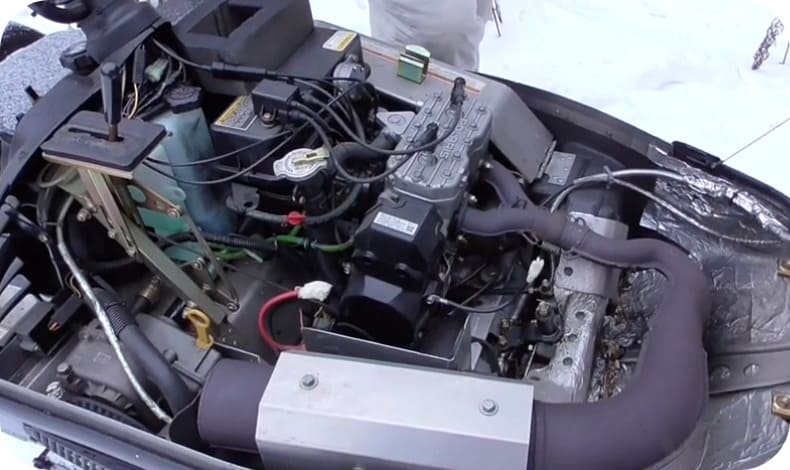
Характеристики двигателя:
| Количество цилиндров, расположение | 2, рядное |
| Суммарный объем | 488 куб. см |
| Мощность | 85 л. с. |
| Система питания | Карбюраторная (2х VM34) |
| Зажигание | Бесконтактное (CDI) |
| Диаметр цилиндра | 7.2 см |
| Ход поршня | 6 см |
| Система выпуска | Одиночная труба |
Максимальная скорость трака составляет 120 км/ч по заснеженному льду и 80 км/ч – по глубокому снегу.
Трансмиссия
В качестве трансмиссии на Widetrak LX 500 используется автоматическая коробка передач с ременным вариатором P-85/Polaris Button.
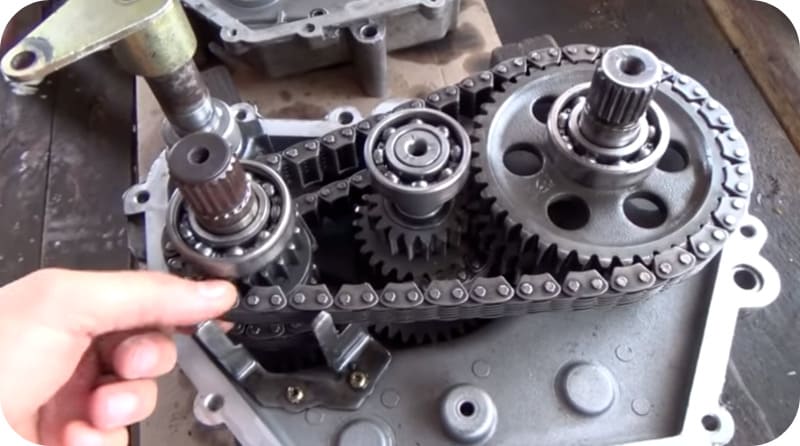
Рычаг управления передачами имеет четыре положения:
- пониженная вперед;
- повышенная вперед;
- нейтральное положение;
- задний ход (реверс).
Пониженная передача предназначена для эксплуатации трака в тяжелых условиях, а также при буксировке грузовых саней. Категорически запрещено ездить на пониженной передача со скоростью выше 40 км/ч.
Также на шасси установлена дисковая тормозная система с гидравлическим приводом. Основные органы управления находятся на левой рулевой рукоятке. Здесь же расположено смотровое окно главного тормозного цилиндра.
Передняя и задняя подвеска
Трак имеет независимую переднюю подвеску, задняя же представлена стандартным шарнирным механизмом.
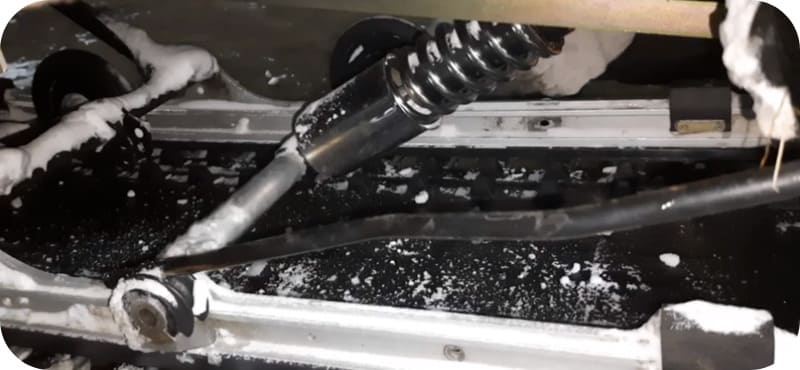
Основные характеристики подвески:
| Параметр | Передняя | Задняя |
| Тип | IFS | WideTrak (шарнирное удлинение) |
| Ход (см) | 18.4 | 22.9 |
| Амортизаторы трака | Nitrex | Nitrex |
Размеры гусеницы
На траке установлен стандартный гусеничный механизм с ременным приводом. Сама лента изготовлена из композитного материала и имеет следующие параметры:
| Длина | 3.453 м |
| Ширина | 50 см |
| Высота грунтозацепов | 3.17 см |
Топливная система
Поскольку двигатель двухтактный, то он предполагает смешанную систему смазки – моторное масло добавляют прямо в бензин. Система питания мотора представлена двумя карбюраторами VM34 – по одному на цилиндр.
Специалист по снегоходу «Буран». Занимаюсь рыболовством в свободное время.
Задать вопрос
Производитель крайне не рекомендует заливать масло в бензобак. Топливную смесь необходимо готовить заранее в специально отведенной для этого емкости.
Для смазки мотора следует выбирать полусинтетическое масло для двухтактных двигателей. При этом важно соблюдать пропорцию 40:1, получится следующее соотношение:
| Полусинтетическое масло | Топливо | |
| Рекомендации (из мануала) | 473 мл | 19 л |
| Для полного бака | 1л 35 мл | 41.6 л |
Для заправки можно использовать бензин марки Аи-92 или Аи-95.
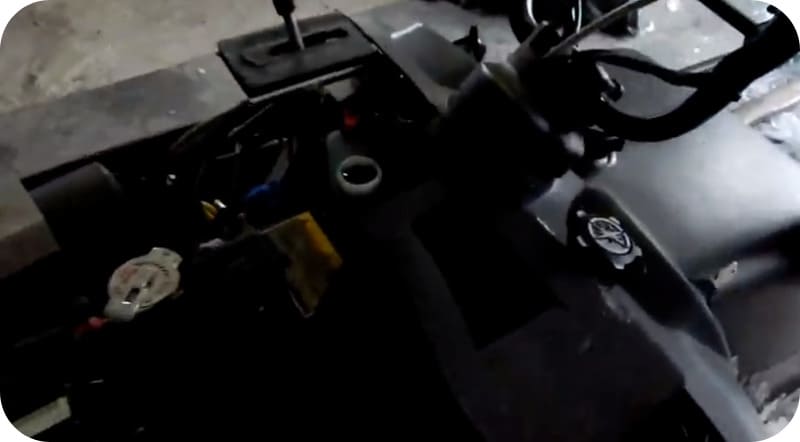
Электроника
В базовую комплектацию данного мотовездехода входит электрический стартер и источник питания для внешних приборов.
Рекомендуемая цена
Модель уже снята с производства, поэтому купить новый трак без пробега не получится. Самый свежий вездеход, который можно найти на сайтах подержанной техники, датируется 2015 годом выпуска.
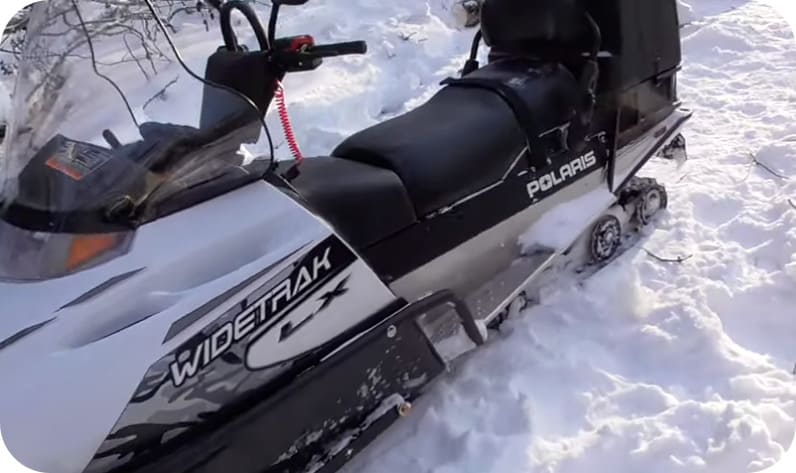
Цена на данный трак зависит от года выпуска, пройденного километража и общего технического состояния. Варьируется в пределах 320 – 690 тыс. рублей. Так, вездеход 2010 года с пробегом 3 тыс. км обойдется в 370 тыс. руб., а образец 2013 г с пробегом более 5 тыс. км – в 475 тыс. руб. Дороже всего обойдется байк 15-го года, который прошел около 100 км. Меньше 320 тыс. руб. будут стоить старые модели 1990-х годов.
Отзывы владельцев
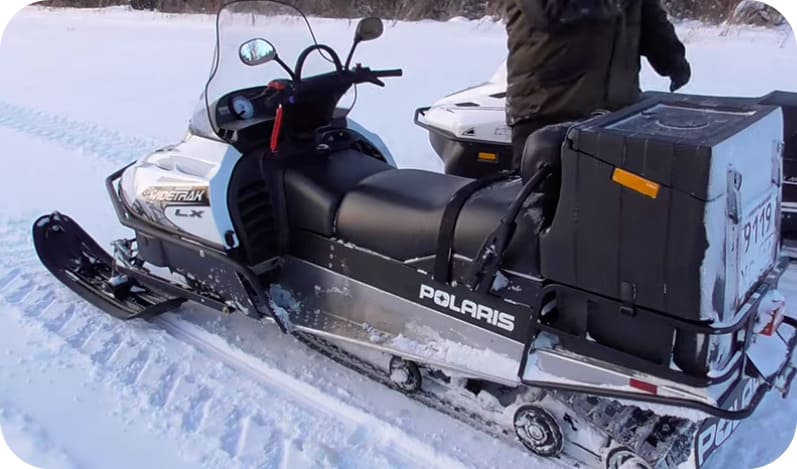
Евгений, Иркутск:
«Купил Полярис ЛХ в 2011 году. С первого дня сразу же сел за руль, чтобы опробовать. В дальнейшем каждый две недели я выезжал на нем на охоту. Выезжали в разные места – и в лес, и в равнинную местность. Снежик одинаково хорошо себя показывает как на целине, так и на укатанной трассе. До этого у меня был Викинг 540. В начале постоянно сравнивал эти модели, и пришел к выводу, что «американец» все же лучше. Очень понравилась система жидкостного охлаждения. Благодаря ей мой байк заводится даже при самых низких температурах».
Владимир, Владивосток:
«Купил Вайдтрак 500 два года назад. За это время успел накатать больше 5 тыс. км. В основном использую трак как «тягач». Грузовые сани массой 300 кг тянет на скорости 30-35 км/ч. При этом расход топлива составляет около 25 литров на сотню, что в общем-то неплохо, учитывая, что ЛХ 500 – двухтактник. За два года вроде серьезных проблем не было, разве что на подвеске пара болтов потерялась. Запускается с первого раза при -20, а вот дальше с первой попытки не всегда получается».
Михаил, Рыбинск:
«Данный вездеход купил с рук в 2016 году. За три года эксплуатации проехал больше 6000 км. Могу сказать, что есть у него как плюсы, так и минусы. Аппарат довольно добротно сделан, да и тянет очень даже неплохо, но вот подвеска, на мой взгляд, слабовата. За время пользования мне пришлось менять рычаг обогатителя, что обошлось в довольно внушительную сумму. Заводские крепления тоже оставляют желать лучшего. Из плюсов – здесь просто отличный мотор».
Предложите, как улучшить StudyLib
(Для жалоб на нарушения авторских прав, используйте
другую форму
)
Ваш е-мэйл
Заполните, если хотите получить ответ
Оцените наш проект
1
2
3
4
5
Для ознакомления с инструкцией необходимо нажать на ссылку «ЗАГРУЗИТЬ», чтобы скачать pdf файл. Если есть кнопка «ПРОСМОТР», то можно просто посмотреть документ онлайн.
Для удобства, Вы можете сохранить данную страницу с файлом руководства по эксплуатации в свой список «избранное» прямо на сайте (доступно для зарегистрированных пользователей).
Смотрите инструкцию для похожих моделей:

Вы можете задать вопрос посетителям сайта по модели POLARIS Widetrak LX (2013). Если Вы являетесь её пользователем, то пожалуйста оставьте, по возможности развёрнутый отзыв: