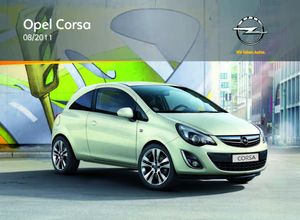
Manufacturer: OPEL, Model Year: 2010.5,
Model line: CORSA,
Model: OPEL CORSA 2010.5
Pages: 226, PDF Size: 6.28 MB
Page 1 of 226

Page 2 of 226
Page 3 of 226
Page 4 of 226
Page 5 of 226

Page 6 of 226
Page 7 of 226
Page 8 of 226
Page 9 of 226
Page 10 of 226
- Load next 10 pages
View, print and download for free: OPEL CORSA 2010.5 Инструкция по эксплуатации (in Russian), 226 Pages, PDF Size: 6.28 MB. Search in OPEL CORSA 2010.5 Инструкция по эксплуатации (in Russian) online. CarManualsOnline.info is the largest online database of car user manuals. OPEL CORSA 2010.5 Инструкция по эксплуатации (in Russian) PDF Download.
All product names, logos, and brands are property of their respective owners.
Privacy Policy | About Us & Contact

Contents
|
Introduction ……………………………… |
2 |
|
In brief …………………………………….. |
6 |
|
Keys, doors and windows ………… |
19 |
|
Seats, restraints ……………………… |
33 |
|
Storage …………………………………. |
50 |
|
Instruments and controls …………. |
66 |
|
Lighting …………………………………. |
93 |
|
Infotainment system ………………. |
101 |
|
Climate control ……………………… |
104 |
|
Driving and operating …………….. |
110 |
|
Vehicle care …………………………. |
134 |
|
Service and maintenance ………. |
174 |
|
Technical data ……………………… |
186 |
|
Customer information ……………. |
207 |
|
Index …………………………………… |
208 |

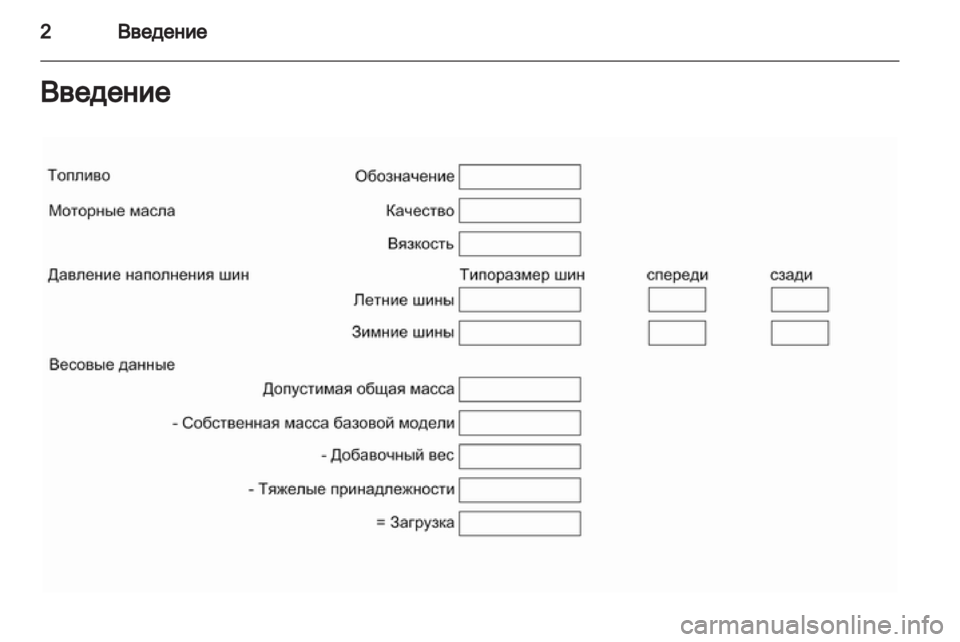
2Introduction
Introduction

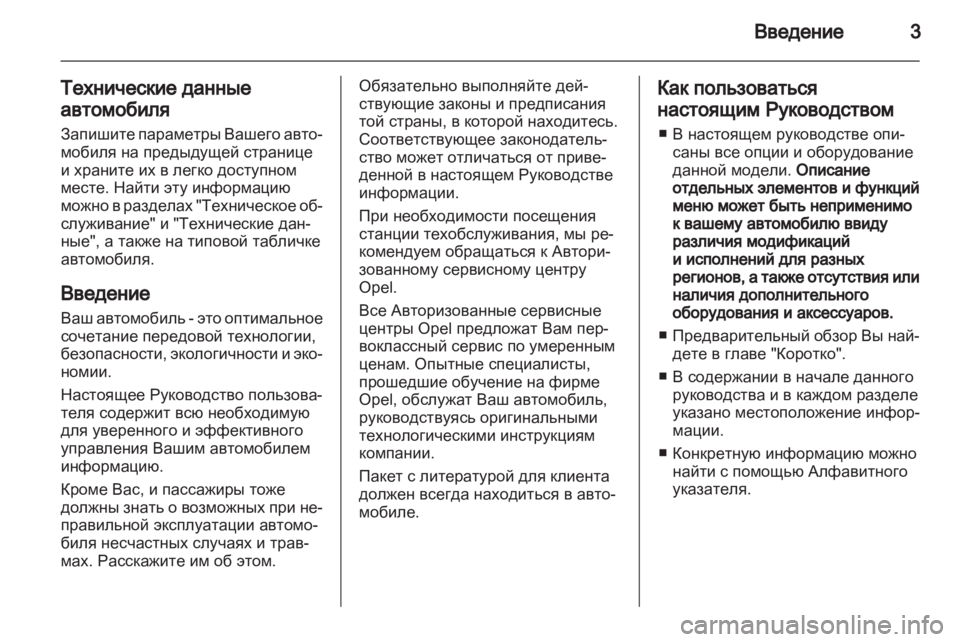
Introduction 3
Vehicle specific data
Please enter your vehicle’s data on the previous page to keep it easily accessible. This information is available under the sections «Service and Maintenance» and «Technical data» as well as on the identification plate.
Introduction
Your vehicle is a designed combination of advanced technology, safety, environmental friendliness and economy.
This Owner’s Manual provides you with all the necessary information to enable you to drive your vehicle safely and efficiently.
Make sure your passengers are aware of the possible risk of accident and injury which may result from improper use of the vehicle.
You must always comply with the specific laws and regulations of the country that you are in. These laws may differ from the information in this Owner’s Manual.
When this Owner’s Manual refers to aworkshopvisit,werecommendyour Opel Service Partner.
All Opel Service Partners provide first-class service at reasonable prices. Experienced mechanics trained by Opel work according to specific Opel instructions.
The customer literature pack should always be kept ready to hand in the vehicle.
Using this manual
■This manual describes all options and features available for this model. Certain descriptions, including those for display and menu functions, may not apply to your vehicle due to model variant, country specifications, special equipment or accessories.
■The «In brief» section will give you an initial overview.
■The table of contents at the beginning of this manual and within each chapter shows where the information is located.
■The index will enable you to search for specific information.
■This Owner’s Manual depicts lefthand drive vehicles. Operation is similarforright-handdrivevehicles.
■The Owner’s Manual uses the factory engine designations. The corresponding sales designations can be found in the chapter «Technical data».
■Directional data, e.g. left or right, or front or back, always relate to the direction of travel.
■The vehicle display screens may not support your specific language.
■Inthismanualalldisplaymessages and interior labellings are written in bold type.

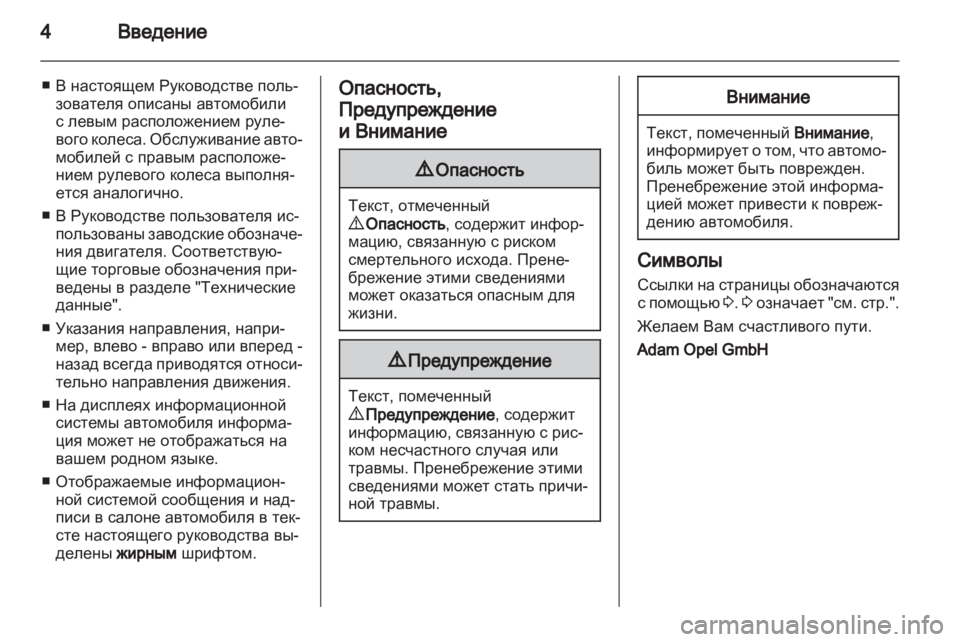
4Introduction
Danger, Warnings and
Cautions
9 Danger
Text marked 9 Danger provides information on risk of fatal injury. Disregarding this information may endanger life.
9 Warning
Text marked 9 Warning provides information on risk of accident or injury. Disregarding this information may lead to injury.
Caution
Text marked Caution provides informationonpossibledamageto the vehicle. Disregarding this information may lead to vehicle damage.
Symbols
Page references are indicated with 3. 3 means «see page».
We wish you many hours of pleasurable driving.
Adam Opel GmbH

Introduction 5

6In brief
In brief
Initial drive information
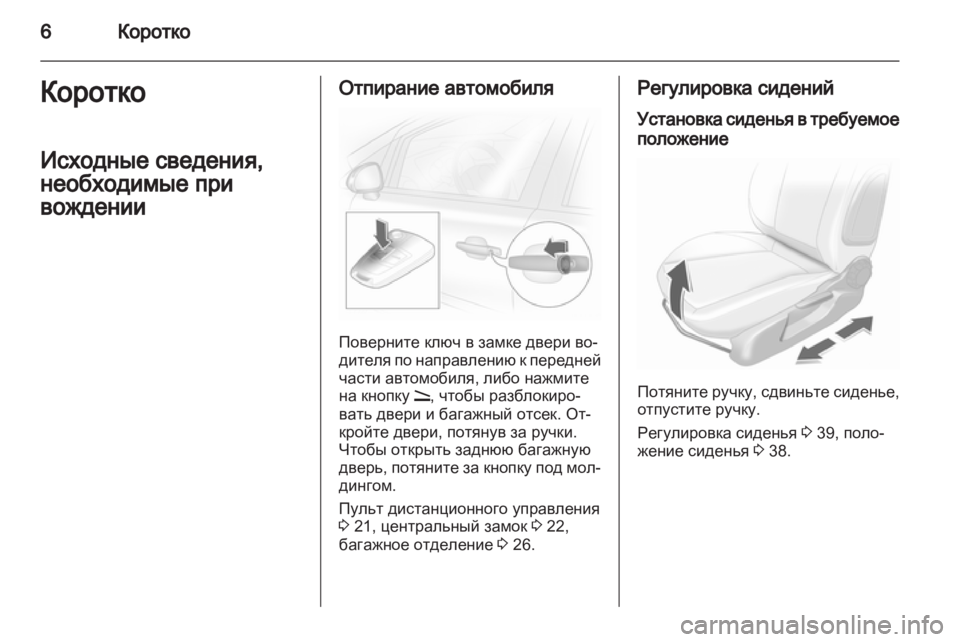
Vehicle unlocking
Turn the key in the driver’s door lock to the front or press button q to
unlock the doors and load compartment. Open the doors by pulling the handles. To open the tailgate, pull the button under the tailgate moulding.
Radio remote control 3 19, Central locking system 3 21, Load compartment 3 24.
Seat adjustment
Seat positioning
Pull handle, slide seat, release handle.
Seat adjustment 3 35, Seat position 3 34.

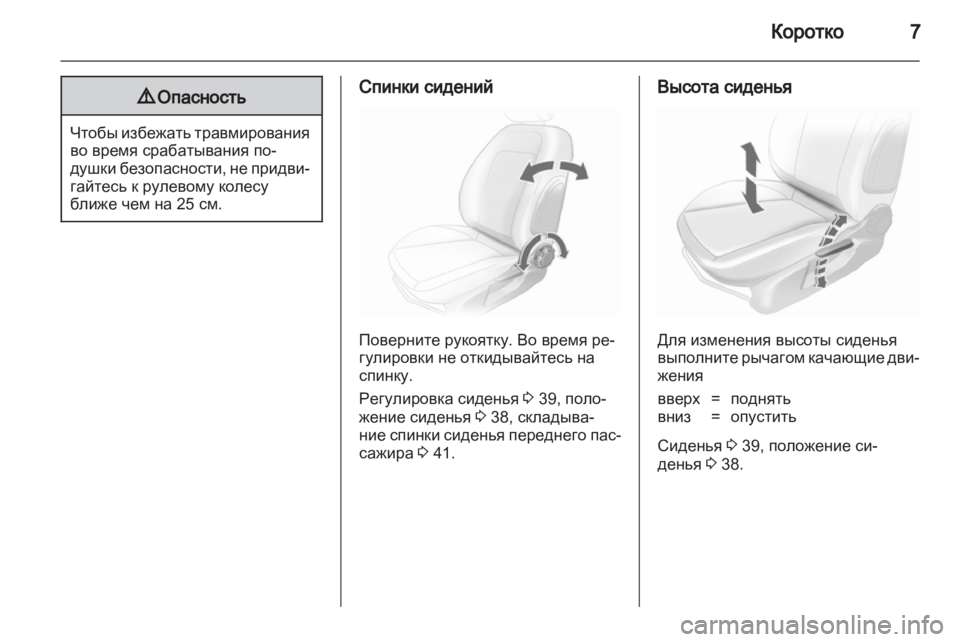
Seat backrests
Turn handwheel. Do not lean on seat when adjusting.
Seat adjustment 3 35, Seat position 3 34, Folding front passenger seat backrest 3 36.
Seat height
Lever pumping motion
Seats 3 35, Seat position 3 34.
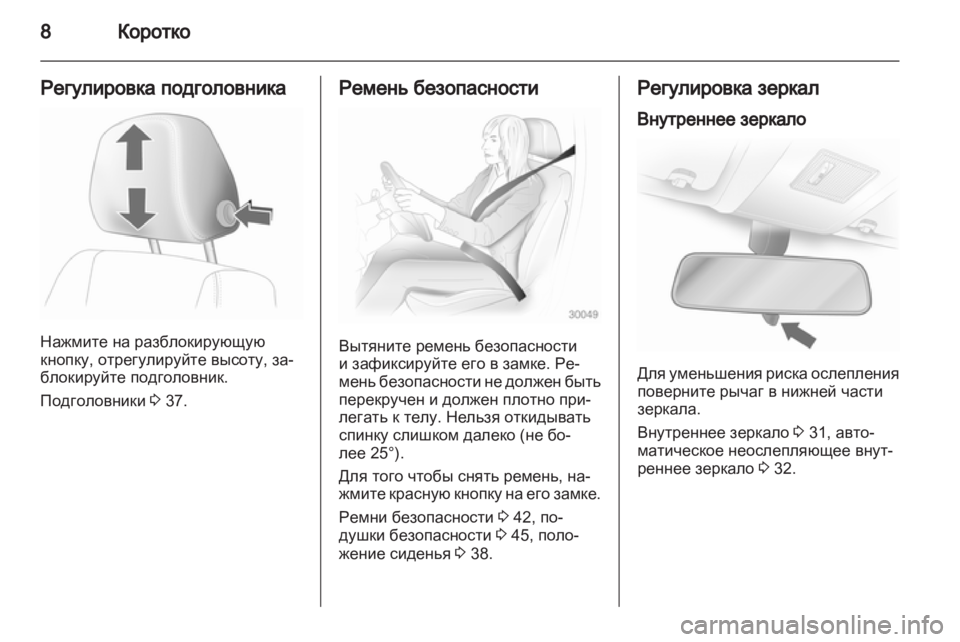
Head restraint adjustment
Press release button, adjust height, engage.
Head restraints 3 33.

8In brief
Seat belt
Pull out the seat belt and engage in belt buckle. The seat belt must not be twisted and must fit close against the body. The backrest must not be tilted back too far (maximum approx. 25 °).
To release belt, press red button on belt buckle.
Seat belts 3 37, Airbag system 3 39, Seat position 3 34.
Mirror adjustment
Interior mirror
Swivel the lever on the underside to reduce dazzle.
Interior mirror 3 28, Automatic antidazzle interior mirror 3 29.
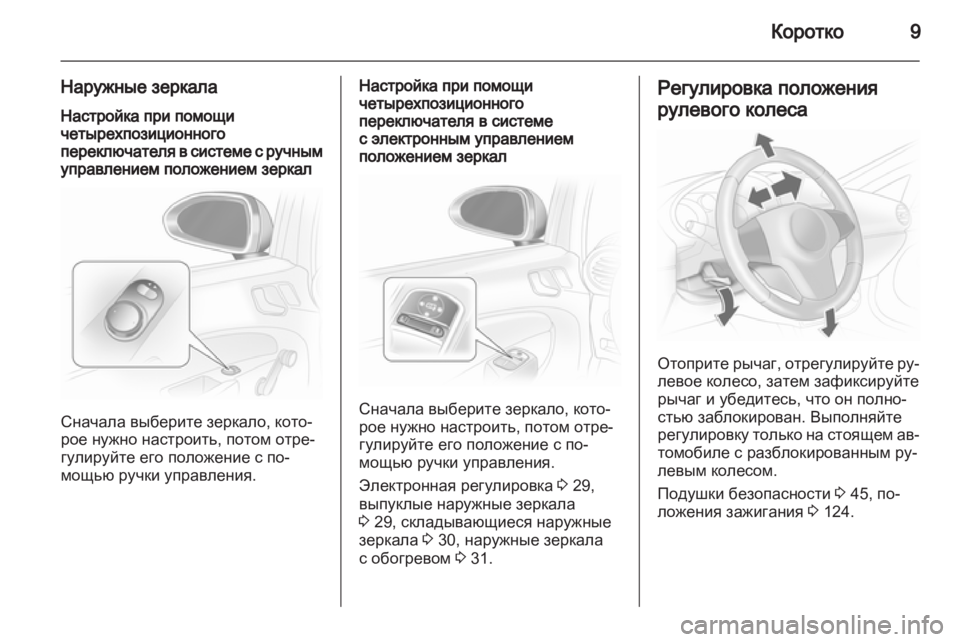
Exterior mirrors
Setting with four-way switch in version with manual window operation
Firstselecttherelevantexteriormirror then use the control to adjust.

Setting with four-way switch in version with electronic window operation
Firstselecttherelevantexteriormirror then use the control to adjust.
Electric adjustment 3 26, Convex exterior mirrors 3 26, Folding exterior mirrors 3 27, Heated exterior mirrors 3 28.
Steering wheel adjustment
Unlock lever, adjust steering wheel, then engage lever and ensure it is fully locked. Do not adjust steering wheelunlessvehicleisstationaryand steering wheel lock has been released.
Airbag system 3 39, Ignition positions 3 111.
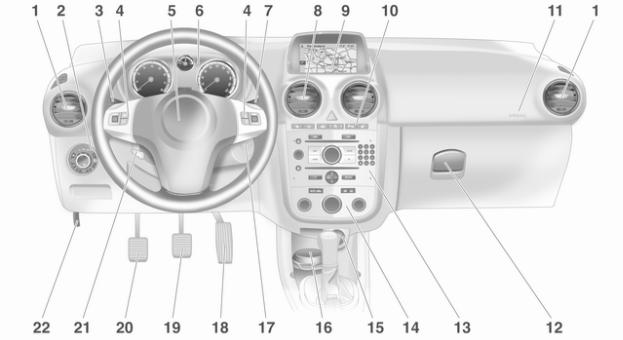

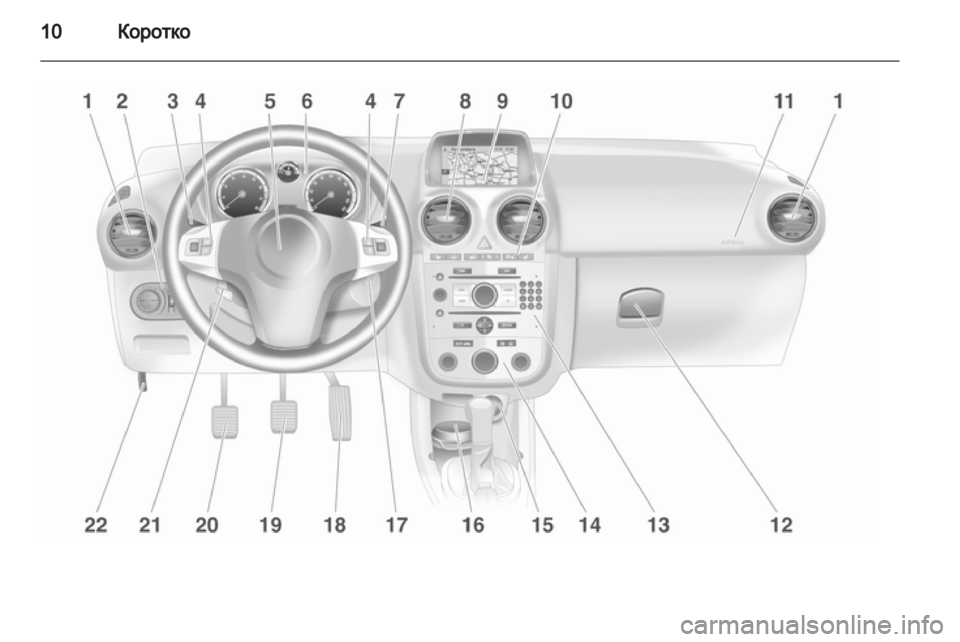
Instrument panel overview
|
1 |
Side air vents …………………. |
108 |
|
2 |
Light switch …………………….. |
93 |
|
Instrument illumination ……… |
97 |
|
|
Rear fog light ……………………. |
97 |
|
|
Front fog lights ………………… |
96 |
|
|
Headlight range |
||
|
adjustment ……………………… |
94 |
3Turn and lane-change signals, headlight flash,
|
low beam and high beam ….. |
96 |
|
|
Exit lighting ………………………. |
99 |
|
|
Parking lights …………………… |
97 |
|
|
Cruise control ………………….. |
80 |
|
|
4 |
Steering wheel controls ……… |
66 |
|
5 |
Horn ……………………………….. |
67 |
|
Driver airbag ……………………. |
40 |
|
|
6 |
Instruments …………………….. |
72 |
7Windscreen wiper,
|
windscreen washer system |
… 68 |
|
|
Trip computer …………………… |
86 |
|
|
8 |
Centre air vents ………………. |
108 |
|
9 |
Info-Display ……………………… |
81 |
|
Trip computer …………………… |
86 |
|
|
Electronic climate control |
||
|
system …………………………… |
106 |
|
10 |
Left heated seat ……………….. |
36 |
|
Heated steering wheel ………. |
67 |
|
|
Tyre deflation detection |
||
|
system …………………………… |
159 |
|
|
Parking assist …………………. |
125 |
|
|
Hazard warning flashers ……. |
96 |
|
|
Central locking system ………. |
21 |
|
|
Electronic stability program . 123 |
||
|
Airbag deactivation …………… |
43 |
|
|
Right heated seat ……………… |
36 |
|
|
11 |
Front passenger airbag ……… |
40 |
|
12 |
Glovebox ………………………… |
50 |
|
13 |
Infotainment system ………… |
101 |
|
14 |
Climate control system …….. |
104 |
|
15 |
Cigarette lighter ………………… |
71 |
|
Power outlet …………………….. |
71 |
|
|
16 |
Ashtray ……………………………. |
71 |
|
17 |
Ignition switch with |
|
|
steering wheel lock …………. |
111 |
|
|
18 |
Accelerator pedal ……………. |
110 |
|
19 |
Brake pedal ……………………. |
122 |
|
20 |
Clutch pedal …………………… |
110 |
|
21 |
Steering wheel adjustment …. |
66 |
|
22 |
Bonnet release lever ……….. |
135 |


Exterior lighting
Turn light switch
7= Off
8 = Side lights
9 = Headlights
Press light switch
> = Front fog lights r = Rear fog lights
Lighting 3 93.
|
Headlight flash, high beam and |
Turn and lane-change signals |
|
low beam |
|
right |
= |
lever up |
|||||
|
headlight flash |
= |
pull lever |
left |
= |
lever down |
||
|
high beam |
= |
push lever |
Turn and lane-change signals |
||||
|
low beam |
= push or pull lever |
||||||
|
3 96, Parking lights 3 97. |
|||||||
|
High beam 3 94, Headlight flash |
|||||||
|
3 |
94, Automatic light control |
||||||
|
3 |
93. |

|
14 |
In brief |
||
Hazard warning flashers |
Horn |
Washer and wiper systems |
|
Windscreen wiper |
|
Operated with the ¨button. |
Press j. |
||
|
Hazard warning flashers 3 96. |
& |
= |
fast |
|
% = |
slow |
||
|
$ = |
timed interval wipe or |
||
|
automatic wiping with rain |
|||
|
sensor |
|||
|
§ |
= |
off |
|
|
For a single wipe when the |
|||
|
windscreen wiper is off, press the |
|||
|
lever down. |
|||
|
Windscreen wiper 3 68, Wiper |
|||
|
blade replacement 3 139. |

Windscreen and headlight washer systems
Pull lever.
Windscreen and headlight washer system 3 68, Washer fluid 3 138.
Rear window wiper and washer system
|
Wiper on |
= |
push lever |
|
Wiper off |
= |
push lever again |
|
Wash |
= |
push lever and hold |
Rear window wiper and washer system 3 69, Wiper blade
replacement 3 139, Washer fluid 3 138.
Climate control
Heated rear window, heated exterior mirrors
Heating is operated by pressing the Übutton.
Heated rear window 3 30.

Demisting and defrosting the windows
Air distribution to l.
Set temperature control to warmest level.
Set fan speed to highest level. Cooling non.
Press button V.
Climate control system 3 104.
Transmission
Manual transmission
Reverse: with the vehicle stationary, wait 3 seconds after depressing clutch pedal and then pull up the button on the selector lever and engage the gear.
If the gear does not engage, set the lever to neutral, release the clutch pedal and depress again; then repeat gear selection.
Manual transmission 3 117.
Manual transmission automated
N = neutral position o = drive position + = higher gear
—= lower gear
A= switch between automatic and manual mode
R= reverse gear (with selector lever lock)
Manual transmission automated 3 118.

Automatic transmission
P = park position R = reverse gear N = neutral position D = drive position
The selector lever can only be moved out of P or N when the ignition is on and the foot brake is depressed (Selector lever lock). To engage P or R, push button on selector lever.
The automatic transmission is available in two versions 3 114.
Starting off
Check before starting off
■Tyre pressure and condition 3 159, 3 200.
■Engine oil level and fluid levels 3 136.
■All windows, mirrors, exterior lighting and number plates are free from dirt, snow and ice and are operational.
■Proper position of mirrors, seats, and seat belts 3 26, 3 34,
3 38.
■Brake function at low speed, particularly if the brakes are wet.
Starting the engine
Turn key to position 1. Move the steering wheel slightly to release the steering wheel lock. Operate clutch and brake, automatic transmission in P or N, do not accelerate; for diesel engines, turn the key to position 2 for preheating and wait until control indicator !goes out; turn key to
3 and release key. Starting the engine 3 111.

Parking
■Always apply the parking brake withoutpressingthereleasebutton. Apply as firmly as possible on
a downhill slope or uphill slope. Depress the foot brake at the same time to reduce operating force.
■Switch off the engine. Turn the ignitionkeyto0andremoveit.Turn thesteeringwheeluntilthesteering wheel lock is felt to engage.
For vehicles with automatic transmission, the key can only be removed when the selector lever is in the P position.
■Ifthevehicleisonalevelsurfaceor uphillslope,engagefirstgearorset the selector lever to P before switching off the ignition. On an uphill slope, turn the front wheels away from the kerb.
If the vehicle is on a downhill slope, engage reverse gear or set the selector lever to P before switching off the ignition. Turn the front wheels towards the kerb.
■Lock the vehicle with button p on the radio remote control.
Activate the anti-theft alarm system 3 25.
■Donotparkthevehicleonaneasily ignitable surface. The high temperature of the exhaust system could ignite the surface.
■Close windows and sunroof.
■The engine cooling fans may run after the engine has been switched off 3 135.
■Afterrunningathighenginespeeds or with high engine loads, operate the engine briefly at a low load or run in neutral for approx. 30 seconds, before switching off in order to protect the turbocharger.
Keys, locks 3 19,
Layingthevehicleupforalongperiod of time 3 134.

Keys, doors and windows |
19 |
|
Keys, doors and |
|
|
windows |
|
|
Keys, locks …………………………….. |
19 |
|
Doors ……………………………………. |
24 |
|
Vehicle security ………………………. |
25 |
|
Exterior mirrors ………………………. |
26 |
|
Interior mirrors ……………………….. |
28 |
|
Windows ……………………………….. |
29 |
|
Roof ……………………………………… |
31 |
Keys, locks
Keys
Replacement keys
The key number is specified in the Car Pass or on a detachable tag.
The key number must be quoted when ordering replacement keys as it is a component of the immobiliser system.
Locks 3 171
Key with foldaway key section
Press button to extend. To fold the key, first press the button.
Car Pass
The Car Pass contains security related vehicle data and should therefore be kept in a safe place.
When the car is taken to a workshop, this vehicle data is needed in order to perform certain operations.
Radio remote control
Used to operate:
■Central locking system,
■Anti-theft locking system,
■Anti-theft alarm system,
■Power windows.

20 Keys, doors and windows
The radio remote control has an approximate range of up to 5 metres. This range can be affected by outside influences. The hazard warning flashers confirm operation.
Handle with care, protect from moisture and high temperatures and avoid unnecessary operation.
Fault
If the central locking system cannot be operated with the radio remote control,itmaybeduetothefollowing:
■Range exceeded,
■Battery voltage too low,
■Frequent,repeatedoperationofthe radio remote control while not in range, which will require resynchronisation,
■Overload of the central locking system by operating at frequent intervals, the power supply is interrupted for a short time,
■Interference from higher-power radio waves from other sources.
Unlocking 3 21.
Radio remote control battery replacement
Replace the battery as soon as the range is noticeably diminished.
Batteries do not belong in household waste. They must be disposed of at an appropriate recycling collection point.
Key with foldaway key section
Extend the key and open the unit. Replace the battery (battery type CR 2032), paying attention to the installation position. Close the unit and synchronise.
Key with fixed key section
Have the battery replaced by a workshop.
Radio remote control synchronisation
After replacing the battery, unlock the door with the key in the driver’s door lock. The radio remote control will be synchronised when you switch on the ignition.
Memorised settings
Whenever the vehicle is locked, the following settings are automatically remembered by the key being used:
■Electronic climate control,
■Info-Display,
■Infotainment system,
■Instrument panel illumination.
The saved settings are automatically used next time that key is used for unlocking.

|
Keys, doors and windows |
21 |
Central locking system
Unlocks and locks doors, load compartment and fuel filler flap.
A pull on an interior door handle unlocks the entire vehicle and opens the door.
Note
In the event of an accident of a certain severity, the vehicle unlocks automatically.
Note
A short time after unlocking with the remote control the doors are locked automatically if no door has been opened.
Unlocking
Central locking system with key activation
Turn the key in the driver’s door lock to the front.
Central locking system with radio remote control
Press button q.
Two settings are possible:
■To unlock only the driver’s door, press button q once, to unlock the entire vehicle, press button q twice.
■To unlock the entire vehicle, press button q once.
Settings can be changed in the Driver Information Center.
Vehicle personalisation 3 90.

22 Keys, doors and windows
Locking
Close doors, load compartment and fuelfillerflap.Ifthedriver’sdoorisnot closed properly, the central locking system will not work.
Central locking system with key activation
Turn the key in the driver’s door lock rearwards.
Central locking system with radio remote control
Press button p.
Central locking button
Press button m: the doors are locked or unlocked.
The LED in the button m illuminates for approx. 2 minutes after locking with the radio remote control.
If the doors are locked from the inside whilst driving, the LED remains lit.
Ifthekeyisintheignitionlock,locking isonlypossibleifalldoorsareclosed.

|
Keys, doors and windows |
23 |
Fault in radio remote control
Unlocking
Turn the key in the driver’s door lock as far as it will go. The entire vehicle is unlocked when the driver’s door is opened. To open the other doors, switch on the ignition and press the central locking button.
Locking
Close the driver’s door, open the passengerdoor,presscentrallocking
button m. The vehicle is locked. Close the passenger door.
Fault in central locking system
Unlocking
Turn the key in the driver’s door lock asfarasitwillgo.Theotherdoorscan be opened by pulling the interior handle (not possible if the anti-theft locking system is active). The load compartment and fuel filler flap remainlocked.Todeactivatetheantitheft locking system, switch on the ignition 3 25.
Locking
Insert the key into the opening above the lock on the inside of the door and operatethelockbyliftinguntilitclicks.
Then close the door. The procedure mustbecarriedoutforeachdoor.The driver’s door can also be locked from the outside with the key. The fuel filler flap and tailgate cannot be locked.
Automatic locking
This security feature can be configured to automatically lock all doors, load compartment and fuel filler flap as soon as the vehicle is driven. Vehicle personalisation
3 90.
Child locks

24 Keys, doors and windows
9 Warning
Use the child locks whenever children are occupying the rear seats.
Using a key or suitable screwdriver, turn button on rear door lock to the horizontal position: door cannot be opened from inside.
Doors
Load compartment
Opening
Pull the button underneath the moulding.
9 Warning
Do not drive with the tailgate open or ajar, e.g. when transporting bulky objects, since toxic exhaust gases could enter the vehicle.
Note
The installation of certain heavy accessories onto the tailgate may affect its ability to remain open.
Closing
Use the interior handle.
Do not press the button under the moulding while closing as this will unlock it again.

|
Keys, doors and windows |
25 |
Vehicle security
Anti-theft locking system
9 Warning
Do not use the system if there are people in the vehicle! The doors cannot be unlocked from the inside.
The system deadlocks all the doors. All doors must be closed or the system cannot be activated.
Iftheignitionwason,thedriver’sdoor must be opened and closed once so that the vehicle can be secured.
Unlocking the vehicle disables the mechanical anti-theft locking system. This is not possible with the central locking button.
Activating with the remote control |
Light-emitting diode (LED) |
|
Press p again at the latest 10 |
During the first 10 seconds of anti- |
||
|
seconds after locking. |
theft alarm system activation: |
||
Anti-theft alarm system |
LED |
= |
Test, ignition delay, |
|
illuminates |
= |
Door, load |
|
|
The anti-theft alarm system |
LED |
||
|
flashes |
compartment or |
||
|
incorporates and is operated in |
|||
|
quickly |
bonnet open, or |
||
|
conjunction with the anti-theft locking |
|||
|
system fault. |
|||
|
system. |
|||
|
It monitors: |
After the first 10 seconds of anti-theft |
||
|
■ Doors, load compartment, bonnet, |
alarm system activation: |
||
|
LED flashes |
= System active. |
||
|
■ Ignition. |
|||
|
slowly |
|||
|
Unlocking the vehicle deactivates |
|||
|
both systems simultaneously. |

26 Keys, doors and windows
Seek the assistance of a workshop in the event of faults.
Alarm
When triggered, the alarm gives off an acoustic signal (horn) and a visual signal (hazard warning flashers). The number and duration of which are stipulated by legislation.
The alarm siren can be silenced by pressing any button of the radio remote control or by switching on the ignition.Theanti-theftalarmsystemis deactivated at the same time.
Immobiliser
The system checks whether the vehicle is allowed to start with the key being used. If the transponder in the key is recognised, the engine can be started.
The electronic immobiliser activates itself automatically after the key has been removed from the ignition switch.
If the control indicator Aflashes when the ignition is on, there is a fault in the system; the engine cannot be started. Switch off the ignition and then repeat the start attempt.
If the control indicator continues flashing, attempt to start the engine using the spare key and seek the assistance of a workshop.
If control indicator illuminates after the engine has started, there is a fault in the engine electronics or transmission electronics 3 77,
3 116, 3 121, or there is water in the diesel fuel filter 3 86.
Note
The immobiliser does not lock the doors. You should always lock the vehicle after leaving it and switch on the anti-theft alarm system 3 21,
3 25.
Exterior mirrors
Convex shape
The convex exterior mirror reduces blind spots. The shape of the mirror makes objects appear smaller, which will affect the abilty to estimate distances.
Electric adjustment
Setting with four-way switch in version with manual window operation

|
Keys, doors and windows |
27 |
Firstselecttherelevantexteriormirror then use the control to adjust.
Setting with four-way switch in version with electronic window operation
Firstselecttherelevantexteriormirror then use the control to adjust.
Folding
For pedestrian safety, the exterior mirrors will swing out of their normal mounting position if they are struck with sufficient force. Reposition the mirror by applying slight pressure to the mirror housing.
Corsa OPC: For pedestrians safety, the exterior mirrors of the Corsa OPC are released from the holder if they are bumped. Fit mirror housing to holder with latching lugs and engage by striking gently.

28 Keys, doors and windows
Manual |
Heated |
Interior mirrors |
Manual anti-dazzle |
The exterior mirrors can be folded in by pressing gently on the outer edge of the housing.
Operated by pressing the Übutton.
Heating works with the engine running. It is switched off automatically after a short time.
To reduce dazzle, adjust the lever on the underside of the mirror housing.

|
Keys, doors and windows |
29 |
Automatic anti-dazzle |
Windows |
Manual windows |
Dazzle from following vehicles at night is automatically reduced.
The door windows can be opened or closed with the window winders.
Power windows
9 Warning
Take care when operating the power windows. Risk of injury, particularly to children.
Keep a close watch on the windows when closing them. Ensure that nothing becomes trapped in them as they move.
Power windows can be operated:
■with the ignition on,
■within 5 minutes of switching the ignition off,
■within 5 minutes of turning the ignition key to position 1.
After switching off the ignition, the window operation is disabled, when the driver’s door is opened, then closed and locked.

30 Keys, doors and windows
Operate the control to open or close the window.
For vehicles with automatic feature, pull or press the switch again to stop window movement.
Safety function
If the window glass encounters resistanceduringautomaticclosing,it is immediately stopped and opened again.
In the event of closing difficulties due to frost or the like, operate the switch several times to close the window in stages.
Operating windows from outside
Depending on the equipment level, the windows can be operated remotely from outside the vehicle.
Press q or p until all windows have opened or closed.
Overload
If the windows are repeatedly operated at short intervals, the window operation is disabled for some time.
Fault
If the windows cannot be opened or closed automatically, activate the window electronics as follows:
1.Close doors.
2.Switch on ignition.
3.Close the window completely and operate the button for 5 more seconds.
4.Open the window completely and operate the button for 1 more second.
5.Repeat this for each window.
Heated rear window

|
Keys, doors and windows |
31 |
Operated by pressing the Übutton.
Heating functions with the engine running and is switched off automatically after a short time.
Depending on the engine type, the heated rear window comes on automatically when the diesel particle filter is being cleaned.
Sun visors
The sun visors can be folded down or swivelled to the side to prevent dazzling.
If the sun visors have integral mirrors, the mirror covers should be closed when driving.
Roof
Sunroof
9 Warning
Take care when operating the sunroof. Risk of injury, particularly to children.
Keep a close watch on the movable parts when operating them. Ensure that nothing becomes trapped in them as they move.
Sunroof can be operated with ignition on.
Operated via a rocker switch in the roof console.
Press the button briefly for activation in steps. Hold down the button for longer for automatic opening.
Raise
With the sunroof closed, press ü. The sunroof is raised at the rear.
Open
Press üagain with the sunroof in the raised position. The sunroof opens automatically until it reaches its end position.
To close: press d.

32 Keys, doors and windows
Caution
When using a roof rack, check the free movement of the sunroof in order to avoid damage. It is only permitted to raise the sunroof.
Note
If the top of the roof is wet, tilt sunroof, allow water to run off and then open sunroof.
Do not affix any stickers to sunroof.
Close
Hold down d until the sunroof is completely closed.
Sunblind
The sunblind is manually operated.
Close or open the sunblind by sliding. When the sunroof is open, the sunblind is always open.
Overload
Ifthesystemisoverloaded,thepower supply is automatically cut off for
a short time. The system is protected by fuses in the fuse box 3 152
Initialising the sun roof
If the sunroof cannot be operated, activate the electronics as follows: withignitionon,closethesunroofand
hold d depressed for at least 10 seconds.
Seek the assistance of a workshop to have the cause of the fault remedied.

|
Seats, restraints |
|
|
Head restraints ………………………. |
33 |
|
Front seats …………………………….. |
34 |
|
Seat belts ………………………………. |
37 |
|
Airbag system ………………………… |
39 |
|
Child restraints ……………………….. |
44 |
Head restraints
Position
9 Warning
Only drive with the head restraint set to the proper position.
The middle of the head restraint should be at eye level. If this is not possible for extremely tall people, set to highest position, and set to lowest position for small people.
Adjustment
Head restraints on front seats
Press the button, adjust height and engage.
Active head restraints
In the event of a rear-end impact, the active head restraints tilt slightly forwards. The head is more effectively supported so the risk of whiplash injury is reduced.
Note
Approved accessories may only be attached to the front passenger seat headrestraintiftheseatisnotinuse.

34 Seats, restraints
Head restraints on rear seats
The height of the head restraints can be set in two positions. To set in the first position, pull the head restraint upwards,inthesecondpositionpress the spring marked in the illustration and push the head restraint right up to the top. To adjust downwards, press the spring marked in the illustration and push the head restraint downwards.
Front seats
Seat position
9 Warning
Only drive with the seat correctly adjusted.
■Sitwithbuttocksasfarbackagainst thebackrestaspossible.Adjustthe distance between the seat and the pedals so that legs are slightly angled when pressing the pedals. Slide the front passenger seat as far back as possible.
■Sit with shoulders as far back against the backrest as possible. Set the backrest to an angle so that it is possible to reach the steering wheel with arms slightly bent. Maintain contact between shoulders and the backrest when turning the steering wheel. Do not tilt the backrest too far back. We recommend a maximum angle of approx. 25°.
■Adjust the steering wheel 3 66.
■Set the seat high enough to have a clear field of vision on all sides and on all display instruments.
There should be at least one hand of clearance between head and the roof frame. Thighs should rest lightly on the seat without pressing into it.
■Adjust the head restraint 3 33.
■Adjust the height of the seat belt 3 38.

Seat adjustment
9 Danger
Do not sit nearer than 25 cm to the steering wheel, to permit safe airbag deployment.
9 Warning
Neveradjustseatswhiledrivingas they could move uncontrollably.
Seat positioning
Pull handle, slide seat, release handle.
Seat backrests
Turn handwheel. Do not lean on backrest when adjusting.
Seat height
Lever pumping motion

|
36 |
Seats, restraints |
||
Seat folding |
Corsa OPC |
Do not operate handwheel to adjust |
|
|
backrest with backrest tilted forward. |
|||
Heating |
|
Lift release lever and tilt backrest |
Remove seat belt from belt mount on |
||
|
forwards. Lower release lever and |
backrest. |
||
|
backrestengagesinloweredposition. |
Pull release lever on rear of backrest |
||
|
Slide seat forwards. |
and tilt backrest forwards. Release |
Activateheatingbypressingßbutton |
|
|
To push the seat back to upright, it |
lever and backrest engages in the |
for the seat with the ignition on. |
|
|
engages in its original position. Lift |
lowered position. Slide seat forwards. |
LED in button ßon: relevant front |
|
|
the release lever, move the backrest |
To move the backrest upright, slide |
seat heating on. |
|
|
back to upright, lower lever, backrest |
seat back and it will engage in its |
Seat heating is operational when the |
|
|
engages. |
original position. Pull release lever, |
||
|
engine is running. |
|||
|
Folding the backrest forwards is |
move backrest upright, release lever, |
||
|
possible only when the backrest is in |
backrest engages. |
||
|
an upright position. |
Folding the backrest forwards is |
||
|
Do not operate handwheel to adjust |
possible only when the backrest is in |
||
|
backrest with backrest tilted forward. |
an upright position. |

Seat belts
The belts are locked during heavy acceleration or deceleration of the vehicle for the safety of the occupants.
9 Warning
Fasten seat belt before each trip.
In the event of an accident, people not wearing seat belts endanger their fellow occupants and themselves.
Seatbeltsaredesignedtobeusedby only one person at a time. They are not suitable for people younger than 12 years of age or smaller than 150 cm.
Periodically check all parts of the belt system for damage and proper functionality.
Have damaged components replaced. After an accident, have the belts and triggered belt tensioners replaced by a workshop.
Note
Make sure that the belts are not damaged by shoes or sharp-edged objects or trapped. Prevent dirt from getting into the belt retractors.
Seat belt reminder X3 76.
Belt force limiters
In the front seats, stress on the body is reduced by the gradual release of the belt during a collision.
Belt tensioners
In the event of a head-on or rear-end collisionofacertainseverity,thefront seat belts are tightened.
9 Warning
Incorrecthandling(e.g.removalor fitting of belts) can trigger the belt tensioners with risk of injury.
Deployment of the belt tensioners is indicated by illumination of control indicator v3 76.

38 Seats, restraints
Triggered belt tensioners must be replaced by a workshop. Belt tensioners can only be triggered once.
Note
Do not affix or install accessories or other objects that may interfere with the operation of the belt tensioners. Do not make any modifications to belt tensioner components as this will invalidate the vehicle type approval.
Three-point seat belt
Fitting
Withdraw belt from retractor, guide it untwisted across the body and insert the latch plate in the buckle. Tension the lap belt regularly whilst driving by tugging the shoulder belt.
With the Corsa OPC: Feed seat belt through belt mount on backrest when fastening seat belt.
Loose or bulky clothing prevents the belt from fitting snugly. Do not place objects such as handbags or mobile phones between the belt and your body.
9 Warning
Thebeltmustnotrestagainsthard or fragile objects in the pockets of your clothing.
Height adjustment
1.Pull belt out slightly.
2.Press button.
3.Adjustheightandengageaudibly.
Adjust the height so that the belt lies across the shoulder. It must not lie across the throat or upper arm.
Do not adjust while driving.

Removing
To release belt, press red button on belt buckle.
Seat belts on the rear outer seats
When not in use or to fold forward the rear backrests, feed seat belts through belt mount.
Usingtheseatbeltwhilepregnant
9 Warning
The lap belt must be positioned as low as possible across the pelvis to prevent pressure on the abdomen.
Airbag system
The airbag system consists of a number of individual systems.
When triggered the airbags inflate within milliseconds. They also deflate so quickly that it is often unnoticeable during the collision.
9 Warning
If handled improperly the airbag systems can be triggered in an explosive manner.

40 Seats, restraints
Note
The airbag systems and belt tensioner control electronics are located in the centre console area. Do not put any magnetic objects in this area.
Do not stick anything on the airbag covers and do not cover them with other materials.
Each airbag is triggered only once. Have deployed airbags replaced by a workshop.
Do not make any modifications to the airbag system as this will invalidate the vehicle type approval.
In the event of airbag deployment have the steering wheel, the instrument panel, all panelling parts, the door seals, the handles and the seats removed by a workshop.
Controlindicatorvforairbagsystems 3 76.
Front airbag system
The front airbag system consists of one airbag in the steering wheel and one in the instrument panel on the front passenger side. These can be identified by the word AIRBAG.
There is also a warning label on the side of the instrument panel, visible when the front passenger door is open.

Thefrontairbagsystemistriggeredin the event of an accident of a certain severity in the depicted area. The ignition must be on.
The forward movement of the front seat occupants is decelerated, thereby considerably reducing the risk of injury to the upper body and head.
9 Warning
Optimum protection is only provided when the seat is in the proper position 3 34.
Keep the area in which the airbag inflates clear of obstructions.
Fit the seat belt correctly and engage securely. Only then the airbag is able to protect.
Side airbag system
Thesideairbagsystemconsistsofan airbagineachfrontseatbackrestand in the rear outboard seat backrests. This can be identified by the word AIRBAG.
The side airbag system is triggered in the event of an accident of a certain severity in the depicted area. The ignition must be on.

42 Seats, restraints
The risk of injury to the upper body and pelvis in the event of a side-on collision is considerably reduced.
9 Warning
Keep the area in which the airbag inflates clear of obstructions.
Note
Only use protective seat covers that have been approved for the vehicle. Be careful not to cover the airbags.
Curtain airbag system
The curtain airbag system consists of an airbag in the roof frame on each side. This can be identified by the word AIRBAG on the roof pillars.
Thecurtainairbagsystemistriggered intheeventofanaccidentofacertain severity in the depicted area. The ignition must be on.

The risk of injury to the head in the event of a side impact is considerably reduced.
9 Warning
Keep the area in which the airbag inflates clear of obstructions.
The hooks on the handles in the roof frame are only suitable for hanging up light articles of clothing, without coat hangers. Do not keep any items in these clothes.
Airbag deactivation
Front airbag and side airbag systems for the front passenger seat have to be deactivated if a child restraint system is to be fitted on this seat. The curtain airbag system, the belt tensioners and all driver airbag systems will remain active. The front passenger airbag systems are active in the as-delivered condition.
Control indicator vand LEDs in the button not on:
Airbag systems for the front passenger are active. No child restraint systems can be installed.
Control indicator W and LEDs in button on:
Front passenger airbags are deactivated and will not inflate in the event of a collision. A child restraint system according to the chart Child restraint installation locations can be installed 3 46.

44 Seats, restraints
Deactivation:
■switch on ignition, control indicator W flashes,
■press button W within 15 seconds and hold down,
■after about 2 seconds, you will hear a confirmation buzzer. Release button W after another 4 seconds at the latest.
Activation:
■switch on ignition, control indicator W flashes,
■press button W within 15 seconds and hold down,
■after about 2 seconds, you will hear a confirmation buzzer. Release button W after another 4 seconds at the latest.
Only if control indicator does not light up, the airbag systems for front passengerseatwillinflateintheevent of a collision.
Change status only when the vehicle is stopped with the ignition off.
Statusremainsuptothenextchange.
Control indicator for airbag deactivation 3 76.
Starting the engine terminates changing of the setting.
The setting can then only be changed once the ignition has been switched off and then back on again.
Child restraints
Child restraint systems
Whenachildrestraintsystemisbeing used, pay attention to the following usage and installation instructions and also those supplied with the child restraint system.
Always comply with local or national regulations. In some countries, the use of child restraint systems is forbidden on certain seats.
9 Warning
When using a child restraint system on the front passenger seat, the airbag systems for the front passenger seat must be deactivated;ifnot,thetriggeringof the airbags poses a risk of fatal injury to the child.
This is especially the case if rearfacing child restraint systems are used on the front passenger seat.

Selecting the right system
Children should travel facing backwards in the vehicle, until as old as possible. It is appropriate to change the system when the child’s head can no longer be properly supported at eye height. The child’s cervical vertebrae are still very weak and in an accident they suffer less stress in the semi-prone rearward position than when sitting upright.
Children under 12 years or under 150 cm tall should only travel in an appropriate child restraint system.
Never hold a child whilst travelling in the vehicle. The child will become too heavy to be held in the event of
a collision.
When transporting children, use the childrestraintsystemssuitableforthe child’s weight.
Ensure that the child restraint system to be installed is compatible with the vehicle type.
Ensure that the mounting location of the child restraint system within the vehicle is correct.
Only allow children to enter and exit the vehicle at the side facing away from the traffic.
When the child restraint system is not inuse,securetheseatwithaseatbelt or remove it from the vehicle.
Note
Do not stick anything on the child restraint systems and do not cover them with any other materials.
A child restraint system which has been subjected to stress in an accident must be replaced.

46 Seats, restraints
Child restraint installation locations
Permissible options for fitting a child restraint system
|
On front passenger seat |
||||
|
Weight and age class |
activated airbag |
deactivated airbag |
On rear outboard seats |
On rear centre seat |
|
Group 0: up to 10 kg |
X |
U1 |
U2 |
X |
|
or approx. 10 months |
||||
|
Group 0+: up to 13 kg |
X |
U1, 2 |
U2 |
X |
|
or approx. 2 years |
||||
|
Group I: 9 to 18 kg |
X |
U1, 2 |
U2 |
X |
|
or approx. 8 months to 4 years |
||||
|
Group II: 15 to 25 kg |
X |
X |
U |
X |
|
or approx. 3 to 7 years |
||||
|
Group III: 22 to 36 kg |
X |
X |
U |
X |
|
or approx. 6 to 12 years |
||||
1= Onlyiffrontpassengerseatairbagsystemsaredeactivated.Ifthechildrestraintsystemisbeingsecuredusingathreepoint seat belt, move seat height adjustment to uppermost position and ensure that vehicle safety belt runs forwards from the upper anchorage point.
2= Seat available with ISOFIX and Top-tether mounting brackets (Not available on the front passenger seat in the Corsa OPC).
|
U |
= |
Universal suitability in conjunction with three-point seat belt. |
|
X |
= |
No child restraint system permitted in this weight class. |
|
Seats, restraints |
47 |
||||||
Permissible options for fitting an ISOFIX child restraint system |
|||||||
|
Weight class |
Size class |
Fixture |
On front passenger seat |
On rear outboard seats |
On rear centre seat |
||
|
Group 0: up to 10 kg |
E |
ISO/R1 |
IL |
IL |
X |
||
|
Group 0+: up to 13 kg |
E |
ISO/R1 |
IL |
IL |
X |
||
|
D |
ISO/R2 |
X |
X |
X |
|||
|
C |
ISO/R3 |
X |
X |
X |
|||
|
Group I: 9 to 18 kg |
D |
ISO/R2 |
X |
X |
X |
||
|
C |
ISO/R3 |
X |
X |
X |
|||
|
B |
ISO/F2 |
IL, IUF |
IL, IUF |
X |
|||
|
B1 |
ISO/F2X |
IL, IUF |
IL, IUF |
X |
|||
|
A |
ISO/F3 |
X |
X |
X |
|||
|
IL |
= Suitable for particular ISOFIX restraint systems of the ‘specific-vehicle’, ‘restricted’ or ‘semi-universal’ categories. |
||||||
|
The ISOFIX restraint system must be approved for the specific vehicle type. |
|||||||
|
IUF |
= SuitableforISOFIXforward-facingchildrestraintsystemsofuniversalcategoryapprovedforuseinthismassgroup. |
||||||
|
X |
= No ISOFIX child restraint system approved in this weight class. |
|
48 |
Seats, restraints |
|
ISOFIX size class and seat device |
||
|
A – ISO/F3 |
= Forward-facing child restraint system for children of maximum size in the weight class 9 to 18 kg. |
|
|
B – ISO/F2 |
= Forward-facing child restraint system for smaller children in the weight class 9 to 18 kg. |
|
|
B1 – ISO/F2X |
= Forward-facing child restraint system for smaller children in the weight class 9 to 18 kg. |
|
|
C – ISO/R3 |
= Rear-facing child restraint system for children of maximum size in the weight class up to 13 kg. |
|
|
D – ISO/R2 |
= Rear-facing child restraint system for smaller children in the weight class up to 13 kg. |
|
|
E – ISO/R1 |
= Rear-facing child restraint system for young children in the weight class up to 13 kg. |

Isofix child restraint systems
Fasten vehicle-approved ISOFIX child restraint systems to the mounting brackets.
When using ISOFIX mounting brackets for seat mounting, universally approved child restraint systems for ISOFIX may be used.
ISOFIX mounting brackets are indicated by a label on the backrest.
Closely follow the installation instructions accompanying the ISOFIX child restraint system.
Top-tether child restraint systems
Fasten Top-tether child restraint systems to the fastening eyes on the back of the rear seat and to the passenger seat rail in the rear foot well. The strap must run between the two guide rods of the head restraint.
On the pillar trim of the rear roof and on the attachment points are symbols indicating the attachement eyes on which to mount the child restraint system.
When using Top-tether for seat mounting, universally approved child restraint systems for Top-tether may be used.
Closely follow the installation instructions accompanying the Toptether child restraint system.

50 Storage
Storage |
|
|
Storage compartments ……………. |
50 |
|
Load compartment ………………….. |
59 |
|
Roof rack system ……………………. |
64 |
|
Loading information ………………… |
64 |
Storage compartments
Glovebox
The glovebox features:
■acardholderinchequecardformat
■a pen holder
■pocket torch holder.
The glovebox should be closed whilst driving.
Cupholders
A cupholder is located in the front of the centre console.
In the 3-door passenger vehicle, also located at the side of the rear seat.
 Loading…
Opel Corsa

G73
Был 2 часа назад
Игорь живу за МКАДом, 44 года
Я езжу на Opel Vectra Две трубы, значит дизель (до этого — 8 машин)
Ульяновск, Россия
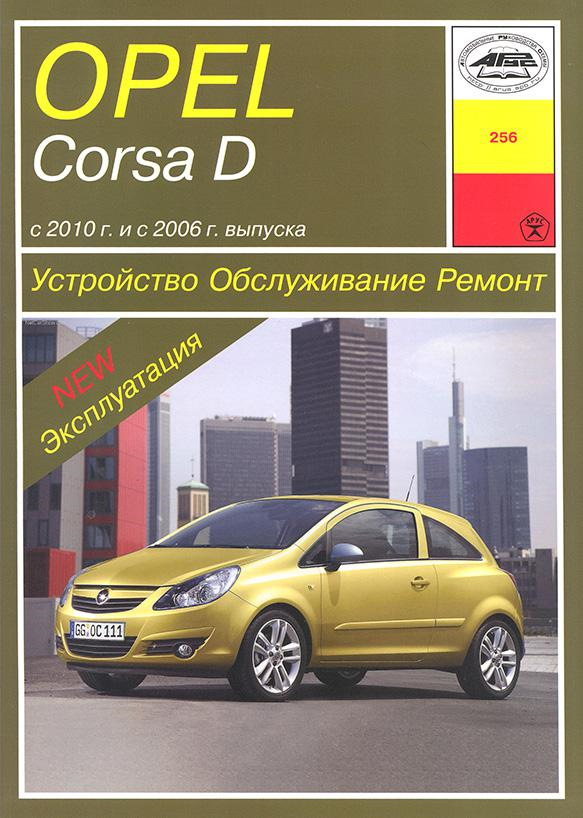
Opel Corsa D обслуживание и ремонт(изд. Арус)
346 стр, чб, качество хорошее.
3 декабря 2019
Метки: просто так
44
11
Ранее Помыл машину в праздник.
Далее Литература для скачки 2.Opel Corsa D.
Разместить рекламу
Реклама
Машины в продаже

Тверь
Opel Corsa, 2008
360 000 ₽

Серпухов
Opel Corsa, 2007
410 000 ₽

Балабаново
Opel Corsa, 2007
540 000 ₽

Москва
Opel Corsa, 2008
552 000 ₽
Посмотреть больше машин на Дроме
Комментарии
11
Войдите или зарегистрируйтесь, чтобы писать комментарии, задавать вопросы и участвовать в обсуждении.
Войти
Зарегистрироваться

JMachikin
Я езжу на Opel Astra G
Благодарю!
3 года

G73
Автор
Я езжу на Opel Vectra C
О, у меня и такая есть?!
3 года

dentaku
Я езжу на Chevrolet Lacetti 5D
Хорошая книга.
1
3 года

Viorel077
Я езжу на Opel Corsa D
Красава.
А где можно найти такую же книгу только с дизельным двигателем?
3 года
G73
Автор
Я езжу на Opel Vectra C
она вроде на английском, завтра будет пост
3 года
Viorel077
Я езжу на Opel Corsa D
ооооооооооооо буду ждать
3 года
G73
Автор
Я езжу на Opel Vectra C
домашний интернет плоховат
3 года

Nikolai796
Я езжу на Opel Corsa D
🤝
Спасибо
3 года
G73
Автор
Я езжу на Opel Vectra C
Особо и не на чем.
3 года

AlgDandi
Я езжу на Opel Corsa D
Спасибо тебе добрый человек, я уже был близок к ее покупке =)
1
3 года
G73
Автор
Я езжу на Opel Vectra C
на днях будут ещё 3-ри книги. Интернет подвел, не смог загрузить их в «облако»
2
3 года
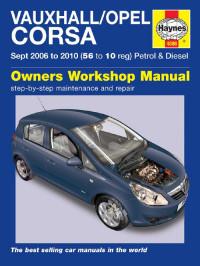
Руководство на английском языке по техническому обслуживанию и ремонту автомобилей Opel Corsa и Vauxhall Corsa 2006-2010 годов выпуска с бензиновыми и дизельными двигателями.
- Автор: John S. Mead
- Издательство: Haynes Publishing
- Год издания: 2010
- Страниц: 297
- Формат: PDF
- Размер: 184,5 Mb
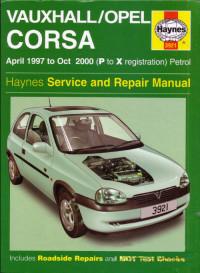
Руководство на английском языке по техническому обслуживанию и ремонту автомобилей Opel Corsa и Vauxhall Corsa 1997-2000 годов выпуска с бензиновыми двигателями.
- Автор: John S. Mead
- Издательство: Haynes Publishing
- Год издания: 2002
- Страниц: 386
- Формат: PDF
- Размер: 905,9 Mb
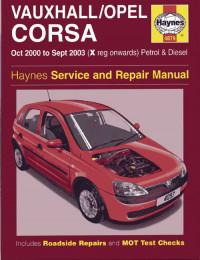
Руководство на английском языке по техническому обслуживанию и ремонту автомобилей Opel Corsa и Vauxhall Corsa 2000-2003 годов выпуска с бензиновыми и дизельными двигателями.
- Автор: —
- Издательство: Haynes Publishing
- Год издания: 2004
- Страниц: 388
- Формат: PDF
- Размер: 99,2 Mb

Сборник руководств по эксплуатации и техническому обслуживанию автомобиля Opel Corsa D.
- Автор: —
- Издательство: Opel AG
- Год издания: —
- Страниц: —
- Формат: PDF
- Размер: 45,3 Mb
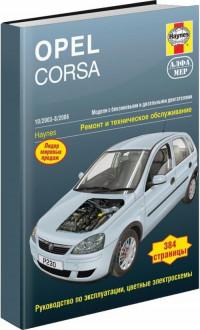
Руководство по техническому обслуживанию и ремонту автомобиля Opel Corsa 2003-2006 годjd выпуска с бензиновыми и дизельными двигателями.
- Автор: —
- Издательство: Алфамер
- Год издания: —
- Страниц: 384
- Формат: —
- Размер: —
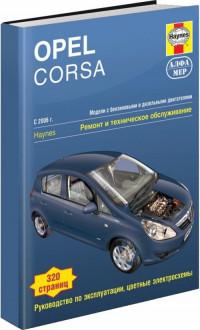
Руководство по техническому обслуживанию и ремонту автомобиля Opel Corsa с 2006 года выпуска с бензиновыми и дизельными двигателями.
- Автор: —
- Издательство: Алфамер
- Год издания: —
- Страниц: 320
- Формат: —
- Размер: —
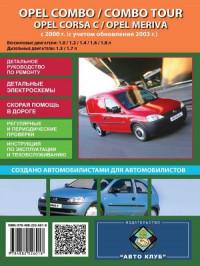
Руководство по эксплуатации, техническому обслуживанию и ремонту автомобилей Opel Corsa/Combo/Combo Tour/Meriva с 2000 года выпуска с бензиновыми и дизельными двигателями.
- Автор: —
- Издательство: Автоклуб
- Год издания: —
- Страниц: 222
- Формат: —
- Размер: —
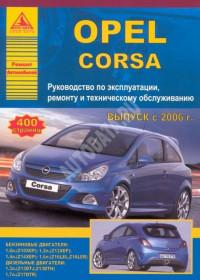
Руководство по эксплуатации, техническому обслуживанию и ремонту автомобиля Opel Corsa с 2006 года выпуска с бензиновыми и дизельными двигателями.
- Автор: —
- Издательство: Арго-Авто
- Год издания: —
- Страниц: 400
- Формат: —
- Размер: —
Мультимедийное руководство по техническому обслуживанию и ремонту автомобилей Opel Combo/Corsa/Tigra 1993-2000 годов выпуска.
- Автор: —
- Издательство: —
- Год издания: —
- Страниц: —
- Формат: —
- Размер: 68,1 Mb
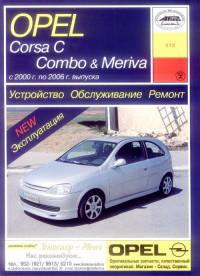
Руководство по эксплуатации, техническому обслуживанию и ремонту автомобилей Opel Combo/Corsa/Meriva 2000-2006 годов выпуска.
- Автор: —
- Издательство: Арус
- Год издания: —
- Страниц: 355
- Формат: PDF
- Размер: 32,8 Mb
Мультимедийное руководство по техническому обслуживанию и ремонту автомобиля Opel Corsa C.
- Автор: —
- Издательство: Новая версия
- Год издания: 2007
- Страниц: —
- Формат: —
- Размер: 276,6 Mb

Opel Corsa D Руководство по эксплуатации, техобслуживанию и ремонту здесь
Opel/ Vauxhall Corsa D Service and Repair Manual
Опель Корса «Д» 2009 руководство по эксплуатации
Опель Корса «Д» 2011 руководство по эксплуатации
Опель Корса «Д» 2012 руководство по эксплуатации
Опель Корса «Д» 2013 руководство по эксплуатации
ЕСЛИ ВЫ ВИДИТЕ ОШИБКУ 406 Not Acceptable и не видите документ, то скорей всего у Вас IP РФ и его надо сменить, на любой другой страны, с помощью VPN ( Scribd и SlideShare блокируют посетителей с Российским IP).
Видео замена передних тормозных колодок автомобиля Opel Corsa «D» 2010 года выпуска
Opel Corsa «D» 2010 (Опель Корса «Д» с 2006) общая информация
Сервисная информация
Для экономной и безопасной эксплуатации автомобиля и поддержания его в хорошем состоянии необходимо выполнять техническое обслуживание автомобиля с установленной периодичностью. На станции техобслуживания имеется подробный обновленный план-график технического обслуживания вашего автомобиля.
Европейские требования к периодичности технического обслуживания
Техническое обслуживание автомобиля необходимо выполнять через каждые 30000 км или 1 раз в год, в зависимости от того, какое событие возникнет первым.
Европейский график технического обслуживания действует в следующих странах: Андорра, Австрия, Бельгия, Босния-Герцеговина, Болгария, Хорватия, Кипр, Чешская Республика, Дания, Эстония, Финляндия, Франция, Германия, Греция, Гренландия, Венгрия, Исландия, Ирландия, Италия, Латвия, Литва, Люксембург, Македония, Мальта, Черногория, Нидерланды, Норвегия, Польша, Португалия, Румыния, Сербия, Словакия, Словения, Испания, Швеция, Швейцария, Великобритания.
Международные требования к периодичности технического обслуживания
Техническое обслуживание автомобиля необходимо выполнять через каждые 15000 км или 1 раз в год, в зависимости от того, какое событие возникнет первым. Международные интервалы обслуживания действуют для стран, которые не перечислены для европейских интервалов обслуживания.
Подтверждение
Выполнение технического обслуживания подтверждается записью в Сервисном и Гарантийном буклете. Дата и пробег заверяются печатью станции техобслуживания и подписью. Подтвержденное прохождение технического обслуживания является обязательным условием выполнения гарантийных и других обязательств и учитывается при продаже автомобиля, поэтому следите, чтобы Сервисный и Гарантийный буклет заполнялся правильно.
Жесткий график обслуживания
Когда наступает срок очередного технического обслуживания, в течение примерно 10 секунд после включения зажигания в строке одометра выводится шифр InSP. Это означает, что необходимо представить автомобиль на станцию техобслуживания для проведения очередных сервисных работ не позднее, чем через неделю или через 500 км пробега.
Гибкий график обслуживания
Периодичность технического обслуживания рассчитывается с учетом нескольких зависящих от условий эксплуатации параметров. Если оставшийся пробег меньше 1500 км, при включении и выключении зажигания выводится код InSP. При этом на экране высвечивается оставшийся пробег, равный 1000 км. Если осталось меньше 1000 км, InSP выводится на несколько секунд. Это означает, что необходимо представить автомобиль на станцию техобслуживания для проведения очередных сервисных работ не позднее, чем через неделю или через 500 км пробега. Вывод оставшегося пробега:
1. Выключите зажигание.
2. Быстро нажмите кнопку сброса счетчика текущего пробега. Выводятся показания одометра.
3. Нажмите и удерживайте кнопку сброса примерно 2 секунды, на дисплее появится код InSP и оставшееся расстояние.
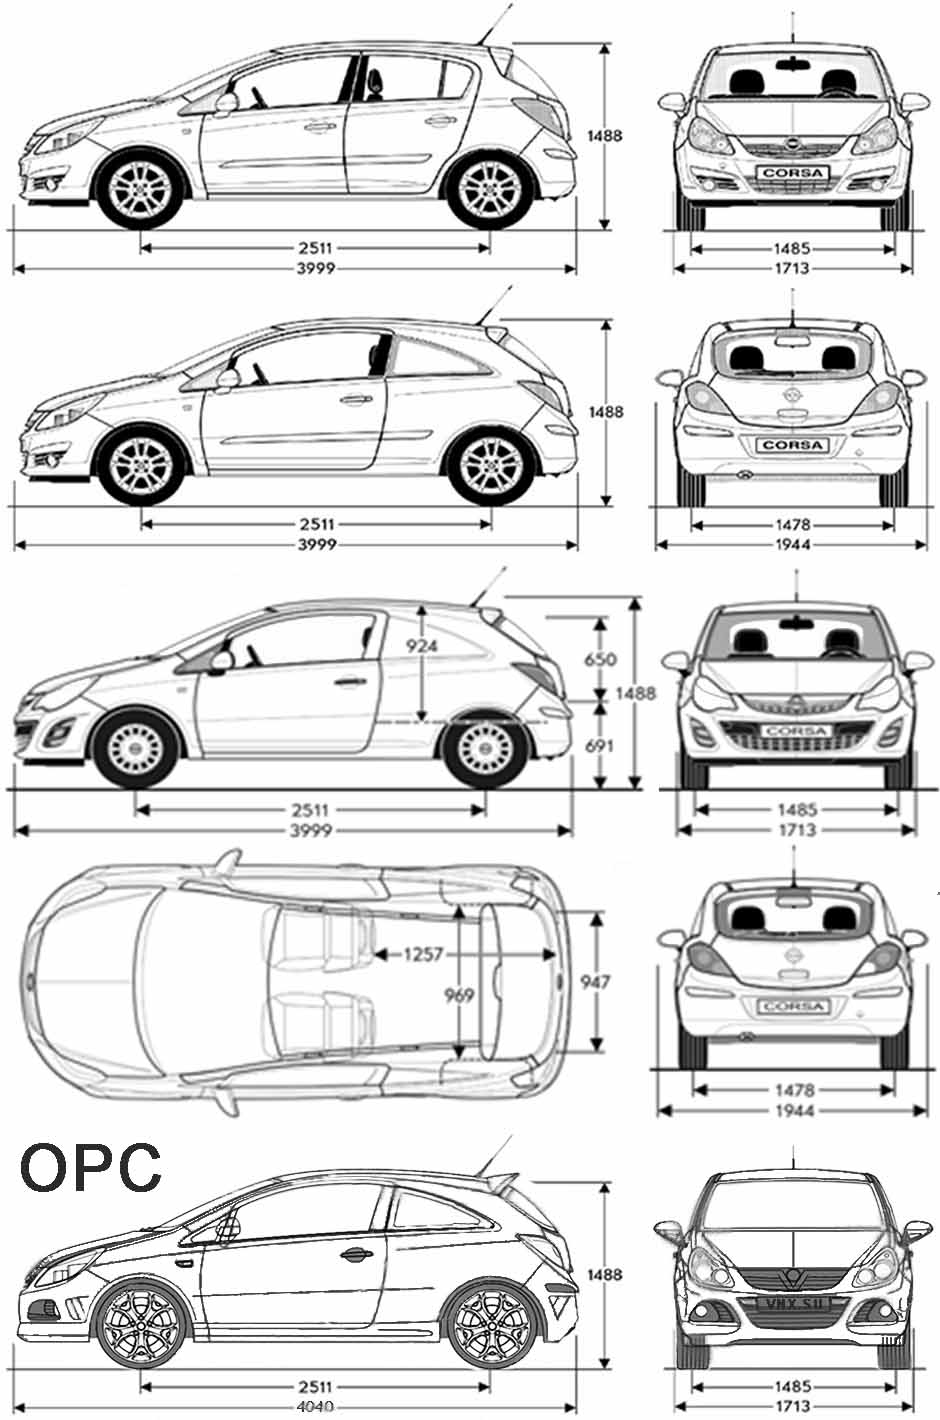
| № | Спецификация / Specs | Данные |
| Габариты (мм/mm) и масса (кг/kg) / Dimensions and Weight | ||
| 1 | Длина / Length | 4040 |
| 2 | Ширина (без/с зеркалами) / Width | 1737/1924 |
| 3 | Высота (загружен/пустой) / Height | 1488 |
| 4 | Колёсная база / Wheelbase | 2511 |
| 5 | Дорожный просвет (клиренс) / Ground clearance | 140 |
| 6 | Снаряжённая масса / Total (curb) weight | 1278-1298 |
| Полная масса / Gross (max.) weight | 1730 | |
|
Двигатель / Engine |
||
| 7 | Тип / Engine Type, Code | Бензиновый, жидкостного охлаждения, четырехтактный, A16LER, ECOTEC |
| 8 | Количество цилиндров / Cylinder arrangement: Total number of cylinders, of valves | 4-цилиндровый, 16V, рядный, DOHC верхним расположением двух распределительных валов |
| 9 | Диаметр цилиндра / Bore | 79.0 мм |
| 10 | Ход поршня / Stroke | 81.5 мм |
| 11 | Объём / Engine displacement | 1598 см³ |
| 12 | Система питания / Fuel supply, Aspiration | Распределенный впрыск топлива |
| Турбонаддув и охлаждение наддувочного воздуха | ||
| 13 | Степень сжатия / Compression ratio | 8.8:1 |
| 14 | Максимальная мощность / Max. output power kW (HP) at rpm | 141 кВт (192 л.с.) при 5850 об/мин |
| 15 | Максимальный крутящий момент / Max. torque N·m at rpm | 230 Нм при 1980-5850 об/мин |
|
Трансмиссия / Transmission |
||
| 16 | Сцепление / Clutch type | Однодисковое, сухое, с диафрагменной нажимной пружиной и гасителем крутильных колебаний, постоянно замкнутого типа |
| 17 | КПП / Transmission type | МКПП 6 шестиступенчатая механическая, двухвальная, с синхронизаторами на всех передачах переднего хода |
О Книге
- Название: Opel Corsa 2010 руководство по эксплуатации
- Бензиновые двигатели: Z10XEP, Z12XEP, Z14XEP, Z16LEL, Z16LER, Z13DTJ, Z13DTH, Z13DTI, Z13DTR, Z13DTJ ECO, Z17DTR
- Выпуск с 2006 года
- Серия: «Owner Guide»
- Год издания: 2010
- Автор: Коллектив авторов
- Издательство: «ADAM OPEL AG, Rüsselsheim, Germany»
- Формат: PDF
- Страниц в книге: 226
- Размер: 51.16 МБ
- Язык: Русский
- Количество электросхем: 0