На любую машину, которой владею, собираю техническую документацию. Не обошло это и нынешний автомобиль, собрал самую полную коллекцию электронных книг и документов на Hyundai Elantra и ещё на АКПП, магнитолу, сигнализацию, ну и в довесок — электрические схемы Kia Ceed, которые могут быть полезны и владельцам Elantra, так как платформы и начинка у машин практически идентичны.
Итак начну:
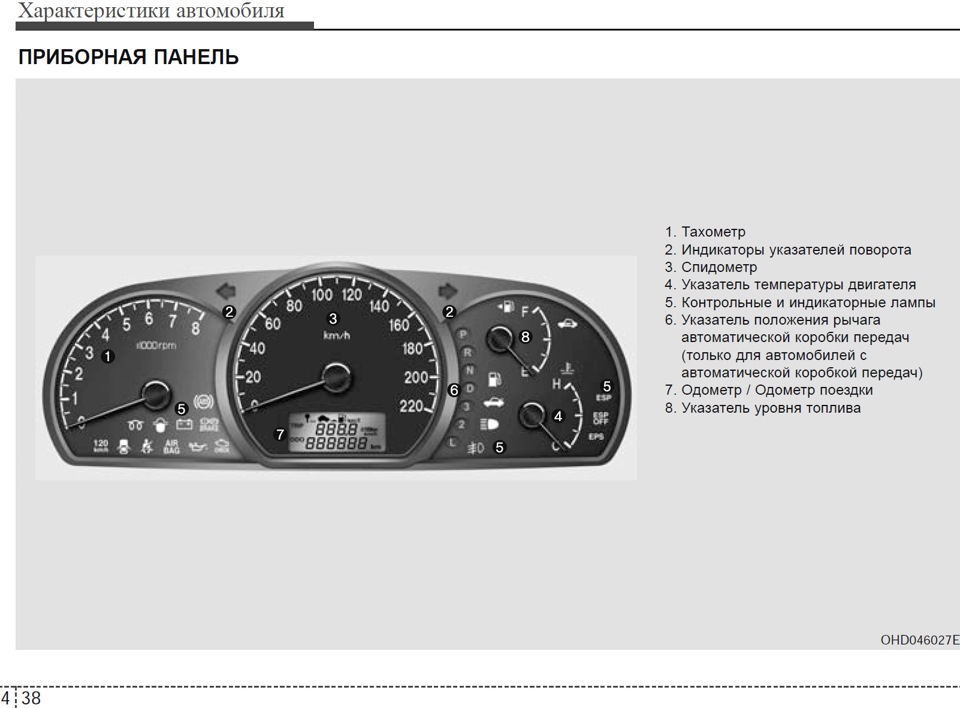
1. Руководство по эксплуатации 2006 г. на русском языке в формате pdf.
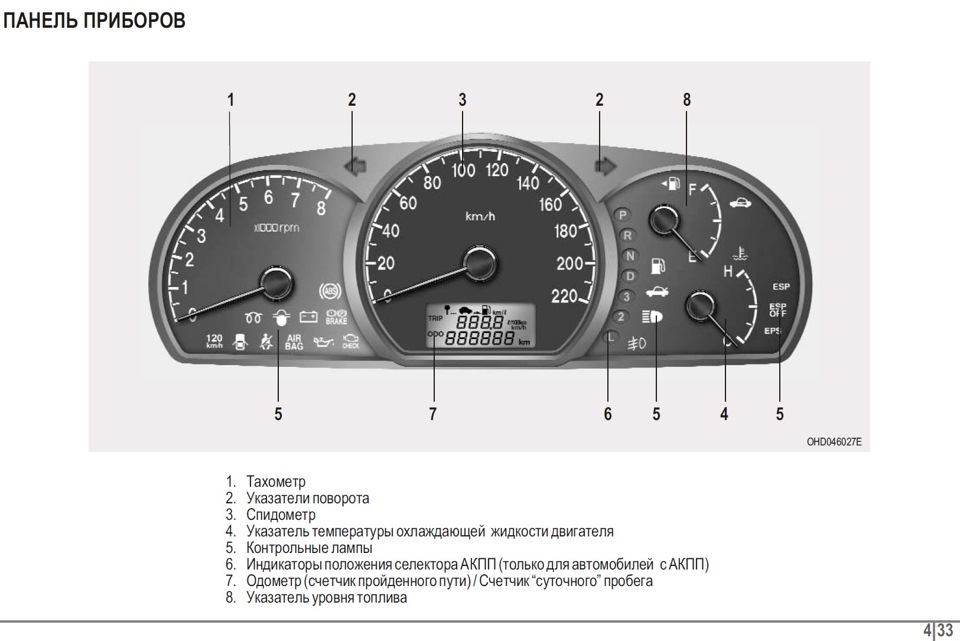
2. Руководство по эксплуатации 2008 г. на русском языке в формате pdf.
Запчасти на фото: 2002202
Руководство 2008 года имеет другой перевод и больше страниц с информацией, 377 против 306 страниц в 2006 году.
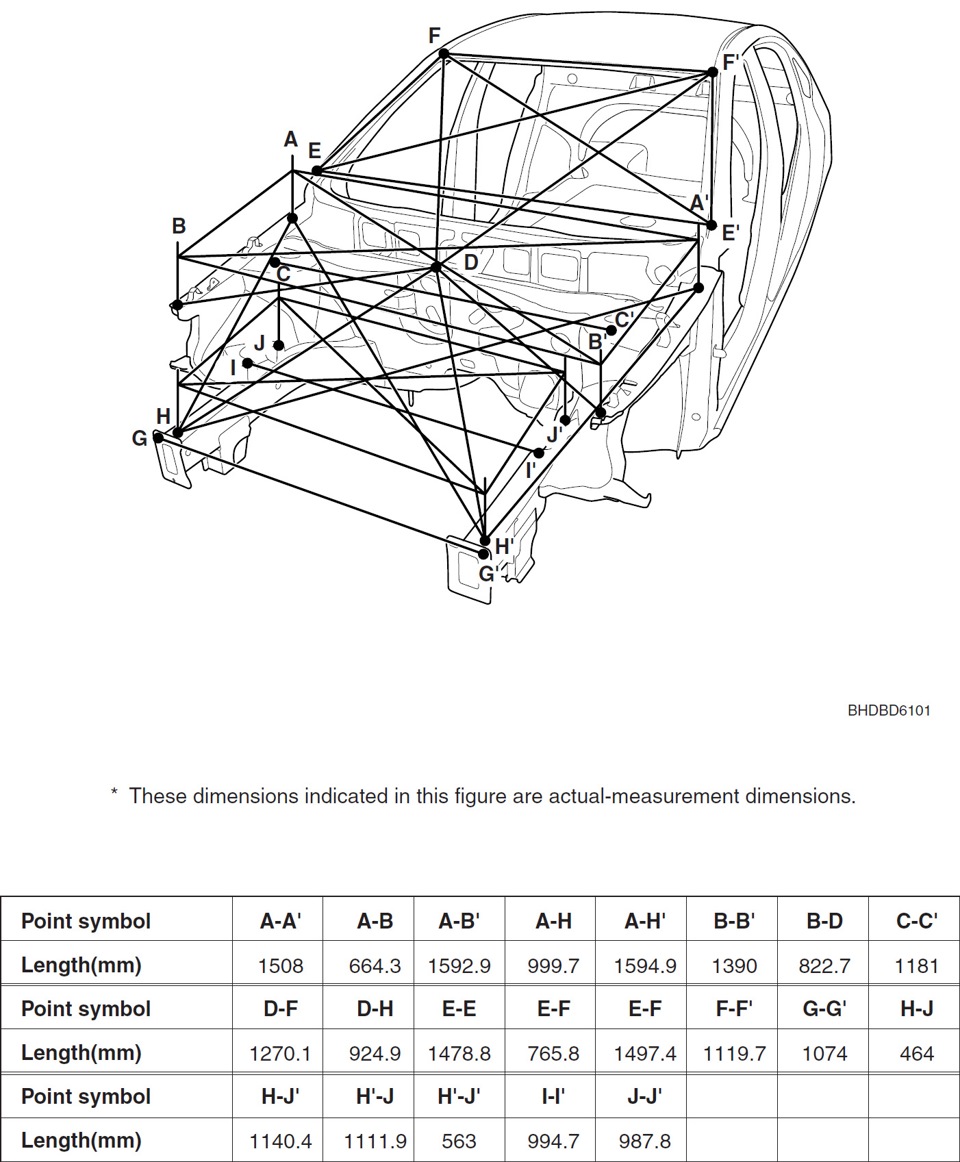
3. Руководство по кузовному ремонту. Все зазоры, точки замеров, панели, элементы и пр. на английском языке в формате pdf.
Запчасти на фото: 315929, 1508664
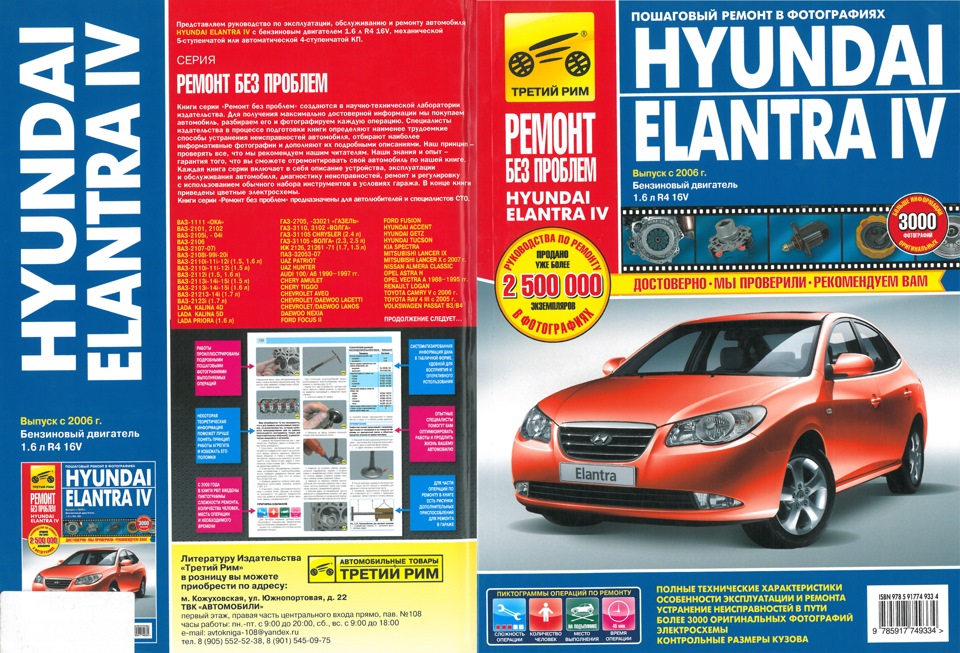
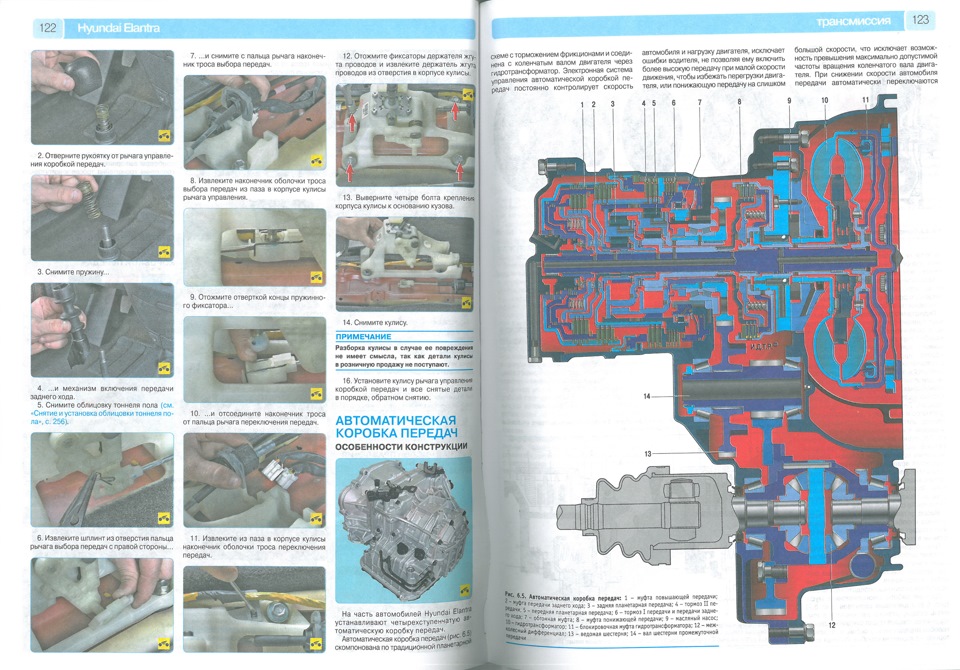
4. Цветная книга по ремонту и обслуживанию Hyundai Elantra IV в фотографиях на русском языке в формате pdf.
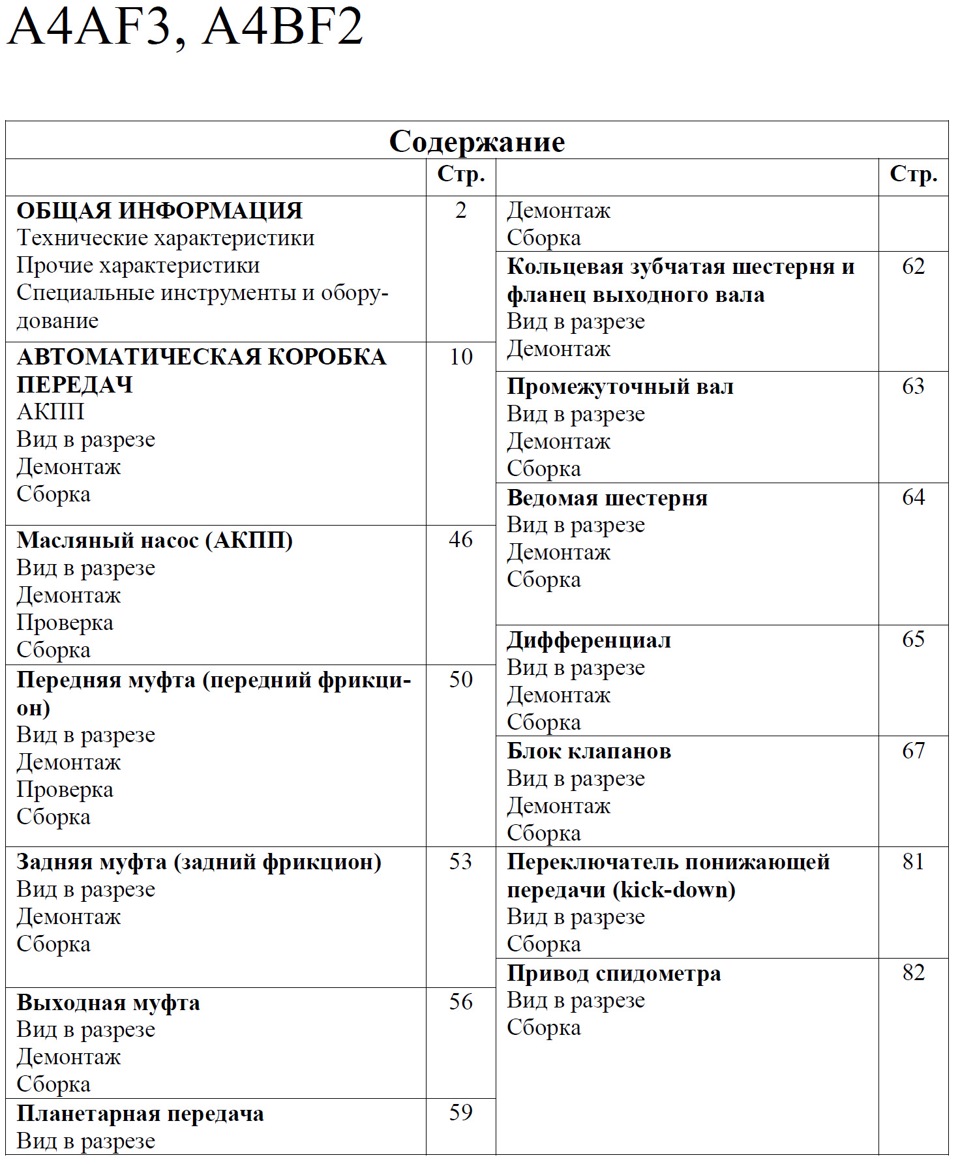
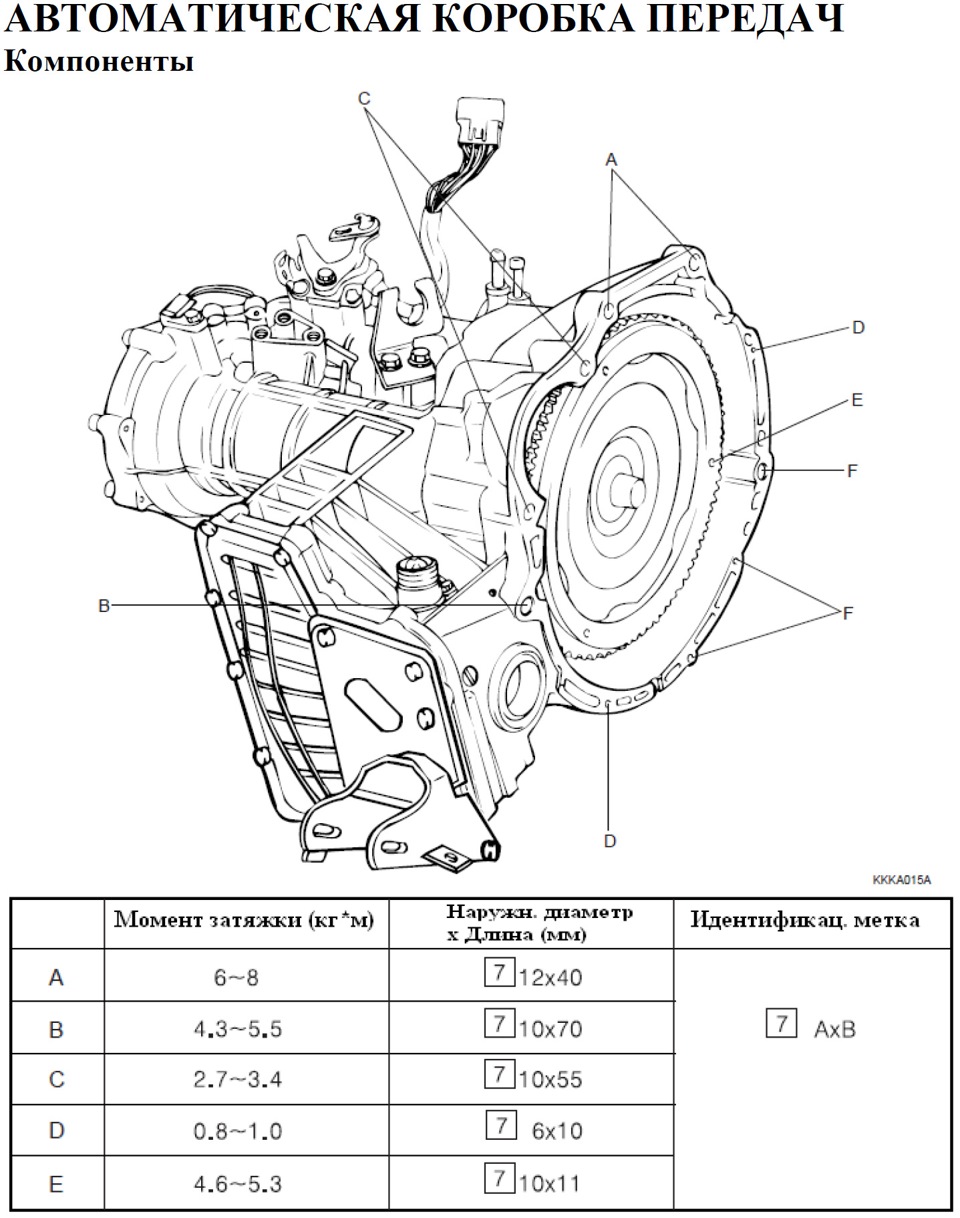
5. АКПП марки a4af3 и a4bf2, устанавливаемые в Hyundai Elantra HD, каталог деталей и инструкция по ремонту на русском языке в формате pdf.
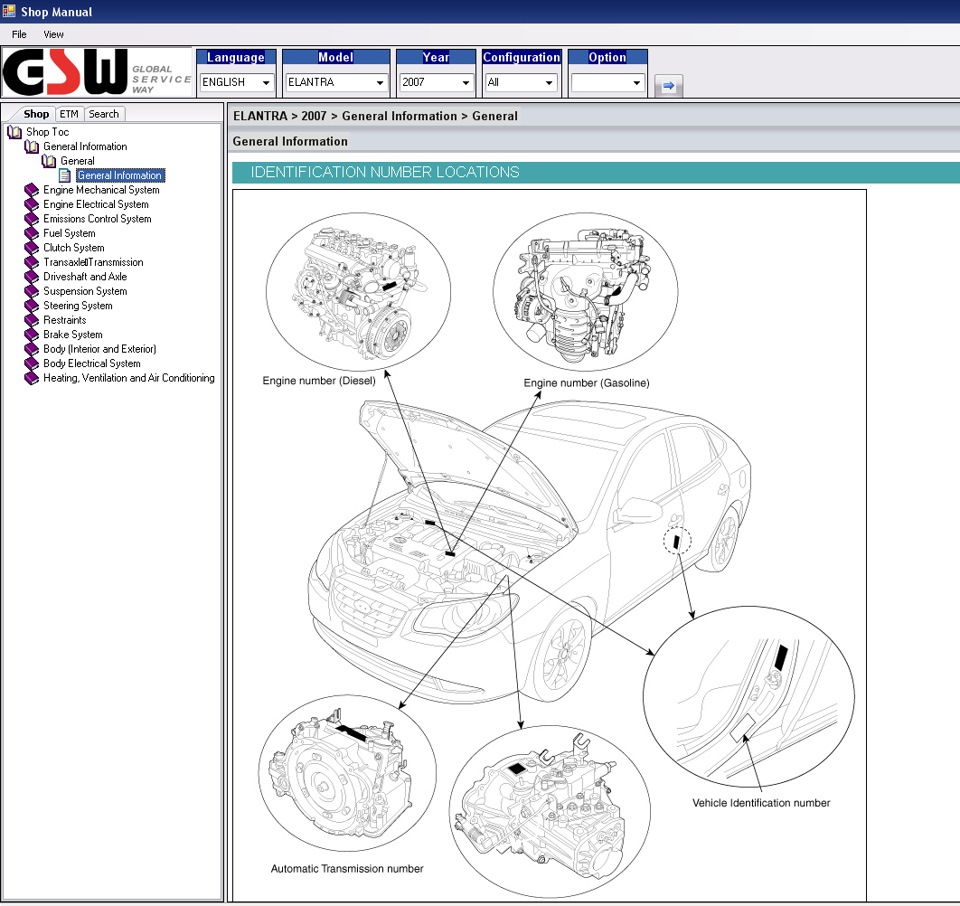
6. Интерактивный каталог на английском языке, самая полная техническая документация Hyundai Elantra J4, полнее не бывает. Каталог выполнен в виде образа CD диска в двух самых распространённых расширениях, iso и mdf. Подробно о запуске каталога в файле ReadMe. Для работы каталога требуется операционная система Windows XP, в других операционках каталог не работает!
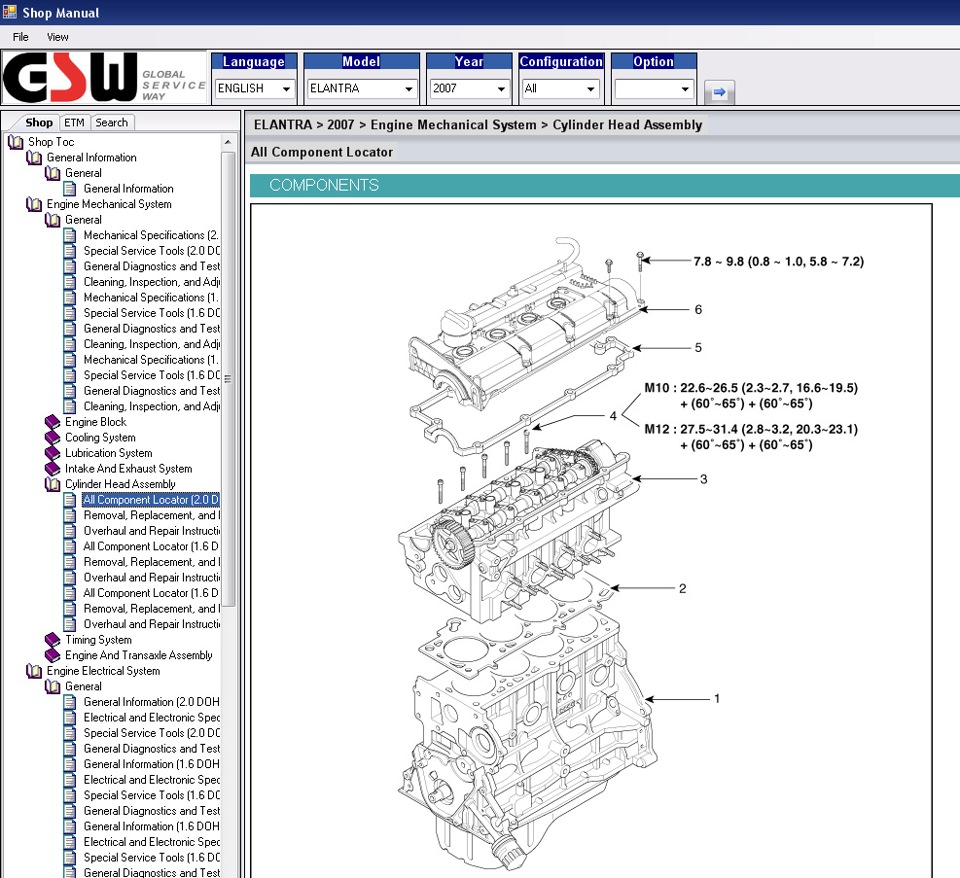
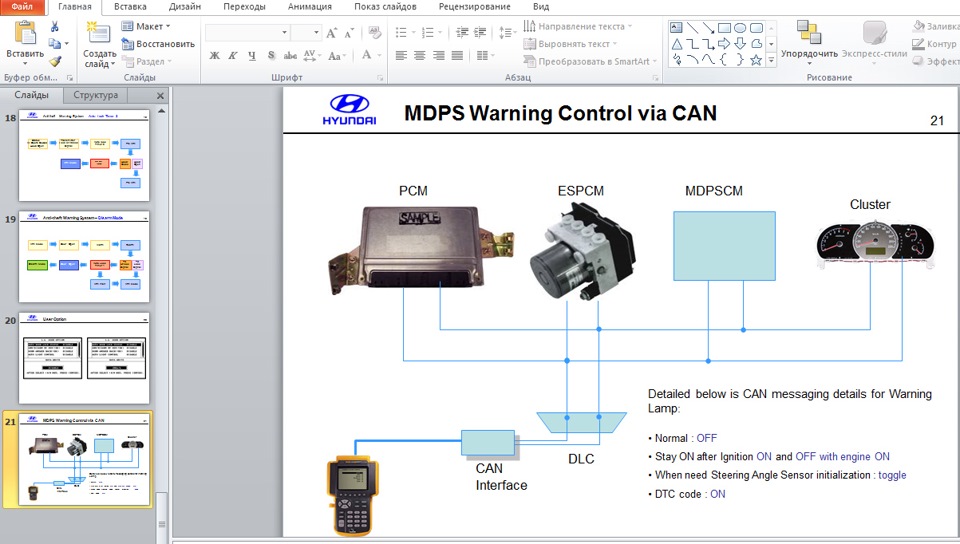
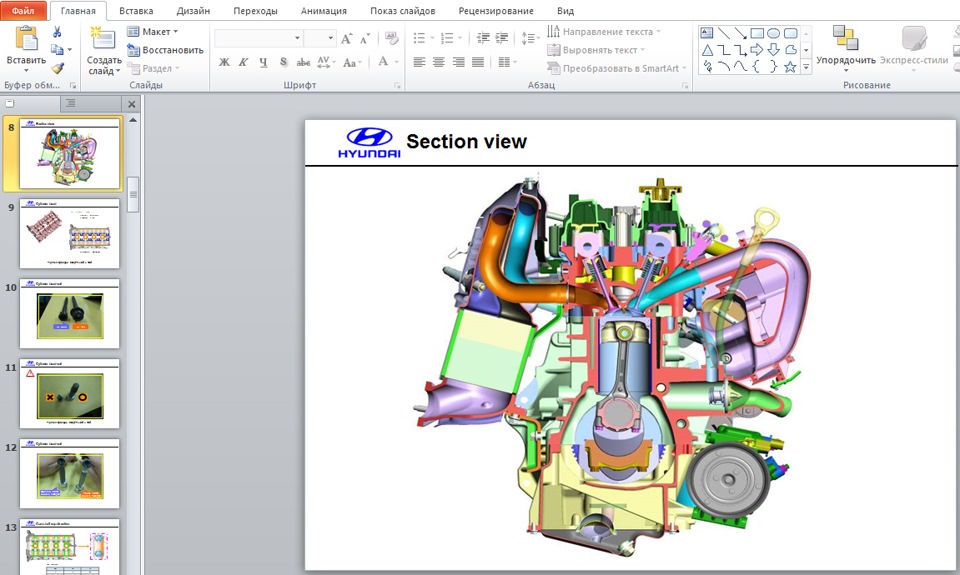
7. Учебные руководства по устройству, обслуживанию и ремонту автомобилей Hyundai на английском языке, спасибо dentaku, за ссылку на документ. Для Elantra HD в формате ppt и продолжение в формате doc.
Для других марок Hyundai:
Список моделей
Accent/Verna (MC)
Centennial/Equus (VI)
Centennial (lZ)
ELANTRA (HD)
GENESIS Coupe (BK)
GENESIS (BH)
GRANDEUR (TG)
i10/Atos (PA)
i20 (PB)
i30/NEOS (FD)
ix35 (EL), он же Tucson (LM)
H-1 (TQ)
SantaFe (CM)
Sonata (NF)
Sonata (YF)
TUCSON (JM)
VERACRUZ (EN)
ОБЩАЯ ССЫЛКА
В качестве бонуса:
a. Электрические схемы Kia Ceed
b. 2Din магнитола Intro CHR в штатное место Hyundai Elantra, две инструкции для разных моделей
c. Сигнализация Excellent от дилера, установленная у меня, все руководства к ней.
Ну и все инструкции в одном месте, общая ссылка.
Автосервис АвтоМиг в Коптево
Автосервис САО — МЦД Красный Балтиец:
Ближайшие для подъезда улицы – Космонавта Волкова, Приорова, Новая Ипатовка, Большая Академическая.
Автосервис АвтоМиг в Лефортово
Автосервис ЮВАО, ВАО — метро Авиамоторная:
Ближайшие станции метро — Авиамоторная, Площадь Ильича, Шоссе Энтузиастов, Чкаловская, Бауманская, Семеновская. Ближайшие для подъезда улицы — третье транспортное кольцо (ТТК), проезд завода Серп и Молот, Лефортовский вал, Красноказарменная улица.
Автосервис АвтоМиг в Щукино
Автосервис СЗАО, САО — метро Октябрьское поле, станция Зорге МЦК (район Щукино, Хорошёво—Мнёвники)
Ближайшие станции метро — Октябрьское поле, Полежаевская. Станция Московского Центрального Кольца — Зорге. Ближайшие для подъезда улицы — Маршала Бирюзова, Берзарина, Народного ополчения, Зорге, Куусинена, Расплетина.
Автосервис АвтоМиг в Измайлово
Автосервис ВАО — метро Соколиная гора (район Измайлово)
Ближайшие станции метро — Соколиная гора, Партизанская, Измайлово, Шоссе Энтузиастов, Черкизовская. Ближайшие для подъезда улицы — Вернисажная, Шоссе Энтузиастов, проспект Будённого, Северо-Восточная хорда, Щербаковская улица, Большая Черкизовская улица.
Автосервис АвтоМиг в Гольяново
Автосервис ВАО — метро Щелковская (район Гольяново)
Ближайшие станции метро — Щелковская, Черкизовская, Бульвар Рокоссовского, Первомайская, Партизанская, Измайловская. Ближайшие для подъезда улицы — Щелковское шоссе, Амурская, Сиреневый бульвар, Монтажная улица, Байкальская улица, Открытое шоссе.
AUTO-TEXCENTER.RU
Франшиза автосервиса, Вакансии автосервиса, Инструкции к корейским авто, Инструкции к китайским авто
Ремонт (сервис) корейских автомобилей. Специализированный техцентр (автосервис) в Москве. Copyright © 2000-2023. Все права сохранены. Обращаем Ваше внимание на то, что данный сайт носит исключительно информационный характер и ни при каких условиях не является публичной офертой, определяемой положениями Статьи 437 (2) Гражданского кодекса Российской Федерации.
Компания «АвтоМиг» является НЕОФИЦИАЛЬНЫМ техническим центром по обслуживанию и ремонту автомобилей марок KIA и HYUNDAI. Никакого отношения ни к официальным представителям (дилерам), ни к самим производителям транспортных средств автосервис не имеет! Все упоминания торговых знаков (марок автомобилей) на данном сайте носят исключительно ИДЕНТИФИЦИРУЮЩИЙ характер (используются не в качестве средства индивидуализации), указывают, какие именно автомобили обслуживает техцентр (в соответствии со ст. 1474, 1487 Гражданского Кодекса РФ).
2008

WARRANTIES FOR YOUR HYUNDAI VEHICLE
Please consult your Owner’s Handbook & Warranty Information booklet for your vehicle’s specific warranty coverage.
RESPONSIBILITY FOR MAINTENANCE
The maintenance requirements for your new Hyundai are found in Section 7. As the owner, it is your
responsibility to see that all maintenance operations specified by the manufacturer are carried out at
the appropriate intervals. When the vehicle is used in severe driving conditions, more frequent maintenance is required for some operations. Maintenance requirements for severe operating conditions
are also included in Section 7.
OWNER’S MANUAL
Operation
Maintenance
Specifications
All information in this Owner’s Manual is current at the time of publication.
However, Hyundai reserves the right to make changes at any time so that
our policy of continual product improvement may be carried out.
This manual applies to all Hyundai models and includes descriptions and
explanations of optional as well as standard equipment. As a result, you
may find material in this manual that does not apply to your specific vehicle.
F1
CAUTION: MODIFICATIONS TO YOUR HYUNDAI
Your Hyundai should not be modified in any way. Such modifications may adversely affect the performance, safety or durability of your Hyundai and may, in addition, violate conditions of the limited
warranties covering the vehicle. Certain modifications may also be in violation of regulations established by the U.S. Department of Transportation and other federal or state agencies.
TWO-WAY RADIO OR CELLULAR TELEPHONE INSTALLATION
Your vehicle is equipped with electronic fuel injection and other electronic components. It is possible
for an improperly installed/adjusted two-way radio or cellular telephone to adversely affect electronic
systems. For this reason, we recommend that you carefully follow the radio manufacturer’s instructions or consult your Hyundai dealer for precautionary measures or special instructions if you choose
to install one of these devices.
F2
SAFETY AND VEHICLE DAMAGE WARNING
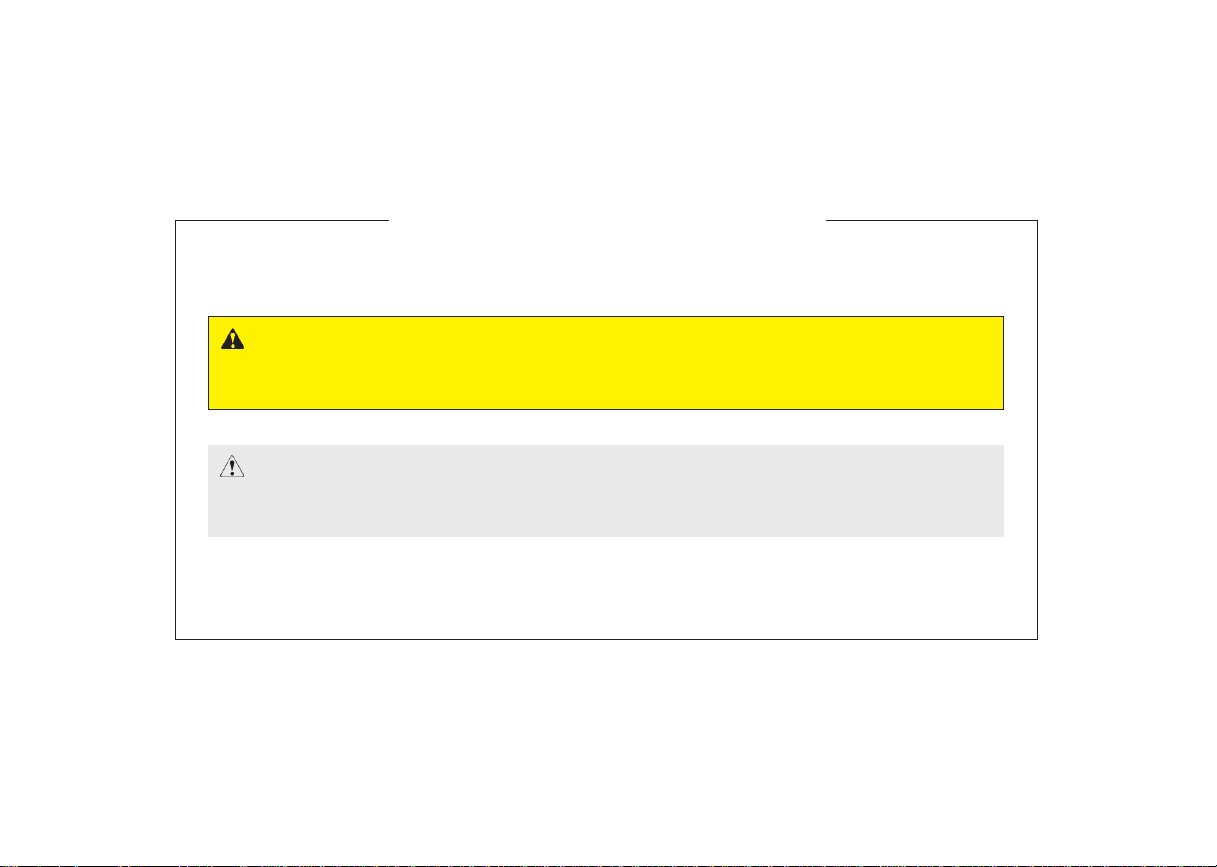
This manual includes information titled as WARNING, CAUTION and NOTICE.
These titles indicate the following:
WARNING
This indicates that a condition may result in harm, serious injury or death to you or other
persons if the warning is not heeded. Follow the advice provided with the warning.
CAUTION
This indicates that a condition may result in damage to your vehicle or its equipment if the
caution is not heeded. Follow the advice provided with the caution.
✽✽
NOTICE
This indicates that interesting or helpful information is being provided.
F3
FOREWORD
Thank you for choosing Hyundai. We are pleased to welcome you to the growing number of discriminating people who drive
Hyundais. The advanced engineering and high-quality construction of each Hyundai we build is something of which we’re very
proud.
Your Owner’s Manual will introduce you to the features and operation of your new Hyundai. It is suggested that you read it carefully because the information it contains can contribute greatly to the satisfaction you receive from your new car.
The manufacturer also recommends that all service and maintenance on your car be performed by an authorized Hyundai dealer. Hyundai dealers are prepared to provide high-quality service, maintenance and any other assistance that may be required.
HYUNDAI MOTOR COMPANY
Note : Because future owners will also need the information included in this manual, if you sell this Hyundai, please leave the man-
ual in the vehicle for their use. Thank you.
CAUTION
Severe engine and transaxle damage may result from the use of poor quality fuels and lubricants that do not meet Hyundai
specifications. You must always use high quality fuels and lubricants that meet the specifications listed on Page 9-4 in the
Vehicle Specifications section of the Owner’s Manual and which also appear in the Service Station Information on the back
cover of the Owner’s Manual.
Copyright 2007 Hyundai Motor Company. All rights reserved. No part of this publication may be reproduced, stored in any retrieval
system or transmitted in any form or by any means without the prior written permission of Hyundai Motor Company.
F4
Guide to Hyundai Genuine Parts
1. What are Hyundai Genuine Parts?
Hyundai Genuine Parts are the same
parts used by Hyundai Motor
Company to manufacture vehicles.
They are designed and tested for the
optimum safety, performance, and reliability to our customers.
2. Why should you use genuine parts?
Hyundai Genuine Parts are engineered and built to meet rigid manufacturing requirements. Using imitation, counterfeit or used salvage parts
is not covered under the Hyundai New
Vehicle Limited Warranty or any other
Hyundai warranty.
In addition, any damage to or failure of
Hyundai Genuine Parts caused by the
installation or failure of an imitation,
counterfeit or used salvage part is not
covered by any Hyundai Warranty.
3. How can you tell if you are purchasing Hyundai Genuine Parts?
Look for the Hyundai Genuine Parts
Logo on the package (see below).
Hyundai Genuine Parts exported to
the United States are packaged with
labels written only in English.
Hyundai Genuine Parts are only sold
through authorized Hyundai
Dealerships.
To find the closest authorized
dealer call 1-800-826-CARS
A100A03L
A100A01L A100A02L A100A04L
F5

Introduction
1
table of contents
Your vehicle at a glance
Safety system of your vehicle
Features of your vehicle
Driving your vehicle
What to do in an emergency
Maintenance
Consumer information
Specifications
Index
2
3
4
5
6
7
8
9
I
Introduction
1
How to use this manual / 1-2
Fuel requirements / 1-3
Vehicle break-in process / 1-5
Vehicle data collection and event data
recorders / 1-6
Indicator symbols on the instrument cluster / 1-7
Introduction
HOW TO USE THIS MANUAL
We want to help you get the greatest
possible driving pleasure from your vehicle. Your Owner’s Manual can assist you
in many ways. We strongly recommend
that you read the entire manual. In order
to minimize the chance of death or injury,
you must read the WARNING and CAUTION sections in the manual.
Illustrations complement the words in this
manual to best explain how to enjoy your
vehicle. By reading your manual, you
learn about features, important safety
information, and driving tips under various road conditions.
The general layout of the manual is provided in the Table of Contents. A good
place to start is the index; it has an alphabetical listing of all information in your
manual.
Sections: This manual has nine sections
plus an index. Each section begins with a
brief list of contents so you can tell at a
glance if that section has the information
you want.
You will find various WARNING’s,
CAUTION’s, and NOTICE’s in this manual. These were prepared to enhance your
personal safety. You should carefully read
and follow ALL procedures and recommendations provided in these
WARNING’s, CAUTION’s and NOTICE’s.
WARNING
A WARNING indicates a situation in
which harm, serious bodily injury or
death could result if the warning is
ignored.
CAUTION
A CAUTION indicates a situation in
which damage to your vehicle could
result if the caution is ignored.
✽✽
NOTICE
A NOTICE indicates interesting or helpful information is being provided.
21
FUEL REQUIREMENTS
Gasoline engine
Unleaded
Your new vehicle is designed to use only
unleaded fuel having a pump octane
number ((R+M)/2) of 87 or highter.
Your new vehicle is designed to obtain
maximum performance with UNLEADED
FUEL, as well as minimize exhaust emissions and spark plug fouling.
CAUTION
Never add any fuel system cleaning
agents to the fuel tank other than
what has been specified. (Consult
an authorized Hyundai dealer for
details.)
WARNING
• Do not «top off» after the nozzle
automatically shuts off when
refueling.
• Tighten the cap until it clicks, otherwise the Check Engine
light will illuminate.
• Always check that the fuel cap is
installed securely to prevent fuel
spillage in the event of an accident.
Gasoline containing alcohol and
methanol
Gasohol, a mixture of gasoline and
ethanol (also known as grain alcohol),
and gasoline or gasohol containing
methanol (also known as wood alcohol)
are being marketed along with or instead
of leaded or unleaded gasoline.
Do not use gasohol containing more than
10% ethanol, and do not use gasoline or
gasohol containing any methanol. Either
of these fuels may cause drivability problems and damage to the fuel system.
Discontinue using gasohol of any kind if
drivability problems occur.
Vehicle damage or driveability problems
may not be covered by the manufacturer’s warranty if they result from the use
of:
1. Gasohol containing more than 10%
ethanol.
2. Gasoline or gasohol containing
methanol.
3. Leaded fuel or leaded gasohol.
Introduction
«E85» fuel is an alternative fuel comprised of 85 percent ethanol and 15 percent gasoline, and is manufactured
exclusively for use in Flexible Fuel
Vehicles. “E85” is not compatible with
your vehicle. Use of “E85” may result in
poor engine performance and damage to
your vehicle’s engine and fuel system.
Hyundai recommends that customers do
not use fuel with an ethanol content
exceeding 10 percent.
CAUTION
Your New Vehicle Limited Warranty
does not cover damage to the fuel
system or any performance problems caused by the use of “E85” fuel.
CAUTION
Never use gasohol which contains
methanol. Discontinue use of any
gasohol product which impairs drivability.
13
Introduction
Use of MTBE
We recommend that fuels containing
MTBE (Methyl Tertiary Butyl Ether) over
15.0% vol. (Oxygen Content 2.7%
weight) should not be used in your vehicle.
Fuel containing MTBE over 15.0% vol.
(Oxygen Content 2.7% weight) may
reduce vehicle performance and produce
vapor lock or hard starting.
CAUTION
Your New Vehicle Limited Warranty
may not cover damage to the fuel
system and any performance problems that are caused by the use of
fuels containing methanol or fuels
containing MTBE (Methyl Tertiary
Butyl Ether) over 15.0% vol.
(Oxygen Content 2.7% weight.)
Do not use methanol
Fuels containing methanol (wood alcohol) should not be used in your vehicle.
This type of fuel can reduce vehicle performance and damage components of
the fuel system.
CAUTION
Your New Vehicle Limited Warranty
may not cover damage to the fuel
system and performance problems
that are caused by the use of
methanol or fuels containing
methanol.
Gasolines for cleaner air
To help contribute to cleaner air, we recommend that you use gasolines treated
with detergent additives, which help prevent deposit formation in the engine.
These gasolines will help the engine run
cleaner and enhance performance of the
Emission Control System.
Operation in foreign countries
If you are going to drive your vehicle in
another country, be sure to:
• Observe all regulations regarding registration and insurance.
• Determine that acceptable fuel is available.
41
VEHICLE BREAK-IN PROCESS
No special break-in period is needed. By
following a few simple precautions for the
first 600 miles (1,000 km) you may add to
the performance, economy and life of
your vehicle.
• Do not race the engine.
• While driving, keep your engine speed
(rpm, or revolutions per minute)
between 2,000 rpm and 4,000 rpm.
• Do not maintain a single speed for long
periods of time, either fast or slow.
Varying engine speed is needed to
properly break-in the engine.
• Avoid hard stops, except in emergencies, to allow the brakes to seat properly.
• Don’t let the engine idle longer than 3
minutes at one time.
• Don’t tow a trailer during the first 1,200
miles (2,000 km) of operation.
Introduction
15
Introduction
VEHICLE DATA COLLECTION AND EVENT DATA RECORDERS
Your Hyundai vehicle is equipped with
many high technology, electronically
controlled systems that help to
ensure your vehicle operates properly
and provides the performance that
you expect. These systems utilize
computers to monitor the operation of
various systems and components and
help to control their operation. These
computerized system operations are
wide-ranging and involve components
to reduce emissions, to continuously
evaluate the readiness of the airbag
and seat belt pretensioner systems, to
determine when the airbag and seat
belt pre-tensioner systems should be
deployed and then to activate the
deployment, and if equipped, to operate anti-lock braking, traction control
and electrical stability control to
assist the driver to control the vehicle
in difficult driving situations. These
systems electronically store information that is useful to service technicians when they need to diagnose and
repair these systems.
Additional information is stored only
when a crash occurs that results in
the deployment of the airbags or seat
belt pre-tensioners. This type of data
storage is done by devices called
event data recorders(EDR).
After a crash event, the airbag and
seat belt pre-tensioner computer system, known as the Supplemental
Restraint System Control Module
(SRSCM) or Airbag Control Unit
(ACU), may record some information
about the condition of the vehicle and
how it was being operated. This information consists of data related to seat
belt usage and if there was diagnostic
information in the airbag or seat belt
systems at the time that a crash
occurred, and if the ACU sensed that a
crash of sufficient severity occurred
to require seat belt pre-tensioner or
airbag deployment.
To retrieve this information, special
equipment is needed and access to
the vehicle or the device that stores
the data is required. Hyundai will not
access information about a crash
event or share it with others except:
• in response to an official request of
police or similar government office,
or
• with the consent of the vehicle
owner or, if the vehicle is leased,
with the consent of the lessee, or
• as part of Hyundai’s defense of litigation, or
• as required by law.
61
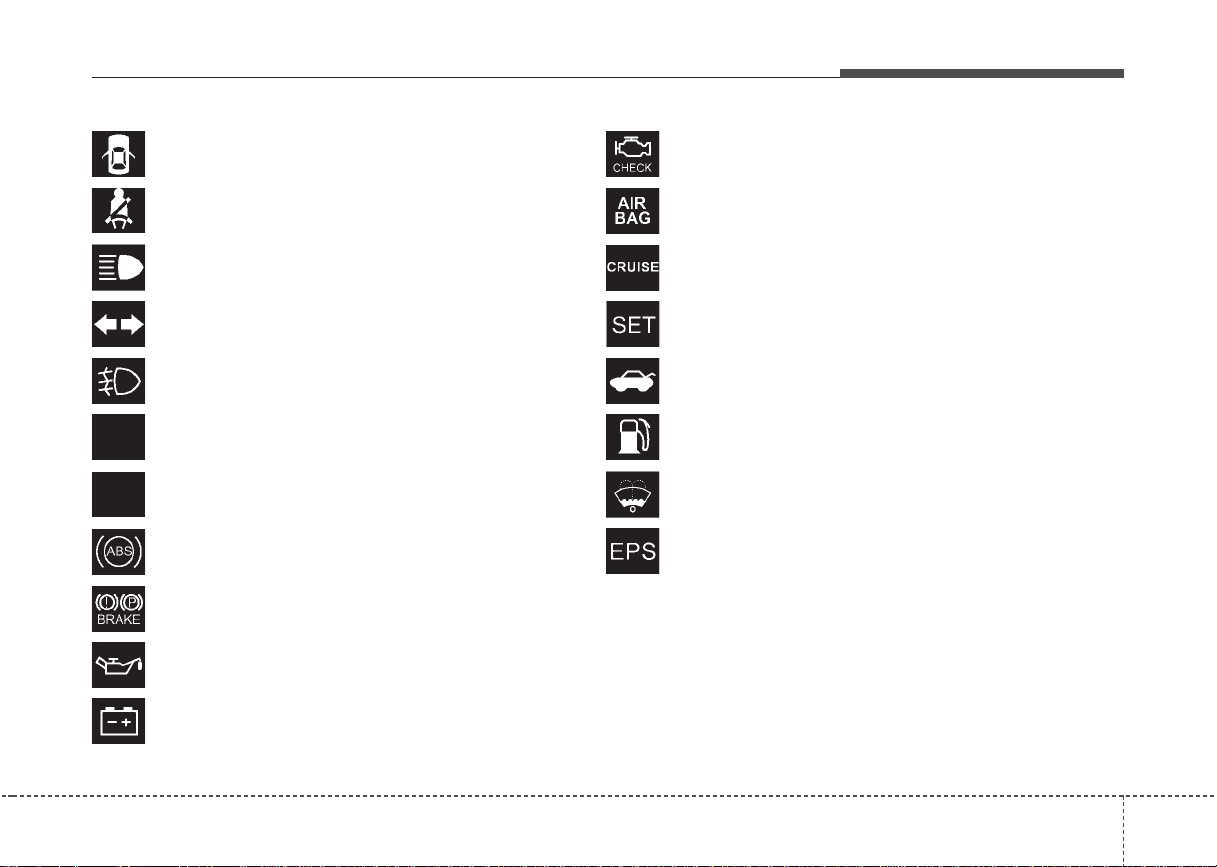
INDICATOR SYMBOLS ON THE INSTRUMENT CLUSTER
Introduction
Door ajar warning light
Seat belt warning light
High beam indicator
Turn signal indicator lights
Front fog light indicator (If equipped)
ESC
ESC indicator (If equipped)
ESC
ESC OFF indicator (If equipped)
OFF
ABS warning light (If equipped)
Parking brake & Brake fluid warning
Engine oil pressure warning
Charging system warning
Malfunction indicator lamp (If equipped)
Air bag warning light (If equipped)
Cruise indicator (If equipped)
Cruise SET indicator (If equipped)
Trunk lid open warning light
Low fuel level warning
Low washer fluid level warning indicator
Electronic power steering (EPS) system warning light
* For more detailed explanations, refer to section 4, “Instrument cluster”.
17
Your vehicle at a glance
Interior overview / 2-2
Instrument panel overview / 2-3
2
Your vehicle at a glance
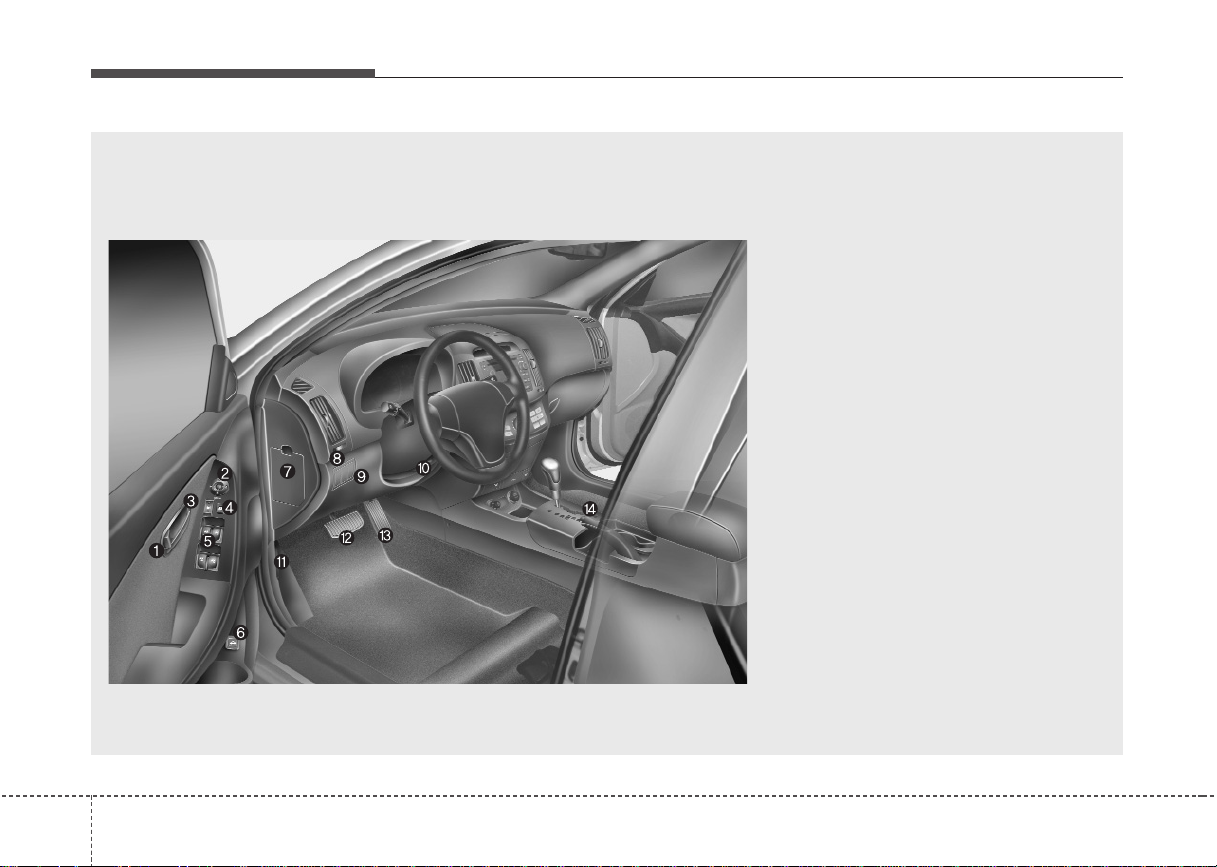
INTERIOR OVERVIEW
1. Door lock/unlock button ……………………….4-8
2. Outside rearview mirror control switch*…..4-37
3. Central door lock switch* ……………………..4-9
4. Power window lock switch*…………………4-17
5. Power window switches* ……………………4-14
6. Trunk lid release button ……………………..4-12
7. Fuse box …………………………………………..7-46
8. ESC OFF button*………………………………5-21
9. Instrument panel illumination………………4-39
10. Steering wheel tilt……………………………4-29
11. Hood release lever ………………………….4-18
12. Brake pedal ……………………………………5-16
13. Accelerator pedal………………………………5-6
14. Parking brake lever………………………….5-18
* : if equipped
OHD006001L
22
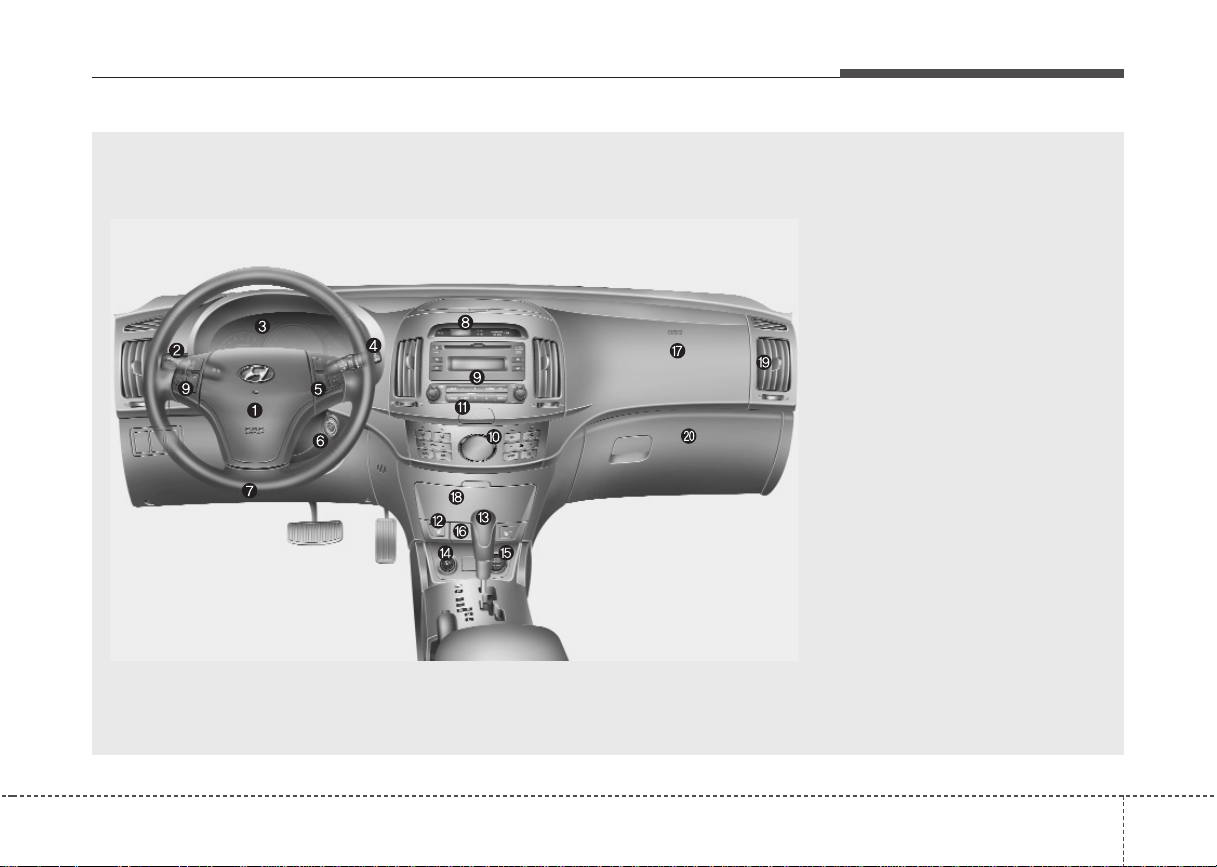
INSTRUMENT PANEL OVERVIEW
Your vehicle at a glance
1. Driver’s air bag…………………………..3-37
2. Light control / Turn signals …………..4-51
3. Instrument cluster ………………………4-38
4. Wiper/Washer…………………………….4-54
5. Auto cruise controls* …………………..5-26
6. Ignition switch ……………………………..5-4
7. Steering wheel…………………………..4-28
8. Digital clock ………………………………….4-85
9. Audio controls* …………………..4-88, 4-92
10. Climate control system* …………….4-60
11. Hazard warning flasher switch……4-50
12. Seat warmer*…………………………….3-6
13. Shift lever ………………………………….5-7
14. Cigar lighter……………………………..4-82
15. Power outlet …………………………….4-84
16. Ashtray……………………………………4-82
17. Passenger’s air bag ………………….3-38
18. Storage compartment ……………….4-80
19. Vent controls ……………………………4-63
20. Glove box………………………………..4-80
* : if equipped
OHD007002N
23
Seat / 3-2
Seat belts / 3-12
Child restraint system / 3-21
Airbag-advanced supplemental restraint
system / 3-29
Safety features of your vehicle
3
Safety features of your vehicle
SEAT
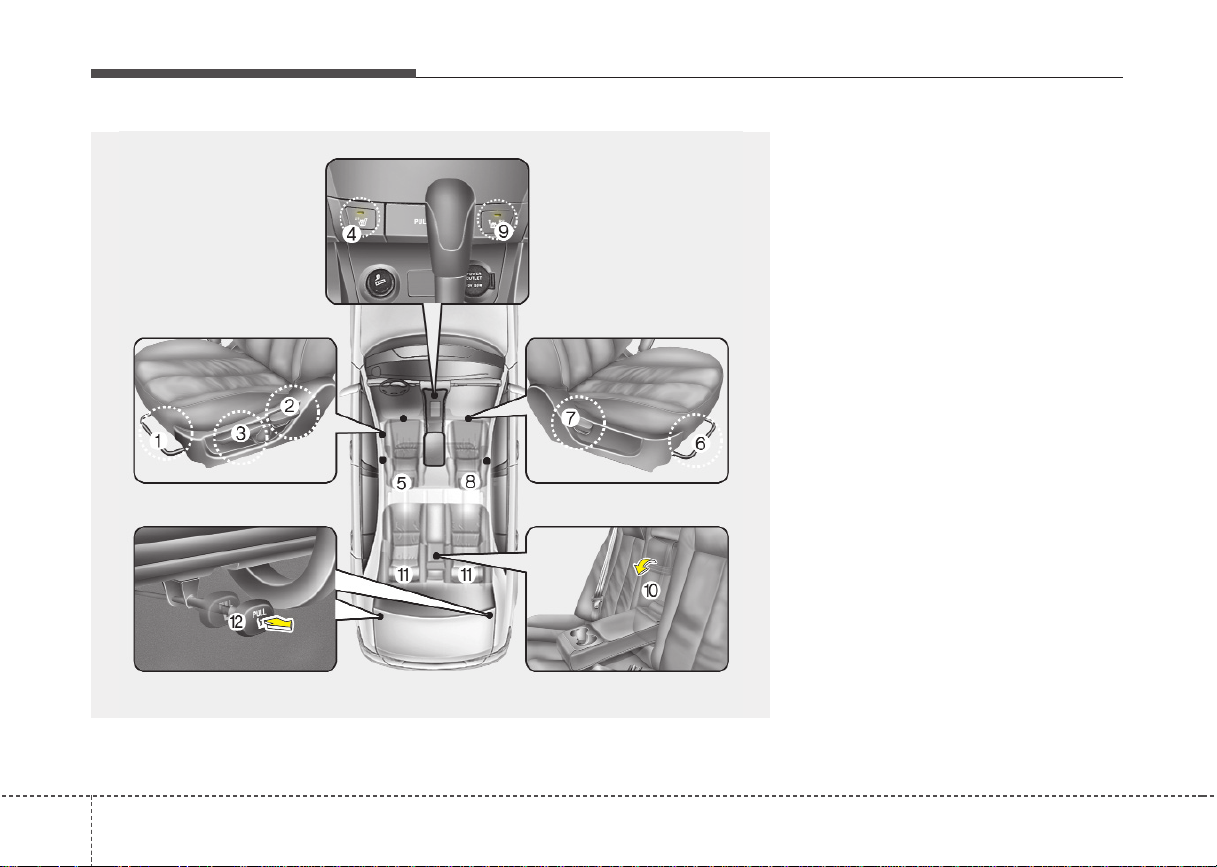
Front seat
(1) Forward and backward (driver seat)
(2) Seatback angle (driver seat)
(3) Seat cushion height (driver seat)*
(4) Seat warmer (driver seat)*
(5) Headrest (driver seat)
(6) Forward and backward (passenger
seat)
(7) Seatback angle (passenger seat)
(8) Headrest (passenger seat)
(9) Seat warmer (passenger seat)*
Rear seats
(10) Center armrest*
(11) Headrest
(12) Seatback folding lever
* if equipped
OHD036001
23
Safety features of your vehicle
WARNING — Loose objects
Loose objects in the driver’s foot
area could interfere with the operation of the foot pedals, possibly
causing an accident. Do not place
anything under the front seats.
WARNING — Uprighting
seat
When you return the seatback to its
upright position, hold the seatback
and return it slowly and be sure
there are no other occupants
around the seat. If the seatback is
returned without being held and
controlled, the back of the seat
could spring forward resulting in
accidental injury to a person struck
by the seatback.
WARNING — Driver’s seat
• Never attempt to adjust seat
while the vehicle is moving. This
could result in loss of control,
and an accident causing death,
serious injury, or property damage.
• Do not allow anything to interfere
with the normal position of the
seatback. Storing items against a
seatback or in any other way
interfering with proper locking of
a seatback could result in serious
or fatal injury in a sudden stop or
collision.
• Always drive and ride with your
seatback upright and the lap portion of the seat belt snug and low
across the hips. This is the best
position to protect you in case of
an accident.
• In order to avoid unnecessary
and perhaps severe air bag
injuries, always sit as far back as
possible from the steering wheel
while maintaining comfortable
control of the vehicle. It is recommended that your chest is at least
10 inches (250 mm) away from
the steering wheel.
OHD036002
Front seat adjustment
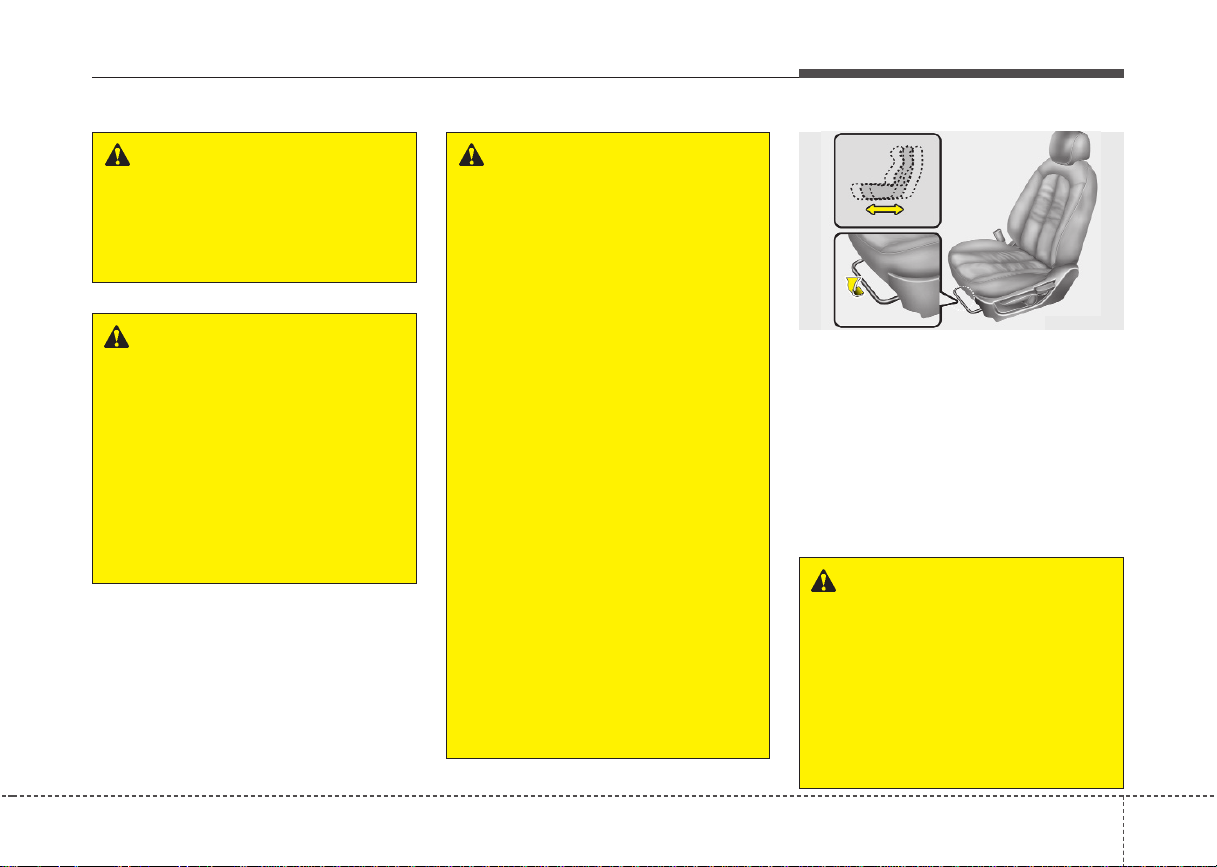
Forward and backward
To move the seat forward or backward:
1. Pull the seat slide adjustment lever
under the front edge of the seat cushion up and hold it.
2. Slide the seat to the position you
desire.
3. Release the lever and make sure the
seat is locked in place.
WARNING
After adjusting the seat, always
check that it is securely locked into
place by attempting to move the
seat forward or reverse without
using the lock release lever.
Sudden or unexpected movement
of the driver’s seat could cause you
to lose control of the vehicle resulting in an accident.
33
Safety features of your vehicle
OHD036003
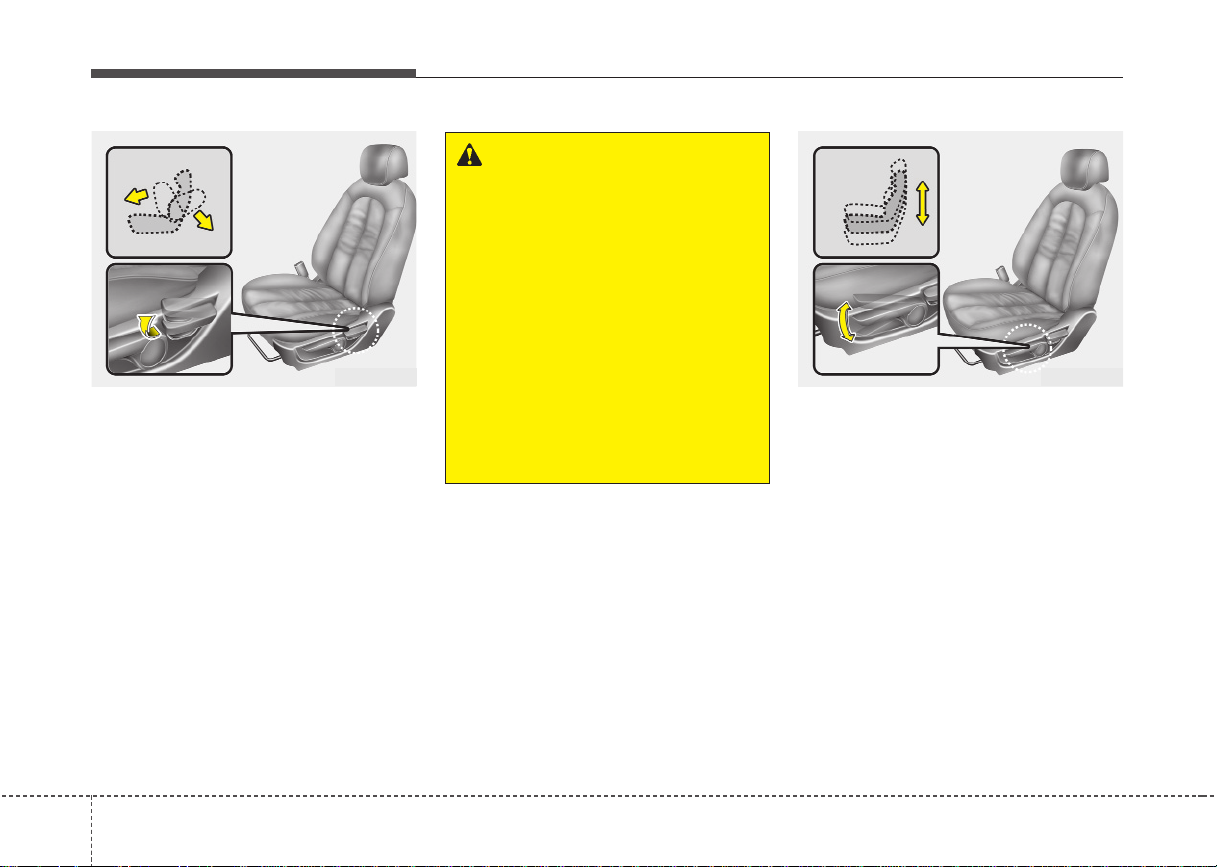
Seatback angle
To recline the seatback:
1. Lean forward slightly and lift up on the
seatback recline lever located on the
outside of the seat at the rear.
2. Carefully lean back on the seat and
adjust the seatback of the seat to the
position you desire.
3. Release the lever and make sure the
seatback is locked in place. (The lever
MUST return to its original position for
the seatback to lock.)
WARNING — Driver respon-
sibility for front seat passenger
Riding in a vehicle with a front seatback reclined could lead to serious
or fatal injury in an accident. If a
front seat is reclined during an
accident, the occupant’s hips may
slide under the lap portion of the
seat belt applying great force to the
unprotected abdomen. Serious or
fatal internal injuries could result.
The driver must advise the front
passenger to keep the seatback in
an upright position whenever the
vehicle is in motion.
OHD036004
Seat cushion height (for driver’s seat)
To change the height of the seat cushion,
push the lever located on the outside of
the seat cushion up or down.
• To lower the seat cushion, push the
lever down several times.
• To raise the seat cushion, pull the lever
up several times.
43
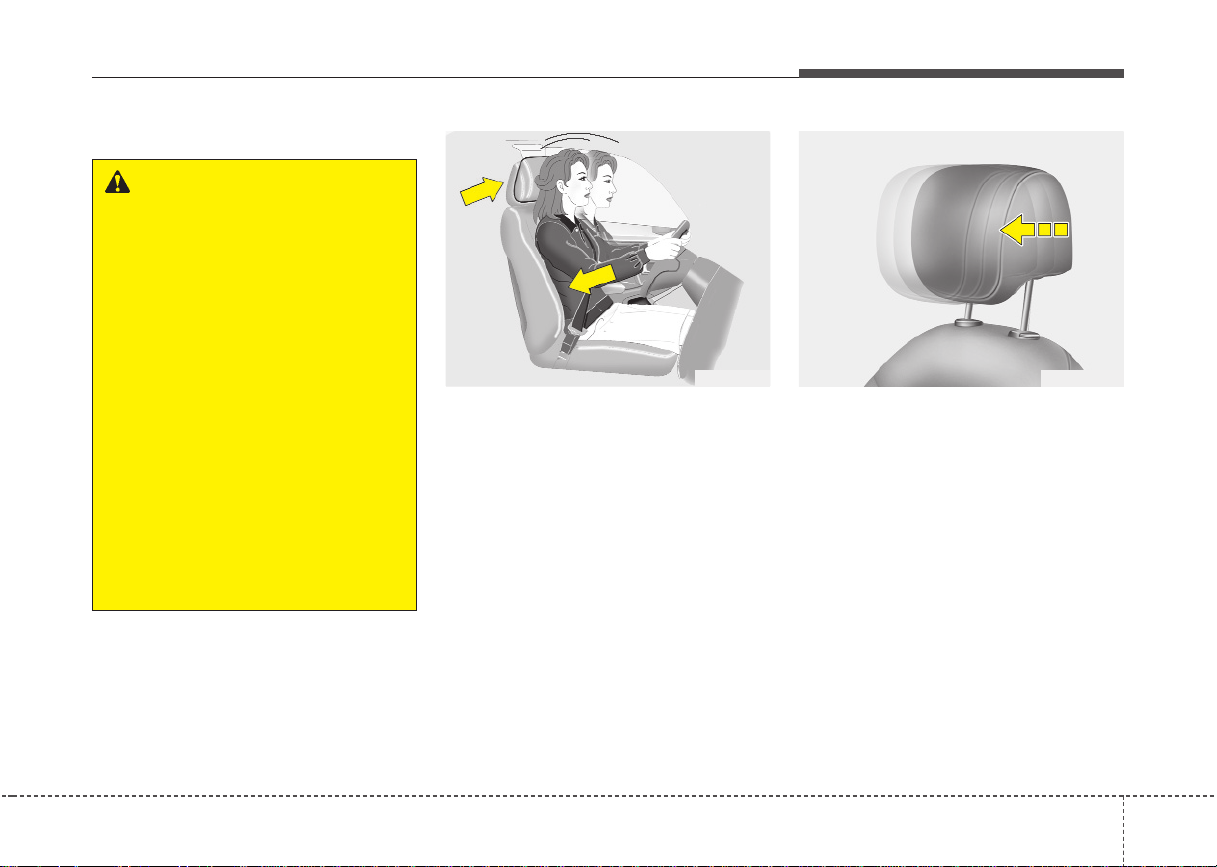
Headrest
WARNING
• For maximum effectiveness in
case of an accident, the headrest
should be adjusted so the middle
of the headrest is at the same
height as the top of the occupant’s eyes. Also adjust the headrest so its distance from the head
is as wide as your fist. For this
reason, the use of a cushion that
holds the body away from the
seatback is not recommended.
• Do not operate the vehicle with
the headrests removed as severe
injury to the occupants may
occur in the event of an accident.
Headrests may provide protection against neck injuries when
properly adjusted.
• Do not adjust the headrest height
while the vehicle is in motion.
Active headrest (if equipped)
The active headrest is designed to move
forward and upward during a rear impact.
This helps to prevent the driver’s and
front passenger’s head from moving
backward and thus helps prevent neck
injuries.
Safety features of your vehicle
OHD036005HNF2041-1
Forward and backward adjustment
(if equipped)
The headrest may be adjusted forward to
three different positions by pulling the
headrest forward. To adjust the headrest
backward, pull it fully forward to the farthest position and release it. Adjust the
headrest so that it properly supports the
head and neck.
35
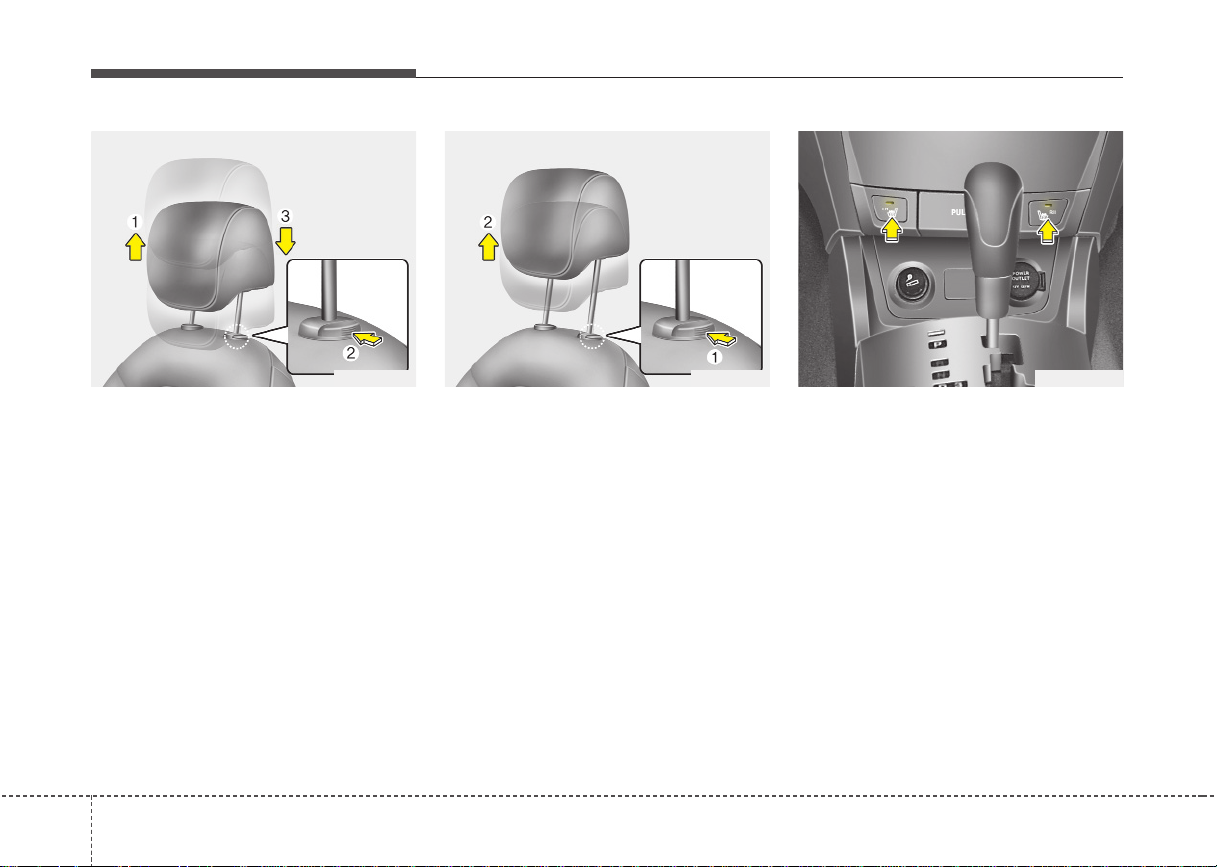
Safety features of your vehicle
Adjusting the height up and down
To raise the headrest, pull it up to the
desired position (1). To lower the headrest, push and hold the release button (2)
on the headrest support and lower the
headrest to the desired position (3).
OHD036007OHD036006 OHD036008
Removal
To remove the headrest, raise it as far as
it can go then press the release button (1)
while pulling upward (2).
Seat warmer (if equipped)
The seat warmer is provided to warm the
front seats during cold weather. With the
ignition switch in the ON position, push
either of the switches to warm the driver’s
seat or the front passenger’s seat.
During mild weather or under conditions
where the operation of the seat warmer
is not needed, keep the switches in the
«OFF» position.
✽✽
NOTICE
With the seat warmer switch in ON
position, the heating system in the seat
turns off or on automatically depending
on the seat temperature.
63
Safety features of your vehicle
CAUTION
• When cleaning the seats, do not
use an organic solvent such as
thinner, benzene, alcohol and
gasoline. Doing so may damage
the surface of the heater or seats.
• To prevent overheating the seat
warmer, do not place blankets,
cushions or seat covers on the
seats while the seat warmer is in
operation.
• Do not place heavy or sharp
objects on seats equipped with
seat warmers. Damage to the seat
warming components could occur.
WARNING — Seat warmer
burns
Passengers should use extreme
caution when using seat warmers
due to the possibility of excess
heating or burns. In particular, the
driver must exercise extreme care
for the following types of passengers:
1. Infants, children, elderly or handicapped persons, or hospital outpatients
2. Persons with sensitive skin or
those that burn easily
3. Fatigued individuals
4. Intoxicated individuals
5. Individuals taking medication
that can cause drowsiness or
sleepiness (sleeping pills, cold
tablets, etc.)
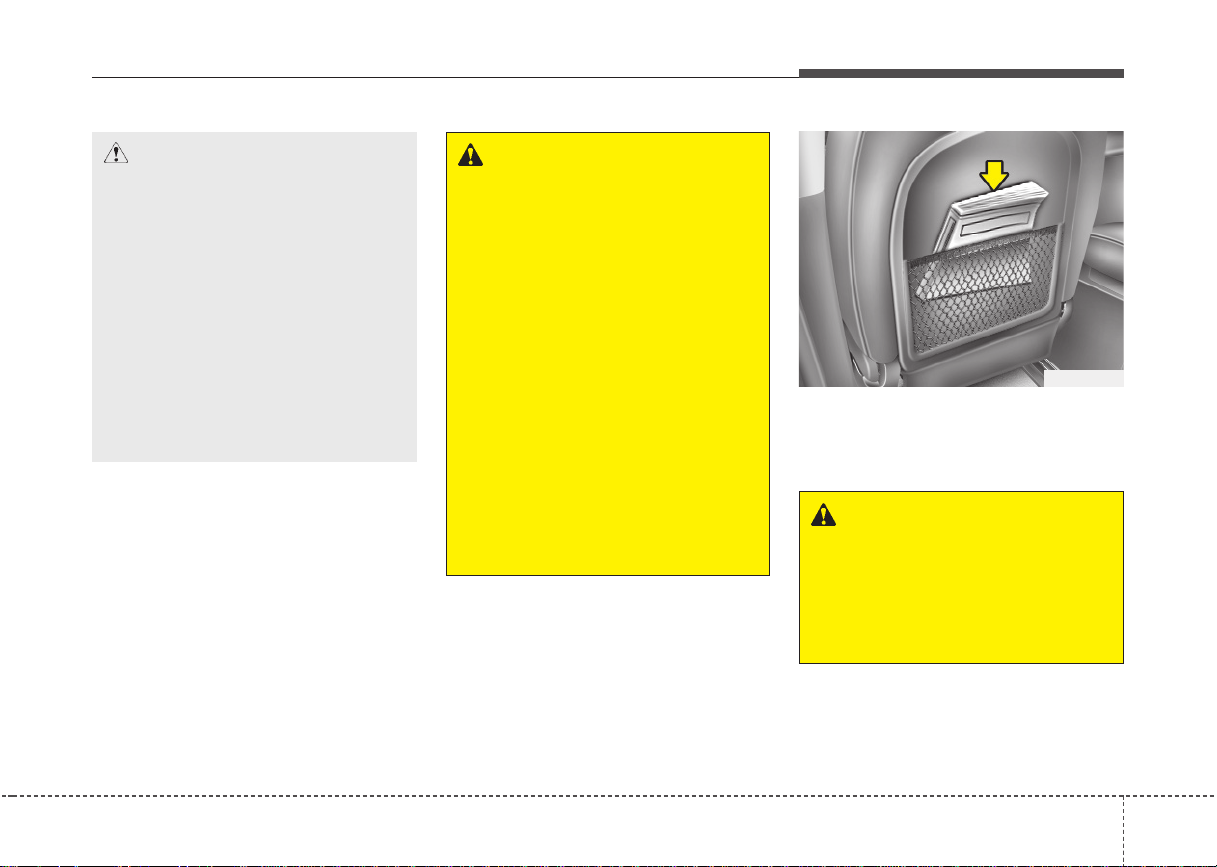
OHD036009
Seatback pocket
The seatback pocket is provided on the
back of the front passenger’s and driver’s
seatbacks.
WARNING — Seatback
pockets
Do not put heavy or sharp objects
in the seatback pockets. In an accident they could come loose from
the pocket and injure vehicle occupants.
37
Safety features of your vehicle
WARNING
For proper operation of the occupant classification system:
• Do not place any items cumulatively weighing over 2.2 lbs (1 kg)
in the seatback pocket or on the
seat.
• Do not hang onto the front passenger seat.
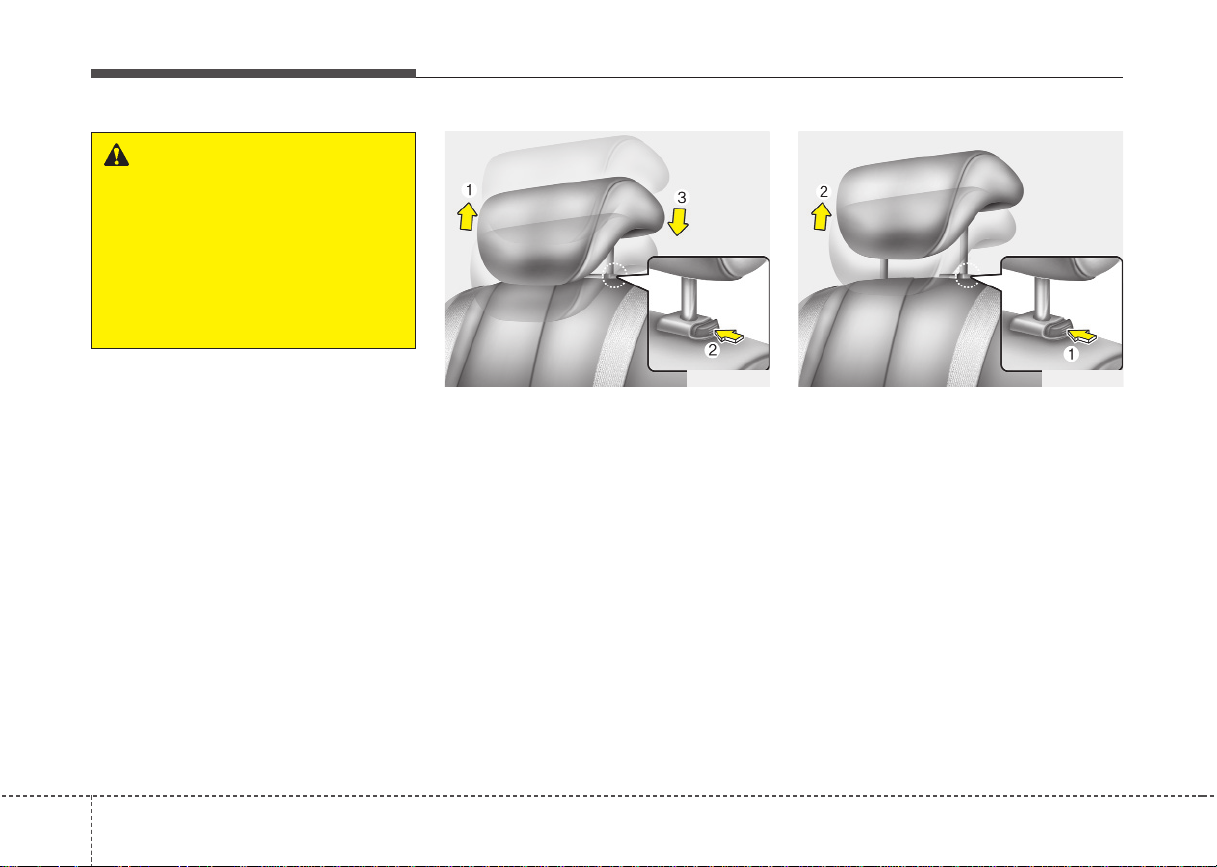
OHD036011 OHD036012
Rear seat adjustment
Headrest
The headrest not only provides comfort
for passengers, but also helps to protect
the head and neck in the event of a collision.
Adjusting the height up and down
To raise the headrest, pull it up to the
desired position (1). To lower the headrest, push and hold the release button (2)
on the headrest support and lower the
headrest to the desired position (3).
Removal
To remove the headrest, raise it as far as
it can go then press the release button
(1) while pulling upward (2).
83
Safety features of your vehicle
WARNING
• For maximum effectiveness in
case of an accident, the headrest
should be adjusted so the middle
of the headrest is at the same
height as the top of the occupant’s eyes. The use of a cushion
that holds the body away from
the seatback is not recommended.
• Do not operate the vehicle with
the headrests removed as severe
injury to an occupant may occur
in the event of an accident.
Headrests may provide protection against severe neck injuries
when properly adjusted.
OHD036010
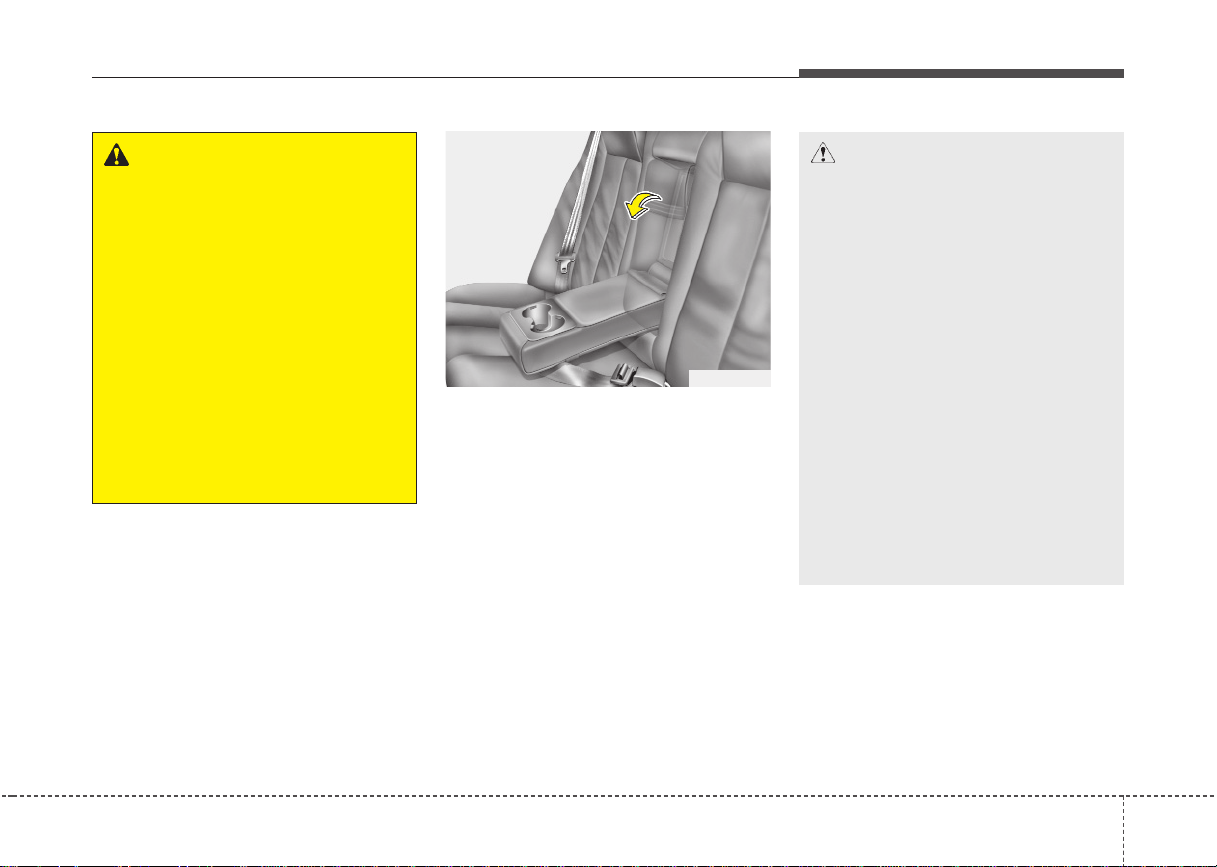
Armrest (if equipped)
To use the armrest, pull it forward from
the seatback.
CAUTION
• Make sure the engine is off, the
automatic transaxle is in P or the
manual transaxle is in neutral and
the parking brake is applied
whenever loading or unloading
cargo. Vehicle may move if shift
lever is inadvertently moved to
another position.
• Be careful when loading cargo
into the rear passenger seats to
prevent damage to the vehicle
interior.
• When cargo is loaded into the
rear passenger seats, ensure the
cargo is properly secured to prevent it from moving while driving.
Unsecured cargo in the passenger compartment can cause damage to the vehicle or injury to it’s
occupants.
39

Safety features of your vehicle
Folding the rear seat
The rear seatbacks may be folded to
facilitate carrying long items or to
increase the luggage capacity of the
vehicle.
WARNING
The purpose of the fold-down rear
seatbacks is to allow you to carry
longer objects than could otherwise be accommodated.
Never allow passengers to sit on
top of the folded down seatback
while the car is moving as this is
not a proper seating position and
no seat belts are available for use.
This could result in serious injury
or death in case of an accident or
sudden stop. Objects carried on the
folded down seatback should not
extend higher than the top of the
front seats. This could allow cargo
to slide forward and cause injury or
damage during sudden stops.
OHD036025 OHD036123L
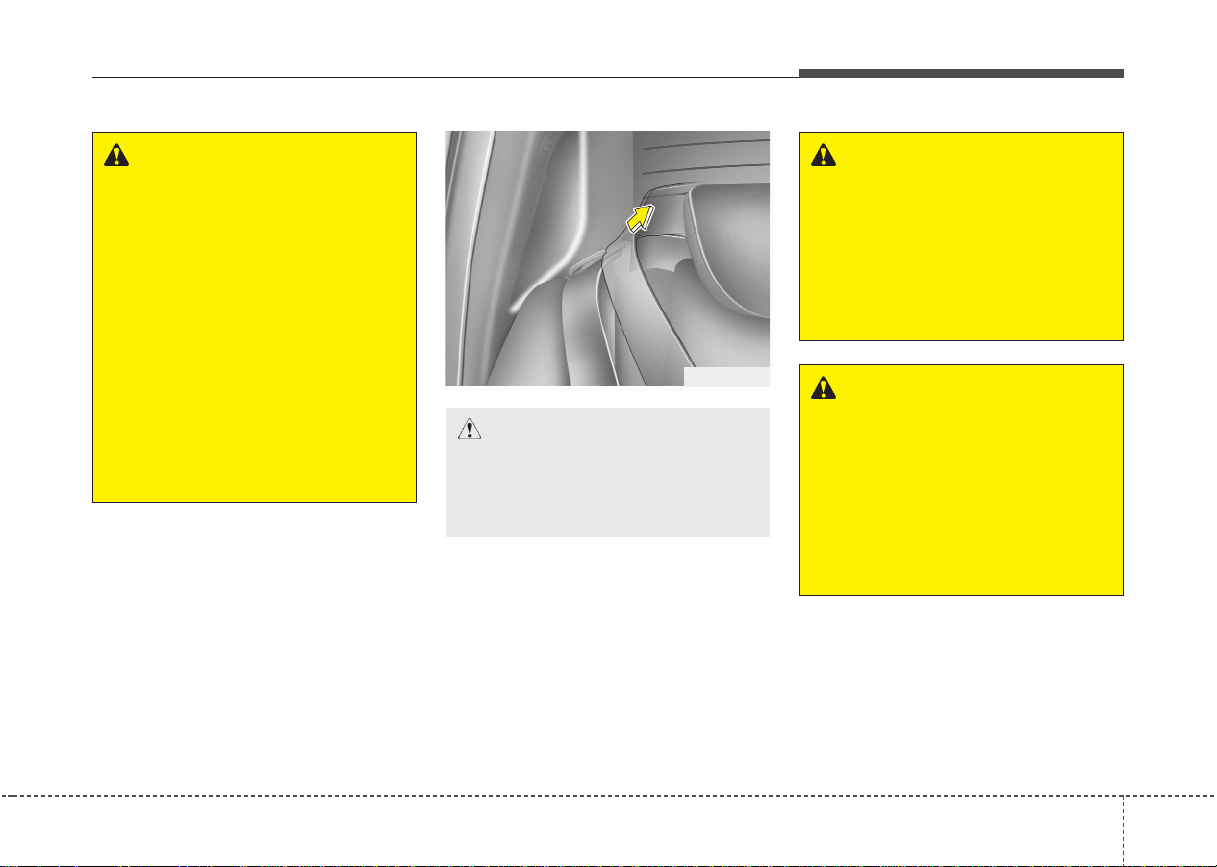
To fold down the rear seatback:
1. Set the front seatback to the upright
position and if necessary, slide the
front seat forward.
2. Lower the rear headrests to the lowest
position.
3. Pull out the seatback locking knob in
the trunk, then fold the seat toward the
front of the vehicle.
4. For center shoulder belt, insert the belt
webbing in the right side rear shoulder
belt guide to prevent the belt from
being trapped under the seat.
5. When you return the seatback to its
upright position, always be sure it has
locked into position by pushing on the
top of the seatback.
103
Safety features of your vehicle
WARNING
When you return the rear seatback
to its upright position after being
folded down:
Be careful not to damage the seat
belt webbing or buckle. Do not
allow the seat belt webbing or
buckle to get caught or pinched in
the rear seat. Ensure that the seatback is completely locked into its
upright position by pushing on the
top of the seaback. Otherwise, in an
accident or sudden stop, the seat
could fold down and allow cargo to
enter the passenger compartment,
which could result in serious injury
or death.
OHD036124L
CAUTION
When returning the rear seatbacks
to the upright position, remember
to return the rear center shoulder
belt to its proper position.
— Rear seat belts
WARNING — Cargo
Cargo should always be secured to
prevent it from being thrown about
the vehicle in a collision and causing injury to the vehicle occupants.
Special care should be taken of
objects placed in the rear seats,
since those may hit the front seat
occupants in a frontal collision.
WARNING — Cargo loading
Make sure the engine is off, the
automatic transaxle is in P or the
manual transaxle is in neutral and
the parking brake is applied whenever loading or unloading cargo.
Failure to take these steps may
allow the vehicle to move if shift
lever is inadvertently moved to
another position.
311

Safety features of your vehicle
SEAT BELTS
Seat belt restraint system
WARNING
• For maximum restraint system
protection, the seat belts must
always be used whenever the car
is moving.
• Seat belts are most effective
when seatbacks are in the
upright position.
• Children age 12 and under must
always be properly restrained in
the rear seat. Never allow children to ride in the front passenger seat. If a child over 12 must
be seated in the front seat, he/she
must be properly belted and the
seat should be moved as far back
as possible.
• Never wear the shoulder belt
under your arm or behind your
back. An improperly positioned
shoulder belt can cause serious
injuries in a crash. The shoulder
belt should be positioned midway
over your shoulder across your
collarbone.
(Continued)
(Continued)
• Avoid wearing twisted seat belts.
A twisted belt can’t do its job as
well. In a collision, it could even
cut into you. Be sure the belt
webbing is straight and not twisted.
• Be careful not to damage the belt
webbing or hardware. If the belt
webbing or hardware is damaged, replace it.
1GQA2083
Seat belt warning
Seat belt warning light
If the driver’s seat belt is not fastened
when the ignition key is turned ON, the
seat belt warning light blinks for approximately 6 seconds. And if the vehicle
speed exceeds 10km/h with the seat belt
unfastened, the seat belt warning light
blinks with the pattern of 6 seconds on
and 24 seconds off for 11 times.The seat
belt warning light will stop if the seat belt
is fastened or the vehicle speed is
reduced to below 5km/h.
123

Seat belt warning chime
If the driver’s seat belt is not fastened
when the ignition key is turned ON, the
seat belt warning chime sounds for
approximately 6 seconds. And if the vehicle speed exceeds 10km/h with the seat
belt unfastened, the seat belt warning
chime sounds with the pattern of 6 seconds on and 24 seconds off for 11
times.The seat belt warning chime will
stop if the seat belt is fastened or the
vehicle speed is reduced to below 5km/h.
1
2
B180A01NF
Seat belt — Driver’s 3-point system
with emergency locking retractor
To fasten your seat belt:
To fasten your seat belt, pull it out of the
retractor and insert the metal tab (1) into
the buckle (2). There will be an audible
«click» when the tab locks into the buckle.
The seat belt automatically adjusts to the
proper length only after the lap belt portion is adjusted manually so that it fits
snugly around your hips. If you lean forward in a slow, easy motion, the belt will
extend and let you move around. If there
is a sudden stop or impact, however, the
belt will lock into position. It will also lock
if you try to lean forward too quickly.
Safety features of your vehicle
OHD036019
You can adjust the height of the shoulder
belt anchor to one of 4 positions for maximum comfort and safety.
If the height of the adjusting seat belt is
too near your neck, you will not be getting
the most effective protection. The shoulder portion should be adjusted so that it
lies across your chest and midway over
your shoulder nearest the door and not
your neck.
To adjust the height of the seat belt
anchor, lower or raise the height adjuster
into an appropriate position.
313

Safety features of your vehicle
To raise the height adjuster, pull it up (1).
To lower it, push it down (3) while pressing the height adjuster button (2).
Release the button to lock the anchor
into position. Try sliding the height
adjuster to make sure that it has locked
into position.
WARNING
• Verify the shoulder belt anchor is
locked into position at the appropriate height. Never position the
shoulder belt across your neck or
face. Improperly positioned seat
belts can cause serious injuries
in an accident.
• Failure to replace seat belts after
an accident could leave you with
damaged seat belts that will not
provide protection in the event of
another collision leading to personal injury or death. Replace
your seat belts after being in an
accident as soon as possible.
B200A01NF
WARNING
You should place the lap belt portion as low as possible and snugly
across your hips, not on your waist.
If the lap belt is located too high on
your waist, it may increase the
chance of injury in the event of a
collision. Both arms should not be
under or over the belt. Rather, one
should be over and the other under,
as shown in the illustration.
Never wear the seat belt under the
arm nearest the door.
Seat belts — Front passenger and rear
seat 3-point system with combination
locking retractor
To fasten your seat belt
Combination retractor type seat belts are
installed in the rear seat positions to help
accommodate the installation of child
restraint systems. Although a combination retractor is also installed in the front
passenger seat position, we strongly recommend that children always be seated
in the rear seat. NEVER place any infant
restraint system in the front seat of the
vehicle.
This type of seat belt combines the features of both an emergency locking
retractor seat belt and an automatic locking retractor seat belt. To fasten your seat
belt, pull it out of the retractor and insert
the metal tab into the buckle. There will
be an audible «click» when the tab locks
into the buckle. When not securing a
child restraint, the seat belt operates in
the same way as the driver’s seat belt
(Emergency Locking Retractor Type). It
automatically adjusts to the proper length
only after the lap belt portion of the seat
belt is adjusted manually so that it fits
snugly around your hips.
143

When the seat belt is fully extended from
the retractor to allow the installation of a
child restraint system, the seat belt operation changes to allow the belt to retract,
but not to extend (Automatic Locking
Retractor Type). Refer to “Using a child
restraint system” in this section.
✽✽
NOTICE
Although the combination retractor
provides the same level of protection for
seated passengers in either emergency
or automatic locking modes, it is recommended that seated passengers use the
emergency locking feature for improved
convenience. The automatic locking
function is intended to facilitate child
restraint installation. To convert from
the automatic locking feature to the
emergency locking operation mode,
allow the unbuckled seat belt to fully
retract.
1
To release the seat belt:
The seat belt is released by pressing the
release button (1) in the locking buckle.
When it is released, the belt should automatically draw back into the retractor.
If this does not happen, check the belt to
be sure it is not twisted, then try again.
B210A01NF
Safety features of your vehicle
OMG035300
Pre-tensioner seat belt
Your vehicle is equipped with driver’s and
front passenger’s pre-tensioner seat
belts. The purpose of the pre-tensioner is
to make sure that the seat belts fit tightly
against the occupant’s body in certain
frontal collisions. The pre-tensioner seat
belts can be activated, where the frontal
collision is severe enough, together with
the air bags.
315

Safety features of your vehicle
When the vehicle stops suddenly, or if
the occupant tries to lean forward too
quickly, the seat belt retractor will lock
into position. In certain frontal collisions,
the pre-tensioner will activate and pull
the seat belt into tighter contact against
the occupant’s body.
If the system senses excessive seat belt
tension on the driver or passenger’s seat
belt when the pre-tensioner activates, the
load limiter inside the pre-tensioner will
release some of the pressure on the
affected seat belt.
1LDE3100
The seat belt pre-tensioner system consists mainly of the following components.
Their locations are shown in the illustration:
1. SRS air bag warning light
2. Retractor pre-tensioner assembly
3. SRS control module
WARNING
To obtain maximum benefit from a
pre-tensioner seat belt:
1. The seatbelt must be working
correctly and adjusted to the
proper position. Please read and
follow all of the important information and precautions about
your vehicle’s occupant safety
features – including seat belts
and air bags – that are provided
in this manual.
2. Be sure you and your passengers always wear seat belts and
wear them properly.
163

✽✽
NOTICE
• Both the driver’s and front passenger’s pre-tensioner seat belts will be
activated in certain frontal collisions.
The pre-tensioner seat belts can be
activated where the frontal collision is
severe enough, together with the air
bags.
The pre-tensioners will not be activated if the seat belts are not being worn
at the time of the collision.
• When the pre-tensioner seat belts are
activated, a loud noise may be heard
and fine dust, which may appear to be
smoke, may be visible in the passenger
compartment. These are normal operating conditions and are not hazardous.
• Although it is harmless, the fine dust
may cause skin irritation and should
not be breathed for prolonged periods. Wash all exposed skin areas thoroughly after an accident in which the
pre-tensioner seat belts were activated.
CAUTION
• Because the sensor that activates
the SRS air bag is connected with
the pre-tensioner seat belt, the
SRS air bag warning light on
the instrument panel will illuminate for approximately 6 seconds
after the ignition key has been
turned to the «ON» position, and
then it should turn off.
• If the pre-tensioner seat belt is not
working properly, this warning
light will illuminate even if there is
no malfunction of the SRS air bag.
If the SRS air bag warning light
does not illuminate when the ignition key is turned to «ON», or if it
remains illuminated after illuminating for approximately 6 seconds, or if it illuminates while the
vehicle is being driven, please
have an authorized Hyundai dealer inspect the pre-tensioner seat
belt or SRS air bag system as
soon as possible.
BAG
AIR
Safety features of your vehicle
WARNING
• Pre-tensioners are designed to
operate only one time. After activation, pre-tensioner seat belts
must be replaced. All seat belts,
of any type, should always be
replaced after they have been
worn during a collision.
• The pre-tensioner seat belt
assembly mechanisms become
hot during activation. Do not
touch the pre-tensioner seat belt
assemblies for several minutes
after they have been activated.
• Do not attempt to inspect or
replace the pre-tensioner seat
belts yourself. This must be done
by an authorized Hyundai dealer.
• Do not strike the pre-tensioner
seat belt assemblies.
• Do not attempt to service or
repair the pre-tensioner seat belt
system in any manner.
(Continued)
317

Safety features of your vehicle
(Continued)
• Improper handling of the pre-tensioner seat belt assemblies, and
failure to heed the warnings not
to strike, modify, inspect, replace,
service or repair the pre-tensioner seat belt assemblies may lead
to improper operation or inadvertent activation and serious injury.
• Always wear the seat belts when
driving or riding in a motor vehicle.
Seat belt precautions
WARNING
All occupants of the vehicle must
wear their seat belts at all times.
Seat belts and child restraints
reduce the risk of serious or fatal
injuries for all occupants in the
event of a collision or sudden stop.
Without a seat belt, occupants
could be shifted too close to a
deploying air bag, strike the interior
structure or be thrown from the
vehicle. Properly worn seat belts
greatly reduce these hazards.
Even with advanced air bags,
unbelted occupants can be severely injured by a deploying air bag.
Always follow the precautions
about seat belts, air bags and occupant seating contained in this manual.
Infant or small child
All 50 states have child restraint laws.You
should be aware of the specific requirements in your state. Child and/or infant
seats must be properly placed and
installed in the rear seat. For more information about the use of these restraints,
refer to “Child restraint system” in this
section.
WARNING
Every person in your vehicle needs
to be properly restrained at all
times, including infants and children. Never hold a child in your
arms or lap when riding in a vehicle. The violent forces created during a crash will tear the child from
your arms and throw the child
against the interior. Always use a
child restraint appropriate for your
child’s height and weight.
183

Safety features of your vehicle
✽✽
NOTICE
Small children are best protected from
injury in an accident when properly
restrained in the rear seat by a child
restraint system that meets the requirements of the the Federal Motor Vehicle
Safety Standards. Before buying any
child restraint system, make sure that it
has a label certifying that it meets
Federal Motor Vehicle Safety Standard
213. The restraint must be appropriate
for your child’s height and weight.
Check the label on the child restraint for
this information. Refer to “Child
restraint system” in this section.
Larger children
Children who are too large for child
restraint systems should always occupy
the rear seat and use the available
lap/shoulder belts. The lap portion should
be fastened snug on the hips and as low
as possible. Check belt fit periodically. A
child’s squirming could put the belt out of
position. Children are afforded the most
safety in the event of an accident when
they are restrained by a proper restraint
system in the rear seat. If a larger child
(over age 13) must be seated in the front
seat, the child should be securely
restrained by the available lap/shoulder
belt and the seat should be placed in the
rearmost position. Children under the
age of 13 should be restrained securely
in the rear seat. NEVER place a child
under the age of 13 in the front seat.
NEVER place a rear facing child seat in
the front seat of a vehicle.
If the shoulder belt portion slightly touches the child’s neck or face, try placing the
child closer to the center of the vehicle. If
the shoulder belt still touches their face
or neck they need to be returned to a
child restraint system.
WARNING — Shoulder belts
on small children
• Never allow a shoulder belt to be
in contact with a child’s neck or
face while the vehicle is in
motion.
• If seat belts are not properly worn
and adjusted on children, there is
a risk of death or serious injury.
319

Safety features of your vehicle
Pregnant women
The use of a seat belt is recommended
for pregnant women to lessen the chance
of injury in an accident. When a seat belt
is used, the lap belt portion should be
placed as low and snugly as possible on
the hips, not across the abdomen. For
specific recommendations, consult a
physician.
Injured person
A seat belt should be used when an
injured person is being transported.
When this is necessary, you should consult a physician for recommendations.
One person per belt
Two people (including children) should
never attempt to use a single seat belt.
This could increase the severity of
injuries in case of an accident.
Do not lie down
To reduce the chance of injuries in the
event of an accident and to achieve maximum effectiveness of the restraint system, all passengers should be sitting up
and the front seats should be in an
upright position when the car is moving.
A seat belt cannot provide proper protection if the person is lying down in the rear
seat or if the front seat is in a reclined
position.
WARNING
Riding with a reclined seatback
increases your chance of serious
or fatal injuries in the event of a collision or sudden stop. The protection of your restraint system (seat
belts and air bags) is greatly
reduced by reclining your seat.
Seat belts must be snug against
your hips and chest to work properly. The more the seatback is
reclined, the greater the chance
that an occupant’s hips will slide
under the lap belt causing serious
internal injuries or the occupant’s
neck could strike the shoulder belt.
Drivers and passengers should
always sit well back in their seats,
properly belted, and with the seatbacks upright.
Care of seat belts
Seat belt systems should never be disassembled or modified. In addition, care
should be taken to assure that seat belts
and belt hardware are not damaged by
seat hinges, doors or other abuse.
WARNING
When you return the rear seatback
to its upright position after the rear
seatback was folded down, be careful not to damage the seat belt webbing or buckle. Be sure that the
webbing or buckle does not get
caught or pinched in the rear seat.
A seat belt with damaged webbing
or buckle will not be as strong and
could possibly fail during a collision or sudden stop, resulting in
serious injury.
203

Periodic inspection
It is recommended that all seat belts be
inspected periodically for wear or damage of any kind. Parts of the system that
are damaged should be replaced as
soon as possible.
Keep belts clean and dry
Seat belts should be kept clean and dry.
If belts become dirty, they can be
cleaned by using a mild soap solution
and warm water. Bleach, dye, strong
detergents or abrasives should not be
used because they may damage and
weaken the fabric.
When to replace seat belts
Entire in-use seat belt assembly or
assemblies should be replaced if the
vehicle has been involved in an accident.
This should be done even if no damage
is visible. Additional questions concerning seat belt operation should be directed
to an authorized Hyundai dealer.
CHILD RESTRAINT SYSTEM
Children riding in the car should sit in the
rear seat and must always be properly
restrained to minimize the risk of injury in
an accident, sudden stop or sudden
maneuver. According to accident statistics, children are safer when properly
restrained in the rear seats than in the
front seat. Larger children not in a child
restraint should use one of the seat belts
provided.
You should be aware of the specific
requirements in your state. Child and/or
infant safety seats must be properly
placed and installed in the rear seat. You
must use a commercially available child
restraint system that meets the requirements of the Federal Motor Vehicle Safety
Standards (FMVSS).
Children could be injured or killed in a
crash if their restraints are not properly
secured. For small children and babies, a
child seat or infant seat must be used.
Before buying a particular child restraint
system, make sure it fits your car seat
and seat belts, and fits your child. Follow
all the instructions provided by the manufacturer when installing the child
restraint system.
Safety features of your vehicle
WARNING
• A child restraint system must be
placed in the rear seat. Never
install a child or infant seat on the
front passenger’s seat. Should an
accident occur and cause the
passenger side air bag to deploy,
it could severely injure or kill an
infant or child seated in an infant
or child seat. Thus only use a
child restraint in the rear seat of
your vehicle.
• A seat belt or child restraint sys-
tem can become very hot if it is
left in a closed vehicle on a sunny
day, even if the outside temperature does not feel hot. Be sure to
check the seat cover and buckles
before placing a child there.
• When the child restraint system
is not in use, store it in the trunk
or fasten it with a seat belt so that
it will not be thrown forward in
the case of a sudden stop or an
accident.
• Children may be seriously injured
or killed by an inflating air bag.
All children, even those too large
for child restraints, must ride in
the rear seat.
321

Safety features of your vehicle
WARNING
To reduce the chance or serious or
fatal injuries:
• Children of all ages are safer
when restrained in the rear seat.
A child riding in the front passenger seat can be forcefully struck
by an inflating air bag resulting in
serious or fatal injuries.
• Always follow the instructions for
installation and use of the child
restraint maker.
• Always make sure the child seat
is secured properly in the car and
your child is securely restrained
in the child seat.
• Never hold a child in your arms or
lap when riding in a vehicle. The
violent forces created during a
crash will tear the child from your
arms and throw the child against
the car’s interior.
• Never put a seat belt over yourself and a child. During a crash,
the belt could press deep into the
child causing serious internal
injuries.
(Continued)
(Continued)
• Never leave children unattended
in a vehicle – not even for a short
time. The car can heat up very
quickly, resulting in serious
injuries to children inside. Even
very young children may inadvertently cause the vehicle to move,
entangle themselves in the windows, or lock themselves or others inside the vehicle.
• Never allow two children, or any
two persons, to use the same
seat belt.
• Children often squirm and reposition themselves improperly.
Never let a child ride with the
shoulder belt under their arm or
behind their back. Always properly position and secure children in
rear seat.
• Never allow a child to stand-up or
kneel on the seat or floorboard of
a moving vehicle. During a collision or sudden stop, the child
can be violently thrown against
the vehicles interior, resulting in
serious injury.
(Continued)
(Continued)
• Never use an infant carrier or a
child safety seat that «hooks»
over a seatback, it may not provide adequate security in an accident.
• Seat belts can become very hot,
especially when the car is parked
in direct sunlight. Always check
seat belt buckles before fastening them over a child.
• Always store or secure a child
seat, even when it is not in use.
During a collision or sudden
stop, the child seat could be
thrown inside the vehicle.
223

Rearward-facing child restraint system
Safety features of your vehicle
Forward-facing child restraint system
CRS
HNF1008
Using a child restraint system
For small children and babies, the use of
a child seat or infant seat is required.This
child seat or infant seat should be of
appropriate size for the child and should
be installed in accordance with the manufacturer’s instructions. It is further
required that the seat be placed in the
vehicle’s rear seat.Your vehicle is provided with child restraint hook holders for
installing the child seat or infant seat.
E2MS103005 E2BLD310
Placing a passenger seat belt into
the auto lock mode
The use of the auto lock mode will
ensure that the normal movement of the
child in the vehicle does not cause the
seat belt to be pulled out and loosen the
firmness of its hold on the child restraint
system. To secure a child restraint system, use the following procedure.
To install a child restraint system on the
outboard or center rear seats, do the following:
1. Place the child restraint system in the
seat and route the lap/shoulder belt
around or through the restraint, following the restraint manufacturer’s
instructions. Be sure the seat belt webbing is not twisted.
2. Fasten the lap/shoulder belt latch into
the buckle. Listen for the distinct “click”
sound.
Position the release button so that it is
easy to access in case of an emergency.
WARNING
A child can be seriously injured or
killed in a collision if the child
restraint is not properly anchored
to the car and the child is not properly restrained in the child restraint.
Always follow the child seat manufacturer’s instructions for installation and use.
323

Safety features of your vehicle
MMSA3028 MMSA3029 MMSA3030
3. Pull the shoulder portion of the seat
belt all the way out.When the shoulder
portion of the seat belt is fully extended, it will shift the retractor to the “Auto
Lock” (child restraint) mode.
4. Slowly allow the shoulder portion of
the seat belt to retract and listen for an
audible “clicking” or “ratcheting” sound.
This indicates that the retractor is in
the “Auto Lock” mode. If no distinct
sound is heard, repeat steps 3 and 4.
5. Remove as much slack from the belt
as possible by pushing down on the
child restraint system while feeding the
shoulder belt back into the retractor.
6. Push and pull on the child restraint
system to confirm that the seat belt is
holding it firmly in place. If it is not,
release the seat belt and repeat steps
2 through 6.
7. Double check that the retractor is in
the “Auto Lock” mode by attempting to
pull more of the seat belt out of the
retractor. If you cannot, the retractor is
in the “Auto Lock” mode.
To remove the child restraint, press the
release button on the buckle and then
pull the lap/shoulder belt out of the
restraint and allow the seat belt to retract
fully.
243

WARNING — Auto lock
mode
The lap/shoulder belt automatically
returns to the “emergency lock
mode” whenever the belt is allowed
to retract fully. Therefore, the preceding seven steps must be followed each time a child restraint is
installed.
If the retractor is not in the
Automatic Locking mode, the child
restraint can move when your vehicle turns or stops suddenly. A child
can be seriously injured or killed if
the child restraint is not properly
anchored to the car, including setting the retractor to the Automatic
Locking mode.
When the seat belt is allowed to
retract to its fully stowed position, the
retractor will automatically switch
from the “Auto Lock” mode to the
emergency lock mode for normal
adult usage.
1JBA3052
Securing a child restraint seat with
“Tether Anchor” system
Child restraint hook holders are located
on the shelf behind the rear seats.
Safety features of your vehicle
2GHA3300
1. Route the child restraint seat strap
over the seatback.
For vehicles with adjustable headrest,
route the tether strap under the headrest and between the headrest posts,
otherwise route the tether strap over
the top of the seatback.
2. Connect the tether strap hook to the
appropriate child restraint hook holder
and tighten to secure the seat.
325

Safety features of your vehicle
WARNING
When using the vehicle’s «Tether
Anchor» system to install a child
restraint system in the rear seat, all
unused vehicle rear seat belt metal
latch plates or tabs must be latched
securely in their seat belt buckles
and the seat belt webbing must be
retracted behind the child restraint
to prevent the child from reaching
and taking hold of unretracted seat
belts. Unlatched metal latch plates
or tabs may allow the child to reach
the unretracted seat belts which
may result in strangulation and a
serious injury or death to the child
in the child restraint.
WARNING — Tether strap
• A child can be seriously injured
or killed in a collision if the child
restraint is not properly
anchored. Always follow the child
seat manufacturer’s instructions
for installation and use.
• Never mount more than one child
restraint to a single tether or to a
single lower anchorage point.The
increased load caused by multiple seats may cause the tethers
or anchorage points to break,
causing serious injury or death.
WARNING
Check that the child restraint system is secure by pushing and
pulling it in different directions.
Incorrectly fitted child restraints
may swing, twist, tip or separate
causing death or serious injury.
— Child restraint
check
WARNING
— Child restraint anchorage
• Child restraint anchorages are
designed to withstand only those
loads imposed by correctly fitted
child restraints. Under no circumstances are they to be used for
adult seat belts or harnesses or
for attaching other items or
equipment to the vehicle.
• The tether strap may not work
properly if attached somewhere
other than the correct tether
anchor.
263

B230D01NF
Child seat lower anchors
Some child seat manufacturers make
child restraint seats that are labeled as
International Standards Organization
Fixed (ISOFIX) or ISOFIX-compatible
child restraint seats. These seats include
two rigid or webbing mounted attachments that connect to two ISOFIX
anchors at specific seating positions in
your vehicle. This type of child restraint
seat eliminates the need to use seat
belts to attach the child seat in the rear
seats.
B230D03NF
ISOFIX anchors have been provided in
your vehicle. The ISOFIX anchors are
located in the left and right outboard rear
seating positions. Their locations are
shown in the illustration. There is no
ISOFIX anchor provided for the center
rear seating position.
The ISOFIX anchors are located
between the seatback and the seat cushion of the rear seat left and right outboard
seating positions.
Safety features of your vehicle
Follow the child seat manufacturer’s
instructions to properly install child
restraint seats with ISOFIX or ISOFIXcompatible attachments.
Once you have installed the ISOFIX child
restraint, assure that the seat is properly
attached to the ISOFIX and tether
anchors. Also, test the child restraint seat
before you place the child in it. Tilt the
seat from side to side. Also try to tug the
seat forward. Check to see if the anchors
hold the seat in place.
WARNING
When using the vehicle’s «ISOFIX»
system to install a child restraint
system in the rear seat, all unused
vehicle rear seat belt metal latch
plates or tabs must be latched
securely in their seat belt buckles
and the seat belt webbing must be
retracted behind the child restraint
to prevent the child from reaching
and taking hold of unretracted seat
belts. Unlatched metal latch plates
or tabs may allow the child to reach
the unretracted seat belts which
may result in strangulation and a
serious injury or death to the child
in the child restraint.
327

Safety features of your vehicle
WARNING — ISOFIX
Anchors
• A child can be seriously injured
or killed in a collision if the child
restraint is not properly
anchored. Always follow the child
seat manufacturer’s instructions
for installation and use.
• Never install a child restraint
using the ISOFIX anchors at the
center position of the rear seat. In
a crash, the ISOFIX anchors may
break if a car seat is improperly
placed in the center position
resulting in serious or fatal
injuries. Only place a ISOFIX or
ISOFIX-compatible child seat in
the left or right out-board rear
seating positions (as shown) to
the appropriate ISOFIX anchors
provided.
• Never mount more than one child
restraint to a single tether or to a
single lower anchorage point.The
increased load caused by multiple seats may cause the tethers
or anchorage points to break,
causing serious injury or death.
WARNING
Install the child restraint seat fully
rearward against the seatback with
the seatback in a vertical position,
not reclined.
283

AIR BAG — ADVANCED SUPPLEMENTAL RESTRAINT SYSTEM
Safety features of your vehicle
Driver’s air bag
6
6
* : if equipped
Front passenger’s
air bag
4
4
2
3
1
7
5
9
3
8
5
Side impact air bag*
Occupant classification system
Curtain Air bag*
Side impact sensor*
Driver seat position
sensor
Front impact sensor
SRS control module
OHD036026/OHD036023/OHD036024/OUN026109/OUN026110/OHD036125/OHD036030/OHD036029/OVQ036096N/OVQ036095N/OHD036028
329

Safety features of your vehicle
SRS components and functions
The SRS consists of the following components:
1. Front Impact Sensors
2. “PASSENGER AIR BAG OFF”
Indicator (Front passenger’s seat only)
3. SRS «AIR BAG» warning light
4. Passenger’s Air bag Module
5. Driver’s Air Bag Module
6. SRS Control Module (SRSCM)
7. Occupant Classification System
(Front passenger’s seat only)
8. Driver’s Seat Track Position Sensor
9. Driver’s and Front Passenger’s Seat
Belt Buckle Sensors
10. Side Impact Sensors*
11. Retractor Pre-tensioner Assemblies
12. Side Air Bag Modules*
13. Curtain Air bag Modules*
* : If equipped
The SRSCM continually monitors all
SRS components while the ignition
switch is ON to determine if a crash
impact is severe enough to require air
bag deployment or pre-tensioner seat
belt deployment.
The SRS AIR BAG warning light on the
instrument panel will illuminate for about
6 seconds after the ignition switch is
turned to the ON position, after which the
AIR BAG warning light should go out.
If any of the following conditions occurs,
this indicates a malfunetion of the SRS.
Have an authorized Hyundai dealer
inspect the air bag system as soon as
possible.
• The light does not turn on briefly when
you turn the ignition ON.
• The light stays on after illuminating for
approximately 6 seconds.
• The light comes on while the vehicle is
in motion.
Driver’s front air bag (1)
B240B01L
The air bag modules are located both in
the center of the steering wheel and in
the front passenger’s panel above the
glove box. When the SRSCM detects a
sufficiently severe impact to the front of
the vehicle, it will automatically deploy
the front air bags.
303

Safety features of your vehicle
Driver’s front air bag (2) Driver’s front air bag (3)
B240B02L B240B03L
Upon deployment, tear seams molded
directly into the pad covers will separate
under pressure from the expansion of the
air bags. Further opening of the covers
then allows full inflation of the air bags.
A fully inflated air bag, in combination
with a properly worn seat belt, slows the
driver’s or the passenger’s forward
motion, reducing the risk of head and
chest injury.
After complete inflation, the air bag
immediately starts deflating, enabling the
driver to maintain forward visibility and
the ability to steer or operate other controls.
Passenger’s front air bag
B240B05L
WARNING
• Do not install or place any accessories (drink holder, cassette
holder, sticker, etc.) on the front
passenger’s panel above the
glove box in a vehicle with a passenger’s air bag. Such objects
may become dangerous projectiles and cause injury if the passenger’s air bag inflates.
• When installing a container of liquid air freshener inside the vehicle, do not place it near the
instrument cluster nor on the
instrument panel surface.
It may become a dangerous projectile and cause injury if the passenger’s air bag inflates.
331
 Loading…
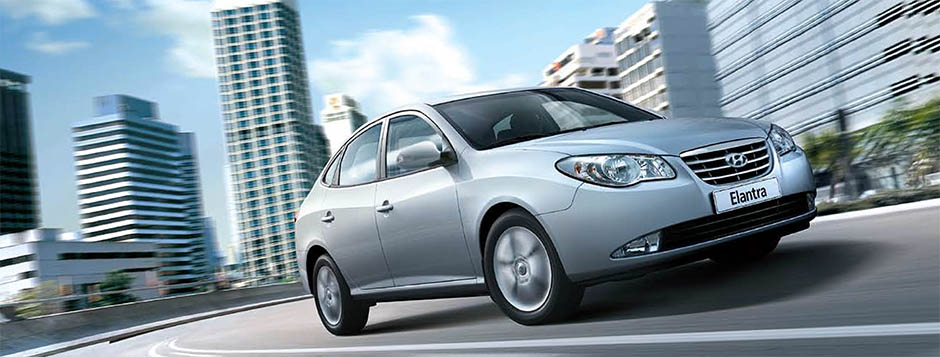
Руководство по эксплуатации и техническому обслуживанию Hyundai Elantra Mark IV (HD/J4, Avante) с бензиновыми двигателями: G4FС 1.6 л (1591 см³) 122 л.с./90 кВт, G4GF Beta II 2.0 л (1975 см³) 140-143 л.с./102-105 кВт и дизельным D4FB U-Line CRDi 1.6 л (1582 см³) 90-115-128 л.с./66-84-94 кВт; Инструкция пользователя легковой автомобиль малого среднего класса Хендэ (Хундай) Элантра с кузовами четырёхдверный седан модели четвертого поколения выпуска с 2006 по 2010 год
ЕСЛИ ВЫ ВИДИТЕ ОШИБКУ 406 Not Acceptable и не видите документ, то скорей всего у Вас IP РФ и его надо сменить, на любой другой страны, с помощью VPN ( Scribd и SlideShare блокируют посетителей с Российским IP).
Hyundai Elantra HD Видео замена ремня генератора, ролика натяжения и рамки магнитолы (Хундай Элантра 06-10)
Hyundai Elantra HD Mark IV общая информация (Хёндэ Элантра 4 2006-2010)
Системы безопасности автомобиля
Ремни безопасности с преднатяжителем (при наличии)
В данном автомобиле ремни безопасности водителя и пассажира, находящегося на переднем сиденье, оборудованы преднатяжителями. Это устройство предназначено для того, чтобы плотнее прижать ремнями безопасности тело человека при лобовых столкновениях определенного типа. Преднатяжители ремней безопасности могут начать работать при серьезном лобовом столкновении, одновременно с раскрытием подушек безопасности. В момент неожиданной остановки автомобиля или при очень резком наклоне человека вперед устройство аварийной блокировки ремней безопасности зафиксирует положение ремня.
При лобовых столкновениях определенного типа произойдет срабатывание преднатяжителя ремней безопасности, которое плотнее прижмет ремень к телу человека. Если датчики системы дополнительного натяжения ремней безопасности определят, что ремни водителя или переднего пассажира натянуты слишком сильно при срабатывании системы, ограничитель нагрузки, встроенный в блок дополнительного натяжения уменьшит усилие, приложенное к данному ремню.
Система преднатяжителей ремней безопасности состоит из следующих основных элементов. Их расположение показано на иллюстрации:
1. Контрольная лампа неисправности подушек безопасности (SRS)
2. Преднатяжитель, расположенный на катушке ремня
3. Блок управления подушками безопасности (SRS).
• Срабатывание обеих преднатяжителей ремней безопасности при аварии (и водителя, и переднего пассажира) произойдет при лобовых столкновениях определенного типа. Преднатяжители ремней безопасности могут начать работать при серьезном лобовом столкновении, одновременно с раскрытием подушек безопасности. Преднатяжители не сработают, если в момент столкновения ремни безопасности не были пристегнуты.
• Срабатывания преднатяжителей ремней безопасности при аварии может сопровождаться громким шумом и появлением в салоне облачка тонко дисперсной пыли, которое может быть похоже на дым. Все это является нормальным следствием работы устройства и не несет в себе никакой опасности.
• Несмотря на свою безвредность, мелкодисперсная пыль может вызывать раздражение кожи; нежелательным является ее попадание в органы дыхания в большом количестве. После дорожно-транспортного происшествия, которое сопровождалось срабатыванием устройства дополнительного натяжения ремня во время столкновения, тщательно вымойте все открытые участки кожи. Для максимальной эффективности работы ремней безопасности, оснащенных преднатяжителями:
1. Ремень безопасности должен работать в соответствии с требованиями и должен быть нормально отрегулирован. Ознакомьтесь со всей важной информацией и мерами безопасности, имеющими отношение к обеспечению безопасности людей, находящихся в автомобиле,
— в том числе к ремням безопасности и подушкам безопасности,
— которые приведены в данном руководстве.
2. Водитель и пассажиры должны всегда быть пристегнуты ремнями безопасности должным образом.
Поскольку датчик, который дает команду на раскрытие подушек безопасности, соединен с преднатяжителями ремней безопасности, лампа, сигнализирующая об отказе системы подушек безопасности SRS на приборной панели, будет гореть в течение около 6 секунд после включения зажигания (поворота ключа в замке зажигания в положение ON); после этого она должна погаснуть.
• Если существует отказ в системе преднатяжителей ремней безопасности, эта сигнальная лампа будет гореть даже в случае исправности системы подушек безопасности SRS. Если лампа, сигнализирующая о неисправности системы подушек безопасности SRS, не загорается при включении зажигания, или продолжает гореть после того, как она загорелась приблизительно на 6 секунд, или загорается во время движения автомобиля, необходимо как можно скорее обратиться к авторизованному дилеру компании Hyundai для проверки состояния преднатяжителей ремней безопасности или системы подушек безопасности SRS.
• Преднатяжители ремней безопасности предназначены только для одноразовой работы. После их срабатывания необходимо заменить соответствующую систему ремней безопасности. Все ремни безопасности, которые использовались во время столкновения, вне зависимости от их типа, подлежат обязательной замене.
• Механизмы узлов преднатяжителей ремней безопасности во время своей работы разогреваются до высокой температуры. Не прикасайтесь к ним в течение нескольких минут после их срабатывания.
• Не пытайтесь самостоятельно провести осмотр или замену ремней безопасности, оборудованных преднатяжителями. Эти работы должны выполняться у авторизованного дилера компании Hyundai.
• Не стучите по узлам преднатяжителей ремней безопасности.
• Не пытайтесь выполнять любые работы по обслуживанию или ремонту системы преднатяжителей ремней безопасности.
• Неправильное обращение с узлами преднатяжителей ремней безопасности, несоблюдение предупреждений о недопустимости применения в их отношении ударного воздействия, их доработки, проверки, обслуживания или замены может привести к их отказу или случайному срабатыванию и к получению серьезных травм.
• Всегда во время движения автомобиля все находящиеся в нем люди (и водитель, и пассажиры) должны быть пристегнуты ремнями безопасности.
Меры предосторожности при использовании ремней безопасности Малолетний ребенок Следует быть знакомым со специальными требованиями, действующими в стране эксплуатации автомобиля. На заднем сиденье должны быть установлены в соответствии с нормами детские кресла. Более подробная информация об использовании этих кресел приведена в пункте “Детские кресла” в настоящем разделе. (продолжение)
• Не стучите по узлам преднатяжителей ремней безопасности.
• Не пытайтесь выполнять любые работы по обслуживанию или ремонту системы преднатяжителей ремней безопасности.
• Неправильное обращение с узлами преднатяжителей ремней безопасности, несоблюдение предупреждений о недопустимости применения в их отношении ударного воздействия, их доработки, проверки, обслуживания или замены может привести к их отказу или случайному срабатыванию и к получению серьезных травм.
• Всегда во время движения автомобиля все находящиеся в нем люди (и водитель, и пассажиры) должны быть пристегнуты ремнями безопасности.
Водитель и все пассажиры автомобиля всегда должны быть пристегнуты ремнями безопасности. Ремни безопасности и детские сиденья уменьшают вероятность получения серьезных травм или повреждений смертельного характера всеми людьми, находящимися в автомобиле, в случае столкновения или внезапной остановки. Без ремня безопасности пассажиры могут оказаться слишком близко от раскрывающейся подушки безопасности, столкнуться с элементами интерьера или быть выброшены из автомобиля. Использование должным образом ремней безопасности существенно уменьшает вероятность возникновения таких угроз.
Для вашей безопасности и прохождения ТО можно приобрести огнетушитель.
Всегда соблюдайте меры предосторожности в отношении ремней безопасности. подушек безопасности и сидений, содержащиеся в данном руководстве. Необходимо обеспечить, чтобы все люди, находящиеся в автомобиле, включая детей любого возраста, были пристегнуты ремнями безопасности должным образом. Никогда не держите ребенка на руках или на коленях во время движения автомобиля. Силы большой величины, возникающие при столкновении, вырвут ребенка из рук и приведут к его удару об элементы салона автомобиля. Всегда используйте специальное детское кресло, соответствующее росту и весу ребенка.
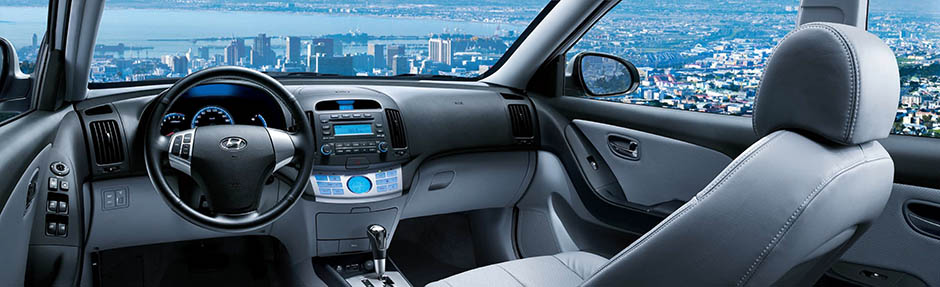
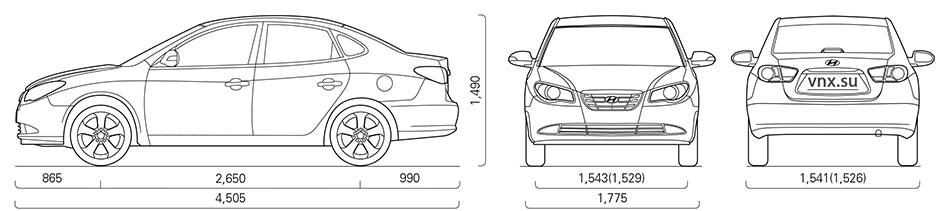
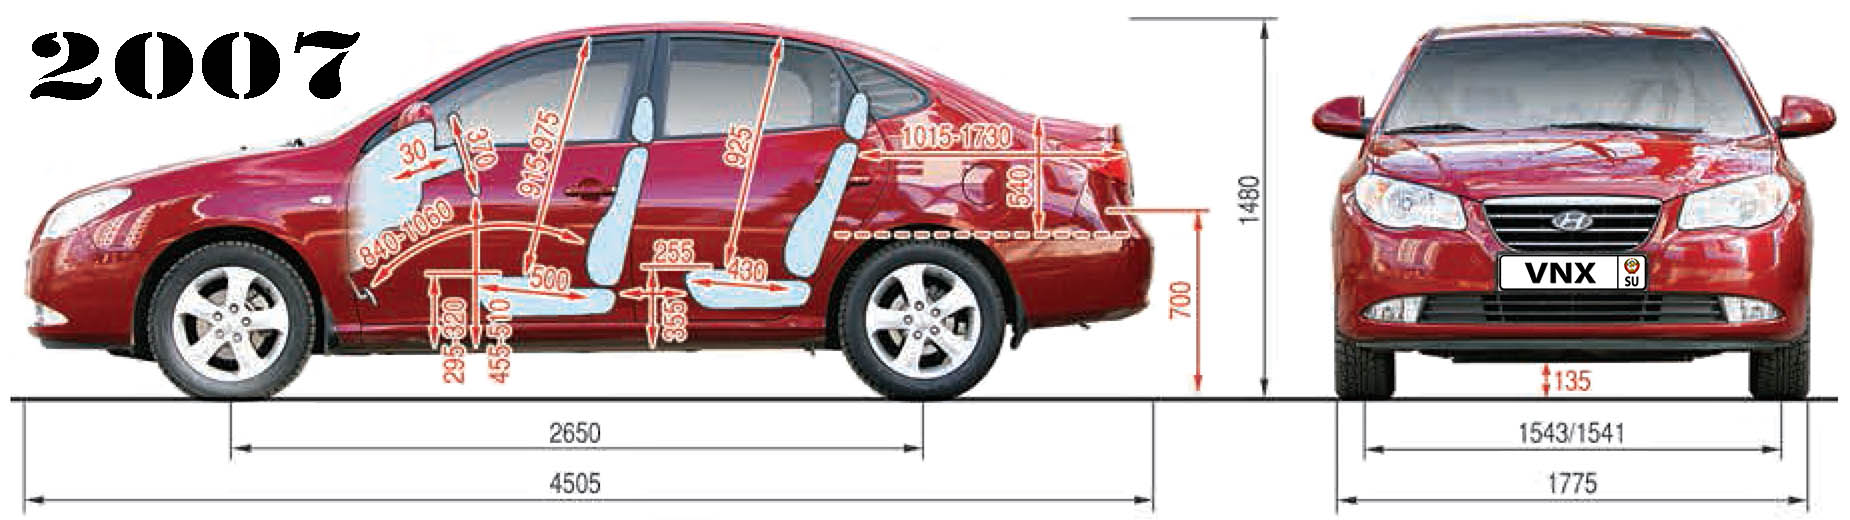
| № | Спецификация / Specs | Данные |
| Габариты (мм/mm) и масса (кг/kg) / Dimensions and Weight | ||
| 1 | Длина / Length | 4505 |
| 2 | Ширина (без/с зеркалами) / Width | 1775 |
| 3 | Высота (загружен/пустой) / Height | 1480-1490 |
| 4 | Колёсная база / Wheelbase | 2650 |
| 5 | Дорожный просвет (клиренс) / Ground clearance | 150⇒135 |
| 6 | Снаряжённая масса / Total (curb) weight | 1221 |
| Полная масса / Gross (max.) weight | 1730 | |
|
Двигатель / Engine |
||
| 7 | Тип / Engine Type, Code | Бензиновый, жидкостного охлаждения, четырехтактный, с электронной системой регулирования фаз CVVT, Beta II (G4GC) |
| 8 | Количество цилиндров / Cylinder arrangement: Total number of cylinders, of valves | 4-цилиндровый, рядный, 16V, DOHC с верхним расположением двух распределительных валов |
| 9 | Диаметр цилиндра / Bore | 82.0 мм |
| 10 | Ход поршня / Stroke | 93.5 мм |
| 11 | Объём / Engine displacement | 1975 см³ |
| 12 | Система питания / Fuel supply, Aspiration | Многоточечный впрыск топлива MPI |
| Атмосферный | ||
| 13 | Степень сжатия / Compression ratio | 10.1:1 |
| 14 | Максимальная мощность / Max. output power kW (HP) at rpm | 102 кВт (140 л.с.) при 6000 об/мин |
| 15 | Максимальный крутящий момент / Max. torque N·m at rpm | 184 Нм при 4600 об/мин |
|
Трансмиссия / Transmission |
||
| 16 | Сцепление / Clutch type | Однодисковое, сухое, с диафрагменной нажимной пружиной и гасителем крутильных колебаний, постоянно замкнутого типа |
| 17 | КПП / Transmission type | МКПП 5 пятиступенчатая механическая, двухвальная, с синхронизаторами на всех передачах переднего хода |
О Книге
- Название: Hyundai Elantra HD Руководство по эксплуатации
- Бензиновые двигатели: G4FС 1.6 л (1591 см³) 122 л.с./90 кВт, G4GF Beta II 2.0 л (1975 см³) 140-143 л.с./102-105 кВт и дизельным D4FB U-Line CRDi 1.6 л (1582 см³) 90-115-128 л.с./66-84-94 кВт
- Выпуск с 2006 года
- Серия: «Owner Guide»
- Год издания: 2008
- Автор: Коллектив авторов
- Издательство: «Hyundai Motor Company»
- Формат: PDF
- Страниц в книге: 377
- Размер: 10.54 МБ
- Язык: Русский
- Количество электросхем: 0