
Перейти к контенту
Магнитолы Panasonic

- Размер инструкции: 1.45 Мб
- Формат файла: pdf
Если вы потеряли инструкцию от магнитолы Panasonic RX-D29, можете скачать файл для просмотра на компьютере или печати.
Инструкция для магнитолы Panasonic RX-D29 на русском языке. В руководстве описаны возможности и полезные функции, а также правила эксплуатации. Перед использованием внимательно ознакомьтесь с инструкцией.
Чтобы не читать всю инструкцию вы можете выполнить поиск по содержимому внутри инструкции и быстро найти необходимую информацию. Рекомендации по использованию помогут увеличить срок службы магнитолы Panasonic RX-D29. Если у вас появилась проблема, то найдите раздел с описанием неисправностей и способами их решения. В нем указаны типичные поломки и способы их решения.
Страницы и текст этой инструкции
 Руководство пользователя магнитолы Panasonic RX-D27_RX-D29
 Информация отображена на картинке
 Информация отображена на картинке
 Информация отображена на картинке
 Информация отображена на картинке
Как использовать наш сайт инструкций OnlineManuals.ru
Наша цель состоит в том, чтобы предоставить вам быстрый доступ к содержанию инструкции для магнитолы Panasonic RX-D27_RX-D29.
С помощью онлайн просмотра, Вы можете быстро просмотреть содержимое инструкции и найти решение проблемы с магнитолы Panasonic RX-D27_RX-D29.
Для Вашего удобства
Если листать руководство пользователя магнитолы Panasonic RX-D27_RX-D29 прямо на сайте, не очень удобно для Вас, есть два возможных решения:
• Просмотр в полноэкранном режиме — легко просмотреть руководство пользователя (без загрузки его на свой компьютер), Вы можете использовать режим полноэкранного просмотра.
Для просмотра инструкции пользователя магнитолы Panasonic RX-D27_RX-D29 на полном экране, используйте кнопку «Открыть в Pdf-viewer».
• Загрузка на компьютер — Вы можете также скачать Руководство пользователя магнитолы Panasonic RX-D27_RX-D29 на свой компьютер и сохранить его в файлах.
Многие люди предпочитают читать документы не на экране, а в печатной версии.
Возможность печати руководства пользователя также была предусмотрена на нашем сайте,
и вы можете использовать ее, нажав на иконку «печать» в Pdf-viewer.
Нет необходимости печатать все руководство магнитолы Panasonic RX-D27_RX-D29, можно выбрать только нужные страницы инструкции.

Portable Stereo CD System
Operating Instructions
Model No. RX-D29
RX-D27
Dear customer
Thank you for purchasing this product.
Before connecting, operating or adjusting this product, please read these instructions completely.
Please keep this manual for future reference.
These operating instructions fundamentally explain the operation of RX-D29.
IMPORTANT SAFETY INSTRUCTIONS
Read these operating instructions carefully before using the unit. Follow the safety instructions on the unit and the applicable safety instructions listed below. Keep these operating instructions handy for future reference.
1)Read these instructions.
2)Keep these instructions.
3)Heed all warnings.
4)Follow all instructions.
5)Do not use this apparatus near water.
6)Clean only with dry cloth.
7)Do not block any ventilation openings. Install in accordance with the manufacturer’s instructions.
 Do not install near any heat sources such as radiators, heat registers, stoves, or other apparatus (including amplifiers) that produce heat.
9)Do not defeat the safety purpose of the polarized or grounding-type plug. A polarized plug has two blades with one wider than the other.
A grounding-type plug has two blades and a third grounding prong.
The wide blade or the third prong are provided for your safety. If the provided plug does not fit into your outlet, consult an electrician for replacement of the obsolete outlet.
10)Protect the power cord from being walked on or pinched particularly at plugs, convenience receptacles, and the point where they exit from the apparatus.
11)Only use attachments/accessories specified by the manufacturer.
12)Use only with the cart, stand, tripod, bracket, or table specified by the manufacturer, or sold with the apparatus. When a cart is used, use caution when moving the cart/apparatus combination to avoid injury from tip-over.
13)Unplug this apparatus during lightning storms or when unused for long periods of time.
14)Refer all servicing to qualified service personnel. Servicing is required when the apparatus has been damaged in any way, such as powersupply cord or plug is damaged, liquid has been spilled or objects have fallen into the apparatus, the apparatus has been exposed to rain or moisture, does not operate normally, or has been dropped.
CAUTION!
THIS PRODUCT UTILIZES A LASER.
USE OF CONTROLS OR ADJUSTMENTS OR PERFORMANCE OF PROCEDURES OTHER THAN THOSE SPECIFIED HEREIN MAY RESULT IN HAZARDOUS RADIATION EXPOSURE.
DO NOT OPEN COVERS AND DO NOT REPAIR YOURSELF. REFER SERVICING TO QUALIFIED PERSONNEL.
CAUTION:
TO PREVENT ELECTRIC SHOCK MATCH WIDE BLADE OF PLUG TO WIDE SLOT, FULLY INSERT.
WARNING:
TO REDUCE THE RISK OF FIRE, ELECTRIC SHOCK OR PRODUCT DAMAGE, DO NOT EXPOSE THIS APPARATUS TO RAIN, MOISTURE, DRIPPING OR SPLASHING AND THAT NO OBJECTS FILLED WITH LIQUIDS, SUCH AS VASES, SHALL BE PLACED ON THE APPARATUS.
CAUTION!
DO NOT INSTALL OR PLACE THIS UNIT IN A BOOKCASE, BUILTIN CABINET OR IN ANOTHER CONFINED SPACE. ENSURE THE UNIT IS WELL VENTILATED. TO PREVENT RISK OF ELECTRIC SHOCK OR FIRE HAZARD DUE TO OVERHEATING, ENSURE THAT CURTAINS AND ANY OTHER MATERIALS DO NOT OBSTRUCT THE VENTILATION VENTS.
Inside of product
2
Use of batteries
•Align the poles (+ and –) properly when inserting the batteries.
•Do not mix old and new batteries or different types of batteries.
•Do not recharge ordinary dry cell batteries.
•Do not heat or disassemble the batteries. Do not allow them to contact flame or water.
•If the unit is not going to be used for a long time or if the unit is to be powered exclusively by AC power, remove the batteries and store them in a cool, dark place.
•Do not keep together with metallic objects such as necklaces.
•Do not use rechargeable type batteries.
•Do not use batteries if the covering has been peeled off.
Mishandling of batteries can damage other items, cause damage to the unit, and may cause a fire through short-circuiting or electrolyte leakage. If electrolyte leaks from the batteries, consult your dealer.
Wash thoroughly with water if electrolyte comes in contact with any part of your body.
Listening caution
Selecting fine audio equipment such as the unit you’ve just purchased is only the start of your musical enjoyment. Now it’s time to consider how you can maximize the fun and excitement your equipment offers.
This manufacturer and the Electronic Industries Association’s Consumer
Electronics Group want you to get the most out of your equipment by playing it at a safe level. One that lets the sound come through loud and clear without annoying blaring or distortion—and, most importantly, without affecting your sensitive hearing.
We recommend you to avoid prolonged exposure to excessive noise.
Sound can be deceiving. Over time your hearing “comfort level” adapts to higher volumes of sound. So what sounds “normal” can actually be loud and harmful to your hearing.
Guard against this by setting your equipment at a safe level BEFORE your hearing adapts.
To establish a safe level:
•Start your volume control at a low setting.
•Slowly increase the sound until you can hear it comfortably and clearly, and without distortion.
Once you have established a comfortable sound level:
• Set the dial and leave it there.
Taking a minute to do this now will help to prevent hearing damage or loss in the future. After all, we want you listening for a lifetime.
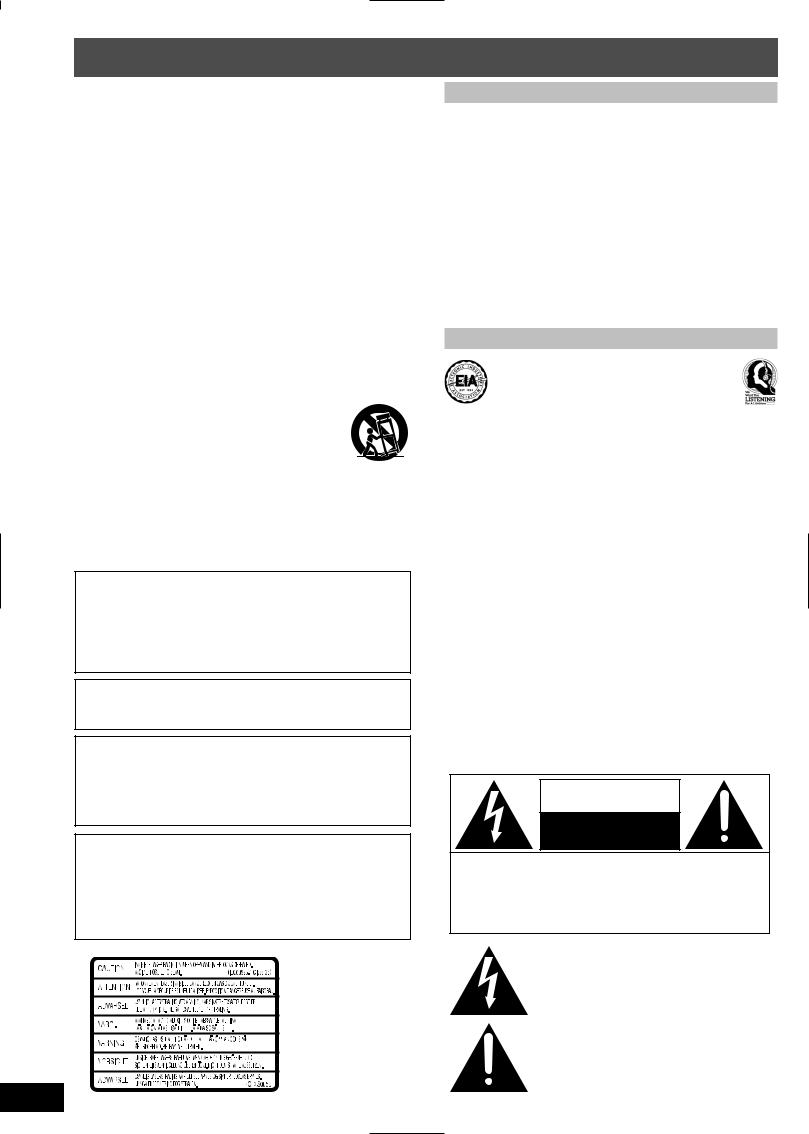
THE FOLLOWING APPLIES ONLY IN THE U.S.A. AND CANADA
The following mark and symbols are located on bottom of the unit.
CAUTION
RISK OF ELECTRIC SHOCK
DO NOT OPEN
CAUTION: TO REDUCE THE RISK OF ELECTRIC
SHOCK, DO NOT REMOVE SCREWS.
NO USER-SERVICEABLE PARTS
INSIDE.
REFER SERVICING TO QUALIFIED
SERVICE PERSONNEL.
The lightning flash with arrowhead symbol, within an equilateral triangle, is intended to alert the user to the presence of uninsulated “dangerous voltage” within the product’s enclosure that may be of sufficient magnitude to constitute a risk of electric shock to persons.
The exclamation point within an equilateral triangle is intended to alert the user to the presence of important operating and maintenance (servicing) instructions in the literature accompanying the appliance.
RQTT0585
Supplied accessories
Please check and identify the supplied accessories.
Use numbers indicated when ordering replacements or optional accessories from your Panasonic dealer.
In the U.S.A. to order accessories, refer to “Accessory Purchases” on page 11.
|
AC power supply cord (polarized) (RJA0065-1D) ………………….. |
1pc. |
|
Remote control transmitter …………………………………………………. |
1pc. |
|
For RX-D29:(EUR648280) |
|
|
For RX-D27:(EUR648278) |
The model number and serial number of this product can be found on either the back or the bottom of the unit.
Please note them in the space provided below and keep for future reference.
MODEL NUMBER
SERIAL NUMBER
User memo:
DATE OF PURCHASE
DEALER NAME
DEALER ADDRESS
TELEPHONE NUMBER
Table of contents |
|
|
IMPORTANT SAFETY INSTRUCTIONS …………………………………….. |
2 |
|
Supplied accessories …………………………………………………………….. |
3 |
|
Maintenance ………………………………………………………………………….. |
3 |
|
Power sources ………………………………………………………………………. |
4 |
|
Concerning the remote control ………………………………………………. |
4 |
|
Controls ………………………………………………………………………………… |
5 |
|
Listening to radio broadcasts …………………………….. |
6 |
|
Listening to CDs ………………………………………………… |
7 |
|
Playing MP3 RX-D29 only …………………………………………………. |
8 |
|
Listening to tapes ……………………………………………… |
8 |
|
Recording …………………………………………………………. |
9 |
|
Setting the time …………………………………………………. |
9 |
|
Using the timers ………………………………………………. |
10 |
|
3D sound with the Sound Virtualizer ……………………………………… |
10 |
|
Sound quality ………………………………………………………………………. |
10 |
|
Using headphones ……………………………………………………………….. |
11 |
|
Audio software …………………………………………………………………….. |
11 |
|
Limited Warranty (ONLY FOR U.S.A.) …………………………………….. |
11 |
|
Troubleshooting guide …………………………………………… |
Back cover |
|
Specifications ………………………………………………………… |
Back cover |
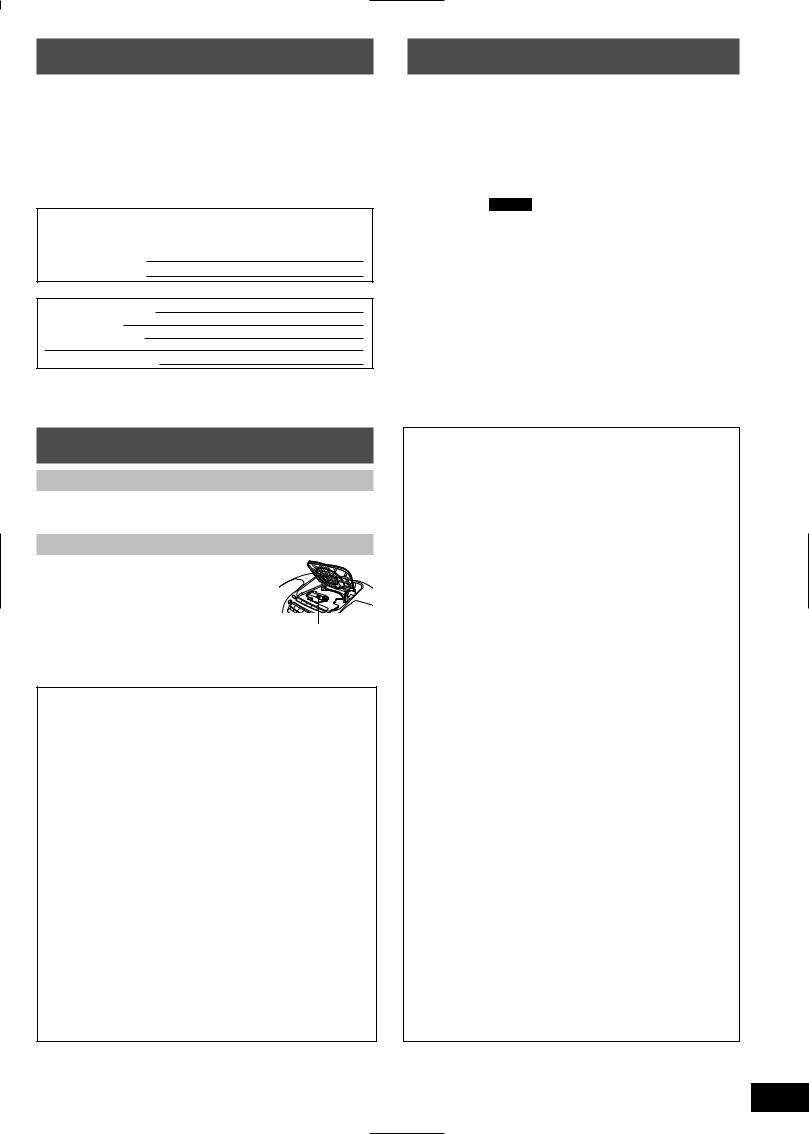
Maintenance
Cleaning inside the deck
Clean the heads regularly to assure good quality playback and recording.
Use a cleaning tape (not included).
Care of the CD lens
Clean the lens regularly to prevent malfunctions.
Use a blower to remove dust and a cotton swab if it is extremely dirty.
Recommended product:
Lens cleaner kit (part no. SZZP1038C).
Lens
THE FOLLOWING APPLIES ONLY IN THE U.S.A.
CAUTION:
This equipment has been tested and found to comply with the limits for a Class B digital device, pursuant to Part 15 of the FCC Rules.
These limits are designed to provide reasonable protection against harmful interference in a residential installation. This equipment generates, uses and can radiate radio frequency energy and, if not installed and used in accordance with the instructions, may cause harmful interference to radio communications. However, there is no guarantee that interference will not occur in a particular installation. If this equipment does cause harmful interference to radio or television reception, which can be determined by turning the equipment off and on, the user is encouraged to try to correct the interference by one or more of the following measures:
•Reorient or relocate the receiving antenna.
•Increase the separation between the equipment and receiver.
•Connect the equipment into an outlet on a circuit different from that to which the receiver is connected.
•Consult the dealer or an experienced radio/TV technician for help. Any unauthorized changes or modifications to this equipment would void the user’s authority to operate this device.
This device complies with Part 15 of the FCC Rules. Operation is subject to the following two conditions: (1) This device may not cause harmful interference, and (2) this device must accept any interference received, including interference that may cause undesired operation.
Product Service
1.Damage requiring service —The unit should be serviced by qualified service personnel if:
(a)The AC power supply cord or AC adaptor has been damaged; or
(b)Objects or liquids have gotten into the unit; or
(c)The unit has been exposed to rain; or
(d)The unit does not operate normally or exhibits a marked change in performance; or
(e)The unit has been dropped or the cabinet damaged.
2.Servicing—Do not attempt to service the unit beyond that described in these operating instructions. Refer all other servicing to authorized servicing personnel.
3.Replacement parts—When parts need replacing ensure the servicer uses parts specified by the manufacturer or parts that have the same characteristics as the original parts. Unauthorized substitutes may result in fire, electric shock, or other hazards.
4.Safety check—After repairs or service, ask the servicer to perform safety checks to confirm that the unit is in proper working condition.
Product information
For product information or assistance with product operation:
In the U.S.A., refer to “Customer Services Directory” on page 11.
For assistance in the continental U.S.A. in obtaining repairs please ship the product to:
Panasonic Services Company — Customer Servicenter Suite B 4900 George McVay Drive
McAllen, TX 78503
In Puerto Rico contact the Panasonic Sales Company. Tel.(787) 750-4300 Fax.(787) 768-2910
When shipping the unit carefully pack and send it prepaid, adequately insured and preferably in the original carton. Include a letter detailing the complaint and provide a day time phone number where you can be reached.
IF REPAIR IS NEEDED DURING THE WARRANTY PERIOD THE PURCHASER WILL BE REQUIRED TO FURNISH A SALES RECEIPT/PROOF OF PURCHASE INDICATING DATE OF PURCHASE, AMOUNT PAID AND PLACE OF PURCHASE. CUSTOMER WILL BE CHARGED FOR THE REPAIR OF ANY UNIT RECEIVED WITHOUT SUCH PROOF OF PURCHASE.
Also, the purchaser will be responsible for shipping the unit to the above address.
In Canada, contact the Panasonic Canada Inc. Customer Care Centre at 905-624-5505, or visit the website (www.panasonic.ca), or an authorized Servicentre closest to you.
3
RQTT0585
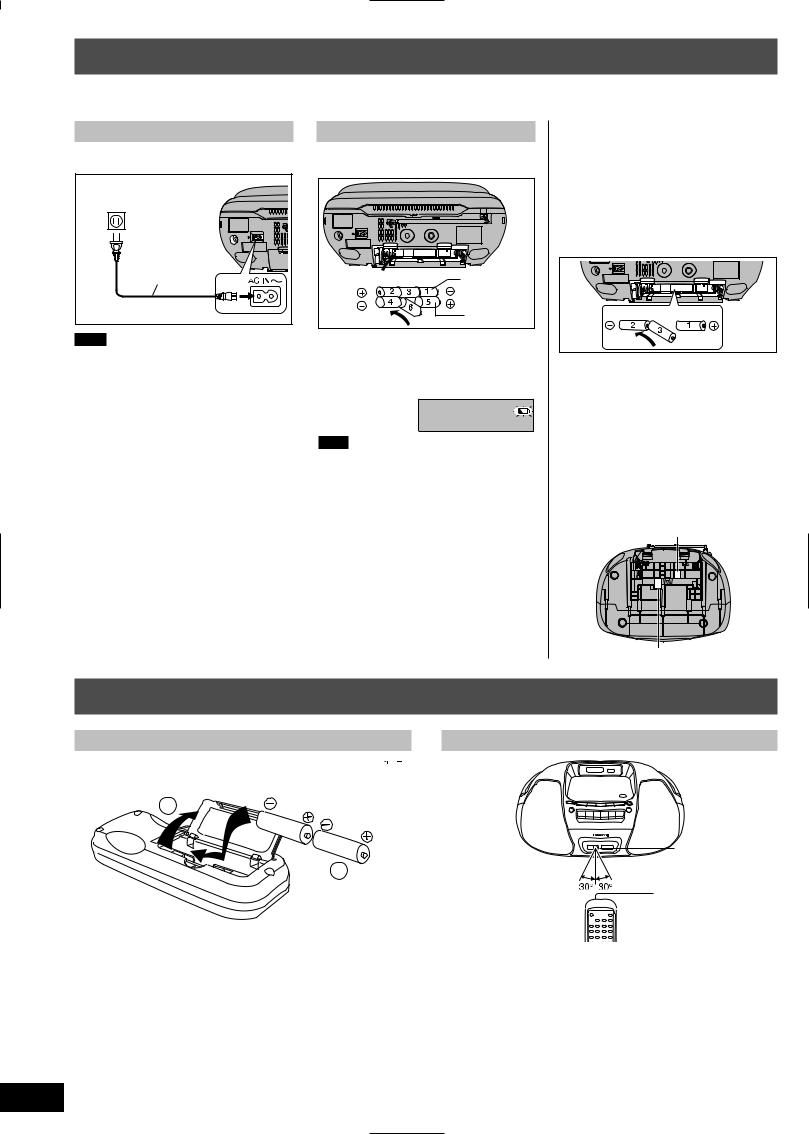
Power sources
The unit can be powered with household AC power or dry cell batteries (not included).
Insert memory batteries (not included) to save the current time, stored timer settings and radio stations.
Using a household AC outlet
Connect the AC power supply cord firmly to the unit and the outlet.
|
Household AC outlet |
|
(AC 120 V, 60 Hz) |
|
AC power cord |
|
(included) |
|
Note |
The included AC power supply cord is for use with this unit only. Do not use it with other equipment.
Using batteries (not included)
The unit cannot be powered by batteries if the AC power supply cord is connected.
|
(R14/LR14, C, UM-2) |
Inner row |
|
Outer row |
When to change the batteries
When the battery indicator begins flashing, replace all 6 of the batteries. It is also a good idea to replace all the batteries before recording.
Note
Before playing starts the battery indicator may flash although the batteries are not drained. It appears correctly once you start play.
Memory back-up
Insert batteries (not included) to save the current time, timer settings and radio stations you have set. If memory batteries are not used, memory items are erased in the following situations:
•Power failures,
•The AC power supply cord is disconnected from the power outlet,
•The AC power supply cord is connected to the
unit while the unit is being powered by batteries. These batteries do not power the unit.
(R6/LR6, AA, UM-3)
When to change the batteries
The batteries last about a year.
Connect the unit to AC power before replacing the batteries.
Before connecting or disconnecting the AC power supply cord, press [TAPE/OFF] and stop the tape to turn the unit off. The memory batteries are worn out faster if the cord is disconnected with the power still on.
Removing the batteries
Open the battery cover and insert your finger in the hole on the bottom of the unit and push out. (Remove the power batteries first.)
For R14/LR14, C, UM-2
Concerning the remote control
Battery installation
Insert the batteries (not included) observing the correct polarities ( ,
, ).
).
(R6, AA, UM-3)
1
1
2
2
Correct method of use
Remote control signal sensor
Transmission window
About 7 meters in front
of the signal sensor
Operation notes
• Do not place obstacles between the remote control signal sensor and the remote control unit.
• Do not expose the remote control signal sensor to direct sunlight or to the bright light of fluorescent light.
• Take care to keep the remote control signal sensor and end of the remote control unit free from dust.
To prevent damage
• Never place heavy items on it.
• Do not disassemble or reconstruct it.
• Do not spill water or other liquids into it.
4
RQTT0585
 Loading…

Рисутк для нижеприведенного объяснения смотрите на стр. © в другой инструкции.
Нормальная настройка
-| Нажмите кнопку [TUNER/BAND
-AUTO PRESET], чтобы выбрать
“FM” или “AM”.
(Аппарат включается.)
2
(Пропустите
этот
пункт
при
использовании пульта ДУ)
Если
на
дисплее
имеется
индикация
“1ЙЙй1”,
нажмите
кнопку [TUNE MODE] для её
гашения.
0
Нажмите
кнопку
[-/N^]
или
[►wz+l
для
настройки
на
желаемую станцию.
Автоматическая настройка
Держите нажатой кнопку
или
И высвободите её, когда начнет
изменятся
индикация
частоты.
Автоматически выбирается станция с
хорошим
приемом
и
процесс
останавливается.
Для
остановки
автоматической
настройки нажмите снова кнопку [-/W^]
или
■■1«1ЯД1-ЦН!1Я4
Возможна остановка автоматической
настройки на частоте, где нет станции,
если
имеются
помехи.
Если
это
произойдет, нажмите кнопку
ИЛИ
[►ФН/+] для настройки.
^ Подрегулируйте громкость.
Для улучшения приема
4M: Выдвиньте штыревую антенну и
подрегулируйте её направление.
AM: Подрегулируйте позицию аппарата.
Если в 4M стерео режиме имеются
чрезмерные помехи
Нажмите кнопку [PLAY MODE] на пульте ДУ
(Высвечивается индикация “MONO”.)
Звук
будет
воспроизводиться
в
монорежиме,
но
при
этом
также
уменьшаются помехи.
Нажмите
кнопку
снова
для
отмены.
(Индикация “MONO” погаснет.)
Настройка с предварительной
установкой
Предварительно
установите
станции
(двадцать ЧМ и двенадцать АМ) для
упрощения настройки.
Автоматическая предварительная
установка
Выполните следующее для каждого из
диапазонов — ЧМ и АМ.
Подготовка;
Нажмите кнопку [TUNER/
BAND
-AUTO
PRESET],
чтобы выбрать “FM” или “AM”
Нажмите и удерживайте кнопку
[TUNER/BAND -AUTO PRESET] на
основном аппарате до тех пор, пока
не высветится индикация “AUTO”
Тюнер
выполняет
предварительную
установку на каналы станций, который он
может принимать.
Ручная предварительная установка
Только ПУЛЬТ ДУ
Выполните предварительную установку
одной станции за один раз.
Нажмите кнопку [РОМ/СЕЕАН].
2 Во время мигания индикации
(около 10 секунд)
Нажмите кнопки с цифрами,
чтобы выбрать канал.
Чтобы выбрать канал 10 или больще
например, 12: [гЮ] [1] -> [2]
Повторите выщеприведенные действия,
чтобы выполнить предварительную
установку других станций.
Занимающая канал станция стирается, если
на
этот
канал
вылолняется
предварительная установка другой станции.
Для прослушивания
предварительно установленных
каналов
Q Нажмите кнопку [TUNER/BAND
-AUTO PRESET] для выбора “FM”
или “AM”.
^ (Пропустите этот пункт при использовании
пульта ДУ)
Нажмите кнопку [TUNE MODE]
для высвечивания индикации
“13сШ”,
© Нажмите кнопку [- /НМ] или
[►►!/+] для выбора желаемого
канала.
(ЧМ : 1 — 20, АМ : 1 — 12)
Пульт ДУ:
[V/ ALBUM](V PRESET TUNE)
ИЛИ [ALBUM ►►!/ ^((PRESETTUNE /^)
Компакт-диски
Рисунок для нижеприведенного объяснения
смотрите на стр. © в другой инструкции.
Нормальное воспроизведение
■1
Нажмите кнопку [^ CD OPEN/
‘ CLOSE] для открывания крышки
КД и вставьте КД.
2 Нажмите кнопку [^ CD OPEN/CLOSE]
^ для закрывания крышки КД.
О Нажмите кнопку [CD ^/11] для
инициирования воспроизведения.
(Аппарат включается.)
Воспроизведение начинается с первой дорожки
и продолжается до последней дорожки.
Только ‘
RX-D29
Во время воспроизведения формата
МРЗ высвечивается индикация “МРЗ”
^ Пoдpeгyлиpyйvтe громкость.
Для остановки воспроизведения
Нажмите кнопку [■].
Во время остановки высвечивается число
дорожек на КД.
Для паузы
Нажмите кнопку [С0Ь/11] во время
воспроизведения.
Для возобновления воспрои
зведения нажмите кнопку [CDMIj.
Для поиска
в прямом/
обратном
направлении
Удерживайте нажатой кнопку
[-/!◄◄] (назад) или [►►I/+]
(вперед) во время
воспроизведения или паузы.
Вы не можете выполнять поиск во
время воспроизведения файлов МРЗ.
Для пропуска
в прямом/
обратном
направлении
Нажмите кнопку [-/Н^] (назад) или
[►►I/+] (вперед) во время
воспроизведения или паузы.
Если в аппарате нет диска, высвечивается
индикация “NO DISC”.
■||.И1!1Ц!М!И1=1
• Если наблюдается воздействие на радио
или ТВ прием, разместите аппарат
подальше от этого оборудования.
• Не нажимайте кнопку [^ CD OPEN/CLOSE]
во время воспроизведения, паузы или сразу
же после вставления КД и закрывания
лотка для КД. КД может быть поцарапан.
Этот аппарат может воспроизводить аудио CD-
R и CD-RW формата CD-DA (цифровое аудио),
которые были завершены (процесс, который
позволяет проигрывателям CD-R/CD-RW
воспроизводить аудио CD-R и CD-RW) при
завершении записи.
Может быть невозможно воспроизводить
некоторые CD-R и CD-RW из-за условий записи.
Режимы воспроизведения КД~|
Только пульт ДУ
Вы можете повторить одну дорожку (1-СЗ),
все
дорожки
( C D )
или
воспроизвести
дорожки в произвольном порядке (RND).
Нажмите кнопку [PLAY MODE] перед
или во время воспроизведения для
выбора желаемого режима.
р~ 1-Сз -»- й> RND выкл (нет индикации)
□
RX-D29
Только
Когда воспроизводится МРЗ, см. стр. 14.
Эти режимы остаются активными до тех пор,
пока индикаторы не будут очищены.
Вы можете использовать режим повторения
с программным воспроизведением.
Примечания
Во время воспроизведения Вы не можете выбрать
режим воспроизведения в произвольном порядке.
Одновременное выполнение произвольного и
программного воспроизведения невозможно.
More products and manuals for Recorders Panasonic
| Models | Document Type |
|---|---|
|
RX-D27 RU |
User Manual
7 pages |
|
RX-FS430 EP9K |
User Manual
17 pages |
|
RX-ED707 |
User Manual
17 pages |
|
RX-ED50 |
User Manual
14 pages |
|
RX-D12 |
User Manual
6 pages |
|
RF-521 |
User Manual
1 pages |
|
rx-ds28 |
User Manual
20 pages |
|
SL-J120 |
User Manual
6 pages |
|
RX-ES23 |
User Manual
28 pages |
|
RX-D55 |
User Manual
16 pages |
|
RX-ES23 |
User Manual
15 pages |
|
SL-DZ1200 |
User Manual
28 pages |
|
SL-1210M5G |
User Manual
12 pages |
|
RQT4912-2P |
User Manual
12 pages |
|
RX-ED50 |
User Manual
24 pages |
|
WX-T3020 |
User Manual
36 pages |
|
RQT7114-2Y |
User Manual
28 pages |
|
RX-D21 |
User Manual
8 pages |
|
12-808 |
User Manual
12 pages |
|
RX-ES23 EN |
User Manual
16 pages |


RQTT0582-1E
Данная инструкция по
эксплуатации содержит
полные инструкции на
русском языке. Пожалуйста,
сравните русский текст с
иллюстрациями в междуна-
родной версии инструкции,
которая поставляется с
данным аппаратом.
Tento návod k obsluze obsahuje
kompletní návod v českém
jazyce. Porovnejte prosím tento
text s obrázky v mezinárodním
návodu, který je dodáván s tímto
přístrojem.
Ta instrukcja obsługi, zawiera
wszelkie instrukcje w języku
polskim. Proszę porównać tekst
z ilustracjami w instrukcji
międzynarodowej dołączonej do
produktu.
Antes de conectar, operar o ajustar este producto,
sírvase leer estas instrucciones completamente.
Guarde este manual para su consulta en el futuro.
Перед подключением, работой или регулировкой
данного аппарата прочтите, пожалуйста, эту
инструкцию полностью. Сoxpaнитe, пoжaлyйcтa,
эту инструкцию.
Dříve než začnete jakékoli zapojování, operace nebo
nastavování tohoto výrobku, prostudujte si prosím
celý tento návod. Uschovejte si prosím tento návod
k obsluze.
Przed uruchomieniem sprzętu prosimy o dokładne
zapoznanie się z treścią niniejszej instrukcji.
Prosimy o zachowanie niniejszej instrukcji obsługi.
Niniejsza instrukcja została opracowana na
podstawie oryginalnej publikacji firmy MATSUSHITA
ELECTRIC INDUSTRIAL CO., LTD.
ESPAÑOL
Consulte las páginas 2-10.
PУCCKИЙ ЯЗЫК Cм. cтр. 11-16.
ČESKY
Viz str. 17-22.
POLSKI
Patrz strony 23-Okładka tylna.
Sistema estéreo portátil con
reproductor de discos compactos
Портативная CD-стереосистема
Přenosný stereo CD systém
Przenośny zestaw stereofoniczny
Instrucciones de funcionamiento
Инструкция по эксплуатации
Návod k obsluze
Instrukcja obsługi
Model No.
RX-D29
RX-D27
E
01Cover_RX-D29
2004/01/14, 3:33 PM
1