
![]()
Important: Do not make any adjustments and modifications that are not described in this manual. Follow all safety instructions to ensure proper operation of the device. The manufacturer assumes no liability for damages resulting from non-compliance with the safety instructions
Safety instructions
- Protect the device from rain and liquids to prevent damage to the device or a short circuit.
- Do not expose the device to excessive heat caused by placing it on a heating device or in direct sunlight.
- Protect the cables from damage by being trapped, particularly at the plugs and where cables exit the housing.
- Do not perform any maintenance operations that are not described in this user manual. Do not disassemble the device into its component parts to carry out repairs. The device may only be repaired in authorized service centers.
- All wireless devices may be susceptible to interference, which could affect performance.
- Back up your data and recordings. The manufacturer’s warranty does not cover loss of data resulting from user actions
Rechargeable built-in battery
- This device contains a built-in Li-polymer battery which should not be replaced by the customer. The battery may only be replaced in authorized service centers or by an authorized Philips partner for dictation equipment.
- Batteries contain substances that may pollute the environment. Used batteries should be disposed of at an official collection point
Data reset
Philips VoiceTracer has an internal memory with 8 GB built-in storage. If you want to perform a factory data reset, observe the following cautions:
- Back up your data and recordings. Performing a factory data reset will delete all data on your device.
- Formatting the memory on a computer may cause incompatibilities with your device. Format the memory only on the device.
Hearing protection
Observe the following guidelines when you use headphones:
- Set the volume to a moderate level and don’t use headphones to listen for excessively long periods of time.
- Be particularly careful to avoid adjusting the volume to a level that your hearing can’t deal with.
- Don’t turn the volume up so high that you can’t hear what is going on around you.
- In potentially dangerous situations, be particularly careful or temporarily discontinue use.
- Don’t use headphones while you are operating a motorized vehicle, cycling, skateboarding, and so on. You could be a hazard to yourself and other road users, and possibly be breaking the law
Small children
Your device and its enhancements may contain small parts. Keep them out of the reach of small children.
Legal restrictions on recording
- The use of the device’s recording function is subject to the legal restrictions that may apply in your country. You should also respect the privacy and personal rights of third parties if you record talks or lectures.
- If you want to record telephone calls, check if this is legal in your country. In certain countries, you may be legally required to inform the person you are conversing with on the telephone that you are recording the conversation.
Cleaning and disinfection
Before cleaning, disconnect all cables from the device.
- To clean the device, use a soft dry cloth.
- To disinfect the device, use products for disinfection of surfaces in clinical areas and patient care equipment, such as surface disinfectant wipes.
- Do not use harsh chemicals or strong detergents.
- Avoid getting moisture in openings.
- Do not rub or strike the surface with anything hard or sharp as this may scratch or damage the surface permanently.
Disposal of your old product
Europe
A crossed-out wheeled bin symbol attached to a product indicates that the product is covered by the European Directive 2011/65/EU. Please get informed about the local separate collection system for electrical and electronic products. Please act according to your local rules and don’t dispose of your old products with your normal household waste. Correct disposal of your old product helps to prevent potential negative consequences for the environment and human health.
United States
Rechargeable Li-ion battery:
- Your product is designed and manufactured with high quality materials and components, which can be recycled and reused. For recycling information, please contact your local waste management facilities or visit www.recycle.philips.com.
- This appliance contains a rechargeable lithium-ion battery which must be disposed of properly.
- Contact your local town or city officials for battery disposal information. You can also call 1-800-822-8837 or visit www.call2recycle.org for battery drop-off locations.
- For assistance, visit our website www.philips.com/support or call 1-800-243-3050 toll free
Rechargeable NiMH battery:
• Your product is designed and manufactured with high quality materials and components, which can be recycled and reused. For recycling information, please contact your local waste management facilities or visit www.recycle.philips.com.
• This appliance contains a rechargeable NiMH battery which must be disposed of properly.
• Contact your local town or city officials for battery disposal information. You can also call 1-800-822-8837 or visit www.call2recycle.org for battery drop-off locations.
• For assistance, visit our website www.philips.com/support or call 1-800-243-3050 toll free.
Canada
Rechargeable Li-ion battery:
• Your product is designed and manufactured with high quality materials and components, which can be recycled and reused. For recycling information, please contact your local waste management facilities or visit www.recycle.philips.com.
• This appliance contains a rechargeable lithium-ion battery which must be disposed of properly.
• Contact your local town or city officials for battery disposal information. You can also call 888-224-9764 or visit www.call2recycle.ca for battery drop-off locations.
• For assistance, visit our website www.philips.com/ support or call 1-800-243-7884 toll free.
Rechargeable NiMH battery:
• Your product is designed and manufactured with high quality materials and components, which can be recycled and reused. For recycling information, please contact your local waste management facilities or visit www.recycle.philips.com.
• This appliance contains a rechargeable NiMH battery which must be disposed of properly.
• Contact your local town or city officials for battery disposal information.
• You can also call 888-224-9764 or visit www.call2recycle.ca for battery drop-off locations.
• For assistance, visit our website www.philips.com/support or call 1-800-243-7884 toll free
About this user manual
Find a quick overview of your device on the next pages. For detailed description, see the following chapters of this user manual. Read the instructions carefully
Symbols used:
Tip: This symbol identifies information that helps you to use your device more efficiently and simply
Note: This symbol indicates notices which you should observe when handling or operating the device.
Caution: This symbol warns of damage to the device and possible data loss. Damage can be caused by improper handling.
Your Voice Tracer audio recorder
We are delighted that you have chosen a Philips device. Visit our website for comprehensive support, such as user manuals, software downloads, warranty information and more: www.philips.com/dictation.
Product highlights
Superior recording quality
- Audio scenes
- Voice-activated recording
- MP3 and PCM recording
- Large color display
- 8 GB internal memory
- Long-lasting battery
What’s in the box
Overview of your audio recorder
- Microphone
- Record/Status LED
- Display
- Left function button
- Middle function button
- Right function button
- Up button
- Backward button
- Record button
- Down button
- Forward button
- File list/Back button
- Play/Stop button
- Power/Lock switch
- Reset button
- Headphones jack
- Speaker
- USB Type-C port
- Eye for wrist strap
Get started
Caution: Before you connect your VoiceTracer, first read the safety instructions (see Safety instructions).
Charging the battery
Charge the built-in battery before you use the device for the first time or if you haven’t used it for an extended time period. If the battery is completely discharged and your device turns off, allow the battery to charge for a while before you turn on the device.
Note:
- A complete charging cycle takes about 3 hours.
- Before you charge the battery via computer, make sure that your computer is turned on.
- While the device is connected to a computer, it can’t be operated manually.
- When the low battery icon is displayed, charge the device promptly.
- If you charge your device via computer instead of using a power supply unit, the charging speed might slow down due to a lower charging current. For fast charging, use a USB power supply unit (not included).
A charging battery icon appears on the screen and the Record/Status LED flashes orange for a few seconds.
Turn the device on and off
To turn the device on or off:
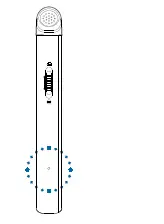
- Slide and hold the Power switch on the right side of the device downwards for three seconds


Key lock
You can lock your device when it’s active to prevent any unwanted device operations or access.
To lock the device:
- Slide the Power switch on the right side of the device upwards towards the lock symbol. X The lock symbol appears on the screen for a moment. X All buttons are locked now.
To unlock the device: - Slide the Power switch downwards. X The unlock symbol appears on the screen for a moment
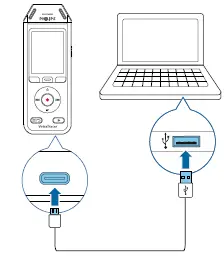
Connect to a computer
You can use your recorder as a USB mass storage to conveniently store, back up and move files. Link the device to a computer with a USB cable. Your recorder will automatically be recognized as a mass storage device. You don’t need to install any software. For more information on how to connect your device to a computer, see the illustration in Charging the battery
Caution
- Don’t disconnect the USB cable from the device while you are transferring files. This might cause data loss.
Note - While the device is connected to a computer, it can’t be operated manually
Set the date and time
You can always change the date and time as well as the time format on your device.
- In stop mode, press the Right function button to open the settings panel.
- Press the Record button to select All settings.
- Press the Right function button to enter the Device settings.
- Press the Down button to navigate to Date & time and then press the Record button to confirm.
- Press the Up/Down buttons to navigate to your desired setting Date, Date format, and Time. Use the Forward and Backward buttons to change your desired setting.
- Press the Record button to confirm your settings.
- Press the Back button to return to the stop mode screen
Set the device language
You can always change the language of your device.
- In stop mode, press the Right function button to open the settings panel.
- Press the Record button to select All settings.
- Press the Right function button to enter the Device settings.
- Press the Record button to select Language.
- Press the Up/Down buttons to navigate to your desired language, and then press the Record button to confirm your selection.
- Press the Back button to return to the stop mode screen
Recording
Record a file
Note:
- Be careful not to cover the microphones while recording. This might result in a lower recording quality.
- If the recording time of your current recording exceeds the available storage capacity, the recording will stop. In this case, delete files from your device to make more storage available. Before you start recording:
- Make sure your device has enough battery power left. When your battery is almost discharged, you will see a battery low icon . X The device will turn off and your current recording will automatically be saved.
- First select the folder you want your recording to be saved in. For more information, see Start a new recording. You can store 100 files in each of the folders A, B, C, and D. If one of the folders is full, your subsequent recordings will automatically be stored in the next folder.
- We recommend that you make a test recording in order to find the most suitable presets for your recording and achieve the best recording results.
Start a new recording
- In stop mode, press the Left function button to start a new recording. The new file mode screen is displayed.
- Press the Right function button to open the settings panel .
To select a folder for your recording to be saved in: Press the Up/Down buttons to navigate to Folder and then press the Record button to confirm your selection. Press the Up/Down buttons to navigate to the folder you want your new recording to be saved in and then press the Record button to confirm your selection.. To return to the stop mode screen, press the Back button.
To adjust the settings for your recording: Press the Up/Down buttons to navigate to your desired setting and then press the Record button to confirm your selection. To return to the stop mode screen, press the Back button.
3. Press the Record button to start recording. The recording screen is displayed. The Record/Status LED illuminates red.
4. Press the Record button again to stop recording. The recording is saved to the preselected folder.
Edit a file
You can edit existing recordings in stop mode by appending or overwriting a recording.
Append: Add additional recording parts at the end of an existing recording.
Overwrite: Overwrite an existing recording part starting from any point within the recording.
To append a recording part: In stop mode of an existing file, press the Record button.
- If the cursor of the audio progress bar is at the end of the recording: The recording screen is displayed and a new recording part is added at the end of your file.
- If the cursor of the audio progress bar is at the beginning of the recording: The editing panel opens. Press the Up/Down buttons to select Append and then press the Record button to confirm your selection. The recording screen is displayed and new recording part is added at the end of your file. To overwrite a recording part:
In playback mode, press the Play/Stop button to stop playback at your desired part.
- Press the Record button. The editing panel opens.
- Press the Up/Down buttons to select Overwrite and then press the Record button to confirm your selection. The recording screen is displayed and a new recording starts from where you stopped playback.
Tip: If you always want to either append or overwrite a recording part and don’t want the editing panel to open each time, press the Right function button to open the settings panel . Press the Down button to navigate to Edit mode and then select Append or Overwrite.
Playback
Play back files
Note: If you have connected headphones to your VoiceTracer, the built-in speakers are disabled
Start and stop playback
- In stop mode, press the Previous track or Next track button to navigate to your desired recording. To start playback, press the Play/Stop button. The Record/Play indicator illuminates green. Alternatively, press the File list button and then press the Up/Down buttons to navigate to your desired recording. To start playback, press the Play/Stop button.
- To adjust the volume, press the Up/Down buttons.
- To stop playback, press the Play/Stop button.
- To continue playback, press the Play/Stop button again.
Fast rewind or fast forward
In playback mode or stop mode, press and hold the Backward or Forward button to jump to the desired part of the recording. Release the switch when you have reached your desired playback part.
Note: If you have set bookmarks and press the Backward or Forward button shortly, the audio progress indicator will jump to the next or previous bookmark. If you have not set bookmarks and press the Backward or Forward button shortly, you will jump to the previous or next file.
Play back files from a selected folder:
- In stop mode, press the File list button. All voice recordings are displayed.
- Press the Left function button to open the folder panel.
- Press the Up/Down buttons to navigate to your desired folder and then press the Record button to confirm your selection. Only the files in the selected folder are displayed now.
Delete files
You can delete individual files from your device.
- In stop mode or playback mode, press the Right function button to open the settings panel.
- Press the Up/Down buttons to navigate to Delete and then press the Record button to confirm your selection
Settings
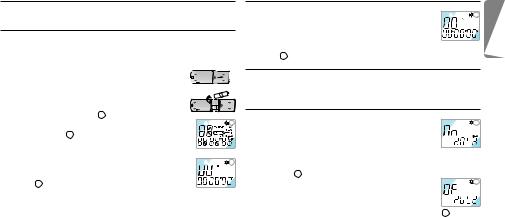
Settings mode
In the settings mode, you can change and adjust various settings according to your own preferences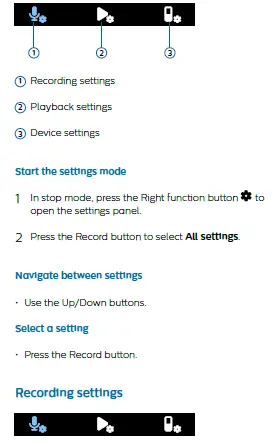 Scene
Scene
Select a scene according to specific recording situations, e.g. a lecture or an interview. Every scene has predefined settings, such as the format or the microphone sensitivity, that cannot be changed. If you would like to change the settings of a scene, you need to select the scene Custom where you can define each setting according to your own preferences
Format
Select the format of your recording according to specific recording situations.
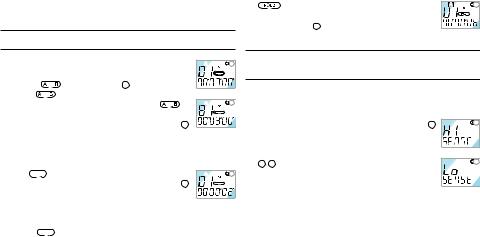
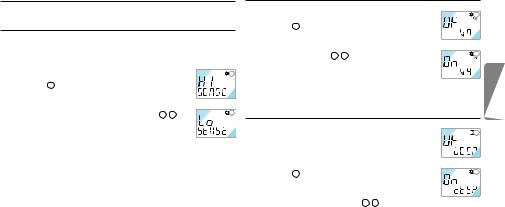
Mic sensitivity
Adjust the microphone sensitivity of your VoiceTracer. Select the sensitivity according to the background noise, number of recorded sound sources and distance between sound source and microphones.
Limiter
Activate this function to prevent recordings from being oversteered by sound input over the maximum sound level. If the recording suddenly exceeds the maximum sound level, the microphone sensitivity is automatically reduced.
Noise cut
Turn the Noise cut feature on in order to reduce background noise while recording. This way, especially audio recordings sound clearer.
Wind filter
Activate the wind filter to reduce wind noise when you are recording in a very windy environment.
Folder
Select the folder you want your recording to be saved in.
Voice activation
Use voice activation to start recording when you begin speaking. When you stop speaking, the device will automatically pause recording after three seconds of silence. It will resume only when you begin speaking
Edit mode
Select what should happen when you edit a recording.
Pre-recording
When the pre-recording function is enabled, the device will start recording some seconds prior to the event.
Timer
Use the timer function to automatically start recording on a preset date and at a preset time. You can also select when the recording should stop again.
Auto divide
During recording, the auto divide feature will automatically split the current recording and save a new file every 15, 30 or 60 minutes.
Auto bookmark
Use the Auto bookmark funktion to automatically set bookmarks at preset time intervals.
External input
Choose between various input sources to guarantee the best recording quality for specific recording situations.
Playback settings
Play mode
Choose between various playback options.
Equalizer
Choose between the equalizer music options Classical, Jazz, Pop, or Rock.
ClearVoice
Activate the ClearVoice function for better playback quality. Dynamic emphasis on quiet passages improves the intelligibility of quiet voices
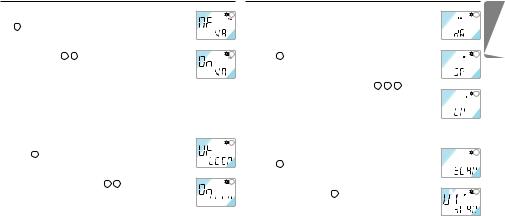
Device settings
Language
Select your desired device language from the language list. You can change the language whenever you want.
Brightness
Adjust the brightness of your screen acccording to your own requirements.
Backlight
To save your VoiceTracer’s battery power, you can reduce the backlight time. If you don’t operate your device for the preset time, the backlight turns off automatically.
Date & time
You can always change the system date and time on your device. Use the Backward, Forward, Up, and Down buttons to set the date and time.
Recording light
If you turn on the recording light, the Record/Status LED will illuminate red when recording.
Auto Off
Select a time for your device to automatically turn off when you don’t operate it.
Device sounds
Select if you want the device sounds, such as key tone and power on/off sound, to be turned on or off.
Format storage
Use this function to format your device’s internal storage and delete all data. For more information, see Reset data.
Reset settings
You can reset your menu settings to their default state—the way they were when you first purchased your device and turned it on. For more information, see Reset settings.
Information
See various information about your device, such as the available memory space or the firmware version.
Device and data management
Transfer data to the computer
You can quickly and conveniently move files from your VoiceTracer to your computer. Link the device to a computer with a USB cable. Your recorder will automatically be recognized as a mass storage device. You don’t need to install any software. For more information on how to connect your device to a computer, see the illustration in Charging the battery
Caution: Don’t disconnect the USB cable from the device while you are transferring files. This might cause data loss.
Note: While the device is connected to a computer, it can’t be operated manually
Transfer data from VoiceTracer to the computer
- Connect the device to the computer via the supplied USB cable. A charging battery icon appears on the screen and the Record/Status LED flashes orange for a few seconds.
- Open Windows Explorer on a Windows computer, or open Finder on a Mac computer. Your VoiceTracer is recognized as an external drive.
- Double-click the VoiceTracer drive. The content of your VoiceTracer is displayed in a new window.
- Select the desired files from one of the folders and copy, cut or drag them to the desired location on your computer.
Reset your device and data
Device reset
If you should encounter problems with your device software, for example, the software freezes, the device works slowly or apps don’t respond, you can reset your device and restart it.
- Press and hold the reset button on the right side of your device by using a small, pointed object, for example, a paper clip.
- To restart the device, slide and hold the Power switch on the right side of the device downwards for three seconds.
Reset data
You can format your device’s internal storage and delete all data from your device.
Caution
- Formatting your VoiceTracer will delete all data on your device. Before you perform a data reset, back up any important data saved on your device.
Note - Your menu settings won’t be deleted and are still available after resetting the data.
To reset your data:
- In stop mode, press the Right function button to open the settings panel.
- Press the Record button to select All settings.
- Press the Right function button to enter the Device settings.
- Use the Up/Down buttons to navigate to Format storage and then press the Record button to confirm your selection.
- Select Delete. All data is deleted from the internal storage
Reset settings
You can reset your menu settings to their default state— the way they were when you first purchased your device and turned it on.
Caution: Resetting your menu settings will delete all settings you have made on your device. After a reset, you will have to adjust all settings again.
Note: Your data won’t be deleted and is still available after resetting the menu settings.
To reset your settings:
- In stop mode, press the Right function button to open the settings panel.
- Press the Record button to select All settings.
- Press the Right function button to enter the Device settings.
- Use the Up/Down buttons to navigate to Reset settings and then press the Record button to confirm your selection.
- Select Reset. All settings on your device are reset to their default state.
Updating your device
Your device is controlled by an internal program called firmware. As a part of ongoing product maintenance, the firmware is upgraded and errors are corrected. It is possible that a newer version (an ‘update’) of the firmware has been released since you purchased the device. In this case, you can easily update your device to the latest version.
Caution
- Before you update the firmware, make sure that your device has at least 30% battery power left. This helps to prevent the power supply being interrupted during the update.
- Don’t disconnect the USB cable from the device while you are transferring files. This might cause data loss.
Note: To find out about new firmware versions, regularly check the product website for your model at www.voicetracer.com/help.
Update your VoiceTracer
- Connect the device to the computer via the supplied USB cable. A charging battery icon appears on the screen and the Record/Status LED flashes orange for a few seconds.
- Download the firmware update file for your model from the product website www.voicetracer.com/help.
- Open Windows Explorer on a Windows computer, or open Finder on a Mac computer.
- Double-click the VoiceTracer drive. The content of your VoiceTracer is displayed in a new window.
- Copy the firmware update file to the root directory of the device. During this process, the Record/Status LED flashes orange. When the process is complete, the Record/Status LED stops flashing.
- Disconnect the device from the computer. The firmware is automatically updated. The Firmware update window is displayed. When the update is complete, the device will automatically switch off.
Troubleshooting
Find the most common problems you could encounter with the VoiceTracer in the following table. If you are unable to solve the problem with the information below, contact the supporting Philips partner you purchased the device from.
| Problem | Cause | Solution |
| The device doesn’t turn on. | • The battery has run out of power. | • Charge the device for a while and then turn it on again. |
| I can’t record with the device. | • You have reached the
maximum file number or the device’s memory is full. |
• Delete some files or move them to an
external device. |
| The device doesn’t respond. | • There is a problem with the | • Try to turn the device off and then |
| software. | restart it. | |
| • If you can’t turn the device off, reset | ||
| the device by pressing the Reset | ||
| button. For more information, see | ||
| Device reset. Resetting the device | ||
| won’t delete any settings or data. | ||
| The device doesn’t play back recordings. | • The volume is off or too low. | • Turn on or turn up the volume. |
| I can’t hear anything from the speakers. | • The headphones are | • Unplug the headphones. |
| connected to the device. | ||
| • Turn on or turn up the volume. | ||
| • The volume is off or too low. | ||
| I can’t hear anything from the | • The volume is off or too low. | • Turn on or turn up the volume. |
| headphones. | ||
| • The headphones aren’t | • Disconnect the headphones and | |
| connected properly. | connect them to the headphones | |
| jack again. | ||
| • The headphones are | ||
| connected to the wrong jack | • Disconnect the headphones and | |
| (i.e. external microphone jack). | connect them to the headphones | |
| jack. | ||
| The quality of audio recordings is too low | • The microphone sensitivity is | • Change the microphone sensitivity to |
| or there’s too much background noise in | set too high. | medium or low. For more information, |
| my audio recordings. | see Mic sensitivity. |
Technical data
Connectivity
- Headphones: stereo jack, 3.5 mm, impedance 16 Ohm or more
- USB: type C, high-speed 2.0
Audio recording
- Built-in microphone: 2 omni-directional microphones
- Recording formats: MPEG1 layer 3 (MP3), PCM (WAV)
- Recording quality: MP3 (8, 32, 64, 96, 128, 192,256, 320 kbps), PCM (22 kHz/16 bit, 44.1/16 bit, 48 kHz/16 bit)
- Audio scenes: Note, Speech recognition, Interview, Lecture, Meeting, Music, Custom
- Recording time (built-in memory): 2147 h (MP3, 8 kbps), 536 h (MP3, 32 kbps), 268 h (MP3, 64 kbps), 178 h (MP3, 96 kbps), 134 h (MP3, 128 kbps), 89 h (MP3, 192 kbps), 67 h (MP3, 256 kbps), 53 h (MP3, 320 kbps), 24 h (PCM, 22 kHz/16 bit), 12 h (PCM, 44.1 kHz/16 bit), 11 h (PCM, 48 kHz/16 bit)
- Pre-recording mode: 5, 10, 15 seconds buffer
- File editing function: overwrite, append
- Auto-divide function: 15, 30, 60 minutes
- Auto-bookmark function: 5, 10, 15, 30, 60 minutes
- Bookmark function: up to 32 per file
- Voice-activated recording: 25 levels
- Instant one-touch recording
- Record monitor function
- Recording timer
- Wind filter
- Limiter (attack time/decay time): slow (32/128 ms), medium (16/64 ms), fast (8/16 ms)
- Noise-cut
Speaker
- Speaker output power: 200 mW
- Speaker size: 11 × 15 mm
Storage media
- Built-in memory capacity: 8 GB
- Mass storage class compliant
Music playback
- Sound enhancement: ClearVoice
- Equalizer: Classic, Jazz, Pop, Rock
- Playback mode: Repeat file, Repeat all, Random
- ID3 tag support
- Supported file formats: MP3, WMA
Power
- Battery type: built-in rechargeable Li-ion polymer battery
- Battery lifetime: up to 36 hours of recording (MP3, 8 kbps)
- Battery capacity: 1000 mAh
- Rechargeable: yes
- Charging time (full charge): 3 hours
Design and finishing
- Color(s): black/chrome
Display
- Type: LCD color display
- Backlight
- Diagonal screen size: 2 in/5 cm
- Resolution: 240 × 320 pixels
Product dimensions
- 4.7 × 12.8 × 1.6 cm / 1.9 × 5.0 × 0.6 in
- Weight: 79 g/2.7 oz
Convenience
- Firmware upgradeable
- Keypad lock
- Multi language: English, French, German, Spanish, Italian, Russian, Polish System requirements
- Free USB port
- Operating system: Windows 10/8/7, macOS, Linux
Green specifications
- Compliant to 2011/65/EU (RoHS)
- Lead-free soldered product
Operation conditions
- Temperature: 1° – 45° C / 34° – 113° F
- Humidity: 10% – 90%
Open source software
Products mentioned in this manual may contain open source software. Speech Processing Solutions GmbH hereby offers to deliver, upon request, a copy of the complete corresponding source code for the copyrighted open source software packages used in this product for which such offer is requested by the respective licenses. This offer is valid up to three years after product purchase. To obtain the source code, please write in English to: [email protected].
FCC Warning Statement
Changes or modifications not expressly approved by the party responsible for compliance could void the user’s authority to operate the equipment. This equipment has been tested and found to comply with the limits for a Class B digital device, pursuant to Part 15 of the FCC Rules. These limits are designed to provide reasonable protection against harmful interference in a residential installation. This equipment generates uses and can radiate radio frequency energy and, if not installed and used in accordance with the instructions, may cause harmful interference to radio
communications. However, there is no guarantee that interference will not occur in a particular installation. If this equipment does cause harmful interference to radio or television reception, which can be determined by turning the equipment off and on, the user is encouraged to try to correct the interference by one or more of the following measures:
- Reorient or relocate the receiving antenna.
- Increase the separation between the equipment and receiver.
- Connect the equipment into an outlet on a circuit different from that to which the receiver is connected
- Consult the dealer or an experienced radio/TV technician for help.
- Neither Speech Processing Solutions GmbH nor its affiliates shall be liable to the purchaser of this product or third parties with respect to claims for damages, losses, costs or expenses incurred by purchaser or third parties as a result of an accident, misuse or abuse of this product or unauthorized modifications, repair, modification of the product or failure to meet the operating and maintenance instructions provided by the manufacturer.
- This user manual is a document with no contractual nature. We accept no liability for changes, mistakes or printing errors.
FAQS
How can I transfer my voice recordings from the Voice Tracer to my computer?
Connect the device to your computer using a USB cable. The device will appear as an external drive. Copy the files from the device to your computer.
How can I delete voice recordings on the Voice Tracer?
Select the voice recording you want to delete, and press Delete.
How can I change the folder where my voice recordings are stored?
Select Settings > Storage location, and then select a new location for your recordings.
How can I adjust the volume of my recordings?
Select Settings > Volume, and then adjust the volume level.
Is there a free voice recording app?
No limitation, Completely FREE! Voice Record Pro is a professional voice recorder. It allows you to record voice memos and on-site sounds at unlimited length with configurable quality. Voice Record Pro can record directly in MP4 (AAC), MP3 (MPEG) and WAV (PCM) formats plus convert function for all supported formats.
What audio recorder do YouTubers use?
Bandicam has earned its reputation as the best game capturing and video recording software for YouTubers.
Is there a voice recorder on my phone?
Some Android™ devices, like the Samsung Galaxy S20+ 5G, come with a voice recording app pre-installed. Hit the red record button when you want to start the recording, and then once again to stop it. From here, you can hit the button again to continue recording, or save the file to your recording archive.
Where is the voice recorder on my phone?
Swipe down from the top of the phone screen twice to open the Quick Settings menu. You may need to swipe left to locate the Screen Recorder app. Tap on it and then tap Start now. The Screen Recorder menu will come up on the screen with the buttons for Record, Settings, and Close/Stop.
How do YouTubers mics sound so good?
For voice recording, lavalier mics, either wired or wireless, are pretty much an industry standard. Other mics for recording good audio for YouTube are cardioid mics on a mount like the OctoPad or an on camera shotgun mic. Lavalier mics are preferred by many YouTubers for voice recording.
Where do YouTubers get their audio from?
The reality is that most YouTubers will use stock, library or non-commercial royalty free music for their videos. With this content, licensing is made as easy and hassle-free as possible.
Is Audacity A free software?
Audacity is an easy-to-use, multi-track audio editor and recorder for Windows, macOS, GNU/Linux and other operating systems. Audacity is free, open source software.
What is the default voice recorder for Android?
Every Android phone will have a voice recording app already installed on it called Recorder. The appearance and quality of the app may vary depending on the model of the phone and the version of Android you have, but it is easy to use.
Does Google have a voice recorder app?
The lack of a native audio recording app built into Google’s lean Android software has always brought a chuckle from people who use iOS. Google finally introduced the Google Recorder app with the Pixel 4, and it has now brought that app to a few older Pixel phones (via Android Police).
Does Windows 11 have an audio recorder?
As with Windows 11’s new Media Player app, if you type in the old app name, in this case “Voice Recorder,” the new one, Sound Recorder, opens and updates itself. (The Media Player behaves similarly when you type “Groove” in the Start menu.)
How Long Can Windows 10 voice recorder record?
Keep in mind that the limit for a recording is 2hours 59 minutes and 59 seconds, according to our tests. Your audio recording is saved under the default name Recording. The date and time when the recording was saved are displayed underneath, followed by the duration of the recording.
How do singers edit their voice?
The use of autotune, pitch correction, vocoders, talk boxes, vocals chops, and other various techniques have inspired entirely new music genres and new ways of recording and processing vocals.
VIDEO
![]()
www.dictation.philips.com
More Manuals From Philips
![]()
Digital Voice Tracer
LFH 7655 / LFH 7675
www.philips.com/dictation

|
EN |
User manual |
3 |
|
DE |
Benutzerhandbuch |
13 |
|
FR |
Manuel de l‘utilisateur |
23 |
|
ES |
Manual del usuario |
33 |
|
IT |
Manuale di istruzioni |
43 |
|
NL |
Gebruikershandleiding |
53 |
|
CZ |
Uživatelská příručka |
63 |
|
HU |
Felhasználói kézikönyv |
73 |
|
PL |
Instrukcja obsługi |
83 |
|
PT |
Manual do utilizador |
93 |
|
RU |
Руководство пользователя |
103 |
|
TR |
Kullanıcı El Kitabı |
113 |

|
User manual |
1 |
Your Digital Voice Tracer |
||||||
|
1 |
Your Digital Voice Tracer |
3 |
5 |
Menu Entry |
8 |
1.1 |
What’s in the Box |
|
|
1.1 |
What’s in the box |
3 |
5.1 |
Mic Recording Sensitivity |
8 |
|||
|
1.2 |
Overview |
4 |
5.2 |
VA Function |
9 |
|||
|
1.3 |
LCD indicators and symbols |
4 |
5.3 |
Beep Setting |
9 |
|||
|
2 |
Getting Started |
5 |
5.4 |
Recording Mode Setting |
9 |
|||
|
2.1 |
Replacing the Batteries |
5 |
5.5 |
File Introduction |
9 |
|||
|
2.2 |
Switching the Voice Tracer On |
5 |
6 |
Delete Function |
10 |
User manual |
||
|
2.3 |
Switching the Voice Tracer Off |
5 |
6.1 |
To Delete a Specific File |
10 |
|||
|
2.4 |
Hold Function |
5 |
6.2 |
To delete a specific folder |
10 |
|||
|
3 |
Recording |
6 |
6.3 |
To delete all folders (format mode) |
10 |
|||
|
3.1 |
Recording With the Built-in |
7 |
Warnings |
10 |
||||
|
Microphone |
6 |
8 |
Specifications |
11 |
USB cable |
|||
|
3.2 |
Recording With an External |
9 |
Troubleshooting |
12 |
||||
|
Microphone |
6 |
|||||||
|
4 |
Playback |
7 |
DVT 7655 DVT 7675 |
|||||
|
4.1 |
Normal Playback |
7 |
Voice Tracer |
|||||
|
4.2 |
Low-speed Playback |
7 |
Batteries |
|||||
|
4.3 |
Search |
7 |
||||||
|
4.4 |
Playback of other files |
7 |
||||||
|
4.5 |
Repeat Playback |
8 |
||||||
|
Ear-Mic combo |
||||||||
|
(DVT 7675 only) |
CD |
|||||||
|
User manual |
E N G L I S H
1.2Overview
|
A |
Earphone socket |
A |
B |
|
|
I |
||||
|
B |
Microphone socket |
J |
||
|
C |
Volume control |
|||
|
K |
||||
|
D NEXT |
||||
|
Fast forward, file selection, menu change |
C |
|||
|
E |
REC/PAUSE Record/Pause |
|||
|
F |
STOP/DEL |
O |
||
|
Stop recording, delete file, delete selected folder, delete all folders |
D |
|||
|
G |
FOLDER/REPEAT |
|||
|
L |
||||
|
Folder selection and repeat playback |
E |
|||
|
H |
Speaker |
M |
||
|
I |
Built-in microphone |
N |
F |
|
|
J |
Record/playback indicator LED |
|||
|
Red = recording, green = playback |
G |
|||
|
K |
LC display |
|||
|
L |
BACK |
|||
|
Fast rewind, file selection, menu change |
||||
|
M |
PLAY/PAUSE/REMAIN |
H |
||
|
Low speed and normal playback, pause, remaining recording time, |
||||
|
FILE (recording number), time, menu selection, file introduction functions |
NMENU/HOLD
Recording sensitivity, voice activation function, beep, recording time, file introduction (scan), hold set/release
OUSB socket
1.3LCD Indicators and Symbols
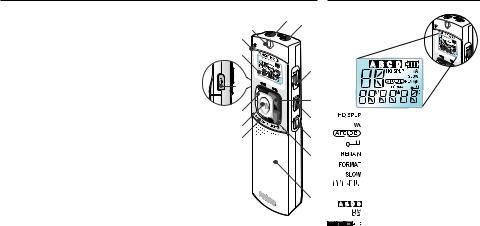
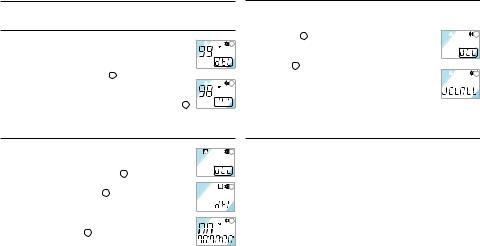
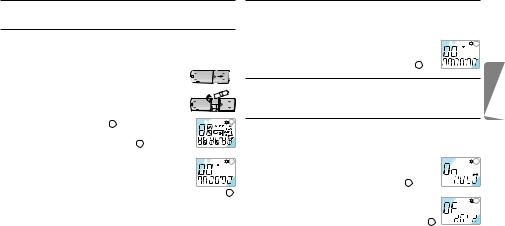
Record mode indicator Voice-activated recording Repeat mode indicator Hold indicator
Record, Play remain time indicator Format indicator
Slow play indicator Play/recording time indicator, menu selection
Folder selection File dispaly (0-99)
Battery indicator (Replace the batteries if the display alternates between status 3 and 4.)
User manual
2 Get Started
2.1Replace the Batteries
1 Be sure that the power is OFF. Do not replace the batteries while the power is on, as this may cause the device to malfunction.
2 Open the battery cover. 3 Insert the batteries. Make sure that the batteries
are inserted properly (size “AAA”) and close the cover. When the batteries are inserted, the LCD will display all indicators 1 and the device will go
|
into standby mode (waiting for recording or playback |
1 |
|||||||
|
to be activated 2 ). |
||||||||
|
4 The power will shut off automatically if no function |
||||||||
|
is activated for 1 minute. |
||||||||
|
5 Press the PLAY/PAUSE/REMAIN button to switch |
2 |
|||||||
|
the power on. Your Voice Tracer will be in standby |
||||||||
|
mode 2 . |
DRemove the batteries if the Voice Tracer will not be used for an extended period. Leaking batteries may damage the Voice Tracer.
EIf the Voice Tracer malfunctions, remove the batteries and re insert them.
User manual
2.2Switch the Voice Tracer On
|
1 Press the PLAY/PAUSE/REMAIN button to activate |
1 |
||
|
the Voice Tracer. The device will switch to standby |
|||
|
mode. When the batteries are inserted, the LCD |
|||
|
displays all indicators and the Voice Tracer goes into standby |
|||
|
mode 1 . |
2.3Switch the Voice Tracer Off
The power will shut off automatically if functions are not activated for 1 minute.
2.4Hold Function
|
1 Press and hold the MENU/HOLD button for |
1 |
||
|
approximately 2 seconds when the Voice Tracer is in |
|||
|
playback, recording, or standby mode to activate the |
|||
|
lock function. All buttons are deactivated when the device is in |
|||
|
HOLD mode, and the LCD displays “ON HOLD” when a button |
|||
|
is pressed 1 . |
|||
|
2 Press and hold the MENU/HOLD button again |
2 |
||
|
for approximately 2 seconds to release the lock |
|||
|
function. The LCD will display “OF HOLD” |
|||
|
indicating that the lock function has been deactivated 2 . |
DHOLD mode will be deactivated if the device switches off and is turned on again.
E N G L I S H
3 Record
CNote: For good results, when working with Dragon speech recognition software, record in HQ mode (factory default) and convert the .zvr file into .wav format after PC download! Please also read the Download Manager software user manual.
Note the following before recording is begun (Be sure the device is in standby mode):
•Press the FOLDER/REPEAT button to select the desired folder. The Voice Tracer will move to the next folder (A, B, C, or D) each time the button is pressed. If a folder is not selected, the Voice Tracer will record in the current folder.
•When the number of files in the current folder reaches 99, the recording will continue after the last file of the next folder.
•Press the PLAY/PAUSE/REMAIN button to display the remaining recording capacity.
•Press the NEXT button to separate a FILE while recording (file separation function).
•The maximum number of files in each folder is 99 or up to 396 files.
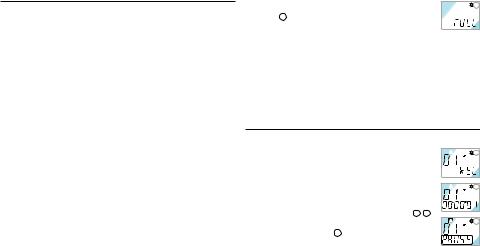
•If the recording time exceeds the available capacity or
|
the file number reaches 396, “FULL” is displayed and |
1 |
|
recording cannot continue 1 . If this happens, delete |
|
|
some recordings or move them to an external device |
|
|
(audio or PC) to continue recording. |
•Do not remove the batteries during recording. This may cause the Voice Tracer to malfunction. If recording for a prolonged period of time, replace the batteries before beginning recording.
•Recording will stop automatically when no sound is detected when the Voice Tracer is in VA mode. Deactivate the VA function when recording important conversations.
3.1 Record With the Built-in Microphone
1 Set the desired recording folder, VA function and
|
1 |
|||||
|
quality (HQ, SP or LP) before recording (see chapter |
|||||
|
“Menu”). |
|||||
|
2 Point the device’s built-in microphone toward the |
|||||
|
sound source. |
|||||
|
2 |
|||||
|
3 Press the REC/PAUSE button to start recording. The |
|||||
|
red LED will light 1 2 . |
|||||
|
4 Press the REC/PAUSE button to pause the recording |
|||||
|
3 . |
|||||
|
3 |
|||||
|
5 Press the REC/PAUSE button again to continue the |
|||||
|
recording. The red LED will light again. |
|||||
|
6 Press the STOP/DEL button to stop recording. |
3.2Record With an External Microphone
To record with an external microphone, connect the microphone to the microphone socket and follow the same procedure as for the built-in microphone.
User manual

4 Playback
DPress and hold the PLAY/PAUSE/REMAIN button during normal playback to display the remaining duration time of the current file.
4.1Normal Playback
|
1 |
||||
|
1 Press the FOLDER/REPEAT button to select the |
||||
|
desired folder (A, B, C, or D). If a folder is not |
||||
|
selected, the last folder into which you recorded |
||||
|
will be played. |
||||
|
2 |
||||
|
2 Press the PLAY/PAUSE/REMAIN button to start |
||||
|
playback. The green LED will light and the duration |
||||
|
time of the playback will be displayed ( 1 and 2 ). |
3 Press the PLAY/PAUSE/REMAIN button again to pause playback. 4 Press the PLAY/PAUSE/REMAIN button again to resume
playback.
5 Press the STOP/DEL button during Playback or Pause to stop playback.
4.2Low-speed Playback
1 Press the REPEAT/FOLDER button to select the desired folder (A, B, C, or D). If you do not select a folder, the folder that you recorded into or played last will be played.
User manual
2 Press and hold the PLAY/PAUSE/REMAIN button for approximately 2 seconds to start low-speed playback. The green LED will light and the duration time of the recording will be displayed.
3 Press the PLAY/PAUSE/REMAIN button briefly again during lowspeed playback to pause.
4 In Pause, press and hold the PLAY/PAUSE/REMAIN button for approximately 2 seconds to resume low-speed playback or press the button briefly to start normal playback.
5 Press the STOP/DEL button during Playback or Pause to stop playback.
4.3Search
1 Press and hold the NEXT button or BACK button for at least a half a second during Playback. Playback stops and the time on the LCD increases or decreases rapidly.
2 Release the button when you wish to start playback.
3 The search will stop when the end of the current file is reached when the NEXT button is pressed and held or when the beginning of the current file is reached when the BACK button is pressed and held.
4.4Playback of Other Files
1 To switch to the next or previous file, press the NEXT button or BACK button briefly during Playback or Pause.
2 To navigate through all files, press and hold the NEXT button
E N G L I S H
or BACK button during Stop until the desired file is reached. 3 Release the button to play the displayed file.
4.5Repeat Playback
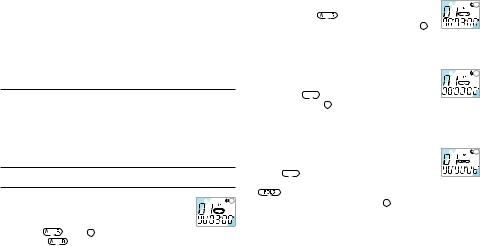
4.5.1 Repeat a Section
|
1 |
||||||
|
1 Press the FOLDER/REPEAT button at the point the |
||||||
|
section is to be reapeated. The starting point is set |
||||||
|
and the |
indicator flashes 1 . |
|||||
|
2 While |
is flashing, press the FOLDER/REPEAT |
|||||
|
button again where repetition is to end. The |
2 |
|||||
|
indicator lights continuously and the selected section |
||||||
|
will be repeated every time during normal playback |
2 . |
|||||
|
3 Press STOP/DEL to stop playback. |
||||||
|
4.5.2 Repeat a File |
||||||
|
1 Press and hold the FOLDER/REPEAT button during Playback. |
||||||
|
2 The |
indicator will appear and the current file |
|||||
|
1 |
||||||
|
will be repeated every time during normal playback |
1 . |
|||||
|
3 Press STOP/DEL to stop playback. |
||||||
|
4.5.3 Repeat a Folder |
||||||
|
1 Press and hold the FOLDER/REPEAT button during Playback. |
||||||
|
2 When |
appears on the LCD, press and hold the FOLDER/ |
|||||
|
REPEAT button again. |
|
3 |
appears on the LCD and all files in the |
1 |
current folder will be repeated every time during normal playback 1 .
5 Menu
5.1Microphone Recording Sensitivity
D The factory default is high sensitivity mode.
|
1 Press the MENU/HOLD button once during Stop |
1 . |
1 |
2 Press the NEXT button or the BACK button . 3 The mode will toggle between low sensitivity mode
(LO SENSE) and high sensitivity mode (HI SENSE)
|
1 2 . |
2 |
|
4 Press the PLAY/PAUSE/REMAIN or the STOP/DEL |
|
|
button to select the displayed mode. |
5 The previous operation will be resumed with the selected mode.
DHigh sensitivity mode: Recommended for recording in a quiet environment and for conference recording.
Low sensitivity mode: Recommended for recording in a noisy environment. Locate the microphone close to the sound source.
User manual
|
5.2 |
Voice Activation Function |
5.4 |
Recording Mode Setting |
|||||||||||||||||
|
1 Press the MENU/HOLD button twice during Stop |
1 |
1 |
||||||||||||||||||
|
D The factory default is high quality recording mode. |
||||||||||||||||||||
|
1 . |
||||||||||||||||||||
|
2 Press the NEXT button or the BACK button . |
1 Press the MENU/HOLD button four times during |
|||||||||||||||||||
|
The mode toggles between VA ON (ON VA) and VA |
||||||||||||||||||||
|
OFF (OF VA) 1 2 . |
2 |
Stop 1 . |
2 |
|||||||||||||||||
|
3 Press the PLAY/PAUSE/REMAIN or STOP/DEL |
2 Press the NEXT button or BACK button . The |
|||||||||||||||||||
|
button to select the displayed mode. |
mode toggles among long play (LP), standard play |
|||||||||||||||||||
|
4 The previous operation will continue in the selected mode. |
(SP) and high quality (HQ) modes 1 2 3 . |
|||||||||||||||||||
|
3 Press the PLAY/PAUSE/REMAIN or STOP/DEL |
3 |
|||||||||||||||||||
|
5.3 |
Beep Setting |
button to select the displayed mode. |
||||||||||||||||||
|
4 The previous operation will continue in the selected |
||||||||||||||||||||
|
D The factory default is BEEP ON. |
mode. |
|||||||||||||||||||
|
1 Press the MENU/HOLD button three times during |
1 |
5.5 |
File Introduction |
|||||||||||||||||
|
Stop 1 . |
1 Press the MENU/HOLD button five times during |
1 |
||||||||||||||||||
|
2 Press the NEXT button or the BACK button . |
Stop 1 . |
|||||||||||||||||||
|
3 The mode toggles between BEEP OFF (OF BEEP) |
2 Press the PLAY/PAUSE/REMAIN button to play the |
|||||||||||||||||||
|
and BEEP ON (ON BEEP) |
1 2 . |
2 |
first 3 seconds of each file starting from the first file |
|||||||||||||||||
|
4 Press the PLAY/PAUSE/REMAIN or the STOP/DEL |
of the current folder |
2 . |
2 |
|||||||||||||||||
button to select the displayed mode. 


 5 The previous operation will continue in the selected mode.
E N G L I S H
6 Delete Function
6.1Delete a Specific File
|
1 |
|||||
|
1 Press the STOP/DEL button briefly during Stop. The |
|||||
|
file number appears and DEL flashes. |
|||||
|
2 Press the NEXT button or BACK button to |
|||||
|
select the file to be deleted 1 . |
|||||
|
2 |
|||||
|
3 Press and hold the STOP/DEL button for |
|||||
|
approximately 3 seconds to delete the current file. |
The number of files is reduced by 1 automatically 2 . 


 4 If you do not want to delete the file, press the STOP/DEL button
briefly.
6.2Delete a Specific Folder
|
1 Press and hold the STOP/DEL button for |
1 |
|
approximately 3 seconds during Stop. The current |
|
|
folder appears and DEL flashes 1 . |
|
|
2 Press the FOLDER/REPEAT button to select the |
2 |
folder you want to delete 2 .
3 Press and hold the STOP/DEL button for approximately 3 seconds again to delete all the files
|
in the selected folder. The Voice Tracer will stop |
3 |
||
|
playing at this folder 3 . |
|||
|
4 If you do not want to delete the folder, press the |
|||
|
10 STOP/DEL button briefly. |
6.3Delete All Folders (format mode)
1 Press and hold the STOP/DEL button for approximately 3 seconds during Stop. The current folder appears and
|
1 |
||||
|
DEL flashes 1 . |
||||
|
2 Press the FOLDER/REPEAT button repeatedly until |
||||
|
all four folders are displayed. “DELALL” will be |
||||
|
displayed 2 . |
||||
|
2 |
||||
|
3 Press and hold the STOP/DEL button again to delete |
||||
|
all files in all folders. After deletion, the position will |
||||
|
be in folder A. |
||||
|
4 If you do not want to delete the folders, press the STOP/DEL |
||||
|
button briefly. |
7 Warnings
•Do not attempt to open, repair, or modify the Voice Tracer.
•Do not use the Voice Tracer where the use of electronic devices is prohibited (such as in aircraft, etc.).
•Do not put the Voice Tracer or its accessories in your mouth.
•Do not immerse the Voice Tracer or spill liquids on it.
•Do not expose the Voice Tracer or its accessories to shocks, as this may cause malfunctions.
•Do not apply excessive force to the LCD display, as this may
User manual
![]()
damage the display or cause malfunctions.
•Do not expose the Voice Tracer to direct sunlight or any source of heat for a prolonged period.
•Remove the batteries if the Voice Tracer will not be used for a long period of time.
•Do not pull attached earphone, microphone, or USB cables with excessive force.
|
8 |
Specifications |
|||
|
Device |
LFH 7655 |
LFH 7675 |
||
|
Recording time / |
HQ |
6 h / 48 kbps / 16 kHz |
12 h / 48 kbps / 16 kHz |
|
|
bit rate / |
SP |
36 h / 6.4 kbps / 8 kHz |
90 h / 6.4 kbps / 8 kHz |
|
|
sample rate |
LP |
66 h / 4 kbps / 8 kHz |
144 h / 4 kbps / 8 kHz |
|
|
Dimensions |
33 mm / 110 mm / 19 mm |
|||
|
Power supply |
LR03 (AAA, UM-4) 2 batteries |
|||
|
Battery life |
Recording: 11 hours, playback: 13 hours |
|||
|
Maximum number of recordings |
Total 396 (99 per folder x 4) |
|||
|
USB mass storage |
E N G L I S H

9 Troubleshooting
LCD is blank
•Replace the batteries with new ones
•Delete some recordings or move recordings to an external device
I cannot play recordings
I cannot hear anything from the speaker
Possible cause:
•The earphones are plugged in
•The volume is at the lowest setting
|
Possible cause: |
Possible cause: |
|||
|
• The batteries are exhausted |
• The Voice Tracer is locked (HOLD mode) |
Correction: |
||
|
• The batteries are not inserted correctly |
• The batteries are exhausted |
• Remove the earphones |
||
|
• Nothing has been recorded yet |
• Adjust the volume |
|||
|
Correction: |
• The volume is at the lowest setting |
|||
|
• Replace the batteries with new ones |
I cannot hear anything from the |
|||
|
• Insert the batteries correctly |
Correction: |
earphones |
||
|
• Release the lock function |
||||
|
I cannot record anything |
• Replace the batteries with new ones |
Possible cause: |
||
|
• Check the number of recordings. |
• The earphones are not plugged in properly |
|||
|
Possible cause: |
• Adjust the volume |
• The volume is at the lowest setting |
||
|
• The Voice Tracer is locked (HOLD mode) |
||||
|
• The batteries are exhausted |
I cannot stop, pause, play or record |
Correction: |
||
|
• The maximum number of recordings has |
• Plug in the earphones properly |
|||
|
been reached or the recording capacity |
Possible cause: |
• Adjust the volume |
||
|
is full |
• The Voice Tracer is locked (HOLD mode) |
|||
|
Correction: |
Correction: |
|||
|
• Release the lock function |
• Release the lock function |

|
Benutzerhandbuch |
1 |
Ihr Digital Voice Tracer |
||||||
|
1 |
Ihr Digital Voice Tracer |
13 |
5 |
Menü |
19 |
1.1 |
Verpackungsinhalt |
|
|
1.1 |
Verpackungsinhalt |
13 |
5.1 |
Aufnahmeempfindlickeit des |
||||
|
1.2 |
Übersicht über Bedienungselemente |
Mikrofons |
19 |
|||||
|
und Anschlüsse |
14 |
5.2 |
VA Function |
19 |
||||
|
1.3 |
LCD Anzeige und Symbole |
14 |
5.3 |
Einstellen des Pieptons |
19 |
|||
|
2 |
Erste Schritte |
15 |
5.4 |
Einstellen des Aufnahmemodus |
20 |
|||
|
2.1 |
Einsetzen der Batterien |
15 |
5.5 |
Dateien scannen |
20 |
Benutzerhandbuch |
||
|
2.2 |
Einschalten des Voice Tracers |
15 |
6 |
Löschfunktion |
20 |
|||
|
2.3 |
Ausschalten des Voice Tracers |
15 |
6.1 |
Löschen einer einzelnen Datei |
20 |
|||
|
2.4 |
Verriegelungsfunktion (Hold) |
15 |
6.2 |
Löschen eines einzelnen Ordners |
20 |
|||
|
3 |
Aufnahme |
16 |
6.3 |
Löschen aller Ordner |
||||
|
3.1 |
Aufnehmen mit dem eingebauten |
(Formatiermodus) |
21 |
USB-Kabel |
||||
|
Mikrofon |
16 |
7 |
Warnhinweise |
21 |
||||
|
3.2 |
Aufnehmen mit einem externen |
8 |
Technische Daten |
21 |
||||
|
Mikrofon |
17 |
9 |
Fehlerbehebung |
22 |
DVT 7655 DVT 7675 |
|||
|
4 |
Wiedergabe |
17 |
Voice Tracer |
|||||
|
4.1 |
Normale Wiedergabe |
17 |
Batterien |
|||||
|
4.2 |
Einstellen der |
|||||||
|
Wiedergabegeschwindigkeit |
17 |
|||||||
|
4.3 |
Suchlauf |
17 |
||||||
|
4.4 |
Navigieren zwischen Dateien |
18 |
Ohrhörer- |
|||||
|
4.5 |
Wiedergabe wiederholen |
18 |
Mikrophoneinheit |
CD |
D E U T S C H
|
Benutzerhandbuch |
(nur DVT 7675) |
13 |

1.2Übersicht über Bedienungselemente und Anschlüsse
AKopfhöreranschluss
BMikrofonanschluss
CLautstärkeregelung
DWEITER
Schnell vor, Dateiwechsel, Menüwechsel
EREC/PAUSE Aufnahme und Pause
F STOP/DEL
Aufnahme stoppen, Datei löschen, ausgewählten Ordner löschen, alle Ordner löschen
GFOLDER/REPEAT
Ordnerwechsel und Wiedergabe wiederholen
HLautsprecher
IEingebautes Mikrofon
JLED-Anzeigeleuchte für Aufnahme (Rot) / Wiedergabe (Grün)
KLCD-Anzeige
LZURÜCK
Schnell vor, Dateiwechsel, Menüwechsel
MWIEDERGABE/PAUSE/RESTZEIT
Langsame und schnelle Wiedergabe, Pause, restliche Aufnahmezeit, DATEI (Aufzeichnungs-Nr.), Zeit, Menüauswahl, Dateieingabefunktionen
NMENU/HOLD
1.3LCD Anzeige und Symbole
|
A |
B |
|
|
I |
||
|
J |
||
|
K |
||
|
C |
||
|
O |
||
|
D |
||
|
L |
E |
|
|
M |
||
|
N |
F |
|
|
G |
||
|
H |
Anzeige des Aufnahmemodus Sprachaktivierung der Aufnahme Anzeige Wiederholmodus Anzeige Tastensperre
Restliche Aufnahme-/Wiedergabezeit Formatanzeige
Anzeige langsame Wiedergabe Anzeige Wiedergabezeit, Aufnahmezeit, Menüwechsel Ordner
Dateianzeige (0-99) Anzeige des Ladezustands
|
Aufnahmempfindlichkeit, VA, Piepton, Aufnahmezeit, Anspielen (Scannen) und Halten einstellen/freigeben |
(Batterien ersetzen, wenn die Anzeige |
|
|
O USBAnschluss |
zwischen den Zuständen 3 und 4 hin und |
|
|
14 |
her springt.) |
Benutzerhandbuch |
2 Erste Schritte
2.1Einsetzen der Batterien
1 Stellen Sie sicher, dass das Gerät abgeschaltet ist. Wenn Sie die Batterien entfernen, während das Gerät eingeschaltet ist, kann dies Funktionsstörungen verursachen.
2 Öffnen Sie das Batteriefach. 3 Legen Sie die Batterien ein. Stellen Sie sicher, dass
die Batterien richtig eingelegt sind (Typ „AAA“) und schließen Sie das Bateriefach wieder. Beim Einlegen der Batterien werden auf dem Bildschirm
|
kurz alle Symbole angezeigt 1 . Anschließend geht |
1 |
||||||||
|
das Gerät in den Bereitschaftsmodus und ist bereit |
|||||||||
|
für die Aufnahme oder Wiedergabe 2 . |
|||||||||
|
4 Der Voice Tracer schaltet sich automatisch ab, wenn |
|||||||||
|
eine Minute lang keine Funktion aktiviert wird. |
2 |
||||||||
|
5 Drücken Sie zum Einschalten für einige Sekunden die |
|||||||||
|
Taste WIEDERGABE/PAUSE/RESTZEIT. Der Voice |
|||||||||
|
Tracer befindet sich nach dem Einschalten im Bereitschaftsmodus 2 . |
D Entfernen Sie die Batterien aus dem Gerät, falls es während einer längeren Zeitspanne nicht verwendet wird. Ausfließende Batterien können den Voice Tracer beschädigen.
E Nehmen Sie bei Funktionsstörungen des Geräts, die Batterien
kurz heraus und setzen Sie sie wieder ein.
Benutzerhandbuch
2.2Einschalten des Voice Tracers
1 Zum Einschalten des Voice Tracers die Taste WIEDERGABE/ PAUSE/RESTZEIT oder REC/PAUSE betätigen. Das Gerät schaltet sich im Bereitschaftsmodus-Modus ein.
|
2 Beim Einlegen der Batterien erscheinen auf dem |
1 |
||
|
LCD alle Anzeigeleuchten und der Voice Tracer |
|||
|
stellt sich auf den Bereitschaftsmodus-Modus 1 . |
2.3Ausschalten des Voice Tracers
Der Voice Tracer schaltet sich automatisch aus, wenn eine Minute lang keine Funktion aktiviert wird.
2.4Verriegelungsfunktion (Hold)
1 Um die Verriegelungsfunktion zu aktivieren halten Sie die Taste MENU/HOLD etwa 2 Sekunden lang gedrückt, während sich der Voice Tracer im Wiedergabe-, Aufnahmeoder Bereit-
|
schafts-Modus befindet. Während des HOLD-Modus |
1 |
||
|
sind alle Tasten deaktiviert, auf dem Display erscheint |
|||
|
„ON HOLD“, wenn eine Taste betätigt wird 1 . |
|||
|
2 Zum Deaktivieren der Verriegelungsfunktion die |
|||
|
MENU/HOLD-Taste noch einmal etwa 2 Sekunden ge- |
2 |
||
|
drückt halten. Auf dem LCD erscheint „OF HOLD“, d. |
|||
|
h., dass die Verriegelungsfunktion deaktiviert wurde 2 . |
|||
|
D Der HOLD-Modus wird auch deaktiviert, wenn sich das Gerät |
|||
|
abschaltet und wieder eingeschaltet wird. |
15 |
||
D E U T S C H
3 Aufnahme
CAchtung: Um mit der Dragon-Spracherkennungssoftware beste Resultate zu erzielen, sollte die Aufnahme im HQ-Modus erfolgen (werksseitig eingestellt). Nach dem Download auf den PC muss die
.zvr-Datei in das .wav-Format umgewandelt werden! Lesen Sie dazu bitte auch das Download-Manager-Bedienungshandbuch.
Bitte beachten Sie vor der Aufnahme folgende Hinweise (Stellen Sie sicher, dass das Gerät im Bereitschaftsmodus-Modus ist):
•Betätigen Sie die Taste FOLDER/REPEAT, um den gewünschten Ordner auszuwählen. Der Voice Tracer geht bei jedem nächsten Druck auf diese Taste auf den nächsten Ordner über (A, B, C und D). Wird kein Ordner ausgewählt, wird im aktuellen Ordner aufgenommen.
•Sobald die Anzahl der Dateien im laufenden Ordner 99 erreicht, wird die Aufnahme nach der letzten Datei des nächsten Ordners fortgesetzt.
•Zum Anzeigen der restlichen Aufnahmekapazität betätigen Sie die Taste WIEDERGABE/PAUSE/RESTZEIT.
•Betätigen Sie die WEITER-Taste während der Aufnahme um diese auf mehrere Dateien zu verteilen.
•In jedem Ordner können maximal 99 Dateien gespeichert werden (in den 4 Ordnern daher 396 Dateien).
•Übersteigt die Aufnahmezeit die verfügbare Kapazität oder wenn die Dateinummer 396 erreicht wird, wird „FULL“ auf dem Display
|
eingeblendet, ein Fortsetzen der Aufnahme ist nicht |
1 |
|
möglich 1 . |
|
|
• In diesem Fall sollte man einige Aufzeichnungen |
|
|
löschen oder sie auf ein externes Gerät übertragen (Audio oder |
|
|
PC), um weiter aufnehmen zu können. |
•Während des Aufnehmens dürfen die Batterien nicht herausgenommen werden. Das kann zu Funktionsstörungen des Voice Tracer führen. Ist eine längere Aufnahme geplant, sollten die Batterien vor dem Aufnehmen durch neue ersetzt werden.
•Die Aufnahme stoppt automatisch, wenn sich der Voice Tracer im VA-Modus befindet und kein Geräusch erfasst wird. Die VA-Funktion sollte für das Aufnehmen wichtiger Gespräche deaktiviert werden.
3.1 Aufnehmen mit dem eingebauten Mikrofon
1 Wählen Sie den gewünschten Aufnahmeordner, die
|
1 |
|||||
|
VA-Funktion und den Aufnahmemodus (HQ, SP oder |
|||||
|
LP) bevor Sie beginnen aufzunehmen. (siehe Kapitel |
|||||
|
„Menü“). |
|||||
|
2 Richten Sie das eingebaute Mikrofon des Geräts auf |
|||||
|
2 |
die Tonquelle aus.
3 Drücken Sie die REC/PAUSE-Taste, um mit der Aufnahme zu beginnen. Die rote LED schaltet sich ein 1 2 .
|
4 Drücken Sie die REC/PAUSE-Taste, um die |
3 |
|
Aufnahme anzuhalten 3 . |
|
|
5 Drücken Sie die REC/PAUSE-Taste erneut, um die |

Aufnahme fortzusetzen. Die rote LED schaltet sich wieder ein. 6 Drücken Sie zum Stoppen der Aufnahme die STOP/DEL-Taste.
3.2Aufnehmen mit einem externen Mikrofon
Schließen Sie ein Mikrofon an den Mikrofonanschluss an und gehen gleich vor wie beim Aufnehmen mit dem eingebauten Mikrofon.
4 Wiedergabe
DHalten Sie während der Wiedergabe die WIEDERGABE/PAUSE/ RESTZEIT-Taste, um die restliche Wiedergabezeit anzuzeigen.
4.1Normale Wiedergabe
|
1 |
|||
|
1 Drücken Sie die FOLDER/REPEAT-Taste, um den |
|||
|
gewünschten Ordner auszuwählen (A, B, C oder |
|||
|
D). Wird kein Ordner ausgewählt, wird der zuletzt |
|||
|
benutzte Ordner abgespielt. |
|||
|
2 |
|||
|
2 Zum Starten der Wiedergabe die WIEDERGABE/ |
|||
|
PAUSE/RESTZEIT-Taste betätigen. Die grüne LED |
|||
|
schaltet sich ein, die Dauer der Wiedergabe wird |
|||
|
angezeigt ( 1 und 2 ). |
3 Drücken Sie die WIEDERGABE/PAUSE/RESTZEIT-Taste, um die Wiedergabe zu unterbrechen.
4 Zum Fortsetzen der Wiedergabe die WIEDERGABE/PAUSE/ RESTZEIT-Taste noch einmal betätigen.
5 Drücken Sie die die STOP/DELETE-Taste, um die Wiedergabe zu stoppen.
4.2Einstellen der Wiedergabegeschwindigkeit
1 Drücken Sie die FOLDER/REPEAT-Taste, um den gewünschten Ordner auszuwählen (A, B, C oder D). Wird kein Ordner ausgewählt, wird der zuletzt benutze Ordner wiedergegeben.
2 Halten Sie die WIEDERGABE/PAUSE/RESTZEIT-Taste etwa 2 Sekunden gedrückt, um die Wiedergabe mit langsamer Geschwindigkeit zu beginnen. Die grüne LED schaltet sich ein, die Dauer der Aufnahme wird angezeigt.
3 Drücken Sie die WIEDERGABE/PAUSE/RESTZEIT-Taste, um die Wiedergabe zu unterbrechen.
4 Um die Wiedergabe mit langsamer Geschwindigkeit fortzusetzen, halten Sie die WIEDERGABE/PAUSE/RESTZEITTaste etwa 2 Sekunden gedrückt. Oder drücken Sie die Taste kurz, um die normale Wiedergabe zu beginnen.
5 Drücken Sie die die STOP/DELETE-Taste, um die Wiedergabe zu stoppen.
4.3Suchlauf
1 Drücken Sie währen der Wiedergaben die WEITER-Taste oder ZURÜCK-Taste mindestens eine halbe Sekunde. Die
D E U T S C H
Wiedergabe stoppt, die Anzeige der Aufnahmezeit auf dem LCD läuft rasch vorwärts oder rückwärts.
2 Lassen Sie die Taste los, wenn die Wiedergabe beginnen soll. 3 Der Suchlauf stoppt, sobald das Ende der laufenden Datei
erreicht ist, wenn die WEITER-Taste gedrückt und niedergehalten wird, oder wenn der Beginn der laufenden Datei erreicht wird und die ZURÜCK-Taste betätigt und niedergehalten wird.
4.4Navigieren zwischen Dateien
1 Um zur nächsten oder vorhergehenden Datei zu springen, betätigen Sie im Stopp-Modus die WEITER-Taste oder ZURÜCK-Taste .
2 Zur Ansicht aller Dateien in einem Ordner die WEITER-Taste oder ZURÜCK-Taste im Stopp-Modus gedrückt halten.
3 Die Taste freigeben, um die angezeigte Datei wiederzugeben.
4.5Wiedergabe wiederholen
4.5.1 Einen Abschnitt wiederholen
|
1 |
||||
|
1 Drücken Sie die FOLDER/REPEAT-Taste an jener |
||||
|
Stelle, wo die Wiederholung eines Abschnitts |
||||
|
beginnen soll. Der Startpunkt ist eingestellt und die |
||||
|
Anzeige |
blinkt 1 . |
|||
|
2 Während |
blinkt, die FOLDER/REPEAT-Taste nochmals an |
|
2 |
||||||
|
der Stellen drücken, an der die Wiederholung enden |
||||||
|
soll. Die Anzeige |
hört auf zu blinken und der |
|||||
|
ausgewählte Abschnitt wird ständig wiederholt 2 . |
||||||
|
3 Drücken Sie die die STOP/DELETE-Taste, um die Wiedergabe |
||||||
|
zu stoppen. |
||||||
|
4.5.2 Eine ganze Datei wiederholen |
||||||
|
1 |
||||||
|
1 Während der Wiedergabe die FOLDER/REPEAT- |
||||||
|
Taste betätigen und gedrückt halten. |
||||||
|
2 Die Anzeige |
erscheint, die laufende Datei wird |
|||||
|
ständig wiederholt |
1 . |
|||||
|
3 Drücken Sie die die STOP/DELETE-Taste, um die Wiedergabe |
||||||
|
zu stoppen. |
||||||
|
4.5.3 Einen Ordner wiederholen |
||||||
|
1 |
||||||
|
1 Während der Wiedergabe die FOLDER/REPEAT- |
||||||
|
Taste betätigen und gedrückt halten. |
||||||
|
2 Wenn |
auf dem LCD erscheint, die FOLDER/ |
|||||
|
REPEAT-Taste wieder betätigen und halten. |
||||||
|
3 |
erscheint auf dem LCD und alle Dateien des laufenden |
|||||
|
Ordners werden ständig wiederholt 1 . |
5 Menü
5.1Aufnahmeempfindlickeit des Mikrofons
D Werkseitig wird der Modus mit hoher Empfindlichkeit eingestellt.
|
1 Während Stopp die MENU/HOLD-Taste einmal |
1 |
|
|
betätigen 1 . |
||
|
2 Die Taste WEITER oder die ZURÜCK drücken. |
||
|
3 Der Modus schaltet zwischen geringer (LO SENSE) |
||
|
und hoher Empfindlichkeit (HI SENSE) um 1 2 . |
2 |
|
|
4 Die WIEDERGABE/PAUSE/RESTZEIT-Taste oder |
||
|
die STOP/DEL-Taste betätigen, um den angezeigten |
||
|
Modus auszuwählen. |
||
|
5 Der vorhergehende Vorgang wird mit dem ausgewählten Modus |
||
|
fortgesetzt. |
DHinweis: HI SENSE: Empfohlen für Aufnahmen in ruhiger Umgebung und für das Aufnehmen von Konferenzen.
LO SENSE: Empfohlen für Aufnahmen in lauter Umgebung. Das Mikrofon nahe an die Tonquelle halten.
5.2VA Function
|
1 Während Stopp die MENU-HOLD-Taste zweimal |
1 |
|
|
betätigen 1 . |
||
|
2 Die Taste WEITER oder die ZURÜCK drücken. |
||
|
3 Der Modus schaltet zwischen VA EIN (ON VA) und |
||
|
VA AUS (OF VA) um 1 2 . |
2 |
|
|
4 Die WIEDERGABE/PAUSE/RESTZEIT-Taste oder |
||
|
die STOP/DEL-Taste betätigen, um den angezeigten |
||
|
Modus auszuwählen. |
||
|
5 Der vorhergehende Vorgang wird mit dem ausgewählten Modus |
||
|
fortgesetzt. |
5.3Einstellen des Pieptons


 1
1

D Werkseitig ist der Piepton aktiviert (BEEP ON).
1 Während Stopp die MENU/ HOLD-Taste dreimal
|
betätigen 1 . |
2 |
|
|
2 Die Taste WEITER oder die ZURÜCK drücken. |
||
|
Der Modus schaltet zwischen BEEP AUS (OF BEEP) |
||
|
und BEEP ON (ON BEEP) um 1 2 . |
||
|
3 Die WIEDERGABE/PAUSE/RESTZEIT-Taste oder die STOP/ |
||
|
DEL-Taste betätigen, um den angezeigten Modus auszuwählen. |
||
|
4 Der vorhergehende Vorgang wird mit dem ausgewählten Modus |
||
|
fortgesetzt. |
D E U T S C H
5.4Einstellen des Aufnahmemodus
D Werkseitig ist der High-Quality-Modus eingestellt.
1 Während Stopp die MENU-HOLD-Taste viermal betätigen 1 .
2 Die Taste WEITER oder die ZURÜCK drücken. Der Modus schaltet zwischen long play (LP) und standard play (SP) sowie High Quality (HQ) um 1 2 3 .
3 Die WIEDERGABE/PAUSE/RESTZEIT-Taste oder die STOP/DEL-Taste betätigen, um den angezeigten Modus auszuwählen.
4 Der vorhergehende Vorgang wird mit dem ausgewählten Modus fortgesetzt.
5.5Dateien scannen
1 Während Stopp die MENU-HOLD-Taste fünfmal betätigen 1 .
2 Die WIEDERGABE/PAUSE/RESTZEIT-Taste betätigen, um die ersten 3 Sekunden jeder Datei (beginnend mit der ersten) des laufenden Ordners anzuspielen 2 .
20
6 Löschfunktion
6.1Löschen einer einzelnen Datei
|
1 |
|||||
|
1 Die STOP/DEL-Taste während Stopp kurz betätigen. |
|||||
|
Die Dateinummer erscheint, und DEL blinkt. |
|||||
|
2 Die Taste WEITER oder die ZURÜCK drücken, |
|||||
|
um die zu löschende Datei auszuwählen 1 . |
|||||
|
2 |
|||||
|
3 Die STOP/DEL-Taste etwa 3 Sekunden gedrückt |
|||||
|
halten, um die gewählte Datei zu löschen. Die Anzahl |
|||||
|
der Dateien wird automatisch um 1 verringert 2 . |
|||||
|
4 Drücken Sie kurz die STOP/DEL-Taste, um den Löschvorgang |
|||||
|
abzubrechen. |
6.2Löschen eines einzelnen Ordners
|
1 Während Stopp die STOP/DEL-Taste etwa 3 |
1 |
|
Sekunden gedrückt halten. Der laufende Ordner |
|
|
wird angezeigt, DEL blinkt 1 . |
|
|
2 Die FOLDER/REPEAT-Taste betätigen, um den zu |
2 |
löschenden Ordner auszuwählen 2 .
3 Die STOP/DEL-Taste etwa 3 Sekunden gedrückt halten, um alle Dateien des ausgewählten Ordners
|
zu löschen. Der Voice Tracer stoppt die Wiedergabe |
3 |
||||
|
bei diesem Ordner 3 . |
|||||
|
4 Drücken Sie kurz die STOP/DEL-Taste, um den |
|||||
|
Löschvorgang abzubrechen. |
Benutzerhandbuch |
||||
![]()
6.3Löschen aller Ordner (Formatiermodus)
|
1 |
||||
|
1 Während Stopp die STOP/DEL-Taste etwa 3 |
||||
|
Sekunden gedrückt halten. Der laufende Ordner |
||||
|
wird angezeigt, DEL blinkt 1 . |
||||
|
2 Die FOLDER/REPEAT-Taste wiederholt betätigen, |
||||
|
2 |
||||
|
bis alle vier Ordner angezeigt werden. „DELALL“ |
||||
|
wird angezeigt 2 . |
3 Die STOP/DEL-Taste etwa 3 Sekunden gedrückt halten, 


 um die Dateien aller Ordner zu löschen. Der Voice Tracer befindet sich nach Abschluss des Löschvorgangs in Ordner A.
4 Drücken Sie kurz die STOP/DEL-Taste, um den Löschvorgang abzubrechen.
7 Warnhinweise
•Versuchen Sie nicht, den Voice Tracer zu öffnen oder zu reparieren.
•Den Voice Tracer nicht verwenden, wenn der Gebrauch elektronischer Geräte verboten ist (wie zum Beispiel in Flugzeugen usw.).
•Den Voice Tracer oder sein Zubehör nicht in den Mund stecken.
•Den Voice Tracer nicht in Flüssigkeiten tauchen oder mit Flüssigkeiten überschütten.
•Den Voice Tracer oder sein Zubehör nicht Stößen aussetzen, das kann
|
Funktionsstörungen verursachen. |
|||||
|
• Nicht stark auf das LCD drücken: das kann das Display beschädigen |
|||||
|
oder Funktionsstörungen verursachen. |
|||||
|
• Den Voice Tracer nicht über längere Zeit direkter Sonnenbestrahlung |
|||||
|
oder Wärmequellen aussetzen. |
|||||
|
• Die Batterien entfernen, falls der Voice Tracer für längere Zeit nicht |
|||||
|
benutzt wird. |
H |
||||
|
• Nicht zu fest an angeschlossenen Kopfhörern, Mikrofon oder USB- |
|||||
|
S C |
|||||
|
Kabeln ziehen. |
|||||
|
D E U T |
|||||
|
8 |
Technische Daten |
||||
|
Gerät |
LFH 7655 |
LFH 7675 |
|||
|
Max. Aufnahmezeit / |
HQ |
6 h / 48 kbps / 16 kHz |
12 h / 48 kbps / 16 kHz |
||
|
Bitrate / |
SP |
36 h / 6.4 kbps / 8 kHz |
90 h / 6.4 kbps / 8 kHz |
||
|
Abtastrate |
LP |
66 h / 4 kbps / 8 kHz |
144 h / 4 kbps / 8 kHz |
||
|
Geräteabmessungen |
33 mm / 110 mm / 19 mm |
||||
|
Stromversorgung |
LR03 (AAA, UM-4) 2 Batterien |
||||
|
Batterielebensdauer |
Aufnahme: 11 h, Wiedergabe: 13 h |
||||
|
Max. Anzahl Aufnahmen |
Insgesamt 396 (99 pro Ordner x 4) |
||||
|
USB-Massenspeicher |

9 Fehlerbehebung |
• Einige Aufnahmen löschen oder auf ein |
|
|
externes Gerät übertragen. |
||
|
Am Bildschirm wird nichts angezeigt |
Die Wiedergabe funktioniert nicht |
Mögliche Ursache:
•Die Batterien sind leer
•Die Batterien wurden falsch eingelegt
Abhilfe:
•Neue Batterien einlegen
•Die Batterien richtig einlegen
Das Aufnehmen funktioniert nicht
Mögliche Ursache:
•Der Voice Tracer ist verriegelt (HOLD ON-Modus)
•Die Batterien sind leer
•Die maximale Anzahl der Aufnahmen wurde erreicht oder keine Speicherkapazität mehr
Abhilfe:
•Die Verriegelungsfunktion deaktivieren
•Neue Batterien einlegen
Mögliche Ursache:
•Der Voice Tracer ist verriegelt (HOLD ON-Modus)
•Die Batterien sind leer
•Es wurde noch nichts aufgenommen
•Die Lautstärkeregelung steht auf ganz leise
Abhilfe:
•Die Verriegelungsfunktion deaktivieren
•Neue Batterien einlegen
•Die Aufnahme-Nr. prüfen
•Die Lautstärkeregelung einstellen
Aufnahme oder Wiedergabe lassen sich nicht stoppen oder auf Pause stellen
Mögliche Ursache:
•Der Voice Tracer ist verriegelt (HOLD ON-Modus)
Abhilfe:
• Die Verriegelungsfunktion deaktivieren
Kein Ton aus dem Lautsprecher
Mögliche Ursache:
•Der Kopfhörer ist angesteckt
•Die Lautstärkeregelung steht auf ganz leise
Abhilfe:
•Den Kopfhörer entfernen
•Die Lautstärkeregelung einstellen
Kein Ton aus dem Kopfhörer
Mögliche Ursache:
•Der Kopfhörer ist nicht komplett angesteckt
•Die Lautstärkeregelung steht auf ganz leise
Abhilfe:
•Den Kopfhörer korrekt anstecken
•Die Lautstärkeregelung einstellen

|
Manuel de l‘utilisateur |
1 |
Votre Digital Voice Tracer |
||||||
|
1 |
Votre Digital Voice Tracer |
23 |
5 |
Menu |
28 |
1.1 |
Contenu de l’emballage |
|
|
1.1 |
Contenu de l’emballage |
23 |
5.1 |
Sensibilité d’enregistrement |
||||
|
1.2 |
Présentation des touches et de la |
du micro |
28 |
|||||
|
connectique |
24 |
5.2 |
Fonction VA |
29 |
||||
|
1.3 |
Indicateur à cristaux liquides et |
5.3 |
Marche/arrêt du bip sonore |
29 |
||||
|
symboles |
24 |
5.4 |
Définition du mode |
|||||
|
2 |
Pour commencer |
25 |
d’enregistrement |
29 |
Manuel de l‘utilisateur |
|||
|
2.1 |
Changer les piles |
25 |
5.5 |
Début de fichier |
30 |
|||
|
2.2 |
Mise sous tension du Voice Tracer |
25 |
6 |
Fonction de suppression |
30 |
|||
|
2.3 |
Mise hors tension du Voice Tracer |
25 |
6.1 |
Pour supprimer un fichier spécifique 30 |
||||
|
2.4 |
Fonction de verrouillage (Hold) |
25 |
6.2 |
Pour supprimer un dossier |
||||
|
3 |
Enregistrement |
26 |
spécifique |
30 |
Câble USB |
|||
|
3.1 |
Enregistrement avec le microphone |
6.3 |
Pour supprimer tous les dossiers |
|||||
|
incorporé |
26 |
(Mode Format) |
30 |
|||||
|
3.2 |
Enregistrement avec un microphone |
7 |
Avertissements |
31 |
DVT 7655 DVT 7675 |
|||
|
externe |
27 |
8 |
Fiche technique |
31 |
Voice Tracer |
|||
|
4 |
Écoute |
27 |
9 |
Dépannage |
32 |
Piles |
||
|
4.1 |
Écoute normale |
27 |
||||||
|
4.2 |
Écoute au ralenti |
27 |
||||||
|
4.3 |
Recherche |
27 |
||||||
|
4.4 |
Écoute d’autres fichiers |
28 |
Kit écouteurs/micro |
|||||
|
4.5 |
Répétition |
28 |
(DVT 7675) |
CD |
F R A N Ç A I S
|
Manuel de l‘utilisateur |
23 |

|
1.2 |
Présentation des touches et de la connectique |
1.3 Indicateur à cristaux liquides et |
||
|
A |
Prise écouteurs |
A |
B |
symboles |
|
I |
||||
|
B |
Prise microphone |
|||
|
J |
||||
|
C |
Contrôle du volume |
|||
|
K |
||||
|
D |
SUIVANT |
|||
|
Avance rapide, changement de fichier, changement de menu |
C |
|||
|
E |
REC/PAUSE Enregistrement et pause |
|||
|
F |
STOP/DEL |
O |
|
Arrêt enregistrement, effacement du fichier, effacement du |
D |
||||
|
dossier sélectionné, effacement de tous les dossiers |
|||||
|
L |
|||||
|
G |
FOLDER/REPEAT Changement de dossier et répétition de l’écoute |
E |
Mode d’enregistrement |
||
|
H |
Haut-parleur |
M |
Activation vocale de l’enregistrement |
||
|
I |
Microphone incorporé |
N |
F |
Indicateur de mode de répétition |
|
|
J |
Indicateur d’état d’enregistrement (rouge) / d’écoute (vert) |
Verrouillage des boutons |
|||
|
K |
Écran à cristaux liquides |
G |
Temps d’enregistrement/de lecture |
||
|
L |
PRÉCÉDENT |
restant |
|||
|
Retour rapide, changement de fichier, changement de menu |
Indicateur de format |
||||
|
M |
ÉCOUTE/PAUSE/TEMPS RESTANT |
Indicateur de lecture au ralenti |
|||
|
Lecture au ralenti et normale, pause, temps d’enregistrement restant, FICHIER |
H |
Durée de lecture, d’enregistrement, |
|||
|
(nombre d’enregistrements), heure, sélection du menu, fonctions de début de fichier |
de changement de menu |
||||
|
N |
MENU/HOLD |
Dossiers |
|||
|
Sensibilité d’enregistrement, VA, avertisseur sonore, temps d’enregistrement, |
Affichage des fichiers (0-99) |
||||
|
début de fichier (scan) et dispositif de verrouillage/déverrouillage |
Indicateur d’état des piles (Changer |
|
O Prise USB |
les piles si l’affichage alterne entre les |
|
|
24 |
niveaux 3 et 4.) |
Manuel de l‘utilisateur |
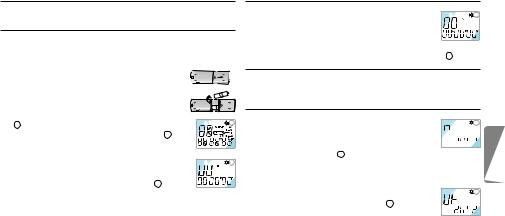
2 Pour commencer
2.1Changer les piles
1 S’assurer que l’alimentation est bien coupée. Ne jamais changer les piles si le périphérique est encore sous tension. Cela pourrait provoquer des dysfonctionnements.
2 Ouvrir le compartiment des piles. 3 Mettre les piles. S’assurer que les piles sont
correctement installées (taille « AAA ») et refermer le compartiment. Lors de l’installation des piles, l’écran à cristaux liquides affiche tous les indicateurs
|
1 et le périphérique passe en mode d’attente (jusqu’au |
1 |
|||||||
|
démarrage de l’enregistrement ou de l’écoute 2 ). |
||||||||
|
4 Le périphérique se met automatiquement hors tension |
||||||||
|
si aucune fonction n’est activée durant 1 minute. |
||||||||
|
5 Appuyer sur le bouton ÉCOUTE/ PAUSE/TEMPS |
2 |
|||||||
|
RESTANT pour mettre le périphérique en marche. |
||||||||
|
Le Voice Tracer passe en mode d’attente 2 . |
DRetirer les piles s’il n’est pas prévu d’utiliser le Voicer Tracer avant longtemps. Toute fuite au niveau des piles peut endommager l’appareil.
ESi le Voice Tracer ne fonctionne pas correctement, retirer les piles et les réinstaller.
Manuel de l‘utilisateur
2.2Mise sous tension du Voice Tracer
|
1 Appuyer sur le bouton ÉCOUTE/PAUSE/TEMPS |
1 |
|||
|
RESTANT pour activer le Voice Tracer. Le |
||||
|
périphérique passe en mode d’attente. Lors de |
||||
|
l’installation des piles, l’écran à cristaux liquides affiche tous les |
||||
|
indicateurs et le Voice Tracer passe en mode d’attente 1 . |
2.3Mise hors tension du Voice Tracer
Le périphérique se met automatiquement hors tension si aucune fonction n’est activée durant 1 minute.
2.4Fonction de verrouillage (Hold)
|
1 Appuyer sur le bouton MENU/HOLD et le maintenir 2 |
1 |
secondes environ lorsque le Voice Tracer est en mode 


 d’écoute, d’enregistrement ou d’attente pour activer la


 fonction de verrouillage 1 . Tous les boutons sont désactivés lorsque le périphérique est en mode de VERROUILLAGE et l’écran à cristaux liquides affiche «ON HOLD» à chaque pression de bouton.
2 Appuyer une nouvelle fois sur le bouton MENU/
|
HOLD et le maintenir 2 secondes environ pour |
2 |
|
débloquer la fonction de verrouillage 2 . L’écran à |
|
|
cristaux liquides affiche «OF HOLD» pour indiquer |
|
|
que la fonction de verrouillage a été désactivée. |
D Le mode de VERROUILLAGE est désactivé si le périphérique est
|
mis hors tension et à nouveau sous tension. |
25 |
F R A N Ç A I S

3 Enregistrement
CRemarque : Pour de bons résultats lorsque vous travaillez avec le logiciel de reconnaissance vocale Dragon, enregistrez en mode HQ (valeur d’usine par défaut) et convertissez le fichier .zvr en format wavaprès téléchargement sur le PC ! Veuillez également lire le manuel d’utilisation du Gestionnaire de téléchargement.
Points à considérer avant de commencer l’enregistrement (S’assurer que le périphérique est en mode d’attente) :
•Appuyer sur le bouton FOLDER/REPEAT pour sélectionner le dossier souhaité. Le Voice Tracer passe au dossier suivant (A, B, C, et D) à chaque pression du bouton. Si aucun dossier n’est sélectionné, l’enregistrement s’effectue sur le dossier affiché.
•Lorsque le nombre de fichiers du dossier affiché atteint 99, l’enregistrement se poursuit à la suite du dernier fichier du dossier suivant.
•Appuyer sur le bouton ÉCOUTE/PAUSE/TEMPS RESTANT pour afficher la capacité d’enregistrement restante.
•Appuyer sur le bouton SUIVANT pour séparer un FICHIER pendant l’enregistrement (fonction de séparation des fichiers).
•Le nombre maximal de fichiers dans chaque dossier est de 99.
•Si la durée d’enregistrement excède la capacité disponible ou si le nombre de fichiers est de 396, l’écran indique «FULL» et il est impossible de poursuivre l’enregistrement 1 . Le cas échéant, supprimer certains
|
enregistrements ou les transférer sur un périphérique ex- |
1 |
|
terne (audio ou PC) afin de poursuivre l’enregistrement. |
|
|
• Ne pas retirer les piles durant l’enregistrement. Cela |
|
|
pourrait provoquer des dysfonctionnements au niveau du Voice |
|
|
Tracer. S’il est prévu d’effectuer un enregistrement de longue |
|
|
durée, changer les piles avant de commencer l’enregistrement. |
•Lorsque le Voice Tracer est en mode VA, l’enregistrement s’arrête automatiquement si aucun son n’est détecté. Désactiver la fonction VA durant l’enregistrement de conversations importantes.
3.1 Enregistrement avec le microphone incorporé
1 Définir la sensibilité d’enregistrement souhaitée, le
|
1 |
|||||
|
dossier, la fonction VA et la qualité (HQ, standard ou |
|||||
|
longue durée) avant de commencer l’enregistrement |
|||||
|
(voir chapitre « Menu »). |
|||||
|
2 Diriger le microphone incorporé du périphérique |
|||||
|
2 |
|||||
|
vers la source sonore. |
|||||
|
3 Appuyer sur le bouton REC/PAUSE pour |
|||||
|
commencer l’enregistrement 1 2 . |
|||||
|
4 Appuyer sur le bouton REC/PAUSE pour suspendre |
|||||
|
3 |
|||||
|
l’enregistrement 3 . |
|||||
|
5 Appuyer sur le bouton REC/PAUSE pour poursuivre |
|||||
|
l’enregistrement. L’indicateur rouge s’allume à |
|||||
|
nouveau. |
6 Appuyer sur le bouton STOP/DEL pour arrêter l’enregistrement.
|
26 |
Manuel de l‘utilisateur |

3.2 Enregistrement avec un microphone externe
Raccorder le microphone à la prise microphone et procéder de la même façon qu’avec le microphone incorporé.
4 Écoute
DAppuyer sur le bouton ÉCOUTE/PAUSE/TEMPS RESTANT et le maintenir durant l’écoute normale pour afficher la durée restante du fichier affiché.
4.1Écoute normale
|
1 |
|||
|
1 Appuyer sur le bouton FOLDER/ REPEAT pour |
|||
|
sélectionner le dossier souhaité (A, B, C ou D). Si |
|||
|
aucun dossier n’est sélectionné, le dernier dossier, |
|||
|
sur lequel un enregistrement a été effectué, sera |
|||
|
2 |
|||
|
écouté. |
|||
|
2 Appuyer sur le bouton ÉCOUTE/PAUSE/TEMPS |
RESTANT pour commencer l’écoute. L’indicateur vert s’allume et la durée de l’enregistrement s’affiche 1 2 .
3 Appuyer à nouveau sur le bouton ÉCOUTE/PAUSE/ TEMPS RESTANT pour suspendre l’écoute.
4 Appuyer sur le bouton ÉCOUTE/PAUSE/TEMPS RESTANT pour reprendre l’écoute.
5 Appuyer sur le bouton STOP/DEL durant l’écoute ou la pause pour arrêter l’écoute.
4.2Écoute au ralenti
1 Appuyer sur le bouton REPEAT/FOLDER pour sélectionner le dossier souhaité (A, B, C ou D). Si aucun dossier n’est
sélectionné, le dernier dossier écouté ou enregistré, sera écouté. 2 Appuyer sur le bouton ÉCOUTE/PAUSE/TEMPS RESTANT et
le maintenir 2 secondes environ pour commencer l’écoute au ralenti. L’indicateur vert s’allume et la durée de lecture s’affiche.
3 Appuyer une nouvelle fois brièvement sur le bouton ÉCOUTE/ PAUSE/ TEMPS RESTANT durant l’écoute au ralenti pour suspendre l’écoute.
4 Sur Pause, appuyer sur le bouton ÉCOUTE/PAUSE/TEMPS RESTANT et le maintenir 2 secondes environ pour reprendre l’écoute au ralenti ou appuyer brièvement sur le bouton pour commencer l’écoute normale.
5 Appuyer sur le bouton STOP/DEL durant l’écoute ou la pause pour arrêter l’écoute.
4.3Recherche
1 Appuyer sur le bouton SUIVANT ou PRÉCÉDENT et le maintenir au moins une demi-seconde durant l’écoute.
2 L’écoute s’arrête et la durée affichée par l’écran à cristaux liquides augmente ou diminue rapidement.
F R A N Ç A I S
|
Manuel de l‘utilisateur |
27 |

3 Relâcher le bouton à l’endroit souhaité pour commencer l’écoute. 4 La recherche s’arrête à la fin du fichier affiché en appuyant sur le
bouton SUIVANT et en le maintenant ou au début du fichier affiché en appuyant sur le bouton PRÉCÉDENT et en le maintenant.
4.4Écoute d’autres fichiers
1 Pour passer au fichier suivant ou précédent, appuyer brièvement sur le bouton SUIVANT ou PRÉCÉDENT durant l’écoute ou la pause.
2 Pour naviguer dans tous les fichiers, appuyer sur le bouton SUIVANT ou PRÉCÉDENT et le maintenir durant l’arrêt pour passer au fichier souhaité.
3 Relâcher le bouton pour écouter le fichier affiché.
4.5Répétition
4.5.1 Répétition d’un passage
|
1 |
||||
|
1 Appuyer sur le bouton FOLDER/REPEAT à l’endroit |
||||
|
souhaité pour commencer la répétition du passage. |
||||
|
Le point de départ est défini et l’indicateur |
||||
|
clignote 1 . |
||||
|
2 |
||||
|
2 Pendant le clignotement |
, appuyer à sur le bou- |
|||
|
ton FOLDER/REPEAT à l’endroit souhaité pour arrêter |
||||
|
la répétition. L’indicateur |
s’allume de façon |
|||
|
continue et le passage sélectionné est répété constamment 2 . |
||||
|
3 Appuyer sur le bouton STOP/DEL pour arrêter l’écoute. |
4.5.2 Répéter un fichier
|
1 |
|||||||
|
1 Appuyer sur le bouton FOLDER/REPEAT et le |
|||||||
|
maintenir durant l’écoute. |
|||||||
|
2 L’indicateur |
se manifeste et le fichier affiché |
||||||
|
est constamment répété 1 . |
|||||||
|
3 Appuyer sur le bouton STOP/DEL pour arrêter l’écoute. |
|||||||
|
4.5.3 Répéter un dossier |
|||||||
|
1 |
|||||||
|
1 Appuyer sur le bouton FOLDER/REPEAT et le |
|||||||
|
maintenir durant l’écoute. |
|||||||
|
2 Lorsque |
apparaît sur l’écran à cristaux liquides, |
||||||
|
appuyer à nouveau sur le bouton FOLDER/REPEAT et le maintenir. |
|||||||
|
3 |
apparaît sur l’écran à cristaux liquides et tous les fichiers |
||||||
|
du dossier affiché sont constamment répétés 1 . |
5 Menu
5.1Sensibilité d’enregistrement du micro
D Les paramètres d’usine par défaut sont en mode haute sensibilité.
1 Appuyer une fois sur le bouton MENU/HOLD en mode arrêt 1 . 2 Appuyer sur le bouton SUIVANT ou PRÉCÉDENT . Le
|
28 |
Manuel de l‘utilisateur |
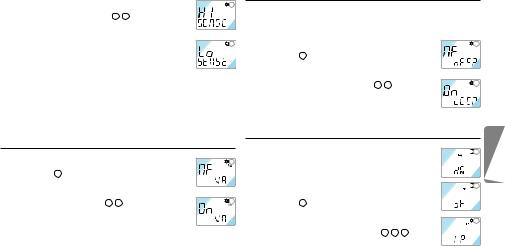
|
mode alterne entre basse sensibilité (LO SENSE) et |
1 |
|
haute sensibilité (HI SENSE) 1 2 . |
|
|
3 Appuyer sur le bouton ÉCOUTE/PAUSE/TEMPS |
|
|
RESTANT ou STOP/DEL pour sélectionner le mode |
|
|
affiché. |
2 |
|
4 L’opération précédente est reprise avec le mode |
|
|
sélectionné. |
DRemarque : HI SENSE : recommandé pour les enregistrements dans un environnement calme et pour l’enregistrement de conférences.
LO SENSE : recommandé pour un enregistrement dans un environnement bruyant. Installer le microphone près de la source sonore.
5.2Fonction VA
|
1 Appuyer deux fois sur le bouton MENU/HOLD en |
1 |
|
mode arrêt 1 . |
|
|
2 Appuyer sur le bouton SUIVANT ou PRÉCÉDENT |
|
|
. Le mode alterne entre VA ACTIVÉE (ON VA) et |
|
|
VA DÉSACTIVÉE (OF VA) 1 2 . |
2 |
|
3 Appuyer sur le bouton ÉCOUTE/PAUSE/TEMPS |
|
|
RESTANT ou STOP/DEL pour sélectionner le mode |
|
|
affiché. |
|
|
4 L’opération précédente est reprise avec le mode sélectionné. |
5.3Marche/arrêt du bip sonore
D Les paramètres d’usine par défaut sont sur BIP ACTIVÉ.
|
1 Appuyer trois fois sur le bouton MENU/HOLD en |
1 |
|
mode arrêt 1 . |
|
|
2 Appuyer sur le bouton SUIVANT ou PRÉCÉDENT |
|
|
. Le mode alterne entre BIP DÉSACTIVÉ (OF |
|
|
BEEP) et BIP ACTIVÉ (ON BEEP) 1 2 . |
2 |
|
3 Appuyer sur le bouton ÉCOUTE/PAUSE/TEMPS |
|
|
RESTANT ou STOP/DEL pour sélectionner le mode |
|
|
affiché. |
|
|
4 L’opération précédente est reprise avec le mode sélectionné. |
5.4Définition du mode d’enregistrement


 1
1

D Les paramètres d’usine par défaut sont en mode d’enregistrement haute qualité.


 2
2

1 Appuyer quatre fois sur le bouton MENU/HOLD en mode arrêt 1 .
2 Appuyer sur le bouton SUIVANT ou PRÉCÉDENT
|
. Le mode alterne entre longue durée (LP), |
3 |
|
standard (SP) et haute qualité (HQ) 1 2 3 . |
|
|
3 Appuyer sur le bouton ÉCOUTE/PAUSE/TEMPS |
F R A N Ç A I S
|
Manuel de l‘utilisateur |
29 |
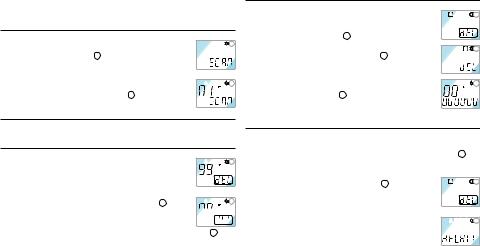
RESTANT ou STOP/DEL pour sélectionner le mode affiché. 4 L’opération précédente est reprise avec le mode sélectionné.
5.5Début de fichier
|
1 Appuyer cinq fois sur le bouton MENU/HOLD |
1 |
|||
|
durant l’Écoute/l’Arrêt 1 . |
||||
|
2 Appuyer sur le bouton ÉCOUTE/PAUSE/TEMPS |
||||
|
RESTANT pour écouter les trois premières |
||||
|
2 |
||||
|
secondes de chaque fichier en commençant par le |
||||
|
premier fichier du dossier affiché 2 . |
6 Fonction de suppression
6.1Pour supprimer un fichier spécifique
|
1 |
|||||
|
1 Appuyer brièvement sur le bouton STOP/DEL |
|||||
|
durant l’arrêt. Le numéro du fichier apparaît et la |
|||||
|
DEL clignote. |
|||||
|
2 Appuyer sur le bouton SUIVANT ou PRÉCÉDENT |
|||||
|
2 |
|||||
|
pour sélectionner le fichier à supprimer 1 . |
3 Appuyer sur le bouton STOP/DEL et le maintenir 3 


 secondes environ pour supprimer le fichier affiché.Le


 nombre de fichiers se réduit automatiquement d’1 fichier 2 .
4 Si le fichier n’est pas à effacer, appuyer brièvement sur le bouton 30 STOP/DEL.
6.2Pour supprimer un dossier spécifique
|
1 Appuyer sur le bouton STOP/DEL et le maintenir 3 |
1 |
|
secondes environ durant l’arrêt. Le dossier affiché |
|
|
apparaît et DEL clignote 1 . |
|
|
2 Appuyer sur le bouton FOLDER/ REPEAT pour |
2 |
sélectionner le dossier à supprimer 2 .
3 Appuyer sur le bouton STOP/DEL et le maintenir 3 secondes environ pour supprimer tous les fichiers du
|
dossier sélectionné. Le Voice Tracer arrête l’écoute |
3 |
||
|
au niveau de ce dossier 3 . |
|||
|
4 Si le dossier n’est pas à effacer, appuyer brièvement |
|||
|
sur le bouton STOP/DEL. |
6.3Pour supprimer tous les dossiers (Mode Format)
1 Appuyer sur le bouton STOP/DEL et le maintenir 3 secondes environ durant l’arrêt. Le dossier affiché apparaît et DEL clignote 1 .
2 Appuyer de façon répétée sur le bouton FOLDER/REPEAT jusqu’à ce que les quatre dossiers s’affichent. «
|
DELALL » apparaît alors sur l’écran |
2 . |
1 |
3 Appuyer sur le bouton STOP/DEL et le maintenir 3 secondes environ pour supprimer les fichiers de tous les dossiers. Après effacement, le Voice Tracer se
|
positionne au niveau du dossier A. |
2 |
||||
|
4 Si les dossiers ne sont pas à effacer, appuyer |
|||||
|
brièvement sur le bouton STOP/DEL. |
|||||
|
Manuel de l‘utilisateur |
![]()
7 Avertissements
•Ne jamais tenter d’ouvrir, de réparer ou de modifier le Voice Tracer.
•Ne pas utiliser le Voice Tracer dans les endroits où l’usage de périphériques électroniques est interdit (par exemple dans les avions etc.).
•Ne pas mettre le Voice Tracer ou ses accessoires dans la bouche.
•Ne pas plonger le Voice Tracer dans l’eau ou l’imprégner d’un quelconque liquide.
•Ne pas exposer le Voice Tracer ou ses accessoires à des chocs qui pourraient provoquer des dysfonctionnements.
•Ne pas exercer de pression sur l’écran à cristaux liquides, ce qui pourrait endommager l’écran ou provoquer des dysfonctionnements.
•Ne pas laisser le Voice Tracer en plein soleil ou exposé à toute autre source de chaleur pendant une période prolongée.
•Retirer les piles du Voice Tracer en cas de non-utilisation prolongée.
•Ne pas retirer violemment les écouteurs, le microphone ou les câbles USB.
|
8 |
Fiche technique |
|||
|
Périphérique |
LFH 7655 |
LFH 7675 |
||
|
Durée d’enregistrement / |
HQ |
6 h / 48 kbps / 16 kHz |
12 h / 48 kbps / 16 kHz |
|
|
débit / fréquence |
SP |
36 h / 6.4 kbps / 8 kHz |
90 h / 6.4 kbps / 8 kHz |
|
|
d’échantillonnage |
LP |
66 h / 4 kbps / 8 kHz |
144 h / 4 kbps / 8 kHz |
|
|
Dimensions |
33 mm / 110 mm / 19 mm |
|||
|
Puissance |
2 piles LR03 (AAA, UM-4) |
|||
|
Durée des piles |
Enregistrement : 11 h, lecture : 13 h |
|||
|
Nombre max. d’enregistrements |
396 au total (99 par dossier x 4) |
|||
|
Mémoire de masse USB |
F R A N Ç A I S
|
Manuel de l‘utilisateur |
31 |

9 Dépannage
L’écran d’affichage est noir
Origine possible :
•Les piles sont épuisées
•Les piles ne sont pas installées correctement
Correction :
•Mettre des piles neuves
•Remettre les piles en place correctement
Aucun enregistrement possible
Origine possible :
•Le Voice Tracer est verrouillé
•Les piles sont épuisées
•Le nombre maximal d’enregistrements est atteint ou la capacité d’enregistrement est épuisée
Correction :
•Débloquer la fonction de verrouillage
•Mettre des piles neuves
•Supprimer certains enregistrements ou les transférer sur un périphérique externe
Aucun enregistrement ne peut être écouté
Origine possible :
•Le Voice Tracer est verrouillé
•Les piles sont épuisées
•Il n’y a encore aucun enregistrement
•Le volume est à son niveau le plus bas
Correction :
•Débloquer la fonction de verrouillage
•Mettre des piles neuves
•Vérifier le nombre d’enregistrements
•Ajuster le contrôle du volume
Impossibilité d’arrêter ou de suspendre l’écoute ou l’enregistrement
Origine possible :
• Le Voice Tracer est verrouillé
Correction :
• Débloquer la fonction de verrouillage
Impossibilité d’écouter avec le hautparleur
Origine possible :
•Les écouteurs sont branchés
•Le contrôle du volume est à son niveau le plus bas
Correction :
•Retirer les écouteurs
•Ajuster le contrôle du volume
Impossibilité d’écouter avec les écouteurs
Origine possible :
•Les écouteurs ne sont pas parfaitement branchés
•Le volume est à son niveau le plus bas
Correction :
•Brancher correctement les écouteurs
•Ajuster le contrôle du volume
|
32 |
Manuel de l‘utilisateur |

|
Manual del usuario |
1 |
Su Digital Voice Tracer |
||||||
|
1 |
Su Digital Voice Tracer |
33 |
5 |
Menú |
38 |
1.1 Contenido de la caja |
||
|
1.1 |
Contenido de la caja |
33 |
5.1 |
Sensibilidad de grabación con |
||||
|
1.2 |
Información general de los controles |
micrófono |
38 |
|||||
|
y las conexiones |
34 |
5.2 |
Función VA |
39 |
||||
|
1.3 |
Indicador LCD y símbolos |
34 |
5.3 |
Establecimiento de aviso |
39 |
|||
|
2 |
Primeros pasos |
35 |
5.4 |
Establecimiento del modo de |
||||
|
2.1 |
Sustitución de pilas |
35 |
grabación |
39 |
Manual del usuario |
|||
|
2.2 |
Encendido del Voice Tracer |
35 |
5.5 |
Introducción de archivos |
40 |
|||
|
2.3 |
Apagado del Voice Tracer |
35 |
6 |
Función de borrado |
40 |
|||
|
2.4 |
Función de bloqueo (Hold) |
35 |
6.1 |
Para borrar un archivo específico |
40 |
|||
|
3 |
Grabación |
36 |
6.2 |
Para borrar una carpeta específica |
40 |
|||
|
3.1 |
Grabación con el micrófono |
6.3 |
Para borrar todas las carpetas |
Cable USB |
||||
|
incorporado |
36 |
(modo formato) |
40 |
|||||
|
3.2 |
Grabación con un micrófono |
7 |
Advertencias |
41 |
||||
|
externo |
37 |
8 |
Características |
41 |
DVT 7655 DVT 7675 |
|||
|
4 |
Reproducción |
37 |
9 |
Solución de problemas |
42 |
Voice Tracer |
||
|
4.1 |
Reproducción normal |
37 |
Pilas |
|||||
|
4.2 |
Reproducción a baja velocidad |
37 |
||||||
|
4.3 |
Búsqueda |
37 |
||||||
|
4.4 |
Reproducción de otros archivos |
38 |
||||||
|
4.5 |
Repetición |
38 |
Ear-Mic combo |
|||||
|
(solo para DVT 7675) |
CD |
|||||||
|
Manual del usuario |
33 |
E S PA Ñ O L

1.2 Información general de los controles y las conexiones |
1.3 Indicador LCD y símbolos |
|
A |
Toma de auriculares |
A |
B |
|
|
I |
||||
|
B |
Toma de micrófono |
|||
|
J |
||||
|
C |
Control de volumen |
|||
|
K |
||||
|
D |
SIGUIENTE |
|||
|
Búsqueda hacia adelante, cambio de archivo, cambio de menú |
C |
|||
|
E |
REC/PAUSE Grabación y pausa |
|||
|
F |
STOP/DEL |
O |
|
Detención de la grabación, borrado de archivo, borrado de |
D |
|||
|
carpeta seleccionada, eliminación de todas las carpetas |
||||
|
L |
||||
|
G |
FOLDER/REPEAT Cambio de carpeta y repetición de reproducción |
E |
||
|
H |
Altavoz |
M |
||
|
I |
Micrófono incorporado |
N |
F |
|
|
J |
Indicador LED de grabación (Rojo) / reproducción (Verde) |
|||
|
K |
Pantalla LCD |
G |
L ANTERIOR
Búsqueda hacia atrás, cambio de archivo, cambio de menú
M REPRODUCCIÓN/PAUSA/TIEMPO RESTANTE
|
Reproducción normal y a baja velocidad, pausa, tiempo de grabación restante, ARCHIVO |
H |
|
(número de grabación), hora, selección de menús, funciones de introducción de archivos |
NMENU/HOLD
Sensibilidad de grabación, VA, aviso, tiempo de grabación, introducción de archivos (examinar) y activación o desactivación del bloqueo
OToma USB
34
Modo de grabación
Activación vocal de la grabación Modo de repetición
Bloqueo de los botones Duración restante de grabación/ de reproducción
Indicador de formato Reproducción a baja velocidad Tiempo de reproducción/ grabación, de cambio de menú Carpetas
Pantalla de archivos (0-99) Estado de las pilas (Sustituya las pilas si
la pantalla alterna entre el stado 3 y el 4.)
Manual del usuario

2 Primeros pasos
2.1Sustitución de pilas
1 Asegúrese de que el dispositivo se encuentra apagado. No sustituya las pilas si el dispositivo se encuentra encendido, ya que esto podría dañarlo.
2 Abra la tapa de las pilas. 3 Introduzca las pilas. Asegúrese de que ha introducido
las pilas de forma correcta (tamaño “AAA”) y cierre la tapa. Una vez colocadas, la pantalla LCD mostrará todos los indicadores 1 y el dispositivo se
|
establecerá en modo en espera (a la espera de que se |
1 |
|||||||
|
active la grabación o la reproducción 2 ). |
||||||||
|
4 El dispositivo se apagará automáticamente si no se |
||||||||
|
activa ninguna función en el espacio de 1 minuto. |
||||||||
|
5 Pulse el botón REPRODUCCIÓN/ PAUSA/TIEMPO |
2 |
|||||||
|
RESTANTE para encender el dispositivo. El Voice |
||||||||
|
Tracer pasará a modo en espera 2 . |
DExtraiga las pilas si no va a utilizar el Voice Tracer durante un periodo prolongado de tiempo. Las pilas que presenten filtraciones puedes dañar el dispositivo.
EEn caso de que no foncione correctamente el voice Tracer, retire las pilas e introdúzcalas de nuevo.
Manual del usuario
2.2Encendido del Voice Tracer
|
1 Pulse el botón REPRODUCCIÓN/PAUSA/ |
1 |
||
|
TIEMPO RESTANTE para activar el Voice Tracer. |
|||
|
El dispositivo pasará al modo en espera. Cuando |
|||
|
introduzca las pilas, la pantalla LCD mostrará todos los |
|||
|
indicadores y el Voice Tracer pasará al modo en espera 1 . |
2.3Apagado del Voice Tracer
El dispositivo se apagará automáticamente si no se activa ninguna función en el espacio de 1 minuto.
2.4Función de bloqueo (Hold)
|
1 Mantenga pulsado el botón MENU/HOLD durante |
1 |
aproximadamente 2 segundos cuando el Voice Tracer 


 se encuentre en modo de reproducción, grabación o en


 espera para activar la función de bloqueo. Todos los botones se desactivan cuando el dispositivo se encuentra en modo de bloqueo y en la pantalla LCD aparece “ON HOLD” cuando se pulsa algún botón 1 .
2 Mantenga pulsado de nuevo el botón MENU/
|
HOLD durante aproximadamente 2 segundos para |
2 |
|
desactivar la función de bloqueo. En la pantalla LCD |
|
|
aparecerá “OF HOLD” para indicar que la función de |
|
|
bloqueo se ha desactivado 2 . |
D El modo de BLOQUEO se desactivará si se apaga el dispositivo y
|
se vuelve a encenderlo. |
35 |
E S PA Ñ O L

3 Grabación
CObservación: Para lograr buenos resultados, cuando trabaje con el software de reconocimiento de voz Dragon grabe en el modo HQ (configurado de fábrica) y convierta el archivo de sonido .zvr en formato .wav después de la descarga del PC. Lea también el manual del usuario del software Download Manager.
Tenga en cuenta las indicaciones siguientes antes de comenzar con el proceso de grabación (Compruebe que el dispositivo se encuentra en modo en espera):
•Pulse el botón FOLDER/REPEAT para seleccionar la carpeta deseada. El Voice Tracer pasará a la carpeta siguiente (A, B, C y D) cada vez que pulse el botón. Si no selecciona una carpeta, la grabación se efectuará en la carpeta actual.
•Cuando el número de archivos de la carpeta actual llegue a 99, la grabación continuará después del último archivo de la carpeta siguiente.
•Pulse el botón REPRODUCCIÓN/PAUSA/TIEMPO RESTANTE para comprobar la capacidad restante de grabación.
•Pulse el botón SIGUIENTE para separar un ARCHIVO mientras se encuentra grabando (función de separación de archivos).
•El número máximo de archivos que pueden guardarse en una carpeta es 99 (hasta 396 archivos: 99 x 4).
•Si el tiempo de grabación supera la capacidad disponible o el número
|
de archivos llega a 396, en la pantalla aparecerá “FULL” |
1 |
|
y no será posible continuar con la grabación 1 . En este |
|
|
caso, borre alguna grabación o páselas a un dispositivo |
|
|
externo (audio o PC) para disponer de espacio de grabación. |
•No extraiga las pilas durante la grabación. De lo contrario, es posible que el Voice Tracer no funcione correctamente. Si tiene la intención de grabar durante un periodo de tiempo prolongado, sustituya las pilas antes de iniciar la grabación.
•El proceso de grabación se detendrá automáticamente si no se detecta ningún sonido cuando el Voice Tracer se encuentra en modo VA. Desactive la función VA si se dispone a grabar conversaciones importantes.
3.1Grabación con el micrófono incorporado
|
1 |
|||||
|
1 Establezca la sensibilidad de grabación, la carpeta, la fun- |
|||||
|
ción VA y la velocidad (HQ, SP o LP) que desea antes |
|||||
|
de comenzar la grabación (consulte el capítulo “Menú”). |
|||||
|
2 Dirija el micrófono incorporado en el dispositivo |
|||||
|
2 |
hacia la fuente de sonido.
3 Pulse el botón REC/PAUSE para iniciar la grabación
1 2 .
|
3 |
|||
|
4 Pulse el botón REC/PAUSE para introducir una |
|||
|
pausa. El indicador LED rojo parpadeará 3 . |
|||
|
5 Pulse de nuevo el botón REC/PAUSE para continuar |
|||
|
con la grabación. El indicador LED rojo se volverá a iluminar. |
|||
|
6 Pulse el botón STOP/DEL para detener la grabación. |

3.2Grabación con un micrófono externo
Conéctelo a la toma de micrófono y siga el procedimiento indicado para el micrófono incorporado.
4 Reproducción
DMantenga pulsado el botón REPRODUCCIÓN/PAUSA/TIEMPO RESTANTE durante la reproducción normal para visualizar la duración restante del archivo.
4.1Reproducción normal
|
1 |
|||
|
1 Pulse el botón FOLDER/ REPEAT para seleccionar |
|||
|
la carpeta deseada (A, B, C o D). Si no selecciona |
|||
|
una carpeta, se llevará a cabo la reproducción de la |
|||
|
última carpeta que haya grabado. |
|||
|
2 |
|||
|
2 Pulse el botón REPRODUCCIÓN/PAUSA/ |
|||
|
TIEMPO RESTANTE para iniciar la reproducción. El |
|||
|
indicador LED verde se iluminará y la duración de |
|||
|
reproducción aparecerá en la pantalla 1 2 . |
|||
|
3 Pulse de nuevo el botón REPRODUCCIÓN/PAUSA/ TIEMPO |
|||
|
RESTANTE para efectuar una pausa en la reproducción. |
|||
|
4 Pulse de nuevo el botón REPRODUCCIÓN/ PAUSA/TIEMPO |
|||
|
RESTANTE para reanudar la reproducción. |
5 Pulse el botón STOP/DEL durante la reproducción o en la pausa para detener la reproducción.
4.2Reproducción a baja velocidad
1 Pulse el botón REPEAT/FOLDER para seleccionar la carpeta deseada (A, B, C o D). Si no selecciona una carpeta, se llevará a cabo la reproducción de la carpeta que ha grabado o reproducido por última vez.
2 Mantenga pulsado el botón REPRODUCCIÓN/PAUSA/TIEMPO RESTANTE durante aproximadamente 2 segundos para comenzar la reproducción a baja velocidad. El indicador LED verde se iluminará y aparecerá en la pantalla la duración de la grabación.
3 Pulse de nuevo el botón REPRODUCCIÓN/PAUSA/TIEMPO RESTANTE durante la grabación a baja velocidad para efectuar una pausa.
4 En pausa, mantenga pulsado el botón REPRODUCCIÓN/ PAUSA/ TIEMPO RESTANTE durante aproximadamente 2 segundos para reanudar la reproducción a baja velocidad o pulse brevemente el botón para iniciar la reproducción normal.
5 Pulse el botón STOP/DEL durante la reproducción o en la pausa para detener la reproducción.
4.3Búsqueda
1 Mantenga pulsado el botón SIGUIENTE o el botón ANTERIORdurante al menos medio segundo durante la reproducción.
2 La reproducción se detendrá y el tiempo aumentará o disminuirá rápidamente en la pantalla LCD.
E S PA Ñ O L

3 Suelte el botón cuando desee iniciar la reproducción.
4 La búsqueda se detendrá al llegar al final del archivo actual si mantiene pulsado el botón SIGUIENTE o al llegar al inicio del archivo actual si mantiene pulsado el botón ANTERIOR .
4.4Reproducción de otros archivos
1 Para pasar al archivo anterior o posterior, pulse brevemente el botón SIGUIENTE o el botón ANTERIOR durante la reproducción y en la pausa.
2 Para navegar por todos los archivos, mantenga pulsado el botón SIGUIENTE o el botón ANTERIOR cuando el dispositivo esté parado para pasar al archivo deseado.
3 Suelte el botón para reproducir el archivo que aparece en la pantalla.
4.5Repetición
4.5.1 Repetición de sección
|
1 |
|||||
|
1 Pulse el botón FOLDER/REPEAT donde desee iniciar |
|||||
|
la repetición de la sección. Una vez establecido el |
|||||
|
punto de inicio, el indicador |
se iluminará por |
||||
|
un breve espacio de tiempo |
1 . |
||||
|
2 |
|||||
|
2 Mientras |
esté iluminado, pulse de nuevo el botón |
||||
|
FOLDER/REPEAT donde desee detener la repetición. |
|||||
|
3 El indicador |
se iluminará continuamente y la |
||||
|
sección seleccionada se repetirá constantemente 2 . |
4 Pulse STOP/DEL para detener la reproducción.
38
4.5.2 Repetición de archivo
|
1 |
||||||
|
1 Mantenga pulsado el botón FOLDER/REPEAT |
||||||
|
durante la reproducción. |
||||||
|
2 El indicador |
aparecerá y el archivo actual se |
|||||
|
repetirá constantemente 1 . |
||||||
|
3 Pulse STOP/DEL para detener la reproducción. |
||||||
|
4.5.3 Repetición de carpeta |
||||||
|
1 |
||||||
|
1 Mantenga pulsado el botón FOLDER/REPEAT |
||||||
|
durante la reproducción. |
||||||
|
2 Cuando aparezca |
en la pantalla LCD, mantenga |
|||||
|
de nuevo pulsado el botón FOLDER/REPEAT. |
||||||
|
3 |
aparece en la pantalla LCD y todos los archivos de la |
|||||
|
carpeta actual se repetirán constantemente 1 . |
5 Menú
5.1Sensibilidad de grabación con micrófono
D El modo de alta sensibilidad viene determinado de fábrica.
1 Pulse el botón MENU/HOLD una vez durante la Parada 1 . 2 Pulse el botón SIGUIENTE o el botón ANTERIOR . El
Manual del usuario
 Loading…
22
Ελληνικά
Καλωσήρθατε
1
Συγχαρητήρια για την αγορά σας και καλωσήρθατε στη Philips! Για
να επωφεληθείτε πλήρως από την υποστήριξη που παρέχει η Philips,
επισκεφθείτε την ιστοσελίδα μας για πληροφορίες υποστήριξης,
όπως εγχειρίδια χρήστη, λήψη λογισμικού, πληροφορίες σχετικά με
την εγγύηση και άλλα: www.philips.com.
Χαρακτηριστικά προϊόντος
1.1
Εγγραφή στη δημοφιλή μορφή MP3
•
Γρήγορη μεταφορά εγγραφών και δεδομένων μέσω σύνδεσης USB
•
2.0 υψηλής ταχύτητας
Εξαιρετικά μεγάλο μπροστινό ηχείο για εξαιρετικά καθαρή
•
αναπαραγωγή φωνής
Εγγραφή που ενεργοποιείται με τη φωνή για σημειώσεις hands-free
•
Μέγιστη συμβατότητα χάρη στη συσκευή μαζικής αποθήκευσης USB
•
Γρήγορη και εύκολη οργάνωση των αρχείων σας σε 4 φακέλους
•
Άμεση εγγραφή με ένα πάτημα – από την απενεργοποίηση στη
•
λειτουργία εγγραφής
Σημαντικές πληροφορίες
2
Ασφάλεια
2.1
Για την αποφυγή βραχυκυκλώματος, μην εκθέτετε το προϊόν σε
•
βροχή ή νερό.
Μην εκθέτετε τη συσκευή σε υπερβολικά υψηλή θερμοκρασία από
•
εξοπλισμό θέρμανσης ή άμεση ηλιακή ακτινοβολία.
Προστατεύετε τα καλώδια από τυχόν σύνθλιψη, ιδιαίτερα στα
•
βύσματα και τα σημεία εξόδου από τη μονάδα.
Δημιουργείτε εφεδρικά αντίγραφα των αρχείων σας. Η Philips δεν
•
φέρει ευθύνη για τυχόν απώλεια δεδομένων.
Προστασία ακοής
2.1.1
Τηρείτε τις παρακάτω οδηγίες και υποδείξεις όταν
χρησιμοποιείτε τα ακουστικά σας:
Ρυθμίζετε τον ήχο σε κανονική ένταση και χρησιμοποιείτε τα
•
ακουστικά για εύλογο χρονικό διάστημα.
Απαιτείται ιδιαίτερη προσοχή, ώστε να μην αυξάνετε την ένταση
•
όταν η ακοή σας προσαρμόζεται στην ήδη επιλεγμένη ρύθμιση.
Μην αυξάνετε την ένταση σε σημείο που να μην ακούτε τι
•
συμβαίνει γύρω σας.
Απαιτείται ιδιαίτερη προσοχή ή προσωρινή διακοπή της χρήσης
•
σε πιθανώς επικίνδυνες καταστάσεις.
Μη χρησιμοποιείτε ακουστικά όταν οδηγείτε οχήματα, όταν κάνετε
•
ποδήλατο, σκέιτμπορντ κλπ., διότι υπάρχει κίνδυνος τροχαίων
ατυχημάτων. Σε πολλές χώρες η χρήση ακουστικών απαγορεύεται
από το νόμο.
Σημαντική πληροφορία (για μοντέλα που διατίθενται με
ακουστικά):
Η Philips εγγυάται τη συμμόρφωση της μέγιστης ηχητικής ισχύος
των συσκευών αναπαραγωγής ήχου που κατασκευάζει με τις
τιμές που καθορίζουν οι αρμόδιες αρχές, με την προϋπόθεση ότι
χρησιμοποιούνται τα αυθεντικά μοντέλα ακουστικών. Αν απαιτείται
αντικατάσταση των ακουστικών, συνιστάται να επικοινωνήσετε με το
κατάστημα λιανικής και να παραγγείλετε ένα μοντέλο της Philips ίδιο
με το αυθεντικό.
Απόρριψη παλαιών προϊόντων
2.2
Το προϊόν αυτό έχει σχεδιαστεί και κατασκευαστεί με υλικά και
•
εξαρτήματα υψηλής ποιότητας, τα οποία μπορούν να
ανακυκλωθούν και να χρησιμοποιηθούν ξανά.
Το σύμβολο ενός τροχήλατου κάδου απορριμμάτων που
•
διαγράφεται με ένα χ υποδηλώνει ότι το προϊόν στο οποίο
εμφανίζεται το σύμβολο αυτό καλύπτεται από την Ευρωπαϊκή
Οδηγία 2002/96/EC.
Ενημερωθείτε σχετικά με το τοπικό σύστημα ξεχωριστής
•
συλλογής ηλεκτρικών και ηλεκτρονικών προϊόντων.
Τηρείτε τους τοπικούς κανονισμούς και μην απορρίπτετε τα παλαιά
•
προϊόντα μαζί με τα κοινά οικιακά απορρίμματα. Η σωστή απόρ-
ριψη των παλαιών προϊόντων συνεισφέρει στην αποφυγή πιθανών
αρνητικών επιπτώσεων στο περιβάλλον και την ανθρώπινη υγεία.
Οι μπαταρίες (συμπεριλαμβανομένων των ενσωματωμένων
•
επαναφορτιζόμενων μπαταριών) περιέχουν ουσίες που ενδέχεται
να μολύνουν το περιβάλλον. Όλες οι μπαταρίες πρέπει να
απορρίπτονται σε καθορισμένο σημείο συλλογής.
Το Digital Voice Tracer
3
1
Υποδοχή ακουστικών
2
Υποδοχή μικροφώνου
3
Ενσωματωμένο μικρόφωνο
4
Αύξηση έντασης ήχου
5
Ηχογράφηση, παύση,
ενεργοποίηση
6
Γρήγορη μετακίνηση προς
τα εμπρός, επιλογή αρχείου,
επιλογή μενού
7
Διακοπή, εμφάνιση, διαγραφή
8
Μείωση έντασης ήχου
9
Ηχείο
10
Θύρα USB
11
Θήκη μπαταριών
12
Ενεργοποίηση/
απενεργοποίηση,
αναπαραγωγή/παύση,
ταχύτητα αναπαραγωγής
13
Μενού
14
Γρήγορη επαναφορά, επιλογή
αρχείου, επιλογή μενού
15
Ευρετήριο, φάκελος,
επανάληψη
16
Οθόνη
17
Διακόπτης λειτουργίας
αναμονής
18
Ένδειξη ηχογράφησης/
αναπαραγωγής
Έναρξη χρήσης
4
Τοποθέτηση μπαταριών
4.1
Σύρετε και ανοίξτε το κάλυμμα των μπαταριών.
1
19
Τοποθετήστε τις μπαταρίες με τη σωστή πολικότητα, όπως
2
υποδεικνύεται στο σχήμα και, στη συνέχεια, κλείστε το κάλυμμα.
20
D
Σημείωση
Αφαιρείτε τις μπαταρίες αν δεν πρόκειται να χρησιμοποιήσετε
•
το Voice Tracer για μεγάλο χρονικό διάστημα. Το Voice Tracer
ενδέχεται να υποστεί βλάβη από τυχόν διαρροές των μπαταριών.
Σε περίπτωση δυσλειτουργίας του Voice Tracer, αφαιρέστε τις
•
μπαταρίες και τοποθετήστε τις ξανά.
Απενεργοποιείτε τη συσκευή ηχογράφησης πριν από την
•
αντικατάσταση των μπαταριών. Αν αφαιρέσετε τις μπαταρίες ενώ
η συσκευή ηχογράφησης βρίσκεται σε λειτουργία, ενδέχεται να
καταστραφεί το αρχείο.
Η ένδειξη μπαταριών αναβοσβήνει όταν οι μπαταρίες είναι σχεδόν
•
άδειες.
Ενεργοποίηση/απενεργοποίηση
4.2
Για να ενεργοποιήσετε τη συσκευή, κρατήστε πατημένο το
1
κουμπί
f
, μέχρι να εμφανιστεί στην οθόνη η ένδειξη
HELLO
.
Για να απενεργοποιήσετε τη συσκευή, κρατήστε πατημένο το
2
κουμπί
f
όταν δεν πραγματοποιείται ηχογράφηση, μέχρι να
εμφανιστεί στην οθόνη η ένδειξη
BYE
.
Λειτουργία αναμονής
4.3
Όταν ο διακόπτης
HOLD
17
βρίσκεται στη θέση αναμονής, όλα
τα κουμπιά της συσκευής παραμένουν ανενεργά. Στην οθόνη
εμφανίζεται στιγμιαία η ένδειξη On Hold και, στη συνέχεια, η οθόνη
απενεργοποιείται. Ξεκλειδώστε το Voice Tracer μετακινώντας το
διακόπτη
HOLD
στη θέση απενεργοποίησης.
Χρήση του Voice Tracer σε συνδυασμό με υπολογιστή
4.4
Ως συσκευή αποθήκευσης USB, το Voice Tracer προσφέρει τη
δυνατότητα εύκολης αποθήκευσης, δημιουργίας εφεδρικών
αντιγράφων και μεταφοράς των αρχείων σας. Η σύνδεση του
Voice Tracer με υπολογιστή πραγματοποιείται χρησιμοποιώντας
μια σύνδεση USB, χωρίς να απαιτείται η εγκατάσταση ειδικού
λογισμικού. Το Voice Tracer αναγνωρίζεται αυτόματα ως
αφαιρούμενος δίσκος, με αποτέλεσμα να είναι δυνατή η απλή
μεταφορά και απόθεση αρχείων προς και από τη μονάδα.
21
D
Σημειώσεις
Μην αποσυνδέετε το Voice Tracer ενώ πραγματοποιείται
•
μεταφορά αρχείων από και προς τη συσκευή. Κατά τη διάρκεια
της μεταφοράς δεδομένων, η ενδεικτική λυχνία ηχογράφησης/
αναπαραγωγής
18
αναβοσβήνει με πορτοκαλί χρώμα
Μην εκτελείτε διαμόρφωση του δίσκου του Voice Tracer σε
•
υπολογιστή.
Ηχογράφηση
5
Ηχογράφηση με το ενσωματωμένο μικρόφωνο
5.1
Πατήστε το κουμπί
1
INDEX / a
όταν δεν πραγματοποιείται
ηχογράφηση, για να επιλέξετε τον επιθυμητό φάκελο
22
.
Πατήστε το κουμπί
2
g
, για να ξεκινήσει η ηχογράφηση. Η ένδειξη
ηχογράφησης/αναπαραγωγής
18
ανάβει με κόκκινο χρώμα.
Στρέψτε το ενσωματωμένο μικρόφωνο
3
προς την πηγή του
ήχου.
Για παύση της ηχογράφησης, πατήστε το κουμπί
3
g
. Η ένδειξη
ηχογράφησης/αναπαραγωγής αναβοσβήνει και στην οθόνη
αναβοσβήνει η ένδειξη
PAUSE 23
. Πατήστε ξανά το κουμπί
g
, για
να συνεχίσετε την ηχογράφηση.
Για να διακόψετε την ηχογράφηση, πατήστε το κουμπί
4
j / DEL
.
D
Σημειώσεις
Πριν από την έναρξη της ηχογράφησης, ρυθμίστε την επιθυμητή
•
λειτουργία φωνητικής ενεργοποίησης και τον τρόπο λειτουργίας
ηχογράφησης (για λεπτομέρειες, βλ. 8 Προσαρμογή ρυθμίσεων).
Πραγματοποιήστε μια δοκιμαστική ηχογράφηση, για να
•
βεβαιωθείτε ότι είναι σωστές οι ρυθμίσεις του Voice Tracer.
Πατήστε παρατεταμένα το κουμπί
•
f κατά την εκτέλεση μιας ηχο-
γράφησης, για να εμφανιστεί η υπολειπόμενη διάρκεια ηχογράφησης.
Πατήστε το κουμπί
•
b
κατά τη διάρκεια της ηχογράφησης, για να
δημιουργήσετε ένα νέο αρχείο.
Ο μέγιστος αριθμός αρχείων σε κάθε φάκελο είναι 99, για συνολική
•
χωρητικότητα 396 αρχείων (99 αρχεία x 4 φακέλους).
Αν η διάρκεια ηχογράφησης υπερβεί τη διαθέσιμη χωρητικότητα
•
ή συμπληρωθούν 396 αρχεία, τότε η ηχογράφηση διακόπτεται και
εμφανίζεται η ένδειξη‘FULL’. Διαγράψτε ορισμένες ηχογραφήσεις ή
μεταφέρετέ τις σε υπολογιστή.
Μην αφαιρείτε τις μπαταρίες κατά την ηχογράφηση. Διαφορετικά,
•
ενδέχεται να προκληθεί βλάβη στη συσκευή ηχογράφησης.
Αν πρόκειται να πραγματοποιήσετε ηχογράφηση για μεγάλο χρονι-
•
κό διάστημα, αντικαταστήστε τις μπαταρίες προτού ξεκινήσετε.
Εγγραφή με εξωτερικό μικρόφωνο
5.2
Για να εκτελέσετε ηχογράφηση με εξωτερικό μικρόφωνο, συνδέστε
το μικρόφωνο στην υποδοχή μικροφώνου και ακολουθήστε τη
διαδικασία ηχογράφησης με ενσωματωμένο μικρόφωνο.
24
Προσθήκη επισημάνσεων ευρετηρίου
5.3
Μπορείτε να χρησιμοποιήσετε τις επισημάνσεις ευρετηρίου, για
να επισημάνετε ορισμένα σημεία μιας ηχογράφησης ως σημεία
αναφοράς.
Πατήστε το κουμπί
1
INDEX / a
κατά τη διάρκεια μιας
ηχογράφησης, για να προσθέσετε μια επισήμανση ευρετηρίου. Ο
αριθμός ευρετηρίου εμφανίζεται για ένα δευτερόλεπτο
25
.
D
Σημειώσεις
Το εικονίδιο
•
υποδηλώνει ότι η ηχογράφηση περιέχει
επισημάνσεις ευρετηρίου.
Μπορείτε να ορίσετε έως και 32 επισημάνσεις ευρετηρίου ανά
•
αρχείο.
Αναπαραγωγή
6
Πατήστε το κουμπί
1
INDEX / a
όταν δεν πραγματοποιείται
ηχογράφηση, για να επιλέξετε τον επιθυμητό φάκελο.
Πατήστε το κουμπί
2
h
ή το κουμπί
b
για να επιλέξετε αρχείο
για αναπαραγωγή.
Πατήστε το κουμπί
3
f
. Ο χρόνος αναπαραγωγής εμφανίζεται
στην οθόνη και ανάβει η πράσινη λυχνία LED
18
.
Ρυθμίστε την ένταση του ήχου χρησιμοποιώντας τα κουμπιά
4
+
και
–.
Για να διακόψετε την αναπαραγωγή, πατήστε το κουμπί
5
j / DEL
.
Στην οθόνη εμφανίζεται ο συνολικός χρόνος αναπαραγωγής του
τρέχοντος αρχείου.
Πατήστε ξανά το κουμπί
6
f
, για να συνεχίσετε την
αναπαραγωγή από την προηγούμενη θέση.
D
Σημείωση
Όταν συνδέετε ακουστικά στην υποδοχή
EAR 1
, το ηχείο της
συσκευής ηχογράφησης απενεργοποιείται.
Λειτουργίες αναπαραγωγής
6.1
Χαμηλή, υψηλή και κανονική ταχύτητα αναπαραγωγής
6.1.1
Πατήστε παρατεταμένα το κουμπί
f
για 1 δευτερόλεπτο ή
περισσότερο, για εναλλαγή μεταξύ κανονικής, χαμηλής και υψηλής
ταχύτητας αναπαραγωγής.
26
Αναζήτηση
6.1.2
Πατήστε παρατεταμένα το κουμπί
h
ή το κουμπί
b
κατά τη
διάρκεια της αναπαραγωγής, για γρήγορη σάρωση προς τα εμπρός
ή προς τα πίσω στο τρέχον αρχείο. Αφήστε το κουμπί, για να
συνεχίσετε την αναπαραγωγή στην επιλεγμένη ταχύτητα.
Επαναφορά και μετακίνηση προς τα εμπρός
6.1.3
Πατήστε το κουμπί
h
ή το κουμπί
b
κατά τη διάρκεια της
αναπαραγωγής, για επαναφορά στην αρχή του αρχείου που
αναπαράγεται ή μετακίνηση προς τα εμπρός στο επόμενο αρχείο,
αντίστοιχα. Αν το αρχείο περιέχει επισημάνσεις ευρετηρίου, η
αναπαραγωγή ξεκινά από εκείνο το σημείο.
Δυνατότητες κατά την αναπαραγωγή
6.2
Μπορείτε να ρυθμίσετε το Voice Tracer για επαναλαμβανόμενη ή
τυχαία αναπαραγωγή των αρχείων.
Επανάληψη τμήματος
6.2.1
Για επανάληψη ή επαναλαμβανόμενη αναπαραγωγή ενός
1
τμήματος, πατήστε το κουμπί
INDEX / a
στο επιθυμητό αρχικό
σημείο. Στην οθόνη αναβοσβήνει η ένδειξη
REP. A – B 27
.
Πατήστε ξανά το κουμπί
2
INDEX / a
στο επιθυμητό τελικό σημείο.
Ξεκινά η επανάληψη του τμήματος.
Πατήστε το κουμπί
3
j / DEL
για να διακόψετε την αναπαραγωγή
ή πατήστε το κουμπί
INDEX / a
για επιστροφή σε κανονική
αναπαραγωγή.
Επανάληψη αρχείου ή φακέλου
6.2.2
Πατήστε παρατεταμένα το κουμπί
1
INDEX / a
για 1 δευτερόλεπτο
ή περισσότερο κατά τη διάρκεια της αναπαραγωγής, για εναλλα-
γή μεταξύ των τρόπων λειτουργίας αναπαραγωγής (επανάληψη
αρχείου, επανάληψη φακέλου ή κανονική αναπαραγωγή).
28
Εικονίδιο
Ερμηνεία
REP. FILE
Συνεχής επανάληψη ενός αρχείου
REP. FOLDER
Συνεχής επανάληψη όλων των αρχείων ενός
φακέλου
19
20
Digital Voice Tracer
LFH0602
LFH0622
For product information and support, visit
www.philips.com
EL Εγχειρίδιο χρήσης
FI Käyttöopas
PT Manual do utilizador
RU Руководство пользователя
SV Användarhandbok
TR Kullanım kılavuzu
Διαγραφή
7
Πατήστε το κουμπί
1
INDEX / a
όταν δεν πραγματοποιείται
ηχογράφηση, για να επιλέξετε τον επιθυμητό φάκελο.
Πατήστε παρατεταμένα το κουμπί
2
j / DEL
για 1 δευτερόλεπτο ή
περισσότερο. Στην οθόνη εμφανίζεται η ένδειξη
DELETE 29
.
Πατήστε το κουμπί
3
h
ή το κουμπί
b
, για να ενεργοποιήσετε
μια επιλογή διαγραφής:
30
Εικονίδιο Ερμηνεία
FILE
Διαγραφή μεμονωμένου αρχείου
FOLDER
Διαγραφή όλων των αρχείων σε ένα φάκελο
Διαγραφή όλων των επισημάνσεων ευρετηρίου σε
ένα αρχείο
Πατήστε το κουμπί
4
f
.
Πατήστε το κουμπί
5
h
ή το κουμπί
b
, για να επιλέξετε το
αρχείο, το φάκελο ή το αρχείο που περιέχει τις επισημάνσεις
ευρετηρίου που επιθυμείτε να διαγράψετε
31
.
Πατήστε ξανά το κουμπί
6
f
.
N
(Όχι)
32
.
Πατήστε το κουμπί
7
h
ή το κουμπί
b
για να επιλέξετε
Y
(Ναι)
33
.
Πατήστε το κουμπί
8
f
για να επιβεβαιώσετε την επιλογή σας.
D
Σημείωση
Πραγματοποιείται αυτόματη αντιστοίχιση διαδοχικών αριθμών
αρχείων.
Προσαρμογή ρυθμίσεων
8
Πατήστε το κουμπί
1
MENU
όταν δεν πραγματοποιείται
ηχογράφηση, για να ανοίξετε το μενού.
Πατήστε το κουμπί
2
h
ή το κουμπί
b
, για να επιλέξετε ένα
στοιχείο μενού
34
.
Πατήστε το κουμπί
3
f
, για να μεταβείτε σε ένα υπομενού.
Πατήστε το κουμπί
4
h
ή το κουμπί
b
, για να τροποποιήσετε
μια ρύθμιση.
Πατήστε το κουμπί
5
f
για να επιβεβαιώσετε την επιλογή σας.
Πατήστε το κουμπί
6
MENU
για έξοδο από την τρέχουσα οθόνη
ρυθμίσεων.
Μενού
Ρύθμι-
ση
Περιγραφή
REC
HQ
SP
LP
SLP
Επιλογή μεταξύ 4 τρόπων λειτουργίας
ηχογράφησης. Για λεπτομέρειες σχετικά με
τους διαθέσιμους τρόπους λειτουργίας και
τους χρόνους ηχογράφησης, βλ. 11 Τεχνικά
χαρακτηριστικά.
SENSE
HI
LO
Ρύθμιση της ευαισθησίας ηχογράφησης,
για αποφυγή εγγραφής θορύβων από το
παρασκήνιο και προσαρμογή στο περιβάλλον της
ηχογράφησης.
BEEP
On
Off
Ηχητικές ειδοποιήσεις κατά τη χρήση των
κουμπιών ή σε περίπτωση σφάλματος.
VA
On
Off
Η ηχογράφηση με φωνητική ενεργοποίηση
είναι μια λειτουργία που παρέχει ευκολία στην
ηχογράφηση χωρίς το πάτημα κουμπιών.
Όταν επιλέγετε τη φωνητική ενεργοποίηση, η
ηχογράφηση ξεκινά όταν αρχίζετε να μιλάτε.
Όταν σταματήσετε να μιλάτε, εκτελείται αυτόματα
παύση της ηχογράφησης στη συσκευή, μετά
από τρία δευτερόλεπτα, ενώ η ηχογράφηση
συνεχίζεται όταν αρχίσετε να μιλάτε ξανά.
FORMAT
Yes
No
Διαγραφή όλων των αρχείων στη συσκευή
ηχογράφησης. Πριν από τη διαμόρφωση της
συσκευής ηχογράφησης, μεταφέρετε τυχόν
σημαντικά αρχεία σε έναν υπολογιστή.
AUTO OF
5
15
Αυτόματη απενεργοποίηση του Voice Tracer μετά
από 5 ή 15 λεπτά αδράνειας.
VER
Εμφάνιση έκδοσης και ημερομηνίας έκδοσης του
υλικολογισμικού.
Ενημέρωση υλικολογισμικού
9
Ο έλεγχος του Voice Tracer πραγματοποιείται από ένα εσωτερικό
πρόγραμμα το οποίο ονομάζεται υλικολογισμικό. Ενδέχεται να έχουν
διατεθεί στην αγορά νεότερες εκδόσεις υλικολογισμικού, μετά την
απόκτηση του Voice Tracer σας.
Συνδέστε το Voice Tracer σε υπολογιστή χρησιμοποιώντας το
1
καλώδιο USB που παρέχεται.
Κατεβάστε την ενημερωμένη έκδοση υλικολογισμικού για
2
το μοντέλο Voice Tracer που διαθέτετε από την ηλεκτρονική
διεύθυνση www.philips.com και αποθηκεύστε το αρχείο στο βασικό
κατάλογο του Voice Tracer.
Αποσυνδέστε το Voice Tracer από τον υπολογιστή. Το
3
υλικολογισμικό ενημερώνεται αυτόματα και όταν ολοκληρωθεί η
διαδικασία, το Voice Tracer απενεργοποιείται.
Αντιμετώπιση προβλημάτων
10
Δεν είναι δυνατή η ενεργοποίηση της συσκευής ηχογράφησης
Ενδέχεται να έχουν εξαντληθεί οι μπαταρίες ή να μην έχουν
•
τοποθετηθεί σωστά. Αντικαταστήστε τις μπαταρίες με καινούριες
και βεβαιωθείτε ότι έχουν τοποθετηθεί σωστά.
Δεν είναι δυνατή η ηχογράφηση με τη συσκευή ηχογράφησης
Η συσκευή ηχογράφησης ενδέχεται να βρίσκεται σε τρόπο
•
λειτουργίας
HOLD
. Σύρετε το διακόπτη
HOLD
στη θέση
απενεργοποίησής του.
Ενδέχεται να έχει συμπληρωθεί ο μέγιστος αριθμός ηχογραφήσεων
•
ή να μην υπάρχει διαθέσιμος χώρος για την ηχογράφηση.
Διαγράψτε ορισμένες ηχογραφήσεις ή μεταφέρετε μερικές
ηχογραφήσεις σε μια εξωτερική συσκευή.
Δεν ακούγεται ήχος από το ηχείο
Ενδέχεται να είναι συνδεδεμένα τα ακουστικά. Αποσυνδέστε τα
•
ακουστικά.
Ο ήχος έχει ρυθμιστεί στη χαμηλότερη ένταση. Ρυθμίστε την
•
ένταση του ήχου.
Δεν είναι δυνατή η αναπαραγωγή ηχογραφήσεων από τη
συσκευή
Η συσκευή ηχογράφησης ενδέχεται να βρίσκεται σε τρόπο
•
λειτουργίας
HOLD
. Σύρετε το διακόπτη
HOLD
στη θέση
απενεργοποίησής του.
Ενδέχεται να έχουν εξαντληθεί οι μπαταρίες ή να μην έχουν
•
τοποθετηθεί σωστά. Αντικαταστήστε τις μπαταρίες με καινούριες
και βεβαιωθείτε ότι έχουν τοποθετηθεί σωστά.
Δεν έχουν πραγματοποιηθεί ηχογραφήσεις. Ελέγξτε τον αριθμό
•
των ηχογραφήσεων.
Δεν είναι δυνατή η διακοπή, η παύση, η αναπαραγωγή ή η
ηχογράφηση στη συσκευή
Η συσκευή ηχογράφησης ενδέχεται να βρίσκεται σε τρόπο
•
λειτουργίας
HOLD
. Σύρετε το διακόπτη
HOLD
στη θέση
απενεργοποίησής του.
Δεν ακούγεται ήχος από τα ακουστικά
Ενδέχεται να μην έχουν συνδεθεί σωστά τα ακουστικά. Συνδέστε
•
σωστά τα ακουστικά.
Ο ήχος έχει ρυθμιστεί στη χαμηλότερη ένταση. Ρυθμίστε την
•
ένταση του ήχου.
Τεχνικά χαρακτηριστικά
11
USB:
•
mini-USB 2.0 υψηλής ταχύτητας
Μικρόφωνο:
•
3,5 mm • σύνθετη αντίσταση 2,2 kΩ
Ακουστικά:
•
3,5 mm • σύνθετη αντίσταση 16 Ω ή υψηλότερη
Εικόνα/Οθόνη:
•
LCD/τμημάτων • Διαγώνιος: 39 mm / 1,5 in.
Μικρόφωνο:
•
Ενσωματωμένο: μονοφωνικό • Εξωτερικό:
μονοφωνικό
Χωρητικότητα ενσωματωμένης μνήμης:
•
1 GB (LFH0602) •
2 GB (LFH0622)
Τύπος ενσωματωμένης μνήμης:
•
NAND Flash
Φορμά εγγραφής:
•
MPEG1 layer 3 (MP3)
Λειτουργίες εγγραφής:
•
HQ (MP3/μονοφωνικά), SP (MP3/
μονοφωνικά), LP (MP3/μονοφωνικά), SLP (MP3/μονοφωνικά)
Ρυθμός bit:
•
64 kbps (λειτουργία HQ), 48 kbps (λειτουργία SP), 32
kbps (λειτουργία LP), 16 kbps (λειτουργία SLP)
Χρόνος εγγραφής (LFH0602/LFH0622):
•
139/283 ώρες
(λειτουργία SLP), 69/141 ώρες (λειτουργία LP), 46/94 ώρες
(λειτουργία SP), 34/70 ώρες (λειτουργία HQ)
Ενσωματωμένο, στρόγγυλο δυναμικό ηχείο 30 mm • Ισχύς εξόδου:
•
110 mW
Συνθήκες λειτουργίας:
•
Θερμοκρασία: 5° – 45° C •
Υγρασία: 10% – 90%
Τύπος μπαταριών:
•
δύο αλκαλικές μπαταρίες Philips AAA (LR03
ή R03)
Διάρκεια ζωής μπαταριών (τρόπος λειτουργίας LP):
•
LFH0602: 35 ώρες • LFH0622: 50 ώρες
Διαστάσεις προϊόντος (Π × Β × Υ):
•
40 × 18,4 × 108 mm
Βάρος:
•
80 g. συμπεριλ. μπαταριών
Απαιτήσεις συστήματος υπολογιστή:
•
Windows 7/Vista/
XP/2000, Mac OS X, Linux • Ελεύθερη θύρα USB
Suomi
Tervetuloa
1
Kiitos, että ostit Philips-tuotteen! Jotta saisit mahdollisimman suuren
hyödyn Philipsin tuotetuesta, vieraile Internet-sivuillamme, joilta löydät
käyttöohjeita, ladattavia ohjelmistoja, takuutietoja ja paljon muuta:
www.philips.com.
Tuotteen ominaisuudet
1.1
Tallenna suosittuun MP3-muotoon
•
Siirrä tallenteita ja tietoja nopealla USB 2.0 -yhteydellä
•
Erittäin suuri etukaiutin takaa selkeän toiston
•
Ääniaktivoitava tallennus mahdollistaa tallennuksen käyttämättä käsiä
•
USB-massamuisti takaa erinomaisen yhteensopivuuden
•
Järjestä tiedostot nopeasti ja helposti 4 kansioon
•
Yhden painikkeen pikatallennus — virrankatkaisutilasta tallennustilaan
•
Tärkeää
2
Turvallisuus
2.1
Oikosulun välttämiseksi älä jätä laitetta sateeseen tai anna sen muuten
•
kastua.
Älä altista laitetta liialliselle kuumuudelle (lämmityslaite tai suora
•
auringonvalo).
Suojaa kaapelit litistymiseltä (etenkin pistokkeet ja kaapelien
•
kiinnityskohdat).
Ota tiedostoista varmuuskopio. Philips ei vastaa mistään tietojen
•
menetyksestä.
Kuuloturvallisuus
2.1.1
Noudata kuulokkeiden käytössä seuraavia ohjeita:
Kuuntele riittävän hiljaisella äänenvoimakkuudella kohtuullisia aikoja.
•
Älä säädä äänenvoimakkuutta heti kovalle vaan anna kuulosi sopeutua
•
ääneenvoimakkuuteen.
Älä käännä äänenvoimakkuutta niin kovalle, ettet kuule ympäristösi
•
ääniä.
Älä käytä laitetta tai lopeta sen käyttö tilapäisesti mahdollisesti
•
vaarallisissa tilanteissa.
Älä käytä kuulokkeita, kun ajat moottoriajoneuvolla, pyöräilet,
•
rullalautailet jne., koska se voi aiheuttaa liikennevaaran ja on laitonta
monilla alueilla.
Tärkeää (mallit, jotka toimitetaan kuulokkeilla):
Philips takaa, että sen audiosoittimien maksimiäänenvoimakkuus vastaa
asianomaisten sääntelyelinten vaatimuksia. Tämä koskee kuitenkin
vain pakkauksen mukana toimitettuja, alkuperäisiä kuulokemalleja. Jos
kuulokkeet on vaihdettava, suosittelemme, että tilaat jälleenmyyjältäsi
alkuperäistä vastaavan Philips-mallin.
Vanhan tuotteen hävittäminen
2.2
Tuotteiden suunnittelussa ja valmistuksessa on käytetty korkealaatuisia
•
materiaaleja ja osia, jotka voidaan kierrättää ja käyttää uudelleen.
Kun tuotteessa on ylirastittu, pyörillä varustettu
•
roskakorisymboli, tuote vastaa eurooppalaisen direktiivin
2002/96/EY vaatimuksia.
Ota selvää paikkakuntasi sähkö- ja elektroniikkatuotteiden erillisestä
•
keruujärjestelmästä.
Toimi paikallisten sääntöjen mukaisesti, äläkä hävitä vanhoja
•
tuotteita tavallisen kotitalousjätteen mukana. Kun vanhat tuotteet
hävitetään oikein, se vähentää niiden mahdollisia haitallisia vaikutuksia
ympäristöön ja ihmisten terveyteen.
Paristot (myös sisäänrakennetut uudelleenladattavat paristot)
•
sisältävät aineita, jotka voivat saastuttaa ympäristöä. Kaikki paristot on
hävitettävä virallisessa keruupisteessä.
Digital Voice Tracer
3
1
Kuulokepistoke
2
Mikrofonipistoke
3
Sisäänrakennettu mikrofoni
4
Lisää äänenvoimakkuutta
5
Äänitä, Tauko, Virta päälle
6
Nopea eteenpäinkelaus,
Tiedoston valinta, Valikon
valinta
7
Pysäytä, Näyttö, Poista
8
Vähennä äänenvoimakkuutta
9
Kaiutin
10
USB-pistoke
11
Paristolokero
12
Virtakytkin, Toisto/Tauko,
Toistonopeus
13
Valikko
14
Nopea taaksepäinkelaus,
Tiedoston valinta, Valikon
valinta
15
Indeksi, Kansio,
Uudelleenkuuntelu
16
Näyttö
17
Pitokytkin
18
Äänityksen/Toiston merkkivalo
Valmistelut
4
Paristojen asettaminen
4.1
Liu’uta paristokansi auki.
1
19
Aseta paristot napaisuusmerkintöjen suuntaisesti ja sulje kansi.
2
20
D
Huomautus
Poista paristot, kun et käytä Voice Traceria pitkään aikaan. Vuotavat
•
paristot voivat vahingoittaa Voice Traceria.
Jos Voice Tracerissa on toimintahäiriö, poista paristot ja aseta ne
•
uudelleen paikalleen.
Pysäytä äänityslaite ennen paristojen vaihtamista. Jos poistat paristot
•
äänityslaitteen käydessä, tiedosto voi korruptoitua.
Kun paristot ovat lähes tyhjät, paristojen merkkivalo vilkkuu.
•
Virtakytkin
4.2
Kytke laitteeseen virta painamalla
1
f
-painiketta, kunnes näyttöön
tulee
HELLO
.
Sammuta laite painamalla
2
f
-painiketta äänityslaitteen ollessa
pysähtyneenä, kunnes näyttöön tulee
BYE
.
Pitotoiminto
4.3
Kun
HOLD
-painike
17
on pitoasennossa, kaikki laitteen painikkeet on
kytketty pois päältä. On Hold näkyy lyhyesti näytössä, ja näyttö kytkeytyy
pois päältä. Vapauta Voice Tracer lukituksesta siirtämällä
HOLD
-kytkin
Off -asentoon.
Voice Tracerin käyttö tietokoneen kanssa
4.4
Voice Tracer on USB-massamuistilaite, ja tiedostojen tallennus,
varmuuskopiointi ja siirto tapahtuvat siten vaivattomasti. Voice Tracer
kytketään tietokoneeseen USB-kaapelilla ilman erityisten ohjelmistojen
asentamista. Voice Tracer näkyy automaattisesti irrotettavana asemana,
joten voit siirtää tiedostoja laitteesta ja laitteeseen vedä- ja pudota-
toiminnolla.
21
D
Huomautukset
Älä kytke Voice Traceria irti, kun tiedostoja siirretään laitteesta
•
tai laitteeseen. Tietojensiirto on käynnissä, kun äänityksen/toiston
merkkivalo
18
vilkkuu oranssina.
Älä käytä tietokonetta Voice Tracerin levyaseman alustamiseen.
•
Äänitys
5
Äänitys sisäänrakennetulla mikrofonilla
5.1
Paina
1
INDEX / a
-painiketta äänityslaitteen ollessa pysähtyneenä, jotta
voit valita haluamasi kansion
22
.
Paina
2
g
-painiketta äänityksen aloittamiseksi. Äänityksen/toiston
merkkivalo
18
palaa punaisena. Suuntaa sisäänrakennettu mikrofoni
3
kohti äänilähdettä.
Keskeytä äänitys painamalla
3
g
-painiketta. Äänityksen/toiston
merkkivalo vilkkuu ja
PAUSE
vilkkuu näytössä
23
. Paina
g
-painiketta
uudelleen äänityksen jatkamiseksi.
Lopeta äänitys painamalla
4
j / DEL
-painiketta.
D
Huomautukset
Aseta haluttu ääniaktivointitoiminto ja äänitystila ennen äänityksen
•
aloittamista (katso lisätietoja kohdasta 8 Henkilökohtaiset asetukset).
Suorita testiäänitys varmistaaksesi, että Voice Tracerin asetukset ovat
•
oikein.
Paina
•
f-painiketta ja pidä sitä painettuna äänityksen aikana jäljellä
olevan äänitysajan näyttämiseksi.
Paina
•
b
-painiketta äänityksen aikana uuden tiedoston luomiseksi.
Kuhunkin kansioon mahtuu enintään 99 tiedostoa, joten
•
kokonaiskapasiteetti on 396 tiedostoa (99 tiedostoa x 4 kansiota).
Jos äänitysaika ylittää käytettävissä olevan kapasiteetin tai tiedostoja on
•
396, äänitys pysähtyy ja näyttöön tulee ’FULL’. Poista muutama äänitys
tai siirrä ne tietokoneeseen.
Älä poista paristoja äänityksen aikana, sillä se voi aiheuttaa
•
äänityslaitteen toimintahäiriön.
Voice Tracerilla voi äänittää, kun se saa virransyötön tietokoneesta
•
USB-kaapelin kautta, jolloin paristot eivät kulu.
Äänitys ulkoisella mikrofonilla
5.2
Kun äänität ulkoisella mikrofonilla, kytke mikrofoni
mikrofonipistokkeeseen ja toimi samoin kuin sisäänrakennetun
mikrofonin tapauksessa.
24
Indeksimerkkien lisääminen
5.3
Indeksimerkeillä voidaan merkitä joitain äänityksen kohtia viitekohdiksi.
Paina
1
INDEX / a
-painiketta äänityksen aikana indeksimerkin
lisäämiseksi. Indeksinumero näkyy näytössä sekunnin
25
.
D
Huomautukset
•
-kuvake ilmoittaa, että äänityksessä on indeksimerkkejä.
Yhteen tiedostoon voi lisätä korkeintaan 32 indeksimerkkiä.
•
Toisto
6
Paina
1
INDEX / a
-painiketta äänityslaitteen ollessa pysähtyneenä,
jotta voit valita haluamasi kansion.
Paina
2
h
— tai
b
-painiketta tiedoston valitsemiseksi toistoa varten.
Paina
3
f
-painiketta. Toistoaika tulee näyttöön, ja vihreä LED-valo
18
syttyy palamaan.
Säädä äänenvoimakkuutta
4
+ ja – painikkeilla.
Pysäytä toisto painamalla
5
j / DEL
-painiketta. Nykyisen tiedoston
kokonaistoistoaika tulee näyttöön.
Paina
6
f
-painiketta uudelleen toiston jatkamiseksi edellisestä
kohdasta.
D
Huomautus
Kun kuulokkeet on kytketty
EAR
-pistokkeeseen
1
, äänityslaitteen
kaiutin kytkeytyy pois päältä.
Toistotoiminnot
6.1
Hidas, nopea ja normaali toisto
6.1.1
Paina ja pidä painettuna
f
-painiketta vähintään 1 sekunti normaalin,
hitaan ja nopean toiston vaihtamiseksi.
26
Haku
6.1.2
Paina
h
— tai
b
-painiketta ja pidä sitä alhaalla toiston aikana nykyisen
tiedoston nopeaksi kelaamiseksi taakse- tai eteenpäin. Vapauta painike
toiston jatkamiseksi valitulla nopeudella.
Taakse- ja eteenpäinkelaus
6.1.3
Paina
h
— tai
b
-painiketta toiston aikana soitettavan tiedoston
kelaamiseksi alkuun tai kelaa vastaavasti eteenpäin seuraavaan tiedostoon.
Jos tiedostossa on indeksimerkkejä, toisto alkaa tästä kohdasta.
Soitto-ominaisuudet
6.2
Voit asettaa Voice Tracerin soittamaan tiedostoja peräkkäin tai
satunnaisesti.
Jakson toistaminen
6.2.1
Voit kuunnella uudelleen tai toistaa jatkuvasti laulusta halutun jakson
1
painamalla
INDEX / a
-painiketta valitussa aloituskohdassa.
REP. A – B
vilkkuu näytössä
27
.
Paina
2
INDEX / a
-painiketta uudestaan valitussa loppukohdassa.
Toistojakso alkaa.
Paina
3
j / DEL
-painiketta toiston pysäyttämiseksi tai paina
INDEX / a
-painiketta palataksesi normaaliin toistoon.
Tiedoston tai kansion toisto
6.2.2
Paina
1
INDEX / a
-painiketta ja pidä sitä alhaalla vähintään sekunti
toiston aikana vaihtaaksesi soittotilan ( toistotiedosto, toistokansio
tai normaali toisto).
28
Ikon
Merkitys
REP. FILE
Soittaa yhden tiedoston toistuvasti uudelleen
REP. FOLDER
Soittaa kaikki kansion tiedostot toistuvasti uudelleen
Poista
7
Paina
1
INDEX / a
-painiketta äänityslaitteen ollessa pysähtyneenä, jotta
voit valita haluamasi kansion.
Paina
2
j / DEL
-painiketta ja pidä sitä alhaalla vähintään sekunti.
DELETE
tulee näyttöön
29
.
Paina
3
h
— tai
b
-painiketta poistotoiminnon valitsemiseksi:
30
Ikon
Merkitys
FILE
Poista yksi tiedosto
FOLDER
Poista kaikki kansion tiedostot
Poista tiedoston kaikki indeksimerkit
Paina
4
f
-painiketta.
Paina
5
h
— tai
b
-painiketta tiedoston valitsemiseksi, ja indeksimerkit
sisältävä kansio tai tiedosto poistetaan
31
.
Paina uudelleen
6
f
-painiketta.
N
(Ei) tulee näyttöön
32
.
Paina
7
h
— tai
b
-painiketta valitaksesi
Y
(Kyllä)
33
.
Paina
8
f
-painiketta valinnan vahvistamiseksi.
D
Huomautus
Peräkkäiset tiedostot numeroidaan uudelleen automaattisesti.
Henkilökohtaiset asetukset
8
Paina
1
MENU
-painiketta, kun äänityslaite on pysähtynyt aikana valikon
avaamiseksi.
Paina
2
h
— tai
b
-painiketta valikkokohdan valitsemiseksi
34
.
Paina
3
f
-painiketta alavalikon valitsemiseksi.
Paina
4
h
— tai
b
-painiketta asetuksen muuttamiseksi.
Paina
5
f
-painiketta valintasi vahvistamiseksi.
Paina
6
MENU
-painiketta poistuaksesi nykyisestä asetusnäytöstä.
Valikko Setting Merkitys
REC
HQ
SP
LP
SLP
Valitse kolmesta äänitystilasta. Lisätietoja valittavana
olevista äänitystiloista ja äänitysajoista on kohdassa
11 Tekniset tiedot.
SENSE
HI
LO
Säätää äänitysherkkyyttä äänityksen taustamelun
poistamiseksi ja sen mukauttamiseksi
äänitysympäristöön.
BEEP
On
Off
Äänityslaite antaa äänimerkin painiketoiminnoista
tai virheistä.
VA
On
Off
Äänellä aktivoitava äänitys soveltuu hyvin handsfree-
äänitykseen. Kun äänellä aktivoitava äänitys on
päällä, äänitys alkaa, kun alat puhua. Kun lopetat
puhumisen, laite lopettaa äänityksen automaattisesti
kolmen sekunnin hiljaisuuden jälkeen ja äänitys
jatkuu vasta, kun alat puhua uudelleen.
FORMAT
Yes
No
Poistaa kaikki tiedostot äänityslaitteesta. Siirrä
kaikki tärkeät tiedostot tietokoneelle ennen
äänityslaitteen formatointia.
AUTO OF
5
15
Voice Tracer sammuu automaattisesti, kun sitä ei
käytetä 5 tai 15 minuutin jälkeen.
VER
Näyttää valmisohjelmistoversion ja julkaisupäivän.
Laiteohjelmiston päivittäminen
9
Voice Traceria ohjataan sisäisellä ohjelmalla eli laiteohjelmistolla.
Uudempia versioita laiteohjelmistosta on saatettu julkaista sen jälkeen,
kun ostit Voice Tracerin.
Kytke Voice Tracer tietokoneeseen mukana toimitetulla USB-
1
kaapelilla.
Lataa laiteohjelmistolla päivitys Voice Tracer -malliisi Internet-sivuilta
2
www.philips.com ja tallenna tiedosto Voice Tracerin juurihakemistoon.
Kytke Voice Tracer irti tietokoneesta. Laiteohjelmisto päivittyy
3
automaattisesti. Voice Tracerin virta sammuu itsestään, kun päivitys
on valmis.
Vianmääritys
10
Äänityslaite ei kytkeydy päälle
Paristot voivat olla lopussa tai niitä ei ole asetettu oikein paikalleen.
•
Vaihda paristot uusiin ja tarkista, että paristot on asetettu oikein
paikalleen.
Äänityslaite ei äänitä mitään
Äänityslaite voi olla
•
HOLD
-tilassa. Liu’uta
HOLD
-kytkin Off-asentoon.
Äänitysten maksimimäärä on saavutettu tai äänityskapasiteetti
•
on täynnä. Poista joitain äänityksiä tai siirrä äänityksiä ulkoiseen
laitteeseen.
Kaiuttimesta ei kuulu mitään
Kuulokkeet voivat olla kytkettyinä laitteeseen. Poista kuulokkeet.
•
Äänenvoimakkuus on kaikkein alhaisimmalla asetuksella. Säädä
•
äänenvoimakkuutta.
Äänityslaite ei toista äänityksiä
Äänityslaite voi olla
•
HOLD
-tilassa. Liu’uta
HOLD
-kytkin Off-asentoon.
Paristot voivat olla lopussa tai niitä ei ole asetettu oikein paikalleen.
•
Vaihda paristot uusiin ja tarkista, että paristot on asetettu oikein
paikalleen.
Mitään ei ole vielä äänitetty. Tarkista äänitysten määrä.
•
Äänityslaite ei pysähdy, keskeydy, soita tai äänitä
Äänityslaite voi olla
•
HOLD
-tilassa. Liu’uta
HOLD
-kytkin Off-asentoon.
Kuulokkeista ei kuulu mitään
Kuulokkeita ei ole ehkä kytketty laitteeseen oikein. Kytke kuulokkeiden
•
pistoke laitteeseen oikein.
Äänenvoimakkuus on kaikkein alhaisimmalla asetuksella. Säädä
•
äänenvoimakkuutta.
Tekniset tiedot
11
USB:
•
Erittäin nopea 2.0 mini-USB
Mikrofoni:
•
3,5 mm • impedanssi 2,2 kΩ
Kuulokkeet:
•
3,5 mm • impedanssi vähintään 16 Ω
Kuva/näyttö:
•
LCD/segmentoitu • näytön diagonaalinen koko: 39 mm
Mikrofoni:
•
Sisäänrakennettu: mono • Ulkoinen: mono
Sisäinen muistikapasiteetti:
•
1 Gt (LFH0602) • 2 Gt (LFH0622)
Sisäisen muistin tyyppi:
•
NAND Flash -muisti
Tallennusformaatit:
•
MPEG1 layer 3 (MP3)
Tallennustilat:
•
HQ (MP3/mono), SP (MP3/mono), LP (MP3/mono),
SLP (MP3/mono)
Bittinopeus:
•
64 kbps (HQ-tila), 48 kbps (SP-tila), 32 kbps (LP-tila),
16 kbps (SLP-tila)
Tallennusaika
•
(LFH0602/LFH0622): 139/283 tuntia (SLP-tila),
69/141 tuntia (LP-tila), 46/94 tuntia (SP-tila), 34/70 tuntia (HQ-tila)
Näytenopeus:
•
22 kHz (HQ-tila), 16 kHz (SP/LP/SLP-tila)
Sisäänrakennettu 30 mm:n pyöreä dynaaminen kaiutin • Teho: 110 mW
•
Käyttöolosuhteet:
•
Lämpötila: 5 ° – 45 ° C / Kosteus: 10% – 90%
Paristotyyppi:
•
kaksi Philipsin AAA-alkaliparistoa (LR03 tai R03)
Pariston käyttöikä (LP-tila):
•
LFH0602: 35 tuntia • LFH0622: 50
tuntia
Tuotteen mitat (L × P × K):
•
40 × 18,4 × 108 mm
Paino:
•
80 g, mukaan lukien paristot
Järjestelmävaatimukset:
•
Windows 7/Vista/XP/2000, Mac OS X,
Linux • Vapaa USB-portti
Português
Boas-vindas
1
Parabéns pela sua compra e bem-vindo à Philips! Para tirar o máximo
proveito da assistência prestada pela Philips, visite a nossa página na
Internet para ficar a conhecer as informações de assistência, como, por
exemplo, manuais de utilizador, transferências de software, informações
de garantia, entre outras: www.philips.com.
Destaques do produto
1.1
Grava no popular formato MP3
•
Transfira gravações e dados rapidamente através de USB 2.0 de alta
•
velocidade
Altifalante dianteiro extra grande para reprodução de voz nítida
•
Gravação activada por voz para tirar notas sem mãos
•
Armazenamento em massa USB garante compatibilidade máxima
•
Organize os seus ficheiros de forma rápida e fácil em 4 pastas
•
Gravação com um toque instantânea – desde desligar ao modo de
•
gravação
Importante
2
Segurança
2.1
Para evitar curto-circuitos, não exponha o aparelho à chuva ou água.
•
Não exponha o aparelho a calor excessivo causado por equipamento
•
de aquecimento ou luz solar directa.
Proteja os cabos de serem dobrados, especialmente nas tomadas e no
•
ponto em que saem da unidade.
Faça cópias de segurança dos ficheiros. A Philips não é responsável por
•
qualquer perda de dados.
Audição segura
2.1.1
Respeite as seguintes indicações quando utilizar auscultadores:
Fique a ouvir em volumes razoáveis e durante períodos de tempo
•
razoáveis.
Tenha cuidado para não regular o volume muito alto, uma vez que a
•
audição se vai adaptando.
Não aumente o volume ao ponto de não conseguir ouvir o que o rodeia.
•
Deve ter cuidado ou parar temporariamente de utilizar o aparelho em
•
situações potencialmente perigosas.
Não utilize auscultadores quando estiver a conduzir um veículo
•
motorizado, a andar de bicicleta ou de skate, etc, pois poderá criar
situações de trânsito perigosas e é ilegal em muitas zonas.
Importante (para modelos fornecidos com auscultadores):
A Philips garante a conformidade com o nível sonoro máximo dos
seus leitores de áudio de acordo com o determinado pelas entidades
reguladoras relevantes, mas apenas com o modelo original de
auscultadores fornecido. Se estes auscultadores precisarem de ser
substituídos, recomendamos que se dirija a um revendedor para obter
um modelo da Philips idêntico ao original.
Eliminação do aparelho antigo
2.2
O aparelho foi concebido e fabricado com materiais e componentes
•
de alta qualidade que podem ser reciclados e reutilizados.
Quando um aparelho tiver este símbolo de um caixote com
•
rodas marcado com uma cruz, é porque esse aparelho está
abrangido pela Directiva Europeia 2002/96/CE.
Informe-se acerca do sistema local de recolha de aparelhos eléctricos
•
e electrónicos.
Actue de acordo com as regulamentações locais e não deite fora
•
os aparelhos antigos juntamente com o lixo doméstico normal. A
eliminação correcta dos aparelhos antigos ajudará a impedir eventuais
consequências negativas para o meio ambiente e para a saúde pública.
As pilhas (incluindo as pilhas recarregáveis) contêm substâncias que
•
podem poluir o meio ambiente. Todas as pilhas devem ser eliminadas
num ponto de recolha oficial.
O seu Digital Voice Tracer
3
1
Entrada dos auscultadores
2
Entrada do microfone
3
Microfone incorporado
4
Subir volume
5
Gravar, Pausa, Ligar
6
Avanço rápido, Selecção de
ficheiros, Selecção do menu
7
Parar, Mostrar, Eliminar
8
Descer volume
9
Altifalante
10
Entrada USB
11
Compartimento das pilhas
12
Ligar/desligar, Reproduzir/Pau-
sa, Velocidade de reprodução
13
Menu
14
Retrocesso rápido, Selecção de
ficheiros, Selecção do menu
15
Índice, Pasta, Repetir
16
Visor
17
Interruptor de suspensão
18
Indicador de gravação/
reprodução
Iniciação
4
Introdução das pilhas
4.1
Deslize a tampa das pilhas para abrir.
1
19
Coloque as pilhas na polaridade correcta, conforme indicado, e
2
feche a tampa.
20
D
Nota
Retire as pilhas quando não pretender utilizar o Voice Tracer por um
•
período de tempo prolongado. As pilhas com fugas podem danificar
o Voice Tracer.
Se o Voice Tracer começar a funcionar mal, retire as pilhas e volte a
•
colocá-las.
Pare o gravador antes de substituir as pilhas. Retirar as pilhas com o
•
gravador a funcionar pode danificar o ficheiro.
Quando as pilhas estiverem quase gastas, o indicador das pilhas pisca.
•
Ligar/desligar
4.2
Para ligar, prima o botão
1
f
até o visor mostrar
HELLO
(Olá).
Para desligar, prima o botão
2
f
com o gravador parado até o visor
mostrar
BYE
(Adeus).
Função de suspensão
4.3
Quando o interruptor
HOLD
(Suspender)
17
estiver na posição de
suspensão, todos os botões do aparelho ficam inactivos. A mensagem
On Hold (Suspenso) será mostrada durante breves momentos no visor
e depois este desliga-se. Desbloqueie o Voice Tracer deslocando o
interruptor
HOLD
(Suspender) para a posição Off.
Utilizar o Voice Tracer com um computador
4.4
Enquanto suporte de armazenamento em massa USB, o Voice Tracer
constitui uma forma prática para gravar, fazer cópias de segurança e
transportar ficheiros. O Voice Tracer pode ser ligado a um computador
através de uma ligação USB e não precisa de nenhum software especial
para ser instalado. O Voice Tracer é mostrado automaticamente como
uma unidade amovível, permitindo que a transferência de ficheiros de e
para a unidade seja feita através do processo de arrastar e largar.
21
D
Notas
Não desligue o Voice Tracer enquanto os ficheiros estiverem a ser
•
transferidos de ou para o aparelho. Os dados ainda podem estar a ser
transferidos enquanto a luz indicadora de gravação/reprodução
18
estiver a piscar a laranja.
Não formate a unidade do Voice Tracer num computador.
•
Gravar
5
Gravar com o microfone incorporado
5.1
Prima o botão
1
INDEX / a
com o gravador parado para seleccionar a
pasta pretendida
22
.
Prima o botão
2
g
para iniciar a gravação. O indicador de gravação/
reprodução
18
acende-se a vermelho. Aponte o microfone
incorporado
3
à fonte do som.
Para fazer uma pausa na gravação, prima o botão
3
g
. O indicador
de gravação/reprodução pisca e a mensagem
PAUSE
(Pausa) é
mostrada no visor
23
. Prima o botão
g
de novo para prosseguir
com a gravação.
Para parar a gravação, prima o botão
4
j / DEL
.
D
Notas
Defina a função de activação por voz e o modo de gravação
•
pretendidos antes de iniciar a gravação (consulte 8 Personalizar as
definições para mais informações).
Faça uma gravação de teste para garantir que as definições do Voice
•
Tracer estão correctas.
Prima e mantenha premido
•
f durante a gravação para mostrar o
tempo de gravação restante.
Prima
•
b
durante a gravação para criar um ficheiro novo.
O número máximo de ficheiros em cada pasta é 99, correspondendo a
•
uma capacidade total de 396 ficheiros (99 ficheiros x 4 pastas).
Se o tempo de gravação ultrapassar a capacidade disponível ou o
•
número de ficheiros atingir os 396, a gravação pára e a mensagem
‘FULL’ (Cheio) é mostrada. Elimine algumas gravações ou transfira-as
para um computador.
Não retire as pilhas durante a gravação. Fazê-lo pode causar uma avaria
•
do gravador.
Se houver a possibilidade de a gravação prolongar-se no tempo,
•
substitua as pilhas antes de iniciar.
Gravar com um microfone externo
5.2
Para gravar com um microfone externo, ligue o microfone à entrada do
microfone e siga o mesmo procedimento utilizado para o microfone
incorporado.
24
Adicionar marcas de índice
5.3
As marcas de índice podem ser utilizadas para marcar determinados
pontos numa gravação como pontos de referência.
Prima o botão
1
INDEX / a
durante a gravação para adicionar uma
marca de índice. O número de índice é mostrado durante um
segundo
25
.
D
Notas
O ícone
•
indica que a gravação contém marcas de índice.
Podem ser adicionadas até 32 marcas de índice por ficheiro.
•
Reprodução
6
Prima o botão
1
INDEX / a
com o gravador parado para seleccionar a
pasta pretendida.
Prima o botão
2
h
ou
b
para seleccionar o ficheiro a reproduzir.
Prima o botão
3
f
. O tempo de reprodução é mostrado no visor e o
LED verde
18
acende-se.
Regule o volume com os botões
4
+ e –.
Para parar a gravação, prima o botão
5
j / DEL
. O tempo total de
reprodução do ficheiro actual é mostrado no visor.
Prima o botão
6
f
de novo para continuar a reprodução a partir da
posição anterior.
D
Nota
Quando os auscultadores estão ligados à entrada
EAR
1
, o altifalante
do gravador fica desligado.
Funções de reprodução
6.1
Reprodução lenta, rápida, normal
6.1.1
Prima e mantenha premido o botão
f
durante 1 segundo ou mais para
alternar entre reprodução normal, lenta e rápida.
26
Procurar
6.1.2
Prima e mantenha premido o botão
h
ou
b
durante a reprodução
para fazer uma procura a alta velocidade para trás ou para a frente no
ficheiro actual. Solte o botão para retomar a reprodução à velocidade
seleccionada.
Retroceder e avançar
6.1.3
Prima o botão
h
ou
b
durante a reprodução para retroceder para
o início do ficheiro que está a ser reproduzido ou para avançar para o
ficheiro seguinte, respectivamente. Se o ficheiro tiver marcas de índice, a
reprodução começa nesse ponto.
Modos de reprodução
6.2
É possível definir o Voice Tracer para reproduzir ficheiros repetida ou
aleatoriamente.
Repetir uma sequência
6.2.1
Para repetir ou fazer um ciclo de uma sequência numa canção, prima
1
o botão
INDEX / a
no ponto de início escolhido.
REP. A – B
pisca
no visor
27
.
Prima o botão
2
INDEX / a
de novo no ponto de fim escolhido. A
sequência de repetição começa.
Prima o botão
3
j / DEL
para parar a reprodução ou prima o botão
INDEX / a
para regressar à reprodução normal.
Repetir um ficheiro ou uma pasta
6.2.2
Prima e mantenha premido o botão
1
INDEX / a
durante 1 segundo
ou mais durante a reprodução para alternar entre modos de repro-
dução (repetir ficheiro, repetir pasta ou reprodução normal).
28
Ícone
Significado
REP. FILE
(Rep. ficheiro)
Reproduzir um ficheiro repetidamente
REP. FOLDER
(Rep. pasta)
Reproduzir todos os ficheiros numa pasta
repetidamente
Eliminar
7
Prima o botão
1
INDEX / a
com o gravador parado para seleccionar a
pasta pretendida.
Prima e mantenha premido o botão
2
j / DEL
durante 1 segundo ou
mais. A mensagem
DELETE
(Apagar) é mostrada no visor
29
.
Prima o botão
3
h
ou
b
para seleccionar uma opção de eliminação:
30
Ícone
Significado
FILE (Ficheiro)
Eliminar um só ficheiro
FOLDER (Pasta)
Eliminar todos os ficheiros de uma pasta
Eliminar todas as marcas de índice de um ficheiro
Prima o botão
4
f
.
Prima o botão
5
h
ou
b
para seleccionar o ficheiro, a pasta ou o
ficheiro com as marcas de índice que pretende eliminar
31
.
Prima o botão
6
f
de novo. A mensagem
N
(Não) é mostrada
32
.
Prima o botão
7
h
ou
b
para seleccionar
Y
(Sim)
33
.
Prima o botão
8
f
para confirmar.
D
Nota
Os números sequenciais dos ficheiros são redefinidos automaticamente.
Personalizar as definições
8
Prima o botão
1
MENU
com o gravador parado para abrir o menu.
Prima o botão
2
h
ou
b
para seleccionar um item de menu
34
.
Prima o botão
3
f
para entrar num submenu.
Prima o botão
4
h
ou
b
para alterar uma definição.
Prima o botão
5
f
para confirmar a selecção.
Prima o botão
6
MENU
para sair do ecrã de definições em que se
encontra.
Menu
Definição Descrição
REC
(Gravar)
HQ
SP
LP
SLP
Escolha entre 4 modos de gravação. Consulte
11 Características técnicas para mais informações
acerca dos modos e tempos de gravação
disponíveis.
SENSE
(Sensibili-
dade)
HI (Alta)
LO (Baixa)
Regule a sensibilidade da gravação para evitar
gravar ruídos de fundo e para se ajustar ao
ambiente de gravação.
BEEP
(Sinal)
On
Off
O gravador emite um sinal sonoro que indica
operações de botões ou erros.
VA
(Activ.
voz)
On
Off
A gravação com activação por voz é uma função
prática para a gravação mãos-livres. Quando a
gravação com activação por voz é activada, a
gravação começa quando o utilizador começar
a falar. Quando parar de falar, o gravador coloca
automaticamente a gravação em pausa após
três segundos de silêncio e só a retoma quando
começar a falar de novo.
FORMAT
(Formatar)
Yes (Sim)
No (Não)
Elimine todos os ficheiros do gravador. Transfira
os ficheiros importantes para um computador
antes de formatar o gravador.
AUTO OF
5
15
O Voice Tracer desliga-se automaticamente após
5 ou 15 minutos de inactividade.
VER
(Versão)
Apresenta a versão do firmware e a data de
edição.
Actualizar o firmware
9
O Voice Tracer é controlado por um programa interno denominado
firmware. É possível que tenham sido lançadas novas versões do
firmware depois de ter adquirido o Voice Tracer.
Ligue o Voice Tracer a um computador com o cabo USB fornecido.
1
Transfira a actualização do firmware para o seu modelo de Voice
2
Tracer a partir de www.philips.com e grave o ficheiro no directório
de raiz do Voice Tracer.
Desligue o Voice Tracer do computador. O firmware é actualizado
3
automaticamente e quando terminar o Voice Tracer desliga-se.
Resolução de problemas
10
O meu gravador não liga
As pilhas podem estar gastas ou não estar correctamente colocadas.
•
Substitua as pilhas gastas por umas novas e verifique se as pilhas novas
estão correctamente colocadas.
O meu gravador não grava nada
O gravador pode estar no modo
•
HOLD
(Suspender). Deslize o
interruptor
HOLD
(Suspender) para a posição Off.
O número máximo de gravações pode ter sido atingido ou a
•
capacidade de gravação pode estar cheia. Elimine algumas gravações ou
transfira gravações para um dispositivo externo.
Não consigo ouvir nada do altifalante
Os auscultadores podem estar ligados. Retire os auscultadores.
•
O volume está no nível mais baixo. Regule o volume.
•
21
23
24
25
26
27
28
29
30
31
32
33
34
1
2
13
3
9
5
7
16
17
11
15
10
4
8
14
12
6
18
5103 109 9734.1

22
O meu gravador não reproduz gravações
O gravador pode estar no modo
•
HOLD
(Suspender). Deslize o
interruptor
HOLD
(Suspender) para a posição Off.
As pilhas podem estar gastas ou não estar correctamente colocadas.
•
Substitua as pilhas gastas por umas novas e verifique se as pilhas novas
estão correctamente colocadas.
Ainda nada foi gravado. Verifique o número de gravações.
•
Não consigo parar, fazer pausa, reproduzir ou gravar com o
meu gravador
O gravador pode estar no modo
•
HOLD
(Suspender). Deslize o
interruptor
HOLD
(Suspender) para a posição Off.
Não consigo ouvir nada através dos auscultadores
Os auscultadores podem não estar correctamente ligados. Ligue
•
correctamente os auscultadores.
O volume está no nível mais baixo. Regule o volume.
•
Características técnicas
11
USB:
•
Mini-USB 2.0 de alta velocidade
Microfone:
•
3,5 mm • impedância de 2,2 kΩ
Auscultador:
•
3,5 mm • impedância de 16 Ω ou mais
Visor:
•
LCD/segmentado • tamanho do ecrã na diagonal: 39 mm
Microfone:
•
Incorporado: mono • Externo: mono
Capacidade da memória incorporada:
•
1 GB (LFH0602) • 2 GB
(LFH0622)
Tipo de memória incorporada:
•
NAND Flash
Formatos de gravação:
•
MPEG1 nível 3 (MP3)
Modos de gravação:
•
HQ (MP3/mono), SP (MP3/mono), LP (MP3/
mono), SLP (MP3/mono)
Taxa de bits:
•
64 kbps (modo HQ), 48 kbps (modo SP), 32 kbps
(modo LP), 16 kbps (modo SLP)
Tempo de gravação
•
(LFH0602/LFH0622):
139/283 horas (modo
SLP), 69/141 horas (modo LP), 46/94 horas (modo SP), 34/70 horas
(modo HQ)
Taxa de amostragem:
•
22 kHz (modo HQ), 16 kHz (modo SP/LP/
SLP)
Altifalante:
•
dinâmico redondo de 30 mm incorporado • potência de
saída: 110 mW
Condições de funcionamento:
•
Temperatura: 5° – 45° C •
Humidade: 10% – 90%
Tipo de pilhas:
•
duas pilhas AAA alcalinas Philips (LR03 ou R03)
Duração das pilhas (Modo LP):
•
LFH0602: 35 horas • LFH622: 50
horas
Dimensões do aparelho (L × P × A):
•
40 × 18,4 × 108 mm
Peso:
•
80 g incluindo pilhas
Requisitos do sistema:
•
Windows 7/Vista/XP/2000, Mac OS X,
Linux • Porta USB livre
Русский
Добро пожаловать
1
Поздравляем с покупкой и приветствуем вас в мире Philips! Чтобы
более эффективно пользоваться поддержкой компании Philips,
посетите веб-узел www.philips.com, содержащий руководства
пользователей, загружаемые программные продукты, информацию о
гарантийных обязательствах и другие сведения.
Основные возможности продукта
1.1
Делайте записи в популярном формате MP3.
•
Быстро передавайте записи и данные, используя
•
высокоскоростной протокол USB 2.0.
Большой передний динамик обеспечивает кристальную чистоту
•
воспроизведения голоса.
Режим голосового управления записью освободит ваши руки.
•
Полностью совместимый внешний USB-накопитель.
•
Простой и быстрый способ организации файлов в четырех папках.
•
Мгновенная запись одним нажатием кнопки – переход из
•
выключенного состояния в режим записи.
Важные сведения
2
Для безопасного и правильного использования
2.1
Во избежание коротких замыканий не подвергайте изделие
•
воздействию влаги, избегайте его попадания под дождь.
Берегите продукт от сильного нагрева, вызванного воздействием
•
прямых солнечных лучей или соседством с нагревательными
приборами.
Не допускайте защемления кабелей, особенно около вилок и в
•
месте выхода из устройства.
Архивируйте свои файлы. Компания Philips не несет
•
ответственности за потерю данных.
Защита органов слуха
2.1.1
При использовании наушников соблюдайте следующие
правила.
Осуществляйте прослушивание с умеренной громкостью и в
•
течение разумных периодов времени.
Не устанавливайте чрезмерно высокий уровень громкости.
•
Не устанавливайте уровень громкости, мешающий слышать
•
окружающие звуки.
В потенциально опасных ситуациях необходимо использовать
•
наушники с осторожностью или временно отказаться от их
использования.
Не пользуйтесь наушниками при управлении механическими
•
транспортными средствами или велосипедами, а также при езде
на скейтах и т. п.: это может стать причиной ДТП и противоречит
законодательству многих стран и регионов.
Внимание (для моделей, оснащенных наушниками)
При условии использования оригинальных наушников, поставляемых
в комплекте с устройством, компания Philips гарантирует
соответствие максимальной громкости звука аудиопроигрывателя
требованиям соответствующих нормативов. При необходимости
замены оригинальных наушников рекомендуется заказать в торговой
сети модель наушников Philips, идентичную исходной.
Утилизация старых продуктов
2.2
Данный продукт произведен с использованием
•
высококачественных материалов и компонентов, которые могут
быть переработаны и использованы повторно.
Продукты, помеченные этим значком мусорной корзины на
•
колесах, соответствуют европейской директиве 2002/96/EC.
Ознакомьтесь с действующими в вашем регионе
•
программами по сбору электрических и электронных продуктов.
При утилизации продукта действуйте в соответствии с местным
•
законодательством. Не выбрасывайте данный продукт вместе с
бытовым мусором. Надлежащая утилизация старых продуктов
предотвращает вредные последствия для окружающей среды и
здоровья людей.
Батареи (включая встроенные аккумуляторы) содержат вещества,
•
которые загрязняют окружающую среду. Все батареи должны
сдаваться в официальные пункты сбора и утилизации.
Digital Voice Tracer
3
1
Разъем для подключения
наушников
2
Разъем для подключения
микрофона
3
Встроенный микрофон
4
Увеличение громкости
5
Запись, пауза, включение
6
Быстрая перемотка вперед,
выбор файла, выбор меню
7
Остановка, отображение,
удаление
8
Уменьшение громкости
9
Динамик
10
Разъем USB
11
Отсек для батарей
12
Включение/отключение,
воспроизведение/пауза,
скорость воспроизведения
13
Меню
14
Быстрая перемотка назад,
выбор файла, выбор меню
15
Индекс, папка, повтор
16
Экран
17
Переключатель Hold
18
Индикатор записи и
воспроизведения
Начало работы
4
Установка батареек
4.1
Сдвиньте крышку отсека для батарей.
1
19
Установите батареи, соблюдая указанную полярность, и
2
закройте крышку отсека для батарей.
20
D
Примечание
Если Voice Tracer не будет использоваться в течение длительного
•
времени, извлеките батареи: разгерметизация батарей может
повредить Voice Tracer.
Если Voice Tracer не работает надлежащим образом, извлеките
•
батареи и установите их повторно.
Останавливайте запись перед заменой батарей: если
•
проигрыватель работает, извлечение батарей может привести к
повреждению файла.
Когда батареи почти разряжены, индикатор уровня заряда мигает.
•
Использование Voice Tracer в качестве музыкального
4.2
проигрывателя
Чтобы включить проигрыватель, нажмите и удерживайте кнопку
1
f
, пока на экране не появится сообщение
HELLO
.
Чтобы выключить проигрыватель, нажмите кнопку
2
f
, когда
проигрыватель остановлен, и удерживайте ее, пока на экране не
появится сообщение
BYE
.
Использование переключателя Hold для блокировки
4.3
всех кнопок
Если переключатель
HOLD
17
установлен в положение Hold, все
кнопки на устройстве будут заблокированы. На экране появится
надпись
On Hold
, после чего он отключится. Чтобы разблокировать
Voice Tracer, передвиньте переключатель
HOLD
в положение
Off
.
Использование Voice Tracer с компьютером
4.4
Являясь устройством хранения данных с интерфейсом USB,
Voice Tracer предоставляет удобные средства хранения,
архивации и переноса файлов. Voice Tracer подключается к
компьютеру с помощью интерфейса USB и не требует установки
специализированного ПО и драйверов. При подключении Voice
Tracer автоматически отображается как съемный носитель, позволяя
переносить файлы на устройство и с устройства.
21
D
Примечания
Не отключайте Voice Tracer от компьютера во время копирования
•
файлов с компьютера или на компьютер. В процессе передачи
данных индикатор записи и воспроизведения
18
мигает
оранжевым цветом.
Не форматируйте накопитель Voice Tracer на компьютере.
•
Запись
5
Запись с помощью встроенного микрофона
5.1
Для выбора нужной папки нажмите кнопку
1
INDEX /
a
, когда
процесс записи остановлен
22
.
Нажмите кнопку
2
g
, чтобы начать запись. Индикатор записи
и воспроизведения
18
будет светиться красным цветом.
Направьте встроенный микрофон
3
в сторону источника звука.
Для приостановки записи нажмите кнопку
3
g
. Индикатор записи
и воспроизведения начнет мигать, а на экране появится сообще-
ние
PAUSE
23
. Чтобы возобновить запись, нажмите кнопку
g
.
Чтобы остановить запись, нажмите кнопку
4
j
/ DEL
.
D
Примечания
Прежде чем начать запись, выберите функцию голосовой
•
активации и режим записи (дополнительные сведения см. в разделе
8
Изменение параметров
).
Сделайте пробную запись, чтобы проверить правильность
•
настроек Voice Tracer.
Для отображения оставшегося времени записи нажмите в режиме
•
записи кнопку
f
и удерживайте ее.
Чтобы создать новый файл, нажмите в режиме записи кнопку
•
b
.
В каждой папке может находиться до 99 файлов, что позволяет
•
хранить на устройстве до 396 файлов (99 файлов x 4 папки).
Если длительность записи превышает максимально допустимую
•
или число файлов достигает 396, процесс записи останавливается
и появляется сообщение FULL. В этом случае необходимо удалить
несколько записей или перенести их на компьютер.
Не извлекайте батареи во время записи – это может привести к
•
сбоям в работе системы записи.
Если вы планируете осуществлять запись в течение долгого
•
времени, замените батареи перед началом записи.
Запись с помощью внешнего микрофона
5.2
Чтобы выполнить запись с помощью внешнего микрофона, подклю-
чите микрофон к гнезду микрофона и используйте такую же про-
цедуру, как и при записи с помощью встроенного микрофона.
24
Создание индексной метки
5.3
Индексные метки позволяют отметить определенные моменты
записи для дальнейшего использования.
Чтобы добавить индексную метку, нажмите в режиме записи
1
кнопку
INDEX /
a
. Появится номер метки, который будет
отображаться в течение одной секунды
25
.
D
Примечания
Значок
•
показывает, что запись содержит индексные метки.
Для каждого файла можно установить до 32 индексных меток.
•
Воспроизведение
6
Для выбора нужной папки нажмите кнопку
1
INDEX /
a
, когда
процесс записи остановлен.
Нажмите кнопку
2
h
или
b
, чтобы выбрать файл для
воспроизведения.
Нажмите кнопку
3
f
. Загорится зеленый светодиодный
индикатор
18
, а на экране появится время воспроизведения.
Настройте громкость с помощью кнопок
4
+
и
–
.
Чтобы остановить воспроизведение, нажмите кнопку
5
j
/ DEL
. На
экране отобразится общее время воспроизведения текущего
файла.
Чтобы продолжить воспроизведение с предыдущей позиции,
6
повторно нажмите кнопку
f
.
D
Примечание
Если к разъему
EAR
1
подключены наушники, динамик
автоматически отключается.
Выбор режима воспроизведения
6.1
Быстрое, медленное и обычное воспроизведение
6.1.1
Для переключения между режимами быстрого, медленного и
обычного воспроизведения нажмите кнопку
f
и удерживайте ее в
течение 1 секунды или дольше.
26
Перемотка назад и вперед
6.1.2
Чтобы быстро промотать текущий файл назад или вперед, во время
воспроизведения нажмите и удерживайте кнопку
h
или
b
. Чтобы
возобновить воспроизведение на выбранной скорости, отпустите
кнопку.
Поиск
6.1.3
Чтобы перейти к началу текущего файла или к следующему
файлу, нажмите во время воспроизведения кнопку
h
или
b
соответственно. Если файл содержит индексные метки,
воспроизведение начнется с позиции, заданной одной из меток.
Обзор функций воспроизведения
6.2
Voice Tracer может воспроизводить файлы с повтором и в
случайном порядке.
Повторное воспроизведение фрагмента записи
6.2.1
Чтобы начать воспроизведение фрагмента записи с повтором,
1
нажмите в начальной позиции выбранного фрагмента кнопку
INDEX /
a
. На экране появится сообщение
REP. A – B
27
.
В конечной позиции выбранного фрагмента нажмите кнопку
2
INDEX /
a
еще раз. Начнется воспроизведение с повтором.
Чтобы остановить воспроизведение, нажмите кнопку
3
j
/ DEL
.
Чтобы вернуться к обычному режиму воспроизведения, нажмите
кнопку
INDEX /
a
.
Воспроизведение файла или папки с повтором
6.2.2
Во время воспроизведения нажмите кнопку
1
INDEX /
a
и
удерживайте ее 1 секунду или дольше, чтобы изменить
режим воспроизведения (воспроизведение файла с
повтором, воспроизведение папки с повтором или обычное
воспроизведение).
28
Символ
Значение
REP. FILE
Многократное воспроизведение одного файла
REP. FOLDER
Многократное воспроизведение всех файлов из
папки
Удаление одного файла, всех файлов в
7
папке, индексных меток в файле
Для выбора нужной папки нажмите кнопку
1
INDEX /
a
, когда
процесс записи остановлен.
Нажмите кнопку
2
j
/ DEL
и удерживайте ее не менее одной
секунды. На экране появится сообщение
DELETE
29
.
Нажмите кнопку
3
h
или
b
, чтобы выбрать вариант удаления:
30
Символ Значение
FILE
Удаление одного файла
FOLDER
Удаление всех файлов в папке
Удаление всех индексных меток в файле
Нажмите кнопку
4
f
Нажмите кнопку
5
h
или
b
, чтобы выбрать файл, папку или
файл с индексными метками для удаления
31
.
Нажмите кнопку
6
f
еще раз. Появится сообщение
N
(«Нет»)
32
.
Нажмите кнопку
7
h
или
b
, чтобы выбрать значение
Y
(«Да»)
33
.
Нажмите кнопку
8
f
, чтобы подтвердить удаление.
D
Примечание
Файлам будут автоматически присвоены последовательные номера.
19
20
Изменение параметров
8
В режиме радио или при остановленном процессе записи
1
нажмите кнопку
MENU
, чтобы открыть меню.
Выберите элемент меню с помощью кнопок
2
h
и
b
34
.
Чтобы открыть вложенное меню, нажмите кнопку
3
f
.
Чтобы выбрать значение, нажмите кнопку
4
h
или
b
.
Нажмите кнопку
5
f
, чтобы подтвердить выбор.
Чтобы завершить настройку параметров, нажмите кнопку
6
MENU
.
Меню
Значе-
ние
Описание
REC
HQ
SP
LP
SLP
Режимы записи HQ, SP, LP и SLP позволяют
повысить длительность записи. Сведения о
доступных режимах записи и длительности
записи см. в разделе
11
Технические
характеристики
.
SENSE
HI
LO
Изменение чувствительности записи. Выбор
значения этого параметра в соответствии с
условиями, в которых производится запись,
позволяет избежать возникновения фонового
шума.
BEEP
On
Off
Voice Tracer издает звуковые сигналы при
возникновении ошибок и при нажатии кнопок.
VA
On
Off
Голосовая активация записи – это удобная
функция, позволяющая выполнять запись, не
нажимая кнопки. Когда этот режим включен,
запись начинается, когда вы начинаете говорить.
Через три секунды после того, как вы замолчите,
Voice Tracer автоматически приостановит запись
и возобновит ее, когда вы начнете говорить
снова.
FORMAT
Yes
No
Удаление всех файлов на устройстве. Перед
выполнением этой операции необходимо
скопировать все важные файлы на компьютер.
AUTO OF
5
15
Voice Tracer автоматически выключается после 5
или 15 минут бездействия.
VER
Отображение версии микропрограммы и даты
выпуска.
Обновление микропрограммы
9
Voice Tracer работает под управлением встроенного ПО,
называемого микропрограммой. После того, как вы приобрели
устройство Voice Tracker, могли быть выпущены новые версии
микропрограммы.
Подключите Voice Tracker к компьютеру с помощью USB-кабеля,
1
входящего в комплект поставки.
Загрузите обновление микропрограммы для своей модели Voice
2
Tracer с веб-страницы
www.philips.com
и сохраните загруженный
файл в корневой папке Voice Tracer.
Процесс обновления микропрограммы начнется автоматически,
3
а по его завершении Voice Tracker отключится.
Устранение неполадок
10
Устройство не включается
Возможно, батареи разряжены или установлены неправильно.
•
Установите новые батареи и проверьте правильность их
установки.
Не выполняется запись
Возможно, устройство находится в режиме
•
HOLD
. Переместите
переключатель
HOLD
в положение Off.
Возможно, достигнуто максимальное число записей или нет
•
свободного места для записей. Удалите часть записей или
перенесите их на внешнее устройство.
Ничего не слышно из динамика
Возможно, подключены наушники. Отключите наушники.
•
Установлен минимальный уровень громкости. Настройте
•
громкость.
Не выполняется воспроизведение
Возможно, устройство находится в режиме
•
HOLD
. Переместите
переключатель
HOLD
в положение Off.
Возможно, батареи разряжены или установлены неправильно.
•
Установите новые батареи и проверьте правильность их
установки.
Отсутствуют записи на устройстве. Убедитесь в том, что имеются
•
файлы для воспроизведения.
Voice Tracer не может останавливать и приостанавливать
операции, а также выполнять запись и воспроизведение
Возможно, устройство находится в режиме
•
HOLD
. Переместите
переключатель
HOLD
в положение Off.
Звук не воспроизводится через наушники
Возможно, наушники подключены неправильно. Подключите
•
наушники надлежащим образом.
Установлен минимальный уровень громкости. Настройте
•
громкость.
11 Технические характеристики
USB:
•
высокоскоростной интерфейс USB 2.0 с разъемом мини-USB
Микрофон:
•
3,5 мм • сопротивление 2,2 кОм
Наушники:
•
3,5 мм • сопротивление не менее 16 Ом
Экран:
•
ЖК/сегментный, Диагональ экрана: 39 мм / 1,5 дюйма.
Микрофон:
•
встроенный — моно • внешний — моно
Емкость встроенной памяти:
•
1 Гб (LFH0602) • 2 Гб (LFH0622)
Тип встроенной памяти:
•
флэш-память типа NAND
Форматы записи:
•
MPEG1 уровень 3 (MP3)
Режимы записи:
•
HQ (MP3/моно), SP (MP3/моно), LP (MP3/моно),
SLP (MP3/моно)
Скорость передачи данных:
•
64 Кбит/с (в режиме HQ), 48
Кбит/с (в режиме SP), 32 Кбит/с (в режиме LP), 16 Кбит/с (в
режиме SLP)
Время записи
•
(LFH0602/LFH0622):
139/283 часа (в режиме
SLP), 69/141 час (в режиме LP), 46/94 часа (в режиме SP), 34/70
часов (в режиме HQ)
Частота дискретизации:
•
22 кГц (в режиме HQ), 16 кГц (в
режиме SP/LP/SLP)
Встроенный круглый динамик диаметром 30 мм • выходная
•
мощность: 110 мВт
Условия эксплуатации:
•
температура — 5–45 °С • влажность —
10–90 %
Тип батарей:
•
две алкалиновые батареи Philips AAA (LR03 или
R03)
Срок службы батарей (режим LP):
•
LFH0602: 35 часов •
LFH0622: 50 часов
Размеры (Ш × Г × В):
•
40 × 18,4 × 108 мм
Масса:
•
80 г (с батареями)
Требования к ОС:
•
Windows 7/Vista/XP/2000, Mac OS X,
Linux • свободный порт USB
Svenska
Välkommen
1
Grattis till ditt köp och välkommen till Philips! För att kunna dra nytta
av all den service som Philips erbjuder kan du besöka vår webbplats.
Där finns supportinformation som t.ex. användarhandböcker,
programnedladdning, garantiinformation och mycket mer:
www.philips.com.
Produktfunktioner
1.1
Spela in i det populära MP3-formatet
•
Överför inspelningar och data snabbt via Hi-Speed USB 2.0
•
Extra stor främre högtalare för kristallklar ljuduppspelning
•
Röstaktiverad inspelning för handsfree-anteckning
•
USB-masslagring garanterar maximal kompatibilitet
•
Organisera dina filer snabbt och enkelt i 4 mappar
•
Direkt enknappsinspelning – från avstängd till inspelningsläge
•
Viktigt
2
Säkerhet
2.1
Produkten bör inte utsättas för regn eller vatten eftersom kortslutning
•
kan uppstå.
Utsätt inte enheten för stark värme som orsakas av värmeanläggningar
•
eller direkt solljus.
Skydda kablarna från att klämmas ihop, särskilt vid kontakter och där
•
de ansluts till enheten.
Säkerhetskopiera dina filer. Philips åtar sig inget ansvar för eventuell
•
dataförlust.
Hörselsäkerhet
2.1.1
Iaktta följande riktlinjer när du använder hörlurar:
Lyssna med rimlig volym under en rimlig tid.
•
Skruva inte upp volymen så högt att du inte kan höra vad som händer
•
runt omkring dig.
Du bör iaktta försiktighet eller tillfälligt avbryta användningen vid
•
potentiellt farliga situationer.
Använd inte hörlurar i trafiken, t ex när du cyklar eller åker
•
skateboard. Det kan skapa trafikfara och är förbjudet på många platser.
Viktigt (för modeller som är utrustade med hörlurar):
Philips garanterar att ljudspelarna följer de regler för maximal ljudstyrka
som fastställs av relevanta tillsynsmyndigheter, men endast med den
originalmodell av hörlurar som medföljer. Om hörlurarna behöver bytas
ut, rekommenderar vi att du kontaktar din återförsäljare för att beställa
en Philips-modell som är identisk med originalet.
Kassera gammal produkt
2.2
Produkten är utformad och tillverkad av högkvalitativa material och
•
komponenter som kan återvinnas och återanvändas.
När denna symbol finns angiven på produkten, anger den att
•
produkten omfattas av det europeiska direktivet 2002/96/EC.
Du bör informera dig om dina lokala insamlingssystem för
•
elektriska och elektroniska produkter.
Följ lokala föreskrifter och släng inte gamla produkter i det vanliga
•
hushållsavfallet. Rätt kassering av gamla produkter hjälper till att
förhindra potentiellt negativa konsekvenser för miljö och hälsa.
Batterier (inklusive inbyggda uppladdningsbara batterier) innehåller
•
ämnen som kan förorena miljön. Alla batterier ska slängas på särskild
insamlingsplats.
Digital Voice Tracer
3
1
Uttag för hörlurar
2
Uttag för mikrofon
3
Inbyggd mikrofon
4
Volymhöjning
5
Spela in, Pausa, Påslagen
6
Snabbspolning framåt, Filval,
Menyval
7
Stoppa, Visa, Ta bort
8
Volymsänkning
9
Högtalare
10
USB-kontakt
11
Batterifack
12
Ström på/av, Spela upp/Pausa,
Uppspelningshastighet
13
Meny
14
Snabbspolning bakåt, Filval,
Menyval
15
Index, Mapp, Repetera
16
Display
17
Låsknapp
18
Indikator för Spela in/Spela upp
Komma igång
4
Sätt i batterierna
4.1
Öppna batterilocket genom att skjuta det neråt.
1
19
Placera batterierna med rätt polaritet enligt märkningen och stäng
2
luckan.
20
D
Obs!
Ta bort batterierna om du inte kommer att använda Voice Tracer
•
under en längre period. Läckande batterier kan skada Voice Tracer.
Om Voice Tracer inte fungerar tar du bort batterierna och sätter
•
tillbaka dem igen. Stoppa diktafonen innan batterierna byts ut. Om du
tar bort batterierna när diktafonen används kan filen förstöras.
När batterierna är nästan tomma blinkar batteriindikatorn.
•
Ström på/av
4.2
För att sätta på diktafonen trycker du på
1
f
—
knappen tills displayen
visar
HELLO
.
För att stänga av diktafonen trycker du på
2
f
-knappen när
inspelningen är stoppad tills displayen visar
BYE
.
Låsfunktion
4.3
När
HOLD
-knappen
17
är i låsläge är alla knappar på enheten
inaktiverade.
On Hold
visas en kort stund på displayen innan den släcks
ner. Lås upp Voice Tracer genom att flytta
HOLD
-knappen till
Av
-läget.
Använda Voice Tracer med en dator
4.4
Som en USB-masslagringsenhet erbjuder Voice Tracer ett bekvämt sätt
att spara, säkerhetskopiera och flytta filer. Voice Tracer ansluts till en
dator med en USB-anslutning och kräver ingen speciell programvara.
Voice Tracer visas automatiskt som en flyttbar enhet, vilket gör att du
enkelt kan dra och släppa filer till och från enheten.
21
D
Obs!
Koppla inte bort Voice Tracer när filer överförs till eller från enheten.
•
Data överförs när spela in/spela upp-indikatorn
18
blinkar orange.
Formatera inte Voice Tracers enhet i datorn.
•
Spela in
5
Spela in med den inbyggda mikrofonen
5.1
Tryck på
1
INDEX /
a
-knappen när diktafonen är stoppad för att välja
önskad mapp
22
.
Tryck på
2
g
-knappen för att starta inspelningen. Indikatorn för spela
in/spela upp
18
lyser rött. Peka med den inbyggda mikrofonen
3
mot ljudkällan.
För att pausa inspelningen, tryck på
3
g
-knappen. Indikatorn för spela
in/spela upp blinkar och
PAUSE
blinkar på displayen
23
. Tryck på
g
-knappen en gång till för att återuppta inspelningen.
För att stoppa inspelningen, tryck på
4
j
/ DEL
-knappen.
D
Obs!
Ange önskad röstaktiveringsfunktion och inspelningsläge innan du
•
startar inspelningen (se
8
Anpassa inställningar
för mer information).
Gör en testinspelning för att kontrollera att inställningarna i Voice
•
Tracer är korrekta.
Tryck och håll ner
•
f
under inspelningen för att visa kvarvarande
inspelningstid.
Tryck på
•
b
under inspelningen för att skapa en ny fil.
Maximala antalet filer i varje mapp är 99, vilket ger en total kapacitet
•
på 396 filer (99 filer × 4 mappar).
Om inspelningstiden överskrider tillgänglig kapacitet eller antalet
•
filer når 396, stoppas inspelningen och ’FULL’ visas. Ta bort några
inspelningar eller flytta dem till en dator.
Ta inte bort batterierna under inspelningen. Detta kan medföra att
•
diktafonen slutar fungera.
Om inspelning ska göras under en längre tidsperiod bör batterierna
•
bytas ut innan inspelningen startas.
Spela in med en extern mikrofon
5.2
För att spela in med en extern mikrofon ansluter du mikrofonen till
mikrofonuttaget och följer samma procedur som för den inbyggda
mikrofonen.
24
Lägga till indexmarkeringar
5.3
Indexmarkeringar används för att märka ut vissa partier i en inspelning
som referenspunkter.
Tryck på
1
INDEX /
a
-knappen under inspelningen för att lägga till en
indexmarkering. Indexnumret visas under en sekund
25
.
D
Obs!
Ikonen
•
visar att inspelningen innehåller indexmarkeringar
Upp till 32 indexmarkeringar kan göras per fil.
•
Uppspelning
6
Tryck på
1
INDEX /
a
-knappen när diktafonen är stoppad för att välja
önskad mapp.
Tryck på
2
h
eller
b
-knappen för att välja vilken fil som ska spelas
upp.
Tryck på
3
f
-knappen. Uppspelningstiden visas på displayen och den
gröna lampan
18
tänds.
Justera volymen med knapparna
4
+
och
–
.
För att stoppa uppspelningen, tryck på
5
j
/ DEL
-knappen. Den totala
uppspelningstiden för aktuell fil visas på displayen.
Tryck på
6
f
-knappen en gång till för att fortsätta uppspelningen från
föregående position.
D
Obs!
När hörlurar är anslutna till
EAR
-uttaget
1
, kommer
diktafonhögtalaren att stängas av.
Uppspelningsfunktioner
6.1
Långsam, snabb, normal uppspelning
6.1.1
Tryck och håll ner
f
-knappen under minst 1 sekund för att växla
mellan normal, långsam eller snabb uppspelning.
26
Sök
6.1.2
Tryck och håll ner
h
eller
b
-knappen under uppspelningen för att
söka bakåt eller framåt i aktuell fil med snabb hastighet. Släpp knappen
för att återuppta uppspelningen med vald hastighet.
Spola bakåt och framåt
6.1.3
Tryck på
h
eller
b
-knappen under uppspelningen för att spola bakåt
till början på den fil som spelas upp respektive framåt till nästa fil. Om
filen innehåller indexmarkeringar börjar uppspelningen vid det partiet.
Uppspelningslägen
6.2
Du kan ställa in Voice Tracer att spela upp filer repeterat eller slumpvis.
Repetera en sekvens
6.2.1
För att repetera eller köra en sekvens i en låt som en slinga trycker
1
du på
INDEX /
a
-knappen vid önskad startpunkt.
REP. A – B
blinkar
på skärmen
27
.
Tryck på
2
INDEX /
a
-knappen en gång till vid önskad slutpunkt. Den
repeterade sekvensen startar.
Tryck på
3
j
/ DEL
-knappen för att stoppa uppspelningen eller tryck på
INDEX /
a
-knappen för att återgå till normal uppspelning.
Repetera en fil eller mapp
6.2.2
Tryck och håll ner
1
INDEX /
a
-knappen i minst 1 sekund under
uppspelningen för att växla mellan uppspelningslägen (repetera fil,
repetera mapp eller normal uppspelning).
28
Ikon
Betydelse
REP. FILE
Spelar upp en fil upprepade gånger
REP. FOLDER
Spelar alla filer i en mapp upprepade gånger
Ta bort
7
Tryck på
1
INDEX /
a
-knappen när diktafonen är stoppad för att välja
önskad mapp.
Tryck och håll ner
2
j
/ DEL
-knappen under minst 1 sekund.
DELETE
visas på skärmen
29
.
Tryck på
3
h
eller
b
-knappen för att välja ett raderingsalternativ:
30
Ikon
Betydelse
FILE
Tar bort en enda fil
FOLDER
Tar bort alla filer i en mapp
Tar bort alla indexmarkeringar i en fil
Tryck på
4
f
-knappen.
Tryck på
5
h
eller
b
-knappen för att välja fil, mapp eller den fil som
innehåller indexmarkeringar som ska raderas
31
.
Tryck på
6
f
-knappen igen.
N
(Nej) visas
32
.
Tryck på
7
h
eller
b
-knappen för att välja
Y
(Ja)
33
.
Tryck på
8
f
-knappen för att bekräfta.
D
Obs!
Sekventiella filnummer tilldelas automatiskt.
Anpassa inställningar
8
Tryck på
1
MENU
-knappen när diktafonen är stoppad för att öppna
menyn.
Tryck på
2
h
eller
b
-knappen för att välja en menypost
34
.
Tryck på
3
f
-knappen för att öppna en undermeny.
Tryck på
4
h
eller
b
-knappen för att ändra en inställning.
Tryck på
5
f
-knappen för att bekräfta valet.
Tryck på
6
MENU
-knappen för att stänga aktuellt inställningsfönster.
Meny
Inställning Beskrivning
REC
HQ
SP
LP
SLP
Välj mellan 4 inspelningslägen. Se
11
Teknisk
information
för mer information om tillgängliga
inspelningslägen och inspelningstider.
SENSE
HI
LO
Justera inspelningskänsligheten för att undvika
inspelning av bakgrundsljud och för att anpassa
till inspelningsmiljön.
BEEP
On
Off
Diktafonen avger ljud vid knappanvändning eller
vid fel.
VA
On
Off
Röstaktiverad inspelning är en bekväm funktion
vid handsfree-inspelning. När röstaktiverad
inspelning är aktiverad startar inspelningen
när du börjar tala. När du slutar tala pausas
diktafonen automatiskt efter tre sekunders
tystnad och återupptar inspelningen när du
börjar tala igen.
FORMAT
Yes
No
Tar bort alla filer i diktafonen. Glöm inte
att överföra viktiga filer till en dator innan
diktafonen formateras.
AUTO OF
5
15
Voice Tracer stängs automatiskt av efter 5 eller
15 minuters inaktivitet.
VER
Visar version och datum för aktuellt firmware.
Uppdatera firmware
9
Voice Tracer styrs av ett internt program som kallas för firmware. Nyare
versioner av firmware kan ha publicerats efter att du köpte Voice Tracer.
Anslut Voice Tracer till en dator med hjälp av den medföljande
1
USB-kabeln.
Hämta uppdateringar till din Voice Tracer-modell från
2
www.philips.com
och spara filen i Voice Tracers rotkatalog.
Koppla från Voice Tracer från datorn. Firmware uppdateras
3
automatiskt och när uppdateringen är klar stängs Voice Tracer av.
Felsökning
10
Det går inte att starta diktafonen
Batterierna kan vara slut eller felplacerade. Byt ut batterierna mot nya
•
och kontrollera att de är rätt placerade.
Diktafonen spelar inte in något
Diktafonen kan vara försatt i
•
HOLD
-läge. Skjut
HOLD
-knappen till
avstängt läge.
Maximalt antal inspelningar kan ha nåtts eller inspelningskapaciteten
•
kan vara full. Ta bort några inspelningar eller flytta inspelningar till en
extern enhet.
Jag hör inget från högtalaren
Hörlurarna kan vara anslutna. Koppla loss hörlurarna.
•
Volymen är på den lägsta nivån. Justera volymen.
•
Diktafonen kan inte spela upp inspelningar
Diktafonen kan vara försatt i
•
HOLD
-läge. Skjut
HOLD
-knappen till
avstängt läge.
Batterierna kan vara slut eller felplacerade. Byt ut batterierna mot nya
•
och kontrollera att de är rätt placerade.
Inget har spelats in än. Kontrollera antalet inspelningar.
•
Diktafonen kan inte stoppa, pausa, spela upp eller spela in
Diktafonen kan vara försatt i
•
HOLD
-läge. Skjut
HOLD
-knappen till
avstängt läge.
Jag hör inget genom hörlurarna
Hörlurarna kanske inte är anslutna på rätt sätt. Koppla in hörlurarna
•
i rätt uttag.
Volymen är på den lägsta nivån. Justera volymen.
•
Teknisk information
11
USB:
•
High-speed 2.0 mini-USB
Mikrofon:
•
3,5 mm • impedans 2,2 kΩ
Hörlurar:
•
3,5 mm • impedans 16 Ω eller mer
Display:
•
LCD/segment, diagonal skärmstorlek: 39 mm
Mikrofon:
•
Inbyggd: mono • Extern: mono
Inbyggd minneskapacitet:
•
1 GB (LFH0602) • 2 GB (LFH0622)
Inbyggd minnestyp:
•
NAND-flash
Inspelningsformat:
•
MPEG1 Lager 3 (MP3)
Inspelningslägen:
•
HQ (MP3/mono), SP (MP3/mono), LP (MP3/
mono), SLP (MP3/mono)
Bithastighet:
•
64 kbit/s (HQ-läge), 48 kbit/s (SP-läge), 32 kbit/s (LP-
läge), 16kbit/s (SLP-läge)
Inspelningstid
•
(LFH0602/LFH0622):
139/283 timmar (SLP-läge),
69/141 timmar (LP-läge), 46/94 timmar (SP-läge), 34/70 timmar
(HQ-läge)
Samplingsfrekvens:
•
22 kHz (HQ-läge), 16 kHz (SP/LP/SLP-läge)
Inbyggd 30 mm rund dynamisk högtalare • utgångseffekt: 110 mW
•
Användningsvillkor:
•
Temperatur: 5° – 45°C • Luftfuktighet: 10% –
90%
Batterityp:
•
två Philips AAA-alkalinbatterier (LR03 eller R03)
Batterilivslängd (LP-läge):
•
LFH0602: 35 timmar, LFH0622: 50
timmar
Produktmått (B × D × H):
•
40 × 18,4 × 108 mm
Vikt:
•
80 g inkl. batterier
Systemkrav:
•
Windows 7/Vista/XP/2000, Mac OS X, Linux • ledig
USB-port
Türkçe
Hoşgeldiniz
1
Philips’e hoşgeldiniz, bu ürünü satın aldığınız için sizi tebrik ederiz!
Philips’in sunduğu destekten tam olarak yararlanmak için, Web sitemizi
ziyaret ederek kullanıcı kılavuzları, indirebileceğiniz yazılımlar, garanti
bilgileri ve çok daha fazlasından faydalanabilirsiniz: www.philips.com.
Ürünle ilgili bilgiler
1.1
Popüler MP3 formatlarında kayıt yapar
•
Yüksek hızlı USB 2.0 ile kayıtları ve verileri hızlı bir şekilde aktarır
•
Kristal netliğinde ses çalma için ekstra büyük ön hoparlör
•
Eller serbest modunda not almak için ses ile etkinleşen kayıt
•
USB yığın depolama, maksimum uyumluluk sağlar
•
Mevcut dört klasörün her biri için 99 kayda kadar destekleyerek
•
dosyalarınızı hızlı ve kolay şekilde organize etmenizi sağlar
Tek dokunuşla anında kayıt, kapalı moddan kayıt moduna geçiş
•
Önemli
2
Güvenlik
2.1
Kısa devreye sebep olmamak için ürünü yağmur veya suya maruz
•
bırakmayın.
Cihazı ısıtma cihazları veya direkt güneş ışığı tarafından oluşturulan aşırı
•
sıcağa maruz bırakmayın.
Kabloların, özellikle üniteden çıktıkları noktadaki fişlerde bükülmesini
•
önleyin.
Dosyalarınız yedekleyin. Philips veri kayıplarından sorumlu değildir.
•
İşitme güvenliği
2.1.1
Kulaklıklarınızı kullanırken aşağıdakilere uyun.
Makul ses yüksekliklerinde makul sürelerle dinleyin.
•
İşitmeniz adapte olacağı için sesi fazla yükseltmemeye dikkat edin.
•
Sesi çevrenizde olup biteni fark etmeyeceğiniz kadar yükseltmeyin.
•
Muhtemel tehlike anlarında dikkatli olun veya kullanmaya geçici olarak
•
ara verin.
Motorlu araç, bisiklet kullanırken veya paten yaparken vs.
•
kulaklıklarınızı kullanmayın. Trafikte tehlike yaratabilir ve birçok yerde
yasalara aykırıdır.
Önemli (kulaklı modeller için):
Philips ürettiği audio player’lar için ilgili düzenleyici kurumlar tarafından
belirlenen maksimum ses seviyesi ile uyumluluğu sadece sağlanan
kulaklığın orijinal modeli ile garanti eder. Bu kulaklıkların değiştirilmesi
gerekirse, Philips tarafından sağlanmış olan ile aynı modeli sipariş etmek
için satıcınızla görüşmenizi tavsiye ederiz.
Eski ürününüzün atılması
2.2
Ürününüz, geri dönüşümü ve tekrar kullanımı mümkün yüksek kaliteli
•
malzemeler ve bileşenler ile tasarlanmış ve üretilmiştir.
Bu üzeri çarpılı çöp kutusu sembolü ürünün üzerindeyse, bu
•
ürünün Avrupa Direktifi 2002/96/EC ile uyumlu olduğunu
gösterir.
Elektrikli ve elektronik ürünlerin ayrı olarak toplandığı sistemler
•
hakkında bilgilenin.
Yerel kurallara uygun hareket edin ve eski ürününüzü normal ev
•
atıklarınızla birlikte atmayın. Eski ürününüzün doğru şekilde atılması
çevre ve insan sağlığı açısından potansiyel negatif etkileri önleyecektir.
Piller (dahili şarj edilebilir piller de dahil) çevreyi kirletebilecek
•
maddeler içerir. Tüm piller resmi toplama noktalarına atılmalıdır.
Digital Voice Tracer
3
1
Kulaklık soketi
2
Mikrofon soketi
3
Dahili mikrofon
4
Sesi açma
5
Kayıt, Duraklatma, Açma
6
Hızlı ileri, Dosya seçimi, Menü
seçimi
7
Durdur, Göster, Sil
8
Sesi kısma
9
Hoparlör
10
USB soketi
11
Pil yuvası
12
Açma/kapatma, Yürütme/
Duraklatma, Yürütme hızı
13
Menü
14
Hızlı geri, Dosya seçimi, Menü
seçimi
15
İndeks, Klasör, Tekrar
16
Ekran
17
Bekletme anahtarı
18
Kayıt/yürütme göstergesi
Başlarken
4
Pilleri takın
4.1
Pil kapağını kaydırarak açın.
1
19
Pilleri gösterilen şekilde doğru biçimde yerleştirin ve kapağı kapatın.
2
20
D
Not
Voice Tracer uzun süre kullanılmayacaksa, pillerini çıkartın. Voice
•
Tracer akan piller yüzünden zarar görebilir.
Voice Tracer arızalanırsa, pilleri çıkartın ve- tekrar takın.
•
Pilleri değiştirmeden önce kayıt cihazını durdurun. Kayıt cihazı
•
çalışırken pillerin çıkartılması dosyaların bozulmasına yol açabilir.
Piller hemen hemen boş olduğunda, pil göstergesi yanıp söner.
•
Açma/kapatma
4.2
Açmak için, ekranda
1
HELLO
f
düğmesine basın.
Kapatmak için, kayıt cihazını durdurduktan sonra ekranda
2
BYE
f
düğmesine basın.
Bekletme fonksiyonu
4.3
HOLD
düğmesi
17
Hold pozisyonuna getirildiğinde, cihazın üstündeki
tüm düğmeler devre dışıdır.
On Hold
gösterilir ve ekran kapanır. Voice
Tracer kilidini açmak için
HOLD
düğmesini
Off
pozisyonuna getirin.
Voice Tracer’ı bilgisayarla birlikte kullanma
4.4
Voice Tracer USB yığın depolama aygıtı olarak dosyalarınızı kaydetmenizi,
yedeklemenizi ve taşımanızı sağlar. Voice Tracer bilgisayara USB bağlantı
ile bağlanır ve özel bir yazılımın kurulmasını gerektirmez. Voice Tracer
otomatik olarak çıkartılabilir sürücü olarak gösterilir, bilgisayardan cihaza
ya da cihazdan bilgisayara dosyaları sürükleyip bırakabilirsiniz.
21
D
Notlar
Cihaza veya cihazdan dosya transfer edilirken Voice Tracer bağlantısını
•
kesmeyin. Kayıt/yürütme göstergesi
18
turuncu olarak yanıp sönerken
veri transferi devam etmektedir.
Voice Tracer sürücüsünü bilgisayarda formatlamayın.
•
Kayıt
5
Dahili mikrofon ile kayıt
5.1
Kayıt cihazı durdurulmuş durumdayken istediğiniz klasörü seçmek
1
için
INDEX /
a
düğmesine basın
22
.
Kaydı durdurmak için
2
g
düğmesine basın. Kayıt/yürütme göstergesi
18
kırmızı yanar. Dahili mikrofonu
3
ses kaynağına yöneltin.
Kaydı duraklatmak için,
3
g
düğmesine basın. Kayıt/yürütme göstergesi
yanıp söner ve ekranda
PAUSE
yanıp söner
23
. Kayda devam etmek
için
g
düğmesine tekrar basın.
Kaydı durdurmak için,
4
j
/ DEL
düğmesine basın.
D
Notlar
Kayda başlamadan önce istediğiniz sesli aktivasyon fonksiyonunu ve
•
kayıt modunu ayarlayın (detaylar için bkz.
8
Ayarları özelleştirme)
.
Voice Tracer ayarlarının doğruluğundan emin olmak için test kaydı
•
yapın.
Kayıt sırasında kalan kayıt süresini göstermek için
•
f
düğmesini basılı
tutun.
Yeni dosya oluşturmak için kayıt sırasında
•
b
düğmesine basın.
Her klasör için maksimum kapasite 99 dosyadır, toplam kapasite 396
•
dosyadır (99 dosya x 4 klasör).
Eğer kayıt süresi kalan kapasiteyi aşarsa veya dosya sayısı 396’ya
•
ulaşırsa, ekranda ‘FULL’ görüntülenir. Kayıtlardan bazılarını silin veya
bilgisayara taşıyın.
Kayıt sırasında pilleri çıkartmayın. Bunu yapmak kayıt cihazının
•
arızalanmasına yol açabilir.
Eğer uzun süreli kayıt yapılacaksa, kayda başlamadan önce pilleri
•
değiştirin.
Harici mikrofon ile kayıt
5.2
Harici bir mikrofon ile kayıt yapmak için, mikrofonu mikrofon soketine
takın ve dahili mikrofon ile aynı prosedürü uygulayın.
24
İndeks işaretleri ekleme
5.3
İndeks işaretleri kayıt içinde bazı noktaları referans noktası olarak
işaretlemek için kullanılabilir.
İndeks işareti eklemek için kayıt sırasında
1
INDEX /
a
düğmesine
basın. İndeks numarası bir saniye süreyle ekranda gösterilir
25
.
D
Notlar
•
simgesi kaydın indeks işaretleri içerdiğini gösterir.
Her dosya için en fazla 32 indeks işareti kullanılabilir.
•
Dinleme
6
Kayıt cihazı durdurulmuş durumdayken istediğiniz klasörü seçmek
1
için
INDEX /
a
düğmesine basın.
Dinlemek istediğiniz dosyayı seçmek için
2
h
veya
b
düğmesine
basın.
f
3
düğmesine basın. Ekranda dinleme süresi gösterilecek ve yeşil
LED
18
yanacaktır.
+
4
ve
–
düğmeleri ile sesi ayarlayın.
Dinlemeyi durdurmak için,
5
j
/ DEL
düğmesine basın. Geçerli dosyanın
toplam dinleme süresi ekranda gösterilecektir.
Önceki konumdan dinlemeye devam etmek için
6
f
düğmesine
tekrar basın.
D
Not
EAR
1
girişine kulaklık takılı olduğunda, kayıt cihazının hoparlörü
kapanır.
Dinleme fonksiyonları
6.1
Yavaş, hızlı, normal dinleme
6.1.1
Normal, yavaş ve hızlı dinleme arasında geçiş yapmak için
f
düğmesine
1 saniye veya daha uzun basın.
26
Arama
6.1.2
Dinleme sırasında geçerli dosya içinde hızlı geri veya ileri taramak için
h
veya
b
düğmesine basın. Dinlemeye seçilen hızda devam etmek için
düğmeyi bırakın.
Geri ve ileri sarma
6.1.3
Dinleme sırasında
h
veya
b
düğmesine basarak dinlemekte olduğunuz
dosyanın başına doğru geri veya sonraki dosyanın başına doğru ileri
sarabilirsiniz. Eğer dosyada indeks işareti varsa dinleme o noktadan
başlar.
Yürütme özellikleri
6.2
Voice Tracer dosyaları arka arkaya veya rasgele yürütecek şekilde
ayarlanabilir.
Bir diziyi tekrarlama
6.2.1
Bir şarkıdaki diziyi tekrarlamak veya döndürmek için, seçtiğiniz
1
başlama noktasında
INDEX /
a
düğmesine basın.
REP. A – B
ekranda
yanıp söner
27
.
Seçtiğiniz bitiş noktasında
2
INDEX /
a
düğmesine tekrar basın. Tekrar
dizisi başlar.
Dinlemeyi durdurmak için
3
j
/ DEL
düğmesine veya normal dinlemeye
geri dönmek için
INDEX /
a
düğmesine basın.
Dosya veya klasörü tekrarlama
6.2.2
Yürütme modları arasında geçiş yapmak için
1
INDEX /
a
düğmesine 1
saniye veya daha uzun basın (dosyayı tekrarla, klasörü tekrarla veya
normal dinleme).
28
Simge
Anlamı
REP. FILE
Bir dosyayı tekrarlayarak çalar
REP. FOLDER
Klasörün içindeki tüm dosyaları tekrarlayarak çalar
Silme
7
Kayıt cihazı durdurulmuş durumdayken istediğiniz klasörü seçmek
1
için
INDEX /
a
düğmesine basın.
1 saniye veya daha uzun süre
2
j
/ DEL
düğmesine basın.
DELETE
ekranda belirir
29
.
Silme seçeneğini seçmek için
3
h
veya
b
düğmesine basın:
30
Simge
Anlamı
FILE
Tek bir dosyayı siler
FOLDER
Bir klasördeki tüm dosyaları siler
Bir dosyadaki tüm indeks işaretlerini siler
f
4
düğmesine basın.
Dosyayı, klasörü veya silinecek indeks işaretini içeren dosyayı
5
seçmek için
h
veya
b
düğmesine basın
31
.
f
6
düğmesine tekrar basın.
N
(Hayır) görüntülenir
32
.
h
7
veya
b
düğmesine basarak
Y
(Evet) seçin
33
.
Onaylamak için
8
f
düğmesine basın.
D
Not
Sıralı dosya numaraları otomatik olarak tekrar atanır.
Ayarları özelleştirme
8
Menüyü açmak için kayıt cihazı durdurulduğunda sırasında
1
MENU
düğmesine basın.
Bir menü öğesi seçmek için
2
h
veya
b
düğmesine basın
34
.
Alt menüye girmek için
3
f
düğmesine basın.
Ayar değiştirmek için
4
h
veya
b
düğmesine basın.
Seçiminizi onaylamak için
5
f
düğmesine basın.
Geçerli ayar ekranından çıkmak için
6
MENU
düğmesine basın.
Menü
Ayar
Tanımı
REC
HQ
SP
LP
SLP
4 kayıt modu arasından seçim yapabilirsiniz. Mevcut
kayıt modları ve kayıt süreleri ile ilgili detaylar için bkz.
11
Teknik veriler
.
SENSE
HI
LO
Arka plan gürültüleri kaydetmemek ve kayıt ortamını
ayarlamak için kayıt hassasiyetini ayarlayın.
BEEP
On
Off
Kayıt cihazı düğmelere basıldığında veya hatalarda
sesli uyarı verir.
VA
On
Off
Sesle aktifleştirilen kayıt ellerinizi kullanmadan kayıt
yapmak için bir konfor özelliğidir. Sesle aktifleştirilen
kayıt etkin olduğunda kayıt konuşmaya başladığınızda
başlar. Konuşma durduğunda kayıt cihazı üç saniyelik
sessizlikten sonra otomatik olarak duraklar ve
konuşma tekrar başladığında kayıt devam eder.
FORMAT
Yes
No
Kayit cihazindaki tüm dosyalari siler. Kayıt cihazını
formatlamadan önce önemli dosyaları bilgisayara
aktarın.
AUTO OF
5
15
Voice Tracer 5 veya 15 dakika kullanılmadığında
otomatik olarak kapanır.
VER
Firmware sürümünü ve çıkış tarihini gösterir.
Firmware güncelleme
9
Voice Tracer firmware denilen dahili bir yazılım ile kontrol edilir. Siz
Voice Tracer’ı satın aldıktan sonra firmware’in yeni sürümleri çıkmış
olabilir.
Verilen USB kablosunu kullanarak Voice Tracer’ı bilgisayara bağlayın.
1
Voice Tracer modeliniz için firmware güncellemesini
2
www.philips.com
adresinden yükleyin ve Voice Tracer kök dizinine
kaydedin.
Voice Tracer’ı bilgisayardan çıkarın. Firmware otomatik olarak
3
güncellenir ve güncelleme bitirildiğinde Voice Tracer kapanır.
Sorun Giderme
10
Kayıt cihazım açılmıyor
Piller boş olabilir veya düzgün yerleştirilmemiş olabilir. Pilleri yenileri ile
•
değiştirin ve pillerin doğru takıldığından emin olun.
Kayıt cihazım hiçbir şey kaydetmiyor
Kayıt cihazı
•
HOLD
modunda olabilir.
HOLD
anahtarını Off pozisyonuna
getirin.
Maksimum kayıt sayısına ulaşılmış olabilir veya kayıt kapasitesi dolmuş
•
olabilir. Kayıtlardan bazılarını silin veya harici bir cihaza aktarın.
Hoparlörden bir şey duyamıyorum
Kulaklıklar takılı olabilir. Kulaklıkları çıkartın.
•
Ses en kısık ayarda olabilir. Sesi ayarlayın.
•
Kayıt cihazım kayıtları yürütemiyor
Kayıt cihazı
•
HOLD
modunda olabilir.
HOLD
anahtarını Off pozisyonuna
getirin.
Piller boş olabilir veya düzgün yerleştirilmemiş olabilir. Pilleri yenileri ile
•
değiştirin ve pillerin doğru takıldığından emin olun.
Henüz hiçbir şey kaydedilmemiştir. Kayıtların sayısını kontrol edin.
•
Kayıt cihazım duramıyor, duraklayamıyor yürütemiyor veya
kaydedemiyor
Kayıt cihazı
•
HOLD
modunda olabilir.
HOLD
anahtarını Off pozisyonuna
getirin.
Kulaklıklardan hiçbir şey duyamıyorum
Kulaklıklar düzgün takılmamış olabilir. Kulaklıkları düzgün takın.
•
Ses en kısık ayarda olabilir. Sesi ayarlayın.
•
Teknik veriler
11
USB:
•
Yüksek hızlı 2.0 mini-USB
Mikrofon:
•
3.5 mm • empedans 2.2 kΩ
Kulaklık:
•
3.5 mm • empedans 16 Ω veya üstü
Ekran:
•
LCD/bölüm • diyagonal ekran boyutu: 39 mm / 1.5 in.
Mikrofon:
•
Dahili: mono • Harici: mono
Dahili bellek kapasitesi:
•
1 GB (LFH0602) • 2 GB (LFH0622)
Dahili bellek tipi:
•
NAND Flash
Kayıt formatları:
•
MPEG1 katman 3 (MP3)
Kayıt modları:
•
HQ (MP3/mono), SP (MP3/mono), LP (MP3/mono),
SLP (MP3/mono)
Örnekleme Hızı:
•
22 kHz (HQ modu), 16 kHz (SP/LP/SLP modu)
Kayıt Süresi
•
(LFH0602/LFH0622):
139/283 saat (SLP modu),
69/141 saat (LP modu), 46/94 saat (SP modu), 34/70 saat (HQ modu)
Bit hızı:
•
64 kbps (HQ modu), 48 kbps (SP modu), 32 kbps (LP modu),
16 kbps (SLP modu)
Dahili 30 mm yuvarlak dinamik hoparlör • Çıkış gücü: 110 mW
•
Çalışma koşulları:
•
Sıcaklık: 5 ° – 45 ° C • Nem: 10% – 90%
Pil tipi:
•
iki adet Philips AAA alkalin pil (LR03 veya R03)
Pil ömrü (LP modu):
•
LFH0602: 35 saat • LFH0622: 50 saat
Ürün boyutları (G × D × Y):
•
40 × 18.4 × 108 mm
Ağırlık:
•
80 g piller dahil
Sistem gereksinimleri:
•
Windows 7/Vista/XP/2000, Mac OS X,
Linux • boş USB portu
21
23
24
25
26
27
28
29
30
31
32
33
c f b g a
Declaration of Conformity
Tested to comply
with FCC standards
FOR HOME OR OFFICE USE
Model Numbers:
LFH0602, LFH0622
Trade Name:
Philips Digital Voice Tracer
Responsible Party:
Philips Speech Processing
Address:
64 Perimeter Center East,
Atlanta, GA 30346, USA
Telephone number:
888-260-6261
Website:
www.philips.com/dictation
This device complies with part 15 of FCC rules. Operation is
subject to the following two conditions:
1) This device may not cause harmful interference.
2) This device must accept any interference received, including
interference that may cause undesired operation.
f
34
1
2
13
3
9
5
7
16
17
11
15
10
4
8
14
12
6
18
Specifications are subject to change without notice. Trademarks are the
property of Royal Philips Electronics or their respective owners.
© 2009 Royal Philips Electronics. All rights reserved.
Version 1.0, 2009/06/20. 5103 109 9734.1
Цифровой аудиорекордер PHILIPS DVT1110.Руководство пользователя
Подробное руководство пользователя находится во внутренней памяти устройства.
Содержание скрывать
1
Что в коробке
2
Установка батарей
3
Запись голоса
4
Объём
5
Документы / Ресурсы
5.1
Рекомендации
Что в коробке


Читайте:

Установка батарей


Внимание!


Запись голоса


Объём


Для получения информации о продукте и поддержки, посещение www.voicetracer.com/help

Документы / Ресурсы
 |
Цифровой аудиорекордер PHILIPS DVT1110 VoiceTracer [pdf] Руководство пользователя DVT1110, DVT1115, Цифровой аудиорекордер VoiceTracer |
Рекомендации
Похожие сообщения
-

Инструкция по эксплуатации цифрового видеорегистратора Lorex
Руководство по эксплуатации цифрового регистратора видеонаблюдения Lorex — Скачать [оптимизированное] Руководство по эксплуатации цифрового регистратора видеонаблюдения Lorex -…
-
PHILIPS TAM2505 digital DAB + Radio Bluetooth Инструкции
DAB + Radio TAM2505 Краткое руководство пользователя Зарегистрируйте продукт и получите поддержку на сайте www.philips.com/support. Технические характеристики могут быть изменены …
-
Руководство пользователя цифрового спутникового рекордера Hughes DIRECTV
Руководство пользователя цифрового спутникового записывающего устройства Hughes DIRECTV — оригинальный PDF Руководство пользователя цифрового спутникового записывающего устройства Hughes DIRECTV -…
-
Цифро-аналоговый преобразователь HOLO AUDIO R2R-DS1024 Руководство пользователя
Цифро-аналоговый преобразователь R2R-DS1024 Руководство пользователя ВЫШЕVIEW Spring3 ЦАП нового поколения на полностью дискретном резисторе…


Характеристики, спецификации
Объем встроенной памяти:
4 Гб
Использование в качестве флэш-накопителя:
есть
Диапазон частот записи:
750 — 18000 Гц
Функция активизации по голосу:
есть
Изменение чувствительности микрофона:
есть
Запись с разным качеством:
есть, количество режимов — 3
Максимальное время записи:
23 ч (с высоким качеством) / 270 ч (с низким качеством)
Подключение к компьютеру:
есть
Размеры дисплея:
22 х 24 мм
Индикатор заряда батареи:
есть
Индикатор оставшегося времени записи:
есть
Тип элементов питания:
ААА
Функции:
часы, блокировка кнопок, пауза, сканирование сообщений
Размеры (ШхВхТ):
34х108х19 мм
Вес устройства:
46 г (без батареи)
Зарегистрируйте ваше изделие и получите поддержку на сайте
www.philips.com/dictation
DVT1100
RU Руководство пользователя

2
Оглавление

5 Запись 19
Оглавление
5.1 Новая запись 19
5.1.1 Отображать оставшееся время записи 20
5.1.2 Запись от внешнего источника 20
1 Важная информация по технике безопасности 5
5.2 Автоматический запуск записи 20
1.1 Указания по технике безопасности 5
5.2.1 Использование функции активирования голосом 20
2 О данном Руководстве пользователя 7
6 Воспроизведение 21
2.1 Условные обозначения 7
6.1 Выбор записи 21
6.2 Воспроизведение записи 21
3 Цифровой диктофон 8
6.3 Изменение скорости воспроизведения 21
3.1 Основные характеристики изделия 8
6.4 Функция быстрого поиска 22
3.2 Содержимое упаковки 9
6.5 Повтор воспроизведения 22
3.3 Общее описание изделия 10
6.5.1 Бесконечный цикл/повторить последовательность 22
3.3.1 Вид спереди и сзади 10
6.6 Установить защиту записи / заблокировать файл 23
3.3.2 Кнопки 11
6.7 Снять защиту / блокировку файла 23
3.4 Первоначальный экран 12
3.4.1 Обзор функций меню 13
7 Удаление 24
7.1 Удаление записей на приборе 24
4 Первые шаги 14
7.2 Удаление всех записей в папке 24
4.1 Установка батарей и аккумуляторов 14
4.2 Включение и выключение прибора 15
8 Настройки 25
4.3 Первая настройка 15
8.1 Настройки записи 25
4.3.1 Задать дату и время 15
8.1.1 Настройка качества записи 25
4.4 Включение и выключение блокировки клавиатуры 16
8.1.2 Включение и выключение индикатора записи 25
4.5 Использование принадлежностей 16
8.1.3 Настройка чувствительности микрофона 26
4.5.1 Подключение наушников 16
8.1.4 Включение и выключение функции активирования
4.5.2 Подключение внешнего микрофона 17
голосом 26
4.6 Подключение к компьютеру 17
8.1.5 Параллельно прослушивать во время записи 27
4.6.1 Передача файлов между прибором и компьютером 18
8.1.6 Настроить автоматическое разделение 27
4.6.2 Отсоединение прибора от компьютера 18
8.2 Настройки прибора 28
Оглавление
3

8.2.1 Включить и отключить звуки кнопок и тональные
сигналы 28
8.2.2 Настроить автоматическое отключение 28
8.2.3 Задать дату и время 29
9 Сервисное обслуживание 30
9.1 Сервисные функции прибора 30
9.1.1 Форматирование памяти 30
9.1.2 Сброс параметров прибора 30
9.1.3 Показать остаток свободной памяти 31
9.2 Замена батарей или аккумуляторов 31
9.3 Обновление фирменного программного обеспечения 31
9.3.1 Показать версию фирменного программного
обеспечения 32
9.4 Устранение неполадок 33
10 Приложение 34
10.1 Технические характеристики 34
4
Оглавление

1.1.1 Батареи и аккумуляторы
1 Важная информация по технике
• Для питания прибора применяйте только батареи или
безопасности
аккумуляторы типа AAA.
• Не пытайтесь повторно заряжать батареи.
• Извлеките батареи или аккумуляторы из прибора, если Вы
Не предпринимайте никаких настроек и не вносите никаких
не используете его в течение длительного времени. Севшие
изменений, которые не предусмотрены в настоящем Руководстве
батареи или аккумуляторы могут повредить прибор.
пользователя. Соблюдайте все указания по технике безопасности
• Не извлекайте батареи или аккумуляторы из прибора во время
для обеспечения бесперебойной работы Вашего прибора.
записи. Это может привести к повреждению или утрате данных.
Производитель не несет никакой ответственности в случае
Возможны сбои в работе прибора.
несоблюдения Вами указаний по технике безопасности.
• Батареи и аккумуляторы содержат вещества, которые негативно
влияют на окружающую среду. Поэтому использованные
батареи и аккумуляторы подлежат утилизации в специально
1.1 Указания по технике безопасности
предусмотренных для этого приемных пунктах.
• Не допускайте попадания на прибор дождя или воды во
избежание короткого замыкания.
• Не допускайте чрезмерного нагревания прибора вследствие
нахождения вблизи нагревательных приборов либо попадания
прямых солнечных лучей.
• Оберегайте кабель от повреждения в результате
передавливания, в особенности на штекерах и в месте выхода
кабеля из корпуса.
• Защищайте свои технические данные и записи. Производитель
не несет ответственности за потерю данных.
• Не предпринимайте никаких работ по техническому
обслуживанию, которые не предусмотрены в настоящем
Руководстве пользователя. Не разбирайте прибор на части для
проведения ремонта. Для проведения ремонта обращайтесь
только в сертифицированный сервисный центр.
Оглавление
5

1.1.2 Защита органов слуха
1.1.4 Законные ограничения для проведения записи
При использовании наушников придерживайтесь
• На применение функции записи, имеющейся в данном изделии,
следующих правил:
в вашей стране, возможно, распространяются законные
• Устанавливайте умеренный уровень громкости и не слушайте
ограничения. Соблюдайте требования по защите информации
запись через наушники слишком долго.
и личных прав третьих лиц, если производите запись, например,
• Обязательно следите за тем, чтобы не устанавливать громкость
разговоров или докладов.
на более высоком уровне, чем позволяет Ваш слух.
• Просим обращать внимание на то, что в некоторых странах
• Устанавливайте громкость на таком уровне, чтобы все еще
существует законное требование уведомлять Вашего
слышать, что происходит вокруг Вас.
собеседника о записи телефонного разговора, либо существует
• В случае возникновения потенциально опасных ситуаций
запрет на запись телефонных разговоров. Перед тем как
проявляйте осторожность либо временно прекратите
записывать разговор, выясните правовую ситуацию по этому
пользование наушниками.
вопросу в Вашей стране.
• Не пользуйтесь наушниками при передвижении в автомобиле,
на велосипеде, скейтборде и т.п. Этим Вы можете создать
аварийную ситуацию при движении и ваши действия, возможно,
являются нарушением законодательства.
1.1.3 Максимальная звуковая мощность
• Производитель гарантирует соответствие максимальной
звуковой мощности своих аудиоустройств действующим
требованиям , однако лишь при условии применения
оригинальной модели входящих в комплект наушников. При
необходимости замены наушников Вы должны приобрести
модель наушников Philips, соответствующую по параметрам
оригиналу.
6
Оглавление
Диктофоны Philips DVT1110 — инструкция пользователя по применению, эксплуатации и установке на русском языке. Мы надеемся, она поможет вам решить возникшие у вас вопросы при эксплуатации техники.
Вы можете скачать инструкцию к Philips DVT1110 по ссылке ниже, если не хотите ждать загрузки. Если остались вопросы, задайте их в комментариях после инструкции.
«Загружаем инструкцию», означает, что нужно подождать пока файл загрузится и можно будет его читать онлайн. Некоторые инструкции очень большие и время их появления зависит от вашей скорости интернета.
Полезные видео
Характеристики
Остались вопросы?
Не нашли свой ответ в руководстве или возникли другие проблемы? Задайте свой вопрос в форме ниже с подробным описанием вашей ситуации, чтобы другие люди и специалисты смогли дать на него ответ. Если вы знаете как решить проблему другого человека, пожалуйста, подскажите ему
![:)]()
Часто задаваемые вопросы

Как посмотреть инструкцию к Philips DVT1110?
Необходимо подождать полной загрузки инструкции в сером окне на данной странице или скачать кликнув по специальной кнопке.
Руководство на русском языке?
Все наши руководства представлены на русском языке или схематично, поэтому вы без труда сможете разобраться с вашей моделью
Как можно распечатать инструкцию?
Скачайте ее по специальной кнопке над формой чтения на ваше устройства и отправьте на печать.
инструкцияPhilips Voice Tracer DVT1110

DVT1110
EN User manual
Register your product and get support at
www.philips.com/dictation
Посмотреть инструкция для Philips Voice Tracer DVT1110 бесплатно. Руководство относится к категории диктофоны, 12 человек(а) дали ему среднюю оценку 8.4. Руководство доступно на следующих языках: английский. У вас есть вопрос о Philips Voice Tracer DVT1110 или вам нужна помощь? Задайте свой вопрос здесь
- 1 Important safety information

Главная
| Philips | |
| Voice Tracer DVT1110 | DVT_1110 | |
| диктофон | |
| 0855971006304 | |
| английский | |
| Руководство пользователя (PDF) |
Аудио
| Диапазон частот | 750 — 18000 Hz |
| Диапазон частот | 750 — 18000 Hz |
| Максимальное время записи | 23 h |
| Режимы записи | High Quality (HQ), Standard Play (SP) |
| Встроенный микрофон | Да |
| Поддерживаемые форматы аудио | PCM, WAV |
| Частота ответа в режиме HQ | 0 — 16000 Hz |
| Частота ответа в режиме SP | 0 — 12000 Hz |
Цвет
Порты и интерфейсы
| Линейные выходы наушников | 1 |
| Интерфейс | USB |
| Линейный вход микрофона | Да |
| Выход для наушников | Да |
Технические характеристики
| Цвет товара | Серый |
| Линейные выходы наушников | 1 |
| Скорость цифрового потока | 512 кбит/с |
| Интервал выборки | 16 kHz |
| Форматы звукозаписи | WAV |
| USB накопитель | Да |
Экран
| Встроенный экран | Да |
| Тип дисплея | ЖК |
| Диагональ экрана | 1.3 « |
Акустика
| Встроенные колонки | Да |
| Число встроенных динамиков | 1 |
| Диаметр динамика | 28 mm |
Радио
Устройства хранения данных
| Поддерживаемые типы носителей | Встроенная память |
| Объем встроенной памяти | 4 GB |
Батарея
| Технология батареи | Щелочной |
| Совместимые размеры батареи | AAA |
| Время работы батареи (макс) | 12 h |
| Число поддерживаемых батарей | 2 |
программное обеспечение
| Поддерживаемые операционные системы Windows | Windows 10, Windows 7, Windows 8 |
| Совместимость с Mac | Да |
| Поддерживаемые операционные системы Mac | Mac OS X 10.0 Cheetah |
Содержимое упаковки
| Батарейки в комплекте | Да |
| Краткая инструкция пользователя | Да |
| Поставляемые кабели | USB |
Вес и размеры
| Ширина | 108 mm |
| Глубина | 19 mm |
| Высота | 34 mm |
| Вес | 46 g |
показать больше
Не можете найти ответ на свой вопрос в руководстве? Вы можете найти ответ на свой вопрос ниже, в разделе часто задаваемых вопросов о Philips Voice Tracer DVT1110.
Какой вес Philips Voice Tracer DVT1110?
Какой размер экрана Philips Voice Tracer DVT1110?
Какая высота Philips Voice Tracer DVT1110?
Какая ширина Philips Voice Tracer DVT1110?
Какая толщина Philips Voice Tracer DVT1110?
Инструкция Philips Voice Tracer DVT1110 доступно в русский?
Не нашли свой вопрос? Задайте свой вопрос здесь
Инструкцию для Philips DVT1110 на русском языке, в формате pdf можно скачать с нашего сайта. Наш каталог предоставляем Вам инструкцию производителя фирмы Philips, которая была взята из открытых источников. Ознакомившись с руководством по эксплуатации от Philips, Вы на все 100% и правильно сможете воспользоваться всеми функциями устройства.
Для сохранения инструкции «Диктофон цифровой Philips DVT1110» на русском языке на вашем компьютере либо телефоне, нажмите кнопку «Скачать инструкцию». Если активна кнопка «Инструкция онлайн», то Вы можете просмотреть документ (manual), в своём браузере онлайн.
Если у Вас нет возможности скачать инструкцию по эксплуатации либо просмотреть её, Вы можете поделиться ссылкой на эту страницу в социальных сетях и при удобном моменте скачать инструкцию. Либо добавьте эту страницу в закладки Вашего браузера, нажав кнопку «Добавить страницу в закладки браузера».
Digital Voice Tracer 2 3 Quando as pilhas forem colocadas pela primeira vez, ser-lhe-a pedido musica REC* PCM Escolha entre varios modos de gravacao, desde 5103 109 9724.1 19 20 24 26 29 30 35 36 4.5 Acertar data e hora D Notas sobre a utilizacao do Voice Tracer como leitor de Menu Definicao Descricao 1 que acerte a data e a hora. • O gravador suporta ficheiros de musica nos formatos .wma e .mp3 (Gravar) SHQ gravacao PCM estereo sem compressao para LFH0862 que podem ser transferidos de um computador para a pasta de musica HQ uma qualidade do audio semelhante a dos CD LFH0867 1 ‘CLOCK’ (Relogio) e mostrada no visor 21 . Prima o botao k. O do gravador. Os ficheiros com proteccao contra copia (gestao digital SP (LFH0882), dois modos de estereo, SHQ e LFH0868 indicador do ano pisca 22 . de direitos) nao sao suportados. LP HQ, ou tres modos monaural, SP, LP e SLP, LFH0882 2 Prima o botao h ou b para acertar o ano. • O Voice Tracer suporta ate dois niveis de pastas dentro da pasta de SLP para maiores tempos de gravacao. Consulte o LFH0885 18 3 Prima o botao k para avancar para o acerto do mes. musica. Cada pasta pode ter ate 199 entradas (ficheiros e pastas). ponto 12 para mais informacoes sobre modos de LFH0888 4 Repita os passos 2 e 3 para continuar a acertar o mes, o dia, o • Prima o botao k para abrir uma pasta ou um ficheiro seleccionado. gravacao e tempos de gravacao disponiveis. LFH0895 21 22 27 31 32 37 38 sistema horario de 12/24 horas e a hora da mesma forma. Prima o botao INDEX / a (Indice) para regressar a pasta do nivel SENSE* HI (Alta) Regule a sensibilidade da gravacao para evitar 17 acima. (Sensibili- LO (Baixa) gravar ruidos de fundo e para se ajustar ao For product information and support, visit 4 D Notas • Prima o botao g durante a reproducao da musica para alterar o modo dade) ambiente de gravacao. www.philips.com 16 5 6 A data e a hora podem ser acertadas a qualquer altura utilizando o do equalizador (Normal > Classic > Jazz > Rock > Pop > Normal). VA* On A gravacao com activacao por voz e uma funcao menu. Consulte o ponto 9 para mais informacoes. (Activ. Off pratica para a gravacao maos-livres. Quando a 7 25 6.1 Funcoes de reproducao voz) gravacao com activacao por voz e activada, a EL ?????????? ?????? 8 4.6 Informacoes no visor gravacao comeca quando o utilizador comecar 15 • Prima o botao j / DEL com o gravador parado para fazer a rotacao das 6.1.1 Seleccionar um ficheiro/localizar uma marca de indice a falar. Quando parar de falar, o gravador coloca PT Manual do utilizador 14 informacoes no visor: tempo total de reproducao do ficheiro actual • Prima o botao b uma vez com o gravador parado para passar para o automaticamente a gravacao em pausa apos > hora > data > tempo de gravacao restante > tempo de gravacao do final de um ficheiro. Prima o botao b novamente para passar para o tres segundos de silencio e so a retoma quando RO Manual de utilizare 13 9 23 28 33 34 39 ficheiro actual > data de gravacao do ficheiro actual. inicio do ficheiro seguinte. comecar a falar de novo. 12 • Prima e mantenha premido k durante a gravacao para mostrar o • Prima o botao h uma vez com o gravador parado para passar para o EDIT* APPND Pode editar um ficheiro gravado anteriormente RU Руководство пользователя tempo de gravacao restante. inicio de um ficheiro. Prima o botao h novamente para passar para o (Editar) OVER substituindo parte da gravacao ou adicionando final do ficheiro anterior. OFF uma gravacao ao final do ficheiro. Defina o 11 4.7 Utilizar o Voice Tracer com um computador • Se o ficheiro incluir marcas de indice, o gravador passa para a marca de modo de edicao pretendido (substituir [=OVER] 10 Enquanto suporte de armazenamento em massa USB, o Voice Tracer indice seguinte ou anterior quando premir o botao h ou b. ou adicionar [=APPND]) antes de editar uma constitui uma forma pratica para gravar, fazer copias de seguranca e gravacao. Consulte o ponto 5.3 para mais transportar ficheiros. O Voice Tracer pode ser ligado a um computador 6.1.2 Reproducao lenta, rapida, normal informacoes. atraves de uma ligacao USB e nao precisa de nenhum software especial Prima e mantenha premido o botao k durante 1 segundo ou mais para INPUT V (voz) Utilize a definicao L (entrada de linha) quando para ser instalado. O Voice Tracer e mostrado automaticamente como alternar entre reproducao normal, lenta e rapida. 31 (Entrada) L (entrada gravar a partir de fontes de audio externas uma unidade amovivel, permitindo que a transferencia de ficheiros de e de linha) ligadas a entrada de linha do gravador. ???????? 4.2 ??????? ????????? 5.2 ??????? ?? ????????? ????????? 6.2 ??????????? ???? ??? ??????????? 9 ?????????? ????????? 11 ???????????? ??????????? Portugues para a unidade seja feita atraves do processo de arrastar e largar. 23 6.1.3 Procurar DIVIDE* Off A funcao de divisao automatica grava ??? ?? ?????????? ?????????? ?? ????????? ?????????, ???????? 30 min. automaticamente um novo ficheiro a cada 30 ???????? ?? ????????? ?? Voice Tracer ??? ???????????????? ? ?? ????????????????? ????????? LFH9154 ??? Philips ??????? ?? Prima e mantenha premido o botao h ou b durante a reproducao (Dividir) para fazer uma procura a alta velocidade para tras ou para a frente no 60 min. ?????? ??????????? ??? ???????. ?? ????????? ???? ??????? ?????????? ??? ??????????? ?? D Notas ou 60 minutos. Desta forma, e muito mais facil ?????????? ??? Voice Tracer. ???? ?? Voice Tracer ????? ??????????? ?? ??????????, ?? ????????????????? ????????? ??????????? ?????????? ??????????? ?? ???????????? ?????????. 28 ?? ????? ????? ????????? ???? ??? ???????????????? ?????????? ??? ????? ?????? ? ???????????? ??? ???????? ??????????? • Nao desligue o Voice Tracer enquanto os ficheiros estiverem a ser ficheiro actual. Solte o botao para retomar a reproducao a velocidade localizar, editar e arquivar gravacoes de grande ????????. ??? ???? ????? ????? ????????????? ??????????? 6.2.1 ????????? ???????? ??? ???? ?? ?????????? ??????????. ?? ????????? ???????? • ????????? ?? ????? ?????????? ?? ????????? ? ?? ??? ????? transferidos de ou para o aparelho. Os dados ainda podem estar a ser seleccionada. duracao, como por exemplo de reunioes ou ??????? 2,5 ????. 5.3 ??????????? ??? ????????????? ??????? ??? ????? ????????? ??????? ?? ?? ?? ????????? ?? ?????? ??????????? ?????. ?????????????? ??? ????????? ?? ?????????? transferidos enquanto a luz indicadora de gravacao/reproducao 18 dissertacoes. 1 ??????????? ???????? ?? ?????????????? ??? ??? ???????????? ?????? 1 ??? ????????? ? ???????????????? ??????????? ???? ????????????? ???????, ?? ?????? ???????? ? ???? ????? ??? ??????????? ??? ????? ??????????? ?????. 1 Boas-vindas estiver a piscar a laranja. 6.1.4 Retroceder e avancar LIGHT On O visor fica aceso durante alguns segundos D ?????????? ??????????????? ??? ????? ??? ??????????? ? ???????????? ??? ????????, ??????? ?? ?????? INDEX / a ??? ????????? ?????? ??????????? ??????????. • Nao formate a unidade do Voice Tracer num computador. Prima o botao h ou b durante a reproducao para retroceder para (Luz) Off quando um botao e premido. ???????????? ??? ??? ????? ??? ??? ??????????? ??? Philips! ??? • ??? ????? ?????? ? ??????? ????? ????????? ????? ??? ??? ?????????? ??? ????? ??? ???????. ??????. ???? ????? ??????????? ? ??????? REP. A – B 32 . ??? ????? ?????? ? ?????????? ?? ?? ??????? ??????????? Parabens pela sua compra e bem-vindo a Philips! Para tirar o maximo o inicio do ficheiro que esta a ser reproduzido ou para avancar para o BEEP On O gravador emite um sinal sonoro que indica ?? ???????????? ?????? ??? ??? ?????????? ??? ??????? ? Philips, ??????????? ????????? LFH9154 ??? Philips. 2 ??????? ???? ?? ?????? INDEX / a ??? ????????? ?????? ??????. 1 ??????? ?? ?????? l/ MENU ???? ??? ???????????????? • ? ??????? ??????????? ????????? ?? ????????? ?? ????? proveito da assistencia prestada pela Philips, visite a nossa pagina na 4.8 Ligar o controlo remoto (apenas para LFH0885) ficheiro seguinte, respectivamente. Se o ficheiro tiver marcas de indice, a (Sinal) Off operacoes de botoes ou erros. ???????????? ??? ?????????? ??? ??? ??????????? ???????????, • ???????? ?????? ??? ????????? ???? ??? ??? ????? ?????. 1 ???????? ??? ????????? ????? ??????????? ???????????? ?????? ? ????????? ??? ????????. ??????????, ??? ?? ???????? ?? ?????. ??????????? HOLD. ?????? ?? ???????? HOLD ??? ???? Internet para ficar a conhecer as informacoes de assistencia, como, por O controlo remoto pode ser utilizado para iniciar e interromper a reproducao comeca nesse ponto. CLOCK DD:MM:YY Se a data e a hora estiverem definidas, esta ???? ?????????? ??????, ???? ??????????, ??????????? ??????? ?? • ? ??????????? ?????? ?? ????? ??????????????? ???? ?? ??????? (????????????? ? ????????) ???? ??? ??? ?????? ??? 3 ??????? ?? ?????? j / DEL ??? ?? ????????? ??? ??????????? 2 ??????? ?? ?????? h ? ?? ?????? b, ??? ?? ????????? ??? ??????????????? ???. exemplo, manuais de utilizador, transferencias de software, informacoes gravacao, para adicionar um ficheiro novo e para adicionar uma marca (Relogio) 12/24 H informacao e guardada automaticamente em cada ??? ??????? ??? ????: www.philips.com. ??? ?????????. ??????????? (??? ???????????? ???????????, ??. ???????? 9). ? ??????? ?? ?????? INDEX / a ??? ????????? ?? ???????? ???????? ????? 39 . • ????????? ?? ???? ??????????? ? ???????? ??????? ???????????? de garantia, entre outras: www.philips.com. de indice. 6.2 Modos de reproducao HH:MM:SS ficheiro que e gravado. • ??? ? ????? ??????????? ??? ????? USB ??? ?????????? 2 ??????? ?? ?????? INDEX / a ???? ??? ???????????????? ???????????. 3 ??????? ?? ?????? k, ??? ?? ????????? ?? ??? ????????. ? ?? ??? ??????? ?????????? ????? ??? ??? ??????????. E possivel definir o Voice Tracer para reproduzir ficheiros repetida ou TIMER Off Programe a gravacao automatica para comecar 1.1 ?????????????? ????????? ??? ???????, ??????????????? ?? ?????????? ???????? (??? ??????????, ??? ?? ????????? ??? ????????? ??????. 4 ??????? ?? ?????? h ? ?? ?????? b, ??? ?? ????????????? ????????? ????????? ???????????? ? ?????????? ??????? 1.1 Destaques do produto 1 Ligue o controlo remoto a entrada dos auscultadores do Voice aleatoriamente. (Tempori- V com o microfone (seleccione V) ou a partir • ??????? ??? ???????? ????? MP3 ???????????? ???????????, ??. ???????? 9) ??? ?????????????? 3 ??????? ?? ?????? h ? b ??? ?? ????????? ?? ?????? ??? 6.2.2 ????????? ??????? ? ??????? / ?????? ??????????? ??? ???????. ???????????? ?? ??? ????????? ???????. • Grava no popular formato MP3 Tracer 24 . zador) CH de um canal de radio (seleccione CH / apenas • ??????? ???????? ???????? ??? ????????? ???? ???????? USB ???? ????????? ???????? ?????????. ????? ?????????? ?? ???????????????? ??? ???????? (??? ??????? ???????????? 5 ??????? ?? ?????? k ??? ?? ????????????? ??? ??????? ???. • Transfira gravacoes e dados rapidamente atraves de USB 2.0 de alta 6.2.1 Repetir uma sequencia LFH0882). Especifique a hora de inicio, a duracao 2.0 ?????? ????????? ???????????? ??????? ?? ??? ??????? ???????, ??. ???????? 6 ??????? ?? ?????? l/ MENU ??? ????? ??? ??? ???????? ????? ??? ????????? ???? ??? ?? ????? velocidade 4.9 Utilizar a base de ligacao (apenas para LFH0868/LFH0888) da gravacao (30/60/120 minutos/sem limite), uma • ?? ??????? ?????????? ???? ???????? ????? ????? ??????? ??? 4.3 ????????????/?????????????? 6.1.1). 1 ??????? ???????????? ?? ?????? INDEX / a ??? 1 ???????????? ?????????. • ????????? ?? ????? ??????????? ?? ?????????. ??????????? ?? • O sistema de microfone zoom concentra-se no som a frente do Voice A base de ligacao pode ser utilizada para carregar ficheiros de um 1 Para repetir ou fazer um ciclo de uma sequencia numa cancao, prima pasta e o canal de radio que pretende gravar. ?? Voice Tracer, ?????????? ?? ???? ???? ??? ?? ???? ???????? 4 ????????? ??????????? ? ????????????? ???? ?? ?????? ? ??????????? ???? ?? ???????? ??? ????????????, ??? ?????????. Tracer, ao mesmo tempo que reduz a captacao de sons laterais e computador para o Voice Tracer e para carregar as pilhas. 25 o botao INDEX / a no ponto de inicio escolhido. REP. A – B pisca ALARM Off Utilize o Voice Tracer como despertador movel. ??? ???????? ??? ???? ??? ?????. 1 ??? ?? ?????????????? ?? ???????, ???????? ???????? ?? ????? ?? ???? ???? ????? ?????????? ?? ???????????????? ???????? ?????? ??? ?????? ??????????? ???????????? ????? ??????? ????????? • ? ???? ???? ????????? ??? ?????????? ??????. ???????? ??? traseiros no visor 32 . (Alarme) b Escolha o modo de alarme (b = sinal sonoro, F = • ??????? ??? ?????????????? ?? ?? ???? ??? ?????????? hands-free ?????? k, ????? ?? ?????????? ???? ????? ? ??????? HELLO. ??? ???????? ??? ??????? ?? ?????? k ??? ????? ??? (????????? ???????, ????????? ???????, ?????? ??????????? REC* PCM ??????? ?????? ???????? ?????? ?????? ??? ????. • Gravacao activada por voz para tirar notas sem maos 1 Ligue a base de ligacao a um computador com o cabo USB 2 Prima o botao INDEX / a de novo no ponto de fim escolhido. A F reproducao de ficheiro) e especifique a hora de • ??????? ??????????? ???? ??? ??????? ??????? ??????????? 2 ??? ?? ???????????????? ?? ???????, ???????? ???????? ?? ????????????. ??????? ??????? ? ???????? ???????????). 33 SHQ ??????????? ???????????, ???? ?? • Armazenamento em massa USB garante compatibilidade maxima fornecido. sequencia de repeticao comeca. inicio e o ficheiro a ser reproduzido. USB ?????? k ???? ??? ???????????????? ??????????, ????? ?? 5 ??????? ?? ?????? g. ? ??????? ???????????/???????????? ????????? ???????? HQ ??????????? ???????????? ?????????? ??? ????? ?????? ? ??????????? ???????????? ??? ?? • Gravacao com um toque instantanea – desde desligar ao modo de 2 Introduza o Voice Tracer na ranhura da base de ligacao. 3 Prima o botao j / DEL para parar a reproducao ou prima o botao AUTO OF 5 O Voice Tracer desliga-se automaticamente apos • ????? ??????? ?? ??? ?????? – ??? ??? ?????????????? ??? ?????????? ???? ????? ? ??????? BYE. ??????????? ??? ???? ????? ??????????? ? ??????? OVER REP. FILE ??????? ????????? ???? ??????? SP PCM ??? ???????? ??????? ?? CD ???? ??????? gravacao INDEX / a para regressar a reproducao normal. 15 5 ou 15 minutos de inactividade. ?????????? ???????? (?????????????) ? APPEND (????????). REP. FOLDER ??????? ????????? ???? ??? ??????? ???? LP (??????? LFH0882), ??? ????????????? • ? ??????? ??????????? ????????? ?? ????????? ?? ????? • Desfrute da reproducao de MP3 e WMA CHARGE On Quando a funcao de recarga esta activada, • ??????????? ???????? ?? ????? MP3 ??? WMA 4.4 ?????????? ???????? 6 ??????? ???? ?? ?????? g, ??? ?? ????????? ? ??????????. ? ??????? SLP ?????? ??????????? ??????????????????? ??????????? HOLD. ?????? ?? ???????? HOLD ??? ???? 6.2.2 Repetir um ficheiro ou uma pasta / modo aleatorio Off as pilhas recarregaveis sao carregadas ???? ? ????????? HOLD 17 ????????? ??? ???? ????????, ??? ???????? ?????????? ??????????? ?? ???????????. FOLDER SHUF ?????? ??????????? ???? ??? ??????? ???????? SHQ ??? HQ ? ????? ??????????? ?????? ??????????????? ???. 5 Gravar automaticamente se o Voice Tracer estiver ligado ?? ??????? ??? ???????? ?????????? ????????. ???? ????? 7 ??????? ?? ?????? j / DEL, ??? ?? ????????? ??? ??????????. ???? ??????? ??????????? ??????????????????? SP, LP • ????????? ?? ????? ?????????? ?? ????????? ? ?? ??? ????? 1 Prima e mantenha premido o botao INDEX / a durante 1 segundo a um computador. Consulte o ponto 4.2 para ??????????? ????????? ? ??????? On Hold ???, ??? ????????, ? ????? ??? SLP ??? ????? ?????????? ???????? ??????????? ?????. ?????????????? ??? ????????? ?? ?????????? 2 Importante 5.1 Gravar com o microfone incorporado ou mais durante a reproducao para alternar entre modos de mais informacoes. 2 ?????????? ??????????? ????????????????. ??????????? ?? Voice Tracer ???????????? ?? D ?????????? D ???????? ???????????. ??? ???????????? ??????? ??? ??????????? ??? ????? ??????????? ?????. reproducao (repetir ficheiro, repetir pasta, reproducao aleatoria da FORMAT Yes (Sim) Elimine todos os ficheiros do gravador, incluindo ???????? HOLD ??? ???? ???????????????. • ???? ??? ??????????? ???? ???????????, ????????? ? ?????? ??????????? ??????? ???????????? ????? ?????????? ???? ?? ???? ??????????? ??????? ??????????? • ??? ????? ??????????????? ????????????. ??????? ??? ?????? 2.1 Seguranca 1 Prima o botao INDEX / a com o gravador parado para seleccionar a pasta ou reproducao normal). 33 (Forma- No (Nao) as estacoes de radio programadas. Transfira os 2.1 ???????? ??????????????? ? ?????? ??????????? ??????????? ??? ??????? ??? ?????? M (???????). ??????????? ??? ??????? ???????????, ??. ??? ????????????. • Para evitar curto-circuitos, nao exponha o aparelho a chuva ou agua. pasta pretendida 26 . Icone Significado tar) ficheiros importantes para um computador antes • ??? ??? ??????? ???????????????, ??? ???????? ?? ?????? ?? 4.5 ??????? ??????????? ??? ???? ???????. ???????? 12. • Nao exponha o aparelho a calor excessivo causado por equipamento 2 Prima o botao g para iniciar a gravacao. O indicador de gravacao/ REP. FILE Reproduzir um ficheiro repetidamente de formatar o gravador. ????? ? ????. ???? ??? ?????????? ??? ????????? ??? ????? ????, ?? ???????? • ? ??????????? ??????????? ??? ????? ?????? ??? ?????? M SENSE* HI ??????? ??? ??????????? ???????????, ??? ????? ?????? ? ???????, ? ?????, ? ??????????? ? ? de aquecimento ou luz solar directa. reproducao 18 acende-se a vermelho. Aponte o microfone (Rep. ficheiro) VER Apresenta a versao do firmware e a data de • ??? ???????? ?? ??????? ?? ?????????? ????? ??????????? ??? ?? ????????? ??? ?????????? ??? ??? ???. (???????). LO ??? ??????? ???????? ??????? ??? ?? ?????????? ??? ??????? • Proteja os cabos de serem dobrados, especialmente nas tomadas e no incorporado 3 a fonte do som. REP. FOLDER Reproduzir todos os ficheiros numa pasta (Versao) edicao. ????????? ????????? ? ????? ?????? ???????????. 7 ???????? ?????????? ??? ?????????? ??? ?????????? • ? ??????? ??????????? ????????? ?? ????????? ?? ????? ponto em que saem da unidade. 3 Para fazer uma pausa na gravacao, prima o botao g. O indicador (Rep. pasta) repetidamente SPLIT* Yes (Sim) Dividir um ficheiro grande em dois ficheiros • ???????????? ?? ??????? ??? ????? ????????, ????????? ??? 1 ???? ????? ??????????? ? ??????? ‘CLOCK’ 21 . ??????? ?? 5.4 ???????? ???????????? ?????????? ??? ???????????. ??????????? HOLD. ?????? ?? ???????? HOLD ??? ???? • Faca copias de seguranca dos ficheiros. A Philips nao e responsavel por de gravacao/reproducao pisca e a mensagem PAUSE (Pausa) e FOLDER SHUF Reproduzir todos os ficheiros de musica numa (Dividir) No (Nao) separados, de forma a que possam ser facilmente ??????? ??? ?? ?????? ?????? ??? ?? ??????. ?????? k. ??????????? ? ??????? ????? 22 . ???????? ?? ??????????????? ??? ???????????? ??????????, ??? 1 ??????? ?? ?????? INDEX / a ???? ??? ???????????????? VA* On ? ?????????? ?? ???????? ???????????? ??????????????? ???. qualquer perda de dados. mostrada no visor 27 . Prima o botao g de novo para prosseguir (Aleatoria da pasta) pasta aleatoriamente arquivados ou transferidos por correio • ???????????? ???????? ????????? ??? ??????? ???. ? Philips ??? 2 ??????? ?? ?????? h ? ?? ?????? b, ??? ?? ????????? ?? ?? ??????????? ???????? ?????? ???? ??????????? ?? ?????? ??????????, ??? ?? ????????? ??? ????????? ??????. Off ????? ??? ?????????? ??? ??????? ??????? ???? com a gravacao. electronico, ou a que parte de um ficheiro possa ????? ?????? ??? ????? ??????? ?????????. ????. ????????. 2 ??????? ???????????? ?? ?????? j / DEL ??? 1 ???????????? ? ?????????? ????? ?? ?????? ????????. ??? ????????? ???? ??? ?? ????????? 2.1.1 Audicao segura 4 Para parar a gravacao, prima o botao j / DEL. D Nota ser eliminada. Para dividir um ficheiro, inicie a 3 ??????? ?? ?????? k, ??? ?? ????????? ??? ??????? ????. ???????????. ???? ????? ??????????? ? ??????? DELETE 34 . ???? ????????? ?? ???????? ????????????, ? • ????????? ?? ??? ????? ???????? ????? ?? ?????????. ???????? O modo aleatorio so esta disponivel na pasta M (musica). reproducao e pare no ponto em que pretende 2.1.1 ????????? ????? 4 ??????????? ?? ?????? 2 ??? 3 ??? ?? ????????? ?? ????, ??? 1 ??????? ?? ?????? INDEX / a ???? ?? ???????? ???? 3 ??????? ?? ?????? h ? ?? ?????? b, ??? ?? ?????????????? ?????????? ?????? ???? ???????? ?? ??????. ????? ?? ?????????. Respeite as seguintes indicacoes quando utilizar auscultadores: D Notas fazer a divisao e abra o menu SPLIT (Dividir). ?????, ?? ??????? 12/24???? ?????? ??? ??? ???, ?? ??? ???? ???????????, ??? ?? ?????????? ??? ?????????? ??????????. ? ??? ??????? ?????????: 35 ???? ??????????? ?? ??????, ?????????? • ? ???? ???? ????????? ??? ?????????? ??????. ???????? ??? • Fique a ouvir em volumes razoaveis e durante periodos de tempo • Defina a funcao de activacao por voz e o modo de gravacao AUTO** Yes (Sim) Sintoniza automaticamente uma estacao de radio ??????? ??? ???????? ??????? ??? ?????????? ???? ??????? ?????. ??????? ?????????? ??????????? ??? ??? ???????????? 29 . ????????? ???????? ???????? ????? ??? ??????????? ??? ?????? ??? ????. razoaveis. pretendidos antes de iniciar a gravacao (consulte o ponto 9 para mais No (Nao) e grava ate 20 estacoes como predefinicoes. ?????????????? ?? ????????? ???: FILE ???????? ??????????? ??????? ???????, ???? ??? ???? ????????????, ??? • Tenha cuidado para nao regular o volume muito alto, uma vez que a informacoes). 7 Eliminar OUTPUT EP Alterna entre saida para auricular (EP) e • ????????? ??? ??? ?? ???????? ?????? ??? ?????????????? ?? D ???????? D ?????????? FOLDER ???????? ???? ??? ??????? ?? ??? ?????? ? ?????????? ??????????? ???? ???????? ?? audicao se vai adaptando. • Faca uma gravacao de teste para garantir que as definicoes do Voice ** (Saida) SP altifalante (SP) no modo de radio. ????????? ??? ?????? ??????? ????????. ???????? ?? ???????? ??? ?????????? ??? ??? ??? ??? ???? ??????, • ?? ????????? ?????????? ??? ? ?????????? ???????? ???????? ???? ??? ???????????? ?????????? ?? ?????? ????. • Nao aumente o volume ao ponto de nao conseguir ouvir o que o Tracer estao correctas. 1 Prima o botao INDEX / a com o gravador parado para seleccionar • ?????????? ????????? ???????, ???? ?? ??? ???????? ??? ?????? ??????????????? ?? ?????. ??. ???????? 9 ??? ???????????? ???????????? ??????????. ??? ?????? EDIT* APPND ???????? ?? ?????????????? ??? ??? 12 ??????? ?????????????? rodeia. • Prima e mantenha premido k durante a gravacao para mostrar o a pasta pretendida. * Esta funcao nao esta disponivel na pasta M (musica). ???? ? ???? ??? ????????????? ???? ??? ?????????? ???????. ???????????. • ???????? ?? ??????? ??? ??? 32 ???????????? ?????????? ??? OVER ???????????? ?????? ??????????????? ??? • Deve ter cuidado ou parar temporariamente de utilizar o aparelho em tempo de gravacao restante. 2 Prima e mantenha premido o botao j / DEL durante 1 segundo ou ** Esta funcao so esta disponivel no modo de radio. • ??? ???????? ??? ?????? ?? ?????? ??? ?? ??? ?????? ?? ??????. 4 ??????? ?? ?????? k. OFF ????? ??? ??????????? ? ???????????? • USB: mini-USB 2.0 ?????? ????????? situacoes potencialmente perigosas. • Prima b durante a gravacao para criar um ficheiro novo. mais. A mensagem DELETE (Apagar) e mostrada no visor 34 . ????????? ???? ???. 4.6 ??????????? ???? ????? 5 ??????? ?? ?????? h ? ?? ?????? b, ??? ?? ????????? ?? ??? ?????????? ??? ????? ??? ???????. • ?????????: 3,5 mm • ??????? ????????? 2,2 k? • Nao utilize auscultadores quando estiver a conduzir um veiculo • O numero maximo de ficheiros em cada pasta e 99, correspondendo a 3 Prima o botao h ou b para seleccionar uma opcao de • ?????????? ????????? ??????? ? ????????? ??????? ??? ?????? • ??????? ?? ?????? j / DEL ???? ??? ???????????????? 5.5 ????? ??? ??????????? ???? ??????, ?? ?????? ? ?? ?????? ??? ???????? ??? ???????????? ???????? ??? ????????? ????? ??????????? • ?????????: 3,5 mm • ??????? ????????? 16 ? ? ????????? motorizado, a andar de bicicleta ou de skate, etc, pois podera criar uma capacidade total de 396 ficheiros (99 ficheiros x 4 pastas). eliminacao: 35 ?? ??????? ??????????? ???????????. ??????????, ??? ???????? ??? ??????????? ???? ?????: ???? ? ?????????? ???? ????? ??????, ?? ????????? ???????? ????? ?????????? ??? ?????????? ?? ?????????? 36 . ???????????? (????????????? [=OVER] • ??????/?????: LCD/???????? • ?????????: 39 mm / 1,5 in. situacoes de transito perigosas e e ilegal em muitas zonas. • Se o tempo de gravacao ultrapassar a capacidade disponivel ou o Icone Significado 10 Actualizar o firmware • ?? ?????????????? ????????? ???? ???????? ???????, ???? ?????? ????????? ?????? ???????????? ????????? ??????? > ??? > ????? ??????? ??????? ??? ?? Voice Tracer, ?????????? ?? ???? 6 ??????? ???? ?? ?????? k. N (???) 37 . ? ???????? [=APPND] ???? ??? ??? • ?????????: ????????????: ???????????? • ?????????: numero de ficheiros atingir os 396, a gravacao para e a mensagem FILE (Ficheiro) Eliminar um so ficheiro ????????, ??????????? ???., ????? ??????? ???????? ???????? ?????????? > ???????????? ???????? ??????????? > ???????? ???? ??? ?? ???? ???????? ??? ???????? ??? ???? ??? ?????. 7 ??????? ?? ?????? h ? ?? ?????? b ??? ?? ????????? Y ??????????? ???? ???????????. ??? ???????????? Importante (para modelos fornecidos com auscultadores): ‘FULL’ (Cheio) e mostrada. Elimine algumas gravacoes ou transfira-as FOLDER (Pasta) Eliminar todos os ficheiros de uma pasta O Voice Tracer e controlado por um programa interno denominado ??????????. ?? ?????? ????? ? ????? ?????????? ???????????? ??????????? ????????? ??????? > ?????????? ??????????? ?????????? ???? ??? ?????????? ????????? ??? ??????? ????? ??? (???) 38 . ???????????? ???????????, ??. ???????? 5.3. • ???????????? ????????????? ??????: 4 GB A Philips garante a conformidade com o nivel sonoro maximo dos para um computador. Eliminar todas as marcas de indice de um ficheiro firmware. E possivel que tenham sido lancadas novas versoes do ??? ?? ????. ????????? ???????. ?? ????? ??????????? ???? ? ???????? ????????? ?????? ??? ?? 8 ??????? ?? ?????? k ??? ?? ????????????? ??? ??????? ???. INPUT V (??????) ?????????????? ?? ??????? L (??????? • ????? ????????????? ??????: NAND Flash seus leitores de audio de acordo com o determinado pelas entidades • Nao retire as pilhas durante a gravacao. Faze-lo pode causar uma avaria firmware depois de ter adquirido o Voice Tracer. • ??????? ???????????? ?? ?????? k ???? ??? ???????? ???? ???? ???????????. ? ?????????? ???? ???????? ??? ????????? ????/ L (??????? line-in) ???? ??? ?????????? ??? ?????????? • ?????? ???????????: MPEG1 layer 3 (MP3), PCM (LFH0882) reguladoras relevantes, mas apenas com o modelo original de do gravador. 4 Prima o botao k. ????????? ?????????? (??? ??????? ??? ??????????? ?? ???????????, ??? ?? ?????????? ? ???????????? ???????? ????????? ??? ?????????????? ??? ???????? ????????????? ??? D ???????? line-in) ????? ????, ???? ??? ???????? line-in ??? • ?????? ??????????? ???????????: PCM (WAV/????????????), auscultadores fornecido. Se estes auscultadores precisarem de ser • Se houver a possibilidade de a gravacao prolongar-se no tempo, 5 Prima o botao h ou b para seleccionar o ficheiro, a pasta ou o 1 Ligue o Voice Tracer a um computador com o cabo USB fornecido. ?????????): ???????????. ?????? ?? ?????????. ???????????????? ???????? ???????????? ?????????? ??????? ???????? ???????????. SHQ (MP3/????????????), HQ (MP3/????????????), SP (MP3/ substituidos, recomendamos que se dirija a um revendedor para obter substitua as pilhas antes de iniciar. ficheiro com as marcas de indice que pretende eliminar 36 . 2 Transfira a actualizacao do firmware para o seu modelo de Voice ? Philips ???????? ?? ?????????? ??? ???????? ???????? ?????? ???????. DIVIDE* Off ???????? ?????????? ?? ??? ?????? ??????????), LP (MP3/??????????), SLP (MP3/??????????) um modelo da Philips identico ao original. • O Voice Tracer pode gravar alimentado atraves de um cabo USB sem 6 Prima o botao k de novo. A mensagem N (Nao) e mostrada 37 . Tracer a partir de www.philips.com e grave o ficheiro no directorio ??? ???????? ???????????? ???? ??? ???????????? ?? ??? 4.7 ????? ??? Voice Tracer ?? ????????? ?? ?????????? 1 ??????? ?? ?????? l/ MENU ???? ?? ???????? ??? ???????????, 30 min. ???? 30 ? 60 ????? ???? ?? ?????????? • Bit rate: 1411 kbps (?????????? PCM), 192 kbps (?????????? gastar as pilhas. Ligue o gravador a um computador com o cabo USB e 7 Prima o botao h ou b para seleccionar Y (Sim) 38 . de raiz do Voice Tracer. ????? ??? ?????????? ?? ???????? ?????, ?? ??? ?????????? ??? ?? ??????? ??????????? USB, ?? Voice Tracer ????????? ?? ??? ?? ???????? ??? ????? ??????????? ???? (?????????????? > 60 min. ????????? ???????????. ?? ??? ????? SHQ), 64 kbps (?????????? HQ), 48 kbps (?????????? SP), 32 kbps 2.2 Eliminacao do aparelho antigo prima o botao g durante 1 segundo ou mais para iniciar a gravacao. 8 Prima o botao k para confirmar. 3 Desligue o Voice Tracer do computador. O firmware e actualizado ???????????????? ?? ????????? ??????? ??????????. ?? ?????????? ?????????? ??????? ???????????, ??????????? ????????? ???? 1 > ???? 2 > ??????????????) 30 . ????, ????????????? ? ??????, ??????????? (?????????? LP), 16 kbps (?????????? SLP) • O aparelho foi concebido e fabricado com materiais e componentes automaticamente e quando terminar o Voice Tracer desliga-se. ????????????? ??? ??????????, ?????????? ?? ?????????????? ?? ?????????? ??? ????????? ??? ??????? ???. ? ??????? ??? 8 ?????? ??????????? ?????????? ??? ???????????? ???????????? ??????? • ?????? ???????????: 572 ???? (?????????? SLP), 286 ???? de alta qualidade que podem ser reciclados e reutilizados. 5.2 Gravar com um microfone externo D Nota ?? ????????? ???????? ??? ?? ???????????? ??? ??????? ??? Philips Voice Tracer ?? ?????????? ???????????????? ??????????????? D ???????? ?????????, ???? ????????? ? ?????????. (?????????? LP), 190 ???? (?????????? SP), 143 ???? (?????????? • Quando um aparelho tiver este simbolo de um caixote com Para gravar com um microfone externo, ligue o microfone a entrada do Os numeros sequenciais dos ficheiros sao redefinidos automaticamente. ???? ?? ?? ?????????. ??? ??????? USB, ????? ?? ?????????? ? ??????????? ??????? ? ?????????? ???? ????? ???????????????? ??? ?? ????????? (???? ??? ??????? LFH0882) LIGHT On ???????? ?????? ??? ?????? ????????????, HQ), 47 ???? (?????????? SHQ), 6,4 ???? (?????????? PCM) rodas marcado com uma cruz, e porque esse aparelho esta microfone e siga o mesmo procedimento utilizado para o microfone ??????????. ?? Voice Tracer ????????????? ???????? ?? ????????? ??? ?? ????????? ????????? ???? (????????? ?? ?? Off ???? ?? ?????? ???? ????????. • ?????? ??????????????: 44.1 kHz (?????????? PCM/SHQ), 22 abrangido pela Directiva Europeia 2002/96/CE. incorporado. 28 11 Resolucao de problemas 2.2 ???????? ??????? ????????? ???????????? ??????, ?? ?????????? ?? ????? ?????? ? ???? LFH0885). 1 ???????? ?? ?????????. ?? ?????????? ????????? ??????????? BEEP On ???????? ???????????? ???? ?? ????? ??? kHz (?????????? HQ), 16 kHz (?????????? SP/LP/SLP) • Informe-se acerca do sistema local de recolha de aparelhos electricos • ?? ?????? ???? ???? ?????????? ??? ????????????? ?? ????? ??? ???????? ??? ??????? ??????? ???? ??? ??? ?? ??????. 23 ?? ??????????? ??????. Off ???????? ? ?? ????????? ?????????. • ??????????? ????????: ????? ?????????: .mp3, .wma • bit e electronicos. 5.3 Editar um ficheiro gravado previamente 8 Modo de radio (apenas LFH0882) O meu gravador nao liga ?????????? ?????? ?????????, ?? ????? ??????? ?? 2 ??????? ???????????? ?? ?????? l/ MENU ??? 1 ???????????? CLOCK DD:MM:YY ?? ????? ???????? ??? ?????????? ??? rate ??????? MP3: 8 – 320 kbps • bit rate ??????? WMA: 48 – 320 • Actue de acordo com as regulamentacoes locais e nao deite fora Pode editar um ficheiro gravado previamente, substituindo parte da • As pilhas podem estar gastas ou nao estar correctamente colocadas. ???????????? ??? ?? ??????????????? ????. D ?????????? ? ???????????, ??? ?? ????????? ???? ????? ??????????? 12/24 H ??? ???, ???? ?? ??????????? ???? kbps (44 kHz), 64 – 192 kbps (48 kHz), ???????????? • ????? os aparelhos antigos juntamente com o lixo domestico normal. A gravacao ou adicionando uma gravacao ao final do ficheiro. 1 Ligue os auscultadores. Os auscultadores fornecidos servem de Substitua as pilhas gastas por umas novas e verifique se as pilhas novas • ?? ??????? ???? ?????????? ????? ???????????? ??? • ??? ??????????? ?? Voice Tracer ??? ???????????????? 6 ??????????? ??????????. HH:MM:SS ??????????? ????????????? ???????? ???? ?????????? DRM eliminacao correcta dos aparelhos antigos ajudara a impedir eventuais antena de radio. estao correctamente colocadas. ??????????? ?? ??? ? ?????????? ??? ?? ?????? ??? ????? ???????? ??????? ??? ??? ???? ?? ???????. ???? ?? ???????? ?? ???? ??????. • ?????????/???? (??????? LFH0882): ???????????? ?????: consequencias negativas para o meio ambiente e para a saude publica. 1 Defina o modo de edicao pretendido (substituir ou adicionar) antes 2 Prima e mantenha premido o botao l/ MENU durante 1 segundo ou ??????????? ?? ??????? ???? ?????????? ??? ??? ????????? ??? ????????? ?????????, ? ?????????? ?????? ???????????/ 1 ??????? ?? ?????? INDEX / a ???? ??? ???????????????? 8.1 ????????? ??????????? ???????????? ??????? TIMER Off ??????????????? ??????? ????????? FM stereo • ????? ??????????: 87,5 - 108 MHz • ??????? • As pilhas (incluindo as pilhas recarregaveis) contem substancias que de iniciar a gravacao (consulte o ponto 9 para mais informacoes). mais para entrar no modo de radio. O meu gravador nao grava nada ?????? 2002/96/EC. ???????????? 18 ??????????? ?? ????????? ????? ??????????, ??? ?? ????????? ??? ????????? ??????. V ??????????? ??? ?? ????????? (??????? ?????????????? ????????: 20 • ????????? ???????? ??????????? podem poluir o meio ambiente. Todas as pilhas devem ser eliminadas 2 Prima o botao INDEX / a com o gravador parado para seleccionar • O gravador pode estar no modo HOLD (Suspender). Deslize o • ???????????? ??????? ?? ?? ?????? ??????? ?????????? • ??? ????????? ?????????? ??? ?????? ??? Voice Tracer ?? 2 ??????? ?? ?????? h ? ?? ?????? b ??? ?? ????????? ?????? 1 ??????? ?? ?????? l/ MENU ???? ? ??????? ??????????? CH V) ? ??? ??? ?????? ?????????? (??????? • ????????????, ????????? ???????? ????? 30 mm • ????? ??????: num ponto de recolha oficial. a pasta pretendida. 8.1 Sintonizacao automatica de estacoes de radio interruptor HOLD (Suspender) para a posicao Off. ???????? ?????????? ??? ???????????? ?????????. ??????????. ??? ??????????? (??? ???????????? ??????? ?? ??? ??????? ????????? ?? ????? ??????????? ??????????, ??? ?? ?????????? CH / ???? ??? ??????? LFH0882). ????????? 110 mW 3 Prima o botao h ou b para seleccionar o ficheiro ao qual ira • O numero maximo de gravacoes pode ter sido atingido ou a • ??????? ???? ???????? ??????????? ??? ??? ??????????? ?? ???????, ??. ???????? 6.1.1). ?? ?????. ??? ??? ???????, ?? ???????? ??????????? • ???????? ???????????: ???????????: 5° – 45° C • ser feita uma adicao (consulte o ponto 6.1.1 para mais informacoes 1 Prima o botao l/ MENU com o gravador no modo de radio para capacidade de gravacao pode estar cheia. Elimine algumas gravacoes ou ?????? ???????? ???? ?? ?? ????? ??????? ???????????. ? 4.8 ??????? ??? ???????????????? (???? ??? ?? LFH0885) 3 ??????? ?? ?????? k. ? ?????? ???????????? ??????????? 2 ??????? ?? ?????? h ? ?? ?????? b ??? ?? ????????? ?? (30/60/120 minutes/unlimited), ?? ?????? ??? ???????: 10% – 90% sobre seleccionar um ficheiro). abrir o menu. transfira gravacoes para um dispositivo externo. ????? ???????? ??? ??????? ????????? ??????????? ???? ?? ??????????????? ?????? ?? ?????????????? ??? ?????? ??? ???? ????? ??? ?????? ? ??????? ?????? LED 18 . ?????????? AUTO. ?? ??????????? ?????? ??? ?????????? ?? • ????? ?????????: ??? ????????? ????????? Philips AAA (LR03 ? 3 O seu Digital Voice Tracer 4 Reproduza o ficheiro ou avance rapidamente ate a posicao em que 2 Prima o botao h ou b para seleccionar AUTO. ??????? ??????? ????????? ?????????? ??? ?????????? ??? ??? ????? ??? ???????????, ??? ???????? ???? ??????? ????? ??? ??? 4 ???????? ??? ?????? ??? ???? ??????????????? ?? ??????? + 3 ??????? ???? ?? ?????? k. N (???). ????????????. R03) ? ????????????????? ????????? LFH9154 ??? Philips deve ser feita a adicao e prima o botao k para fazer uma pausa 3 Prima o botao k de novo. A mensagem N (Nao) e mostrada. Nao consigo ouvir nada do altifalante ????????? ?????. ???????? ???? ??????????? ??????????. ??? –. 4 ??????? ?? ?????? h ? ?? ?????? b ??? ?? ????????? Y ALARM Off ????? ??? Voice Tracer ?? ?????? ?????????. • ???????? ???? ????????? (?????? ??????????? LP): 50 ???? 1 Entrada dos auscultadores, 11 Compartimento das pilhas na reproducao. 4 Prima o botao h ou b para seleccionar Y (Sim). • Os auscultadores podem estar ligados. Retire os auscultadores. • ?? ????????? (??????????????????? ??? ????????????? 5 ??? ?? ????????? ??? ???????????, ??????? ?? ?????? j / DEL. (???). b ???????? ????? ??????????? ??????????? (b = • ?????????? ????????? (? ? ? ? ?): 40 ? 18,4 ? 108 mm entrada do controlo remoto 12 Ligar/desligar, Reproduzir/ 5 Prima o botao g. O indicador de gravacao/reproducao pisca e e 5 Prima o botao k para confirmar. O radio sintoniza • O volume esta no nivel mais baixo. Regule o volume. ????????????????? ?????????) ????????? ?????? ??? ????????? 1 ???????? ?? ??????????????? ???? ??????? EAR ??? Voice ???? ????? ??????????? ? ????????? ?????? ???????????? ??? 5 ??????? ?? ?????? k ??? ?? ????????????? ??? ??????? ???. F ??????? ????, F = ??????????? ???????) ??? • ?????: 80 g. ????????. ????????? 2 Entrada do microfone, entrada Pausa, Velocidade de apresentado INSERT (introduzir), OVER (substituir) ou APPEND automaticamente as estacoes de radio e grava as frequencias como ?? ???????? ?? ??????????. ???? ?? ????????? ?????? ?? Tracer 24 . ????????? ???????. ???????????????? ????????? ??????????? ??? ???????????? ????????? ??? ??? ??????? ??? ?? ?????? ??? • ?????????? ?????????? ??????????: Windows 7/Vista/ de linha reproducao (adicionar) no visor. predefinicoes. O radio pode gravar ate 20 estacoes de radio como O meu gravador nao reproduz gravacoes ????????????? ?? ??????????? ?????? ????????. 6 ??????? ???? ?? ?????? k, ??? ?? ?????????? ??? ??????? ??? ????????? ??? ?? ?????????? ????????????? ?????????? ?? ???????????. XP/2000, Mac OS X, Linux • ???????? ???? USB 3 Microfone incorporado 13 Menu, radio FM, funcao de 6 Prima o botao g novamente para iniciar a gravacao. A gravacao predefinicoes. • O gravador pode estar no modo HOLD (Suspender). Deslize o 4.9 ????? ??? ??????? ???????? (???? ??? ?? LFH0868/ ??????????? ??? ??? ??????????? ????. ?? ???????????. ???????? ?? ???????????? ??? ??? 20 AUTO OF 5 ???????? ?????????????? ??? Voice Tracer 4 Subir volume zoom existente e editada. interruptor HOLD (Suspender) para a posicao Off. LFH0888) ????????????? ???????? ?? ??????????? ??? ?????????. 15 ???? ??? 5 ? 15 ????? ?????????. 5 Gravar, Pausa, Ligar 14 Retrocesso rapido, Seleccao de 7 Prima o botao j / DEL para parar a gravacao. 8.2 Sintonizacao manual de uma estacao de radio • As pilhas podem estar gastas ou nao estar correctamente colocadas. ? ??????? ???????? ?????? ?? ?????????????? ??? ?? ??????? D ?????????? CHARGE On ???? ????? ?????????????? ? ?????????? 6 Avanco rapido, Seleccao de ficheiros, Seleccao do menu Substitua as pilhas gastas por umas novas e verifique se as pilhas novas 3 ?? Digital Voice Tracer ??????? ??? ?? Voice Tracer ?? ???? ?????????? ????? ??? ??? ??? • ?? ?? ?????????? ????????? ?????????? ?????????? ???????? 8.2 ???????????? ??????????? ?? ??????????? ?????? Off ????????, ?? ????????????????? ????????? ficheiros, Seleccao do menu 15 Indice, Pasta, Repetir D Notas 1 Para sintonizar uma frequencia com precisao, prima brevemente o estao correctamente colocadas. ???????????? ??? ?????????. 25 ??????????? ??? ?????????? 3 ????????????? ??? ??????????? ??????????? ???????? ???? ?? Voice Tracer 7 Parar, Mostrar, Eliminar 16 Visor • O modo de gravacao do ficheiro original e activado durante a edicao botao h ou b. • Ainda nada foi gravado. Verifique o numero de gravacoes. 1 ??????? ??????????, 12 ????????????/ ???? ???? ??? ??????????? ? ???????????. 1 ??? ?? ????????? ??? ????????? ?? ????????, ??????? ????????? ????? ??????????? ?? ??????????. ??? 8 Descer volume 17 Interruptor de suspensao de uma gravacao. 2 Para procurar o sinal mais forte seguinte, prima e mantenha ??????? ???????????????? ??????????????, 1 ???????? ?? ?????? ???????? ?? ???? ?????????? ?? ?? • ???? ???????? ????????? ???? ??????? EAR 1 , ?? ????? ??? ?? ?????? h ? ?? ?????? b. ???????????? ???????????, ??. ???????? 4.2. 9 Altifalante 18 Indicador de gravacao/ • A edicao de gravacao nao esta disponivel na pasta M (musica). premido o botao h ou b. Nao consigo parar, fazer pausa, reproduzir ou gravar com o 2 ??????? ??????????, ???????????/?????, ?????????? ??????? USB. ???????? ??????????? ????????????????. 2 ??? ?? ?????????? ????????? ??? ?? ??????? ?????? ????, FORMAT Yes ???????? ???? ??? ??????? ??? ??????? 10 Entrada USB reproducao 3 Prima o botao k para gravar a frequencia como predefinicao. meu gravador ??????? line-in ???????? ???????????? 2 ???????? ?? Voice Tracer ???? ??????? ??? ??????? ????????. ??????? ???????????? ?? ?????? h ? ?? ?????? b. No ???????????, ??????????????????? ??? 5.4 Adicionar marcas de indice 4 Regule o volume com os botoes + e –. • O gravador pode estar no modo HOLD (Suspender). Deslize o 3 ???????????? ????????? 13 ?????, ????????? FM, D ?????????? ??????? ?? ?? ????? ??? Voice Tracer ?? 3 ??????? ?? ?????? k, ??? ?? ???????????? ?? ????????? ?? ????????????????? ???????????? ???????. As marcas de indice podem ser utilizadas para marcar determinados 5 Para sair do modo de radio, prima e mantenha premido o botao interruptor HOLD (Suspender) para a posicao Off. 4 ?????? ??????? ???? ?????????? ???? ??????? ???????????? ???????? ??????????. ???? ??? ?? ?????????? ??? ???????? pontos numa gravacao como pontos de referencia. l/ MENU durante 1 segundo ou mais. 5 ??????????, ?????, 14 ??????? ?????????, ??????? • ? ??????? ??????????? ??????????? ?????? ???????? ?? 4 ???????? ??? ?????? ??? ???? ??????????????? ?? ??????? + ???????????, ?????????? ????? ????????? 4 Iniciacao Nao consigo ouvir nada atraves dos auscultadores ???????????? ???????, ??????? ????? 5 ?????????? ????? .wma ??? .mp3, ?? ????? ???????? ?? ?????????? ??? ??? –. ?????? ?? ???? ??????????. 1 Prima o botao INDEX / a durante a gravacao para adicionar uma D Nota • Os auscultadores podem nao estar correctamente ligados. Ligue 6 ??????? ?????????? ???? 15 ?????????, ???????, ?????????? ??? ?????? ???????? ??? ???????? ???????????. 5 ??? ????? ??? ??? ????? ??????????? ??????????, ??????? VER ???????? ??????? ??? ??????????? ??????? 4.1 Introducao das pilhas marca de indice. O numero de indice e mostrado durante um Prima o botao j / DEL com o gravador no modo de radio para alternar correctamente os auscultadores. ?? ??????, ??????? ???????, ????????? 5.1 ?????????? ?? ?? ???????????? ????????? ??? ?????????????? ?????? ?? ????????? ???? ??? ?????????? ???????????? ?? ?????? l/ MENU ??? 1 ???????????? ? ??? ???????????????. O Voice Tracer funciona com as pilhas recarregaveis LFH9154 Philips ou segundo 29 . entre a recepcao estereo e mono. • O volume esta no nivel mais baixo. Regule o volume. ??????? ????? 16 ????? (??????? ?????????? ???????????). ???????????. SPLIT* Yes ??????????? ??????? ??????? ???????? com pilhas alcalinas AAA. 7 ???????, ????????, ???????? 17 ????????? ??????????? 1 ??????? ?? ?????? INDEX / a ???? ??? ???????????????? • ?? Voice Tracer ??????????? ??? ??? ??? ??????? ??????? ????? No ?? ??? ????????? ??????, ???? ?? ????? D Notas 8.3 Reproduzir uma estacao de radio predefinida 8 ?????? ??????? ???? ???????? ??????????, ??? ?? ????????? ??? ????????? ?????? 26 . ??? ??????? ????????. ???? ??????? ?????? ?? ???????? ??? ??? D ???????? ?????? ? ?????? ???????????? ? ???????? 1 Deslize a tampa das pilhas para abrir. 19 • O icone indica que a gravacao contem marcas de indice. 9 ????? 18 ??????? ???????????/ 2 ??????? ?? ?????? g, ??? ?? ????????? ? ??????????. ? ??????? 199 ???????????? (?????? ??? ???????). ??????? ?? ?????? j / DEL ???? ? ??????? ??????????? ???? ???? ???????????? ???????????? 2 Coloque as pilhas na polaridade correcta, conforme indicado, e • Podem ser adicionadas ate 32 marcas de indice por ficheiro. 1 Prima o botao INDEX / a com o gravador no modo de radio para 12 Caracteristicas tecnicas 10 ???? USB ???????????? ???????????/???????????? 18 ?????? ?? ??????? ?????. • ??????? ?? ?????? k, ??? ?? ???????? ??? ?????????? ??????/ ????????? ?? ????? ??????????? ??????????, ??? ???????? ?????? ? ? ???????? ?????? ??? ???????. ??? feche a tampa. 20 alternar entre o modo de frequencia e predefinido. 11 ???? ????????? ??????? ?? ???????????? ????????? 3 ???? ??? ???? ??? ??????. ??????? ?? ?????? INDEX / a ??? ?? ??????????? ??? ????????????? ??? ??????????? ?????. ?? ??????????? ??? ??????, ????????? 5.5 Utilizar a funcao de zoom 2 No modo predefinido, prima o botao h ou b para mudar para • USB: Mini-USB 2.0 de alta velocidade ????. ?????? ??? ?????? ????????? ???????. ??????????? ???, ???????? ?? ??? ?????? D Nota E recomendado para gravar palestras, discursos e outras situacoes em outra estacao de radio predefinida. • Microfone: 3,5 mm • impedancia de 2,2 k? 3 ??? ????? ??? ???????????, ??????? ?? ?????? g. ? ??????? • ??????? ?? ?????? g ???? ??? ??????????? ????????, ??? 8.3 ??????? ?????????????? ???????????? ??????? ???? ?????????? ?? ??????????????? ? • Nao misture pilhas de diferentes tipos e/ou marcas. que o locutor esta longe da posicao de gravacao. A funcao de zoom 3 Regule o volume com os botoes + e –. • Auscultador: 3,5 mm • impedancia de 16 ? ou mais ???????????/???????????? ??????????? ??? ???? ????? ???????? ??? ?????? ??????????? ??? ???????????? ???? ??????????? ???, ??? ????????, ??????? ?? • Retire as pilhas quando nao pretender utilizar o Voice Tracer por um inclui duas definicoes de som/distancia para maximizar o efeito audio 4 Para sair do modo de radio, prima e mantenha premido o botao • Visor: LCD/segmentado • tamanho do ecra na diagonal: 39 mm 4 ?????? ?????? ??????????? ? ??????? PAUSE 27 . ??????? ???? ?? ?????? g, (????????? > Classic > Jazz > Rock > Pop > ?????????). 1 ??????? ?? ?????? INDEX / a ???? ? ??????? ??????????? ????? SPLIT. periodo de tempo prolongado. As pilhas com fugas podem danificar que pretende obter. l/ MENU durante 1 segundo ou mais. • Microfone: Incorporado: estereo • Externo: estereo ??? ?? ?????????? ??? ??????????. ????????? ?? ????? ??????????? ??????????, ??? ???????? AUTO** Yes ????????? ??????????? ???????????? o Voice Tracer. • Capacidade da memoria incorporada: 4 GB 4.1 ?????????? ????????? 4 ??? ?? ????????? ??? ??????????, ??????? ?? ?????? j / DEL. 6.1 ??????????? ???????????? ?????? ?????????? ??? ?????? ??????????? ???????????. No ??????? ??? ?????????? ??? ??? 20 ??????? • Se o Voice Tracer comecar a funcionar mal, retire as pilhas e volte a 1 Prima o botao l/ MENU durante a gravacao para alterar o modo de 8.4 Eliminar uma estacao de radio predefinida • Tipo de memoria incorporada: NAND Flash ?? Voice Tracer ?????????? ?? ??? ????????????????? ????????? 2 ???? ????? ??????????? ???????????, ??????? ?? ?????? h ? ?? ???????????. coloca-las. zoom (Off > Zoom 1> Zoom 2 > Off) 30 . • Formatos de gravacao: MPEG1 nivel 3 (MP3), PCM (LFH0882) LFH9154 ??? Philips ? ?? ????????? ????????? ???. D ?????????? 6.1.1 ??????? ??????? / ???????? ??????????? ?????????? ?? ?????? b ??? ?? ????????? ?? ???? ???? ????????????? OUTPUT EP ???????? ?????? ?????? ?????????? (EP) • Pare o gravador antes de substituir as pilhas. Retirar as pilhas com o 1 Prima o botao INDEX / a com o gravador no modo de radio para • Modos de gravacao: PCM (WAV/estereo), SHQ (MP3/estereo), HQ • ???? ??? ??? ?????? ??? ???????????, ???????? ??? ????????? • ??????? ?? ?????? b ??? ????, ??? ? ??????? ??????????? ??????????? ??????. ** SP ??? ?????? (SP), ???? ????? ??????????? gravador a funcionar pode danificar o ficheiro. D Nota alternar entre o modo de frequencia e predefinido. (MP3/estereo), SP (MP3/mono), LP (MP3/mono), SLP (MP3/mono) 1 ?????? ??? ??????? ?? ??????? ??? ?????????. 19 ?????????? ????????? ????????????? ??? ??? ????? ??????????? ????????? ?? ????????? ??????, ??? ?? ????????? ??? ????? ??? 3 ???????? ??? ?????? ??? ???? ??????????????? ?? ??????? + ??????????. • Quando as pilhas estiverem quase gastas, o indicador das pilhas pisca. A funcao de zoom esta optimizada para o microfone interno e para o 2 No modo predefinido, prima o botao h ou b para seleccionar a • Taxa de bits: 1411 kbps (modo PCM), 192 kbps (modo SHQ), 64 2 ??????????? ??? ????????? ?? ?? ????? ??????????, ???? ??????????? (??? ???????????? ???????????, ??. ???????? 9). ???????. ??????? ?? ?????? b ????, ??? ?? ????????? ???? ???? ??? –. • Se demorar mais de 2 minutos a substituir as pilhas, podera ser microfone de zoom externo (fornecido com o LFH0885). estacao de radio predefinida que pretende eliminar. kbps (modo HQ), 48 kbps (modo SP), 32 kbps (modo LP), 16 kbps ????????????? ??? ????? ???, ??? ????????, ??????? ?? ???????. • ??????????????? ??? ??????????? ??????????, ??? ?? ??? ???????? ???????. 4 ??? ????? ??? ??? ????? ??????????? ??????????, ??????? * ???? ? ?????????? ??? ????? ????????? ??? ?????? M (???????). necessario acertar a hora. 3 Prima e mantenha premido o botao j / DEL durante 1 segundo ou (modo SLP) 20 ??????????? ??? ????? ?????? ?? ????????? ??? Voice Tracer. • ??????? ?? ?????? h ??? ????, ??? ? ??????? ??????????? ???????????? ?? ?????? l/ MENU ??? 1 ???????????? ? ** ???? ? ?????????? ????? ????????? ???? ???? ????? ??????????? mais para eliminar a estacao de radio predefinida. • Tempo de gravacao: 572 horas (modo SLP), 286 horas (modo LP), • ??????? ???????????? ?? ?????? k ???? ??? ???????? ???? ????????? ?? ????????? ??????, ??? ?? ????????? ???? ???? ??? ???????????. ??????????. 4.2 Carregar as pilhas 190 horas (modo SP), 143 horas (modo HQ), 47 horas (modo SHQ), D ?????????? ???????????, ??? ?? ?????????? ? ???????????? ???????? ???????. ??????? ?? ?????? h ????, ??? ?? ????????? ??? ????? E possivel carregar as pilhas recarregaveis LFH9154 Philips no 6 Reproducao 8.5 Gravar a partir de radio FM 6,4 horas (modo PCM) • ?? ?????????????? ???? ????????? ???????????? ????? ???/? ???????????. ??? ???????????? ???????. 8.4 ???????? ?????????????? ???????????? ??????? Voice Tracer. Quando este esta ligado a um computador, as pilhas • Taxa de amostragem: 44.1 kHz (modo PCM/SHQ), 22 kHz (modo ??????. • ??????? ?? ?????? b ???? ?? ???????? ??? ???????????, ??? ?? • ??? ?? ?????? ???????????? ???????????? ??????????, ? recarregaveis sao carregadas automaticamente. Um ciclo de recarga 1 Prima o botao INDEX / a com o gravador parado para seleccionar 1 Sintonize manualmente uma estacao de radio ou inicie a reproducao HQ), 16 kHz (modo SP/LP/SLP) • ????????? ??? ????????? ?? ??? ????????? ?? ??????????????? ????????????? ??? ??? ??????. ??????? ??????????? ?? ??????? ???? ??????????? ? ??????? 1 ??????? ?? ?????? INDEX / a ???? ? ??????? ??????????? 10 ????????? ??????????????? completo demora cerca de 2,5 horas. a pasta pretendida. de uma estacao de radio predefinida. • Reproducao de musica: Formato de compressao: .mp3, .wma • ?? Voice Tracer ??? ?????? ??????? ????????. ?? Voice Tracer • ? ???????? ??????? ??????? ?? ???? ?????? ????? 99, ??? ???????? ?????????? ?????????? ???? ???????? ?? ?????? h ? b. ????????? ?? ????? ??????????? ??????????, ??? ???????? 2 Prima o botao h ou b para seleccionar o ficheiro a reproduzir 2 Prima o botao g para iniciar a gravacao. Taxa de bits MP3: 8 – 320 kbps • Taxa de bits WMA: 48 – 320 kbps ????????? ?? ??????? ????? ??? ????? ???????? ??? ?????????. ???????????? 396 ??????? (99 ?????? x 4 ????????). ?????? ?????????? ??? ?????? ??????????? ???????????. ? ??????? ??? Voice Tracer ???????????????? ??? ??? ????????? D Notas (consulte o ponto 6.1.1 para mais informacoes sobre seleccionar 3 Para parar a gravacao, prima o botao j / DEL. (44 kHz), 64 – 192 kbps (48 kHz), estereo • Sem suporte DRM • ?? ????????? ?????????????? ??? Voice Tracer, ????????? ??? • ?? ? ???????? ??????????? ??????? ?? ????????? ???????????? 6.1.2 ??????, ????? ??? ???????? ???????? ???????????? 2 ???? ????? ??????????? ???????????, ??????? ?? ?????? h ? ????????? ?? ????? ?????????? ??????????????. ????????? ?? ????? • Nao e possivel carregar pilhas diferentes das pilhas LFH9154 Philips um ficheiro). • Sintonizador/recepcao (LFH0882): Bandas do sintonizador: FM ????????? ??? ??????????? ??? ????. ? ???????????? 396 ??????, ???? ? ?????????? ??????????? ??? ??????? ???????????? ?? ?????? k ??? 1 ???????????? ? ?? ?????? b ??? ?? ????????? ??? ????????????? ??????????? ???????? ???? ????? ???????? ???????? ???????????????, ???? ??? fornecidas. 3 Prima o botao k. O tempo de reproducao e mostrado no visor e estereo • Intervalo de frequencias: 87.5 – 108 MHz • Numero de • ??????????????? ?? ??????? ??????????? ???? ??? ??? ??????????? ? ???????‘FULL’. ????????? ????????? ???????????? ? ???????????, ??? ???????? ?????? ?????????, ??????? ??? ?????? ?????? ??? ?????????? ?? ??????????. ???????? ??? Voice Tracer ???. • Carregue completamente as pilhas antes da primeira utilizacao. o LED verde 18 acende-se. canais predefinidos: 20 • Sintonizador digital automatico ????????????? ??? ?????????. ?? ?????????? ??? ????????? ??? ?????????? ??? ?? ??????????. ????????? ????????????. 31 3 ??????? ???????????? ?? ?????? j / DEL ??? 1 ???????????? • O computador tem de estar ligado para o carregamento das pilhas. 4 Regule o volume com os botoes + e –. 9 Personalizar as definicoes • Altifalante: dinamico redondo de 30 mm incorporado • potencia de ? ??????? ??????????? ????????? ?? ??????????, ????????? ?? • ??? ????????? ??? ????????? ???? ??? ??????????. ???????????, ? ???????????, ??? ?? ?????????? ??? ????????????? 1 ???????? ?? Voice Tracer ?? ?????????? ??????????????? ?? • Se a porta USB do computador nao fornecer capacidade de energia 5 Para parar a gravacao, prima o botao j / DEL. O tempo total de saida: 110 mW ??????????? ?? ??????. ????????? ?? ????????? ????? ??? ??????? ???????????. 6.1.3 ????????? ??????????? ??????. ??????? USB ??? ?????????. suficiente, desactive a funcao de carregamento (consulte o ponto 9 reproducao do ficheiro actual e mostrado no visor. O menu esta disponivel com o gravador parado e com a radio • Condicoes de funcionamento: Temperatura: 5° – 45° C • • ? ??????? ????????? ??????????? ???? ?? ????????? ????? ?????? • ?? ????????? ?? ???????????????? ?????????? ??? ?????? ??????? ???????????? ?? ?????? h ? ?? ?????? b ???? ?? 2 ????????? ??? ??????????? ?????? ??????????????? ??? para mais informacoes) e utilize um carregador de pilhas externo. 6 Prima o botao k de novo para continuar a reproducao a partir da sintonizada. Os itens de menu disponiveis diferem consoante esteja Humidade: 10% – 90% ??????. ??????? ????????, ?????????????? ??? ????????? ?????? ???????? ??? ????????????, ??? ??????? ?????? ???? ?? ?????? 8.5 ?????????? ??? ????????? FM ?? ??????? Voice Tracer ??? ????????? ??? ??? ??????????? posicao anterior. numa pasta de voz, numa pasta de musica ou no modo de radio. • Tipo de pilhas: duas pilhas AAA alcalinas Philips (LR03 ou R03) ou • ?? ? ????????????? ??? ????????? ????????? ??????????? ??? 2 ??????????. ? ???? ?? ???? ??? ?????? ??????. ?????? ?? ??????, ??? ?? ????????? www.philips.com ??? ??????????? ?? ?????? ??? ?????? 4.3 Ligar/desligar pilhas recarregaveis LFH9154 Philips ?????, ????????? ?? ?????????? ??????? ??? ????. • ?? Voice Tracer ???? ?????????? ??????????? ?? ?????????? ?????????? ??? ??????????? ???? ?????????? ????????. 1 ????????????? ??????????? ?? ??? ??????????? ?????? ? ???????? ??? Voice Tracer. D Notas 1 Prima o botao l/ MENU com o gravador parado para abrir o menu. • Duracao das pilhas (Modo LP): 50 horas ???? ???????? USB, ????? ????? ??? ?????????. ???????? ?? ???????? ???? ????????????? ??????????? ??????. 3 ??????????? ?? Voice Tracer ??? ??? ??????????. ?? 1 Para ligar, prima o botao k ate o visor mostrar HELLO (Ola). • A funcao de retroceder automatico reproduz automaticamente os 2 Prima o botao h ou b para seleccionar um item de menu 39 . • Dimensoes do aparelho (L ? P ? A): 40 ? 18,4 ? 108 mm ??????? ??????????? ?? ??????????, ??????????????? ?? 6.1.4 ????????? ??? ?????????? ???? ?? ?????? 2 ??????? ?? ?????? g, ??? ?? ????????? ? ??????????. ?????????????? ???????????? ???????? ??? ???? ??????????? ? 2 Para desligar, prima o botao k com o gravador parado ate o visor ultimos 3 segundos da gravacao sempre que retomar a reproducao. 3 Prima o botao k para entrar num submenu. • Peso: 80 g incluindo pilhas ??????? USB ??? ??????? ?? ?????? g ??? 1 ???????????? ? ??????? ?? ?????? h ? ?? ?????? b ???? ?? ???????? ??? 3 ??? ?? ????????? ??? ??????????, ??????? ?? ?????? j / DEL. ??????????, ?? Voice Tracer ????????????????. mostrar BYE (Adeus). • Quando os auscultadores estao ligados a entrada EAR 1 , o altifalante 4 Prima o botao h ou b para alterar uma definicao. • Requisitos do sistema: Windows 7/Vista/XP/2000, Mac OS X, Linux ???????????, ??? ?? ?????????? ??? ??????????. ????????????, ??? ????????? ???? ???? ??? ??????? ??? do gravador fica desligado. 5 Prima o botao k para confirmar a seleccao. • Porta USB livre ???????????? ? ?????????? ???? ?? ?????? ??? ??????? ??????, 4.4 Funcao de suspensao 6 Prima o botao l/ MENU para sair do ecra de definicoes em que se ??????????. ?? ?? ?????? ???????? ???????????? ??????????, ? Quando o interruptor HOLD (Suspender) 17 estiver na posicao de encontra. ??????????? ?????? ??? ?????? ?? ??????. suspensao, todos os botoes do aparelho ficam inactivos. A mensagem On Hold (Suspenso) sera mostrada durante breves momentos no visor e depois este desliga-se. Desbloqueie o Voice Tracer deslocando o interruptor HOLD (Suspender) para a posicao Off.
Romana 4.7 Utilizarea Voice Tracer cu un calculator 6.1.2 Redare lenta, rapida, normala INPUT V (voce) Utilizati setarea L (line-in) atunci cand inregistrati 1 2 3 19 20 24 26 29 30 35 36 Declaration of Conformity L (line-in) din surse audio externe prin mufa line-in a Ca dispozitiv USB de stocare in masa, Voice Tracer ofera o metoda Apasati si tineti apasat butonul k timp de 1 secunda sau mai mult pentru a schimba intre functiile de redare normala, lenta si rapida. 31 aparatului. comoda de a salva, de a face copii de siguranta si de a muta fisiere. Voice Tracer se conecteaza la un calculator printr-o conexiune USB si nu DIVIDE* Off Caracteristica de separare automata inregistreaza f Tested to comply necesita instalarea unui software special. Voice Tracer este afisat in mod 6.1.3 Cautare 30 min. automat intr-un fisier nou la fiecare 30 sau 60 with FCC standards automat ca driver amovibil, permitandu-va, intr-un mod foarte simplu, sa Apasati si tineti apasat butonul h sau b in timpul redarii pentru 60 min. de minute. Aceasta permite gasirea, editarea si FOR HOME OR OFFICE USE 1 Bine ati venit! trageti sau sa puneti fisiere catre unitate si din interiorul acesteia. 23 a derula inainte sau inapoi in fisierul curent la viteza mare. Eliberati arhivarea mult mai rapida a inregistrarilor de lunga butonul pentru a relua redarea la viteza selectata. durata, cum ar fi sedintele si conferintele. 18 Model Numbers: LFH0862, LFH0867, LFH0868, LFH0882, Felicitari pentru achizitia facuta si bine ati venit la Philips! Pentru a D Nota LIGHT On Afisajul va ramane luminat pentru cateva secunde LFH0885, LFH0888, LFH0895 beneficia din plin de asistenta pe care Philips o pune la dispozitia • Nu deconectati Voice Tracer in timp ce fisierele sunt transferate de pe 6.1.4 Derulare inapoi si derulare inainte Off dupa apasarea unui buton. 21 22 27 31 32 37 38 Trade Name: Philips Digital Voice Tracer dvs., vizitati site-ul nostru pentru informatii referitoare la manuale aparat sau pe acesta. Daca luminita de indicare inregistrare/pornire 18 Apasati butonul h sau b in timpul redarii pentru a derula inapoi la BEEP On Aparatul ofera reactie sonora la operatiile cu 17 Responsible Party: Philips Speech Processing de utilizare, la descarcari de software, precum si pentru informatii licareste in culoarea portocalie, datele sunt inca in proces de transferare. inceputul fisierului ascultat, respectiv inainte la urmatorul fisier. Daca Off butoanele sau la erori. 4 Address: 64 Perimeter Center East, referitoare la garantie si altele: www.philips.com. • Nu formatati driverul aparatului Voice Tracer pe un calculator. fisierul contine semne de marcare, redarea incepe din acel punct. CLOCK DD:MM:YY Daca data si ora sunt setate, informatiile din 16 5 6 Atlanta, GA 30346, USA 12/24 H momentul in care fisierul este inregistrat sunt Telephone number: 888-260-6261 1.1 Caracteristicile produsului 4.8 Conectati dispozitivul de control de la distanta 6.2 Caracteristici de redare HH:MM:SS stocate automat pentru fiecare fisier. 7 25 Website: www.philips.com/dictation • Inregistrare in formatul comun MP3 (LFH0885 exclusiv) Puteti seta Voice Tracer pentru a asculta fisiere, cu redare repetata sau TIMER Off Un sincronizator poate fi setat pentru a incepe 8 • Transferati rapid inregistrari de voce si date utilizand conexiunea USB Dispozitivul de control de la distanta poate fi utilizat pentru a incepe sau aleatoare. V inregistrarea la un moment specificat. Meniul 15 This device complies with part 15 of FCC rules. Operation is 2.0 de mare viteza pentru a opri provizoriu inregistrarea, pentru a adauga un fisier nou si CH ofera trei optiuni: Off (Oprit), V (= inregistrare 14 subject to the following two conditions: • Sistemul de „zoom” al microfonului se focalizeaza pe sunetul din fata pentru a adauga un semn de marcare. 6.2.1 Repetarea unei secvente prin sincronizator, cu utilizarea microfonului) si 1) This device may not cause harmful interference. Voice Tracer, reducand in acelasi timp captarea sunetelor laterale si CH (=inregistrare prin sincronizator de la radioul 13 9 23 28 33 34 39 2) This device must accept any interference received, including din spate. 1 Conectati dispozitivul de control de la distanta la mufa EAR cu care 1 Pentru a repeta sau a reda continuu, apasati butonul INDEX / a la incorporat/LFH0882 exclusiv). Indicati ora de 12 interference that may cause undesired operation. • Inregistrare activata prin voce pentru luarea de notite fara a utiliza este prevazut aparatul Voice Tracer 24 . punctul de pornire selectat. REP. A – B pe ecran 32 . incepere, durata inregistrarii (30/60/120 minute/ mainile 2 Apasati din nou butonul INDEX / a la punctul final selectat. Incepe nelimitat), un dosar si canalul de radio care • Stocarea USB in masa asigura compatibilitate maxima 4.9 Utilizati statia de conectare (LFH0868/LFH0888 exclusiv) secventa setata pe repetare. trebuie inregistrat. 11 • Inregistrare imediata „one-touch”, de la starea oprit direct la modul Statia de conectare poate fi utilizata pentru incarcarea fisierelor de pe 3 Apasati butonul j / DEL pentru a opri redarea sau apasati butonul ALARM Off Utilizati Voice Tracer ca ceas cu alarma mobil. 10 c f b g a inregistrare Voice Tracer pe un calculator si pentru reincarcarea bateriilor. 25 INDEX / a pentru a reveni la modul de redare normala. b Alegeti modul de alarma (b = beep, F = redare • Delectati-va cu functia de redare a muzicii, care suporta formate MP3 F fisier) si indicati ora de incepere si fisierul care ?i WMA 1 Legati statia de conectare la un calculator prin intermediul cablului 6.2.2 Repetarea unui fisier sau dosar / mod de redare aleatorie trebuie activat. USB pus la dispozitie. AUTO OF 5 Voice Tracer se opreste automat dupa 5 sau 15 2 Introduceti aparatul Voice Tracer in slotul pentru conectare al statiei 1 Apasati si tineti apasat butonul INDEX / a timp de 1 secunda sau 15 minute de inactivitate. de conectare. mai mult, in timpul redarii, pentru a schimba intre modurile de CHARGE On In momentul in care functia de incarcare este 4.3 Использование Voice Tracer в качестве музыкального 5.4 Создание индексной метки DIVIDE* Off Если используется функция автоматического • Тип батарей: две алкалиновые батареи Philips AAA (LR03 или 2 Important ascultare (repeta fisier, repeta dosar, dosar aleatoriu sau redare Off pornita, bateriile reincarcabile se incarca in mod Русский проигрывателя Индексные метки позволяют отметить определенные моменты 7 Удаление одного файла, всех файлов в 30 min. разбиения, каждые 30 или 60 минут создается R03) или аккумулятора Philips LFH9154 normala). 33 automat atunci cand aparatul Voice Tracer este записи для дальнейшего использования. 60 min. новый файл и запись осуществляется именно в • Срок службы батарей (режим LP): 50 часов 2.1 Siguranta Pictograma Semnificatie conectat la un calculator. Pentru mai multe 1 Чтобы включить проигрыватель, нажмите и удерживайте кнопку папке, индексных меток в файле него. Благодаря этому значительно упрощается • Размеры (Ш ? Г ? В): 40 ? 18,4 ? 108 мм • Pentru a evita producerea unui scurtcircuit, nu expuneti produsul la 5 Inregistrare REP. FILE Asculta un fisier in mod de redare repetata informatii, a se vedea capitolul 4.2. k, пока на экране не появится сообщение HELLO. 1 Чтобы добавить индексную метку, нажмите в режиме записи поиск, редактирование и архивирование • Масса: 80 г (с батареями) ploaie sau apa. REP. FOLDER Asculta toate fisierele din cadrul dosarului in modul FORMAT Yes Stergeti toate fisierele din aparat, inclusiv statiile 2 Чтобы выключить проигрыватель, нажмите кнопку k, когда кнопку INDEX / a. Появится номер метки, который будет 1 Для выбора нужной папки нажмите кнопку INDEX / a, когда длинных записей, например записей собраний • Требования к ОС: Windows 7/Vista/XP/2000, Mac OS X, Linux • • Nu expuneti aparatul la caldura excesiva cauzata de echipamente de 5.1 Inregistrare cu microfonul intern de redare repetata No radio programate. Transferati toate fisierele 1 Добро пожаловать проигрыватель остановлен, и удерживайте ее, пока на экране не отображаться в течение одной секунды 29 . процесс записи остановлен. или лекций. свободный порт USB incalzire sau de lumina directa a soarelui. FOLDER SHUF Asculta toate fisierele din cadrul dosarului in modul importante pe un calculator inainte de a formata появится сообщение BYE. 2 Нажмите кнопку j / DEL и удерживайте ее не менее одной LIGHT On Если установлен параметр On (включено), • Protejati cablurile astfel incat acestea sa nu se indoaie, mai ales la mufe 1 Apasati butonul INDEX / a, in timp ce aparatul este oprit, pentru a de redare aleatorie aparatul. Поздравляем с покупкой и приветствуем вас в мире Philips! Чтобы D Примечания секунды. На экране появится сообщение DELETE 34 . Off после нажатия какой-либо кнопки экран будет si la locul in care acestea ies din unitate. selecta fisierul dorit. 26 VER Afisare a versiunii firmware si a datei versiunii. более эффективно пользоваться поддержкой компании Philips, 4.4 Использование переключателя Hold для блокировки • Значок показывает, что запись содержит индексные метки. 3 Нажмите кнопку h или b, чтобы выбрать вариант удаления: светиться еще в течение нескольких секунд. • Copiati fisierele. Philips nu isi asuma raspunderea pentru nicio pierdere 2 Apasati butonul g pentru a incepe inregistrarea. Indicatorul D Nota SPLIT* Yes Impartiti un fisier mare in doua fisiere separate, посетите веб-узел www.philips.com, содержащий руководства всех кнопок • Для каждого файла можно установить до 32 индексных меток. 35 BEEP On Voice Tracer издает звуковые сигналы при de date. inregistrare/pornire 18 licareste in culoarea rosie. Indreptati Modul de redare aleatorie poate fi utilizat doar in dosarul M (muzica). No astfel incat acestea sa poata fi arhivate sau пользователей, загружаемые программные продукты, информацию о Если переключатель HOLD 17 установлен в положение Hold, все Символ Значение Off возникновении ошибок и при нажатии кнопок. microfonul intern 3 in directia sursei de sunet. transferate cu usurinta prin e-mail sau astfel incat гарантийных обязательствах и другие сведения. кнопки на устройстве будут заблокированы. На экране появится 5.5 Использование функции зуммирования FILE Удаление одного файла CLOCK DD:MM:YY При создании каждого файла сведения о дате и 2.1.1 Protejarea auzului 3 Pentru a intrerupe inregistrarea, apasati butonul g. Indicatorul acea parte a fisierului sa poata fi stearsa. Pentru a надпись On Hold, после чего он отключится. Чтобы разблокировать При включенной системе зуммирования микрофон воспринимает FOLDER Удаление всех файлов в папке 12/24 H времени создания сохраняются автоматически, Respectati urmatoarele instructiuni atunci cand utilizati inregistrare/pornire va licari, iar PAUSE va aparea pe ecran 27 . imparti un fisier, porniti si opriti in pozitia la care 1.1 Основные возможности продукта Voice Tracer, передвиньте переключатель HOLD в положение Off. только фронтальный звук, не реагируя на шумы сзади, справа или Удаление всех индексных меток в файле HH:MM:SS если на устройстве заданы дата и время. castile: Apasati din nou butonul g pentru a relua inregistrarea. 7 Stergerea trebuie realizata divizarea, dupa care deschideti • Делайте записи в популярном формате MP3. слева. Эта функция может быть полезной при записи лекций, TIMER Off Этот пункт меню позволяет в заданное время • Ascultati la niveluri de volum potrivite, pentru durate de timp 4 Pentru a opri inregistrarea, apasati butonul j / DEL. meniul SPLIT. • Быстро передавайте записи и данные, используя 4.5 Установка даты и времени докладов и других выступлений, когда говорящий находится на 4 Нажмите кнопку k V автоматически начать запись с микрофона rezonabile. 1 Apasati butonul INDEX / a, in timp ce aparatul este oprit, pentru a AUTO** Yes Cautare automata a unei statii radio si stocare a высокоскоростной протокол USB 2.0. После первой установки аккумуляторов вам будет предложено расстоянии от диктофона. Для достижения более высокого качества 5 Нажмите кнопку h или b, чтобы выбрать файл, папку или CH (значение V) или радиоприемника (значение • Fiti atent(a) sa nu reglati volumul la un nivel mai mare decat cel la care D Nota selecta dosarul dorit. No maximum 20 de statii la presetari. • Благодаря системе зуммирования микрофон воспринимает только установить дату и время. записи предусмотрено два режима системы зуммирования, которые файл с индексными метками для удаления 36 . CH, только для модели LFH0882). Укажите auzul dvs. se poate adapta. • Setati functia de activare vocala si modul de inregistrare dorite inainte 2 Apasati si tineti apasat butonul j / DEL timp de 1 secunda sau mai OUTPUT EP Schimbare intre iesirea pentru casti (EP) si cea фронтальный звук, не реагируя на шумы сзади, справа или слева. различаются параметрами звука и расстояния. 6 Нажмите кнопку k еще раз. Появится сообщение N («Нет») 37 . время начала записи, длительность (30, 60, • Nu reglati volumul la un nivel atat de mare incat sa nu auziti ce se de a incepe sa inregistrati (Pentru informatii suplimentare, a se vedea mult. DELETE apare pe ecran 34 . ** SP pentru difuzor (SP) in modul radio. • Режим голосового управления записью освободит ваши руки. 1 На экране появится надпись ‘CLOCK’ 21 . Нажмите кнопку k. 7 Нажмите кнопку h или b, чтобы выбрать значение Y («Да») 120 минут или All — все), а также папку и intampla in jurul dvs. capitolul 9). 3 Apasati butonul h sau b pentru a selecta o optiune de stergere: • Полностью совместимый внешний USB-накопитель. Индикатор года начнет мигать 22 . 1 С помощью кнопки l/ MENU во время записи можно 38 . радиостанцию для записи. • Trebuie sa fiti atent(a) sau sa intrerupeti temporar utilizarea in situatii • Efectuati o inregistrare de testare pentru a va asigura ca setarile Voice 35 * Aceasta functie nu este disponibila in dosarul M (muzica). • Мгновенная запись одним нажатием кнопки – переход из 2 Нажимая кнопки h и b, выберите год. переключаться между режимами зуммирования звука в такой 8 Нажмите кнопку k, чтобы подтвердить удаление. ALARM Off Позволяет использовать устройство Voice potential periculoase. Tracer sunt corecte. Pictograma Semnificatie ** Aceasta functie este disponibila numai in modul radio. выключенного состояния в режим записи. 3 Нажмите кнопку k, чтобы перейти к выбору месяца. последовательности: Выключено > Зум 1 > Зум 2> Выключено 30 . b Tracer в качестве будильника. Выберите тип • Nu utilizati casti in timp ce folositi un vehicul cu motor, bicicleta sau • Apasati si mentineti apasat k in timpul inregistrarii pentru ca aparatul FILE Sterge un singur fisier • Возможность воспроизведения музыкальных файлов в форматах 4 Повторяя шаги 2 и 3, аналогичным образом задайте месяц, D Примечание F сигнала (b — гудок, F — воспроизведение skateboard-ul etc. Acest lucru poate duce la crearea unui pericol in sa afiseze timpul ramas pentru inregistrare. FOLDER Sterge toate fisierele dintr-un dosar MP3 и WMA. день, время и выберите формат отображения времени (12- или D Примечание Файлам будут автоматически присвоены последовательные номера. файла) и воспроизводимый файл, задайте время trafic si este ilegal in multe zone. • Apasati b in timpul inregistrarii pentru a crea un nou fisier. Sterge toate semnele de marcare dintr-un fisier 24-часовой). Функция зуммирования звука оптимизирована для внутреннего и сигнала. • Numarul maxim de fisiere in fiecare dosar este de 99, avand o 10 Actualizare a versiunii firmware внешнего микрофонов (последний входит в комплект поставки AUTO OF 5 Voice Tracer автоматически выключается после Important (pentru modele furnizate cu casti): capacitate totala de 396 de fisiere (99 fisiere x 4 dosare). 4 Apasati butonul k. D Примечание модели LFH0885). 15 5 или 15 минут бездействия. Philips garanteaza respectarea valorii maxime a presiunii acustice a • Daca timpul de inregistrare depaseste capacitatea disponibila sau daca 5 Apasati butonul h sau b pentru a selecta fisierul, dosarul sau Produsul dvs. Voice Tracer este controlat de un software integrat, 2 Важные сведения Дату и время в любой момент можно изменить, используя 8 Режим радио (только для модели LFH0882) CHARGE On Если включена функция зарядки, аккумуляторы playerelor audio, astfel cum este stabilita aceasta de catre organismele numarul de fisiere ajunge la 396, inregistrarea se opreste, iar mesajul fisierul care contine semnele de marcare care trebuie sterse 36 . denumit firmware. Este posibil ca versiuni noi ale software-ului integrat возможности меню. Более подробные сведения см. в разделе 9. Off автоматически начинают заряжаться при de reglementare relevante, insa numai pentru modelul original al castilor “FULL” va fi afisat. Stergeti cateva inregistrari sau mutati-le pe un 6 Apasati din nou butonul k. N (Nu) este afisat 37 . sa fi fost lansate pe piata ulterior achizitionarii de catre dumneavostra 2.1 Для безопасного и правильного использования 1 Подключите наушники. Наушники, входящие в комплект подключении устройства Voice Tracer к ПК. furnizate. In cazul in care aceste casti necesita inlocuire, va recomandam calculator. 7 Apasati butonul h sau b pentru a selecta Y (Da) 38 . a Voice Tracer. • Во избежание коротких замыканий не подвергайте изделие 4.6 Отображение информации на экране 6 Воспроизведение поставки, играют роль радиоантенны. Более подробные сведения см. в разделе 4.2. sa contactati furnizorul dvs. pentru a comanda un model Philips identic • Nu scoateti bateriile in timpul inregistrarii. Acest lucru poate duce la 8 Apasati butonul k pentru a confirma. воздействию влаги, избегайте его попадания под дождь. • Нажимая кнопку j / DEL, когда запись остановлена, можно 2 Нажмите кнопку l/ MENU и удерживайте ее не менее секунды, FORMAT Yes Удаление всех файлов на устройстве, включая cu cel original. functionarea cu intreruperi a aparatului. 1 Conectati Voice Tracer la un calculator utilizand cablul USB pus la • Берегите продукт от сильного нагрева, вызванного воздействием переходить к просмотру следующего типа сведений. При этом 1 Для выбора нужной папки нажмите кнопку INDEX / a, когда чтобы войти в режим радио. No данные о радиостанциях. Перед выполнением • Daca inregistrati pentru o perioada indelungata de timp, inlocuiti D Nota dispozitie. прямых солнечных лучей или соседством с нагревательными сведения на экране отображаются в следующем порядке: длина процесс записи остановлен. этой операции необходимо скопировать все 2.2 Aruncarea produsului vechi bateriile inainte de a incepe. Numerele dosarelor secventiale sunt redistribuite in mod automat. 2 Descarcati versiunea firmware actualizata pentru modelul dvs. Voice приборами. воспроизводимой записи > текущее время > текущая дата > 2 Нажмите кнопку h или b, чтобы выбрать файл для 8.1 Автоматический поиск радиостанций важные файлы на компьютер. • Produsul dvs. este creat si realizat din materiale si componente de • Voice Tracer poate functiona in timp ce este alimentat printr-un cablu Tracer de pe www.philips.com si salvati fisierul in directorul radacina • Не допускайте защемления кабелей, особенно около вилок и в оставшееся время записи > время записи текущего файла > дата воспроизведения (подробные сведения о выборе файлов см. в VER Отображение версии микропрограммы и даты calitate superioara care pot fi reciclate si reutilizate. USB, fara a epuiza bateria. Conectati aparatul la un calculator utilizand al Voice Tracer. месте выхода из устройства. записи текущего файла. разделе 6.1.1). 1 В режиме радио нажмите кнопку l/ MENU, чтобы открыть меню. выпуска. • Atunci cand acest simbol, indicand un recipient cu rotile taiat, un cablu USB si apasati butonul g timp de 1 secunda sau mai mult 3 Deconectati Voice Tracer de la calculator. Software-ul integrat • Архивируйте свои файлы. Компания Philips не несет • Чтобы просмотреть оставшееся время записи в режиме записи, 3 Нажмите кнопку k. Загорится зеленый светодиодный 2 С помощью кнопок h или b выберите значение AUTO. SPLIT* Yes Функция позволяет разделить один este atasat la un produs, se indica faptul ca produsul este pentru a incepe sa inregistrati. 8 Mod radio (LFH0882 exclusiv) este actualizat in mod automat; in momentul in care procesul este ответственности за потерю данных. нажмите и удерживайте кнопку k. индикатор 18 , а на экране появится время воспроизведения. 3 Нажмите кнопку k еще раз — на экране появится символ N No большой файл на два, которые могут быть acoperit de Directiva Europeana 2002/96/CE. finalizat Voice Tracer se va opri. 4 Настройте громкость с помощью кнопок + и –. (Нет). заархивированы, переданы по электронной • Informati-va in legatura cu sistemul de colectare separata a deseurilor 5.2 Inregistrare cu un microfon extern 1 Conecteaza castile. Castile puse la dispozitie functioneaza ca antena 2.1.1 Защита органов слуха 4.7 Использование Voice Tracer с компьютером 5 Чтобы остановить воспроизведение, нажмите кнопку j / DEL. На 4 С помощью кнопок h или b выберите значение Y (Да). почте или удалены по отдельности. de echipamente electrice si electronice din zona dvs. Pentru a inregistra cu un microfon extern, conectati microfonul la mufa radio. При использовании наушников соблюдайте следующие Являясь устройством хранения данных с интерфейсом USB, экране отобразится общее время воспроизведения текущего 5 Нажмите кнопку k, чтобы подтвердить выбор. Будет Чтобы разделить файл, остановите его • Actionati in conformitate cu regulile locale si nu aruncati produsele acestuia si urmati aceeasi procedura ca si pentru microfonul intern. 28 2 Apasa si tine apasat butonul l/ MENU timp de 1 secunda sau mai правила. Voice Tracer предоставляет удобные средства хранения, файла. произведен автоматический поиск радиостанций и сохранение воспроизведение в позиции, где будет vechi impreuna cu deseurile menajere obisnuite. Aruncarea corecta mult pentru a seta modul radio. 11 Detectarea si remedierea defectiunilor • Осуществляйте прослушивание с умеренной громкостью и в архивации и переноса файлов. Voice Tracer подключается к 6 Чтобы продолжить воспроизведение с предыдущей позиции, их частот. Устройство позволяет сохранять сведения о 20 проходить граница между файлами, и задайте a produselor vechi va contribui la prevenirea eventualelor consecinte 5.3 Editarea unui fisier inregistrat in prealabil течение разумных периодов времени. компьютеру с помощью интерфейса USB и не требует установки повторно нажмите кнопку k. радиостанциях. для параметра SPLIT значение Yes. negative asupra mediului si asupra sanatatii umane. Puteti edita un fisier inregistrat in prealabil prin suprascrierea partiala a 8.1 Cautarea automata a statiilor radio Aparatul meu nu poate fi pornit • Не устанавливайте чрезмерно высокий уровень громкости. специализированного ПО и драйверов. При подключении Voice AUTO** Yes Автоматический поиск радиостанций и • Bateriile (inclusiv bateriile reincarcabile interne) contin substante inregistrarii sau prin adaugarea unei inregistrari la sfarsitul fisierului. • Bateriile pot fi descarcate sau introduse incorect. Inlocuiti bateriile cu • Не устанавливайте уровень громкости, мешающий слышать Tracer автоматически отображается как съемный носитель, позволяя D Примечания 8.2 Поиск радиостанций вручную No сохранение сведений о них (до 20 станций). care pot polua mediul. Toate bateriile trebuie aruncate la un punct de 1 Apasati butonul l/ MENU, in timp ce aparatul este setat pe modul unele noi si verificati daca acestea sunt introduse corect. окружающие звуки. переносить файлы на устройство и с устройства. 23 • Если включена функция автовозврата, каждый раз при OUTPUT EP Выбор выходного устройства в режиме радио: colectare oficial. 1 Setati modul de editare dorit (suprascrieti sau adaugati), inainte de radio, pentru a deschide meniul. • В потенциально опасных ситуациях необходимо использовать возобновлении воспроизведения предыдущие три секунды записи 1 Для точной настройки нажимайте кнопки h и b. ** SP наушники (EP) или динамик (SP). a incepe inregistrarea (pentru informatii suplimentare, a se vedea 2 Apasati butonul h sau b pentru a selecta AUTO. Aparatul meu nu inregistreaza nimic наушники с осторожностью или временно отказаться от их D Примечания будут воспроизводиться повторно. 2 Чтобы найти следующую станцию с достаточно сильным capitolul 9). 3 Apasati din nou butonul k. N (Nu) este afisat. • Aparatul poate fi setat pe modul HOLD. Puneti printr-o miscare de использования. • Не отключайте Voice Tracer от компьютера во время копирования • Если к разъему EAR 1 подключены наушники, динамик сигналом, нажмите и удерживайте кнопку h или b. * Функция недоступна для папки M (музыка). 2 Apasati butonul INDEX / a, in timp ce aparatul este oprit, pentru a 4 Apasati butonul h sau b pentru a selecta Y (Da). alunecare comutatorul HOLD pe pozitia Off. • Не пользуйтесь наушниками при управлении механическими файлов с компьютера или на компьютер. В процессе передачи автоматически отключается. 3 Чтобы сохранить радиостанцию с найденной частотой, нажмите ** Функция доступна только в режиме радио. 3 Produsul dvs. Digital Voice Tracer selecta fisierul dorit. 5 Apasati butonul k pentru a confirma. Radioul cauta automat statii • Numarul maxim de inregistrari poate fi atins sau capacitatea de транспортными средствами или велосипедами, а также при езде данных индикатор записи и воспроизведения 18 мигает кнопку k. 3 Apasati butonul h sau b pentru a selecta fisierul in care trebuie radio si salveaza frecventele in presetari. Radioul poate stoca pana la inregistrare este cea maxima. Stergeti cateva inregistrari sau mutati на скейтах и т. п.: это может стать причиной ДТП и противоречит оранжевым цветом. D Примечания относительно использования Voice Tracer в 4 Отрегулируйте громкость с помощью кнопок + и –. 1 Mufa casti, mufa de conectare 11 Compartiment pentru baterii adaugate date (pentru informatii suplimentare privind selectarea 20 de statii radio la presetari. inregistrarile pe un aparat extern. законодательству многих стран и регионов. • Не форматируйте накопитель Voice Tracer на компьютере. качестве проигрывателя музыки 5 Чтобы выйти из режима радио, нажмите кнопку l/ MENU и de la distanta 12 Pornire/oprire, asculta/pauza, unui fisier, a se vedea capitolul 6.1.1). • Voice Tracer поддерживает музыкальные файлы в форматах WMA удерживайте ее не менее секунды. 10 Обновление микропрограммы 2 Mufa microfon, mufa line-in viteza de ascultare 4 Porniti sau inaintati pana la pozitia in care trebuie adaugate date si 8.2 Cautare manuala a unei statii radio Nu aud nimic din difuzor Внимание (для моделей, оснащенных наушниками) 4.8 Подключение пульта ДУ (только для модели LFH0885) и MP3. Такие файлы можно скопировать с ПК в папку музыкальных 3 Microfon intern 13 Meniu, radio FM, functie de apasati butonul k pentru a intrerupe redarea. • Castile pot fi conectate. Inlaturati castile. При условии использования оригинальных наушников, поставляемых С помощью пульта ДУ можно приостанавливать и возобновлять файлов на устройстве Voice Tracer. Файлы с защитой от D Примечание Voice Tracer работает под управлением встроенного ПО, 4 Marire volum „zoom” 5 Apasati butonul g. Indicatorul de inregistrare/pornire va licari, iar 1 Pentru ajustarea fina a frecventei, apasati rapid butonul h sau b. • Nivelul volumului este setat la minimum. Reglati volumul. в комплекте с устройством, компания Philips гарантирует воспроизведение, добавлять новые файлы или метки к ним. копирования (с использованием системы управления цифровыми Для переключения между стерео- и моноприемом сигналов называемого микропрограммой. После того, как вы приобрели 5 Inregistrare, pauza, pornire 14 Derulare rapida inapoi, mesajele OVER sau APPEND vor aparea pe ecran. 2 Pentru a cauta urmatorul semnal mai puternic, apasati si tineti соответствие максимальной громкости звука аудиопроигрывателя правами) не поддерживаются. нажимайте в режиме радио кнопку j / DEL. устройство Voice Tracker, могли быть выпущены новые версии 6 Derulare rapida inainte, selectare fisier, selectare meniu 6 Apasati din nou butonul g pentru a incepe inregistrarea. apasat h sau b. Nu pot asculta inregistrarile de pe reportofon требованиям соответствующих нормативов. При необходимости 1 Подключите пульт ДУ к разъему EAR устройства Voice Tracer 24 . • В папке с музыкальными файлами на устройстве Voice Tracer микропрограммы. selectare fisier, selectare meniu 15 Index, dosar, repeta Inregistrarea existenta va fi editata. 3 Apasati butonul k pentru a salva frecventa ca presetare. • Aparatul poate fi setat pe modul HOLD. Puneti printr-o miscare de замены оригинальных наушников рекомендуется заказать в торговой можно использовать двухуровневую структуру каталогов, при 8.3 Выбор сохраненной радиостанции 7 Oprire, afisare, stergere 16 Afisare 7 Apasati butonul j / DEL pentru a opri inregistrarea. 4 Reglati nivelul volumului utilizand butoanele + si –. alunecare comutatorul HOLD pe pozitia Off. сети модель наушников Philips, идентичную исходной. 4.9 Использование док-станции (только для моделей этом каждый из них может содержать до 199 объектов (файлов 1 Подключите Voice Tracker к компьютеру с помощью USB-кабеля, 8 Micsorare volum 17 Comutator Hold (asteptare) 5 Pentru a iesi din modul radio, apasati si tineti apasat butonul • Bateriile pot fi descarcate sau introduse incorect. Inlocuiti bateriile cu LFH0868 и LFH0888) и папок). 1 Для переключения между режимом поиска радиостанций и входящего в комплект поставки. 9 Difuzor 18 Indicator Inregistrare/pornire D Nota l/ MENU timp de 1 secunda sau mai mult. unele noi si verificati daca acestea sunt introduse corect. С помощью док-станции можно загружать файлы с устройства Voice • Чтобы открыть выбранный файл или папку, нажмите кнопку k. режимом прослушивания радио нажмите в режиме радио кнопку 2 Загрузите обновление микропрограммы для своей модели Voice 10 Mufa USB • Modul de inregistrare setat anterior al fisierului initial este valabil in • Nu s-a inregistrat nimic pana in acest moment. Verificati numarul de 2.2 Утилизация старых продуктов Tracer на ПК, а также заряжать аккумуляторы. 25 Чтобы перейти на один уровень выше, нажмите кнопку INDEX / a. INDEX / a. Tracer с веб-страницы www.philips.com и сохраните загруженный momentul editarii unei inregistrari. D Nota inregistrari. • Данный продукт произведен с использованием • Чтобы изменить режим эквалайзера, во время воспроизведения 2 Чтобы перейти к прослушиванию другой радиостанции из числа файл в корневой папке Voice Tracer. • Functia de editare a unei inregistrari nu poate fi utilizata in folderul M Apasati butonul j / DEL, in timp ce aparatul este setat in modul radio, высококачественных материалов и компонентов, которые могут 1 Подключите док-станцию к ПК с помощью USB-кабеля, нажмите кнопку g. Режимы переключаются в такой сохраненных, нажмите в режиме прослушивания радио кнопку 3 Процесс обновления микропрограммы начнется автоматически, (muzica). pentru a alege intre receptia stereo si mono. Aparatul meu nu poate fi oprit, intrerupt, pornit sau nu poate быть переработаны и использованы повторно. входящего в комплект. последовательности: Normal > Classic > Jazz > Rock > Pop > h или b. а по его завершении Voice Tracker отключится. 4 Incepeti sa inregistreze • Продукты, помеченные этим значком мусорной корзины на 2 Вставьте устройство Voice Tracer в разъем док-станции. Normal (Обычный > Классика > Джаз > Рок > Поп > Обычный). 3 Отрегулируйте громкость с помощью кнопок + и –. 5.4 Adaugarea marcajelor 8.3 Ascultarea unei statii radio presetate • Aparatul poate fi setat pe modul HOLD. Puneti printr-o miscare de колесах, соответствуют европейской директиве 2002/96/EC. 4 Чтобы выйти из режима радио, нажмите кнопку l/ MENU и 4.1 Introduceti bateriile Semnele de marcare pot fi utilizate pentru a indica anumite secvente alunecare comutatorul HOLD pe pozitia Off. • Ознакомьтесь с действующими в вашем регионе 6.1 Выбор режима воспроизведения удерживайте ее не менее секунды. Aparatul Voice Tracer functioneaza cu baterii reincarcabile Philips dintr-o inregistrare ca puncte de referinta. 1 Apasati butonul INDEX / a, in timp ce aparatul este setat in modul программами по сбору электрических и электронных продуктов. 11 Устранение неполадок LFH9154 sau cu baterii alcaline AAA. radio, pentru a alege intre modul pentru frecventa si cel pentru Nu aud nimic din casti • При утилизации продукта действуйте в соответствии с местным 5 Запись 6.1.1 Выбор файла и поиск индексной метки 8.4 Удаление из памяти сохраненной радиостанции 1 Apasati butonul INDEX / a, in timpul inregistrarii, pentru a adauga presetare. • Castile nu sunt conectate corespunzator. Conectati castile in mod законодательством. Не выбрасывайте данный продукт вместе с • Если процесс записи остановлен, для перехода в конец Устройство не включается 1 Inlaturati capacul de la compartimentul bateriilor printr-o miscare un semn de marcare. Numarul de marcare este afisat timp de o 2 In modul pentru presetare, apasati butonul h sau b pentru a corespunzator. бытовым мусором. Надлежащая утилизация старых продуктов 5.1 Запись с помощью встроенного микрофона файла нажмите кнопку b один раз. Чтобы перейти в начало 1 Для переключения между режимом поиска радиостанций и • Возможно, батареи разряжены или установлены неправильно. de alunecare. 19 secunda. 29 schimba pe o alta statie radio presetata. • Nivelul volumului este setat la minimum. Reglati volumul. предотвращает вредные последствия для окружающей среды и следующего файла, нажмите кнопку b еще раз. режимом прослушивания радио нажмите в режиме радио кнопку Установите новые батареи и проверьте правильность их 2 Asezati bateriile respectand polaritatea corecta, astfel cum este 3 Reglati nivelul volumului utilizand butoanele + si –. здоровья людей. 1 Для выбора нужной папки нажмите кнопку INDEX / a, когда • Если процесс записи остановлен, для перехода в начало INDEX / a. установки. indicat si introduceti capacul la loc. 20 D Nota 4 Pentru a iesi din modul radio, apasati si tineti apasat butonul • Батареи (включая встроенные аккумуляторы) содержат вещества, процесс записи остановлен 26 . файла нажмите кнопку h один раз. Чтобы перейти в конец 2 Чтобы выбрать другую радиостанцию из числа сохраненных для • Icoana indica faptul ca inregistrarea contine semne de marcare. l/ MENU timp de 1 secunda sau mai mult. которые загрязняют окружающую среду. Все батареи должны 2 Нажмите кнопку g, чтобы начать запись. Индикатор записи предыдущего файла, нажмите кнопку h еще раз. последующего ее удаления, нажмите в режиме прослушивания Не выполняется запись D Nota • Pot fi setate maximum 32 de semne de marcare per fisier. 12 Date tehnice сдаваться в официальные пункты сбора и утилизации. и воспроизведения 18 будет светиться красным цветом. • Если файл содержит индексные метки, при нажатии кнопок h радио кнопку h или b. • Возможно, устройство находится в режиме HOLD. Переместите • Nu introduceti baterii de tipuri si/sau de marci diferite. 8.4 Stergerea unei statii radio presetate Направьте встроенный микрофон 3 в сторону источника звука. или b осуществится переход к позиции, заданной одной из 3 Чтобы удалить сохраненную радиостанцию, нажмите кнопку переключатель HOLD в положение Off. • Scoateti bateriile daca nu veti utiliza produsul Voice Tracer pentru 5.5 Utilizati functia de „zoom” • USB: Mini USB 2.0 de mare viteza 3 Для приостановки записи нажмите кнопку g. Индикатор меток. j / DEL и удерживайте ее не менее секунды. • Возможно, достигнуто максимальное число записей или нет o perioada indelungata de timp. Bateriile care prezinta scurgeri pot Atunci cand functia de „zoom” este activa, microfoanele se focalizeaza 1 Apasati butonul INDEX / a, in timp ce aparatul este setat in modul • Microfon: 3.5 mm • impedanta 2.2 k? записи и воспроизведения начнет мигать, а на экране появится свободного места для записей. Удалите часть записей или deteriora produsul Voice Tracer. pe sunetul din fata Voice Tracer, reducand in acelasi timp captarea radio, pentru a alege intre modul pentru frecventa si cel pentru • Casti: 3.5 mm • impedanta 16 ? sau mai mult 3 Digital Voice Tracer сообщение PAUSE 27 . Чтобы возобновить запись, нажмите 6.1.2 Быстрое, медленное и обычное воспроизведение 8.5 Запись с FM-радио перенесите их на внешнее устройство. • In cazul in care Voice Tracer functioneaza cu intreruperi, scoateti sunetelor laterale si din spate. Aceasta functie este recomandata pentru presetare. • Afisare: LCD/segment • marime a ecranului in diagonala: 39 mm кнопку g . Для переключения между режимами быстрого, медленного и bateriile si introduceti-le din nou. inregistrarea conferintelor, a discursurilor si in alte situatii in care 2 In modul pentru presetare, apasati butonul h sau b pentru a • Microfon: Intern: stereo • Extern: stereo 1 Разъем для подключения 10 Разъем USB 4 Чтобы остановить запись, нажмите кнопку j / DEL. обычного воспроизведения нажмите кнопку k и удерживайте ее в 1 Выберите частоту нужной станции вручную или выберите одну Ничего не слышно из динамика • Opriti aparatul inainte de a inlocui bateriile. Inlocuirea bateriilor in oratorul se afla la distanta de pozitia dumneavoastra de inregistrare. selecta statia radio presetata care trebuie stearsa. • Capacitate memorie incorporata: 4 GB наушников, разъем для пульта 11 Отсек для батарей течение 1 секунды или дольше. 31 из сохраненных станций. • Возможно, подключены наушники. Отключите наушники. timp ce aparatul este pornit poate duce la deteriorarea fisierului. Functia de „zoom” are doua setari sunet/distanta pentru a maximiza 3 Apasati si tineti apasat butonul j / DEL timp de 1 secunda sau mai • Tip memorie incorporata: memorie flash NAND ДУ 12 Включение/отключение, D Примечания 2 Нажмите кнопку g, чтобы начать запись. • Установлен минимальный уровень громкости. Настройте • In momentul in care bateriile sunt aproape descarcate, indicatorul efectul audio pe care doriti sa-l obtineti. mult pentru a sterge statia radio presetata. • Formate de inregistrare: MPEG1 layer 3 (MP3), PCM (LFH0882) 2 Разъем для подключения воспроизведение/пауза, • Прежде чем начать запись, выберите функцию голосовой 6.1.3 Перемотка назад и вперед 3 Нажмите кнопку j / DEL,чтобы остановить запись. громкость. pentru baterie licareste. • Moduri de inregistrare: PCM (WAV/stereo), SHQ (MP3/stereo), микрофона, разъем линейного скорость воспроизведения активации и режим записи (Более подробные сведения см. в Чтобы быстро промотать текущий файл назад или вперед, во • Daca inlocuirea bateriei dureaza mai mult de 2 minute, ar putea fi 1 Apasati butonul l/ MENU in timpul inregistrarii pentru a modifica 8.5 Inregistrare de pe radio FM HQ (MP3/mono), SP (MP3/mono), LP (MP3/mono), SLP (MP3/mono) входа 13 Меню, FM-радио, функция разделе 9.) время воспроизведения нажмите и удерживайте кнопку h или Не выполняется воспроизведение necesara resetarea timpului. modul „zoom” (Oprit > Zoom 1 > Zoom 2 > Oprit). 30 . • Rata de transfer de date: 1411 kbps (mod PCM), 192 kbps (mod 3 Встроенный микрофон зуммирования звука • Сделайте пробную запись, чтобы проверить правильность b. Чтобы возобновить воспроизведение на выбранной скорости, • Возможно, устройство находится в режиме HOLD. Переместите 1 Cautati manual o statie radio sau porniti o statie radio presetata. SHQ), 64 kbps (mod HQ), 48 kbps (mod SP), 32 kbps (mod LP), 16 4 Увеличение громкости 14 Быстрая перемотка назад, настроек Voice Tracer. отпустите кнопку. 9 Изменение параметров переключатель HOLD в положение Off. 4.2 Incarcarea bateriilor D Nota 2 Apasati butonul g pentru a incepe inregistrarea. kbps (mod SLP) 5 Запись, пауза, включение выбор файла, выбор меню • Для отображения оставшегося времени записи нажмите в режиме • Возможно, батареи разряжены или установлены неправильно. Bateriile reincarcabile Philips LFH9154 pot fi incarcate in aparatul Voice Functia de „zoom” este optimizata pentru microfonul intern si pentru 3 Pentru a opri inregistrarea, apasati butonul j / DEL. • Durata de inregistrare: 572 de ore (mod SLP), 286 de ore (mod 6 Быстрая перемотка вперед, 15 Индекс, папка, повтор записи кнопку k и удерживайте ее. 6.1.4 Поиск Когда процесс записи остановлен или во время прослушивания Установите новые батареи и проверьте правильность их Tracer. Atunci cand aparatul Voice Tracer este conectat la un calculator, microfonul zoom extern (furnizat impreuna cu LFH0885). LP), 190 de ore (mod SP), 143 de ore (mod HQ), 47 de ore (mod выбор файла, выбор меню 16 Экран • Чтобы создать новый файл, нажмите в режиме записи кнопку b. Чтобы перейти к началу текущего файла или к следующему радио можно получить доступ к меню. В зависимости от выбранной установки. bateriile reincarcabile se incarca in mod automat. Un ciclu complet de SHQ), 6,4 de ore (mod PCM) 7 Остановка, отображение, 17 Переключатель Hold • В каждой папке может находиться до 99 файлов, что позволяет файлу, нажмите во время воспроизведения кнопку h или папки (с голосовыми записями или с музыкальными файлами) и • Отсутствуют записи на устройстве. Убедитесь в том, что имеются удаление reincarcare dureaza aproximativ 2,5 ore. 9 Personalizarea setarilor • Frecventa de e?antionare: 44.1 kHz (mod PCM/SHQ), 22 kHz 8 Уменьшение громкости 18 Индикатор записи и • хранить на устройстве до 396 файлов (99 файлов x 4 папки). b соответственно. Если файл содержит индексные метки, активного режима меню содержит те или иные пункты. файлы для воспроизведения. воспроизведения воспроизведение начнется с позиции, заданной одной из меток. Если длительность записи превышает максимально допустимую (mod HQ), 16 kHz (mod SP/LP/SLP) D Note 6 Redare • Redare muzica: Format de comprimare: .mp3, .wma • Rata de 9 Динамик или число файлов достигает 396, процесс записи останавливается 1 В режиме радио или при остановленном процессе записи Voice Tracer не может останавливать и приостанавливать • Alte baterii decat bateriile LFH9154 furnizate de Philips nu pot fi Meniul este disponibil in timp ce aparatul este oprit si in timpul receptiei transfer de date MP3: 8 – 320 kbps • Rata de transfer de date WMA: и появляется сообщение FULL. В этом случае необходимо удалить 6.2 Обзор функций воспроизведения нажмите кнопку l/ MENU, чтобы открыть меню. операции, а также выполнять запись и воспроизведение incarcate. 1 Apasati butonul INDEX / a, in timp ce aparatul este oprit, pentru a radio. Articolele de meniu disponibile difera in functie de dosarul sau 48 – 320 kbps (44 kHz), 64 – 192 kbps (48 kHz), stereo • Fara suport несколько записей или перенести их на компьютер. Voice Tracer может воспроизводить файлы с повтором и в 2 Выберите элемент меню с помощью кнопок h и b 39 . • Возможно, устройство находится в режиме HOLD. Переместите • Incarcati complet bateriile inainte de prima utilizare. selecta fisierul dorit. de modul in care va aflati, si anume intr-un dosar cu inregistrari, intr-un DRM • Не извлекайте батареи во время записи – это может привести к случайном порядке. 3 Чтобы открыть вложенное меню, нажмите кнопку k. переключатель HOLD в положение Off. • Calculatorul trebuie sa fie pornit atunci cand bateriile se afla in proces 2 Apasati butonul h sau b pentru a selecta fisierul care trebuie dosar de muzica sau intr-un mod radio. • Tuner/receptie (LFH0882): Benzi de frecventa: FM stereo • 4 Начало работы сбоям в работе системы записи. 4 Чтобы выбрать значение, нажмите кнопку h или b. de incarcare. redat (pentru informatii suplimentare privind selectarea unui fisier, a Interval de frecventa: 87.5 – 108 MHz • Numar de canale presetate: 20 • Если вы планируете осуществлять запись в течение долгого 6.2.1 Повторное воспроизведение фрагмента записи 5 Нажмите кнопку k, чтобы подтвердить выбор. Звук не воспроизводится через наушники • In cazul in care portul USB al calculatorului nu furnizeaza suficienta se vedea capitolul 6.1.1). 1 Apasati butonul l/ MENU, in timp ce aparatul este oprit, pentru a • Cautare digitala automata 4.1 Установка батареек времени, замените батареи перед началом записи. 6 Чтобы завершить настройку параметров, нажмите кнопку • Возможно, наушники подключены неправильно. Подключите capacitate electrica, opriti functia de incarcare (pentru informatii 3 Apasati butonul k. Timpul de redare va fi afisat pe ecran, iar deschide meniul. • Difuzor dinamic circular intern de 30 mm • putere de iesire: 110 mW Питание устройства Voice Tracer осуществляется с помощью • Если устройство подключено к ПК с помощью USB-кабеля, в 1 Чтобы начать воспроизведение фрагмента записи с повтором, l/ MENU. наушники надлежащим образом. suplimentare, a se vedea capitolul 9) si utilizati un incarcator de baterie LEDUL verde 18 se va aprinde. 2 Apasati butonul h sau b pentru a selecta articolul de meniu 39 . • Tip de baterie: doua baterii alcaline Philips AAA (LR03 sau R03) sau аккумуляторов Philips LFH9154 или алкалиновых батареек типа AAA. процессе записи энергия аккумуляторов не расходуется: просто нажмите в начальной позиции выбранного фрагмента кнопку • Установлен минимальный уровень громкости. Настройте extern. 4 Reglati volumul utilizand butoanele + si –. 3 Apasati butonul k pentru a intra intr-un meniu secundar. bateriile reincarcabile Philips LFH9154 подключите Voice Tracer к ПК с помощью USB-кабеля и начните INDEX / a. На экране появится сообщение REP. A – B 32 . Меню Значение Описание громкость. 5 Pentru a opri redarea, apasati butonul j / DEL. Timpul total de 4 Apasati butonul h sau b pentru a schimba o setare. • Durata de viata a bateriei (mod LP): 50 ore 1 Сдвиньте крышку отсека для батарей. 19 запись, нажав кнопку g и удерживая ее в течение 1 секунды или 2 В конечной позиции выбранного фрагмента нажмите кнопку REC* PCM Этот пункт меню позволяет выбрать режим 4.3 Pornit/Oprit redare a fisierului curent va fi afisat pe ecran. 5 Apasati butonul k pentru a confirma selectia dvs. • Dimensiuni produs (W ? D ? H): 40 ? 18.4 ? 108 mm 2 Установите батареи, соблюдая указанную полярность, и дольше. INDEX / a еще раз. Начнется воспроизведение с повтором. SHQ записи — несжатую стереофоническую запись 6 Apasati din nou butonul k pentru a continua redarea de la pozitia 6 Apasati butonul l/ MENU pentru a iesi din afisajul cu setarile • Greutate: 80 g, inclusiv baterii закройте крышку отсека для батарей. 20 3 Чтобы остановить воспроизведение, нажмите кнопку j / DEL . HQ в формате PCM (ИКМ), которая обеспечивает 1 Pentru a porni, apasati butonul k pana la afisarea mesajului anterioara. curente. • Cerinte privind sistemul: Windows 7/Vista/XP/2000, Mac OS X, 5.2 Запись с помощью внешнего микрофона Чтобы вернуться к обычному режиму воспроизведения, нажмите SP качество звука, сопоставимое с качеством 12 Технические характеристики HELLO. Linux • port USB liber D Примечания Чтобы выполнить запись с помощью внешнего микрофона, кнопку INDEX / a. LP записи на компакт-дисках (модель LFH0882), 2 Pentru a opri, apasati butonul k, in timp ce aparatul este oprit, D Nota Meniu Setare Descriere • Не используйте одновременно аккумуляторы разных типов и/или подключите микрофон к гнезду микрофона и используйте такую же SLP стереофонические режимы SHQ и HQ и три • USB: высокоскоростной интерфейс USB 2.0 с разъемом мини-USB pana la afisarea mesajului BYE. • Functia „auto-backspace” reda in mod automat ultimele 3 secunde de REC* PCM Alegeti intre mai multe moduri de inregistrare, марок. процедуру, как и при записи с помощью встроенного микрофона. 28 6.2.2 Воспроизведение файла или папки с повтором / монофонических режима — SP, LP и SLP (в • Микрофон: 3,5 мм • сопротивление 2,2 кОм inregistrare, de fiecare data cand redarea este reluata. SHQ de la modul de inregistrare stereo PCM • Если Voice Tracer не будет использоваться в течение длительного воспроизведение в случайном порядке режиме SLP можно сохранять длинные записи). • Наушники: 3,5 мм • сопротивление не менее 16 Ом 4.4 Functia de asteptare • In momentul in care castile sunt conectate la mufa EAR 1 , difuzorul HQ necomprimata pentru o calitate similara celei unui времени, извлеките батареи: разгерметизация батарей может 5.3 Редактирование записанных файлов Подробные сведения о доступных режимах и • Экран: ЖК/сегментный, Диагональ экрана: 39 мм / 1,5 дюйма. In momentul in care comutatorul HOLD 17 se afla in pozitia Asteptare, aparatului va fi deconectat. SP CD audio (LFH0882), pana la doua moduri stereo, повредить Voice Tracer. Существуют различные возможности редактирования записей: 1 Во время воспроизведения нажмите кнопку INDEX / a и времени записи см. в разделе 12. • Микрофон: встроенный — стерео • внешний — стерео toate butoanele aparatului sunt inactive. Mesajul On Hold va fi afisat LP inclusiv SHQ si HQ sau trei moduri mononaurale, • Если Voice Tracer не работает надлежащим образом, извлеките частичная перезапись файла, добавление записи в конец файла. удерживайте ее 1 секунду или дольше, чтобы изменить SENSE* HI Изменение чувствительности записи. Выбор • Емкость встроенной памяти: 4 Гб pentru scurt timp pe ecran, iar afisajul se va opri. Deblocati Voice Tracer D Note privind utilizarea Voice Tracer ca music player SLP inclusiv SP, LP si SLP pentru un timp extins de батареи и установите их повторно. режим воспроизведения (воспроизведение файла с повтором, LO значения этого параметра в соответствии с • Тип встроенной памяти: флэш-память типа NAND mutand comutatorul HOLD in pozitia Oprit. • Aparatul suporta fisiere cu muzica in formate .wma si .mp3, care pot fi inregistrare. A se vedea capitolul 12 pentru detalii • Останавливайте запись перед заменой батарей: если 1 Для начала выберите нужный режим редактирования воспроизведение папки с повтором, воспроизведение в условиями, в которых производится запись, • • Форматы записи: MPEG1 уровень 3 (MP3), PCM (только для transferate de pe calculator in dosarul de muzica al aparatului. Fisierele privind modurile de inregistrare disponibile si проигрыватель работает, извлечение батарей может привести к (перезапись или добавление). Более подробные сведения см. в случайном порядке или обычное воспроизведение). 33 позволяет избежать возникновения фонового модели LFH0882) 4.5 Reglarea datei si a orei protejate impotriva copierii (managementul drepturilor digitale) nu timpii de inregistrare. повреждению файла. разделе 9. Символ Значение шума. • Режимы записи: PCM (WAV/стерео), SHQ (MP3/стерео), HQ In momentul in care bateriile sunt instalate pentru prima oara, aparatul sunt suportate. SENSE* HI Ajustati viteza de inregistrare pentru a evita • Когда батареи почти разряжены, индикатор уровня заряда мигает. 2 Для выбора нужной папки нажмите кнопку INDEX / a, когда REP. FILE Многократное воспроизведение одного файла VA* On Голосовая активация записи – это удобная (MP3/стерео), SP (MP3/моно), LP (MP3/моно), SLP (MP3/моно) va va cere sa setati data si ora. • Voice Tracer suporta pana la doua niveluri de dosare din cadrul LO inregistrarea zgomotelor de fond si pentru a regla • Если замена аккумуляторов длится более двух минут, может процесс записи остановлен. REP. FOLDER Многократное воспроизведение всех файлов Off функция, позволяющая выполнять запись, не • Скорость передачи данных: 1411 Кбит/с (в режиме PCM), 192 dosarului de muzica. Fiecare dosar poate suporta pana la 199 de intrari aparatul in functie de mediul de inregistrare. потребоваться повторная установка времени на устройстве. 3 Нажимая кнопки h и b, выберите файл для редактирования из папки нажимая кнопки. Когда этот режим включен, Кбит/с (в режиме SHQ), 64 Кбит/с (в режиме HQ), 48 Кбит/с (в 1 “CLOCK” va fi afisat pe ecran 21 . Apasati butonul k. Indicatorul (fisiere si dosare). VA* On Modul de inregistrare cu activare prin voce (Более подробные сведения о выборе файлов см. в разделе FOLDER SHUF Воспроизведение всех файлов из папки в запись начинается, когда вы начинаете режиме SP), 32 Кбит/с (в режиме LP), 16 Кбит/с (в режиме SLP) pentru an licareste 22 . • Apasati butonul k pentru a deschide un dosar/fisier selectat. Apasati Off reprezinta o caracteristica comoda pentru 4.2 Зарядка аккумуляторов 6.1.1.) случайном порядке говорить. Через три секунды после того, как • Время записи: 572 часа (в режиме SLP), 286 часов (в режиме 2 Apasati butonul h sau b pentru a seta anul. butonul INDEX / a pentru a va intoarce la dosarul cu un nivel mai sus. inregistrarea „maini libere”. In momentul in care Аккумуляторы Philips LFH9154 можно заряжать непосредственно в 4 С помощью воспроизведения или перемотки записи найдите вы замолчите, Voice Tracer автоматически LP), 190 часов (в режиме SP), 143 часа (в режиме HQ), 47 часов (в 3 Apasati butonul k pentru a trece la setarile pentru luna. • Apasati butonul g in timpul redarii muzicii pentru a schimba modul modul de inregistrare cu activare prin voce este устройстве Voice Tracer. Достаточно подключить Voice Tracer к ПК, начальную позицию фрагмента записи, который необходимо D Примечание приостановит запись и возобновит ее, когда вы режиме SHQ), 6,4 часа (в режиме PCM) 4 Repetati pasii 2 si 3 in acelasi mod, pentru a continua cu setarea egalizatorului (Normal > Classic > Jazz > Rock > Pop > Normal). activat, inregistrarea va incepe in momentul in и процесс зарядки аккумуляторов начнется автоматически. Полный редактировать, и нажмите кнопку k, чтобы приостановить Воспроизведение в случайном порядке возможно только для папки начнете говорить снова. • Частота дискретизации: 44,1 кГц (в режимах PCM/SHQ), 22 кГц lunii, a zilei, a sistemului 12/24 si a orei. care incepeti sa vorbiti. In momentul in care nu цикл зарядки длится около 2,5 часа. воспроизведение или перемотку. M (музыка). EDIT* APPND Существуют различные возможности (в режиме HQ), 16 кГц (в режиме SP/LP/SLP) 6.1 Functiile de redare mai vorbiti, aparatul se va intrerupe automat din 5 Нажмите кнопку g. Индикатор записи и воспроизведения начнет OVER редактирования записей: частичная перезапись • Воспроизведение музыки: форматы — MP3, WMA • D Nota inregistrare dupa trei secunde de tacere si va D Примечания мигать, а на экране можно будет выбрать режим: OVER или OFF файла, добавление записи в конец файла. поддерживаемый битрейт в формате MP3: 8–320 кбит/с • Data si ora pot fi modificate in orice moment prin intermediul meniului. 6.1.1 Selectarea unui fisier/localizarea unui semn index reincepe numai cand incepeti sa vorbiti din nou. • Аккумуляторы, отличные от поставляемых в комплекте Philips APPEND (перезапись или добавление). Перед началом редактирования выберите поддерживаемый битрейт в формате WMA: 48–320 кбит/с Pentru informatii suplimentare, a se vedea capitolul 9. • Apasati butonul b o data, in timp ce aparatul de inregistrare este EDIT* APPND Puteti edita un fisier inregistrat anterior prin LFH9154, заряжать нельзя. 6 Чтобы начать запись, нажмите кнопку g еще раз. Начнется нужный режим (перезапись [=OVER] или (44 кГц), 64–192 кбит/с (48 кГц), estereo • DRM (управление oprit, pentru a trece peste sfarsitul unui fisier. Apasati din nou butonul OVER suprascrierea partiala a inregistrarii sau prin • Перед первым использованием устройства полностью зарядите изменение существующего файла. добавление [=APPND]). Более подробные цифровыми правами) не поддерживается 4.6 Afisarea informatiilor b pentru a trece peste inceputul urmatorului fisier. OFF adaugarea unei inregistrari la sfarsitul fisierului. аккумуляторы. 7 Чтобы остановить запись, нажмите кнопку j / DEL. сведения см. в разделе 5.3. • Радиоприемник (только для модели LFH0882): диапазон • Apasati butonul j / DEL, in timp ce aparatul este oprit, pentru a alterna • Apasati butonul h in timp ce aparatul de inregistrare este oprit, Setati modul de editare dorit (suprascrieti • Чтобы зарядка аккумуляторов осуществлялась, ПК должен быть INPUT V (голос) Параметр L (линейный вход) следует выбрать, FM, стерео • диапазон частот: 87,5–108 МГц • число запоминаемых informatiile de pe ecran: timp de redare total a fisierului curent > timp pentru a trece peste inceputul unui fisier. Apasati din nou butonul h [=OVER] sau adaugati [=APPND]), inainte de a включен. D Примечания L (линей- если запись осуществляется с внешних станций: 20 • автоматический поиск радиостанций > data > timp de inregistrare ramas > timp de inregistrare a fisierului pentru a trece peste sfarsitul fisierului anterior. edita o inregistrare. Pentru mai multe informatii, a • Если USB-порт ПК не обеспечивает достаточную для зарядки • При редактировании записи сначала включается режим ный вход) источников, подключенных к линейному входу • Встроенный круглый динамик диаметром 30 мм • выходная curent > data inregistrarii fisierului curent. • Daca fisierul contine semne index, aparatul de inregistrare va trece la se vedea capitolul 5.3. мощность, отключите эту функцию (подробные сведения см. в редактирования исходного файла. устройства Voice Tracer. мощность: 110 мВт Specifications are subject to change without notice. Trademarks are the • Apasati si mentineti apasat k in timpul inregistrarii pentru ca aparatul semnul index anterior sau la cel care urmeaza, in momentul in care разделе 9) и воспользуйтесь внешним зарядным устройством. • Редактирование записей в папке M (музыка) невозможно. • Условия эксплуатации: температура — 5–45 °С • влажность property of Royal Philips Electronics or their respective owners. sa afiseze timpul ramas pentru inregistrare. apasati butonul h sau butonul b. — 10–90 % © 2009 Royal Philips Electronics. All rights reserved. Version 1.0, 2009/07/13. 5103 109 9724.1