

Эргорюкзак для новорожденных Аiebao Air
Эргорюкзак для новорожденных Аiebao Air
3 в 1 Эрго-рюкзак хипсит кенгуру
- Рюкзак переноска для детей с рождения до 36 месяцев
- Используется как рюкзак (малыш сзади на спине) + кенгуру (малыш спереди) + удобное сиденье (хипсит)
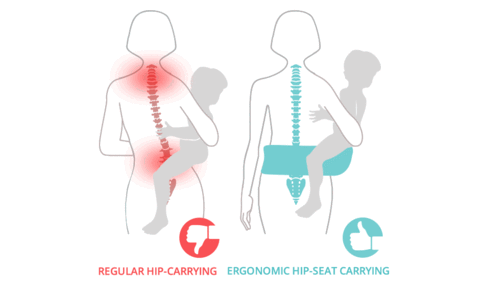
- Широкий поясной ремень (длина х ширина:110х13см.), не создаёт нагрузку на позвоночник, вам и ребёнку удобно и комфортно
- Материал: хлопок
- Надёжные замки-фиксаторы обеспечивают вашему малышу комфортную посадку, не допуская случайного раскрытия
- Карман под мелкие вещи и напитки
- Ровные строчки из прочной нити; широкие прочные стропы с нагрузкой до 20 кг.
Эргорюкзак хипсит Aiebao
Для использования с рождения до 3-х лет. (0 — 20 кг.)


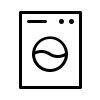
Хорошо отстирывается в режиме деликатной стирки 30 С
Правильное развитие ребёнка!

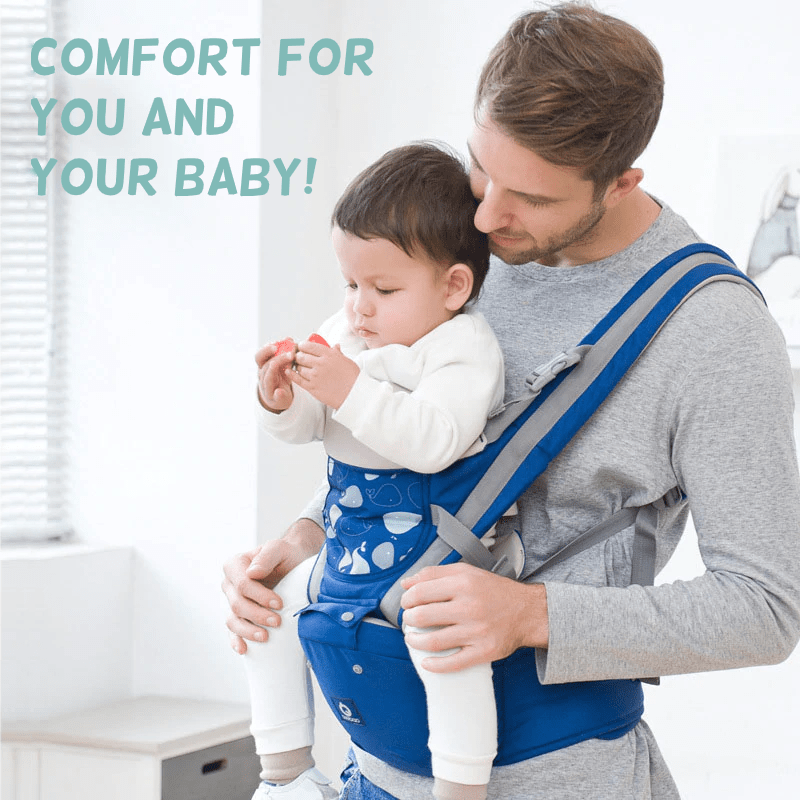
Эрго рюкзак хипсит Aiebao учитывает ключевые параметры комфортного средства переноски малышей. Один из немногих эрго-рюкзаков, укомплектованный сиденьем (хипситом), чтобы предоставить ребёнку максимум удобства

При использовании эргорюкзака Aiebao ребёнок находится в физиологически правильном положении, эрго-рюкзак обеспечивает равномерную поддержку позвоночника и шеи вашего малыша, хипсит обеспечивает правильное развитие тазовой области
Как правильно использовать.
Инструкция Aiebao
Как правильно использовать.
Инструкция Aiebao

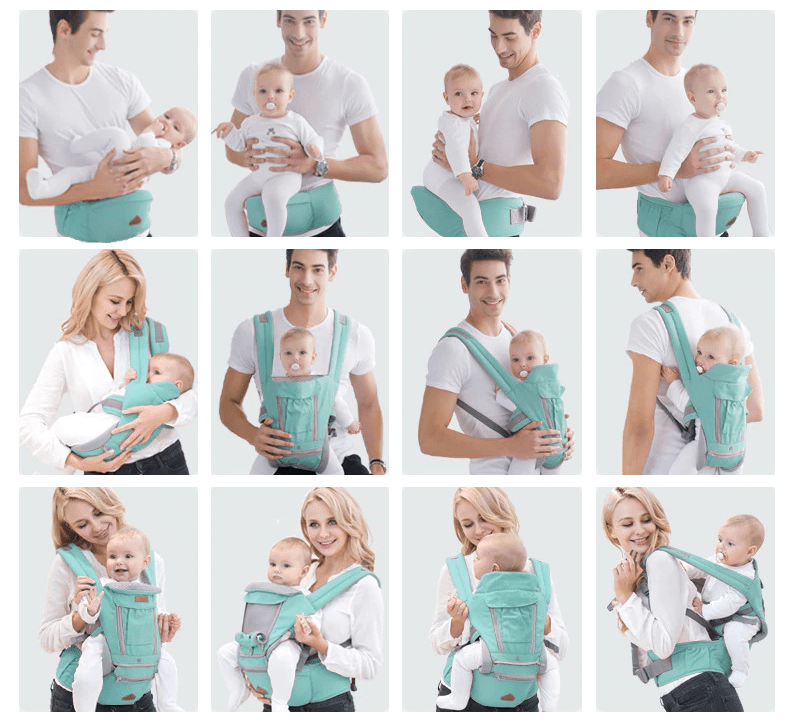
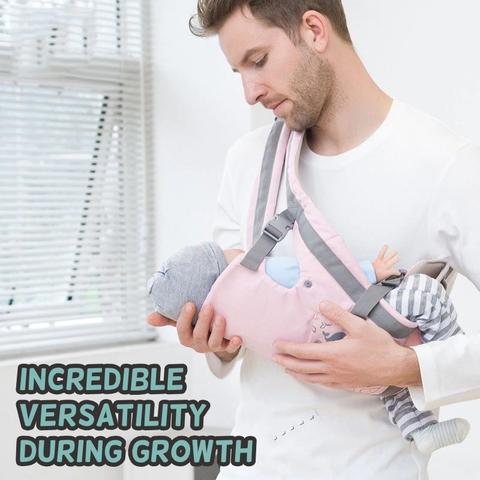
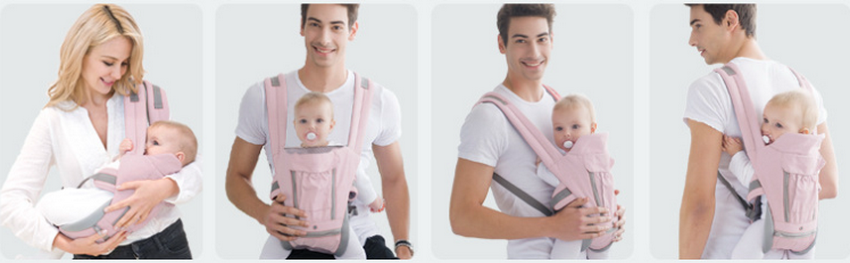
Малыш находится в положении лежа — горизонтально, хипсит отстёгнут, рюкзак-переноска крепится за лямку через одно плечо. Специально разработанный воротник удерживает голову и шейный отдел малыша в анатомически правильном положении, пока тот не научится держать голову самостоятельно

Малыш может находится перед папой или мамой лицом, либо вперед (воротник опускается), а также за спиной

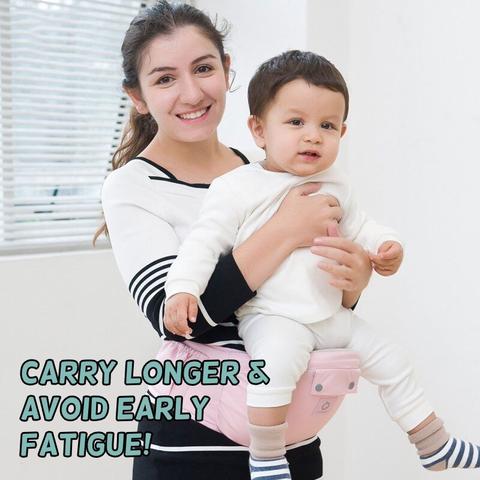
Малыш может сидеть лицом к вам и вперед, без спинки; сиденье располагается перед вами или на бедре
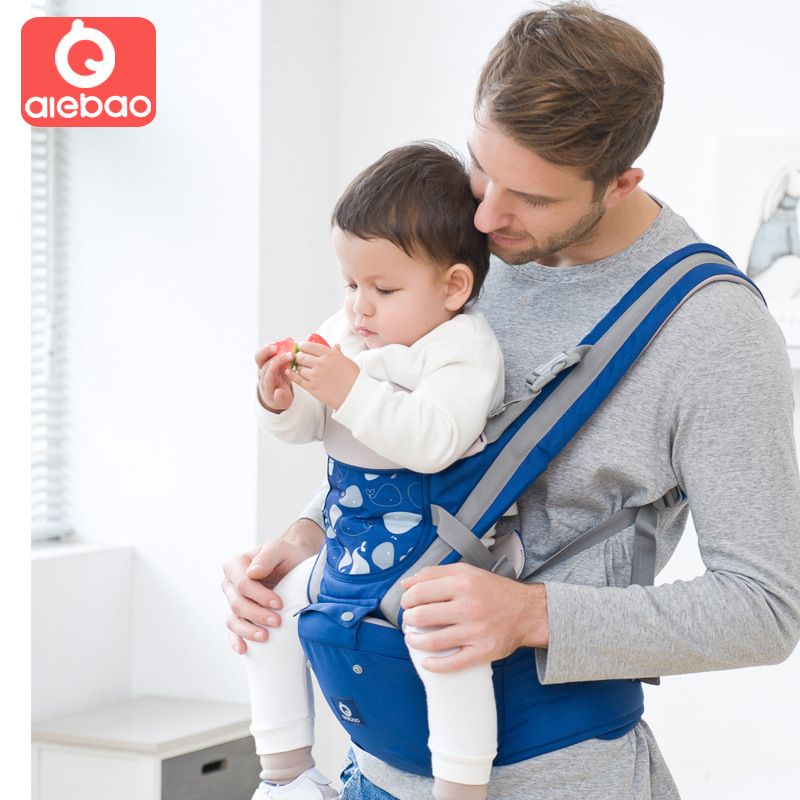
Малыш может сидеть со спинкой — лицом к вам или вперёд, а также за спиной

Прочные стропы, надёжные замки-фиксаторы
Широкие наплечные ремни-стропы выдерживают до 20 кг; защёлки-фиксаторы препятствует произвольному открытию

Комфортные плечевые ремни
Эргорюкзак хипсит оснащён прочными широкими ремнями шириной 6,5 см, мама не испытывает дискомфорта при ношении малыша, ремни не врезаются в плечи, не натирают и не раздражают кожу

Детский эрго рюкзак + удобный хипсит
Комфортный широкий поясничный ремень снимает нагрузку с позвоночника родителя, вы не испытываете дискомфорта при ношении малыша.
Сиденье (хипсит), с правильным углом наклона, обеспечивает ребёнку правильную посадку; сиденье с хорошей амортизацией — ребёнок не устаёт и не капризничает

Рекомендации к использованию
Правильное использование эргорюкзака очень важно: до 3-х месяцев малыша необходимо переносить в лежачем горизонтальном положении, а в сидячем начиная с 3-х ~ 4-х месяцев, когда он начнет уверенно держать головку.

Правильный наклонный угол посадки малыша
Наклонный угол посадки более безопасен, тело малыша всегда находится вплотную к вашему телу

Материал рюкзака — натуральный хлопок
Натуральная гипоаллергенная ткань, которая дышит, и малыш чувствует себя комфортно и безопасно
Детский эрго рюкзак-кенгуру-хипсит Аiebao Air 3 в 1
Предназначен для малышей от 0 до 36 месяцев
- Тип товара: рюкзак-переноска
- Материал рюкзака: хлопок
- Назначение: переноска ребенка
- Вес ребенка: до 20 кг
- Ширина лямок: 6,5 см
- Высота общая: 50 см
- Высота нижней части: 13,5 см
- Ширина: 14 см
- Вес: 880 г
Катя, г. Дагомыс
Заказывала для девочки 8 мес. Понравилось что рюкзак можно использвать отдельно типа кенгуру и вместе с сиденьем как хипсит. Рюкзак к хипситу крепится замком на молнии плюс две кнопки с ограничителем, так что малыш не выпадет даже при случайном расстегивании молнии. Сам материал легкий и дышащий, к телу не липнет. Лямки широкие и плечи не натирает. Пока довольны, за эти деньги хорошая вещь
Мила, Одинцовский р-он
Мы недавно перешли с кольцевого слинга на рюкзак. Выбирали долго, купили Аибао. Оказалось, что мне с рюкзачком значительно удобней. Сынуле почти 4 месяца, он у меня крупный парень и очень юркий, из слинга на кольцах постоянно норовил вылезть (может я неправильно его носила,не знаю), а в рюкзаке хорошо зафиксирован. Мы довольны.
Доставляем по всей России

Доставка курьером: в течение 0~2 дней после заказа
Стоимость доставки 290 руб.
Оплата онлайн на сайте или при получении заказа
Московская / Ленинградская область
Доставка курьером в течение 1~2 дней
Стоимость доставки 350 рублей
Оплата онлайн на сайте или при получении заказа
Доставка от 2 до 8 дней, в зависимости от удаленности от Москвы
Стоимость доставки курьером — 400 руб.
Пункты выдачи Сдэк / Boxberry, отделение Почты РФ — 350 руб.
Оплата при получении заказа наличными / картой
Пункты выдачи заказов Boxberry (г. Москва)
Стоимость 200 руб.
В течение 2 дней после заказа.
Оплата наличными / картой, при получении заказа
Комфортный эрго рюкзак Aiebao Air для новорождённых!
Хорошее качество, разумная цена

© Hagenstore 2017 — 2021
Интернет-магазин ХагенСтор
Aiebao Baby Carrier Instructions Manual
Important Keep Instructions For Future Use: Aiebao Baby Carrier Instructions Manual read all instructions before assembling and using your carrier.
Failure to follow each instruction can result in serious injury or death to your baby. Keep instructions and review them before attempting new carrying positions.
Aiebao Fall And Suffocation Hazard
Fall Hazard
- infants can fall through a wide leg opening or out of carrier.
- Adjust leg openings to fit baby’s legs snugly.
- Before each use, make sure all fasteners are secure.
- Take special care when leaning or walking.
- Never bend at waist; bend at knees.
- Only use this carrier for babies between 8 lbs (3.6 kgs) and 40 lbs (18.2 kgs).
Suffocation Hazard
- – Infants under 4 months can suffocate in this product if face is pressed tight against your body.
- Do not strap infant too tight against your body.
- Allow room for head movement.
- Keep infant’s face free follow instructions at all times.
Follow These Warnings When Using Aiebao Baby Carrier
Follow instructions for use. When fastening the carrier, keep one hand on baby
Baby must face toward you until he/she can hold their head upright before being worn in the Facing-Out Position to avoid possible neck or back injury.
Baby must be able to sit up on his or her own before being worn in the Back Carry position to avoid possible back or neck injury.
NEVER use the wide seat position when carrying the baby in the Facing-Out position
Do NOT exceed the maximum capacity of 2 lbs (0.9 kgs) when using storage pockets for personal items.
NEVER use storage pockets to hold hot, cold, bulky, or sharp items that effect baby’s comfort or positioning in the carrier.
Premature infants, infants with respiratory problems, and infants under 4 months are at greatest risk of suffocation.
Baby’s face should always be visible and free from obstructions.
Be aware of your surroundings. Avoid any potential hazards or obstructions when putting baby in the carrier and when removing baby from the carrier.
NEVER use a soft carrier when balance or mobility is impaired because of exercise, sporting activities, drowsiness, or medical conditions. It is intended for use by adults while walking or standing only.
Your balance may be adversely affected by your movement and that of your baby.
Never use a soft carrier while engaging in activities such as cooking and cleaning which involve a heat source or exposure to chemicals.
Keep away from fire and strong heat sources while wearing this carrier.
Never wear a soft carrier while driving or being a passenger in a motor vehicle.
DO NOT use this carrier as a child restraint in a motor vehicle. This type of carrier will not properly restrain your baby in the event of a crash.
NEVER leave baby unattended in this carrier.
ALWAYS check to ensure that all buckles, snaps, straps, and adjustments are secure before each use.
Make sure baby is properly placed in the carrier, including leg placement, before each use.
This product is subject to wear and tear over time. Check for ripped seams, torn straps or fabric and damaged fasteners before each use.
DO NOT use this product if deterioration or problems are detected.
NEVER lean against baby
NEVER place more than one child in this carrier.
DO NOT wear more than one carrier at a time, ever.
DO NOT use in showers, pools, or any water environments
For Safe and Secure Carrying:
If you are new to baby wearing or are using a new carrier style, there are definitely some things you need to know before placing your baby in the carrier.
Here are some important Dos and Don’ts for proper use of your
carrier. Please be sure to review this manual in its entirety for all safety information.
Practice before you start. Be sure to try out your carrier before you put baby in the first time.
Check regularly that baby’s chin is positioned upwardly and never pressed into his/her chest.
Don’t overdress your baby. Your closeness and body heat along with the carrier fabric will help to keep them warm.
TIP: Small children have poor temperature regulation, so check baby’s abdomen, forehead, and neck frequently.
Check your baby’s legs often to make sure they are warm and blood circulates freely. Should the calves and feet appear to be a slightly different color, shift baby in the carrier.
If baby falls asleep or starts to fuss in the Facing-Out position you should switch to the Facing-In position or remove them from the carrier entirely
Aiebao Helpful Hints
Facing-In Position – Baby Facing Toward You – Until your child is able to hold his/her head upright, this is the correct position.
It affords your baby lots of close physical contact and attention, while leaving your hands free. In this position, you can entertain and bond with your newborn by talking, touching, playing or just making eye-contact.
Facing-Out Position – Baby Facing Away From You – Once your child is able to hold
his/her head up, your baby is ready for a new adventure.
This position allows him/her to visually explore their surroundings while maintaining close contact with you.
Always use the narrow seat position when carrying in the baby facing-out position.
Back Carry Position – Child Facing Towards You – When your little one can fully sit up on his/her own, putting them on your back allows you to carry the child comfortably for longer periods of time.
In this position your baby is free to check out what is going on
around them and still know that you are right there.
What seat position should I use? For Facing-In Position, smaller babies, 8 lbs to 15 lbs, use the Folded Seat. Larger babies and children use the Expanded Seat.
The Expanded Seat allows a larger child to ride in a comfortable seated position with their legs wrapping around you.For Facing-Out Position, always use the Folded Seat.
For Back Carry Assisted Position, always use the Expanded Seat.
How do I know if my baby is at the right height when carrier is worn in the front?
You should be able to tilt forward slightly and kiss the top of your child’s head.
When placing your baby in or taking them out of the carrier, sitting down will make the procedure easier. Until you are familiar with the placement of baby, it is also recommended to do so over a soft surface.
It is best to limit the use of your carrier to 10-20 minutes until you and your baby are both completely comfortable in it together.
Wearing the carrier closer to your body and higher up on your back (or chest when worn
in the front position) will minimize stress to your back and shoulders from prolonged use.
Aiebao Care Instructions:
- Machine wash cold, separately, on gentle cycle with mild detergent.
- DO NOT bleach.
- Wipe clean with a cloth or sponge between machine washings.
- Drip dry only. DO NOT iron.
Aiebao Baby Carrier Position Options
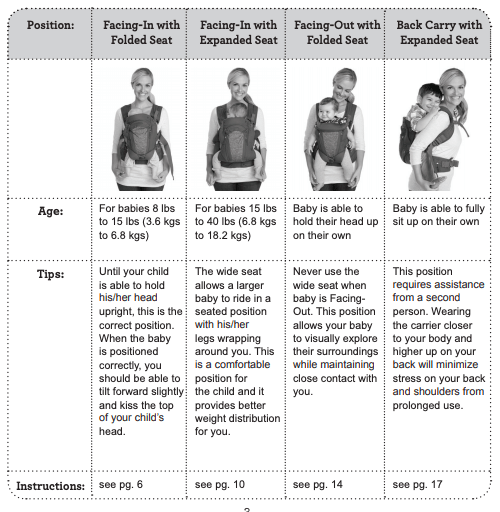
Aiebao Baby Carrier use for an Infant: Facing-In position
with Folded SeatThis position is for babies 8 lbs to 15 lbs. (3.6 kgs to 6.8 kgs)
*Baby MUST be carried in the Facing-In position until baby is able to hold his or her head upright without assistance.
*We recommend having another adult assist you if this is your first time using this type of carrier.
*When using this carrier in the Facing-In position, you should fit it to the user before placing the baby in the carrier.
*Support baby securely throughout the process of putting baby in the carrier, until all the buckles and straps are properly fastened and adjusted.
Take extra care when fastening buckles.You will hear a ‘click’ when properly secured.
Your baby should always be comfortable.
If your baby is fussy it could be an indication that he or she is not properly positioned.
If this occurs, take your baby out immediately and adjust.
NOTE: The carrier parts in bold can be found on the carrier illustrations
How To Use Aiebao Baby Carrier For Infant Baby
- Adjust the Conversion Flaps to the Folded Seat
position by folding the flap upward and fastening the
Conversion Snap on one flap to the Conversion Snap
on the other flap. - Unfasten the Chest/Back Buckle and Waist Belt &
Buckle. Hold the carrier so the grey interior fabric of the
Shoulder Straps and Waist Belt face you. - Place your arms through the Shoulder Straps making
sure the grey interior fabric rests on your shoulders.
The carrier should be hanging down in front of you, with
the Side Closure Buckles, Head Support Buckles,
and Leg Straps open. - With Shoulder Straps in place, reach behind your back
to connect Back/Chest Buckle. If this is difficult you
may need to raise the Back/Chest Strap on the Back/
Chest Strap Height Adjuster and loosen the Shoulder
Straps. If you need assistance, have another person
fasten the buckle. - Pull the webbing strap on the Back/Chest Strap to tighten. The Shoulder Straps should be wide and the Back/Chest Strap should be straight across your back.
- NOTE: The height of the Back/Chest Strap can be adjusted
by sliding the Back/Chest Strap to the desired height. The
strap should lay in a comfortable position on your upper back.
6. Fasten the Waist Belt & Buckle around your waist and pull the webbing to tighten.
*NOTE: People with longer torsos may find a higher belt position more comfortable (closer to the navel); shorter people may wish to wear the belt more on the hips.
- IMPORTANT! ALWAYS ensure that the Waist Belt fits
securely against your body at all times without creating a gap.
7. Fasten the Side Closure Buckle on one side. This step
will create a Leg Opening on the closed side.
8. With the carrier open on one side and the baby facing
you, carefully slide the baby into the carrier by fitting his/
her leg through the Leg Opening on the closed side of
the carrier.
*IMPORTANT! Keep one hand on the baby until all buckles
and straps are properly fastened.
*Make sure your baby’s leg goes through the Leg Opening on
the closed side of the carrier.
9. While supporting the baby with one hand, fasten the
other Side Closure Buckle.
10. Support the baby’s head by attaching the two Head
Support Buckles above each arm. Adjust the size of
the Head Support by pulling both of the Head Support
Straps.
*IMPORTANT! Always make sure there is enough room around your baby’s
face to provide a clear source of air.
11. Attach the Leg Strap to the Leg Strap Button on BOTH
SIDES of the carrier.
IMPORTANT! For babies between 8-11 lbs (3.6-5 kgs), the Leg Straps must be attached to make the leg opening smaller and to avoid a potential falling hazard.NOTE: For babies over 11 lbs (5 kg), this step is
unnecessary.
12. To adjust how high the baby rides on your chest, lift the
baby slightly and pull the Shoulder Strap Adjuster, first
on one strap, then on the other.
13. The Shoulder Strap Adjusters should be equal lengths after adjusting.
When the baby is properly positioned you should be able to tilt your head forward and kiss the top of your baby’s head.
NOTE: Wearing the carrier closer to your body and higher up on your chest will minimize stress to your back and shoulders from prolonged use.
IMPORTANT: Always make sure baby’s face, nose, and mouth are not
obstructed. Check your baby’s position regularly. Your baby should
centered in the carrier in a seated position with arms and legs extended and not constricted by the carrier.
14. It is extremely important to avoid any slouching in baby’s position. A slouching position can restrict baby’s airways.
15. Baby’s head should be upright or resting on your chest with the face, nose, and mouth positioned to the left or right.
16. Baby’s chin should never rest on baby’s chest. This can result in closing or partially closing baby’s airway
Head Support Adjustment
If your baby can fully hold his or her head upright on their own, you can lower the Head Support. Your baby MUST have sufficient head control.
before you lower the Head Support Fold down the Head Support and fasten the two Head Support Snaps to the carrier body.
Removing Baby from the Carrier: Facing-In Position
- NEVER unbuckle the Waist Belt while your baby is in the carrier.
- IMPORTANT! Make sure one arm is securely supporting baby throughout the process of removing baby from the
carrier. - ALWAYS support baby’s head in an upright position throughout the process of removing baby from the carrier.
- Be aware of your surroundings. Avoid any potential hazards or obstructions when removing baby from the carrier.
- Keeping one hand securely on the baby, release the two Head Support Buckles.
- Still keeping one hand on your baby, release the Side Closure Buckle on one side.
Put one hand on your baby inside the carrier, holding him/her to your chest. - Release Side Closure Buckle on the other side of the carrier. With both hands, lift
your baby and place him/her in a safe location. - You can now remove the carrier from your body
Aiebao Baby Carrier use for an Older Baby: Facing-In position with Expanded Seat
This position is for babies 15 lbs to 40 lbs (6.8 kgs to 18.2 kgs).
*Baby must be carried in the Facing-In position until baby is able to hold his or her head upright without assistance.
We recommend having another adult assist you if this is your first time using this type of carrier.
When using this carrier in the Facing-In position, you should fit it to the user before placing the baby in the carrier
Support baby securely throughout the process of putting baby in the carrier, until all the buckles and straps are properly fastened and adjusted.
- Take extra care when fastening buckles. You will hear a ‘click’ when properly secured.
- Your baby should always be comfortable. If your baby is fussy it could be an indication
that he or she is not properly positioned. If this occurs, take your baby out immediately
and adjust.
NOTE: The carrier parts in bold can be found on the carrier illustrations.
- Adjust the Conversion Flaps for the Expanded
Seat position by attaching the button hole over the
Conversion Toggle on the Waist Belt. - Unfasten the Chest/Back Buckle and Waist Belt
Buckle. Hold the carrier so the grey interior fabric of the
Shoulder Straps and Waist Belt face you. - Place your arms through the Shoulder Straps making
sure the grey interior fabric rests on your shoulders.
The carrier should be hanging down in front of you, with
the Side Closure Buckles, Head Support Buckles,
and Leg Straps open. - With Shoulder Straps in place, reach behind your back
to connect the Back/Chest Buckle. If this is difficult you
may need to raise the Back/Chest Strap on the Back/
Chest Strap Height Adjuster and loosen the Shoulder
Straps. If you need assistance, have another person
fasten the buckle.
- Pull the webbing strap on the Back/Chest Strap to
tighten. The Shoulder Straps should be wide and the
Back/Chest Strap should be straight across your back.
- NOTE: The height of the Back/Chest Strap can be adjusted by sliding
the Back/Chest Strap to the desired height.The strap should lay in a
comfortable position on your upper back.
6. Fasten the Waist Belt & Buckle around your waist and
pull the webbing to tighten.
NOTE: People with longer torsos may find a higher belt position more
comfortable (closer to the navel); shorter people may wish to wear the belt more on the hips.
IMPORTANT! ALWAYS ensure that the Waist Belt fits securely against
your body at all times without creating a gap.
7. Fasten the Side Closure Buckle on one side. You will
hear a ‘click’ when the buckle is secure. This step will
create a Leg Opening on the closed side.
8. With the carrier open on one side and the baby facing
you, carefully slide the baby into the carrier by fitting his/
her leg through the Leg Opening on the closed side of
the carrier.
IMPORTANT! Keep one hand on the baby until all buckles and straps
are properly fastened. Make sure your baby’s leg goes through the Leg Opening on the closed side of the carrier
9. While supporting the baby with one hand, fasten the
other Side Closure Buckle.
10. Support the baby’s head by attaching the two Head Support Buckles above each arm.
11. Adjust the size of the Head Support by pulling both of the Head Support Straps.
IMPORTANT! Always make sure there is enough room around your baby’s face to provide a clear source of air.
12. To adjust how high the baby rides on your chest, lift the baby slightly and pull the Shoulder Strap Adjuster, first on one strap, then on the other.
13. The Shoulder Strap Adjusters should be equal lengths after adjusting.
14. When the baby is properly positioned, you should be able to tilt your head forward and kiss the top of your baby’s head.
*NOTE: Wearing the carrier closer to your body and higher up on your chest
will minimize stress to your back and shoulders from prolonged use.
IMPORTANT: Always make sure baby’s face, nose, and mouth are not
obstructed. Check your baby’s position regularly.
15. Your baby should be centered in the carrier in a seated position with arms and legs extended and not constricted by the carrier.
16. It is extremely important to avoid any slouching in baby’s position. A slouching position can restrict baby’s airways.
17. Baby’s head should be upright or resting on your chest with the face, nose, and mouth positioned to the left or right.
18. Baby’s chin should never rest on baby’s chest. This can result in closing or partially closing baby’s airway
Aiebao Baby Carrier Use for an Older Baby: Facing-Out position with Folded Seat
This position is for babies with head control.
Never use the Expanded Seat when carrying the baby in the Facing-Out Position.
IMPORTANT! To avoid possible injury to baby’s neck or back, your baby MUST have sufficient head control before you place baby in the Facing-Out position.
Baby should be able to hold his or her head upright without assistance.
- We recommend having another adult assist you if this is your first time using this type of
carrier. - When using this carrier in the Facing-Out position, you should fit it to the user before placing
the baby in the carrier. - Support baby securely throughout the process of putting baby in the carrier, until all the buckles and straps are
properly fastened and adjusted. - Take extra care when fastening buckles. You will hear a ‘click’ when properly secured.
- Your baby should always be comfortable. If your baby is fussy it could be an indication that he or she is not properly
positioned. If this occurs, take your baby out immediately and adjust. - If baby falls asleep in the Facing-Out position you should switch to the Facing-In position or remove them from the
carrier entirely.
*NOTE: The carrier parts in bold can be found on the carrier Illustrations.
Aiebao Baby Carrier Head Support Adjustment
Fold down the Head Support and fasten the two Head
Support Snaps to the carrier body.
If your baby can fully hold his or her head upright on their own, you can lower the Head Support. Your baby MUST have sufficient head control before you lower the Head Support
Removing Baby from the Aiebao Baby Carrier: Facing-In Position
- NEVER unbuckle the Waist Belt while your baby is in the carrier.
- IMPORTANT! Make sure one arm is securely supporting baby throughout the process of removing baby from the
carrier. - ALWAYS support baby’s head in an upright position throughout the process of removing baby from the carrier.
- Be aware of your surroundings. Avoid any potential hazards or obstructions when removing baby from the carrier.
- Keeping one hand securely on the baby, release the two Head Support Buckles.
- Still keeping one hand on your baby, release the Side Closure Buckle on one side.
Put one hand on your baby inside the carrier, holding him/her to your chest. - Release Side Closure Buckle on the other side of the carrier. With both hands, lift
your baby and place him/her in a safe location. - You can now remove the carrier from your body
How To Use Aiebao Baby Carrier For Older Baby Facing-In Position
- Adjust the Conversion Flaps to the Folded Seat
position by folding the flap upward and fastening the
Conversion Snap on one flap to the Conversion Snap
on the other flap. - Unfasten the Chest/Back Buckle and the Waist Belt &
Buckle. Hold the carrier so the grey interior fabric of the
Shoulder Straps and Waist Belt face you. (The straps
should form a “V”). - Place your arms through the Shoulder Straps making
sure the interior grey fabric rests on your shoulders.
The carrier should be hanging down in front of you, with
the Side Closure Buckles, Head Support Buckles,
and Leg Straps open. - With Shoulder Straps in place, reach behind your back
to connect Back/Chest Buckle. If this is difficult you
may need to raise the Back/Chest Strap on the Back/
Chest Strap Height Adjuster and loosen the Shoulder
Straps. If you need assistance, have another person
fasten the buckle
- Pull the webbing strap on the Back/Chest Strap to
tighten. The Shoulder Straps should be wide and the
Back/Chest Strap should be straight across your back.
- NOTE: The height of the Back/Chest Strap can be adjusted
by sliding the Back/Chest Strap to the desired height. The
strap should lay in a comfortable position on your upper back.
6. Fasten the Waist Belt & Buckle around your waist and
pull the webbing to tighten.
NOTE: People with longer torsos may find a higher belt
position more comfortable (closer to the navel); shorter people
may wish to wear the belt more on the hips.
IMPORTANT! ALWAYS ensure that the Waist Belt fits
securely against your body at all times without creating a gap.
7. Fasten the Side Closure Buckle on one side. The step
will create a Leg Opening on the closed side.
8. Fold down the Head Support and fasten the two Head
Support Snaps to the carrier body
- With the carrier open on one side and the baby facing
away from you, carefully slide the baby into the carrier
by fitting his/her leg through the Leg Opening on the
closed side of the carrier.
*IMPORTANT! Keep one hand on the baby until all buckles and straps
are properly fastened.
*Make sure your baby’s leg goes through the Leg Opening on the
closed side of the carrier.
10. While supporting the baby with one hand, fasten the
other Side Closure Buckle.
11. Attach both Head Support Buckles, making sure that
the Head Support area remains folded down. Adjust
the size of the Head Support area by pulling both of the
Head Support Straps.
12. To adjust how high the baby rides on your chest, lift
the baby slightly and pull the Shoulder Strap Adjuster,
first on one strap, then on the other.
The ShoulderStrap Adjusters should be equal lengths after
adjusting. When the baby is properly positioned, you
should be able to tilt your head forward and kiss the
top of your baby’s head.
NOTE: The arms of smaller babies should be positioned below the
Head Support Buckles. Larger babies’ arms should be above the
buckles, and rest comfortably over the folded-down Head Support.
IMPORTANT: Always make sure baby’s face, nose, and mouth are not
obstructed. Check your baby’s position regularly. Your baby should be
centered in the carrier in a seated position with arms and legs extended and not constricted by the carrier.
13. It is extremely important to avoid any slouching in baby’s position. A slouching position can restrict baby’s airways.
14. Baby’s head should be upright. Baby’s chin should never rest
on baby’s chest. This can result in closing or partially closing baby’s
airway.
Removing Baby from the Aiebao Baby Carrier: Facing-Out Position
- NEVER unbuckle the Waist Belt while your baby is in the carrier.
- IMPORTANT! Make sure one arm is securely supporting baby throughout the process of removing baby from the
carrier. - ALWAYS support baby’s head in an upright position throughout the process of removing baby from the carrier.
- Be aware of your surroundings. Avoid any potential hazards or obstructions when removing baby from the carrier.
- Keeping one hand securely on the baby, release the two Head Support Buckles.
- Still keeping one hand on your baby, release the Side Closure Buckle on one side.
Put one hand on your baby inside the carrier, holding him/her to your chest. - Release Side Closure Buckle on the other side of the carrier. With both hands, lift
your baby and place him/her in a safe location. - You can now remove the carrier from your body
Aiebao Baby Carrier Use for an Older Baby: Back Carry Position with Expanded Seat
IMPORTANT! The baby MUST be able to fully sit up on his or her own before being worn in the Back Carry Position.
STOP! First time users, DO NOT attempt to use the carrier in the Back Carry Position without the assistance of a second adult. We highly recommend always using the assistance of a
second adult.
- When using this carrier in the Back Carry Position, you should fit it to the user before placing
the baby in the carrier. - Either you or your partner should be supporting baby securely throughout the process of putting baby in the carrier,
until all the buckles and straps are properly fastened and adjusted. - Take extra care when fastening buckles. You will hear a ‘click’ when properly secured.
*Your baby should always be comfortable. If your baby is fussy it could be an indication that he or she is not properly
positioned. If this occurs, take your baby out immediately and adjust.
*NOTE: The carrier parts in bold can be found on the carrier Illustrations.
- To adjust the Conversion Flaps for the Expanded Seat
position, attach the button hole over the Conversion
Toggle on the Waist Belt.
- Place your arms through the straps like you are putting
on a jacket. The carrier should be hanging down behind
you, with the Side Closure Buckles, Head Support
Buckles, and Leg Straps open. - Fasten the Chest/Back Buckle. Pull the strap to tighten.
NOTE: The height of the Back/Chest Strap can be adjusted by sliding
the Back/ Chest Strap to the desired height. The strap should lay in a
comfortable position on your chest. - Fasten the Waist Belt Buckle around your waist and
pull the webbing to tighten.
*NOTE: Persons with longer torsos may find a higher belt position more
comfortable (closer to the navel); shorter people may wish to wear the
belt more on the hips.
- IMPORTANT! ALWAYS ensure that the Waist Belt fits securely against
your body at all times without creating a gap.
5. Once the Waist Belt is properly fitted, lean forward
slightly and have your partner lift baby up and place
them on your back. Their legs should wrap around
your waist.
NOTE: It is helpful to lean forward slightly to help keep the child in a
high position on your back.
6. Either you or your partner should be supporting baby securely
throughout the process of putting baby in the carrier, until all the buckles and straps are properly fastened and adjusted.
7. With your hands supporting baby, have your partner pull
the carrier up over baby’s back.
8. Once the carrier body is up, the second person will
secure it closed by attaching first the Side Closure
Buckles and then the Head Support Buckles.
9. Once all buckles are fastened, stand up straight. While
your partner continues to support baby, they can adjust
the Head Support by pulling the Head Support Straps.
10. To adjust how high the baby rides on your back, your
partner can lift the baby slightly and you pull the
Shoulder Strap Adjuster, first on one strap, and then
the other. The Shoulder Strap Adjusters should be equal lengths after adjusting.
NOTE: Wearing the carrier closer to your body and higher up on your
back will minimize stress to your back and shoulders from prolonged
use.
11. Once the carrier is securely buckled and adjusted, your
partner can remove their support of baby. Have your
partner check to ensure the baby is properly positioned.
*IMPORTANT: Always make sure baby’s face, nose, and mouth are not
obstructed.
12. Check your baby’s position regularly. Your baby should be centered
in the carrier in a seated position with arms and legs extended an
not constricted by the carrier.
13. It is extremely important to avoid any slouching in baby’s position. A slouching position can restrict baby’s airways. Baby’s head should be upright or resting on your back with the face, nose, and mouth positioned to the left or right.
14. Baby’s chin should never rest on baby’s chest. This can result in closing or partially closing baby’s airway
Removing Baby from The Aiebao Baby Carrier: Back Carry Position Assisted
- NEVER unbuckle the Waist Belt while your baby is in the carrier.
- IMPORTANT! Make sure your partner is securely supporting baby throughout the entire process of removing baby
from the carrier. - IMPORTANT! NEVER lean against the child. ALWAYS make sure there is enough room around your child’s face to
provide a clear source of air. - Be aware of your surroundings. Avoid any potential hazards or obstructions when removing baby from the carrier.
- Slightly loosen the Shoulder Straps.
- While your partner holds baby securely in place, they should release the Head Support Buckles and one Side Closure Buckle.
- Your partner can now lift the child from the carrier.
- Release the Back/Chest Strap Buckle and the Waist Belt Buckle to remove the carrier.
Removing Baby from The Aiebao Baby Carrier: Back Carry Position Unassisted
- NEVER unbuckle the Waist Belt while your baby is in the carrier.
- IMPORTANT! NEVER lean against the child. ALWAYS make sure there is enough room around your child’s face to
provide a clear source of air. - Be aware of your surroundings. Avoid any potential hazards or obstructions when removing baby from the carrier.
- To remove baby yourself, sit down slowly and carefully in a secure corner seat such
as a sofa. - Gently ease baby back and unbuckle the Back/Chest Strap and Waist Belt.
Remove the Shoulder Straps and slowly remove baby from your back. - Remove baby from the carrier by unfastening both Head Support Buckles and
Side Closure Buckles.
Хипсит – физиологическая переноска для детей. Переноска Хипсит представляет собой сиденье для ребенка, прочно закрепляющееся у вас на поясе. Благодаря широкому поясу нагрузка равномерно распределяется по всей пояснице, снижая тем самым нагрузку на спину. После родов многие чувствуют боль в спине. Уникальная конструкция переноски Хипсит, благодаря распределению нагрузки, уменьшает боли в спине при переноске ребенка.
Хипситы, слинги и эргорюкзаки
Свыше 100 моделей в интернет магазине
В магазин

Хипсит или эргорюкзак:
1. При переноске ребенка с помощью Хипсита или эргономичного рюкзака, ваш позвоночник не искривляется, благодаря широкому поясу, распределяющего нагрузку на бедра.
2. Ребенка, сидящего в переноске Хипсит необходимо поддерживать одной рукой. У модели Понье Хипсит есть возможность пристегнуть дополнительную лямку для поддержания спины ребенка. В эргономичном рюкзаке ваши руки полностью свободны.
3. Переносить ребенка с помощью Хипсита можно в положении «животом к животу» или «на бедре», что для малыша является более физиологичным. В эргономичном рюкзаке переносить ребенка можно в 5 разных положениях:
— в горизонтальном (новорожденного и детей до 4 мес.) при наличии специальной вкладки. Но необходимо помнить, что вкладка не является физиологичной.
— в вертикальном «животом к животу» (с 4 до 7-8 мес. и дольше), но при условии критериев правильной посадки.
— в положении «за спиной у взрослого» (с 8 мес. и дольше).
— в положении «на бедре» (с 8 мес. и дольше).
— в положении «лицом к миру» (с 8 мес. и дольше).
4. Использовать переноску Хипсит можно только с 9 месяцев, когда ребенок уверенно самостоятельно сидит. Собственный вес ребенка в этом возрасте приходится на попу и бедра ребенка, что весьма комфортно для него. Посадка ребенка на Хипсите напоминает букву «П». Эргономичный рюкзак можно использовать с рождения при наличии специальной вкладки для переноски новорожденного в горизонтальном положении. Необходимо знать, что специальная вкладка не является физиологичной. С 4 месяцев можно садить ребенка в эргономичный рюкзак при условии, что малыш уверенно держит голову, а в положении лежа на животе, самостоятельно приподнимается с опорой на предплечья, вес ребенка при этом должен быть не менее 7,5-8 кг. Ребенок должен идеально вписаться в эргономичный рюкзак, заполнив собой весь его объем. Пустот и складок в эргорюкзаке быть не должно. Посадка ребенка должна напоминать четко выраженную букву «М», а позвоночник должен сохранять дугообразную форму. Врачи рекомендуют использовать эргономичный рюкзак с 6-7 месяцев, т.е. с периода самостоятельного сидения ребенка. При условиях соблюдения критериев правильной посадки и соответствия размера эргорюкзака росту и весу ребенка. Посадка ребенка в этом возрасте должна напоминать четко выраженную букву «П».


5. Одевать и раздевать Хипсит просто и быстро. На снятие\одевание эргономичного рюкзака уйдет чуть больше времени.
6. Хипсит компактен, он легко поместится в сумку.
7. Посадить и спустить ребенка с Хипсита на землю при необходимости можно быстро и оперативно, в отличие от других переносок.
8. Некоторые модели Хипсита можно использовать до 4-5 лет. Эргономичный рюкзак при необходимости можно использовать до 5 лет.
9. Сидя на Хипсите, ребенок имеет возможность повернуться в любую сторону, дотронуться до интересующего его предмета. Ничто не сковывает его движений. В эргономичном рюкзаке в положения «лицом к миру», также может дотягиваться до предметов, при этом мама будет точно уверена, что ребенок не упадет, благодаря стропам.
10. Ребенку в хипсите не жарко.
11. Хипсит как и эргономичный рюкзак — прекрасная альтернатива коляски.
В статье «Эргономичный рюкзак для переноски детей«, которую можно прочесть ЗДЕСЬ подробно описаны конструктивные особенности эргорюкзаков, критерии правильной посадки с рождения до 5 лет, видео инструкция по одеванию и переноске детей в различных положениях быстро обучит вас пользоваться эргономичным рюкзаком.
Хипситы, слинги и эргорюкзаки
Свыше 100 моделей в нашем каталоге
В магазин
С какого возраста можно использовать Хипсит?
Многие производители выпускают Хипситы для детей от 3 — 6 месяцев.
На фото справа – хипсит для детей от 3 месяцев при достижении ими веса в 12 кг. Сиденье хипсита расположено под углом 90 градусов.
На фото слева Хипсит для детей, рекомендованный производителем для детей от 6 месяцев до 3 лет, весом от 7 до 20 кг. Сиденье Хипсита расположено под углом 60 градусов.

Но имейте ввиду, что дети в 3 месяца самостоятельно сидеть не могут, а в 6 месяцев, если и сидят, то сидят плохо, неуверенно, мышцы спины еще не окрепли. Сидя в подобных Хипситах позвоночник ребенка 3-6 месяцев испытывает серьезные нагрузки и ранняя посадка ребенка в Хипсит приведет к нежелательным для здоровья малыша последствиям.
Врачи-педиатры и врачи-физиологи рекомендуют использовать хипсит только тогда, когда ребенок уверенно самостоятельно сидит, т.е. примерно с 9 месяцев до 3-4 лет. В возрасте 9 месяцев мышцы спины ребенка достаточно окрепли, чтобы держать собственный вес ребенка.
Для не ходящих детей лучше использовать эргономичный рюкзак или слинг-рюкзак.
Конструкция Хипсита
Переноска Хипсит состоит из широкого пояса (1), застёгивающегося на крепкую липучку вокруг поясничного отдела (2). Для того, чтобы липучка не расстегнулась имеется дополнительный страховочный ремень (3) с застежкой (4). К ремню сбоку пришита полочка, на которую садится ребенок (5). Верхняя часть полочки сделана так, чтобы ребенку было мягко и комфортно сидеть. Внутрь «полочки» вшита легкая, но твердая вкладка из пенополиуретана или резиново-пружинящей смеси Mum’s Era. Предотвращает давление вкладки на бедро вшитая поролоновая прокладка. Излишки ремня фиксируются резинкой или клипсой (6). Для различных мелочей у некоторых моделей Хипсита с внутренней и вешней стороны имеются кармашки.
Благодаря тому, что переноску Хипсит можно повернуть на пояснице в любую сторону это делает его очень удобным в использовании.
Сиденье Хипсита не рекомендуют поворачивать к животу, так как в этом положении полочка сильно давит на живот. Оптимальное положение Хипсита – сбоку над бедром. Для малыша такая поза является естественной, что позволяет ему принимать активное участие в вашей повседневной жизни. Врачи советуют почаще менять положение Хипсита (перемещать на правую либо на левую стороны).


Все модели Хипсита изготовлены таким образом, что позволяет ребенку сидеть на ровной поверхности, а у мамы при этом не искривляется позвоночник. Вы имеете возможность посадить ребенка как лицом к себе, так и от себя, что обеспечит малышу прекрасный кругозор. Но какое бы положение вы не выбрали ребенка необходимо всегда поддерживать одной рукой.
Хипситы, слинги и эргорюкзаки
Свыше 100 моделей в интернет магазине
В магазин
Как правильно одеть Хипсит смотрите подробную видеоинструкцию.
Как стирать переноску Хипсит
• Твердая часть сидения перед стиркой вынимается.
• Переноску Хипсит лучше стирать в специальной сетке для стирки, при этом все пряжки и липучки должны быть застегнуты.
• Хипсит необходимо стирать в холодной воде, выставив функцию «Деликатная стирка».
• В ходе стирки для сохранения цвета хипсита используйте мягкие щадящие средства.
• Сушить хипсит необходимо только в тени в расправленном виде.
• При незначительных загрязнениях рекомендуем ручную стирку.
Какой хипсит лучше купить?
Наиболее распространенные марки переносок хипсит, которые можно купить в магазине это: Хипсит Mum’s Era, Хипсит Понье (Pognae), Хипсит Hippychick и Хипсит Бэмби.
Хипситы Mum’s Era и Бэмби производятся в России.
Хипситы Pognae производятся в Корее.
Хипситы Hippychick производятся в Англии.
Рассмотрим более подробно каждую из модели переносок Хипсит.
| Модель Хипсита |
Обхват талии (длина пояса) |
Приподнятая полочка (тоддлер) | Возраст ребенка | Дополнительные аксессуары | Место производства переноски Хипсит |
| Хипсит Понье (Pognae) |
до 110 см | Имеется | С 6 мес. до 3 лет | Спинка. Поясная сумка |
Корея |
| Хипсит-смарт Понье | до 110 см | Имеется | С 6 мес. до 3 лет | Мешок для переноски, поясная сумочка, накладки для сосания, спинка на одно плечо, спинка на 2 плеча |
Корея |
| Хипсит Хиппичик |
до 125 см (с удлинителем) |
Нет | С 6 мес. до 2 лет | Удлинитель ремня, поясная сумочка | Англия |
| Хипсит Бемби | до 110 см | Нет | С 6 мес. до 2 лет | Мешочек для переноски | Россия |
| Хипсит-тоддлер Бемби | до 110 см | Имеется | С 6 мес. до 3 лет | Поясная сумочка, мешочек для переноски | Россия |
| Хипсит Mum’s Era | до 125 см | Имеется | С 6 мес. до 3 лет | Нет | Россия |
Материал для изготовления Хипситов:
Для изготовления хипситов используют либо плотную хлопковую ткань (джинсовый Pognae Denim), либо полиэстер (нейлон) (остальные Pognae, Hippychick, Бэмби и Mum’s Era).
Плотный высококачественный полиэстер используют только при изготовлении модели Понье и Хиппичик. Все остальные модели изготавливают из обычного полиэстера.
Дополнительные спинки и аксессуары, используемые в переносках Хипсит:
В Хипситах Pognae (Понье) имеется дополнительная спинка на ремне через одно плечо, которая позволяет перераспределять нагрузку на верхний отдел позвоночника и освободить вторую руку.
В Хипсах Понье-Смарт (Pognae Smart) имеется дополнительная спинка с двумя лямками, позволяющая использовать Хипсит как рюкзак.
Хипситы Бэмби-тоддлер, Бэмби и Понье-Смарт поставляются в комплекте с мешочком для переноски разных мелочей. К Хипситу Хиппичик можно дополнительно приобрести дополнительный пояс, позволяющий увеличить обхват основного пояса до 125 см, а у модели Хипсита Mum’s Era изначально длина пояса увеличивается до 125 см.
Модель Хипсита Бэмби-тоддлер поставляется в комплекте с сумочкой, к моделям Хипситам Понье и Хиппичик сумочка приобретается отдельно. Сумочка, прикрепленная к поясу, легко перемещается в любое удобное для вас место.


Переноска Хипсит. Отзывы
• Хипситы удобны в использовании.
• Для переноски детей весом до 15 кг рекомендуем купить Хипсит Хиппичик или Хипсит Бэмби.
• Для переноски детей весом до 30 кг лучше купить модель Хипсит Бэмби-тоддлер, Pognae (Понье) Хипсит, либо Хипсит Mum’s Era, благодаря тому, что данные модели имеют наклон полочки и усиленные крепления.
• Хипсит Хиппичик, а также его дешевый аналог Хипсит Бэмби имеет горизонтальную полочку и вшитую внутрь поролоновую вкладку.
• Хипсит Бэмби-тоддлер, Понье Хипсит и Хипсит Mum’s Era отличаются приподнятой под углом полочкой.
• У модели хипсита Mum’s Era полочка слегка пружинит, смягчая при этом нагрузку при ходьбе.
• Переноска Понье Хипсит изготовлен из крепких, жестких материалов, в отличие от Хипсита Mum ’ s era он меньше прогибается от веса ребенка, а ремень при переноске ребенка не сминается. Максимальная длина ремня 110 см, что на 10 см короче, чем у Хипсита Mum’s era.
• У модели Понье Хипсит есть возможность пристегнуть дополнительную лямку для поддержания спины ребенка. Эта модель прекрасно подходит для переноски тяжелых детей.
• Так как хипсит Mum’s era сделан из более мягких материалов, чем Понье Хипсит, он сильнее прогибается от веса ребенка. В положении хипсита «на животе» ремень сминается. Для модели Хипсит Mum’s era не предусмотрено дополнительных аксессуаров.
• Все модели Хипситов в положении на животе при переноске ребенка давят на живот, какие-то больше, какие-то меньше. В положении на бедре давления на живот не происходит. В таком положении тазобедренные кости не дают сильно прогибаться сиденью. Если вы планируете носить ребенка в положении на животе, то лучше купить модель хипсита Pognae.
Что подарить маме новорожденного?
Переноска Хипсит является отличным практичным подарком молодой маме. Хипсит убережет позвоночник от нагрузок, поддержит спину в ровном положении, облегчит переноску ребенка.
Еще одним прекрасным подарком молодой маме является Тотсит. Тотсит превратит любой стул в удобный стул для кормления.
Тотсит удобно брать с собой в гости, где не окажется детского стульчика для кормления. В этом случае Тотсит избавит вас от необходимости кормить ребенка держа его при этом на руках.
В малогабаритных квартирах, где нет места детским стульчикам для кормления Топсит будет незаменимой вещью.

Хипситы, слинги и эргорюкзаки
Свыше 100 моделей в интернет магазине
В магазин
Полезные статьи:
Детское автокресло: подробная характеристика детских автокресел по группам, какое выбрать, как установить в зависимости от возраста ребенка, характеристика креплений автокресел.
Активное слушание — как путь установления лучшего контакта с ребенком.В каких ситуациях применяется активное слушание? Как научиться слушать и слышать ребенка?
Ребенок раздражает? Не слушается? Стремитесь сделать за ребенка то, что он может сделать сам? Как себя вести с ребенком? Ответы найдете в нашей статье ЗДЕСЬ!
Что такое хипсит кенгуру Aiebao 3в1
Купить хипсит кенгуру Aiebao 3в1 на нашем сайте можно ОПТОМ от 20 шт. или меньше, если Вы покупаете у нас и другие товары.
Лучшая модель детской переноски на 4 сезона!
Ваш малыш часто плачет и просится на ручки, а у вас нет сил его носить на руках?
Ищете комфортный способ носить ребенка на руках?
Вы часто носите ребенка на бедре?
Вас беспокоят боли в спине и плечах при ношении ребенка на руках, в кенгуру или слинге?
Вы хотите выйти в магазин, на улицу, в банк, в офис с ребенком без коляски?
Ребенок не хочет ехать в коляске и просится к Вам на руки?
Ваш ребенок начал ходить, но не может ходить долго?
В таком случае, вам необходим хипсит кенгуру Aiebao 3в1, быстрого и комфортного размещения малыша! Хипсит-кенгуру Aiebao 3в1 это гибрид хипсита и эрго-рюкзака. В данной переноске можно носить ребенка лицом к маме, лицом к окружающему миру, а также носить ребенка на боку на хипсите. Благодаря специальной анатомической конструкции хипсит-кенгуру переносит вес ребенка с поясницы на таз и бедра, снимая нагрузку с позвоночника и рук взрослого. Позволяет носить малышей с 6 месяцев и до 3-х лет с легкостью в спине, а также с его помощью можно быстро поднять или спустить ребенка вниз, без утомительных застегиваний.
Хипсит кенгуру Aiebao 3в1 имеет три варианта использования:
1. От 0 до 3 месяцев горизонтально в положении лежа (малыш лежит перед мамой, переноска крепится за лямку через одно плечо). При этом специально разработанный воротник удерживает голову и шейный отдел малыша в анатомически правильном положении, пока тот не научится держать голову самостоятельно. Жесткая спинка позволяет укрепить позвоночный столб малыша, избегая провисания и сгибания спины.
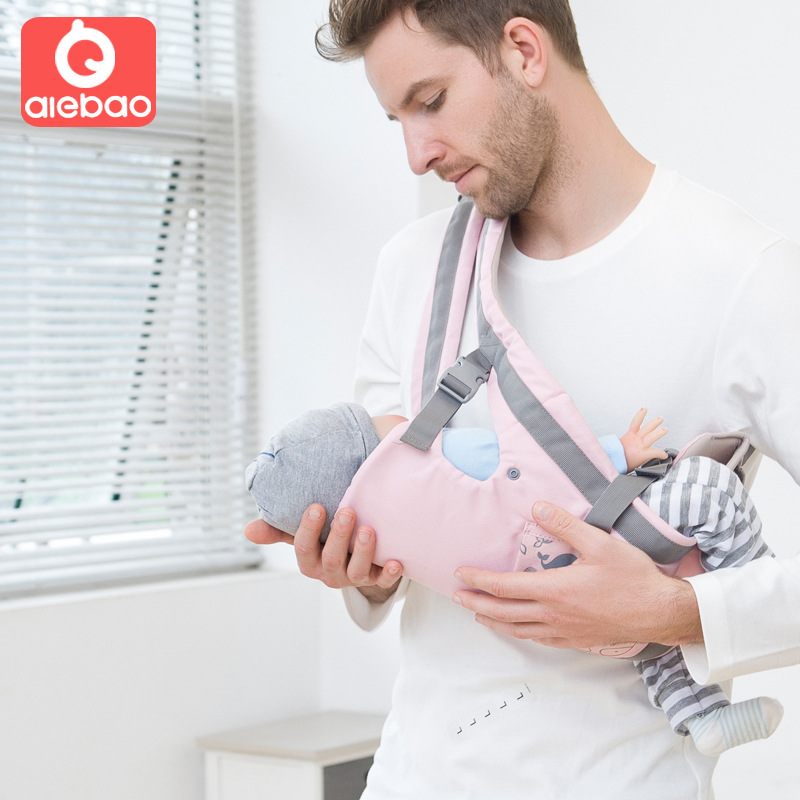
2. Рюкзак кенгуру.
Малыш может находится перед мамой лицом к ней или вперед (воротник опускается), а также за спиной. Если ваш ребенок еще самостоятельно не сидит, с сидения вынимается твердая часть, в следствии чего, ребенок находиться в рюкзачке в удобной физиологической позе. В рюкзаке ребенок находится в таком же положении, как на ручках у мамы, ножки широко разведены в позе «лягушенка». Такое положение является физиологичным и не только максимально удобно для малыша, но и очень полезно, поскольку является профилактикой дисплазии тазобедренных суставов. В рюкзачке есть подголовник, на случай, если ваш малыш еще не уверенно держит голову. С рюкзачком очень удобно ходить на плановые осмотры в поликлинику.
3. Хипсит.
Со спинкой малыш сидит перед мамой лицом к ней или вперед, а также за спиной. Ношение вперед к себе. Посадка вперед к себе во все времена считается эргономично правильной, ведь за счет этого нагрузка снижается как для малыша так и для мамы, так же происходит близкий контакт с малышом, что психологически полезно. Подойдет для долгих прогулок и сна. Ношение вперед к дороге. Малыши за частую после 5 месяцев становятся очень любопытны и им хочется лицезреть мир, к тому же вокруг столько интересного, зоопарки, океанариумы, птички, природа во дворе. С такой посадкой отлично изучаем мир!
Без спинки сиденье располагается перед мамой или на бедре, а малыш может сидеть лицом вперед или к маме. Стульчик на боку, застегивается на талии или на бедре! Подходит для деток с 6 месяцев и вплоть до 3-х лет. Ваш ребенок уже сидит или начал ходить, но не может идти долго? тогда стульчик вам пригодиться как нельзя к стати. Идете гулять при этом сидушка прицеплена у вас на боку, поверьте, мешать она вам не станет, т.к. она легкая и вы в любой момент сможете поднять малыша и посадить без застегиваний! А также спуститься из дома на площадку, поднять малыша как только он запросился на ручки, посетить врача в поликлинике, и даже отнести старшего ребенка утром в садик посадив его на Хипсит. Подходит на быстрые и короткие прогулки.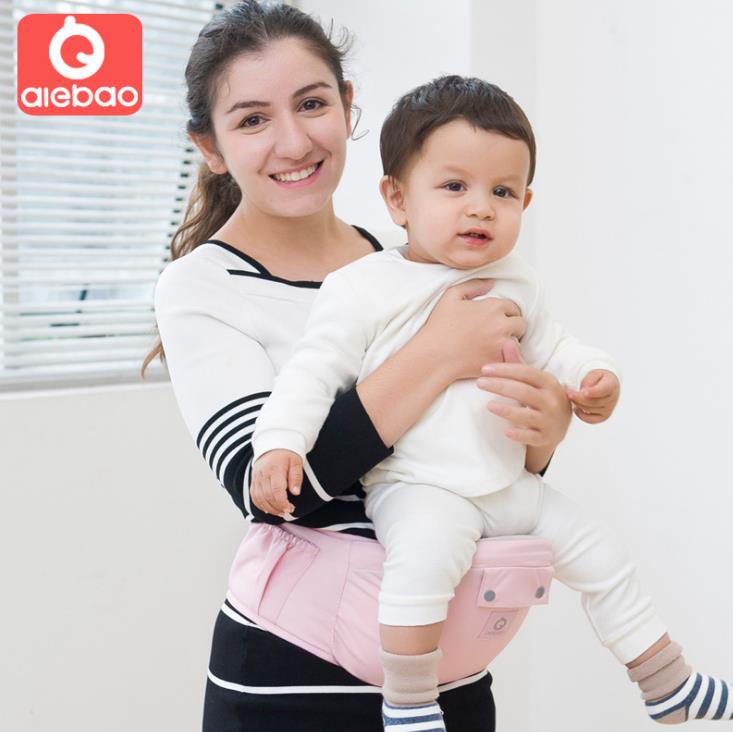
Преимущества:
- Мягкие шлейки при ношении не оказывают давления на плечи, имеет мягкую и надежную посадку.
- Вентилируемая 3-d сетка с внутренней стороны рюкзака позволяет проходить воздуху, благодаря чему вам и ребенку будет комфортно в жаркую погоду.
- Эргономический дизайн рюкзака сиденье хипсита расположено под углом к маме.
- Можно использовать хипсит (сидение) отдельно, так и в составе рюкзака внутренняя твердая часть хипсита вынимается, а ткань можно постирать.
- Удобно, быстро и просто одевается!
- Самая удобная переноска для детей весом до 26 кг.
Характеристика:
Возраст: с рождения до 3-х лет;
Максимальный вес: до 26 кг;
Материал снаружи: 100 % хлопок, внутри: полиэстер с вентилируемой сеточкой;
Цвет: синий, красный, розовый, бирюзовый;
Карман для мелочей на спине;
Способ фиксации: липкая лента, регулируемые шлейки с пряжками.
Страховочный пояс, регулируемый по длине 60 см.
Фиксирующий пояс на липкой ленте 85 см (максимальная длина).
Комплектация:
Хипсит кенгуру Aiebao 3в1 1 шт.
Упаковка: картонная коробка;
Размер упаковки: 23.00 х 28.00 х 8.00 см.
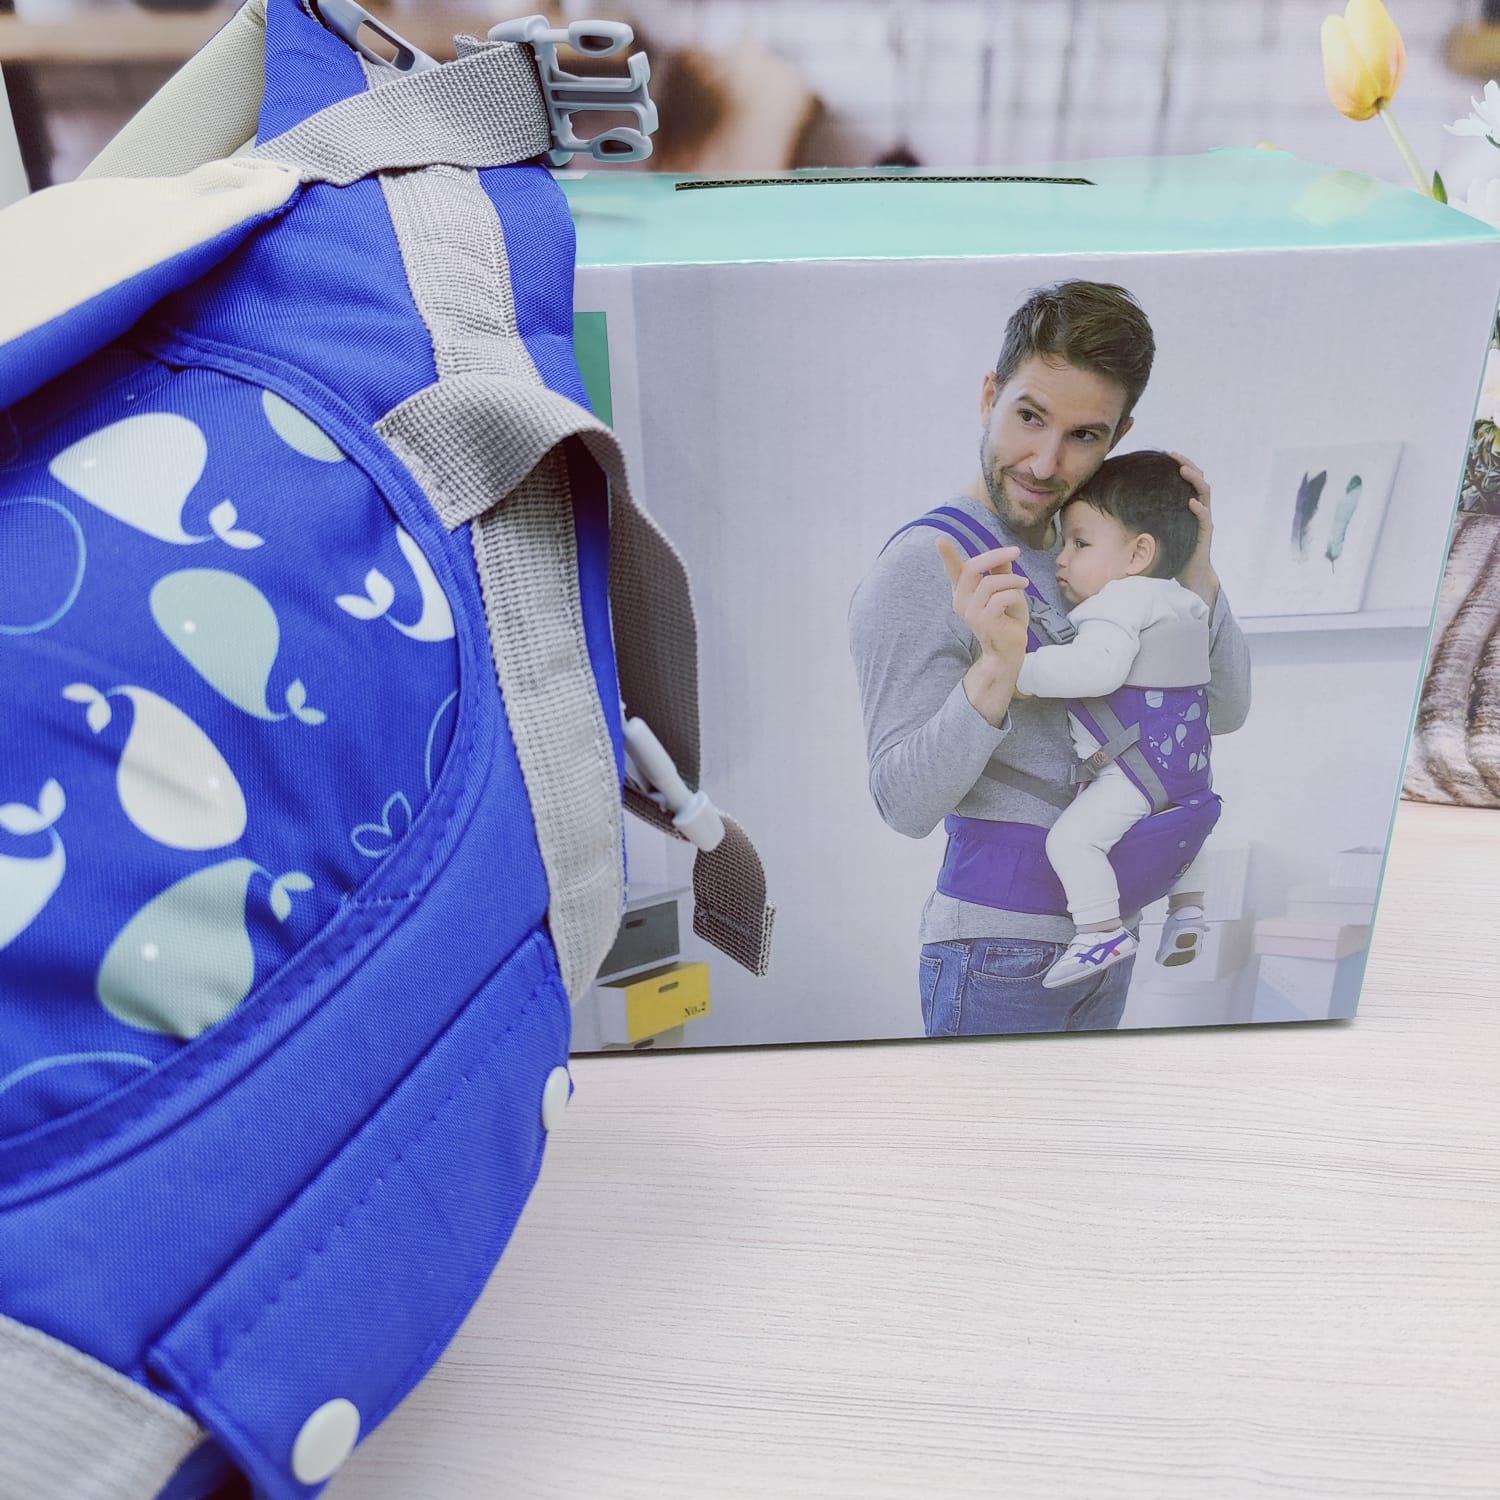
Почему купить хипсит кенгуру Aiebao 3в1 оптом выгодно у нас
- Гарантия низких цен, напрямую от производителя
- Отгрузка товара со склада в Минске в течение 1-7 рабочих дней
- Акции, скидки и подарки для постоянных клиентов
- Двухуровневая проверка каждой единицы товара на брак
- Замена неликвида в течение 14 дней,
- Доставка Белпочтой, EMS, курьером, самовывоз, транспортной компанией.
- Оплата по ЕРИП, электронными деньгами, банковской картой, наличными и на расчётный счёт!
- Выгрузка на сайт ссылкой — более 3000 позиций, с фото и описанием на ваш сайт с поддержкой актуальности наличия
- Предоставляем живые фотографии товаров
- Гарантированная замена брака