
Godox V1 TTL Li-ion Round Head Camera Flash Manual
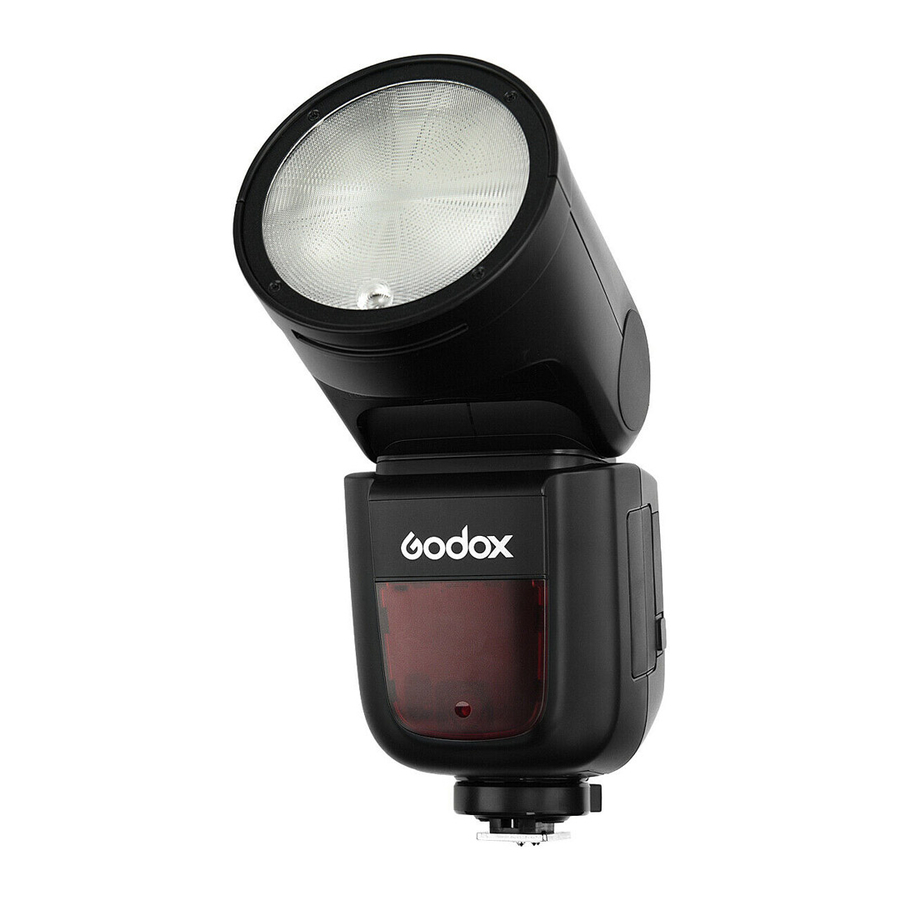
Foreword
Thank you for purchasing this product.
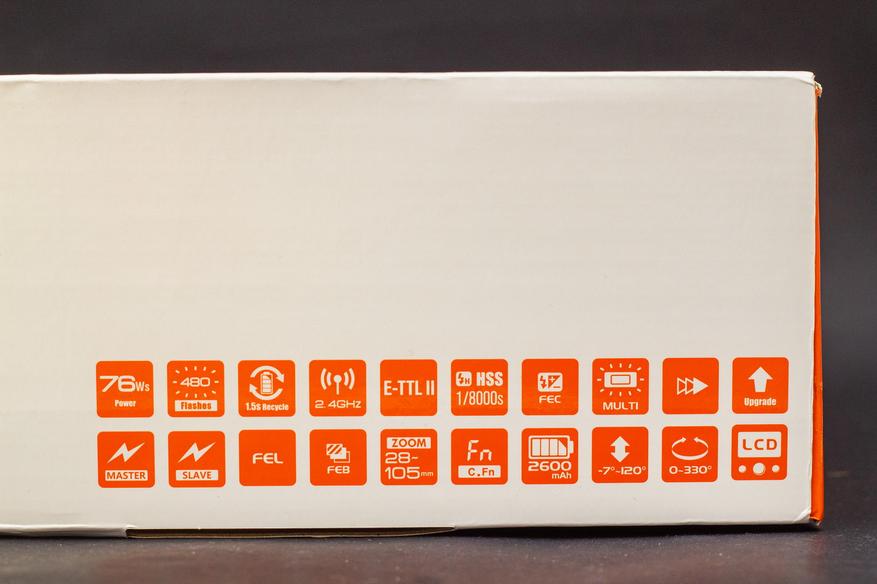
This V1C camera flash applies to Canon EOS series cameras and is compatible with E-TTL II autoflash. With this E-TTL II compatible flash, your shooting will become simpler. You can easily achieve a correct flash exposure even in complex light-changing environments. This camera flash features:
- With round flash head to achieve soft, even and more creative light effects. It has a 2W LED modeling lamp, which can be used off the camera.
- 76Ws power output at the max step. 81 steps from 1/1 to 1/128.
- Pro 2 00mAh Li-ion Battery- 6 max.1.5s recycle- 480 full power pops.
- Fully support Canon E-TTL II camera flash. Workable as Master or Slave unit in a wireless flash group.
- Use dot-matrix LCD panel to make clear and convenient operations.
- With built-in 2.4GHz wireless remote system to support transmitting and receiving.
- Provided multiple functions, include HSS (up to 1/8000s), FEC, FEB, etc.
- Stable consistency and color temperature with good even lighting.
- Support with firmware upgrade.
Warning
Always keep this product dry. Do not use in rain or in damp conditions.
Do not disassemble. Should repairs become necessary, this product must be sent to an authorized maintenance center.
Keep out of reach of children.
Stop using this product if it breaks open due to extrusion, falling or strong hit. Otherwise, electric shock may occur if you touch the electronic parts inside it.
Do not fire the flash directly into the eyes (especially those of babies) within short distances. Otherwise visual impairment may occur.
Do not use the flash unit in the presence of flammable gases, chemicals and other similar materials. In certain circumstance, these materials may be sensitive to the strong light emitting from this flash unit and fire or electromagnetic interference may result.
Do not leave or store the flash unit if the ambient temperature reads over 50℃. Otherwise the electronic parts may be damaged.
Turn off the flash unit immediately in the event of malfunction.
Conventions used in this Manual
Name of Parts
Body
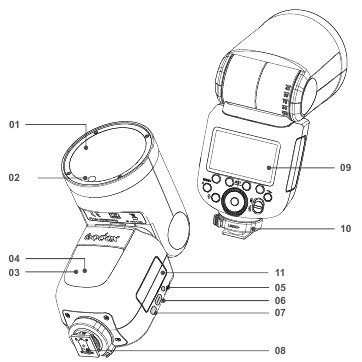
- Flash Head
- LED Modeling Lamp(01~10)
- Wireless Sensor
- Focus Assist Beam
- Sync Cord Jack
- Type-C USB Port
- Battery Remove Button
- Hotshoe
- LCD Panel
- Hotshoe Fixing Buckle
- Lithium Battery
Control Panel
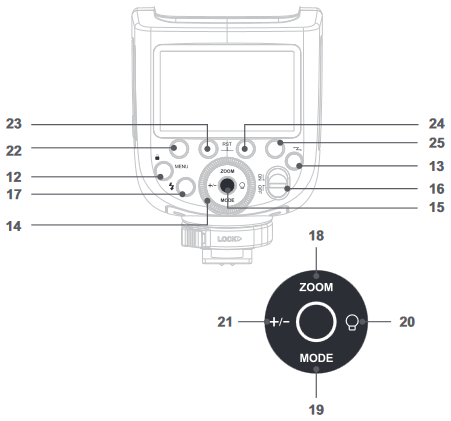
- <MENU>Flash Menu Button/Locking Button
- <
 >Wireless Selection Button
 - Select Dial
- Set Button
- ON/OFF Power Switch
- <
 > Test Button / Flash Ready Indicator
 - <ZOOM> Focus Lengthм Setting
- <MODE>Mode Selection Button
- <
 >Modeling Lamp Setting
 - <+/->Power Output
- Function Button 1
- Function Button 2
- Function Button 3
- Function Button 4
 >Wireless Selection Button
LCD Panel
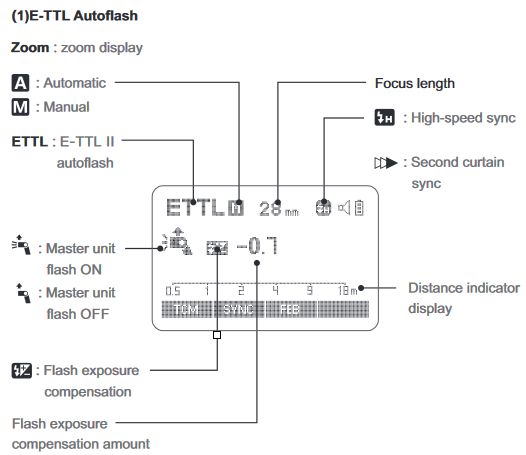
- The display will only show the settings currently applied.
- The functions displayed above function buttons 1 to 4, such as SYNC and <A/B/C/D>, change according to settings’ status.
- When a button or dial is operated, the LCD panel illuminated.
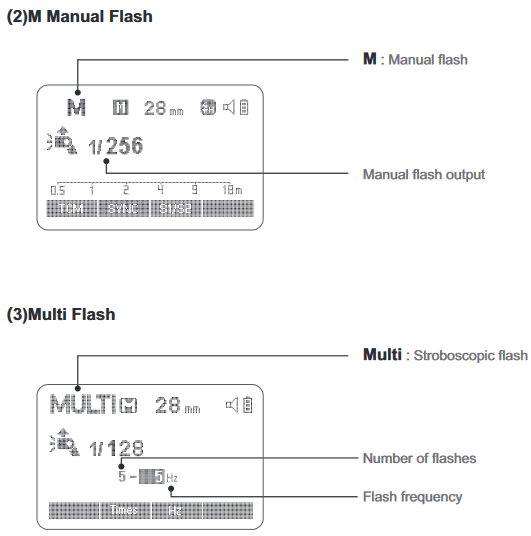
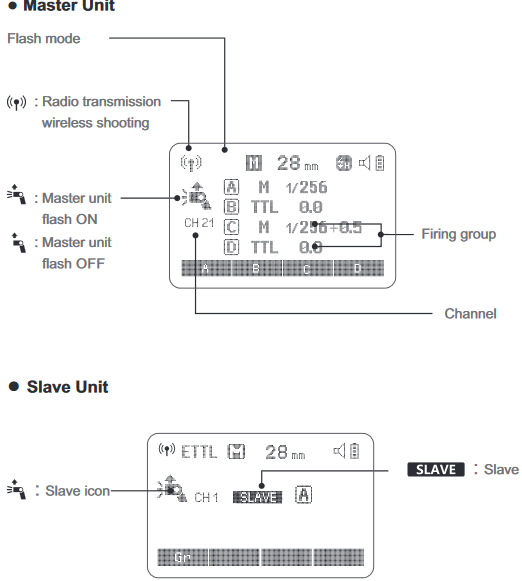
LCD Panel in Three Modes
What’s in the Box of V1C Kit?
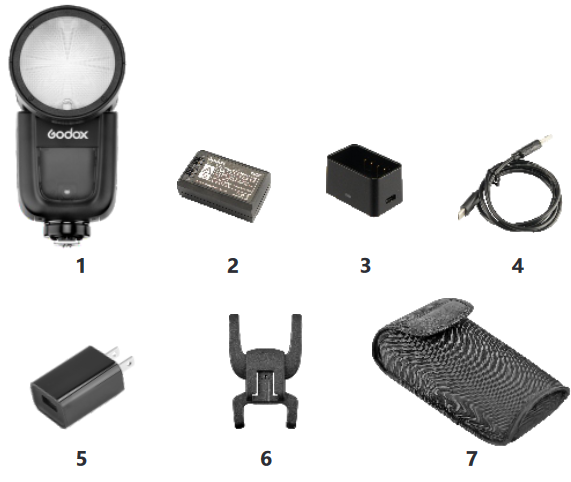
- Flash Unit
- Lithium Battery
- USB Battery Charger
- USB Line
- Charger
- Mini Stand
- Protection Case
- Instruction Manual
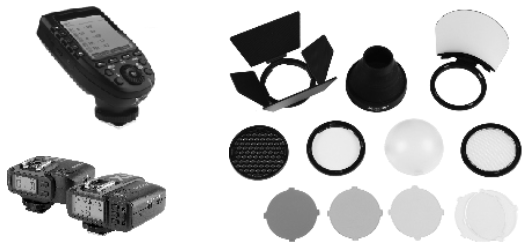
Separately Sold Accessories
The product can be used in combination with the following accessories sold separately, so as to achieve best photography effects: XProC & X1C TTL wireless flash trigger, AK-R1 accessory kit for round flash head, etc.
Battery
Features
- This flash unit uses Li-ion polymer battery which has long runtime. The available charge-and-discharge times are 500.
- It is reliably safe. The inner circuit is against overcharge, overdischarge, overcurrent, and short circuit.
- Take only 3.5 hours to fully charge the battery by using the standard battery charger.
Cautions
- Do not short circuit.
- Do not expose to rain or immerse into water. This battery is not water proof.
- Keep out of reach of children.
- No over 24 hours’ continuous charging.
- Store in dry, cool, ventilated places.
- Do not put aside or into fire.
- Dead batteries should be disposed according to local regulations.
- If the battery had ceased using for over 3 months, please make a full recharge.
Loading and Unloading the Battery
- To unload the battery, hold down the battery remove button and push the battery downwardly to take it out.

- According to the triangle sign on the battery pack, insert it into the compartment until a white knob locks the battery with a click sound.

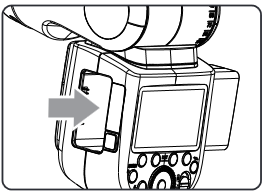
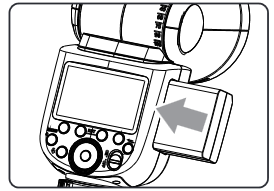
Battery Level Indication
Make sure the battery pack is securely loaded in the flash. Check the battery level indication on the LCD panel to see the remaining battery level.
| Battery Level Indication | Meaning |
| 3 grids | Full |
| 2 grids | Middle |
| 1 grid | Low |
| Blank grid | Lower battery, please recharge it. |
| Blinking | The battery level is going to be used out immediately. And the flash will auto power off in 1 minute. Note: Please recharge the battery as soon as possible (within 10 days). Then, the battery can be used or be placed for long period. |
LED Modeling Lamp
Press the Modeling Lamp Setting button to set the modeling lamp. Short press the Set Button to turn on or off the modeling lamp. When turning the modeling lamp on, turn the select dial to set its brightness. There are 10 levels(01~10) for choice.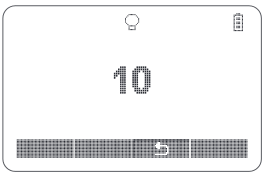
Power Management
Use ON/OFF Power Switch to power the flash unit on or off. Turn off if it will not be used for an extended period of time. Setting as a master flash, it will turn the power off automatically after a certain period (approx. 90 seconds) of idle use. Pressing the camera shutter halfway or pressing any flash button will wake up the flash unit. Setting as a slave flash, it will enter sleep mode after a certain period (adjustable, 60 minutes by default) of idle use. Pressing any flash button will wake it up.
C.Fn Disabling Auto Power Off function is recommended when the flash is used off camera. (C.Fn-STBY)
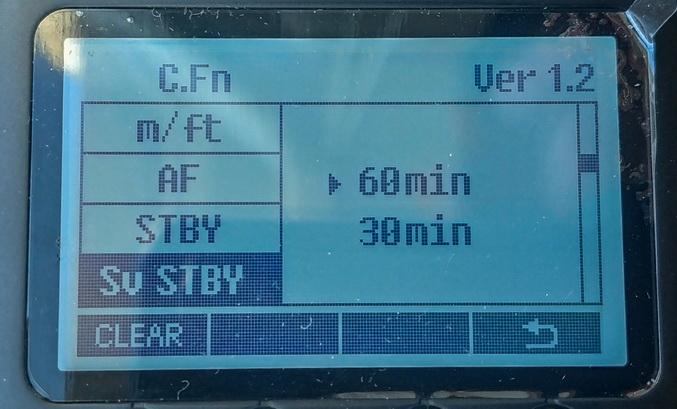
C.Fn Slave Auto Power Off Timer is set to 60 minutes by default. Another option «30 minutes» is available. (C.Fn- Sv STBY)
Flash Mode—E-TTL Autoflash
This flash has three flash modes: E-TTL, Manual (M), and Multi (Stroboscopic). In E-TTL mode, the camera and the flash will work together to calculate the correct exposure for the subject and the background. In this mode, multiple TTL functions are available: FEC, FEB, FEL, HSS, second curtain sync, modeling flash, control with the camera’s menu screen.
* Press < MODE > Mode Selection Button and three flash modes will display on the LCD panel one by one with each pressing.
ETTL Mode
Press < MODE > Mode Selection Button to enter E-TTL mode. The LCD panel will display.
- Press the camera release button halfway to focus. The aperture and effective flash range will be displayed in the viewfinder.
- When the shutter button is fully pressed, the flash will fire a preflash that the camera will use to calculate exposure and flash output the instant before the photo is taken.
 FEC: Flash Exposure Compensation
With FEC function, this flash can adjust from -3 to +3 in 1/3rd stops. It is useful in situations where minor adjusting of the TTL system is needed based on the environment.
Setting FEC:
FEL: Flash Exposure Lock
FEL can lock the correct flash exposure setting for any part of the scene. With <ETTL> displayed on the LCD panel, press the camera’s <FEL> button. If the camera does not have the <FEL> button, press the < * > button.
- Focus the subject.
- Press the <FEL> button.

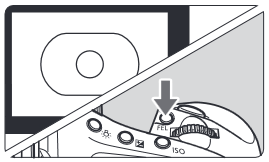
- Aim the subject at the center of the viewfinder and press <FEL> button.
- The camera flash will fire a preflash and the required flash output for the subject is retained in memory.
- Each time the <FEL> button is pressed, a preflash will be fired and a new flash exposure setting will be locked.
- If the subject is too far away and underexposure, the <
 > icon will blink in the viewfinder. Move closer to the subject and try the FE lock again.
 - If <ETTL> is not displayed on the LCD panel, FE lock cannot be set.
- If the subject is too small, FE lock might not be very effective.
 > icon will blink in the viewfinder. Move closer to the subject and try the FE lock again.
 High-Speed Sync
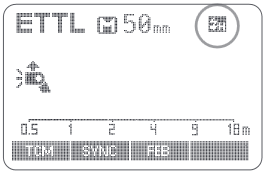
High Speed Sync (FP flash) enables the flash to synchronize with all camera shutter speeds. This is convenient when you want to use aperture priority for fill-flash portraits.
- Press Function Button 2 < SYNC > so that <
 > is displayed.
 - Check that <> is displayed in the viewfinder.

 > is displayed.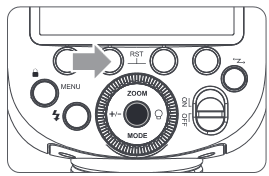
 Second-Curtain Sync
With a slow shutter speed, you can create a light train following the subject. The flash fires right before the shutter closes.
Press function button 2 < SYNC > button so that < > is displayed on the LCD panel.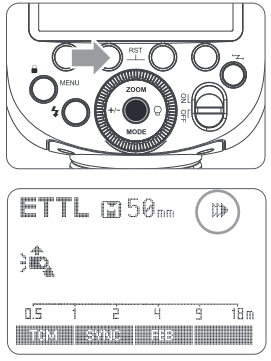
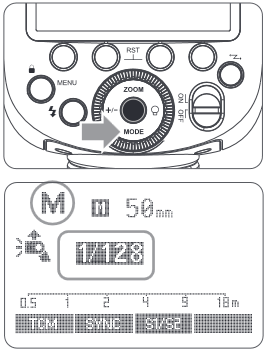
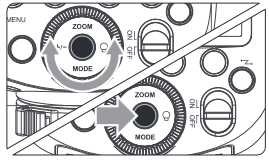
The flash output is adjustable from 1/1 full power to 1/256th power in 1/10th stop increments. To obtain a correct flash exposure, use a hand-held flash meter to determine the required flash output.
- Press < M: Manual Flash> button so that < M > is displayed.
- Turn the Select Dial to choose a desired flash output amount.
- Press Set Button again to confirm the setting.
Optic S1 Secondary Unit Setting
In M manual flash mode, press <S1/S2> button so that this flash can function as an optic S1 secondary flash with optic sensor. With this function, the flash will fire synchronously when the main flash fires, the same effect as that by the use of radio triggers. This helps create multiple lighting effects.
Optic S2 Secondary Unit Setting
Press <S1/S2> button so that this flash can also function as an optic S2 secondary flash with optic sensor in M manual flash mode. This is useful when cameras have pre-flash function. With this function, the flash will ignore a single «preflash» from the main flash and will only fire in response to the second, actual flash from the main unit.
- S1 and S2 optic triggering is only available in M manual flash mode.
Multi: Stroboscopic Flash
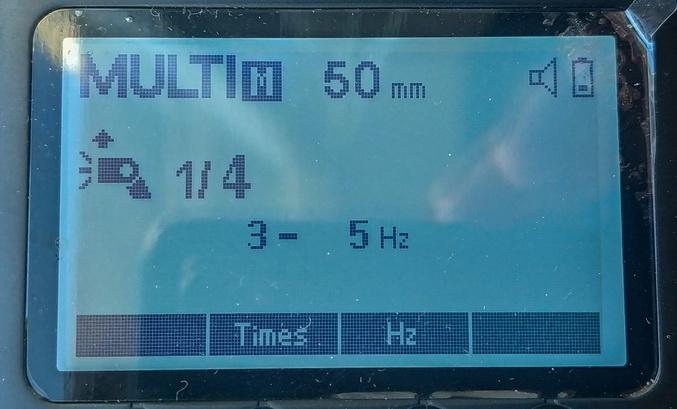
With stroboscopic flash, a rapid series of flashes is fired. It can be used to capture a multiple images of a moving subject in a single photograph. You can set the firing frequency (number of flashes per sec. expressed as Hz), the number of flashes, and the flash output.
- Press <MODE> button so that < MULTI > is displayed.

- Set the flash frequency and flash times.

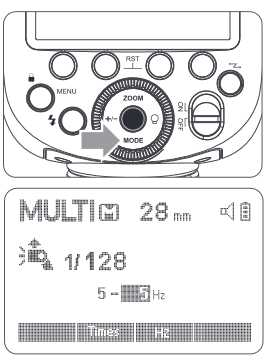

- Press the Function Button 2 <Times> to select the flash times. Turn the Select Dial to set the number.
- Press the Function Button 3 <Hz> to select the flash frequency. Turn the Select Dial to set the number.
- Turn the Select Dial to choose a desired flash output.
- After you finish the setting, press Set Button and all the settings will be displayed.
Calculating the Shutter Speed
During stroboscopic flash, the shutter remains open until the firing stops. Use the formula below to calculate the shutter speed and set it with the camera.
Number of Flashes / Flash Frequency = Shutter Speed
For example, if the number of flashes is 10 and the firing frequency is 5 Hz, the shutter speed should be at least 2 seconds.
To avoid overheating and deteriorating the flash head, do not use stroboscopic flash more than 10 times in succession. After 10 times, allow the camera flash to rest for at least 15 minutes. If you try to use the stroboscopic flash more than 10 times in succession, the firing might stop automatically to protect the flash head. If this happens, allow at least 15 minutes’ rest for the camera flash.
Stroboscopic flash is most effective with a highly reflective subject against a dark background.
- Using a tripod and a remote control is recommended.
- A flash output of 1/1 and 1/2 cannot be set for stroboscopic flash.
- Stroboscopic flash can be used with»buLb«.
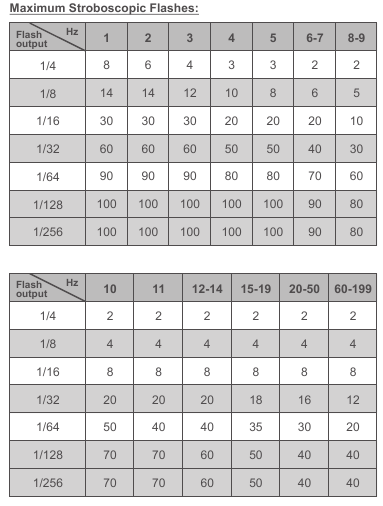
- If the number of flashes is displayed as «—«, the firing will continue until the shutter closes or the battery is exhausted. The number of flashes will be limited as shown by the following table.
Wireless Flash Shooting: Radio (2.4G) Transmission
- When the camera’s shooting mode is set to a fully automatic mode or an Image Zone mode, the operations in this chapter are not available. Set the camera’s shooting mode to P/Tv/Av/M/B (Creative Zone Mode).
- The V1C attach to the camera is called the master unit, and a V1C that is wirelessly controlled is called the slave unit.
- You can also wirelessly control the V1C set as the slave unit with the transmitter X1T-C (sold separately). For details on setting the master unit functions, see the transmitter’s instructions.
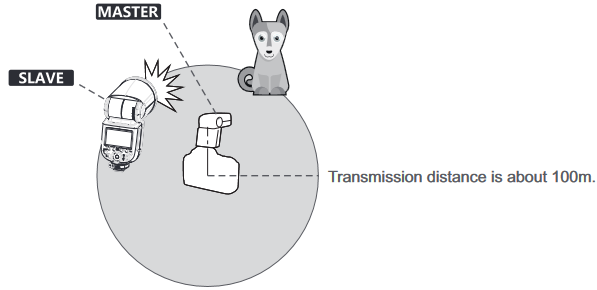
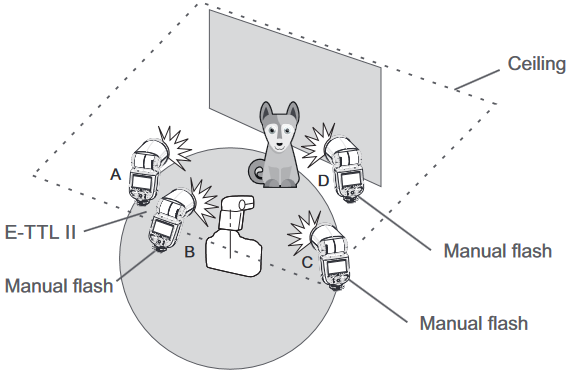
Using a flash (master/slave) with a radio transmission wireless shooting function make it easy to shoot with advanced wireless multiple flash lighting, in the same way as E-TTL II autoflash shooting. The basic relative position and operation range are as shown in the picture. You can then perform wireless E-TTL II autoflash shooting just by setting the master unit to <ETTL>.
Positioning and Operation Range (Example of wireless flash shooting)
- Autoflash Shooting with One Slave Unit

- Use the supplied mini stand to position the slave unit.
- Before shooting, perform a test flash and test shooting.
- The transmission distance might be shorter depending on the conditions such as positioning of slave units, the surrounding environment and whether conditions.
Wireless Multiple Flash Shooting
You can divide the slave units into two or three groups and perform E-TTL II autoflash while changing the flash ratio (factor). In addition, you can set and shoot with a different flash mode for each firing group, for up to 4 groups.
- Shooting with a Different Flash Mode set for Each Group
* The flash mode settings are indicated only as an example
Wireless Settings
Master Unit’s Flash OFF
When the master unit is set to OFF, only the slave units will fire a flash.
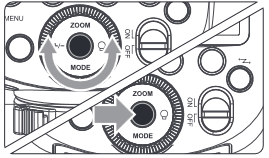
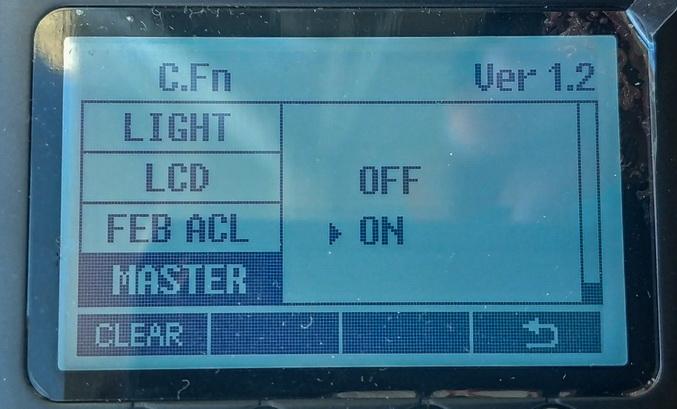
- Press <MENU> Button to enter C.Fn MASTER setting.

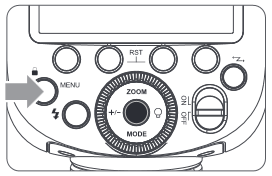
Setting the Communication Channel
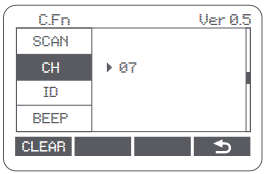
If there are other wireless flash systems nearby, you can change the channel IDs to prevent signal interference. The channel IDs of the master unit and the slave unit(s) must be set to the same.
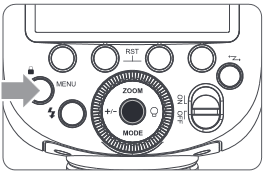
- Press <MENU> Button to enter C.Fn CH setting.
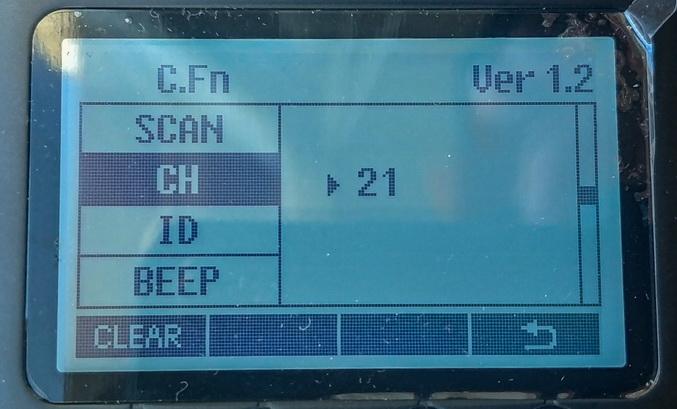
- In C.Fn CH, turn the Select Dial to choose channel ID CH 07 from 1 to 32.
- Press the Set Button to confirm.
Wireless ID Settings
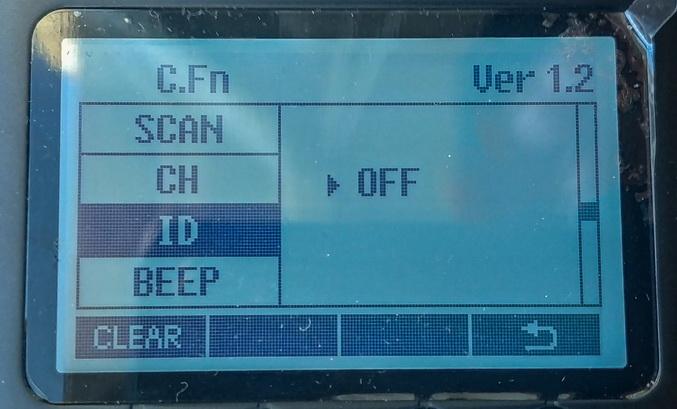
Change the wireless channels and wireless ID to avoid interference for it can only be triggered after the wireless IDs and channels of the master unit and the slave unit are set to the same. Press the <MENU> button to enter C.Fn ID. Press the Set Button to choose OFF channel expansion shutdown, and choose any figure from 01 to 99.
Scan the Spare Channel
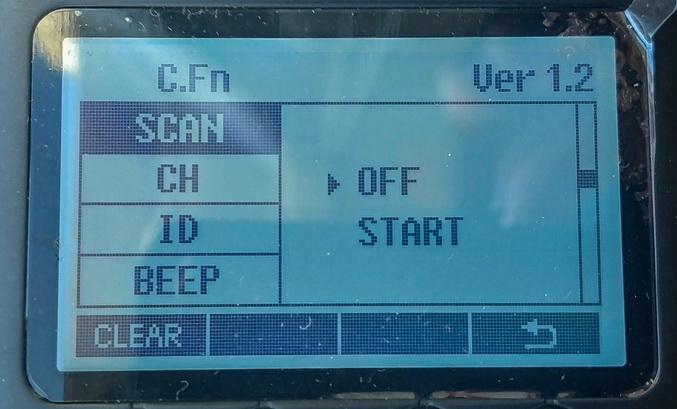
To avoid the interference of using the same channel by others, this function can be used: enter the C.Fn settings and find the SCAN option. When setting it to START, it will scan from 1% to 100%. And the 8 spare channels will be displayed after the scan is completed.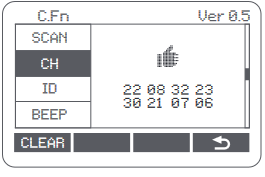
ETTL: Fully Automatic Wireless Flash Shooting
Using Automatic Wireless Flash with a Single Slave Unit
- Master Unit Setting
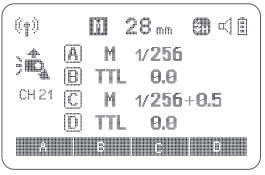
- Attach a V1C camera flash on the camera and set it as the master unit.
- X1T-C can also be used as master unit. X1T-C can control V1C ‘s ZOOM value when the ZOOM is adjusted to auto (A) mode.
Using Automatic Wireless Flash with Multiple Slave Units 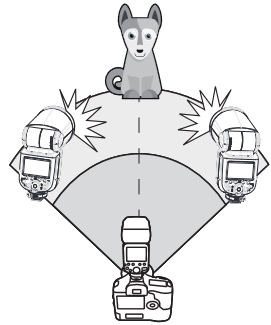
When stronger flash output or more convenient lighting operation is needed, increase the number of slave units and set it as a single slave unit. To add slave units, use the same steps as setting «automatic wireless flash with a single slave unit». Any flash group can be set (A/B/C/D/E).
When the number of slave units is increased and the master unit flash firing is ON, automatic control is implemented to make all groups of flashes fire the same flash output and ensure the total flash output up is to standard exposure.
- Press the depth-of-field preview button on the camera to fire a modeling flash.
- If the slave unit’s auto power off function is workable, press the master unit’s test button to power it on. Please note that test firing is unavailable during the camera’s regular metering time.
- The effective time of slave auto power off is changeable. (C.Fn-Sv STBY)
- By making some settings, the auto AF-assist transmitter will not blink after the slave unit’s flash ready indicator is lightened. (C.Fn-AF)
Using Fully Automatic Wireless Flash
The FEC and other settings that set on the master unit will also be appeared on the slave unit automatically. The slave unit does not need any operation. Use the following settings to make wireless flashes according to the same methods with normal flash shooting.
- Flash Exposure Compensation

- Flash Exposure Lock
- Manual Flash
- Stroboscopic Flash

About Master Unit
Use two or more master units. By preparing several cameras that with master units flash attached, cameras can be changed in shooting while keeping the same lighting source (slave unit).
M: Wireless Flash Shooting with Manual Flash
This describes wireless (multiple shooting) using manual flash. You can shoot with a different flash output setting for each slave unit (firing group). Set all parameters on the master unit.
- Setting the flash mode to <M>.

- Setting flash output.1/2/3/4<A/B/C/D>

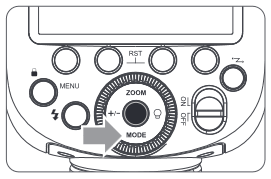
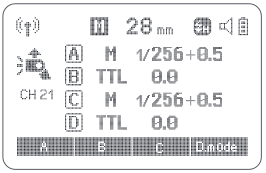
- Press Function Button 3 < Gr >. Turn the Select Dial to set the flash output of the groups. Press Set Button to confirm.
- Taking the picture.
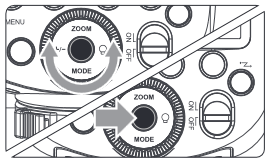
- Each group fires at the set flash ratio.
Setting <M> Flash Mode
You can directly operate the slave unit to manually set the manual flash or stroboscopic flash.
- Setting the slave unit.
- Setting flash mode to <M>.
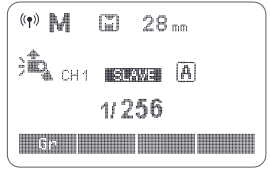
- Press <MODE> button so that <M> is displayed.
- Set the manual flash output.
Multi: Wireless Flash Shooting with Manual Flash
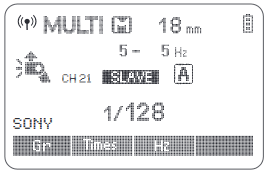
Setting <MULTI> stroboscopic flash.
- Press <MODE> button so that <MULTI> is displayed. SONY
- Setting the stroboscopic flash
Other Applications
Sync Triggering
The Sync Cord Jack is a Φ2.5mm plug. Insert a trigger plug here and the flash will be fired synchronously with the camera shutter.
Modeling Flash
If the camera has a depth-of-field preview button, pressing it will fire the flash continuously for 1 second. This is called modeling flash. It enables you to see the shadow effects on the subject and the lighting balance. You can fire the modeling flash during wireless or normal flash shooting.
- To avoid overheating and deteriorating the flash head, do not fire the modeling flash for more than 10 consecutive times. If you fire the modeling flash 10 consecutive times, allow at least 10 minutes’ break for the camera flash.
- The modeling flash cannot be fired with the EOS 300 and Type-B cameras.
Auto Focus Assist Beam
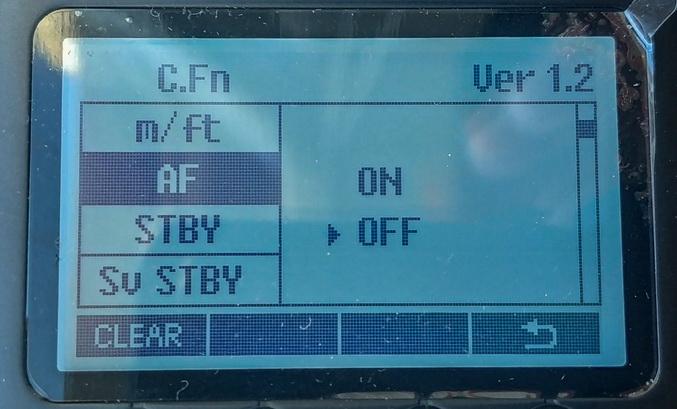
In poorly-lit or low-contrast shooting environments, the built-in auto focus assist beam will automatically light on to make it easier for autofocus. The beam will light up only when autofocus is difficult and get out as soon as the autofocus becomes correct. If you want to turn off the auto focus assist beam, set the «AF» to «OFF» on the C.Fn settings.
- If you find the auto focus assist beam does not light up, this is because the camera has got a correct autofocus.
| Position | Effective Range |
| Center | 0.6~10m / 2.0~32.8 feet |
| Periphery | 0.6~5m / 2.0~16.4 feet |
Bounce Flash
By pointing the flash head toward a wall or ceiling, the flash will bounce off the surface before illuminating the subject. This can soften shadows behind the subject for a more natural-looking shot. This is called bounce flash. To set the bounce direction, hold the flash head and turn it to a satisfying angle.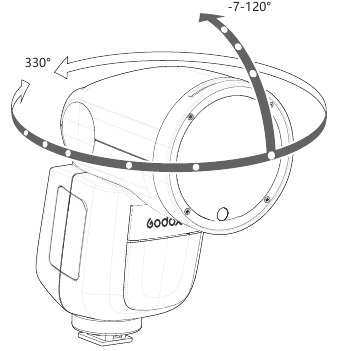
- If the wall or ceiling is too far away, the bounced flash might be too weak and result in underexposure.
- The wall or ceiling should be a plain, white color for high reflectance. If the bounce surface is not white, a color cast may appear in the picture.
ZOOM: Setting the Flash Coverage
The flash coverage can be set automatically or manually. It can be set to match the lens focal length from 28mm to 105mm.
In Manual Zoom mode, press the <ZOOM> button.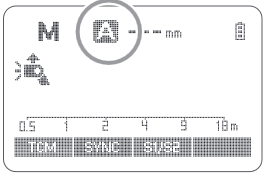
- Turn the Select Dial to change the flash coverage.
- If <A> is displayed, the flash coverage will be set automatically.
If you set the flash coverage manually, make sure it covers the lens focal length so that the picture will not have a dark periphery.
Low Battery Warning
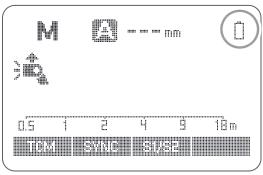
If the battery power is low, < > will appear and blink on the LCD panel. Please replace the battery immediately.
C.Fn: Setting Custom Functions
The following table lists the available and unavailable custom functions of this flash.
| C.Fn Custom Functions | |||
| Custom Function Signs | Function | Setting No. | Settings & Description |
| m/ft | Distance indicator | m | m |
| ft | feet | ||
| AF | AF-assist beam | ON | ON |
| OFF | OFF | ||
| STBY | Auto sleep setting | ON | ON |
| OFF | OFF | ||
| Sv STBY | Slave auto power off timer |
60min | 60min |
| 30min | 30min | ||
| SCAN | Scan the spare channel |
OFF | OFF Start to find the spare |
| START | Start to find the spare channel Choose channels | ||
| CH | Channel setting | 01-32 | Choose channels from 01-32 |
| ID | Wireless ID | OFF | Off |
| 01-99 | Choose any figure from 01-99 | ||
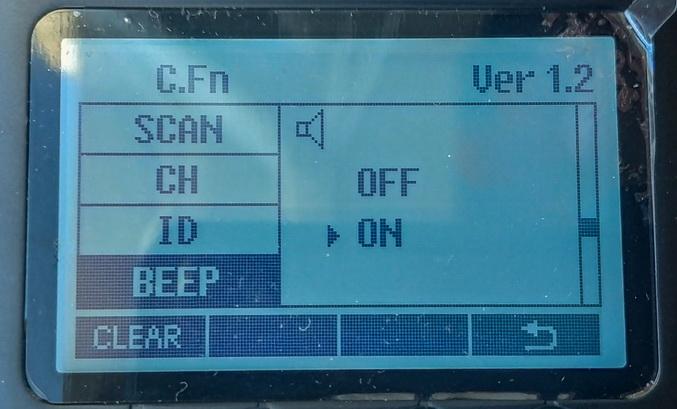
| BEEP | Beeper | ON | ON |
| OFF | OFF | ||
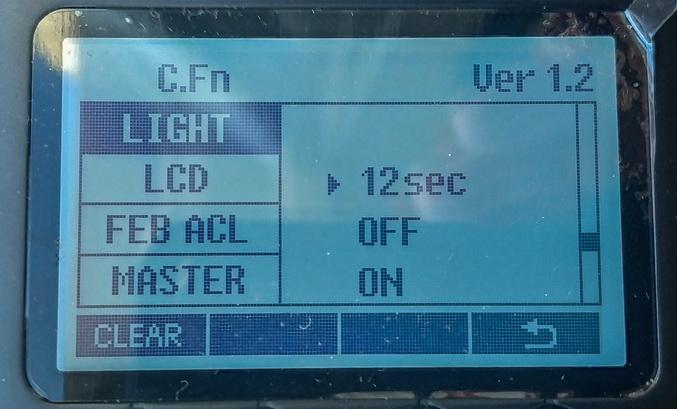
| LIGHT | Backlighting time | 12sec | Off in 12 sec. |
| OFF | Always off | ||
| ON | Always lighting | ||
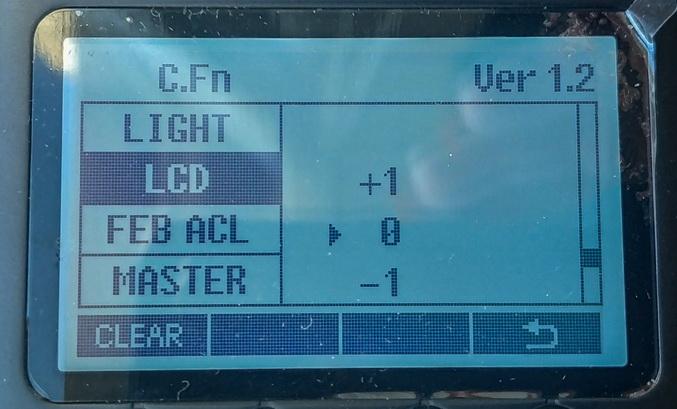
| LCD | LCD contrast ratio | -3~+3 | 7 levels |
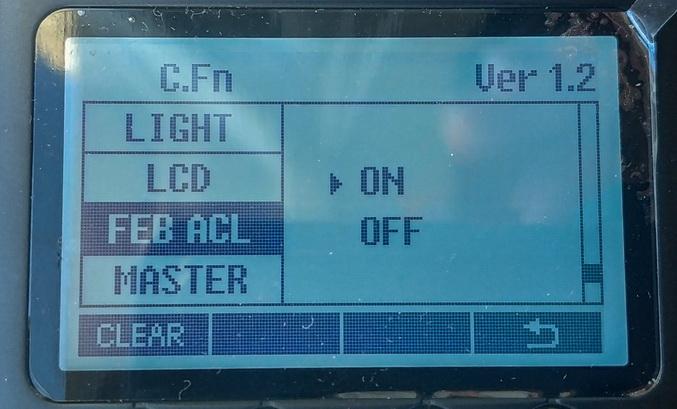
| FEB ACL | FEB auto cancel | ON | ON |
| OFF | OFF | ||
| MASTER | Master unit control | OFF | OFF |
| ON | ON |
- Press<MENU> Button until C.Fn menu is displayed. The «Ver x.x» in the top-right corner refers to the software version.
- Select the Custom Function No.
- Turn the Select Dial to select the Custom Function No.
- Change the Setting.
- Press Set Button and the Setting No. blinks.
- Turn the Select Dial to set the desired number. Pressing Set Button will confirm the settings.
- After you set the Custom Function and press <MENU> button, the camera will be ready to shoot.
- In the C.Fn states, long press the «Clear»button for 2 seconds until «OK»is displayed on the panel, which means the values in C.Fn can be reset.
If the camera flash is attached to an EOS camera which has a speedlite control function, the flash can be controlled using the camera’s menu screen. For the menu operation procedure, refer to your camera’s instruction manual.
- Setting Camera Flash Functions
The following flash functions are settable according to different flash modes.
- Flash mode
- Shutter sync (1st/2nd curtain, high speed sync)
- FEB
- Flash exposure compensation
- Flash firing
- Clear camera flash’s settings
- Custom Functions of Camera Flash
C.Fn-00, C.Fn-01, C.Fn-03, C.Fn-08, C.Fn-10, C.Fn-20, C.Fn-22.
Clear All Flash Custom Functions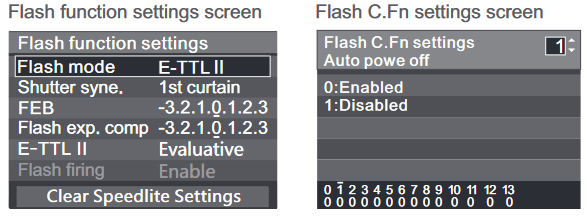
* Screens from the EOS-1D Mark III.
- If flash exposure compensation has already been set with the camera flash, flash exposure compensation cannot be set with the camera. To set it with the camera, the camera flash’s flash exposure compensation must be set to zero.
- If any Flash Custom Functions and flash settings other than flash exposure compensation have been set by both the camera and the flash, the latest settings will take effect.
Protection Function
- Over-Temperature Protection
- To avoid overheating and deteriorating the flash head, do not fire more than 30 continuous flashes in fast succession at 1/1 full power. After 30 continuous flashes, allow a rest time of at least 10 minutes.
- If you fire more than 30 continuous flashes and then fire more flashes in short intervals, the inner over-temperature protection function may be activated and make the recycling time over 10 seconds. If this occurs, allow a rest time of about 10 minutes, and the flash unit will then return to normal.
- When the over-temperature protection is started,
 is shown on the LCD display.
Number of flashes that will activate over-temperature protection:
 is shown on the LCD display.
| 1/1 | 30 |
| 1/2 +0.7 | 40 |
| 1/2 +0.3 | 50 |
| 1/2 | 60 |
| 1/4(+0.3,+0.7) | 100 |
| 1/8(+0.3,+0.7) | 200 |
| 1/16(+0.3,+0.7) | 300 |
| 1/32(+0.3,+0.7) | 500 |
| 1/64(+0.3,+0.7) | 1000 |
| 1/128(+0.3,+0.7) |
Number of flashes that will activate over-temperature protection in high-speed sync triggering mode:
| Power Output | Times |
| 1/1 | 15 |
| 1/2(+0.3,+0.7); | 20 |
| 1/4(+0.3,+0.7) | 30 |
| 1/8(+0.3,+0.7); | |
| 1/16(+0.3,+0.7) | 40 |
| 1/32(+0.3,+0.7); | |
| 1/64(+0.3,+0.7); | 50 |
| 1/128(+0.3,+0.7); |
- Other Protections
The system provides real-time protection to secure the device and your safety. The following lists prompts for your reference:
| Prompts on LCD Panel | Meaning |
| E1 | A failure occurs on the recycling system so that the flash cannot fire. Please restart the flash unit. If the problem still exists, please send this product to a maintenance center. |
| E2 | The system gets excessive heat. Please allow a rest time of 10 minutes. |
| E3 | The voltage on two outlets of the flash tube is too high. Please send this product to a maintenance center. |
| E9 | There are some errors occurred during the upgrading process. Please using the correct firmware upgrade method. |
Technical Data
| Model | V1C |
| Compatible Cameras | Canon EOS cameras (E-TTL II autoflash) |
| Power (1/1 output) | 76Ws |
| Flash Coverage | 28 to 105mm
|
| Flash Duration | 1/300 to 1/20000 seconds |
| Exposure Control | |
| Exposure control system | E-TTL II autoflash and manual flash |
| Flash exposure | Manual. FEB: ±3 stops in 1/3 stop increments |
| compensation (FEC) | (Manual FEC and FEB can be combined.) |
| FE lock | With <FEL> button or< * > button |
| Sync mode | High-speed sync (up to 1/8000 seconds), first-curtain sync, and second-curtain sync |
| Multi flash | Provided (up to 100 times, 199Hz) |
| Wireless Flash | |
| Wireless flash function | Master, Slave, Off |
| Master groups | A, B, C, D |
| Controllable slave groups | A, B, C, D, E (E group can be controlled by X series flash trigger) |
| Transmission range (approx.) | 100m |
| Channels | 32 (1~32) |
| ID | 01~99 |
| Modeling flash | Fired with camera’s depth-of-field preview button |
| Auto Focus Assist Beam | |
| Effective range (approx.) | Center: 0.6~10m / 2.0~32.8 feet Periphery: 0.6~5m / 2.0~16.4 feet |
| LED Modeling Lamp | |
| Power | 2W |
| Color Temperature | 3300K±200K |
| Power Supply | |
| Power source | 7.2V/2600mAh Li-ion battery |
| Recycle time | Approx 1.5 seconds. Green LED indicator will light up |
| when the flash is ready. | |
| Full power flashes | Approx. 480 |
| Power saving | Power off automatically after approx. 90 seconds of idle operation. (60 minutes if set as slave) |
| Sync Triggering Mode | Hotshoe, 2.5mm sync line |
| Color Temperature | 5600±200k |
| Dimensions | |
| W x H x D | 76*93*197mm |
| Weight without battery | 420g |
| Weight with battery | 530g |
| 2.4G Wireless FrequencyRange | 2413.0MHz-2464.5MHz |
| Max. Transmitting Power of 2.4G Wireless | 5dbm |
Troubleshooting
If there is a problem, refer to this Troubleshooting Guide.
The Camera Flash does not fire.
The power turns off by itself.
- After 90 seconds of idle operation, auto power off took effect if the flash is set as master.
→Press the shutter button halfway or press any flash button to wake up. - After 60 minutes (or 30 minutes) of idle operation, the flash unit will enter sleep mode if it is set as slave.
→Press any flash button to wake up.
Auto zoom does not work.
- The camera flash is not attached securely to the camera.
→Attach the camera flash’s mounting foot to the camera.
The flash exposure is underexposed or overexposed.
- There was a highly reflective object (e.g. glass window) in the picture.
→Use FE lock (FEL). - You used high-speed sync.
→With high-speed sync, the effective flash range will be shorter. Make sure the subject is within the effective flash range displayed. - You used Manual Flash mode.
→Set the flash mode to ETTL or modify the flash output.
Photos have dark corners or only parts of the target subject are illuminated.
- The focal length of lens exceeds the flash coverage.
→Check the flash coverage you set. This flash unit has the flash coverage between 28 and 105mm, which fits medium-format cameras.
Firmware Upgrade
- The USB port is a Type-C USB socket. Type-C USB connection line is applicable.
- As the firmware upgrade needs the support of Godox G3 software, please download and install the «Godox G3 firmware upgrade software» before upgrading. Then, choose the related firmware file.
- As the product needs to do firmware upgrade, please refer to instruction manual of the newest electric version as final.
Compatible Camera Models
This flash unit can be used on the following Canon EOS series camera models:
1DX 5D Mark III 5D Mark II 6D 7D 60D 50D 40D 30D 650D 600D 550D 500D 450D 400D Digital 1100D 1000D 5D Mark IV 7D Mark II 6D Mark II 760D 750D 70D 80D 800D 77D M5 M3 M50 EOS R 1500D 3000D
This table only lists the tested camera models, not all Canon EOS series cameras. For the compatibility of other camera models, a self-test is recommended. Rights to modify this table are retained.
Maintenance
- Shut down the device immediately should abnormal operation be detected.
- Avoid sudden impacts and the product should be dedusted regularly.
- It is normal for the flash tube to be warm when in use. Avoid continuous flashes if unnecessary.
- Maintenance of the flash must be performed by our authorized maintenance department which can provide original accessories.
- This product, except consumables e.g. flash tube, is supported with a one-year warranty.
- Unauthorized service will void the warranty.
- If the product had failures or was wetted, do not use it until it is repaired by professionals.
- Changes made to the specifications or designs may not be reflected in this manual.

Documents / Resources
Download manual
Here you can download full pdf version of manual, it may contain additional safety instructions, warranty information, FCC rules, etc.
Download Godox V1 TTL Li-ion Round Head Camera Flash Manual
Посмотреть инструкция для Godox Speedlite V1 Canon бесплатно. Руководство относится к категории вспышки, 4 человек(а) дали ему среднюю оценку 8.5. Руководство доступно на следующих языках: английский. У вас есть вопрос о Godox Speedlite V1 Canon или вам нужна помощь? Задайте свой вопрос здесь
Не можете найти ответ на свой вопрос в руководстве? Вы можете найти ответ на свой вопрос ниже, в разделе часто задаваемых вопросов о Godox Speedlite V1 Canon.
Инструкция Godox Speedlite V1 Canon доступно в русский?
Не нашли свой вопрос? Задайте свой вопрос здесь
Для работы проектов iXBT.com нужны файлы cookie и сервисы аналитики.
Продолжая посещать сайты проектов вы соглашаетесь с нашей
Политикой в отношении файлов cookie
Сегодня мы рассмотрим новую и слегка необычную внешнюю вспышку с круглой головкой от производителя Godox.
Немного о производителе
Компания Godox специализируется на производстве различного фотооборудования, в основном вспышек и света и уже успела завоевать лидерство у фотографов благодаря отличном качеству продукции и приемлемым ценам. У производителя есть свой сайт, где можно посмотреть всю продукцию и почитать её характеристики.
Упаковка
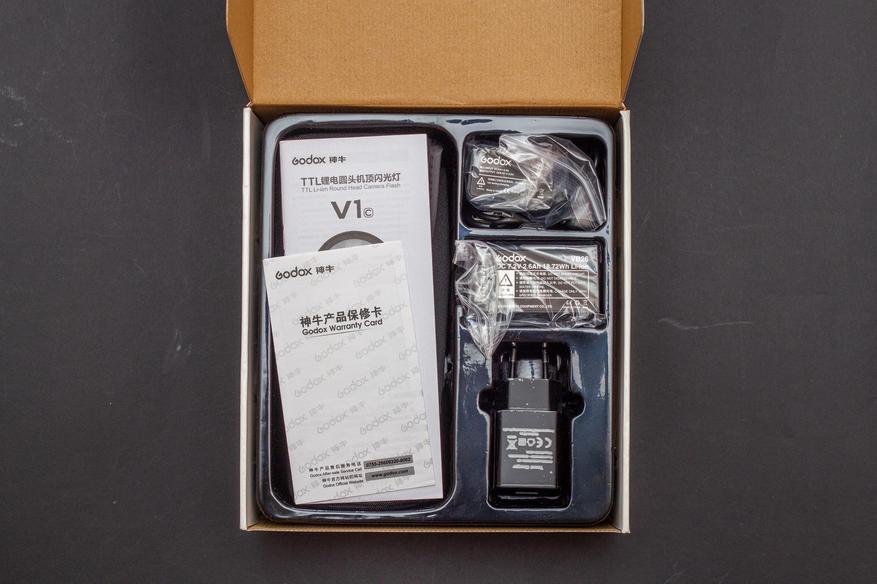
В комплекте идёт:
• накамерная вспышка;
• литий-ионная батарея;
• зарядное устройство;
• кабель для зарядки (Type-C);
• мини-стойка;
• чехол;
• руководство по эксплуатации.
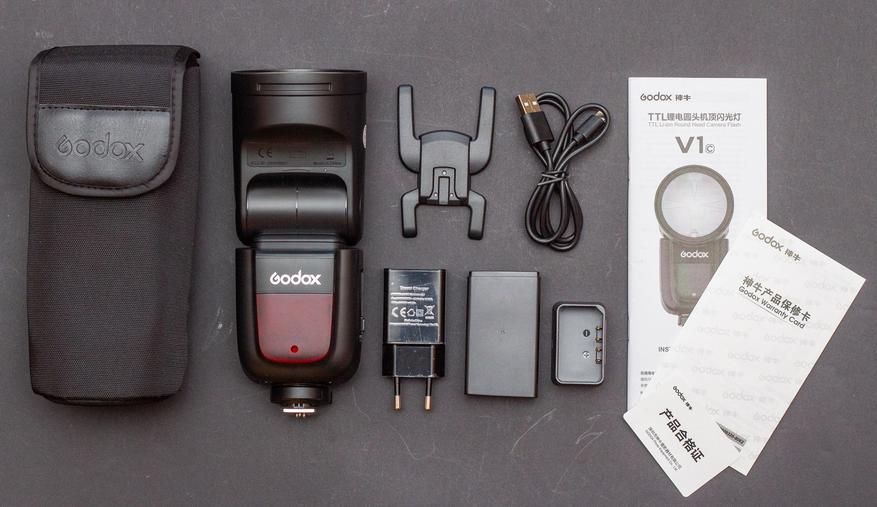
Инструкция подробная, на английском и китайском. Скачать её в электронном виде можно здесь.
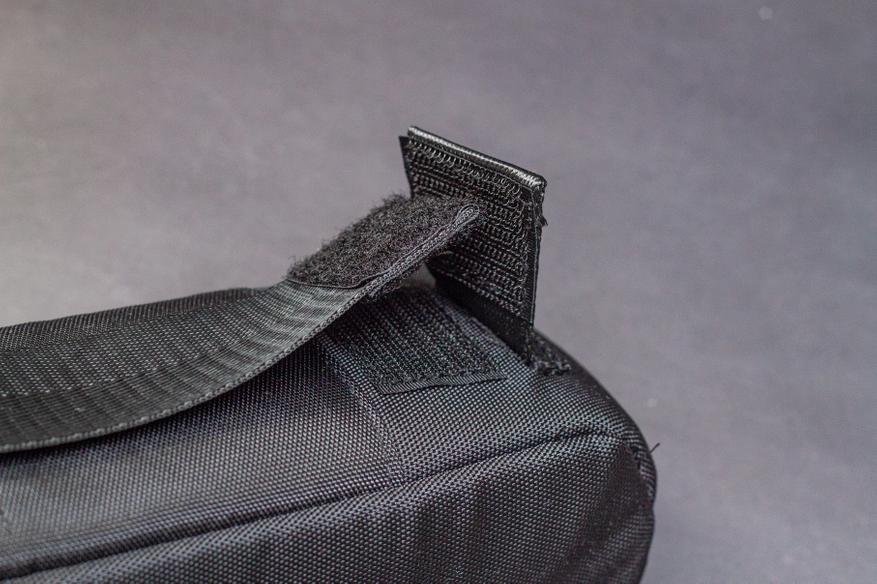
Чехол качественный, имеет петлю для крепления на пояс.
Технические характеристики:
|
Модель |
V1C |
V1N |
V1S |
|
Совместимые камеры |
Canon EOS (E-TTLII) |
Nikon (i-TTL) |
Sony (TTL) |
|
Мощность |
76 Дж |
||
|
Угол подсветки |
от 28 до 105 мм |
||
|
Автоматический зум (угол подсветки выбирается автоматически в зависимости от фокусного расстояния объектива и размера изображения) |
|||
|
Ручной зум |
|||
|
Наклон головки вспышки: от 0˚до 330˚ горизонтально и от -7˚ до 120˚ вертикально |
|||
|
Длительность импульса |
От 1/300 до 1/20000 секунды |
||
|
Управление экспозицией вспышки |
|||
|
Система управления экспозицией вспышки |
E-TTL II и ручной режим вспышки |
i-TTL и ручной режим вспышки |
TTL и ручной режим вспышки |
|
Компенсация вспышки (FEC) |
Ручная FEC и FEB: ±3 ступени с шагом 1/3 (Ручная FEC и FEB могут комбинироваться) |
||
|
Блокировка экспозиции |
Кнопкой <FEL˃ или <*˃ |
нет |
нет |
|
Режим синхронизации |
Высокоскоростная синхронизация (до 1/8000 секунды), синхронизация по первой шторке, синхронизация по второй шторке |
||
|
Режим стробоскопа |
Есть (до 100 импульсов, 199 Гц) |
Есть (до 90 импульсов, 100 Гц) |
|
|
Дистанционное управление вспышкой |
|||
|
Режимы дистанционного управления вспышкой |
Режим ведущей вспышки (Master), режим ведомой вспышки (Slave), выкл. |
||
|
Количество групп |
A, B, C, D |
M, A, B, C |
|
|
Количество ведомых групп |
A, B, C, D, E (группа E управляется системой синхронизации Godox X) |
A, B, C, D, E (группа D/E управляется системой синхронизации Godox X) |
|
|
Радиус передачи сигнала (приблиз.) |
100 м |
||
|
Количество каналов |
32 (1~32) |
||
|
ID |
01~99 |
||
|
Моделирующая вспышка |
Запускается кнопкой предпросмотра глубины резкости на фотокамере |
нет |
|
|
Подсветка автофокуса |
|||
|
Эффективное расстояние (приблиз.) |
В центре: 0,6-10м / 2,0-32,8 футов |
||
|
LED пилотная лампа |
|||
|
Мощность |
2 Вт |
||
|
Цветовая температура |
3300К±200К |
||
|
Электропитание |
|||
|
Источник питания |
7.2В/2600мАч литий-ионная батарея |
||
|
Время перезарядки |
Приблиз. 1,5 с. Зеленый LED индикатор сигнализирует о готовности вспышки |
||
|
Количество импульсов на полной мощности |
Около 480 |
||
|
Энергосбережение |
Автоматическое отключение после 90 секунд бездействия (60 минут в режиме ведомой вспышки) |
||
|
Методы синхронизации |
«горячий башмак», гнездо для синхрокабеля 2,5мм |
||
|
Цветовая температура |
5600±200К |
||
|
Размеры |
|||
|
Размеры корпуса |
76х93х197 мм |
||
|
Вес нетто без учета аккумулятора |
420 г |
||
|
Вес нетто с аккумулятором |
530 г |
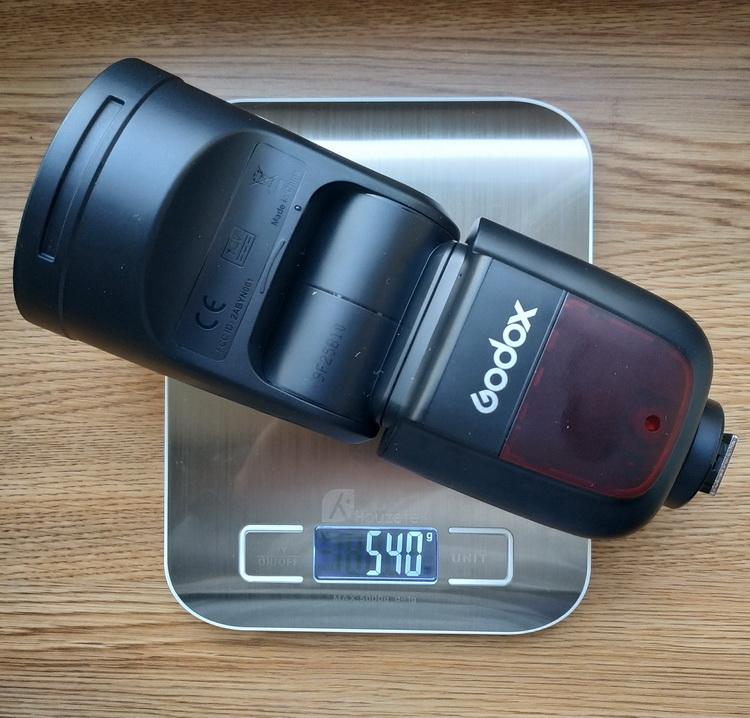
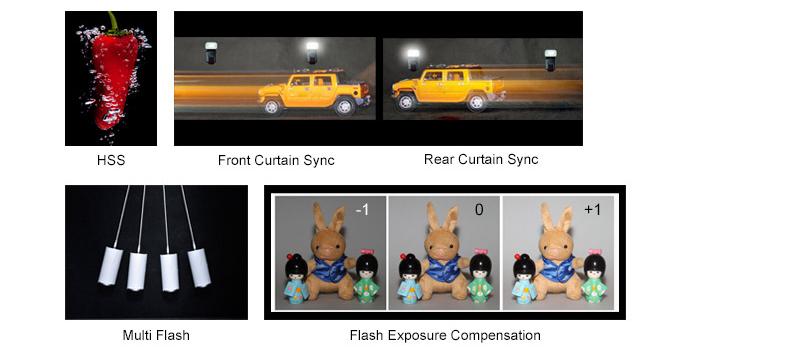
• Среди особенностей отмечу полную поддержку автоматических режимов TTL, ручной режим, режим высокоскоростной синхронизации HSS 1/8000с, функцию компенсации мощности FEC и синхронизацию по первой/второй шторке.
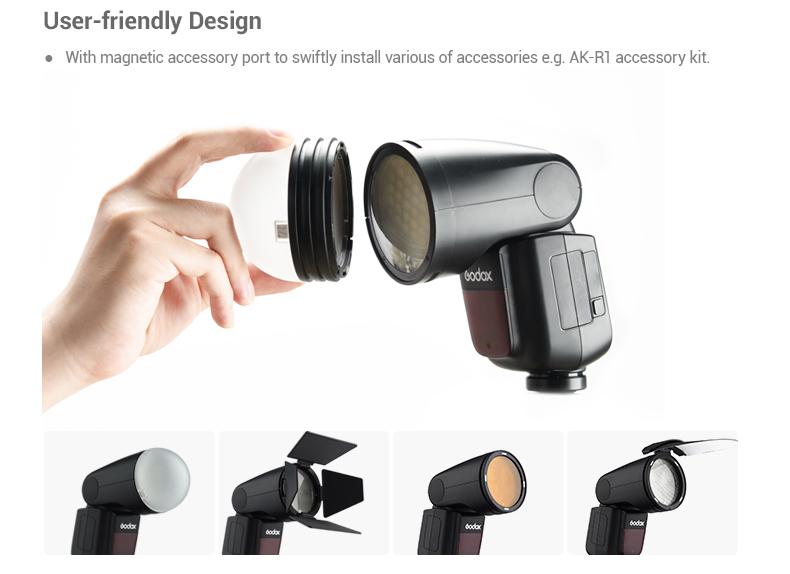
• Дополнительно можно прикупить набор аксессуаров и светофильтров для вспышки под индексом AK-R1.
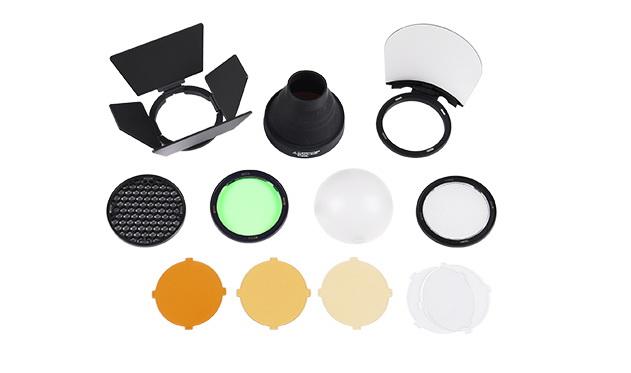
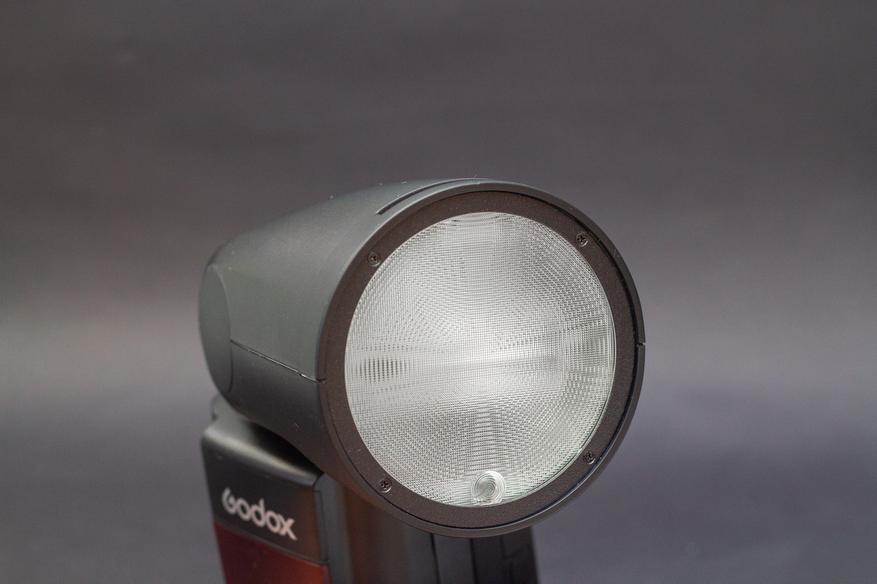
• Стоит отметить, что аксессуары крепятся на магните (установлены по периметру головки), поэтому при использовании плоского рассеивателя / отражателя и фотографировании в портретной ориентации – его можно просто повернуть (прокрутить) в нужное положение, что обычно невозможно в других вспышках.
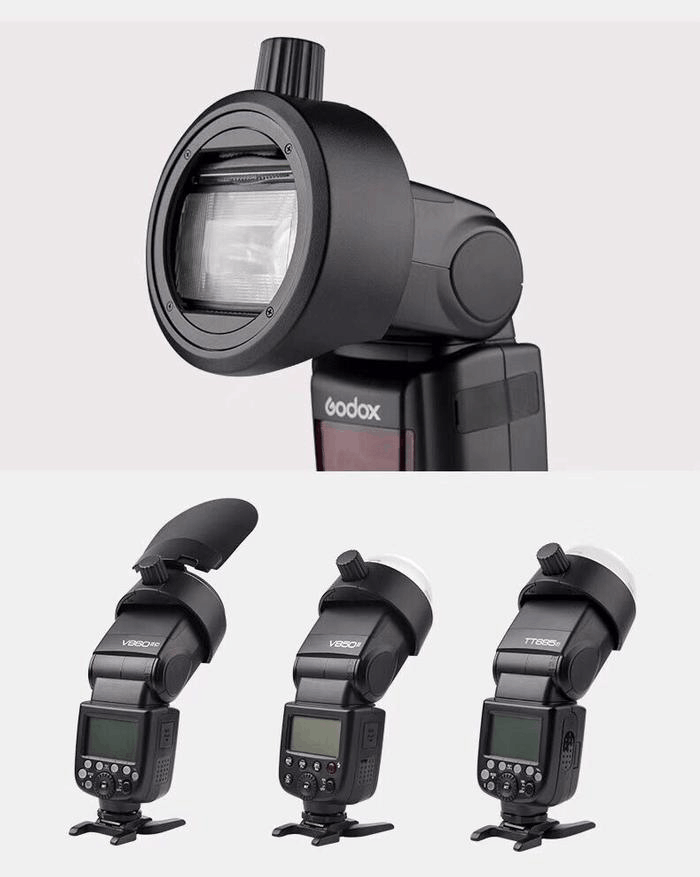
• Производитель также выпустил переходник, который позволяет крепить данные аксессуары на вспышки с прямоугольной головкой.
• Корпус вспышки сделан из пластика, сборка отличная. К недостаткам отнесу лишь то, что из-за круглой головки и скользкого пластика она может скатиться с наклонной поверхности, поэтому нужно быть внимательным при её эксплуатации.
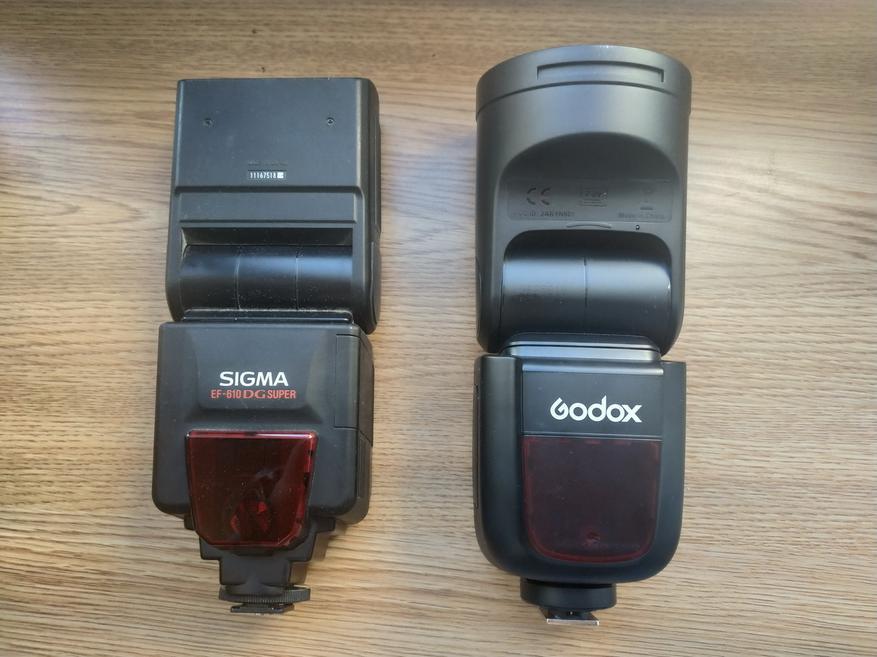
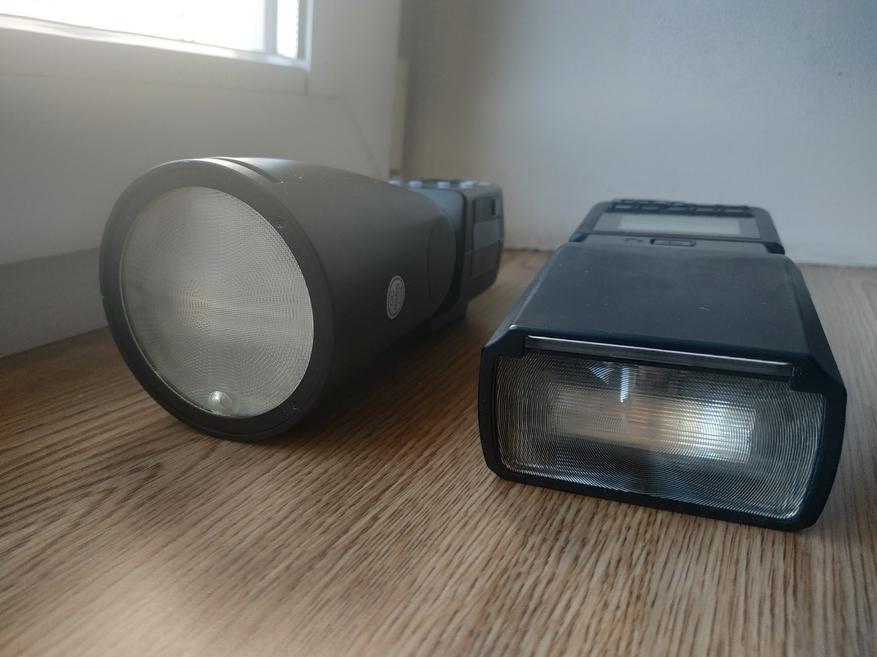
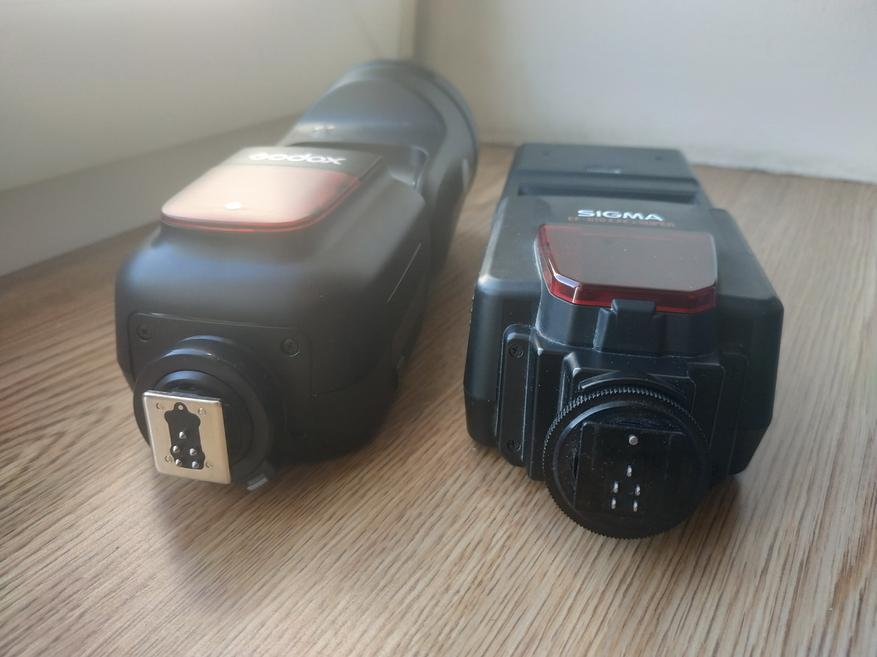
Сравнение со вспышкой Sigma EF 610 DG Super:
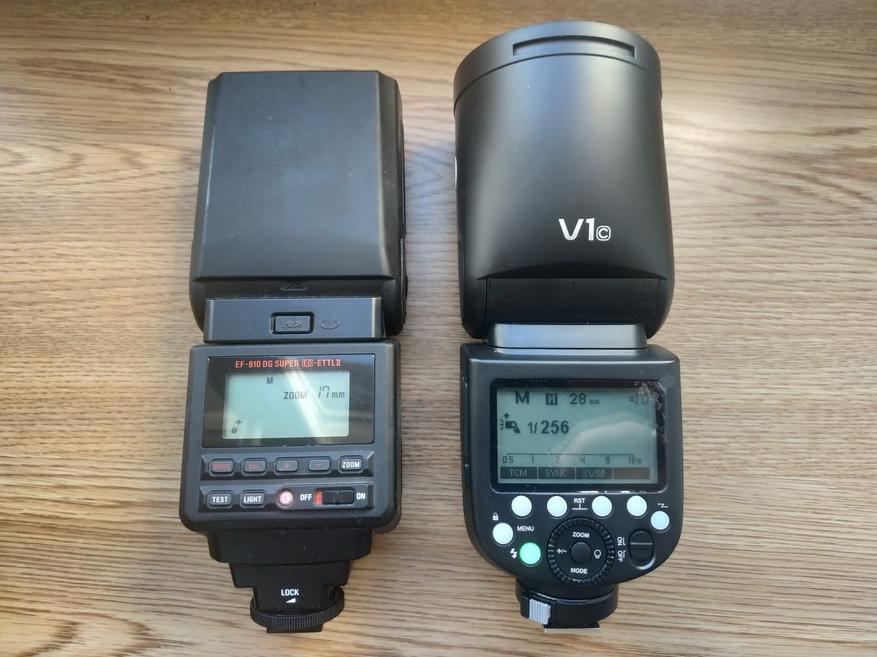
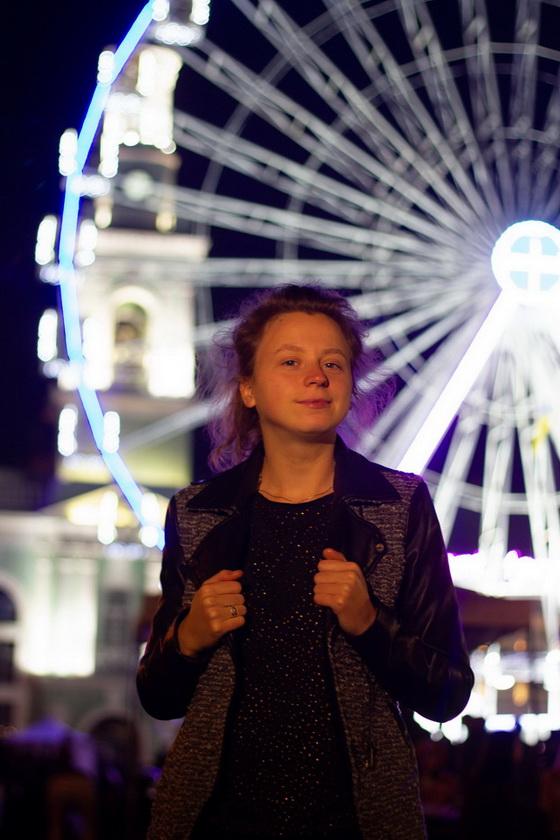
• На головке вспышки установлена LED-лампа, которая может светить приятным теплым светом (3300К) и имеет 10 уровней яркости. Лампа не сверхъяркая, но её вполне достаточно чтобы подсветить объект на расстоянии 1.5-2 метров и ближе в тёмное время суток. Лампа может быть включена и во время работы вспышки.
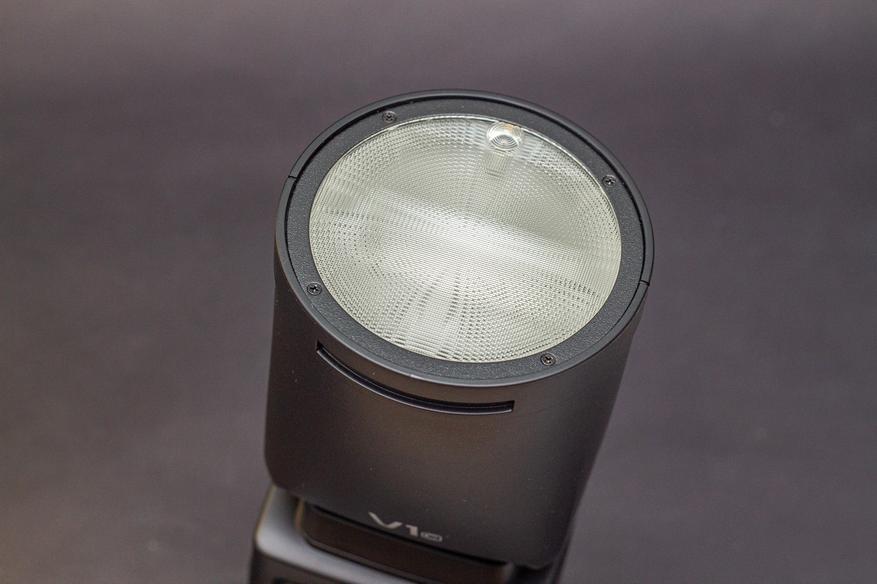
Пример освещения (ВСЕ ФОТОПРИМЕРЫ В ОБЗОРЕ С ИСПОЛЬЗОВАНИЕМ ВСПЫШКИ БЕЗ ОБРАБОТКИ):
Минимальная / максимальная яркость:
• К преимуществам батарейного отсека отнесу отсутствие какой-либо крышки, которая может отвалиться / затеряться.
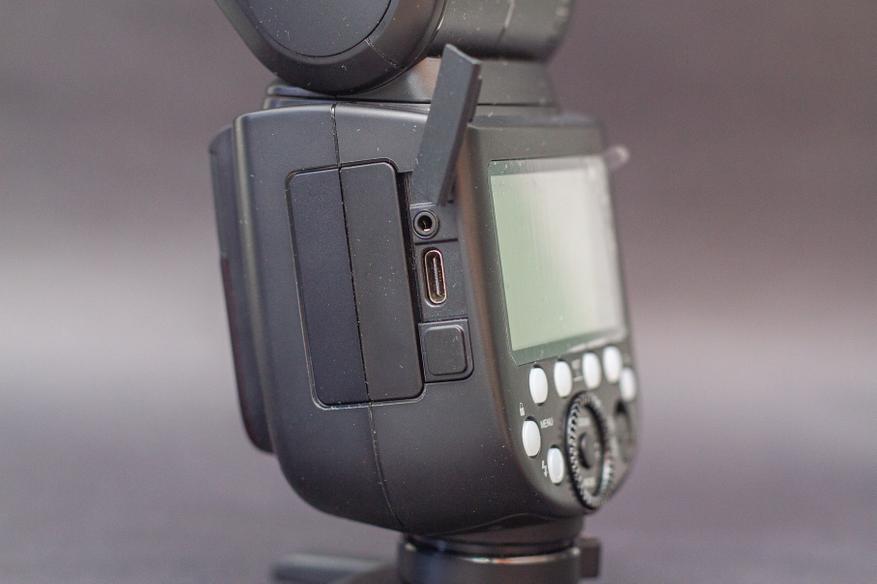
• Слева находится кнопка для изъятия батареи и два порта под заглушкой USB Type-C для обновления прошивки (последнюю прошивку можно скачать здесь) и 2.5мм порт для синхронизации.
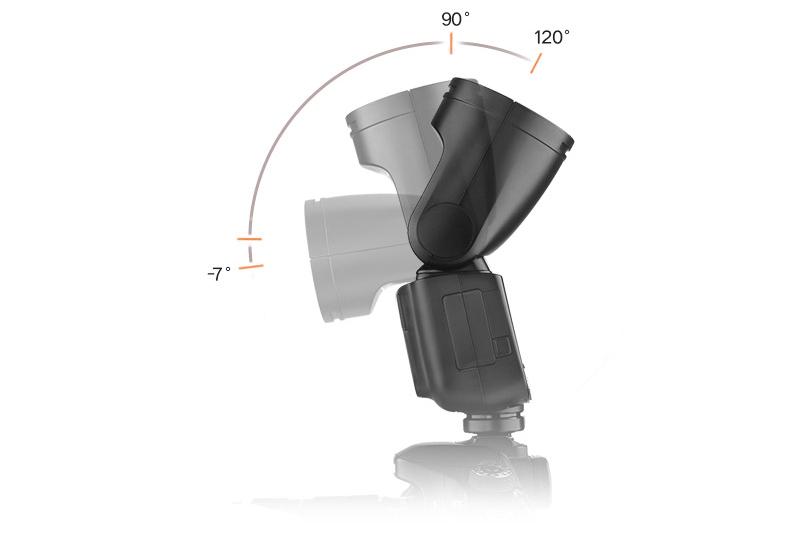
• Среди преимуществ конструкции также отмечу, что в любой позиции верхнюю часть можно повернуть назад (в изначальной позиции вспышка поворачивается назад, создавая угол 120°), то есть не нужно поворачивать на 180° по горизонтали чтобы направить верхнюю часть в потолок.
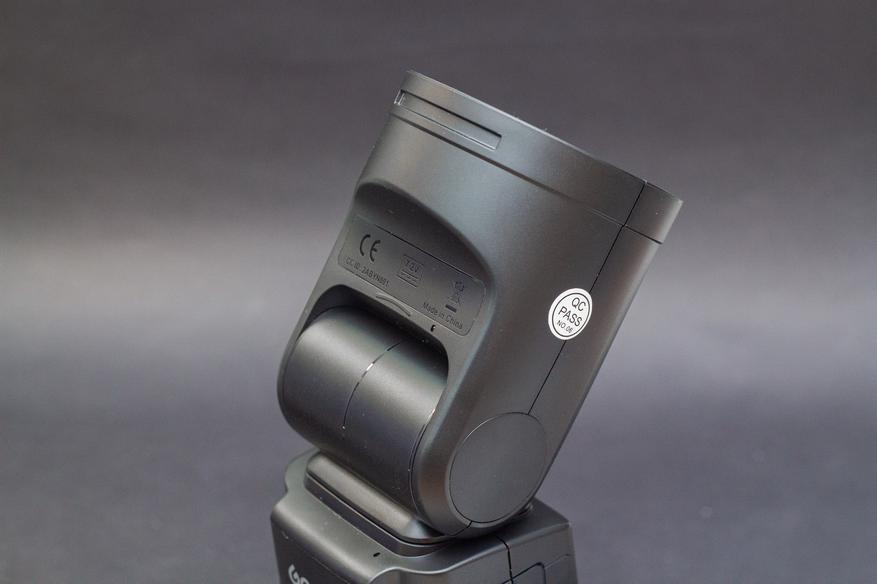
• Вспышка крепится на камеру / стойку с помощью башмака с защёлкой.
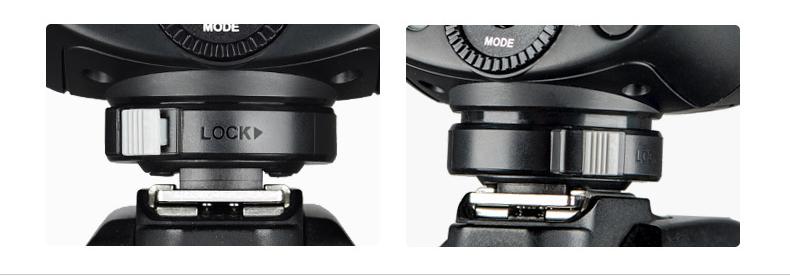
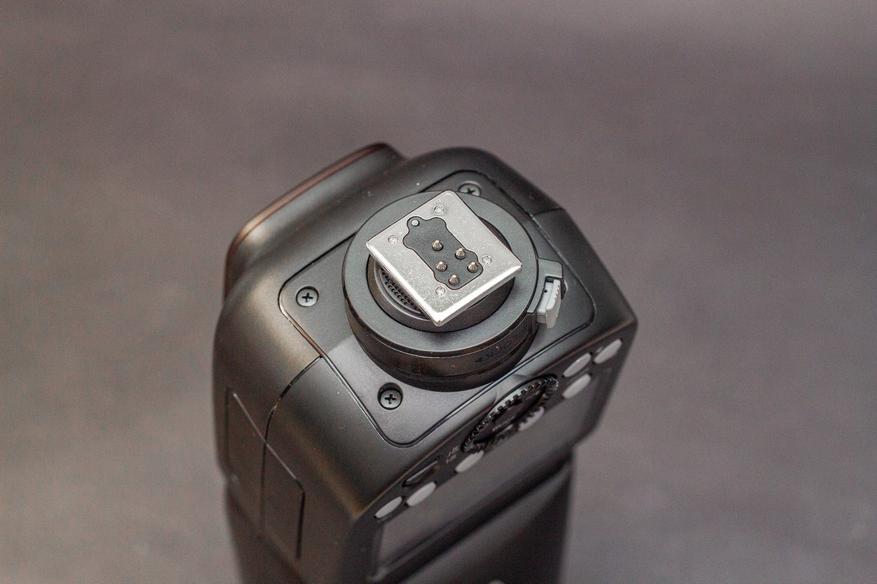
• Вспышка оснащена матричным ЖК-дисплеем, который имеет хорошую видимость и подсветку. Подсветка загорается при нажатии на любую кнопку и горит 12 секунд по умолчанию (ее можно либо выключить совсем либо включить, чтобы она не гасла).
• Блок управления вспышкой удобный и продуманный. Посредине находится колёсико, которое можно не только вращать, но и нажимать.
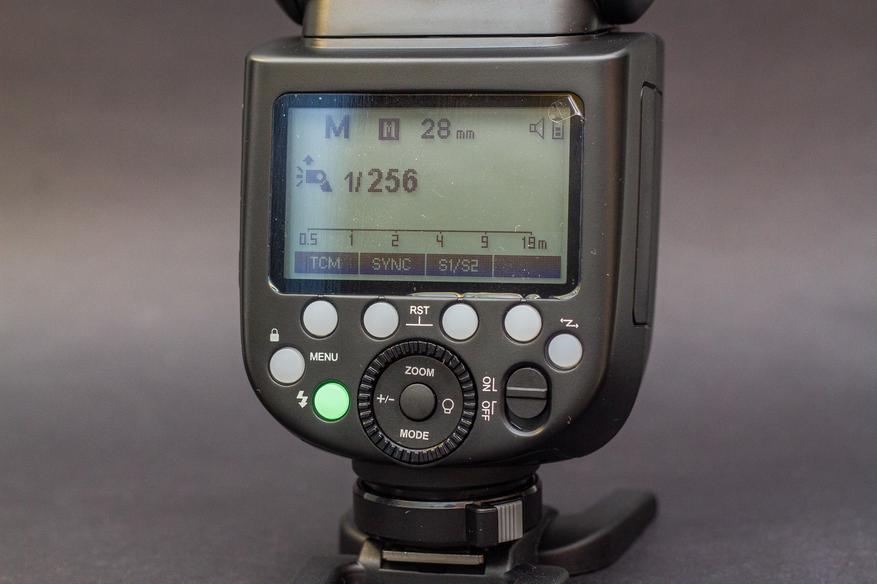
• Вспышка имеет три основных режима: E-TTL, ручной и режим стробоскопа.
• Вспышка имеет 9 режимов мощности и в каждом режиме по 10 шагов мощности (по 1/10 стопа). Управление мощностью удобное, можно изменять по 1/10 шага (прокручиванием колёсика) либо же по сразу же переключаться между целыми стопами (нажатием на колёсико). Максимальная мощность – 1/1, минимальная – 1/256.
• Если в режиме TTL сделать снимок, а потом переключиться в ручной режим – настройки мощности сохранятся.
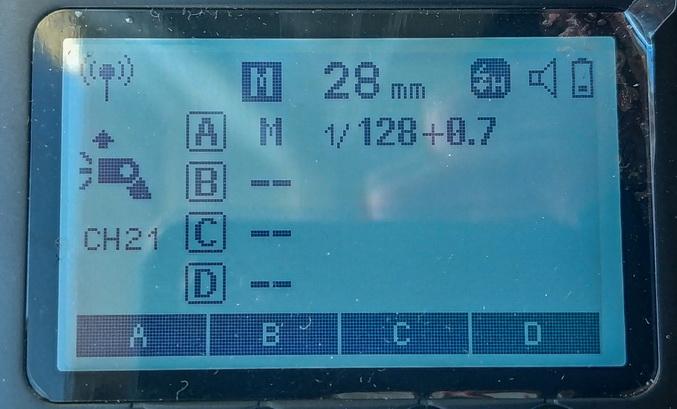
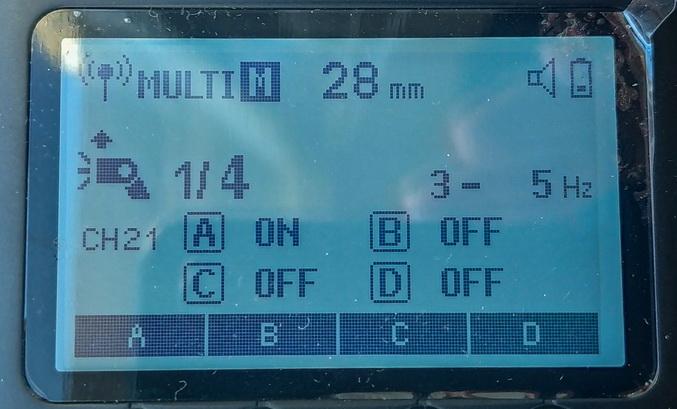
• Вспышка работает в такой же системе радиосинхронизации (Godox 1.4G X), как и остальные вспышки Godox. К слову, это одна из лучших (если не лучшая) система радиосинхронизации на рынке, которая отличается стабильной работой, совместимостью со всеми брендами (максимально универсальная), возможностью совмещать накамерные и студийные вспышки и так далее.
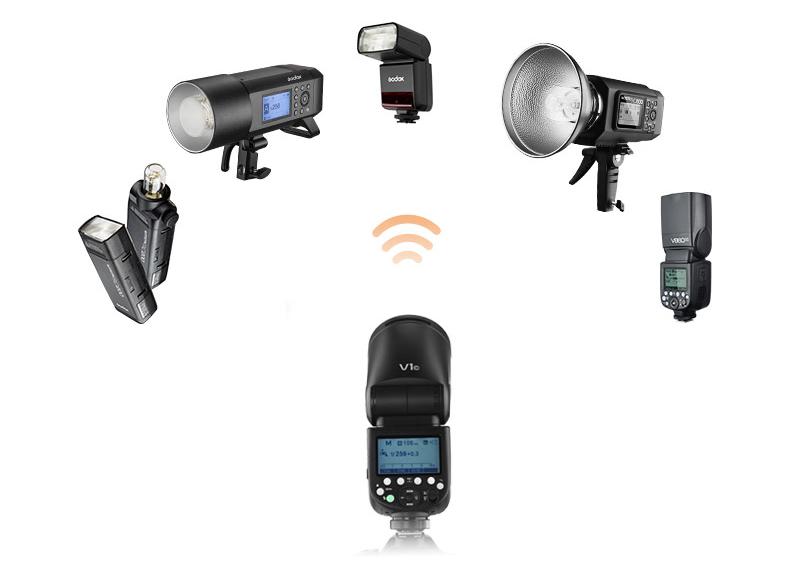
• Стоит отметить удобное управление другими вспышками в ведущем режиме: каждая кнопка отвечает за отдельную вспышку, мощность же каждой вспышки регулируется прокручиванием или нажатием на колёсико (для изменения по 1/10 шага или целого стопа соответственно).
• В режиме радиосинхронизации порадовала функция поиска наиболее надёжного канала, которая будет особенно полезна если рядом снимают другие фотографы. Производитель также отлично оптимизировал расход батареи в режиме ожидания – он минимальный и не тает на глазах.
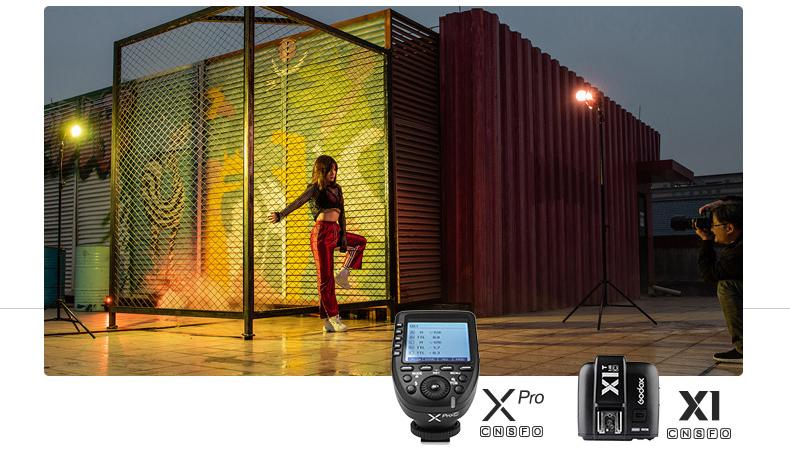
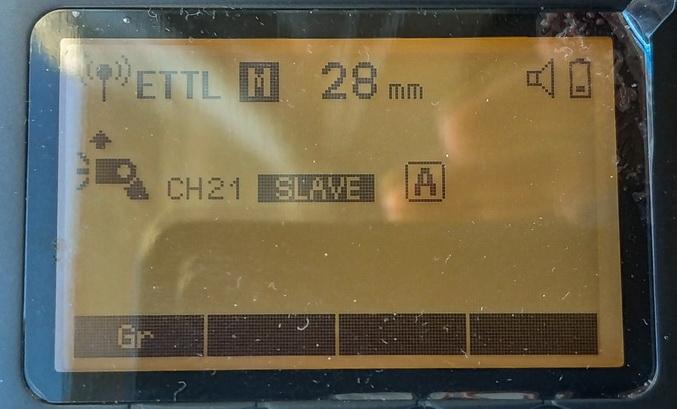
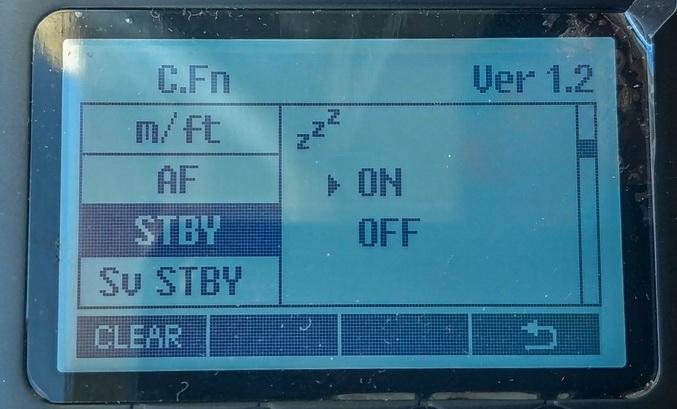
• В режиме ведомой вспышки она может находиться в режиме ожидания 60 либо 30 минут, после чего перейдёт в режим сна (нажатие на любую кнопку снова приведет ее в боевую готовность).
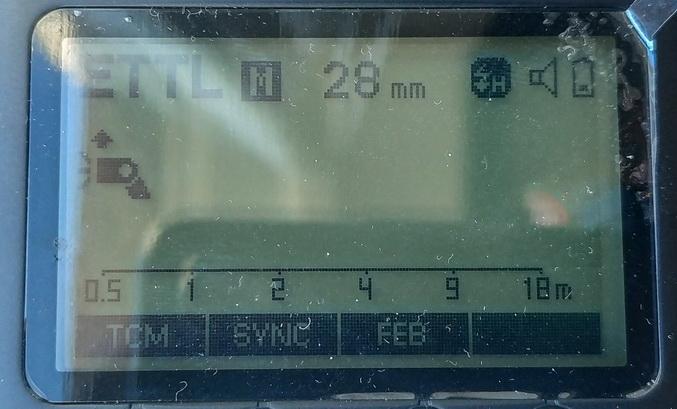
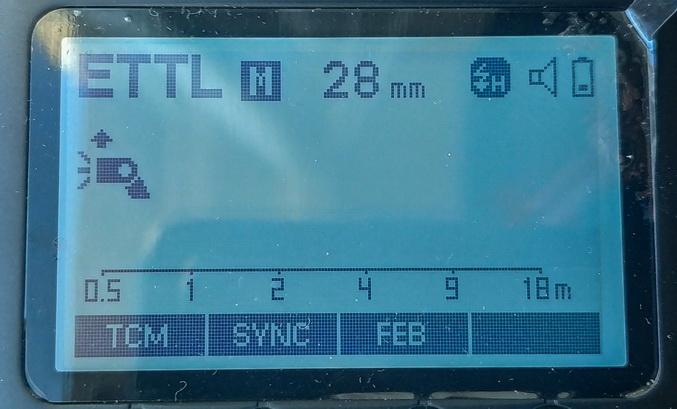
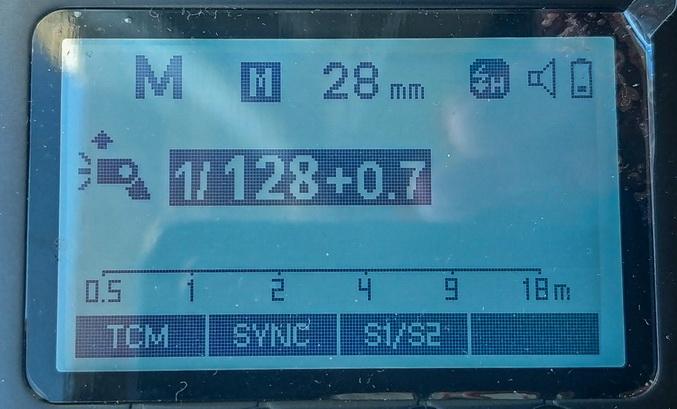
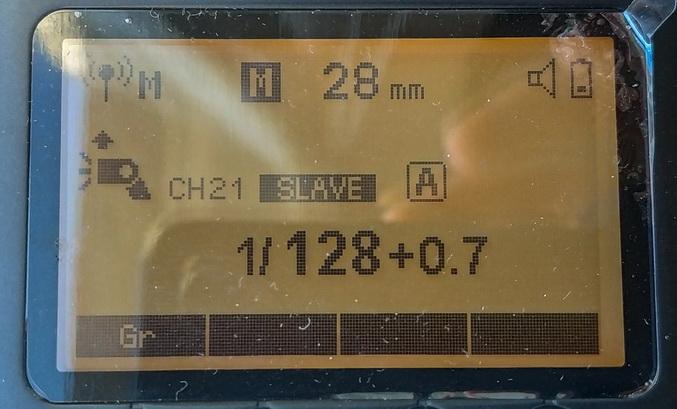
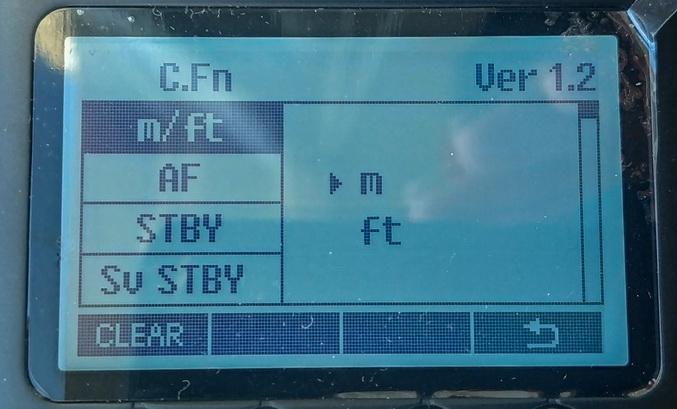
Фото менюшек:
 |
 |
 |
 |
 |
 |
 |
 |
 |
 |
 |
 |
 |
 |
 |
 |
 |
 |
 |
 |
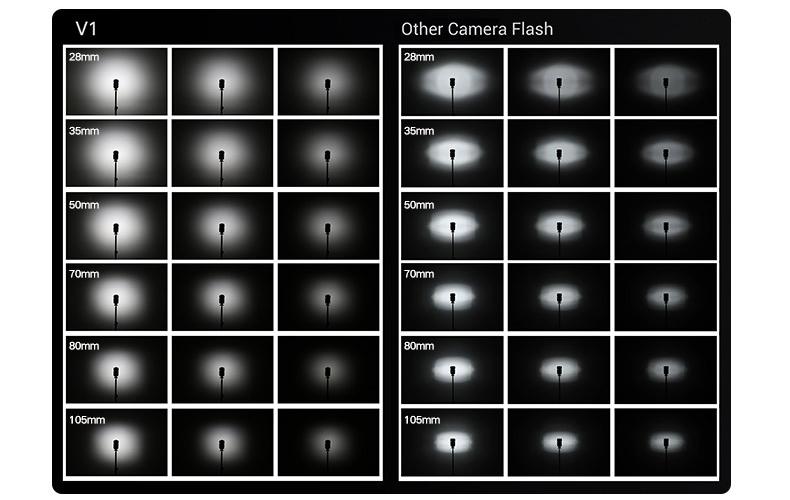
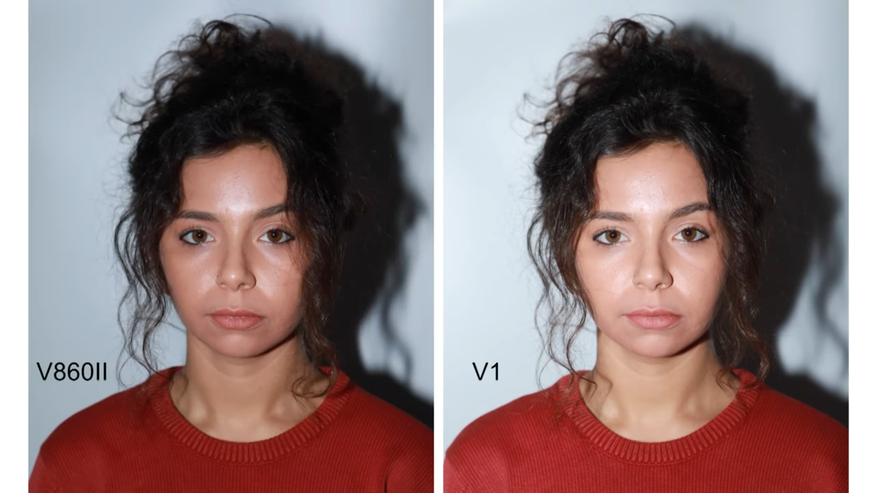
• Круглая форма головки соответственно обеспечивает круглое пятно света. По сравнению со вспышкой с обычной прямоугольной головкой, свет этой вспышки имеет более ровных переход, лучше рассеивается, заполняет кадр и создаёт мягче тени.
Все 6 фото сделаны на следующих настройках: f5, ISO 400, выдержка 1/100, объектив 50мм.
Вспышка Godox, ручной режим, 1/64 (в лоб) |
Вспышка Sigma, ручной режим, 1/64 (в лоб) |
Вспышка Sigma, ручной режим, 1/128 (в лоб) |
Вспышка Godox, ручной режим, 1/2 (в потолок) |
Вспышка Sigma, ручной режим, 1/2 (в потолок) |
Вспышка Sigma, ручной режим, 1/4 (в потолок) |
Примеры без / с вспышкой:
Автономность
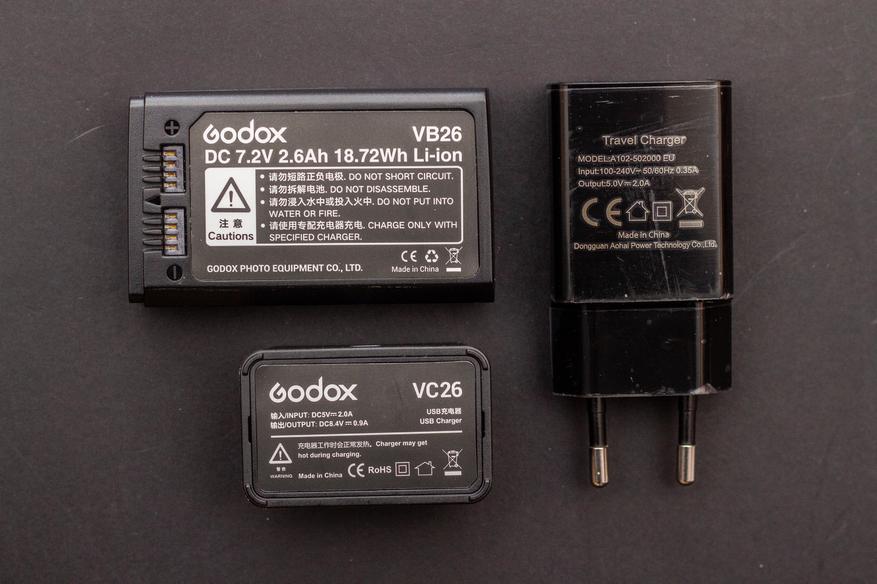
• Вспышка работает от аккумулятора с ёмкостью 2600мАч, которого хватит где-то на 480 срабатываний вспышки на максимальной мощности. Также отмечу, что аккумулятор обеспечивает быструю перезарядку вспышки на максимальной мощности (1.5 секунд).
• Как только вспышка перезарядилась и готова к работе — раздается звуковой сигнал (при необходимости его можно отключить).
• Некоторые говорят, что данная вспышка склонна к перегревам при работе на максимальной мощности, из-за чего увеличивается время перезарядки до 3-4 секунд, однако на практике я этого не заметил (специально делал около 50 пыхов на максимальной яркости – на перезарядку уходило 1.5-2 секунды). Возможно эта проблема была на первых прошивках, я же тестировал на последней (V1.3).
• В режиме ожидания мигает светодиод, тем самым указывая заряд батареи: по 3 мигания — высокий, 2 — средний, 1 — низкий, если же постоянно мигает — заряд батареи критически низкий.
• Производителем заявлено, что на зарядку уходит три с половиной часа, однако у меня на зарядку полностью разряженной батареи ушло ровно три часа.
Итоги
• Производитель Godox выпустил отличную вспышку с большим и хорошо продуманным функционалом, а также стабильной работой (особенно в качестве ведущей или ведомой вспышки). Могу её смело рекомендовать тем, кто занимается профессиональной фотосъёмкой и для кого важна стабильность и удобство в работе.
+ магнитное крепление аксессуаров и возможность использовать рассеиватель в портретной ориентации;
+ удобное управление c возможностью быстрого изменения настроек;
+ продуманный и удобный конструктив (слот для батареи; защёлка на горячем башмаке; головка отклоняется назад без необходимости поворота верхней части на 180 градусов);
+ стабильная и удобная работа (управление другими вспышками) в режиме ведущей / ведомой;
+ быстрая перезарядка;
+ равномерное распределение света и мягкие тени благодаря круглой головке;
+ низкий расход батареи в режиме ожидания;
+ большая функциональность (полная поддержка автоматических режимов TTL, ручной режим, режим высокоскоростной синхронизации HSS 1/8000с, функция компенсации мощности FEC, синхронизация по первой/второй шторке и т.д.).
— круглая форма головки и гладкий пластик (не софт-тач) делают её скользкой.
Бонус
Приобрести вспышку можно здесь:
• AliExpress
На мой субъективный
взгляд, в арсенале каждого фотографа должна быть вспышка. Она спасает, когда
естественного света недостаточно, а когда его достаточно, помогает подсветить
или части лица, или модель сзади, тем самым диктуя свои условия. А еще вспышка
позволяет полностью загнать модель в вакуум, сделав все вокруг почти черным и,
по сути, превратить любой закуток двора в свою студию.
На примере вспышек от
компании Godox опробуем озвученные выше варианты их использования.
О вспышках
Буквально несколько слов
о вспышках.
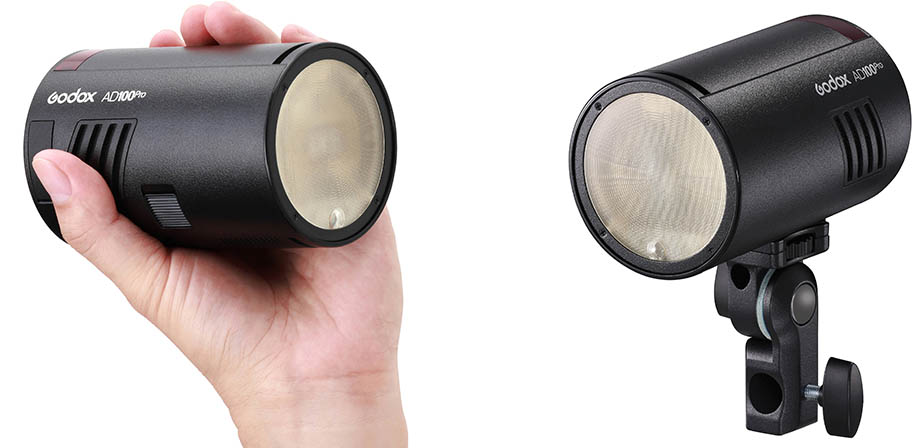
Одна модель – Godox AD100 Pro на 100 Дж, визуально
напоминающая миниатюрный моноблок, а по размеру как обычная банка.
 >Wireless Selection Button
 > Test Button / Flash Ready Indicator
 >Modeling Lamp Setting
 LCD Panel
- The display will only show the settings currently applied.
- The functions displayed above function buttons 1 to 4, such as SYNC and <A/B/C/D>, change according to settings’ status.
- When a button or dial is operated, the LCD panel illuminated.
LCD Panel in Three Modes
What’s in the Box of V1C Kit?
- Flash Unit
- Lithium Battery
- USB Battery Charger
- USB Line
- Charger
- Mini Stand
- Protection Case
- Instruction Manual
Separately Sold Accessories
The product can be used in combination with the following accessories sold separately, so as to achieve best photography effects: XProC & X1C TTL wireless flash trigger, AK-R1 accessory kit for round flash head, etc.
Battery
Features
- This flash unit uses Li-ion polymer battery which has long runtime. The available charge-and-discharge times are 500.
- It is reliably safe. The inner circuit is against overcharge, overdischarge, overcurrent, and short circuit.
- Take only 3.5 hours to fully charge the battery by using the standard battery charger.
Cautions
- Do not short circuit.
- Do not expose to rain or immerse into water. This battery is not water proof.
- Keep out of reach of children.
- No over 24 hours’ continuous charging.
- Store in dry, cool, ventilated places.
- Do not put aside or into fire.
- Dead batteries should be disposed according to local regulations.
- If the battery had ceased using for over 3 months, please make a full recharge.
Loading and Unloading the Battery
- To unload the battery, hold down the battery remove button and push the battery downwardly to take it out.
- According to the triangle sign on the battery pack, insert it into the compartment until a white knob locks the battery with a click sound.
Battery Level Indication
Make sure the battery pack is securely loaded in the flash. Check the battery level indication on the LCD panel to see the remaining battery level.
| Battery Level Indication | Meaning |
| 3 grids | Full |
| 2 grids | Middle |
| 1 grid | Low |
| Blank grid | Lower battery, please recharge it. |
| Blinking | The battery level is going to be used out immediately. And the flash will auto power off in 1 minute. Note: Please recharge the battery as soon as possible (within 10 days). Then, the battery can be used or be placed for long period. |
LED Modeling Lamp
Press the Modeling Lamp Setting button to set the modeling lamp. Short press the Set Button to turn on or off the modeling lamp. When turning the modeling lamp on, turn the select dial to set its brightness. There are 10 levels(01~10) for choice.
Power Management
Use ON/OFF Power Switch to power the flash unit on or off. Turn off if it will not be used for an extended period of time. Setting as a master flash, it will turn the power off automatically after a certain period (approx. 90 seconds) of idle use. Pressing the camera shutter halfway or pressing any flash button will wake up the flash unit. Setting as a slave flash, it will enter sleep mode after a certain period (adjustable, 60 minutes by default) of idle use. Pressing any flash button will wake it up.
C.Fn Disabling Auto Power Off function is recommended when the flash is used off camera. (C.Fn-STBY)
C.Fn Slave Auto Power Off Timer is set to 60 minutes by default. Another option «30 minutes» is available. (C.Fn- Sv STBY)
Flash Mode—E-TTL Autoflash
This flash has three flash modes: E-TTL, Manual (M), and Multi (Stroboscopic). In E-TTL mode, the camera and the flash will work together to calculate the correct exposure for the subject and the background. In this mode, multiple TTL functions are available: FEC, FEB, FEL, HSS, second curtain sync, modeling flash, control with the camera’s menu screen.
* Press < MODE > Mode Selection Button and three flash modes will display on the LCD panel one by one with each pressing.
ETTL Mode
Press < MODE > Mode Selection Button to enter E-TTL mode. The LCD panel will display.
- Press the camera release button halfway to focus. The aperture and effective flash range will be displayed in the viewfinder.
- When the shutter button is fully pressed, the flash will fire a preflash that the camera will use to calculate exposure and flash output the instant before the photo is taken.
FEC: Flash Exposure Compensation
With FEC function, this flash can adjust from -3 to +3 in 1/3rd stops. It is useful in situations where minor adjusting of the TTL system is needed based on the environment.
Setting FEC:
FEL: Flash Exposure Lock
FEL can lock the correct flash exposure setting for any part of the scene. With <ETTL> displayed on the LCD panel, press the camera’s <FEL> button. If the camera does not have the <FEL> button, press the < * > button.
- Focus the subject.
- Press the <FEL> button.
- Aim the subject at the center of the viewfinder and press <FEL> button.
- The camera flash will fire a preflash and the required flash output for the subject is retained in memory.
- Each time the <FEL> button is pressed, a preflash will be fired and a new flash exposure setting will be locked.
- If the subject is too far away and underexposure, the <> icon will blink in the viewfinder. Move closer to the subject and try the FE lock again.
- If <ETTL> is not displayed on the LCD panel, FE lock cannot be set.
- If the subject is too small, FE lock might not be very effective.
High-Speed Sync
High Speed Sync (FP flash) enables the flash to synchronize with all camera shutter speeds. This is convenient when you want to use aperture priority for fill-flash portraits.
- Press Function Button 2 < SYNC > so that <> is displayed.
- Check that <> is displayed in the viewfinder.
Second-Curtain Sync
With a slow shutter speed, you can create a light train following the subject. The flash fires right before the shutter closes.
Press function button 2 < SYNC > button so that <> is displayed on the LCD panel.
The flash output is adjustable from 1/1 full power to 1/256th power in 1/10th stop increments. To obtain a correct flash exposure, use a hand-held flash meter to determine the required flash output.
- Press < M: Manual Flash> button so that < M > is displayed.
- Turn the Select Dial to choose a desired flash output amount.
- Press Set Button again to confirm the setting.
Optic S1 Secondary Unit Setting
In M manual flash mode, press <S1/S2> button so that this flash can function as an optic S1 secondary flash with optic sensor. With this function, the flash will fire synchronously when the main flash fires, the same effect as that by the use of radio triggers. This helps create multiple lighting effects.
Optic S2 Secondary Unit Setting
Press <S1/S2> button so that this flash can also function as an optic S2 secondary flash with optic sensor in M manual flash mode. This is useful when cameras have pre-flash function. With this function, the flash will ignore a single «preflash» from the main flash and will only fire in response to the second, actual flash from the main unit.
- S1 and S2 optic triggering is only available in M manual flash mode.
Multi: Stroboscopic Flash
With stroboscopic flash, a rapid series of flashes is fired. It can be used to capture a multiple images of a moving subject in a single photograph. You can set the firing frequency (number of flashes per sec. expressed as Hz), the number of flashes, and the flash output.
- Press <MODE> button so that < MULTI > is displayed.
- Set the flash frequency and flash times.
- Press the Function Button 2 <Times> to select the flash times. Turn the Select Dial to set the number.
- Press the Function Button 3 <Hz> to select the flash frequency. Turn the Select Dial to set the number.
- Turn the Select Dial to choose a desired flash output.
- After you finish the setting, press Set Button and all the settings will be displayed.
Calculating the Shutter Speed
During stroboscopic flash, the shutter remains open until the firing stops. Use the formula below to calculate the shutter speed and set it with the camera.
Number of Flashes / Flash Frequency = Shutter Speed
For example, if the number of flashes is 10 and the firing frequency is 5 Hz, the shutter speed should be at least 2 seconds.
To avoid overheating and deteriorating the flash head, do not use stroboscopic flash more than 10 times in succession. After 10 times, allow the camera flash to rest for at least 15 minutes. If you try to use the stroboscopic flash more than 10 times in succession, the firing might stop automatically to protect the flash head. If this happens, allow at least 15 minutes’ rest for the camera flash.
Stroboscopic flash is most effective with a highly reflective subject against a dark background.
- Using a tripod and a remote control is recommended.
- A flash output of 1/1 and 1/2 cannot be set for stroboscopic flash.
- Stroboscopic flash can be used with»buLb«.
- If the number of flashes is displayed as «—«, the firing will continue until the shutter closes or the battery is exhausted. The number of flashes will be limited as shown by the following table.
Wireless Flash Shooting: Radio (2.4G) Transmission
- When the camera’s shooting mode is set to a fully automatic mode or an Image Zone mode, the operations in this chapter are not available. Set the camera’s shooting mode to P/Tv/Av/M/B (Creative Zone Mode).
- The V1C attach to the camera is called the master unit, and a V1C that is wirelessly controlled is called the slave unit.
- You can also wirelessly control the V1C set as the slave unit with the transmitter X1T-C (sold separately). For details on setting the master unit functions, see the transmitter’s instructions.
Using a flash (master/slave) with a radio transmission wireless shooting function make it easy to shoot with advanced wireless multiple flash lighting, in the same way as E-TTL II autoflash shooting. The basic relative position and operation range are as shown in the picture. You can then perform wireless E-TTL II autoflash shooting just by setting the master unit to <ETTL>.
Positioning and Operation Range (Example of wireless flash shooting)
- Autoflash Shooting with One Slave Unit
- Use the supplied mini stand to position the slave unit.
- Before shooting, perform a test flash and test shooting.
- The transmission distance might be shorter depending on the conditions such as positioning of slave units, the surrounding environment and whether conditions.
Wireless Multiple Flash Shooting
You can divide the slave units into two or three groups and perform E-TTL II autoflash while changing the flash ratio (factor). In addition, you can set and shoot with a different flash mode for each firing group, for up to 4 groups.
- Shooting with a Different Flash Mode set for Each Group
* The flash mode settings are indicated only as an example
Wireless Settings
Master Unit’s Flash OFF
When the master unit is set to OFF, only the slave units will fire a flash.
- Press <MENU> Button to enter C.Fn MASTER setting.
Setting the Communication Channel
If there are other wireless flash systems nearby, you can change the channel IDs to prevent signal interference. The channel IDs of the master unit and the slave unit(s) must be set to the same.
- Press <MENU> Button to enter C.Fn CH setting.
- In C.Fn CH, turn the Select Dial to choose channel ID CH 07 from 1 to 32.
- Press the Set Button to confirm.
Wireless ID Settings
Change the wireless channels and wireless ID to avoid interference for it can only be triggered after the wireless IDs and channels of the master unit and the slave unit are set to the same. Press the <MENU> button to enter C.Fn ID. Press the Set Button to choose OFF channel expansion shutdown, and choose any figure from 01 to 99.
Scan the Spare Channel
To avoid the interference of using the same channel by others, this function can be used: enter the C.Fn settings and find the SCAN option. When setting it to START, it will scan from 1% to 100%. And the 8 spare channels will be displayed after the scan is completed.
ETTL: Fully Automatic Wireless Flash Shooting
Using Automatic Wireless Flash with a Single Slave Unit
- Master Unit Setting
- Attach a V1C camera flash on the camera and set it as the master unit.
- X1T-C can also be used as master unit. X1T-C can control V1C ‘s ZOOM value when the ZOOM is adjusted to auto (A) mode.
Using Automatic Wireless Flash with Multiple Slave Units
When stronger flash output or more convenient lighting operation is needed, increase the number of slave units and set it as a single slave unit. To add slave units, use the same steps as setting «automatic wireless flash with a single slave unit». Any flash group can be set (A/B/C/D/E).
When the number of slave units is increased and the master unit flash firing is ON, automatic control is implemented to make all groups of flashes fire the same flash output and ensure the total flash output up is to standard exposure.
- Press the depth-of-field preview button on the camera to fire a modeling flash.
- If the slave unit’s auto power off function is workable, press the master unit’s test button to power it on. Please note that test firing is unavailable during the camera’s regular metering time.
- The effective time of slave auto power off is changeable. (C.Fn-Sv STBY)
- By making some settings, the auto AF-assist transmitter will not blink after the slave unit’s flash ready indicator is lightened. (C.Fn-AF)
Using Fully Automatic Wireless Flash
The FEC and other settings that set on the master unit will also be appeared on the slave unit automatically. The slave unit does not need any operation. Use the following settings to make wireless flashes according to the same methods with normal flash shooting.
- Flash Exposure Compensation
- Flash Exposure Lock
- Manual Flash
- Stroboscopic Flash
About Master Unit
Use two or more master units. By preparing several cameras that with master units flash attached, cameras can be changed in shooting while keeping the same lighting source (slave unit).
M: Wireless Flash Shooting with Manual Flash
This describes wireless (multiple shooting) using manual flash. You can shoot with a different flash output setting for each slave unit (firing group). Set all parameters on the master unit.
- Setting the flash mode to <M>.
- Setting flash output.1/2/3/4<A/B/C/D>
- Press Function Button 3 < Gr >. Turn the Select Dial to set the flash output of the groups. Press Set Button to confirm.
- Taking the picture.
- Each group fires at the set flash ratio.
Setting <M> Flash Mode
You can directly operate the slave unit to manually set the manual flash or stroboscopic flash.
- Setting the slave unit.
- Setting flash mode to <M>.
- Press <MODE> button so that <M> is displayed.
- Set the manual flash output.
Multi: Wireless Flash Shooting with Manual Flash
Setting <MULTI> stroboscopic flash.
- Press <MODE> button so that <MULTI> is displayed. SONY
- Setting the stroboscopic flash
Other Applications
Sync Triggering
The Sync Cord Jack is a Φ2.5mm plug. Insert a trigger plug here and the flash will be fired synchronously with the camera shutter.
Modeling Flash
If the camera has a depth-of-field preview button, pressing it will fire the flash continuously for 1 second. This is called modeling flash. It enables you to see the shadow effects on the subject and the lighting balance. You can fire the modeling flash during wireless or normal flash shooting.
- To avoid overheating and deteriorating the flash head, do not fire the modeling flash for more than 10 consecutive times. If you fire the modeling flash 10 consecutive times, allow at least 10 minutes’ break for the camera flash.
- The modeling flash cannot be fired with the EOS 300 and Type-B cameras.
Auto Focus Assist Beam
In poorly-lit or low-contrast shooting environments, the built-in auto focus assist beam will automatically light on to make it easier for autofocus. The beam will light up only when autofocus is difficult and get out as soon as the autofocus becomes correct. If you want to turn off the auto focus assist beam, set the «AF» to «OFF» on the C.Fn settings.
- If you find the auto focus assist beam does not light up, this is because the camera has got a correct autofocus.
| Position | Effective Range |
| Center | 0.6~10m / 2.0~32.8 feet |
| Periphery | 0.6~5m / 2.0~16.4 feet |
Bounce Flash
By pointing the flash head toward a wall or ceiling, the flash will bounce off the surface before illuminating the subject. This can soften shadows behind the subject for a more natural-looking shot. This is called bounce flash. To set the bounce direction, hold the flash head and turn it to a satisfying angle.
- If the wall or ceiling is too far away, the bounced flash might be too weak and result in underexposure.
- The wall or ceiling should be a plain, white color for high reflectance. If the bounce surface is not white, a color cast may appear in the picture.
ZOOM: Setting the Flash Coverage
The flash coverage can be set automatically or manually. It can be set to match the lens focal length from 28mm to 105mm.
In Manual Zoom mode, press the <ZOOM> button.
- Turn the Select Dial to change the flash coverage.
- If <A> is displayed, the flash coverage will be set automatically.
If you set the flash coverage manually, make sure it covers the lens focal length so that the picture will not have a dark periphery.
Low Battery Warning
If the battery power is low, <> will appear and blink on the LCD panel. Please replace the battery immediately.
C.Fn: Setting Custom Functions
The following table lists the available and unavailable custom functions of this flash.
| C.Fn Custom Functions | |||
| Custom Function Signs | Function | Setting No. | Settings & Description |
| m/ft | Distance indicator | m | m |
| ft | feet | ||
| AF | AF-assist beam | ON | ON |
| OFF | OFF | ||
| STBY | Auto sleep setting | ON | ON |
| OFF | OFF | ||
| Sv STBY | Slave auto power off timer |
60min | 60min |
| 30min | 30min | ||
| SCAN | Scan the spare channel |
OFF | OFF Start to find the spare |
| START | Start to find the spare channel Choose channels | ||
| CH | Channel setting | 01-32 | Choose channels from 01-32 |
| ID | Wireless ID | OFF | Off |
| 01-99 | Choose any figure from 01-99 | ||
| BEEP | Beeper | ON | ON |
| OFF | OFF | ||
| LIGHT | Backlighting time | 12sec | Off in 12 sec. |
| OFF | Always off | ||
| ON | Always lighting | ||
| LCD | LCD contrast ratio | -3~+3 | 7 levels |
| FEB ACL | FEB auto cancel | ON | ON |
| OFF | OFF | ||
| MASTER | Master unit control | OFF | OFF |
| ON | ON |
- Press<MENU> Button until C.Fn menu is displayed. The «Ver x.x» in the top-right corner refers to the software version.
- Select the Custom Function No.
- Turn the Select Dial to select the Custom Function No.
- Change the Setting.
- Press Set Button and the Setting No. blinks.
- Turn the Select Dial to set the desired number. Pressing Set Button will confirm the settings.
- After you set the Custom Function and press <MENU> button, the camera will be ready to shoot.
- In the C.Fn states, long press the «Clear»button for 2 seconds until «OK»is displayed on the panel, which means the values in C.Fn can be reset.
If the camera flash is attached to an EOS camera which has a speedlite control function, the flash can be controlled using the camera’s menu screen. For the menu operation procedure, refer to your camera’s instruction manual.
- Setting Camera Flash Functions
The following flash functions are settable according to different flash modes.
- Flash mode
- Shutter sync (1st/2nd curtain, high speed sync)
- FEB
- Flash exposure compensation
- Flash firing
- Clear camera flash’s settings
- Custom Functions of Camera Flash
C.Fn-00, C.Fn-01, C.Fn-03, C.Fn-08, C.Fn-10, C.Fn-20, C.Fn-22.
Clear All Flash Custom Functions
* Screens from the EOS-1D Mark III.
- If flash exposure compensation has already been set with the camera flash, flash exposure compensation cannot be set with the camera. To set it with the camera, the camera flash’s flash exposure compensation must be set to zero.
- If any Flash Custom Functions and flash settings other than flash exposure compensation have been set by both the camera and the flash, the latest settings will take effect.
Protection Function
- Over-Temperature Protection
- To avoid overheating and deteriorating the flash head, do not fire more than 30 continuous flashes in fast succession at 1/1 full power. After 30 continuous flashes, allow a rest time of at least 10 minutes.
- If you fire more than 30 continuous flashes and then fire more flashes in short intervals, the inner over-temperature protection function may be activated and make the recycling time over 10 seconds. If this occurs, allow a rest time of about 10 minutes, and the flash unit will then return to normal.
- When the over-temperature protection is started, is shown on the LCD display.
Number of flashes that will activate over-temperature protection:
| 1/1 | 30 |
| 1/2 +0.7 | 40 |
| 1/2 +0.3 | 50 |
| 1/2 | 60 |
| 1/4(+0.3,+0.7) | 100 |
| 1/8(+0.3,+0.7) | 200 |
| 1/16(+0.3,+0.7) | 300 |
| 1/32(+0.3,+0.7) | 500 |
| 1/64(+0.3,+0.7) | 1000 |
| 1/128(+0.3,+0.7) |
Number of flashes that will activate over-temperature protection in high-speed sync triggering mode:
| Power Output | Times |
| 1/1 | 15 |
| 1/2(+0.3,+0.7); | 20 |
| 1/4(+0.3,+0.7) | 30 |
| 1/8(+0.3,+0.7); | |
| 1/16(+0.3,+0.7) | 40 |
| 1/32(+0.3,+0.7); | |
| 1/64(+0.3,+0.7); | 50 |
| 1/128(+0.3,+0.7); |
- Other Protections
The system provides real-time protection to secure the device and your safety. The following lists prompts for your reference:
| Prompts on LCD Panel | Meaning |
| E1 | A failure occurs on the recycling system so that the flash cannot fire. Please restart the flash unit. If the problem still exists, please send this product to a maintenance center. |
| E2 | The system gets excessive heat. Please allow a rest time of 10 minutes. |
| E3 | The voltage on two outlets of the flash tube is too high. Please send this product to a maintenance center. |
| E9 | There are some errors occurred during the upgrading process. Please using the correct firmware upgrade method. |
Technical Data
| Model | V1C |
| Compatible Cameras | Canon EOS cameras (E-TTL II autoflash) |
| Power (1/1 output) | 76Ws |
| Flash Coverage | 28 to 105mm
|
| Flash Duration | 1/300 to 1/20000 seconds |
| Exposure Control | |
| Exposure control system | E-TTL II autoflash and manual flash |
| Flash exposure | Manual. FEB: ±3 stops in 1/3 stop increments |
| compensation (FEC) | (Manual FEC and FEB can be combined.) |
| FE lock | With <FEL> button or< * > button |
| Sync mode | High-speed sync (up to 1/8000 seconds), first-curtain sync, and second-curtain sync |
| Multi flash | Provided (up to 100 times, 199Hz) |
| Wireless Flash | |
| Wireless flash function | Master, Slave, Off |
| Master groups | A, B, C, D |
| Controllable slave groups | A, B, C, D, E (E group can be controlled by X series flash trigger) |
| Transmission range (approx.) | 100m |
| Channels | 32 (1~32) |
| ID | 01~99 |
| Modeling flash | Fired with camera’s depth-of-field preview button |
| Auto Focus Assist Beam | |
| Effective range (approx.) | Center: 0.6~10m / 2.0~32.8 feet Periphery: 0.6~5m / 2.0~16.4 feet |
| LED Modeling Lamp | |
| Power | 2W |
| Color Temperature | 3300K±200K |
| Power Supply | |
| Power source | 7.2V/2600mAh Li-ion battery |
| Recycle time | Approx 1.5 seconds. Green LED indicator will light up |
| when the flash is ready. | |
| Full power flashes | Approx. 480 |
| Power saving | Power off automatically after approx. 90 seconds of idle operation. (60 minutes if set as slave) |
| Sync Triggering Mode | Hotshoe, 2.5mm sync line |
| Color Temperature | 5600±200k |
| Dimensions | |
| W x H x D | 76*93*197mm |
| Weight without battery | 420g |
| Weight with battery | 530g |
| 2.4G Wireless FrequencyRange | 2413.0MHz-2464.5MHz |
| Max. Transmitting Power of 2.4G Wireless | 5dbm |
Troubleshooting
If there is a problem, refer to this Troubleshooting Guide.
The Camera Flash does not fire.
The power turns off by itself.
- After 90 seconds of idle operation, auto power off took effect if the flash is set as master.
→Press the shutter button halfway or press any flash button to wake up. - After 60 minutes (or 30 minutes) of idle operation, the flash unit will enter sleep mode if it is set as slave.
→Press any flash button to wake up.
Auto zoom does not work.
- The camera flash is not attached securely to the camera.
→Attach the camera flash’s mounting foot to the camera.
The flash exposure is underexposed or overexposed.
- There was a highly reflective object (e.g. glass window) in the picture.
→Use FE lock (FEL). - You used high-speed sync.
→With high-speed sync, the effective flash range will be shorter. Make sure the subject is within the effective flash range displayed. - You used Manual Flash mode.
→Set the flash mode to ETTL or modify the flash output.
Photos have dark corners or only parts of the target subject are illuminated.
- The focal length of lens exceeds the flash coverage.
→Check the flash coverage you set. This flash unit has the flash coverage between 28 and 105mm, which fits medium-format cameras.
Firmware Upgrade
- The USB port is a Type-C USB socket. Type-C USB connection line is applicable.
- As the firmware upgrade needs the support of Godox G3 software, please download and install the «Godox G3 firmware upgrade software» before upgrading. Then, choose the related firmware file.
- As the product needs to do firmware upgrade, please refer to instruction manual of the newest electric version as final.
Compatible Camera Models
This flash unit can be used on the following Canon EOS series camera models:
1DX 5D Mark III 5D Mark II 6D 7D 60D 50D 40D 30D 650D 600D 550D 500D 450D 400D Digital 1100D 1000D 5D Mark IV 7D Mark II 6D Mark II 760D 750D 70D 80D 800D 77D M5 M3 M50 EOS R 1500D 3000D
This table only lists the tested camera models, not all Canon EOS series cameras. For the compatibility of other camera models, a self-test is recommended. Rights to modify this table are retained.
Maintenance
- Shut down the device immediately should abnormal operation be detected.
- Avoid sudden impacts and the product should be dedusted regularly.
- It is normal for the flash tube to be warm when in use. Avoid continuous flashes if unnecessary.
- Maintenance of the flash must be performed by our authorized maintenance department which can provide original accessories.
- This product, except consumables e.g. flash tube, is supported with a one-year warranty.
- Unauthorized service will void the warranty.
- If the product had failures or was wetted, do not use it until it is repaired by professionals.
- Changes made to the specifications or designs may not be reflected in this manual.
Documents / Resources
Download manual
Here you can download full pdf version of manual, it may contain additional safety instructions, warranty information, FCC rules, etc.
Download Godox V1 TTL Li-ion Round Head Camera Flash Manual
Посмотреть инструкция для Godox Speedlite V1 Canon бесплатно. Руководство относится к категории вспышки, 4 человек(а) дали ему среднюю оценку 8.5. Руководство доступно на следующих языках: английский. У вас есть вопрос о Godox Speedlite V1 Canon или вам нужна помощь? Задайте свой вопрос здесь
Не можете найти ответ на свой вопрос в руководстве? Вы можете найти ответ на свой вопрос ниже, в разделе часто задаваемых вопросов о Godox Speedlite V1 Canon.
Инструкция Godox Speedlite V1 Canon доступно в русский?
Не нашли свой вопрос? Задайте свой вопрос здесь
Для работы проектов iXBT.com нужны файлы cookie и сервисы аналитики.
Продолжая посещать сайты проектов вы соглашаетесь с нашей
Политикой в отношении файлов cookie
Сегодня мы рассмотрим новую и слегка необычную внешнюю вспышку с круглой головкой от производителя Godox.
Немного о производителе
Компания Godox специализируется на производстве различного фотооборудования, в основном вспышек и света и уже успела завоевать лидерство у фотографов благодаря отличном качеству продукции и приемлемым ценам. У производителя есть свой сайт, где можно посмотреть всю продукцию и почитать её характеристики.
Упаковка
В комплекте идёт:
• накамерная вспышка;
• литий-ионная батарея;
• зарядное устройство;
• кабель для зарядки (Type-C);
• мини-стойка;
• чехол;
• руководство по эксплуатации.
Инструкция подробная, на английском и китайском. Скачать её в электронном виде можно здесь.
Чехол качественный, имеет петлю для крепления на пояс.
Технические характеристики:
|
Модель |
V1C |
V1N |
V1S |
|
Совместимые камеры |
Canon EOS (E-TTLII) |
Nikon (i-TTL) |
Sony (TTL) |
|
Мощность |
76 Дж |
||
|
Угол подсветки |
от 28 до 105 мм |
||
|
Автоматический зум (угол подсветки выбирается автоматически в зависимости от фокусного расстояния объектива и размера изображения) |
|||
|
Ручной зум |
|||
|
Наклон головки вспышки: от 0˚до 330˚ горизонтально и от -7˚ до 120˚ вертикально |
|||
|
Длительность импульса |
От 1/300 до 1/20000 секунды |
||
|
Управление экспозицией вспышки |
|||
|
Система управления экспозицией вспышки |
E-TTL II и ручной режим вспышки |
i-TTL и ручной режим вспышки |
TTL и ручной режим вспышки |
|
Компенсация вспышки (FEC) |
Ручная FEC и FEB: ±3 ступени с шагом 1/3 (Ручная FEC и FEB могут комбинироваться) |
||
|
Блокировка экспозиции |
Кнопкой <FEL˃ или <*˃ |
нет |
нет |
|
Режим синхронизации |
Высокоскоростная синхронизация (до 1/8000 секунды), синхронизация по первой шторке, синхронизация по второй шторке |
||
|
Режим стробоскопа |
Есть (до 100 импульсов, 199 Гц) |
Есть (до 90 импульсов, 100 Гц) |
|
|
Дистанционное управление вспышкой |
|||
|
Режимы дистанционного управления вспышкой |
Режим ведущей вспышки (Master), режим ведомой вспышки (Slave), выкл. |
||
|
Количество групп |
A, B, C, D |
M, A, B, C |
|
|
Количество ведомых групп |
A, B, C, D, E (группа E управляется системой синхронизации Godox X) |
A, B, C, D, E (группа D/E управляется системой синхронизации Godox X) |
|
|
Радиус передачи сигнала (приблиз.) |
100 м |
||
|
Количество каналов |
32 (1~32) |
||
|
ID |
01~99 |
||
|
Моделирующая вспышка |
Запускается кнопкой предпросмотра глубины резкости на фотокамере |
нет |
|
|
Подсветка автофокуса |
|||
|
Эффективное расстояние (приблиз.) |
В центре: 0,6-10м / 2,0-32,8 футов |
||
|
LED пилотная лампа |
|||
|
Мощность |
2 Вт |
||
|
Цветовая температура |
3300К±200К |
||
|
Электропитание |
|||
|
Источник питания |
7.2В/2600мАч литий-ионная батарея |
||
|
Время перезарядки |
Приблиз. 1,5 с. Зеленый LED индикатор сигнализирует о готовности вспышки |
||
|
Количество импульсов на полной мощности |
Около 480 |
||
|
Энергосбережение |
Автоматическое отключение после 90 секунд бездействия (60 минут в режиме ведомой вспышки) |
||
|
Методы синхронизации |
«горячий башмак», гнездо для синхрокабеля 2,5мм |
||
|
Цветовая температура |
5600±200К |
||
|
Размеры |
|||
|
Размеры корпуса |
76х93х197 мм |
||
|
Вес нетто без учета аккумулятора |
420 г |
||
|
Вес нетто с аккумулятором |
530 г |
• Среди особенностей отмечу полную поддержку автоматических режимов TTL, ручной режим, режим высокоскоростной синхронизации HSS 1/8000с, функцию компенсации мощности FEC и синхронизацию по первой/второй шторке.
• Дополнительно можно прикупить набор аксессуаров и светофильтров для вспышки под индексом AK-R1.
• Стоит отметить, что аксессуары крепятся на магните (установлены по периметру головки), поэтому при использовании плоского рассеивателя / отражателя и фотографировании в портретной ориентации – его можно просто повернуть (прокрутить) в нужное положение, что обычно невозможно в других вспышках.
• Производитель также выпустил переходник, который позволяет крепить данные аксессуары на вспышки с прямоугольной головкой.
• Корпус вспышки сделан из пластика, сборка отличная. К недостаткам отнесу лишь то, что из-за круглой головки и скользкого пластика она может скатиться с наклонной поверхности, поэтому нужно быть внимательным при её эксплуатации.
Сравнение со вспышкой Sigma EF 610 DG Super:
• На головке вспышки установлена LED-лампа, которая может светить приятным теплым светом (3300К) и имеет 10 уровней яркости. Лампа не сверхъяркая, но её вполне достаточно чтобы подсветить объект на расстоянии 1.5-2 метров и ближе в тёмное время суток. Лампа может быть включена и во время работы вспышки.
Пример освещения (ВСЕ ФОТОПРИМЕРЫ В ОБЗОРЕ С ИСПОЛЬЗОВАНИЕМ ВСПЫШКИ БЕЗ ОБРАБОТКИ):
Минимальная / максимальная яркость:
• К преимуществам батарейного отсека отнесу отсутствие какой-либо крышки, которая может отвалиться / затеряться.
• Слева находится кнопка для изъятия батареи и два порта под заглушкой USB Type-C для обновления прошивки (последнюю прошивку можно скачать здесь) и 2.5мм порт для синхронизации.
• Среди преимуществ конструкции также отмечу, что в любой позиции верхнюю часть можно повернуть назад (в изначальной позиции вспышка поворачивается назад, создавая угол 120°), то есть не нужно поворачивать на 180° по горизонтали чтобы направить верхнюю часть в потолок.
• Вспышка крепится на камеру / стойку с помощью башмака с защёлкой.
• Вспышка оснащена матричным ЖК-дисплеем, который имеет хорошую видимость и подсветку. Подсветка загорается при нажатии на любую кнопку и горит 12 секунд по умолчанию (ее можно либо выключить совсем либо включить, чтобы она не гасла).
• Блок управления вспышкой удобный и продуманный. Посредине находится колёсико, которое можно не только вращать, но и нажимать.
• Вспышка имеет три основных режима: E-TTL, ручной и режим стробоскопа.
• Вспышка имеет 9 режимов мощности и в каждом режиме по 10 шагов мощности (по 1/10 стопа). Управление мощностью удобное, можно изменять по 1/10 шага (прокручиванием колёсика) либо же по сразу же переключаться между целыми стопами (нажатием на колёсико). Максимальная мощность – 1/1, минимальная – 1/256.
• Если в режиме TTL сделать снимок, а потом переключиться в ручной режим – настройки мощности сохранятся.
• Вспышка работает в такой же системе радиосинхронизации (Godox 1.4G X), как и остальные вспышки Godox. К слову, это одна из лучших (если не лучшая) система радиосинхронизации на рынке, которая отличается стабильной работой, совместимостью со всеми брендами (максимально универсальная), возможностью совмещать накамерные и студийные вспышки и так далее.
• Стоит отметить удобное управление другими вспышками в ведущем режиме: каждая кнопка отвечает за отдельную вспышку, мощность же каждой вспышки регулируется прокручиванием или нажатием на колёсико (для изменения по 1/10 шага или целого стопа соответственно).
• В режиме радиосинхронизации порадовала функция поиска наиболее надёжного канала, которая будет особенно полезна если рядом снимают другие фотографы. Производитель также отлично оптимизировал расход батареи в режиме ожидания – он минимальный и не тает на глазах.
• В режиме ведомой вспышки она может находиться в режиме ожидания 60 либо 30 минут, после чего перейдёт в режим сна (нажатие на любую кнопку снова приведет ее в боевую готовность).
Фото менюшек:
|
|
|
|
|
|
|
|
|
|
|
|
|
|
|
|
|
|
|
|
• Круглая форма головки соответственно обеспечивает круглое пятно света. По сравнению со вспышкой с обычной прямоугольной головкой, свет этой вспышки имеет более ровных переход, лучше рассеивается, заполняет кадр и создаёт мягче тени.
Все 6 фото сделаны на следующих настройках: f5, ISO 400, выдержка 1/100, объектив 50мм.
| Вспышка Godox, ручной режим, 1/64 (в лоб) |
Вспышка Sigma, ручной режим, 1/64 (в лоб) |
Вспышка Sigma, ручной режим, 1/128 (в лоб) |
| Вспышка Godox, ручной режим, 1/2 (в потолок) |
Вспышка Sigma, ручной режим, 1/2 (в потолок) |
Вспышка Sigma, ручной режим, 1/4 (в потолок) |
Примеры без / с вспышкой:
Автономность
• Вспышка работает от аккумулятора с ёмкостью 2600мАч, которого хватит где-то на 480 срабатываний вспышки на максимальной мощности. Также отмечу, что аккумулятор обеспечивает быструю перезарядку вспышки на максимальной мощности (1.5 секунд).
• Как только вспышка перезарядилась и готова к работе — раздается звуковой сигнал (при необходимости его можно отключить).
• Некоторые говорят, что данная вспышка склонна к перегревам при работе на максимальной мощности, из-за чего увеличивается время перезарядки до 3-4 секунд, однако на практике я этого не заметил (специально делал около 50 пыхов на максимальной яркости – на перезарядку уходило 1.5-2 секунды). Возможно эта проблема была на первых прошивках, я же тестировал на последней (V1.3).
• В режиме ожидания мигает светодиод, тем самым указывая заряд батареи: по 3 мигания — высокий, 2 — средний, 1 — низкий, если же постоянно мигает — заряд батареи критически низкий.
• Производителем заявлено, что на зарядку уходит три с половиной часа, однако у меня на зарядку полностью разряженной батареи ушло ровно три часа.
Итоги
• Производитель Godox выпустил отличную вспышку с большим и хорошо продуманным функционалом, а также стабильной работой (особенно в качестве ведущей или ведомой вспышки). Могу её смело рекомендовать тем, кто занимается профессиональной фотосъёмкой и для кого важна стабильность и удобство в работе.
+ магнитное крепление аксессуаров и возможность использовать рассеиватель в портретной ориентации;
+ удобное управление c возможностью быстрого изменения настроек;
+ продуманный и удобный конструктив (слот для батареи; защёлка на горячем башмаке; головка отклоняется назад без необходимости поворота верхней части на 180 градусов);
+ стабильная и удобная работа (управление другими вспышками) в режиме ведущей / ведомой;
+ быстрая перезарядка;
+ равномерное распределение света и мягкие тени благодаря круглой головке;
+ низкий расход батареи в режиме ожидания;
+ большая функциональность (полная поддержка автоматических режимов TTL, ручной режим, режим высокоскоростной синхронизации HSS 1/8000с, функция компенсации мощности FEC, синхронизация по первой/второй шторке и т.д.).
— круглая форма головки и гладкий пластик (не софт-тач) делают её скользкой.
Бонус
Приобрести вспышку можно здесь:
• AliExpress
На мой субъективный
взгляд, в арсенале каждого фотографа должна быть вспышка. Она спасает, когда
естественного света недостаточно, а когда его достаточно, помогает подсветить
или части лица, или модель сзади, тем самым диктуя свои условия. А еще вспышка
позволяет полностью загнать модель в вакуум, сделав все вокруг почти черным и,
по сути, превратить любой закуток двора в свою студию.
На примере вспышек от
компании Godox опробуем озвученные выше варианты их использования.
О вспышках
Буквально несколько слов
о вспышках.
Одна модель – Godox AD100 Pro на 100 Дж, визуально
напоминающая миниатюрный моноблок, а по размеру как обычная банка.
К ней подходят аксессуары
от вспышек V1
и AD200,
поскольку диаметр головки такой же.
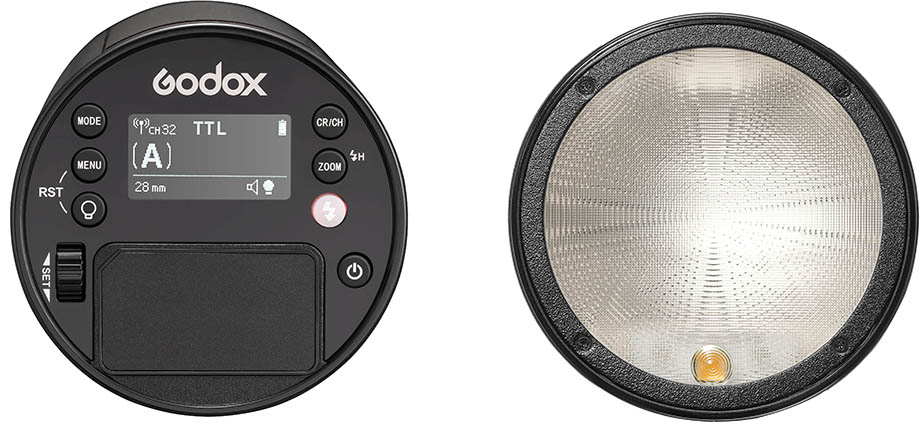
Также ее можно поставить
на кронштейн S2 и использовать с обычными зонтами и насадками Bowens. А световой поток можно немного смягчать,
отодвигая вспышку от рассеивателя.
Godox сделал на базе AD100 Pro комплекты, благодаря чему у вас
за спиной в обычном рюкзаке – целая переносная фотостудия.
360 импульсов на одном
заряде, и они могут быть короче, чем у V1.
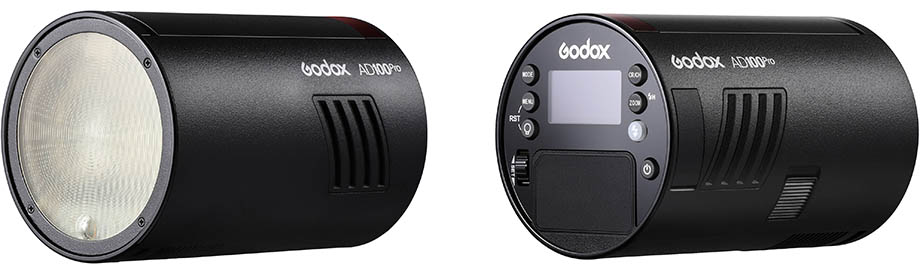
Главное, будьте
аккуратнее, когда извлекаете аккумулятор – он буквально выстреливает наружу.
Так что лучше направляйте его вверх.
Вторая вспышка – это Godox V1 на 76 Дж. Существует под разные камеры: Canon, Nikon, Sony, Pentax, Fujifilm и Olympus/Panasonic.
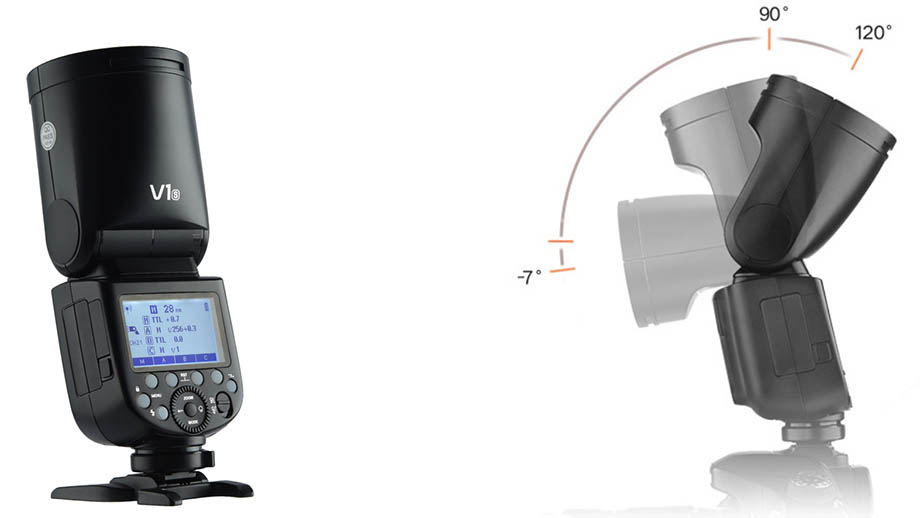
Обе вспышки имеют
подсветку. Это, конечно, не 100%-но
моделирующий свет, так как диод находится статично, и не двигается вместе с
диодом основной вспышки при изменении угла рассеивания, но как помощник для
ориентира очень даже подходит. И обеими вспышками можно управлять родным пульсатором Godox X, настроить канал и группу. В общем, все
необходимые функции для управления светом имеются.
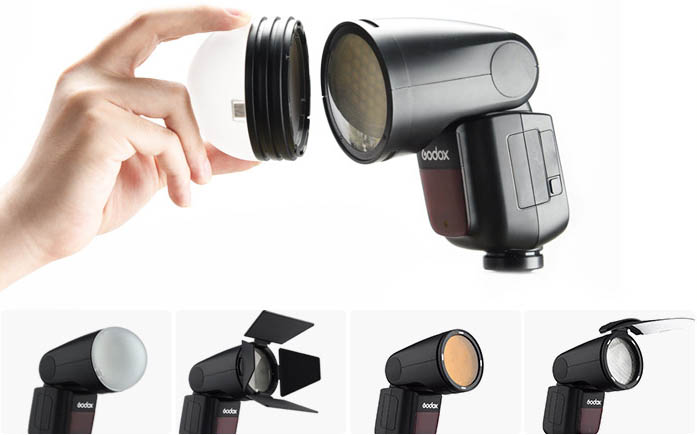
Для более оперативной
работы мы будем использовать гибкий раскладной софтбокс с креплением как под
обычную, так и круглую вспышку.
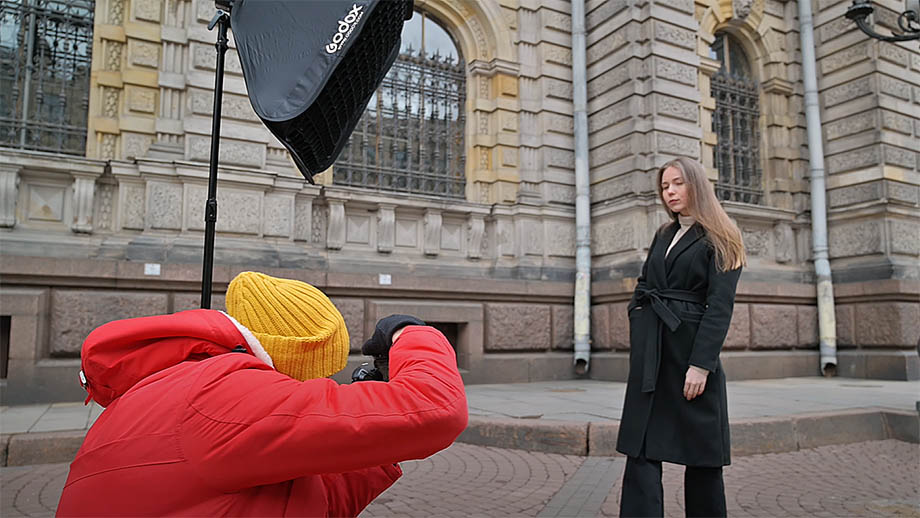
Немного теории
Прежде чем мы начнем
снимать, информация для тех, кто только планирует снимать со вспышками.
Чтобы в снимке не было
дефектов в виде черных полос, нужно выставлять выдержку не короче 1/160 с для
обычных камер и не короче 1/200 – 1/250 для профессиональных. Вот, к примеру,
снимок предметки, где я выставил выдержку 1/250 с, а камера поддерживает только
до 1/200 с – в итоге видим полосу снизу:
Почему так?
Дело в том, что матрица
должна успеть полностью открыться во время снимка с импульсным светом и
полностью осветиться тем самым импульсом. В любительских камерах затвор
успевает полностью открыть матрицу
вплоть до выдержки 1/160 с, а в проф. камерах – до 1/250 с.
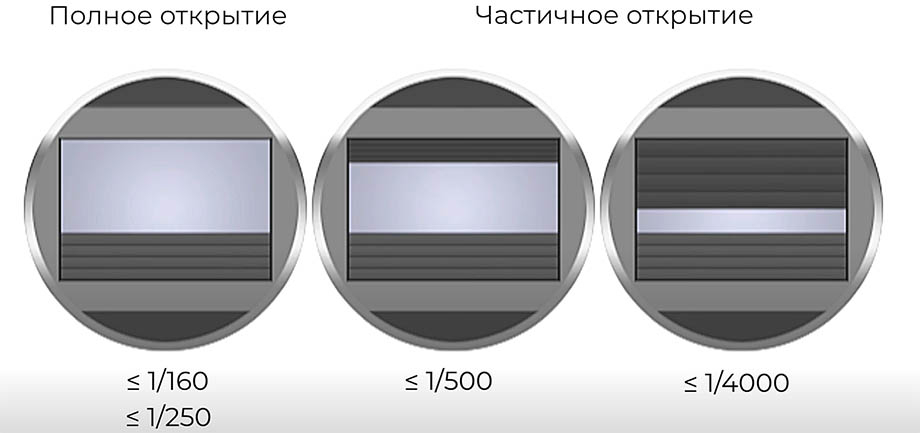
При более короткой
выдержке матрица частично закрывается шторками затвора и из-за чего получаются
темные полосы.
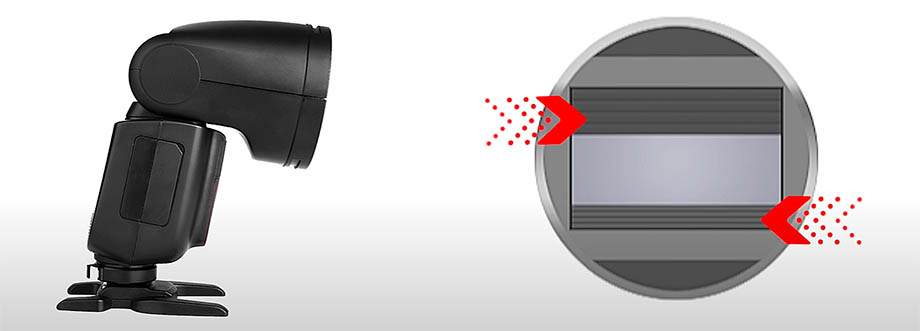
Я понимаю, что эта информация
банальна, но кто только планирует снимать со вспышкой, может этого и не знать.
Итак, в первом случае мы
за счет вспышки просто частично подсвечиваем модель там, где света
недостаточно.
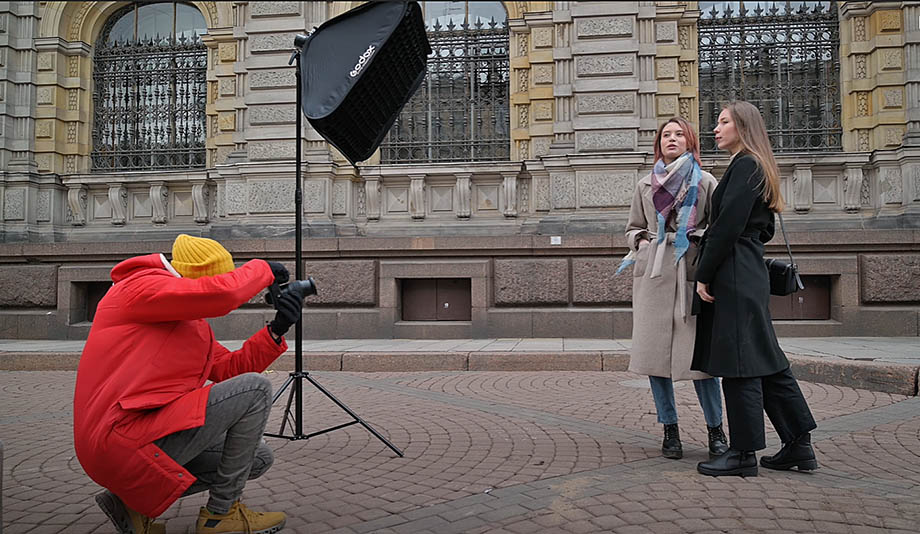
Пару слов о гибком
софтбоксе. В день, когда мы снимали, изначально планировалось провести съемку
на мосту, но ветер был таким сильным, что софтбокс просто складывался, поскольку
в его конструкции нет жестких спиц. И если стойку можно придержать, то с
софтбоксом в таких условиях ничего не сделать. Это обратная сторона
мобильности. Поэтому нам пришлось переместиться во двор.
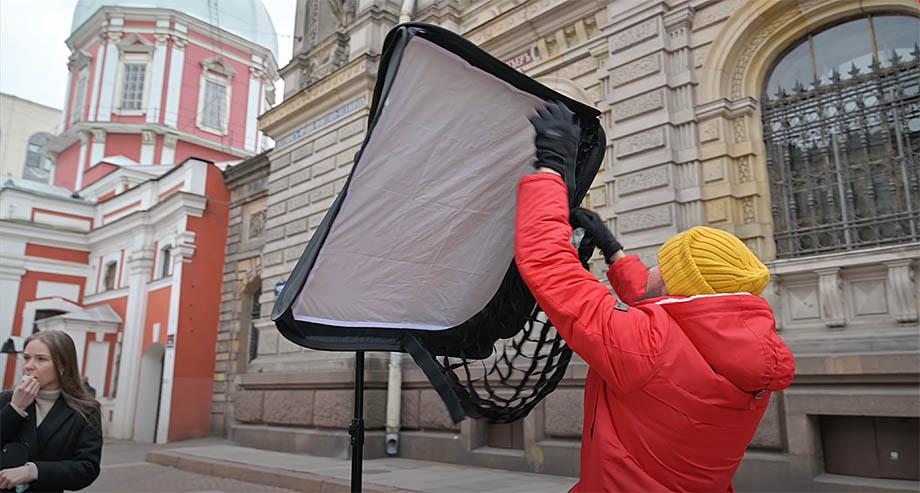
Снимая на улице, я сделал
пару тестовых снимков с сотовой насадкой, и отказался от этой идеи, так как
нижняя часть модели уходила в тень, а хотелось подсветить чуть большую площадь,
к тому же и сам софтбокс тоже был небольшой, поэтому соты здесь не пригодились
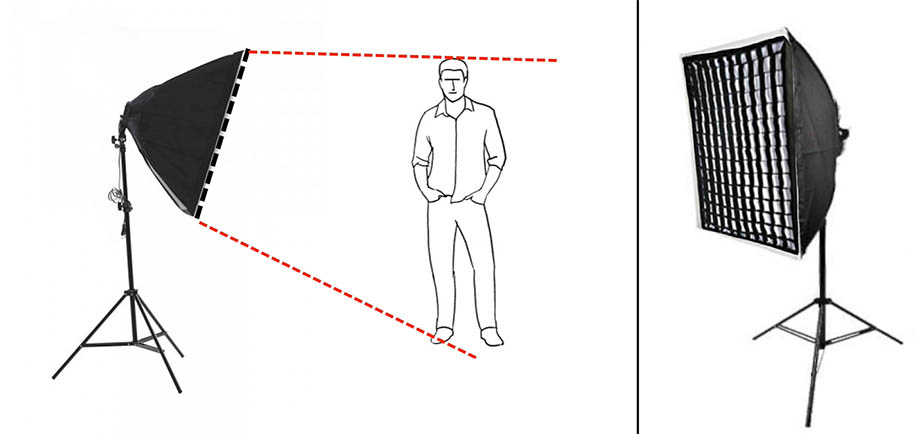
Сотовые насадки нужны,
чтобы сузить пучок света и тем самым сфокусировать световой поток на конкретном
участке.
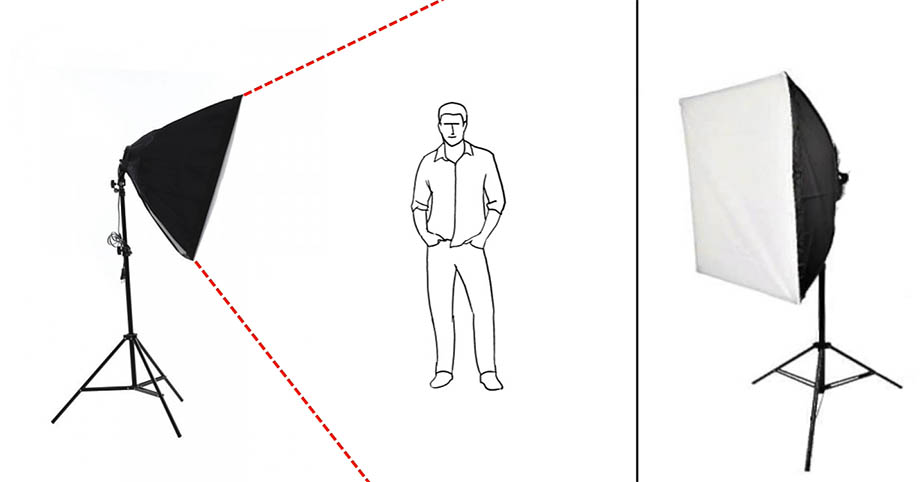
Если софтбокс маленький,
можно таким образом отделить светом лицо от туловища, а с большими боксами и
сотами – целиком человека от фона и дополнить светом более сфокусировано на конкретную
часть.
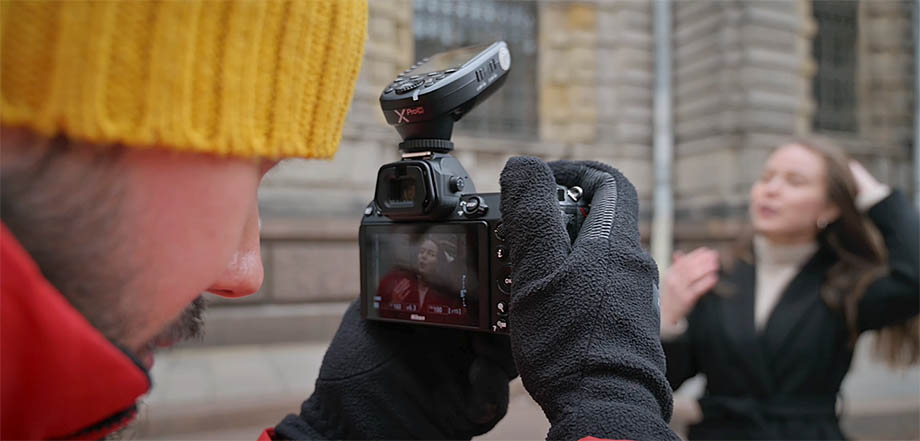
Наша задача – не трогать фон, а лишь подсветить
модель, сделав освещение лица и туловища более равномерным. Причем, сделать все так, чтобы в глаза не сильно, а в идеале
вообще не бросалось, что лицо модели дополнительно подсвечено. В данном
случае у нас AD100 Pro на ⅛
мощности, на камере диафрагма – F5, выдержка – 1/160.
В данном случае мы
направляем свет даже немного вскользь, а не прямо на модель, это позволяет
сделать освещение еще мягче. Повторюсь, мне не хотелось, чтобы было явное
ощущение работы вспышки.
Так я делал на первых
снимках:



Главное правило, никогда
не направляйте вспышку прямо в лицо, вы просто получите плоский блин. Поэтому
освещение лучше направлять с боку под разными углами. Оптимальный рисунок можно
подобрать эмпирическим путем. Но, как правило, угол 45° является оптимальным, и от него можно уже делать
различные вариации.
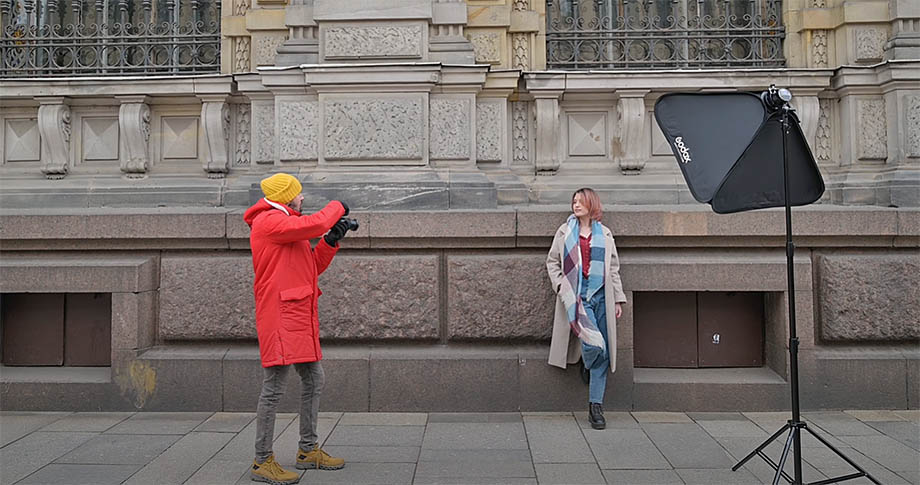
Например, снимая модель у
стены, мне больше понравилось освещать не со стороны, откуда я снимал, а с
противоположной, то есть используя среднее
положение между контровой подсветкой и заполняющим светом. Вот наши снимки в таком варианте:

Съемка в помещении
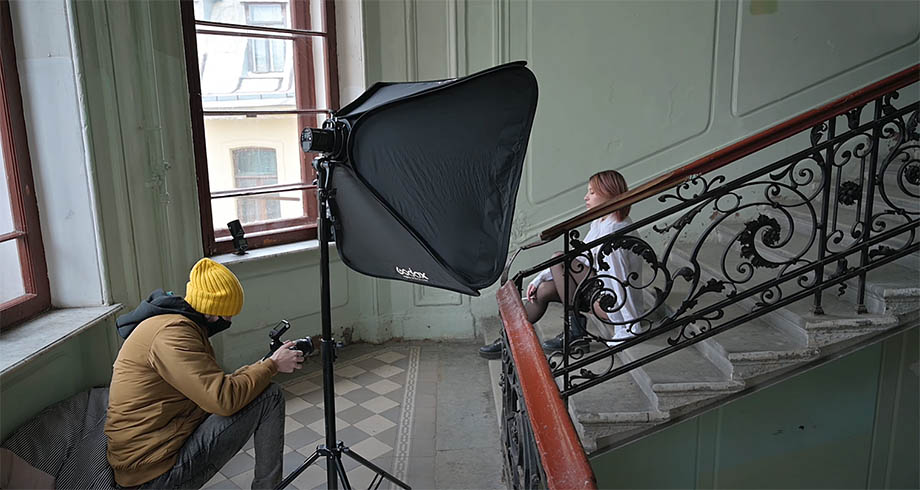
В данном случае захотелось
сделать вполне бытовой снимок, но с изюминкой студийности за счет искусственного
освещения. Историю к фото можете придумать сами, допустим, это любовница вышла
покурить на лестницу парадной. Кстати, сигарету мы не поджигали, это было бы некрасиво по отношению к жильцам, к
тому же мы не курим и сигаретный дым не переносим, так что пепел и дым добавим
в фотошопе. Беспокоясь о нашей моделе, мы посадили её на небольшую подушечку
под цвет лестницы.
Вот так выглядит снимок
при F4 и
выдержке 1/200:
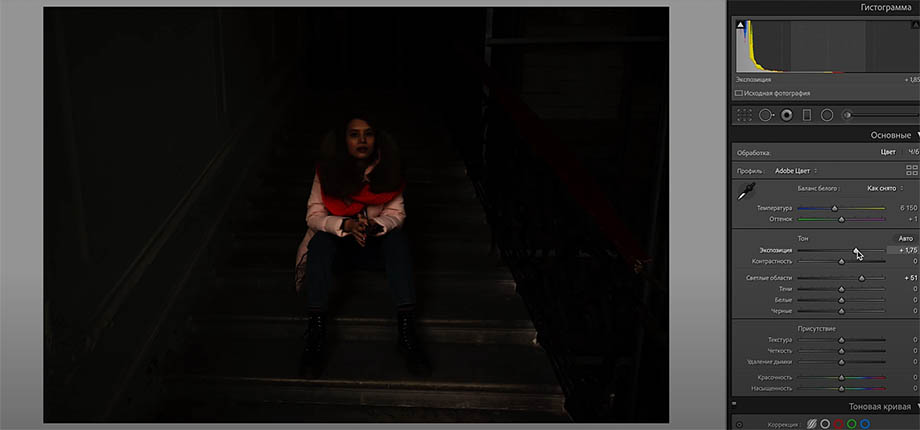
Как видите, все темно,
можно сделать черный вакуум, прикрыв диафрагму еще сильнее.
Далее подбираем
необходимую мощность вспышки, направляем её под углом и на модель, а не
вскользь, так как тут мы наоборот акцентирует её как самое светлое пятно на
снимке. И вот что у нас получилось:

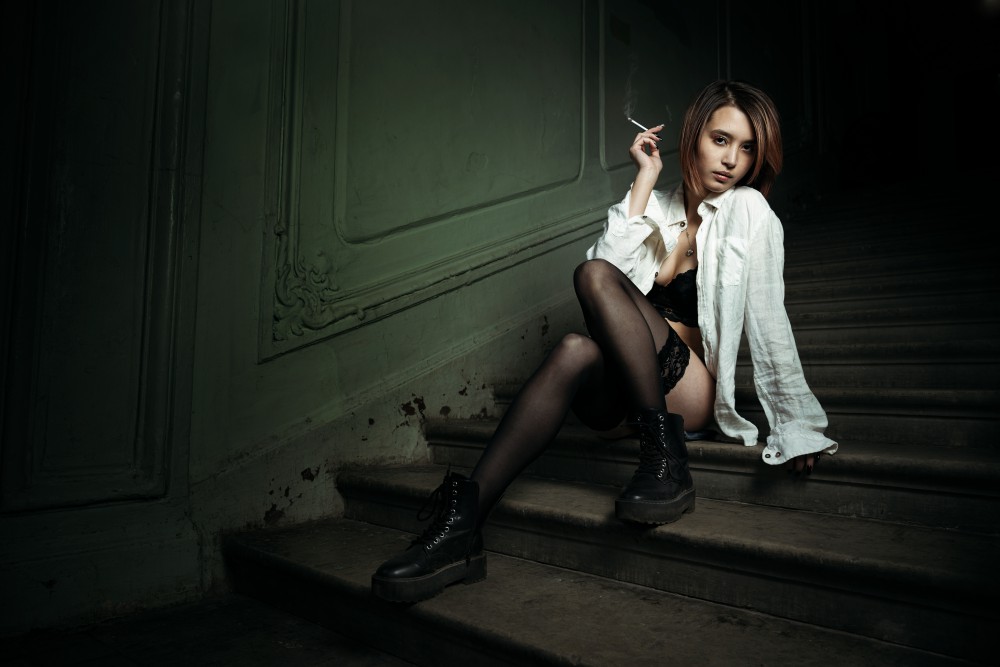
Убираем софтбокс и
моноблок Godox AD100 Pro. Попробуем более
мобильный вариант, установим вспышку Godox V1 непосредственно на башмак камеры, её можно
вращать во все стороны и для наших целей она очень удобна.
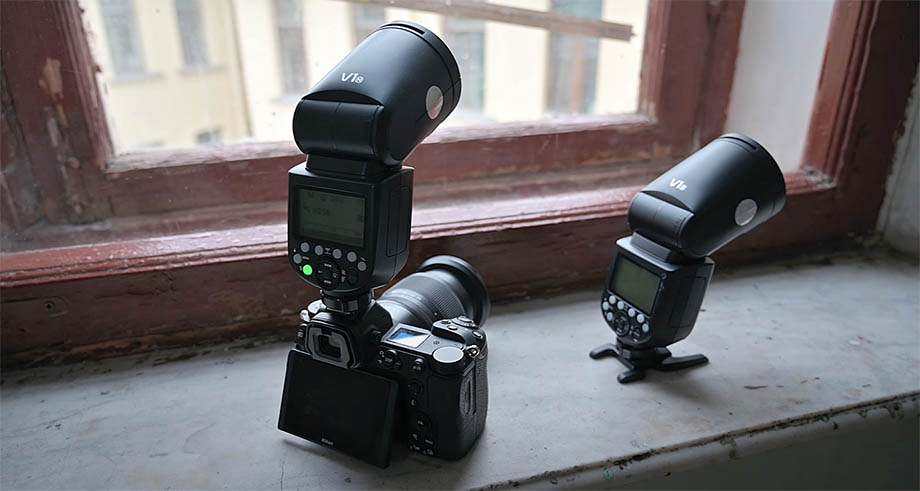
Нужно понять, что для нас
станет рассеивателем. В потолок направлять вспышку нет смысла, так мы сильно
рассеем свет по всей площади. Справа от меня стена довольно далеко – то есть не
вариант, направить вспышку на модель – это самое худшее, что можно придумать.
Остается только стена слева.
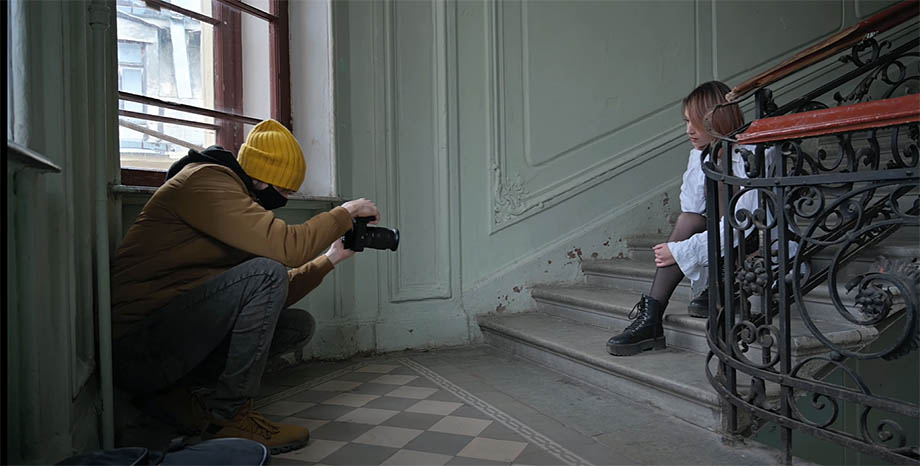
Далее просто
экспериментируем, под каким углом свет падает лучше, и подбираем необходимую
мощность.
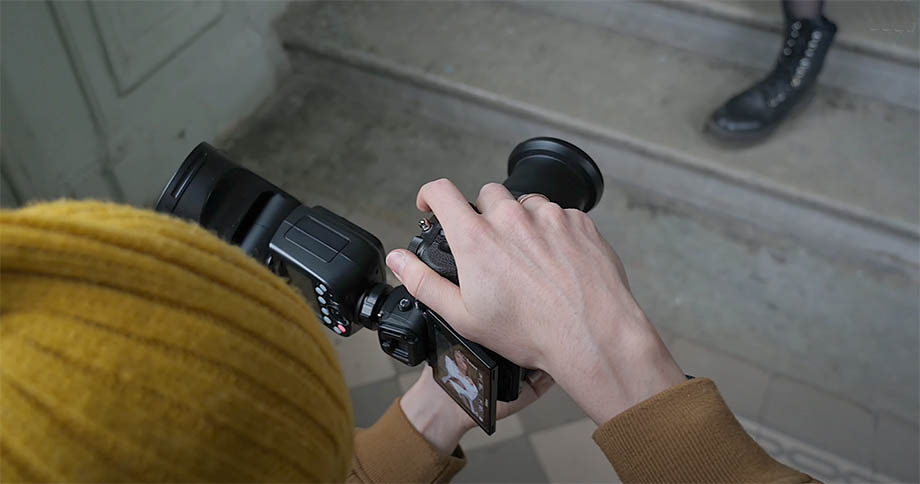
После того как с основным
цветом разобрались, можно поставить позади модели вторую вспышку и немного
подсветить контур.
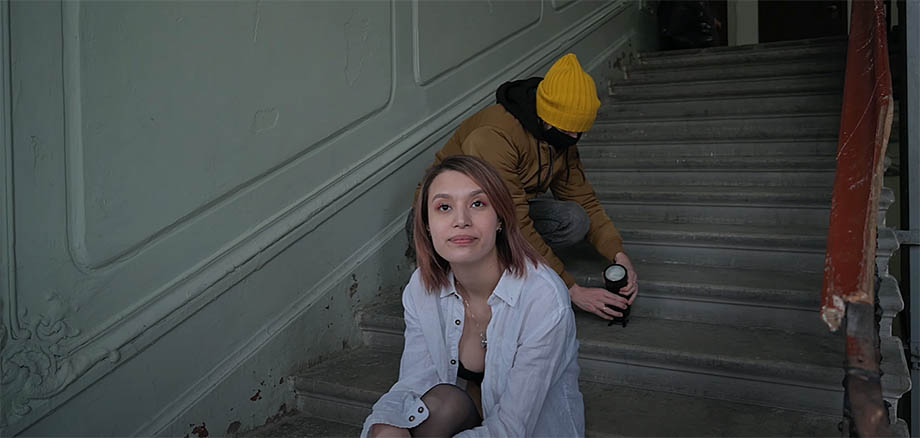
В чем главная проблема
такой схемы?
По сути их две:
• привязанность к отражающей поверхности, если вы
не прихватили с собой, например, отражатель, на который можно направить вспышку;
• вторая сложность – цвет и, как следствие, отражение
от этой поверхности, поскольку стена зеленоватая, а значит, потом этот оттенок
нужно будет подавить при обработке.
И вот что у нас вышло:
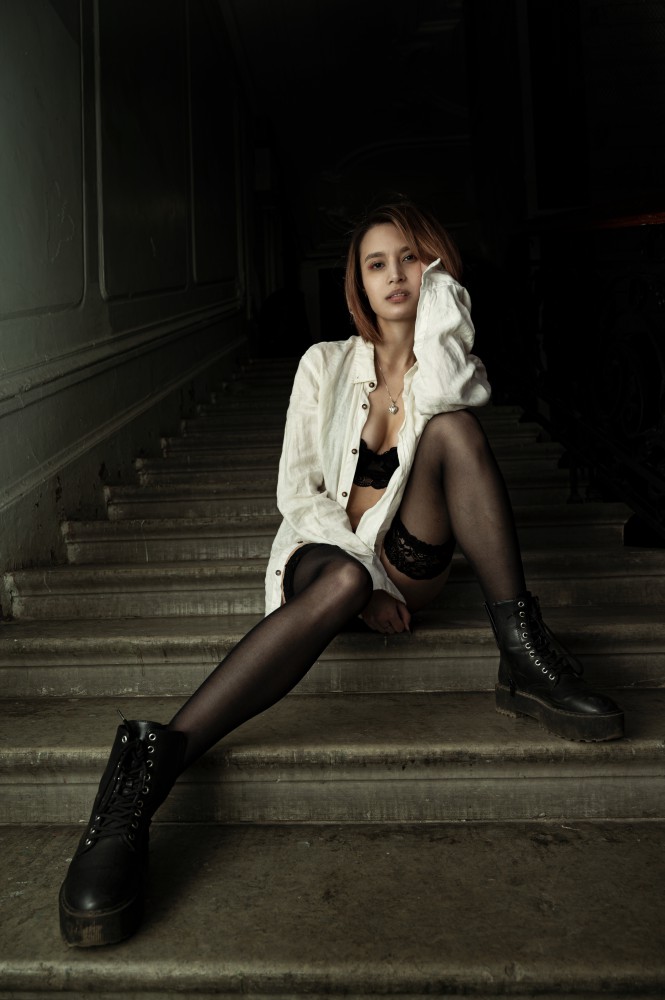

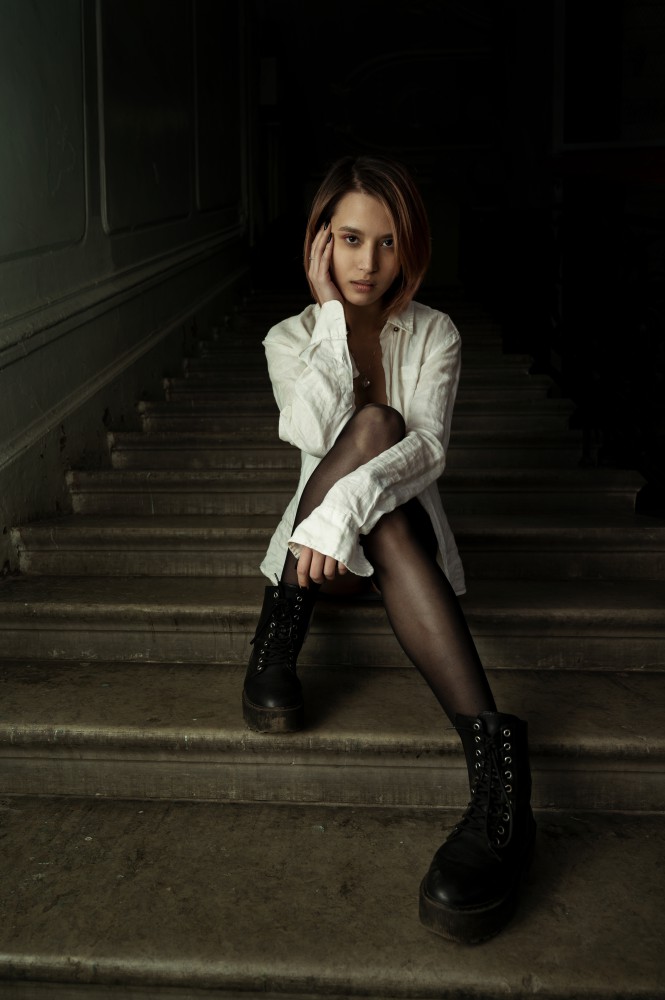
Задача выполнена, модель –
это самое яркое пятно на снимке, остальное пространство уходит в темноту.
Итоги
Надеюсь, по итогу данного
видео все, кто раньше не хотел или не считал нужным иметь в своем арсенале
вспышку, пересмотрят свой взгляд.
Само собой, применение
может быть разным. Кто-то, допустим, снимает на выездах в офисах, спортзалах и в
других подобных местах, где часто не очень светло, да и свет, сами понимаете,
какой. А на улице это хороший
способ добавить к естественному освещению искусственное для корректировки
светового рисунка или даже принудительно создавать свой, подавляя внешний свет.
Смотреть руководство для Godox Speedlite V1 Canon ниже. Все руководства на ManualsCat.com могут просматриваться абсолютно бесплатно. Нажав кнопку «Выбор языка» вы можете изменить язык руководства, которое хотите просмотреть.

MANUALSCAT | RU
Вопросы и ответы
У вас есть вопрос о Godox Speedlite V1 Canon, но вы не можете найти ответ в пользовательском руководстве? Возможно, пользователи ManualsCat.com смогут помочь вам и ответят на ваш вопрос. Заполните форму ниже — и ваш вопрос будет отображаться под руководством для Godox Speedlite V1 Canon. Пожалуйста, убедитесь, что вы опишите свои трудности с Godox Speedlite V1 Canon как можно более детально. Чем более детальным является ваш вопрос, тем более высоки шансы, что другой пользователь быстро ответит на него. Вам будет автоматически отправлено электронное письмо, чтобы проинформировать вас, когда кто-то из пользователей ответит на ваш вопрос.
Задать вопрос о Godox Speedlite V1 Canon
- Бренд:
- Godox
- Продукт:
- вспышки
- Модель/название:
- Speedlite V1 Canon
- Тип файла:
- Доступные языки:
- английский
Сопутствующие товары Godox Speedlite V1 Canon
Немного о производителе
Компания Godox специализируется на производстве различного фотооборудования, в основном вспышек и света и уже успела завоевать лидерство у фотографов благодаря отличном качеству продукции и приемлемым ценам. У производителя есть свой сайт, где можно посмотреть всю продукцию и почитать её характеристики.
Упаковка
|
|
|

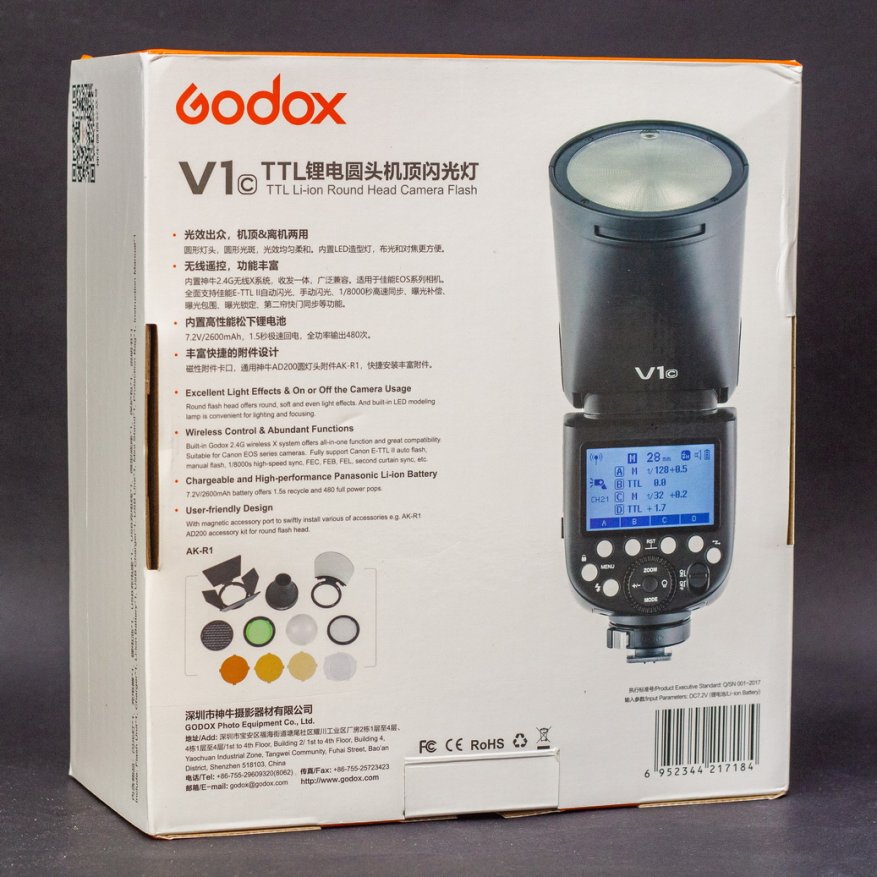
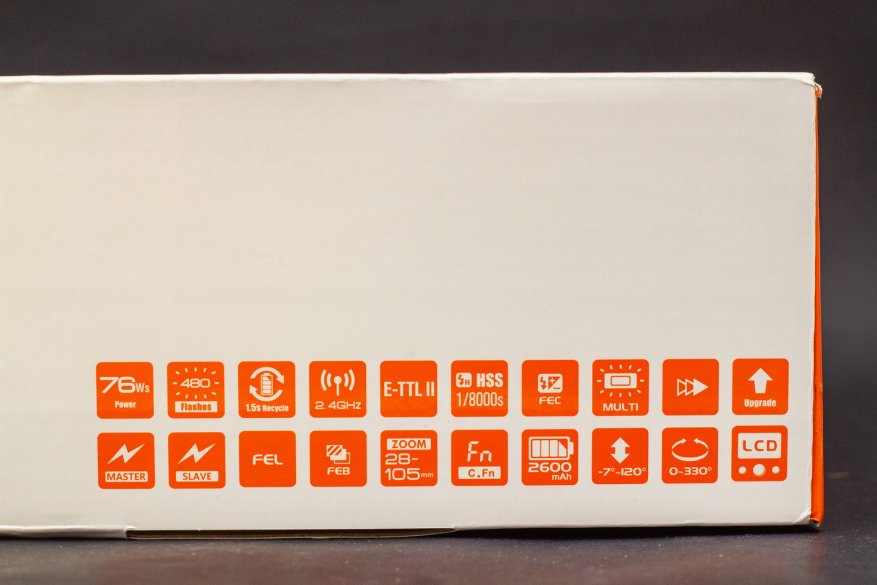
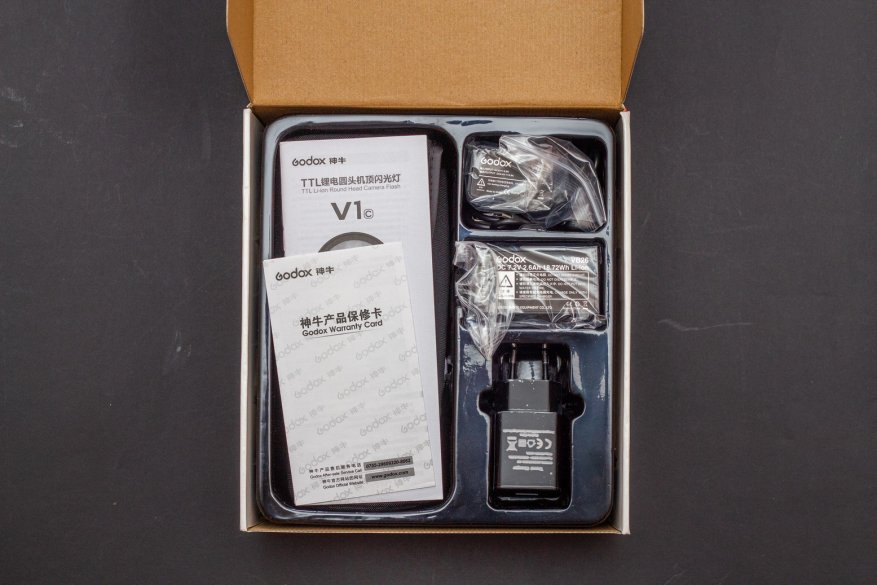
В комплекте идёт:
• накамерная вспышка;
• литий-ионная батарея;
• зарядное устройство;
• кабель для зарядки (Type-C);
• мини-стойка;
• чехол;
• руководство по эксплуатации.
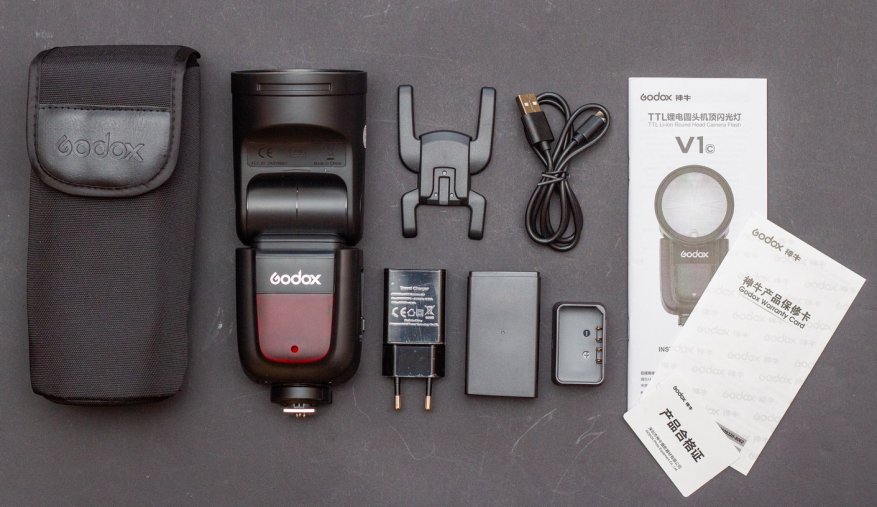
Инструкция подробная, на английском и китайском. Скачать её в электронном виде можно здесь.
Чехол качественный, имеет петлю для крепления на пояс.
|
|
|
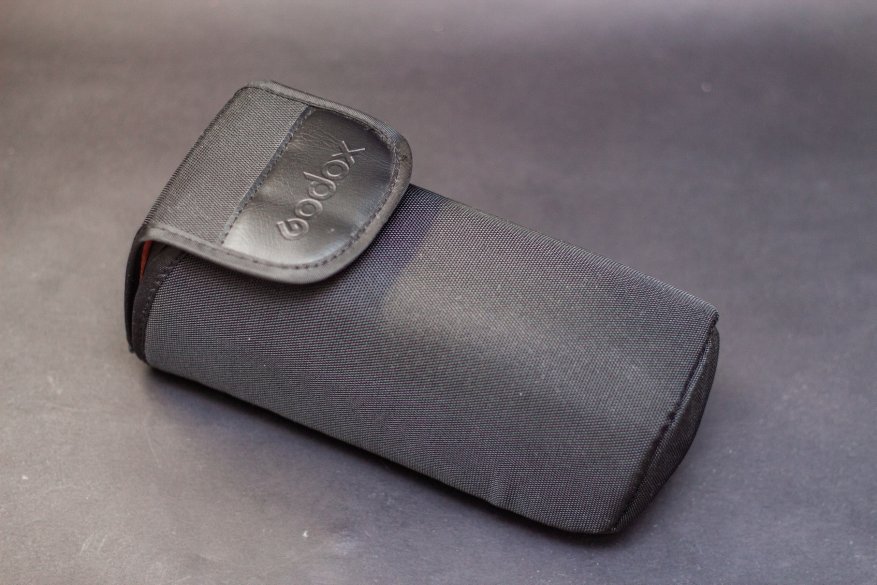


Технические характеристики:
|
Модель |
V1C |
V1N |
V1S |
|
Совместимые камеры |
Canon EOS (E-TTLII) |
Nikon (i-TTL) |
Sony (TTL) |
|
Мощность |
76 Дж |
||
|
Угол подсветки |
от 28 до 105 мм |
||
|
Автоматический зум (угол подсветки выбирается автоматически в зависимости от фокусного расстояния объектива и размера изображения) |
|||
|
Ручной зум |
|||
|
Наклон головки вспышки: от 0˚до 330˚ горизонтально и от -7˚ до 120˚ вертикально |
|||
|
Длительность импульса |
От 1/300 до 1/20000 секунды |
||
|
Управление экспозицией вспышки |
|||
|
Система управления экспозицией вспышки |
E-TTL II и ручной режим вспышки |
i-TTL и ручной режим вспышки |
TTL и ручной режим вспышки |
|
Компенсация вспышки (FEC) |
Ручная FEC и FEB: ±3 ступени с шагом 1/3 (Ручная FEC и FEB могут комбинироваться) |
||
|
Блокировка экспозиции |
Кнопкой <FEL˃ или <*˃ |
нет |
нет |
|
Режим синхронизации |
Высокоскоростная синхронизация (до 1/8000 секунды), синхронизация по первой шторке, синхронизация по второй шторке |
||
|
Режим стробоскопа |
Есть (до 100 импульсов, 199 Гц) |
Есть (до 90 импульсов, 100 Гц) |
|
|
Дистанционное управление вспышкой |
|||
|
Режимы дистанционного управления вспышкой |
Режим ведущей вспышки (Master), режим ведомой вспышки (Slave), выкл. |
||
|
Количество групп |
A, B, C, D |
M, A, B, C |
|
|
Количество ведомых групп |
A, B, C, D, E (группа E управляется системой синхронизации Godox X) |
A, B, C, D, E (группа D/E управляется системой синхронизации Godox X) |
|
|
Радиус передачи сигнала (приблиз.) |
100 м |
||
|
Количество каналов |
32 (1~32) |
||
|
ID |
01~99 |
||
|
Моделирующая вспышка |
Запускается кнопкой предпросмотра глубины резкости на фотокамере |
нет |
|
|
Подсветка автофокуса |
|||
|
Эффективное расстояние (приблиз.) |
В центре: 0,6-10м / 2,0-32,8 футов |
||
|
LED пилотная лампа |
|||
|
Мощность |
2 Вт |
||
|
Цветовая температура |
3300К±200К |
||
|
Электропитание |
|||
|
Источник питания |
7.2В/2600мАч литий-ионная батарея |
||
|
Время перезарядки |
Приблиз. 1,5 с. Зеленый LED индикатор сигнализирует о готовности вспышки |
||
|
Количество импульсов на полной мощности |
Около 480 |
||
|
Энергосбережение |
Автоматическое отключение после 90 секунд бездействия (60 минут в режиме ведомой вспышки) |
||
|
Методы синхронизации |
«горячий башмак», гнездо для синхрокабеля 2,5мм |
||
|
Цветовая температура |
5600±200К |
||
|
Размеры |
|||
|
Размеры корпуса |
76х93х197 мм |
||
|
Вес нетто без учета аккумулятора |
420 г |
||
|
Вес нетто с аккумулятором |
530 г |

• Среди особенностей отмечу полную поддержку автоматических режимов TTL, ручной режим, режим высокоскоростной синхронизации HSS 1/8000с, функцию компенсации мощности FEC и синхронизацию по первой/второй шторке.
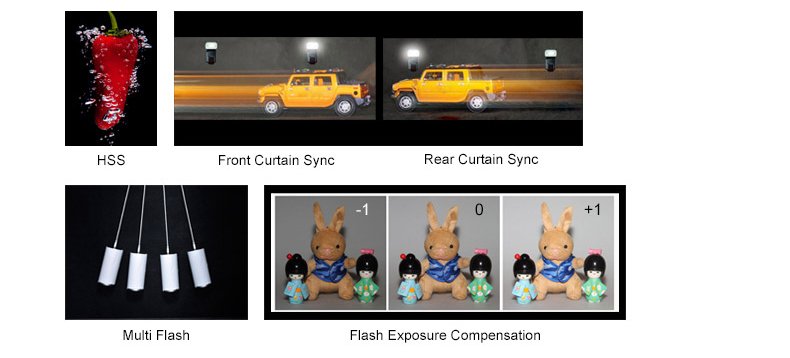
• Дополнительно можно прикупить набор аксессуаров и светофильтров для вспышки под индексом AK-R1.

• Стоит отметить, что аксессуары крепятся на магните (установлены по периметру головки), поэтому при использовании плоского рассеивателя / отражателя и фотографировании в портретной ориентации – его можно просто повернуть (прокрутить) в нужное положение, что обычно невозможно в других вспышках.
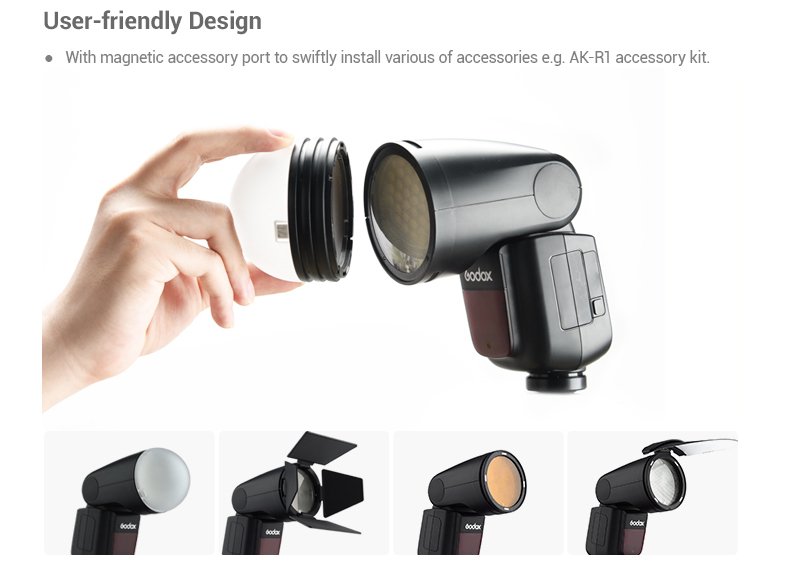
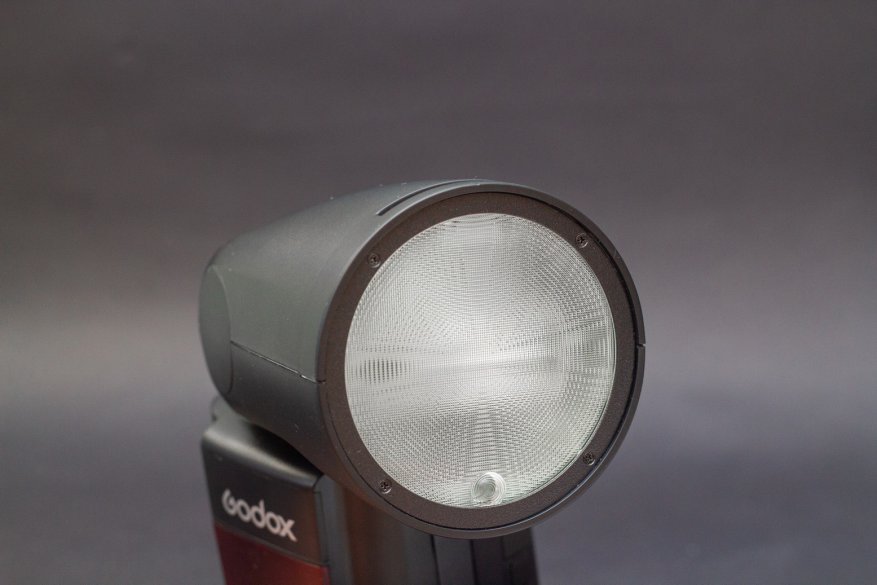
• Производитель также выпустил переходник, который позволяет крепить данные аксессуары на вспышки с прямоугольной головкой.
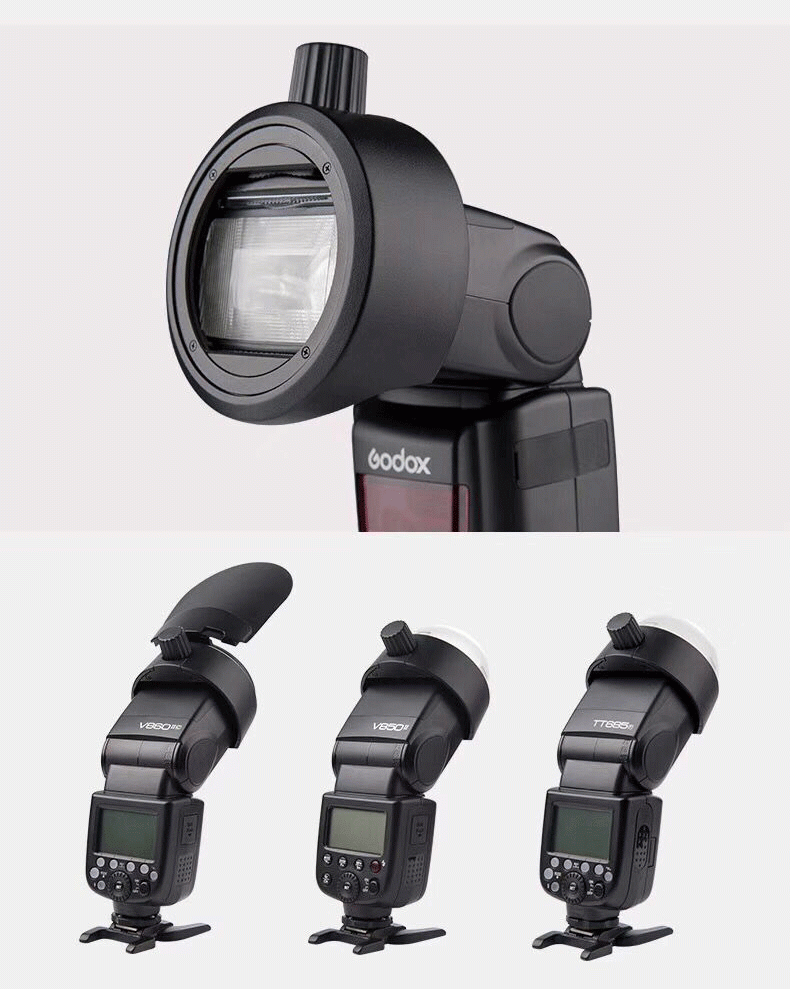
• Корпус вспышки сделан из пластика, сборка отличная. К недостаткам отнесу лишь то, что из-за круглой головки и скользкого пластика она может скатиться с наклонной поверхности, поэтому нужно быть внимательным при её эксплуатации.
Сравнение со вспышкой Sigma EF 610 DG Super:
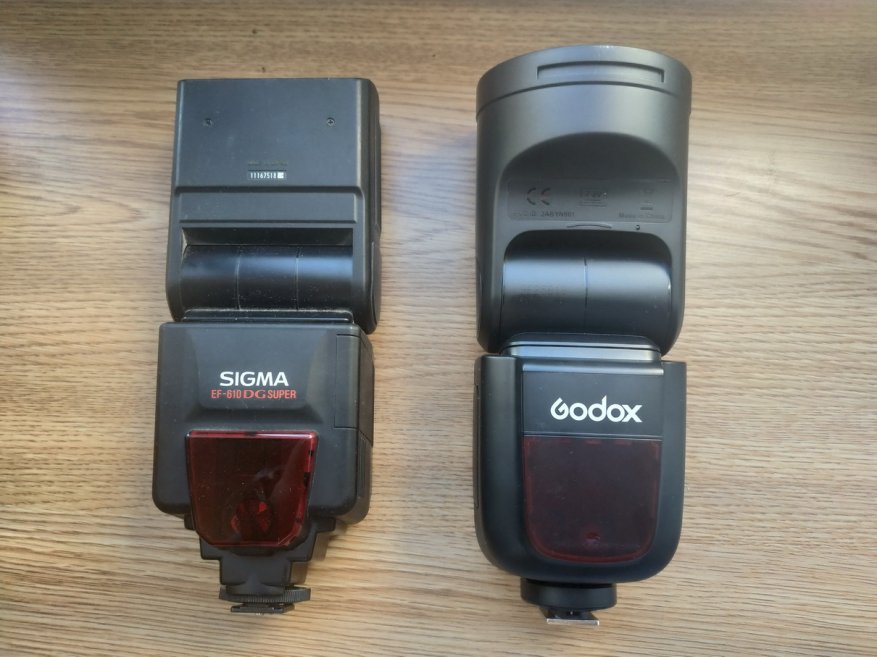
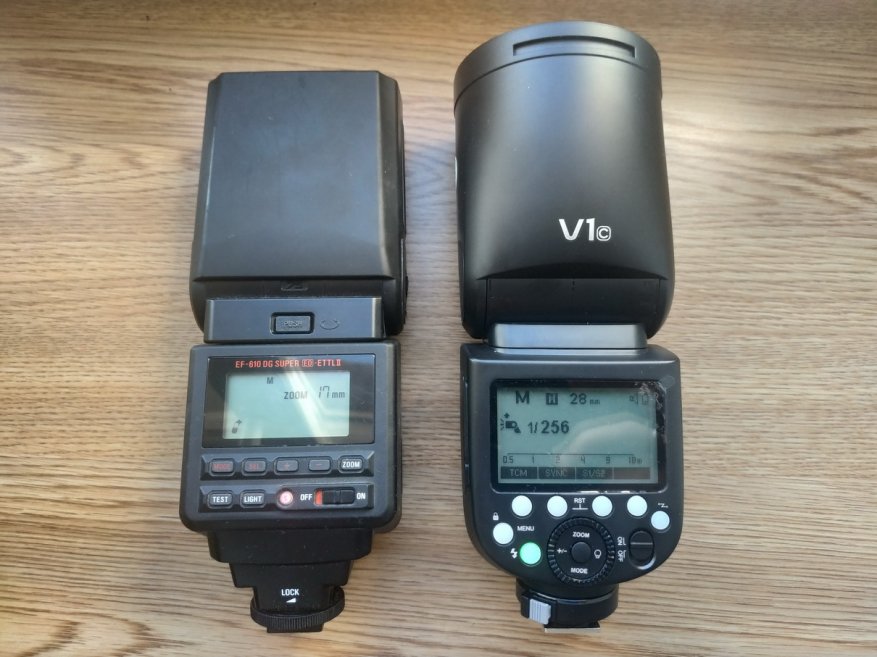


• На головке вспышки установлена LED-лампа, которая может светить приятным теплым светом (3300К) и имеет 10 уровней яркости. Лампа не сверхъяркая, но её вполне достаточно чтобы подсветить объект на расстоянии 1.5-2 метров и ближе в тёмное время суток. Лампа может быть включена и во время работы вспышки.
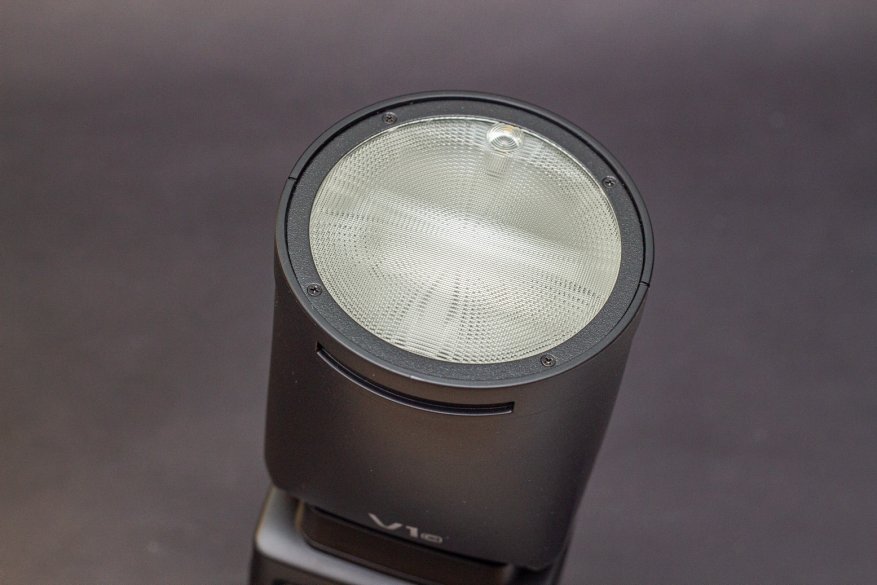
Пример освещения (ВСЕ ФОТОПРИМЕРЫ В ОБЗОРЕ С ИСПОЛЬЗОВАНИЕМ ВСПЫШКИ БЕЗ ОБРАБОТКИ):
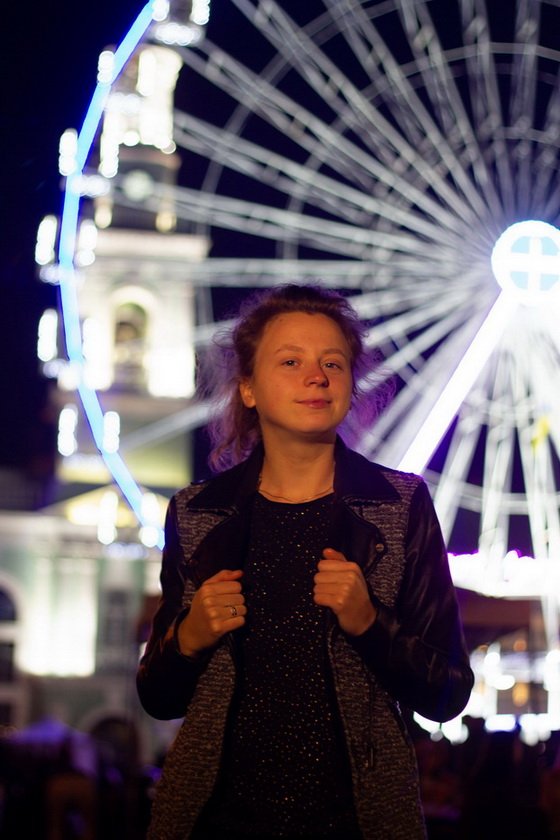
Минимальная / максимальная яркость:
• К преимуществам батарейного отсека отнесу отсутствие какой-либо крышки, которая может отвалиться / затеряться.
|
|
|
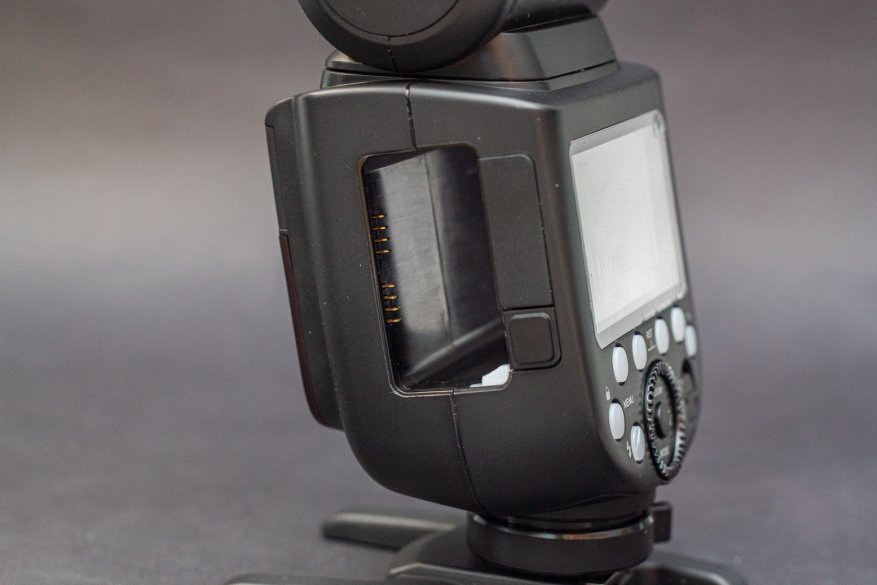

• Слева находится кнопка для изъятия батареи и два порта под заглушкой USB Type-C для обновления прошивки (последнюю прошивку можно скачать здесь) и 2.5мм порт для синхронизации.

|
|
|
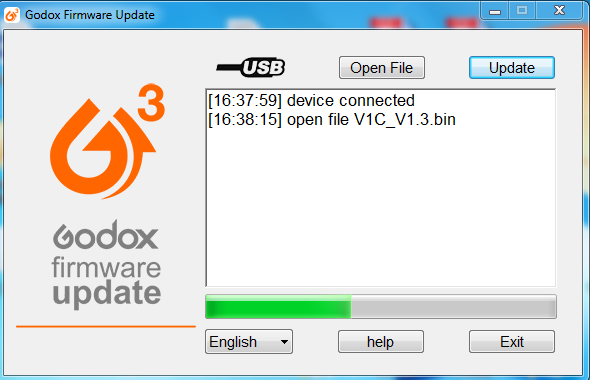

• Среди преимуществ конструкции также отмечу, что в любой позиции верхнюю часть можно повернуть назад (в изначальной позиции вспышка поворачивается назад, создавая угол 120°), то есть не нужно поворачивать на 180° по горизонтали чтобы направить верхнюю часть в потолок.

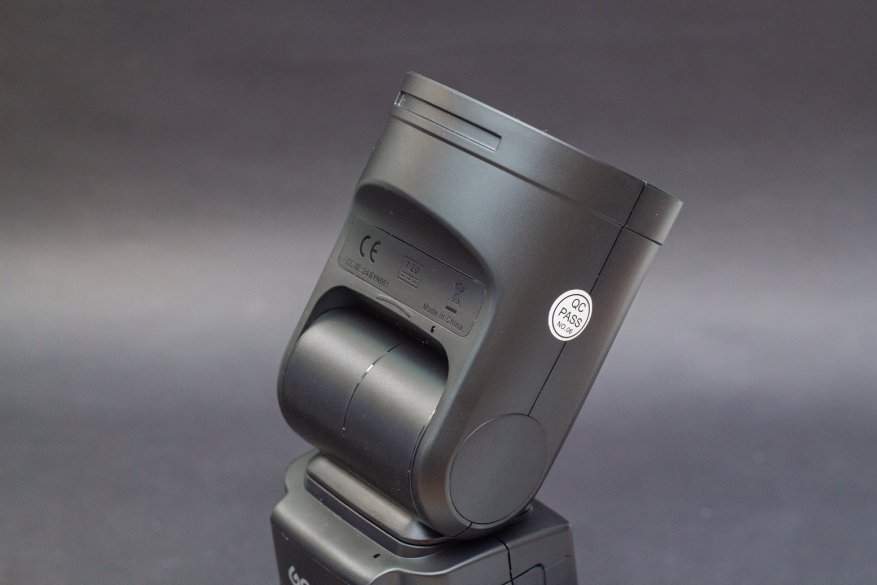
|
|
|
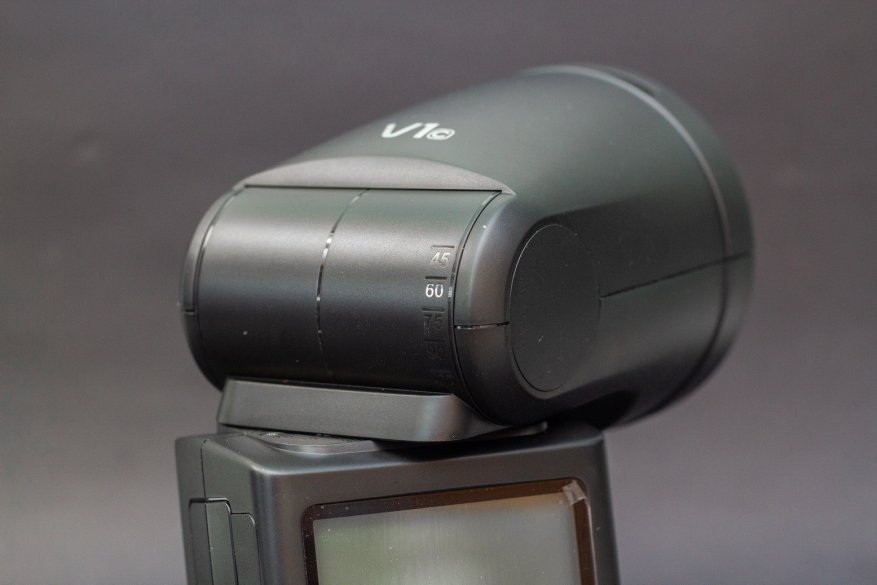
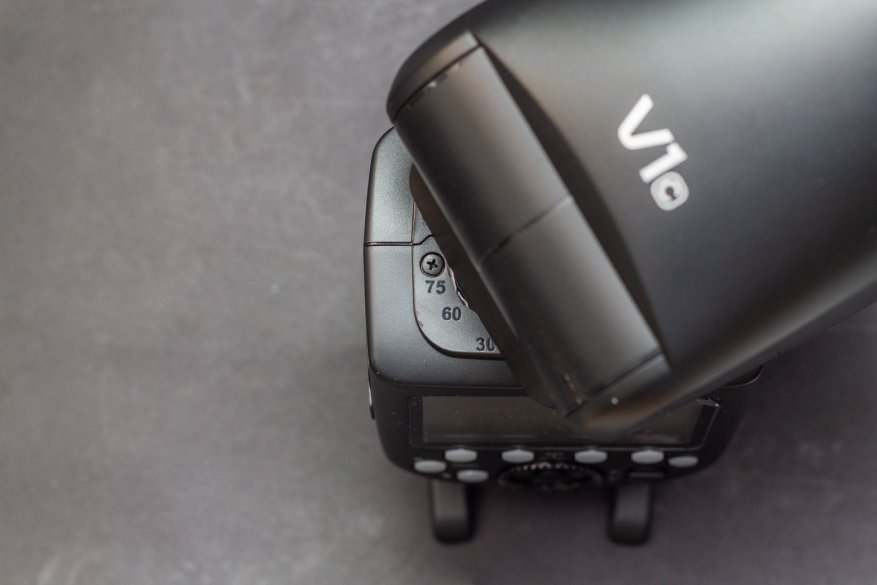
• Вспышка крепится на камеру / стойку с помощью башмака с защёлкой.
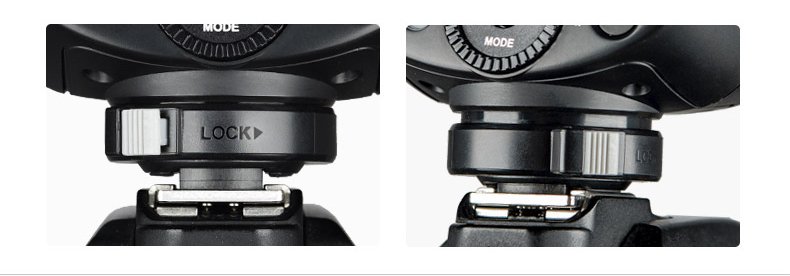
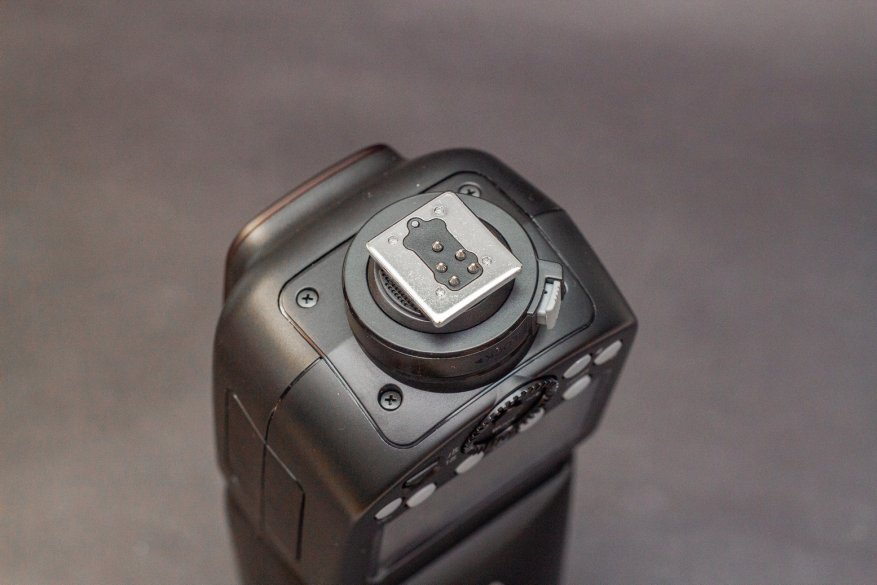
• Вспышка оснащена матричным ЖК-дисплеем, который имеет хорошую видимость и подсветку. Подсветка загорается при нажатии на любую кнопку и горит 12 секунд по умолчанию (ее можно либо выключить совсем либо включить, чтобы она не гасла).
• Блок управления вспышкой удобный и продуманный. Посредине находится колёсико, которое можно не только вращать, но и нажимать.
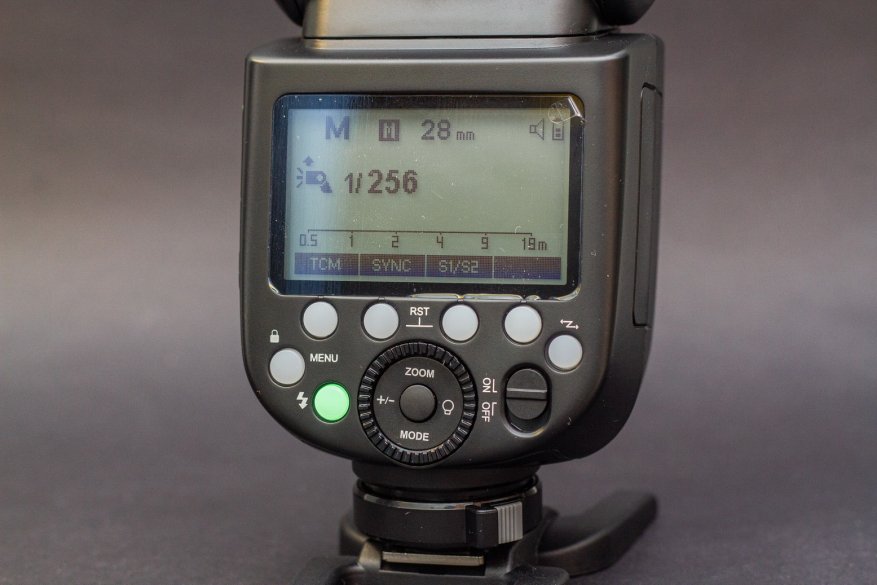
• Вспышка имеет три основных режима: E-TTL, ручной и режим стробоскопа.
• Вспышка имеет 9 режимов мощности и в каждом режиме по 10 шагов мощности (по 1/10 стопа). Управление мощностью удобное, можно изменять по 1/10 шага (прокручиванием колёсика) либо же по сразу же переключаться между целыми стопами (нажатием на колёсико). Максимальная мощность – 1/1, минимальная – 1/256.
• Если в режиме TTL сделать снимок, а потом переключиться в ручной режим – настройки мощности сохранятся.
• Вспышка работает в такой же системе радиосинхронизации (Godox 1.4G X), как и остальные вспышки Godox. К слову, это одна из лучших (если не лучшая) система радиосинхронизации на рынке, которая отличается стабильной работой, совместимостью со всеми брендами (максимально универсальная), возможностью совмещать накамерные и студийные вспышки и так далее.

• Стоит отметить удобное управление другими вспышками в ведущем режиме: каждая кнопка отвечает за отдельную вспышку, мощность же каждой вспышки регулируется прокручиванием или нажатием на колёсико (для изменения по 1/10 шага или целого стопа соответственно).
• В режиме радиосинхронизации порадовала функция поиска наиболее надёжного канала, которая будет особенно полезна если рядом снимают другие фотографы. Производитель также отлично оптимизировал расход батареи в режиме ожидания – он минимальный и не тает на глазах.
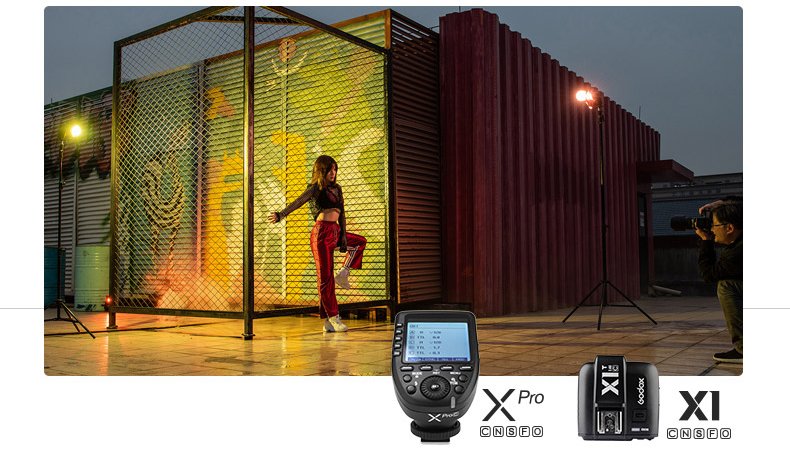
• В режиме ведомой вспышки она может находиться в режиме ожидания 60 либо 30 минут, после чего перейдёт в режим сна (нажатие на любую кнопку снова приведет ее в боевую готовность).
Фото менюшек:
|
|
|
|
|
|
|
|
|
|
|
|
|
|
|
|
|
|
|
|
|
|
|
|
|
|
|
|
|
|

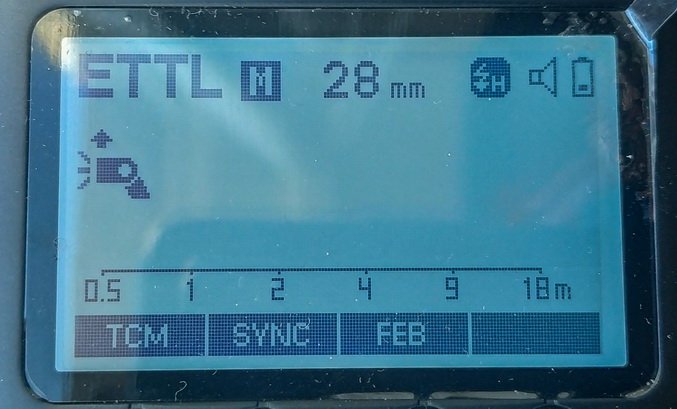

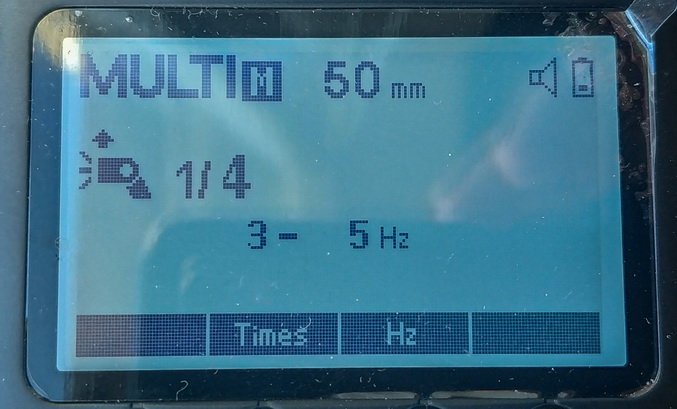
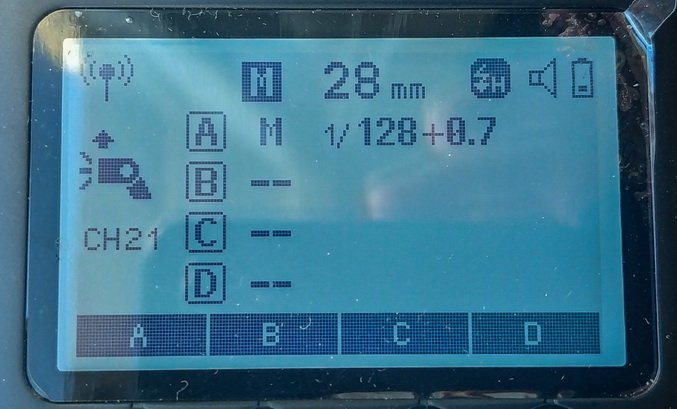
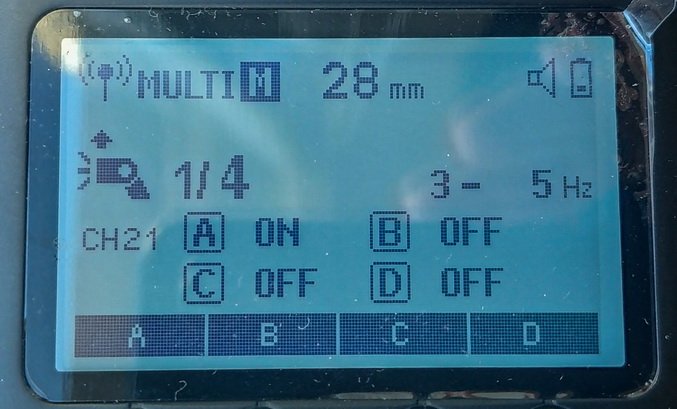
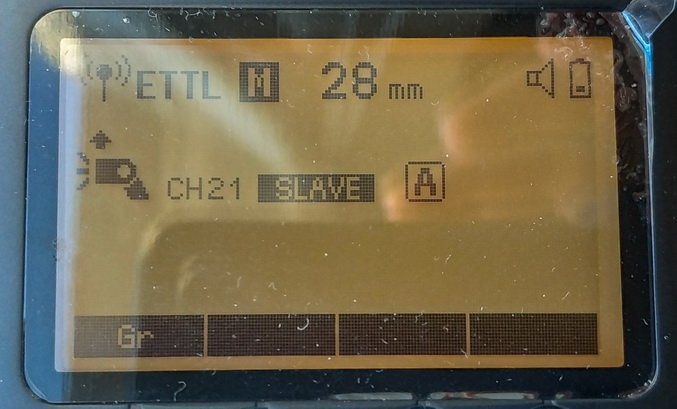

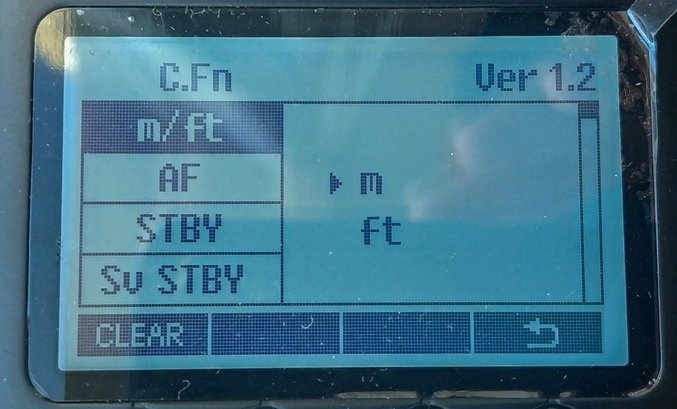
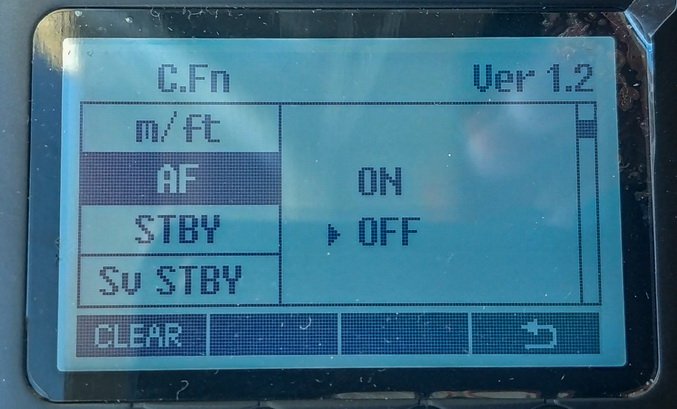
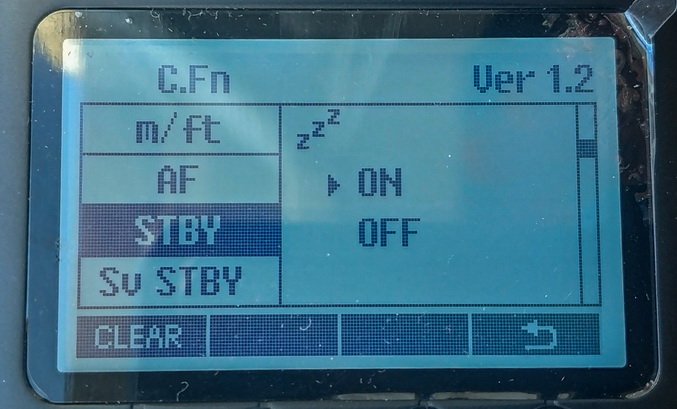
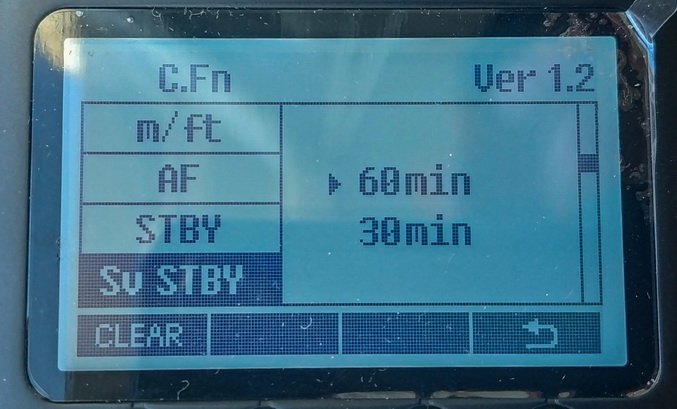
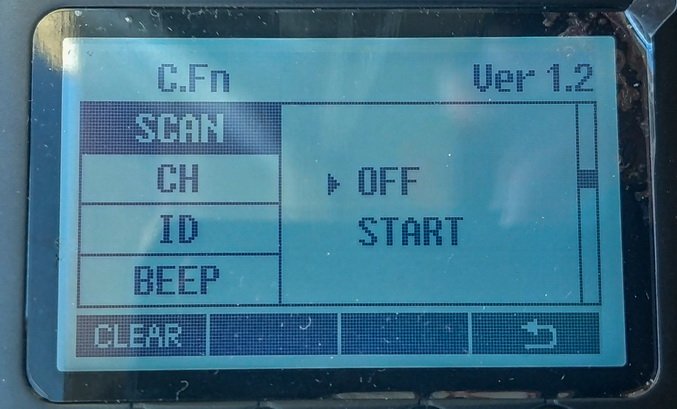
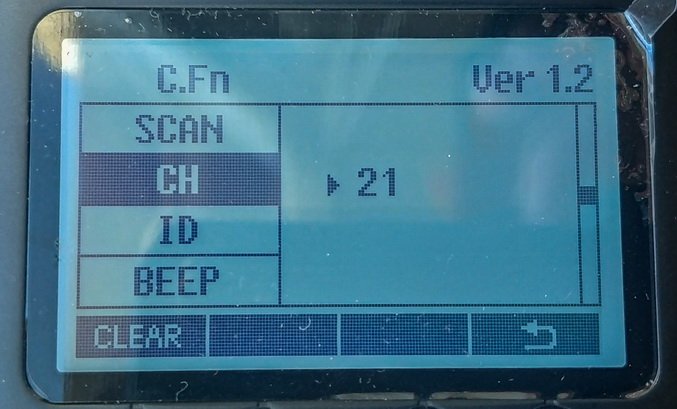
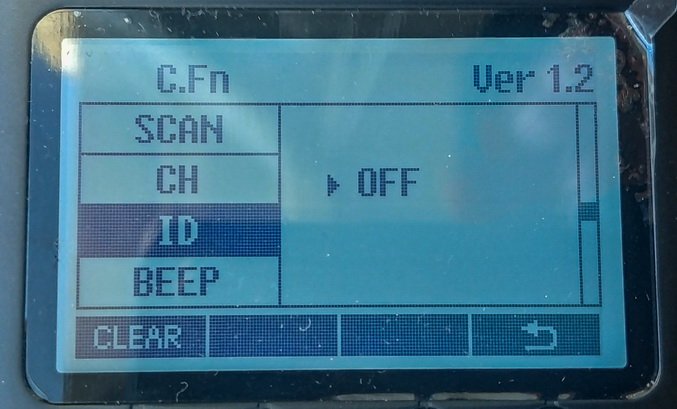
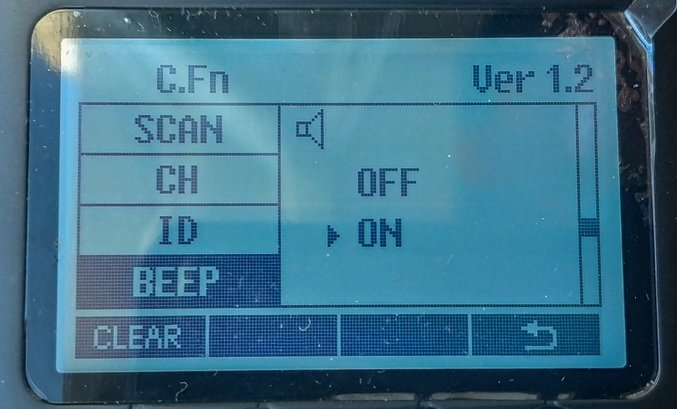
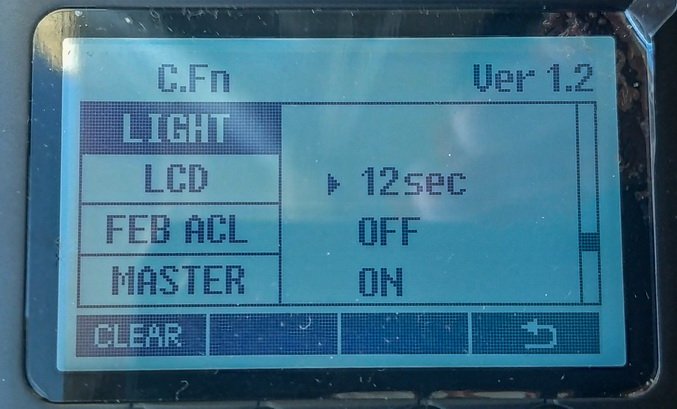

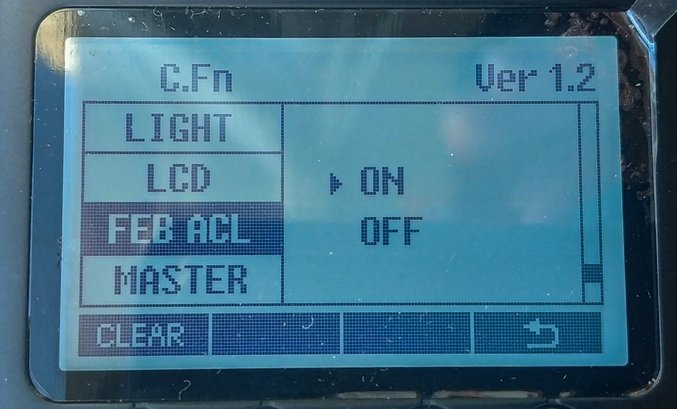
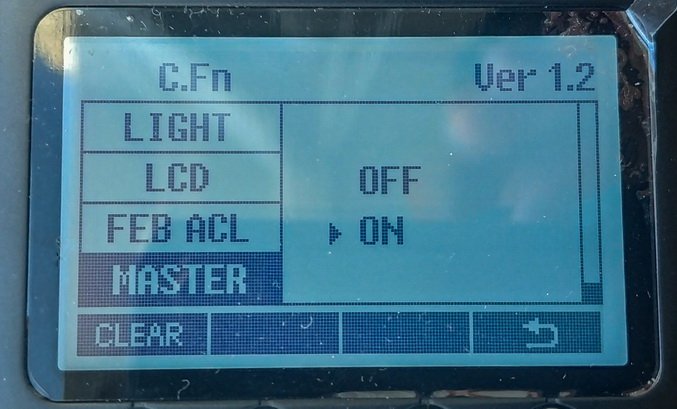
|
|
|
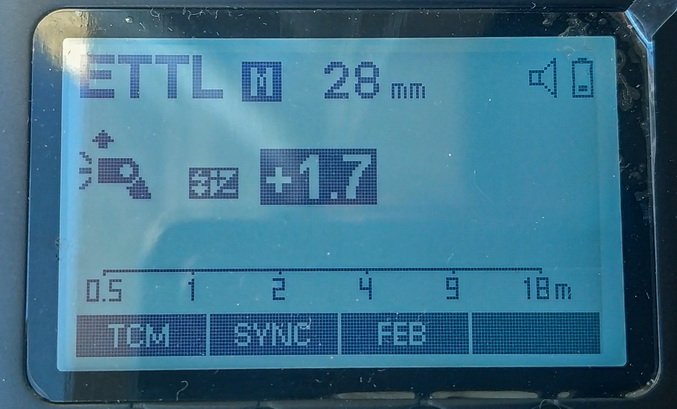
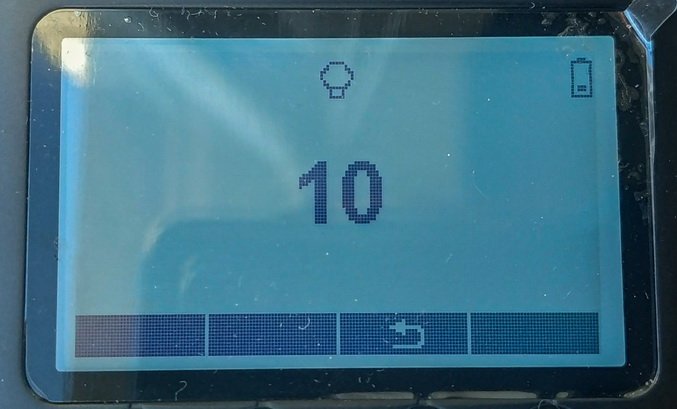
• Круглая форма головки соответственно обеспечивает круглое пятно света. По сравнению со вспышкой с обычной прямоугольной головкой, свет этой вспышки имеет более ровных переход, лучше рассеивается, заполняет кадр и создаёт мягче тени.
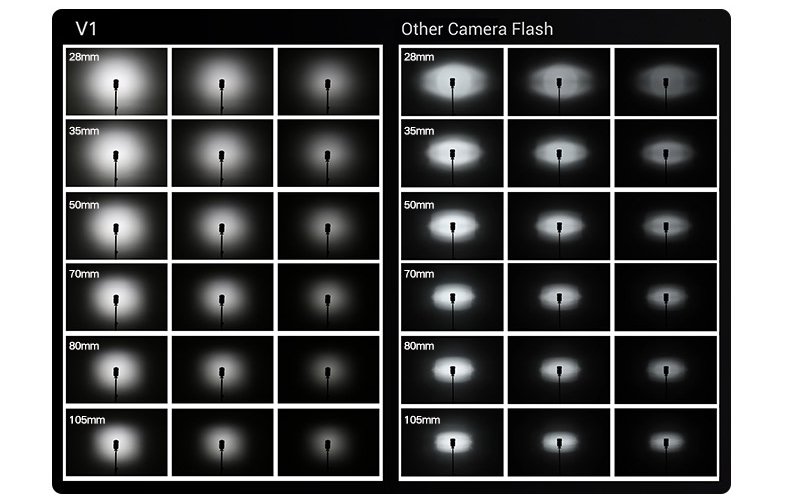
Все 6 фото сделаны на следующих настройках: f5, ISO 400, выдержка 1/100, объектив 50мм.
| Вспышка Godox, ручной режим, 1/64 (в лоб)
|
Вспышка Sigma, ручной режим, 1/64 (в лоб)
|
Вспышка Sigma, ручной режим, 1/128 (в лоб)
|
| Вспышка Godox, ручной режим, 1/2 (в потолок)
|
Вспышка Sigma, ручной режим, 1/2 (в потолок)
|
Вспышка Sigma, ручной режим, 1/4 (в потолок)
|






Примеры без / с вспышкой:
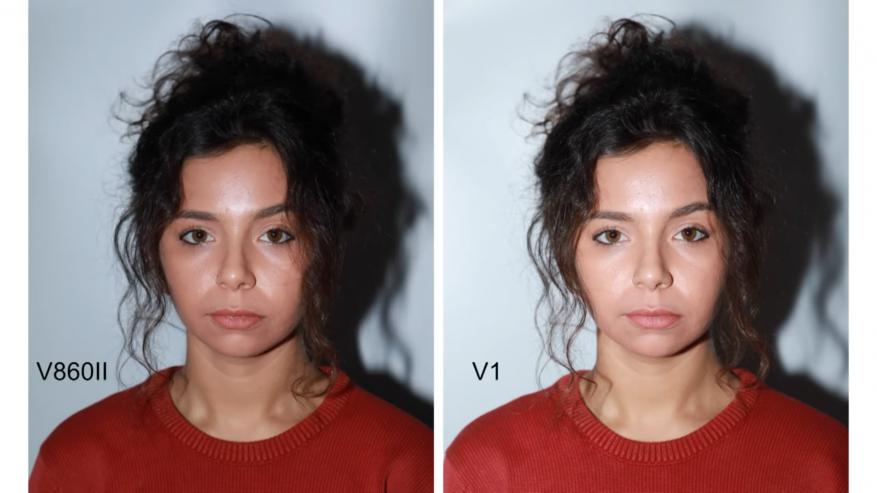
Автономность
• Вспышка работает от аккумулятора с ёмкостью 2600мАч, которого хватит где-то на 480 срабатываний вспышки на максимальной мощности. Также отмечу, что аккумулятор обеспечивает быструю перезарядку вспышки на максимальной мощности (1.5 секунд).
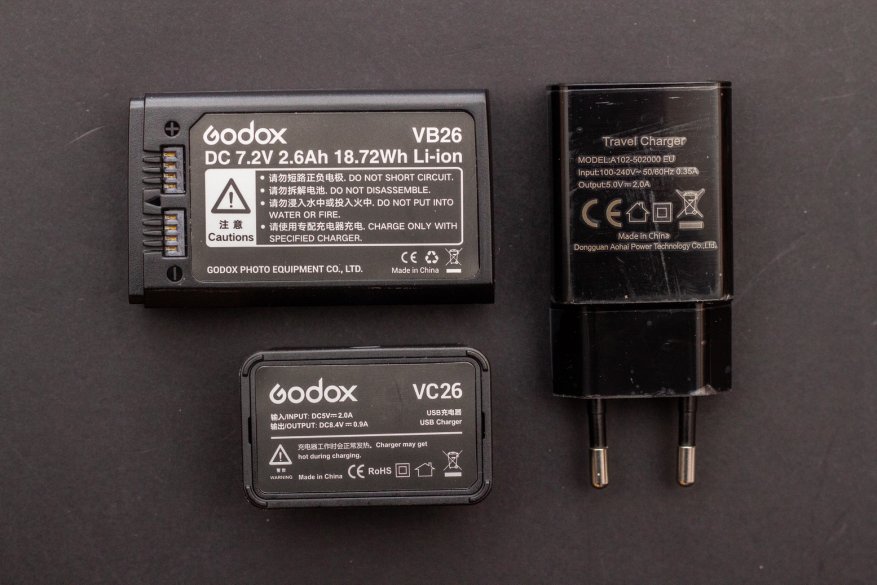
• Как только вспышка перезарядилась и готова к работе — раздается звуковой сигнал (при необходимости его можно отключить).
• Некоторые говорят, что данная вспышка склонна к перегревам при работе на максимальной мощности, из-за чего увеличивается время перезарядки до 3-4 секунд, однако на практике я этого не заметил (специально делал около 50 пыхов на максимальной яркости – на перезарядку уходило 1.5-2 секунды). Возможно эта проблема была на первых прошивках, я же тестировал на последней (V1.3).
• В режиме ожидания мигает светодиод, тем самым указывая заряд батареи: по 3 мигания — высокий, 2 — средний, 1 — низкий, если же постоянно мигает — заряд батареи критически низкий.
• Производителем заявлено, что на зарядку уходит три с половиной часа, однако у меня на зарядку полностью разряженной батареи ушло ровно три часа.
|
|
|


Итоги
• Производитель Godox выпустил отличную вспышку с большим и хорошо продуманным функционалом, а также стабильной работой (особенно в качестве ведущей или ведомой вспышки). Могу её смело рекомендовать тем, кто занимается профессиональной фотосъёмкой и для кого важна стабильность и удобство в работе.
+ магнитное крепление аксессуаров и возможность использовать рассеиватель в портретной ориентации;
+ удобное управление c возможностью быстрого изменения настроек;
+ продуманный и удобный конструктив (слот для батареи; защёлка на горячем башмаке; головка отклоняется назад без необходимости поворота верхней части на 180 градусов);
+ стабильная и удобная работа (управление другими вспышками) в режиме ведущей / ведомой;
+ быстрая перезарядка;
+ равномерное распределение света и мягкие тени благодаря круглой головке;
+ низкий расход батареи в режиме ожидания;
+ большая функциональность (полная поддержка автоматических режимов TTL, ручной режим, режим высокоскоростной синхронизации HSS 1/8000с, функция компенсации мощности FEC, синхронизация по первой/второй шторке и т.д.).
— круглая форма головки и гладкий пластик (не софт-тач) делают её скользкой.
Бонус:

Приобрести вспышку можно здесь:
• Ebay (самая низкая цена на рынке на данный момент)
• Алиэкспресс
• Яндекс.Маркет
• Price.UA (для покупателей из Украины)
На чтение 2 мин Опубликовано Обновлено
Вспышка Godox V1 — это компактное и универсальное устройство, которое может быть использовано для создания качественного освещения в фотографии. Однако, чтобы получить максимальную пользу от этой вспышки, важно правильно настроить ее параметры и функции. В данной статье будут рассмотрены основные способы настройки вспышки Godox V1, чтобы вы смогли достичь желаемых результатов и раскрыть все ее возможности.
Первым шагом в настройке вспышки Godox V1 является установка ее на камеру. Для этого вам потребуется зажать фиксатор и аккуратно сложить вспышку внутрь крепления камеры, а затем ослабить фиксатор, чтобы вспышка зафиксировалась в нужном положении. Убедитесь, что вспышка надежно закреплена, чтобы избежать ее падения и повреждений.
После установки вспышки на камеру, вам необходимо настроить ее основные параметры. Вспышка Godox V1 имеет ряд функций и настроек, с помощью которых вы можете создать необходимое освещение. Например, можно регулировать мощность вспышки, что позволяет управлять яркостью света. Также есть возможность изменять угол рассеивания света, применять различные сценарии освещения и использовать синхронизацию с камерой.
Не забудьте также проверить, что вспышка правильно работает и загружена электричеством. Убедитесь, что аккумулятор установлен и заряжен, а также что все соединения надежно установлены. В случае любых проблем или неполадок, рекомендуется обратиться к инструкции по эксплуатации или проконсультироваться с профессионалом.
Настроить вспышку Godox V1 может показаться сложной задачей на первый взгляд, однако, при достаточном опыте и практике, вы сможете легко освоить все ее возможности и получить качественные фотографии с привлекательным освещением. Надеемся, что данное подробное руководство поможет вам справиться с настройкой вспышки Godox V1 и достичь желаемых результатов в вашей фотографической практике.
Интродукция к вспышке Godox V1
Вспышка Godox V1 имеет компактный и портативный дизайн, что делает ее идеальным выбором для фотографов, которым нужна мобильность и гибкость в работе. Она оснащена различными функциями, такими как TTL автоэкспозиция, HSS (High-Speed Sync) и беспроводное управление. Это позволяет фотографам легко контролировать освещение и создавать различные эффекты.
Godox V1 совместима с большинством камер и может быть использована как на камере, так и в режиме вспышки вне камеры. Вспышка оснащена встроенным аккумулятором, что обеспечивает длительное время работы без необходимости замены батарей. Кроме того, она поддерживает различные аксессуары, такие как моделирующая лампа, соты и мягкие короба, что позволяет расширить возможности освещения при съемке.

Литий-ионная вспышка для камеры с круглой головкой TTL
V1s

РУКОВОДСТВО ПОЛЬЗОВАТЕЛЯ
GODOX Photo Equipment Co., Ltd.
1–4 этажи, здания 2 / 1–4 этажи, корпус 4, промышленная зона Яочуань, община Танвэй, улица Фухай, район Баоань, Шэньчжэнь 518103, Китай
Тел: + 86-755-29609320 (8062)
Факс: + 86-755-25723423
E-mail: godox@godox.com
http://www.godox.com
705-В1С000-00
Сделано в Китае
предисловие
Благодарим вас за покупку этого продукта.
Эта вспышка камеры V1S применяется к камерам серии Sony и совместима с автовспышкой TTL. С этой TTL-совместимой вспышкой ваша съемка станет проще. Вы можете легко добиться правильной экспозиции вспышки даже в сложных условиях изменяющегося освещения. Особенности этой вспышки камеры:
- С круглой головкой вспышки для создания мягких, ровных и творческих световых эффектов. Он имеет моделирующий светодиод мощностью 2 Вт.amp, который можно использовать вне камеры.
- Выходная мощность 76 Вт при максимальном шаге. 81 шаг от 1/1 до 1/128.
- Литий-ионный аккумулятор Pro 2 00 мАч — 6 макс. Перезарядки 1.5 с — полная мощность. 480
- Полная поддержка вспышки камеры Sony TTL. Работает как ведущее или ведомое устройство в беспроводной группе вспышек.
- Используйте точечно-матричную ЖК-панель для четких и удобных операций.
- Со встроенной беспроводной системой дистанционного управления 2.4 ГГц для поддержки передачи и приема.
- Предоставляет несколько функций, включая HSS (до 1/8000 с), FEC, FEB и т. Д.
- Стабильная консистенция и цветовая температура при хорошем равномерном освещении.
- Поддержка обновления прошивки.
 Предупреждение
Всегда держите этот продукт сухим. Не использовать под дождем или в damp условиях.Не разбирать. Если возникнет необходимость в ремонте, этот продукт необходимо отправить в авторизованный сервисный центр.Хранить в недоступном для детей месте.Прекратите использовать этот продукт, если он сломался из-за выдавливания, падения или сильного удара. В противном случае возможно поражение электрическим током, если вы дотронетесь до электронных деталей внутри.Не направляйте вспышку прямо в глаза (особенно младенцам) с близкого расстояния. В противном случае возможно нарушение зрения.Не используйте вспышку в присутствии горючих газов, химикатов и других подобных материалов. При определенных обстоятельствах эти материалы могут быть чувствительны к сильному свету, излучаемому этой вспышкой, что может привести к возгоранию или электромагнитным помехам.Не оставляйте и не храните вспышку, если температура окружающей среды превышает 50 ℃. В противном случае электронные компоненты могут быть повреждены.Немедленно выключите вспышку в случае неисправности.
ВИНГ
Новаторская литий-ионная вспышка для камеры с круглой головкой TTL
Условные обозначения, используемые в данном руководстве
Наименование частей

● Корпус
- Вспышка головы
- Светодиодное моделирование Lamp(От 01 до 10)
- Беспроводной датчик
- Луч поддержки фокусировки
- Разъем для шнура синхронизации
- USB-порт Type-C
- Кнопка извлечения аккумулятора
- Горячий башмак
- ЖК-панель
- Пряжка для крепления Hotshoe
- Литиевая батарейка
 ● Панель управления
 - Кнопка меню вспышки / кнопка блокировки
- <
 > Кнопка выбора беспроводной сети
 - Выбрать набор
- Установить кнопку
- Выключатель питания ВКЛ. / ВЫКЛ.
- <
 > Кнопка тестирования / индикатор готовности вспышки
 - Настройка длины фокусировки
- Кнопка выбора режима
- <> Моделирование Lamp настройка
- <+/-> Выходная мощность
- Функциональная кнопка 1
- Функциональная кнопка 2
- Функциональная кнопка 3
- Функциональная кнопка 4
 ● Панель управления
 > Кнопка выбора беспроводной сети
 > Кнопка тестирования / индикатор готовности вспышки
(1) Автовспышка TTL
Масштаб: отображение масштабирования (стр. 51)

 На дисплее будут отображаться только текущие применяемые настройки.
- Функции, отображаемые над функциональными кнопками с 1 по 4, например SYNC и , измените в соответствии со статусом настроек.
- Когда нажата кнопка или диск, ЖК-панель подсвечивается.
(2) M Ручная вспышка

(3) Мульти вспышка

(4) Съемка с радиопередачей
● Мастер Блок

● Ведомый блок

● ЖК-панель в трех режимах
● прикреплен к камере

● Радиопередача 2.4 ГГц: в качестве ведущего устройства

● Радиопередача 2.4 ГГц: в качестве ведомого устройства

● Что в коробке с комплектом V1S?
- Вспышка
- Литиевая батарейка
- Зарядное устройство USB
- USB-кабель
- зарядное устройство
- Мини-подставка
- Защитный чехол
- Инструкция по эксплуатации

● Аксессуары, продаваемые отдельно.
Изделие можно использовать в сочетании со следующими аксессуарами, продаваемыми отдельно, для достижения наилучших фотоэффектов:
Беспроводной триггер вспышки XProS и X1S TTL, комплект принадлежностей AK-R1 для круглой головки вспышки и т. Д.

Батарея
● Особенности
- В этой вспышке используется литий-ионный аккумулятор с длительным сроком службы. Доступное время зарядки и разрядки — 500.
- Это надежно безопасно. Внутренняя цепь защищена от перезаряда, переразряда, перегрузки по току и короткого замыкания.
- Полная зарядка аккумулятора с помощью стандартного зарядного устройства занимает всего 3.5 часа.
● Предостережения
- Не допускайте короткого замыкания.
- Не подвергайте воздействию дождя и не погружайте в воду. Этот аккумулятор не является водонепроницаемым.
- Хранить в недоступном для детей месте.
- Нет более 24 часов непрерывной зарядки.
- Хранить в сухом, прохладном, вентилируемом месте.
- Не откладывать в сторону или в огонь.
- Разряженные батареи следует утилизировать в соответствии с местными правилами.
- Если аккумулятор не использовался более 3 месяцев, полностью зарядите его.
● Загрузка и разгрузка аккумулятора
- Чтобы выгрузить аккумулятор, нажмите и удерживайте кнопку извлечения аккумулятора и нажмите на аккумулятор вниз, чтобы вынуть его.

- В соответствии со знаком треугольника на батарейном блоке вставьте его в отсек до тех пор, пока белая ручка не зафиксирует батарею со звуком щелчка.


● Индикация уровня заряда батареи
Убедитесь, что батарейный блок надежно вставлен во вспышку. Проверьте индикатор уровня заряда батареи на ЖК-панели, чтобы увидеть оставшийся уровень заряда батареи.
| Индикация уровня заряда батареи | Смысл |
| Сети 3 | В полностью |
| Сети 2 | средняя |
| 1 сетка | Низкий |
| Пустая сетка | Опустите аккумулятор, зарядите его. |
| моргание | Уровень заряда батареи будет немедленно израсходован. И вспышка автоматически выключится через 1 минуту.
Примечание: Пожалуйста, зарядите аккумулятор как можно скорее (в течение 10 дней). Затем аккумулятор можно использовать или ставить на длительное время. |
Светодиодное моделирование Lamp
Нажмите кнопку моделирования Lamp Кнопка настройки для настройки моделирования lamp. Кратковременно нажмите кнопку Set, чтобы включить или выключить моделирование.amp. При повороте моделирующей лamp Включите, поверните диск выбора, чтобы установить его яркость. На выбор доступно 10 уровней (01 ~ 10).

Присоединение к камере
- Присоедините вспышку камеры.
● Поверните фиксирующую пряжку Hotshoe влево и вставьте вспышку камеры в горячий башмак.
- Закрепите вспышку камеры.
● Поверните фиксирующую пряжку Hotshoe вправо до фиксации.
- Отсоедините вспышку камеры.
● Нажмите кнопку и поверните фиксирующую пряжку Hotshoe влево, пока она не ослабнет.


Управление электропитанием
Используйте переключатель питания ON / OFF для включения или выключения вспышки. Выключите, если он не будет использоваться в течение длительного периода времени. Установленная в качестве ведущей вспышки, она автоматически отключает питание после определенного периода (примерно 90 секунд) простоя. Нажатие кнопки спуска затвора камеры наполовину или нажатие любой кнопки вспышки приведет к включению вспышки. При установке в качестве ведомой вспышки она перейдет в спящий режим после определенного периода (настраиваемый, по умолчанию 60 минут) простоя. Нажатие любой кнопки вспышки разбудит его.
 C.Fn Если вспышка используется вне камеры, рекомендуется отключить функцию автоматического отключения питания. (C. Fn-STBY, стр. 52)
C.Fn Таймер автоматического выключения ведомого устройства по умолчанию установлен на 60 минут. Возможен вариант «30 минут». (C.FnSv STBY, стр. 52)
Режим вспышки — Автовспышка TTL
Эта вспышка имеет три режима вспышки: TTL, ручной (M) и мульти (стробоскопический). В режиме TTL камера и вспышка будут работать вместе, чтобы рассчитать правильную экспозицию для объекта и фона. В этом режиме доступны несколько функций TTL: FEC, HSS, синхронизация по второй шторке, моделирующая вспышка, управление с помощью экрана меню камеры.
* Нажмите кнопку выбора режима <MODE>, и три режима вспышки будут отображаться на ЖК-панели один за другим при каждом нажатии.
Нажмите кнопку выбора режима <MODE>, чтобы войти в режим TTL. В
Режим TTL
● Нажмите кнопку спуска камеры наполовину, чтобы сфокусироваться. Диафрагма и эффективный диапазон вспышки будут отображаться на viewИскатель.
Будет отображена ЖК-панель.
● Когда кнопка спуска затвора полностью нажата, вспышка запускает предварительную вспышку, которую камера будет использовать для расчета экспозиции и мощности вспышки за мгновение до съемки фотографии.
 FEC: компенсация экспозиции вспышки
Благодаря функции FEC эта вспышка может регулироваться от -3 до +3 с шагом 1/3 ступени.
Это полезно в ситуациях, когда требуется небольшая настройка системы TTL в зависимости от окружающей среды.
Настройка FEC:
- Нажмите функциональную кнопку 2
Нажмите кнопку <+/->. Значок <> и величина компенсации экспозиции вспышки будут выделены на ЖК-дисплее.
- Установите величину компенсации экспозиции вспышки.
● Поверните диск выбора, чтобы установить сумму.
● «0.3» означает 1/3 шага, «0.7» означает 2/3 шага.
● Чтобы отменить компенсацию экспозиции вспышки, установите величину «+0».
- Нажмите кнопку Set еще раз, чтобы подтвердить настройку.


Высокоскоростная синхронизация
Высокоскоростная синхронизация (вспышка FP) позволяет синхронизировать вспышку со всеми выдержками камеры. Это удобно, если вы хотите использовать приоритет диафрагмы для портретов с заполняющей вспышкой.
> Синхронизация по второй шторке
С длинной выдержкой вы можете создать световой след, следующий за объектом. Вспышка срабатывает прямо перед закрытием затвора. Выберите режим вспышки REAR в настройках камеры Sony.
M: ручная вспышка
Мощность вспышки регулируется от 1/1 полной мощности до 1/256 мощности с шагом 1/10 ступени. Чтобы получить правильную экспозицию вспышки, используйте ручной экспонометр, чтобы определить требуемую мощность вспышки.
- Нажмите кнопку <MODE>, чтобы отобразить <M>.

- Нажмите кнопку <+/-> и поверните диск выбора, чтобы выбрать желаемую мощность вспышки.

- Нажмите кнопку Set еще раз, чтобы подтвердить настройку.


Настройка дополнительного устройства Optic S1
В ручном режиме вспышки M нажмите кнопку, чтобы эта вспышка могла работать как оптическая вторичная вспышка S1 с оптическим датчиком. С помощью этой функции вспышка срабатывает синхронно с основной вспышкой, такой же эффект, как и при использовании триггеров по радио. Это помогает создать несколько световых эффектов.
Настройка дополнительного устройства Optic S2
Нажмите чтобы эта вспышка также могла работать как оптическая вторичная вспышка S1 с оптическим датчиком в ручном режиме M вспышки. Это полезно, когда камеры имеют функцию предварительной вспышки. С помощью этой функции вспышка игнорирует одиночную «предварительную вспышку» от основной вспышки и срабатывает только в ответ на вторую, фактическую вспышку от основного устройства.
● Оптический запуск S1 и S2 доступен только в ручном режиме M вспышки.
Мульти: стробоскопическая вспышка
При стробоскопической вспышке производится серия быстрых вспышек. Его можно использовать для захвата нескольких изображений движущегося объекта на одной фотографии.
Вы можете установить частоту срабатывания (количество вспышек в секунду, выраженное в Гц), количество вспышек и мощность вспышки.
- Нажмите кнопка, чтобы отображается.

- Установите частоту вспышки и время вспышки.
● Нажмите функциональную кнопку 2. для выбора времени вспышки. Поверните диск выбора, чтобы установить номер.
● Нажмите функциональную кнопку 3. для выбора частоты вспышки. Поверните диск выбора, чтобы установить номер.
- Поверните диск выбора, чтобы выбрать желаемую мощность вспышки.
● После того, как вы закончите настройку, нажмите кнопку Set, и все настройки будут отображены.


Расчет выдержки затвора Во время стробоскопической вспышки затвор остается открытым до прекращения срабатывания. Используйте приведенную ниже формулу, чтобы рассчитать выдержку и установить ее с помощью камеры.
Количество вспышек / частота вспышек = выдержка
Для бывшихampТо есть, если количество вспышек 10, а частота срабатывания 5 Гц, выдержка должна быть не менее 2 секунд.
Во избежание перегрева и выхода из строя головки вспышки не используйте стробоскопическую вспышку более 10 раз подряд.
После 10 раз дайте вспышке отдохнуть не менее 15 минут. Если вы попытаетесь использовать стробоскопическую вспышку более 10 раз подряд, срабатывание может автоматически прекратиться для защиты головки вспышки. В этом случае дайте вспышке камеры отдохнуть не менее 15 минут.
- Стробоскопическая вспышка наиболее эффективна при съемке сильно отражающего объекта на темном фоне.
- Рекомендуется использовать штатив и пульт дистанционного управления.
- Мощность вспышки 1/1 и 1/2 не может быть установлена для стробоскопической вспышки.
- Стробоскопическую вспышку можно использовать с «buLb».
- Если количество вспышек отображается как «-», срабатывание будет продолжаться до закрывания затвора или до полного разряда батареи. Количество вспышек будет ограничено, как показано в следующей таблице.
| Вспышка Гц выходной | 1 | 2 | 3 | 4 | 5 | 6-7 | 8-9 |
| 1/4 | 8 | 6 | 4 | 3 | 3 | 2 | 2 |
| 1/8 | 14 | 14 | 12 | 10 | 8 | 6 | 5 |
| 1/16 | 30 | 30 | 30 | 20 | 20 | 20 | 10 |
| 1/32 | 60 | 60 | 60 | 50 | 50 | 40 | 30 |
| 1/64 | 90 | 90 | 90 | 80 | 80 | 70 | 60 |
| 1/128 | 90 | 90 | 90 | 90 | 90 | 90 | 80 |
| 1/256 | 90 | 90 | 90 | 90 | 90 | 90 | 80 |
| Вспышка Гц выходной | 10 | 20-50 | 60-100 |
| 1/4 | 2 | 2 | 2 |
| 1/8 | 4 | 4 | 4 |
| 1/16 | 8 | 8 | 8 |
| 1/32 | 20 | 16 | 12 |
| 1/64 | 50 | 30 | 20 |
| 1/128 | 70 | 40 | 40 |
| 1/256 | 70 | 40 | 40 |
Съемка со вспышкой с беспроводным управлением: передача по радио (2.4 ГГц)
- V1S, подключенный к камере, называется ведущим устройством, а V1S с беспроводным управлением называется ведомым устройством.
- Вы также можете по беспроводной сети управлять V1S, установленным в качестве ведомого устройства, с помощью передатчика X1T-S или XProS (продается отдельно). Подробнее о настройке функций ведущего устройства см.
инструкции передатчика.
Использование вспышки (ведущей / ведомой) с функцией съемки с беспроводным радиоуправлением упрощает съемку с использованием усовершенствованного беспроводного управления несколькими вспышками так же, как при съемке с автоматической TTL-вспышкой. Основное относительное положение и рабочий диапазон показаны на рисунке. Затем вы можете выполнить беспроводную TTL-съемку с автоматической вспышкой, просто установив ведущее устройство на .
Позиционирование и рабочий диапазон (Example беспроводной съемки со вспышкой)
● Съемка с автоматической вспышкой с одним ведомым устройством.

- Используйте прилагаемую мини-подставку для размещения ведомого устройства.
- Перед съемкой выполните тестовую вспышку и тестовую съемку.
- Расстояние передачи может быть меньше в зависимости от таких условий, как расположение ведомых устройств, окружающей среды и погодных условий.
Съемка с несколькими беспроводными вспышками
Вы можете разделить ведомые устройства на две или три группы и выполнить TTL-автовспышку, изменяя коэффициент (коэффициент) вспышки. Кроме того, вы можете установить и снимать с разными режимами вспышки для каждой группы стрельбы, до 4 групп.
● Автоматическая съемка с двумя подчиненными группами.

● Автоматическая съемка с тремя подчиненными группами.

- Параметры беспроводной сети
Вы можете переключаться между обычной вспышкой и беспроводной вспышкой. Для обычной съемки со вспышкой обязательно установите для беспроводной сети значение ВЫКЛ.
Настройка основного блока Настройка ведомого устройства
- Выбор группового режима
1. Функциональная кнопка 1/2/3/4 может управлять группой M / A / B / C. Кратковременное нажатие функциональной кнопки позволяет выбрать TTL / M / OFF. Выберите один из них в качестве режима вспышки ведущего устройства. 2. Нажмите кнопку, чтобы переключиться в многомодовый режим.
- Настройка канала связи
Если поблизости есть другие беспроводные системы вспышки, вы можете изменить идентификаторы каналов, чтобы предотвратить помехи сигнала. Идентификаторы каналов ведущего устройства и ведомого устройства должны быть одинаковыми.
1. Нажмите Кнопка для входа в настройку C.Fn CH. 2. В C.Fn CH поверните диск выбора, чтобы выбрать идентификатор канала от 1 до 32.
 3. Нажмите кнопку Set для подтверждения.
- Настройки беспроводного идентификатора
Измените беспроводные каналы и идентификатор беспроводной сети, чтобы избежать помех, поскольку она может быть активирована только после того, как идентификаторы беспроводной сети и каналы ведущего устройства и ведомого устройства будут установлены одинаковыми. нажмите нажмите кнопку, чтобы ввести идентификатор C.Fn. Нажмите кнопку Set, чтобы выбрать выключение расширения канала, и выберите любое число от 01 до 99.
- Сканирование резервного канала
Чтобы избежать помех от использования того же канала другими, можно использовать эту функцию: войдите в настройки C.Fn и найдите опцию SCAN. При установке на START он будет сканировать от 1% до 100%. И 8 запасных каналов будут отображаться после завершения сканирования.
- TTL: полностью автоматическая съемка со вспышкой с беспроводным управлением
Использование автоматической беспроводной вспышки с одним ведомым устройством
 Настройка ведомого устройства
 2. Нажмите кнопку, чтобы переключиться в многомодовый режим.
 2. В C.Fn CH поверните диск выбора, чтобы выбрать идентификатор канала от 1 до 32.
 3. Нажмите кнопку Set для подтверждения.


1. Настройка основного блока
- Присоедините к камере вспышку V1S и установите ее в качестве ведущего устройства.
- M / A / B / C можно настроить на TTL отдельно.
 2. Настройка ведомого устройства
● Установите другую вспышку камеры в качестве беспроводного ведомого устройства. 3. Проверить канал связи.
● Если ведущее устройство и ведомое устройство (-а) настроены на разные каналы, установите их на один и тот же канал. (Стр.46)
4. Установите камеру и вспышку.
● Расположите камеру и вспышку, как показано на рисунке. (Стр.44)
5 .. Убедитесь, что вспышка готова.
● Убедитесь, что индикатор готовности ведущей вспышки горит.
6. Проверьте работу вспышки.
● Нажмите кнопку тестирования <> главного устройства.
● Затем будет срабатывать ведомое устройство. В противном случае отрегулируйте угол ведомого устройства по отношению к ведущему устройству и расстояние от ведущего устройства.
Использование автоматической беспроводной вспышки с несколькими ведомыми устройствами

Когда требуется более мощная вспышка или более удобное управление освещением, увеличьте количество ведомых устройств и установите их как одно ведомое устройство.
Чтобы добавить ведомые устройства, выполните те же действия, что и при настройке «Автоматическая беспроводная вспышка с одним ведомым устройством». Можно установить любую группу вспышек (A / B / C / D / E).
Когда количество ведомых устройств увеличивается и срабатывает ведущая вспышка, осуществляется автоматическое управление, чтобы все группы вспышек срабатывали с одинаковой мощностью вспышки и обеспечивали общую мощность вспышки до стандартной экспозиции.
- Если функция автоматического отключения питания ведомого устройства работает, нажмите кнопку тестирования ведущего устройства, чтобы включить его. Обратите внимание, что тестовое срабатывание недоступно в течение обычного времени замера камеры.
- Эффективное время автоматического отключения ведомого устройства можно изменить. (C.Fn-Sv STBY, стр. 55)
Использование полностью автоматической беспроводной вспышки
FEC и другие настройки, установленные на главном устройстве, также автоматически появятся на подчиненном устройстве. Подчиненное устройство не требует никаких операций. Используйте следующие настройки, чтобы использовать беспроводные вспышки в соответствии с теми же методами, что и при обычной съемке со вспышкой.
- Компенсация экспозиции вспышки (± Стр. 39)
О мастер-блоке
Используйте два или более основных блока. Подготовив несколько камер, к которым подключена ведущая вспышка, камеры можно менять при съемке, сохраняя тот же источник освещения (ведомое устройство).
7. M: съемка со вспышкой с беспроводным управлением и ручной вспышкой.
Здесь описывается беспроводное соединение (многократная съемка) с использованием ручной вспышки. Вы можете снимать с разными настройками мощности вспышки для каждого ведомого устройства (группы съемки). Установите все параметры на главном блоке.
1. Установка режима вспышки на .

2. Установка мощности вспышки. 1/2/3/4
● Нажмите функциональную кнопку 3.Gr>. Поверните диск выбора, чтобы установить мощность вспышки для групп. Нажмите кнопку Set для подтверждения.

3. Фотосъемка.
● Каждая группа срабатывает с установленной мощностью вспышки.

Параметр Режим вспышки
Вы можете напрямую управлять ведомым устройством, чтобы вручную настроить ручную вспышку или стробоскопическую вспышку.
- Установка ведомого устройства.
- Установка режима вспышки на .
● Нажмите кнопка, чтобы отображается.
● Установите ручную мощность вспышки. (Стр.41)
8. Мульти: съемка с беспроводной вспышкой в ручном режиме.
Параметр стробоскопическая вспышка.
- Нажмите кнопка, чтобы отображается.
- Установка стробоскопической вспышки. (Стр.42)
Другие инновации
Синхронизация запуска
Гнездо для шнура синхронизации представляет собой штекер диаметром 2.5 мм. Вставьте сюда штекер триггера, и вспышка сработает синхронно с затвором камеры.
Вспомогательный луч для автофокусировки
В плохо освещенных или малоконтрастных условиях съемки встроенный вспомогательный луч автофокусировки автоматически загорается, чтобы облегчить автофокусировку. Луч загорится только тогда, когда автофокусировка затруднена, и погаснет, как только автофокус станет правильным. Если вы хотите отключить вспомогательную подсветку автофокусировки, установите для параметра «AF» значение «OFF» в настройках C.Fn.
- Если вы обнаружите, что вспомогательный луч автофокусировки не загорается, это связано с тем, что камера имеет правильный автофокус.
- Модели камер с поддержкой вспомогательного луча автофокусировки: α7M3 / α7R3 / α7II / α7 / α6000 / α9
| Позиция | Рабочий диапазон |
| Центр | 0.6 ~ 10 м / 2.0 ~ 32.8 футов |
| периферия | 0.6 ~ 5 м / 2.0 ~ 16.4 футов |
Отражение вспышки
Если направить головку вспышки на стену или потолок, вспышка отразится от поверхности до того, как осветит объект. Это может смягчить тени за объектом для более естественного изображения.
Это называется отраженной вспышкой.
Чтобы установить направление отражения, удерживайте головку вспышки и поверните ее на нужный угол.

- Если стена или потолок расположены слишком далеко, отраженная вспышка может быть слишком слабой и привести к недоэкспонированию.
- Стена или потолок должны быть однотонного белого цвета для обеспечения высокой отражательной способности. Если отражающая поверхность не белая, на изображении может появиться цветовой оттенок.
МАСШТАБ: настройка угла обзора вспышки
Угол освечивания можно установить автоматически или вручную. Его можно настроить в соответствии с фокусным расстоянием объектива от 28 мм до 105 мм.

В режиме ручного масштабирования нажмите кнопку кнопка.
- Поверните диск выбора, чтобы изменить угол освечивания.
- Если отображается <>, угол освечивания устанавливается автоматически.
Если вы устанавливаете угол освечивания вручную, убедитесь, что он перекрывает фокусное расстояние объектива, чтобы на снимке не было темных краев.
Предупреждение о разряде батареи
Если батарея разряжена, > появится и начнет мигать на ЖК-дисплее. Немедленно замените аккумулятор.

C.Fn: настройка пользовательских функций
В следующей таблице перечислены доступные и недоступные пользовательские функции этой вспышки.
C.Fn Пользовательские функции
|
Знаки пользовательских функций |
Функция | Настройка №. |
Настройки и описание |
| м / фут | Индикатор расстояния | m | m |
| ft | ноги | ||
| AF | Подсветка автофокусировки | ON | ON |
| OFF | OFF | ||
| ОЖИДАНИЕ | Настройка автоматического сна | ON | ON |
| OFF | OFF | ||
| Св ОЖИДАНИЕ | Таймер автоматического выключения ведомого устройства | 60min | 60min |
| 30min | 30min | ||
| SCAN | Сканируйте запасной канал | OFF | OFF |
| НАЧАТЬ МАЙНИНГ | Начни искать запасной канал | ||
| CH | Настройка канала | 01-32 | Выберите каналы от 01 до 32 |
| ID | Беспроводной идентификатор | OFF | от |
| 01-99 | Выбирайте любую цифру от 01-99 | ||
| ЗВУК | Бипер | ON | ON |
| OFF | OFF | ||
| СВЕТ | Время подсветки | 12sec | Отключение через 12 сек. |
| OFF | Выключен | ||
| ON | Всегда горит | ||
| ЖК-дисплей | Коэффициент контрастности ЖК-дисплея | -3 ~ + 3 | 7 уровней |
- нажимать Нажимайте, пока не отобразится меню C.Fn. «Ver xx» в правом верхнем углу обозначает версию программного обеспечения.
- Выберите номер пользовательской функции.
● Поверните диск выбора, чтобы выбрать номер пользовательской функции. - Измените настройку.
● Нажмите кнопку «Установить» и выберите номер настройки.
● Поверните диск выбора, чтобы установить желаемый номер. Нажатие кнопки Set подтвердит настройки.
● После установки пользовательской функции и нажатия кнопки кнопку, камера будет готова к съемке. - В состояниях C.Fn нажмите и удерживайте кнопку «Очистить» в течение 2 секунд, пока на панели не отобразится «ОК», что означает, что значения в C.Fn можно сбросить.
Функция защиты
- Защита от перегрева
● Во избежание перегрева и выхода из строя головки вспышки не производите более 30 непрерывных вспышек подряд на 1/1 полной мощности. После 30 непрерывных миганий подождите не менее 10 минут.
● Если вы срабатываете более 30 непрерывных вспышек, а затем запускаете больше вспышек с короткими интервалами, может сработать внутренняя функция защиты от перегрева, и время перезарядки будет более 10 секунд. В этом случае подождите около 10 минут, и вспышка вернется в нормальное состояние.
● Когда срабатывает защита от перегрева, на ЖК-дисплее отображается.
Количество миганий, которые активируют защиту от перегрева:
Уровень выходной мощности Количество вспышек
1/1 30 1/2 +0.7 40 1/2 +0.3 50 1/2 60 1/4 (+ 0.3, + 0.7) 100 1/8 (+ 0.3, + 0.7) 200 1/16 (+ 0.3, + 0.7) 300 1/32 (+ 0.3, + 0.7) 500 1/64 (+ 0.3, + 0.7) 1000 1/128 (+ 0.3, + 0.7) 1/256 (+ 0.3, + 0.7) Количество миганий, которые активируют защиту от перегрева в режиме срабатывания высокоскоростной синхронизации:
Выходная мощность раз 1/1 15 1/2 (+ 0.3, + 0.7); 20 1/4 (+ 0.3, + 0.7) 30 1/8 (+ 0.3, + 0.7); 1/16 (+ 0.3, + 0.7) 40 1/32 (+ 0.3, + 0.7); 1/64 (+ 0.3, + 0.7); 50 1/128 (+ 0.3, + 0.7); 1/256 (+ 0.3, + 0.7); - Другая защита
Система обеспечивает защиту в реальном времени для защиты устройства и вашей безопасности. Следующие списки требуют вашей справки:
Подсказки на ЖК-панели Смысл
E1 В системе рециркуляции происходит сбой, и вспышка не срабатывает. Пожалуйста, перезапустите вспышку. Если проблема все еще существует, отправьте этот продукт в сервисный центр. E2 Система сильно нагревается. Пожалуйста, дайте отдых 10 минут. E3 Объемtage на двух выходах импульсной лампы слишком высоко.
Отправьте этот продукт в сервисный центр.E9 В процессе обновления произошли некоторые ошибки. Пожалуйста, используйте правильный метод обновления прошивки.
Технические данные
| Модель | V1S |
| Совместимые камеры | Камеры Sony (автовспышка TTL) |
| Мощность (1/1 выхода) | 76Ws |
| Покрытие Flash | 28 — 105mm |
| • Автоматическое масштабирование (угол освечивания вспышки устанавливается автоматически в соответствии с фокусным расстоянием объектива и размером изображения) | |
| • Ручное масштабирование | |
| • Поворотная / наклонная головка вспышки (отраженная вспышка): от 0 до 330 ° по горизонтали и от -7 ° до 120 ° по вертикали. | |
| Длительность вспышки | От 1/300 до 1/20000 секунд |
| • Управление экспозицией | |
| Система контроля экспозиции | Автовспышка TTL и ручная вспышка |
| Компенсация экспозиции вспышки (FEC) | Руководство по эксплуатации. FEB: ± 3 ступени с шагом 1/3 ступени (можно комбинировать ручные FEC и FEB.) |
| Режим синхронизации | Высокоскоростная синхронизация (до 1/8000 секунды), синхронизация по первой шторке и синхронизация по второй шторке |
| Мультивспышка | Предусмотрено (до 90 раз, 100 Гц) |
| • Беспроводная вспышка | |
| Функция беспроводной вспышки | Мастер, Ведомый, Выкл. |
| Мастер-группы | М, А, Б, С |
| Управляемые подчиненные группы | A, B, C, D, E (группа D / E может управляться триггером вспышки серии X) |
| Дальность передачи (прибл.) | 100m |
| каналы | 32 (1 ~ 32) |
| ID | 01 ~ 99 |
| Моделирующая вспышка | Съемка с предустановленной глубиной резкости камеры.view кнопка |
| • Вспомогательный луч для автофокусировки | |
| Эффективная дальность действия (прибл.) | Центр: 0.6 ~ 10 м / 2.0 ~ 32.8 футов |
| Периферия: 0.6 ~ 5 м / 2.0 ~ 16.4 футов | |
| • Светодиодное моделирование Lamp | |
| Питания | 2W |
| Цветовая температура | 3300 К ± 200 К |
| • Напряжение питания | |
| Источник питания | Литий-ионная батарея 7.2V / 2600mAh |
| Время переработки | Примерно 1.5 секунды. Зеленый светодиодный индикатор загорится, когда вспышка будет готова. |
| Мигает на полной мощности | Приблизительный 480 |
| Энергосбережение | Автоматическое выключение через прибл. 90 секунд холостого хода. (60 минут, если установлено как ведомое) |
| • Режим синхронизации синхронизации | Башмак, синхронизация 2.5 мм |
| • Цветовая температура | 5600 ± 200 тыс. |
| • Размеры | |
| Ш x В x Г | 76 * 93 * 197мм |
| Вес без батареи | 420g |
| Вес с аккумулятором | 530g |
| Диапазон частот беспроводной связи 2.4 ГГц | 2413.0MHz-2464.5MHz |
| Максимум. Мощность передачи 2.4G беспроводной сети | 5dbm |
Решение Проблем
Если есть проблема, обратитесь к этому руководству по поиску и устранению неисправностей.
Вспышка камеры не срабатывает.
Питание отключается само.
- После 90 секунд работы в режиме ожидания сработало автоматическое отключение питания, если вспышка установлена в качестве ведущей.
→ Нажмите кнопку спуска затвора наполовину или нажмите любую кнопку вспышки, чтобы проснуться. - После 60 минут (или 30 минут) работы в режиме ожидания вспышка перейдет в спящий режим, если она установлена как ведомая.
→ Нажмите любую кнопку вспышки, чтобы проснуться.
Авто-зум не работает.
- Вспышка камеры ненадежно прикреплена к камере.
→ Прикрепите ножку для крепления вспышки камеры к камере. Экспозиция вспышки недоэкспонирована или переэкспонирована. - Вы использовали высокоскоростную синхронизацию.
→ При высокоскоростной синхронизации эффективный диапазон вспышки будет меньше. Убедитесь, что объект находится в пределах отображаемого эффективного диапазона вспышки. - Вы использовали ручной режим вспышки.
→ Установите режим вспышки TTL или измените мощность вспышки. У фотографий темные углы или освещены только части объекта съемки. - Фокусное расстояние объектива превышает угол освечивания вспышки.
→ Проверьте установленный угол освечивания. У этой вспышки угол освечивания составляет от 28 до 105 мм, что подходит для фотоаппаратов среднего формата.
Обновление прошивки
- Порт USB представляет собой разъем USB типа C. Применима линия подключения USB Type-C.
- Поскольку для обновления прошивки требуется поддержка программного обеспечения Godox G3, перед обновлением загрузите и установите «ПО для обновления прошивки Godox G3». Затем выберите соответствующую прошивку file.
- Поскольку продукту необходимо обновить прошивку, обратитесь к руководству по эксплуатации новейшей электрической версии в качестве окончательной.
Совместимые модели камер
Эту вспышку можно использовать со следующими моделями камер Sony:
| a7Rll | а7R | a58 | a99 | ILCE6000L | |
| а7РИ | а7R3 | a9 | а77II | a77 | a350 |
В этой таблице перечислены только протестированные модели камер, а не все камеры серии Sony. Для совместимости с другими моделями камер рекомендуется провести самотестирование.
Права на изменение этой таблицы сохраняются.
.Обслуживание
- Немедленно выключите устройство, если обнаружите ненормальную работу.
- Избегайте внезапных ударов, продукт следует регулярно вычитать.
- Нагревание лампы-вспышки во время использования является нормальным явлением. Избегайте непрерывных вспышек, если в этом нет необходимости.
- Обслуживание вспышки должно выполняться нашим уполномоченным отделом обслуживания, который может предоставить оригинальные аксессуары.
- На этот продукт, за исключением расходных материалов, например, импульсной лампы, предоставляется гарантия сроком на один год.
- Несанкционированное обслуживание аннулирует гарантию.
- Если изделие вышло из строя или намокло, не используйте его, пока не отремонтируют профессионалы.
- Изменения, внесенные в спецификации или дизайн, могут не отражаться в этом руководстве.
Предупреждение FCC
Это устройство соответствует части 15 правил FCC. Эксплуатация возможна при соблюдении следующих двух условий: (1) это устройство не может создавать вредных помех, и (2) это устройство должно принимать любые принимаемые помехи, включая помехи, которые могут вызвать нежелательную работу. Любые изменения или модификации, прямо не одобренные стороной, ответственной за соответствие, могут лишить пользователя права на эксплуатацию оборудования.
Примечание: Это оборудование было протестировано и признано соответствующим ограничениям для цифровых устройств класса B в соответствии с частью 15 правил FCC. Эти ограничения разработаны для обеспечения разумной защиты от вредных помех при установке в жилых помещениях. Это оборудование генерирует, использует и может излучать радиочастотную энергию и, если оно установлено и используется не в соответствии с инструкциями, может создавать вредные помехи для радиосвязи. Однако нет гарантии, что помехи не возникнут при конкретной установке. Если это оборудование действительно создает недопустимые помехи для приема радио или телевидения, что можно определить путем включения и выключения оборудования, пользователю рекомендуется попытаться устранить помехи одним или несколькими из следующих способов:
> Переориентируйте или переместите приемную антенну.
> Увеличьте расстояние между оборудованием и приемником.
> Подключить оборудование к розетке в цепи, отличной от той, к которой подключен приемник.
> Обратиться за помощью к дилеру или опытному специалисту по радио / телевидению.
* Предупреждение RF:
Это оборудование соответствует ограничениям FCC на радиационное воздействие, установленным для неконтролируемой среды. Это оборудование следует устанавливать и эксплуатировать на расстоянии не менее 20 см между радиатором и вашим телом.
Документы / Ресурсы
Для работы проектов iXBT.com нужны файлы cookie и сервисы аналитики.
Продолжая посещать сайты проектов вы соглашаетесь с нашей
Политикой в отношении файлов cookie
Сегодня мы рассмотрим новую и слегка необычную внешнюю вспышку с круглой головкой от производителя Godox.
Немного о производителе
Компания Godox специализируется на производстве различного фотооборудования, в основном вспышек и света и уже успела завоевать лидерство у фотографов благодаря отличном качеству продукции и приемлемым ценам. У производителя есть свой сайт, где можно посмотреть всю продукцию и почитать её характеристики.
Упаковка
В комплекте идёт:
• накамерная вспышка;
• литий-ионная батарея;
• зарядное устройство;
• кабель для зарядки (Type-C);
• мини-стойка;
• чехол;
• руководство по эксплуатации.
Инструкция подробная, на английском и китайском. Скачать её в электронном виде можно здесь.
Чехол качественный, имеет петлю для крепления на пояс.
Технические характеристики:
|
Модель |
V1C |
V1N |
V1S |
|
Совместимые камеры |
Canon EOS (E-TTLII) |
Nikon (i-TTL) |
Sony (TTL) |
|
Мощность |
76 Дж |
||
|
Угол подсветки |
от 28 до 105 мм |
||
|
Автоматический зум (угол подсветки выбирается автоматически в зависимости от фокусного расстояния объектива и размера изображения) |
|||
|
Ручной зум |
|||
|
Наклон головки вспышки: от 0˚до 330˚ горизонтально и от -7˚ до 120˚ вертикально |
|||
|
Длительность импульса |
От 1/300 до 1/20000 секунды |
||
|
Управление экспозицией вспышки |
|||
|
Система управления экспозицией вспышки |
E-TTL II и ручной режим вспышки |
i-TTL и ручной режим вспышки |
TTL и ручной режим вспышки |
|
Компенсация вспышки (FEC) |
Ручная FEC и FEB: ±3 ступени с шагом 1/3 (Ручная FEC и FEB могут комбинироваться) |
||
|
Блокировка экспозиции |
Кнопкой <FEL˃ или <*˃ |
нет |
нет |
|
Режим синхронизации |
Высокоскоростная синхронизация (до 1/8000 секунды), синхронизация по первой шторке, синхронизация по второй шторке |
||
|
Режим стробоскопа |
Есть (до 100 импульсов, 199 Гц) |
Есть (до 90 импульсов, 100 Гц) |
|
|
Дистанционное управление вспышкой |
|||
|
Режимы дистанционного управления вспышкой |
Режим ведущей вспышки (Master), режим ведомой вспышки (Slave), выкл. |
||
|
Количество групп |
A, B, C, D |
M, A, B, C |
|
|
Количество ведомых групп |
A, B, C, D, E (группа E управляется системой синхронизации Godox X) |
A, B, C, D, E (группа D/E управляется системой синхронизации Godox X) |
|
|
Радиус передачи сигнала (приблиз.) |
100 м |
||
|
Количество каналов |
32 (1~32) |
||
|
ID |
01~99 |
||
|
Моделирующая вспышка |
Запускается кнопкой предпросмотра глубины резкости на фотокамере |
нет |
|
|
Подсветка автофокуса |
|||
|
Эффективное расстояние (приблиз.) |
В центре: 0,6-10м / 2,0-32,8 футов |
||
|
LED пилотная лампа |
|||
|
Мощность |
2 Вт |
||
|
Цветовая температура |
3300К±200К |
||
|
Электропитание |
|||
|
Источник питания |
7.2В/2600мАч литий-ионная батарея |
||
|
Время перезарядки |
Приблиз. 1,5 с. Зеленый LED индикатор сигнализирует о готовности вспышки |
||
|
Количество импульсов на полной мощности |
Около 480 |
||
|
Энергосбережение |
Автоматическое отключение после 90 секунд бездействия (60 минут в режиме ведомой вспышки) |
||
|
Методы синхронизации |
«горячий башмак», гнездо для синхрокабеля 2,5мм |
||
|
Цветовая температура |
5600±200К |
||
|
Размеры |
|||
|
Размеры корпуса |
76х93х197 мм |
||
|
Вес нетто без учета аккумулятора |
420 г |
||
|
Вес нетто с аккумулятором |
530 г |
• Среди особенностей отмечу полную поддержку автоматических режимов TTL, ручной режим, режим высокоскоростной синхронизации HSS 1/8000с, функцию компенсации мощности FEC и синхронизацию по первой/второй шторке.
• Дополнительно можно прикупить набор аксессуаров и светофильтров для вспышки под индексом AK-R1.
• Стоит отметить, что аксессуары крепятся на магните (установлены по периметру головки), поэтому при использовании плоского рассеивателя / отражателя и фотографировании в портретной ориентации – его можно просто повернуть (прокрутить) в нужное положение, что обычно невозможно в других вспышках.
• Производитель также выпустил переходник, который позволяет крепить данные аксессуары на вспышки с прямоугольной головкой.
• Корпус вспышки сделан из пластика, сборка отличная. К недостаткам отнесу лишь то, что из-за круглой головки и скользкого пластика она может скатиться с наклонной поверхности, поэтому нужно быть внимательным при её эксплуатации.
Сравнение со вспышкой Sigma EF 610 DG Super:
• На головке вспышки установлена LED-лампа, которая может светить приятным теплым светом (3300К) и имеет 10 уровней яркости. Лампа не сверхъяркая, но её вполне достаточно чтобы подсветить объект на расстоянии 1.5-2 метров и ближе в тёмное время суток. Лампа может быть включена и во время работы вспышки.
Пример освещения (ВСЕ ФОТОПРИМЕРЫ В ОБЗОРЕ С ИСПОЛЬЗОВАНИЕМ ВСПЫШКИ БЕЗ ОБРАБОТКИ):
Минимальная / максимальная яркость:
• К преимуществам батарейного отсека отнесу отсутствие какой-либо крышки, которая может отвалиться / затеряться.
• Слева находится кнопка для изъятия батареи и два порта под заглушкой USB Type-C для обновления прошивки (последнюю прошивку можно скачать здесь) и 2.5мм порт для синхронизации.
• Среди преимуществ конструкции также отмечу, что в любой позиции верхнюю часть можно повернуть назад (в изначальной позиции вспышка поворачивается назад, создавая угол 120°), то есть не нужно поворачивать на 180° по горизонтали чтобы направить верхнюю часть в потолок.
• Вспышка крепится на камеру / стойку с помощью башмака с защёлкой.
• Вспышка оснащена матричным ЖК-дисплеем, который имеет хорошую видимость и подсветку. Подсветка загорается при нажатии на любую кнопку и горит 12 секунд по умолчанию (ее можно либо выключить совсем либо включить, чтобы она не гасла).
• Блок управления вспышкой удобный и продуманный. Посредине находится колёсико, которое можно не только вращать, но и нажимать.
• Вспышка имеет три основных режима: E-TTL, ручной и режим стробоскопа.
• Вспышка имеет 9 режимов мощности и в каждом режиме по 10 шагов мощности (по 1/10 стопа). Управление мощностью удобное, можно изменять по 1/10 шага (прокручиванием колёсика) либо же по сразу же переключаться между целыми стопами (нажатием на колёсико). Максимальная мощность – 1/1, минимальная – 1/256.
• Если в режиме TTL сделать снимок, а потом переключиться в ручной режим – настройки мощности сохранятся.
• Вспышка работает в такой же системе радиосинхронизации (Godox 1.4G X), как и остальные вспышки Godox. К слову, это одна из лучших (если не лучшая) система радиосинхронизации на рынке, которая отличается стабильной работой, совместимостью со всеми брендами (максимально универсальная), возможностью совмещать накамерные и студийные вспышки и так далее.
• Стоит отметить удобное управление другими вспышками в ведущем режиме: каждая кнопка отвечает за отдельную вспышку, мощность же каждой вспышки регулируется прокручиванием или нажатием на колёсико (для изменения по 1/10 шага или целого стопа соответственно).
• В режиме радиосинхронизации порадовала функция поиска наиболее надёжного канала, которая будет особенно полезна если рядом снимают другие фотографы. Производитель также отлично оптимизировал расход батареи в режиме ожидания – он минимальный и не тает на глазах.
• В режиме ведомой вспышки она может находиться в режиме ожидания 60 либо 30 минут, после чего перейдёт в режим сна (нажатие на любую кнопку снова приведет ее в боевую готовность).
Фото менюшек:
|
|
|
|
|
|
|
|
|
|
|
|
|
|
|
|
|
|
|
|
• Круглая форма головки соответственно обеспечивает круглое пятно света. По сравнению со вспышкой с обычной прямоугольной головкой, свет этой вспышки имеет более ровных переход, лучше рассеивается, заполняет кадр и создаёт мягче тени.
Все 6 фото сделаны на следующих настройках: f5, ISO 400, выдержка 1/100, объектив 50мм.
| Вспышка Godox, ручной режим, 1/64 (в лоб) |
Вспышка Sigma, ручной режим, 1/64 (в лоб) |
Вспышка Sigma, ручной режим, 1/128 (в лоб) |
| Вспышка Godox, ручной режим, 1/2 (в потолок) |
Вспышка Sigma, ручной режим, 1/2 (в потолок) |
Вспышка Sigma, ручной режим, 1/4 (в потолок) |
Примеры без / с вспышкой:
Автономность
• Вспышка работает от аккумулятора с ёмкостью 2600мАч, которого хватит где-то на 480 срабатываний вспышки на максимальной мощности. Также отмечу, что аккумулятор обеспечивает быструю перезарядку вспышки на максимальной мощности (1.5 секунд).
• Как только вспышка перезарядилась и готова к работе — раздается звуковой сигнал (при необходимости его можно отключить).
• Некоторые говорят, что данная вспышка склонна к перегревам при работе на максимальной мощности, из-за чего увеличивается время перезарядки до 3-4 секунд, однако на практике я этого не заметил (специально делал около 50 пыхов на максимальной яркости – на перезарядку уходило 1.5-2 секунды). Возможно эта проблема была на первых прошивках, я же тестировал на последней (V1.3).
• В режиме ожидания мигает светодиод, тем самым указывая заряд батареи: по 3 мигания — высокий, 2 — средний, 1 — низкий, если же постоянно мигает — заряд батареи критически низкий.
• Производителем заявлено, что на зарядку уходит три с половиной часа, однако у меня на зарядку полностью разряженной батареи ушло ровно три часа.
Итоги
• Производитель Godox выпустил отличную вспышку с большим и хорошо продуманным функционалом, а также стабильной работой (особенно в качестве ведущей или ведомой вспышки). Могу её смело рекомендовать тем, кто занимается профессиональной фотосъёмкой и для кого важна стабильность и удобство в работе.
+ магнитное крепление аксессуаров и возможность использовать рассеиватель в портретной ориентации;
+ удобное управление c возможностью быстрого изменения настроек;
+ продуманный и удобный конструктив (слот для батареи; защёлка на горячем башмаке; головка отклоняется назад без необходимости поворота верхней части на 180 градусов);
+ стабильная и удобная работа (управление другими вспышками) в режиме ведущей / ведомой;
+ быстрая перезарядка;
+ равномерное распределение света и мягкие тени благодаря круглой головке;
+ низкий расход батареи в режиме ожидания;
+ большая функциональность (полная поддержка автоматических режимов TTL, ручной режим, режим высокоскоростной синхронизации HSS 1/8000с, функция компенсации мощности FEC, синхронизация по первой/второй шторке и т.д.).
— круглая форма головки и гладкий пластик (не софт-тач) делают её скользкой.
Бонус
Приобрести вспышку можно здесь:
• AliExpress
На мой субъективный
взгляд, в арсенале каждого фотографа должна быть вспышка. Она спасает, когда
естественного света недостаточно, а когда его достаточно, помогает подсветить
или части лица, или модель сзади, тем самым диктуя свои условия. А еще вспышка
позволяет полностью загнать модель в вакуум, сделав все вокруг почти черным и,
по сути, превратить любой закуток двора в свою студию.
На примере вспышек от
компании Godox опробуем озвученные выше варианты их использования.
О вспышках
Буквально несколько слов
о вспышках.
Одна модель – Godox AD100 Pro на 100 Дж, визуально
напоминающая миниатюрный моноблок, а по размеру как обычная банка.
К ней подходят аксессуары
от вспышек V1
и AD200,
поскольку диаметр головки такой же.
Также ее можно поставить
на кронштейн S2 и использовать с обычными зонтами и насадками Bowens. А световой поток можно немного смягчать,
отодвигая вспышку от рассеивателя.
Godox сделал на базе AD100 Pro комплекты, благодаря чему у вас
за спиной в обычном рюкзаке – целая переносная фотостудия.
360 импульсов на одном
заряде, и они могут быть короче, чем у V1.
Главное, будьте
аккуратнее, когда извлекаете аккумулятор – он буквально выстреливает наружу.
Так что лучше направляйте его вверх.
Вторая вспышка – это Godox V1 на 76 Дж. Существует под разные камеры: Canon, Nikon, Sony, Pentax, Fujifilm и Olympus/Panasonic.
Обе вспышки имеют
подсветку. Это, конечно, не 100%-но
моделирующий свет, так как диод находится статично, и не двигается вместе с
диодом основной вспышки при изменении угла рассеивания, но как помощник для
ориентира очень даже подходит. И обеими вспышками можно управлять родным пульсатором Godox X, настроить канал и группу. В общем, все
необходимые функции для управления светом имеются.
Для более оперативной
работы мы будем использовать гибкий раскладной софтбокс с креплением как под
обычную, так и круглую вспышку.
Немного теории
Прежде чем мы начнем
снимать, информация для тех, кто только планирует снимать со вспышками.
Чтобы в снимке не было
дефектов в виде черных полос, нужно выставлять выдержку не короче 1/160 с для
обычных камер и не короче 1/200 – 1/250 для профессиональных. Вот, к примеру,
снимок предметки, где я выставил выдержку 1/250 с, а камера поддерживает только
до 1/200 с – в итоге видим полосу снизу:
Почему так?
Дело в том, что матрица
должна успеть полностью открыться во время снимка с импульсным светом и
полностью осветиться тем самым импульсом. В любительских камерах затвор
успевает полностью открыть матрицу
вплоть до выдержки 1/160 с, а в проф. камерах – до 1/250 с.
При более короткой
выдержке матрица частично закрывается шторками затвора и из-за чего получаются
темные полосы.
Я понимаю, что эта информация
банальна, но кто только планирует снимать со вспышкой, может этого и не знать.
Итак, в первом случае мы
за счет вспышки просто частично подсвечиваем модель там, где света
недостаточно.
Пару слов о гибком
софтбоксе. В день, когда мы снимали, изначально планировалось провести съемку
на мосту, но ветер был таким сильным, что софтбокс просто складывался, поскольку
в его конструкции нет жестких спиц. И если стойку можно придержать, то с
софтбоксом в таких условиях ничего не сделать. Это обратная сторона
мобильности. Поэтому нам пришлось переместиться во двор.
Снимая на улице, я сделал
пару тестовых снимков с сотовой насадкой, и отказался от этой идеи, так как
нижняя часть модели уходила в тень, а хотелось подсветить чуть большую площадь,
к тому же и сам софтбокс тоже был небольшой, поэтому соты здесь не пригодились
Сотовые насадки нужны,
чтобы сузить пучок света и тем самым сфокусировать световой поток на конкретном
участке.
Если софтбокс маленький,
можно таким образом отделить светом лицо от туловища, а с большими боксами и
сотами – целиком человека от фона и дополнить светом более сфокусировано на конкретную
часть.
Наша задача – не трогать фон, а лишь подсветить
модель, сделав освещение лица и туловища более равномерным. Причем, сделать все так, чтобы в глаза не сильно, а в идеале
вообще не бросалось, что лицо модели дополнительно подсвечено. В данном
случае у нас AD100 Pro на ⅛
мощности, на камере диафрагма – F5, выдержка – 1/160.
В данном случае мы
направляем свет даже немного вскользь, а не прямо на модель, это позволяет
сделать освещение еще мягче. Повторюсь, мне не хотелось, чтобы было явное
ощущение работы вспышки.
Так я делал на первых
снимках:
Главное правило, никогда
не направляйте вспышку прямо в лицо, вы просто получите плоский блин. Поэтому
освещение лучше направлять с боку под разными углами. Оптимальный рисунок можно
подобрать эмпирическим путем. Но, как правило, угол 45° является оптимальным, и от него можно уже делать
различные вариации.
Например, снимая модель у
стены, мне больше понравилось освещать не со стороны, откуда я снимал, а с
противоположной, то есть используя среднее
положение между контровой подсветкой и заполняющим светом. Вот наши снимки в таком варианте:
Съемка в помещении
В данном случае захотелось
сделать вполне бытовой снимок, но с изюминкой студийности за счет искусственного
освещения. Историю к фото можете придумать сами, допустим, это любовница вышла
покурить на лестницу парадной. Кстати, сигарету мы не поджигали, это было бы некрасиво по отношению к жильцам, к
тому же мы не курим и сигаретный дым не переносим, так что пепел и дым добавим
в фотошопе. Беспокоясь о нашей моделе, мы посадили её на небольшую подушечку
под цвет лестницы.
Вот так выглядит снимок
при F4 и
выдержке 1/200:
Как видите, все темно,
можно сделать черный вакуум, прикрыв диафрагму еще сильнее.
Далее подбираем
необходимую мощность вспышки, направляем её под углом и на модель, а не
вскользь, так как тут мы наоборот акцентирует её как самое светлое пятно на
снимке. И вот что у нас получилось:
Убираем софтбокс и
моноблок Godox AD100 Pro. Попробуем более
мобильный вариант, установим вспышку Godox V1 непосредственно на башмак камеры, её можно
вращать во все стороны и для наших целей она очень удобна.
Нужно понять, что для нас
станет рассеивателем. В потолок направлять вспышку нет смысла, так мы сильно
рассеем свет по всей площади. Справа от меня стена довольно далеко – то есть не
вариант, направить вспышку на модель – это самое худшее, что можно придумать.
Остается только стена слева.
Далее просто
экспериментируем, под каким углом свет падает лучше, и подбираем необходимую
мощность.
После того как с основным
цветом разобрались, можно поставить позади модели вторую вспышку и немного
подсветить контур.
В чем главная проблема
такой схемы?
По сути их две:
• привязанность к отражающей поверхности, если вы
не прихватили с собой, например, отражатель, на который можно направить вспышку;
• вторая сложность – цвет и, как следствие, отражение
от этой поверхности, поскольку стена зеленоватая, а значит, потом этот оттенок
нужно будет подавить при обработке.
И вот что у нас вышло:
Задача выполнена, модель –
это самое яркое пятно на снимке, остальное пространство уходит в темноту.
Итоги
Надеюсь, по итогу данного
видео все, кто раньше не хотел или не считал нужным иметь в своем арсенале
вспышку, пересмотрят свой взгляд.
Само собой, применение
может быть разным. Кто-то, допустим, снимает на выездах в офисах, спортзалах и в
других подобных местах, где часто не очень светло, да и свет, сами понимаете,
какой. А на улице это хороший
способ добавить к естественному освещению искусственное для корректировки
светового рисунка или даже принудительно создавать свой, подавляя внешний свет.

Вспышка Godox V1C V1 для Canon

Уважаемый клиент,
Спасибо за покупку нашего продукта. Пожалуйста, внимательно прочтите следующие инструкции перед первым использованием и сохраните это руководство пользователя для использования в будущем. Обратите особое внимание на инструкции по технике безопасности. Пожалуйста, свяжитесь со службой поддержки клиентов, если у вас есть какие-либо вопросы или комментарии по поводу устройства.
✉ www.alza.co.uk/контакт
✆ +44 (0) 203 514 4411
Импорт Alza.cz as, Янковцова 1522/53, Голешовице, 170 00 Прага 7, www.alza.cz
предисловие
Благодарим вас за покупку этого продукта.
Эта вспышка камеры V1C применяется к камерам серии Canon EOS и совместима с автоматической вспышкой E-TTL II. С этой вспышкой, совместимой с E-TTL II, ваша съемка станет проще. Вы можете легко добиться правильной экспозиции при съемке со вспышкой даже в сложных условиях с изменяющимся освещением.
Особенности этой фотовспышки:
- С круглой головкой вспышки для достижения мягких, ровных и креативных световых эффектов. Модельный светодиод мощностью 2 Вт.amp, который можно использовать вне камеры
- Выходная мощность 76 Вт на максимальном шаге. 81 шаг от 1/1 до 1/128
- Литий-ионный аккумулятор Pro 2600 мАч — макс. 1.5 с перезарядки-480 хлопков полной мощности.
- Полностью поддерживает вспышку камеры Canon E-TTL II. Работает как передатчик или приемник в группе беспроводной вспышки.
- Используйте точечно-матричную ЖК-панель для четких и удобных операций.
- Со встроенной беспроводной системой дистанционного управления 2.4 ГГц для поддержки передачи и приема.
- Предоставляется несколько функций, включая HSS (до 1/8000 с), FEC, FEB и т. д.
- Стабильная консистенция и цветовая температура при хорошем равномерном освещении.
- Поддержка с обновлением прошивки.
Предупреждение
- Всегда держите этот продукт сухим. Не использовать под дождем или в damp условиях.
- Не разбирать. Если возникнет необходимость в ремонте, этот продукт необходимо отправить в авторизованный сервисный центр.
- Хранить в недоступном для детей месте.
- Прекратите использовать этот продукт, если он сломался из-за выдавливания, падения или сильного удара. В противном случае возможно поражение электрическим током, если вы дотронетесь до электронных деталей внутри.
- Не направляйте вспышку прямо в глаза (особенно младенцам) с близкого расстояния. В противном случае возможно нарушение зрения.
- Не используйте вспышку в присутствии легковоспламеняющихся газов, химикатов и других подобных материалов. В определенных обстоятельствах эти материалы могут быть чувствительны к сильному свету, излучаемому данной вспышкой, что может привести к пожару или электромагнитным помехам.
- Не оставляйте и не храните вспышку, если температура окружающей среды превышает 50 ° C. В противном случае электронные компоненты могут быть повреждены.
- В случае неисправности немедленно выключите вспышку.
Наименование частей

Корпус
- Вспышка головы
- Светодиодное моделирование Lamp (От 01 до 10)
- Беспроводной датчик
- Луч поддержки фокусировки
- Разъем для шнура синхронизации
- USB-порт Type-C
- Крышка аккумулятора
- Горячий башмак
- ЖК-панель
- Пряжка для крепления Hotshoe
- Литиевая батарейка
Панель управления
- Кнопка меню вспышки/кнопка блокировки
- Кнопка выбора беспроводной сети
- Выбрать набор
- Установить кнопку
- Выключатель питания ВКЛ. / ВЫКЛ.
- Кнопка тестирования / индикатор готовности вспышки
- Настройка длины фокуса
- Кнопка выбора режима
- Моделирование Lamp настройка
- <+/-> Выходная мощность
- Функциональная кнопка 1
- Функциональная кнопка 2
- Функциональная кнопка 3
- Функциональная кнопка 4

ЖК-панель
Автовспышка E-TTL
Увеличить: зум дисплей
- На дисплее будут отображаться только текущие применяемые настройки.
- Функции, отображаемые над функциональными кнопками с 1 по 4, такие как SYNC и , изменяются в зависимости от состояния настроек.
- При нажатии кнопки или диска загорается ЖК-панель.
M Ручная вспышка 
Мульти вспышка 
Съемка по радио
Примечание: Вспышка, прикрепленная к камере, называется «передатчиком», а другие вспышки, управляемые по беспроводной сети, называются «приемниками».
ЖК-панель в трех режимах
Что в коробке с комплектом V1C

- Вспышка
- Литиевая батарейка
- Зарядное устройство USB
- USB Line
- Зарядное устройство
- Мини-подставка
- Защитный чехол
- Инструкция по эксплуатации
Отдельно продаваемые аксессуары
Изделие можно использовать в сочетании со следующими аксессуарами, продаваемыми отдельно, для достижения наилучших фотоэффектов: беспроводной триггер вспышки XProC и X1C TTL, комплект аксессуаров AK-R1 для круглой головки вспышки и т. д.
Батарея
Особенности
- В этой вспышке используется литий-ионный полимерный аккумулятор с длительным временем работы. Доступное время зарядки и разрядки составляет 500.
- Это надежно безопасно. Внутренняя цепь защищена от перезаряда, переразряда, перегрузки по току и короткого замыкания.
- Полная зарядка аккумулятора с помощью стандартного зарядного устройства занимает всего 3.5 часа.
Предостережения
- Не допускайте короткого замыкания.
- Не подвергайте воздействию дождя и не погружайте в воду. Эта батарея не является водонепроницаемой.
- Хранить в недоступном для детей месте.
- Не более 24 часов непрерывной зарядки.
- Хранить в сухом, прохладном, вентилируемом месте.
- Не откладывать в сторону или в огонь.
- Разряженные батареи следует утилизировать в соответствии с местными правилами.
- Если батарея перестала использоваться более 3 месяцев, выполните полную зарядку.
Загрузка и разгрузка аккумулятора
Чтобы вынуть аккумулятор, нажмите и удерживайте кнопку извлечения аккумулятора и нажмите на аккумулятор вниз, чтобы извлечь его.
Согласно треугольному знаку на батарейном блоке, вставьте его в отсек до тех пор, пока ручка не зафиксирует батарею со звуком щелчка.
Индикация уровня заряда батареи
Убедитесь, что батарейный блок надежно вставлен во вспышку. Проверьте индикатор уровня заряда батареи на ЖК-панели, чтобы увидеть оставшийся уровень заряда батареи.
| Индикация уровня заряда батареи | Смысл |
| Сети 3 | В полностью |
| Сети 2 | средняя |
| 1 сетка | Низкий |
| Пустая сетка | Опустите батарею, перезарядите ее. |
| моргание | Уровень заряда батареи будет израсходован немедленно. И вспышка автоматически включится через 1 минуту.
Примечание: Пожалуйста, перезарядите аккумулятор как можно скорее (в течение 10 дней). Затем аккумулятор можно использовать или поместить на длительный период. |
Светодиодное моделирование Lamp
Нажмите кнопку моделирования Lamp Кнопка настройки для настройки моделирования lamp. Кратковременно нажмите кнопку Set, чтобы включить или выключить моделирование.amp. При повороте моделирующей лamp включен, поверните диск выбора, чтобы установить его яркость. Есть 10 уровней (01~10) на выбор.
Присоединение к камере

Управление электропитанием
Используйте переключатель питания ON/OFF для включения или выключения вспышки. Выключите, он не будет использоваться в течение длительного периода времени. Установив вспышку передатчика, он автоматически выключит питание через определенный период (около 90 секунд) бездействия. Нажатие затвора камеры наполовину или нажатие любой кнопки вспышки активирует вспышку. Установив вспышку приемника, она перейдет в спящий режим через определенный период (настраиваемый, по умолчанию 60 минут) бездействия. Нажатие любой кнопки вспышки разбудит его.
Режим вспышки — автовспышка E-TTL
Эта вспышка имеет три режима вспышки: E-TTL, ручной (M) и мульти (стробоскопический). В режиме E-TTL камера и вспышка будут работать вместе, чтобы рассчитать правильную экспозицию для объекта и фона. В этом режиме доступны несколько функций TTL: FEC, FEB, FEL, HSS, синхронизация по второй шторке, моделирующая вспышка, управление с помощью экрана меню камеры.
*Нажимать Кнопка выбора режима и три режима вспышки будут отображаться на ЖК-дисплее один за другим при каждом нажатии.
ЭТТЛ
режим
Нажимать Кнопка выбора режима для входа в режим E-TTL. Отобразится ЖК-панель режима.
- Нажмите кнопку спуска камеры наполовину, чтобы сфокусироваться. Диафрагма и эффективный диапазон вспышки будут отображаться в viewИскатель.
- Когда кнопка спуска затвора полностью нажата, вспышка срабатывает с предварительной вспышкой, которую камера будет использовать для расчета экспозиции и мощности вспышки за мгновение до того, как будет сделан снимок.
ФЭК: Компенсация экспозиции вспышки
С функцией FEC эта вспышка может регулироваться от -3 до +3 с шагом 1/3 ступени. Это полезно в ситуациях, когда требуется незначительная настройка системы TTL в зависимости от окружающей среды.
Настройка FEC:
ФЕВ: Брекетинг экспозиции вспышки
Вы можете сделать три снимка со вспышкой, автоматически изменяя мощность вспышки для каждого снимка с -3 до +3 с шагом 1/3 ступени. Камера запишет три изображения с разной экспозицией: одно экспонировано в соответствии с расчетами камеры, одно переэкспонировано, а другое недоэкспонировано. Величина чрезмерной и недостаточной экспозиции регулируется пользователем. Эта функция помогает получить правильную экспозицию, особенно при съемке движущихся объектов или при сложном освещении.
- Февраль будет отменен после того, как будут сделаны три фотографии.
- Для достижения наилучших результатов установите режим привода камеры на «одиночный» и перед съемкой убедитесь, что вспышка готова.
- FEB может использоваться с FEC и FEL.
 Вы можете запретить автоматическую отмену FEB после того, как будут сделаны три снимка. (C.Fn-FEB ACL)
 Вы можете запретить автоматическую отмену FEB после того, как будут сделаны три снимка. (C.Fn-FEB ACL)
FEL: Блокировка экспозиции вспышки
FEL может заблокировать правильную настройку экспозиции вспышки для любой части сцены.
С отображается на ЖК-дисплее, нажмите кнопку камеры кнопка. Если камера не имеет нажмите кнопку <*>.
- Сфокусируйтесь на объекте
- нажмите кнопка.
- Направьте объект в центр viewискатель и нажмите кнопка.
- Вспышка камеры сработает с предварительной вспышкой, и необходимая мощность вспышки для объекта сохранится в памяти.
- Каждый раз нажата кнопка, сработает предварительная вспышка, и новая установка экспозиции вспышки будет заблокирована.
- Если объект находится слишком далеко и недоэкспонирован,
 > значок будет мигать в viewискатель. Подойдите ближе к объекту и попробуйте снова зафиксировать FE.
 - Если не отображается на ЖК-панели, блокировка FE не может быть установлена.
- Если объект слишком мал, фиксация FE может быть не очень эффективной.
 > значок будет мигать в viewискатель. Подойдите ближе к объекту и попробуйте снова зафиксировать FE.
Высокоскоростная синхронизация
Высокоскоростная синхронизация (вспышка FP) позволяет синхронизировать вспышку со всеми выдержками камеры. Это удобно, если вы хотите использовать приоритет диафрагмы для портретов с заполняющей вспышкой.
 Синхронизация по второй шторке
С длинной выдержкой вы можете создать световой поезд, следующий за объектом. Вспышка срабатывает непосредственно перед закрытием затвора.
Нажмите функциональную кнопку 2 кнопку, чтобы> отображается на ЖК-дисплее.
M: ручная вспышка
Мощность вспышки регулируется от 1/1 полной мощности до 1/256 мощности с шагом 1/10 ступени. Чтобы получить правильную экспозицию вспышки, используйте ручной экспонометр, чтобы определить требуемую мощность вспышки.
- Настройка дополнительного устройства Optic S1
В ручном режиме вспышки M нажмите кнопку, чтобы эта вспышка могла работать как оптическая вторичная вспышка S1 с оптическим датчиком. С помощью этой функции вспышка срабатывает синхронно с основной вспышкой, такой же эффект, как и при использовании триггеров по радио. Это помогает создать несколько световых эффектов. - Настройка дополнительного устройства Optic S2
Нажимать кнопку, чтобы эта вспышка также могла работать как дополнительная оптическая вспышка S1 с оптическим датчиком в ручном режиме вспышки M. Это полезно, когда камеры имеют функцию предварительной вспышки. С этой функцией вспышка будет игнорировать одиночную «предварительную вспышку» от основной вспышки и будет срабатывать только в ответ на вторую, фактическую вспышку от основного блока.
Оптический запуск S1 и S2 доступен только в ручном режиме вспышки M.
Мульти: стробоскопическая вспышка
При стробоскопической вспышке происходит серия быстрых вспышек. Его можно использовать для захвата нескольких изображений движущегося объекта на одной фотографии.
Вы можете установить частоту срабатывания (количество вспышек в секунду, выраженное в Гц), количество вспышек и мощность вспышки.
Нажмите кнопка, чтобы отображается.
Установите частоту вспышки и время вспышки.
- Нажмите функциональную кнопку 2 для выбора времени вспышки. Поверните диск выбора, чтобы установить номер.
- Нажмите функциональную кнопку 3 для выбора частоты вспышки. Поверните диск выбора, чтобы установить номер.


Поверните диск выбора, чтобы выбрать желаемую мощность вспышки. После того, как вы закончите настройку, нажмите кнопку Set, и все настройки будут отображены.
Расчет выдержки затвора
Во время стробоскопической вспышки затвор остается открытым до прекращения срабатывания. Используйте приведенную ниже формулу, чтобы рассчитать скорость затвора и установить ее с помощью камеры.
Количество вспышек / частота вспышек = выдержка
Для бывшихampт. е. при количестве вспышек 10 и частоте срабатывания 5 Гц выдержка должна быть не менее 2 секунд.
Во избежание перегрева и повреждения головки вспышки не используйте стробоскопическую вспышку более 10 раз подряд. После 10 раз дайте вспышке камеры отдохнуть не менее 15 минут. Если вы попытаетесь использовать стробоскопическую вспышку более 10 раз подряд, срабатывание может автоматически прекратиться для защиты головки вспышки. Если это произойдет с камерой, дайте по крайней мере 15 минут отдохнуть для вспышки камеры.
- Стробоскопическая вспышка наиболее эффективна при съемке сильно отражающего объекта на темном фоне.
- Рекомендуется использовать штатив и пульт дистанционного управления.
- Мощность вспышки 1/1 и 1/2 не может быть установлена для стробоскопической вспышки.
- Стробоскопическую вспышку можно использовать с «лампочкой».
- Если количество вспышек отображается как «–», срабатывание будет продолжаться до тех пор, пока не закроется затвор или не разрядится батарея. Количество вспышек будет ограничено согласно следующей таблице:
Максимальное количество стробоскопических вспышек
Съемка со вспышкой с беспроводным управлением: передача по радио (2.4 ГГц)
- Когда режим съемки камеры установлен на полностью автоматический режим или режим Image Zone, операции в этой главе недоступны. Установите режим съемки камеры на P/Tv/Av/M/B (режим творческой зоны).
- Подключение V1C к камере называется передатчиком, а V1C с беспроводным управлением называется приемным устройством.
- Вы также можете по беспроводной сети управлять V1C, установленным в качестве приемника, с помощью передатчика X1T-C (продается отдельно). Подробнее о настройке функций передатчика см. В инструкции передатчика.
Использование вспышки (передатчик/приемник) с функцией беспроводной съемки с радиоуправлением упрощает съемку с усовершенствованным беспроводным освещением с несколькими вспышками так же, как при съемке с автоматической вспышкой E-TTL II.
Основное относительное положение и рабочий диапазон показаны на рисунке. Затем вы можете выполнять съемку с автоматической вспышкой E-TTL II, просто установив передатчик в режим
.
Позиционирование и рабочий диапазон (Example беспроводной съемки со вспышкой)
- Съемка с автовспышкой с одним приемником
- Используйте прилагаемую мини-подставку для размещения приемника.
- Перед съемкой выполните тестовую вспышку и тестовую съемку.
- Расстояние передачи может быть меньше в зависимости от таких условий, как расположение приемных устройств, окружающей среды и условий.
Съемка с несколькими беспроводными вспышками
Вы можете разделить блоки приемника на две или три группы и выполнить автоматическую вспышку E-TTL II, изменяя коэффициент вспышки (коэффициент). Кроме того, вы можете установить и снимать с разными режимами вспышки для каждой группы срабатывания, до 4 групп.
Автоматическая съемка с двумя группами приемников
Автоматическая съемка с тремя группами приемников 
Съемка с разными режимами вспышки, установленными для каждой группы 
- Настройки режима вспышки указаны только в качестве примера.ample
Параметры беспроводной сети
Вы можете переключаться между обычной вспышкой и беспроводной вспышкой. Для обычной съемки со вспышкой обязательно установите для беспроводной сети значение ВЫКЛ.
Настройка модуля передатчика
Настройка блока приемника 
Мигание модуля трансмиттера выключено
< >: Вспышка блока передатчика включена.
< >: Вспышка блока передатчика выключена.
- Даже если срабатывание вспышки блока передатчика отключено, она все равно срабатывает предварительную вспышку для передачи беспроводных сигналов.
Настройка канала связи
Если поблизости есть другие беспроводные фотовспышки, вы можете изменить идентификаторы каналов, чтобы предотвратить помехи сигнала. Идентификаторы каналов передатчика и приемника должны быть одинаковыми.
Настройки беспроводного идентификатора
Измените беспроводные каналы и идентификатор беспроводной сети, чтобы избежать помех, поскольку она может быть активирована только после того, как идентификаторы беспроводной связи и каналы модуля передатчика и модуля приемника будут установлены одинаковыми. нажмите нажмите кнопку, чтобы ввести идентификатор C.Fn. Нажмите кнопку Set, чтобы выбрать выключение расширения канала, и выберите любое число от 01 до 99.
Сканирование резервного канала
Чтобы избежать помех от использования того же канала другими, можно использовать эту функцию: войдите в настройки C.Fn и найдите параметр SCAN. При установке его на СТАРТ он будет сканировать от 1% до 100%. И 8 запасных каналов будут отображаться после завершения сканирования.
ETTL: полностью автоматическая съемка со вспышкой с беспроводным управлением
Использование автоматической беспроводной вспышки с одним приемником
- Настройка модуля передатчика
- Прикрепите к камере вспышку V1C и установите ее в качестве передатчика.
- X1T-C также можно использовать в качестве передатчика. X1T-C может управлять значением ZOOM V1C, когда ZOOM настроен на автоматический режим (A).

- Настройка блока приемника
- Установите другую вспышку камеры в качестве беспроводного приемника.

- Установите другую вспышку камеры в качестве беспроводного приемника.
- Проверить канал связи.
- Если блок передатчика Блок(и) приемника настроены на другой канал, установите их на один и тот же канал.
- Расположите камеру и вспышки
- Расположите камеру и вспышки, как показано на рисунке.
- Установите режим вспышки передатчика на
- Установите режим вспышки передатчика на .
- Для стрельбы будет автоматически установлен для ресивера.
- Установите срабатывание вспышки модуля передатчика в положение ВКЛ, чтобы сработать вспышка.
- Убедитесь, что вспышка готова
- Убедитесь, что индикатор готовности передатчика светится.
- Когда индикатор готовности вспышки приемника готов, область подсветки лампы помощи AF будет мигать с интервалом в 1 секунду.
- Проверьте работу вспышки.
- Нажмите кнопку тестирования на передатчике.>
- Затем приемник сработает. Если нет, отрегулируйте угол приемника по отношению к передатчику и расстояние от передатчика.
- Нажмите кнопку тестирования на передатчике.
- Использование автоматической беспроводной вспышки с несколькими приемниками
Когда требуется более сильная вспышка или более удобное управление освещением, увеличьте количество приемников и установите его как один приемный блок. Чтобы добавить блоки-приемники, выполните те же действия, что и при настройке «автоматической беспроводной вспышки с одним блоком-приемником». Можно установить любую группу вспышек (A / B / C / D / E). Когда количество приемников увеличивается и срабатывает вспышка передатчика, осуществляется автоматическое управление, чтобы все группы вспышек срабатывали с одинаковой мощностью вспышки и чтобы общая мощность вспышки соответствовала стандартной экспозиции.
- Нажмите кнопку глубины резкостиview кнопку на камере, чтобы запустить проверочную вспышку.
- Если функция автоматического выключения блока приемника работает, нажмите кнопку тестирования блока передатчика, чтобы включить его. Обратите внимание, что тестовое срабатывание недоступно в течение обычного времени замера камеры.
- Эффективное время автоматического отключения питания приемника можно изменить (C.Fn-RX STBY).
- При выполнении некоторых настроек автоматический вспомогательный передатчик AF не будет мигать после того, как загорится индикатор готовности вспышки на приемнике. (C.Fn-AF)
- Использование полностью автоматической беспроводной вспышки
FEC и другие настройки, установленные на передатчике, также автоматически появятся на приемнике. Блок приемника не нуждается в каких-либо операциях. Используйте следующие настройки для создания беспроводных вспышек в соответствии с теми же методами, что и при обычной съемке со вспышкой.- Компенсация экспозиции вспышки

- Блокировка экспозиции вспышки
- Ручная вспышка
- Стробоскопическая вспышка
- Компенсация экспозиции вспышки
- О передатчике
Используйте два или более передатчика. Подготовив несколько камер с подключенными вспышками передатчика, камеры можно менять при съемке, сохраняя при этом один и тот же источник света. (приемник). - M: Съемка со вспышкой с беспроводным управлением и ручной вспышкой
Здесь описывается беспроводная (многократная съемка) с ручной вспышкой. Вы можете снимать с разными настройками мощности вспышки для каждой группы приемников (вспышек). Установите все параметры на трансмиттере.
- Параметр Режим вспышки
Вы можете напрямую управлять приемником, чтобы вручную настроить ручную вспышку или стробоскопическую вспышку.
- Настройка приемника.
- Установка режима вспышки на
- Нажимать кнопку, чтобы отображается.
- Установите ручную мощность вспышки.
- Мульти: съемка со вспышкой с беспроводным управлением и ручной вспышкой

- Параметр Стробоскопическая вспышка
- Нажмите кнопка, чтобы отображается.
- Установка стробоскопической вспышки.
- Параметр Стробоскопическая вспышка


Другие инновации
Синхронизация запуска
Гнездо для шнура синхронизации представляет собой штекер диаметром 2.5 мм. Вставьте сюда штекер триггера, и вспышка сработает синхронно с затвором камеры.
Моделирующая вспышка
Если в камере есть предварительнаяview кнопку, нажатие на нее приведет к непрерывному срабатыванию вспышки в течение 1 секунды. Это называется моделирующей вспышкой. Это позволяет вам видеть эффекты тени на объекте и баланс освещения. Вы можете включить проверочную вспышку во время съемки с беспроводной или обычной вспышкой.
- Во избежание перегрева и повреждения головки вспышки не включайте моделирующую вспышку более 10 раз подряд. Если вы используете моделирующую вспышку 10 раз подряд, дайте по крайней мере 10-минутный перерыв для вспышки камеры.
- Проверочную вспышку нельзя использовать с камерами EOS 300 и Type-B.
Вспомогательный луч для автофокусировки
В плохо освещенных или низкоконтрастных условиях съемки встроенный вспомогательный луч автоматической фокусировки автоматически загорается, чтобы облегчить автофокусировку. Луч загорится только при затруднении автофокуса и погаснет, как только автофокус станет правильным.
Если вы хотите отключить вспомогательный луч автоматической фокусировки, установите для параметра «AF» значение «OFF» в настройках C.Fn.
- Если вы обнаружите, что автоматический вспомогательный луч не загорается, это означает, что у камеры правильный автофокус.
| Позиция | Рабочий диапазон |
| Центр | 0.6 ~ 10 м / 2.0 ~ 32.8 футов |
| периферия | 0.6 ~ 5 м / 2.0 ~ 16.4 футов |
Отражение вспышки
Если направить головку вспышки на стену или потолок, вспышка отразится от поверхности перед освещением объекта. Это может смягчить тени позади объекта, чтобы сделать снимок более естественным. Это называется отраженной вспышкой.
Чтобы установить направление отражения, удерживайте головку вспышки и поверните ее на нужный угол.
- Если стена или потолок расположены слишком далеко, отраженная вспышка может быть слишком слабой и привести к недоэкспонированию.
- Стена или потолок должны быть однотонного белого цвета для обеспечения высокой отражательной способности. Если отражающая поверхность не белая, на изображении может появиться цветовой оттенок.
МАСШТАБ: настройка угла обзора вспышки
Угол освечивания можно установить автоматически или вручную. Его можно настроить в соответствии с фокусным расстоянием объектива от 28 мм до 105 мм.
- В режиме ручного масштабирования нажмите кнопку кнопка.
- Поверните диск выбора, чтобы изменить угол освечивания.
- ЕслиA>, угол освечивания устанавливается автоматически.
- Если вы устанавливаете угол освечивания вручную, убедитесь, что он перекрывает фокусное расстояние объектива, чтобы на снимке не было темных краев.
Предупреждение о разряде батареи
Если заряд батареи низкий > появится и начнет мигать на ЖК-дисплее. Немедленно замените аккумулятор.
C.Fn: настройка пользовательских функций
В следующей таблице перечислены доступные и недоступные пользовательские функции этой вспышки.
| Пользовательская функция Признаки | Функция | настройка Нет. | настройка & Описание |
| м / фут | Индикатор расстояния | m | m |
| Ft | Футов | ||
| AF | Подсветка автофокусировки | ON | ON |
| OFF | OFF | ||
| ОЖИДАНИЕ | Настройка автоматического сна | ON | ON |
| OFF | OFF | ||
| ОЖИДАНИЕ ПРИЕМА | Приемник авто
таймер отключения питания |
60min | 60min |
| 30min | 30min | ||
| SCAN | Сканируйте запасной канал | OFF | OFF |
| Начать игру | Начните искать
запасные каналы |
||
| CH | Настройка канала | 01 ~ 32 | Выберите каналы
от 01-32 |
| ID | Беспроводной идентификатор | OFF | от |
| 01-99 | Выбери любую фигуру
от 01-99 |
||
| ЗВУК | Бипер | ON | ON |
| OFF | OFF | ||
| LIGHT | Время подсветки | 12sec | Выкл. через 12 сек. |
| OFF | Выключен | ||
| ON | Всегда горит | ||
| ЖК-дисплей | ЖК-контрастное соотношение | -3 ~ + 3 | 7 уровней |
| ФЕВ ACL | Автоматическая отмена в феврале | ON | ON |
| OFF | OFF | ||
| TX | Управление блоком передатчика | OFF | |
| ON |
- Нажимать Нажимайте кнопку , пока не отобразится меню C.Fn. «Ver xx» в правом верхнем углу указывает на версию программного обеспечения.
- Выберите номер пользовательской функции.
- Поверните диск выбора, чтобы выбрать номер пользовательской функции.
- Измените настройку.
- Нажмите кнопку «Установить», и номер настройки начнет мигать.
- Поверните диск выбора, чтобы установить желаемый номер. Нажатие кнопки Set подтвердит настройки.
- После установки пользовательской функции и нажатия кнопку, камера будет готова к съемке.
- В состояниях C.Fn нажмите и удерживайте кнопку «Очистить» в течение 2 секунд, пока на панели не отобразится «ОК», что означает, что значения в C.Fn можно сбросить.
Если вспышка прикреплена к камере EOS, которая имеет функцию управления вспышкой Speedlite, вспышкой можно управлять с помощью экрана меню камеры. Порядок работы с меню см. В руководстве по эксплуатации камеры.
- Настройка функций вспышки камеры
Следующие функции настраиваются в соответствии с различными режимами вспышки.- Режим вспышки
- Синхронизация затвора (1-я/2-я шторка, высокоскоростная синхронизация)
- Февраль
- Компенсация экспозиции вспышки
- Вспышка срабатывания
- Очистить настройки вспышки камеры
- Пользовательская функция вспышки камеры
C.Fn-00, C.Fn.01, C.Fn-03, C.Fn-08, C.Fn-10, C.Fn-20, C.Fn-22
Пользовательская функция Clear All Flash
- Если компенсация экспозиции при съемке со вспышкой уже была установлена с помощью вспышки камеры, компенсацию экспозиции при съемке со вспышкой нельзя установить с помощью камеры. Чтобы установить его с помощью камеры, компенсация экспозиции вспышки камеры должна быть установлена на ноль.
- Если какие-либо пользовательские функции вспышки и настройки вспышки, кроме компенсации экспозиции вспышки, были установлены как камерой, так и вспышкой, вступят в силу последние настройки.
Функция защиты
Защита от перегрева
- • Во избежание перегрева и повреждения головки вспышки не делайте более 30 непрерывных вспышек в быстрой последовательности на 1/1 полной мощности. После 30 непрерывных вспышек сделайте перерыв не менее 10 минут.
• Если вы зажжете более 30 непрерывных вспышек, а количество вспышек будет больше с короткими интервалами, может сработать внутренняя функция защиты от перегрева. В этом случае подождите около 10 минут, после чего вспышка вернется в нормальное состояние. - Когда срабатывает защита от перегрева, на ЖК-дисплее отображается .
Количество миганий, которые активируют защиту от перегрева:
| Уровень выходной мощности | Количество вспышек |
| 1/1 | 30 |
| 1 / 2 + 0.7 | 40 |
| 1 / 2 + 0.3 | 50 |
| 1/2 | 60 |
| 1/4(+0.3, +0.7) | 100 |
| 1/8(+0.3, +0.7) | 200 |
| 1/16(+0.3, +0.7 | 300 |
| 1/32(+0.3, +0.7) | 500 |
| 1/64(+0.3, +0.7) | 1000 |
| 1/128(+0.3, +0.7) |
Количество вспышек, при котором сработает защита от перегрева в режиме срабатывания высокоскоростной синхронизации:
| Уровень выходной мощности | раз |
| 1/1 | 15 |
| 1/2(+0.3, +0.7) | 20 |
| 1/4(+0.3, +0.7) | 30 |
| 1/8(+0.3, +0.7) | |
| 1/16(+0.3, +0.7 | 40 |
| 1/32(+0.3, +0.7) | |
| 1/64(+0.3, +0.7) | 50 |
| 1/128(+0.3, +0.7) |
Другая защита
Система обеспечивает защиту в реальном времени для защиты устройства и вашей безопасности. В следующем списке перечислены подсказки для справки:
| Подсказки на ЖК-дисплей Панель | Смысл |
| E1 | В системе рециркуляции происходит сбой, поэтому вспышка не может сработать. Пожалуйста, перезапустите флешку. Если проблема не устранена, отправьте этот продукт в сервисный центр. |
| E2 | Система сильно нагревается. Пожалуйста, дайте отдых 10 минут. |
| E3 | Объемtagе на двух выходах импульсной лампы слишком высоко. Пожалуйста, отправьте этот продукт в сервисный центр. |
| E9 | В процессе обновления произошли некоторые ошибки. Пожалуйста, используйте правильный метод обновления прошивки. |
Технические данные
| Модель | V1C |
| Совместимые камеры | Камеры Canon EOS (автовспышка E-TTL II) |
| Питания (1 / 1 выход) | 76Ws |
| Flash Покрытие | 28 — 105mm |
| Автозум (охват вспышки устанавливается автоматически в соответствии с размером изображения с фокусным расстоянием объектива) | |
| Ручной зум
· Поворот/наклон головки вспышки (отражающая вспышка): от 0 до 300° по горизонтали и от – 7° до 120° по вертикали |
|
| Flash Длительность | От 1/300 до 1/20000 секунд |
Экспозиция Control
| Экспозиция контроль система | Автовспышка E-TTL II и ручная вспышка |
| Компенсация экспозиции вспышки (FEC) | Руководство. FEB±3 ступени с шагом 1/3 ступени (можно комбинировать ручную FEC и FEB) |
| FE Блокировка | С кнопку или кнопку <*> |
| Синхронизация Режим | Высокоскоростная синхронизация (до 1/8000 секунды по первой шторке и по второй шторке |
| Мульти вспышка | Предусмотрено (до 100 раз, 199 Гц) |
Беспроводной сети Flash (Радио 2.4G Передача инфекции)
| Беспроводной сети вспышка функция | Передатчик, приемник, выкл. |
| Группы передатчиков | А, Б, С, Д, |
| Управляемый Получатель группы | A, B, C, D, E (группой E можно управлять с помощью триггера вспышки серии X) |
| коробка передач ассортимент (Прибл.) | 100m |
| каналы | 32 (1 ~ 32) |
| ID | 01 ~ 99 |
| Моделирующая вспышка | Снято с предварительной глубиной резкости камерыview кнопка |
Вспомогательный луч для автофокусировки
| Эффективный ассортимент (Прибл.) | Центр: 0.6~10 м / 2.0-32.8 фута
Периферия: 0.6 ~ 5 м / 2.0 ~ 16.4 футов |
LED моделирование Lamp
| Питания | 2W |
| Цветовая температура | 3300 К ± 200 К |
Питания Предложения
| Питания источник | Литий-ионный аккумулятор 7.2 В/2600 мАч |
| Переработка время | прибл. 1.5 секунды. Когда вспышка готова, загорится зеленый светодиодный индикатор. |
| Мигает на полной мощности | Приблизительный 480 |
| Питания экономия | Автоматическое выключение через прибл. 90 секунд холостого хода. (60 минут, если установлен как Получатель) |
Синхронизация Инициирование режим
| Синхронизация Инициирование режим | Горячий башмак, линия синхронизации 2.5 мм |
Габаритные размеры:
| Ш x В x Г | 76 * 93 * 197мм |
| Вес без аккумулятор | 420g |
| Вес аккумулятор | 530g |
| 2.4G Беспроводной сети частота Диапазон | 2413.0MHz-2464.5MHz |
| Макс. Мощность передачи 2.4G Беспроводной сети | 5dbm |
УСТРАНЕНИЕ НЕПОЛАДОК
Если есть проблема, обратитесь к этому руководству по поиску и устранению неисправностей.
Вспышка камеры не срабатывает.
Вспышка камеры ненадежно прикреплена к камере.
- Надежно прикрепите монтажную ножку камеры к камере.
- Электрические контакты вспышки и камеры загрязнены.
- Очистите контакты.
Питание отключается само.
После 90 секунд бездействия срабатывает автоматическое отключение питания, если вспышка настроена как передатчик.
- Нажмите кнопку спуска затвора наполовину или нажмите любую кнопку вспышки, чтобы проснуться.
После 60 минут (или 30 минут) работы в режиме ожидания вспышка перейдет в спящий режим, если она настроена как приемник.
- Нажмите любую кнопку вспышки, чтобы проснуться.
Авто зум не работает.
Вспышка камеры ненадежно прикреплена к камере.
- Прикрепите монтажную ножку вспышки камеры к камере.
Экспозиция вспышки недоэкспонирована или переэкспонирована.
На снимке был объект с высокой отражающей способностью (например, стеклянное окно).
- Использовать блокировку FE (FEL)
Вы использовали высокоскоростную синхронизацию.
- При высокоскоростной синхронизации эффективный диапазон вспышки будет меньше. Убедитесь, что объект находится в пределах отображаемого эффективного диапазона вспышки.
Вы использовали ручной режим вспышки.
- Установите режим вспышки на ETTL или измените мощность вспышки.
Фотографии имеют темные углы или освещены только части объекта съемки.
Локальная длина объектива превышает охват вспышки.
- Проверьте установленный угол освечивания. Эта вспышка имеет угол освечивания от 28 до 105 мм, что подходит для фотоаппаратов среднего формата.
Обновление прошивки
- Порт USB представляет собой разъем USB типа C. Применима линия подключения USB Type-C.
- Поскольку для обновления прошивки требуется поддержка программного обеспечения Godox G3, перед обновлением загрузите и установите «программное обеспечение для обновления прошивки Godox G3». Затем выберите соответствующую прошивку file.
- Поскольку продукту необходимо обновить прошивку, обратитесь к руководству по эксплуатации новейшей электрической версии в качестве окончательной.
Совместимые модели камер
Данную вспышку можно использовать со следующими моделями камер Canon серии EOS:
В этой таблице перечислены только протестированные модели камер, а не все камеры серии Canon EOS. Для совместимости с другими моделями камер рекомендуется провести самотестирование.
Права на изменение этой таблицы сохраняются.
Обслуживание
- Немедленно выключите устройство, если обнаружите ненормальную работу.
- Избегайте внезапных ударов, продукт следует регулярно очищать от пыли.
- Нагревание лампы-вспышки во время использования является нормальным явлением. Избегайте непрерывных вспышек, если в этом нет необходимости.
- Обслуживание вспышки должно выполняться нашим уполномоченным отделом обслуживания, который может предоставить оригинальные аксессуары.
- Несанкционированное обслуживание аннулирует гарантию.
- Если продукт имел сбои или был более влажным, не используйте его, пока он не будет отремонтирован профессионалами.
- Изменения, внесенные в технические характеристики или конструкцию, могут не отражаться в данном руководстве.
Условия гарантии
На новый товар, приобретенный в торговой сети Alza.cz, предоставляется гарантия 2 года. Если вам потребуется ремонт или другие услуги в течение гарантийного периода, обратитесь напрямую к продавцу продукта, вы должны предоставить оригинал доказательства покупки с датой покупки.
Следующее считается противоречащим условиям гарантии, в отношении которых заявленная претензия не может быть признана:
- Использование продукта для любых целей, кроме тех, для которых он предназначен, или несоблюдение инструкций по техническому обслуживанию, эксплуатации и обслуживанию продукта.
- Повреждение товара в результате стихийного бедствия, вмешательства постороннего лица или механически по вине покупателя (например, при транспортировке, очистке неподходящими средствами и т.п.).
- Естественный износ и старение расходных материалов или компонентов во время использования (например, аккумуляторов и т. Д.).
- Воздействие неблагоприятных внешних воздействий, таких как солнечный свет и другое излучение или электромагнитные поля, проникновение жидкости, проникновение объекта, перенапряжение в сетиtagе, объем электростатического разрядаtage (включая молнию), неисправность питания или входного напряженияtage и несоответствующая полярность этого томаtagе, химические процессы, такие как использованные источники питания и т. д.
- Если кто-либо внес модификации, модификации, изменения в конструкцию или адаптацию для изменения или расширения функций продукта по сравнению с приобретенным дизайном или с использованием неоригинальных компонентов.
Декларация соответствия ЕС
Идентификационные данные уполномоченного представителя производителя / импортера:
Импортер: Alza.cz как
Зарегистрированный офис: Янковцова 1522/53, Голешовице, 170 00 Прага 7
КИН: 27082440
Предмет декларации:
Тема: Внешняя вспышка
Модель / Тип: V1C
Вышеуказанный продукт был протестирован в соответствии со стандартом (ами), используемым для демонстрации соответствия основным требованиям, изложенным в Директиве (ах):
Директива № 2014 / 53 / EU
Директива № 2011/65/ЕС с поправками 2015/863/ЕС
WEEE
Этот продукт нельзя утилизировать как обычные бытовые отходы в соответствии с Директивой ЕС по утилизации электрического и электронного оборудования (WEEE — 2012/19 / EU). Вместо этого он должен быть возвращен в место покупки или передан в общественный пункт приема вторсырья. Обеспечивая правильную утилизацию этого продукта, вы поможете предотвратить возможные негативные последствия для окружающей среды и здоровья человека, которые в противном случае могли бы быть вызваны ненадлежащим обращением с отходами этого продукта. Свяжитесь с местными властями или ближайшим пунктом сбора для получения более подробной информации. Неправильная утилизация этого типа отходов может привести к штрафам в соответствии с национальными правилами.

Документы / Ресурсы
Рекомендации
Вспышка является одним из важных инструментов в арсенале фотографа. Godox V1 — это новое поколение вспышек с мощными функциями и возможностями. Она обеспечивает более равномерное и естественное освещение при съемке. Однако настройка вспышки может быть сложной задачей для некоторых пользователей. В этой подробной инструкции мы расскажем, как правильно настроить вспышку Godox V1 и достичь отличных результатов в своей работе.
Первым шагом в настройке вспышки является подключение ее к камере. Убедитесь, что камера выключена, прежде чем подключать вспышку. Вставьте контакты вспышки в разъем на верхней части камеры. При этом контакты должны быть тщательно выровнены, чтобы избежать повреждений. Затем включите камеру. Если вспышка успешно подключена, на экране камеры должна появиться иконка вспышки.
После успешного подключения вспышки к камере, необходимо настроить ее параметры. В зависимости от ваших предпочтений и типа съемки, вы можете изменить мощность вспышки, время затвора и другие настройки. Вспышка Godox V1 имеет интуитивно понятный пользовательский интерфейс, который позволяет легко настраивать все параметры. Помните, что правильный выбор настроек определяет качество освещения и яркость фотографий.
В дополнение к основным параметрам, вспышка Godox V1 предлагает различные режимы съемки, такие как TTL, множитель мощности и ручное управление. Каждый из этих режимов имеет свои особенности и предназначен для определенных условий съемки. Исследуйте различные режимы съемки и экспериментируйте с настройками, чтобы найти оптимальные для ваших нужд.
Настройка вспышки Godox V1 может занять некоторое время и требует определенного опыта. Однако, с помощью этой подробной инструкции вы сможете быстро освоить все функции вспышки и достичь профессиональных результатов в своей фотографии. Используйте ее возможности на полную мощность и создавайте потрясающие кадры в любых условиях!
Содержание
- Начало работы: распаковка и подготовка к использованию
- Необходимые настройки перед съемкой
- Работа с основными режимами вспышки
- Функции и возможности Godox V1
Начало работы: распаковка и подготовка к использованию
Перед тем как начать пользоваться вспышкой Godox V1, необходимо правильно распаковать и подготовить ее к работе. В этом разделе мы расскажем вам о необходимых шагах для успешного включения вспышки.
1. Распакуйте коробку с вспышкой Godox V1 и проверьте наличие следующих компонентов:
| — Вспышка Godox V1 | — Батарея | — Зарядное устройство | — Мягкий диффузор | — Инструкция по эксплуатации |
2. Убедитесь, что батарея полностью заряжена. Вставьте ее в соответствующий отсек на задней панели вспышки.
3. Подключите зарядное устройство к вспышке и вставьте его в розетку. Подождите, пока индикатор зарядки не погаснет, что означает полную зарядку батареи.
4. При необходимости прикрепите мягкий диффузор к передней части вспышки. Он поможет рассеять свет и создать более мягкое освещение.
5. Теперь ваша вспышка Godox V1 готова к использованию. Включите ее, нажав кнопку включения на задней панели. Убедитесь, что на дисплее появилась информация о заряде батареи.
Теперь вы можете приступить к настройке и использованию вспышки Godox V1 в соответствии с вашими потребностями.
Необходимые настройки перед съемкой
Перед тем, как приступить к съемке с вспышкой Godox V1, необходимо выполнить несколько важных настроек, чтобы получить оптимальный результат:
| 1. | Установите вспышку на камеру и включите ее. |
| 2. | Установите режим работы вспышки. Вы можете выбрать TTL, Manual или Multi режим в зависимости от ваших предпочтений и съемочной ситуации. |
| 3. | Настройте мощность вспышки. В режиме TTL, вспышка автоматически регулирует мощность, однако в режиме Manual вам нужно будет самостоятельно задать нужную мощность. Вы можете сделать это непосредственно на вспышке или через меню на камере. |
| 4. | Установите синхронизационный режим. В зависимости от типа фотокамеры, у вас могут быть различные варианты синхронизации вспышки. Настройте соответствующий режим на вспышке и камере. |
| 5. | Выберите нужную диафрагму и выдержку на камере в соответствии с условиями съемки. |
| 6. | Подключите аксессуары к вспышке при необходимости. Godox V1 имеет различные аксессуары, такие как диффузоры и соты, которые могут помочь изменить направленность света. |
После выполнения всех необходимых настроек вы будете готовы к съемке с вспышкой Godox V1 и сможете получить качественные и профессиональные фотографии.
Работа с основными режимами вспышки
Вспышка Godox V1 имеет несколько основных режимов работы, которые позволяют настраивать световые эффекты и контролировать вывод вспышки.
Мощность вспышки
Один из основных параметров, которые можно настроить на Godox V1, — это мощность вспышки. С помощью регулировки мощности можно контролировать яркость света, который будет выдаваться вспышкой. Высокая мощность позволяет осветить большие площади, низкая мощность полезна для мягкого и нежного освещения.
Для изменения мощности вспышки необходимо выбрать соответствующий режим настройки на панели вспышки и воспользоваться регулятором мощности.
Режим TTL
Режим TTL (Through The Lens) позволяет вспышке автоматически настраивать мощность на основе измерений, сделанных камерой. В этом режиме вспышка самостоятельно определяет необходимую мощность, исходя из условий съемки. Такой режим удобен, если вам нужно быстро и точно настроить вспышку, не уделяя слишком много времени на ручную настройку.
Для работы в режиме TTL необходимо установить вспышку в соответствующий режим на панели управления или в настройках камеры.
Режим Manual
Режим Manual позволяет полностью контролировать мощность вспышки вручную. В этом режиме вы сами устанавливаете нужную мощность, основываясь на опыте или определенных требованиях съемки. Ручная настройка мощности позволяет более гибко работать с вспышкой и создавать желаемые световые эффекты.
Для работы в режиме Manual необходимо установить вспышку в соответствующий режим на панели управления и воспользоваться регулятором мощности для установки нужного значения.
Функции и возможности Godox V1
1. Беспроводное управление
Благодаря встроенному беспроводному приемнику, Godox V1 может быть контролируема другой вспышкой или передатчиком на расстоянии до 100 метров. Это позволяет создавать сложное освещение без проводов и гибко регулировать мощность вспышки.
2. Вращение и наклон фонаря
Фонарь Godox V1 может вращаться на 330 градусов и наклоняться на 120 градусов в разные стороны. Это позволяет вам точно управлять направлением света, создавать разные эффекты и получать идеальное освещение для каждой ситуации.
3. HSS и TTL-режимы
Godox V1 поддерживает HSS (High-Speed Sync) и TTL (Through-The-Lens) режимы. В режиме HSS вы сможете создавать снимки с высокой скоростью затвора, что позволит вам снимать быстродвижущиеся объекты при ярком солнечном свете. Режим TTL позволяет с легкостью установить правильную экспозицию в любых условиях освещения.
4. Моделирование света
Вспышка Godox V1 имеет встроенный светодиодный модельный свет, который позволяет вам предварительно просматривать эффекты освещения перед съемкой. Это особенно полезно при использовании множества вспышек и создании сложных схем освещения.
5. Быстрая перезарядка
Вспышка Godox V1 оснащена литий-ионным аккумулятором, что позволяет сократить время перезарядки до 1,5 секунды на полную мощность. Это увеличивает скорость работы и позволяет вам делать больше снимков без долгого ожидания.
Godox V1 – мощная и удобная вспышка с большими возможностями, которая станет незаменимым инструментом для фотографов любого уровня.