
instructions) (Original ENGLISH
INSTRUCTION MANUAL
Electric Chain Saw
UC3041A
UC3541A
UC4041A
014315
 DOUBLE INSULATION
IMPORTANT: Read Before Using.
ENGLISH (Original instructions)
SPECIFICATIONS
|
Model |
UC3041A |
UC3541A |
UC4041A |
||||||||
|
Max. chain speed |
14.5 m/s (870 m/min) |
||||||||||
|
Bar length |
300 mm |
350 mm |
400 mm |
||||||||
|
Standard guide bar |
Cutting length |
265 mm |
325 mm |
360 mm |
|||||||
|
Guide bar type |
Sprocket nose bar |
||||||||||
|
Type |
90PX |
91PX |
90PX |
91PX |
90PX |
91PX |
|||||
|
Standard saw chain |
Pitch |
3/8″ |
|||||||||
|
No. of drive links |
46 |
52 |
56 |
||||||||
|
Recommended guide bar length |
300 — 400 mm |
||||||||||
|
Overall length (without guide bar) |
455 mm |
||||||||||
|
Net weight |
4.6 kg |
4.7 kg |
4.7 kg |
||||||||
|
Extension cable (optional) |
DIN 57282/HO 7RN -F L=30 m max.,3×1.5 mm2 |
•Due to our continuing program of research and development, the specifications herein are subject to change without notice.
•Specifications may differ from country to country.
•Weight according to EPTA-Procedure 01/2003
END218-7
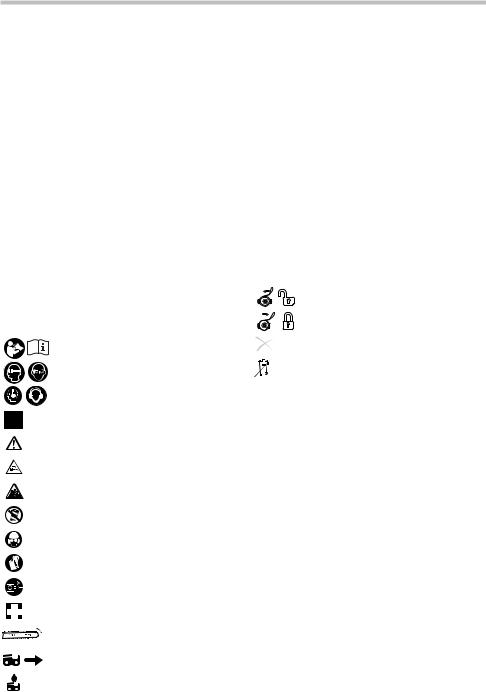
Symbol
The following show the symbols used for the equipment. Be sure that you understand their meaning before use.
Read instruction manual and follow the warnings and safety instructions.
Wear eye protection.
Wear ear protection.
DOUBLE INSULATION
Caution: particular care and attention
required!
Caution: withdraw the mains plug immediately if the cable is damaged!
Caution: kickback!
Protect against rain and damp!
Wear a helmet, goggles and ear protection!
Wear safety gloves!
Withdraw the mains plug!
First aid
Maximum permissible length of cut
Direction of chain travel
Chain oil
Chain brake released
Chain brake applied
Prohibited!
Only for EU countries
Do not dispose of electric equipment together with household waste material!
In observance of the European Directive, on Waste Electric and Electronic Equipment and its implementation in accordance with national law, electric equipment that have reached the end of their life must be collected separately and returned to an environmentally compatible recycling facility.
ENE085-1
Intended use
The tool is intended for cutting lumbers and logs.
ENF002-2
Power supply
The tool should be connected only to a power supply of the same voltage as indicated on the nameplate, and can only be operated on single-phase AC supply. They are double-insulated and can, therefore, also be used from sockets without earth wire.
ENF100-1
For public low-voltage distribution systems of between 220 V and 250 V.
Switching operations of electric apparatus cause voltage fluctuations. The operation of this device under unfavorable mains conditions can have adverse effects
2

to the operation of other equipment. With a mains impedance equal or less than 0.29 Ohms it can be presumed that there will be no negative effects. The mains socket used for this device must be protected with a fuse or protective circuit breaker having slow tripping characteristics.
ENG905-1
Noise
The typical A-weighted noise level determined according to EN60745:
Sound pressure level (LpA) : 90.3 dB (A)
Sound power level (LWA) : 101.3 dB (A)
Uncertainty (K) : 2.5 dB (A)
Wear ear protection
ENG900-1
Vibration
The vibration total value (tri-axial vector sum) determined according to EN60745:
Work mode : cutting wood Vibration emission (ah) : 4.7 m/s2 Uncertainty (K) : 1.5 m/s2
ENG901-1
•The declared vibration emission value has been measured in accordance with the standard test method and may be used for comparing one tool with another.
•The declared vibration emission value may also be used in a preliminary assessment of exposure.
 WARNING:
•The vibration emission during actual use of the power tool can differ from the declared emission value depending on the ways in which the tool is used.
•Be sure to identify safety measures to protect the operator that are based on an estimation of exposure in the actual conditions of use (taking account of all parts of the operating cycle such as the times when the tool is switched off and when it is running idle in addition to the trigger time).
ENH021-8
For European countries only
EC Declaration of Conformity
Makita declares that the following Machine(s):
Designation of Machine: Chain Saw
Model No./ Type: UC3041A, UC3541A, UC4041A Specifications: see «SPECIFICATIONS» table.
Conforms to the following European Directives:
2000/14/EC, 2006/42/EC
They are manufactured in accordance with the following Standard or standardized documents:
EN60745
The Technical file in accordance with 2006/42/EC is available from:
Makita, Jan-Baptist Vinkstraat 2, 3070, Belgium
The conformity assessment procedure required by Directive 2000/14/EC was in Accordance with annex V Measured Sound Power Level: 102.2 dB (A) Guaranteed Sound Power Level: 104 dB (A)
26.4.2013
000331
Yasushi Fukaya
Director
Makita, Jan-Baptist Vinkstraat 2, 3070, Belgium
GEA005-3
General Power Tool Safety Warnings
 WARNING Read all safety warnings and all instructions. Failure to follow the warnings and instructions may result in electric shock, fire and/or serious injury.
Save all warnings and instructions for future reference.
The term «power tool» in the warnings refers to your mains-operated (corded) power tool or battery-operated (cordless) power tool.
Work area safety
1.Keep work area clean and well lit. Cluttered or dark areas invite accidents.
2.Do not operate power tools in explosive atmospheres, such as in the presence of flammable liquids, gases or dust. Power tools create sparks which may ignite the dust or fumes.
3

3.Keep children and bystanders away while 15. Do not overreach. Keep proper footing and
operating a power tool. Distractions can cause you to lose control.
Electrical safety
4.Power tool plugs must match the outlet. Never modify the plug in any way. Do not use any adapter plugs with earthed (grounded) power tools. Unmodified plugs and matching outlets will reduce risk of electric shock.
5.Avoid body contact with earthed or grounded surfaces such as pipes, radiators, ranges and refrigerators. There is an increased risk of electric shock if your body is earthed or grounded.
6.Do not expose power tools to rain or wet conditions. Water entering a power tool will increase the risk of electric shock.
balance at all times. This enables better control of the power tool in unexpected situations.
16.Dress properly. Do not wear loose clothing or jewellery. Keep your hair, clothing, and gloves away from moving parts. Loose clothes, jewellery or long hair can be caught in moving parts.
17.If devices are provided for the connection of dust extraction and collection facilities, ensure these are connected and properly used. Use of dust collection can reduce dust-related hazards.
Power tool use and care
18.Do not force the power tool. Use the correct power tool for your application. The correct power tool will do the job better and safer at the rate for which it was designed.
7.Do not abuse the cord. Never use the cord for 19. Do not use the power tool if the switch does
carrying, pulling or unplugging the power tool. Keep cord away from heat, oil, sharp edges or moving parts. Damaged or entangled cords increase the risk of electric shock.
8.When operating a power tool outdoors, use an extension cord suitable for outdoor use. Use of a cord suitable for outdoor use reduces the risk of electric shock.
9.If operating a power tool in a damp location is unavoidable, use a residual current device (RCD) protected supply. Use of an RCD reduces the risk of electric shock.
10.Use of power supply via a RCD with a rated residual current of 30mA or less is always
recommended. Personal safety
11.Stay alert, watch what you are doing and use common sense when operating a power tool. Do not use a power tool while you are tired or under the influence of drugs, alcohol or medication. A moment of inattention while operating power tools may result in serious personal injury.
not turn it on and off. Any power tool that cannot be controlled with the switch is dangerous and must be repaired.
20.Disconnect the plug from the power source and/or the battery pack from the power tool before making any adjustments, changing accessories, or storing power tools. Such preventive safety measures reduce the risk of starting the power tool accidentally.
21.Store idle power tools out of the reach of children and do not allow persons unfamiliar with the power tool or these instructions to operate the power tool. Power tools are dangerous in the hands of untrained users.
22.Maintain power tools. Check for misalignment or binding of moving parts, breakage of parts and any other condition that may affect the power tool’s operation. If damaged, have the power tool repaired before use. Many accidents are caused by poorly maintained power tools.
23.Keep cutting tools sharp and clean. Properly maintained cutting tools with sharp cutting edges are less likely to bind and are easier to control.
12.Use personal protective equipment. Always 24. Use the power tool, accessories and tool bits
wear eye protection. Protective equipment such as dust mask, non-skid safety shoes, hard hat, or hearing protection used for appropriate conditions will reduce personal injuries.
13.Prevent unintentional starting. Ensure the switch is in the off-position before connecting to power source and/or battery pack, picking up or carrying the tool. Carrying power tools with your finger on the switch or energising power tools that have the switch on invites accidents.
14.Remove any adjusting key or wrench before turning the power tool on. A wrench or a key left attached to a rotating part of the power tool may result in personal injury.
etc. in accordance with these instructions, taking into account the working conditions and the work to be performed. Use of the power tool for operations different from those intended could result in a hazardous situation.
Service
25.Have your power tool serviced by a qualified repair person using only identical replacement parts. This will ensure that the safety of the power tool is maintained.
26.Follow instruction for lubricating and changing accessories.
27.Keep handles dry, clean and free from oil and grease.
4
GEB037-8
Chain saw safety warnings
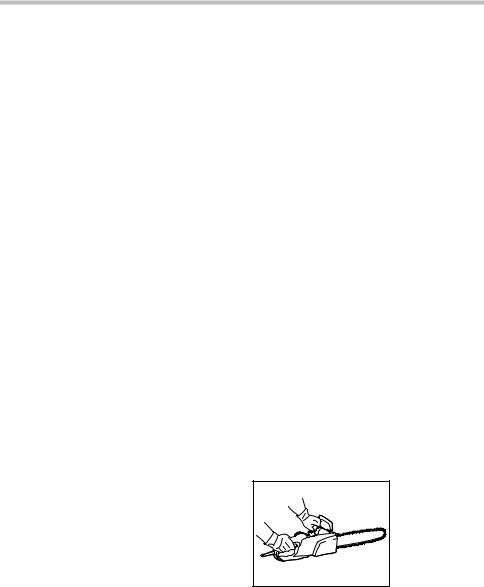
1.Keep all parts of the body away from the saw chain when the chain saw is operating. Before you start the chain saw, make sure the saw chain is not contacting anything. A moment of inattention while operating chain saws may cause entanglement of your clothing or body with the saw chain.
2.Always hold the chain saw with your right hand on the rear handle and your left hand on the front handle. Holding the chain saw with a reversed hand configuration increases the risk of personal injury and should never be done.
3.Hold the power tool by insulated gripping surfaces only, because the saw chain may contact hidden wiring or its own cord. Saw chains contacting a «live» wire may make exposed metal parts of the power tool «live» and could give the operator an electric shock.
4.Wear safety glasses and hearing protection. Further protective equipment for head, hands, legs and feet is recommended. Adequate protective clothing will reduce personal injury by flying debris or accidental contact with the saw chain.
5.Do not operate a chain saw in a tree. Operation of a chain saw while up in a tree may result in personal injury.
6.Always keep proper footing and operate the chain saw only when standing on fixed, secure and level surface. Slippery or unstable surfaces such as ladders may cause a loss of balance or control of the chain saw.
7.When cutting a limb that is under tension be alert for spring back. When the tension in the wood fibres is released the spring loaded limb may strike the operator and/or throw the chain saw out of control.
8.Use extreme caution when cutting brush and saplings. The slender material may catch the saw chain and be whipped toward you or pull you off balance.
9.Carry the chain saw by the front handle with the chain saw switched off and away from your body. When transporting or storing the chain saw always fit the guide bar cover.
Proper handling of the chain saw will reduce the likelihood of accidental contact with the moving saw chain.
10.Follow instructions for lubricating, chain tensioning and changing accessories.
Improperly tensioned or lubricated chain may either break or increase the chance for kickback.
11.Keep handles dry, clean, and free from oil and grease. Greasy, oily handles are slippery causing loss of control.
12.Cut wood only. Do not use chain saw for purposes not intended. For example: do not use chain saw for cutting plastic, masonry or non-wood building materials. Use of the chain saw for operations different than intended could result in a hazardous situation.
13.Causes and operator prevention of kickback:
Kickback may occur when the nose or tip of the guide bar touches an object, or when the wood closes in and pinches the saw chain in the cut.
Tip contact in some cases may cause a sudden reverse reaction, kicking the guide bar up and back towards the operator.
Pinching the saw chain along the top of the guide bar may push the guide bar rapidly back towards the operator.
Either of these reactions may cause you to lose control of the saw which could result in serious personal injury. Do not rely exclusively upon the safety devices built into your saw. As a chain saw user, you should take several steps to keep your cutting jobs free from accident or injury.
Kickback is the result of tool misuse and/or incorrect operating procedures or conditions and can be avoided by taking proper precautions as given below:
−Maintain a firm grip, with thumbs and fingers encircling the chain saw handles, with both hands on the saw and position your body and arm to allow you to resist kickback forces. Kickback forces can be controlled by the operator, if proper precautions are taken. Do not let go of the chain saw.
−Do not overreach and do not cut above shoulder height. This helps prevent unintended tip contact and enables better control of the chain saw in unexpected situations.
−Only use replacement bars and chains specified by the manufacturer. Incorrect replacement bars and chains may cause chain breakage and/or kickback.
5
Should the connecting cable be damaged, withdraw the mains plug immediately.
−Follow the manufacturer’s sharpening and maintenance instructions for the saw chain. Decreasing the depth gauge height can lead to increased kickback.
ADDITIONAL SAFETY RULES
1.Read the instruction manual in order to familiarize yourself with operation of the chain saw.
2.Before using the chain saw for the first time, arrange to have instruction in its operation. If this is not possible, at least practice cutting round timber on a trestle before beginning work.
3.The chain saw must not be used by children or young persons under 18 years of age. Young persons over 16 years of age may be exempted from this restriction if they are undergoing training under the supervision of an expert.
4.Working with the chain saw requires a high level of concentration. Do not work with the saw if you are not feeling fit and well. Carry out all work calmly and carefully.
5.Never work under the influence of alcohol, drugs or medication.
Proper use
1.The chain saw is intended solely for cutting wood. Do not use it for example to cut plastic or porous concrete.
2.Only use the chain saw for operations described in this instruction manual. Do not, for example, use it to trim hedges or for similar purposes.
3.The chain saw must not be used for forestry work, i.e. for felling and limbing standing timber. The chain saw cable does not provide the operator with the mobility and safety required for such work.
4.The chain saw is not intended for commercial use.
5.Do not overload the chain saw.
Personal protective equipment
1.Clothing must be close-fitting, but must not obstruct mobility.
2.Wear the following protective clothing during work:
•A tested safety helmet, if a hazard is presented by falling branches or similar;
•A face mask or goggles;
•Suitable ear protection (ear muffs, custom or mouldable ear plugs). Octave brand analysis upon request.
•Firm leather safety gloves;
•Long trousers manufactured from strong fabric;
•Protective dungarees of cut-resistant fabric;
•Safety shoes or boots with non-slip soles, steel toes, and cut-resistant fabric lining;
•A breathing mask, when carrying out work which produces dust (e.g. sawing dry wood).
Protection against electric shock
The chain saw must not be used in wet weather or damp environments, as the electric motor is not waterproof.
1.Only plug the saw into sockets in tested electrical circuits. Check that the system voltage matches that on the rating plate. Ensure that a 16 A line fuse is fitted. Saws used in the open air must be connected to a residual current-operated circuitbreaker with an operating current no higher than 30 mA.
Safe working practices
1.Before starting work, check that the chain saw is in proper working order and that its condition complies with the safety regulations. Check in particular that:
•The chain brake is working properly;
•The run-down brake is working properly;
•The bar and the sprocket cover are fitted correctly;
•The chain has been sharpened and tensioned in accordance with the regulations;
•The mains cable and mains plug are
undamaged;
Refer to the «CHECKS » section.
2.Always ensure in particular that the extension cable used is of adequate cross-section (see «SPECIFICATIONS»). When using a cable reel, wind the cable completely off the reel. When using the saw in the open air, ensure that the cable employed is intended for open-air use and is rated accordingly.
3.Keep the cord away from the cutting area and to position cord so that it will not be caught on branches, and the like, during cutting.
4.Do not operate the chain saw in the vicinity of flammable dust or gases, as the motor generates sparks and presents a risk of explosion.
5.Work only on firm ground and with a good footing. Pay particular attention to obstacles (e.g. the cable) in the working area. Take particular care where moisture, ice, snow, freshly cut wood or bark may make surfaces slippery. Do not stand on ladders or trees when using the saw.
6.Take particular care when working on sloping ground; rolling trunks and branches pose a potential hazard.
7.Never cut above shoulder height.
6
 Loading…
You can only view or download manuals with
Sign Up and get 5 for free
Upload your files to the site. You get 1 for each file you add
Get 1 for every time someone downloads your manual
Buy as many as you need
Код: 48690
17 120
рублей
Бесплатная доставка
по Красноярску
?
в наличии
в Красноярске
Новости интернет-магазина «Лаукар»:
Дополнительная информация в категории Цепная пила:
В интернет-магазине бытовой техники «Лаукар» Вы можете скачать инструкцию к товару Цепная пила Makita UC 4041А совершенно бесплатно.
Все инструкции, представленные на сайте интернет-магазина бытовой техники «Лаукар», предоставляются производителем товара.
Перед началом использования товара рекомендуем Вам ознакомиться с инструкцией по применению.
Для того чтобы скачать инструкцию, Вам необходимо нажать на ссылку «скачать инструкцию», расположенную ниже, а в случае, если ссылки нет,
Вы можете попробовать обратиться к данной странице позднее,
возможно специалисты интернет-магазина бытовой техники «Лаукар» еще не успели загрузить для скачивания инструкцию к товару:
Цепная пила Makita UC 4041А.

Фирма-производитель оставляет за собой право на внесение изменений в конструкцию, дизайн и комплектацию товара: Цепная пила Makita UC 4041А. Пожалуйста, сверяйте информацию о товаре с информацией на
официальном сайте компании производителя.
Узнавай о новинках и акциях первым
Вы успешно зарегистрированы на сайте.
Вам доступен личный кабинет пользователя.
Перейти к покупкам
Ваш пароль воcстановлен!
Теперь вы можете полноценно пользоваться
всеми возможностями нашего интернет-магазина.
Здравствуйте, Ваша претензия принята и зарегистрирована.
В течение 3-х рабочих дней Вам, на электронную почту, будет дан письменный ответ. В случае возникновения дополнительных вопросов, менеджер претензионного отдела свяжется с Вами.
Перейти к покупкам

Ваше сообщение об ошибке на сайте успешно отправлено.
Большое спасибо!
Добавить отзыв о магазине
Торг для данного товара сейчас не возможен!
Сколько вы готовы заплатить за этот товар?
Введите ваше ценовое предложение
Мы согласны с вашим предложением
Мы принимаем вашу цену, и вы можете купить товар по цене:
0 руб.
-
Страница 1
GB Electric Chain Saw Instruction manual F T ronçonneuse Électrique Manuel d’instructions D Elektro-Motor säge Betriebsanleitung I Motosega elettrica Istr uzioni per l’uso NL Elektrisc he ketting zaa g Gebruiksaanwijzing E Electrosier r a Manual de instr ucciones P Motosser ra Elétrica Manual de instr uções DK El-kædesav Br ugsan visning[…]
-
Страница 2
2 1 014316 2 006909 3 006919 4 014317 1 2[…]
-
Страница 3
3 5 014318 6 014342 7 014324 3 4 5 6 7 8 9 16 18 10 11 13 15 17 14 12 19 20 10 11 12[…]
-
Страница 4
4 8 014323 9 014422 10 014325 11 014326 12 014678 13 014343 14 014359 15 014320 21 22 8 24 23 22 25 26 12 9 8 10 11 29 28 19 27 16 4[…]
-
Страница 5
5 16 010373 17 006921 18 014330 19 014331 20 014438 21 014332 22 014341 23 014333 Reclaimend oil 5 30 7 31 32 7 32 31 14 15[…]
-
Страница 6
6 24 006914 25 006915 26 014334 27 006917 28 006918 29 006923 30 009202 31 006924 A B A B 45 o 2 1 / 2 45 o 33 34 35 35 36 36[…]
-
Страница 7
7 32 014335 33 014338 34 006927 35 006928 36 014344 37 006930 38 014357 39 006932 39 37 37 37 38 38 40 40 30 41 42 21[…]
-
Страница 8
8 ENGLISH (Origina l instructions) Explanati on of general view SPECIFICA TIONS • Due to our continuing program of research and developme n t, the specifications herein are subject to change without notice. • Specifications may d iffer from cou ntry to coun try . • Weight according to EP T A-Procedure 01/2003 Symbol END218-7 The following sho[…]
-
Страница 9
9 ……… …… Only for E U countrie s Do not dispose of electric equi pment together with household waste materi al! In observance of the Europ ean Directive, on Wa ste Electric and Electronic Equipment and its imple m entation in accordance with national law , electric equipment that have reached th e end of their life must be colle cted sepa[…]
-
Страница 10
10 – Do not overreach and do not cut above shoulder height. This helps pre vent unintended tip contact and enab les better control of the chain saw in unexpected situations. – Only use replacement bars and chains specified by the manufacturer . Incorrect replacement bars and chains may cause chain breakage and/or kickback. – Follow the manufa[…]
-
Страница 11
11 14. Use a secure suppor t (trestle) when cutting sawn timber. 15. Do not use the chain sa w to prise off or brush away pieces of wood and other objects. 16. Guide the chain saw such that no part of your body is within the extended p ath of the saw chain (see figure). (Fig. 2 ) 17. When moving around between sawing operations, apply the chain bra[…]
-
Страница 12
12 follow the sa fety rules stated in this instruction manual may cause serious personal injury . DESIGNA TION OF P ARTS (Fig. 5) ASSEMBL Y CAUTION: • Always be sure that th e tool is switched off and unplugged before carrying out any work on the tool. Removing or installing saw chain CAUTION: • Always wear gloves when installing or removing th[…]
-
Страница 13
13 emptied, add oil up to the bo ttom edge o f the filler neck. The oil delivery may otherwise be impaire d. T o fill the oil, perform the following steps: (Fig. 18) 1. Clean the area aro und the oil filler cap thoroughly to prevent any dirt f rom entering the oil t ank. 2. Unscrew the oil filler cap and ad d oil up to the lower edge of the filler […]
-
Страница 14
14 CAUTION: • If the upper edge of the bar is used for cutti ng, the chain saw may be deflected in your directio n if the chain becomes trapped. For t his reason, cut with the lower edge, so that the saw will be def lected away from your body . (Fig. 2 4) Cut wood under tension on the pressure side (A ) first. Then make the final cut on the tensi[…]
-
Страница 15
15 – The cutting edge is obviously damaged; – The saw pulls to the left or right in the wood. The reason for this behavior is uneven sharpenin g of the saw chain, or damage to one sid e only . Sharpen the saw chain frequently , but remove onl y a little materi al each time. T wo or three strokes with a file are usually suf ficient for routine r[…]
-
Страница 16
16 Before returning the ch ain saw to service, fill up with fresh BIOTOP saw chain oil. T o maintain product SAFETY and RELIABIL ITY , repairs, carbon brush inspection and replacement, any other maintenance or adjustment shou ld be performed by Makita Authorized Service Centers, alwa ys using Makita replacement part s. TROUBLE SHOOTING Before askin[…]
-
Страница 17
17 For European countries only ENH021-8 EC Declaration of Conformity Makit a declares that the following Machine(s): Designation of Machine: Chain Saw Model No./T ype: UC3041A, UC3541A, UC4041A S pecifications: see “SPECIFICA TIONS” table. Conforms to the following European Directives: 2000/14/EC, 20 06/42/EC They are manufactured in acco rdanc[…]
-
Страница 18
18 FRANÇAIS (Instructions d’origine) Descriptif SPÉCIFICA TIONS • Étant donné l’évolutio n constante de notre programme de recherche et de développ ement , les spécifications contenues dans ce manuel sont sujet tes à des modifications sans préavis. • Les spécifications peuvent varie r suivant les pays. • Poids conforme à la pro[…]
-
Страница 19
19 ………. Frein de chaîne de sserré ………. Frein de chaîn e serré …………. … Interdit ! …………… Pour les p ays européens uniquement Ne pas jeter les app areils électriques dans les ordures ménagères ! Conformément à la directive e uropéenne relative aux déchet s d’équipements électriques et électro niques (DE[…]
-
Страница 20
20 Un choc en retour peut se produire lorsque le nez ou la pointe du guide-chaîne touche un obj et ou lorsque le bois se resserre et pince la chaîne lors de la coupe. Dans certains cas, le contact avec la pointe peut entraîner une réactio n inverse soudaine, renvoyant le guide-chaîn e vers le haut, puis vers l’opérateur . Si vous p incez la[…]
-
Страница 21
21 Habitudes de travail sûres 1. A vant de commencer votre travail, assurez-vous que la tronço nneuse est en bon ét at de fonctionnement et conforme au x règlements de sécurité. Assurez-vous tout part iculièrement que : • Le frein de chaîne fonctio nne correctement ; • Le frein de mise hors tension fo nctionne correctement ; • Le guid[…]
-
Страница 22
22 OFF). Cela empêche la chaîne de tourne r après sa mise hors tension, ce qui présente un danger . – Les carters de protection des poignées avant et arrière protège nt l’utilisateur des blessures que peuvent causer une pièce de bois projetée vers l’arrière ou le bris de la chaîne. – Le verrou de la gâchette empêche la mise sou[…]
-
Страница 23
23 1 1. Placez le carter du p ignon de sorte que les crochet s s’insèrent le long des orifices et que la broche s’adapte sur sa p artie correspondante sur le carter du pignon. (Fig. 10) 12. T ournez le levier dans le sens horaire pour fixer le carter du pi gnon. (Fig . 1 1) 13. Appuyez sur le levier et re met tez-le dans sa positio n initiale.[…]
-
Страница 24
24 VÉRIFICA TIONS Avant de commencer votre travail, procédez aux vérifications suivantes : Vérification de la tension de la c haîne A VERTISSEMENT : • Débranchez toujours l’outil avant de vérif ier la tension, et portez des gant s de travail. Assurez-vous que la chaîne s’ adapte parfaitement contre le côté inférieur du guide (voir […]
-
Страница 25
25 A TTENTION : • Si le bord supérieur du guide-chaîne est ut ilisé pour la coupe, la tro nçonneuse risque de rebondir dans votre direction si la chaîne se co ince. Pour cet te raison, vous devez couper avec le bord inférieur , de sorte que la tronçonneuse rebondisse en s’éloignant de votre corp s. (Fig. 24) Coupez d’abord le boi s pa[…]
-
Страница 26
26 Nettoyage de la tronçonneuse Nettoyez régulièrement la tronçonn euse avec un chiff on propre. Les poignées, en pa rticulier , doivent toujours être exempt es d’huil e. Vérification du car ter en plastique Procédez régulièrement à l’inspection visuelle de toutes les pièces du carter . Si des pièces sont endommagées, faites-les r[…]
-
Страница 27
27 A TTENTION : • Utilisez exclusivement des chaînes et guide-chaînes approuvés pour ce modèle de tronçonneuse (reportez- vous à « SPÉCIFI CA TIONS »). Avant de poser une chaîne neu ve, vérifier l’état du pignon. (Fig. 39) A TTENTION : • Un pignon usé endommagera la chaîne neuve. Remplacez le pignon s’il est usé. Lorsque vous[…]
-
Страница 28
28 • Jauge de chaîne • Lime ronde de 4,0 mm • Lime ronde de 4,5 mm • Lime plate • Porte -lime avec lime de 4,0 mm • Porte -lime avec lime de 4,5 mm • Poignée de lime • Huile de chaîne • Graisse multi-usage • Pistolet graisseur REMARQUE : • Certains élément s de la liste peuvent être inclus en t ant qu’accessoires stand[…]
-
Страница 29
29 DEUTSCH (Origina lanweisunge n) Erklärung der Gesamtdarstellung SPEZIFIKA TIONEN • Aufgrund unserer bestän digen Forschungen und Weiterentwicklungen si nd Änderungen an den hier angegebenen T echnischen Daten ohne V orankündigung vorbehalten. • Die T echnischen Daten können in de n einzelnen Ländern voneinander abweichen. • Gewicht e[…]
-
Страница 30
30 ………. Kettenbremse aktiviert …………. … V erboten! ………… … Nur für EU-Lände r Werfen Si e Elektrowerkzeuge nicht in den Hausmüll! Gemäß der Europäischen Richtlinie über Elektro- und Elektronik-Altg eräte und ihrer Umsetzung in nationales Recht müssen verbrauchte Elektrowerkzeuge getrennt gesammelt und einer umweltge[…]
-
Страница 31
31 13. Ursachen für Rückschläge und geeignet e V orkehrungen: Wenn die Nase oder die S pitze der Führungsschien e ein Objekt berührt oder wenn sich das Holz in den Schnitt biegt und d ie Sägekette einklemmt, kann es zu einem Rückschlag kommen. Wenn die S pitze mit Gegenstände n in Berührung kommt, kann es zu einer plötzlichen Bewegungsumk[…]
-
Страница 32
32 Sicheres Arbeiten 1. V or Arbeits beginn sicherstellen, dass die Motorsäge einwandfrei funkt ioniert und deren Zusta nd den Sicherheitsbest immungen entspricht. S tellen Sie insbesondere si cher, dass: • die Kettenbremse ordnungsgemäß funktioniert, • die Auslaufbremse ordnungsgemä ß funktioniert, • die Schiene und der Kettenr adschutz[…]
-
Страница 33
33 geschleuderte Holzstücke oder durch eine ger issene Sägekette. –D i e Schalterverriegelung verhinde rt ein unbeabsichtigtes Ei nsch alten der Motorsäge. –D e r Kettenfä nger schützt den Bediener vor V erletzungen, die durch eine abg esprungene oder gerissene Kette ent stehen können. T ranspo rt und Lagerung Bei Nichtgebrauch oder zum T[…]
-
Страница 34
34 9. Richten Sie die Zugseit e mit der Öffnung auf der Führungsschiene aus. (Abb. 9) 10. Halten Sie die Führu ngsschiene und drehen Sie das Einstellrad in „+“ Richtung, um die Sägekettensp annung zu regulieren. 1 1. Positionieren Sie den Kettenradschutz so, dass die Haken in die Öffnu ngen passen und der S tift in sein Gegenstück auf dem[…]
-
Страница 35
35 HINWEIS: • Bei der ersten Inbetriebnah me der Motorsäge kann es bis zu zwei Minuten dauern, bis das Sägekettenöl beginnt, die Sägevorr ichtung zu schmieren. Lassen Sie die Säge so lange ohne Last laufen (siehe „PRÜFUNGEN“). PRÜFUNGEN Führen Sie vor Arbeitsbe ginn die folgenden Prüfungen durch: Überprüfung d er Kettenspannung W A[…]
-
Страница 36
36 Zackenleiste tiefer ansetzen und er neut den vorderen Griff hochzie hen. Wenn Sie mehre re Schnitte durchführen, schalten Sie di e Motorsäge zwischen den Schnitten aus. ACHTUNG: • Beim Sägen mit der Schienenober seite kann die Säge in Ihre Richtung ausschl agen, wenn die Sägekette einklemmt. Deshalb sollten Sie mit de r Schienenunterseite[…]
-
Страница 37
37 Überprüfen des Kun st stoffgehä uses Führen Si e regelmäß ig eine Sichtp rüfung all er Gehäuseteil e durch. Lassen Sie beschädigte T eile sofort und ordnungsgemäß in von MAKIT A autorisierten Service centern reparieren. Schärfen der Säg ekette ACHTUNG: • Bei allen Arbeiten an der Säge kette unbedingt den Netzstecker ziehen und Sc[…]
-
Страница 38
38 W artung der Ketten- und Ausl aufbremse Die Bremssysteme sind sehr wich tige Sicherheit seinrichtungen. Wie alle anderen T eile der Motorsäge unterliegen sie eine m gewissen V erschleißgrad. Sie müssen regelmäßig von MAKIT A autorisierten Servicecent ern überprüft werden. Diese Maßnahme dient Ihrer persönlichen Sicherh eit. Aufbewahrung[…]
-
Страница 39
39 • Rundfeile 4,0 mm • Rundfeile 4,5 mm • Flachfeile • Feilenhalter mit 4,0 mm Feile • Feilenhalter mit 4,5 mm Feile • Feilengriff • Sägenkettenöl • Mehrzweckfett •F e t t p r e s s e HINWEIS: • Einige der in der Liste aufgef ührten Elemente sind dem Werkzeugpaket als St andardzubehör beigefügt. Diese können in den einzel[…]
-
Страница 40
40 IT ALIANO (Istruzioni originali) Spiegazione della vista generale SPECIFICHE TECNICHE • Le caratteristiche t ecniche riportate di seguito sono so ggette a modifiche senza preavvi so in virtù del nostro programma continuo di ricerca e sviluppo. • Le caratteristiche tecniche po ssono differire da paese a p aese. • Peso determinato in confor[…]
-
Страница 41
41 ………. Freno catena inn estato …………. … Vietato! ………… … Solo per Pa esi UE Non gettare le apparecchiature elettri che tra i rifiuti domestici. Secondo la Direttiva Europea sui rifiuti di apparecchiat ure elettriche ed elettroniche e la sua attuazione in co nformità alle norme nazionali, le appa recchiature elettriche esau[…]
-
Страница 42
42 quando il legno si richiude e intrappola la catena all’interno del t aglio. In alcuni casi il contatt o della punta potrebbe provocare un improvviso movimento inverso, sollevando la barra di guida e colpend o l’operatore. L ’incastramento della catena lungo l’estr emità della barra di guida potrebbe sp ingere velocemente la barra di gui[…]
-
Страница 43
43 2. V erificare, ne llo specifico, che il cavo della prolunga utilizzat a sia della sezione adeguat a (vedere la sezione “SPECIFICHE TECNICHE”). Se si usa un avvolgicavo, sroto lare totalmente il cavo. Per ut ilizzare la sega all’aperto, verificare che il cavo impiegato sia adatto all’uso per esterni e abb ia la portata adeguata . 3. T en[…]
-
Страница 44
44 Manutenzio ne 1. Estrarre la sp ina dalla presa di corrente prima di eseguire qualsiasi intervento di regolazion e o manutenzione. 2. Controllare con regolarità che il ca vo di alimentazione sia sempre ben isolato. 3. Pulire la motosega con regolarità. 4. Far ri parare immediatament e e in modo adeguato l’alloggiamento in plastica. 5. Non ut[…]
-
Страница 45
45 5. Premere e riport are la leva nella posizione di part enz a. (Fig. 13) Accertarsi che la caten a della sega sia ben collocata contro il lato inferiore della barra. A TTENZIONE: • Non serrare troppo la ca tena. Una tensione eccessiva può provocare la rottura della catena , l’usura della barra di guida e la rottura della ghier a di regolazi[…]
-
Страница 46
46 Non tirare con forza l’inte rruttore senza aver prima premuto la sicu ra di accens ione. In caso contrario, l’interruttore potre bbe rompersi. V erifica del freno catena NOT A: • Se la motosega non si avvia, è necessario disinnest are il freno catena. Per allent are il freno catena, tirare il paramano con fo rza all’indietro fino allo s[…]
-
Страница 47
47 Abbattimento A TTENZIONE: • L ’abbattimento deve essere eseguito solo da personale preparato, poiché si tratta di un’operazione pericolosa. Per l’abbattimento di un albero , osservare i regolamenti nazionali vigenti. (Fig. 27) – Prima di iniziare l’abbattimento, verificare che: (1) Nell’area di lavoro siano presenti solo gli addet[…]
-
Страница 48
48 AV V E R T E N Z A : • Una distanza eccessiva accresce il rischio di contraccolpo. – L ’angolo di affilatura di 30° deve essere ugu ale per tutte le lame. Eventuali dif ferenze di angolatura provocano un funzionamen to irregolare dell’utensile, maggiore usura e più frequenti rottur e della catena. – L ’angolo di inclinazione latera[…]
-
Страница 49
49 problema non specificato nel manuale , non tentare di smontare l’uten sile. Rivolgersi invece ai centri di assistenza autorizzati Makit a. 014314 ACCESSORI OPZIONALI A TTENZIONE: • Si consiglia l’uso dei seguenti accessori per l’ut ensile Makita descritto in questo manuale. L ’uso di qualsiasi altro accessorio potrebb e provocare lesio[…]
-
Страница 50
50 periodi in cui rimane inattivo, oltre al tempo di avviamento). Solo per i paesi europei ENH021-8 Dichiarazione di conformità CE Makit a dichiara che le macchine seguenti: Denominazione dell’uten sile: Motosega N. modello/T ipo: UC3041A, UC3541A, UC4041A Caratteristiche tecniche: vedere la tabella “SPECIFICHE TECNICHE”. sono conformi alle […]
-
Страница 51
51 NEDERLANDS (Origine le instructies) V erklaring van het onderd elenoverzicht TECHNISCHE GEGEVENS • Als gevolg van ons doorlopende onderzoeks- en ontwik kel ingsprogramma, zijn de technische gegeven s van dit gereedschap onderhevig aan ve randeringe n zonder voorafgaande kennisgeving . • De technische gegevens kunnen van land tot land verschi[…]
-
Страница 52
52 ………. Kettingr em vastgezet …………. … V erboden! ………….. . Alleen voor EU-landen Geef elektrisch gereedschap niet met het huisvuil mee! V olgens de Europe se richtlijn inzake oude elektrisch e en elektronische apparaten en de to epassing daarvan binnen de nationale wetgeving, dien t gebruikt elektrisch gereedschap gescheiden […]
-
Страница 53
53 hout zich sluit en d e zaagketting in de zaagsnede vastklemt. Zagen met alleen de punt van het za agblad kan een plotselinge, omgekeerde reactie veroorzaken waardoor het zaagblad o mhoog geworpen wordt in de richting van de gebr uiker . Het beknellen van de zaagketting langs de bovenrand van het zaagblad kan het zaagblad snel terugwerpe n in de […]
-
Страница 54
54 en dat deze voldoet aan de veiligheidsregels. Controleer met name dat: • De kettingrem go ed werkt; • De uitloopre m goed werkt; • Het zaagblad en de afdekking van het kett ingwiel goed zijn gemonteerd; • De ketting is g eslepen en gespannen overeenkomstig de regels; • Het netsn oer en de stekker niet beschadigd zijn; Raadpleeg het hoo[…]
-
Страница 55
55 kunnen worden geworpen, of do or een gebroken zaagketting. –D e uit-vergrendeling voorkomt dat de kettingzaag per ongeluk wordt ingeschakeld. –D e kettingvanger beschermt de gebruiker tegen verwonding in het ge val dat de ketting springt of breekt. V ervoer en op slag W anneer de kettingzaag niet in gebruik is of wordt vervoerd , trekt u de […]
-
Страница 56
56 12. Draai de hendel recht som om de afdekking van het kettingwiel vast te zetten (zie afb. 1 1) . 13. Duw de hendel omlaag naar zijn oorspronkel ijke stand. De kettin gspanni ng instellen De zaagketting kan na vele gebruiksuren los gaan zitten. Controleer regelmatig de kettingsp anning vóór gebruik. 1. Duw de hendel omhoog to t hij volledig is[…]
-
Страница 57
57 Controleer of de zaagketting goed langs d e onderkant van het zaagblad loopt (zie cirkel) (zie afb. 12) . Controleer de ket tingspanning veelvuldi g omdat een nieuwe ketting door gebruik langer wo rdt. Door een buitensporig hog e kettingspanning kan de zaagketting breken, het zaagblad slijt en en de stelknop afbreken. Een te slappe zaagkettin g […]
-
Страница 58
58 trekkracht (B). Hiermee voorko mt u dat het zaagblad bekneld raakt (zie afb. 25) . T akken a fzagen LET OP: • T akken afzagen mag uit sluitend worden uitgevoerd door opgeleide perso nen. Door het risico van terugslag kan een gevaarlijke situatie ont staan. Ondersteun bij h et afzagen van takken zo mogelijk de kettingzaag op de boomstam. Zaag n[…]
-
Страница 59
59 beschadigd is, laat u dit onmiddellijk op de juiste wijze repareren door een erkend MAKIT A-servicecentrum. De zaagketting slijpen LET OP: • T rek altijd de stekker uit het stopcontact en draag veiligheidshandschoenen bij het uitvoeren va n werkzaamheden aan de zaagke tting. Slijp de zaagketting als (zie afb. 31): – Poederachtig zaagsel word[…]
-
Страница 60
60 De kettingrem en uitlooprem onderhouden De remmen zijn uiterst bela ngrijke veiligheidsvoorzieni ngen. Net als ieder ander onderdeel van de kettingzaag zijn de remmen onderhevig aan e en bepaalde mate van slijtage. Ze moeten rege lmatig worden geïnspecteer d door een erkend MAKIT A-servicecentrum. Deze maatregel is voor uw eigen veiligheid. Het[…]
-
Страница 61
61 • Vijlhouder me t vijl van 4,0 mm • Vijlhouder me t vijl van 4,5 mm • Vijlhandvat • Zaagkettingolie • Universeelvet • V etspuit OPMERKING: • Sommige items op de lijst kun nen zijn inbegrepen in de doos van het ge reedschap als standaard t oebehoren. Zij kunnen van land tot land verschillen. Geluid ENG905-1 De typische, A-gewoge n g[…]
-
Страница 62
62 ESP AÑOL (Instruc ciones originales ) Explicación de los dibujos ESPECIFICACIONES • Debido a nuestro programa conti nuo de investigación y desar rollo, las especificaciones aquí descritas están su jetas a cambios sin previo aviso. • Las especificaciones puede n ser diferentes de un país a ot ro. • Peso de acuerdo con el procedimiento[…]
-
Страница 63
63 ………. Freno de la cadena aplicado …………. … Prohibido. ………… … Sólo para países de la Unión Europ ea ¡No deseche los aparatos eléctricos junto con los residuos domésticos! De conformidad con la Directiva Europea sobre residuos de ap ar atos eléctricos y electrónicos y su aplicación de acuerdo con la legislación na[…]
-
Страница 64
64 El contragolpe se puede producir cuando el extr emo o la punta de la barr a de guía toca un objeto o cuando la madera se cierra y atrapa la cadena de la sierr a en el corte. En algunos casos, el contacto de la punt a puede provocar una repent ina reacción inversa, empujando la barra de guía hacia arriba y hacia atrás, hacia el operario. Si l[…]
-
Страница 65
65 • El freno de detención funciona correct amente. • La barra y la cubierta de la rued a dentada están instaladas correct amente. • La cadena se ha afilado y tensado de acue rdo con las normas. • El cable y el enchufe de la toma de corriente no están dañados. Consulte la sección “COMPROBACIONE S”. 2. En concreto, compru ebe siempr[…]
-
Страница 66
66 T ransporte y almacenamiento Cuando no utilice la sierra o cuand o la transporte, desenchufe la herramient a de la toma de corriente y proteja la sier ra con la cubierta d e la barra de guía suministra da. Nunca transporte la sierra con la cadena de la sierra en funcionamiento . 1. T ransporte la sierra sujetándol a únicamente por el mango fr[…]
-
Страница 67
67 Ajuste de la tensión de la cade na de la sierra La cadena de la sierra puede aflojarse despué s de muchas horas de uso. Revise periódicamente la tensión de la cadena de la sierra antes de utiliza rla. 1. Pulse y abra co mpletamente la palanca hast a que oiga un chasquido. Gírela un poco en el sentido contrario a las agujas del reloj p ara a[…]
-
Страница 68
68 Compruebe la tensión de la cadena ADVERTENCIA: • Desenchufe siempre la herramie nta de la toma de corriente antes de comprobar la te nsión de la cadena y póngase guantes de segurid ad. Asegúrese de que la cadena de la sierra se ajuste perfectamente cont ra el lado inferior de la barra (vea el círculo). (Fig. 12) Compruebe con frecuencia l[…]
-
Страница 69
69 PRECAUCIÓN: • Si utiliza el borde superior de la barra p ara cortar , la sierra podría desviarse en dirección hacia usted si la cadena queda atrap ada. Por este motivo, corte con el borde inferior , de forma que l a sierra se desvíe lejos de su cuerpo. (F ig. 24) Si se trat a de madera sometida a tensión, corte primero el lado bajo presi?[…]
-
Страница 70
70 Limpieza de la sie rra Limpie la sierra regularmente co n un trapo limpio. Los mangos, en concreto, no deben ensuciar se de aceite. Comprobación de l alojamiento de plástico Realice regularmente inspecciones visuales de toda s las piezas del alojami ento. Si cualquier pieza está dañada, haga que se rep are inmediatamente y de forma correcta […]
-
Страница 71
71 PRECAUCIÓN: • Utilice solamente cadenas y barras aprobadas para este modelo de sierra (consulte “ESPECIFICACIONES”). Antes de inst alar una nueva cadena de la sierra, compruebe el est ado de la rueda dentada. (Fig. 39) PRECAUCIÓN: • Si la rueda dentada está desgastada, podría dañar la nueva cadena de la sierra. En este caso, sustitu[…]
-
Страница 72
72 ACCESORIOS OPCIONALES PRECAUCIÓN: • Se recomienda el uso de estos accesorios o complementos con la herra mienta Makita especificada en este manual. El uso de otros acceso rios o complementos puede conllevar el riesgo de ocasionar daños corporales. Utilice los accesorios o complementos solamente para su fin establecido. Si necesita cualquier […]
-
Страница 73
73 PORTUGUÊS (Instr uções de origem) Descrição geral ESPECIFICAÇÕES • Devido à pesquisa e desenvolvi mento cons tantes, esta s especif icações estão sujeitas a al teração sem aviso prévio. • Estas especifi cações podem diferir de p aís para pa ís. • Peso de acordo com procedimento EP T A de 01/2003 Símbolo END218-7 Descriç[…]
-
Страница 74
74 ………… … Apenas para países d a UE Não deite equipamentos eléct ricos no lixo doméstico! De acordo com a directiva europeia sobre ferramentas eléctricas e electrónicas usadas e a sua aplicação para as leis naciona is, as ferrament as eléctricas usadas dev em ser recolhidas em separado e encaminhadas a uma instalação de recicla[…]
-
Страница 75
75 manter os t rabalhos de corte livres de ferimentos ou acidentes. O coice é o resultado da má utilização da ferra menta e/ou procedimentos de funcion amento incorrectos, podendo ser evit ado tomando as devidas precauções, tal co mo indicado em baixo: – Mantenha um punho firme, com os p olegares e os dedos a envolver as pegas da motosserra[…]
-
Страница 76
76 4. Não utiliz e a motosserr a perto de pó ou gases inflamáveis, uma vez que o motor gera faíscas e representa um ri sco de explosão . 5. T rabalhe apenas em solo firme e com um bom apoio. T ome especial ate nção aos obstáculos (por exemplo , o cabo) na zona de trabalho. T ome especial cuidado nas situações em que a humidade, gelo, neve[…]
-
Страница 77
77 7. Não efectue qua lquer trabalho de manutenção ou reparação al ém do descrito neste manual de instruções. Qualquer outro pr ocedimento deve ser efectuado pelos ce ntros de assistência autorizados. 8. Apenas utilize peças e aces sórios genuínos que se destinem ao seu modelo de serra. A utilização de outras peças au menta o risco d[…]
-
Страница 78
78 • Efectue o procedimen to de instalação ou remoção da corrente da serra num local limpo sem serrim e materiais semelhantes. Engatar o cabo de extensão PRECAUÇÃO: • Certifique-se de que o cabo da extensão e stá desligado da corrente. (Fig. 14) Ao engatar o ca bo de extensão, prenda-o ao cabo da motosserra com o gancho do cabo. Prend[…]
-
Страница 79
79 1. Segure na mo tosserra com ambas as mãos quando a ligar . Segure na pega trasei ra com a mão direit a e a pega dianteira com a esquerda. Cert ifique-se de que a barra e a corrente não entr am em contacto com qualquer objecto. 2. Prima primeiro o bot ão de bloqueio e, de seguida, o gatilho. A corrente da serra começa imedi atamente a funci[…]
-
Страница 80
80 (2) Qualquer pe ssoa envolvida possui um caminho de retirada sem obstáculos num ângulo de cerca de 45° em relação a qualquer eixo do abate. Considere o risco adicional de t ropeçar em cabos eléctricos; (3) A base do tronco está livre de objectos estranhos, raízes e ramos; (4) Não existem pessoas ou obje ctos presentes a uma distância […]
-
Страница 81
81 com que a corrente funcione de forma irr egular, aumenta o d esgaste e pode fazer quebr ar a corrente. – O ângulo da chapa lateral do cort ador é determinado pela profundidade da penetr ação da lima redonda. Se a lima especificada for utiliza da correctamente, o ângulo da chap a lateral correcto é produzido automaticamente. – O ângulo[…]
-
Страница 82
82 RESOLUÇÃO DE PROBLEMAS Antes de pedir repara ções, efectue primeiro a sua própria inspecção. Se encont rar um problema que não é explicado no manual, não tente desmontar a ferramenta. Em vez disso, consulte os centros de assistência autorizados da Makita . 014314 ACESSÓRIOS OPCIONAIS PRECAUÇÃO: • Os seguin tes acessório s ou ext[…]
-
Страница 83
83 utilização (tendo em conta t odas as pa rtes do ciclo de funcionamento, como as vezes que a ferrame nta é desligada e quando está a trabalhar ao ralenti, além do tempo de utilização). Apenas p ara países e uropeus ENH021-8 Declaração de conformidade CE A Makita declara que as máquinas: Designação da máquina: Motosserra Nº/T ipo de[…]
-
Страница 84
84 DANSK (Origina lvejledning) Forklaring til generel oversigt SPECIFIKA TIONER • På grund af vores løbende forsknings- og udviklingsprogr a m kan specifikationerne her i ændres uden forudgå ende varsel. • S pecifikationerne kan variere fra land t il land. • Vægt i henhold til EP T A-procedure 01/2003 Symbol END218-7 Her vises de symbole[…]
-
Страница 85
85 ………. Kædebremse aktiveret …………. … Forbudt! …………. .. Kun for EU-l ande Elektrisk udstyr må ikk e bortskaf fes som almindeligt af fald! I henhold til det europæiske direktiv om bortska ffelse af elektriske og ele ktroniske produkter og dets impleme ntering i overensstemmelse med gældende national lovgivning skal brugt e[…]
-
Страница 86
86 forholdsregler for at ho lde savearbejdet fri for uheld og skader . T ilbageslag skyldes forkert brug af maskin en og/eller forkerte betjenin gsprocedurer eller betingelser og kan undgås ved at træf fe de nø dvendige forholdsregler som beskrevet nedenfor: – Hold godt fast, med tommelfingrene og fingrene sluttet rund t om kædesavens håndt […]
-
Страница 87
87 8. Hold kædesaven med begge hænder , når den tændes og anvendes. Hold det bageste hån dtag med højre hånd og det forre ste håndtag med venstre hånd. Hold fast omkring hån dtagene med tommelfingrene. Svær det og kæden må ikke berøre genstande, når der tændes for saven. (Fig. 1) 9. Ryd det sted, der ska l saves, for fremmedobjekter[…]
-
Страница 88
88 • Hvem rapporterer uheldet? BEMÆRK: Personer med dårligt blodomløb, der udsættes for kr aftige vibrationer , risikerer beskadigelse af blo dkar eller nervesystemet. Vibratio ner kan medføre følgende symptomer i fingre, hænder eller håndled: Led det “sover” (følelsesløshed), prikken, smerte, stikken, ændring af hudfarven eller af[…]
-
Страница 89
89 Smøring FORSIG TIG: • Sørg altid for , at maskinen er slukket, og at stikket er taget ud af stikkont akten, før du smører savkæden. Smør savkæden og sværdet med biologisk ne dbrydelig savkædeolie med en klæbeti lsætning. Klæbetilsætningen i savkædeolien forhindrer , at olien slynges for hurtigt af saven. Der må ikke benyttes min[…]
-
Страница 90
90 oliepåfyldningshullet i sværdet (se under “VEDLIGEHOLDELSE”). Justering af kædesmøringen (Fig. 22 ) Du kan justere oliepumpens tilførselshastighed med justeringsskruen. FORSIG TIG: • Brug altid et forreste håndt ag og bagerste hånd tag, og hold maskinen ordentligt fast i både det forreste håndta g og bagerste håndtag und er anven[…]
-
Страница 91
91 VEDLIGEHOLDELSE FORSIG TIG: • Sørg altid for , at maskinen er slukket, og at stikket er taget ud, før du udfører inspe ktion eller vedligeholdelse. • Bær altid handsker , når du udfører insp ektion eller vedligeholdelse. • Brug aldrig benzin, be nzen, fortynder , alkohol eller lignende. Det kan muligvis medføre misfarvning, deformat[…]
-
Страница 92
92 FORSIG TIG: • Brug kun kæder og sværd, der er beregnet til de nne savmodel (se under “SPECIF IKA TIONER”). Før du monterer en ny savkæde, skal du kontrollere kædehjulets tilst and. (Fig. 3 9) FORSIG TIG: • Et slidt kædehjul beska diger en ny savkæde. Udskift i dette tilfælde kædehjulet . Monter altid en ny låsering, når kædeh[…]
-
Страница 93
93 BEMÆRK: • Visse dele på listen er muligvis indehold t maskinindp akningen som standardtilbehør . De kan variere fra land til land. Stø j ENG905-1 Det typiske A-vægtede støjniveau beste mt i overensstemmelse med EN60745: L ydtryksniveau (L pA ): 90,3 dB (A) L ydeffektniveau (L WA ): 101,3 dB (A) Usikkerhed (K): 2, 5 dB (A) Bær høreværn[…]
-
Страница 94
94 ΕΛΛΗΝΙΚΑ ( Πρωτ ογενε ίς οδηγίες ) Περιγραφή γενικής όψης ΠΡΟ ΔΙΑΓΡ ΑΦΕΣ • Λόγω του συνεχ όμενου προγράμματος που εφαρμόζ ουμε για έρευνα κα ι ανάπτυξη , τα τεχνικά χαρ ακ τ ηρ ι στ ικ ά στο παρ[…]
-
Страница 95
95 ………… …… Λάδι αλ υσίδας ………. Φρένο αλυσίδας ανενεργό ………. Φρένο αλυσίδας ενεργό …………. … Απαγορεύετ αι ! ………… … Μόνο για τις χώρε ς της ΕΕ Μην απορρίπτετε ηλεκτρικές συσκευές στον κά?[…]
-
Страница 96
96 πιθανότητα της τυχ αίας επαφής με την κινούμενη αλυσίδα του πριονιού . 10. Να ακ ολουθείτε τις οδηγίες για τη λίπανση , το σφίξιμο της αλυσίδας και την αλλαγή τω ν αξεσουάρ . Το ακατάλληλο σφί ξ?[…]
-
Страница 97
97 • Ανθεκτικά , δερμάτινα προστατευτικ ά γάντια , • Μακρύ παντ ελόνι κα τασκευ ασμέ νο από ανθεκτικό ύφασμα , • Προσ τατευτι κή φόρμα εργασίας από ύφασμα ανθεκτικό στο σχίσιμο , • Παπο ύτσια ή ?[…]
-
Страница 98
98 • Μην ξεκινάτε ποτέ να κόβετε με τη μύτη της οδηγητικής λάμας . • Μη χρησιμοποιείτε ποτέ τη μύτη της οδηγητ ικής λάμας για κοπή . Να είσαστε ιδιαίτερα προσεχτικοί όταν συνεχίζετε κοπές που ε?[…]
-
Страница 99
99 εν λόγω προϊόντος . Η ΛΑΝΘΑΣΜΕΝΗ ΧΡΗΣΗ ή η μη τήρηση των κανόνων ασφαλείας που διατυπώνοντ αι στο παρό ν εγχειρίδιο οδηγιών μπορεί να προκαλέσει σοβαρό τραυματισμό . ΠΕΡΙΓΡ Α ΦΗ ΜΕΡΩΝ ( Εικ .5 […]
-
Страница 100
100 Γι α να σταματήσετε το εργαλείο , αφ ήστε τη σκανδάλη — διακό πτης . Λίπανση ΠΡΟΣΟΧΗ : • Να βεβαιώνεστε πάντοτε ότι το εργαλείο είναι σβηστό και αποσυνδεδεμένο από το ηλεκτρικό ρεύ μα πριν από[…]
-
Страница 101
101 ΠΡΟΣΟΧΗ : • Αν το αλ υσοπρίονο δεν σταματ ά αμέσως μην το χρησιμοπ οιήσετε σε καμ ία περίπτωση . Επικοινωνήστε με ένα εξου σιοδοτημένο κέντρο εξυπηρέτησης της Makita. Έλεγχος του λιπαντή της αλ?[…]
-
Страница 102
102 – Κοπή των ριζ ών αντερείσματος : Ξεκι νήστε με τα μεγαλ ύτερα αντερείσματ α . Πραγματοποιήσ τε πρώτα μια κάθετη κοπ ή κα ι μετά μια οριζ όντια κοπή . – Άνοιγμα εγκοπής : Η εγκο πή καθορίζει τη?[…]
-
Страница 103
103 Λίμα κα ι κ ατε ύθυνση λίμας – Γι α να ακονίσετε την αλ υσίδα , χρησιμοποιήστε μια ειδική στρογγυλή λίμα ( προαιρετικό αξεσο υάρ ) για αλυσο πρίονα . Οι συνηθισμένες στρογγυλές λίμες δεν είναι[…]
-
Страница 104
104 ΕΠΙΛ ΥΣΗ ΠΡΟΒ ΛΗΜΑ Τ ΩΝ Πριν ζητήσετε επισκευές , προβείτε πρώ τα στον δικό σας έλεγχο . Εάν βρείτε κάποι ο πρόβλημα που δεν επεξηγείται στο εγχειρίδιο , μην προσπ αθήσετε να αποσυναρμολογήσ?[…]
-
Страница 105
105 ENG901-1 • Η δηλωθείσα τιμή των παραγομένων κραδασμών έχει καταμετ ρηθεί σύμφωνα με την τυποποι ημέν η μέθοδο δοκιμασίας και μπορεί να χρησιμοπ οιηθεί για την σύγκριση ενός εργαλείου με ένα άλ[…]
-
Страница 106
106 TÜRKÇE (Orijinal talimatlar) Genel görünü m TEKN İ K ÖZELL İ KLER • Sürekli yap ı lan ara ş t ı rma ve geli ş tirmelerden dolay ı , bura da belirtilen özellikler önceden bildirilmeksizin de ğ i ş tirilebilir . • Özellikler ülkeden ülkeye farkl ı l ı klar gösterebilir . • EPT A Prosedürü 01/2003 uyar ı nca a ğ ?[…]
-
Страница 107
107 ………… … Sadece AB ülkeleri için Elektrikli cihazlar ı evdeki çöp kutusuna atmay ı n! Kullan ı lm ı ş elektrikli cihazlar ı , Elektrikli ve Elektronik Cihaz At ı klar ı Hakk ı ndaki Avrupa Yönergesine göre ve bu yönergeler ulusal hukuk kurallar ı na göre uyarlanarak, ayr ı olarak toplanmal ı ve çevre ş artlar ı na[…]
-
Страница 108
108 Geri tepme, maki nenin yanl ı ş kullan ı m ı n ı n ve/veya makinenin yanl ı ş i ş lemlerle veya yanl ı ş ko ş ullar alt ı nda çal ı ş t ı r ı lmas ı n ı n bir sonucudur ve bun dan kaç ı nmak için a ş a ğ ı daki önlemleri n al ı nmas ı gerekir . – A ğ aç kesim motorunun saplar ı n ı ba ş parmak ve parmaklar ı […]
-
Страница 109
109 kar , ya ş tahta veya a ğ aç kabuklar ı n ı n zemini kayganla ş t ı rd ı ğ ı durumlarda özellikle tedbirli olun. Merdivende veya a ğ aç üzer indeyken a ğ aç kesim motorunu kullanmay ı n. 6. E ğ imli bir zeminde çal ı ş ı rken özellikle dikkatli olun; yuvarlanan kütükler ve dallar tehlike yaratabilir . 7. Kesti ğ iniz y[…]
-
Страница 110
110 9. Onaylanm am ı ş pala, testere zinciri veya di ğ er yedek parça veya aksesuarlar ı n kullan ı lmas ı ndan kaynaklanan kazalar veya hasarlar için hiçbir sorumluluk kabul edilmez. İ lk yard ı m Ya l n ı z çal ı ş may ı n. Daima ikinci bir ki ş iye seslenebilece ğ iniz bir uzakl ı kta çal ı ş ı n. 1. Y an ı n ı zda daima[…]
-
Страница 111
111 ÇALI Ş TIRMA Açma/kapatma ( Ş ekil 15) D İ KKA T : • Açma/kapama dü ğ mesinin çal ı ş t ı ğ ı n ı kontrol etmeye ba ş lamadan önce, maki nenin kapal ı ve fi ş inin çekili oldu ğ undan emin olun. • Makineyi fi ş e takmadan önce, açma/ka pama dü ğ mesinin do ğ ru ş ekilde çal ı ş ı p çal ı ş mad ı ğ ı n ?[…]
-
Страница 112
112 Açma/kapama dü ğ mesini t amamen b ı rak ı n. T estere zincirinin bir saniye içerisinde rölanti konumuna geldi ğ inden emin olun. D İ KKA T : • T estere zinciri hemen durmuyorsa, a ğ aç kesim motorunu kesinlikle kull anmaya çal ı ş may ı n. Y etkili Makita servis merkezlerine dan ı ş ı n. Zincir y a ğ lama mekanizmas ı kon[…]
-
Страница 113
113 – Kerti k üzerinde ya pt ı ğ ı n ı z herhangi bir düzeltmeyi kerti ğ in tü m geni ş li ğ i boyunca uygulay ı n. –K a r ş ı kesimi, kerti ğ in taban kesiminde n biraz daha yüksekt e yap ı n. K ar ş ı kesim tam olarak yata y olmal ı . Kertik ile ka r ş ı kesimin aras ı nda, a ğ aç gövdesinin yakla ş ı k 1/10’luk b[…]
-
Страница 114
114 – Ne ka dar küçük olursa olsu n, ç ı k ı nt ı olu ş turan her tür malzemeyi özel bir yass ı e ğ eyle (opsiyonel aksesuar) yok edin. – Derinlik mesnedinin ön k ı sm ı n ı tekrar yuvarlat ı n. Palay ı temizleme ve z incir di ş lisini ya ğ lama D İ KKA T : •B u i ş lemi yaparken daima koruyucu eldiven kullan ı n. Çapa[…]
-
Страница 115
115 SORUN G İ DERME Onar ı m talebinde bulunm adan önce, kendiniz kontrol edin. K ı lavuzda aç ı klanmam ı ş herhangi bir sorunla kar ş ı la ş ı rsan ı z, makineyi sökmeye çal ı ş may ı n. Bu nun yerine, Y etkili Makita Servis Merkezlerine dan ı ş ı n. 014314 OPS İ YONEL AKSESUARLAR D İ KKA T : • Bu kullan ı m k ı lavuzun[…]
-
Страница 116
116 Ya l n ı zca A vrupa ülkeleri i çin ENH021-8 A T Uygunlu k Beyan ı Makita a ş a ğ ı daki Makine(ler) il e ilgili ş u hususlar ı beyan ed er: Makinenin Ad ı : A ğ aç Kesim Motoru Model Numaras ı /T ipi: UC3041A, UC3541A , UC4041A T eknik Özellikler: bkz. “TEKN İ K ÖZELL İ KLER” tablosu. Ş u Avrupa Yönergelerine uygundur: 2[…]