
Version 1.0 | 01/16/2013 User Manual Wireless N H.264 Network Camera DCS-931L
Manual Overview D-Link reserves the right to revise this publication and to make changes in the content hereof without obligation to notify any person or organization of such revisions or changes. Information in this document may become obsolete as our services and websites develop and change.
Table of Contents Table of Contents Product Overview……………………………………………………… 4 Package Contents……………………………………………………………….. 4 System Requirements………………………………………………………… 4
Section 1 — Product Overview Product PackageOverview Contents • • • • • • DCS-931L Wireless N H.264 Network Camera CAT5 Ethernet Cable Power Adapter Manual and Software on CD Quick Install Guide Mounting Kit Note: Using a power supply with a different voltage than the one included with your product
Section 1 — Product Overview Introduction Congratulations on your purchase of the DCS-931L Wireless N H.264 Network Camera. The DCS-931L is a versatile and unique solution for your small office or home. Unlike a standard webcam, the DCS-931L is a complete system with a built-in CPU and web server
Section 1 — Product Overview Features Easy to Use and mydlink-Enabled for Easy Access and Management The DCS-931L is a standalone surveillance camera that requires no special hardware or software, and can run independently even without a PC. This camera is also mydlink-enabled, which means you can
Section 1 — Product Overview Hardware Overview Front View Camera Lens Microphone D-Link DCS-931L User Manual 7
Section 1 — Product Overview Rear View Power Connector Ethernet Port Power and Link LED Reset Button WPS LED WPS Button Camera Stand D-Link DCS-931L User Manual 8
Section 2 — Installation Installation There are three ways to set up your camera: Zero Configuration Setup: If you have a mydlink-enabled router, this is the easiest way to set up your camera. Refer to page 10. Camera Installation Wizard: If you do not have a mydlink-enabled router, use the Camera
Section 2 — Installation Zero Configuration Setup If you have a mydlink-enabled Cloud Router, you can take advantage of Zero Configuration. Zero Configuration automatically configures your camera’s settings for you, and adds it to your mydlink account automatically. This type of setup allows you to
Section 2 — Installation Check Your mydlink Account Open a web browser and login to your mydlink account. The mydlink page will check for new devices and display a New device Found! pop-up notification in the bottom-left corner. Click the notification to continue. A summary and confirmation
Section 2 — Installation Zero Configuration will navigate to the mydlink Live View tab for your camera where you will see a screen similar to the following. If you wish to connect your camera to your router wirelessly, you can simply disconnect the Ethernet cable and move the camera to its intended
Section 2 — Installation Camera Installation Wizard Windows Users Insert the Installation CD-ROM into your computer’s optical drive to start the autorun program. Simply click Set up your Cloud Camera to go through the Setup Wizard, which will guide you step-by-step through the installation process
Section 2 — Installation Mac Users Insert the Installation CD-ROM into your computer’s optical drive. On the desktop, open your CD drive and double-click on the SetupWizard file. After about 20-30 seconds, the Setup Wizard will open, which will guide you step-by-step through the installation
Section 2 — Installation Manual Hardware Installation If you wish to set up your camera without using the Camera Setup Wizard, please follow these steps. Note: In order to use the mydlink features of this product, you will need to go through the Camera Setup Wizard or Zero Configuration Setup.
Section 2 — Installation Wireless Installation Considerations The D-Link Wireless Network Camera lets you access your network using a wireless connection from anywhere within the operating range of your wireless network. However, the number, thickness and location of walls, ceilings, or other
Section 2 — Installation WPS — Push Button Setup Alternatively, you may create a secure wireless connection using the WPS Button on the back of the camera. To create a WPS connection: Step 1 Make sure the camera is plugged in, then press and hold the WPS button for three seconds. The blue WPS
Section 2 — Installation mydlink After registering your DCS-931L camera with a mydlink account in the Camera Installation Wizard, you will be able to remotely access your camera from the www.mydlink.com website. After signing in to your mydlink account, you will see a screen similar to the
Section 3 — Configuration Configuration Using the Web Configuration Interface After completing the Camera Installation Wizard, you are ready to use your camera. The camera’s built-in Web configuration interface is designed to allow you to easily access and configure your DCS-931L. At the end of the
Section 3 — Configuration Live Video The Live Video screen shows you the live video feed from your camera.For information on how to configure your Live Video streams, refer to “Video” on page 29. Video Click the H.264 or MJPEG radio button to choose which stream to view. Compression Format: Zoom:
Section 3 — Configuration Setup Wizard You may choose to configure your network by using the Internet Connection Setup Wizard that includes step-by-step instructions. Otherwise, you may manually configure your connection using the Manual Internet Connection Setup. Note: To register your camera with
Section 3 — Configuration Internet Connection Setup Wizard This wizard will guide you through a step-by-step process to configure your new D-Link Camera and connect the camera to the Internet. Click Next to continue. Select what kind of Internet connection your camera should use: • DHCP Connection
Section 3 — Configuration If you have a Dynamic DNS account and would like the camera to update your IP address automatically, select Enable and enter your host information. Otherwise, simply select Disable. Click Next to continue. Enter a name for your camera. Click Next to continue. Configure the
Section 3 — Configuration Network Setup This section allows you to configure your network settings. DHCP: Select this connection if you have a DHCP server running on your network and would like a dynamic IP address to be updated to your camera automatically. Static IP Client: You may obtain a
Section 3 — Configuration Wireless Setup This section allows you to set up and configure the wireless settings on your camera. Enable Check this box to allow your camera to connect to your network wirelessly. Wireless: SSID: Enter the network name(SSID) of the wireless network you want to connect
Section 3 — Configuration Extender Setup This section allows you to setup and configure the wireless network extending feature of your camera. Extender Mode allows your camera to extend the range of your existing wireless network. You can choose to use the same network name and settings as your
Section 3 — Configuration DDNS This section allows you to configure the DDNS setting for your camera. DDNS will allow all users to access your camera using a domain name instead of an IP address. Enable: Click to enable the DDNS function. Server Address: Select your Dynamic DNS Server from the pull
Section 3 — Configuration Image Setup This section allows you to configure the image settings for your camera. Enable If you have lights flickering in your camera video, try enabling antiflicker. Antiflicker: Otherwise, you should leave this disabled. Flip Image: Select this box to vertically flip
Section 3 — Configuration Video This section allows you to configure the video settings for your camera. Video Profile: This section allows you to change the Resolution, FPS, and Quality. Encode Type: Your camera has separate settings for the H.264 and MJPEG video streams. Resolution: Select the
Section 3 — Configuration Audio This section allows you to adjust the audio settings for your camera. Note: Please wait a few seconds for the camera to adjust the audio after making changes. Audio Settings: You may Enable or Disable the camera audio feed. Volume Settings: Select the desired volume
Section 3 — Configuration Motion Detection Motion detection allows you to mark areas of your camera’s video to monitor for motion, which can be used to trigger snapshots or recordings. Refer to “Mail” on page 33 and “FTP” on page 35 for more details. Motion Select whether you want to enable or
Section 3 — Configuration Sound Detection Sound detection allows you to detect when there is a loud sound in the area, which can be used to trigger snapshots or recordings. Refer to “Mail” on page 33 and “FTP” on page 35 for more details. Sound Select whether you want to enable or disable the sound
Section 3 — Configuration Mail This section allows you to configure your camera to send snapshots and video clips to an e-mail address. If you are not sure what settings to use, check with your e-mail service provider. SMTP Server This is the domain name or IP address of your external e-mail
Section 3 — Configuration Enable the Enabling this will allow snapshots to be e-mailed to you in different ways: e-mailing of images to an • Choosing Always will e-mail snapshots continuously based on the e-mail account: E-mail Interval specified. • Choosing Schedule will allow you to schedule when
Section 3 — Configuration FTP This section allows you to configure your camera to send snapshots and video clips to an FTP server. Host Name: Enter the IP address of the FTP server that you will be connecting to. Port: Enter the port of the FTP server that you will be connecting to. User Name:
Section 3 — Configuration File: Select how you want uploading of snapshots to be handled: • Overwrite will replace the old snapshot with the new one. This means you will only have one snapshot that is updated every time a new one is taken. • Date/Time Suffix will add the date and time to the end of
Section 3 — Configuration Time and Date This section allows you to configure the settings of the internal system clocks for your camera. Time Zone: Select the time zone for your region from the drop down menu. Synchronize Enabling this will allow the camera to update its clock automatically from
Section 3 — Configuration Maintenance Admin This section allows you to change the administrator’s password and configure the server settings for your camera. You can also manage the user account(s) that are allowed to access to your camera. Admin To change the admin password used to log into the
Section 3 — Configuration System This section allows you to save and restore your configuration, restore the factory settings, and/or restart the camera. Save To Local Click the Save Configuration button to save the current camera Hard Drive: configuration to your local PC. Load From To load a
Section 3 — Configuration Firmware Upgrade Your current firmware version and date will be displayed on your screen. You may go to the D-Link Support Page to check for the latest firmware versions available. To upgrade the firmware on your DCS-931L, download the latest firmware from the D-Link
Section 3 — Configuration Status Device Info This section displays all the detailed information about your device and network settings. D-Link DCS-931L User Manual 41
Section 3 — Configuration Active User This page lists all the active users’ information including the User Name, IP address, and the time that camera access began. D-Link DCS-931L User Manual 42
Section 4 — Troubleshooting Troubleshooting 1. What is Remote Access? How do I enable it? Remote Access allows you to access your camera from any PC connected to the Internet through a web browser. This lets you view your camera feed and manage your camera’s settings when you’re away from home. To
Section 4 — Troubleshooting 3. Why does the LED not light up? The power supply might be faulty. Confirm that you are using the provided DC 5V power supply for this network camera. Verify that the power supply is correctly connected. If the camera is functioning normally, the LED may have been
Section 4 — Troubleshooting 8. The images are poor quality, how can I improve the image quality? Make sure that your computer’s display properties are set to at least 6-bit color. Using 16 or 256 colors on your computer will produce dithering artifacts in the image, making the image look as if it
Technical Specifications Technical Specifications System Requirements • Microsoft Windows® 8/7/Vista/XP, or Mac with OS X 10.6 or higher • PC with 1.3 GHz or above and at least 128 MB RAM • Internet Explorer 7, Firefox 12, Safari 4, or Chrome 20 or higher version with Java installed and enabled
Technical Specifications Viewing Angle • Horizontal: 45.3° • Vertical: 34.5° • Diagonal: 54.9° Digital Zoom • Up to 4x 3A Control • AGC (Auto Gain Control) • AWB (Auto White Balance) • AES (Auto Electronic Shutter) Storage Temperature • -20 ˚C to 70 ˚C (-4 ˚F to 158 ˚F) Humidity • 20-80% RH
-
Page 1: D-Link DCS-931L
V ersion 1.0 | 01/16/2013 U ser Manual W ir eless N H.264 Netw ork Camer a DCS-931L[…]
-
Page 2: D-Link DCS-931L
D-Link reser ves the right to revise this publication and to make changes in the conten t hereof without obligation to notify any person or organization of such revisions or changes . Information in this document ma y become obsolete as our services and websites dev elop and change. Please r efer to the www .mydlink.com website f or the most cur re[…]
-
Page 3: D-Link DCS-931L
3 D-Link DCS -931L User Manual T able of C ontents Product Overview …………………………………………………….. 4 P ack age Cont ents ………………………………………………………………. 4 Syst em Requirements ……………………………………………………….. 4 Introduction ……………….[…]
-
Page 4: D-Link DCS-931L
4 D-Link DCS -931L User Manual Sec tion 1 — Pr oduc t Overview • DCS-931L Wir eless N H.264 Network Camera • CA T5 Ethernet C able • P ower Adapt er • Manual and Sof tware on CD • Quick Install Guide • Mounting Kit Note: Using a power supply with a dieren t voltage than the one included with your product will cause damage and void th[…]
-
Page 5: D-Link DCS-931L
5 D-Link DCS -931L User Manual Sec tion 1 — Pr oduc t Overview Introduction Congr atulations on your purchase of the DCS-931L Wir eless N H.264 Network C amera. The DCS-931L is a versatile and unique solution f or your small oce or home. Unlike a standar d webcam, the DCS-931L is a complete system with a built-in CPU and web server that transmit[…]
-
Page 6: D-Link DCS-931L
6 D-Link DCS -931L User Manual Sec tion 1 — Pr oduc t Overview Easy to Use and m ydlink-Enabled f or Easy Ac cess and Management The DCS-931L is a standalone sur veillance camera that requires no special har dware or sof tware, and can run independently even without a PC. This camera is also mydlink-enabled, which means you can view and manage your[…]
-
Page 7: D-Link DCS-931L
7 D-Link DCS -931L User Manual Sec tion 1 — Pr oduc t Overview Har dwar e O ver view F ront V iew Camera L ens Microphone[…]
-
Page 8: D-Link DCS-931L
8 D-Link DCS -931L User Manual Sec tion 1 — Pr oduc t Overview Rear V iew P ower C onnector Ethernet P or t Reset Button WPS LED WPS Button Camera S tand P ower and Link LED[…]
-
Page 9: D-Link DCS-931L
9 D-Link DCS -931L User Manual Sec tion 2 — Installation There ar e three wa ys to set up your camer a: Zero Congur ation S etup : If you have a mydlink -enabled r outer , this is the easiest way to set up your camera. Refer to page 10. Camer a Installation Wizar d : I f you do not have a my dlink-enabled router , use the Camera I nstallation Wi[…]
-
Page 10: D-Link DCS-931L
10 D-Link DCS -931L User Manual Sec tion 2 — Installation If y ou have a m ydlink-enabled Cloud Rout er , you can take advantage of Zero Conguration. Zero Conguration automatically congures your camer a’s settings for y ou, and adds it to your m ydlink account aut omatically . This type of setup allows y ou to set up your camera b y s[…]
-
Page 11: D-Link DCS-931L
11 D-Link DCS -931L User Manual Sec tion 2 — Installation A summar y and conrmation notica tion will appear with the automa tically congured details. Make a note of the details and click Y es to add the camera to your ac count. Check Y our my dlink Acc ount Ope n a we b br ow ser and logi n to you r my dlink acc oun t. The my dli nk page w[…]
-
Page 12: D-Link DCS-931L
12 D-Link DCS -931L User Manual Sec tion 2 — Installation Zer o Congura tion will naviga te to the my dlink Live View tab for your camera where y ou will see a screen similar to the f ollowing. If you wish to c onnec t your camer a to your r outer wirelessly , you can simply disconnect the Ethernet cable and move the camera to its intended locat[…]
-
Page 13: D-Link DCS-931L
13 D-Link DCS -931L User Manual Sec tion 2 — Installation C amera Installation W izard W indow s Users Note : I f the autorun progr am does not open, go to My Computer , bro wse to your CD drive, and double — click on the autorun.ex e le. Inser t the I nstallation CD-ROM into your computer’ s optical drive to star t the autorun prog ram. Simpl[…]
-
Page 14: D-Link DCS-931L
14 D-Link DCS -931L User Manual Sec tion 2 — Installation Mac Users Inser t the Installation CD-ROM int o y our c omputer ’ s optical drive. On the desktop , open your CD drive and double — click on the SetupW izard le. After about 20-30 seconds, the Setup Wizard will open, which will guide y ou step-by-step through the installation process fr[…]
-
Page 15: D-Link DCS-931L
15 D-Link DCS -931L User Manual Sec tion 2 — Installation Manual Hardw are Installation If you wish to set up your camer a without using the Camera Setup Wizard , please follo w these steps. Note: In order to use the mydlink f eatures of this product, you will need to go through the Camera Setup W izard or Zero Congura tion Setup. Optional: Use […]
-
Page 16: D-Link DCS-931L
16 D-Link DCS -931L User Manual Sec tion 2 — Installation W ireless Installation C onsiderations The D-Link Wir eless Net work Camera lets you access your network using a wireless connection from anywhere within the operating range of your wireless network . How ever , the number , thick ness and location of walls, ceilings , or other objects that […]
-
Page 17: D-Link DCS-931L
17 D-Link DCS -931L User Manual Sec tion 2 — Installation T o creat e a WPS connection: Step 1 Make sur e the camera is plugged in, then press and hold the WPS butt on f or three seconds . The blue WPS status LED will star t blink ing. Step 2 Pr ess the WPS button on y our router within 60 seconds. The WPS button is usually on the fron t or side of[…]
-
Page 18: D-Link DCS-931L
18 D-Link DCS -931L User Manual Sec tion 2 — Installation m ydlink After registering your DCS -931L camera with a mydlink account in the Camera I nstallation Wizar d, you will be able to remotely access your camera from the w ww .my dlink .com website . After signing in to your mydlink account, you will see a screen similar to the f ollowing: F or […]
-
Page 19: D-Link DCS-931L
19 D-Link DCS -931L User Manual 19 Sec tion 3 — Congur ation C ongura tion U sing the W eb C ongura tion Inter fac e After completing the Camera Installation W izard, you are ready to use your camera. The camera ’ s built-in W eb conguration inter face is designed to allow you to easily acc ess and congure your DCS-931L. At the end[…]
-
Page 20: D-Link DCS-931L
20 D-Link DCS -931L User Manual 20 Sec tion 3 — Congur ation Liv e V ideo V ideo Compr ession F ormat: Zoom: Audio: Click the H.264 or MJPEG radio button to choose which str eam to view . Click on these buttons to zoom in and out of the video . Click on these buttons to turn audio playback on and o . The Live Video screen shows you the live v[…]
-
Page 21: D-Link DCS-931L
21 D-Link DCS -931L User Manual 21 Sec tion 3 — Congur ation Setup W izard Y ou may choose to congure your net work by using the Internet Connection S etup W izard that includes step-by-s tep instructions. O therwise, you may manually congur e your connection using the Manual Internet Connection Setup . Note : T o register your camera with[…]
-
Page 22: D-Link DCS-931L
22 D-Link DCS -931L User Manual 22 Sec tion 3 — Congur ation Internet C onnec tion Setup W izard This wizard will guide y ou through a step-by-step pr ocess to congure y our new D-Link Camera and connect the camera to the Internet. Click Next to continue . Select what k ind of Internet connection your camera should use: • DHCP Connection (D[…]
-
Page 23: D-Link DCS-931L
23 D-Link DCS -931L User Manual 23 Sec tion 3 — Congur ation Enter a name f or your camera. Click Ne x t to continue . Congur e the correct time to ensure that all events are trigger ed, captured, and scheduled at the right time. Click Ne xt to continue. This page displays y our congured settings. Click Apply to sa ve and activat e your ch[…]
-
Page 24: D-Link DCS-931L
24 D-Link DCS -931L User Manual 24 Sec tion 3 — Congur ation Network Setup Select this connection if you have a DHCP ser ver running on your network and would like a dynamic IP address to be updated to your camera automatically . Y ou may obtain a static or xed IP address and other net work information from y our network administrator for y o[…]
-
Page 25: D-Link DCS-931L
25 D-Link DCS -931L User Manual 25 Sec tion 3 — Congur ation W ireless Setup Chec k this box to allow yo ur camera to con nect to your network wirel essly . En ter the netw ork nam e(S SID ) of the wir eles s netw ork you wa nt to con nect to . Y ou can also click the Site Sur vey button below to choose an available network and ll in settings[…]
-
Page 26: D-Link DCS-931L
26 D-Link DCS -931L User Manual 26 Sec tion 3 — Congur ation Ex tender Setup Check this box to enable Extender Mode. This shows the name of the Host wireless network that the camera is connected to and will extend. Select an option: • Same as Host W ireless Network Name : Y o ur ex te n de d ne t w o r k will use the same name and settings as […]
-
Page 27: D-Link DCS-931L
27 D-Link DCS -931L User Manual 27 Sec tion 3 — Congur ation Click to enable the DDNS function. Select your D ynamic DNS Ser ver from the pull down menu . Enter the host name of the DDNS server . Enter your username or e-mail used to connect to the DDNS. Enter your passw ord used to connect to the DDNS server . Enable: Ser ver A ddress: Host Nam[…]
-
Page 28: D-Link DCS-931L
28 D-Link DCS -931L User Manual 28 Sec tion 3 — Congur ation Image S etup If you hav e lights ickering in your camera video , tr y enabling antiicker . Other wise, you should leav e this disabled. Select this box to vertically ip the video. Horizontally ip the video . Note : If the camera is installed upside down, Flip I mage and Mir[…]
-
Page 29: D-Link DCS-931L
29 D-Link DCS -931L User Manual 29 Sec tion 3 — Congur ation V ideo V ideo Prole: Encode T ype: Resolution: FPS: JPEG Quality: V iew Mode: Light F requency: This section allows you t o congure the video settings for y our camera. This section allows you t o change the Resolution , FPS , and Quality . Y our camera has separate settings f or[…]
-
Page 30: D-Link DCS-931L
30 D-Link DCS -931L User Manual 30 Sec tion 3 — Congur ation A udio This section allows you t o adjust the audio settings for your camera. Note: Please wait a f ew seconds for the camer a to adjust the audio after mak ing changes. Audio Settings: V olume S ettings: Y ou may Enable or Disable the camera audio feed . Select the desired volume perc[…]
-
Page 31: D-Link DCS-931L
31 D-Link DCS -931L User Manual 31 Sec tion 3 — Congur ation Motion Detec tion Motion detec tion allows you to mar k areas of your camera ’ s video to monitor for motion, which can be used to tr igger snapshots or recordings . Refer to “Mail” on page 33 and “FTP ” on page 35 for more details . Motion Detection: Time: Sensitivity : Dete[…]
-
Page 32: D-Link DCS-931L
32 D-Link DCS -931L User Manual 32 Sec tion 3 — Congur ation Sound Detec tion Sound detection allows you to detect when there is a loud sound in the area, which can be used to trigger snapshots or recordings . Refer to “Mail” on page 33 and “FTP ” on page 35 for more details . Sound Detection: Time: Detection Lev el: Select whether you w[…]
-
Page 33: D-Link DCS-931L
33 D-Link DCS -931L User Manual 33 Sec tion 3 — Congur ation Mail SMTP Server Addr ess: Sender e -mail Addr ess: Receiver e-mail Addr ess: User Name: P assword: This is the domain name or IP address of y our external e -mail ser ver . This is the e -mail address listed as the sender for your notication e -mails . This is the e -mail address t[…]
-
Page 34: D-Link DCS-931L
34 D-Link DCS -931L User Manual 34 Sec tion 3 — Congur ation Enable the e -mailing of images to an e -mail account: E-mail Interval: Enable the e -mailing of video clips to an e -mail accoun t: T est E-mail Ac count: Enabling this will allow snapshots to be e -mailed to you in di erent ways: • Choosing A l ways will e -mail snapshots contin[…]
-
Page 35: D-Link DCS-931L
35 D-Link DCS -931L User Manual 35 Sec tion 3 — Congur ation FTP Host Name: P or t: User Name: P assword: P ath: P assive Mode: Enter the IP address of the FTP server that you will be c onnecting to. Enter the port of the FTP ser ver that you will be connecting to . Enter the user name of your FTP server accoun t. Enter the passwor d of your FTP[…]
-
Page 36: D-Link DCS-931L
36 D-Link DCS -931L User Manual 36 Sec tion 3 — Congur ation F ile: T est FTP Ser ver: Select how you want uploading of snapshots to be handled: • Overwrite will replace the old snapshot with the new one. This means you will only have one snapshot that is updated ever y time a new one is taken. • Date/T ime Suffix will add the date and time […]
-
Page 37: D-Link DCS-931L
37 D-Link DCS -931L User Manual 37 Sec tion 3 — Congur ation T ime and Date Time Z one: Synchr onize NTP Ser ver: Set the Date and Time Manually: Select the time zone for your r egion from the drop do wn menu. Enabling this will allow the camera to update its clock automatically from an NTP ser ver . S elect the NTP ser v er closest to you, and […]
-
Page 38: D-Link DCS-931L
38 D-Link DCS -931L User Manual 38 Sec tion 3 — Congur ation Maintenanc e A dmin This sec tion allows you to change the administrator ’ s password and congure the ser ver settings for your camera. Y ou can also manage the user account(s) that ar e allowed t o access to your camer a. Admin P assword: Camera Name: LED Con trol: User A ccess C[…]
-
Page 39: D-Link DCS-931L
39 D-Link DCS -931L User Manual 39 Sec tion 3 — Congur ation S yst em This section allows you t o save and rest ore your congur ation, restor e the fac tory settings, and/or restart the camera. Save T o Local Hard Drive: Load F rom Local Hard Drive: Restore T o F ac tory Default: Rebbot The Device: Click the Save C onfiguration button to save[…]
-
Page 40: D-Link DCS-931L
40 D-Link DCS -931L User Manual 40 Sec tion 3 — Congur ation F irm ware Upg rade Y our cur rent rmware version and date will be displayed on your screen. Y ou may go to the D -Link Suppor t P age to check for the latest r mwar e versions av ailable. T o upgrade the rmware on your DCS-931L, download the latest rmware from the D -Link […]
-
Page 41: D-Link DCS-931L
41 D-Link DCS -931L User Manual 41 Sec tion 3 — Congur ation Sta tus Devic e Info This section displays all the detailed inf ormation about your device and network settings.[…]
-
Page 42: D-Link DCS-931L
42 D-Link DCS -931L User Manual 42 Sec tion 3 — Congur ation A c tive U ser This page lists all the active users ’ information including the User Name , IP address, and the time tha t camera access began.[…]
-
Page 43: D-Link DCS-931L
43 D-Link DCS -931L User Manual Sec tion 4 — T roubleshooting T roubleshooting 1. What is Remote Ac cess? How do I enable it? Remote Access allows you to access your camera from any PC connected to the I nternet through a web browser . This lets you view your camera feed and manage y our camera ’ s settings when you ’ re aw ay from home . T o e[…]
-
Page 44: D-Link DCS-931L
44 D-Link DCS -931L User Manual Sec tion 4 — T roubleshooting 3. Why does the LED not light up? The power supply might be faulty . Conrm that you are using the provided DC 5V pow er supply for this net work camera. V erify that the power supply is correctly connected. If the camera is functioning normally , the LED may have been disabled. See ?[…]
-
Page 45: D-Link DCS-931L
45 D-Link DCS -931L User Manual Sec tion 4 — T roubleshooting 8. The images are poor quality , how can I improv e the image quality? Make sure that your computer ’ s display proper ties are set to at least 6-bit color . Using 16 or 256 colors on your computer will pr oduce dithering ar tifacts in the image, making the image look as if it is of po[…]
-
Page 46: D-Link DCS-931L
46 D-Link DCS -931L User Manual T echnical Specications T echnical Specications SY STEM REQUIREMENT S • Microsoft Windows® 8/7/V ista/XP , or Mac with OS X 10.6 or higher • PC with 1.3 GHz or above and at least 128 MB RAM • Internet Explorer 7, F iref ox 12, Safari 4, or Chrome 20 or higher version with Jav a installed and enabled NE T[…]
-
Page 47: D-Link DCS-931L
47 D-Link DCS -931L User Manual T echnical Specications VIEWING ANGLE • Horizontal: 45.3° • V er tical: 34.5° • Diagonal: 54.9° DIGIT AL Z OOM • Up to 4x 3A CON T R O L • AGC ( Auto Gain Contr ol) • A WB (A uto White Balance) • AES (A uto Electronic Shutter) POWER • Input: 100-240 V AC, 50/60 Hz • Output: 5 V DC, 1 A • Ext[…]
Version 1.0 | 01/16/2013 User Manual Wireless N H.264 Network Camera DCS-931L
Manual Overview D-Link reserves the right to revise this publication and to make changes in the content hereof without obligation to notify any person or organization of such revisions or changes. Information in this document may become obsolete as our services and websites develop and change.
Table of Contents Table of Contents Product Overview……………………………………………………… 4 Package Contents……………………………………………………………….. 4 System Requirements………………………………………………………… 4
Section 1 — Product Overview Product PackageOverview Contents • • • • • • DCS-931L Wireless N H.264 Network Camera CAT5 Ethernet Cable Power Adapter Manual and Software on CD Quick Install Guide Mounting Kit Note: Using a power supply with a different voltage than the one included with your product
Section 1 — Product Overview Introduction Congratulations on your purchase of the DCS-931L Wireless N H.264 Network Camera. The DCS-931L is a versatile and unique solution for your small office or home. Unlike a standard webcam, the DCS-931L is a complete system with a built-in CPU and web server
Section 1 — Product Overview Features Easy to Use and mydlink-Enabled for Easy Access and Management The DCS-931L is a standalone surveillance camera that requires no special hardware or software, and can run independently even without a PC. This camera is also mydlink-enabled, which means you can
Section 1 — Product Overview Hardware Overview Front View Camera Lens Microphone D-Link DCS-931L User Manual 7
Section 1 — Product Overview Rear View Power Connector Ethernet Port Power and Link LED Reset Button WPS LED WPS Button Camera Stand D-Link DCS-931L User Manual 8
Section 2 — Installation Installation There are three ways to set up your camera: Zero Configuration Setup: If you have a mydlink-enabled router, this is the easiest way to set up your camera. Refer to page 10. Camera Installation Wizard: If you do not have a mydlink-enabled router, use the Camera
Section 2 — Installation Zero Configuration Setup If you have a mydlink-enabled Cloud Router, you can take advantage of Zero Configuration. Zero Configuration automatically configures your camera’s settings for you, and adds it to your mydlink account automatically. This type of setup allows you to
Section 2 — Installation Check Your mydlink Account Open a web browser and login to your mydlink account. The mydlink page will check for new devices and display a New device Found! pop-up notification in the bottom-left corner. Click the notification to continue. A summary and confirmation
Section 2 — Installation Zero Configuration will navigate to the mydlink Live View tab for your camera where you will see a screen similar to the following. If you wish to connect your camera to your router wirelessly, you can simply disconnect the Ethernet cable and move the camera to its intended
Section 2 — Installation Camera Installation Wizard Windows Users Insert the Installation CD-ROM into your computer’s optical drive to start the autorun program. Simply click Set up your Cloud Camera to go through the Setup Wizard, which will guide you step-by-step through the installation process
Section 2 — Installation Mac Users Insert the Installation CD-ROM into your computer’s optical drive. On the desktop, open your CD drive and double-click on the SetupWizard file. After about 20-30 seconds, the Setup Wizard will open, which will guide you step-by-step through the installation
Section 2 — Installation Manual Hardware Installation If you wish to set up your camera without using the Camera Setup Wizard, please follow these steps. Note: In order to use the mydlink features of this product, you will need to go through the Camera Setup Wizard or Zero Configuration Setup.
Section 2 — Installation Wireless Installation Considerations The D-Link Wireless Network Camera lets you access your network using a wireless connection from anywhere within the operating range of your wireless network. However, the number, thickness and location of walls, ceilings, or other
Section 2 — Installation WPS — Push Button Setup Alternatively, you may create a secure wireless connection using the WPS Button on the back of the camera. To create a WPS connection: Step 1 Make sure the camera is plugged in, then press and hold the WPS button for three seconds. The blue WPS
Section 2 — Installation mydlink After registering your DCS-931L camera with a mydlink account in the Camera Installation Wizard, you will be able to remotely access your camera from the www.mydlink.com website. After signing in to your mydlink account, you will see a screen similar to the
Section 3 — Configuration Configuration Using the Web Configuration Interface After completing the Camera Installation Wizard, you are ready to use your camera. The camera’s built-in Web configuration interface is designed to allow you to easily access and configure your DCS-931L. At the end of the
Section 3 — Configuration Live Video The Live Video screen shows you the live video feed from your camera.For information on how to configure your Live Video streams, refer to “Video” on page 29. Video Click the H.264 or MJPEG radio button to choose which stream to view. Compression Format: Zoom:
Section 3 — Configuration Setup Wizard You may choose to configure your network by using the Internet Connection Setup Wizard that includes step-by-step instructions. Otherwise, you may manually configure your connection using the Manual Internet Connection Setup. Note: To register your camera with
Section 3 — Configuration Internet Connection Setup Wizard This wizard will guide you through a step-by-step process to configure your new D-Link Camera and connect the camera to the Internet. Click Next to continue. Select what kind of Internet connection your camera should use: • DHCP Connection
Section 3 — Configuration If you have a Dynamic DNS account and would like the camera to update your IP address automatically, select Enable and enter your host information. Otherwise, simply select Disable. Click Next to continue. Enter a name for your camera. Click Next to continue. Configure the
Section 3 — Configuration Network Setup This section allows you to configure your network settings. DHCP: Select this connection if you have a DHCP server running on your network and would like a dynamic IP address to be updated to your camera automatically. Static IP Client: You may obtain a
Section 3 — Configuration Wireless Setup This section allows you to set up and configure the wireless settings on your camera. Enable Check this box to allow your camera to connect to your network wirelessly. Wireless: SSID: Enter the network name(SSID) of the wireless network you want to connect
Section 3 — Configuration Extender Setup This section allows you to setup and configure the wireless network extending feature of your camera. Extender Mode allows your camera to extend the range of your existing wireless network. You can choose to use the same network name and settings as your
Section 3 — Configuration DDNS This section allows you to configure the DDNS setting for your camera. DDNS will allow all users to access your camera using a domain name instead of an IP address. Enable: Click to enable the DDNS function. Server Address: Select your Dynamic DNS Server from the pull
Section 3 — Configuration Image Setup This section allows you to configure the image settings for your camera. Enable If you have lights flickering in your camera video, try enabling antiflicker. Antiflicker: Otherwise, you should leave this disabled. Flip Image: Select this box to vertically flip
Section 3 — Configuration Video This section allows you to configure the video settings for your camera. Video Profile: This section allows you to change the Resolution, FPS, and Quality. Encode Type: Your camera has separate settings for the H.264 and MJPEG video streams. Resolution: Select the
Section 3 — Configuration Audio This section allows you to adjust the audio settings for your camera. Note: Please wait a few seconds for the camera to adjust the audio after making changes. Audio Settings: You may Enable or Disable the camera audio feed. Volume Settings: Select the desired volume
Section 3 — Configuration Motion Detection Motion detection allows you to mark areas of your camera’s video to monitor for motion, which can be used to trigger snapshots or recordings. Refer to “Mail” on page 33 and “FTP” on page 35 for more details. Motion Select whether you want to enable or
Section 3 — Configuration Sound Detection Sound detection allows you to detect when there is a loud sound in the area, which can be used to trigger snapshots or recordings. Refer to “Mail” on page 33 and “FTP” on page 35 for more details. Sound Select whether you want to enable or disable the sound
Section 3 — Configuration Mail This section allows you to configure your camera to send snapshots and video clips to an e-mail address. If you are not sure what settings to use, check with your e-mail service provider. SMTP Server This is the domain name or IP address of your external e-mail
Section 3 — Configuration Enable the Enabling this will allow snapshots to be e-mailed to you in different ways: e-mailing of images to an • Choosing Always will e-mail snapshots continuously based on the e-mail account: E-mail Interval specified. • Choosing Schedule will allow you to schedule when
Section 3 — Configuration FTP This section allows you to configure your camera to send snapshots and video clips to an FTP server. Host Name: Enter the IP address of the FTP server that you will be connecting to. Port: Enter the port of the FTP server that you will be connecting to. User Name:
Section 3 — Configuration File: Select how you want uploading of snapshots to be handled: • Overwrite will replace the old snapshot with the new one. This means you will only have one snapshot that is updated every time a new one is taken. • Date/Time Suffix will add the date and time to the end of
Section 3 — Configuration Time and Date This section allows you to configure the settings of the internal system clocks for your camera. Time Zone: Select the time zone for your region from the drop down menu. Synchronize Enabling this will allow the camera to update its clock automatically from
Section 3 — Configuration Maintenance Admin This section allows you to change the administrator’s password and configure the server settings for your camera. You can also manage the user account(s) that are allowed to access to your camera. Admin To change the admin password used to log into the
Section 3 — Configuration System This section allows you to save and restore your configuration, restore the factory settings, and/or restart the camera. Save To Local Click the Save Configuration button to save the current camera Hard Drive: configuration to your local PC. Load From To load a
Section 3 — Configuration Firmware Upgrade Your current firmware version and date will be displayed on your screen. You may go to the D-Link Support Page to check for the latest firmware versions available. To upgrade the firmware on your DCS-931L, download the latest firmware from the D-Link
Section 3 — Configuration Status Device Info This section displays all the detailed information about your device and network settings. D-Link DCS-931L User Manual 41
Section 3 — Configuration Active User This page lists all the active users’ information including the User Name, IP address, and the time that camera access began. D-Link DCS-931L User Manual 42
Section 4 — Troubleshooting Troubleshooting 1. What is Remote Access? How do I enable it? Remote Access allows you to access your camera from any PC connected to the Internet through a web browser. This lets you view your camera feed and manage your camera’s settings when you’re away from home. To
Section 4 — Troubleshooting 3. Why does the LED not light up? The power supply might be faulty. Confirm that you are using the provided DC 5V power supply for this network camera. Verify that the power supply is correctly connected. If the camera is functioning normally, the LED may have been
Section 4 — Troubleshooting 8. The images are poor quality, how can I improve the image quality? Make sure that your computer’s display properties are set to at least 6-bit color. Using 16 or 256 colors on your computer will produce dithering artifacts in the image, making the image look as if it
Technical Specifications Technical Specifications System Requirements • Microsoft Windows® 8/7/Vista/XP, or Mac with OS X 10.6 or higher • PC with 1.3 GHz or above and at least 128 MB RAM • Internet Explorer 7, Firefox 12, Safari 4, or Chrome 20 or higher version with Java installed and enabled
Technical Specifications Viewing Angle • Horizontal: 45.3° • Vertical: 34.5° • Diagonal: 54.9° Digital Zoom • Up to 4x 3A Control • AGC (Auto Gain Control) • AWB (Auto White Balance) • AES (Auto Electronic Shutter) Storage Temperature • -20 ˚C to 70 ˚C (-4 ˚F to 158 ˚F) Humidity • 20-80% RH
-
Страница 1
V ersion 1.0 | 01/16/2013 U ser Manual W ir eless N H.264 Netw ork Camer a DCS-931L[…]
-
Страница 2
D-Link reser ves the right to revise this publication and to make changes in the conten t hereof without obligation to notify any person or organization of such revisions or changes . Information in this document ma y become obsolete as our services and websites dev elop and change. Please r efer to the www .mydlink.com website f or the most cur re[…]
-
Страница 3
3 D-Link DCS -931L User Manual T able of C ontents Product Overview …………………………………………………….. 4 P ack age Cont ents ………………………………………………………………. 4 Syst em Requirements ……………………………………………………….. 4 Introduction ……………….[…]
-
Страница 4
4 D-Link DCS -931L User Manual Sec tion 1 — Pr oduc t Overview • DCS-931L Wir eless N H.264 Network Camera • CA T5 Ethernet C able • P ower Adapt er • Manual and Sof tware on CD • Quick Install Guide • Mounting Kit Note: Using a power supply with a dieren t voltage than the one included with your product will cause damage and void th[…]
-
Страница 5
5 D-Link DCS -931L User Manual Sec tion 1 — Pr oduc t Overview Introduction Congr atulations on your purchase of the DCS-931L Wir eless N H.264 Network C amera. The DCS-931L is a versatile and unique solution f or your small oce or home. Unlike a standar d webcam, the DCS-931L is a complete system with a built-in CPU and web server that transmit[…]
-
Страница 6
6 D-Link DCS -931L User Manual Sec tion 1 — Pr oduc t Overview Easy to Use and m ydlink-Enabled f or Easy Ac cess and Management The DCS-931L is a standalone sur veillance camera that requires no special har dware or sof tware, and can run independently even without a PC. This camera is also mydlink-enabled, which means you can view and manage your[…]
-
Страница 7
7 D-Link DCS -931L User Manual Sec tion 1 — Pr oduc t Overview Har dwar e O ver view F ront V iew Camera L ens Microphone[…]
-
Страница 8
8 D-Link DCS -931L User Manual Sec tion 1 — Pr oduc t Overview Rear V iew P ower C onnector Ethernet P or t Reset Button WPS LED WPS Button Camera S tand P ower and Link LED[…]
-
Страница 9
9 D-Link DCS -931L User Manual Sec tion 2 — Installation There ar e three wa ys to set up your camer a: Zero Congur ation S etup : If you have a mydlink -enabled r outer , this is the easiest way to set up your camera. Refer to page 10. Camer a Installation Wizar d : I f you do not have a my dlink-enabled router , use the Camera I nstallation Wi[…]
-
Страница 10
10 D-Link DCS -931L User Manual Sec tion 2 — Installation If y ou have a m ydlink-enabled Cloud Rout er , you can take advantage of Zero Conguration. Zero Conguration automatically congures your camer a’s settings for y ou, and adds it to your m ydlink account aut omatically . This type of setup allows y ou to set up your camera b y s[…]
-
Страница 11
11 D-Link DCS -931L User Manual Sec tion 2 — Installation A summar y and conrmation notica tion will appear with the automa tically congured details. Make a note of the details and click Y es to add the camera to your ac count. Check Y our my dlink Acc ount Ope n a we b br ow ser and logi n to you r my dlink acc oun t. The my dli nk page w[…]
-
Страница 12
12 D-Link DCS -931L User Manual Sec tion 2 — Installation Zer o Congura tion will naviga te to the my dlink Live View tab for your camera where y ou will see a screen similar to the f ollowing. If you wish to c onnec t your camer a to your r outer wirelessly , you can simply disconnect the Ethernet cable and move the camera to its intended locat[…]
-
Страница 13
13 D-Link DCS -931L User Manual Sec tion 2 — Installation C amera Installation W izard W indow s Users Note : I f the autorun progr am does not open, go to My Computer , bro wse to your CD drive, and double — click on the autorun.ex e le. Inser t the I nstallation CD-ROM into your computer’ s optical drive to star t the autorun prog ram. Simpl[…]
-
Страница 14
14 D-Link DCS -931L User Manual Sec tion 2 — Installation Mac Users Inser t the Installation CD-ROM int o y our c omputer ’ s optical drive. On the desktop , open your CD drive and double — click on the SetupW izard le. After about 20-30 seconds, the Setup Wizard will open, which will guide y ou step-by-step through the installation process fr[…]
-
Страница 15
15 D-Link DCS -931L User Manual Sec tion 2 — Installation Manual Hardw are Installation If you wish to set up your camer a without using the Camera Setup Wizard , please follo w these steps. Note: In order to use the mydlink f eatures of this product, you will need to go through the Camera Setup W izard or Zero Congura tion Setup. Optional: Use […]
-
Страница 16
16 D-Link DCS -931L User Manual Sec tion 2 — Installation W ireless Installation C onsiderations The D-Link Wir eless Net work Camera lets you access your network using a wireless connection from anywhere within the operating range of your wireless network . How ever , the number , thick ness and location of walls, ceilings , or other objects that […]
-
Страница 17
17 D-Link DCS -931L User Manual Sec tion 2 — Installation T o creat e a WPS connection: Step 1 Make sur e the camera is plugged in, then press and hold the WPS butt on f or three seconds . The blue WPS status LED will star t blink ing. Step 2 Pr ess the WPS button on y our router within 60 seconds. The WPS button is usually on the fron t or side of[…]
-
Страница 18
18 D-Link DCS -931L User Manual Sec tion 2 — Installation m ydlink After registering your DCS -931L camera with a mydlink account in the Camera I nstallation Wizar d, you will be able to remotely access your camera from the w ww .my dlink .com website . After signing in to your mydlink account, you will see a screen similar to the f ollowing: F or […]
-
Страница 19
19 D-Link DCS -931L User Manual 19 Sec tion 3 — Congur ation C ongura tion U sing the W eb C ongura tion Inter fac e After completing the Camera Installation W izard, you are ready to use your camera. The camera ’ s built-in W eb conguration inter face is designed to allow you to easily acc ess and congure your DCS-931L. At the end[…]
-
Страница 20
20 D-Link DCS -931L User Manual 20 Sec tion 3 — Congur ation Liv e V ideo V ideo Compr ession F ormat: Zoom: Audio: Click the H.264 or MJPEG radio button to choose which str eam to view . Click on these buttons to zoom in and out of the video . Click on these buttons to turn audio playback on and o . The Live Video screen shows you the live v[…]
-
Страница 21
21 D-Link DCS -931L User Manual 21 Sec tion 3 — Congur ation Setup W izard Y ou may choose to congure your net work by using the Internet Connection S etup W izard that includes step-by-s tep instructions. O therwise, you may manually congur e your connection using the Manual Internet Connection Setup . Note : T o register your camera with[…]
-
Страница 22
22 D-Link DCS -931L User Manual 22 Sec tion 3 — Congur ation Internet C onnec tion Setup W izard This wizard will guide y ou through a step-by-step pr ocess to congure y our new D-Link Camera and connect the camera to the Internet. Click Next to continue . Select what k ind of Internet connection your camera should use: • DHCP Connection (D[…]
-
Страница 23
23 D-Link DCS -931L User Manual 23 Sec tion 3 — Congur ation Enter a name f or your camera. Click Ne x t to continue . Congur e the correct time to ensure that all events are trigger ed, captured, and scheduled at the right time. Click Ne xt to continue. This page displays y our congured settings. Click Apply to sa ve and activat e your ch[…]
-
Страница 24
24 D-Link DCS -931L User Manual 24 Sec tion 3 — Congur ation Network Setup Select this connection if you have a DHCP ser ver running on your network and would like a dynamic IP address to be updated to your camera automatically . Y ou may obtain a static or xed IP address and other net work information from y our network administrator for y o[…]
-
Страница 25
25 D-Link DCS -931L User Manual 25 Sec tion 3 — Congur ation W ireless Setup Chec k this box to allow yo ur camera to con nect to your network wirel essly . En ter the netw ork nam e(S SID ) of the wir eles s netw ork you wa nt to con nect to . Y ou can also click the Site Sur vey button below to choose an available network and ll in settings[…]
-
Страница 26
26 D-Link DCS -931L User Manual 26 Sec tion 3 — Congur ation Ex tender Setup Check this box to enable Extender Mode. This shows the name of the Host wireless network that the camera is connected to and will extend. Select an option: • Same as Host W ireless Network Name : Y o ur ex te n de d ne t w o r k will use the same name and settings as […]
-
Страница 27
27 D-Link DCS -931L User Manual 27 Sec tion 3 — Congur ation Click to enable the DDNS function. Select your D ynamic DNS Ser ver from the pull down menu . Enter the host name of the DDNS server . Enter your username or e-mail used to connect to the DDNS. Enter your passw ord used to connect to the DDNS server . Enable: Ser ver A ddress: Host Nam[…]
-
Страница 28
28 D-Link DCS -931L User Manual 28 Sec tion 3 — Congur ation Image S etup If you hav e lights ickering in your camera video , tr y enabling antiicker . Other wise, you should leav e this disabled. Select this box to vertically ip the video. Horizontally ip the video . Note : If the camera is installed upside down, Flip I mage and Mir[…]
-
Страница 29
29 D-Link DCS -931L User Manual 29 Sec tion 3 — Congur ation V ideo V ideo Prole: Encode T ype: Resolution: FPS: JPEG Quality: V iew Mode: Light F requency: This section allows you t o congure the video settings for y our camera. This section allows you t o change the Resolution , FPS , and Quality . Y our camera has separate settings f or[…]
-
Страница 30
30 D-Link DCS -931L User Manual 30 Sec tion 3 — Congur ation A udio This section allows you t o adjust the audio settings for your camera. Note: Please wait a f ew seconds for the camer a to adjust the audio after mak ing changes. Audio Settings: V olume S ettings: Y ou may Enable or Disable the camera audio feed . Select the desired volume perc[…]
-
Страница 31
31 D-Link DCS -931L User Manual 31 Sec tion 3 — Congur ation Motion Detec tion Motion detec tion allows you to mar k areas of your camera ’ s video to monitor for motion, which can be used to tr igger snapshots or recordings . Refer to “Mail” on page 33 and “FTP ” on page 35 for more details . Motion Detection: Time: Sensitivity : Dete[…]
-
Страница 32
32 D-Link DCS -931L User Manual 32 Sec tion 3 — Congur ation Sound Detec tion Sound detection allows you to detect when there is a loud sound in the area, which can be used to trigger snapshots or recordings . Refer to “Mail” on page 33 and “FTP ” on page 35 for more details . Sound Detection: Time: Detection Lev el: Select whether you w[…]
-
Страница 33
33 D-Link DCS -931L User Manual 33 Sec tion 3 — Congur ation Mail SMTP Server Addr ess: Sender e -mail Addr ess: Receiver e-mail Addr ess: User Name: P assword: This is the domain name or IP address of y our external e -mail ser ver . This is the e -mail address listed as the sender for your notication e -mails . This is the e -mail address t[…]
-
Страница 34
34 D-Link DCS -931L User Manual 34 Sec tion 3 — Congur ation Enable the e -mailing of images to an e -mail account: E-mail Interval: Enable the e -mailing of video clips to an e -mail accoun t: T est E-mail Ac count: Enabling this will allow snapshots to be e -mailed to you in di erent ways: • Choosing A l ways will e -mail snapshots contin[…]
-
Страница 35
35 D-Link DCS -931L User Manual 35 Sec tion 3 — Congur ation FTP Host Name: P or t: User Name: P assword: P ath: P assive Mode: Enter the IP address of the FTP server that you will be c onnecting to. Enter the port of the FTP ser ver that you will be connecting to . Enter the user name of your FTP server accoun t. Enter the passwor d of your FTP[…]
-
Страница 36
36 D-Link DCS -931L User Manual 36 Sec tion 3 — Congur ation F ile: T est FTP Ser ver: Select how you want uploading of snapshots to be handled: • Overwrite will replace the old snapshot with the new one. This means you will only have one snapshot that is updated ever y time a new one is taken. • Date/T ime Suffix will add the date and time […]
-
Страница 37
37 D-Link DCS -931L User Manual 37 Sec tion 3 — Congur ation T ime and Date Time Z one: Synchr onize NTP Ser ver: Set the Date and Time Manually: Select the time zone for your r egion from the drop do wn menu. Enabling this will allow the camera to update its clock automatically from an NTP ser ver . S elect the NTP ser v er closest to you, and […]
-
Страница 38
38 D-Link DCS -931L User Manual 38 Sec tion 3 — Congur ation Maintenanc e A dmin This sec tion allows you to change the administrator ’ s password and congure the ser ver settings for your camera. Y ou can also manage the user account(s) that ar e allowed t o access to your camer a. Admin P assword: Camera Name: LED Con trol: User A ccess C[…]
-
Страница 39
39 D-Link DCS -931L User Manual 39 Sec tion 3 — Congur ation S yst em This section allows you t o save and rest ore your congur ation, restor e the fac tory settings, and/or restart the camera. Save T o Local Hard Drive: Load F rom Local Hard Drive: Restore T o F ac tory Default: Rebbot The Device: Click the Save C onfiguration button to save[…]
-
Страница 40
40 D-Link DCS -931L User Manual 40 Sec tion 3 — Congur ation F irm ware Upg rade Y our cur rent rmware version and date will be displayed on your screen. Y ou may go to the D -Link Suppor t P age to check for the latest r mwar e versions av ailable. T o upgrade the rmware on your DCS-931L, download the latest rmware from the D -Link […]
-
Страница 41
41 D-Link DCS -931L User Manual 41 Sec tion 3 — Congur ation Sta tus Devic e Info This section displays all the detailed inf ormation about your device and network settings.[…]
-
Страница 42
42 D-Link DCS -931L User Manual 42 Sec tion 3 — Congur ation A c tive U ser This page lists all the active users ’ information including the User Name , IP address, and the time tha t camera access began.[…]
-
Страница 43
43 D-Link DCS -931L User Manual Sec tion 4 — T roubleshooting T roubleshooting 1. What is Remote Ac cess? How do I enable it? Remote Access allows you to access your camera from any PC connected to the I nternet through a web browser . This lets you view your camera feed and manage y our camera ’ s settings when you ’ re aw ay from home . T o e[…]
-
Страница 44
44 D-Link DCS -931L User Manual Sec tion 4 — T roubleshooting 3. Why does the LED not light up? The power supply might be faulty . Conrm that you are using the provided DC 5V pow er supply for this net work camera. V erify that the power supply is correctly connected. If the camera is functioning normally , the LED may have been disabled. See ?[…]
-
Страница 45
45 D-Link DCS -931L User Manual Sec tion 4 — T roubleshooting 8. The images are poor quality , how can I improv e the image quality? Make sure that your computer ’ s display proper ties are set to at least 6-bit color . Using 16 or 256 colors on your computer will pr oduce dithering ar tifacts in the image, making the image look as if it is of po[…]
-
Страница 46
46 D-Link DCS -931L User Manual T echnical Specications T echnical Specications SY STEM REQUIREMENT S • Microsoft Windows® 8/7/V ista/XP , or Mac with OS X 10.6 or higher • PC with 1.3 GHz or above and at least 128 MB RAM • Internet Explorer 7, F iref ox 12, Safari 4, or Chrome 20 or higher version with Jav a installed and enabled NE T[…]
-
Страница 47
47 D-Link DCS -931L User Manual T echnical Specications VIEWING ANGLE • Horizontal: 45.3° • V er tical: 34.5° • Diagonal: 54.9° DIGIT AL Z OOM • Up to 4x 3A CON T R O L • AGC ( Auto Gain Contr ol) • A WB (A uto White Balance) • AES (A uto Electronic Shutter) POWER • Input: 100-240 V AC, 50/60 Hz • Output: 5 V DC, 1 A • Ext[…]
Описание
Беспроводная 802.11n сетевая камера DCS-931L с поддержкой кодека H.264 является универсальным и уникальным решением для малого офиса или дома. В отличие от стандартных Web-камер DCS-931L представляет собой полноценную систему со встроенным процессором и Web-сервером, передающим высококачественное видеоизображение. Данная IP-камера также поддерживает функции удаленного управления, обнаружения движения и детектора звука для комплексного и эффективного решения домашней безопасности.

Автономная система видеонаблюдения
DCS-931L является автономной камерой, которая не требует специального аппаратного или программного обеспечения и может работать самостоятельно, даже без компьютера. Использование камеры DCS-931L и Интернет-соединения позволяет отправлять уведомления со снапшотами или видеоклипами по электронной почте при обнаружении движения или звука. Можно задать области обнаружения движения, например, вход в здание, а также можно установить пороговый уровень звука, превышение которого будет фиксироваться камерой.

Многофункциональная система видеонаблюдения
Входящее в комплект поставки DCS-931L программное обеспечение D-ViewCam позволяет расширить функциональные возможности камеры и создать полноценную систему видеонаблюдения. С помощью D-ViewCam возможно осуществлять централизованное управление несколькими сетевыми камерами (до 32 видеокамер и до 64 пользователей), выполнять запись с широким набором функций, включая запись по срабатыванию датчиков, по расписанию или вручную.
Постоянный удаленный доступ к видео с помощью облачного сервиса mydlink
Поддержка камерой DCS-931L сервиса mydlink™ делает наблюдение за домом или офисом более легким, удобным и позволяет всегда оставаться на связи вне зависимости от местонахождения. Доступ к сервису mydlink можно получить через Web-браузер, а также с помощью дополнительных приложений mydlink для пользователей мобильных устройств. Приложения mydlink позволяют пользователю, использующему Wi-Fi, 3G или 4G соединение, легко и быстро просмотреть видеоизображение с камеры.

Высокая скорость передачи данных, большой радиус действия беспроводной сети
Благодаря беспроводному подключению 802.11b/g/n и разъему Ethernet/Fast Ethernet можно легко интегрировать камеру в существующую сеть. Режим повторителя позволяет увеличить радиус действия беспроводной сети, что помогает устранить зоны с низким уровнем сигнала и легко добавить другие беспроводные устройства в сеть.

Характеристики
Аппаратный профиль камеры
• 1/5-дюймовый CMOS-сенсор VGA с технологией прогрессивного сканирования
• Минимальное освещение: 1 люкс @F2.8
• 4-кратное цифровое увеличение
• Фокусное расстояние: 3,15 мм
• Апертура: F2.8
• Время выдержки: от 1/15 до 1/15000 сек.
• Угол обзора:
— 45,3° (по горизонтали)
— 34,5° (по вертикали)
— 54,9° (по диагонали)
• Встроенный микрофон
Характеристики изображения
• Настройка качества и размера изображения, скорости передачи кадров и скорости передачи данных
• Метки времени и вставки текста
• Настраиваемые окна для обнаружения движения
• Настройка яркости, насыщенности цвета, контраста
Сжитие видео
• Сжатие в форматах H.264/MJPEG
• JPEG для стоп-кадров
Разрешение видео
640×480, 320×240,160×112 до 30 кадров/с
Сжатие аудио
PCM
Подключения
• Порт 10/100 BASE-TX Ethernet
• Беспроводное соединение 802.11n
Сетевые протоколы
• IPv4, ARP, TCP, UDP, ICMP
• DHCP-клиент
• NTP-клиент (D-Link)
• DNS-клиент
• DDNS-клиент (D-Link)
• SMTP-клиент
• FTP-клиент
• HTTP-сервер
• PPPoE
• UPnP Port Forwarding
• LLTD
Безопасность
• Аутентификация по паролю
• Шифрование HTTP
Системные требования для Web-интерфейса
• Операционная система: Microsoft Windows XP, Vista, 7, 8
• Web-браузер: Internet Explorer, Firefox, Chrome, Safari
Управление событиями
• Обнаружение движения
• Детектор уровня звука
• Уведомление о событии и загрузка снапшотов/видеоклипов через электронную почту или FTP
Удаленное управление
Интерфейс для настройки, доступный через Web-браузер
Поддержка мобильных устройств
Приложение mydlink Lite для iOS и Android
Системные требования D-ViewCam™
• Операционная система: Microsoft Windows 7/Vista/XP
• Web-браузер: Internet Explorer 7 или выше
• Протокол: Стандартный TCP/IP
Функции программного обеспечения D-ViewCam™
• Удаленное управление/контроль: до 32 камер
• Просмотр изображений на одном экране: до 32 камер
• Поддержка всех функций управления, доступных через Web-интерфейс
• Опции записи по срабатыванию датчика, по расписанию или вручную
Сертификаты
Заказ
DCS-931L Беспроводная облачная сетевая VGA-камера с режимом повторителя
Изображения
DCS-931L/Ax

Вид спереди

Вид сзади
Загрузки
Смотрите также
-
Страница 1
V ersion 1.0 | 01/16/2013 U ser Manual W ir eless N H.264 Netw ork Camer a DCS-931L[…]
-
Страница 2
D-Link reser ves the right to revise this publication and to make changes in the conten t hereof without obligation to notify any person or organization of such revisions or changes . Information in this document ma y become obsolete as our services and websites dev elop and change. Please r efer to the www .mydlink.com website f or the most cur re[…]
-
Страница 3
3 D-Link DCS -931L User Manual T able of C ontents Product Overview …………………………………………………….. 4 P ack age Cont ents ………………………………………………………………. 4 Syst em Requirements ……………………………………………………….. 4 Introduction ……………….[…]
-
Страница 4
4 D-Link DCS -931L User Manual Sec tion 1 — Pr oduc t Overview • DCS-931L Wir eless N H.264 Network Camera • CA T5 Ethernet C able • P ower Adapt er • Manual and Sof tware on CD • Quick Install Guide • Mounting Kit Note: Using a power supply with a dieren t voltage than the one included with your product will cause damage and void th[…]
-
Страница 5
5 D-Link DCS -931L User Manual Sec tion 1 — Pr oduc t Overview Introduction Congr atulations on your purchase of the DCS-931L Wir eless N H.264 Network C amera. The DCS-931L is a versatile and unique solution f or your small oce or home. Unlike a standar d webcam, the DCS-931L is a complete system with a built-in CPU and web server that transmit[…]
-
Страница 6
6 D-Link DCS -931L User Manual Sec tion 1 — Pr oduc t Overview Easy to Use and m ydlink-Enabled f or Easy Ac cess and Management The DCS-931L is a standalone sur veillance camera that requires no special har dware or sof tware, and can run independently even without a PC. This camera is also mydlink-enabled, which means you can view and manage your[…]
-
Страница 7
7 D-Link DCS -931L User Manual Sec tion 1 — Pr oduc t Overview Har dwar e O ver view F ront V iew Camera L ens Microphone[…]
-
Страница 8
8 D-Link DCS -931L User Manual Sec tion 1 — Pr oduc t Overview Rear V iew P ower C onnector Ethernet P or t Reset Button WPS LED WPS Button Camera S tand P ower and Link LED[…]
-
Страница 9
9 D-Link DCS -931L User Manual Sec tion 2 — Installation There ar e three wa ys to set up your camer a: Zero Congur ation S etup : If you have a mydlink -enabled r outer , this is the easiest way to set up your camera. Refer to page 10. Camer a Installation Wizar d : I f you do not have a my dlink-enabled router , use the Camera I nstallation Wi[…]
-
Страница 10
10 D-Link DCS -931L User Manual Sec tion 2 — Installation If y ou have a m ydlink-enabled Cloud Rout er , you can take advantage of Zero Conguration. Zero Conguration automatically congures your camer a’s settings for y ou, and adds it to your m ydlink account aut omatically . This type of setup allows y ou to set up your camera b y s[…]
-
Страница 11
11 D-Link DCS -931L User Manual Sec tion 2 — Installation A summar y and conrmation notica tion will appear with the automa tically congured details. Make a note of the details and click Y es to add the camera to your ac count. Check Y our my dlink Acc ount Ope n a we b br ow ser and logi n to you r my dlink acc oun t. The my dli nk page w[…]
-
Страница 12
12 D-Link DCS -931L User Manual Sec tion 2 — Installation Zer o Congura tion will naviga te to the my dlink Live View tab for your camera where y ou will see a screen similar to the f ollowing. If you wish to c onnec t your camer a to your r outer wirelessly , you can simply disconnect the Ethernet cable and move the camera to its intended locat[…]
-
Страница 13
13 D-Link DCS -931L User Manual Sec tion 2 — Installation C amera Installation W izard W indow s Users Note : I f the autorun progr am does not open, go to My Computer , bro wse to your CD drive, and double — click on the autorun.ex e le. Inser t the I nstallation CD-ROM into your computer’ s optical drive to star t the autorun prog ram. Simpl[…]
-
Страница 14
14 D-Link DCS -931L User Manual Sec tion 2 — Installation Mac Users Inser t the Installation CD-ROM int o y our c omputer ’ s optical drive. On the desktop , open your CD drive and double — click on the SetupW izard le. After about 20-30 seconds, the Setup Wizard will open, which will guide y ou step-by-step through the installation process fr[…]
-
Страница 15
15 D-Link DCS -931L User Manual Sec tion 2 — Installation Manual Hardw are Installation If you wish to set up your camer a without using the Camera Setup Wizard , please follo w these steps. Note: In order to use the mydlink f eatures of this product, you will need to go through the Camera Setup W izard or Zero Congura tion Setup. Optional: Use […]
-
Страница 16
16 D-Link DCS -931L User Manual Sec tion 2 — Installation W ireless Installation C onsiderations The D-Link Wir eless Net work Camera lets you access your network using a wireless connection from anywhere within the operating range of your wireless network . How ever , the number , thick ness and location of walls, ceilings , or other objects that […]
-
Страница 17
17 D-Link DCS -931L User Manual Sec tion 2 — Installation T o creat e a WPS connection: Step 1 Make sur e the camera is plugged in, then press and hold the WPS butt on f or three seconds . The blue WPS status LED will star t blink ing. Step 2 Pr ess the WPS button on y our router within 60 seconds. The WPS button is usually on the fron t or side of[…]
-
Страница 18
18 D-Link DCS -931L User Manual Sec tion 2 — Installation m ydlink After registering your DCS -931L camera with a mydlink account in the Camera I nstallation Wizar d, you will be able to remotely access your camera from the w ww .my dlink .com website . After signing in to your mydlink account, you will see a screen similar to the f ollowing: F or […]
-
Страница 19
19 D-Link DCS -931L User Manual 19 Sec tion 3 — Congur ation C ongura tion U sing the W eb C ongura tion Inter fac e After completing the Camera Installation W izard, you are ready to use your camera. The camera ’ s built-in W eb conguration inter face is designed to allow you to easily acc ess and congure your DCS-931L. At the end[…]
-
Страница 20
20 D-Link DCS -931L User Manual 20 Sec tion 3 — Congur ation Liv e V ideo V ideo Compr ession F ormat: Zoom: Audio: Click the H.264 or MJPEG radio button to choose which str eam to view . Click on these buttons to zoom in and out of the video . Click on these buttons to turn audio playback on and o . The Live Video screen shows you the live v[…]
-
Страница 21
21 D-Link DCS -931L User Manual 21 Sec tion 3 — Congur ation Setup W izard Y ou may choose to congure your net work by using the Internet Connection S etup W izard that includes step-by-s tep instructions. O therwise, you may manually congur e your connection using the Manual Internet Connection Setup . Note : T o register your camera with[…]
-
Страница 22
22 D-Link DCS -931L User Manual 22 Sec tion 3 — Congur ation Internet C onnec tion Setup W izard This wizard will guide y ou through a step-by-step pr ocess to congure y our new D-Link Camera and connect the camera to the Internet. Click Next to continue . Select what k ind of Internet connection your camera should use: • DHCP Connection (D[…]
-
Страница 23
23 D-Link DCS -931L User Manual 23 Sec tion 3 — Congur ation Enter a name f or your camera. Click Ne x t to continue . Congur e the correct time to ensure that all events are trigger ed, captured, and scheduled at the right time. Click Ne xt to continue. This page displays y our congured settings. Click Apply to sa ve and activat e your ch[…]
-
Страница 24
24 D-Link DCS -931L User Manual 24 Sec tion 3 — Congur ation Network Setup Select this connection if you have a DHCP ser ver running on your network and would like a dynamic IP address to be updated to your camera automatically . Y ou may obtain a static or xed IP address and other net work information from y our network administrator for y o[…]
-
Страница 25
25 D-Link DCS -931L User Manual 25 Sec tion 3 — Congur ation W ireless Setup Chec k this box to allow yo ur camera to con nect to your network wirel essly . En ter the netw ork nam e(S SID ) of the wir eles s netw ork you wa nt to con nect to . Y ou can also click the Site Sur vey button below to choose an available network and ll in settings[…]
-
Страница 26
26 D-Link DCS -931L User Manual 26 Sec tion 3 — Congur ation Ex tender Setup Check this box to enable Extender Mode. This shows the name of the Host wireless network that the camera is connected to and will extend. Select an option: • Same as Host W ireless Network Name : Y o ur ex te n de d ne t w o r k will use the same name and settings as […]
-
Страница 27
27 D-Link DCS -931L User Manual 27 Sec tion 3 — Congur ation Click to enable the DDNS function. Select your D ynamic DNS Ser ver from the pull down menu . Enter the host name of the DDNS server . Enter your username or e-mail used to connect to the DDNS. Enter your passw ord used to connect to the DDNS server . Enable: Ser ver A ddress: Host Nam[…]
-
Страница 28
28 D-Link DCS -931L User Manual 28 Sec tion 3 — Congur ation Image S etup If you hav e lights ickering in your camera video , tr y enabling antiicker . Other wise, you should leav e this disabled. Select this box to vertically ip the video. Horizontally ip the video . Note : If the camera is installed upside down, Flip I mage and Mir[…]
-
Страница 29
29 D-Link DCS -931L User Manual 29 Sec tion 3 — Congur ation V ideo V ideo Prole: Encode T ype: Resolution: FPS: JPEG Quality: V iew Mode: Light F requency: This section allows you t o congure the video settings for y our camera. This section allows you t o change the Resolution , FPS , and Quality . Y our camera has separate settings f or[…]
-
Страница 30
30 D-Link DCS -931L User Manual 30 Sec tion 3 — Congur ation A udio This section allows you t o adjust the audio settings for your camera. Note: Please wait a f ew seconds for the camer a to adjust the audio after mak ing changes. Audio Settings: V olume S ettings: Y ou may Enable or Disable the camera audio feed . Select the desired volume perc[…]
-
Страница 31
31 D-Link DCS -931L User Manual 31 Sec tion 3 — Congur ation Motion Detec tion Motion detec tion allows you to mar k areas of your camera ’ s video to monitor for motion, which can be used to tr igger snapshots or recordings . Refer to “Mail” on page 33 and “FTP ” on page 35 for more details . Motion Detection: Time: Sensitivity : Dete[…]
-
Страница 32
32 D-Link DCS -931L User Manual 32 Sec tion 3 — Congur ation Sound Detec tion Sound detection allows you to detect when there is a loud sound in the area, which can be used to trigger snapshots or recordings . Refer to “Mail” on page 33 and “FTP ” on page 35 for more details . Sound Detection: Time: Detection Lev el: Select whether you w[…]
-
Страница 33
33 D-Link DCS -931L User Manual 33 Sec tion 3 — Congur ation Mail SMTP Server Addr ess: Sender e -mail Addr ess: Receiver e-mail Addr ess: User Name: P assword: This is the domain name or IP address of y our external e -mail ser ver . This is the e -mail address listed as the sender for your notication e -mails . This is the e -mail address t[…]
-
Страница 34
34 D-Link DCS -931L User Manual 34 Sec tion 3 — Congur ation Enable the e -mailing of images to an e -mail account: E-mail Interval: Enable the e -mailing of video clips to an e -mail accoun t: T est E-mail Ac count: Enabling this will allow snapshots to be e -mailed to you in di erent ways: • Choosing A l ways will e -mail snapshots contin[…]
-
Страница 35
35 D-Link DCS -931L User Manual 35 Sec tion 3 — Congur ation FTP Host Name: P or t: User Name: P assword: P ath: P assive Mode: Enter the IP address of the FTP server that you will be c onnecting to. Enter the port of the FTP ser ver that you will be connecting to . Enter the user name of your FTP server accoun t. Enter the passwor d of your FTP[…]
-
Страница 36
36 D-Link DCS -931L User Manual 36 Sec tion 3 — Congur ation F ile: T est FTP Ser ver: Select how you want uploading of snapshots to be handled: • Overwrite will replace the old snapshot with the new one. This means you will only have one snapshot that is updated ever y time a new one is taken. • Date/T ime Suffix will add the date and time […]
-
Страница 37
37 D-Link DCS -931L User Manual 37 Sec tion 3 — Congur ation T ime and Date Time Z one: Synchr onize NTP Ser ver: Set the Date and Time Manually: Select the time zone for your r egion from the drop do wn menu. Enabling this will allow the camera to update its clock automatically from an NTP ser ver . S elect the NTP ser v er closest to you, and […]
-
Страница 38
38 D-Link DCS -931L User Manual 38 Sec tion 3 — Congur ation Maintenanc e A dmin This sec tion allows you to change the administrator ’ s password and congure the ser ver settings for your camera. Y ou can also manage the user account(s) that ar e allowed t o access to your camer a. Admin P assword: Camera Name: LED Con trol: User A ccess C[…]
-
Страница 39
39 D-Link DCS -931L User Manual 39 Sec tion 3 — Congur ation S yst em This section allows you t o save and rest ore your congur ation, restor e the fac tory settings, and/or restart the camera. Save T o Local Hard Drive: Load F rom Local Hard Drive: Restore T o F ac tory Default: Rebbot The Device: Click the Save C onfiguration button to save[…]
-
Страница 40
40 D-Link DCS -931L User Manual 40 Sec tion 3 — Congur ation F irm ware Upg rade Y our cur rent rmware version and date will be displayed on your screen. Y ou may go to the D -Link Suppor t P age to check for the latest r mwar e versions av ailable. T o upgrade the rmware on your DCS-931L, download the latest rmware from the D -Link […]
-
Страница 41
41 D-Link DCS -931L User Manual 41 Sec tion 3 — Congur ation Sta tus Devic e Info This section displays all the detailed inf ormation about your device and network settings.[…]
-
Страница 42
42 D-Link DCS -931L User Manual 42 Sec tion 3 — Congur ation A c tive U ser This page lists all the active users ’ information including the User Name , IP address, and the time tha t camera access began.[…]
-
Страница 43
43 D-Link DCS -931L User Manual Sec tion 4 — T roubleshooting T roubleshooting 1. What is Remote Ac cess? How do I enable it? Remote Access allows you to access your camera from any PC connected to the I nternet through a web browser . This lets you view your camera feed and manage y our camera ’ s settings when you ’ re aw ay from home . T o e[…]
-
Страница 44
44 D-Link DCS -931L User Manual Sec tion 4 — T roubleshooting 3. Why does the LED not light up? The power supply might be faulty . Conrm that you are using the provided DC 5V pow er supply for this net work camera. V erify that the power supply is correctly connected. If the camera is functioning normally , the LED may have been disabled. See ?[…]
-
Страница 45
45 D-Link DCS -931L User Manual Sec tion 4 — T roubleshooting 8. The images are poor quality , how can I improv e the image quality? Make sure that your computer ’ s display proper ties are set to at least 6-bit color . Using 16 or 256 colors on your computer will pr oduce dithering ar tifacts in the image, making the image look as if it is of po[…]
-
Страница 46
46 D-Link DCS -931L User Manual T echnical Specications T echnical Specications SY STEM REQUIREMENT S • Microsoft Windows® 8/7/V ista/XP , or Mac with OS X 10.6 or higher • PC with 1.3 GHz or above and at least 128 MB RAM • Internet Explorer 7, F iref ox 12, Safari 4, or Chrome 20 or higher version with Jav a installed and enabled NE T[…]
-
Страница 47
47 D-Link DCS -931L User Manual T echnical Specications VIEWING ANGLE • Horizontal: 45.3° • V er tical: 34.5° • Diagonal: 54.9° DIGIT AL Z OOM • Up to 4x 3A CON T R O L • AGC ( Auto Gain Contr ol) • A WB (A uto White Balance) • AES (A uto Electronic Shutter) POWER • Input: 100-240 V AC, 50/60 Hz • Output: 5 V DC, 1 A • Ext[…]
Описание
Беспроводная 802.11n сетевая камера DCS-931L с поддержкой кодека H.264 является универсальным и уникальным решением для малого офиса или дома. В отличие от стандартных Web-камер DCS-931L представляет собой полноценную систему со встроенным процессором и Web-сервером, передающим высококачественное видеоизображение. Данная IP-камера также поддерживает функции удаленного управления, обнаружения движения и детектора звука для комплексного и эффективного решения домашней безопасности.
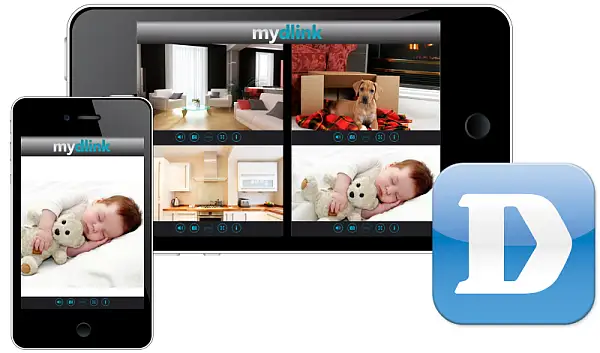
Автономная система видеонаблюдения
DCS-931L является автономной камерой, которая не требует специального аппаратного или программного обеспечения и может работать самостоятельно, даже без компьютера. Использование камеры DCS-931L и Интернет-соединения позволяет отправлять уведомления со снапшотами или видеоклипами по электронной почте при обнаружении движения или звука. Можно задать области обнаружения движения, например, вход в здание, а также можно установить пороговый уровень звука, превышение которого будет фиксироваться камерой.
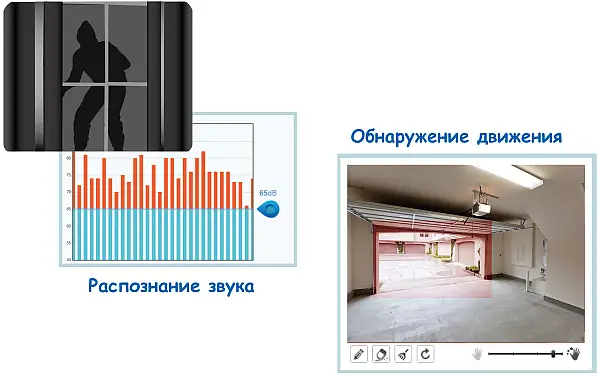
Многофункциональная система видеонаблюдения
Входящее в комплект поставки DCS-931L программное обеспечение D-ViewCam позволяет расширить функциональные возможности камеры и создать полноценную систему видеонаблюдения. С помощью D-ViewCam возможно осуществлять централизованное управление несколькими сетевыми камерами (до 32 видеокамер и до 64 пользователей), выполнять запись с широким набором функций, включая запись по срабатыванию датчиков, по расписанию или вручную.
Постоянный удаленный доступ к видео с помощью облачного сервиса mydlink
Поддержка камерой DCS-931L сервиса mydlink™ делает наблюдение за домом или офисом более легким, удобным и позволяет всегда оставаться на связи вне зависимости от местонахождения. Доступ к сервису mydlink можно получить через Web-браузер, а также с помощью дополнительных приложений mydlink для пользователей мобильных устройств. Приложения mydlink позволяют пользователю, использующему Wi-Fi, 3G или 4G соединение, легко и быстро просмотреть видеоизображение с камеры.
Высокая скорость передачи данных, большой радиус действия беспроводной сети
Благодаря беспроводному подключению 802.11b/g/n и разъему Ethernet/Fast Ethernet можно легко интегрировать камеру в существующую сеть. Режим повторителя позволяет увеличить радиус действия беспроводной сети, что помогает устранить зоны с низким уровнем сигнала и легко добавить другие беспроводные устройства в сеть.
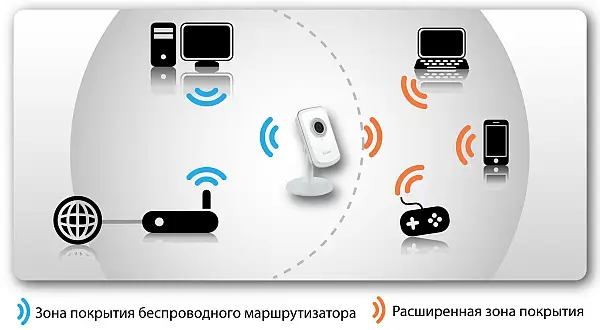
Характеристики
Аппаратный профиль камеры
• 1/5-дюймовый CMOS-сенсор VGA с технологией прогрессивного сканирования
• Минимальное освещение: 1 люкс @F2.8
• 4-кратное цифровое увеличение
• Фокусное расстояние: 3,15 мм
• Апертура: F2.8
• Время выдержки: от 1/15 до 1/15000 сек.
• Угол обзора:
— 45,3° (по горизонтали)
— 34,5° (по вертикали)
— 54,9° (по диагонали)
• Встроенный микрофон
Характеристики изображения
• Настройка качества и размера изображения, скорости передачи кадров и скорости передачи данных
• Метки времени и вставки текста
• Настраиваемые окна для обнаружения движения
• Настройка яркости, насыщенности цвета, контраста
Сжитие видео
• Сжатие в форматах H.264/MJPEG
• JPEG для стоп-кадров
Разрешение видео
640×480, 320×240,160×112 до 30 кадров/с
Сжатие аудио
PCM
Подключения
• Порт 10/100 BASE-TX Ethernet
• Беспроводное соединение 802.11n
Сетевые протоколы
• IPv4, ARP, TCP, UDP, ICMP
• DHCP-клиент
• NTP-клиент (D-Link)
• DNS-клиент
• DDNS-клиент (D-Link)
• SMTP-клиент
• FTP-клиент
• HTTP-сервер
• PPPoE
• UPnP Port Forwarding
• LLTD
Безопасность
• Аутентификация по паролю
• Шифрование HTTP
Системные требования для Web-интерфейса
• Операционная система: Microsoft Windows XP, Vista, 7, 8
• Web-браузер: Internet Explorer, Firefox, Chrome, Safari
Управление событиями
• Обнаружение движения
• Детектор уровня звука
• Уведомление о событии и загрузка снапшотов/видеоклипов через электронную почту или FTP
Удаленное управление
Интерфейс для настройки, доступный через Web-браузер
Поддержка мобильных устройств
Приложение mydlink Lite для iOS и Android
Системные требования D-ViewCam™
• Операционная система: Microsoft Windows 7/Vista/XP
• Web-браузер: Internet Explorer 7 или выше
• Протокол: Стандартный TCP/IP
Функции программного обеспечения D-ViewCam™
• Удаленное управление/контроль: до 32 камер
• Просмотр изображений на одном экране: до 32 камер
• Поддержка всех функций управления, доступных через Web-интерфейс
• Опции записи по срабатыванию датчика, по расписанию или вручную
Сертификаты
Декларация соответствия для DCS-931L
Сертификат соответствия ЕАС № ТС RU C-TW.БЛ08.В.00620, срок действия с 18.05.2017 по 17.05.2023*
*Продление сроков действия в соответствие с Приложением №18 к постановлению Правительства РФ от 12.03.2022 № 353 (ред. от 12.09.2022) «Об особенностях разрешительной деятельности в Российской Федерации в 2022 году»
Заказ
DCS-931L Беспроводная облачная сетевая VGA-камера с режимом повторителя
Изображения
DCS-931L/Ax
Вид спередиВид сзади
Загрузки
Общее описание
Программное обеспечение FW 1.15.01
Скачать
Программное обеспечение FW 1.14.11
Скачать
Программное обеспечение FW 1.13.05
Скачать
Программное обеспечение FW 1.12.03
Скачать
Программное обеспечение FW 1.10.13
Скачать
Краткое руководство по установке
Руководство пользователя
Мастер установки для MAC_OS
Мастер установки для Windows
Мы предлагаем следующие способы доставки товара:
Самовывоз из пункта выдачи
Самостоятельное получение заказа в пункте выдачи. Дата и время получения заранее согласуется с менеджером магазина.
Отгрузка товара юридическим лицам осуществляется только при наличии печати или правильно оформленной и заполненной доверенности, наличии паспорта получателя.
Курьерская доставка по Москве
Доставка по адресу покупателя или до пункта приема транспортной компании в г. Москве. Дата и время доставки заранее согласуется с менеджером магазина.
Доставка транспортной компанией по России
Доставка транспортной компанией по России до пункта выдачи транспортной компании или до конечного адреса покупателя.
Мы предлагаем следующие способы оплаты товара:
Оплата наличными
Оплата за наличный расчет для физических и юридических лиц. После внесения денежных средств Покупатель подписывает товаросопроводительные документы и получает кассовый чек.
Безналичная оплата
Мы работаем с физическими и юридическими лицами за безналичный расчёт со 100% предоплатой с оформлением всех предусмотренных законодательством документов. Счёт на оплату направляется Покупателю на электронную почту после запроса счета через форму на сайте либо по электронной почте. Цена на заказанный товар действительна в течение 2 дней с момента оформления Заказа.
Электронные способы
Оплата Заказа электронными способами, в т.ч. банковскими картами. Оплата Заказа данным способом доступна запросом ссылки на оплату у нашего менеджера.
Если у вас возникнут вопросы по оформлению заказа, вы можете обратиться к нам, позвонив по телефону +7 495 179-34-22 или связавшись по электронной почте sale@ru-dlink.com. Мы гарантируем оперативный ответ на ваш запрос и предоставление наилучших условий от официального поставщика D-LINK.
Запрос цены или КП
Мы предоставляем официальную гарантию на всю продукцию.
Сервис расширенной гарантии включает в себя:
- Приемку в сервисном центра для выполнения диагностики дефекта.
- Ремонт.
- Бесплатную доставку клиенту.
В рамках дополнительной программы оборудование D-LINK может быть поставлено с расширенной гарантией D-LINK. Cрок расширенной гарантии D-LINK – 12 месяцев с даты регистрации партнером продажи данного оборудования в базе данных компании D-LINK. По желанию клиента расширенная гарантия может быть продлена на следующие 12 месяцев по истечению первоначального срока или приобретена сразу на 24 или 36 месяцев.
Контакты гарантийного отдела:
Телефон: +7 495 179-34-22
E-mail: sale@ru-dlink.com
Получить КП / Счет
Для расчета коммерческого предложения или получения счета на поставку оборудования D-LINK оставьте заявку в форме ниже или свяжитесь с отделом продаж по телефону +7 495 179-34-22 или электронной почте sale@ru-dlink.com. Мы гарантируем оперативный ответ на ваш запрос и предоставление наилучших условий от официального поставщика D-LINK.
Специалист по решениям D-LINK:
- Окажет профессиональную консультацию.
- Сообщит вашу цену на продукцию.
- Сообщит информацию об актуальных акциях и скидках.
- Подскажет ближайшее к вам отделение с наличием нужной продукции.
- Согласует с вами возможную дату и время доставки.
Запрос цены или КП
DCS 931L — это высококачественная камера наблюдения, которая позволяет вам контролировать свое пространство в реальном времени. В данной статье вы найдете подробную инструкцию о том, как правильно настроить камеру DCS 931L.
Первым шагом в настройке камеры DCS 931L является подключение ее к вашей локальной сети. Для этого вам понадобится Ethernet-кабель, который нужно вставить в соответствующий порт на камере и в свободный порт на вашем маршрутизаторе.
После подключения камеры к сети перейдите к следующему шагу — настройке самой камеры. Для этого вам потребуется компьютер с доступом в интернет и веб-браузер. Запустите браузер и введите IP-адрес камеры в адресную строку. Вы будете перенаправлены на веб-интерфейс настройки камеры DCS 931L.
Веб-интерфейс предлагает вам множество опций для настройки камеры, включая подключение к беспроводной сети, настройку детектора движения, установку времени и даты, а также многое другое. Вам следует внимательно изучить каждое из этих меню и настроить их в соответствии с вашими потребностями.
После завершения настройки камеры DCS 931L не забудьте сохранить изменения. Теперь ваша камера готова к использованию. Вы можете отслеживать свое пространство через веб-интерфейс или с помощью мобильного приложения, которое можно скачать на смартфон или планшет.
Содержание
- Инструкция по настройке камеры DCS 931L
- Шаг 1: Подготовка к установке
- Шаг 2: Подключение камеры к сети
- Шаг 3: Конфигурация сетевых настроек камеры
- Шаг 4: Настройка доступа к камере из интернета
- Шаг 5: Дополнительные настройки и функции
Инструкция по настройке камеры DCS 931L
Шаг 1. Подготовка камеры.
Перед началом настройки камеры DCS 931L, убедитесь, что у вас имеется следующее:
- Камера DCS 931L.
- Сетевой кабель для подключения камеры к маршрутизатору.
- Беспроводной маршрутизатор с функцией Wi-Fi.
Шаг 2. Подключение камеры к маршрутизатору.
Для подключения камеры DCS 931L к маршрутизатору, выполните следующие действия:
- Подключите сетевой кабель одним концом к камере DCS 931L, а другим концом — к свободному порту на маршрутизаторе.
- Включите камеру, подключив ее к источнику питания.
- Подождите несколько минут, чтобы камера запустилась и установила соединение с маршрутизатором.
Шаг 3. Настройка камеры через веб-интерфейс.
После того, как камера DCS 931L успешно подключена к маршрутизатору, выполните следующие действия:
- Откройте любой веб-браузер на компьютере, подключенном к той же сети, что и камера DCS 931L.
- Введите IP-адрес камеры в адресную строку браузера и нажмите Enter.
- Появится окно авторизации. Введите логин и пароль по умолчанию (обычно это admin/admin) и нажмите Войти.
- Откроется веб-интерфейс камеры DCS 931L. Здесь вы сможете провести все необходимые настройки камеры, включая создание учетной записи, установку Wi-Fi, настройку обнаружения движения и многое другое.
- Пройдите по каждому разделу настроек и внесите необходимые изменения в соответствии с вашими потребностями.
Шаг 4. Проверка настроек и тестирование камеры.
После того, как вы завершили настройку камеры DCS 931L, выполните следующие действия:
- Проверьте, что все настройки были сохранены и применены.
- Проверьте подключение камеры к сети и убедитесь, что она работает исправно.
- Протестируйте функции камеры, такие как запись видео, снимки, обнаружение движения и т. д.
Поздравляем! Теперь вы знаете, как настроить камеру DCS 931L и использовать ее для наблюдения и контроля в режиме реального времени.
Шаг 1: Подготовка к установке
Перед настройкой камеры DCS-931L вам потребуется выполнить несколько предварительных действий:
- Убедитесь, что ваша камера соответствует минимальным требованиям для работы. Они указаны в документации к устройству.
- Подключите камеру к источнику питания с помощью кабеля питания, который был поставлен в комплекте. Убедитесь, что камера включена.
- Настройте ваш маршрутизатор таким образом, чтобы он поддерживал DHCP (динамическое получение IP-адреса).
- Узнайте IP-адрес вашего маршрутизатора. Вы можете найти его в документации к маршрутизатору или с помощью команды ipconfig в командной строке Windows.
- При необходимости установите Wi-Fi усилитель сигнала, чтобы убедиться, что камера будет иметь надежное беспроводное подключение к вашей сети.
После выполнения всех подготовительных действий вы можете переходить к следующему шагу настройки камеры DCS-931L.
Шаг 2: Подключение камеры к сети
Перед началом настройки камеры Dcs 931l необходимо осуществить ее подключение к сети. Для этого следуйте инструкциям ниже:
- Определите место, где будет располагаться камера. Выберите место, где она имеет наилучший обзор и легко подключается к розетке электропитания.
- Вставьте адаптер питания в розетку электропитания.
- Подключите камеру к адаптеру питания с помощью кабеля питания.
- Дождитесь, пока индикатор питания на камере зажжется зеленым или желтым. Это означает, что камера включена и готова к работе.
- Подключите камеру к маршрутизатору с помощью Ethernet-кабеля. Вставьте один конец кабеля в разъем на камере, а другой — в свободный порт маршрутизатора.
- Подождите несколько минут, чтобы камера установила соединение с маршрутизатором.
- Для проверки подключения камеры откройте веб-браузер и введите в адресной строке IP-адрес камеры. Если открывается страница авторизации или веб-интерфейс камеры, это означает, что камера успешно подключена к сети.
После успешного подключения камеры к сети вы можете перейти к следующему шагу — настройке параметров безопасности и доступа.
Шаг 3: Конфигурация сетевых настроек камеры
После успешной установки программного обеспечения и подключения камеры на предыдущих шагах, необходимо настроить сетевые параметры камеры для обеспечения ее правильной работы.
Для начала откройте установленное программное обеспечение и найдите в нем настройки сетевого подключения к камере.
В настройках сети камеры вы найдете следующие параметры:
IP-адрес:
IP-адрес – это уникальный идентификатор, который присваивается камере и используется для ее сетевого подключения. Установите IP-адрес в соответствии с настройками вашей сети. Обычно IP-адрес начинается с «192.168» или «10.0». Убедитесь, что IP-адрес камеры не конфликтует с другими устройствами в вашей сети.
Маска подсети:
Маска подсети определяет диапазон IP-адресов, которые могут быть использованы в вашей локальной сети. Настройте маску подсети в соответствии с настройками вашей сети.
Основной шлюз:
Основной шлюз – это IP-адрес маршрутизатора или маршрутизатора в вашей сети. Укажите IP-адрес основного шлюза, чтобы камера могла подключаться к внешней сети.
DNS-сервер:
DNS-серверы преобразуют доменные имена в IP-адреса. Укажите IP-адреса DNS-серверов, которые будут использоваться камерой при преобразовании доменных имен.
После настройки всех сетевых параметров камеры сохраните внесенные изменения. Камера будет перезагружена с обновленными настройками сети.
Поздравляю! Вы успешно настроили сетевые параметры камеры DCS-931L. Теперь вы можете использовать ее для видеонаблюдения в вашей сети.
Шаг 4: Настройка доступа к камере из интернета
После успешного завершения настройки локального доступа к камере, вам может потребоваться настроить доступ к ней из интернета. Это позволит вам просматривать изображение с камеры в любом месте, где есть доступ к интернету.
- Перейдите в меню настройки камеры, выбрав соответствующий пункт меню.
- Выберите вкладку «Доступ из интернета» или подобную.
- Установите флажок «Разрешить удаленный доступ к камере из интернета» или аналогичный параметр.
- Запишите ваш внешний IP-адрес или доменное имя, которое будет использоваться для доступа к камере из интернета.
- Настройте порты для удаленного доступа к камере. Обычно используется порт 80 для HTTP-доступа и порт 554 для RTSP-доступа.
- Сохраните изменения.
После настройки доступа из интернета, вам необходимо будет настроить маршрутизатор или файрвол, чтобы перенаправить входящие запросы на указанные порты к IP-адресу камеры. Обратитесь к документации по вашему маршрутизатору или файрволу для выполнения этой настройки.
Шаг 5: Дополнительные настройки и функции
После основной настройки камеры DCS 931l, у вас есть возможность настроить дополнительные параметры и включить дополнительные функции.
1. Для начала, вы можете установить расписание записи. Это позволит камере автоматически записывать видео в определенные периоды дня или недели. Просто выберите временной диапазон и настройте параметры записи.
2. Вы также можете настроить оповещения на мобильное устройство или по электронной почте. Это позволит вам получать уведомления о движении или звуке, обнаруженном камерой. Выберите метод оповещения и настройте соответствующие параметры.
3. Кроме того, вы можете настроить удаленный доступ к камере через Интернет. Это позволит вам просматривать видеозаписи в режиме реального времени и получать оповещения где бы вы ни находились. Просто настройте соединение сети и создайте учетную запись для удаленного доступа.
4. Для обеспечения большей безопасности, вы можете настроить функцию обнаружения движения и звука. Камера будет автоматически реагировать на движение или звук в заданных зонах и отправлять вам уведомления. Настройте параметры обнаружения и выберите зоны на экране.
5. Кроме того, вы можете настроить запись видео на карту памяти или сетевое хранилище. Это позволит вам сохранять видеозаписи для последующего просмотра. Просто выберите место хранения и настройте параметры записи.
6. Не забудьте сохранить все изменения после настройки дополнительных функций и параметров. Это позволит вашей камере работать согласно заданным настройкам и функционалу.
Пользуясь этой подробной инструкцией, вы легко сможете настроить камеру DCS 931l и воспользоваться всеми ее функциями и возможностями. Удачной работы!