
Перейти к контенту
![]()
Русские электронные инструкции по эксплуатации
Постоянно обновляемый большой каталог документации по эксплуатации и использованию современных устройств и оборудования на русском языке. Бесплатное скачивание файлов.
Поиск:
Главная
♥ В закладки
Просмотр инструкции в pdf


/%D0%A1%D1%83%D1%88%D0%B8%D0%BB%D1%8C%D0%BD%D1%8B%D0%B5%20%D0%BC%D0%B0%D1%88%D0%B8%D0%BD%D1%8B/Serie%20|%206%20WTW85469OE.jpeg)
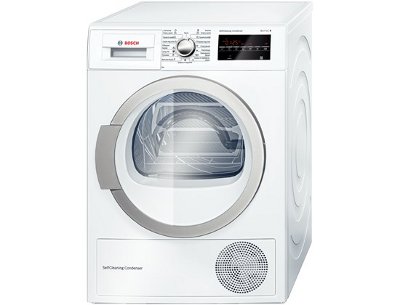
Инструкция по эксплуатации сушильной машины Bosch (Бош) Serie | 6 WTW85469OE.
Скачать инструкцию к сушильной машине Bosch (Бош) Serie | 6 WTW85469OE (2,47 МБ)

Инструкции по эксплуатации сушильных машин Bosch (Бош)
« Инструкция к сушильной машине Miele TCE530WP
» Инструкция к сушильной машине Bosch (Бош) Serie | 4 WTH83001OE
Вам также может быть интересно
/%D0%9A%D0%BE%D1%84%D0%B5%D0%B2%D0%B0%D1%80%D0%BA%D0%B8/TAS6507.jpeg)
Инструкция к кофеварке Bosch (Бош) TAS6507
/%D0%A1%D1%82%D0%B8%D1%80%D0%B0%D0%BB%D1%8C%D0%BD%D1%8B%D0%B5%20%D0%BC%D0%B0%D1%88%D0%B8%D0%BD%D1%8B/%20%D0%BC%D0%B0%D1%88%D0%B8%D0%BD%D0%B0%20%D1%81%D1%82%D0%B0%D0%BD%D0%B4%D0%B0%D1%80%D1%82%D0%BD%D0%B0%D1%8F%20Bosch%20Serie%20|%208%20WAV28IH1OE.jpg)
Инструкция к стиральной машине Bosch (Бош) машина стандартная Bosch Serie | 8 WAV28IH1OE
/%D0%9F%D1%8B%D0%BB%D0%B5%D1%81%D0%BE%D1%81%D1%8B/Sphera%20Bagless%20BGL32500.jpg)
Инструкция к пылесосу Bosch Sphera Bagless BGL32500
/%D0%9F%D1%8B%D0%BB%D0%B5%D1%81%D0%BE%D1%81%D1%8B/Readyy%20y%20BBHF214G.jpeg)
Инструкция к пылесосу Bosch (Бош) Readyy y BBHF214G
/%D0%9C%D0%B8%D0%BA%D1%80%D0%BE%D0%B2%D0%BE%D0%BB%D0%BD%D0%BE%D0%B2%D1%8B%D0%B5%20%D0%BF%D0%B5%D1%87%D0%B8/Serie|2%20FFL020MS1.jpg)
Инструкция к микроволновой печи Bosch (Бош) Serie|2 FFL020MS1
/%D0%A5%D0%BE%D0%BB%D0%BE%D0%B4%D0%B8%D0%BB%D1%8C%D0%BD%D0%B8%D0%BA%D0%B8/Serie%20|%204%20KGN49XI20R.jpg)
Инструкция к холодильнику Bosch (Бош) Serie | 4 KGN49XI20R
/%D0%9C%D0%B8%D0%BA%D1%81%D0%B5%D1%80%D1%8B/CleverMixx%20MFQ24200.jpeg)
Инструкция к миксеру Bosch (Бош) CleverMixx MFQ24200
/%D0%9F%D0%BE%D1%81%D1%83%D0%B4%D0%BE%D0%BC%D0%BE%D0%B5%D1%87%D0%BD%D1%8B%D0%B5%20%D0%BC%D0%B0%D1%88%D0%B8%D0%BD%D1%8B/SPS25FW12R.jpg)
Инструкция к посудомоечной машине Bosch (Бош) SPS25FW12R
Добавить комментарий
Имя *
Email *
Сайт
Комментарий


![]()


Сохранить моё имя, email и адрес сайта в этом браузере для последующих моих комментариев.
- Добавить инструкцию
- Заказать инструкцию
- Политика конфиденциальности
user manualBosch Serie 6 WTG85230EE

en Installation and operating instructions
Tumble dryer
WTG85230EE
View the manual for the Bosch Serie 6 WTG85230EE here, for free. This manual comes under the category dryers and has been rated by 54 people with an average of a 8.2. This manual is available in the following languages: English. Do you have a question about the Bosch Serie 6 WTG85230EE or do you need help? Ask your question here
- Your new tumble dryer
- Display rules
- : Warning!
- Caution!
- Note/tip
- 1. 2. 3. / a) b) c)
- Contentsen Installation and operating instructions
- [ Consumption values
The Bosch Serie 6 WTG85230EE is a freestanding dryer that utilizes a heat pump drying system. It features a right-hinged door and offers both rotary and touch controls for ease of use. The built-in LED display provides clear visibility of the selected settings. This dryer is certified with CE and VDE certifications, ensuring compliance with European standards.
With a rated capacity of 8 kg, the Bosch Serie 6 WTG85230EE is suitable for medium-sized laundry loads. It has been classified as a drying class B appliance, indicating its efficiency. The cycle time for this dryer is approximately 203 minutes.
Operating at a noise level of 65 dB, this dryer offers adjustable drying levels to cater to different fabrics and moisture levels. Additionally, it has a delay start feature that allows for a maximum delay of 24 hours, providing flexibility in scheduling the drying process.
Overall, the Bosch Serie 6 WTG85230EE offers reliable and efficient drying performance. With its heat pump technology, it helps to conserve energy and reduce electricity consumption. The durable construction and premium materials used in its manufacturing ensure its longevity.
Please note that this objective description is based solely on the provided specifications, and no subjective opinion is given about the product’s performance or quality.

General
| Bosch | |
| Serie 6 WTG85230EE | WTG85230EE | |
| dryer | |
| 4242002942841 | |
| English | |
| User manual (PDF) |
Design
| Appliance placement | Freestanding |
| Loading type | Top-load |
| Drying system | Heat pump |
| Product colour | White |
| Door hinge | Right |
| Control type | Rotary, Touch |
| Built-in display | Yes |
| Display type | LED |
| Certification | CE, VDE |
Performance
| Rated capacity | 8 kg |
| Drying class | B |
| Cycle time | 203 min |
| Noise level | 65 dB |
| Adjustable drying level | Yes |
Ergonomics
| Delay start (max) | 24 h |
| Delayed start timer | Yes |
| LED program stage indicator | Yes |
| Remaining time indication | Yes |
Power
| Energy efficiency class | A++ |
| Connected load | 1000 W |
| AC input voltage | 220-240 V |
| AC input frequency | 50 Hz |
| Energy consumption | 1.04 kWh |
| Annual energy consumption | 232 kWh |
| Heat source | Electric |
Weight & dimensions
| Width | 598 mm |
| Depth | 599 mm |
| Height | 842 mm |
| Weight | 53000 g |
Packaging data
| Package width | 625 mm |
| Package depth | 675 mm |
| Package height | 870 mm |
show more
Can’t find the answer to your question in the manual? You may find the answer to your question in the FAQs about the Bosch Serie 6 WTG85230EE below.
What is a condenser dryer?
A condenser dryer is a dryer in which condensation ends up in a reservoir.
What is a drain dryer?
A drain dryer is a dryer in which the warm air and condensation are drained through a hose.
What is the best thing to do about a smelly dryer?
It is best to wipe the dryer drum with a damp cloth and some lemon cleaner.
There is a burning smell from my dryer, now what?
Check the following: — That the fluff filter is clean. — That the bottom of the dryer is free of dust. — That the drain hose is clean. If the above does not help, a mechanic should be called in.
What is the weight of the Bosch Serie 6 WTG85230EE?
The Bosch Serie 6 WTG85230EE has a weight of 53000 g.
What certifications does the Bosch Serie 6 WTG85230EE have?
The Bosch Serie 6 WTG85230EE has the following certifications: CE, VDE.
What is the height of the Bosch Serie 6 WTG85230EE?
The Bosch Serie 6 WTG85230EE has a height of 842 mm.
What is the width of the Bosch Serie 6 WTG85230EE?
The Bosch Serie 6 WTG85230EE has a width of 598 mm.
What is the depth of the Bosch Serie 6 WTG85230EE?
The Bosch Serie 6 WTG85230EE has a depth of 599 mm.
What energy label does the Bosch Serie 6 WTG85230EE have?
The Bosch Serie 6 WTG85230EE has energy label A++.
Is the manual of the Bosch Serie 6 WTG85230EE available in English?
Yes, the manual of the Bosch Serie 6 WTG85230EE is available in English .
Is your question not listed? Ask your question here
View the manual for the Bosch Serie | 6 WTW83460 here, for free. This manual comes under the category dryers and has been rated by 31 people with an average of a 8.8. This manual is available in the following languages: English. Do you have a question about the Bosch Serie | 6 WTW83460 or do you need help? Ask your question here
The Bosch Serie | 6 WTW83460 is a freestanding dryer with a heat pump drying system. With a right-side door hinge, it features touch control and a built-in LED display for easy operation. The drum of this dryer is made of stainless steel, ensuring strength and longevity. It comes with a 1.45-meter cord length for convenient placement.
This dryer has a rated capacity of 7 kg, making it suitable for moderate laundry loads. With a drying class of B, it offers efficient and effective drying performance. The cycle time for this dryer is 181 minutes.
With a noise level of 65 dB, this dryer operates at a relatively quiet level. It also features an Anti-Crease function, which helps reduce wrinkling in clothes. The LED display provides clear information on cycle progress and settings.
Overall, the Bosch Serie | 6 WTW83460 is a reliable and durable dryer with its high-quality stainless steel drum and touch control functionality. It offers efficient drying performance and an Anti-Crease function to ensure clothes remain wrinkle-free. The built-in LED display enhances user-friendliness, providing clear information on the drying cycle. With its right-side door hinge and freestanding placement, this dryer can be easily integrated into any laundry room.

General
| Bosch | |
| Serie | 6 WTW83460 | WTW83460 | |
| dryer | |
| 4242002925851 | |
| English | |
| User manual (PDF) |
Design
| Appliance placement | Freestanding |
| Loading type | Front-load |
| Drying system | Heat pump |
| Product color | White |
| Door hinge | Right |
| Control type | Touch |
| Built-in display | Yes |
| Display type | LED |
| Drum material | Stainless steel |
| Cord length | 1.45 m |
Performance
| Drum capacity | 7 kg |
| Drying class | B |
| Cycle time | 181 min |
| Noise level | 65 dB |
| Anti-Crease function | Yes |
| Moisture sensor | Yes |
| Wool, Mix, Sport, Timed, Quick, Blouse/shirt, Cotton, Towel | |
| Anti-Crease cycle | 120 min |
Ergonomics
| Delayed start timer | Yes |
| Delay start (max) | 24 h |
| Drum interior light | Yes |
| Remaining time indication | Yes |
| LED program stage indicator | Yes |
| Buzzer | Yes |
| Child lock | Yes |
| Self-cleaning | Yes |
Power
| Energy efficiency class | A++ |
| Connected load | 1000 W |
| AC input voltage | 220-240 V |
| AC input frequency | 50 Hz |
| Current rating | 10 A |
| Power consumption (off) | 0.1 W |
| Energy consumption | 1.61 kWh |
| Annual energy consumption | 212 kWh |
| Heat source | — |
Weight & dimensions
| Width | 598 mm |
| Depth | 599 mm |
| Height | 842 mm |
| Weight | 47000 g |
show more
Can’t find the answer to your question in the manual? You may find the answer to your question in the FAQs about the Bosch Serie | 6 WTW83460 below.
What is a condenser dryer?
A condenser dryer is a dryer in which condensation ends up in a reservoir.
What is a drain dryer?
A drain dryer is a dryer in which the warm air and condensation are drained through a hose.
What is the best thing to do about a smelly dryer?
It is best to wipe the dryer drum with a damp cloth and some lemon cleaner.
There is a burning smell from my dryer, now what?
Check the following: — That the fluff filter is clean. — That the bottom of the dryer is free of dust. — That the drain hose is clean. If the above does not help, a mechanic should be called in.
What is the weight of the Bosch Serie | 6 WTW83460?
The Bosch Serie | 6 WTW83460 has a weight of 47000 g.
What is the height of the Bosch Serie | 6 WTW83460?
The Bosch Serie | 6 WTW83460 has a height of 842 mm.
What is the width of the Bosch Serie | 6 WTW83460?
The Bosch Serie | 6 WTW83460 has a width of 598 mm.
What is the depth of the Bosch Serie | 6 WTW83460?
The Bosch Serie | 6 WTW83460 has a depth of 599 mm.
What energy label does the Bosch Serie | 6 WTW83460 have?
The Bosch Serie | 6 WTW83460 has energy label A++.
How do I select the correct drying program for different types of fabrics?
To select the appropriate drying program for different fabrics, you should consider using a manual to understand the specific settings and recommended programs for each fabric type. This will ensure optimal drying results and prevent any damage to your clothes.
Why is my dryer not generating enough heat to dry my clothes properly?
Insufficient heat in your dryer can be caused by various factors, such as a clogged lint filter or improper ventilation. Consult the manual to learn how to clean the lint filter and check if the ventilation system is functioning properly. This will help improve the dryer’s heating efficiency.
How can I troubleshoot if my dryer is not turning on?
If your dryer fails to turn on, it could be due to issues like a tripped circuit breaker or a faulty power cord connection. Refer to the manual for troubleshooting steps, such as checking the power supply, ensuring the door is properly closed, and verifying the circuit breaker status.
What should I do if my dryer displays an error code?
If your dryer shows an error code, it indicates a specific issue that needs attention. Use the manual to identify the meaning of the error code and follow the recommended steps to resolve the problem. This will help you quickly diagnose and fix any potential malfunctions.
Can I adjust the drying time for a specific load size?
Yes, you can adjust the drying time for different load sizes. Consult the manual to learn how to manually adjust the drying time or use various sensors and features available in the dryer to optimize the drying process based on the load size. This will ensure energy efficiency and prevent over-drying.
Does the Bosch Serie | 6 WTW83460 have a heat pump drying system?
Yes, the Bosch Serie | 6 WTW83460 has a heat pump drying system. This means that it uses less energy compared to traditional dryers, making it more efficient and cost-effective for the user.
Does the Bosch Serie | 6 WTW83460 have a display?
Yes, the Bosch Serie | 6 WTW83460 has a built-in display with LED technology. This allows the user to easily see and control the settings of the dryer.
What is the capacity of the Bosch Serie | 6 WTW83460?
The Bosch Serie | 6 WTW83460 has a rated capacity of 7 kg. This means that it can handle up to 7 kg of laundry in a single drying cycle.
What is the drying class of the Bosch Serie | 6 WTW83460?
The drying class of the Bosch Serie | 6 WTW83460 is B. This means that it has average drying performance compared to other dryers in its class.
Does the Bosch Serie | 6 WTW83460 have an anti-crease function?
Yes, the Bosch Serie | 6 WTW83460 has an anti-crease function. This feature helps to reduce wrinkling in the laundry, making it easier to iron or wear straight from the dryer.
Is the manual of the Bosch Serie | 6 WTW83460 available in English?
Yes, the manual of the Bosch Serie | 6 WTW83460 is available in English .
Is your question not listed? Ask your question here
Сушилка для белья — Serie | 6 Avantixx WTW85460OE

Загрузить Руководство Bosch WTW85460OE в формате PDF: WTW85460OE
SelfCleaning Condenser™: cамоочищающийся конденсатор
Система SensitiveDrying: бережная сушка благодаря уникальной структуре барабана.
Уровень шума 64 дБ: сушит особенно тихо.
Особенности модели
- Принцип теплового насоса
- Самоочищающийся конденсатор
- Максимальная загрузка: 9 кг
- Класс энергопотребления: A
- Светодиодная индикация заполнения ворсового фильтра и контейнера для конденсата
- Барабан из нержавеющей стали
- Внутренняя подсветка барабана: LED
- Прозрачная дверь, хром
- Программы
- Специальные программы: Верхняя одежда, Рубашки Бизнес, Пуховики/Подушки, Супер 40’, Покрывала, Полотенца, Тепло 60’, Хлопок, Синтетика, Смешанное белье, Женское белье, Шерсть, Холод 30’, Тепло 30’
- Клавиши специальных функций с технологией Touch Control: Меньше нагрев, Сигнал, Легко гладить,24 ч отсрочка старта
- Сигнал окончания хода программы
- Автоматическая остановка барабана при открывании двери
- Специальная корзина для сушки шерсти
- AntiVibration дизайн боковой панели
- Блокировка от детей
- Размеры (В х Ш х Г): 84.2 x 59.8 x 65.2 см

Summary of Content for Bosch Series 6 WQG245S9GB Dryer User Manual PDF
Register yournew device onMyBosch now andget free benefits:bosch-home.com/welcome
Tumble dryer WQG245S9GB
[en] User manual and installation instructions
en
2
Futher information and explanations are available online:
Table of contents 1 Safety …………………………………….. 4 1.1 General information……………….. 4 1.2 Intended use…………………………. 4 1.3 Restriction on user group……….. 4 1.4 Safe installation …………………….. 5 1.5 Safe use ………………………………. 7 1.6 Safe cleaning and mainten-
ance…………………………………….. 9
2 Preventing material damage ….. 11
3 Environmental protection and saving energy……………………….. 11
3.1 Disposing of packaging ……….. 11 3.2 Saving energy……………………… 11 3.3 Energy saving mode ……………. 12
4 Installation and connection……. 12 4.1 Unpacking the appliance ……… 12 4.2 Scope of delivery…………………. 12 4.3 Requirements for the install-
ation location ………………………. 13 4.4 Water drain hose…………………. 13 4.5 Aligning the appliance………….. 16 4.6 Connecting the appliance to
the electricity supply…………….. 16
5 Familiarising yourself with your appliance………………………. 17
5.1 Appliance …………………………… 17 5.2 Control panel………………………. 18
6 Display …………………………………. 19
7 Buttons ………………………………… 22
8 Dryness level………………………… 25 8.1 Changing the dryness level…… 25 8.2 Adjusting the dryness level …… 25
9 Programmes…………………………. 26 9.1 Automatic programmes………… 26 9.2 Timed programmes……………… 27
10 Accessories………………………… 29
11 Laundry………………………………. 29 11.1 Preparing the laundry…………. 29
12 Basic operation …………………… 30 12.1 Switching on the appliance …. 30 12.2 Setting a programme …………. 30 12.3 Loading laundry…………………. 30 12.4 Starting the programme ……… 30 12.5 Adding laundry ………………….. 30 12.6 Cancelling the programme …. 31 12.7 Unloading the laundry ………… 31 12.8 Switching off the appliance …. 31 12.9 Fluff filter …………………………… 31 12.10 Condensation container ……. 33
13 Childproof lock……………………. 34 13.1 Activating the childproof
lock………………………………….. 34 13.2 Deactivating the childproof
lock………………………………….. 34
14 Basic settings……………………… 35 14.1 Overview of the basic set-
tings…………………………………. 35 14.2 Changing the basic set-
tings…………………………………. 36
15 Appliance care ……………………. 36 15.1 Preparing the appliance for
the appliance care pro- gramme …………………………… 36
en
3
15.2 Preparing the condensation container for the appliance care programme………………… 37
15.3 Starting the appliance care programme……………………….. 37
15.4 Running the basic appli- ance care programme on the appliance…………………….. 37
15.5 Preparing the appliance for the intensive appliance care programme………………… 39
15.6 Running the intensive appli- ance care programme ……….. 39
15.7 Ending the intensive appli- ance care programme ……….. 41
16 Cleaning and servicing………… 42 16.1 Tips on cleaning and care ….. 42 16.2 Moisture sensor…………………. 42
17 Troubleshooting………………….. 43
18 Transportation, storage and disposal ……………………………… 47
18.1 Preparing the appliance for transportation ……………………. 47
18.2 Disposing of old appliance …. 47
19 Customer Service………………… 48 19.1 Product number (E-Nr.) and
production number (FD)……… 48
20 Consumption values……………. 49
21 Technical data …………………….. 50
enSafety
4
1Safety
Observe the following safety instructions.
1.1General information
Read this instruction manual carefully. Keep the instruction manual and the product information safe
for future reference or for the next owner. Do not connect the appliance if it has been damaged in transit.
1.2Intended use Only use this appliance: For drying and freshening up fabrics that are washed with water
and suitable for dryers. In private households and in enclosed spaces in a domestic en-
vironment. Up to an altitude of max. 4000 m above sea level.
1.3Restriction on user group This appliance may be used by children aged 8 or over and by people who have reduced physical, sensory or mental abilities or inadequate experience and/or knowledge, provided that they are supervised or have been instructed on how to use the appliance safely and have understood the resulting dangers. Do not let children play with the appliance. Cleaning and user maintenance must not be performed by chil- dren unless they are being supervised. Keep children under the age of 3 years and pets away from the appliance.
Safetyen
5
1.4Safe installation
WARNING Risk of electric shock! Incorrect installation is dangerous. Connect and operate the appliance only in accordance with the
specifications on the rating plate. Connect the appliance to a power supply with alternating cur-
rent only via a properly installed socket with earthing. The protective conductor system of the domestic electrical in-
stallation must be properly installed. The installation must have a sufficiently large cross section. When using a residual current circuit breaker, only use a type
with the mark. Never equip the appliance with an external switching device,
e.g. a timer or remote control. Never connect the appliance to a circuit that is regularly
switched on and off by the energy supplier. When the appliance is installed, the mains plug of the power
cord must be freely accessible. If free access is not possible, an all-pole isolating switch must be installed in the permanent elec- trical installation according to the installation regulations. When installing the appliance, check that the power cable is not
trapped or damaged. If the insulation of the power cord is damaged, this is dangerous. Never let the power cord come into contact with hot appliance
parts or heat sources. Never let the power cord come into contact with sharp points or
edges. Never kink, crush or modify the power cord.
WARNING Risk of fire! It is dangerous to use an extended power cord and non-approved adapters. Do not use extension cables or multiple socket strips. Only use adapters and power cords approved by the manufac-
turer.
enSafety
6
If the power cord is too short and a longer one is not available, please contact an electrician to have the domestic installation adapted.
WARNING Risk of injury! The high weight of the appliance may result in injury when lifted. Do not lift the appliance on your own. If this appliance is not correctly installed in a washer-dryer stack, the installed appliance may fall. Only stack the dryer on a washing machine using the connec-
tion kit from the dryer manufacturer «Accessories», Page 29. No other installation method is per- mitted. Do not install the appliance in a washer-dryer stack if the dryer
manufacturer does not offer a suitable connection kit. Do not install appliances from different manufacturers and with
varying depths and widths in a washer-dryer stack. Do not install a washer-dryer stack on a platform; the appli-
ances may tip over.
WARNING Risk of suffocation! Children may put packaging material over their heads or wrap themselves up in it and suffocate. Keep packaging material away from children. Do not let children play with packaging material.
CAUTION Risk of injury! The appliance may vibrate or move when in use. Place the appliance on a clean, even, solid surface. Align the appliance using the appliance feet and a spirit level. If hoses and power cords have been laid incorrectly, this causes a tripping hazard. Lay hoses and power cords in such a way that there is no risk
of tripping. If the appliance is moved by holding onto protruding components, such as the appliance door, the parts may break off. Do not move the appliance by holding onto protruding parts.
Safetyen
7
CAUTION Risk of cutting! Touching sharp edges on the appliance may lead to cuts. Do not touch the sharp edges on the appliance. Wear protective gloves when installing and transporting the ap-
pliance.
1.5Safe use
WARNING Risk of electric shock! If the appliance or the power cord is damaged, this is dangerous. Never operate a damaged appliance. Never pull on the power cord to unplug the appliance. Always
unplug the appliance at the mains. If the appliance or the power cord is damaged, immediately un-
plug the power cord or switch off the fuse in the fuse box. Call customer services. Page 48 An ingress of moisture can cause an electric shock. Only use the appliance in enclosed spaces. Never expose the appliance to intense heat or humidity. Do not use steam- or high-pressure cleaners, hoses or sprays
to clean the appliance.
WARNING Risk of harm to health! Children can lock themselves in the appliance, thereby putting their lives at risk. Do not install the appliance behind a door as this may obstruct
the appliance door or prevent it from opening. With redundant appliances, unplug the power cord. Then cut
through the cord and damage the lock on the appliance door beyond repair so that the appliance door will no longer close.
WARNING Risk of suffocation! Children may breathe in or swallow small parts, causing them to suffocate. Keep small parts away from children. Do not let children play with small parts.
enSafety
8
WARNING Risk of explosion! If there is coal dust or flour in the air around the appliance, this may cause an explosion. Keep the area around the appliance clean during operation.
WARNING Risk of poisoning! Condensation water from this appliance is not suitable for drinking and may be contaminated with fluff. Do not drink or reuse the condensation water from the appli-
ance. Detergents and care products may result in poisoning if con- sumed. If accidentally swallowed, seek medical advice. Keep detergents and care products out of the reach of children.
WARNING Risk of explosion! If there is any residual material left in the fluff filter, this may ignite during the drying process. Clean the fluff filter regularly. Highly flammable objects such as lighters or matches may ignite during the drying process. Remove all highly flammable objects from any pockets in your
laundry before the drying process. Unwashed laundry that has come into contact with solvents, oil, wax, wax remover, paint, grease or stain remover may ignite when drying is in progress. Do not place laundry in this appliance to be dried if the laundry
has not been washed first. Rinse the laundry thoroughly with warm water and detergent be-
fore drying it in the machine. Do not use the appliance if industrial chemicals have been used
to clean the laundry beforehand.
WARNING Risk of fire! If drying is interrupted early, the laundry is not cooled sufficiently and may ignite. Do not interrupt the drying programme early.
Safetyen
9
If drying is interrupted early, remove the laundry immediately and spread it out.
CAUTION Risk of injury! The covering plate may break if you stand on or climb onto the appliance. Do not stand on or climb onto the appliance. The appliance may tip over if you sit on or lean against the open door. Do not sit on or lean against the appliance door. Do not place any objects on the appliance door. Reaching into the drum while it is still turning may cause hand in- juries. Wait for the drum to come to a complete stop before reaching
inside.
1.6Safe cleaning and maintenance
WARNING Risk of electric shock! Incorrect repairs are dangerous. Repairs to the appliance should only be carried out by trained
specialist staff. Only use genuine spare parts when repairing the appliance. If the power cord of this appliance is damaged, it must be re-
placed by the manufacturer, the manufacturer’s Customer Ser- vice or a similarly qualified person in order to prevent any risk.
An ingress of moisture can cause an electric shock. Do not use steam- or high-pressure cleaners, hoses or sprays
to clean the appliance.
WARNING Risk of injury! The use of non-original spare parts and non-original accessories is dangerous. Only use the manufacturer’s original spare parts and original ac-
cessories.
enSafety
10
WARNING Risk of poisoning! Poisonous fumes may be given off if you use cleaning agents that contain solvents. Do not use cleaning agents that contain solvents.
Preventing material damageen
11
2Preventing material damage
ATTENTION! The functionality of the appliance may be impaired if you use the wrong quantity of fabric softener, de- tergent, care product or cleaning agent. Follow the dosage recommenda-
tions from the manufacturer. Exceeding the maximum load capa- city impairs the function of the appli- ance. Observe the maximum load capa-
city for each programme and do not exceed it. «Programmes», Page 26
The function of the appliance may be impaired if the appliance overheats. Keep the ventilation opening on
the appliance clear during opera- tion.
Make sure that the area is ad- equately ventilated.
Light objects such as hair and fluff may be sucked in from the ventilation opening on the appliance during op- eration and impair the function of the appliance. Keep the area around the appli-
ance clean during operation. Keep light objects away from the
appliance. Foam and foam rubber may deform or melt during the drying process. Do not dry laundry that contains
foam or foam rubber. Unsuitable cleaning products may damage the surfaces of the appli- ance. Do not use harsh or abrasive de-
tergents. Do not use cleaning products with
a high alcohol content. Do not use hard scouring pads or
cleaning sponges.
Clean the appliance with nothing but water and a soft, damp cloth.
Remove all detergent residue, spray residue or other residues im- mediately if they come into contact with the appliance.
3Environmental protec- tion and saving energy
3.1Disposing of packaging The packaging materials are environ- mentally compatible and can be re- cycled. Sort the individual components by
type and dispose of them separ- ately.
3.2Saving energy If you follow these instructions, your appliance will use less power.
Operate the appliance in a well-vent- ilated room and keep the ventilation opening on the appliance clear. a If air exchange is impeded, this ex-
tends the programme duration and increases energy consumption.
Spin the laundry in the washing ma- chine before drying. a Damper laundry extends the pro-
gramme duration and increases energy consumption.
Observe the programme’s maximum load capacity. «Programmes», Page 26 a If the maximum load is exceeded,
this extends the programme dura- tion and increases energy con- sumption.
enInstallation and connection
12
After drying, clean the fluff filter Page 31. a If the fluff filter is dirty, this reduces
the air flow in the appliance, ex- tends the programme duration and increases energy consumption.
3.3Energy saving mode If you do not use the appliance for an extended period, it automatically switches to energy-saving mode. All displays go out and Start/ Reload flashes. Energy-saving mode ends when you use the appliance again.
4Installation and con- nection
4.1Unpacking the appliance
ATTENTION! Objects remaining in the drum that are not designed for operation with the appliance may cause material damage and damage to the appli- ance. Remove these objects, along with
all supplied accessories, from the drum before starting the appliance.
1. Remove any packaging and pro- tective covers completely from the appliance. «Disposing of packaging», Page 11
2. Check the appliance for visible damage.
3. Open the appliance door. «Basic operation», Page 30
4. Remove any accessories from the drum.
5. Close the appliance door.
4.2Scope of delivery After unpacking all parts, check for any damage in transit and complete- ness of the delivery.
ATTENTION! If the appliance is operated with in- complete or defective accessories, the appliance may not be able to op- erate properly, or this may result in material damage or damage to the appliance. Do not operate the appliance with
incomplete or defective accessor- ies.
Replace the accessories in ques- tion before operating the appli- ance. «Accessories», Page 29
Included with the appliance
Description
Tumble dryer
Accompanying documents
Water drain hose with connection adapter, fixing material and el- bow. «Water drain hose», Page 13
Installation and connectionen
13
4.3Requirements for the in- stallation location
ATTENTION! If the appliance is tilted at an angle greater than 40, residual water may leak out of the appliance and cause material damage. Tilt the appliance carefully. Transport the appliance in an up-
right position. If residual water in the appliance freezes, this may cause damage to the appliance. Do not install or operate this appli-
ance anywhere that is liable to ex- perience frost or outdoors.
If the appliance is operated immedi- ately after transportation, the refriger- ant contained in the appliance may result in damage to the appliance. Immediately after transporting the
appliance, leave it to rest for two hours before putting it into opera- tion.
Installation loca- tion
Requirements
On the floor Place the appli- ance on a clean, level and firm surface. Align the appli- ance Page 16.
Installation loca- tion
Requirements
In a washer-dryer stack
Only use the ori- ginal connection set from the dryer manufac- turer when set- ting up this appli- ance in a washer-dryer stack. Connection kit
with pull-out worktop Page 29
Connection kit Page 29
This appliance must only be stacked on a washing machine from the same manufacturer. The depth and width of this ap- pliance must cor- respond with the dimensions of the washing ma- chine. Do not place the washer-dryer stack on a plat- form.
Against a wall Do not trap the hoses and power cord between the wall and the ap- pliance.
4.4Water drain hose Condensation forms during drying, which your appliance uses for auto- matic cleaning. Use the water drain
enInstallation and connection
14
hose to drain away excess condens- ation directly into the waste water system. Notes Operate this appliance using the
water drain hose provided. If you connect the water drain hose Page 14, you do not have to regularly empty the condensation container Page 33.
You can order this optional «Accessories», Page 29 from our customer service.
Connecting the water drain hose If you do not want to regularly empty the appliance’s condensation con- tainer, connect the water outlet hose.
ATTENTION! When operating the appliance without the water drain hose being connected properly, liquid may leak out of the connecting piece. Before operating the appliance,
connect the water drain hose prop- erly to the connecting piece.
Requirements The appliance and the accessory
have been unpacked. «Unpacking the appliance», Page 12
The appliance is installed at the in- stallation location. «Requirements for the installa- tion location», Page 13
1. Pull out the condensation hose from the connecting piece.
The condensation hose is connec- ted to the connecting piece at the factory. Note: When removing the con- densation hose, liquid may leak out of the connecting piece.
2. Push the condensation hose into the holder.
Installation and connectionen
15
3. Push the water drain hose as far as it will go into the connecting piece.
4. Connect the appliance to the water outlet. «Water outlet connection types», Page 15
Tip: To collect condensation in the condensation container again (e.g. if you change where the appliance is located), carry out these steps in re- verse order.
Water outlet connection types
ATTENTION! In the event of a blocked or covered outlet, accumulated wastewater can flow back into the appliance. Before operating the appliance, en-
sure that the wastewater drains away quickly and eliminate any blockages.
Drainage into a siphon.
Secure the con- nection point with a (12-22 mm) hose clamp. Secure the water drain hose with a hose guide at a height of at least 80 cm and no more than 100 cm.
Note: You can use the Y-distrib- utor Page 29 to connect the water drain hose of an additional appliance, such as a washing machine, to the same siphon out- let.
Drainage into a wash basin.
1
2
Push the water drain hose fully through the and secure it using fixing material. Secure the elbow at a height of no more than 100 cm.
Drainage into a gully.
Push the water drain hose fully through the and secure it using fixing material. Secure the elbow to the gully.
enInstallation and connection
16
4.5Aligning the appliance In order to reduce vibrations and noises, align the appliance correctly. To align the appliance, turn the ap-
pliance feet. Check that the appli- ance is level using a spirit level.
All appliance feet must stand firmly on the ground.
4.6Connecting the appliance to the electricity supply
1. Insert the mains plug of the appli- ance’s power cable in a socket nearby. The connection details of the appli- ance can be found under Tech- nical data Page 50.
2. Check the mains plug is inserted properly.
Familiarising yourself with your applianceen
17
5Familiarising yourself with your appliance
5.1Appliance You can find an overview of the parts of your appliance here.
1
2
3
4
5
On certain models, specific details such as the colour and shape may differ from those pictured.
1 Ventilation opening
2 Fluff filter Page 31
3 Door
4 Condensation container Page 33
5 Control panel Page 18
enFamiliarising yourself with your appliance
18
5.2Control panel You can use the control panel to configure all functions of your appliance and to obtain information about the operating status.
2 3
1 1
4
4
1 Programmes Page 26
2 Programme selector Page 30
3 Display Page 19
4 Buttons Page 22
Displayen
19
6Display The display shows the current settings, options or relevant information.
Example: Display
Display Designation Description 0:40 1 Programme dura-
tion/programme time remaining
Expected programme duration or pro- gramme time remaining in hours and minutes.
1:25 Timed programme The timed programme is set. «Timed programmes», Page 27
9.0 1 Recommended load
The maximum load capacity for the selec- ted programme in kg.
0:45 1 «Ready in» time «Buttons», Page 24 Childproof lock lights up: The childproof lock is activ-
ated. flashes: The childproof lock is activated
and the appliance has been operated. «Deactivating the childproof lock», Page 34
(Start/Re- load)
Start/Pause Start, cancel or pause Lights up: The programme is running
and can be cancelled or paused. Flashes: The programme can be star-
ted or continued. 1 Example
enDisplay
20
Display Designation Description (Iron Dry) Dryness level: Iron
Dry The dryness level is activated. «Buttons», Page 23
(Cupboard Dry)
Dryness level: Cupboard Dry
The dryness level is activated. «Buttons», Page 23
(Cupboard Dry Plus)
Dryness level: Cupboard Dry Plus
The dryness level is activated. «Buttons», Page 22
+1 +2 +3
Dryness level ad- justed
The adjusted dryness level is activated. «Dryness level», Page 25
(Reduced Ironing)
Crease-reduction function
The crease-reduction function is activated. «Buttons», Page 23
(Low Heat) Gentle drying Gentle drying is activated for delicate fab- rics. «Buttons», Page 23
4.5 kg (Half Load)
Half load Half load is activated. «Buttons», Page 24
(Mute) Quiet drying Quiet drying with no audible signals is ac- tivated. «Buttons», Page 24
Condensation container
Empty the condensation container Page 33. Insert the condensation container Page 33.
Fluff filter Clean the fluff filter Page 31. CrE Basic appliance
care programme Run the basic appliance care programme. «Running the basic appliance care pro- gramme on the appliance», Page 37
Hot Cooling process The laundry is cooled while the drum is rotating, in order to avoid damage to the laundry. The process can be cancelled by opening the door. Note: Do not change the programme.
Automatic self- cleaning
The automatic self-cleaning function rinses the appliance’s heat exchanger. Note: Do not remove the condensation container and do not interrupt the pro- gramme.
Drying Programme status 1 Example
Displayen
21
Display Designation Description Dryness level: Iron
Dry Programme status
Dryness level: Cupboard Dry
Programme status
Anti-crease Programme status (Start/ Re-
load) Pause Programme status
End End of pro- gramme
Programme status
1 Example
enButtons
22
7Buttons Below is an overview of the buttons and their setting options.
Button Selection Description Start/ Reload Start
Cancel Pause
Start, cancel or pause the programme.
3 sec. Activate Deactivate
Activate or deactivate the childproof lock. Disable the control panel to prevent unwanted or accidental operation. If the childproof lock is activated and the appli- ance has been switched off, the childproof lock remains activated. «Childproof lock», Page 34
Cupboard Dry Plus Cupboard Dry Plus +1 +2 +3
Selecting Cupboard Dry Plus activates the dryness level. The dryness level defines how damp or dry the laundry is after the programme ends. «Dryness level», Page 25
The dryness level can be adjusted by select- ing +1 , +2 or +3 . «Adjusting the dry- ness level», Page 25
Buttonsen
23
Button Selection Description Cupboard Dry Cupboard Dry
+1 +2 +3
Selecting Cupboard Dry activates the dry- ness level. The dryness level defines how damp or dry the laundry is after the programme ends. «Dryness level», Page 25
The dryness level can be adjusted by select- ing +1 , +2 or +3 . «Adjusting the dry- ness level», Page 25
Iron Dry Iron Dry +1 +2 +3
Selecting Iron Dry ac- tivates the dryness level. The dryness level defines how damp or dry the laundry is after the programme ends. «Dryness level», Page 25
The dryness level can be adjusted by select- ing +1 , +2 or +3 . «Adjusting the dry- ness level», Page 25
Reduced Ironing Activate Deactivate
Activate or deactivate the crease-reduction func- tion. Once the programme has ended, the drum moves the laundry at regular intervals for 60 minutes to prevent creasing.
Low Heat Activate Deactivate
Activate or deactivate gentle drying. The temperature is re- duced for delicate fab- rics, e.g. polyacrylic or elastane. The programme duration is extended.
enButtons
24
Button Selection Description Finish in Programme end
Programme length Set the programme
end. The programme dura- tion is already in- cluded in the set num- ber of hours. Once the programme has started, the pro- gramme duration is displayed.
Set the programme duration for timed pro- grammes. «Timed pro- grammes», Page 27
Mute Activate Deactivate
Activate or deactivate operating signals and in- formation signals.
Half Load Activate Deactivate
Dry individual items of laundry or small loads of laundry.
Dryness levelen
25
8Dryness level Each automatic programme has a specified dryness level. The dryness level defines how dry or damp your laundry is after the programme ends.
Dryness level Laundry Drying result Cupboard Dry Plus
Multi-layered, thick laundry that does not dry readily.
The laundry is dry.
Cupboard Dry
Normal, single-layered laundry.
The laundry is dry.
Iron Dry Normal, single-layered laundry
The laundry is still a little damp after drying. To prevent creasing after drying, iron the laundry or hang it up.
8.1Changing the dryness level
For some automatic programmes, you can change the dryness level so that your laundry will be drier or more damp. 1. Set an automatic programme.
«Automatic programmes», Page 26
a The display shows the specified dryness level.
2. Press Cupboard Dry , Cupboard Dry Plus or Iron Dry .
a The display shows: (Cupboard Dry), (Cupboard Dry Plus) or (Iron Dry)
8.2Adjusting the dryness level
If the laundry feels too damp after it has been dried to a particular dry- ness level, you can adjust the dry- ness level. 1. Set an automatic programme.
«Automatic programmes», Page 26
a The display shows the specified dryness level.
2. Press Cupboard Dry Plus , Cup- board Dry or Iron Dry .
a The display shows: «+1» , «+2» or «+3» .
enProgrammes
26
9Programmes You can dry your fabrics using either an automatic programme or a timed pro- gramme.
9.1Automatic programmes Automatic programmes are pro- grammes in which humidity sensors measure the residual moisture in the laundry during the drying cycle. The programme only ends once the set dryness level is reached. Each automatic programme has a dryness level Page 25. The dry- ness level defines how dry or damp the laundry is after the programme ends.
Tips Select the dryness level according
to the type of fabric or the desired drying result. «Dryness level», Page 25
The laundry’s care labels provide you with additional information about programme selection.
Programme Description Max. load (kg)
Cottons Dry hard-wearing, heat-resistant fabrics made of cotton or linen.
9.0
Cottons Eco Dry hard-wearing, heat-resistant fabrics made of cotton or linen. Energy-saving programme.
9.0
Easy Care Dry items made of synthetic materials or blended fabrics.
3.5
Mixed Load Dry items made of cotton and synthetics. 3.0 Duvet Dry clothing, pillows, quilts or bedspreads
filled with synthetic fibres. Note: Dry large items of laundry, blankets or pillows individually.
2.5
Delicates Dry delicate items made of satin, synthet- ics or blended fabrics.
2.0
Down Wear Dry clothing, bedspreads or eiderdowns stuffed with down. Notes Dry large items of laundry, such as
blankets or sleeping bags individually. Once the programme has ended, shake
the items of laundry to distribute the stuffing and eliminate any pockets of moisture.
1.5
Programmesen
27
Programme Description Max. load (kg)
Hygiene Plus Dry hard-wearing, heat-resistant fabrics made of cotton or linen. Note: Particularly suitable for strict hy- giene requirements.
4.0
Sportswear Dry self-drying sportswear made of per- formance fibres, microfibres and synthet- ics.
1.5
Shirts Suitable for shirts and blouses made of cotton, linen, synthetics or blended fab- rics. Note: For optimal drying results, dry a maximum of 5 shirts or 5 blouses at the same time. Once the laundry is dry, iron it or hang it up. The residual moisture is then distrib- uted evenly.
1.5
Super Quick 40′ Dry items made of synthetics and light cotton.
2.0
Towels Dry hard-wearing, heat-resistant towels and dressing gowns made of cotton or linen.
6.0
9.2Timed programmes Timed programmes are programmes with a defined or adjustable programme duration. The programme ends once this time has elapsed, even if the laundry is still not dry, for example. Timed programmes are suitable for drying individual items of laundry or thin fabrics. Tip: The laundry’s care labels provide you with additional information about pro- gramme selection.
Programme Description Max. load (kg)
Wool Finish Dry machine-washable items made of wool or containing wool. Note: The laundry becomes fluffier but not dry. Remove laundry once the programme has ended and allow it to dry.
0.5
enProgrammes
28
Programme Description Max. load (kg)
Timed Program Warm Dry all types of fabric except for wool and silk. Suitable for pre-dried or slightly damp laundry and for drying off multi-layered, thick laundry.
3.0
Accessoriesen
29
10Accessories Use original accessories. These have been made especially for your appli- ance. Note: Some accessories are avail- able in other colours. Contact «Customer Service», Page 48.
Use Order number Connection kit To save space, stack the
appliance on a suitable washing machine of the same width and depth and that is from the same manufacturer.
WTZ2741X
Connection kit with pull- out worktop
To save space, stack the appliance on a suitable washing machine of the same width and depth and that is from the same manufacturer. The pull-out worktop makes it easier to load and unload the appli- ance.
WTZ2742X
Y-distributor Connect the water drain hose of an additional ap- pliance to the same si- phon outlet.
15000490
Appliance care product Spare part for the intens- ive appliance care func- tion.
00311829
11Laundry
11.1Preparing the laundry
ATTENTION! Objects remaining in the laundry may damage the laundry and the drum. Remove all items from any pock-
ets in your laundry before using the appliance.
To protect your appliance and the laundry, prepare the laundry be- forehand. Empty any pockets Brush sand out of all collars and
pockets Close bed covers and cushion
covers Close all zips, Velcro fasteners,
hooks and eyes
enoperation
30
Tie cloth belts, apron strings, etc. together or use a laundry bag.
Remove curtain hooks and lead strips or use a mesh laundry bag
Use a mesh laundry bag for small items of laundry, such as children’s socks
Separate items of laundry and shake them out, or observe the programme description
Spin the laundry before drying
operation
12Basic operation operation
12.1Switching on the appli- ance
Requirement: The appliance has been correctly installed and connec- ted. «Installation and connection», Page 12 Turn the programme selector to a
programme.
Note: The lighting for the drum goes out automatically.
12.2Setting a programme
1. Turn the programme selector and set the required programme. «Programmes», Page 26
2. If required, adjust the programme settings.
12.3Loading laundry Note: To prevent creasing, note the maximum load for the programmes. «Programmes», Page 26
Requirements The laundry is prepared and sor-
ted. «Laundry», Page 29
The drum is empty. 1. Open the door. 2. Place the laundry in the drum. 3. Close the door.
Ensure that there is no laundry trapped in the door.
12.4Starting the programme Requirement: A programme is set. «Setting a programme», Page 30 Press Start/ Reload . a The display shows the programme
duration or the «Ready in» time. a After the programme has ended,
the display shows: «End» .
Note: If «Hot» appears, the appliance cools the laundry. When «Hot» goes out, the laundry has cooled down.
12.5Adding laundry After the programme starts, you can remove or add laundry at any time. Requirement: A programme has started. «Starting the programme», Page 30 1. Press Start/ Reload .
The cooling process starts auto- matically after approximately 30 seconds and cools down the laun- dry while the drum is rotating. If you want to avoid or cancel the cooling process, open the door. «Display», Page 20
2. Open the door. 3. Add or remove laundry. 4. Close the door. 5. Press Start/ Reload .
operationen
31
12.6Cancelling the pro- gramme
1. Press Start/ Reload . 2. Open the appliance door. 3. Remove the laundry.
«Unloading the laundry», Page 31
12.7Unloading the laundry 1. Open the door. 2. Remove the laundry from the
drum.
12.8Switching off the appli- ance
Turn the programme selector to Off .
12.9Fluff filter During drying, fluff from the laundry is collected in the fluff filter. The fluff fil- ter protects the appliance from fluff.
Cleaning the fluff filter If the drying programme has finished or the display shows a notification while the appliance is in operation, clean the fluff filter. Note: If you do not clean the appli- ance as described, the appliance’s functionality may be impaired. Requirements The display shows the following
after drying: «End» or during operation: . 1. Open the door.
2. Remove the fluff from the door.
3. Remove the two-part fluff filter.
4. Remove the fluff from the recess.
Ensure that no fluff falls into the air channel.
enoperation
32
5. Disconnect the two-part fluff filter.
6. Open the two fluff filters.
7. Remove the fluff.
8. Clean the two fluff filters thoroughly under warm, running water and then dry them off.
9. Close the two fluff filters and put them together.
10. Insert the two-part fluff filter.
11.Close the door.
operationen
33
12.10Condensation con- tainer
Condensation forms during drying, which your appliance uses for auto- matic cleaning. By default, the con- densation is collected in the appli- ance’s condensation container. Note: Operate this appliance using the water drain hose provided. If you connect the water drain hose Page 14, you do not have to regu- larly empty the condensation con- tainer Page 33.
Emptying the condensation container If the drying programme has finished or the display shows a notification while the appliance is in operation, empty the condensation container. Requirements The display shows the following
after drying: «End» or during operation: . 1. Pull out the condensation con-
tainer, keeping it level.
2. Empty the condensation container.
Make sure that you insert the con- densation container before operat- ing the appliance. «Inserting the condensation con- tainer», Page 33
Inserting the condensation container Requirement: The condensation con- tainer Page 33 is removed from the appliance. Push the condensation container
in as far as it will go.
enChildproof lock
34
13Childproof lock Secure your appliance against being operated unintentionally using the controls.
13.1Activating the childproof lock
Press and hold the two 3 sec. buttons for approx. 3 seconds.
a The display shows . a The controls are locked. a The childproof lock remains active
even after the appliance has been switched off and in the event of a power failure.
13.2Deactivating the child- proof lock
Requirement: To deactivate the childproof lock, the appliance must be switched on. Press and hold the two 3 sec.
buttons for approx. 3 seconds. a goes out in the display.
Basic settingsen
35
14Basic settings You can configure the basic settings for your appliance to meet your needs.
14.1Overview of the basic settings
Basic setting Programme position
Value Description
End signal 2 0 (off) 1 (quiet) 2 (me- dium) 3 (loud) 4 (very loud)
Set the volume of the signal at the end of the programme.
Button signal 3 0 (off) 1 (quiet) 2 (me- dium) 3 (loud) 4 (very loud)
The volume of the audible signal emitted when the buttons are pressed.
Programme counter
5 421 Display the number of started pro- grammes.
1 Example
enAppliance care
36
14.2Changing the basic set- tings
1. Set the programme selector to po- sition 1.
2. Press Iron Dry and, at the same time, turn the programme selector to position 2.
a The display shows the current value.
3. Set the programme selector to the required position. «Overview of the basic settings», Page 35
4. To change the value, press Finish in .
5. To save the changes, switch off the appliance.
15Appliance care
15.1Preparing the appliance for the appliance care programme
The appliance must be prepared be- fore basic or intensive appliance care is carried out. Requirement: The fluff filter has been cleaned. «Cleaning the fluff filter», Page 31.
1. Remove the laundry.
2. Close the appliance door. 3. Pull out the condensation con-
tainer, keeping it level.
4. Empty the condensation container Page 33.
Appliance careen
37
15.2Preparing the condensa- tion container for the ap- pliance care programme
Note: If the condensation is drained using the drain hose, the condensa- tion container must be prepared be- fore the basic or intensive appliance care programme. «Water drain hose», Page 13 1. Remove the stopper from the re-
cess in the condensation con- tainer.
2. Insert the plug from below.
a The condensation container is ready for the appliance care pro- gramme.
Note: If the condensation is drained using the drain hose, perform the above-mentioned steps after the ba- sic or intensive appliance care pro- gramme in the reverse order.
15.3Starting the appliance care programme
Requirements The appliance is ready to run the
appliance care programme. «Preparing the appliance for the appliance care programme «, Page 36.
The condensation container is ready for the appliance care pro- gramme. «Preparing the condensation container for the appliance care programme», Page 37.
1. Set the programme to position 1.
2. Press and hold Iron Dry . 3. Set the programme to position 4. 4. Release Iron Dry . a «CP1» and the programme dura-
tion alternate on the display.
15.4Running the basic appli- ance care programme on the appliance
To remove any light soiling, you can run a basic appliance care pro- gramme. Note: After a certain period of use, the appliance automatically recom- mends that you run the basic appli- ance care programme. Before the start and end of the programme, the display shows the note «CrE» for 5
enAppliance care
38
seconds. The note is shown re- peatedly until the basic appliance care programme has been run com- pletely. Requirements The appliance is ready to run the
appliance care programme. «Preparing the appliance for the appliance care programme «, Page 36.
The appliance care programme has started. «Starting the appliance care pro- gramme», Page 37
1. Add approx. 1 litres of hot tap water into the condensation con- tainer.
Hold the full condensation con- tainer level so that no liquid spills out.
2. Insert the condensation container so that it locks into place.
3. Press Start/ Reload .
a The appliance care programme starts and an audible signal sounds.
a «End» appears on the display once the appliance care pro- gramme has ended and an aud- ible signal sounds.
4. Pull out the condensation con- tainer, keeping it level.
5. Empty the condensation container Page 33.
Appliance careen
39
6. Insert the condensation container so that it locks into place.
a The appliance care programme has been completed.
Note: If the condensate water has been drained from the machine via the drain hose, please follow the steps in «Preparing the condensation con- tainer for the appliance care pro- gramme», Page 37 in reverse order, after both the intensive and regular cleaning processes.
15.5Preparing the appliance for the intensive appli- ance care programme
If the appliance is not used for more than one month, stubborn dirt or odours may occur. To remove this, you can run an intensive appliance care programme. Note: The intensive appliance care programme runs for approximately 4 hours. The programme may take longer if you do not carry out the ne- cessary steps in good time while the programme is running. Once it has started, the intensive ap- pliance care programme should not be cancelled.
Requirements The appliance is ready to run the
appliance care programme. «Preparing the appliance for the appliance care programme «, Page 36.
The appliance care programme has started. «Starting the appliance care pro- gramme», Page 37
Press . a «CP2» and the programme dura-
tion alternate on the display.
15.6Running the intensive appliance care pro- gramme
1. Pull out the condensation con- tainer horizontally and empty it.
enAppliance care
40
2. Pour a bottle of the original appli- ance care product «Accessories», Page 29 and ap- prox. 1 litres of warm tap water into the condensation container.
Hold the full condensation con- tainer level so that no liquid spills out.
3. Insert the condensation container so that it locks into place.
4. Press Start/ Reload . The appli- ance care programme starts and an audible signal sounds. After around 3 hours, the appli- ance pauses the appliance care programme and the remaining pro- gramme duration flashes on the display.
5. Pull out the condensation con- tainer horizontally and empty it.
6. Add approx. 1 litres of hot tap water into the condensation con- tainer.
Hold the full condensation con- tainer level so that no liquid spills out.
7. Carefully tip and empty the con- densation container horizontally in order to remove any remaining ori- ginal care product.
Appliance careen
41
15.7Ending the intensive ap- pliance care programme
1. Add approx. 1 litres of hot tap water into the condensation con- tainer.
Hold the full condensation con- tainer level so that no liquid spills out.
2. Insert the condensation container so that it locks into place.
3. Press Start/ Reload . a The appliance care programme is
resumed. «End» appears on the display and a signal tone sounds once the appliance care pro- gramme has ended.
4. Pull out the condensation con- tainer, keeping it level.
5. Empty the condensation container Page 33.
6. Insert the condensation container so that it locks into place.
7. Switch off the appliance. «Switching off the appliance», Page 31
a The appliance care programme has been completed.
enCleaning and servicing
42
Note: If the condensate water has been drained from the machine via the drain hose, please follow the steps in «Preparing the condensation con- tainer for the appliance care pro- gramme», Page 37 in reverse order, after both the intensive and regular cleaning processes.
16Cleaning and servi- cing
To keep your appliance working effi- ciently for a long time, it is important to clean and maintain it carefully. Note: You can find further information in the digital instruction manual by scanning the QR code in the table of contents or on www.bosch- home.com.
16.1Tips on cleaning and care
Wipe down the housing and the controls with nothing but water and a damp cloth.
This ensures the parts of the appli- ance will remain clean and hy- gienic.
Remove all de- tergent residue, spray residue or other residues immediately.
Fresh deposits are easier to re- move without leaving any residue.
Leave the appli- ance door open after use.
This allows the residual water to dry, reducing odours in the ap- pliance.
16.2Moisture sensor The moisture sensor in this appliance measures how damp the laundry is during the drying cycle. The appli- ance changes the duration of the automatic programme depending on the residual moisture in the laundry.
Cleaning the moisture sensor Over time, residue from limescale, detergents and care products can build up on the moisture sensor. Clean the moisture sensor regularly.
ATTENTION! Hard or rough objects may damage the moisture sensor. Do not use hard or rough objects,
abrasive cleaning products or steel wool for cleaning.
Note: If you do not clean the appli- ance as described, the appliance’s functionality may be impaired. 1. Open the door. 2. Clean the moisture sensor with a
sponge.
Troubleshootingen
43
17Troubleshooting You can rectify minor faults on your appliance yourself. Read the troubleshoot- ing information before contacting after-sales service. This will avoid unneces- sary costs.
WARNING Risk of electric shock! Incorrect repairs are dangerous. Repairs to the appliance should only be carried out by trained specialist
staff. Only use genuine spare parts when repairing the appliance. If the power cord of this appliance is damaged, it must be replaced by the
manufacturer, the manufacturer’s Customer Service or a similarly qualified person in order to prevent any risk.
Fault Cause and troubleshooting «Hot» and the drum rotates.
Cooling process active. 1. Not a fault. 2. Do not change the programme during the cooling
process.
Note: The cooling process takes up to 10 minutes. You can continue to operate the appliance.
Humming noise. Compressor active. Not a fault normal operating noise.
The display goes out and Start/ Reload flashes.
Energy-saving mode is active Press any button. a The symbol lights up again.
«CrE» After a period of operation, the appliance automatic- ally recommends that you run the basic appliance care programme. «Running the basic appliance care programme
on the appliance», Page 37
Fluff filter is soiled. «Cleaning the fluff filter», Page 31
The appliance is not working.
The mains plug of the power cord is not plugged in. Connect the appliance to the power supply.
The circuit breaker in the fuse box has tripped. Check the circuit breaker in the fuse box.
There has been a power cut. Check whether the lighting in your kitchen or other
appliances are working.
enTroubleshooting
44
Fault Cause and troubleshooting Appliance paused, but the drum is rotating.
Cooling process active. Not a fault no action required.
Creasing. The load is too large. Observe the maximum load capacity of the
«Programmes», Page 26.
The laundry lies in the drum for too long after drying. 1. Remove the laundry from the drum as soon as the
drying programme has finished. 2. Spread the items of laundry for cooling.
Unsuitable programme for the type of fabric. Set the suitable programme for the type of fabric.
«Programmes», Page 26
Easy-Care fabrics are dried for too long. «Changing the dryness level», Page 25. «Adjusting the dryness level», Page 25.
Anti-Crease not activated. Activate the Anti-Crease function.
«Buttons», Page 23
and programme terminated.
Condensation tank filled. 1. «Emptying the condensation container», Page 33. 2. «Inserting the condensation container», Page 33. 3. «Starting the programme», Page 30.
Water drain hose is caught or jammed. 1. Ensure that the water drain hose is not kinked or
trapped. 2. Route the water drain hose without kinks.
Water drain hose is not connected correctly. Ensure that the water drain hose is connected cor-
rectly. «Connecting the water drain hose», Page 14
Water drain hose is blocked. Rinse the water drain hose with tap water.
Condensation in the condensation tank even though the water drain hose is connec- ted.
The appliance uses condensation for the automatic self-cleaning. Not a fault no action required.
Water drain hose is not connected correctly. Ensure that the water drain hose is connected cor-
rectly. «Connecting the water drain hose», Page 14
Troubleshootingen
45
Fault Cause and troubleshooting The programme does not start.
Childproof lock is activated. «Deactivating the childproof lock», Page 34
You have not pressed Start/ Reload . Press Start/ Reload .
No programme set. 1. «Setting a programme», Page 30. 2. «Starting the programme», Page 30.
The length of the pro- gramme changes dur- ing the drying cycle.
The programme operation is optimised electronically. This may change the programme duration. Not a fault no action required.
Pumping noise. Condensation pump active. Not a fault normal operating noise.
Buzzing noise. Compressor ventilation active. Not a fault normal operating noise.
The drying time is too long.
Fluff filter is soiled. «Cleaning the fluff filter», Page 31
The ambient temperature is greater than 30 C. Ensure that the ambient temperature is lower than
30 C.
The ambient temperature is lower than 15 C. Ensure that the ambient temperature is above 15
C.
Insufficient air circulation at the appliance’s installation location. Ventilate the appliance’s installation location.
The appliance’s ventilation opening is blocked. Ensure that the ventilation opening of the appliance
is kept clear.
Heat exchanger is soiled. «Running the basic appliance care programme
on the appliance», Page 37
Automatic self-cleaning function rinses the appliance’s heat exchanger. 1. Not a fault. 2. Do not pull out the condensation tank. 3. Do not cancel the programme.
Water is leaking from the appliance.
Appliance is not correctly aligned. «Aligning the appliance», Page 16
Water drain hose is not connected correctly.
enTroubleshooting
46
Fault Cause and troubleshooting Water is leaking from the appliance.
Ensure that the water drain hose is connected cor- rectly. «Connecting the water drain hose», Page 14
The laundry is too damp.
Unsuitable programme for the type of fabric. Set a timed programme for the subsequent drying.
«Programmes», Page 26
There has been a power cut. Check whether the lighting in your kitchen or other
appliances are working.
The load is too large. Observe the maximum load capacity of the
«Programmes», Page 26.
After the end of the programme, warm laundry feels damper than it actually is. 1. Remove the laundry from the drum as soon as the
drying programme has finished. 2. Spread the items of laundry for cooling.
Unsuitable dryness level set. «Changing the dryness level», Page 25.
Drying target not adjusted. «Adjusting the dryness level», Page 25.
Load too small. Set a timed programme for the subsequent drying.
«Programmes», Page 26
Moisture sensor dirty. «Cleaning the moisture sensor», Page 42.
The drying process is interrupted and the condensa- tion tank has been filled. 1. «Emptying the condensation container», Page 33. 2. «Inserting the condensation container», Page 33. 3. «Starting the programme», Page 30.
Odours have formed in the appliance.
Stubborn dirt in the appliance or an extended appli- ance downtime of more than one month. «Preparing the appliance for the intensive appli-
ance care programme», Page 39.
Transportation, storage and disposalen
47
18Transportation, stor- age and disposal
18.1Preparing the appliance for transportation
ATTENTION! If the appliance is operated immedi- ately after transportation, the refriger- ant contained in the appliance may result in damage to the appliance. Immediately after transporting the
appliance, leave it to rest for two hours before putting it into opera- tion.
Tip: The appliance may contain re- sidual water, which may drip out of it when transported. The appliance should be transported upright. Requirements The condensation container is
emptied. Emptying the condensa- tion container Page 33
The appliance has been switched on. «Switching on the appliance», Page 30
1. Set any programme Page 30. 2. Start the programme Page 30
and wait 5 minutes. a The condensation is drained. 3. Switch off the appliance.
«Switching off the appliance», Page 31
4. Remove the water drain hose from the connection point. «Water outlet connection types», Page 15
5. Secure the water drain hose on the appliance against unintentional loosening. Ensure that you do not bend the water drain hose.
6. Empty the condensation container Page 33.
7. Insert the condensation container Page 33.
8. Disconnect the appliance’s mains plug from the power supply.
a The appliance is now ready to be transported.
18.2Disposing of old appli- ance
Valuable raw materials can be re- used by recycling.
WARNING Risk of harm to health! Children can lock themselves in the appliance, thereby putting their lives at risk. Do not install the appliance behind
a door as this may obstruct the ap- pliance door or prevent it from opening.
With redundant appliances, unplug the power cord. Then cut through the cord and damage the lock on the appliance door beyond repair so that the appliance door will no longer close.
1. Unplug the appliance from the mains.
2. Cut through the power cord. 3. Dispose of the appliance in an en-
vironmentally friendly manner. Information about current disposal methods are available from your specialist dealer or local authority.
This appliance is la- belled in accordance with European Directive 2012/19/EU concerning used electrical and elec-
enCustomer Service
48
tronic appliances (waste electrical and electronic equipment — WEEE). The guideline determ- ines the framework for the return and recycling of used appliances as applicable throughout the EU.
19Customer Service Function-relevant genuine spare parts according to the corresponding Eco- design Order can be obtained from Customer Service for a period of at least 10 years from the date on which your appliance was placed on the market within the European Eco- nomic Area. Note: Under the terms of the manu- facturer’s warranty the use of Cus- tomer Service is free of charge. Detailed information on the warranty period and terms of warranty in your country is available from our after- sales service, your retailer or on our website. If you contact Customer Service, you will require the product number (E- Nr.) and the production number (FD) of your appliance. The contact details for Customer Ser- vice can be found in the enclosed Customer Service directory or on our website.
19.1Product number (E-Nr.) and production number (FD)
You can find the product number (E- Nr.) and the production number (FD) on the appliance’s rating plate. Depending on the model, the rating plate is located: On the inside of the door. On the inside of the maintenance
flap. On the rear of the appliance. Make a note of your appliance’s de- tails and the Customer Service tele- phone number to find them again quickly.
Consumption valuesen
49
20Consumption values The Cottons Eco programme (denoted by the arrow symbol) is suitable for drying cotton laundry with a normal dampness level, and is the most efficient programme for drying damp cotton laundry in terms of com- bined energy consumption. The consumption values for this pro- gramme that are declared on the en- ergy label refer to a moisture content of the laundry of 60%. The values specified for other pro- grammes are indicative only and were determined in accordance with the applicable standard EN61121.
The actual values may deviate from the indicated values depending on the type of fabric, composition of laundry to be dried, residual moisture in the fabric, set degree of dryness, amount of laundry being loaded, en- vironmental conditions and the activ- ation of additional functions. The expected programme dura- tion/»Ready in» time that is shown on the appliance display when selecting the programme is based on the spin speed in the washing machine of 1000 rpm when the appliance is de- livered.
Programme Final mois- ture level (%)
Load (kg)
Spin speed (rpm)
Initial mois- ture level (%)
Pro- gramm e dura- tion (h:min)
Energy con- sump- tion (kWh/ cycle)
Cottons + Cupboard Dry
-1.5 9.0 1400 50 2:59 2.07
Cottons + Cupboard Dry
-1.5 4.5 1400 50 2:16 1.42
Cottons + Cupboard Dry
-1.5 9.0 1000 60 3:19 2.36
Cottons + Cupboard Dry
-1.5 4.5 1000 60 2:27 1.58
Cottons + Cupboard Dry
-1.5 9.0 800 70 3:39 2.65
Cottons + Cupboard Dry
-1.5 4.5 800 70 2:38 1.74
Cottons Eco 0.0 9.0 1400 50 2:38 1.77 Cottons Eco 0.0 4.5 1400 50 1:51 1.09 Cottons Eco 0.0 9.0 1000 60 2:56 2.05 Cottons Eco 0.0 4.5 1000 60 2:01 1.25 Cottons Eco 0.0 9.0 800 70 3:14 2.34 Cottons Eco 0.0 4.5 800 70 2:12 1.41
Cottons + Iron Dry 12.0 9.0 1400 50 1:47 1.19
en Technical data
50
Programme Final mois- ture level (%)
Load (kg)
Spin speed (rpm)
Initial mois- ture level (%)
Pro- gramm e dura- tion (h:min)
Energy con- sump- tion (kWh/ cycle)
Cottons + Iron Dry 12.0 4.5 1400 50 1:12 0.70 Cottons + Iron Dry 12.0 9.0 1000 60 2:07 1.49 Cottons + Iron Dry 12.0 4.5 1000 60 1:23 0.87 Cottons + Iron Dry 12.0 9.0 800 70 2:28 1.79 Cottons + Iron Dry 12.0 4.5 800 70 1:34 1.03 Easy Care + Cup- board Dry
2.0 3.5 800 40 1:00 0.55
Easy Care + Cup- board Dry
2.0 3.5 600 50 1:09 0.67
21 Technical data
Appliance height 84.2 cm Appliance width 59.8 cm Appliance depth 61.3 cm Appliance depth with door closed
64.8 cm
Appliance depth with door open
109.6 cm
Weight 56.4 kg Maximum load 9.0 kg Mains voltage 220-240 V,
50 Hz Minimum in-
stallation protec- tion
10A
Nominal power 800 W Power consump- tion
Off mode: 0.15 W
Left-on mode: 0.50 W
Ambient temper- ature
Minimum: 5 C
Maximum: 35 C
Length of the power cord
145 cm
This product contains light sources from energy efficiency class F. These light sources are available as a spare part and must only be replaced by trained specialist staff. You can find more information about your model online at https:// eprel.ec.europa.eu/1. This web ad- dress is linked to the official EU EPREL product database. Please then follow the instructions on searching for the model. The model identifier is made up of the charac- ters before the slash in the product number (E-Nr.) on the rating plate. Al- ternatively, you can also find the model identifier in the first line of the EU energy label.
1 Only applies to countries in the European Economic Area
Thank you for buying a Bosch Home Appliance!
Register your new device on MyBosch now and profit directly from:
Expert tips & tricks for your appliance Warranty extension options Discounts for accessories & spare-parts Digital manual and all appliance data at hand Easy access to Bosch Home Appliances Service
Free and easy registration also on mobile phones: www.bosch-home.com/welcome
Looking for help? You’ll find it here.
Expert advice for your Bosch home appliances, help with problems or a repair from Bosch experts. Find out everything about the many ways Bosch can support you: www.bosch-home.com/service Contact data of all countries are listed in the attached service direct- ory.
*9001676510* 9001676510(020907) en
BSH Hausgerte GmbH Carl-Wery-Strae 34 81739 Mnchen, GERMANY www.bosch-home.com
A Bosch Company
Valid within Great Britain: Imported to Great Britain by BSH Home Appliances Ltd. Grand Union House Old Wolverton Road Wolverton, Milton Keynes MK12 5PT U
Manualsnet FAQs
If you want to find out how the Series 6 Bosch works, you can view and download the Bosch Series 6 WQG245S9GB Dryer User Manual on the Manualsnet website.
Yes, we have the User Manual for Bosch Series 6 as well as other Bosch manuals. All you need to do is to use our search bar and find the user manual that you are looking for.
The User Manual should include all the details that are needed to use a Bosch Series 6. Full manuals and user guide PDFs can be downloaded from Manualsnet.com.
The best way to navigate the Bosch Series 6 WQG245S9GB Dryer User Manual is by checking the Table of Contents at the top of the page where available. This allows you to navigate a manual by jumping to the section you are looking for.
This Bosch Series 6 WQG245S9GB Dryer User Manual consists of sections like Table of Contents, to name a few. For easier navigation, use the Table of Contents in the upper left corner.
You can download Bosch Series 6 WQG245S9GB Dryer User Manual free of charge simply by clicking the “download” button in the upper right corner of any manuals page. This feature allows you to download any manual in a couple of seconds and is generally in PDF format. You can also save a manual for later by adding it to your saved documents in the user profile.
To be able to print Bosch Series 6 WQG245S9GB Dryer User Manual, simply download the document to your computer. Once downloaded, open the PDF file and print the Bosch Series 6 WQG245S9GB Dryer User Manual as you would any other document. This can usually be achieved by clicking on “File” and then “Print” from the menu bar.

A
Соблюдайте указания по технике
безопасности на с. 13!
ш
Перед началом эксплуатации сушильной
машины внимательно изучите данную
инструкцию, а также отдельную инструкцию
по режиму энергосбережения!
Содертание Страница
■ Подготовка к работе …………………………………….2
■ Панель управления………………………………………2
■ Сушка
……………………………………………………….
3/4
■ Дисплей и настройки…………………………………….5
■ Указания по сушке белья ……………………………..6
■ Что вам обязательно следует знать
………………
6
■ Обзор программ
………………………………………….
7
■ Уход и очистка
……………………………………………..
8
■ Установка и подключение……………………………..9
■ Защита от замерзания/транспортировка
..........
9
■ Дополнительные принадлежности……………….10
■ Технические характеристики
……………………….
10
■ Параметры расхода……………………………………10
■ Рабочие шумы
…………………………………………..
11
■ Что делать, если
………………………………………..
12
■ Сервисная служба…………………………………….. 13
■ Указания по технике безопасности
….….………
13
Использование по назначению
Поздравляем! — Вы приобрели современную бытовую технику
высочайшего качества марки Bosch.
Конденсационная сушильная машина с тепловым насосом и
автоматической очисткой теплообменника отличается особо
экономичным расходом энергии и не требует особого ухода
^ с. 6.
Любая сушильная машина, произведенная на нашем заводе,
тщательно проверяется на правильность функционирования и
безупречность состояния.
При возникновении вопросов наша сервисная служба будет рада
помочь вам.
А
Экологичная утилизация
При утилизации упаковки соблюдайте правила экологической
безопасности.
Данный прибор имеет отметку о соответствии европейским
нормам 2002/96/EG для электрических и электронных приборов
(Waste Electrical and Electronic Equipment — WEEE).
Данные нормы определяют действующие на территории
Европейского союза правила возврата и утилизации старой
бытовой техники.
только для бытового использования;
только для сушки текстильных изделий, которые
стираются в воде.
Не оставляйте детей без присмотра вблизи
сушильной машины!
Не подпускайте домашних животных к сушильной
машине.
Дети старше 8 лет и лица, не способные в силу
своих ограниченных физических, психических и
сенсорных возможностей, а также из-за
недостаточных знаний и опыта, правильно
обращаться с сушильной машиной, могут
использовать её только под присмотром или
после инструктажа ответственного лица.
Дополнительную информацию о продукции, принадлежностях,
запасных деталях и сервисном обслуживании вы можете найти на
нашем интернет-сайте: www.bosch-home.com
Программы/типы текстильных изделий
Подробный обзор программ и типов текстильных изделий
—> Обзор программ, с. 7.
Соблюдайте указания по уходу от изготовителя.
^Хлопок
^ Синтетика
Ноские текстильные изделия.
Текстильные изделия из синтетики
или меланжевых тканей.
Возможность выбора результата сушки для программ ^ Хлопок
и ^ Синтетика:
Ш: Очень сухое Изделия с плотными, многослойными
деталями.
Щ . Сушка в шкаф Однослойные изделия.
^ Сушка под утюг
По окончании сушки бельё можно
гладить.
^ Спортивная Функциональная одежда из
микрофибры.
@ Полотенца Махровые изделия, например,
полотенца
и банные халаты.
Ш Смешанное Различные текстильные изделия
бельё
из хлопка и синтетики.
© Сушка по Любые текстильные изделия, кроме
времени тепло
шерсти и шёлка.
^ Рубашки/Бизнес Текстильные изделия из хлопка, льна и
синтетики.
® Супер 40’
Текстильные изделия из синтетики,
хлопка и меланжевых тканей.
^ Пуховики Текстильные изделия с пуховым
наполнителем.
^ Женское бельёс Женское бельё из синтетики, хлопка
или меланжевых тканей.
^ Шерсть в корзине Шерстяные изделия, пригодные для
машинной стирки.
Этап выполнения программы
Блокировка для безопасности детей
Резервуар для конденсата
Ворсовый фильтр
Автоматическая очистка
теплообменника
SEL,
CLEANING
?
Дополнительная
информацияна с. 5
©
0 (Время сушки) Настройка времени сушки возможна только для программ сушки по времени.
(Корректировка результата сушки)
Точная настройка результата сушки.
th— SHh
© (Время до окончания) Настройка окончания программы.
Пониж. темп. Сушка при пониженной температуре.
Q
Легко гладить Увеличение цикла защиты от сминания.
©
Сигнал
Включение/выключение сигнала.
(Старт/Пауза)
Запуск, остановка и продолжение программы;
активизация или деактивизация ^ (блокировки для безопасности детей).
Опорожните резервуар для конденсата
Сливайте конденсат после каждой сушки!
Но не во время цикла сушки.
1. Выдвиньте резервуар для конденсата,
держа его горизонтально.
Вылейте конденсат.
Всегда задвигайте резервуар для
конденсата полностью до фиксации.
Если индикатор Й (резервуар для
конденсата), несмотря на произведенный
слив, мигает —> промойте фильтр в резервуаре для
конденсата, с. 8/12.
А
Во время сушки не выдвигайте/не опорожняйте
резервуар .для конденсата.
Дисплей и настройки
Очистите ворсовый фильтр
Чистый ворсовый фильтр уменьшает
расход электроэнергии и время сушки.
Ворсовый фильтр состоит из двух частей. Очищайте
внутреннюю и внешнюю части фильтра после каждой
сушки:
Откройте дверцу.
Удалите ворсинки
на дверце и около
неё.
Выньте обе части
ворсового фильтра.
Удалите ворсинки по краю шахты
ворсового фильтра, чтобы они не
попали в неё.
4. Раскройте фильтр и
удалите ворсинки.
Обе части промойте
под струёй воды и высушите.
Закройте внутреннюю и внешнюю
части фильтра, соедините их и снова
установите фильтр на место.
Выньте белье и выключите
сушильную машину
Окончание программы
Прерывание программы
I (Старт/Пауза);Откройте дверцу или нажмите клавишу I
процесс сушки прервется.
Добавьте или выньте бельё и закройте дверцу.
При необходимости выберите другую программу и
дополнительную функцию. Нажмите клавишу М (Старт/
Пауза). Через несколько минут изменится оставшееся
время.
Барабан и дверца могут быть горячими!
(ворсовый фильтр) Очистка ворсового фильтра’
I I (резервуар для
с. 4/12.
Опорожнение резервуара для конденсата ^ с. 4,8/12.
SELL CLEANING
Автоматическая очистка теплообменника ■ с. 8.
Р-
(этапы
выполнения
программы)
На дисплее отображаются этапы выполнения программы:
Ш сушка;
^ сушка под утюг;
Щ сушка в шкаф;
—Р- перерыв —»при необходимости;
окончание программы.
(блокировка для
безопасности
детей)
Вы можете зашитить сушильную машину от непреднамеренного изменения
настроек. Для активизации/деактивизации опции ^(блокировка для
безопасности детей) запустите программу или выберите опцию ^ (Время
до окончания) и затем нажмите клавишу М (Старт/Пауза) и удерживайте
5 секунд до включения звукового сигнала. Появится/погаснет символ
активизированной/деактивизированной опции —»^(блокировка для
безопасности детей).
[ч:мин]
(оставшееся
время)
При выборе программы на дисплее отображается предполагаемая
продолжительность сушки (оставшееся время) при максимальном объёме
загрузки. В процессе сушки датчики влажности определяют фактический
объём загрузки и корректируют продолжительность программы. Поэтому
значение оставшегося времени на дисплее меняется.
Выбранная опция активизирована/деактивизирована —»индикатор вкл/выкл.
См. отдельные инструкции по режиму энергосбережения.
^ Время сушки (только для программ сушки по времени) настраивается с
© (Время сушки) шагом 10 минут и может составлять от 20 минут до макс. 3 часов.
^ Предусмотрены три ступени результата сушки (напр., сушка в шкаф). Степень
(Корректировка сушки увеличивается. Стандартная настройка = 0. Предусмотренные
результата сушки) значения: О, 1,2, 3. После точной настройки программы эта настройка
сохраняется также для других программ, до изменения настройки ^
(Корректировка результата сушки).
/ь- гчь
©
(Время до
окончания)
Настройка окончания программы возможна посредством выбора ©
(Времени до окончания). ©(Время до окончания) увеличивается с шагом
в один час, макс, до 24 ч. Нажимайте клавишу © (Время до окончания) до
тех пор, пока на дисплее не появится нужное количество часов (б=час). Для
запуска программы нажмите клавишу М (Старт/Пауза). Программа
завершится по истечении заданного времени.
Через несколько минут после настройки © (Время до окончания) дисплей
гаснет в целях экономии энергии. Для активизации дисплея нажмите любую
клавишу, откройте/закройте дверцу или поверните программатор.
Пониж. темп.
Более низкая температура сушки изделий из деликатных тканей, напр.,
полиакрила, полиамида или эластана, при увеличенном времени сушки.
©
Легко гладить
По окончании программы барабан регулярно поворачивается во избежание
образования заломов. Бельё не слеживается и остается объемным.
Стандартная настройка для каждой программы составляет 60 минут.
Продолжительность автоматической
функции зашиты белья от сминания может быть увеличена на 60 минут.
Сигнал
Для включения и выключения сигнала. По окончании программы раздается
^ Сигнал, если он был активизирован. Настройка данной опции не
влияет на друтие звуковые ситналы.
Указания по сушке белья…
□
М аркировка на изделиях
Соблюдайте указания по уходу от изготовителя.
□ Пригодны для сушки в сушильной машине.
□ Нормальная сушка.
□ Сушка при низкой температуре —»дополнительно выберите опцию ^ Пониж. темп.
Н Сушка в машине запрешена.
Не допускается сушка в сушильной машине изделий из следующих видов тканей:
— воздухонепроницаемые ткани (например, прорезиненные);
— тонкие ткани (шёлк, синтетические гардины) —» могут образоваться заломы!
— Бельё с масляными пятнами.
Реком ендации по суш ке
— Для достижения равномерного результата сушки отсортируйте бельё по виду ткани и программе сушки.
— Очень маленькие текстильные изделия (например, детские носки) всегда сушите вместе с большим предметом
белья (например, с полотенцем).
— Застегните все молнии, крючки, петли, кнопки.
Завяжите тканевые пояса, лямки, тесёмки, при необходимости используйте мешок для белья.
— Не пересушивайте синтетику —»могут образоваться заломы. Такое бельё лучше досушить на воздухе.
— Не сушите в сушильной машине шерстяные ткани. Однако для них можно использовать программу освежения
—»с. 7, программа Шерсть/освежение (в зависимости от модели).
— Не гладьте бельё непосредственно после сушки, дайте ему некоторое время полежать
—»остаточная влага равномерно распределится по белью.
— Трикотажные изделия (например, футболки, трикотажное бельё) часто садятся при первой сушке.
—» Не используйте протрамму Ш: Очень сухое.
— Накрахмаленное бельё подходит для сушки в сушильной машине только при определенных условиях —» крахмал
оставляет после себя налёт, который затрудняет сушку белья.
— При стирке с сушкой заливайте кондиционер в объёме, указанном изтотовителем.
— Для предварительно высушенных, мнотослойных тканей или отдельных небольших предметов белья используйте
протрамму сушки по времени. Подходиттакже для досушивания.
О храна окрут аю щ ей среды /реком ендации по эконом ичной эксплуат ации
чем выше скорость отжима при стирке, тем
Обзор программ,
— Перед сушкой бельё следуетхорошо отжать в стиральной машине
короче продолжительность сушки и меньше расход электроэнертии.
— Затружайте максимально допустимое количество белья, но не допускайте перетрузки машины
с. 7.
— Во время сушки обеспечьте достаточную вентиляцию помешения.
— После каждой сушки очишайте ворсовый фильтр —»Очистка ворсового фильтра, с. 4/12.
— Не перекрывайте воздухозаборное отверстие сушильной машины.
Что вам обязательно следует знать
Ваша сушильная машина потребляет небольшое количество электроэнертии и в техническом плане отличается
наличием холодильното цикла, который также как и в холодильнике, эффективно использует энертию. Чистка
теплообменника сушильной машины производится автоматически в процессе сушки.
Ворсовый фильтр и фильтр в резервуаре для конденсата необходимо ретулярно очишать.
Ни в коем случае не включайте сушильную машину без ворсового фильтра и фильтра в резервуаре для конденсата!
Ворсовый фильтр
Во время сушки в ворсовый фильтр собираются ворсинки и волосы, которые метут быть на белье. Забившийся
ворсовый фильтр может снизить теплообмен.
Чтобы этото не случилось, ворсовый фильтр необходимо очишать после каждой сушки. Для этото промойте фильтр под
струёй воды —»с. 4/12.
Фильтр в резервуаре для конденсата
Фильтр в резервуаре для конденсата очишает конденсируемую воду. Эта конденсированная вода используется для
автоматической очистки. Фильтр необходимо ретулярно промывать под струёй воды. Опорожнение резервуара для
конденсата перед очисткой фильтра —»см. с. 4,8/12.
Текстильные изделия
Не сушите в машине изделия, если на них имеются видимые следы растворителя, масла, воска, жира или краски:
например, фиксируюшето лака для волос, жидкости для снятия лака, пятновыводителя, промывочното бензина и т. д.
Выньте из карманов посторонние предметы.
Не сушите изделия из воздухонепроницаемых тканей.
Старайтесь не сушить бельё из ворсистых тканей. П
Шерстяные ткани можно только освежить с помошь соответствуюшей протраммы. Ц
10
-в-
а а
-в-
3 ^
1= S
CD
СО CD
S ©
Я ‘CD
‘CD О
~ 1=1
Э
>. О
(-> Б
со ^
о is
15 1==:
2 ^
><
CD О
S 1C
О ОЗ
CD \Z
в ‘CD
В ^
О
^ S g
о. ^
I— QD
о 03
СО
<73 ^ ■
‘ С _Q CQ
I i
I’
о 3
О ^
(^1
■ & CD
03 CD
□ Q
о 03
.
cq;
в g
CD
P <71
^ o3
_Q cq;
О
Ш
T
CD
О CD
^ I—
_Q CD
5 i
CQ
CD
=9 ^
Q. о
S’ ^
о
Q_ CO
^ CQ
c; Q_
-Q CO
E ^
о Г-Л
^ CD
в