
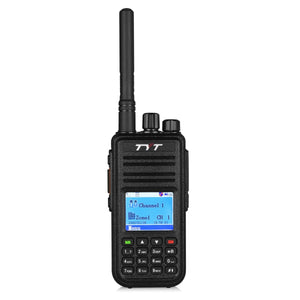
Рация MD-UV390 является популярным и эффективным решением для связи на короткие расстояния. Она имеет множество функций и возможностей, которые могут быть сложными для новичков. Однако, настройка данной рации может быть довольно простым процессом, если вы знаете основные шаги.
Первое, что вы должны сделать, это включить рацию и установить нужные настройки, такие как частота и кодирование. Для этого вам понадобится доступ к меню, которое обычно находится в настройках рации. В меню вы найдете различные пункты, которые позволят вам настроить рацию в соответствии с вашими потребностями.
Когда вы настроите основные параметры, вам может потребоваться также настроить другие функции, такие как режимы работы, звуковые сигналы и привязки каналов. Все эти настройки могут быть представлены в меню и требуют определенных команд и действий для их установки.
Не забывайте, что важно правильно настроить рацию, чтобы ее использование было максимально эффективным и безопасным. Поэтому следуйте указаниям в инструкции, которая поставляется с рацией. Если у вас возникли трудности или вопросы, не стесняйтесь обратиться к руководству пользователя или обратиться за помощью к опытным пользователям данной рации.
Содержание
- Подготовка перед настройкой
- Шаг 1: Установка программного обеспечения
- Шаг 2: Подключение рации к компьютеру
- Шаг 3: Настройка частоты и каналов
- Шаг 4: Настройка тоновой сигнализации
- Шаг 5: Настройка других параметров
Подготовка перед настройкой
Перед тем, как приступить к настройке рации MD-UV390, необходимо выполнить несколько подготовительных шагов:
- Убедитесь в наличии всех необходимых компонентов. Перед началом настройки убедитесь, что у вас есть все необходимые компоненты: рация MD-UV390, антенна, аккумулятор, зарядное устройство и другие аксессуары. Если что-то не хватает, докупите недостающие детали.
- Зарядите аккумулятор полностью. Перед настройкой рации убедитесь, что аккумулятор полностью заряжен. Это гарантирует длительную автономную работу рации и предотвращает возникновение проблем в процессе настройки.
- Ознакомьтесь с руководством пользователя. Перед началом настройки рации рекомендуется внимательно изучить руководство пользователя. Это поможет вам понять основные функции и возможности рации, что упростит настройку и использование устройства.
- Найдите подходящее место для настройки. Выберите место, где не будет возникать помех и шума, чтобы процесс настройки прошел максимально гладко. Идеальным вариантом будет тихая и спокойная комната, где вам не будут мешать посторонние звуки.
- Подготовьте необходимые инструменты. Перед началом настройки убедитесь, что у вас есть все необходимые инструменты: компьютер с доступом в Интернет, USB-кабель для подключения рации к компьютеру, программное обеспечение для настройки рации и другие инструменты, указанные в руководстве пользователя.
При выполнении всех этих подготовительных шагов вы гарантируете гладкое и успешное проведение процесса настройки рации MD-UV390.
Шаг 1: Установка программного обеспечения
Для начала настройки рации MD-UV390 необходимо установить соответствующее программное обеспечение на компьютер. Это позволит вам получить доступ к расширенным функциям рации и управлять ее настройками.
Перейдите на официальный сайт производителя рации и найдите раздел загрузок. Скачайте и установите последнюю версию программы, совместимую с вашей операционной системой.
После установки программы подключите рацию к компьютеру с помощью USB-кабеля, который поставляется в комплекте. Дождитесь, пока компьютер распознает устройство и установит необходимые драйверы.
Теперь запустите установленную программу. Выберите режим программирования и установите соединение между рацией и компьютером, следуя инструкциям программы.
Поздравляю! Вы успешно установили программное обеспечение для рации MD-UV390 и готовы приступить к следующим шагам настройки.
Шаг 2: Подключение рации к компьютеру
Для настройки рации MD-UV390 необходимо подключить ее к компьютеру. Это позволит вам загрузить последнюю версию прошивки и внести необходимые изменения в настройки.
Для подключения рации к компьютеру вам понадобится USB-кабель, поставляемый в комплекте с рацией. Вставьте один конец кабеля в разъем USB на рации, а другой конец подключите к свободному порту USB на компьютере.
После подключения рации к компьютеру вам понадобится специальное программное обеспечение для настройки рации. Вы можете скачать его с официального сайта производителя или использовать другое программное обеспечение, поддерживающее рацию MD-UV390.
После установки программного обеспечения запустите его и следуйте инструкциям по подключению рации. Обычно вам потребуется выбрать порт USB, к которому подключена рация, и установить соответствующие параметры связи.
Когда рация успешно подключена к компьютеру, вы сможете приступить к загрузке прошивки и настройке рации в соответствии с инструкциями производителя или программного обеспечения.
Шаг 3: Настройка частоты и каналов
После успешного подключения рации MD-UV390 к компьютеру, переходим к настройке частоты и каналов в соответствии с вашими потребностями. Для этого следуйте инструкциям ниже:
- Откройте программу программирования. Запустите программу, которую вы установили на предыдущем шаге.
- Выберите радиостанцию MD-UV390 в программе. Обычно в программе есть функция для выбора радиостанции, с которой вы будете работать. Найдите и выберите модель MD-UV390.
- Настройте частоты и каналы. В программе будет доступна функция для настройки частот и каналов. Введите необходимые значения, основываясь на вашей радиоконфигурации и требованиях.
- Сохраните настройки на рацию. После установки нужных значений, сохраните настройки на рацию, следуя инструкции в программе.
- Проверьте настройки радиостанции. После сохранения настроек, выключите рацию и включите ее снова, чтобы убедиться, что настройки успешно применились.
После завершения шага 3, настройка вашей рации MD-UV390 будет выполнена, и вы будете готовы использовать ее для связи на выбранной частоте и каналах.
Шаг 4: Настройка тоновой сигнализации
Настройка тоновой сигнализации важна для определения различных типов вызовов и режимов работы рации MD-UV390. В этом шаге вы научитесь настраивать тоновую сигнализацию на рации.
Для начала, в меню рации найдите пункт настройки тоновой сигнализации. Обычно он находится в разделе «Настройки» или «Настройки звука». Возможно, вам потребуется пароль доступа, чтобы получить доступ к этим настройкам.
После того, как вы найдете пункт настройки тоновой сигнализации, выберите режим работы тоновой сигнализации: CTCSS или DCS. CTCSS (Continuous Tone Coded Squelch System) использует аналоговый сигнал для фильтрации шумов и помех на канале. DCS (Digital Coded Squelch) использует цифровой код для фильтрации шумов и помех.
Затем, выберите нужный тон или код из списка доступных опций. Часто используются стандартные тоновые частоты и коды. Выбор зависит от вашего региона и настроек системы, с которой вы планируете использовать рацию.
После выбора нужного тона или кода, сохраните настройки и проверьте, правильно ли рация настроена на тоновую сигнализацию. Можно проверить это, попросив другого пользователя совершить вызов и убедившись, что рация реагирует только на вызовы с выбранным тоном или кодом.
Настройка тоновой сигнализации позволит вам эффективно использовать рацию MD-UV390, устанавливая различные режимы работы и фильтруя нежелательные сигналы и помехи на канале.
Шаг 5: Настройка других параметров
Ваша рация MD-UV390 обладает рядом других параметров, которые могут быть настроены для улучшения ее функциональности и идеального соответствия вашим потребностям.
Ниже приведены некоторые из этих параметров:
- Уровень громкости: Вы можете настроить уровень громкости рации, чтобы он соответствовал вашим предпочтениям и условиям окружающей среды.
- Тональные сигналы: Вы можете настроить различные тональные сигналы для оповещения о входящих вызовах или других событиях.
- Режим экономии батареи: Включение режима экономии батареи позволит увеличить время работы рации за счет снижения потребления энергии в режиме ожидания.
- Вибрация: Вы можете настроить рацию на режим вибрации для получения уведомлений в тихой или шумной среде.
- Яркость дисплея: Вы можете настроить яркость дисплея рации для комфортного использования в различных условиях освещения.
Чтобы настроить эти параметры, откройте меню на рации и найдите соответствующие настройки. Обычно они находятся в разделе «Настройки» или «Настройки системы».
Изменение параметров рации может потребовать некоторой экспериментирования, чтобы достичь оптимальных результатов. Постепенно регулируйте параметры и проверяйте их в реальных условиях использования.
UV Series

TH-UV8000E
Manuals & Software
Here you will find user manuals, device drivers and softwares for a wide range of our products.
MD Series
MD-380
Manuals & Software
Here you will find user manuals, device drivers and softwares for a wide range of our products.

MD-380G
Manuals & Software
Here you will find user manuals, device drivers and softwares for a wide range of our products.

MD-390
Manuals & Software
Here you will find user manuals, device drivers and softwares for a wide range of our products.
MD-390G
Manuals & Software
Here you will find user manuals, device drivers and softwares for a wide range of our products.
MD-680
Manuals & Software
Here you will find user manuals, device drivers and softwares for a wide range of our products.
MD-UV380G
Manuals & Software
Here you will find user manuals, device drivers and softwares for a wide range of our products.
MD-680D
Manuals & Software
Here you will find user manuals, device drivers and softwares for a wide range of our products.
Mobile Car Radio
TH-9800
Manuals & Software
Here you will find user manuals, device drivers and softwares for a wide range of our products.
TH-9000D
Manuals & Software
Here you will find user manuals, device drivers and softwares for a wide range of our products.
MD-9600
Manuals & Software
Here you will find user manuals, device drivers and softwares for a wide range of our products.


DMR Digital Transceiver
TYT ELECTRONICS CO., LTD
Block 39-1,Optoelectronics-information industry base, Nan'an, Quanzhou, Fujian, China
Brand: TYT
Model: MD-UV380, MD-UV380G, MD-UV390
DMR Digital Transceiver
DMR Digital Transceiver
DMR Digital Transceiver
DMR Digital Transceiver
| Document ID | 4106323 |
| Application ID | xl9mXA8MNfJTIcxpEqKz5g== |
| Document Description | user manual |
| Download: | |
| Mirror Download [FCC.gov] | |
| Short Term Confidential | No |
| Permanent Confidential | No |
| Supercede | No |
| Document Type | User Manual |
| Display Format | Adobe Acrobat PDF — pdf |
| Filesize | 488.39kB (6104910 bits) |
| Date Submitted | 2018-12-14 00:00:00 |
| Date Available | 2018-12-14 00:00:00 |
| Creation Date | 2018-07-26 20:20:49 |
| Producing Software | Adobe PDF library 10.01 |
| Document Lastmod | 2018-07-26 20:20:55 |
| Document Title | MD-UV380英文内页180321 |
| Document Creator | Adobe Illustrator CS6 (Macintosh) |
Source Exif Data [exif.tools]:
File Type                       : PDF
File Type Extension             : pdf
MIME Type                       : application/pdf
PDF Version                     : 1.6
Linearized                      : Yes
XMP Toolkit                     : 3.1-701
Modify Date                     : 2018:07:26 20:20:55+08:00
Create Date                     : 2018:07:26 20:20:49+08:00
Metadata Date                   : 2018:07:26 20:20:55+08:00
Creator Tool                    : Adobe Illustrator CS6 (Macintosh)
Format                          : application/pdf
Title                           : MD-UV380英文内页180321
Document ID                     : uuid:a3391756-43e7-4319-a23a-519e34b8cfd3
Instance ID                     : uuid:28924a72-06c3-49e2-b1b6-e6ab03fced3b
Producer                        : Adobe PDF library 10.01
Page Count                      : 20
Creator                         : Adobe Illustrator CS6 (Macintosh)
Производитель: TYT
Код Товара: TYT-MD-UV390-DMR-GPS

Краткое описание
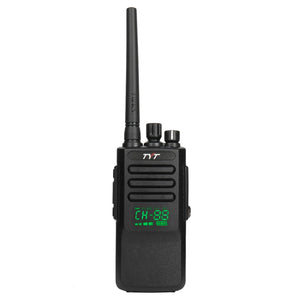
Портативная цифровая радиостанция TYT MD-UV390 DMR GPS…Читать далее…
Краткие характеристики
Дальность связи максимальная, Км — 8
Диапазон частот, МГц — VHF 136-174 / UHF 400-480
Мощность передатчика, не более Вт — 5
Тип модуляции — 4FSK
Шаг изменения частоты, кГц — 25/12.5
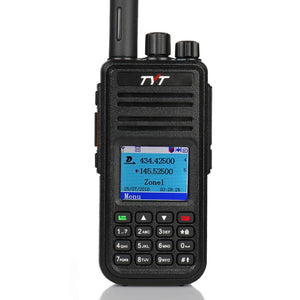
Комплект поставки — Рация — 1шт, Антенна — 2шт, Аккумулятор — 1шт, Зарядное устройство — 1шт, Клипса на пояс — 1шт, Инструкция на английском языке — 1шт.
Смотреть все характеристики

Доставка от 2 дней, БЕСПЛАТНО от 10 тыс.р!
Все варианты и сроки доставки доступны в начале оформления заказа.

Безопасная удобная оплата!
Через СБП, любой банковской картой или от юр. лица, предоставляются все документы.
![]()
Нам доверяют!
Отзывы сотен довольных покупателей на Яндекс Маркет и на нашем сайте.
- Описание
- Характеристики
- Отзывов (1)
- Вопрос — ответ (11)
| Технические характеристики | |
| Дальность связи максимальная, Км | 8 |
| Диапазон частот, МГц | VHF 136-174 / UHF 400-480 |
| Мощность передатчика, не более Вт | 5 |
| Тип модуляции | 4FSK |
| Шаг изменения частоты, кГц | 25/12.5 |
| Выходная мощность аудио, мВт | >1000 |
| Питание Батарея | Li-ion 7,4В/2200 мАч |
| Количество ячеек памяти | 3000 |
| Поддержка CTCSS/DCS субтонов | Да |
| FM радиоприемник | Нет |
| Одновременный приём на разных диапазонах | Да |
| Сканирование частот (каналов) | Да |
| Блокировка клавиатуры | Да |
| LCD/LED дисплей | Да |
| Влагозащита | Да |
| Настройка с клавиатуры | Да |
| Размеры, мм | 131x61x36 |
| Вес без упаковки, грамм | 317 |
| Комплект поставки | |
| Комплект поставки | Рация — 1шт, Антенна — 2шт, Аккумулятор — 1шт, Зарядное устройство — 1шт, Клипса на пояс — 1шт, Инструкция на английском языке — 1шт. |
Теги: рации,TYT,рации тит,TYT MD-UV390 DMR GPS,ТУТ,MD-UV390,390,ДМР,DMR,титька,цифровая,рация цифровая,рацию купить,рации с доставкой,рации с доставкой по России
TYT (Tytera) is a chinese manufacturer of commercial
and amateur radios. These radios are popular due to their relatively low cost
and versatility.
Presented 2021-01-01
Video [slides]
Info and Stock Software
This page will focus on using the following models for Ham radio applications,
particularly on the Brandmeister and PNWDigital DMR networks:
- TYT MD-380: Monoband DMR Handheld available in VHF and UHF variants.
- Stock manual
- Support custom firmware
- Contact database
- Last heard
- Promiscuous Mode
- After market manual
- Stock CPS: 2020-05-08 firmware D15.01 for MD-380 new vocode
- Limits:
- 1000 Channels
- 10,000 Contacts
- 250 Scan lists (of 32 channels each)
- 250 Zones (of 16 channels each)
- TYT MD-390
- Same as above, but with built in GPS
- TYT MD-UV380: Dualband VHF+UHF DMR Handheld
- Stock manual
- Stock firmware now supports digital contact database and monitor
- No custom firmware support at all
- Stock CPS: 2020-03-16 MD-UV380, MD-UV390 firmware
- Stock MD-UV380 Firmware 2019-11-20 MD-UV380, MD-UV390 firmware
- Limits:
- 3000 Channels
- 10,000 Contacts (or 120K with ContactListCSV firmware)
- 250 Scan lists (of 64 channels each)
- 250 Zones (of 64 channels each)
- TYT MD-UV390
- Same as above, but with built in GPS
Additional Software
USB Driver (Windows)
Windows may require the STM32 DFU driver (requires an email address to download the package) direct link — may not work, try entering an email address.
NOTE: The TYT radios use a “dumb” passthrough cable. It will not appear as
a USB device unless it is plugged into the radio and turned ON.
Note: Linux USB works without any special driver.
Farnsworth editcp (Windows/Linux)
Highly recommend the aftermarket CPS
editcp by Dale Farnsworth
which supports all 380/390 variants and allows for conversion between the
different radios.
Additionally editcp runs on windows and linux and supports JSON
import/export for interfacing with scripts
and codeplug generators such as dzcb.
editcp is capable of reading and writing the codeplug and contact database
over USB, so the official CPS is not required.
N0GSG DMR Contact Manager supports a
variety of radio codeplug formats. It is primarily used to download, filter,
and reformat the DMR contact database to match the size and format appropriate
for your radio.
For TYT radios the contact limit is either 10K or 120K (for UV380/UV390 with
CSV firmware).
The tool can also be used to cobble codeplugs together from different types
of radios. Since it can read and write native codeplug formats, it doesn’t
require the use the spreadsheets or CSV munging.
Codeplug Layout
Contacts map a DMR ID to a Name.
Talkgroups
a “Talkgroup” is a way of routing and filtering traffic. A “Group Call” contact
should be added to the “Digital Contact” list for each talkgroup the radio
will receive or transmit on.
Group List
Also known as RX lists. A group list defines a set of Group Call contacts
that can all be received on a given channel. A common use for Group List is
to monitor other static talkgroups on a particular repeater timeslot to
avoid interrupting other traffic on the timeslot that may be coming from a
different talkgroup.
Private Call
Private call is typically only used for mapping callsigns and names to
IDs. Recommend the use of N0GSG contact manager to automatically import
the DMR contact database.
On the UV380 “ContactsCSV” firmware, the DMR contact database is managed
separately, and Private Call contacts are not used.
Channels
A channel is either Analog or Digital mode.
- Channel Name: 16 character channel name. Doesn’t have to be unique,
but recommended for your sanity. For digital repeaters, the name
typically includes the talkgroup, timeslot, and shortened repeater name/code. - Admit Criteria: when the radio allows transmit
- Always: “impolite” mode. OK for analog, but not advised for digital.
- Channel Free: transmit when no carrier heard on RX frequency
- Correct CTCSS/CDCSS: transmit when the received signal does not
match the configured TX tone (analog only) - Color Code: transmit when the received signal does not match the
configured Color Code (digital only)
- Band Width: 12.5, 20, 25 (KHz)
- Only configurable for Analog channels
- Most analog repeaters are 25
- FRS / GMRS / MURS unlicensed frequencies use 12.5 or 20
- Scan List: The channel scanlist will be used when the scan feature is
enabled and this channel is selected. - RX / TX Ref Frequency: Adjust the radio’s internal clock frequency to
shift interferance from used frequencies to unused frequencies. This
setting is almost never used. - TOT: Time-Out-Timer. Radio will stop transmitting after the number of
seconds elapses. I personally use a 90 second TOT, just to avoid
talking forever. Depending on the channel / repeater a different value
may be desirable to avoid timing out the repeater. - TOT Rekey Delay: If the TOT is triggered, the radio will wait for this
delay before transmitting again. -
Power: High / Middle / Low
- Auto Scan: the channel enters scan mode when selected
- Rx Only: don’t allow transmit on this channel. Useful for public
safety or unlicensed channels. - Lone Worker: require the user to press a button or enter emergency mode. NOT USED by amateurs.
- VOX: Activate PTT when mic detects audio
- Allow Talkaround: If talkaround is enabled, use RX settings for TX. NOT USED by amateurs.
- Send/Receive GPS Info: For 390 variants, also send GPS data. NOT USED by amateurs.
Analog
- Squelch: appears in the “common” section, but only applies to Analog channels.
Recommend “1”. - CTCSS/DCS Dec: Open the squelch for received signals matching this tone
- CTCSS/DCS Enc: Include this tone when transmitting
- RX / TX Signalling System: DTMF signalling. NOT USED by amateurs.
- QT Reverse / Non-QT/DQT Turn-off: NOT USED by amateurs.
- Display PTT ID: Leave off. NOT USED by amateurs.
Digital
- Contact Name: The channel transmits on this talkgroup
- Group List: The channel receives traffic for all talkgroups in the list.
- Color Code: Analogous to CTCSS tone for DMR repeaters. Most use color code 1.
- Repeater Slot: The timeslot to transmit / receive on. A channel can
be on either TS 1 or TS 2. A particular channel will not
receive traffic from the other slot unless promiscuous mode (MD-380) or
monitor mode (MD-UV380) is enabled. However a TS 1 channel on “A” band and
TS 2 channel on “B” band will allow dual timeslot monitoring in normal
mode. - In Call Criteria: Determines how the radio responds when currently receiving
a call on the channel. Typically “Follow Admit Criteria” should be used.
Unused commercial settings (LEAVE ALL TURNED OFF)
These settings are for commercial dispatch environments and don’t really
make sense for currently deployed Ham infrastructure.
- Private Call Confirmed: Amateurs typically don’t use private call
- Emergency Alarm Ack: allow radio to respond to dispatch emergency alert
- Data Call Confirmed: use a reliable data transport.
- DCDM Switch: Unknown.
- Emergency System: Unused.
- Privacy: Unused. Part 97 doesn’t allow for obscured communications in most cases.
- GPS System: Unused.
Zones
Zones are generally a collection of Digital Channels for a single repeater
or Analog Channels for a particular area (city, county, etc).
Each zone has a name of 16 or fewer characters. On the MD-380/390, a zone contains up
to 16 channels. On the MD-UV380/390, a zone has both an “A” band (top row)
and a “B” band (bottom row) of 64 channels each.
A zone may contain mixed analog and digital channels.
The zone list may be reordered with editcp or N0GSG. The stock CPS does not
allow reordering the zone list.
Scanlists
A scanlist consists of 32 or fewer channels that are scanned together.
Each channel may have a default scanlist set, but any scanlist can
be used with any channel by selecting it from the menu.
A scanlist provides several options to control the scan:
- Priority Channel 1/2: These channels are checked 50% of the time.
Even when the radio is receiving traffic from a different scan
channel, it will still check the priority channels. - TX Designated Channel: This channel will be used when PTT is pressed.
- Selected — the channel selected in the zone
- Last Active — the last channel to receive traffic
- Explicitly specify a channel for the list
- Signalling Hold Time (default 500ms): Controls how long the radio will
monitor an Analog channel to decode a DTMF sequence. Typically NOT used
by amateurs. - Priority Sample Time (default: 2000ms): How often the radio will check
the priority channel when the scan is receiving a signal on another
channel. Lower values will make the received audio choppy. Higher values
could result in missed calls on the priority channel.
Other Resources
- ARRL Ohio has some excellent DMR presentations
- MD-380 Codeplug Explained
- Codeplug Programming — Explaination of all relevant settings
Table of Contents for TYT MD-390:
-
~y Number································-········-··········-············-71 Versions·····-····-············-··········—········-············-····-·-···-71 Program Radio· -.- — — -.- — -.-.- — — — -. 72 RxFrequency····-····——————————-
-
3. Press [D orD] key to radio settings, and then press [e] key to selecl. 4. Press [D orD] key to keypad lock, then press [e] key to selecl. 5. Press [D orD] key to manual, and then press [e] key to select, screen show to se- lect Manual, you need to long press [ GI ] key to lock keypad on the mai n interface. 6. Press [D orD] key 5S, 10S, 15S, the screen shows to select the corresponding time, then keypad will be locked and return to the main screen if user have not any keypad op- eration
-
124 t Emergency Function Emergency alarm only use to transfer emergency situations, you can release a emerge cali at anytime and anywhere . Even the walkie talkie is busy in transferring or receiving Radio support 3 types of emergency cali: • Emergency Cali • Cali follow emergency alarm • A voice follow emergency alert Moreover: alarm has the following types: • Prohibit: radio can not send emergency cali but can receive . • Local + Remote: An emergency cali w
-
Switch On Overview User’s Manual Clockwise to turn on the radio volume knob, there will be a «KADA» sound , message sou while the LED indicator lights up and becomes Green color if the battery is full charg Notice: if ali LED indicators are forbidden, the screen will not light up when switch on th walkie talkie, but with a message sound . Notice: if the Tones/Alerts is forbidden ,there will not any sound when power on . Her need to power off the walkie talkie and anticlockwise with th
-
211 3. Screen will show emergency cali successful, then speak clearly .When under activate emergency microphone, radio transfer automatically without press [PTT] key before d ation within limits 4. During transfer , LED indicator becomes red and emergency alarm mark will show on scre 5. After the time of emergency microphone, radio stop to transmit .Press [PTT] key to tre smit again If the radio under the «Silence» mode, there are not any sounds or notices ring the emergency mode, not receive calls from target walkie talkie, until pass the pr pr
-
Ali Tones If desired, you can enable or disable ali radio Ione and prompls (excepl emergency incom- ing Ione). Press pre-programmed ali Beep ON / OFF lo turn on or off ali radio tones, Use the menu funclion: 1. Press [ e] key lo enter Ihe menu mode. 2. Press [D orD] key lo utilities, and Ihen press [e ] key lo select. 3. Press [D orD] key lo radio settings, and Ihen press the [e] key lo sele
-
CONTENTS Emergency Alarm — — —- — — — — — — — — — — — — — — — — — — — — — — — — — — — — — — — — — — — — — — — — — — — — — 25 Emergency Alarm Cali — — — — — — — — — — — — — — — — — — — — — — — — — — — — — — — — — — — — — — — — — -·25 Voice Emergency Alarm- — — — — — — — — — — — — —- — — — — — — — — — — — — — — — — — -·26 Re-start Emergency Mode — — — — — — — — — — — — — — — — — — — — — — — — — — — — — — — — — — — — — — — — — — — — — — — 27 Logout Emergency Mode — — — — — —
-
To customers Thank you very much for using our two-way radioso This product has a newly developed function menu and humanism operation designo making it easy to use. It will meet your requirement by the compact size and reasonable price. ~ I f I
-
» MD~390· Waterproof Transceìver • AnaÌcig and Digital combined • Use TDMA digital technotoçv- • Complying with digital protocoi ETSITS 102;36-1. -2, -3 • Compatible with Mototrbo Tier I & Il • GES optional I • Firmware ‘Uf3gradeable » USER’S MANUAL ‘. . ‘J , ‘ . , , «. ‘
-
Utilities Utilities includes the following contents: • Radio settings • Radio Info • Program Radio Radio Settings Radio Setting includes: • Talkaround • Tones/Alerts • Power • Backlight • Squelch • Intro Screen • Keypad Lock • Language • LED Indicator ·VOX • Passwd Lock • Clock • Mode 591 — Talkaround I l When the transponder does not work, or when the radio located outside the range of the transponder but located within the range of other radios cali, you can continue to commun- icate. This
-
Or if the message was not sent, issued a high tone hint sound, and screen displays text message sent failure. If message sent failure, intercom chance to return to the retransmis sion options screen. Press the [ 131 key to send SMS weight to the same user/group name or ID. Note: Except for Pessing the [13 I ,[D or D I key, if you change the volume and the pre- ss any other key, will return to this message. When you press [PTT] for a single cali or group cali, or as a response to the group calling,radio will exit the
-
lo select. 7. Press Ihe number keys lo enler Ihe corresponding number, press [ D] key lo delete Ihe lasl number, press [ e] lo return lo Ihe previous menu. 8. After finish Ihe change, press [ e] key, Ihe screen displays receiving frequency has been saved. Nole: Ediling frequency will be limiled wilhin Ihe frequency range setted by programming software, if less Ihan Ihe wrile frequency range setted by software, Ihe final change resull will be Ihe m
Questions, Opinions and Exploitation Impressions:
You can ask a question, express your opinion or share our experience of TYT MD-390 device using right now.