
- Главная
-
Suzuki
-
Автомобили
-
Alto
-
Руководство по эксплуатации
Вы можете бесплатно скачать Руководство по эксплуатации для Suzuki Alto.
Также вы сможете прочесть онлайн этот документ без скачивания.
Скачать Руководство по эксплуатации для Suzuki Alto
Тип файла
PDF
Размер
2.22 Mb
Кол-во страниц
139
Просмотров
65535
Вы не робот?
60
Скачать файл:
suzuki-alto-owner-s-manual.pdf
Читать онлайн Руководство по эксплуатации для Suzuki Alto (Страница 1)

Next →
- 1
- 2
- 3
- 4
- 5
- 6
- 7
- 8
- 9
- 10
- 11
- 12
- 13
- 14
- 15
- 16
- 17
- 18
- 19
- 20
- 21
- 22
- 23
- 24
- 25
- 26
- 27
- 28
- 29
- 30
- 31
- 32
- 33
- 34
- 35
- 36
- 37
- 38
- 39
- 40
- 41
- 42
- 43
- 44
- 45
- 46
- 47
- 48
- 49
- 50
- 51
- 52
- 53
- 54
- 55
- 56
- 57
- 58
- 59
- 60
- 61
- 62
- 63
- 64
- 65
- 66
- 67
- 68
- 69
- 70
- 71
- 72
- 73
- 74
- 75
- 76
- 77
- 78
- 79
- 80
- 81
- 82
- 83
- 84
- 85
- 86
- 87
- 88
- 89
- 90
- 91
- 92
- 93
- 94
- 95
- 96
- 97
- 98
- 99
- 100
- 101
- 102
- 103
- 104
- 105
- 106
- 107
- 108
- 109
- 110
- 111
- 112
- 113
- 114
- 115
- 116
- 117
- 118
- 119
- 120
- 121
- 122
- 123
- 124
- 125
- 126
- 127
- 128
- 129
- 130
- 131
- 132
- 133
- 134
- 135
- 136
- 137
- 138
- 139
Другие Автомобили Suzuki Alto
Топ Suzuki Автомобили
-
2008 Forenza Инструкция по применению
PDF файлов
1Просмотров
21635 -
SX4/SX4 SEDAN Руководство по уходу и обслуживанию
PDF файлов
1Просмотров
284175 -
GSX-R600 Правила техники безопасности
PDF файлов
1Просмотров
41718 -
GSX-R1000 Правила техники безопасности
PDF файлов
1Просмотров
61767 -
Grand Vitara 99011-66J22-03E Правила техники безопасности
PDF файлов
1Просмотров
198802 -
Alto Правила техники безопасности
PDF файлов
1Просмотров
288745
Вопросы
-
слабая батарея
Ноутбуки
Acer
1310
Alex 12.02.2016 17:26
Ранее вы смотрели
Производители
Bolens
BRK electronic
Eos Wireless
Follet
Handmark
Learning Resources
RuggedCom
Simpson Electric
ViewEra
WiLife
Типы устройств
Парогенераторы
Ледогенераторы
Цифровые ресиверы
Детские аксессуары
Компрессоры и управляющие устройства
Радарные системы
Видеобороскоп
Настил
Беспроводные расширители диапазона
Поверхностное внесение удобрений
Устройства
Biostar P4M890-M7 PCI-E
Compaq Presario 305
Cooper Lighting P/E-P55T2P4D
HP Folio B0N00LAABM
Husqvarna YTH2042, 96043012105, 2013-01
JVC GVT0182-005A
Polaroid DVP 500
Siemens M55
ViewSonic VS10945-1G
freeuserguide.ru
About Us
Contacts
Disclamers
Privacy Policy
Эта страница полезна для вас? Поделитесь ссылкой:
Друзья, всем привет!
Когда присматривал себе эту машинку, то пытался сначала с ней познакомится посредством прочтения ее инструкции, и… не нашел! Вообще! Не, ну общие характеристики как то размер и маркировка двигателя есть, но вот подробного описания нет. Аналогично и с братом близнецом Nissan Pixo. Информацию собирать и знакомится пришлось по крупиночкам. Мои эмоции зашкаливали когда вместе с автомобилем был и мануал.
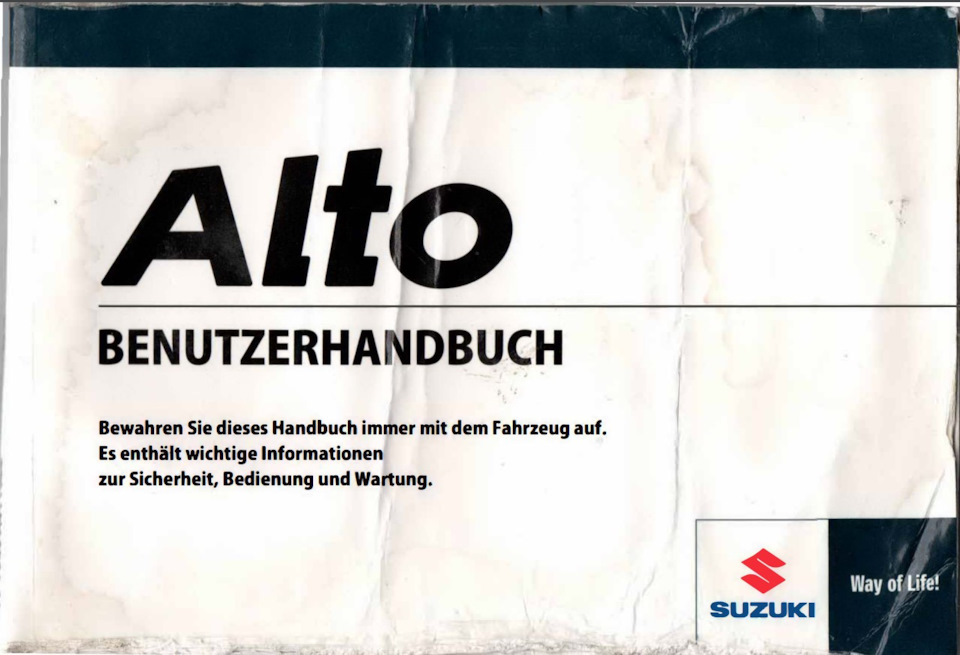
Сервисной книжки правда не было, но это пол беды))
Книга на немецком, так как авто завозилось и покупалось на рынке Германии. Была в очень плачевном состоянии, как будто в сложенном вдвое состоянии на ней домкратом в луже кто то машину подымал. Много листов были склеены, разделялись «по живому». Книга была отсканирована в хорошем качестве для возможности распознания, от этого и вес файла — больше 22 мегабайт)). Страницы были подписаны в соответствии с оригиналом.
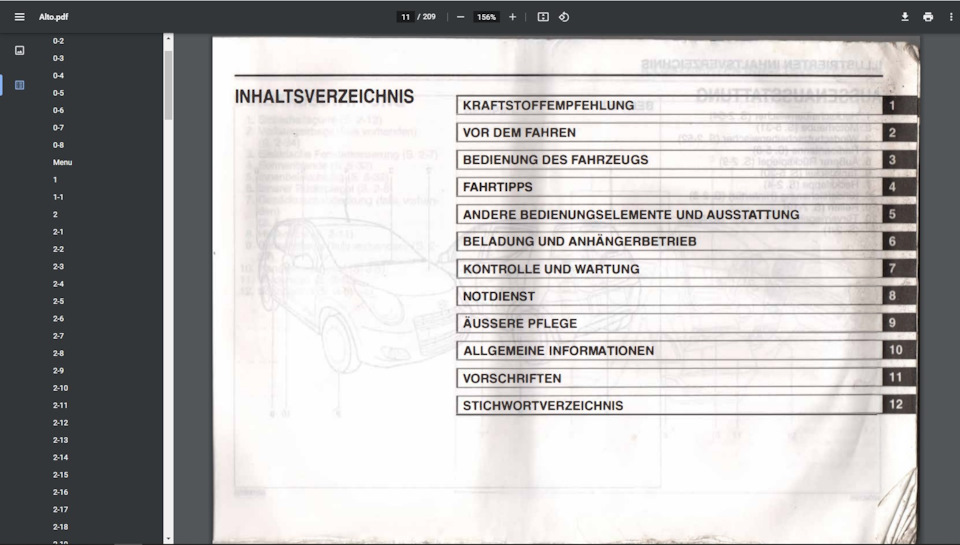
Пытался перевести и на рус и укр язык — кое что не переводит, а то что переводит местами набор слов и букв…
Подходит и к Nissan Pixo!
Пользуйтесь!)
Пы/Сы
Очень боюсь потерять этот файлик, так как его создание и оформление заняло пол дня)), поэтому для лучшего сохранения было загружено на Гугл-диск с последующей публикацией его здесь.
Цена вопроса: 0 грн
Пробег: 21 000 км

- 1
- 2
- 3
- 4
- 5
- 6
- 7
- 8
- 9
- 10
- 11
- 12
- 13
- 14
- 15
- 16
- 17
- 18
- 19
- 20
- 21
- 22
- 23
- 24
- 25
- 26
- 27
- 28
- 29
- 30
- 31
- 32
- 33
- 34
- 35
- 36
- 37
- 38
- 39
- 40
- 41
- 42
- 43
- 44
- 45
- 46
- 47
- 48
- 49
- 50
- 51
- 52
- 53
- 54
- 55
- 56
- 57
- 58
- 59
- 60
- 61
- 62
- 63
- 64
- 65
- 66
- 67
- 68
- 69
- 70
- 71
- 72
- 73
- 74
- 75
- 76
- 77
- 78
- 79
- 80
- 81
- 82
- 83
- 84
- 85
- 86
- 87
- 88
- 89
- 90
- 91
- 92
- 93
- 94
- 95
- 96
- 97
- 98
- 99
- 100
- 101
- 102
- 103
- 104
- 105
- 106
- 107
- 108
- 109
- 110
- 111
- 112
- 113
- 114
- 115
- 116
- 117
- 118
- 119
- 120
- 121
- 122
- 123
- 124
- 125
- 126
- 127
- 128
- 129
- 130
- 131
- 132
- 133
- 134
- 135
- 136
- 137
- 138
- 139
- 140

59K,76G,844-74E
|
TABLE OF CONTENTS |
MAINTENANCE SERVICE RECORD |
1 |
|
WARRANTY POLICY |
2 |
|
|
BEFORE DRIVING |
3 |
|
|
STEERING COLUMN CONTROLS |
4 |
|
|
INSTRUMENT PANEL |
5 |
|
|
OTHER CONTROLS AND EQUIPMENT |
6 |
|
|
OPERATING YOUR VEHICLE |
7 |
|
|
DRIVING TIPS AND SAFE DRIVING |
8 |
|
|
INSPECTION AND MAINTENANCE |
9 |
|
|
EMERGENCY SERVICE |
10 |
|
|
BODY WORK CARE |
11 |
|
|
GENERAL INFORMATION |
12 |
|
|
SPECIFICATION |
13 |
|
|
1 |

59K,76G,844-74E
2

59K,76G,844-74E
FOREWORD
This manual is an essential part of your vehicle and should be kept with the vehicle at all times. Please read this manual carefully and review it from time to time. It contains important information on maintenance. It is especially important that this manual remain with the vehicle at the time of resale. The next owner will need this information also.
You are invited to avail the three free inspection services as described in this manual. Three free inspection coupons are attached to this manual. Please show this manual to your dealer when you take your vehicle for any Service.
To prolong the life of your vehicle and reduce maintenance costs, the periodic maintenance must be carried out according to the «PERIODIC MAINTENANCE SCHEDULE» described in «INSPECTION AND MAINTENANCE» section of this manual. Periodic maintenance is essential for preventing trouble and accidents to ensure your satisfaction and safety.
Daily Inspection and Care as per «DAILY INSPECTION CHECKLIST» described in the «INSPECTION AND MAINTENANCE» section of this Manual is essential for prolonging the operating life of the vehicle and for safe driving.
3
MARUTI SUZUKI INDIA LIMITED believes in conservation and protection of Earth’s natural resources.
To that end, we encourage every vehicle owner to recycle, trade in, or properly dispose of, as appropriate, used motor oil, coolant, and other fluids; batteries; and tyres.
MARUTI SUZUKI INDIA LIMITED
All information in this manual is based on the latest product information available at the time of publication. Due to improvements or other changes, there may be discrepancies between information in this manual and your vehicle. MARUTI SUZUKI reserves the right to make changes at any time without notice.
This vehicle may not comply with standards or regulations of other countries. Before attempting to register this vehicle in any other country, check all applicable regulations and make any necessary modifications.
IMPORTANT
WARNING/CAUTION/NOTE
Please read this manual and follow its instructions carefully. To emphasise special information, the words WARNING, CAUTION, and NOTE have special meanings. Information following these signal words should be carefully reviewed.
w WARNING
The personal safety of the driver, passengers, or bystanders may be involved. Disregarding this information could result in their injury or death.
CAUTION
These instructions point out special service procedures or precautions that must be followed to avoid damaging the vehicle.
NOTE :
This provides special information to make maintenance easier or important instructions clearer.
0-1

59K,76G,844-74E
76G-00-001
The circle with a slash in this manual means “Don’t do this” or Don’t let this happen”.
0-2
MODIFICATION WARNING
w WARNING
Do not modify this vehicle. Modification could adversely affect safety, handling, performance, or durability and may contravene regulations. In addition, damage or performance problems resulting from modification may not be covered under warranty.
w WARNING
Your vehicle has monocoque body construction which provides for certain crumple zones in the body which absorbs larger part of impact energy in the event of a front collision and protects the occupants from impact. Do not use any fitments such as crash guards. These fitments will increase the risk to the occupants because of the shock directly getting transmitted to the occupants.
CAUTION
Improper instllation of mobile communication equipment such as cellular telephones or CB (Citizen’s Band) radios may cause electronic interference with your vehicle’s ignition system, resulting in vehicle performance problems. Consult your MARUTI SUZUKI dealer or qualified service technician for advice on installing such mobile communication equipment.
Copying, quoting or reproduction of any part of this manual is not permitted without explicit approval by MARUTI
SUZUKI INDIA LIMITED.
4

59K,76G,844-74E MAINTENANCE SERVICE RECORD
|
MAINTENANCE SERVICE RECORD |
1 |
|||||||
|
MODEL |
CHASSIS NO. |
ENGINE NO. |
KEY NO. |
DATE OF |
MILEAGE |
BATTERY |
||
|
DELIVERY |
(km) |
MAKE |
SR. NO./BATCH CODE |
|||||
OWNER’S NAME & ADDRESS ____________________________________________________________________________
_____________________________________________________________________ TEL. NO. _________________________
|
ADDRESS/STAMP OF SELLING DEALER |
SELLING DEALER CODE |
SHOWROOM
IMPORTANT INFORMATION TO CUSTOMER
Dear Customer
WORKSHOP For any assistance with regard to our product, please contact General Manager/Works Manager at any of our Dealer or Authorised Service Station. For additional enquiry you may contact our Regional office or Service Department. The Addresses and Phone nos. are given in Service Network booklet provided along with vehicle.
|
MAINTENANCE SERVICE RECORD |
59K,76G,844-74E |
||||||
|
DATE OF |
KIND OF |
MILEAGE |
DESCRIPTION OF JOB |
NAME OF SERVICING |
JOB CARD |
MECHANIC’S |
|
|
SERVICE |
SERVICE |
(km) |
DEALER/MASS |
NO. |
SIGNATURE |
||
|
F….free Service P….Paid Service W…. |
Warranty. A….Accident |
|
1-2 |
6 |
|
59K,76G,844-74E |
WARRANTY POLICY |
WARRANTY POLICY
Maruti Suzuki India Limited (hereinafter called “Maruti Suzuki”), warrants that each new Maruti Suzuki vehicle distributed in India by Maruti Suzuki and sold by an authorised Maruti Suzuki dealer will be free, under normal use and service, from any defects in material and workmanship at the time of manufacture SUBJECT TO THE FOLLOWING TERMS AND CONDITIONS:
(1)Qualification:
To qualify for this warranty:
(a)The Maruti Suzuki vehicle must be delivered by Maruti Suzuki authorised dealer and set-up, serviced by Maruti Suzuki authorised dealer/service station.
(b)The warranty registration card in respect of each vehicle must be completed by the dealer at the time of delivery of the vehicle and dealer should retain the same.
(2)Term:
The term of the warranty shall be twenty four (24) months or 40,000 kilometers (whichever occurs first) from the date of delivery to the first owner.
(3)Maruti Suzuki Warranty Obligation:
If any defect(s) should be found in a Maruti Suzuki vehicle within the term stipulated above, Maruti Suzuki only obligation is to repair or replace at its sole discretion any part shown to be defective, with a new part or the equivalent at no cost to the owner for parts or labour, when Maruti Suzuki acknowledges that such a defect is attributable to faulty material or workmanship at the time of manufacture. The owner is responsible for any repair or replacements which are not
7
|
covered by this warranty. |
||
|
2 |
||
|
(4) Limitation: |
||
|
This warranty shall not apply |
to: |
(a)normal maintenance service required other than the three free services, including without limitation, oil and fluid changes, headlight aiming, fastener retightening, wheel balancing, wheel alignment and tyre rotation, cleaning of injectors, adjustments of carburettor, ignition timing, clutch and valve clearance.
(b)the replacement of normal wear parts including without limitation, bulbs, battery, tyres and tubes, spark plugs, belts, hoses, filters, wiper blades, brushes, contact points, fuses, clutch disc, brake shoes, brake pads, cable and all rubber parts (except oil seal and glass run).
(c)any vehicle which has been used for competition or racing.
(d)any repairs or replacement required as a result of accidents or collision.
(e)any defects caused by misuse, negligence, abnormal use or insufficient care.
(f)any vehicle which has been modified or altered, including without limitation, the installation of performance accessories.
(g)any vehicle on which parts or accessories not approved by Maruti Suzuki have been used.
(h)any vehicle which has not been operated in accordance with the operating instructions in the Maruti Suzuki Owner’s Manual.
(i)any vehicle which has not received, during the warranty term, the service inspections prescribed in the Maruti Suzuki Owner’s Manual.
(j)any vehicle which has been assembled, disassembled,
2-1
|
WARRANTY POLICY |
59K,76G,844-74E |
adjusted or repaired by other than an Maruti Suzuki authorised dealer/service station.
(k)any vehicle which has been used for purposes other than what it was designed for.
(l)any damage or deterioration caused by industrial pollution and bird droppings.
(m)insignificant defects which do not affect the function of the vehicle including without limitation, sound, vibration and fluid seep.
(n)any natural wear and tear including without limitation, aging etc.
(o)Installation and usage of Domestic LPG Gas/LPG cylinder.
For Maruti Suzuki Air-Conditioned Vehicles
(p)V-belts, hoses and gas leaks.
(5)Extent of Warranty:
This warranty is the entire written warranty given by Maruti Suzuki for Maruti Suzuki vehicles and no dealer or its or his agent or employee is authorised to extend or enlarge this warranty and no dealer or its or his agent or employee is authorised to make any oral warranty on Maruti Suzuki behalf. Maruti Suzuki reserves the right to add any improvements or change the design of any model at any time with no obligation to make the same changes on units previously sold.
(6)Warranty Service:
To obtain warranty service, the complete vehicle must be presented at the owner’s expenses to any authorised Maruti Suzuki dealer.
2-2
(7)Owner’s Warranty Responsibilities:
It is responsibility of each owner to:
(a)make certain that the warranty registration/PDI card was completed at the time of delivery of the vehicle;
(b)have performed, at his own expenses, by an Maruti Suzuki authorised dealer/service station all the service inspections specified in the Maruti Suzuki “Owner’s Manual and Service Booklet” and maintain adequate proof that such service inspections have been performed.
(c)make certain that the Maruti Suzuki authorised dealer/ servise station performing the service inspection has certified the work on the “Maintenance Service Record” page in the “Owner’s Manual and Service Booklet” and
(d)present the Maruti Suzuki “Owner’s Manual and Service Booklet” to the authorised Maruti Suzuki dealer whenever requesting service inspections or warranty service.
If the “Owner’s Manual and Service Booklet” should be lost or destroyed the owner should consult the authorised Maruti Suzuki dealer from whom the vehicle was purchased for instructions concerning replacement of the “Owner’s Manual and Service Booklet”.
(8)Disclaimer of Consequential Damage:
Maruti Suzuki assumes no responsibility for loss of vehicle, loss of time, inconvenience or any other indirect incidental or consequential damage resulting from the vehicle not being available to the owner because of any defect covered by this warranty.
(9)Change of Owner
Even if ownership of the vehicle changes, the remaining warranty period is effective for the new owner.
8
|
59K,76G,844-74E |
EMISSION WARRANTY |
|
Maruti Suzuki offers the |
Emission Warranty on all Maruti Suzuki vehicles (apart from the Regular warranty and will run parallel |
to the regular product warranty) only in four metropolitan cities (New Delhi, Kolkata, Mumbai and Chennai) with effect from
July 1st, 2001.
Terms:
The Emission Warranty will be applicable for 80,000 kms or 3 years (Which ever comes earlier) from the date of delivery to the first owner. The remaining warranty terms will be valid in case of any change in ownership provided the production of all valid document.
Conditions:
1.Under Emission Warranty, Warranty claims will be admitted for a prima facie examination, in case vehicle fails to meet to the
Emission Standard as specified in sub rule (2) of rule no. 115 of Central Motor Vehicles Rules (CMVR), 1989.
2.The warranty claims will only be accepted after examination carried out by Maruti Suzuki or it’s dealer which leads to firm conclusions that the
a)Original settings have not been tempered in any case.
b)Part (as given in Annexure-A) has a manufacturing defect.
c) Vehicle is unable to meet the Emission Standards (as given in 1.), inspite of the vehicle having been maintained and used in accordance with the instructions as specified in Owner’s Manual and Service Booklet and the used fuel and different oils (Engine oil, Transmission oil, Brake oil etc.) are also as per specification.
3.The method of examination for deciding the warranty of the parts will be at the sole discretion of Maruti Suzuki and it’s dealer
and results of the examination will be final and binding. If after examination, the warrantable condition is not established, Maruti Suzuki and it’s dealer has the right to charge all, or part of the cost of such examination.
4.Under Emission Warranty, the parts (as given in Annexure-A) will be changed free of cost, but the consumables will be charged as per actual.
5.If the part covered under Emission Warranty or the associated parts, are not independently replaceable, on account of these being integral parts a complete assembly, Maruti Suzuki and it’s dealer will have the sole discretion to replace entire assembly or by using some of the parts of the system through suitable repair or modifications.
|
EMISSION WARRANTY |
59K,76G,844-74E |
6.Any consequential repairs or replacement of parts which may be found necessary to establish compliance of Emission Warranty, will not be considered under warranty, unless the same is under product warranty. The consumable will be charged as per actual under such repair or replacement.
7. Maruti Suzuki will not be responsible for the cost of transportation of the vehicle to the nearest Maruti Suzuki dealer workshop or any loss due to non-availability of the vehicle during the period of lodging of a warranty claim and examination and/or repair by Maruti Suzuki dealer.
8.Maruti Suzuki will not be responsible for any penalty that may be charged by statutory authorities on account of failure to comply with the EMISSION STANDARDS.
9.Emission Warranty will not be affected on the change of owner, provided all the documents are available.
10.All maintenance actions (as specified in the Owner’s Manual and Service Booklet) need to be followed and recorded in the manual for emission warranty.
11.The customer needs to produce the PUC (Pollution Under Control) certificate valid for the period preceding the test during which the failure is discovered. The receipts (for the maintenance of the vehicle as per specification in Owner’s Manual and Service Booklet from the date of original purchase of the vehicle) will also be required.
Condition Under which the Emission Warranty is not APPLICABLE
1.In the absence of valid PUC certificate.
|
2. |
Vehicle |
not serviced |
from Maruti Suzuki authorised workshop as per the schedule specified in the |
Owner’s Manual. |
|
3. |
Vehicle |
subjected to |
abnormal use (accident, motor race, rallies or for the purpose of establishing |
the records etc.) |
4.Use of non MGP (Maruti Genuine Part).
5.Vehicle tempered in an unauthorised manner.
|
6. |
Tampering with odometer so that the actual kilometer reading can not be read. |
|
7. |
Use of adulterated fuel and/or unspecified oils (Engine oil, Transmission oil and Brake oil etc.) |
|
59K,76G,844-74E |
EMISSION WARRANTY |
Annexure-A
List of parts covered under Emission Warranty
1.Fuel injection Assembly, Pressure Regulator, Throttle Body Assembly.
2.Electronic Control Module (ECM).
3.Intake Manifold.
4.EGR valve.
5.Distributor and internal parts.
6.Ignitions coil.
7.Canister Assembly.
8.Vapour Liquid Separator.
9.Fuel Tank and Filler Cap.
10.PCV (Positive Crankcase Ventilation) Valve.
11.Oil Filler Cap.
12.Catalytic Convertor.
13.Exhaust manifold.
14.All fuel injection System related SENSORS.
15.Maniverter

76G-74E BEFORE DRIVING
BEFORE DRIVING
|
……………………………………………………………………………Fuel Recommendation |
3-1 |
3 |
||
|
Immobilizer System |
3-2 |
|||
|
Door Locks ……………………………………………………………………………………………. |
3-4 |
|||
|
Windows ………………………………………………………………………………………………… |
3-6 |
|||
|
Mirrors ……………………………………………………………………………………………………. |
3-8 |
|||
|
Front Seat Adjustment ………………………………………………………………………….. |
3-9 |
|||
|
Adjusting Seat Position ………………………………………………………………………… |
3-9 |
|||
|
Adjusting Seatbacks ……………………………………………………………………………. |
3-10 |
|||
|
Seat |
Belts ……………………………………………………………………………………………. |
3-11 |
||
|
Lap |
Belt (if equipped) …………………………………………………………………………. |
3-15 |
13

FUEL RECOMMENDATION
You must use unleaded petrol with an octane number (RON) of 91 or higher.
CAUTION
Use of leaded fuel in vehicle equipped with catalytic converter is prohibited, because lead deactivates the pollutant reducing components of catalytic converter and may result in permanent damage to catalytic converter.
3-1
Petrol/Ethanol Blends
Blends of unleaded petrol and ethanol (grain alcohol), also known as gasohol, are commercially available in some areas. Blends of this type may be used in your vehicle if they are no more than 5% ethanol. Make sure this petrol-ethanol blend has octane ratings no lower than those recommended for petrol.
Petrol/Methanol Blends
Blends of unleaded petrol and methanol (wood alcohol) are also commercially available in some areas. DO NOT USE fuels containing more than 5% methanol under any circumstances. Fuel system damage or vehicle performance problems resulting from the use of such fuels are not the responsibility of MARUTI SUZUKI and may not be covered under Warranty.
Fuels containing 5% or less methanol may be suitable for use in your vehicle if they contain cosolvents and corrosion inhibitors.
NOTE:
If you are not satisfied with the driveability or fuel economy of your vehicle when you are using a petrol/alcohol blend, you should switch back to unleaded petrol containing no alcohol.
CAUTION
Be careful not to spill fuel containing alcohol while refuelling. If fuel is spilled on the vehicle body, wipe it up immediately. Fuels containing alcohol can cause paint damage, which is not covered under New Vehicle Limited Warranty.
CAUTION
The fuel tank has an air space to allow for fuel expansion in hot weather. If you continue to add fuel after the filler nozzle has automatically shut off or an initial blowback occurs, the air chamber will become full. Exposure to heat when fully fuelled in this manner will result in leakage due to fuel expansion. To prevent such fuel leakage, stop filling after the filler nozzle has automatically shut off, or when using an alternative non automatic system, initial vent blowback occurs.
14

IMMOBILIZER KEYS
Your vehicle comes with a pair of identical keys. Keep the spare key in a safe place. One key can open all of the locks on the vehicle.
The key identification number is stamped on a metal tag provided with the keys. Keep the tag in a safe place. If you lose your keys, you will need this number to have new keys made. Write the number down and keep it in a safe accessible place away from the vehicle.
Key Number :
wWARNING
•Do not use locally made key.
•Should you require a duplicate key, place your order with a MARUTI SUZUKI dealer only.
Note:
Keep the spare key very carefully. When it is lost, consult your dealer by quoting key number.
15
Immobilizer System
This system is designed to help prevent vehicle theft by electronically disabling the engine starting system.
The engine can be started only with your vehicle’s original immobilizer ignition key which has an electronic identification code programmed into it. The key communicates the identification code to the vehicle when the key is turned to the “ON” position. If you need to make spare keys, contact your MARUTI SUZUKI dealer. The vehicle must be programmed with the correct identification code for the spare keys. A key made by an ordinary locksmith will not work.
3-2

76G-03-003
If the Immobilizer system light (1) blinks when the ignition switch is in the “ON” position, there may be something wrong with your key or with the immobilizer system. Contact your MARUTI SUZUKI dealer to inspect the system.
3-3
NOTE:
•If you lose your Immobilizer ignition key, contact your MARUTI SUZUKI dealer as soon as possible to have the lost one deactivated, then have the new key made by them.
•If you own other vehicles with immobilizer keys, keep those keys away from the ignition switch when using your vehicle, or the engine may not be started because they may interfere with your vehicle’s immobilizer system.
CAUTION
In case of attaching any metal objects to the immobilizer key, it may not start the engine.
The immobilizer key is a sensitive electronic instrument. To avoid damaging the immobilizer key:
•Do not expose it to impacts, moisture or high temperature such as by leaving it on the dashboard under direct sunlight.
•Keep the immobilizer key away from magnetic objects.
76G-03-004
Ignition Key Reminder (if equipped)
A buzzer sounds intermittently to remind you to remove the ignition key if it is in the ignition switch when the driver’s doors is opened.
16

76G-03-005
Side Door Locks
To lock the driver’s door from outside the vehicle:
a)Insert the key fully and turn the top of the key toward the rear of the vehicle, or
b)Push in the lock knob down and hold the door handle up as you close the door.
To unlock the driver’s door from outside the vehicle, insert the key fully and turn the top of the key toward the front of the vehicle. To lock a front passenger’s door from outside the vehicle, turn the lock knob forward, then pull and hold the door handle as you close the door.
To lock a rear door from outside the vehicle, push in the lock knob down and close the door.
17
76G-03-006
To lock a door from inside the vehicle, push the lock knob down. Pull the lock knob up to unlock the door.
w WARNING
Always lock all doors when driving. Locking the door prevents occupants from being thrown from the vehicle in the event of an accident. It also helps prevent unintentional opening of the doors.
76G-03-007
Central door locking system (if equipped)
You can lock and unlock all doors simultaneously by using the key in the driver’s door lock.
To lock all doors simultaneously, insert the key in the driver’s door lock and turn the top of the key toward the rear of the vehicle.
To unlock all doors simultaneously, insert the key in a driver’s door lock and turn the top of the key toward the front of the vehicle.
You can also lock or unlock all the side doors by pushing down or pulling up the driver’s door lock knob.
3-4

|
BEFORE DRIVING |
76G-74E |
||
|
EXAMPLE |
TYPE-1 (ALTO) |
||
NOTE:
•Moving the lock knob on passenger’s door locks or unlocks the passenger’s door only.
•Be sure to hold the door handle up when you close a locked front door, or the door will not remain locked.
76G-03-008
Child-Proof Locks (if equipped)
As illustrated, a child-proof lock is provided for both rear doors. When the lock lever is down, position , the child proof lock is activated, and when up, in position 2 the child-proof lock is deactivated, when the child-proof lock is activated, the rear door
cannot be opened from the inside even if
1
the inside door lock is unlocked but can be opened from the outside.
76G-03-009
Rearend Door Lock
To unlock the door, insert the key into the lock knob and turn it clockwise.
w WARNING
Be sure to place the child-proof lock in the locked position whenever children are seated in the rear.

WINDOWS
TYPE-2 (ALTO K10)
76G-03-009A
w WARNING
Always make sure that the rearend door is closed and latched securely. Closing the door completely helps to prevent exhaust gases from entering the vehicle. Completely closing the rearend door also helps prevent occupants from being thrown from the vehicle in the event of an accident.
19
76G-03-011
Raise or lower the door windows by turning the handle located on the door panel.
76G-03-012
Electric window controls (if equipped)
The driver’s door has switches 1 & 2 to operate the driver’s window and front passenger’s window respectively.
The passenger’s door only has a switch 3 to operate the passenger’s window. The electric windows can only be operated when the ignition switch is in the “ON” position.
To open a window with the driver’s door switches, push the top part of the switch and to close the window lift up the top part of the switch.
3-6

76G-03-013
The driver’s window has an “auto-down” feature for added convenience (at toll booths or drive-through restaurants, for example). This means you can open the window without holding the window switch in the “Down” position. Press the driver’s window switch completely down and release it. To stop the window before it reaches the bottom, lift up the switch briefly.
To open or to close a window with the passenger’s door switch, push the top part of the switch or lift up the top part of the switch respectively.
3-7
76G-03-014
The driver’s door also has a lock switch for the passenger’s window. When you push in the lock switch, the passenger’s window can not be raised or lowered by operating either of the switches 2 or 3. To restore normal operation, push the switch again.
w WARNING
You should always push in the lock switch when there are children in the vehicle. Children can be seriously injured if they get part of their body caught by the window during operation.
CAUTION
Since the electric windows consumes a large amount of electricity, the same should not be used excessively with engine in “OFF” condition.
20

MIRRORS
76G-03-015
Inside Rearview Mirror
To adjust the inside rearview mirror, move the mirror up, down, or sideways to obtain the best view.
Outside Rearview Mirrors
Adjust the outside rearview mirrors (with the help of control lever, if equipped), so that you can just see the side of your vehicle in the mirrors.
w WARNING
Be careful when judging the size or distance of a vehicle or other object seen in the side convex mirror (if equipped). Be aware that objects look smaller and appear farther away than when seen in a flat mirror.
21
TYPE-2 (ALTO K10)
76G-03-017A
3-8

|
FRONT SEAT ADJUSTMENT |
|
TYPE-1 (ALTO) |
|
76G-03-018 |
|
TYPE-2 (ALTO K10) |
w WARNING
Never attempt to adjust the driver’s seat or seatback while driving. The seat or seatback could move unexpectedly, causing loss of control. Make sure that the driver’s seat and seatback are properly adjusted before you start driving.
ADJUSTING SEAT POSITION
TYPE-1 (ALTO)
76G-03-019A
TYPE-2 (ALTO K10)
76G-03-018A 76G-03-019B
3-9 22

The adjustment lever for each front seat is located under the front of the seat. To adjust the seat position, pull up on the adjustment lever and slide the seat forward or rearward. After adjustment, try to move the seat forward and rearward to ensure that it is securely latched.
w WARNING
To avoid excessive seat belt slack, which reduces the effectiveness of the seat belts as a safety device, make sure that the seats are adjusted before the seat belts are fastened.
ADJUSTING SEATBACKS
TYPE-1 (ALTO)
76G-03-022
TYPE-2 (ALTO K10)
76G-03-023
w WARNING
Seatbacks should always be in an upright position when driving, or seat belt effectiveness may be reduced. Seat belts are designed to offer maximum protection when seatbacks are in the fully upright position.
Front Seats
The seatbacks can be adjusted to different angles. To adjust the seatback angle, pull up the lever on the outboard side of the seat, move the seatback to the desired position, and release the lever to lock the seatback in place.

76G-03-026
w WARNING
Seat belts are good help to protect occupants from injury or death in the event of accidents. We urge you to wear seat belts at all times if the belts are equipped. If seat belts are not equipped at the rear seating positions, we recommend you to install optional or after market high quality seat belts to increase occupant’s safety.
3-11
76G-03-027
wWARNING
•Never allow persons to ride in the cargo area of a vehicle. In the event of an accident, there is a much greater risk of injury for persons who are not riding in a seat with their seat belt securely fastened.
•Seat belts should always be adjusted so the lap portion of the belt is worn low across the pelvis, not across the waist. Shoulder straps should be worn on the outside shoulder only, and never under the arm. Seat belts should never be worn with the straps twisted and should be adjusted as
V
76G-03-028
|
w WARNING |
|
|
V |
tightly as is comfortable to provide |
|
the protection for which they have |
|
|
been designed. A slack belt will |
|
|
provide less protection than one |
|
|
which is snug. |
•Make sure that each seat belt buckle is inserted into the proper buckle catch.
•Do not wear your seat belt over hard or breakable objects in your pockets or on your clothing. If an accident occurs, objects such as
glasses, pens, etc. under the seat belt can cause injury. V
24

76G-03-029
w WARNING
V • Never use the same seat belt on
more than one occupant and never attach a seat belt over an infant or child being held on an occupant’s lap. Such seat belt use could cause serious injury in the event of an accident.
• Pregnant women should use seat belts, although specific recommendations about restraint use should be made by the woman’s medical advisor. Remember that the lap portion of the belt should be worn as low as possible across the hips,
|
as shown in the diagram. |
V |
25
w WARNING
V• Periodically inspect seat belt assemblies for excessive wear and damage. Seat belts should be replaced if webbing becomes frayed, contaminated, or damaged in any way. It is essential to replace the entire seat belt assembly after it has been stressed in an impact, even if damage to the assembly is not obvious.
• Infants and small children should never be transported unless they are properly restrained. Restraint systems for infants and small children can be purchased locally and should be used. Make sure that the system you purchase meets applicable safety standards. Read and follow all the directions provided by the manufacturer.
• Avoid contamination of seat belt webbing by polishes, oils, chemicals, and particularly battery acid. Cleaning may safely be carried out using mild soap and water.
• For children, if the shoulder belt irritates the neck or face, move the child closer to the center of the
w WARNING
V Be sure to inspect all seat belt
assemblies after any collision. Any seat belt assembly which was in use during a collision (other than a very minor one) should be replaced, even if damage to the assembly is not obvious. Any seat belt assembly which was not in use during a collision should be replaced if it does not function properly or is damaged in any way.
3-12

76G-03-030
To fasten the seat belt, sit up straight and well back in the seat, pull the buckle tongue attached to the seat belt across your body and slide it into the buckle catch on the opposite side until you hear a “click”.
3-13
To reduce the risk of sliding under the belt during a collision, position the lap portion of the belt across your lap as low on your hips as possible and adjust the belt to a snug fit using the proper method for each type of the belt as described below. Make sure that the belt is not twisted.
76G-03-032
26

76G-03-034
To unfasten the belt, press the release button on the buckle catch.
76G-03-035
To Adjust the Belt
•Pull the shoulder portion of the belt upwards through the tongue plate.
The length of the diagonal shoulder strap adjusts itself to allow freedom of movement. The seat belt has an emergency locking retractor (ELR), which is designed to lock the seat belt only during a sudden stop or impact.
76G-03-036
Seat Belt Inspection
Periodically inspect the seat belts to make sure they work properly and are not damaged. Check the webbing, buckles, latch plates, retractors, anchorages and guide loops. Replace any seat belts which do not work properly or are damaged.
w WARNING
No modifications or additions of any sort should be made to the seat belt or its operating mechanism.

76G-03-037
On this belt the adjuster is incorporated in the tounge unit.
To tighten the belt, pull the free end of the belt across alongside the lap strap until it is adjusted to a snug comfortable position.
3-15
76G-03-038
To lengthen, release the tounge from the buckle unit, pull the tounge (adjuster) in the direction of the arrow, at right angles to the belt. The tounge should then be refitted into the buckle unit and the belt tightened as previously described.
76G-03-039
NOTE:
To identify the center seat belt buckle catch and tongue in the rear seat, «CENTER» is moulded on the buckle catch and tongue of the center lap belt. The buckle catches are designed so a buckle tongue can not be inserted into the wrong buckle catch.
28

76G-74E STEERING COLUMN CONTROLS
STEERING COLUMN CONTROLS
|
Ignition Switch ………………………………………………………………………………………. |
4-1 |
||
|
Lighting/Turn Signal Control |
Lever ………………………………………………………. |
4-2 |
|
|
…………………………………………………………………………Hazard Warning Switch |
4-5 |
4 |
|
|
………………………………………………….Windscreen Wiper and Washer Lever |
4-5 |
||
|
Horn ……………………………………………………………………………………………………….. |
4-6 |
||
|
Electrical Power Steering (if |
equipped) ……………………………………………….. |
4-7 |
29

|
STEERING COLUMN CONTROLS |
76G-74E |
IGNITION SWITCH
76G-04-001
w WARNING
To avoid possible injury, do not operate controls by reaching through the steering wheel.
4-1
76G-04-002
The ignition switch has the following four positions:
wWARNING
•Do not use any locally made key.
•Should you require duplicate key, place your order with MARUTI SUZUKI dealer only.
76G-04-003
LOCK
This is the normal parking position. It is the only position in which the key can be removed.
The “LOCK” position locks the ignition, and prevents normal use of the steering wheel after the key is removed.
To release the steering lock, fully insert the key and turn it clockwise to one of the other positions. If you have trouble turning the key to unlock the steering, try turning the steering wheel slightly to the right or left while turning the key.
30

|
76G-74E |
STEERING COLUMN CONTROLS |
ACC
Accessories such as the radio can operate, but the engine is off.
ON
This is the normal operating position. All electrical systems are on.
START
This is the position for starting the engine using the starter motor. The key should be released from this position as soon as the engine starts.
wWARNING
•Never remove the ignition key while the vehicle is moving. The steering wheel will lock and you will not be able to steer the vehicle.
•Do not leave children alone in a parked vehicle. Unattended children could cause accidental movement of the vehicle, which could result in severe personal injury.
•Always remove the key when parked to prevent unintentional operation of the vehicle and to improve security.
31
LIGHTING/TURN SIGNAL
CONTROL LEVER
ALTO
CAUTION
•Do not use the starter motor for more than 15 seconds at a time. If the engine does not start; wait 15 seconds before trying again. If the engine does not start after several attempts, check the fuel and ignition systems or consult your MARUTI SUZUKI dealer.
•Do not leave the ignition switch in the “ON” position if the engine is not running as the battery will discharge.
ALTO K10 TYPE-1
76G-04-005A
4-2

|
STEERING COLUMN CONTROLS |
76G-74E |
||||||||||
|
ALTO K10 TYPE-2 |
ALTO |
ALTO K10 TYPE-2 |
|||||||||
|
76G-04-005B |
76G-04-006 |
76G-04-006B |
This control lever is located on the outboard side of the steering column. Operate the lever as described below.
Lighting Operation
To turn the lights on or off, twist the knob on the end of the lever. There are three positions: in the “OFF” position all lights are off; in the middle position the front parking lights, tail-lights, registration plate light, and instrument lights are on, but the headlights are off; in the third position the headlights come on in addition to the other lights.
ALTO K10 TYPE-1
76G-04-006A
With the headlights on, push the lever forward to switch to the high beams (main beams) or pull the lever toward you to switch to the low beams. When the high beams (main beams) are on, a light on the instrument panel will come on. To flash the high beams (main beams) pull the lever slightly towards you and release it.

|
76G-74E |
STEERING COLUMN CONTROLS |
|||||
|
ALTO |
ALTO K10 TYPE-2 |
ALTO |
||||
|
76G-04-007 |
76G-04-007B |
76G-04-008 |
||
|
Turn Signal Operation |
||||
|
ALTO K10 TYPE-1 |
ALTO K10 TYPE-1 |
|||
|
With the ignition switch in the “ON” position, |
||||
|
move the lever up or down to activate the |
||||
|
left or |
right turn signals. |
Normal Turn Signal
Move the lever clockwise until it clicks to signal a right turn or anticlockwise to signal a left turn. When the turn is completed, the signal will cancel and the lever will return to its normal position.
76G-04-007A 76G-04-008A
33 4-4

|
STEERING COLUMN CONTROLS |
76G-74E |
|||||
|
HAZARD WARNING SWITCH |
WINDSCREEN WIPER AND |
|||||
|
WASHER LEVER |
||||||
|
ALTO K10 TYPE-2 |
||||||
76G-04-008B
Lane Change Signal
Some times, such as when changing lanes, the steering wheel is not turned far enough to cancel the turn signal. For convenience, you can flash the turn signal by moving the lever part way and holding it there. The lever will return to its normal position when you release it.
4-5
76G-04-009
Push in the marked part of the hazard warning switch to activate the hazard warning lights. All four turn signal lights and both turn signal indicators will flash simultaneously. To turn off the lights, push the switch once again.
Use the hazard warning lights to warn other traffic during emergency parking or when your vehicle could otherwise become a traffic hazard.
76G-04-010
Windscreen Wipers
To turn the windscreen wipers on, move the lever down to one of the three operating positions. In the “INT” position, (if equipped) the wipers operate intermittently. The “INT” position is very convenient for driving in mist or light rain. In the “LO” position the wipers operate at a steady low speed. In the “HI” position, the wipers operate at a steady high speed. To turn off the wipers, move the lever back to the “OFF” position.
34

|
76G-74E |
STEERING COLUMN CONTROLS |
76G-04-011
Windscreen Washer
To spray windscreen washer fluid, pull the lever toward you. The windscreen wipers will automatically turn on at low speed if they are not already on and the «INT» position is equipped.
wWARNING
•To prevent windscreen icing in cold weather, turn on the defroster to heat the windscreen before and during windscreen washer use.
•Do not use radiator antifreeze in the windscreen washer reservoir. It can severely impair visibility when sprayed on the windscreen, and can also damage your vehicle’s paint.
35
CAUTION
To prevent damage to the windscreen wiper and washer system components, you should take the following precautions:
•Do not continue to hold in the lever when there is no windscreen washer fluid being sprayed or the washer motor can be damaged.
•Do not attempt to remove dirt from a dry windscreen with the wipers or you can damage the windscreen and the wiper blades. Always wet the windscreen with washer fluid before operating the wipers.
•Clear ice or packed snow from the wiper blades before using the wipers.
•Check the washer fluid level regularly. Check it often when the weather is bad.
•Only fill the washer fluid reservoir 3/4 full during cold weather to allow room for expansion if the temperature falls low enough to freeze the solution.
HORN
EXAMPLE
76G-04-012
Press the horn button of the steering wheel to sound the horn. The horn will sound with the ignition switch in any position.
4-6

STEERING COLUMN CONTROLS
ELECTRIC POWER STEERING (If equipped)
76G-04-013
Depending on specifications, your vehicle is equipped with electric power steering system to reduce the steering effort while driving.
4-7

76G-74E INSTRUMENT PANEL
INSTRUMENT PANEL
|
Instrument |
Panel …………………………………………………………………………………… |
5-1 |
||
|
Instrument |
Cluster ………………………………………………………………………………… |
5-2 |
||
|
Warning and Indicator Lights ………………………………………………………………. |
5-4 |
|||
|
Speedometer ………………………………………………………………………………………….. |
5-7 |
|||
|
5 |
||||
|
Odometer/Tripmeter ……………………………………………………………………………….. |
5-8 |
|||
|
Tachometer |
………………………………………………………………………(if equipped) |
5-9 |
||
|
Fuel Gauge |
……………………………………………………………………………………………. |
5-9 |
||
|
High Engine Coolant Temperature Warning Light (Red Color) ………….. |
5-9 |
|||
|
Glove Box ……………………………………………………………………………………………. |
5-10 |
|||
|
Head Light Leveling Switch ……………………………………………………………….. |
5-10 |
|||
|
Heating System (if equipped) ……………………………………………………………… |
5-11 |
|||
|
System Operating Instructions ……………………………………………………………. |
5-12 |
|||
|
Air Conditioning System (if equipped) ………………………………………………. |
5-17 |
|||
|
System Operating Instructions ……………………………………………………………. |
5-17 |
37

|
INSTRUMENT PANEL |
76G-74E |
|
|
INSTRUMENT PANEL |
||
|
TYPE-1 (ALTO) |
1. |
Instrument cluster |
|
2. |
Ignition switch |
|
|
3. |
Lighting switch/Turn signal and |
|
|
dimmer switch |
||
|
4. |
Windscreen wiper and washer switch |
|
|
5. |
Hazard warning switch |
|
|
6. |
Other switches (if equipped) |
|
|
7. |
Heater control panel (if equipped) |
|
|
8. |
Ashtray (if equipped) |
|
|
9. |
Bonnet release (if equipped) |
|
|
10. |
Center ventilator |
|
|
11. |
Side ventilator |
|
|
12. |
Side defroster |
|
|
13. |
Glove box |
|
|
14. Fuse box |
||
|
76G-05-001 |
TYPE-2 (ALTO / ALTO K10)

INSTRUMENT CLUSTER (ALTO)
1 Speedometer
2 Odometer/Trip meter
3 Odometer/Trip meter selector knob
4 Fuel gauge
5 High Temperature Coolant warning lamp
6 Warning and indicator lights
76G-05-003

|
INSTRUMENT PANEL |
76G-74E |
||
|
INSTRUMENT CLUSTER (ALTO K10) |
|||
|
TYPE-1 |
1 |
Speedometer |
|
|
2 |
Odometer/Trip meter |
||
|
3 |
Odometer/Trip meter selector knob |
||
|
4 |
Tachometer (if equipped) |
||
|
5 |
Fuel gauge |
||
|
6 |
High Temperature Coolant warning lamp |
||
|
7 |
Warning and indicator lights |
TYPE-2
76G-05-004
|
5-3 |
76G-05-004A |
|||||||
|
40 |

WARNING AND INDICATOR LIGHTS
76G-05-005
Brake fluid level warning/Parking Brake Indicator light
This light operates under three different type of operations :
1)The light comes on briefly when the ignition switch is turned to the “ON” postion.
2)The light comes on when the parking brake is engaged with the ignition switch in the “ON” position.
3)The light comes on when the fluid in the brake fluid reservoir falls below the adequate level.
The light should go out after starting the engine and fully releasing the parking brake, if the fluid level in the brake fluid resevoir is adequate.
If the light does not go off or comes on whilst your driving, it may mean that there is something wrong with the vehicle’s braking system. If this happens, you should:
1) Pull off the road and stop carefully.
w WARNING
Remember that stopping distance may be longer, you may have to push harder on the pedal, and the pedal may go down farther than normal.
2)Test the brakes by carefully starting and stopping at the side of the road.
3)If you determine that it is safe, drive carefully at low speed to the nearest dealer for repairs. or
4)Have the vehicle towed to the nearest dealer for repairs.
w WARNING
If any of the following conditions occur, you should immediately ask your MARUTI SUZUKI dealer to inspect the brake system.
•If the brake fluid level warning light does not go out after the engine has been started and the parking brake has been fully released.
•If the brake fluid level warning light does not come on when the ignition switch is turned to the “ON” position with the parking brake applied.
•If the brake fluid level warning light comes on at any time during vehicle operation.
NOTE:
Because the disc brake system is self adjusting, the fluid level will drop as the brake pads become worn.
Replenishing the brake fluid reservoir is considered normal periodic maintenance.

76G-05-006
Oil Pressure Light
This light comes on when the ignition switch is turned on, and goes out when the engine is started. The light will come on and remain on if there is insufficient oil pressure. If the light comes on when driving, pull off the road as soon as you can and stop the engine. Check the oil level and add oil if necessary (see section «INSPECTION & MAINTENANCE»). If there is enough oil, the lubrication system should be inspected by your MARUTI SUZUKI dealer before you drive the vehicle again.
5-5
EXAMPLE
76G-05-007
CAUTION
•If you operate the engine with this light on, severe engine damage can result.
•Do not rely on the Oil Pressure Light to indicate the need to add oil. Be sure to periodically check the engine oil level (see section «INSPECTION & MANINTENANCE»).
76G-05-008
Charging Light
This light comes on when the ignition switch is turned on, and goes out when the engine is started. The light will come on and remain on if there is something wrong with the battery charging system. If the light comes on when the engine is running, the charging system should be inspected immediately by your MARUTI SUZUKI dealer.
CAUTION
Do not continue driving long with the charging light ON as this will drain the battery ‘dead’.
42

76G-05-009
“Malfunction Indicator” Light
Your vehicle has a computer-controlled emission control system. A “Malfunction Indicator” light is provided on the instrument panel to indicate when it is necessary to have the emission control system serviced. The “Malfunction Indicator” light comes on when the ignition switch is turned to “ON” and goes out when the engine is started.
If the “Malfunction Indicator” light comes on when the engine is running, there is a problem with the emission control system. Take the vehicle to your MARUTI SUZUKI dealer to have the problem corrected.
CAUTION
Continuing to drive the vehicle when the “Malfunction Indicator” light is on can cause permanent damage to the vehicle’s emission control system, and can affect fuel economy and driveability.
43
76G-05-009A
Electric Power Steering Light (if equipped)
This light comes on when the ignition switch is turned to the “ON” position, and goes out when the engine is started.
If this light comes on while driving, the power steering system may not work properly. Have the system inspected by your MARUTI SUZUKI Authorized workshop.
NOTE:
If the power steering system does not work properly, you will feel heavier to steer but you still will be able to steer.
76G-05-010
Immobilizer System Light
When the ignition switch is turned to the “ON” position, this light comes on to let you know the light is working. If this light blinks with the ignition switch turned to “ON”, there may be something wrong with the immobilizer system. Contact your MARUTI SUZUKI dealer to have the system inspected.
5-6
 Loading…
We have 9 Suzuki
Alto manuals
covering a total of 4 years of production.
In the table below you can see 0
Alto Workshop Manuals,0
Alto Owners Manuals and 4 Miscellaneous
Suzuki Alto downloads.
Our most popular manual is the
Suzuki Suzuki Alto Suzuki Alto Workshop Manual Service Manual
.
This (like all of our manuals) is available to download for free in PDF format.
How to download a Suzuki Alto
Repair Manual (for any year)
These Alto manuals have been provided by our users,
so we can’t guarantee completeness. We’ve checked the years that the manuals cover
and we have Suzuki Alto repair manuals
for the following years; 2011, 2012 and 2015.
Go through the 9 different PDF’s that are displayed below,
for example this one. You’ll then be shown the first 10 pages of this specific
document, you can then scroll down and click ‘show full PDF’. Then you can click
download you’ve got a totally free car manual, forever!
What topics does the Suzuki Alto
Service/Repair Manual cover?
In total, that’s over 429 pages of content dedicated to your
Suzuki Alto. Here’s a non exhaustive list
of what’s covered;
- Suzuki Alto service manual for roadside repairs
- Suzuki Alto owners manual covering weekly checks
- Suzuki Alto workshop manual covering Lubricants, fluids and tyre pressures
- Suzuki Alto service PDF’s covering routine maintenance and servicing
- Detailed Suzuki Alto Engine and Associated Service Systems (for Repairs and Overhaul) (PDF)
- Suzuki Alto Transmission data Service Manual PDF
- Suzuki Alto Brakes and suspension PDF
- Suzuki Alto Wiring Diagrams
Looking for a Free Suzuki Alto Haynes /
Suzuki Alto Chilton Manuals?
We get a lot of people coming to the site looking to get themselves a free
Suzuki Alto Haynes
manual. There are two things you need to know; firstly it’s illegal, and secondly —
there are much better ways of servicing and understanding your
Suzuki Alto engine than
the Haynes manual. That’s essentially what we’re here for — to give you an
alternative to the Haynes and Chilton, online and totally for free.
Show more
Show less
SUZUKI ALTO Owner’s Manuals and Service Manuals for online browsing and download. Search through 704 SUZUKI Manuals online for free. CarManualsOnline.info is the largest free online database of SUZUKI user manuals.
SUZUKI, Select Model:
All, AERIO, ALTO, BALENO, CELERIO, ERTIGA, FORENZA, GRAND VITARA, IGNIS, JIMNY, KIZASHI, LJ10, LJ20, LJ50, LJ80, MARUTI, NEXA, RENO, SAMURAI, SPLASH, SWIFT, SX4, XL7
SUZUKI ALTO, Select Model:
- SUZUKI ALTO 1985 2.G
- SUZUKI ALTO 2007 6.G
- SUZUKI ALTO 2009
- SUZUKI ALTO 2010
- SUZUKI ALTO 2011
- SUZUKI ALTO 2012 7.G
- SUZUKI ALTO 2013 7.G
- SUZUKI ALTO 2014
- SUZUKI ALTO 2015
- SUZUKI ALTO 2016
- SUZUKI ALTO 2017
- SUZUKI ALTO 2018
- SUZUKI ALTO 2019
- SUZUKI ALTO 2020
- SUZUKI ALTO 2021
List of All SUZUKI ALTO Manuals:
Recent Searches in SUZUKI Manuals
sdm SUZUKI SWIFT 2006 2.G Service Service Manual, ignition SUZUKI IGNIS 2019 Manual Online, wiring diagram SUZUKI SX4 2006 1.G Service User Guide, brakes SUZUKI SWIFT 2000 1.G RG413 Service Service Manual, ABS SUZUKI SWIFT 2007 2.G Service Manual Online, lock SUZUKI IGNIS 2020 Owners Manual, Coolant SUZUKI SWIFT 2005 2.G Service Owners Manual, sensor SUZUKI SWIFT 2006 2.G Service Workshop Manual, ignition SUZUKI GRAND VITARA 2006 Manual PDF