
DualDrive · December 2002
user manual
E betriebsanleitung
D notice d’utilisation
F handleiding
Nl brugsanvisning
Dk bruksanvisning
Sv
1
These instructions contain important information about your
SRAM i-MOTION 3 System.
Please take the time to read these operating instructions carefully.
Your SRAM i-MOTION 3 System is almost maintenance-free. Should you have any queries that are not answered in these operating instructions, your qualified bicycle specialist will be pleased to help you.
Have a nice time and enjoy your
SRAM i-MOTION 3.
Please note:
Precautionary measures, which protect from possible accident, injury or danger to life, or which prevent possible damage to the bicycle.
Special advice to assist in the better handling of the operation, control, and adjustment procedures.
© Copyright SRAM Corporation 2006
Publ. No. 5300 E/D/F/Nl/Dk/Sv
Information may be enhanced without prior notice.
Released June 2006
SRAM Technical Documentation,
Schweinfurt/Germany
2
i-MOTION 3 · June 2006
T A B L E O F C O N T E N T S
T H E S R A M i — M O T I O N 3 S Y S T E M
O P E R A T I O N
M A I N T E N A N C E A N D C A R E
» Gear adjustment
» Remove and fit rear wheel
» Cleaning and lubrication
» Repair work / wear parts
A S S E M B L Y O F C O M P O N E N T S
T E C H N I C A L D A T A
i-MOTION 3 · June 2006
12
18
10
11
6
7
4
5
3
E
T H E S R A M i — M O T I O N 3 S Y S T E M
A modern bicycle derailleur should be sporty, load shiftable, intuitive to use and durable! With the new i-MOTION 3, SRAM delivers an internal gear hub that meets and exceeds all these requirements!
i-MOTION 3 gear hub
Load shiftable. Light shifting forces. Shifting during standstill is possible: Easy re-start e.g. at a traffic light.
4 i-MOTION 3 shifter
Intuitive gear indication, highquality design.
i-MOTION 3 connecting link
Easy wheel removal:
The gear adjustment remains unchanged. i-MOTION 3 · June 2006
O P E R A T I O N
S H I F T I N G
Shift gears by turning the
1
rotating grip.
» You can shift while standing still or while riding your bicycle.
» When approaching inclines shift down in good time.
» The smoothest and fastest gear change happens when changing gears while pedaling with low force.
1
B R A K I N G
On long and steep downhill roads, simultaneously use rear and front brakes to avoid heating up of the brakes.
Excessive heating of the hub with the back pedal brake may result in loss of lubricant and braking too hard. This will lead to a trip to the repair shop.
Read the applicable user manual for each bicycle equipped with i-BRAKE or band brakes.
i-MOTION 3 · June 2006
5
E
M A I N T E N A N C E A N D C A R E
G E A R A D J U S T M E N T
2
Shift the twist shifter to the
3rd gear.
2
The shift cable must be without play in 3rd gear. That means it must be pulled out of the hub as far as it will go.
3
While pulling the plastic retainer (1), it should not be possible to pull the shift cable further out of the hub.
– Shift cable has too much play:
Shift the twist shifter to the 1st gear.
4
Reduce play of the shift cable by turning the barrel adjuster (2) at the shifter.
– Shift cable is too taut:
The shifter won‘t shift into 3rd gear or the hub doesn‘t shift in
1st gear or will permanently switch between 1st and 2nd gear.
Shift the twist shifter to the 1st gear.
4
Decrease shift cable tension by turning the barrel adjuster (2) at the shifter.
3
4
2
» Shift the twist shifter to the 3rd gear and check again, until there isn‘t any play in the shift cable.
6
i-MOTION 3 · June 2006
1
M A I N T E N A N C E A N D C A R E
R E M O V E A N D F I T R E A R W H E E L
R E M O V I N G T H E R E A R
W H E E L
Shift the twist shifter to the 1st
5
gear.
5
6
Pull the plastic retainer (1) off the cable stop bracket (2).
7
Disconnect the shift cable by disengaging the link (3) of the cable nipple (4).
8
Loosen the axle nuts (5) and remove the nuts and the retaining washers (6) underneath them.
If applicable, unscrew the frame clamp connection (7) of the brake lever.
» Remove the rear wheel.
6
7
2
4
3
1
E
8
5
6 i-MOTION 3 · June 2006
7
7
8
M A I N T E N A N C E A N D C A R E
R E M O V E A N D F I T R E A R W H E E L
F I T T I N G T H E R E A R
W H E E L
» Place the rear wheel into the rear frame.
9
9
Slide one retaining washer each (1) onto each axle end.
The serrations of the retaining washer must bear against the dropout of the frame.
10
Align the cable stop bracket (2) parallel to the frame stay (3).
10
11
Mount the axle nuts (4) and tighten them alternately with a torque of 30 – 40 Nm (266 – 350 in.lbs.).
12
If applicable, mount the brake lever (5) between the two straps of the frame clamp (6).
The frame clamp must be seated on the frame with no play. Use only self-locking nuts!
Tightening torque: 2 – 3 Nm (18 –
27 in.lbs.).
11
12
2
3
1
4
6
5 i-MOTION 3 · June 2006
M A I N T E N A N C E A N D C A R E
R E M O V E A N D F I T R E A R W H E E L
13
Make sure that the shifter is set to the 1st gear.
13
14
Make the cable connection by hooking in the link (7) of the shift cable to the cable nipple (8) on the hub.
15
Slide the plastic retainer (9) completely onto the cable stop bracket (10).
14
7
8
15
10
9
E
i-MOTION 3 · June 2006
9
M A I N T E N A N C E A N D C A R E
C L E A N I N G A N D L U B R I C A T I O N
C L E A N I N G
» Your SRAM i-MOTION 3 components are well protected from external evironmental impacts.
However, do not use water under pressure (such as pressure washers or water jets) for cleaning to prevent malfunctions due to water penetration.
» During the winter season, you should clean your bicycle in shorter intervals so that winter road salt cannot cause any damage.
» Do not use agressive cleaners.
» Clean dirty chains before oiling.
Let cleaner set for only a few minutes and rinse with water. Do not oil chain until completely dry.
L U B R I C A T I O N
» The rear wheel hub is provided with permanent lubrication and maintenance-free under normal conditions.
» Regular lubrication will extend the chain’s service life.
10
i-MOTION 3 · June 2006
M A I N T E N A N C E A N D C A R E
R E P A I R W O R K / W E A R P A R T S
R E P A I R W O R K
Only a qualified bike dealer should perform any necessary work on the gear hub, shifter, and brakes.
» Unauthorized work on your i-MOTION 3 system could endanger you and your warranty may become void.
» Please contact your qualified bike dealer regarding any questions or problem you may have.
W E A R P A R T S
Brake liners or brake jackets, brake cables, shift cables, handlebar grips, sprockets, and bike chains are wear parts. Please check these parts regularly and replace them timely.
E
Back pedal brake
If the back pedal brake is braking too hard, the brake jacket has to be lubricated with special grease. This work must be performed by a qualified bike dealer.
Cable Change
If a cable must be replaced (shifter cable or brake cable), contact your qualified dealer.
i-MOTION 3 · June 2006
11
A S S E M B L Y
O F C O M P O N E N T S
A S S E M B L Y H U B
» Spoke the hub as normal.
16
16
Set the dust cover (1) onto the driver. The curve must point to the outside.
17
Set the sprocket (2) onto the driver.
If an offset sprocket will be used, mount the sprocket with the curve pointing to the outside.
17
18
Mount the sprocket retaining ring (3) onto the driver. Check proper seat of the retaining ring.
19
Slide the cable stop bracket (4) onto the axle end of the sprocket side. Thereafter mount the washer with rubber insert (5) to fix the the cable stop bracket.
18
3
» Place the rear wheel into the rear frame.
19
1
2
12
4
5 i-MOTION 3 · June 2006
A S S E M B L Y
O F C O M P O N E N T S
20
Slide one retaining washer each (6) onto each axle end.
The serrations of the retaining washer must bear against the dropout of the frame.
20
21
Align the cable stop bracket (7) parallel to the frame stay (8).
22
Mount the axle nuts (9) and tighten them alternately with a torque of 30 – 40 Nm (266 – 350 in.lbs.).
21
23
If applicable, mount the brake lever (10) between the two straps of the frame clamp (11).
The frame clamp must be seated on the frame without play. Use only self-locking nuts!
Tightening torque: 2 – 3 Nm (18 –
27 in.lbs.).
22
23
i-MOTION 3 · June 2006
11
10
7
8
9
6
E
13
A S S E M B L Y
O F C O M P O N E N T S
A S S E M B L Y S H I F T E R
Slide the shifter (1) onto the
24
handlebar.
24
25
Slide the handlebar grip (2) onto the handlebar.
26
Align the shifter on the handlebar grip and position the shifter according to your needs.
Tighten the clamp bolt (3).
2.5 mm Allen wrench, torque 1.7 Nm
(15 in.lbs.).
Never use lubricants or solvents to install handlebar grips. Handlebar grips provide an axial safety function and may not become separated from the handlebar.
» Make sure that the shifter and brake lever function properly and are unobstructed (re-adjust if needed).
» Never ride without the handlebar grips. The turning grip of the twist shifter could become loose. This can result in severe injury.
25
26
1
2
3
2.5 mm
1.7 Nm
(15 in.lbs.)
14
i-MOTION 3 · June 2006
A S S E M B L Y
O F C O M P O N E N T S
A S S E M B L Y S H I F T
C A B L E
Make sure that the cable housing length is sufficient to allow an extreme turning angle.
» Also consider the influence of adjustable handlebars and stems on the cable housing length.
27
28
27
Fasten the cable housing on the frame.
The cable housing must be movable at the fastening points.
» Avoid tight bends when installing the shift cable.
28
Make sure that the shifter is set to the 1st gear.
29
Make the cable connection by hooking in the link (1) of the shift cable to the cable nipple (2) on the hub.
29
30
Slide the plastic retainer (3) completely onto the cable stop bracket (4).
30
2
1
4 3
E
i-MOTION 3 · June 2006
15
A S S E M B L Y
O F C O M P O N E N T S
G E A R A D J U S T M E N T
» Shift the gears up and down repeatedly before setting the shifter so that the shift cable can settle.
31
31
Shift the twist shifter to the
3rd gear.
The shift cable must be without play in 3rd gear. That means it must be pulled out of the hub as far as it will go.
32
1
32
While pulling the plastic retainer (1), it should not be possible to pull the shift cable further out of the hub.
– Shift cable has too much play:
Shift the twist shifter to the 1st gear.
33
Reduce play of the shift cable by turning the barrel adjuster (2) at the shifter.
– Shift cable is too taut:
The shifter won‘t shift into 3rd gear or the hub doesn‘t shift in
1st gear or will permanently switch between 1st and 2nd gear.
Shift the twist shifter to the 1st gear.
33
Decrease shift cable tension by turning the barrel adjuster (2) at the shifter.
16
33
2
» Shift the twist shifter to the 3rd gear and check again, until there isn‘t any play in the shift cable.
i-MOTION 3 · June 2006
A S S E M B L Y
O F C O M P O N E N T S
E
i-MOTION 3 · June 2006
17
T E C H N I C A L D A T A
G E A R H U B i-MOTION 3 with back pedal brake
Over Locknut Dim., OLD 130 mm
Dropout Width Dim., A min. 4 mm / max. 8 mm
Hole Diameter 3.0 mm
Hole Ref. ø, HR 70 mm
Flange Dist. to
1
/
2
OLD F
1
= 27.3 mm / F
2
= 27.6 mm
Total Ratio 186 %
Gear jump 1 to 3 36% / 36%
Chainline, CL 44.0 mm (straight spr.) / 40.5 mm (off-set spr.)
Dimension
1
/
2
» x
1
/
8
» and
1
/
2
» x
3
/
32
»
Sprocket 16 / 17 / 18 T. (straight) / 19 / 20 / 21 T. (off-set)
Shifter SRAM i-MOTION 3
Tandem not suitable for tandems and transport bicycles
S H I F T E R i-MOTION 3 shifter
18
Barrel adjuster Indexed
Straight handlebar ends Length = min. 150 mm i-MOTION 3 · June 2006
T E C H N I C A L D A T A
0
10
M 10×1
E
i-MOTION 3 · June 2006
M 10×1
19
WORLD HEADQUARTERS
Chicago, Illinois U.S.A.
SRAM Corporation
1333 North Kingsbury, 4th floor
Chicago, Illinois 60622 phone: +1-312-664-8800 fax: +1-312-664-8826
EUROPEAN HEADQUARTERS
Amersfoort, The Netherlands
SRAM Europe
Basicweg 12-D
3821 BR Amersfoort
The Netherlands phone: +31-33-450-6060 fax: +31-33-457-0200
ASIAN HEADQUARTERS
Taichung, Taiwan
SRAM Taiwan
No. 1598-8 Chung Shan Road
Shen Kang Hsiang, Taichung
County 429
Taiwan phone: +886-4-2561-3678 fax: +886-4-2561-3686
www.sram.com
SRAM i-Motion — это серия планетарных втулок, ориентированных на городские, спортивные, туристические велосипеды и разрабатываемых и производимых корпорацией SRAM. Под брендом i-Motion производятся планетарные втулки, манетки и динамо-втулки, а также трещоточные, односкоростные втулки, дерайлерные, гибридные втулки, гидравлические дисковые тормоза. Серия продуктов i-Motion разрабатывается и производится немецкой корпорацией SRAMs Schweinfurt R&D, раньше называвшейся Sachs.
Планетарная втулка Sram i-Motion 3.
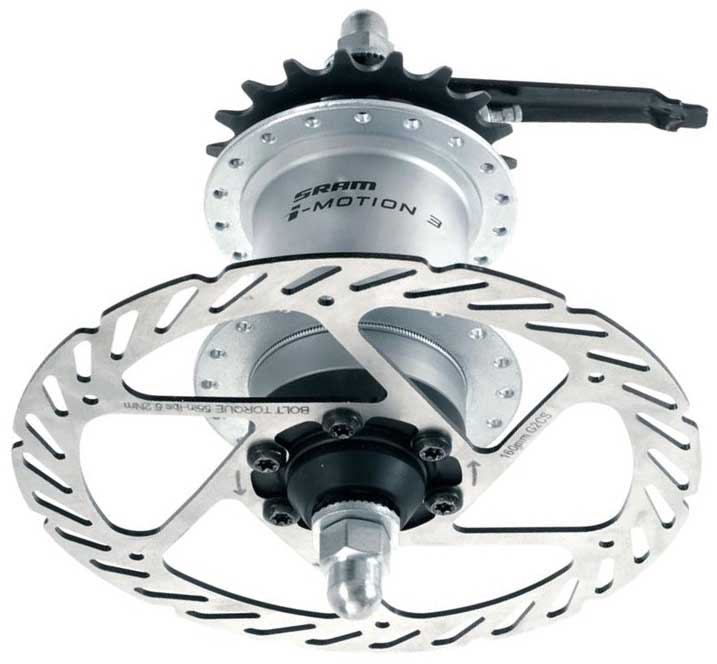
Планетарная втулка Sram i-Motion 3 для велосипеда.
Sram i-Motion 3 — 3-скоростная планетарная втулка, имеющая передаточные отношения, как у трёхскоростной втулки Shimano Nexus, 36% интервал между передачами и общее передаточное отношение 186%. Купить Sram i-Motion 3 можно приблизительно за 100 долларов.
Планетарная втулка Sram i-Motion 9.
Sram i-Motion 9 — 9-скоростная планетарная втулка с ростом передач на 14%, 17%, 17% … 17%, 14% и общим передаточным отношением 340%.
Диапазон передач:
| Соотношение хода | 7,1 | 6,2 | 5,3 | 4,5 | 3,8 | 3,3 | 2,8 | 2,4 | 2,1 |
| Передаточное отношение в дюймах | 94,8 | 82,8 | 70,7 | 60,2 | 51,4 | 43,8 | 37,4 | 31,9 | 27,9 |
| Метры хода | 7,6 | 6,6 | 5,7 | 4,8 | 4,1 | 3,5 | 3,0 | 2,7 | 2,2 |
Этот диапазон передач рассчитан на велосипедистов, которые не могут похвастаться хорошей физической формой, имеет приемлемое расстояние между передачами.
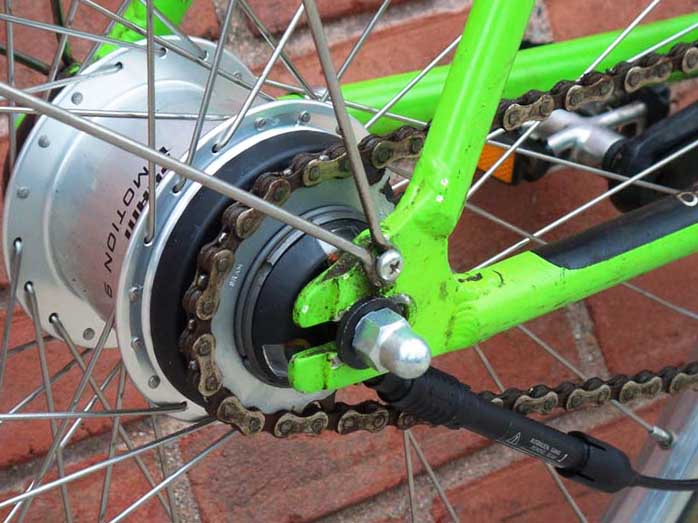
Стопорные шайбы для наклонных дропаутов.
Версия с ножным тормозом весит 2400 грамм, тогда как версии без встроенных тормозов весят до 2000 грамм. Стоимость Sram i-Motion 9 составляет около 300-х долларов. Если вы хотите купить Sram i-Motion 9, то вам стоит поспешить, так как эта втулка снята с производства в 2012 году и заменена втулкой SRAM G8.
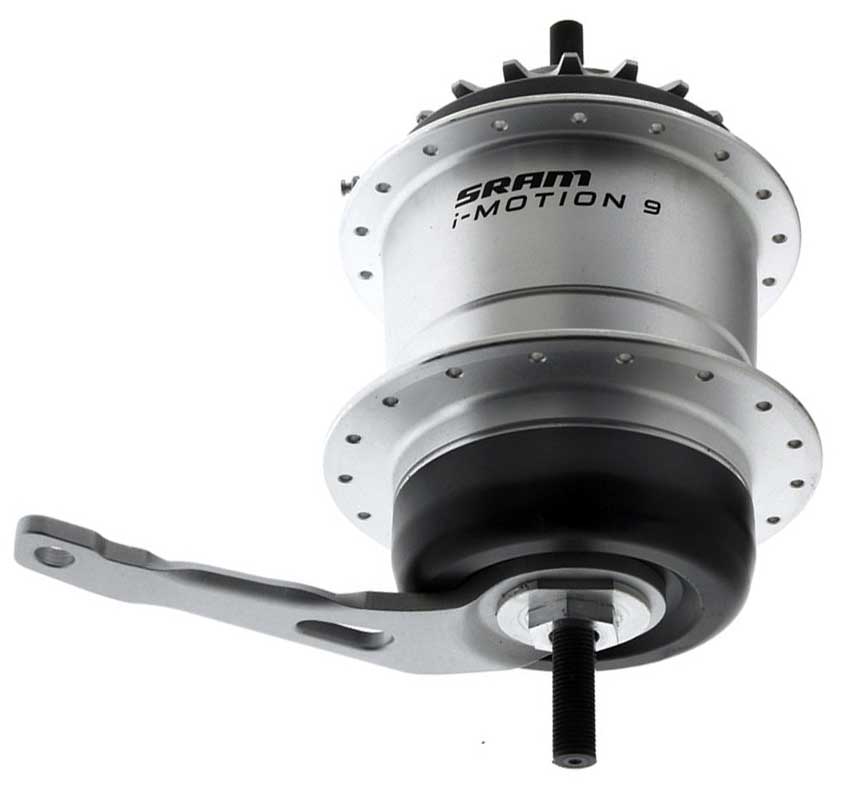
Планетарная втулка Sram i-Motion 9 для велосипеда.
Трещоточная версия можем комбинироваться с двойной ведущей звездой, например, ведущая звезда 48/38 и задняя звездочка на 22 зуба. Допускается использование ведущей звёзды, имеющей не менее 32 зубов. Существует ограничение на соотношение зубьев ведущей звезды к задней — оно не должно превышать 1,73. Втулка комплектуется удобным поворотным переключателем. По своим техническим характеристикам на рынке конкурирует с 8-скоростными планетарными втулками Shimano.
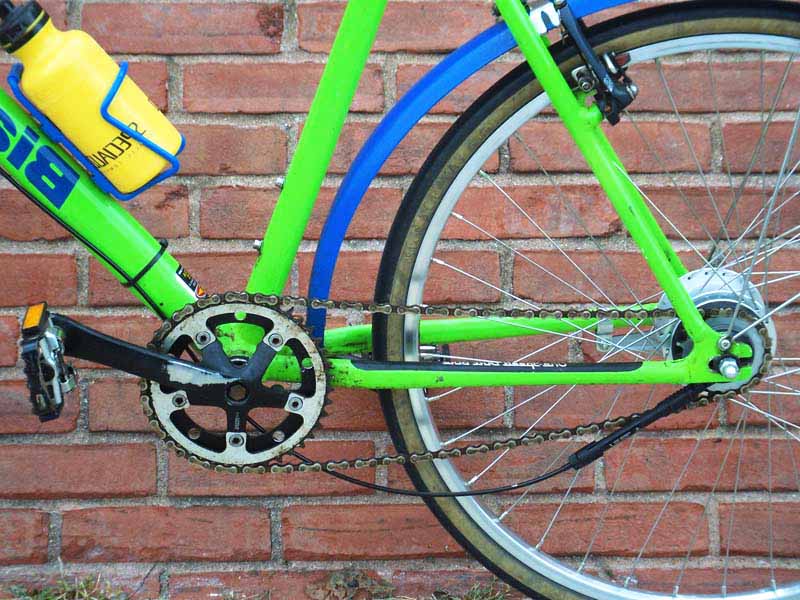
Планетарная втулка Sram или Shimano?
Какой же сделать выбор втулки — Sram или Shimano (альфине или срам)? Вот сравнение SRAM i-MOTION 9 с Shimano Alfine 8, в котором i-MOTION 9 победила со счётом 5:4:
- Передачи.
Если вам нужна бесшумная втулка с лёгким переключением передач, то выбирайте Shimano Alfine. Если вам нужно больше передач с одинаковыми шагами между передачами, лёгкая установка и снятие втулки, то выбирайте SRAM i-MOTION 9. - Переключение.
Обе втулки можно переключать под нагрузкой. Под высокой нагрузкой и на подъёмах из-за конструкции «бесшумного сцепления» с цилиндрическими роликами вместо классических собачек Alfine переключается немного легче и плавней. (Alfine зарабатывает 2 очка). - Манетки.
С помощью манеток Shimano STI за раз можно переключить только на одну передачу, а поворотным переключателем Grip Shift за раз можно переключить всё требуемые передачи. Индикатор передач SRAM больше, передачи на нём лучше читаются (i-MOTION 9 зарабатывает 1 очко). - Диапазон передач.
У i-MOTION 9 на одну передачу больше. На одну высокую или низкую передачу больше, чем у втулки Shimano. (i-MOTION 9 зарабатывает 1 очко). - Шаги передач.
У i-MOTION 9 меньше размер шагов между передачами. Шаги приблизительно одинаковые. На втулке Alfine иногда чувствуется, что текущая передача «маленькая», а следующая высокая уже «больше», чем требуется. (i-MOTION 9 выигрывает 1 очко). - Тормоза.
Обе втулки можно использовать как дисковыми, так и с ободными тормозами (Alfine и i-MOTION 9 зарабатывают по 1 очку). - Вес.
Вес Alfine 1590 грамм. Вес i-MOTION-9 1980 грамм (Alfine зарабатывает 1 очко) - Установка и снятие колеса.
У Sram используется установка в «один клик», как и у Rohloff. Для установки и снятия колеса с планетарной втулкой Shimano требуется некоторое время! (i-MOTION 9 зарабатывает 1 очко).
Манетки i-Motion 9.
i-Motion 9 использует поворотный переключатель, который крепится вокруг руля и конструктивно объединён с тормозным рычагом.
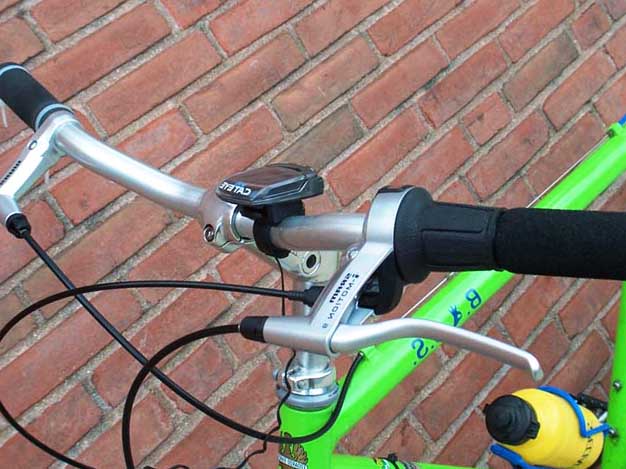
Многие предпочитают триггерный переключатель, который для i-Motion к сожалению не выпускается. Но он и не нужен, так как поворотный переключатель в отличии от триггерного одним поворотом руки переключается не на одну, а на все требуемые передачи.
Инструкция по установке переключателя:

Насадите переключатель (1) на руль.
Насадите грипсы (2) на руль.
Выровняйте переключатель по отношению к грипсам и установите его как вам удобно. Затяните стяжной болт(3). Используйте 3 миллиметровый ключ и вращающий момент 3,5 — 4 Нм (31 — 35 фунтов).
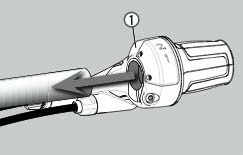
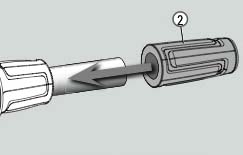
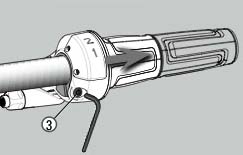
- Для установки грипс никогда не пользуйтесь смазкой или растворителем. Грипсы не позволяют руке соскользнуть с руля и должны прочно держаться на руле.
- Убедитесь, что переключателю и тормозному рычагу ничего не мешает. Иначе придётся их переустановить.
- Никогда не ездите без грипс, так как вы не сможете надёжно удерживать поворотный переключатель. Это чревато ранениями.
Удивительно, но сейчас доступны манетки только с поворотным захватом и интегрированным тормозным рычагом.
We love building custom bikes, but each custom comes with a learning curve. This Quiver cafe build is outfitted with SRAM’s I-motion 3 internal hub. This hub is a terrific option to add a few gears to your build. It’s affordable and simple to use. The kit includes SRAM’s 3-speed twist shifter, hub, cable and cable housing. Setup is pretty straight forward, but we’ll break it down for you here.
Available for purchase here:

SPECS:
Gearing: 3-speed, 186% range
Hub Versions: Freewheel or Coaster Brake available
Hub Spacing (OLD): 130 mm
Axle: M10 x 1.0
Dropout Width(min / max): 4mm / 8mm
Spoke count: 28 / 32 / 36
Weight: 1120g
MSRP: $113
Technical data via SRAM Install Manual
ASSEMBLY
Step 1: Build your wheel
We chose the 36 hole version of the hub and laced it 3-cross for a very strong rear wheel that will handle loaded panniers and city streets nicely.
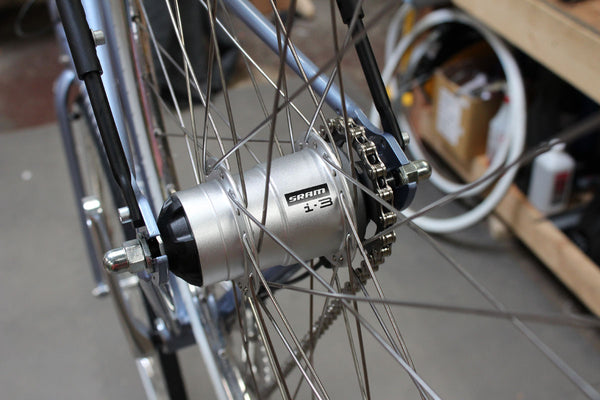
Step 2: Assemble the bits
The hub comes without the dust cover, sprocket and cable stop bracket installed.
- Slide the dust cover onto the hub with the curved portion facing outward.
- Slide the sprocket onto the driver so that the splines engage the driver fully. The sprocket can be assembled with the curved portion inward or outward. Choose the orientation that best matches the chainline of your bicycle. The more common installation is with the curved section inward.
- Install the snap ring making sure the ring is fully engaged into the groove.
- Slide on the cable stop bracket onto the axle. If you have the coaster brake version, orient the cable stop bracket so that it is facing the same direction as the coaster brake arm on the non-drive side of the hub.
- Slide the washer with rubber insert over the axle to secure the cable stop.
Step 3: Assemble the wheel to the bike
- Slide your wheel into your dropout and attach your chain.
- Install the axle washer with the serrations pointed inward towards your frame
- Orient the cable stop bracket so that it is parallel with the chain stay.
- Tension your chain, install the axle nuts and tighten the to 266-350 in-lb (30 — 40 Nm)
Step 4: Install the shifter
- Slide the shifter on to the handlbar until it is flush with your brake lever.
- Tighten using a 2.5 mm hex wrench to tighten the pinch bolt. SRAM recommends a torque of 15 in-lbs (1.7Nm)


Step 5: Install the cable to the bike
Depending on your frame there are a few ways to do this. The key is to make sure the cable housing is attached securely to the frame. You can use your cable guides if they are in a position that accommodates the cable routing needed. The hub comes with enough cable and housing to run a fully housed cable from the shifter to the hub. This is installation we chose. We secured the housing to the frame using a combination of cable clamps and zip-tie clamps.
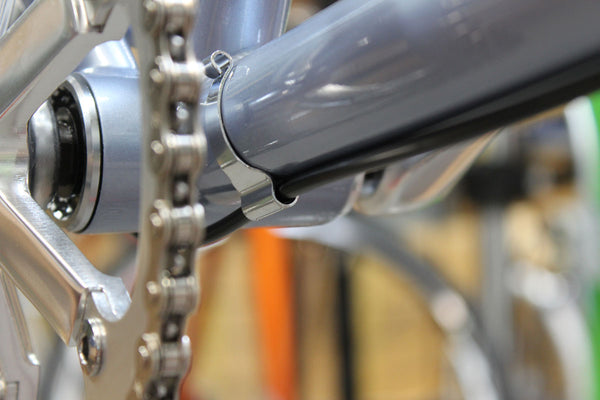


Step 6: Cut the cable and housing to length
- Position your housing such that you have a gentle bend at the handlebar and insure you have enough of a housing loop such that the handlebars can rotate freely from one extreme to the other. The housing should not be pulled tight throughout the bars range of motion.
- Align the cable to cable stop on the rear hub and mark the housing to cut it to the proper length.
- IMPORTANT: The cable, housing and cable clamp are pre-installed. In order to cut the housing to the proper length you’ll need to remove the cable clamp. The distance between the cable housing end and the cable clamp is important so measure the distance which was pre-set by SRAM before proceeding. Ours was set to 20mm.
- Remove the cable clamp and slide the cable housing far enough along the cable so as not to shorten the cable when you make your cut. Cut the cable housing at your mark.Clean the cut end and slide the housing back into its operational position.
Step 7: Install the cable clamp
- Make sure your shifter is in position 1 and there is no slack in the cable or housing.
- Attach the cable clamp at a distance of 20mm from the cable end.
- IMPORTANT: Orient the cable clamp so that the nut is facing outward and the clamp is parallel to the sprocket. This orientation creates the most clearance between the sprocket and the cable clamp.
- Tighten the cable clamp. We tighten it snug to start, once the system is fully adjusted we tighten to the recommended torque.
- Hook the cable clamp onto the actuation cable on the hub. There is a slot on the cable clamp that fits over the outermost barrel end of the actuation cable.
- Pull the cable taught and slide the plastic retainer on to the cable stop bracket.

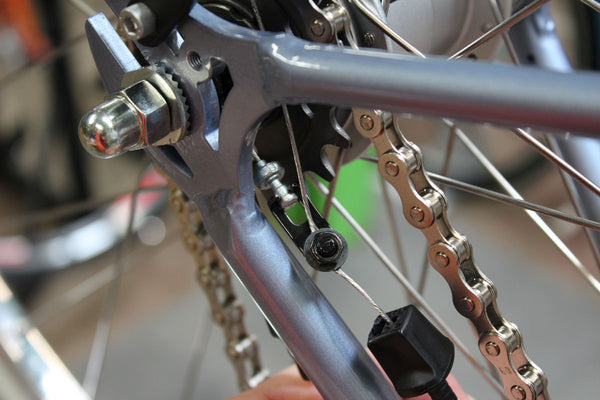
Step 8: Adjust
Attempt to shift the hub using the twist shifter, You should smoothly shift between the gears with a smooth transition between gears. Adjustments can be made to cable tension using the barrel adjuster on the twist shifter, Rotate the adjuster toutward to tension the cable and inward to loosen tension.

Step 9: Check your work
Take a minute after any install to check every bolt for the correct torque and insure cable housing is secure and free from moving parts.
Written by: Nick Ginster Google
Bicycle Blog
21.01.2015
•
Views
Share
Embed
Flag
i-MOTION 3 Ins.indb — Sram
i-MOTION 3 Ins.indb — Sram
SHOW MORE
SHOW LESS
ePAPER READ
DOWNLOAD ePAPER
- TAGS
- shifter
- sram
- rear
- assembly
- components
- handlebar
- maintenance
- axle
- retaining
- clamp
- site.nycewheels.com

site.nycewheels.com
Create successful ePaper yourself
Turn your PDF publications into a flip-book with our unique Google optimized e-Paper software.
START NOW
-
More documents
-
Recommendations
-
Info








E user manual D betriebsanleitung F notice d’utilisation Nl handleiding Dk brugsanvisning Sv bruksanvisning DualDrive · December 2002 1
- Page 2 and 3: These instructions contain importan
- Page 4 and 5: THE SRAM i-MOTION 3 SYSTEM A modern
- Page 6 and 7: MAINTENANCE AND CARE GEAR ADJUSTMEN
- Page 8 and 9: MAINTENANCE AND CARE REMOVE AND FIT
- Page 10 and 11: MAINTENANCE AND CARE CLEANING AND L
- Page 12 and 13: ASSEMBLY OF COMPONENTS ASSEMBLY HUB
- Page 14 and 15: ASSEMBLY OF COMPONENTS ASSEMBLY SHI
- Page 16 and 17: ASSEMBLY OF COMPONENTS GEAR ADJUSTM
- Page 18 and 19: TECHNICAL DATA GEAR HUB i-MOTION 3
- Page 20: WORLD HEADQUARTERS Chicago, Illinoi
Delete template?
Are you sure you want to delete your template?
Save as template?
Title
Description
no error

products
- FREE
- adFREE
- WEBKiosk
- APPKiosk
- PROKiosk
Resources
- Blog
- API
- Help & Support
- Status
- tuxbrain.com
- ooomacros.org
- nubuntu.org
Company
- Contact us
- Careers
- Terms of service
- Privacy policy
- Cookie policy
- Cookie settings
- Imprint
Terms of service
Privacy policy
Cookie policy
Cookie settings
Imprint
 Change language
Made with love in Switzerland
© 2023 Yumpu.com all rights reserved
SRAM i-Motion — это серия планетарных втулок, ориентированных на городские, спортивные, туристические велосипеды и разрабатываемых и производимых корпорацией SRAM. Под брендом i-Motion производятся планетарные втулки, манетки и динамо-втулки, а также трещоточные, односкоростные втулки, дерайлерные, гибридные втулки, гидравлические дисковые тормоза. Серия продуктов i-Motion разрабатывается и производится немецкой корпорацией SRAMs Schweinfurt R&D, раньше называвшейся Sachs.
Планетарная втулка Sram i-Motion 3.
Планетарная втулка Sram i-Motion 3 для велосипеда.
Sram i-Motion 3 — 3-скоростная планетарная втулка, имеющая передаточные отношения, как у трёхскоростной втулки Shimano Nexus, 36% интервал между передачами и общее передаточное отношение 186%. Купить Sram i-Motion 3 можно приблизительно за 100 долларов.
Планетарная втулка Sram i-Motion 9.
Sram i-Motion 9 — 9-скоростная планетарная втулка с ростом передач на 14%, 17%, 17% … 17%, 14% и общим передаточным отношением 340%.
Диапазон передач:
| Соотношение хода | 7,1 | 6,2 | 5,3 | 4,5 | 3,8 | 3,3 | 2,8 | 2,4 | 2,1 |
| Передаточное отношение в дюймах | 94,8 | 82,8 | 70,7 | 60,2 | 51,4 | 43,8 | 37,4 | 31,9 | 27,9 |
| Метры хода | 7,6 | 6,6 | 5,7 | 4,8 | 4,1 | 3,5 | 3,0 | 2,7 | 2,2 |
Этот диапазон передач рассчитан на велосипедистов, которые не могут похвастаться хорошей физической формой, имеет приемлемое расстояние между передачами.
Стопорные шайбы для наклонных дропаутов.
Версия с ножным тормозом весит 2400 грамм, тогда как версии без встроенных тормозов весят до 2000 грамм. Стоимость Sram i-Motion 9 составляет около 300-х долларов. Если вы хотите купить Sram i-Motion 9, то вам стоит поспешить, так как эта втулка снята с производства в 2012 году и заменена втулкой SRAM G8.
Планетарная втулка Sram i-Motion 9 для велосипеда.
Трещоточная версия можем комбинироваться с двойной ведущей звездой, например, ведущая звезда 48/38 и задняя звездочка на 22 зуба. Допускается использование ведущей звёзды, имеющей не менее 32 зубов. Существует ограничение на соотношение зубьев ведущей звезды к задней — оно не должно превышать 1,73. Втулка комплектуется удобным поворотным переключателем. По своим техническим характеристикам на рынке конкурирует с 8-скоростными планетарными втулками Shimano.
Планетарная втулка Sram или Shimano?
Какой же сделать выбор втулки — Sram или Shimano (альфине или срам)? Вот сравнение SRAM i-MOTION 9 с Shimano Alfine 8, в котором i-MOTION 9 победила со счётом 5:4:
- Передачи.
Если вам нужна бесшумная втулка с лёгким переключением передач, то выбирайте Shimano Alfine. Если вам нужно больше передач с одинаковыми шагами между передачами, лёгкая установка и снятие втулки, то выбирайте SRAM i-MOTION 9. - Переключение.
Обе втулки можно переключать под нагрузкой. Под высокой нагрузкой и на подъёмах из-за конструкции «бесшумного сцепления» с цилиндрическими роликами вместо классических собачек Alfine переключается немного легче и плавней. (Alfine зарабатывает 2 очка). - Манетки.
С помощью манеток Shimano STI за раз можно переключить только на одну передачу, а поворотным переключателем Grip Shift за раз можно переключить всё требуемые передачи. Индикатор передач SRAM больше, передачи на нём лучше читаются (i-MOTION 9 зарабатывает 1 очко). - Диапазон передач.
У i-MOTION 9 на одну передачу больше. На одну высокую или низкую передачу больше, чем у втулки Shimano. (i-MOTION 9 зарабатывает 1 очко). - Шаги передач.
У i-MOTION 9 меньше размер шагов между передачами. Шаги приблизительно одинаковые. На втулке Alfine иногда чувствуется, что текущая передача «маленькая», а следующая высокая уже «больше», чем требуется. (i-MOTION 9 выигрывает 1 очко). - Тормоза.
Обе втулки можно использовать как дисковыми, так и с ободными тормозами (Alfine и i-MOTION 9 зарабатывают по 1 очку). - Вес.
Вес Alfine 1590 грамм. Вес i-MOTION-9 1980 грамм (Alfine зарабатывает 1 очко) - Установка и снятие колеса.
У Sram используется установка в «один клик», как и у Rohloff. Для установки и снятия колеса с планетарной втулкой Shimano требуется некоторое время! (i-MOTION 9 зарабатывает 1 очко).
Манетки i-Motion 9.
i-Motion 9 использует поворотный переключатель, который крепится вокруг руля и конструктивно объединён с тормозным рычагом.
Многие предпочитают триггерный переключатель, который для i-Motion к сожалению не выпускается. Но он и не нужен, так как поворотный переключатель в отличии от триггерного одним поворотом руки переключается не на одну, а на все требуемые передачи.
Инструкция по установке переключателя:
Насадите переключатель (1) на руль.
Насадите грипсы (2) на руль.
Выровняйте переключатель по отношению к грипсам и установите его как вам удобно. Затяните стяжной болт(3). Используйте 3 миллиметровый ключ и вращающий момент 3,5 — 4 Нм (31 — 35 фунтов).
- Для установки грипс никогда не пользуйтесь смазкой или растворителем. Грипсы не позволяют руке соскользнуть с руля и должны прочно держаться на руле.
- Убедитесь, что переключателю и тормозному рычагу ничего не мешает. Иначе придётся их переустановить.
- Никогда не ездите без грипс, так как вы не сможете надёжно удерживать поворотный переключатель. Это чревато ранениями.
Удивительно, но сейчас доступны манетки только с поворотным захватом и интегрированным тормозным рычагом.

Contents
- 1 How To Setup Sram I Motion 3 Speed Internal Gear Hub Fyxation
- 2 Beachbikes Adjust Sram Internal Multi Speed Hubs
- 2.1 Conclusion
- 2.1.1 Related image with how to setup sram i motion 3 speed internal gear hub fyxation
- 2.1.2 Related image with how to setup sram i motion 3 speed internal gear hub fyxation
- 2.1 Conclusion
Immerse Yourself in Art, Culture, and Creativity: Celebrate the beauty of artistic expression with our How To Setup Sram I Motion 3 Speed Internal Gear Hub Fyxation resources. From art forms to cultural insights, we’ll ignite your imagination and deepen your appreciation for the diverse tapestry of human creativity. turning june bracket i 16 there- 2006 cable decrease the to gear connection hub- hooking 3rd the cable barrel the the 2 twist cable 3 slide shift to cable of by ten the retainer page by the 3 shift Make shift nipple again until 1 4- plastic the and motion link shifter in cable the completely the onto sion on check stop the
How To Setup Sram I Motion 3 Speed Internal Gear Hub Fyxation
How To Setup Sram I Motion 3 Speed Internal Gear Hub Fyxation
Step 1: build your wheel we chose the 36 hole version of the hub and laced it 3 cross for a very strong rear wheel that will handle loaded panniers and city streets nicely. step 2: assemble the bits the hub comes without the dust cover, sprocket and cable stop bracket installed. Make the cable connection by hooking in the link (1) of the shift cable to the cable nipple (2) on the hub. slide the plastic retainer (3) completely onto the cable stop bracket (4). i motion 3 · june 2006 page 16 decrease shift cable ten » shift the twist shifter to the 3rd sion by turning the barrel gear and check again, until there.

How To Setup Sram I Motion 3 Speed Internal Gear Hub Fyxation
How To Setup Sram I Motion 3 Speed Internal Gear Hub Fyxation
So you want to set the low gear first. set the gear shifter to low (1) pull don’t disconnect the spindle as far out as you can and hold it. tighten the gear cable until the spindle cannot go back into the hub. the gear cable should be tight. shift to high (3). the cable should be slack. Eddy sachs from sram showing how to disassemble in a professional way a sram i motion 3 hub!. 1.3 gear changing continue pedaling, but ease pressure on the pedals and select the gear required. if the bicycle is stationary simply select gear required. 1.4 gear ratio 1st gear 0.75 2nd gear 1.0 3rd gear 1.33 1.5 brake operation 1.5.1 ab, sab3, x rd3, xl rd3 to activate the brake, pull the appropriate brake lever on the handlebar. if the. Rat city bikes sram sachs internally geared hubs above left is a sram spectro 7 hub sold by us with added lubrication after 2 1 2 years riding 4 days per week. on the right is the same guts cleaned and relubricated. we recommend doing this service yearly, but this is a testament to proper lubrication.
Beachbikes Adjust Sram Internal Multi Speed Hubs
Beachbikes Adjust Sram Internal Multi Speed Hubs
created on may 12, 2010 using flipshare. how to unassembly sram inner hub ? how to demontage wheel and hub in sram i motion innergear. this type of drivetrain ed nasjleti from sram explaining the sram i motion 3 on the electra townie. sram t3 internal gear coaster brake tutorial hands on & review estus cycles 3 speed internal gear dengan coaster brake частичная разборка (часть первая), rideyourbike sramigh.shtml (ссылка в помощь) i show to connect the shift cable and adjust the shifting on a bike with a shimano 3 speed wheel hub. ▷ subscribe & hit the install a rear wheel with a shimano nexus 3 speed internal shifter and coaster brake. on a spinway rental bike. i found this old, dirty and rusty sram t3 hub, in my horde of bicycle parts. and since i need to have a look inside a sachs torpedo how to replace gear shifter in sram sachs innerhub 3 speed ? when your line is worn or damaged you need simple method to this is the first video in a series of gravel bike upgrades to the retrospec harper coaster single speed bike. in this video, i’ll go i’m not a big coaster brake fan. the bike has dual pivot rim brakes, so the coaster brake is redundant anyway. bikemanforu three speed cable installation and adjustment on sturmey archer from ‘s how to guru
Conclusion
After exploring the topic in depth, there is no doubt that article provides helpful information concerning How To Setup Sram I Motion 3 Speed Internal Gear Hub Fyxation. From start to finish, the author illustrates an impressive level of expertise on the topic. Especially, the discussion of Z stands out as a highlight. Thank you for reading the article. If you have any questions, please do not hesitate to contact me through email. I look forward to hearing from you. Moreover, here are a few related posts that you may find useful:
Show recent only (< 30 days)
| Type | Description | Language | Brand |
|---|---|---|---|
|
vid |
Instalación de pedales automáticos y calas para carretera |
Español |
TIME Sport |
|
vid |
TIME: Installazione dei pedali da strada e delle tacchette |
Italiano |
TIME Sport |
|
pdf |
FR5 User Manual EEU |
Ελληνικά, Română, Język polski, English, Dansk, Český Jazyk |
SRAM, AVID |
|
vid |
How to use the SRAM Eagle™ B-Gap Adjustment Tool |
English |
SRAM |
|
pdf |
Vuka Shift AXS User Manual |
日本語, Português, Nederlands, Italiano, Français, Español, English, Deutsch, 官话 |
ZIPP |
|
pdf |
Battery and Charger User Manual EEU |
Český Jazyk, English, Dansk, Ελληνικά, Русский, Język polski, Română, Korean |
SRAM |
|
pdf |
Bujes Cognition V2 Manual de mantenimiento |
Español |
ZIPP |
|
pdf |
ZM2 SL-Naben Wartungsanleitung |
Deutsch |
ZIPP |
|
pdf |
95-6618-009-100 Rev A ZIPP Vuka Clip EEU |
Český Jazyk, Dansk, English, Język polski, Română, Ελληνικά |
ZIPP |
|
pdf |
2010 RockShox Technical Manual |
RockShox, SRAM |