
Страницы и текст этой инструкции
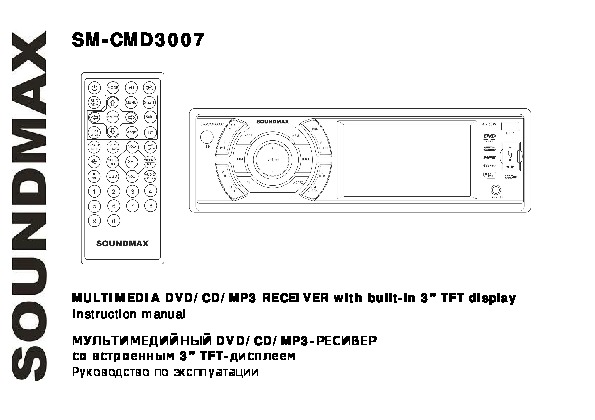 Инструкция — SM-CMD3007
 Информация отображена на картинке
 Информация отображена на картинке
 Информация отображена на картинке
 Информация отображена на картинке
Как использовать наш сайт инструкций OnlineManuals.ru
Наша цель состоит в том, чтобы предоставить вам быстрый доступ к содержанию инструкции для — SM-CMD3007.
С помощью онлайн просмотра, Вы можете быстро просмотреть содержимое инструкции и найти решение проблемы с — SM-CMD3007.
Для Вашего удобства
Если листать руководство пользователя — SM-CMD3007 прямо на сайте, не очень удобно для Вас, есть два возможных решения:
• Просмотр в полноэкранном режиме — легко просмотреть руководство пользователя (без загрузки его на свой компьютер), Вы можете использовать режим полноэкранного просмотра.
Для просмотра инструкции пользователя — SM-CMD3007 на полном экране, используйте кнопку «Открыть в Pdf-viewer».
• Загрузка на компьютер — Вы можете также скачать Инструкция — SM-CMD3007 на свой компьютер и сохранить его в файлах.
Многие люди предпочитают читать документы не на экране, а в печатной версии.
Возможность печати руководства пользователя также была предусмотрена на нашем сайте,
и вы можете использовать ее, нажав на иконку «печать» в Pdf-viewer.
Нет необходимости печатать все руководство — SM-CMD3007, можно выбрать только нужные страницы инструкции.
SM-CMD3007 MULTIMEDIA DVD/CD/MP3 RECEIVER with built-in 3” TFT display Instruction manual DVD/CD/MP33” TFT-
Dear customer! Thank you for purchasing our product. For safety, it is strongly recommended to read this manual carefully before connecting, operating and/or adjusting the product and keep the manual for reference in the future. Table of contents Table of contents
Important safeguards Read carefully through the manual to familiarize yourselves with this unit. Keep this manual handy as a reference for operating procedures and precautions. Do not allow persons who have not read through this manual to use this unit. “CLASS 1 LASER PRODUCT” This product contains
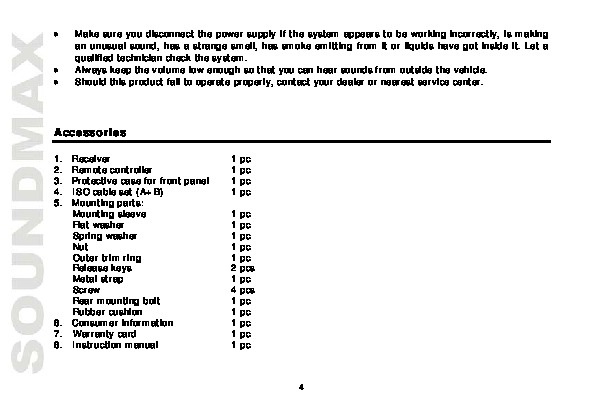
Make sure you disconnect the power supply if the system appears to be working incorrectly, is making an unusual sound, has a strange smell, has smoke emitting from it or liquids have got inside it. Let a qualified technician check the system. Always keep the volume low enough so that you can hear
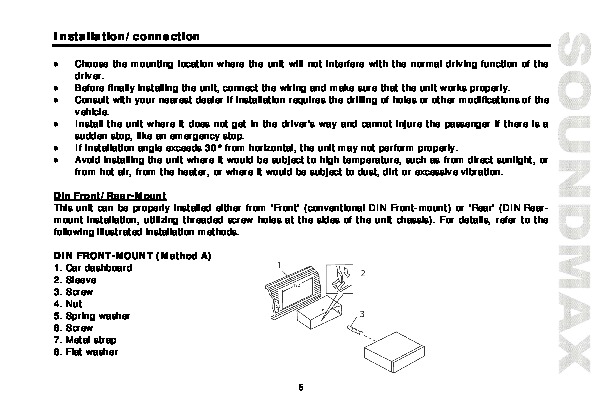
Installation/connection Choose the mounting location where the unit will not interfere with the normal driving function of the driver. Before finally installing the unit, connect the wiring and make sure that the unit works properly. Consult with your nearest dealer if installation requires the
1. Install the sleeve into the dashboard; ensure it is installed with the correct side and there are no obstacles (wires, dashboard elements, etc) for the unit installation. 2. After installing the sleeve into the dashboard, bend tabs fitting to the size of the dashboard to fix the sleeve in place.
2. DIN REAR-MOUNT (Method B) For this method, use the screw holes in the lateral sides of the unit. Fix the unit with the help of the factory radio mounting brackets. 1. Select a position in which the screw holes of the brackets (3) are aligned with the screw holes in the unit body, and screw in
Electrical Connection Connector A 1. 2. 3. 4. Memory +12V 5. Auto antenna output 6. 7. +12V (to ignition key) 8. Ground Connector B 1. Rear right speaker (+) 2. Rear right speaker (-) 3. Front right speaker (+) 4. Front right speaker (-) 5. Front left speaker (+) 6. Front left speaker (-) 7. Rear
ISO Connection table Location Function Connector A 1 2 3 4 5 6 7 8 Connector B Rear right (+) — Purple Rear right (-) — Purple/Black Front right (+) — Grey Front right (-) — Grey/Black Front left (+) — White Front left (-) — White/Black Rear left (+) — Green Rear left (-) — Green/Black Battery
Unit controls Front panel 1. IR sensor 2. 1/PLAY/PAUSE button 3. POWER/MUTE button 4. MODE button 5. VOLUME+ button 6. MENU button 7. BND button 8. 6/DIR+ button 9. NEXT button 10. TFT display 11. OPEN button 12. USB port 13. PREVIOUS button 14. 2/INT button 15. 3/RPT button 16. OK button 17.
Inner panel 1. Memory card slot 2. Eject button 3. Panel status indicator 4. RESET button (hole) 5. Disc loading slot Pressing RESET hole will erase the clock setting and stored stations. Panel status indicator lights up when you flip down the panel and flashes when you remove the panel. 11
Remote controller (RC) 1. MODE button 2. PWR button 3. BND/RDM button 4. ENTER button/Cursor buttons 5. STEREO/MONO button 6. PTY/PROG button 7. P.SCN/RPT button 8. SEEK-/PREVIOUS button 9. AF/TA button 10. STOP/PBC button 11. OSD button 12. Number buttons 13. PLAY/PAUSE button 14. MUTE button 15.
Changing the battery 1. Press the catch and at the same time pull out the battery tray (pic. 1). 2. Insert the 1 lithium battery, type CR2025 (3V) battery with the stamped (+) mark facing upward. Insert the battery tray into the remote controller (pic.2). Pic. 1 Pic. 2 Warning: Store the battery
General operations Reset the unit Operating the unit for the first time or after replacing the car battery, you must reset the unit. Press RESET button (hole) with a pointed object (such as a ballpoint pen) to set the unit to initial state. Note: When some errors occur, you can also press RESET
button on the panel to select the audio setting item. Press ENTER button or RIGHT cursor button on the RC or OK button on the panel to enter the selected item. Press LEFT/RIGHT buttons on the RC or VOLUME+/VOLUME- buttons on the panel to adjust the audio setting. Press and hold OK button on the
Sharpness: Adjust level of screen sharpness. Support 15 levels. Default level is 10. Screen: Adjust screen aspect: 16:9 => 4:3 => FULL. Color reset: Resume color default status. (Select YES or NO with cursor buttons, press ENTER button on the RC or OK button on the panel to confirm). EXPERT MENU
Radio operations Band selection Press BND/RDM button on the RC or BND button on the panel to switch to the bands in the following order: FM1 — FM2 — FM3 (OIRT) – MW (AM). Manual/automatic tuning Manual tuning: Press and hold PREVIOUS/NEXT buttons on the RC or panel to enter manual tuning mode.
Stereo/Mono reception In FM mode, press STEREO/MONO button on the RC to select stereo or mono signal reception mode. On-screen display Press OSD button on the RC to show enabled PTY function icon. RDS background RDS service availability varies with areas. Please understand if RDS service is not
PTY (Program type) function Press PTY/PROG button on the RC to open PTY program type list, and repeat pressing PTY/PROG button to select a PTY type. After selecting the program type you want, press number buttons 1 — 6 on the RC or on the panel to start search. Press it again to stop the PTY
announcement. At the end of the announcement the radio will return to its previous state ready for the next announcement. REG ON/OFF: When REG is available (On), the receiver accepts regional variants of the tuned station display. When REG is unavailable (Off), the receiver ignores regional
Disc/USB/SD/MMC operations USB/SD/MMC notes USB functions (flash memory type) MP3 music play. SD/MMC card support, 2 in 1 (SD/MMC) support. USB flash memory. FAT 12/ FAT 16/ FAT 32 is possible FAT 12/16 (dir: 200 support, file: 500 support), FAT 32 (dir: 200 support, file: 500 support). Filename:
Note: When SD/MMC card and USB device are both inserted, the playing mode will be changed into the mode of the device inserted later. Play/pause The unit will automatically play from the first sound track recorded on a disc/SD/MMC/USB device. To ensure good system performance, wait until the unit
to start playback again. Playback will resume from the point it was stopped at. If you press STOP/PBC button on the RC or press and hold 1/PLAY/PAUSE button on the panel twice, playback will stop completely and can be resumed only from the beginning of the disc. Selecting tracks During playback
GOTO Press and hold AUDIO/GOTO button to show the playback parameters for the current chapter/track/time (track/title/chapter number or time). Press cursor buttons to navigate between the parameters and use number buttons to input needed settings. Press OK button on the panel or ENTER button on the
PBC (Playback Control) function (for VCD only) This function is only available for the VCD with PBC function. Press and hold STOP/PBC button on the RC to set PBC on/off; when PBC is off, the screen will show PBC menu if you switch PBC on. If the menu consists of a list of titles, you can select a
DVD Setup menu Press SETUP button on the RC to display setup screen, use LEFT/RIGHT cursor buttons and ENTER button to select the desired setup page: System, Language, Audio, Video, Digital. In the selected page select an option using UP/DOWN cursor buttons, then press RIGHT cursor button to go to
Note: The rating can be selected only under the password unlocked status, and the limits can be worked only under the password locked status. Default If this item is selected, the unit will return to original setting. Language setup OSD language Select the language to be used for the on-screen
Video setup Set a parameter with UP/DOWN cursor buttons: Brightness, Contrast, Hue, Saturation, Sharpness. Digital setup Dynamic range If watching large dynamic scope movie program at night, selecting this mode you can reduce the volume to a very low level, at the same time, to keep the fine
Handling and cleaning discs Dirty, scratched or warped discs may cause skip ping or noise. Handle the disc only by the edges. To keep clean do not touch its surface. Discs should be stored in their cases after use to avoid scratches. Do not expose discs to direct sunlight, high humidity, high
Troubleshooting guide Below is a table describing simple measures that can help you eliminate most problems likely to emerge when this unit is in use. If below measures do not help, turn to a service center or to the nearest dealer. Symptom Cause Solution No power The car ignition is not on. If the
Specification General Power supply: Maximum power output: Storage support: Compatible formats: Unit dimensions/Net weight: Gift box dimensions/Gross weight: ESP function: Temperature range: TFT display Screen size: Resolution: Aspect ratio: Contrast ratio: Brightness: View angle: FM Radio Frequency
! . . , ……………………………………………………………………………………….32 ………………………………………………………………………..33 ………………………………………………………………………………34
, . . 1 1. . . , , . , , . . . , . , . 20 . . . . , , . . , . . , , , . , . . . 33
, , , , . , , , . 1. 2. 3. 4. 5. 6. 7. 8. ( ISO- : ( ) ) 1 1 1 1 1 1 1 1 1 2 1 4 1 1 1 1 1 34 . . . ,
, , . , . . , . , , , . 30°, . , , , , , , , , . . « » ( « ), « » ( » « » DIN DIN, , . 35 ).
« 1. 2. 3. 4. 5. 6. 7. 8. »( ) . . 1. , , , ) . 2. , . . 3. . . . 4. 5. . . . 36
– – – 1. 2. 3. . ). . , , . ( ). , , , , . , ( .). « »( ) . . 1. , (3) (2) 2. 3. 4. 5. . . . . ( : ). . 37
, . . , , . OPEN. , ; . , , . , . . . . : : , . . . , , . : , , 38 . .
A 1. 2. 3. 4. 5. 6. 7. 8. B +12 +12 ( ) 1. 2. 3. 4. 5. 6. 7. 8. (+) (-) (+) (-) (+) (-) (+) (-) 39
ISO A 1 2 3 4 5 6 7 8 — . . . . . . +12 .- . — . . . : . . . B (+) (-) (+) (-) (+) (-) (+) (-) — ./ . , , “Attention! You cannot use this function while driving” (“ “), . 40 . ; !
1. 2. 1/PLAY/PAUSE 3. POWER/MUTE 4. MODE 5. VOLUME+ 6. MENU 7. BND 8. 6/DIR+ 9. NEXT 10. TFT11. OPEN 12. USB13. PREVIOUS 14. 2/INT 15. 3/RPT 16. OK 17. VOLUME18. AS/PS 19. 4/RDM 20. 5/DIR21. A/V 41
1. 2. 3. 4. 5. EJECT ( ) RESET RESET , , 42 . .
( 1. 2. 3. 4. 5. 6. 7. 8. 9. 10. 11. 12. 13. 14. 15. 16. 17. 18. 19. 20. 21. 22. 23. 24. 25. ) MODE PWR BND/RDM ENTER/ STEREO/MONO PTY/PROG P.SCN/RPT SEEK-/PREVIOUS AF/TA STOP/PBC OSD PLAY/PAUSE MUTE MENU SUB-T SETUP ANGLE INT A-B/ZOOM VOL+ SEEK+/NEXT SEL AUDIO/GOTO VOL- 43
1. 2. , (CR 2025 3V), . . . : . , . ( 6 – ). . . . 44
, ( ) RESET . ( , ); . : RESET . ( POWER/MUTE . OPEN), POWER . MODE => USB => : => AV IN. , : USB => , . POWER/MUTE MUTE. MUTE . . VOL+/VOLVOLUME+/VOLUME- . 45
OK : BASS ( ) => EQ ( SEL ) =>TREBLE ( ) => FADER ( ) => BALANCE ). VOLUME+/- . ENTER . VOLUME+/VOLUME- OK . OK SEL . . : . , ( POWER , ) 3 . MENU . VOLUME+/- . ENTER OK . VOLUME+/VOLUME- , SEL ENTER , OK . OK , MENU . AUDIO ( Bass: Treble: ) . 10 . 10 . . 46 — 0. — 0.
Balance: . Fader: . 10 . . 10 . EQ DSP: PICTURE ( Red: Green: Blue: Brightness: Contrast: Sharpness: Screen: Color reset: , EXPERT DX: . FLAT => CLASSICS => POP => ROCK => DSP OFF ( )( /USB/ ) . 50 . — 25. . 50 . — 25. . 50 . — 25. . 50 . — 25. . 50 . — 25. . 15 . — 10. : 16:9 => 4:3 => FULL ( ). (
. BND/RDM BND : FM1 — FM2 — FM3 (OIRT) – MW (AM). : PREVIOUS NEXT MANUAL. . PREVIOUS NEXT . : PREVIOUS NEXT , . , . 6 , (18 FM, 6 AM). , . . . : P.SCN/RPT , AS/PS . 6 6 , . . : , . 48
: , P.SCN/RPT AS/PS ; , . FM- STEREO/MONO , . . OSD RDS RDS ( PTY. ) . , , RDS . AF ( ) AF/TA BND AF. , , . . : RDS AF , , RDS. AF. TA (Traffic Alarm) AF/ ) TA. , TA. MODE , , , 49 TP
, ). , . TP, , TA TA, TP, ; TP TA, . , . . MODE TP. , PTY ( AF/ , T . ) PTY/PROG (PTY), . . . («PTY , “PTY NONE” «). MENU . VOLUME+/- RDS SETUP. ENTER OK . VOLUME+/VOLUMESEL ENTER , , OK . OK , MENU . 50
RDS SETUP TA ALARM/SEEK: ; PI SOUND/MUTE: PI sound: TA SEEK, TA ALARM, , PI , , . PI, . PI mute: . RETUNE S/L: Retune-S Retune-L – TA Seek. Retune S: , , TA SEEK 90 TA SEEK. MASK DPI/ALL: AF, , MASK DPI. , , , EON TA DX/LOCAL: EON TA LOCAL ( EON TA DX ( REG ON/OFF: REG ON ( , PIREG OFF ( ): PITA
/USB- • • • • USB/SD/MMC MP3 USB ( SD/MMC, 2 1 (SD/MMC). USB . FAT 12/ FAT 16/ FAT 32 FAT 12/ 16 ( 200 , 500 ), FAT 32 ( 200 , 500 ). : 32 : 32 . (id3tag ver 2.0) : 32 . ). . USB 2.0. : USB: USB 2.0. : 8 . SD/MMC: . . : 8 . . . . . , EJECT. , . . SD/MMC/USBSD/MMC USB- USB52 . .
MMC/SD USB. . : USB . , , ( /USB). , . 1/PLAY/PAUSE PLAY/PAUSE ; . MP3/DivX/JPEG , MP3/DivX/JPEG, 1. 2. 3. 4. 5. 6. 7. 8. : ( ) , ENTER . : AVI, . 2 AVI . 53
/USB/ 1/PLAY/PAUSE STOP/PBC . PAUSE PLAY/ , . . STOP/PBC 1/PLAY/PAUSE . PREVIOUS ; . . NEXT (0-9) PREVIOUS . NEXT . DVD/VCD PREVIOUS PLAY/PAUSE. , NEXT. : . ( ) A-B/ZOOM, . , ; . . P.SCAN/RPT, . ( , , ). 54 ,
INT 2/INT , . . , . BND/RDM, , . . PTY/PROG, . , , ( ). PLAY/PAUSE , « » , ENTER OK . « », . ENTER OK , PTY/PROG, . OSD , , , ( PBC ( )( VCDSTOP/PBC , ). VCD) PBC. , , . 55 PBC.
A: X2 => B/ZOOM X3 => X4 => X1/2 => X1/3 => X1/4 => 6/DIR+ . 5/DIR- . AUDIO/GOTO; , , . . OK ENTER , . ( DVD) ANGLE , , . , . ( DVD) AUDIO/GOTO . , . ( DVD) SUB-T . , . ( VCD) AUDIO/GOTO => . : 56 => =>
( DVD) MENU , . OK ENTER . ID3MP3 ID3-tag, . 57 . PLAY/PAUSE
DVD SETUP ; ENTER : , , , , , . . ENTER OK (NTSC, PAL, PAL60, . ). . : . (interlace-S-Video). . 4:3 PS: 4:3 LB: 16:9: 4:3. 4:3, 16:9. – 0000. : . . : . , 1 (1) , . 8: . 58 , .
(8) . :8 : . . . . . DVD . . DVD : DivX [R] VOD: . . DivX. . 59
: , , , , . , . . “Full”, , “Off”, . : ( R), , ( (L+R). 60 L),
, . , . , , . , . ( , ). . , , . . . . ( . ), . , , . . , , . . 61
, , , . , . . . ”. . . . . . 35 , “ . 35 , . . . . , . . . 62 ,
. . . . , . . . RESET. . . . . 63
12 50 4 DVD/DVD±R/DVD±RW/CD/CD-R/CD-RW/USB/SD/MMC DVD/DVCD/SVCD/VCD/HDCD/MP3/CDDA/Picture-CD/PhotoCD/JPEG/MPEG4 (DivX) 170 178 50 /1,55 235 285 103 /2,25 40 CD, 120 3 -200C — +600C 3 240 16:9 400:1 250 1200 2 , 1200 FM 65 <15 18 – 74 /87,5 – 108 AM 522 – 1620 6 . . 64
Просмотр
Доступно к просмотру 64 страницы. Рекомендуем вам скачать файл инструкции, поскольку онлайн просмотр документа может сильно отличаться от оригинала.
-
SM-CMD3007
MULTIMEDIA DVD/CD/MP3 RECEIVER with built-in 3” TFT display
Instruction manual
?????j?oOj???? DVD/CD/MP3-?o?jOo?
?? ?????????? 3” TFT-????????
??????????? ?? ????????????
-
Dear customer!
Thank you for purchasing our product. For safety, it is strongly recommended to read this manual carefully
before connecting, operating and/or adjusting the product and keep the manual for reference in the future.
Table of contents
Table of contents............................................................................................... 2
Important safeguards......................................................................................... 3
Accessories....................................................................................................... 4
Installation/connection ....................................................................................... 5
Unit controls ....................................................................................................10
General operations............................................................................................14
Radio operations...............................................................................................17
Disc/USB/SD/MMC operations.............................................................................21
DVD Setup menu..............................................................................................26
Handling and cleaning discs................................................................................29
Troubleshooting guide .......................................................................................30
Specification ....................................................................................................31
2
-
Important safeguards
x   Read carefully through the manual to familiarize yourselves with this unit.
x   Keep this manual handy as a reference for operating procedures and precautions. Do not allow persons
who have not read through this manual to use this unit.
x   “CLASS 1 LASER PRODUCT”
This  product  contains  a  laser  diode  of  higher  class  than  1.  Laser  beams  from  the  optical  pickup  are
dangerous to the eyes. To ensure continued safety, do not remove any covers or attempt to gain
access to the inside of the product. Refer all servicing to qualified personnel.
x   Do not allow this unit to come into contact with liquids. Electrical shock could result. Also, damage to
this unit, smoke, and overheating could result from contact with liquids or dust. Protect this unit from
moisture.
x   Make sure that foreign objects do not get inside the unit; they may cause malfunctions, or create safety
hazards such as electrical shock or laser beam exposure.
x   The beginning of operation is the moment of the unit installation. Before use the device in winter it is
recommended   to  heat  up  the  passenger  compartment  during  20  seconds  or  to  the  operation
temperature.
x   Using the unit with the temperature that goes beyond the operation temperature greatly decreases the
operation resource of the screen and other components of the unit and can result in an outage.
x   Disconnect the vehicle’s negative battery terminal while mounting and connecting the unit.
x   The  unit  is  designed  for  negative  terminal  of  the  battery,  which  is  connected  to  the  vehicle  metal.
Please ensure it before installation.
x   When replacing the fuse, be sure to use one with an identical amperage rating. Using a fuse with a
higher amperage rating may cause serious damage to the unit.
x   Do not allow the speaker wires to be shorted together when the unit is switched on. Otherwise it may
overload or burn out the power amplifier.
x   Make  sure  you  disconnect  the  power  supply  and  aerial  if  you  will  not  be  using  the  system  for  a  long
period or during a thunderstorm.
3
- 1
- 2
- 3
- 4
- 64
9
ISO Connection table
Function
Location
Connector A
Connector B
1
—
Rear right (+) — Purple
2
—
Rear right (-) — Purple/Black
3
—
Front right (+) — Grey
4
Battery +12V/Yellow
Front right (-) — Grey/Black
5
Auto Antenna — Blue
Front left (+) — White
6
—
Front left (-) — White/Black
7
Ignition/Red
Rear left (+) — Green
8
Ground/Black
Rear left (-) — Green/Black
Note: Power antenna wire is intended for power supply of the antenna and for remote control of an
additional amplifier.
Parking wire connection
If Parking cable is connected to hand brake switch, the video display of the TFT monitor will be controlled by
driving status, system setup and input video sources. When the car is moving ahead, if the video disc is
played, the screen shows “Attention! You cannot use this function while driving”, and blank screen. The
above warning screen will prevent the driver from watching images.
-
Страница 1
SM-CMD3 007 MULTIMEDIA D VD/CD/MP3 RECEIVER wit h built-in 3” TFT disp lay In st ru cti on m anu al DVD /CD/MP3- 3” TFT- […]
-
Страница 2
2 Dear c ust omer! Thank you for purch asing our pr oduct. For saf ety, it is strongly r ec o mmended to read thi s manual c arefully before conn ecting, op erating and/ or adjusting t he product an d ke ep t he manual for ref erence in th e futur e. Table of co ntents Tabl e of cont ents ……………………………………………………[…]
-
Страница 3
3 Import ant safegu ards Read carefull y through the manual to fa miliarize your selves with thi s unit. Kee p t his m an u al han dy as a r ef er en ce f or o per ati n g pr oc edu r es an d pr ec aut io ns . Do not all ow p ers ons who hav e not r ead throu gh t his manual to u se this un it. “CLASS 1 LA SER PRODU CT” T h i s p r […]
-
Страница 4
4 M ak e s u r e y o u di sc o n n ec t th e p ow e r s u p pl y i f t h e s y s te m a pp e ar s t o b e w o rk i n g i nc or r e c t l y , i s ma k i n g a n u n u s u a l s o u n d , h a s a s t r a n g e s m e l l , h a s s m o k e e m i t t i n g f r o m i t o r l i q u i d s h a v e g o t i n s i d e i t . L e t a qualifie d techni cian c[…]
-
Страница 5
5 Install ation/ connect ion Choos e th e mountin g location where th e unit will no t interfere with the norm al driving f unction of the driver. Before finally installing the unit , c on nect the wirin g a nd m ake sure that the unit work s properly. Consult with y our n earest d ea l er if installation require s the drill ing of hole[…]
-
Страница 6
6 1. I n s t a l l t h e s l e e v e i n t o t h e d a s h b o a r d ; e n s u r e i t i s i n s t a l l e d w i t h t h e c o r r e c t s i d e a n d t h e r e a r e n o obstacle s (wires, da shboard elements, etc) for the unit insta llat io n. 2. A f t e r i n s t a l l i n g t h e s l e e v e i n t o t h e d a s h b o a r d , b e n d t a b s f i[…]
-
Страница 7
7 2. D IN REA R -M OUNT (M et hod B ) For t his method, u s e the screw h oles in t h e latera l sides of the unit. Fix the un it with the help of t he factory radio mountin g brackets. 1. Se lect a p osition in which the s crew holes of t he brac kets (3) are aligned with t he screw hole s in the unit body, and s crew in two s crews (2) in each s […]
-
Страница 8
8 Electrica l Connectio n Connector A Connector B 1. — 1. Rea r right speaker (+) 2. — 2. Rea r right speaker (-) 3. — 3. Fro n t rig ht speaker (+) 4. Memory +12V 4. Fro n t rig ht speaker (-) 5. Auto antenn a output 5. Fr ont left speake r (+) 6. — 6. Fr ont left speake r (-) 7. +12 V (to ignit ion key) 7. Re ar left speake r (+) 8. Groun d 8. Re[…]
-
Страница 9
9 ISO Connec tio n table Functio n Location Connector A Connector B 1 — Rear right (+) — P urple 2 — Rea r right (-) — Purp le/Black 3 — Fro nt right (+) — Gre y 4 Battery +12 V/Yellow Front right (-) — Grey/Bla ck 5 Auto Antenna — Bl ue Fron t left (+) — W hite 6 — Front left (-) — White/Black 7 Ignition/R ed Rear left (+ ) — Gr e en 8 Ground/ Bla[…]
-
Страница 10
10 Unit c ontrols Front pa nel 1. IR sensor 2. 1/PLAY/P AUSE butto n 3. POWER/MUTE butt on 4. MODE button 5. VOLUME+ bu tton 6. MENU button 7. BND button 8. 6/DIR+ button 9. NEXT button 10. TFT d isplay 11. OPEN butto n 12. USB port 13. PREVIOUS but ton 14. 2/INT butto n 15. 3/RPT butt on 16. OK button 17. VOLUME- b utton 18. AS/PS button 19. 4/RDM[…]
-
Страница 11
11 Inner panel 1. Memory car d slo t 2. Eje ct button 3. Panel status in dic ator 4. RESET button (hole) 5. Disc loading s lot Press ing RESET hole will e rase the cloc k setting and stored stations. Panel s tatus in d icator lig hts up when you flip down the pa nel and flashes when you remove the panel.[…]
-
Страница 12
12 Remote contr oller (R C) 1. MOD E button 2. PWR bu tton 3. BND/RDM button 4. ENTER bu tton/Cursor buttons 5. STERE O/MONO b utton 6. PTY/PROG button 7. P.SCN/R PT button 8. SEEK-/ PREVI OUS butto n 9. AF/TA but ton 10. STOP/PB C button 11. OSD button 12 . Nu mbe r b ut to ns 13. PLAY/PA USE button 14. MUT E button 15. MEN U button 16. SUB-T butt[…]
-
Страница 13
13 Changing the b attery 1. Pr ess the c atch and at the same time pull out the battery t ray (pic. 1) . 2. In sert the 1 lithium batt ery, type CR2025 (3V) ba tt e ry with t h e stamped (+) ma rk facing u p w ar d. Inse rt the batte ry tray into the remote controlle r (p i c . 2). Warni n g: S t o r e t h e b a t t e r y w h e r e c h i l d r […]
-
Страница 14
14 Gene ral op eratio ns Reset the unit O p e r at i n g th e u ni t f o r th e f i r st t i m e o r af t er r e pl ac i n g th e c ar b a tt e r y , y o u m u s t r e s e t t h e u n i t . P r es s R E S E T button (hol e) with a point ed o bject (su ch as a ballpoi nt pen) to set the u nit to initial state. Note: W h en s o me e r r o r s o cc ur[…]
-
Страница 15
15 button on th e panel to sele ct t he audio settin g item. Press ENTER button or RIGHT cursor button on the RC or OK b utton on the panel to e nter the se lected item. Press L EFT/RIG HT butt ons on th e RC or V OLUME+ /VOL UME- button s on the p anel to adj ust th e audio set tin g. P re ss an d ho ld O K but to n on th e pa nel or pr es s SE L […]
-
Страница 16
16 Sharpness : Adjus t l e vel of screen sharpness. Support 15 le vels. Default leve l is 10. Sc reen: Adjust screen aspect : 1 6:9 = > 4:3 => FULL. C olor reset: Re sume colo r default statu s. (Selec t YES or NO with cursor b uttons, p r e ss ENTER b utton on the RC or OK button on th e panel to confi rm). EXPERT M ENU DX: S[…]
-
Страница 17
17 Radio opera tions Band se lection Press BND /RDM bu tton on th e R C or BND b utton on t he panel to swi tch to th e ban ds in th e followin g orde r: FM1 — F M2 — FM3 (OIRT) – MW (AM). Manual/a utomatic t unin g Manual tunin g: Press and hol d PREVI OUS/NEXT buttons on the R C or panel to enter man ual tuning m o d e . M A N U A L w i l l[…]
-
Страница 18
18 Stereo/ Mon o receptio n In FM mode, pr ess STERE O/MONO butto n on the RC to select stereo or mono signal re ception mo de. On-screen display Press OSD b utton on th e RC t o show ena bled PTY function icon . RDS bac kground RDS servic e availab ility var ies with area s. Please u n der stand if RDS s ervice is not available in yo u area, the f[…]
-
Страница 19
19 PTY ( Progra m ty pe) f unction P r e s s P T Y / P R O G b u t t o n o n t h e R C t o o p e n P T Y p r o g r a m t y p e l i s t , a n d r e p e a t p r e s s i n g P T Y / P R O G b u t t o n t o s e l e c t a P T Y t y p e . A f t e r s e l e c t i n g t h e p r o g r a m t y p e y o u w a n t , p r e s s n u m b e r b u t t o n s 1 — 6 o n[…]
-
Страница 20
20 announc ement. At the end of th e announ cement the radio will return to its previou s s t ate r eady for the next annou ncement . R E G O N / O F F : W h e n R E G i s a v a i l a b l e ( O n ) , t h e r e c e i v e r a c c e p t s r e g i o n a l v a r i a n t s o f t h e t u n e d s t a t i o n dis play. When REG is unavailab le (Off), th[…]
-
Страница 21
21 Dis c/USB/ SD/ MMC ope rations USB/S D/MM C note s USB functions (flas h memory type ) MP3 music p lay. SD/MM C card su pport, 2 in 1 (SD/ MMC) su pport. USB fla sh memory. FAT 12 / FAT 16/ F AT 32 is p ossible FA T 12/16 (dir: 200 support, file: 500 suppo r t), FA T 32 (dir: 200 support, file : 500 support). File name: 32 byte / Dir[…]
-
Страница 22
22 Note: When SD/MM C card and USB d evice are both ins erted, the playing mod e will be change d into the mod e of th e dev ic e ins ert ed lat er. Play /pause T h e u n i t w i l l a u t o m a t i c a l l y p l a y f r o m t h e f i r s t s o u n d t r a c k r e c o r d e d o n a d i s c / S D / M M C / U S B d e v i c e . T o ensure go od system[…]
-
Страница 23
23 t o s t a r t p l a y b a c k a g a i n . P l a y b a c k w i l l r e s u m e f r o m t h e p o i n t i t w a s s t o p p e d a t . I f y o u p r e s s S T O P / P B C b ut t on on t h e R C o r pr e s s a n d ho l d 1 / PL A Y / PA U S E b ut to n o n t he p a n el t w i c e , p l a y ba c k w i l l s to p c o m pl et e ly and can be resum ed o[…]
-
Страница 24
24 GOTO P r e s s a n d h o l d A U D I O / G O T O b u t t o n t o s h o w t h e p l a y b a c k p a r a m e t e r s f o r t h e c u r r e n t c h a p t e r / t r a c k / t i m e (tr ack/ titl e/ chap ter nu mb er or ti me) . Pr ess c ursor butt ons to n avi gate betw een th e par am eters an d use number bu ttons to inp ut neede d settings. Pr es[…]
-
Страница 25
25 PBC (Pla yback C ontrol) func tion (for VCD o nly) This function is only availabl e for the VCD with P BC function . Press an d hold STOP/ PBC butt on on the R C to set PBC on/of f; whe n PBC is off, the screen wil l show PBC me n u if yo u swit ch PBC o n. If the me nu consists of a list of t itles , you can se lect a des ired one u sing number[…]
-
Страница 26
26 DVD Setup me nu P r e s s S E T U P bu t t o n o n th e R C t o di s p l ay s e t u p s c r e e n , u s e L E F T / R IG H T c u r s o r b u tt o n s a n d E N T E R b u t t o n t o select th e desired setup page: System , Language, Audio, Video, Dig i t al. In th e selected page se l ect an option u s i n g U P / D O W N c u r s o r b u t t o n[…]
-
Страница 27
27 Note: T h e r a t i n g c a n b e s e l e c t e d o n l y u n d e r t h e p a s s w o r d u n l o c k e d s t a t u s , a n d t h e l i m i t s c a n b e w o r k e d only und er the passwor d locked stat us. De fault If th is ite m is se l e cted, the unit will re turn to origina l setting. Language set up OSD lan guage Se lect the langu[…]
-
Страница 28
28 Video setu p Set a param eter with UP/DO WN cursor butt ons: Brig htness, Contr ast, Hue, S atur ation , Sh arpne ss. Digital setup Dynami c r ange If wa tching large dynamic sc ope movie program at n ight , selecting this m o d e y o u c a n r e d u c e t h e v o l u m e t o a v e r y l o w l e v e l , a t t h e s a m e t i m e , t o k e e […]
-
Страница 29
29 Hand ling and clean ing d iscs Di rty, scra tch ed or war ped di scs m ay caus e skip pin g or noi se. Handle t he disc on ly by the edges. To keep clean do not to uch its surfa ce. Discs shoul d be st ored in t heir case s aft er use to av oid scr at ches. Do not expo se discs to direct sunlig ht, high humidity , high temper atu[…]
-
Страница 30
30 Troubl esho oting g uide Be low is a tab l e des cribing s i mp le measures that can he lp you elimina te most problems like ly to eme r ge when th is unit is in use. If belo w measures do not help, tu rn to a service center or to the nearest de aler. S ymp t om Cau se Solution The car ignition is n ot on. I f the power supply is properl y conne[…]
-
Страница 31
31 Specif icati on General Pow er suppl y: 12 V DC Maximu m power o utput: 4 x 50 W Storag e s u pport: DVD/DVD±R/DVD±R W/CD/CD-R/CD-R W /USB/SD/MMC Comp atibl e form ats: DVD/DVCD/SVCD/VCD/HDCD/MP3/CDDA/Picture-CD/Photo- CD/JP EG/MPEG4 ( DivX) Unit dimen sions/Net w eight: 170 x 178 x 50 mm/1.55 kg Gift box dimensions/Gross weight: 235 x 285 x 1[…]
-
Страница 32
32 ! . […]
-
Страница 33
33 , . […]
-
Страница 34
34 , , […]
-
Страница 35
35 ?[…]
-
Страница 36
36 « » ( ) 1. ?[…]
-
Страница 37
37 – – – 1. ?[…]
-
Страница 38
38 , […]
-
Страница 39
39 A B 1. — 1. (+ ) 2. — 2. (-) 3. — 3. […]
-
Страница 40
40 ISO A B 1 — . . (+) — 2 — . . (-) — ./ ?[…]
-
Страница 41
41 1. 2. 1/ PLA Y/ PAU SE 3. POWER/MUTE 4. MODE 5. VO LUME+ 6. MEN U 7. BND 8. 6/DI[…]
-
Страница 42
42 1. 2. EJECT 3. 4. ( ) RE SET 5. ?[…]
-
Страница 43
43 ( ) 1. MODE 2. PWR 3. BND /RDM 4. ENTER/ 5. STER EO/MON O 6. PTY/ PROG 7. ?[…]
-
Страница 44
44 1. , . 2. ?[…]
-
Страница 45
45 , ?[…]
-
Страница 46
46 O K S E L ?[…]
-
Страница 47
47 B a l a n c e : . 1 0 . […]
-
Страница 48
48 . B N D / R D M B N D […]
-
Страница 49
49 : , P .SC N/ RP T A S /PS ; […]
-
Страница 50
50 , ). ?[…]
-
Страница 51
51 RDS SETU P T A A L A R M / S E E K : T A S E E K , […]
-
Страница 52
52 /USB — USB/S D/MMC MP3 U SB ( ?[…]
-
Страница 53
53 MM C/ SD U SB. . […]
-
Страница 54
54 / US B/ STOP/PBC […]
-
Страница 55
55 I N T 2 / I N T , […]
-
Страница 56
56 A- B/[…]
-
Страница 57
57 ( DVD) M E N U , . ?[…]
-
Страница 58
58 DVD S E T U P ; […]
-
Страница 59
59 (8) . : 8 : ?[…]
-
Страница 60
60 : , ?[…]
-
Страница 61
61 , […]
-
Страница 62
62 , , […]
-
Страница 63
63 . . […]
-
Страница 64
64 12 50 4 ?[…]
-
Page 1: SoundMAX SM-CMD3007
SM-CMD3 007 MULTIMEDIA D VD/CD/MP3 RECEIVER wit h built-in 3” TFT disp lay In st ru cti on m anu al DVD /CD/MP3- 3” TFT- […]
-
Page 2: SoundMAX SM-CMD3007
2 Dear c ust omer! Thank you for purch asing our pr oduct. For saf ety, it is strongly r ec o mmended to read thi s manual c arefully before conn ecting, op erating and/ or adjusting t he product an d ke ep t he manual for ref erence in th e futur e. Table of co ntents Tabl e of cont ents ……………………………………………………[…]
-
Page 3: SoundMAX SM-CMD3007
3 Import ant safegu ards Read carefull y through the manual to fa miliarize your selves with thi s unit. Kee p t his m an u al han dy as a r ef er en ce f or o per ati n g pr oc edu r es an d pr ec aut io ns . Do not all ow p ers ons who hav e not r ead throu gh t his manual to u se this un it. “CLASS 1 LA SER PRODU CT” T h i s p r […]
-
Page 4: SoundMAX SM-CMD3007
4 M ak e s u r e y o u di sc o n n ec t th e p ow e r s u p pl y i f t h e s y s te m a pp e ar s t o b e w o rk i n g i nc or r e c t l y , i s ma k i n g a n u n u s u a l s o u n d , h a s a s t r a n g e s m e l l , h a s s m o k e e m i t t i n g f r o m i t o r l i q u i d s h a v e g o t i n s i d e i t . L e t a qualifie d techni cian c[…]
-
Page 5: SoundMAX SM-CMD3007
5 Install ation/ connect ion Choos e th e mountin g location where th e unit will no t interfere with the norm al driving f unction of the driver. Before finally installing the unit , c on nect the wirin g a nd m ake sure that the unit work s properly. Consult with y our n earest d ea l er if installation require s the drill ing of hole[…]
-
Page 6: SoundMAX SM-CMD3007
6 1. I n s t a l l t h e s l e e v e i n t o t h e d a s h b o a r d ; e n s u r e i t i s i n s t a l l e d w i t h t h e c o r r e c t s i d e a n d t h e r e a r e n o obstacle s (wires, da shboard elements, etc) for the unit insta llat io n. 2. A f t e r i n s t a l l i n g t h e s l e e v e i n t o t h e d a s h b o a r d , b e n d t a b s f i[…]
-
Page 7: SoundMAX SM-CMD3007
7 2. D IN REA R -M OUNT (M et hod B ) For t his method, u s e the screw h oles in t h e latera l sides of the unit. Fix the un it with the help of t he factory radio mountin g brackets. 1. Se lect a p osition in which the s crew holes of t he brac kets (3) are aligned with t he screw hole s in the unit body, and s crew in two s crews (2) in each s […]
-
Page 8: SoundMAX SM-CMD3007
8 Electrica l Connectio n Connector A Connector B 1. — 1. Rea r right speaker (+) 2. — 2. Rea r right speaker (-) 3. — 3. Fro n t rig ht speaker (+) 4. Memory +12V 4. Fro n t rig ht speaker (-) 5. Auto antenn a output 5. Fr ont left speake r (+) 6. — 6. Fr ont left speake r (-) 7. +12 V (to ignit ion key) 7. Re ar left speake r (+) 8. Groun d 8. Re[…]
-
Page 9: SoundMAX SM-CMD3007
9 ISO Connec tio n table Functio n Location Connector A Connector B 1 — Rear right (+) — P urple 2 — Rea r right (-) — Purp le/Black 3 — Fro nt right (+) — Gre y 4 Battery +12 V/Yellow Front right (-) — Grey/Bla ck 5 Auto Antenna — Bl ue Fron t left (+) — W hite 6 — Front left (-) — White/Black 7 Ignition/R ed Rear left (+ ) — Gr e en 8 Ground/ Bla[…]
-
Page 10: SoundMAX SM-CMD3007
10 Unit c ontrols Front pa nel 1. IR sensor 2. 1/PLAY/P AUSE butto n 3. POWER/MUTE butt on 4. MODE button 5. VOLUME+ bu tton 6. MENU button 7. BND button 8. 6/DIR+ button 9. NEXT button 10. TFT d isplay 11. OPEN butto n 12. USB port 13. PREVIOUS but ton 14. 2/INT butto n 15. 3/RPT butt on 16. OK button 17. VOLUME- b utton 18. AS/PS button 19. 4/RDM[…]
-
Page 11: SoundMAX SM-CMD3007
11 Inner panel 1. Memory car d slo t 2. Eje ct button 3. Panel status in dic ator 4. RESET button (hole) 5. Disc loading s lot Press ing RESET hole will e rase the cloc k setting and stored stations. Panel s tatus in d icator lig hts up when you flip down the pa nel and flashes when you remove the panel.[…]
-
Page 12: SoundMAX SM-CMD3007
12 Remote contr oller (R C) 1. MOD E button 2. PWR bu tton 3. BND/RDM button 4. ENTER bu tton/Cursor buttons 5. STERE O/MONO b utton 6. PTY/PROG button 7. P.SCN/R PT button 8. SEEK-/ PREVI OUS butto n 9. AF/TA but ton 10. STOP/PB C button 11. OSD button 12 . Nu mbe r b ut to ns 13. PLAY/PA USE button 14. MUT E button 15. MEN U button 16. SUB-T butt[…]
-
Page 13: SoundMAX SM-CMD3007
13 Changing the b attery 1. Pr ess the c atch and at the same time pull out the battery t ray (pic. 1) . 2. In sert the 1 lithium batt ery, type CR2025 (3V) ba tt e ry with t h e stamped (+) ma rk facing u p w ar d. Inse rt the batte ry tray into the remote controlle r (p i c . 2). Warni n g: S t o r e t h e b a t t e r y w h e r e c h i l d r […]
-
Page 14: SoundMAX SM-CMD3007
14 Gene ral op eratio ns Reset the unit O p e r at i n g th e u ni t f o r th e f i r st t i m e o r af t er r e pl ac i n g th e c ar b a tt e r y , y o u m u s t r e s e t t h e u n i t . P r es s R E S E T button (hol e) with a point ed o bject (su ch as a ballpoi nt pen) to set the u nit to initial state. Note: W h en s o me e r r o r s o cc ur[…]
-
Page 15: SoundMAX SM-CMD3007
15 button on th e panel to sele ct t he audio settin g item. Press ENTER button or RIGHT cursor button on the RC or OK b utton on the panel to e nter the se lected item. Press L EFT/RIG HT butt ons on th e RC or V OLUME+ /VOL UME- button s on the p anel to adj ust th e audio set tin g. P re ss an d ho ld O K but to n on th e pa nel or pr es s SE L […]
-
Page 16: SoundMAX SM-CMD3007
16 Sharpness : Adjus t l e vel of screen sharpness. Support 15 le vels. Default leve l is 10. Sc reen: Adjust screen aspect : 1 6:9 = > 4:3 => FULL. C olor reset: Re sume colo r default statu s. (Selec t YES or NO with cursor b uttons, p r e ss ENTER b utton on the RC or OK button on th e panel to confi rm). EXPERT M ENU DX: S[…]
-
Page 17: SoundMAX SM-CMD3007
17 Radio opera tions Band se lection Press BND /RDM bu tton on th e R C or BND b utton on t he panel to swi tch to th e ban ds in th e followin g orde r: FM1 — F M2 — FM3 (OIRT) – MW (AM). Manual/a utomatic t unin g Manual tunin g: Press and hol d PREVI OUS/NEXT buttons on the R C or panel to enter man ual tuning m o d e . M A N U A L w i l l[…]
-
Page 18: SoundMAX SM-CMD3007
18 Stereo/ Mon o receptio n In FM mode, pr ess STERE O/MONO butto n on the RC to select stereo or mono signal re ception mo de. On-screen display Press OSD b utton on th e RC t o show ena bled PTY function icon . RDS bac kground RDS servic e availab ility var ies with area s. Please u n der stand if RDS s ervice is not available in yo u area, the f[…]
-
Page 19: SoundMAX SM-CMD3007
19 PTY ( Progra m ty pe) f unction P r e s s P T Y / P R O G b u t t o n o n t h e R C t o o p e n P T Y p r o g r a m t y p e l i s t , a n d r e p e a t p r e s s i n g P T Y / P R O G b u t t o n t o s e l e c t a P T Y t y p e . A f t e r s e l e c t i n g t h e p r o g r a m t y p e y o u w a n t , p r e s s n u m b e r b u t t o n s 1 — 6 o n[…]
-
Page 20: SoundMAX SM-CMD3007
20 announc ement. At the end of th e announ cement the radio will return to its previou s s t ate r eady for the next annou ncement . R E G O N / O F F : W h e n R E G i s a v a i l a b l e ( O n ) , t h e r e c e i v e r a c c e p t s r e g i o n a l v a r i a n t s o f t h e t u n e d s t a t i o n dis play. When REG is unavailab le (Off), th[…]
-
Page 21: SoundMAX SM-CMD3007
21 Dis c/USB/ SD/ MMC ope rations USB/S D/MM C note s USB functions (flas h memory type ) MP3 music p lay. SD/MM C card su pport, 2 in 1 (SD/ MMC) su pport. USB fla sh memory. FAT 12 / FAT 16/ F AT 32 is p ossible FA T 12/16 (dir: 200 support, file: 500 suppo r t), FA T 32 (dir: 200 support, file : 500 support). File name: 32 byte / Dir[…]
-
Page 22: SoundMAX SM-CMD3007
22 Note: When SD/MM C card and USB d evice are both ins erted, the playing mod e will be change d into the mod e of th e dev ic e ins ert ed lat er. Play /pause T h e u n i t w i l l a u t o m a t i c a l l y p l a y f r o m t h e f i r s t s o u n d t r a c k r e c o r d e d o n a d i s c / S D / M M C / U S B d e v i c e . T o ensure go od system[…]
-
Page 23: SoundMAX SM-CMD3007
23 t o s t a r t p l a y b a c k a g a i n . P l a y b a c k w i l l r e s u m e f r o m t h e p o i n t i t w a s s t o p p e d a t . I f y o u p r e s s S T O P / P B C b ut t on on t h e R C o r pr e s s a n d ho l d 1 / PL A Y / PA U S E b ut to n o n t he p a n el t w i c e , p l a y ba c k w i l l s to p c o m pl et e ly and can be resum ed o[…]
-
Page 24: SoundMAX SM-CMD3007
24 GOTO P r e s s a n d h o l d A U D I O / G O T O b u t t o n t o s h o w t h e p l a y b a c k p a r a m e t e r s f o r t h e c u r r e n t c h a p t e r / t r a c k / t i m e (tr ack/ titl e/ chap ter nu mb er or ti me) . Pr ess c ursor butt ons to n avi gate betw een th e par am eters an d use number bu ttons to inp ut neede d settings. Pr es[…]
-
Page 25: SoundMAX SM-CMD3007
25 PBC (Pla yback C ontrol) func tion (for VCD o nly) This function is only availabl e for the VCD with P BC function . Press an d hold STOP/ PBC butt on on the R C to set PBC on/of f; whe n PBC is off, the screen wil l show PBC me n u if yo u swit ch PBC o n. If the me nu consists of a list of t itles , you can se lect a des ired one u sing number[…]
-
Page 26: SoundMAX SM-CMD3007
26 DVD Setup me nu P r e s s S E T U P bu t t o n o n th e R C t o di s p l ay s e t u p s c r e e n , u s e L E F T / R IG H T c u r s o r b u tt o n s a n d E N T E R b u t t o n t o select th e desired setup page: System , Language, Audio, Video, Dig i t al. In th e selected page se l ect an option u s i n g U P / D O W N c u r s o r b u t t o n[…]
-
Page 27: SoundMAX SM-CMD3007
27 Note: T h e r a t i n g c a n b e s e l e c t e d o n l y u n d e r t h e p a s s w o r d u n l o c k e d s t a t u s , a n d t h e l i m i t s c a n b e w o r k e d only und er the passwor d locked stat us. De fault If th is ite m is se l e cted, the unit will re turn to origina l setting. Language set up OSD lan guage Se lect the langu[…]
-
Page 28: SoundMAX SM-CMD3007
28 Video setu p Set a param eter with UP/DO WN cursor butt ons: Brig htness, Contr ast, Hue, S atur ation , Sh arpne ss. Digital setup Dynami c r ange If wa tching large dynamic sc ope movie program at n ight , selecting this m o d e y o u c a n r e d u c e t h e v o l u m e t o a v e r y l o w l e v e l , a t t h e s a m e t i m e , t o k e e […]
-
Page 29: SoundMAX SM-CMD3007
29 Hand ling and clean ing d iscs Di rty, scra tch ed or war ped di scs m ay caus e skip pin g or noi se. Handle t he disc on ly by the edges. To keep clean do not to uch its surfa ce. Discs shoul d be st ored in t heir case s aft er use to av oid scr at ches. Do not expo se discs to direct sunlig ht, high humidity , high temper atu[…]
-
Page 30: SoundMAX SM-CMD3007
30 Troubl esho oting g uide Be low is a tab l e des cribing s i mp le measures that can he lp you elimina te most problems like ly to eme r ge when th is unit is in use. If belo w measures do not help, tu rn to a service center or to the nearest de aler. S ymp t om Cau se Solution The car ignition is n ot on. I f the power supply is properl y conne[…]
-
Page 31: SoundMAX SM-CMD3007
31 Specif icati on General Pow er suppl y: 12 V DC Maximu m power o utput: 4 x 50 W Storag e s u pport: DVD/DVD±R/DVD±R W/CD/CD-R/CD-R W /USB/SD/MMC Comp atibl e form ats: DVD/DVCD/SVCD/VCD/HDCD/MP3/CDDA/Picture-CD/Photo- CD/JP EG/MPEG4 ( DivX) Unit dimen sions/Net w eight: 170 x 178 x 50 mm/1.55 kg Gift box dimensions/Gross weight: 235 x 285 x 1[…]
-
Page 32: SoundMAX SM-CMD3007
32 ! . […]
-
Page 33: SoundMAX SM-CMD3007
33 , . […]
-
Page 34: SoundMAX SM-CMD3007
34 , , […]
-
Page 35: SoundMAX SM-CMD3007
35 ?[…]
-
Page 36: SoundMAX SM-CMD3007
36 « » ( ) 1. ?[…]
-
Page 37: SoundMAX SM-CMD3007
37 – – – 1. ?[…]
-
Page 38: SoundMAX SM-CMD3007
38 , […]
-
Page 39: SoundMAX SM-CMD3007
39 A B 1. — 1. (+ ) 2. — 2. (-) 3. — 3. […]
-
Page 40: SoundMAX SM-CMD3007
40 ISO A B 1 — . . (+) — 2 — . . (-) — ./ ?[…]
-
Page 41: SoundMAX SM-CMD3007
41 1. 2. 1/ PLA Y/ PAU SE 3. POWER/MUTE 4. MODE 5. VO LUME+ 6. MEN U 7. BND 8. 6/DI[…]
-
Page 42: SoundMAX SM-CMD3007
42 1. 2. EJECT 3. 4. ( ) RE SET 5. ?[…]
-
Page 43: SoundMAX SM-CMD3007
43 ( ) 1. MODE 2. PWR 3. BND /RDM 4. ENTER/ 5. STER EO/MON O 6. PTY/ PROG 7. ?[…]
-
Page 44: SoundMAX SM-CMD3007
44 1. , . 2. ?[…]
-
Page 45: SoundMAX SM-CMD3007
45 , ?[…]
-
Page 46: SoundMAX SM-CMD3007
46 O K S E L ?[…]
-
Page 47: SoundMAX SM-CMD3007
47 B a l a n c e : . 1 0 . […]
-
Page 48: SoundMAX SM-CMD3007
48 . B N D / R D M B N D […]
-
Page 49: SoundMAX SM-CMD3007
49 : , P .SC N/ RP T A S /PS ; […]
-
Page 50: SoundMAX SM-CMD3007
50 , ). ?[…]
-
Page 51: SoundMAX SM-CMD3007
51 RDS SETU P T A A L A R M / S E E K : T A S E E K , […]
-
Page 52: SoundMAX SM-CMD3007
52 /USB — USB/S D/MMC MP3 U SB ( ?[…]
-
Page 53: SoundMAX SM-CMD3007
53 MM C/ SD U SB. . […]
-
Page 54: SoundMAX SM-CMD3007
54 / US B/ STOP/PBC […]
-
Page 55: SoundMAX SM-CMD3007
55 I N T 2 / I N T , […]
-
Page 56: SoundMAX SM-CMD3007
56 A- B/[…]
-
Page 57: SoundMAX SM-CMD3007
57 ( DVD) M E N U , . ?[…]
-
Page 58: SoundMAX SM-CMD3007
58 DVD S E T U P ; […]
-
Page 59: SoundMAX SM-CMD3007
59 (8) . : 8 : ?[…]
-
Page 60: SoundMAX SM-CMD3007
60 : , ?[…]
-
Page 61: SoundMAX SM-CMD3007
61 , […]
-
Page 62: SoundMAX SM-CMD3007
62 , , […]
-
Page 63: SoundMAX SM-CMD3007
63 . . […]
-
Page 64: SoundMAX SM-CMD3007
64 12 50 4 ?[…]