
Руководства Sony LBT-D309CD Размер файлов: 9166 KB, Язык: English, Формат: pdf, Платформа: Windows/Linux, Дата: 2017-04-09
На данной странице вы можете скачать руководства Sony LBT-D309CD. Мы предлагаем вам ознакомиться с руководством пользователя, инструкцией по сервисному обслуживанию и ремонту.
Также здесь вы найдете список заказных номеров на комплектующие Sony LBT-D309CD.
Все файлы предоставляются исключительно в ознакомительных целях. И не являютя руководством по ремонту, а направлены лишь на то чтобы помочь вам более детально ознакомиться с принципом построения устройства.
Содержимое представленных здесь руководств требуют от вас знания технического английского языка.
Если вы собираетесь скачать руководство по сервисному обслуживанию Sony LBT-D309CD, иными словами сервис мануал, вы дожны обладать хотя бы минимальными познаниями в области электроники и пониманием базовых принципов работы электромеханических устройств.
Для просмотра руководств вам понадобится Adobe Acrobat Reader версии 9 и выше либо другая программа для просмотра pdf файлов.
В связи с популярностью информации представленной на сайте и ее бесплатного предоставления конечному пользователю, убедительная просьба использовать специальные программные продукты для многопотокового скачивания файлов.
Руководства для Sony LBT-D309CD
- Руководство пользователя (User manual)
- Руководство по сервисному обслуживанию (Service manual)
- Руководство по ремонту (Repair manual)
- Перечень комплектующих (PartList)
Краткое содержание страницы № 1
3-865-267-11(1)
Compact Hi-Fi
Stereo System
Operating Instructions
Owner’s Record
The model and serial numbers are located on the rear panel. Record the serial
number in the space provided below. Refer to them whenever you call upon your
Sony dealer regarding this product.
Model No. Serial No.
LBT-D390 LBT-XB44K
LBT-D790 LBT-XB50
LBT-G5500 LBT-XB60
LBT-XB33 LBT-XB66
LBT-XB33K LBT-XB66K
LBT-XB44 LBT-XB660
©1998 by Sony Corporation
Краткое содержание страницы № 2
INFORMATION WARNING This equipment has been tested and found to comply with the limits for a Class B digital device, To prevent fire or shock hazard, do not pursuant to Part 15 of the FCC Rules. These limits expose the unit to rain or moisture. are designed to provide reasonable protection against harmful interference in a residential To avoid electrical shock, do not open the cabinet. Refer servicing to qualified personnel only. installation. This equipment generates, uses, and can radiate ra
Краткое содержание страницы № 3
Table of Contents Getting Started Sound Adjustment Step 1: Hooking up the system ………… 4 Adjusting the sound ………………………. 28 Step 2: Setting the time ……………………. 6 Selecting the audio emphasis …………. 29 Step 3: Presetting radio stations ………. 7 Adjusting the audio emphasis ………… 30 Connecting optional AV Making a personal audio emphasis components ……………………………….. 8 file ………………………………………..
Краткое содержание страницы № 4
+ + – R L Getting Started Step 1: Hooking up the system Follow steps 1 through 5 to hook up your system using the supplied cords and accessories. AM loop antenna Right speaker Left speaker FM antenna 5 2 3 1 1 1 4 The above illustration is of the LBT-XB66K. 1 Connect the speakers. 2 Insert only the stripped portion of the cord. Inserting the vinyl portion will 1 Connect the speaker cords to SPEAKER jacks of the same color. interfere with the speaker connection and no sound will come from the Kee
Краткое содержание страницы № 5
AM FM75 AM COAXIAL FM 75 2 Connect the FM/AM antennas. 4 Connect the power cord to a wall outlet. Set up the AM loop antenna, then connect it. The demonstration appears in the display. For European model If the plug on this unit does not fit your Extend the FM wire wall outlet, detach the supplied adapter antenna horizontally. from the plug (except for North and AM loop antenna South American countries, Europe and Australia). 5 Deactivate the demonstration mode by pressing DISPLAY/DEMO while t
Краткое содержание страницы № 6
4 Press TUNING +/– to set the Step 2: Setting the minutes. time You must set the time before using the timer functions. The clock is on a 24- hour system for the European and Brazilian models, and a 12-hour system for other models. 5 Press ENTER/NEXT. The 24-hour system model is used for The clock starts. illustration purpose. 1 3,5 2,4 LBT-XB66/XB66K/XB660 only 1 Press t/CLOCK SET. The hour indication flashes. LBT-D390/D790/G5500/XB33/XB33K/ XB44/XB44K/XB50/XB60 only 2 Press TUNING +/– to set t
Краткое содержание страницы № 7
3 Press TUNING +/–. Step 3: Presetting The frequency indication changes and scanning stops when the system tunes in radio stations a station. “TUNED” and “STEREO” (for a stereo program) appear. You can preset the following number of LBT-D390/D790/G5500/XB33/XB33K/XB44/ stations: XB44K/XB50/XB60 — 2 band model: 20 for FM and 10 for AM DOLBY NR OFF TUNED — 3 band model: 20 for FM, 10 for MW, and STEREO AUTO 10 for LW ALL DISC S MHz — 4 band model: 20 for FM, 10 for MW, 10 for LW, and 5 for UKV LBT
Краткое содержание страницы № 8
Step 3: Presetting radio stations (continued) Connecting To tune in a station with a weak optional AV signal components Press TUNING MODE repeatedly until “MANUAL” appears in step 2, then press TUNING +/– to tune in the station. To enhance your system, you can connect optional components. Refer to the To change the preset number instructions included with each component Start over from step 1. for details. Note The preset stations are canceled when you Connecting audio disconnect the power cord
Краткое содержание страницы № 9
Connecting surround speakers Connecting an MD deck for digital (LBT-D790/XB33/XB33K/XB50/XB60 only) recording (except for LBT-D390/ You can connect optional surround speakers. D790/G5500) You can record a CD to an MD digitally by connecting your MD deck using an optical cable. To the digital input of the MD deck To surround To surround speaker (R) speaker (L) Note You need to connect both left and right surround speakers. Otherwise, the sound will not be heard. Connecting a VCR Connecting an MD
Краткое содержание страницы № 10
AM FM75 AM AM FM75 AM COAXIAL FM 75 COAXIAL FM 75 Connecting optional AV AM antenna components (continued) Connect a 6 to 15 meter (20 to 50 feet) insulated wire to the AM antenna terminal. Connecting outdoor Leave the supplied AM loop antenna connected. antennas For European model Connect an outdoor antenna to improve the Screw clamp reception. FM antenna Insulated wire (not supplied) Connect an optional FM outdoor antenna. You can also use the TV antenna instead. For European model IEC sta
Краткое содержание страницы № 11
T R E Basic Operations P E R E D O M Y A L P A Basic Operations 1 Press 6 OPEN and place a CD on Playing a CD the disc tray. — Normal Play If the disc is not placed properly it will not be recognized. You can play up to five CDs in a row. With the label 1/u » » side up. p 0) p 0) Pr (Power) VOLUME á When you play 6 6 6 a CD single, Pp 0 ) place it on the inner circle of the tray. 2 Press DISC SKIP to place up to four more CDs on the tray. The disc tray rotates so you can insert other CDs. 3 Clos
Краткое содержание страницы № 12
Playing a CD (continued) To Do this Stop playback Press p. Pause Press P. Press again to resume playback. Select a track During playback or pause, turn the jog dial clockwise (to go forward) or counterclockwise (to go backward) and release it when you reach the desired track. Or press AMS* + (to go forward) or AMS* = (to go backward) on the remote. Find a point in Press and hold ) or 0 during a track playback, and release at the desired point. Select a CD Press one of the DIRECT PLAY buttons (or
Краткое содержание страницы № 13
Basic Operations 3 Close the front cover. Recording a CD — CD Synchro Recording 4 Press DISC SKIP repeatedly until the disc number you want to record This function lets you record from a CD to a appears in the playing position tape easily. You can use TYPE I (normal) or indicator. TYPE II (CrO2) tapes. The recording level is adjusted automatically. 5 Press CD SYNC. 1/u Deck B stands by for recording and the (Power) SURROUND 7 p » 5 CD player stands by for playback, and the indicator on the á but
Краткое содержание страницы № 14
2 Press TUNING MODE repeatedly Listening to the until “PRESET” appears in the display. radio MANUAL n AUTO n PRESET — Preset Tuning Before using this function, preset radio stations in the tuner’s memory (see “Step 3 Press TUNING +/– (or PRESET +/– 3: Presetting radio stations”). on the remote) to tune in the desired preset station. STEREO/MONO 1/u (Power) VOLUME 3 2 1 LBT-D390/D790/G5500/XB33/XB33K/XB44/ XB44K/XB50/XB60 Preset number DOLBY NR OFF TUNED STEREO PRESET ALL DISC S MHz Frequency LBT
Краткое содержание страницы № 15
Basic Operations 3 Press TUNING +/– to tune in a Recording from the preset station. radio LBT-D390/D790/G5500/XB33/XB33K/XB44/ XB44K/XB50/XB60 Preset number You can record a radio program on a tape by tuning in a preset station. You can use TYPE I DOLBY NR (normal) or TYPE II (CrO2) tapes. The OFF TUNED STEREO recording level is automatically adjusted. PRESET ALL DISC S 1/u MHz (Power) SURROUND 3 2 1 Frequency LBT-XB66/XB66K/XB660 Preset number DOLBY NR OFF PRESET TUNED STEREO ALL DISC S MHz Fre
Краткое содержание страницы № 16
Recording from the radio (continued) Playing a tape Tips • If you want to record on the reverse side, press » so the indicator on the » button (for the reverse You can play any type of tape, TYPE I side) lights up green after pressing r REC in step (normal), TYPE II (CrO2) or TYPE IV (metal). 5. The deck automatically detects the tape type. • When you record on both sides, be sure to start To select either deck A or B, press DECK A from the front side. If you start from the reverse ( or DECK B (
Краткое содержание страницы № 17
Basic Operations Tips 1 Press 6 EJECT and insert a • Pressing á or » while the system power is off recorded tape in deck A or B. automatically turns on the system and starts tape playback if there is a tape in the deck (One Touch With the side you want Play). to play facing forward • You can switch from another source to the tape deck just by pressing á or » (Automatic Source Selection). • When you want to reduce the hiss noise in low- » » p 0) p 0) level high-frequency signals, press DOLBY NR s
Краткое содержание страницы № 18
4 Press P. Recording from a Dubbing starts. When dubbing ends, decks A and B tape automatically stop. — High-speed Dubbing You can use TYPE I (normal) or TYPE II To stop dubbing (CrO2) tapes. The recording level is Press p on deck A or B. automatically adjusted. Tips 1/u (Power) • When you dub on both sides, start recording from the front side. If you start from the reverse side, recording stops at the end of the reverse side. • You don’t have to set DOLBY NR, since the tape in deck B is automat
Краткое содержание страницы № 19
nn nn The CD Player Using the CD Playing CD tracks display repeatedly — Repeat Play You can check the remaining time of the This function lets you repeat a single CD or current track or the whole CD. all CDs in Normal Play, Shuffle Play, and DISPLAY/DEMO Program Play. / Press DISPLAY/DEMO during 1/ALL DISCS REPEAT playback. Each time you press this button in / Press REPEAT repeatedly during Normal Play, the display changes as follows: playback until “REPEAT” appears in the display. Repeat Play s
Краткое содержание страницы № 20
To cancel Shuffle Play Press PLAY MODE repeatedly until Playing CD tracks “SHUFFLE” or “PROGRAM” disappears in random order from the display. The tracks continue playing in their original order. — Shuffle Play To select a desired CD You can play all the tracks on one CD or all Press one of the DIRECT PLAY buttons the CDs in random order. during 1 Disc Shuffle Play. Tips 1 • You can start Shuffle Play during Normal Play by pressing PLAY MODE repeatedly until “SHUFFLE” appears in the display. • To

SONY STR-A37 D309 D359

Type:  (PDF)
(PDF)
Size
11.0 MB
Page
41
Category
AUDIO
SERVICE MANUAL
If you get stuck in repairing a defective appliance
download
this repair information for help. See below.
Good luck to the repair!
Please do not offer the downloaded file for sell only
use it for personal usage!
Looking for similar sony manual?
Document preview [1st page]
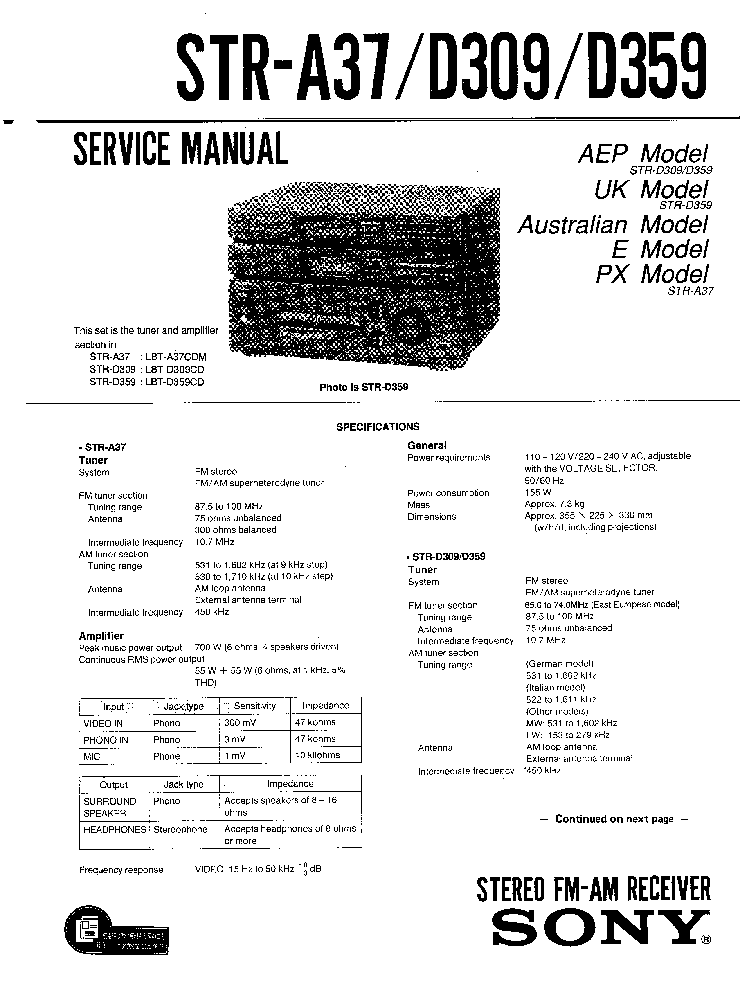
Click on the link for free download!
Document preview [2nd page]
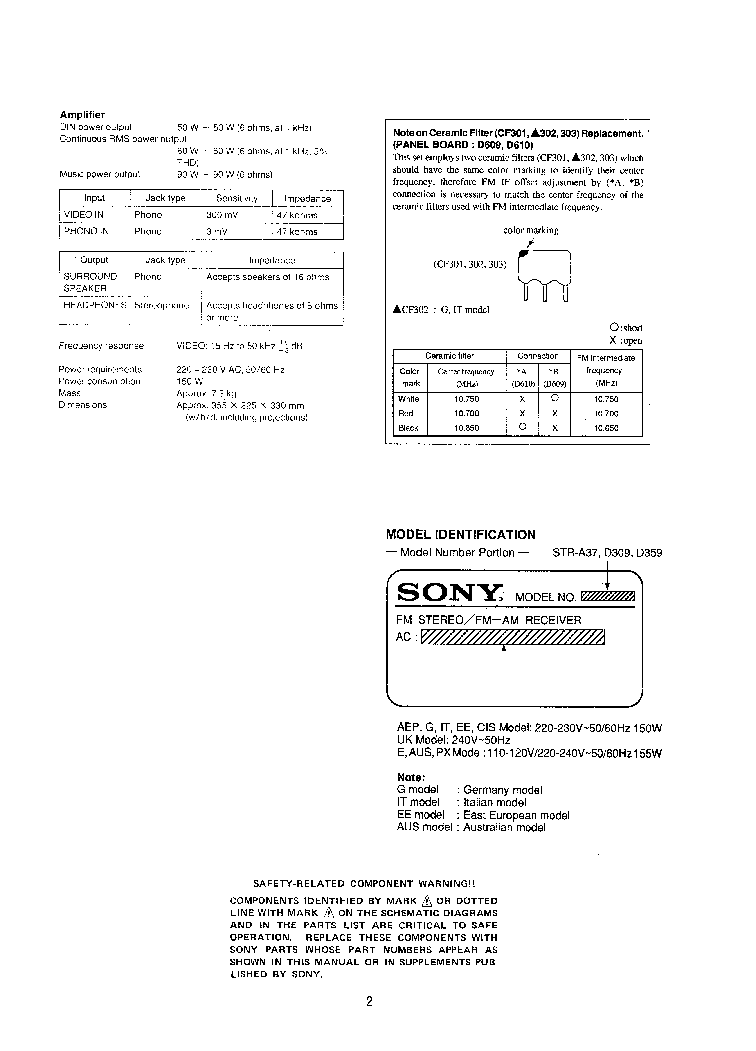
Click on the link for free download!
Please tick the box below to get download link:
- Also known:
SONY STRA-37 STRA37 D309 D359 STRA 37 309 359 STR A37 STR-A37
- If you have any question about repairing write your question to the Message board. For this no need registration.
- If the site has helped you and you also want to help others, please Upload a manual, circuit diagram or eeprom that is not yet available on the site.
Have a nice Day! - Please take a look at the below related repair forum topics. May be help you to repair.
Warning!
If you are not familiar with electronics, do not attempt to repair!
You could suffer a fatal electrical shock! Instead, contact your nearest service center!
Note! To open downloaded files you need acrobat reader or similar pdf reader program. In addition,
some files are archived,
so you need WinZip or WinRar to open that files. Also some files are djvu so you need djvu viewer to open them.
These free programs can be found on this page: needed progs
If you use opera you have to disable opera turbo function to download file!
If you cannot download this file, try it with CHROME or FIREFOX browser.
Relevant AUDIO forum topics:
Sziasztok!
A fenti tunerben van egy 5 lábú fekete téglatest alakú alkatrész. Ez van ráírva: TOKO AR50Hx.
Úgy tűnik, hogy belül kh-s, mert ha megnyomom torzít a rádió. Kérdésem, hogy mi lehet ez és mivel tudnám helyettesíteni? Gondolom valamilyen szűrő lehet, de milyen? Az IC-t sem sikerült beazonosítani, rajz alapján okosabb lennék, de mindenhol csak a blokkvázlata szerepel.
Üdv.
Sziasztok. Szuksegem van egy nehany tanacsra (vagy inkabb iskolaztatasra). Akar az «iskolapad» c. forumban is nyithattam volna a topikot, de 2 konkret radiorol van szo. Az egyik egy Sharp CD-C900 mini hifi. Automata keresovel nem talal egy adot sem, kezi keresessel szepen bejon mindegyik ado, megfelelo hangerovel. Ha megnyomom a sztereo gombot, azonnal eltunik a hang, ha mono-ra valtok ujbol visszajon a hang. AM mukodik rendesen, keresi, megtalalja es menti a memoriaba az adokat. Sajnos szervizkonyvet sehol a neten letoltheto formaban nem talaltam. Keszitettem fenykepeket a tuner panelrol. A masik keszulek egy Sony ST-D709 ami hasonlo jelenseget produkal, vagyis automata keresovel egyetlen adot sem talal, kezi keresessel bejonnek, de nagyon halkan. AM ezen is mukodik rendesen es sokkal hangosabb mint az fm. Ennek a manualja fenn van a tanyan, ennek a belsejerol is keszitettem kepeket. Elore is koszonom a segito szendeku tanacsokat. Udv.
Üdvözletem . Keresném a SONY CDX-S 2200 rajzát.Segítségeteket előre is köszönöm. Öreg Tom
Sziasztok. Belebotlottam ebbe a tobbcsatornas erositobe, ami nem akar bekapcsolni. Vegigolvastam «petervis» irasat a neten es bar ugy irja, hogy az en modellemre is ervenyes, valojaban semmi koze hozza. Tehat a st-by panel: 2 kulonallo aramkor van rajta, egyik a st-by aramkor amit a st-by trafo taplal, a masik amit a fotrafo taplal. A st-by aramkor kimeneten megvan a 11v, ez atmegy a digi panelra, ott megtaplal egy 3,3v-os stabkockat, onnan a 3,3v atmegy az elolapi panelra ahol csak az infravevot taplalja. A proci egy 5v-os agbol kapja a tapot, visszafele haladva eljutottam a st-by panelra, de a masik aramkorbe, amely a fotraforol jon taplalva. Ertelemszeruen a proci laban nincs tapfesz. Hogy kapcsol ez be?
Similar manuals:
If you want to join us and get
repairing help
please sign in or sign up by completing a simple electrical test
or write your question to the Message board without registration.
You can write in English language into the forum (not only in Hungarian)!
E-Waste Reduce

PDF инструкция · 48 страниц(ы) английский
инструкцияSony LBT-D390

©1998 by Sony Corporation
Operating Instructions
Owner’s Record
The model and serial numbers are located on the rear panel. Record the serial
number in the space provided below. Refer to them whenever you call upon your
Sony dealer regarding this product.
Model No. Serial No.
3-862-180-13(1)
Compact Hi-Fi
Stereo System
LBT-XB44K
LBT-XB50
LBT-XB60
LBT-XB66
LBT-XB66K
LBT-XB660
LBT-D390
LBT-D790
LBT-G5500
LBT-XB33
LBT-XB33K
LBT-XB44
Посмотреть инструкция для Sony LBT-D390 бесплатно. Руководство относится к категории hi-fi системы, 2 человек(а) дали ему среднюю оценку 7.1. Руководство доступно на следующих языках: английский. У вас есть вопрос о Sony LBT-D390 или вам нужна помощь? Задайте свой вопрос здесь
Главная
Не можете найти ответ на свой вопрос в руководстве? Вы можете найти ответ на свой вопрос ниже, в разделе часто задаваемых вопросов о Sony LBT-D390.
Когда звук считается слишком громким?
Могут ли устройства разных марок подключаться друг к другу при помощи Bluetooth?
Как лучше всего выполнять чистку hi-fi система?
Инструкция Sony LBT-D390 доступно в русский?
Не нашли свой вопрос? Задайте свой вопрос здесь
Краткое содержание страницы № 1
3-865-267-11(1)
Compact Hi-Fi
Stereo System
Operating Instructions
Owner’s Record
The model and serial numbers are located on the rear panel. Record the serial
number in the space provided below. Refer to them whenever you call upon your
Sony dealer regarding this product.
Model No. Serial No.
LBT-D390 LBT-XB44K
LBT-D790 LBT-XB50
LBT-G5500 LBT-XB60
LBT-XB33 LBT-XB66
LBT-XB33K LBT-XB66K
LBT-XB44 LBT-XB660
©1998 by Sony Corporation
Краткое содержание страницы № 2
INFORMATION WARNING This equipment has been tested and found to comply with the limits for a Class B digital device, To prevent fire or shock hazard, do not pursuant to Part 15 of the FCC Rules. These limits expose the unit to rain or moisture. are designed to provide reasonable protection against harmful interference in a residential To avoid electrical shock, do not open the cabinet. Refer servicing to qualified personnel only. installation. This equipment generates, uses, and can radiate ra
Краткое содержание страницы № 3
Table of Contents Getting Started Sound Adjustment Step 1: Hooking up the system ………… 4 Adjusting the sound ………………………. 28 Step 2: Setting the time ……………………. 6 Selecting the audio emphasis …………. 29 Step 3: Presetting radio stations ………. 7 Adjusting the audio emphasis ………… 30 Connecting optional AV Making a personal audio emphasis components ……………………………….. 8 file ………………………………………..
Краткое содержание страницы № 4
+ + – R L Getting Started Step 1: Hooking up the system Follow steps 1 through 5 to hook up your system using the supplied cords and accessories. AM loop antenna Right speaker Left speaker FM antenna 5 2 3 1 1 1 4 The above illustration is of the LBT-XB66K. 1 Connect the speakers. 2 Insert only the stripped portion of the cord. Inserting the vinyl portion will 1 Connect the speaker cords to SPEAKER jacks of the same color. interfere with the speaker connection and no sound will come from the Kee
Краткое содержание страницы № 5
AM FM75 AM COAXIAL FM 75 2 Connect the FM/AM antennas. 4 Connect the power cord to a wall outlet. Set up the AM loop antenna, then connect it. The demonstration appears in the display. For European model If the plug on this unit does not fit your Extend the FM wire wall outlet, detach the supplied adapter antenna horizontally. from the plug (except for North and AM loop antenna South American countries, Europe and Australia). 5 Deactivate the demonstration mode by pressing DISPLAY/DEMO while t
Краткое содержание страницы № 6
4 Press TUNING +/– to set the Step 2: Setting the minutes. time You must set the time before using the timer functions. The clock is on a 24- hour system for the European and Brazilian models, and a 12-hour system for other models. 5 Press ENTER/NEXT. The 24-hour system model is used for The clock starts. illustration purpose. 1 3,5 2,4 LBT-XB66/XB66K/XB660 only 1 Press t/CLOCK SET. The hour indication flashes. LBT-D390/D790/G5500/XB33/XB33K/ XB44/XB44K/XB50/XB60 only 2 Press TUNING +/– to set t
Краткое содержание страницы № 7
3 Press TUNING +/–. Step 3: Presetting The frequency indication changes and scanning stops when the system tunes in radio stations a station. “TUNED” and “STEREO” (for a stereo program) appear. You can preset the following number of LBT-D390/D790/G5500/XB33/XB33K/XB44/ stations: XB44K/XB50/XB60 — 2 band model: 20 for FM and 10 for AM DOLBY NR OFF TUNED — 3 band model: 20 for FM, 10 for MW, and STEREO AUTO 10 for LW ALL DISC S MHz — 4 band model: 20 for FM, 10 for MW, 10 for LW, and 5 for UKV LBT
Краткое содержание страницы № 8
Step 3: Presetting radio stations (continued) Connecting To tune in a station with a weak optional AV signal components Press TUNING MODE repeatedly until “MANUAL” appears in step 2, then press TUNING +/– to tune in the station. To enhance your system, you can connect optional components. Refer to the To change the preset number instructions included with each component Start over from step 1. for details. Note The preset stations are canceled when you Connecting audio disconnect the power cord
Краткое содержание страницы № 9
Connecting surround speakers Connecting an MD deck for digital (LBT-D790/XB33/XB33K/XB50/XB60 only) recording (except for LBT-D390/ You can connect optional surround speakers. D790/G5500) You can record a CD to an MD digitally by connecting your MD deck using an optical cable. To the digital input of the MD deck To surround To surround speaker (R) speaker (L) Note You need to connect both left and right surround speakers. Otherwise, the sound will not be heard. Connecting a VCR Connecting an MD
Краткое содержание страницы № 10
AM FM75 AM AM FM75 AM COAXIAL FM 75 COAXIAL FM 75 Connecting optional AV AM antenna components (continued) Connect a 6 to 15 meter (20 to 50 feet) insulated wire to the AM antenna terminal. Connecting outdoor Leave the supplied AM loop antenna connected. antennas For European model Connect an outdoor antenna to improve the Screw clamp reception. FM antenna Insulated wire (not supplied) Connect an optional FM outdoor antenna. You can also use the TV antenna instead. For European model IEC sta
Краткое содержание страницы № 11
T R E Basic Operations P E R E D O M Y A L P A Basic Operations 1 Press 6 OPEN and place a CD on Playing a CD the disc tray. — Normal Play If the disc is not placed properly it will not be recognized. You can play up to five CDs in a row. With the label 1/u » » side up. p 0) p 0) Pr (Power) VOLUME á When you play 6 6 6 a CD single, Pp 0 ) place it on the inner circle of the tray. 2 Press DISC SKIP to place up to four more CDs on the tray. The disc tray rotates so you can insert other CDs. 3 Clos
Краткое содержание страницы № 12
Playing a CD (continued) To Do this Stop playback Press p. Pause Press P. Press again to resume playback. Select a track During playback or pause, turn the jog dial clockwise (to go forward) or counterclockwise (to go backward) and release it when you reach the desired track. Or press AMS* + (to go forward) or AMS* = (to go backward) on the remote. Find a point in Press and hold ) or 0 during a track playback, and release at the desired point. Select a CD Press one of the DIRECT PLAY buttons (or
Краткое содержание страницы № 13
Basic Operations 3 Close the front cover. Recording a CD — CD Synchro Recording 4 Press DISC SKIP repeatedly until the disc number you want to record This function lets you record from a CD to a appears in the playing position tape easily. You can use TYPE I (normal) or indicator. TYPE II (CrO2) tapes. The recording level is adjusted automatically. 5 Press CD SYNC. 1/u Deck B stands by for recording and the (Power) SURROUND 7 p » 5 CD player stands by for playback, and the indicator on the á but
Краткое содержание страницы № 14
2 Press TUNING MODE repeatedly Listening to the until “PRESET” appears in the display. radio MANUAL n AUTO n PRESET — Preset Tuning Before using this function, preset radio stations in the tuner’s memory (see “Step 3 Press TUNING +/– (or PRESET +/– 3: Presetting radio stations”). on the remote) to tune in the desired preset station. STEREO/MONO 1/u (Power) VOLUME 3 2 1 LBT-D390/D790/G5500/XB33/XB33K/XB44/ XB44K/XB50/XB60 Preset number DOLBY NR OFF TUNED STEREO PRESET ALL DISC S MHz Frequency LBT
Краткое содержание страницы № 15
Basic Operations 3 Press TUNING +/– to tune in a Recording from the preset station. radio LBT-D390/D790/G5500/XB33/XB33K/XB44/ XB44K/XB50/XB60 Preset number You can record a radio program on a tape by tuning in a preset station. You can use TYPE I DOLBY NR (normal) or TYPE II (CrO2) tapes. The OFF TUNED STEREO recording level is automatically adjusted. PRESET ALL DISC S 1/u MHz (Power) SURROUND 3 2 1 Frequency LBT-XB66/XB66K/XB660 Preset number DOLBY NR OFF PRESET TUNED STEREO ALL DISC S MHz Fre
Краткое содержание страницы № 16
Recording from the radio (continued) Playing a tape Tips • If you want to record on the reverse side, press » so the indicator on the » button (for the reverse You can play any type of tape, TYPE I side) lights up green after pressing r REC in step (normal), TYPE II (CrO2) or TYPE IV (metal). 5. The deck automatically detects the tape type. • When you record on both sides, be sure to start To select either deck A or B, press DECK A from the front side. If you start from the reverse ( or DECK B (
Краткое содержание страницы № 17
Basic Operations Tips 1 Press 6 EJECT and insert a • Pressing á or » while the system power is off recorded tape in deck A or B. automatically turns on the system and starts tape playback if there is a tape in the deck (One Touch With the side you want Play). to play facing forward • You can switch from another source to the tape deck just by pressing á or » (Automatic Source Selection). • When you want to reduce the hiss noise in low- » » p 0) p 0) level high-frequency signals, press DOLBY NR s
Краткое содержание страницы № 18
4 Press P. Recording from a Dubbing starts. When dubbing ends, decks A and B tape automatically stop. — High-speed Dubbing You can use TYPE I (normal) or TYPE II To stop dubbing (CrO2) tapes. The recording level is Press p on deck A or B. automatically adjusted. Tips 1/u (Power) • When you dub on both sides, start recording from the front side. If you start from the reverse side, recording stops at the end of the reverse side. • You don’t have to set DOLBY NR, since the tape in deck B is automat
Краткое содержание страницы № 19
nn nn The CD Player Using the CD Playing CD tracks display repeatedly — Repeat Play You can check the remaining time of the This function lets you repeat a single CD or current track or the whole CD. all CDs in Normal Play, Shuffle Play, and DISPLAY/DEMO Program Play. / Press DISPLAY/DEMO during 1/ALL DISCS REPEAT playback. Each time you press this button in / Press REPEAT repeatedly during Normal Play, the display changes as follows: playback until “REPEAT” appears in the display. Repeat Play s
Краткое содержание страницы № 20
To cancel Shuffle Play Press PLAY MODE repeatedly until Playing CD tracks “SHUFFLE” or “PROGRAM” disappears in random order from the display. The tracks continue playing in their original order. — Shuffle Play To select a desired CD You can play all the tracks on one CD or all Press one of the DIRECT PLAY buttons the CDs in random order. during 1 Disc Shuffle Play. Tips 1 • You can start Shuffle Play during Normal Play by pressing PLAY MODE repeatedly until “SHUFFLE” appears in the display. • To
Manual Library / Sony
Midi HiFi Audio System (1993-94)
 add a review

Downloads
Related Catalogues
Audio
If you have any problems opening files please read the download FAQ. All files are provided under strict licence and reproduction without prior permission or for financial gain is strictly prohibited.
If you have additional documentation please consider donating a copy to our free archive.
Sony HiFi Systems
Comments
Gallery Images
This website is not affiliated with or sponsored by Sony. To purchase LBT-D309/LBT-D309CD spares or accessories, please contact the company via their website or visit an authorised retailer.
Design and Content © HiFi Engine 2006-2023
SONY STR-A37 D309 D359
Type: (PDF)
Size
11.0 MB
Page
41
Category
AUDIO
SERVICE MANUAL
If you get stuck in repairing a defective appliance
download
this repair information for help. See below.
Good luck to the repair!
Please do not offer the downloaded file for sell only
use it for personal usage!
Looking for similar sony manual?
Document preview [1st page]
Click on the link for free download!
Document preview [2nd page]
Click on the link for free download!
Please tick the box below to get download link:
- Also known:
SONY STRA-37 STRA37 D309 D359 STRA 37 309 359 STR A37 STR-A37
- If you have any question about repairing write your question to the Message board. For this no need registration.
- If the site has helped you and you also want to help others, please Upload a manual, circuit diagram or eeprom that is not yet available on the site.
Have a nice Day! - Please take a look at the below related repair forum topics. May be help you to repair.
Warning!
If you are not familiar with electronics, do not attempt to repair!
You could suffer a fatal electrical shock! Instead, contact your nearest service center!
Note! To open downloaded files you need acrobat reader or similar pdf reader program. In addition,
some files are archived,
so you need WinZip or WinRar to open that files. Also some files are djvu so you need djvu viewer to open them.
These free programs can be found on this page: needed progs
If you use opera you have to disable opera turbo function to download file!
If you cannot download this file, try it with CHROME or FIREFOX browser.
Relevant AUDIO forum topics:
Üdv!
Sony HT-CT80 2.1 hangprojektor kezelőszervei (nyomógombjai) működnek — világít — távirányítója működik, de nem szól, nincs hang. Legutolsó bekapcsoláskor néma maradt, azóta nem lehet semmit kezdeni vele. Lehet hogy alaplap hibás, ha igen honnan lehet hozzá beszerezni, vagy szervízköny esetleg valakinek?
Hello,
a mini HIFI bekapcsolt állapotában a jobb hanszóró búg. A bal oldalin egyáltalán nem hallható búgás.
Nem túl nagy hangerővel, de ha az ember 10-20cm-re ül akkor hallható.
Pár méter távolságból gyakorlatilag észrevehetlen. Hangja transzformátorra jellemző hangra hasonlit. Fülre nem tudom megállapítani a frekvenciát,50 vagy 100Hz-re saccolom.
A kimeneten gyakorlatilag DMM-el nem mérhető AC vagy DC jel.
Scoppal «CSATL-bal.jpg», «CSATL-jobb.jpg» jelalakok láthatóak. Látszik, hogy a jobb oldali részen tüskék vannak.
Az STK4142II-táp kondenzátorain a «C.jpg», «C egyutt.jpg» jelalakok láthatók (sárga NEG táp). DC szinten nem látok eltérést, AC ban is csekély.
Különbséget akkor látok, ha kikapcsolom a készüléket «C egyutt OFF.jpg», itt jol látható, hogy a negativ tápfesz ripple-je jóval nagyobb.
Ha a hálózati dugót kihuzom, akkor a negativ tápellátáson lévő kondenzátor sokkal gyorsabban merül, mint a pozitiv oldalé «C discharges.jpg»
Véleményem szerint a negativ tápszürést végző kondit cserélni kellene. Nem igazán értem, hogy a bal oldali csatornán ez miért nem okoz gondot..
Elképzelhető, hogy ez a probléma, vagy valakinek van más tapasztalat/ötlete mielőtt kicserélem mindkét kondit?
Sziasztok!
Egy SONY RX50-es hifinek a CD lejátszója «NO DISK» feliratot ír bármilyen lemezt is helyezek bele. 30 próbálkozásból egyszer beolvasott egy lemezt de azt is 1:00 perctől kezdte lejátszani nagyjából 2 másodpercig szólt a muszika majd ugrott 2:30-ra és újabb 2 másodperc zene majd újabb ugrás. Lejátszón a tálca szépen mozog ki és be is. Miután behúzta a lemezt minden esetben elkezdi pörgetni. Ezután a lejátyzó elkezdi a sávraállást is és a fókuszálást de mégse tudja beolvasni a lemezt. A motorok szépen mozognak egyik sem szorul. Valaki legyen szíves mondja el mit érdemes ilyenkor vizsgálni.
Üdv.: Norbi
«FONTOS! Olyan fórum téma nevet válassz, ami beszédes, minél pontosabban illeszkedik arra, amivel kapcsolatban írsz. Egy lehetséges jó elnevezés
pl: ORION LCD PT26S chassis 17MB12-2, a tápja nem indul
Az nem elég, hogy pl: «LG LCD-TV» vagy «HP laptop» és hasonlóak. Illetve érdektelen, nem releváns információt se tartalmazzon a cím!
A helytelenül elnevezett topik felfüggesztésre, majd 48 óra után törlésre kerül! Felfüggesztett állapotban nem tudnak mások addig hozzászólni, amíg ki nem javítod a címet.
A hibás cím utólagos javítása (48 órán belül) a «Szerkesztés» fülre kattintva végezhető el.»
Tiszteletem!
Az említett erősítőt 2 napja hozták. Bekapcsolás után kis idővel a kijelzőn a «protect»
felirat jelenik meg.Tápokat jónak mérem,végfokok nem zárlatosak.Szemrevételezéssel
nem találtam rossz alkatrészt.Nincs nagy tapasztalatom az ilyen komoly erősítőkben,
minden ötletet szívesen várok!
Köszönöm!
Üdv.
Köszönöm az eddigi ötleteket!Ebbe az erősítőbe nem „hibrid” (pl:stk)végfok van hanem
több kicsi tranyó.Így néz ki: http://dl.dropbox.com/u/10013794/strdb1070.JPG
Megmértem a hangszóró kimeneteket,nincs kiugró eltérés feszültségben.Viszont feltűnt
méregetés közben,hogy ha a speakers kapcsolót off-ba rakom,néha nem jön a protect felirat.
Persze ha on-ra váltok egyből jön a felirat.Mivel ebbe az erősítőbe 3 db két áramkörös relével
kapcsolgatják az összes hangszóró kimenetet,csak a relé előtt mértem.Fel is tűnt hamar hogy mindegyik
relé forrasztásában hiba van.Átforrasztottam de a hiba nem változott.
Múlt éjjel rávettem magam és átforrasztottam minden alkatrészt ami to-220 tok
méretű vagy nagyobb egység.A hiba megszűnt,készülék lepróbálva,működik!
Köszönöm mindenki hozzászólását!
Üdv.
Similar manuals:
If you want to join us and get
repairing help
please sign in or sign up by completing a simple electrical test
or write your question to the Message board without registration.
You can write in English language into the forum (not only in Hungarian)!
E-Waste Reduce
- Login
- Sign up

Home >
SONY >
LBT >
LBT3, LBTA, LBTD, LBTG, LBTL >
LBT-D309CD Service Manual
- Download
-
of 87
Your Donation Will Be Matched 1-to-1! Can You Chip In?
Dear Patron: Please don’t scroll past this. The Internet Archive is a nonprofit fighting for universal access to quality information. We build and maintain all our own systems, but we don’t charge for access, sell user information, or run ads. Instead, we’re powered by online donations averaging about $14. We’d be deeply grateful if you’d join the one in a thousand users that support us financially.
Right now, we have a matching gift campaign that will double the impact of every donation. We understand that not everyone can donate right now, but if you can afford to contribute this Tuesday, we promise it will be put to good use. Our resources are crucial for knowledge lovers everywhere—so if you find all these bits and bytes useful, please pitch in.
Your Donation Will Be Matched! Can You Chip In?
Dear Patron: Please don’t scroll past this. Right now we have a matching gift campaign that will double the impact of every donation. We understand that not everyone can give right now, but if you can afford to contribute this Tuesday, we promise it will be put to good use. If you find all these bits and bytes useful, please pitch in.
Для того, чтобы скачать инструкцию по ремонту для музыкальных центров SONY, выберете модель, соответствующую Вашему устройству.
Список моделей для музыкальных центров SONY Вы можете увидеть ниже. Когда Вы найдете необходимый Вам файл, кликните напротив
него кнопку «Скачать», чтобы перейти на конечную страницу для загрузки сервис мануала для музыкальных центров SONY. Обратите внимание,
представленные в нашем каталоге руководства по ремонту, схемы для музыкальных центров SONY находятся в PDF формате и всегда доступны
для бесплатной загрузки.
Если Вы не сможете найти необходимый Вам файл, свяжитесь с нами. Просто оставьте свой запрос на отсутствующий файл через нашу
контактную форму, и мы постараемся Вам помочь.
Обзор
- AC адаптер Сервис мануал (20)
- AV-ресиверы Сервис мануал (24)
- CD/DVD приводы Сервис мануал (7)
- GPS-навигаторы Сервис мануал (28)
- Hi-fi, hi-end — прочее Сервис мануал (360)
- LCD (ЖК телевизоры) Сервис мануал (78)
- MP3 Flash-плееры Сервис мануал (28)
- TV combo Сервис мануал (16)
- TV+DVD combo Сервис мануал (3)
- Web-камеры Сервис мануал (2)
- Автомагнитолы Сервис мануал (594)
- Авторадио Сервис мануал (10)
- Аксессуары для камер Сервис мануал (11)
- Видеокамеры Сервис мануал (611)
- Видеокамеры Сервис мануал (346)
- Видеомагнитофоны Сервис мануал (76)
- Винил-проигрыватели Сервис мануал (28)
- Графические планшеты и дигитайзеры Сервис мануал (1)
- Диктофоны Сервис мануал (44)
- Домашние кинотеатры Сервис мануал (6)
- Другое Сервис мануал (14)
- Звук, акустика, компоненты Сервис мануал (12)
- Кабели, пульты, аксессуары Сервис мануал (14)
- Караоке Сервис мануал (4)
- Кассетные плееры Сервис мануал (1093)
- Колонки, акустика для дома Сервис мануал (488)
- Компьютеры (разное) Сервис мануал (389)
- Концентраторы (hub) Сервис мануал (7)
- Магнитофоны и магнитолы Сервис мануал (386)
- Микрофоны Сервис мануал (101)
- Мобильные телевизоры Сервис мануал (15)
- Мониторы Сервис мануал (167)
- Музыкальные центры Сервис мануал (354)
- Наушники Сервис мануал (67)
- Ноутбуки Сервис мануал (1555)
- Плазменные панели Сервис мануал (126)
- Плееры Сервис мануал (1406)
- Принтеры Сервис мануал (64)
- Проекторы Сервис мануал (34)
- Проекционные телевизоры Сервис мануал (160)
- Прочая фототехника и аксессуары Сервис мануал (61)
- Радиоприёмники Сервис мануал (199)
- Сабвуферы Сервис мануал (66)
- Сотовые телефоны Сервис мануал (34)
- Спутниковое TV Сервис мануал (9)
- ТВ-тюнеры Сервис мануал (6)
- Телевизоры Сервис мануал (717)
- Телефоны Сервис мануал (172)
- Усилители Сервис мануал (383)
- Факсы Сервис мануал (2)
- Цифровые фотоаппараты Сервис мануал (43)
- Эквалайзеры Сервис мануал (14)
SONY STR-A37 D309 D359
Type: (PDF)
Size
11.0 MB
Page
41
Category
AUDIO
SERVICE MANUAL
If you get stuck in repairing a defective appliance
download
this repair information for help. See below.
Good luck to the repair!
Please do not offer the downloaded file for sell only
use it for personal usage!
Looking for similar sony manual?
Document preview [1st page]
Click on the link for free download!
Document preview [2nd page]
Click on the link for free download!
Please tick the box below to get download link:
- Also known:
SONY STRA-37 STRA37 D309 D359 STRA 37 309 359 STR A37 STR-A37
- If you have any question about repairing write your question to the Message board. For this no need registration.
- If the site has helped you and you also want to help others, please Upload a manual, circuit diagram or eeprom that is not yet available on the site.
Have a nice Day! - See related repair forum topics below. May be help you to repair.
Warning!
If you are not familiar with electronics, do not attempt to repair!
You could suffer a fatal electrical shock! Instead, contact your nearest service center!
Note! To open downloaded files you need acrobat reader or similar pdf reader program. In addition,
some files are archived,
so you need WinZip or WinRar to open that files. Also some files are djvu so you need djvu viewer to open them.
These free programs can be found on this page: needed progs
If you use opera you have to disable opera turbo function to download file!
If you cannot download this file, try it with CHROME or FIREFOX browser.
Relevant AUDIO forum topics:
Sziasztok!
A fenti HIFI kijelzőjén a PROTECT hibaüzenet villog. Végfok panelt lehúzva sem változik a helyzet.
Üdv: Wolf
Helló!
Ezt a készüléket az autómmal együtt kaptam és most szeretném a műhelyemben erősítőnek használni a számítógéphez. Sajnos azonban nem tudok rajta bemenetet váltani. A gomb működik, hiszen azzal is kapcsolom be, és ha teszek bele kazettát azt is váltja, de sajnos nem vált át. Kell vmi külső rövidzár vagy valami amiről tudja a készülék, hogy van rajta más bemenet is?
Üdv.: Ízirájder
Sziasztok!
Volt asszony megkért lessem meg. De én sose javítottam ilyen bigyókat.
Hiba, hogy bekapcs után a powerled vibrál, majd kikapcsol, közben kicsit
kvartyog.
Ha sokáig nyomkodjuk bekapcsol és megy 
Elvileg elkó, de kicseréltem a táp 4700 mikijét és ugyan az a hiba 
Segítség!
Köszike!
Üdv:
Pityesz
Sziasztok!
A címben említett Deck-el szenvedek épp itthon.
Úgy került hozzám, hogy a MECHANIKA szét volt esve + valami állat befújta valamivel amitől
szó szerint összeragadt sz egész!
Egyszer elsikerült indítanom rendesen volt kimenet + működtek a kijelzők is.
Kimostam újrakentem mindent + pótoltam a hiányosságokat, most már a mechanika olyan mint új korában!
De össze szerelés közben véletlenül odacsíptem a kasznihoz egy vezetéket!
Zárlat lett belőle!!!!!
A mellékelt képen megjelöltem pirossal. (zárlat.jpg)
Szóval a Q901 emitterét sikerült a kasznihoz becsípnem.
Volt egy ellenállás ami úgy igazából csak biztosítékként játszott szerepet, azt kicseréltem.
Az az ellenállás a rajzon nem szerepel, mert ki van takarva! Q901 collector-on van.
Pozíciója: R908.
+ Még egy dolog!
C128 (C228) és R136 (R236) közös pontjáig mérhető a jel.
R136 (R236) után már csak 0V. Tovább nem megy a jel!
Most már működik a csévlő csonkokat hajtó motor + van háttér világítás a kijelzőknél.
De nincs kimenet az RCA-kon!
IC101 és IC201 (CX174-2) pin9 (output) van kimenet!
Igaz csak multiméterem van, de ki tudom mérni. (kimenet.jpg)
Azért írtam átlagot, mert ingadozó. De ez a zene végett van.
Az IC301 az nem uPC4557 hanem JRC NJM4560D dual op-amp.
Lehet, hogy ez halt meg és visszahat a kimenetekre?
A tápfeszek mindenhol megvannak!
Szerintetek mi lehet még ami befolyásolhat?
Similar manuals:
If you want to join us and get
repairing help
please sign in or sign up by completing a simple electrical test
or write your question to the Message board without registration.
You can write in English language into the forum (not only in Hungarian)!
E-Waste Reduce