
-
Contents
-
Table of Contents
-
Troubleshooting
-
Bookmarks
Quick Links
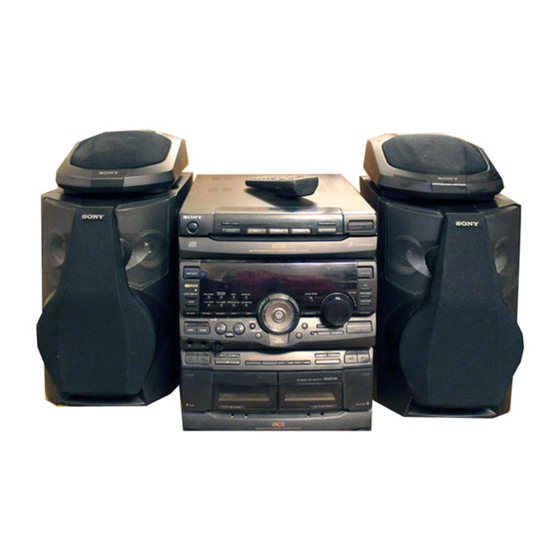
Mini Hi-Fi
Component
System
Operating Instructions
f
MHC-RX90
©1996 by Sony Corporation
3-859-544-12(1)
Related Manuals for Sony MHC-RX90
Summary of Contents for Sony MHC-RX90
- Page 1
Mini Hi-Fi Component System Operating Instructions MHC-RX90 ©1996 by Sony Corporation 3-859-544-12(1) - Page 2
WARNING To prevent fire or shock hazard, do not expose the unit to rain or moisture. To avoid electrical shock, do not open the cabinet. Refer servicing to qualified personnel only. Do not install the appliance in a confined space, such as a bookcase or built-in cabinet. -
Page 3: Table Of Contents
Table of Contents Getting Started Step 1: Hooking up the system … 4 Step 2: Setting the time … 6 Step 3: Presetting radio stations … 7 Connecting optional AV components . 8 Basic Operations Playing a CD … 11 Recording a CD …
-
Page 4: Getting Started
Getting Started Step 1: Hooking up the system Do the following procedure 1 to 4 to hook up your system using the supplied cords and accessories. Surround speaker (Right) FM aerial Front speaker (Right) Connect the speakers. 1 Connect the speaker cords of front speakers to the SPEAKER jacks of the same colour .
- Page 5
Note Do not place the surround speakers on top of a TV. This may cause distortion of the colours in the TV screen. Insert only the stripped portion. Gray ( ‘) Black (’) Connect the FM/AM aerials. Set up the AM loop aerial, then connect it. -
Page 6: Step 2: Setting The Time
Step 1: Hooking up the system (continued) Inserting two size AA (R6) batteries into the remote With normal use, the batteries should last for about six months. When the remote no longer operates the system, replace both batteries with new ones. Note If you do not use the remote for a long period of time, remove the batteries to avoid possible damage…
-
Page 7: Step 3: Presetting Radio Stations
Press ENTER/NEXT. The clock starts working. Tips • If you’ve made a mistake, start over from step 1. • Setting the time deactivates the demo mode. If you want to display the demo mode, press DISPLAY/DEMO when the power is off. Note When setting the time, set the equalizer display to anything other than Spectrum analyzer pattern 3…
-
Page 8: Connecting Optional Av Components
Step 3: Presetting radio stations (continued) Press TUNING MODE repeatedly to select “AUTO”. Turn the jog dial. The frequency indication changes and scanning stops when the system tunes in a station. “TUNED” and “STEREO” (for a stereo programme) appear. AUTO Press TUNER MEMORY.
-
Page 9: Connecting A Vcr
Connecting an MD deck for analog recording Make sure to match the colour of the plugs and the connectors. To listen to the sound of the connected MD deck, press FUNCTION repeatedly until “MD” appears. To the audio output To the audio input of the MD deck of the MD deck Note…
-
Page 10: Connecting Outdoor Aerials
Connecting optional AV components (continued) Connecting outdoor aerials Connect the outdoor aerial to improve the reception. FM aerial Connect the optional FM outdoor aerial. You can also use the TV aerial instead. IEC standard socket connector (not supplied) Earth lead (not supplied) AM aerial Connect a 6- to 15- meter (20- to 50- feet) insulated wire to the AM aerial terminal.
-
Page 11: Basic Operations
Basic Operations Playing a CD — Normal play You can play up to three CDs in a row. POWER „ ⁄ … … » Æ » „ „ ⁄ 1/ALL DISCS DISC SKIP VOLUME „ EX-CHANGE CD ( VOL +/– Press §…
- Page 12
Playing a CD (continued) Do this Stop play Press (p on the remote). Pause Press · (P on the remote). Press again to resume play. Select a track During play or pause, turn the jog dial clockwise (to go forward) or counterclockwise (to go back) and release it when you reach the desired track. -
Page 13: Recording A Cd
Recording a CD — CD Synchro Recording The CD SYNCHRO button lets you record from a CD to a tape easily. You can use TYPE I (normal) or TYPE II (CrO ) tapes. The recording level is adjusted automatically. DISC SKIP POWER EX-CHANGE „…
-
Page 14: Listening To The Radio
Listening to the radio –– Preset Tuning Preset radio stations in the tuner’s memory first (see “Step 3: Presetting radio stations”). POWER STEREO/MONO ⁄ … … » Æ „ ⁄ VOLUME TUNER/BAND VOL +/– Press TUNER/BAND repeatedly until the band you want appears in the display.
-
Page 15: Recording From The Radio
To listen to non-preset radio stations Press TUNING MODE repeatedly so that “MANUAL” appears in step 2, then tune in the station by turning the jog dial. Tips • Pressing TUNER/BAND when the power is off automatically turns the power on and tunes to the last received station (One Touch Play).
-
Page 16: Playing A Tape
Recording from the Radio (continued) Press § EJECT and insert a blank tape into deck B. With the side you want to record facing forward Press r. Deck B stands by for recording. Press EDIT/DIRECTION repeatedly to select A to record on one side. Select a (or RELAY) to record on both sides.
- Page 17
Press § EJECT and insert a recorded tape in deck A or B. … With the side » Æ „ you want to play facing forward ⁄ Press EDIT/DIRECTION repeatedly to select A to play one side. Select a* to play both sides. To play both decks in succession, select RELAY (relay play).** P r e s s ·… -
Page 18: Recording From A Tape
Recording from a tape — High-speed Dubbing You can use TYPE I (normal) or TYPE II (CrO ) tapes. The recording level is automatically adjusted. REPEAT/DOLBY NR POWER ⁄ … … » Æ „ ⁄ Press § EJECT and insert a recorded tape in deck A and a blank tape in deck B.
-
Page 19: The Cd Player
The CD Player Using the CD display You can check the remaining time of the current track or that of the CD. DISPLAY/DEMO POWER „ ⁄ Press DISPLAY/DEMO during playback. Each time you press the button during normal playback, the display changes as follows: n Playing time on the current track µ…
-
Page 20: Playing The Cd Tracks In Random Order
Playing the CD tracks in random order –– Shuffle Play You can play all the tracks on one CD or all CDs in random order. DISC 1-3 POWER ⁄ … … » Æ „ ⁄ Press FUNCTION repeatedly until “CD” appears in the display, then place a CD.
-
Page 21: Programming The Cd Tracks
Programming the CD tracks –– Programme Play You can make a programme of up to 32 tracks from all the CDs in the order you want them to be played. POWER „ „ ⁄ DISC SKIP CD ( CHECK CLEAR Press FUNCTION repeatedly until “CD”…
-
Page 22: Playing Cds Without Interruption
Programming the CD tracks (continued) Press Check the CHECK on the remote programme repeatedly. After the last track, “CHECK END” appears. Clear a track from CLEAR on the remote in the end stop mode. Clear a specific CHECK on the remote track repeatedly until the number of the track to be…
-
Page 23: The Tape Deck
The Tape Deck Recording on a tape manually You can record from CD, tape, or radio as you like. For example, you can record just the songs you want or record from the middle of the tape. The recording level is adjusted automatically.
-
Page 24: Recording A Cd By Specifying Track Order
Recording a CD by specifying track order — Programme Edit You can record tracks from all the CDs in the order you want. When programming, make sure the playing times for each side do not exceed the length of one side of the tape. REPEAT/DOLBY NR POWER ⁄…
-
Page 25: Selecting Tape Length Automatically
Press on the remote to insert a pause at the end of side A. “P” appears in the display and the total playing time resets to “0.00” in the display. Repeat steps 5 and 6 for tracks from the same disc or steps 4 to 6 for tracks from another disc to programme the remaining tracks to be recorded on side B.
-
Page 26: Dj Effects
DJ Effects Looping part of a CD — Loop With the loop function, you can repeat part of a CD during playback. This lets you create original recordings. LOOP jog dial POWER ⁄ Press and hold LOOP during playback at the point you want to start the Loop function, and release to resume normal play.
-
Page 27: Waving The Equalizer
Waving the equalizer — Wave With the Wave function, you can fluctuate the graphic equalizer automatically. This effect can be used with any source, but it cannot be recorded. jog dial WAVE POWER „ ⁄ Press and hold WAVE to start the Wave function, and release to resume normal listening.
-
Page 28: Using The Beat Function
Using the beat function With the beat function, you can create a variety of rhythms automatically. This effect can be used with any source, to create original recordings. LEVEL +/– jog dial POWER ⁄ BEAT BEAT BEAT ON/OFF SPEED SELECT Press BEAT ON/OFF to make sure the indicator is off, then start playing a source.
-
Page 29: Sound Adjustment
Sound Adjustment Adjusting the sound You can reinforce the bass, create a more powerful sound, and listen with headphones. POWER DBFB „ Æ‚ ⁄ … … » Æ » „ „ ⁄ PHONES GROOVE To reinforce bass (DBFB) Press DBFB*. Every time you press the button, the display changes as follows: DBFB…
-
Page 30: Selecting The Audio Emphasis
Selecting the audio emphasis The audio emphasis menu lets you select the sound characteristic according to the sound you are listening to. The personal file function (see “Making a personal audio emphasis file”) lets you store your own effects. EFFECT ON/OFF POWER ⁄…
-
Page 31: Adjusting The Audio Emphasis
To change the equalizer display Each time you press SPECTRUM ANALYZER, the equalizer display changes to show one of the four displays below. Spectrum analyzer pattern 1 µ Spectrum analyzer pattern 2 µ Spectrum analyzer pattern 3 µ Graphic equalizer curve Adjusting the audio emphasis You can adjust the audio emphasis using the…
-
Page 32: Activating The Surround Effect
Adjusting the Audio Emphasis (continued) Turn the jog dial to adjust level. Repeat steps 2 and 3. Press ENTER/NEXT when finished. Note If you choose another menu audio emphasis (other than “EFFECT OFF”) the adjusted sound effect is lost. To retain the adjusted sound effect for future use, store it in a personal file.
-
Page 33: Making A Personal Audio Emphasis File
Making a personal audio emphasis file —Personal file You can create a personal file of audio patterns (surround effect and graphic equalizer) and store them in the memory of the unit. Later call up an audio pattern to play a favourite tape, CD, or radio programme.
-
Page 34: Switching The Speaker Formation
Switching the Speaker Formation –Sonic formation You can select from four speaker formations depending on your listening situation. POWER SONIC FORMATION ⁄ … … » Æ „ ⁄ Press SONIC FORMATION repeatedly until the mode you want appears in the display. As you press SONIC FORMATION, the mode changes as follows: NORMAL n WHISPER n LINK…
- Page 35
LINK mode The same sound is output from the front speakers and surround speakers. For instance, when you want to listen to the same sound in two rooms, it is suitable to set the front speakers and the surround speakers in each room. -
Page 36: Other Features
Other Features Using the Radio Data System (RDS) (For Western European model only) What is the Radio Data System? Radio Data System (RDS) is a broadcasting service that allows radio stations to send additional information along with the regular programme signal. This tuner offers convenient RDS features like station name display and location of stations by programme type.
- Page 37
Press ENTER/NEXT while the preset station number is flashing. To cancel PTY search Press PTY again. List of programme types (PTY) AFFAIRS Topical programmes that expand on current news. ALARM Emergency broadcasts. CULTURE Programmes about national or regional culture. DRAMA Radio plays and serials EDUCATION Educational programmes, such as “how-… -
Page 38: Singing Along: Karaoke
Singing along: Karaoke You can sing along with any stereo CD or tape by turning down the singer’s voice. You need to connect an optional microphone. POWER ⁄ 2 1,5 VOLUME Turn MIC LEVEL to 0 to turn down the microphone control level. Connect an optional microphone to MIX MIC.
-
Page 39: Falling Asleep To Music
Press r. Press Press · to start playing the CD player (or tape deck A). Playback starts. Start singing along with the music. To stop recording Press p on deck B and the CD player. Tips • If acoustic feedback (howling) occurs, move the microphone away from the speakers or change the direction of the microphone.
-
Page 40: Waking Up To Music
Waking up to music — Wake-up Timer You can wake up to music at a preset time every day. Make sure you have set the clock (see “Step 2: Setting the time”). 4,5,6,7,8 ⁄ … … » Æ „ ⁄ TIMER SELECT Prepare the music source you want to play.
-
Page 41: Timer-Recording Radio Programmes
To check the setting Press TIMER SELECT and turn the jog dial to select the respective mode (DAILY 1 or DAILY 2), then press ENTER/NEXT. To change the setting, start over from step 1. To cancel the timer operation Press TIMER SELECT and turn the jog dial to select “OFF”, then press ENTER/NEXT.
- Page 42
Timer-recording radio programmes (continued) Turn jog dial to select REC, then press ENTER/NEXT. “ON” appears and the hour digits flash in the display. Set the time to start recording. Turn jog dial to set the hour, then press ENTER/NEXT. The minute indication starts flashing. Turn jog dial to set the minute, then press ENTER/NEXT. -
Page 43: Additional Information
• When you move the system, take out any discs. If you have any questions or problems concerning your stereo system, please consult your nearest Sony dealer. Notes on CDs • Before playing, clean the CD with a cleaning cloth.
-
Page 44: Troubleshooting
First, check that the power cord is connected firmly and the speakers are connected correctly and firmly. Should any problem persist, consult your nearest Sony dealer. General The display starts flashing as soon as you plug in the power cord even though you haven’t turned on the power…
- Page 45
There is severe hum or noise. • A TV or VCR is placed too close to the stereo system. Move the stereo system away from the TV or VCR. The sound from the connected source is distorted. • If “VIDEO” appears in the display when you press FUNCTION, switch the display to “MD”… -
Page 46: Tape Deck
Troubleshooting (continued) Tape Deck The tape does not record. •No tape in the cassette holder. •The tab has been removed from the cassette (see “To save a tape permanently” on page 43). •The tape has reeled to the end. The tape does not record nor play or there is a decrease in sound level.
-
Page 47: Specifications
Tape player section Recording system 4-track 2-channel stereo Frequency response 60 – 13,000 Hz (±3 dB), (DOLBY NR OFF) using Sony TYPE I cassette 60 – 14,000 Hz (±3 dB), using Sony TYPE II cassette Wow and flutter ±0.15% W.Peak (IEC) 0.1% W.RMS (NAB)
- Page 48
Approx. 280 x 330 x 366 Mass Approx. 9.5 kg Supplied accessories: AM loop aerial (1) Remote RM-SD80 (1) Sony SUM-3 (NS) batteries (2) FM lead aerial (1) Speaker cords (4) Front speaker pads (8) Design and specifications are subject to change… -
Page 49: Index
L, M Index Loop 26 Normal Play 11 Adjusting the audio emphasis 31 the sound 29 One Touch Play 12, 15, 17 the volume 12, 14, 17 Aerials 4, 10 Automatic Source Selection P , Q 12, 15, 17 Personal file 33 Playing Batteries 6 CD player 11, 19…
- Page 50
Sony Corporation Printed in Indonesia…

-
Contents
-
Table of Contents
-
Troubleshooting
-
Bookmarks
Quick Links
Mini Hi-Fi
Component
System
Operating Instructions
f
MHC-RX90
©1996 by Sony Corporation
3-859-544-12(1)
Related Manuals for Sony MHC-RX90
Summary of Contents for Sony MHC-RX90
- Page 1
Mini Hi-Fi Component System Operating Instructions MHC-RX90 ©1996 by Sony Corporation 3-859-544-12(1) - Page 2
WARNING To prevent fire or shock hazard, do not expose the unit to rain or moisture. To avoid electrical shock, do not open the cabinet. Refer servicing to qualified personnel only. Do not install the appliance in a confined space, such as a bookcase or built-in cabinet. -
Page 3: Table Of Contents
Table of Contents Getting Started Step 1: Hooking up the system … 4 Step 2: Setting the time … 6 Step 3: Presetting radio stations … 7 Connecting optional AV components . 8 Basic Operations Playing a CD … 11 Recording a CD …
-
Page 4: Getting Started
Getting Started Step 1: Hooking up the system Do the following procedure 1 to 4 to hook up your system using the supplied cords and accessories. Surround speaker (Right) FM aerial Front speaker (Right) Connect the speakers. 1 Connect the speaker cords of front speakers to the SPEAKER jacks of the same colour .
- Page 5
Note Do not place the surround speakers on top of a TV. This may cause distortion of the colours in the TV screen. Insert only the stripped portion. Gray ( ‘) Black (’) Connect the FM/AM aerials. Set up the AM loop aerial, then connect it. -
Page 6: Step 2: Setting The Time
Step 1: Hooking up the system (continued) Inserting two size AA (R6) batteries into the remote With normal use, the batteries should last for about six months. When the remote no longer operates the system, replace both batteries with new ones. Note If you do not use the remote for a long period of time, remove the batteries to avoid possible damage…
-
Page 7: Step 3: Presetting Radio Stations
Press ENTER/NEXT. The clock starts working. Tips • If you’ve made a mistake, start over from step 1. • Setting the time deactivates the demo mode. If you want to display the demo mode, press DISPLAY/DEMO when the power is off. Note When setting the time, set the equalizer display to anything other than Spectrum analyzer pattern 3…
-
Page 8: Connecting Optional Av Components
Step 3: Presetting radio stations (continued) Press TUNING MODE repeatedly to select “AUTO”. Turn the jog dial. The frequency indication changes and scanning stops when the system tunes in a station. “TUNED” and “STEREO” (for a stereo programme) appear. AUTO Press TUNER MEMORY.
-
Page 9: Connecting A Vcr
Connecting an MD deck for analog recording Make sure to match the colour of the plugs and the connectors. To listen to the sound of the connected MD deck, press FUNCTION repeatedly until “MD” appears. To the audio output To the audio input of the MD deck of the MD deck Note…
-
Page 10: Connecting Outdoor Aerials
Connecting optional AV components (continued) Connecting outdoor aerials Connect the outdoor aerial to improve the reception. FM aerial Connect the optional FM outdoor aerial. You can also use the TV aerial instead. IEC standard socket connector (not supplied) Earth lead (not supplied) AM aerial Connect a 6- to 15- meter (20- to 50- feet) insulated wire to the AM aerial terminal.
-
Page 11: Basic Operations
Basic Operations Playing a CD — Normal play You can play up to three CDs in a row. POWER „ ⁄ … … » Æ » „ „ ⁄ 1/ALL DISCS DISC SKIP VOLUME „ EX-CHANGE CD ( VOL +/– Press §…
- Page 12
Playing a CD (continued) Do this Stop play Press (p on the remote). Pause Press · (P on the remote). Press again to resume play. Select a track During play or pause, turn the jog dial clockwise (to go forward) or counterclockwise (to go back) and release it when you reach the desired track. -
Page 13: Recording A Cd
Recording a CD — CD Synchro Recording The CD SYNCHRO button lets you record from a CD to a tape easily. You can use TYPE I (normal) or TYPE II (CrO ) tapes. The recording level is adjusted automatically. DISC SKIP POWER EX-CHANGE „…
-
Page 14: Listening To The Radio
Listening to the radio –– Preset Tuning Preset radio stations in the tuner’s memory first (see “Step 3: Presetting radio stations”). POWER STEREO/MONO ⁄ … … » Æ „ ⁄ VOLUME TUNER/BAND VOL +/– Press TUNER/BAND repeatedly until the band you want appears in the display.
-
Page 15: Recording From The Radio
To listen to non-preset radio stations Press TUNING MODE repeatedly so that “MANUAL” appears in step 2, then tune in the station by turning the jog dial. Tips • Pressing TUNER/BAND when the power is off automatically turns the power on and tunes to the last received station (One Touch Play).
-
Page 16: Playing A Tape
Recording from the Radio (continued) Press § EJECT and insert a blank tape into deck B. With the side you want to record facing forward Press r. Deck B stands by for recording. Press EDIT/DIRECTION repeatedly to select A to record on one side. Select a (or RELAY) to record on both sides.
- Page 17
Press § EJECT and insert a recorded tape in deck A or B. … With the side » Æ „ you want to play facing forward ⁄ Press EDIT/DIRECTION repeatedly to select A to play one side. Select a* to play both sides. To play both decks in succession, select RELAY (relay play).** P r e s s ·… -
Page 18: Recording From A Tape
Recording from a tape — High-speed Dubbing You can use TYPE I (normal) or TYPE II (CrO ) tapes. The recording level is automatically adjusted. REPEAT/DOLBY NR POWER ⁄ … … » Æ „ ⁄ Press § EJECT and insert a recorded tape in deck A and a blank tape in deck B.
-
Page 19: The Cd Player
The CD Player Using the CD display You can check the remaining time of the current track or that of the CD. DISPLAY/DEMO POWER „ ⁄ Press DISPLAY/DEMO during playback. Each time you press the button during normal playback, the display changes as follows: n Playing time on the current track µ…
-
Page 20: Playing The Cd Tracks In Random Order
Playing the CD tracks in random order –– Shuffle Play You can play all the tracks on one CD or all CDs in random order. DISC 1-3 POWER ⁄ … … » Æ „ ⁄ Press FUNCTION repeatedly until “CD” appears in the display, then place a CD.
-
Page 21: Programming The Cd Tracks
Programming the CD tracks –– Programme Play You can make a programme of up to 32 tracks from all the CDs in the order you want them to be played. POWER „ „ ⁄ DISC SKIP CD ( CHECK CLEAR Press FUNCTION repeatedly until “CD”…
-
Page 22: Playing Cds Without Interruption
Programming the CD tracks (continued) Press Check the CHECK on the remote programme repeatedly. After the last track, “CHECK END” appears. Clear a track from CLEAR on the remote in the end stop mode. Clear a specific CHECK on the remote track repeatedly until the number of the track to be…
-
Page 23: The Tape Deck
The Tape Deck Recording on a tape manually You can record from CD, tape, or radio as you like. For example, you can record just the songs you want or record from the middle of the tape. The recording level is adjusted automatically.
-
Page 24: Recording A Cd By Specifying Track Order
Recording a CD by specifying track order — Programme Edit You can record tracks from all the CDs in the order you want. When programming, make sure the playing times for each side do not exceed the length of one side of the tape. REPEAT/DOLBY NR POWER ⁄…
-
Page 25: Selecting Tape Length Automatically
Press on the remote to insert a pause at the end of side A. “P” appears in the display and the total playing time resets to “0.00” in the display. Repeat steps 5 and 6 for tracks from the same disc or steps 4 to 6 for tracks from another disc to programme the remaining tracks to be recorded on side B.
-
Page 26: Dj Effects
DJ Effects Looping part of a CD — Loop With the loop function, you can repeat part of a CD during playback. This lets you create original recordings. LOOP jog dial POWER ⁄ Press and hold LOOP during playback at the point you want to start the Loop function, and release to resume normal play.
-
Page 27: Waving The Equalizer
Waving the equalizer — Wave With the Wave function, you can fluctuate the graphic equalizer automatically. This effect can be used with any source, but it cannot be recorded. jog dial WAVE POWER „ ⁄ Press and hold WAVE to start the Wave function, and release to resume normal listening.
-
Page 28: Using The Beat Function
Using the beat function With the beat function, you can create a variety of rhythms automatically. This effect can be used with any source, to create original recordings. LEVEL +/– jog dial POWER ⁄ BEAT BEAT BEAT ON/OFF SPEED SELECT Press BEAT ON/OFF to make sure the indicator is off, then start playing a source.
-
Page 29: Sound Adjustment
Sound Adjustment Adjusting the sound You can reinforce the bass, create a more powerful sound, and listen with headphones. POWER DBFB „ Æ‚ ⁄ … … » Æ » „ „ ⁄ PHONES GROOVE To reinforce bass (DBFB) Press DBFB*. Every time you press the button, the display changes as follows: DBFB…
-
Page 30: Selecting The Audio Emphasis
Selecting the audio emphasis The audio emphasis menu lets you select the sound characteristic according to the sound you are listening to. The personal file function (see “Making a personal audio emphasis file”) lets you store your own effects. EFFECT ON/OFF POWER ⁄…
-
Page 31: Adjusting The Audio Emphasis
To change the equalizer display Each time you press SPECTRUM ANALYZER, the equalizer display changes to show one of the four displays below. Spectrum analyzer pattern 1 µ Spectrum analyzer pattern 2 µ Spectrum analyzer pattern 3 µ Graphic equalizer curve Adjusting the audio emphasis You can adjust the audio emphasis using the…
-
Page 32: Activating The Surround Effect
Adjusting the Audio Emphasis (continued) Turn the jog dial to adjust level. Repeat steps 2 and 3. Press ENTER/NEXT when finished. Note If you choose another menu audio emphasis (other than “EFFECT OFF”) the adjusted sound effect is lost. To retain the adjusted sound effect for future use, store it in a personal file.
-
Page 33: Making A Personal Audio Emphasis File
Making a personal audio emphasis file —Personal file You can create a personal file of audio patterns (surround effect and graphic equalizer) and store them in the memory of the unit. Later call up an audio pattern to play a favourite tape, CD, or radio programme.
-
Page 34: Switching The Speaker Formation
Switching the Speaker Formation –Sonic formation You can select from four speaker formations depending on your listening situation. POWER SONIC FORMATION ⁄ … … » Æ „ ⁄ Press SONIC FORMATION repeatedly until the mode you want appears in the display. As you press SONIC FORMATION, the mode changes as follows: NORMAL n WHISPER n LINK…
- Page 35
LINK mode The same sound is output from the front speakers and surround speakers. For instance, when you want to listen to the same sound in two rooms, it is suitable to set the front speakers and the surround speakers in each room. -
Page 36: Other Features
Other Features Using the Radio Data System (RDS) (For Western European model only) What is the Radio Data System? Radio Data System (RDS) is a broadcasting service that allows radio stations to send additional information along with the regular programme signal. This tuner offers convenient RDS features like station name display and location of stations by programme type.
- Page 37
Press ENTER/NEXT while the preset station number is flashing. To cancel PTY search Press PTY again. List of programme types (PTY) AFFAIRS Topical programmes that expand on current news. ALARM Emergency broadcasts. CULTURE Programmes about national or regional culture. DRAMA Radio plays and serials EDUCATION Educational programmes, such as “how-… -
Page 38: Singing Along: Karaoke
Singing along: Karaoke You can sing along with any stereo CD or tape by turning down the singer’s voice. You need to connect an optional microphone. POWER ⁄ 2 1,5 VOLUME Turn MIC LEVEL to 0 to turn down the microphone control level. Connect an optional microphone to MIX MIC.
-
Page 39: Falling Asleep To Music
Press r. Press Press · to start playing the CD player (or tape deck A). Playback starts. Start singing along with the music. To stop recording Press p on deck B and the CD player. Tips • If acoustic feedback (howling) occurs, move the microphone away from the speakers or change the direction of the microphone.
-
Page 40: Waking Up To Music
Waking up to music — Wake-up Timer You can wake up to music at a preset time every day. Make sure you have set the clock (see “Step 2: Setting the time”). 4,5,6,7,8 ⁄ … … » Æ „ ⁄ TIMER SELECT Prepare the music source you want to play.
-
Page 41: Timer-Recording Radio Programmes
To check the setting Press TIMER SELECT and turn the jog dial to select the respective mode (DAILY 1 or DAILY 2), then press ENTER/NEXT. To change the setting, start over from step 1. To cancel the timer operation Press TIMER SELECT and turn the jog dial to select “OFF”, then press ENTER/NEXT.
- Page 42
Timer-recording radio programmes (continued) Turn jog dial to select REC, then press ENTER/NEXT. “ON” appears and the hour digits flash in the display. Set the time to start recording. Turn jog dial to set the hour, then press ENTER/NEXT. The minute indication starts flashing. Turn jog dial to set the minute, then press ENTER/NEXT. -
Page 43: Additional Information
• When you move the system, take out any discs. If you have any questions or problems concerning your stereo system, please consult your nearest Sony dealer. Notes on CDs • Before playing, clean the CD with a cleaning cloth.
-
Page 44: Troubleshooting
First, check that the power cord is connected firmly and the speakers are connected correctly and firmly. Should any problem persist, consult your nearest Sony dealer. General The display starts flashing as soon as you plug in the power cord even though you haven’t turned on the power…
- Page 45
There is severe hum or noise. • A TV or VCR is placed too close to the stereo system. Move the stereo system away from the TV or VCR. The sound from the connected source is distorted. • If “VIDEO” appears in the display when you press FUNCTION, switch the display to “MD”… -
Page 46: Tape Deck
Troubleshooting (continued) Tape Deck The tape does not record. •No tape in the cassette holder. •The tab has been removed from the cassette (see “To save a tape permanently” on page 43). •The tape has reeled to the end. The tape does not record nor play or there is a decrease in sound level.
-
Page 47: Specifications
Tape player section Recording system 4-track 2-channel stereo Frequency response 60 – 13,000 Hz (±3 dB), (DOLBY NR OFF) using Sony TYPE I cassette 60 – 14,000 Hz (±3 dB), using Sony TYPE II cassette Wow and flutter ±0.15% W.Peak (IEC) 0.1% W.RMS (NAB)
- Page 48
Approx. 280 x 330 x 366 Mass Approx. 9.5 kg Supplied accessories: AM loop aerial (1) Remote RM-SD80 (1) Sony SUM-3 (NS) batteries (2) FM lead aerial (1) Speaker cords (4) Front speaker pads (8) Design and specifications are subject to change… -
Page 49: Index
L, M Index Loop 26 Normal Play 11 Adjusting the audio emphasis 31 the sound 29 One Touch Play 12, 15, 17 the volume 12, 14, 17 Aerials 4, 10 Automatic Source Selection P , Q 12, 15, 17 Personal file 33 Playing Batteries 6 CD player 11, 19…
- Page 50
Sony Corporation Printed in Indonesia…

PDF инструкция · 50 страниц(ы) английский
инструкцияSony MHC-RX90

Mini Hi-Fi
Component
System
©1996 by Sony Corporation
Operating Instructions
3-859-544-12(1)
f
MHC-RX90
Посмотреть инструкция для Sony MHC-RX90 бесплатно. Руководство относится к категории Hi-Fi системы, 1 человек(а) дали ему среднюю оценку 9.1. Руководство доступно на следующих языках: английский. У вас есть вопрос о Sony MHC-RX90 или вам нужна помощь? Задайте свой вопрос здесь

Главная
Не можете найти ответ на свой вопрос в руководстве? Вы можете найти ответ на свой вопрос ниже, в разделе часто задаваемых вопросов о Sony MHC-RX90.
Когда звук считается слишком громким?
Могут ли устройства разных марок подключаться друг к другу при помощи Bluetooth?
Как лучше всего выполнять чистку Hi-Fi система?
Инструкция Sony MHC-RX90 доступно в русский?
Не нашли свой вопрос? Задайте свой вопрос здесь
Mini Hi-Fi
Component
System
©1996 by Sony Corporation
Operating Instructions
3-859-544-12(1)
f
MHC-RX90
Краткое содержание страницы № 1
3-859-544-12(1)
Mini Hi-Fi
Component
System
Operating Instructions
f
MHC-RX90
©1996 by Sony Corporation
Краткое содержание страницы № 2
WARNING To prevent fire or shock hazard, do not expose the unit to rain or moisture. To avoid electrical shock, do not open the cabinet. Refer servicing to qualified personnel only. Do not install the appliance in a confined space, such as a bookcase or built-in cabinet. Laser component in this product is capable of emitting radiation exceeding the limit for Class 1. This appliance is classified as a CLASS 1 LASER product. The CLASS 1 LASER PRODUCT MARKING is located on the rear exterior. Thi
Краткое содержание страницы № 3
Table of Contents Getting Started Sound Adjustment Step 1: Hooking up the system ………… 4 Adjusting the sound ………………………. 29 Step 2: Setting the time ……………………. 6 Selecting the audio emphasis …………. 30 Step 3: Presetting radio stations ………. 7 Adjusting the audio emphasis ………… 31 Connecting optional AV components . 8 Making a personal audio emphasis file ……………………………………………. 33 Switching the speaker form
Краткое содержание страницы № 4
+ + – R L Getting Started Step 1: Hooking up the system Do the following procedure 1 to 4 to hook up your system using the supplied cords and accessories. Surround speaker (Right) Surround speaker (Left) 1 1 AM loop aerial FM aerial 4 2 1 1 1 3 Front speaker Front speaker (Right) (Left) Connect the speakers. 2 Connect the speaker cords of 1 surround speakers to the SURROUND 1 Connect the speaker cords of front SPEAKER jacks of the same colour . speakers to the SPEAKER jacks of the same colour
Краткое содержание страницы № 5
+ + – FM75 COAXIAL AM R L Note Connect the power cord to a wall 3 Do not place the surround speakers on outlet. top of a TV. This may cause distortion of the colours in the TV screen. Demo mode appears in the display. Insert only the stripped portion. Deactivate the demo mode by 4 pressing DISPLAY/DEMO when the system power is turned off. The demo mode is also deactivated when you set the time. Gray (‘) Black (’) To attach the front speaker pads Attach the supplied front speaker pads to the bott
Краткое содержание страницы № 6
Step 1: Hooking up the system (continued) Step 2: Setting the Inserting two size AA (R6) time batteries into the remote You must set the time before using the timer functions. ] } } 1 2,4 3,5 ] 0) „ Æ‚ ⁄ Tip With normal use, the batteries should last for about six months. When the remote no longer operates the system, replace both batteries with new ones. Note If you do not use the remote for a long period of time, remove the batteries to avoid possible damage from battery leakage. When carry
Краткое содержание страницы № 7
5 Press ENTER/NEXT. Step 3: Presetting The clock starts working. radio stations Tips • If you’ve made a mistake, start over from step 1. The 3 band model lets you preset up to 40 • Setting the time deactivates the demo mode. stations, 20 for FM, 10 for MW and 10 for LW. If you want to display the demo mode, press The 4 band model lets you preset up to 45 DISPLAY/DEMO when the power is off. stations, 20 for FM, 10 for MW, 10 for LW and 5 for UKV. Note When setting the time, set the equalizer dis
Краткое содержание страницы № 8
Step 3: Presetting radio stations (continued) Connecting optional AV components 2 Press TUNING MODE repeatedly to select “AUTO”. To enhance your system, you can connect optional components. Refer to the 3 Turn the jog dial. instructions of each component. The frequency indication changes and scanning stops when the system tunes in a station. “TUNED” and “STEREO” (for Connecting audio a stereo programme) appear. components TUNED STEREO Select one of the following two connections, VOLUME depend
Краткое содержание страницы № 9
Connecting an MD deck for analog Connecting a super woofer recording speaker Make sure to match the colour of the plugs You can connect an optional super woofer and the connectors. To listen to the sound of speaker. the connected MD deck, press FUNCTION repeatedly until “MD” appears. To the audio output To the audio input of the MD deck of the MD deck To super woofer Connecting a VCR Note Make sure to match the colour of the plugs If you cannot select “MD” even when you have and the connectors.
Краткое содержание страницы № 10
FM75 COAXIAL y AM FM75 COAXIAL y AM Connecting optional AV components (continued) Connecting outdoor aerials Connect the outdoor aerial to improve the reception. FM aerial Connect the optional FM outdoor aerial. You can also use the TV aerial instead. IEC standard socket connector Screw clamp (not supplied) Earth lead (not supplied) AM aerial Connect a 6- to 15- meter (20- to 50- feet) insulated wire to the AM aerial terminal. Leave the supplied AM loop aerial connected. Insulated wire (not sup
Краткое содержание страницы № 11
Basic Operations Basic Operations 1 Press § OPEN/CLOSE and place Playing a CD up to two CDs on the disc tray. — Normal play If a disc is not placed properly it will not be recognized. You can play up to three CDs in a row. =0) + „ With the label Æ‚ ⁄ POWER 0 ) 21 Æ‚ side up. When you play a single CD, place it on 0) „ the inner circle Æ‚ ⁄ of the tray. To insert a third disc, press DISC SKIP EX-CHANGE to rotate the disc tray. 2 Press one of the DISC 1~3 buttons. The disc tray closes and play
Краткое содержание страницы № 12
Playing a CD (continued) Tips • Pressing · when the power is off automatically turns the power on and starts CD playback if there is a CD in the tray (One Touch To Do this Play). Stop play Press (p on the remote). • You can switch from another source to the CD Pause Press · (P on the remote). player and start playing a CD just by pressing Press again to resume play. · or the DISC 1~3 buttons (Automatic Source Selection). Select a track During play or pause, turn the • If there is no CD in the p
Краткое содержание страницы № 13
Basic Operations 2 Press § OPEN/CLOSE and place a Recording a CD CD. — CD Synchro Recording Then press again to close the disc tray. If the indicator for the tray you want to record is not lit green, press DISC SKIP The CD SYNCHRO button lets you record EX-CHANGE repeatedly so that it lights from a CD to a tape easily. You can use TYPE green. I (normal) or TYPE II (CrO2) tapes. The recording level is adjusted automatically. =0) + „ Æ‚ With the label ⁄ DISC SKIP side up. When 2 POWER EX-CHANGE
Краткое содержание страницы № 14
1 Press TUNER/BAND repeatedly Listening to the radio until the band you want appears in –– Preset Tuning the display. The bands you can receive vary Preset radio stations in the tuner’s memory depending on the the model you first (see “Step 3: Presetting radio stations”). purchased. Be sure to check which bands you can receive. 3 POWER STEREO/MONO Every time you press the button, the band changes as follows: 3 band model: 0) „ Æ‚ ⁄ FM n MW n LW 4 band model: FM n MW n LW n UKV* * “STEREO PLUS” i
Краткое содержание страницы № 15
Basic Operations To listen to non-preset radio stations Recording from the Press TUNING MODE repeatedly so that radio “MANUAL” appears in step 2, then tune in the station by turning the jog dial. You can record the radio programme on a Tips tape by calling up a preset station. You can • Pressing TUNER/BAND when the power is off use TYPE I (normal) or TYPE II (CrO2) tapes. automatically turns the power on and tunes to the last received station (One Touch Play). The recording level is automatica
Краткое содержание страницы № 16
Recording from the Radio (continued) Playing a tape 4 Press § EJECT and insert a blank You can use any type of tape, TYPE I tape into deck B. (normal), TYPE II (CrO2) or TYPE IV (metal) , since the deck automatically detects the tape With the side type. To select either deck A or B, press you want to DECK A or DECK B on the remote. record facing forward VOLUME POWER REPEAT/DOLBY NR 2 0) „ Æ‚ ⁄ 5 Press r. Deck B stands by for recording. 6 Press EDIT/DIRECTION repeatedly to select A to record on
Краткое содержание страницы № 17
Basic Operations Tips 1 Press § EJECT and insert a • Pressing · or ª when the power is off recorded tape in deck A or B. automatically turns the power on and starts tape playback if there is a tape in the deck (One Touch Play). … »Æ „ • You can switch from another source to the tape With the side you want to deck just by pressing · or ª (Automatic Source play facing Selection). forward • When you want to reduce the hiss noise in low- level high-frequency signals, press REPEAT/ DOLBY NR so that
Краткое содержание страницы № 18
3 Press EDIT/DIRECTION repeatedly Recording from a to select A to record on one side. Select a (or RELAY) to record on tape both sides. — High-speed Dubbing 4 Press . You can use TYPE I (normal) or TYPE II (CrO2) tapes. The recording level is Dubbing starts. automatically adjusted. To stop dubbing REPEAT/DOLBY NR Press on deck A or B. 3 POWER Tips • When you dub on both sides, start recording from the front side. If you record from the reverse side, 0) „ Æ‚ ⁄ recording stops at the end of the
Краткое содержание страницы № 19
The CD Player Using the CD display Playing the CD tracks repeatedly You can check the remaining time of the –– Repeat Play current track or that of the CD. POWER DISPLAY/DEMO This function lets you repeat a single CD or all CDs in normal play, Shuffle Play and Programme Play. 0) „ Æ‚ ⁄ REPEAT/DOLBY NR POWER 1/ALL DISCS 0) „ Æ‚ ⁄ / Press DISPLAY/DEMO during playback. / Press REPEAT/DOLBY NR during Each time you press the button during playback until “REPEAT” appears normal playback, the display c
Краткое содержание страницы № 20
To cancel Shuffle Play Press PLAY MODE repeatedly until Playing the CD tracks “SHUFFLE” or “PROGRAM” disappears in random order from the display. The tracks continue playing in their original order. –– Shuffle Play To select a desired CD You can play all the tracks on one CD or all Press DISC 1~3 . CDs in random order. Tips • You can start Shuffle Play during normal play by DISC 1-3 1 2 4 POWER 3 pressing PLAY MODE repeatedly to select “SHUFFLE”. • To skip a track, turn the jog dial clockwise (o
-
Инструкции по эксплуатации
1

SONY MHC-RX90 инструкция по эксплуатации
(50 страниц)
- Языки:Английский
- Тип:
PDF - Размер:
697.66 KB
Просмотр
На NoDevice можно скачать инструкцию по эксплуатации для SONY MHC-RX90. Руководство пользователя необходимо для ознакомления с правилами установки и эксплуатации SONY MHC-RX90. Инструкции по использованию помогут правильно настроить SONY MHC-RX90, исправить ошибки и выявить неполадки.
Краткое содержание страницы № 1
3-859-544-12(1)
Mini Hi-Fi
Component
System
Operating Instructions
f
MHC-RX90
©1996 by Sony Corporation
Краткое содержание страницы № 2
WARNING To prevent fire or shock hazard, do not expose the unit to rain or moisture. To avoid electrical shock, do not open the cabinet. Refer servicing to qualified personnel only. Do not install the appliance in a confined space, such as a bookcase or built-in cabinet. Laser component in this product is capable of emitting radiation exceeding the limit for Class 1. This appliance is classified as a CLASS 1 LASER product. The CLASS 1 LASER PRODUCT MARKING is located on the rear exterior. Thi
Краткое содержание страницы № 3
Table of Contents Getting Started Sound Adjustment Step 1: Hooking up the system ………… 4 Adjusting the sound ………………………. 29 Step 2: Setting the time ……………………. 6 Selecting the audio emphasis …………. 30 Step 3: Presetting radio stations ………. 7 Adjusting the audio emphasis ………… 31 Connecting optional AV components . 8 Making a personal audio emphasis file ……………………………………………. 33 Switching the speaker form
Краткое содержание страницы № 4
+ + – R L Getting Started Step 1: Hooking up the system Do the following procedure 1 to 4 to hook up your system using the supplied cords and accessories. Surround speaker (Right) Surround speaker (Left) 1 1 AM loop aerial FM aerial 4 2 1 1 1 3 Front speaker Front speaker (Right) (Left) Connect the speakers. 2 Connect the speaker cords of 1 surround speakers to the SURROUND 1 Connect the speaker cords of front SPEAKER jacks of the same colour . speakers to the SPEAKER jacks of the same colour
Краткое содержание страницы № 5
+ + – FM75 COAXIAL AM R L Note Connect the power cord to a wall 3 Do not place the surround speakers on outlet. top of a TV. This may cause distortion of the colours in the TV screen. Demo mode appears in the display. Insert only the stripped portion. Deactivate the demo mode by 4 pressing DISPLAY/DEMO when the system power is turned off. The demo mode is also deactivated when you set the time. Gray (‘) Black (’) To attach the front speaker pads Attach the supplied front speaker pads to the bott
Краткое содержание страницы № 6
Step 1: Hooking up the system (continued) Step 2: Setting the Inserting two size AA (R6) time batteries into the remote You must set the time before using the timer functions. ] } } 1 2,4 3,5 ] 0) „ Æ‚ ⁄ Tip With normal use, the batteries should last for about six months. When the remote no longer operates the system, replace both batteries with new ones. Note If you do not use the remote for a long period of time, remove the batteries to avoid possible damage from battery leakage. When carry
Краткое содержание страницы № 7
5 Press ENTER/NEXT. Step 3: Presetting The clock starts working. radio stations Tips • If you’ve made a mistake, start over from step 1. The 3 band model lets you preset up to 40 • Setting the time deactivates the demo mode. stations, 20 for FM, 10 for MW and 10 for LW. If you want to display the demo mode, press The 4 band model lets you preset up to 45 DISPLAY/DEMO when the power is off. stations, 20 for FM, 10 for MW, 10 for LW and 5 for UKV. Note When setting the time, set the equalizer dis
Краткое содержание страницы № 8
Step 3: Presetting radio stations (continued) Connecting optional AV components 2 Press TUNING MODE repeatedly to select “AUTO”. To enhance your system, you can connect optional components. Refer to the 3 Turn the jog dial. instructions of each component. The frequency indication changes and scanning stops when the system tunes in a station. “TUNED” and “STEREO” (for Connecting audio a stereo programme) appear. components TUNED STEREO Select one of the following two connections, VOLUME depend
Краткое содержание страницы № 9
Connecting an MD deck for analog Connecting a super woofer recording speaker Make sure to match the colour of the plugs You can connect an optional super woofer and the connectors. To listen to the sound of speaker. the connected MD deck, press FUNCTION repeatedly until “MD” appears. To the audio output To the audio input of the MD deck of the MD deck To super woofer Connecting a VCR Note Make sure to match the colour of the plugs If you cannot select “MD” even when you have and the connectors.
Краткое содержание страницы № 10
FM75 COAXIAL y AM FM75 COAXIAL y AM Connecting optional AV components (continued) Connecting outdoor aerials Connect the outdoor aerial to improve the reception. FM aerial Connect the optional FM outdoor aerial. You can also use the TV aerial instead. IEC standard socket connector Screw clamp (not supplied) Earth lead (not supplied) AM aerial Connect a 6- to 15- meter (20- to 50- feet) insulated wire to the AM aerial terminal. Leave the supplied AM loop aerial connected. Insulated wire (not sup
Краткое содержание страницы № 11
Basic Operations Basic Operations 1 Press § OPEN/CLOSE and place Playing a CD up to two CDs on the disc tray. — Normal play If a disc is not placed properly it will not be recognized. You can play up to three CDs in a row. =0) + „ With the label Æ‚ ⁄ POWER 0 ) 21 Æ‚ side up. When you play a single CD, place it on 0) „ the inner circle Æ‚ ⁄ of the tray. To insert a third disc, press DISC SKIP EX-CHANGE to rotate the disc tray. 2 Press one of the DISC 1~3 buttons. The disc tray closes and play
Краткое содержание страницы № 12
Playing a CD (continued) Tips • Pressing · when the power is off automatically turns the power on and starts CD playback if there is a CD in the tray (One Touch To Do this Play). Stop play Press (p on the remote). • You can switch from another source to the CD Pause Press · (P on the remote). player and start playing a CD just by pressing Press again to resume play. · or the DISC 1~3 buttons (Automatic Source Selection). Select a track During play or pause, turn the • If there is no CD in the p
Краткое содержание страницы № 13
Basic Operations 2 Press § OPEN/CLOSE and place a Recording a CD CD. — CD Synchro Recording Then press again to close the disc tray. If the indicator for the tray you want to record is not lit green, press DISC SKIP The CD SYNCHRO button lets you record EX-CHANGE repeatedly so that it lights from a CD to a tape easily. You can use TYPE green. I (normal) or TYPE II (CrO2) tapes. The recording level is adjusted automatically. =0) + „ Æ‚ With the label ⁄ DISC SKIP side up. When 2 POWER EX-CHANGE
Краткое содержание страницы № 14
1 Press TUNER/BAND repeatedly Listening to the radio until the band you want appears in –– Preset Tuning the display. The bands you can receive vary Preset radio stations in the tuner’s memory depending on the the model you first (see “Step 3: Presetting radio stations”). purchased. Be sure to check which bands you can receive. 3 POWER STEREO/MONO Every time you press the button, the band changes as follows: 3 band model: 0) „ Æ‚ ⁄ FM n MW n LW 4 band model: FM n MW n LW n UKV* * “STEREO PLUS” i
Краткое содержание страницы № 15
Basic Operations To listen to non-preset radio stations Recording from the Press TUNING MODE repeatedly so that radio “MANUAL” appears in step 2, then tune in the station by turning the jog dial. You can record the radio programme on a Tips tape by calling up a preset station. You can • Pressing TUNER/BAND when the power is off use TYPE I (normal) or TYPE II (CrO2) tapes. automatically turns the power on and tunes to the last received station (One Touch Play). The recording level is automatica
Краткое содержание страницы № 16
Recording from the Radio (continued) Playing a tape 4 Press § EJECT and insert a blank You can use any type of tape, TYPE I tape into deck B. (normal), TYPE II (CrO2) or TYPE IV (metal) , since the deck automatically detects the tape With the side type. To select either deck A or B, press you want to DECK A or DECK B on the remote. record facing forward VOLUME POWER REPEAT/DOLBY NR 2 0) „ Æ‚ ⁄ 5 Press r. Deck B stands by for recording. 6 Press EDIT/DIRECTION repeatedly to select A to record on
Краткое содержание страницы № 17
Basic Operations Tips 1 Press § EJECT and insert a • Pressing · or ª when the power is off recorded tape in deck A or B. automatically turns the power on and starts tape playback if there is a tape in the deck (One Touch Play). … »Æ „ • You can switch from another source to the tape With the side you want to deck just by pressing · or ª (Automatic Source play facing Selection). forward • When you want to reduce the hiss noise in low- level high-frequency signals, press REPEAT/ DOLBY NR so that
Краткое содержание страницы № 18
3 Press EDIT/DIRECTION repeatedly Recording from a to select A to record on one side. Select a (or RELAY) to record on tape both sides. — High-speed Dubbing 4 Press . You can use TYPE I (normal) or TYPE II (CrO2) tapes. The recording level is Dubbing starts. automatically adjusted. To stop dubbing REPEAT/DOLBY NR Press on deck A or B. 3 POWER Tips • When you dub on both sides, start recording from the front side. If you record from the reverse side, 0) „ Æ‚ ⁄ recording stops at the end of the
Краткое содержание страницы № 19
The CD Player Using the CD display Playing the CD tracks repeatedly You can check the remaining time of the –– Repeat Play current track or that of the CD. POWER DISPLAY/DEMO This function lets you repeat a single CD or all CDs in normal play, Shuffle Play and Programme Play. 0) „ Æ‚ ⁄ REPEAT/DOLBY NR POWER 1/ALL DISCS 0) „ Æ‚ ⁄ / Press DISPLAY/DEMO during playback. / Press REPEAT/DOLBY NR during Each time you press the button during playback until “REPEAT” appears normal playback, the display c
Краткое содержание страницы № 20
To cancel Shuffle Play Press PLAY MODE repeatedly until Playing the CD tracks “SHUFFLE” or “PROGRAM” disappears in random order from the display. The tracks continue playing in their original order. –– Shuffle Play To select a desired CD You can play all the tracks on one CD or all Press DISC 1~3 . CDs in random order. Tips • You can start Shuffle Play during normal play by DISC 1-3 1 2 4 POWER 3 pressing PLAY MODE repeatedly to select “SHUFFLE”. • To skip a track, turn the jog dial clockwise (o
PDF инструкция · 50 страниц(ы) английский
инструкцияSony MHC-RX90
Mini Hi-Fi
Component
System
©1996 by Sony Corporation
Operating Instructions
3-859-544-12(1)
f
MHC-RX90
Посмотреть инструкция для Sony MHC-RX90 бесплатно. Руководство относится к категории Hi-Fi системы, 1 человек(а) дали ему среднюю оценку 9.1. Руководство доступно на следующих языках: английский. У вас есть вопрос о Sony MHC-RX90 или вам нужна помощь? Задайте свой вопрос здесь
Главная
Не можете найти ответ на свой вопрос в руководстве? Вы можете найти ответ на свой вопрос ниже, в разделе часто задаваемых вопросов о Sony MHC-RX90.
Когда звук считается слишком громким?
Могут ли устройства разных марок подключаться друг к другу при помощи Bluetooth?
Как лучше всего выполнять чистку Hi-Fi система?
Инструкция Sony MHC-RX90 доступно в русский?
Не нашли свой вопрос? Задайте свой вопрос здесь
Mini Hi-Fi
Component
System
©1996 by Sony Corporation
Operating Instructions
3-859-544-12(1)
f
MHC-RX90
Краткое содержание страницы № 1
3-859-544-12(1)
Mini Hi-Fi
Component
System
Operating Instructions
f
MHC-RX90
©1996 by Sony Corporation
Краткое содержание страницы № 2
WARNING To prevent fire or shock hazard, do not expose the unit to rain or moisture. To avoid electrical shock, do not open the cabinet. Refer servicing to qualified personnel only. Do not install the appliance in a confined space, such as a bookcase or built-in cabinet. Laser component in this product is capable of emitting radiation exceeding the limit for Class 1. This appliance is classified as a CLASS 1 LASER product. The CLASS 1 LASER PRODUCT MARKING is located on the rear exterior. Thi
Краткое содержание страницы № 3
Table of Contents Getting Started Sound Adjustment Step 1: Hooking up the system ………… 4 Adjusting the sound ………………………. 29 Step 2: Setting the time ……………………. 6 Selecting the audio emphasis …………. 30 Step 3: Presetting radio stations ………. 7 Adjusting the audio emphasis ………… 31 Connecting optional AV components . 8 Making a personal audio emphasis file ……………………………………………. 33 Switching the speaker form
Краткое содержание страницы № 4
+ + – R L Getting Started Step 1: Hooking up the system Do the following procedure 1 to 4 to hook up your system using the supplied cords and accessories. Surround speaker (Right) Surround speaker (Left) 1 1 AM loop aerial FM aerial 4 2 1 1 1 3 Front speaker Front speaker (Right) (Left) Connect the speakers. 2 Connect the speaker cords of 1 surround speakers to the SURROUND 1 Connect the speaker cords of front SPEAKER jacks of the same colour . speakers to the SPEAKER jacks of the same colour
Краткое содержание страницы № 5
+ + – FM75 COAXIAL AM R L Note Connect the power cord to a wall 3 Do not place the surround speakers on outlet. top of a TV. This may cause distortion of the colours in the TV screen. Demo mode appears in the display. Insert only the stripped portion. Deactivate the demo mode by 4 pressing DISPLAY/DEMO when the system power is turned off. The demo mode is also deactivated when you set the time. Gray (‘) Black (’) To attach the front speaker pads Attach the supplied front speaker pads to the bott
Краткое содержание страницы № 6
Step 1: Hooking up the system (continued) Step 2: Setting the Inserting two size AA (R6) time batteries into the remote You must set the time before using the timer functions. ] } } 1 2,4 3,5 ] 0) „ Æ‚ ⁄ Tip With normal use, the batteries should last for about six months. When the remote no longer operates the system, replace both batteries with new ones. Note If you do not use the remote for a long period of time, remove the batteries to avoid possible damage from battery leakage. When carry
Краткое содержание страницы № 7
5 Press ENTER/NEXT. Step 3: Presetting The clock starts working. radio stations Tips • If you’ve made a mistake, start over from step 1. The 3 band model lets you preset up to 40 • Setting the time deactivates the demo mode. stations, 20 for FM, 10 for MW and 10 for LW. If you want to display the demo mode, press The 4 band model lets you preset up to 45 DISPLAY/DEMO when the power is off. stations, 20 for FM, 10 for MW, 10 for LW and 5 for UKV. Note When setting the time, set the equalizer dis
Краткое содержание страницы № 8
Step 3: Presetting radio stations (continued) Connecting optional AV components 2 Press TUNING MODE repeatedly to select “AUTO”. To enhance your system, you can connect optional components. Refer to the 3 Turn the jog dial. instructions of each component. The frequency indication changes and scanning stops when the system tunes in a station. “TUNED” and “STEREO” (for Connecting audio a stereo programme) appear. components TUNED STEREO Select one of the following two connections, VOLUME depend
Краткое содержание страницы № 9
Connecting an MD deck for analog Connecting a super woofer recording speaker Make sure to match the colour of the plugs You can connect an optional super woofer and the connectors. To listen to the sound of speaker. the connected MD deck, press FUNCTION repeatedly until “MD” appears. To the audio output To the audio input of the MD deck of the MD deck To super woofer Connecting a VCR Note Make sure to match the colour of the plugs If you cannot select “MD” even when you have and the connectors.
Краткое содержание страницы № 10
FM75 COAXIAL y AM FM75 COAXIAL y AM Connecting optional AV components (continued) Connecting outdoor aerials Connect the outdoor aerial to improve the reception. FM aerial Connect the optional FM outdoor aerial. You can also use the TV aerial instead. IEC standard socket connector Screw clamp (not supplied) Earth lead (not supplied) AM aerial Connect a 6- to 15- meter (20- to 50- feet) insulated wire to the AM aerial terminal. Leave the supplied AM loop aerial connected. Insulated wire (not sup
Краткое содержание страницы № 11
Basic Operations Basic Operations 1 Press § OPEN/CLOSE and place Playing a CD up to two CDs on the disc tray. — Normal play If a disc is not placed properly it will not be recognized. You can play up to three CDs in a row. =0) + „ With the label Æ‚ ⁄ POWER 0 ) 21 Æ‚ side up. When you play a single CD, place it on 0) „ the inner circle Æ‚ ⁄ of the tray. To insert a third disc, press DISC SKIP EX-CHANGE to rotate the disc tray. 2 Press one of the DISC 1~3 buttons. The disc tray closes and play
Краткое содержание страницы № 12
Playing a CD (continued) Tips • Pressing · when the power is off automatically turns the power on and starts CD playback if there is a CD in the tray (One Touch To Do this Play). Stop play Press (p on the remote). • You can switch from another source to the CD Pause Press · (P on the remote). player and start playing a CD just by pressing Press again to resume play. · or the DISC 1~3 buttons (Automatic Source Selection). Select a track During play or pause, turn the • If there is no CD in the p
Краткое содержание страницы № 13
Basic Operations 2 Press § OPEN/CLOSE and place a Recording a CD CD. — CD Synchro Recording Then press again to close the disc tray. If the indicator for the tray you want to record is not lit green, press DISC SKIP The CD SYNCHRO button lets you record EX-CHANGE repeatedly so that it lights from a CD to a tape easily. You can use TYPE green. I (normal) or TYPE II (CrO2) tapes. The recording level is adjusted automatically. =0) + „ Æ‚ With the label ⁄ DISC SKIP side up. When 2 POWER EX-CHANGE
Краткое содержание страницы № 14
1 Press TUNER/BAND repeatedly Listening to the radio until the band you want appears in –– Preset Tuning the display. The bands you can receive vary Preset radio stations in the tuner’s memory depending on the the model you first (see “Step 3: Presetting radio stations”). purchased. Be sure to check which bands you can receive. 3 POWER STEREO/MONO Every time you press the button, the band changes as follows: 3 band model: 0) „ Æ‚ ⁄ FM n MW n LW 4 band model: FM n MW n LW n UKV* * “STEREO PLUS” i
Краткое содержание страницы № 15
Basic Operations To listen to non-preset radio stations Recording from the Press TUNING MODE repeatedly so that radio “MANUAL” appears in step 2, then tune in the station by turning the jog dial. You can record the radio programme on a Tips tape by calling up a preset station. You can • Pressing TUNER/BAND when the power is off use TYPE I (normal) or TYPE II (CrO2) tapes. automatically turns the power on and tunes to the last received station (One Touch Play). The recording level is automatica
Краткое содержание страницы № 16
Recording from the Radio (continued) Playing a tape 4 Press § EJECT and insert a blank You can use any type of tape, TYPE I tape into deck B. (normal), TYPE II (CrO2) or TYPE IV (metal) , since the deck automatically detects the tape With the side type. To select either deck A or B, press you want to DECK A or DECK B on the remote. record facing forward VOLUME POWER REPEAT/DOLBY NR 2 0) „ Æ‚ ⁄ 5 Press r. Deck B stands by for recording. 6 Press EDIT/DIRECTION repeatedly to select A to record on
Краткое содержание страницы № 17
Basic Operations Tips 1 Press § EJECT and insert a • Pressing · or ª when the power is off recorded tape in deck A or B. automatically turns the power on and starts tape playback if there is a tape in the deck (One Touch Play). … »Æ „ • You can switch from another source to the tape With the side you want to deck just by pressing · or ª (Automatic Source play facing Selection). forward • When you want to reduce the hiss noise in low- level high-frequency signals, press REPEAT/ DOLBY NR so that
Краткое содержание страницы № 18
3 Press EDIT/DIRECTION repeatedly Recording from a to select A to record on one side. Select a (or RELAY) to record on tape both sides. — High-speed Dubbing 4 Press . You can use TYPE I (normal) or TYPE II (CrO2) tapes. The recording level is Dubbing starts. automatically adjusted. To stop dubbing REPEAT/DOLBY NR Press on deck A or B. 3 POWER Tips • When you dub on both sides, start recording from the front side. If you record from the reverse side, 0) „ Æ‚ ⁄ recording stops at the end of the
Краткое содержание страницы № 19
The CD Player Using the CD display Playing the CD tracks repeatedly You can check the remaining time of the –– Repeat Play current track or that of the CD. POWER DISPLAY/DEMO This function lets you repeat a single CD or all CDs in normal play, Shuffle Play and Programme Play. 0) „ Æ‚ ⁄ REPEAT/DOLBY NR POWER 1/ALL DISCS 0) „ Æ‚ ⁄ / Press DISPLAY/DEMO during playback. / Press REPEAT/DOLBY NR during Each time you press the button during playback until “REPEAT” appears normal playback, the display c
Краткое содержание страницы № 20
To cancel Shuffle Play Press PLAY MODE repeatedly until Playing the CD tracks “SHUFFLE” or “PROGRAM” disappears in random order from the display. The tracks continue playing in their original order. –– Shuffle Play To select a desired CD You can play all the tracks on one CD or all Press DISC 1~3 . CDs in random order. Tips • You can start Shuffle Play during normal play by DISC 1-3 1 2 4 POWER 3 pressing PLAY MODE repeatedly to select “SHUFFLE”. • To skip a track, turn the jog dial clockwise (o
Скачать
Mini Hi-Fi
Component
System
©1996 by Sony Corporation
Operating Instructions
3-859-544-12(1)
f
MHC-RX90
-
Sony MHC-RX90 — page 1
Mini Hi-Fi Component System ©1996 by Sony Corporation Operating Instructions 3-859-544-12(1) f MHC-RX90 …
-
Sony MHC-RX90 — page 2
2 WARNING To prevent fire or shock hazard, do not expose the unit to rain or moisture. To avoid electrical shock, do not open the cabinet. Refer servicing to qualified personnel only. Do not install the appliance in a confined space, such as a bookcase or built-in cabinet. Laser component in this product is capable of emitting radiation exceeding t …
-
Sony MHC-RX90 — page 3
GB 3 T able of Contents Getting Started Step 1: Hooking up the system ………… 4 Step 2: Setting the time ……………………. 6 Step 3: Presetting radio stations ………. 7 Connecting optional AV components . 8 Basic Operations Playing a CD ………………………………….. 11 Recording a CD ……………………………… …
-
Sony MHC-RX90 — page 4
4 1 1 2 1 3 4 1 1 Step 1: Hooking up the system Do the following procedure 1 to 4 to hook up your system using the supplied cords and accessories. Getting Started 2 Connect the speaker cords of surround speakers to the SURROUND SPEAKER jacks of the same colour . Keep the speaker cords away from the aerials to prevent noise. Connect the speakers. 1 …
-
Sony MHC-RX90 — page 5
5 To attach the front speaker pads Attach the supplied front speaker pads to the bottom of the speakers to stabilize the speakers and prevent them from slipping. Connect the power cord to a wall outlet. Demo mode appears in the display. Deactivate the demo mode by pressing DISPLAY/DEMO when the system power is turned off. The demo mode is also deac …
-
Sony MHC-RX90 — page 6
6 Step 2: Setting the time You must set the time before using the timer functions. 1 Press CLOCK/TIMER SET. The hour indication flashes. 2 Turn the jog dial to set the hour. The clock is on a 24-hour system. 3 Press ENTER/NEXT. The minute indication flashes. 4 Turn the jog dial to set the minute. Æ‚ ⁄ „ 0) 1 3,5 2,4 Inserting two size AA (R6 …
-
Sony MHC-RX90 — page 7
7 5 Press ENTER/NEXT. The clock starts working. Tips • If you’ve made a mistake, start over from step 1. • Setting the time deactivates the demo mode. If you want to display the demo mode, press DISPLAY/DEMO when the power is off. Note When setting the time, set the equalizer display to anything other than Spectrum analyzer pattern 3 (see “ …
-
Sony MHC-RX90 — page 8
8 Connecting optional A V components To enhance your system, you can connect optional components. Refer to the instructions of each component. Connecting audio components Select one of the following two connections, depending on the equipment to be connected and method of connecting. Connecting an MD deck for digital recording You can record from C …
-
Sony MHC-RX90 — page 9
9 Connecting a super woofer speaker You can connect an optional super woofer speaker. Connecting a VCR Make sure to match the colour of the plugs and the connectors. To listen to the sound of the connected VCR, press FUNCTION repeatedly until “VIDEO” appears. Note If the sound is distorted when selecting “VIDEO”, switch to “MD” (see pre …
-
Sony MHC-RX90 — page 10
10 Connecting outdoor aerials Connect the outdoor aerial to improve the reception. FM aerial Connect the optional FM outdoor aerial. You can also use the TV aerial instead. AM aerial Connect a 6- to 15- meter (20- to 50- feet) insulated wire to the AM aerial terminal. Leave the supplied AM loop aerial connected. Important If you connect an outdoor …
-
Sony MHC-RX90 — page 11
Basic Operations 11 Playing a CD — Normal play 1 Press § OPEN/CLOSE and place up to two CDs on the disc tray. If a disc is not placed properly it will not be recognized. To insert a third disc, press DISC SKIP EX-CHANGE to rotate the disc tray. 2 Press one of the DISC 1~3 buttons. The disc tray closes and play starts. If you press · (or · on t …
-
Sony MHC-RX90 — page 12
12 To Do this Stop play Press ( p on the remote). Pause Press · ( P on the remote). Press again to resume play. Select a track During play or pause, turn the jog dial clockwise (to go forward) or counterclockwise (to go back) and release it when you reach the desired track. Or press + (to go forward) or = (to go back) on the remote. Find a point i …
-
Sony MHC-RX90 — page 13
Basic Operations 13 Recording a CD — CD Synchro Recording With the side you want to record facing forward 2 4 DISC SKIP EX-CHANGE The CD SYNCHRO button lets you record from a CD to a tape easily. You can use TYPE I (normal) or TYPE II (CrO 2 ) tapes. The recording level is adjusted automatically. 1 Press § EJECT and insert a blank tape into deck …
-
Sony MHC-RX90 — page 14
14 Listening to the radio –– Preset Tuning Preset radio stations in the tuner’s memory first (see “Step 3: Presetting radio stations”). 3 2 1 Æ‚ … „ »Æ ⁄ ⁄ ⁄ „ 0) … „ »Æ POWER b B v V TUNER/BAND VOLUME STEREO/MONO = + VOL +/– n Turn counter- clockwise (or press = on the remote) for lower preset numbers. TUNED S …
-
Sony MHC-RX90 — page 15
Basic Operations 15 Recording from the radio You can record the radio programme on a tape by calling up a preset station. You can use TYPE I (normal) or TYPE II (CrO 2 ) tapes. The recording level is automatically adjusted. 1 Press TUNER/BAND to select the band you want. 2 Press TUNING MODE so that “PRESET” appears in the display. 3 Turn the jo …
-
Sony MHC-RX90 — page 16
16 Playing a tape You can use any type of tape, TYPE I (normal), TYPE II (CrO 2 ) or TYPE IV (metal) , since the deck automatically detects the tape type. To select either deck A or B, press DECK A or DECK B on the remote. 1 1 33 º/‚ 4 Press § EJECT and insert a blank tape into deck B. 5 Press r . Deck B stands by for recording. 6 Press EDIT/DI …
-
Sony MHC-RX90 — page 17
Basic Operations 17 Tips • Pressing · or ª when the power is off automatically turns the power on and starts tape playback if there is a tape in the deck (One Touch Play). • You can switch from another source to the tape deck just by pressing · or ª (Automatic Source Selection). • When you want to reduce the hiss noise in low- level high- …
-
Sony MHC-RX90 — page 18
18 Recording from a tape — High-speed Dubbing 3 Press EDIT/DIRECTION repeatedly to select A to record on one side. Select a (or RELAY) to record on both sides. 4 Press . Dubbing starts. To stop dubbing Press on deck A or B. Tips • When you dub on both sides, start recording from the front side. If you record from the reverse side, recording sto …
-
Sony MHC-RX90 — page 19
19 Using the CD display You can check the remaining time of the current track or that of the CD. Playing the CD tracks repeatedly –– Repeat Play This function lets you repeat a single CD or all CDs in normal play, Shuffle Play and Programme Play. The CD Player DISPLAY/DEMO / Press DISPLAY/DEMO during playback. Each time you press the button dur …
-
Sony MHC-RX90 — page 20
20 Playing the CD tracks in random order –– Shuffle Play You can play all the tracks on one CD or all CDs in random order. 1 Press FUNCTION repeatedly until “CD” appears in the display, then place a CD. 2 Press PLAY MODE repeatedly until “SHUFFLE” appears in the display. 3 Press 1/ALL DISCS to choose “1 DISC” or “ALL DISCS”. “ …
-
Sony MHC-RX90 — page 21
21 Programming the CD tracks –– Programme Play You can make a programme of up to 32 tracks from all the CDs in the order you want them to be played. 3 Press one of the DISC 1~3 buttons to select a CD. 4 Turn the jog dial until the desired track appears in the display. 5 Press ENTER/NEXT. The track is programmed. The programme step number appear …
-
Sony MHC-RX90 — page 22
22 Playing CDs without interruption –– Non-Stop Play/Applause Mix You can play CDs without pausing between tracks or you can mix the sound of applause between tracks. To Press Check the CHECK on the remote programme repeatedly. After the last track, “CHECK END” appears. Clear a track from CLEAR on the remote in the end stop mode. Clear a sp …
-
Sony MHC-RX90 — page 23
23 Recording on a tape manually 5 Press on deck B. Recording starts. 6 Start playing the source to be recorded. To Press Stop recording on the deck B Pause recording on the deck B Tips • If you want to record from the reverse side, press ª so that ª (for reverse side) lights up. • When you want to reduce the hiss noise in low- level high-freq …
-
Sony MHC-RX90 — page 24
24 You can record tracks from all the CDs in the order you want. When programming, make sure the playing times for each side do not exceed the length of one side of the tape. Recording a CD by specifying track order — Programme Edit 1 Place a CD and insert a blank tape into deck B. 2 Press FUNCTION repeatedly until “CD” appears in the display …
-
Sony MHC-RX90 — page 25
25 Selecting tape length automatically —Tape Select Edit You can check the most suitable tape length for recording a CD. Note that you cannot use Tape Select Edit for discs containing more than 20 tracks. 1 Insert a CD. 2 Press FUNCTION repeatedly until “CD” appears in the display. 3 Press EDIT/DIRECTION once, so that “EDIT” flashes. The …
-
Sony MHC-RX90 — page 26
26 Æ‚ ⁄ „ 0) POWER Looping part of a CD — Loop With the loop function, you can repeat part of a CD during playback. This lets you create original recordings. / Press and hold LOOP during playback at the point you want to start the Loop function, and release to resume normal play. To adjust the loop length Turn the jog dial while holding LO …
-
Sony MHC-RX90 — page 27
27 Æ‚ ⁄ „ 0) POWER W aving the equalizer — Wave With the Wave function, you can fluctuate the graphic equalizer automatically. This effect can be used with any source, but it cannot be recorded. / Press and hold WAVE to start the Wave function, and release to resume normal listening. To adjust the wave length Turn the jog dial while holdin …
-
Sony MHC-RX90 — page 28
28 Using the beat function With the beat function, you can create a variety of rhythms automatically. This effect can be used with any source, to create original recordings. 1 Press BEAT ON/OFF to make sure the indicator is off, then start playing a source. 2 Press BPM CONTROL repeatedly to obtain the beat speed you desire. Every time you press the …
-
Sony MHC-RX90 — page 29
29 You can reinforce the bass, create a more powerful sound, and listen with headphones. To reinforce bass (DBFB) Press DBFB*. Every time you press the button, the display changes as follows: DBFB n DBFB n display off “DBFB ” is more effective than “DBFB ” . * DBFB = Dynamic Bass Feedback For a powerful sound (GROOVE) Press GROOVE. The volu …
-
Sony MHC-RX90 — page 30
30 Selecting the audio emphasis The audio emphasis menu lets you select the sound characteristic according to the sound you are listening to. The personal file function (see “Making a personal audio emphasis file”) lets you store your own effects. 1 Press MUSIC, MOVIE, or GAME to select a menu. See the chart “Music menu options” below. The …
-
Sony MHC-RX90 — page 31
31 Adjusting the audio emphasis You can adjust the audio emphasis using the graphic equalizer and surround effect. Adjusting the graphic equalizer You can adjust the sound by raising or lowering the levels of specific frequency ranges. Before operation, first select the audio emphasis you want for your basic sound. 1 Select the audio emphasis you w …
-
Sony MHC-RX90 — page 32
32 Activating the surround effect You can enjoy the surround effect. / Press SURROUND repeatedly so that “SUR ” appears in the display. Note When you choose other sound effects, the surround effects will be canceled. If you want to memorize the effect, store it into a personal file (see “Making a personal audio emphasis file”). Æ‚ … ? …
-
Sony MHC-RX90 — page 33
33 To call up the personal file 1 Press P FILE to display the last selected personal file. 2 Use the jog dial to select the personal file you desire. 3 Press ENTER/NEXT. Making a personal audio emphasis file —Personal file You can create a personal file of audio patterns (surround effect and graphic equalizer) and store them in the memory of the …
-
Sony MHC-RX90 — page 34
34 NORMAL mode The surround speakers provide reverberation and reflective sound effects that emphasize the sound from the front speakers. WHISPER mode The sound from the front speakers is cut off and output from the surround speaker with its sound decreased. For instance, when you want to listen to the sound in bed, it is suitable to set the surrou …
-
Sony MHC-RX90 — page 35
35 SURROUND SPEAKER (R) SURROUND SPEAKER (L) FRONT SPEAKER (R) FRONT SPEAKER (L) LINK mode The same sound is output from the front speakers and surround speakers. For instance, when you want to listen to the same sound in two rooms, it is suitable to set the front speakers and the surround speakers in each room. FRONT ONLY mode No sound is output f …
-
Sony MHC-RX90 — page 36
36 Other Features What is the Radio Data System? Radio Data System (RDS) is a broadcasting service that allows radio stations to send additional information along with the regular programme signal. This tuner offers convenient RDS features like station name display and location of stations by programme type. RDS is available only on FM stations.* N …
-
Sony MHC-RX90 — page 37
37 5 Press ENTER/NEXT while the preset station number is flashing. To cancel PTY search Press PTY again. List of programme types (PTY) AFFAIRS Topical programmes that expand on current news. ALARM Emergency broadcasts. CULTURE Programmes about national or regional culture. DRAMA Radio plays and serials EDUCATION Educational programmes, such as “h …
-
Sony MHC-RX90 — page 38
38 Singing along: Karaoke n 5 Adjust the microphone volume by turning MIC LEVEL. When you are done Turn MIC LEVEL to 0 and disconnect the microphone from MIX MIC, then press KARAOKE PON/MPX repeatedly so that “ h ” disappears. Mixing and recording sounds 1 Do the above steps 1 to 5. Then, insert a tape in deck B. 2 Press FUNCTION repeatedly to …
-
Sony MHC-RX90 — page 39
39 Falling asleep to music — Sleep Timer You can let the system turn off at the preset time, so you can sleep to the music. You can preset the time to be turned off by 10 minutes. / Press SLEEP. Every time you press the button, the minute display (the turn-off time) changes as follows: AUTO n 90min n 80min n 70min n … n 10min n OFF n AUTO … W …
-
Sony MHC-RX90 — page 40
40 1 Prepare the music source you want to play. • CD: Insert a CD. To start from a specific track, make a programme (see “Programming the CD tracks”). • Tape: Insert an tape with the side you want to play facing forward. • Radio: Tune in the preset station you want (see “Step 3: Presetting radio stations”). 2 Adjust the volume. 3 Pres …
-
Sony MHC-RX90 — page 41
41 To timer-record, you must preset the radio station (see “Step 3: Presetting radio stations”) and set the clock (see “Step 2: Setting the time”) beforehand. 6 3,4,5 2 TIMER SELECT 1 Tune in the preset radio station (see “Listening to the radio”). 2 Press CLOCK/TIMER SET. “SET (DAILY 1)” appears. Æ‚ … „ »Æ ⁄ ⁄ ⁄ „ …
-
Sony MHC-RX90 — page 42
42 To check the setting Press TIMER SELECT and turn the jog dial to select “REC”, then press ENTER/NEXT. To change the setting, start over from step 1. To cancel the timer operation Press TIMER SELECT and turn the jog dial to select “OFF”, then press ENTER/NEXT. Notes • When setting the timer-recording, set the equalizer display to anythi …
-
Sony MHC-RX90 — page 43
43 Precautions Cleaning the cabinet Use a soft cloth slightly moistened with mild detergent solution. To save a tape permanently To prevent a tape from being accidentally recorded over, break off the cassette tab from side A or B as illustrated. If you later want to reuse the tape for recording, cover the broken tab with adhesive tape. When you are …
-
Sony MHC-RX90 — page 44
44 T roubleshooting If you run into any problem using this stereo system, use the following check list. First, check that the power cord is connected firmly and the speakers are connected correctly and firmly. Should any problem persist, consult your nearest Sony dealer. General The display starts flashing as soon as you plug in the power cord even …
-
Sony MHC-RX90 — page 45
45 There is severe hum or noise. • A TV or VCR is placed too close to the stereo system. Move the stereo system away from the TV or VCR. The sound from the connected source is distorted. • If “VIDEO” appears in the display when you press FUNCTION, switch the display to “MD” (see “Notes: Connecting a VCR”). “0:00” flashes in the …
-
Sony MHC-RX90 — page 46
46 Tape Deck The tape does not record. • No tape in the cassette holder. • The tab has been removed from the cassette (see “To save a tape permanently” on page 43). • The tape has reeled to the end. The tape does not record nor play or there is a decrease in sound level. • The heads are dirty. Clean them (see “Cleaning the tape heads? …
-
Sony MHC-RX90 — page 47
47 Tape player section Recording system 4-track 2-channel stereo Frequency response 60 – 13,000 Hz (±3 dB), (DOLBY NR OFF) using Sony TYPE I cassette 60 – 14,000 Hz (±3 dB), using Sony TYPE II cassette Wow and flutter ±0.15% W.Peak (IEC) 0.1% W.RMS (NAB) ±0.2% W.Peak (DIN) Tuner section FM stereo, FM/AM superheterodyne tuner FM tuner sectio …
-
Sony MHC-RX90 — page 48
48 Speaker Front Speaker (SS-L90V) Speaker system 4-way, 5-unit, bass-reflex type Speaker units Woofer: 17 cm, cone type Centre Tweeter: 5 cm, cone type Side Tweeter: 5 cm, cone type x2 Super Tweeter: 2 cm, dome type Nominal impedance 8 ohms Dimensions (w/h/d) Approx. 220 x 330 x 315 mm Mass Approx. 5 kg net per speaker Surround Speaker (SS-SR101) …
-
Sony MHC-RX90 — page 49
49 Index L, M Loop 26 N Normal Play 11 O One Touch Play 12, 15, 17 P , Q Personal file 33 Playing a CD 11 a preset radio station 14 tracks in random order (Shuffle Play) 20 tracks in the desired order (Programme Play) 21 tracks repeatedly (Repeat Play) 19 Presetting radio stations 7 Preset tuning 14 Programme Play 21 Protecting recordings 43 PTY 36 …
-
Sony MHC-RX90 — page 50
Sony Corporation Printed in Indonesia …
-
Страница 1
Mini Hi-Fi Component System ©1996 by Sony Corporation Operating Instructions 3-859-544-12(1) f MHC-RX90[…]
-
Страница 2
2 WARNING To prevent fire or shock hazard, do not expose the unit to rain or moisture. To avoid electrical shock, do not open the cabinet. Refer servicing to qualified personnel only. Do not install the appliance in a confined space, such as a bookcase or built-in cabinet. Laser component in this product is capable of emitting radiation exceeding t[…]
-
Страница 3
GB 3 T able of Contents Getting Started Step 1: Hooking up the system ………… 4 Step 2: Setting the time ……………………. 6 Step 3: Presetting radio stations ………. 7 Connecting optional AV components . 8 Basic Operations Playing a CD ………………………………….. 11 Recording a CD ……………………………… […]
-
Страница 4
4 1 1 2 1 3 4 1 1 Step 1: Hooking up the system Do the following procedure 1 to 4 to hook up your system using the supplied cords and accessories. Getting Started 2 Connect the speaker cords of surround speakers to the SURROUND SPEAKER jacks of the same colour . Keep the speaker cords away from the aerials to prevent noise. Connect the speakers. 1 […]
-
Страница 5
5 To attach the front speaker pads Attach the supplied front speaker pads to the bottom of the speakers to stabilize the speakers and prevent them from slipping. Connect the power cord to a wall outlet. Demo mode appears in the display. Deactivate the demo mode by pressing DISPLAY/DEMO when the system power is turned off. The demo mode is also deac[…]
-
Страница 6
6 Step 2: Setting the time You must set the time before using the timer functions. 1 Press CLOCK/TIMER SET. The hour indication flashes. 2 Turn the jog dial to set the hour. The clock is on a 24-hour system. 3 Press ENTER/NEXT. The minute indication flashes. 4 Turn the jog dial to set the minute. Æ‚ ⁄ „ 0) 1 3,5 2,4 Inserting two size AA (R6[…]
-
Страница 7
7 5 Press ENTER/NEXT. The clock starts working. Tips • If you’ve made a mistake, start over from step 1. • Setting the time deactivates the demo mode. If you want to display the demo mode, press DISPLAY/DEMO when the power is off. Note When setting the time, set the equalizer display to anything other than Spectrum analyzer pattern 3 (see “[…]
-
Страница 8
8 Connecting optional A V components To enhance your system, you can connect optional components. Refer to the instructions of each component. Connecting audio components Select one of the following two connections, depending on the equipment to be connected and method of connecting. Connecting an MD deck for digital recording You can record from C[…]
-
Страница 9
9 Connecting a super woofer speaker You can connect an optional super woofer speaker. Connecting a VCR Make sure to match the colour of the plugs and the connectors. To listen to the sound of the connected VCR, press FUNCTION repeatedly until “VIDEO” appears. Note If the sound is distorted when selecting “VIDEO”, switch to “MD” (see pre[…]
-
Страница 10
10 Connecting outdoor aerials Connect the outdoor aerial to improve the reception. FM aerial Connect the optional FM outdoor aerial. You can also use the TV aerial instead. AM aerial Connect a 6- to 15- meter (20- to 50- feet) insulated wire to the AM aerial terminal. Leave the supplied AM loop aerial connected. Important If you connect an outdoor […]
-
Страница 11
Basic Operations 11 Playing a CD — Normal play 1 Press § OPEN/CLOSE and place up to two CDs on the disc tray. If a disc is not placed properly it will not be recognized. To insert a third disc, press DISC SKIP EX-CHANGE to rotate the disc tray. 2 Press one of the DISC 1~3 buttons. The disc tray closes and play starts. If you press · (or · on t[…]
-
Страница 12
12 To Do this Stop play Press ( p on the remote). Pause Press · ( P on the remote). Press again to resume play. Select a track During play or pause, turn the jog dial clockwise (to go forward) or counterclockwise (to go back) and release it when you reach the desired track. Or press + (to go forward) or = (to go back) on the remote. Find a point i[…]
-
Страница 13
Basic Operations 13 Recording a CD — CD Synchro Recording With the side you want to record facing forward 2 4 DISC SKIP EX-CHANGE The CD SYNCHRO button lets you record from a CD to a tape easily. You can use TYPE I (normal) or TYPE II (CrO 2 ) tapes. The recording level is adjusted automatically. 1 Press § EJECT and insert a blank tape into deck[…]
-
Страница 14
14 Listening to the radio –– Preset Tuning Preset radio stations in the tuner’s memory first (see “Step 3: Presetting radio stations”). 3 2 1 Æ‚ … „ »Æ ⁄ ⁄ ⁄ „ 0) … „ »Æ POWER b B v V TUNER/BAND VOLUME STEREO/MONO = + VOL +/– n Turn counter- clockwise (or press = on the remote) for lower preset numbers. TUNED S[…]
-
Страница 15
Basic Operations 15 Recording from the radio You can record the radio programme on a tape by calling up a preset station. You can use TYPE I (normal) or TYPE II (CrO 2 ) tapes. The recording level is automatically adjusted. 1 Press TUNER/BAND to select the band you want. 2 Press TUNING MODE so that “PRESET” appears in the display. 3 Turn the jo[…]
-
Страница 16
16 Playing a tape You can use any type of tape, TYPE I (normal), TYPE II (CrO 2 ) or TYPE IV (metal) , since the deck automatically detects the tape type. To select either deck A or B, press DECK A or DECK B on the remote. 1 1 33 º/‚ 4 Press § EJECT and insert a blank tape into deck B. 5 Press r . Deck B stands by for recording. 6 Press EDIT/DI[…]
-
Страница 17
Basic Operations 17 Tips • Pressing · or ª when the power is off automatically turns the power on and starts tape playback if there is a tape in the deck (One Touch Play). • You can switch from another source to the tape deck just by pressing · or ª (Automatic Source Selection). • When you want to reduce the hiss noise in low- level high-[…]
-
Страница 18
18 Recording from a tape — High-speed Dubbing 3 Press EDIT/DIRECTION repeatedly to select A to record on one side. Select a (or RELAY) to record on both sides. 4 Press . Dubbing starts. To stop dubbing Press on deck A or B. Tips • When you dub on both sides, start recording from the front side. If you record from the reverse side, recording sto[…]
-
Страница 19
19 Using the CD display You can check the remaining time of the current track or that of the CD. Playing the CD tracks repeatedly –– Repeat Play This function lets you repeat a single CD or all CDs in normal play, Shuffle Play and Programme Play. The CD Player DISPLAY/DEMO / Press DISPLAY/DEMO during playback. Each time you press the button dur[…]
-
Страница 20
20 Playing the CD tracks in random order –– Shuffle Play You can play all the tracks on one CD or all CDs in random order. 1 Press FUNCTION repeatedly until “CD” appears in the display, then place a CD. 2 Press PLAY MODE repeatedly until “SHUFFLE” appears in the display. 3 Press 1/ALL DISCS to choose “1 DISC” or “ALL DISCS”. “[…]
-
Страница 21
21 Programming the CD tracks –– Programme Play You can make a programme of up to 32 tracks from all the CDs in the order you want them to be played. 3 Press one of the DISC 1~3 buttons to select a CD. 4 Turn the jog dial until the desired track appears in the display. 5 Press ENTER/NEXT. The track is programmed. The programme step number appear[…]
-
Страница 22
22 Playing CDs without interruption –– Non-Stop Play/Applause Mix You can play CDs without pausing between tracks or you can mix the sound of applause between tracks. To Press Check the CHECK on the remote programme repeatedly. After the last track, “CHECK END” appears. Clear a track from CLEAR on the remote in the end stop mode. Clear a sp[…]
-
Страница 23
23 Recording on a tape manually 5 Press on deck B. Recording starts. 6 Start playing the source to be recorded. To Press Stop recording on the deck B Pause recording on the deck B Tips • If you want to record from the reverse side, press ª so that ª (for reverse side) lights up. • When you want to reduce the hiss noise in low- level high-freq[…]
-
Страница 24
24 You can record tracks from all the CDs in the order you want. When programming, make sure the playing times for each side do not exceed the length of one side of the tape. Recording a CD by specifying track order — Programme Edit 1 Place a CD and insert a blank tape into deck B. 2 Press FUNCTION repeatedly until “CD” appears in the display[…]
-
Страница 25
25 Selecting tape length automatically —Tape Select Edit You can check the most suitable tape length for recording a CD. Note that you cannot use Tape Select Edit for discs containing more than 20 tracks. 1 Insert a CD. 2 Press FUNCTION repeatedly until “CD” appears in the display. 3 Press EDIT/DIRECTION once, so that “EDIT” flashes. The […]
-
Страница 26
26 Æ‚ ⁄ „ 0) POWER Looping part of a CD — Loop With the loop function, you can repeat part of a CD during playback. This lets you create original recordings. / Press and hold LOOP during playback at the point you want to start the Loop function, and release to resume normal play. To adjust the loop length Turn the jog dial while holding LO[…]
-
Страница 27
27 Æ‚ ⁄ „ 0) POWER W aving the equalizer — Wave With the Wave function, you can fluctuate the graphic equalizer automatically. This effect can be used with any source, but it cannot be recorded. / Press and hold WAVE to start the Wave function, and release to resume normal listening. To adjust the wave length Turn the jog dial while holdin[…]
-
Страница 28
28 Using the beat function With the beat function, you can create a variety of rhythms automatically. This effect can be used with any source, to create original recordings. 1 Press BEAT ON/OFF to make sure the indicator is off, then start playing a source. 2 Press BPM CONTROL repeatedly to obtain the beat speed you desire. Every time you press the[…]
-
Страница 29
29 You can reinforce the bass, create a more powerful sound, and listen with headphones. To reinforce bass (DBFB) Press DBFB*. Every time you press the button, the display changes as follows: DBFB n DBFB n display off “DBFB ” is more effective than “DBFB ” . * DBFB = Dynamic Bass Feedback For a powerful sound (GROOVE) Press GROOVE. The volu[…]
-
Страница 30
30 Selecting the audio emphasis The audio emphasis menu lets you select the sound characteristic according to the sound you are listening to. The personal file function (see “Making a personal audio emphasis file”) lets you store your own effects. 1 Press MUSIC, MOVIE, or GAME to select a menu. See the chart “Music menu options” below. The […]
-
Страница 31
31 Adjusting the audio emphasis You can adjust the audio emphasis using the graphic equalizer and surround effect. Adjusting the graphic equalizer You can adjust the sound by raising or lowering the levels of specific frequency ranges. Before operation, first select the audio emphasis you want for your basic sound. 1 Select the audio emphasis you w[…]
-
Страница 32
32 Activating the surround effect You can enjoy the surround effect. / Press SURROUND repeatedly so that “SUR ” appears in the display. Note When you choose other sound effects, the surround effects will be canceled. If you want to memorize the effect, store it into a personal file (see “Making a personal audio emphasis file”). Æ‚ … ?[…]
-
Страница 33
33 To call up the personal file 1 Press P FILE to display the last selected personal file. 2 Use the jog dial to select the personal file you desire. 3 Press ENTER/NEXT. Making a personal audio emphasis file —Personal file You can create a personal file of audio patterns (surround effect and graphic equalizer) and store them in the memory of the […]
-
Страница 34
34 NORMAL mode The surround speakers provide reverberation and reflective sound effects that emphasize the sound from the front speakers. WHISPER mode The sound from the front speakers is cut off and output from the surround speaker with its sound decreased. For instance, when you want to listen to the sound in bed, it is suitable to set the surrou[…]
-
Страница 35
35 SURROUND SPEAKER (R) SURROUND SPEAKER (L) FRONT SPEAKER (R) FRONT SPEAKER (L) LINK mode The same sound is output from the front speakers and surround speakers. For instance, when you want to listen to the same sound in two rooms, it is suitable to set the front speakers and the surround speakers in each room. FRONT ONLY mode No sound is output f[…]
-
Страница 36
36 Other Features What is the Radio Data System? Radio Data System (RDS) is a broadcasting service that allows radio stations to send additional information along with the regular programme signal. This tuner offers convenient RDS features like station name display and location of stations by programme type. RDS is available only on FM stations.* N[…]
-
Страница 37
37 5 Press ENTER/NEXT while the preset station number is flashing. To cancel PTY search Press PTY again. List of programme types (PTY) AFFAIRS Topical programmes that expand on current news. ALARM Emergency broadcasts. CULTURE Programmes about national or regional culture. DRAMA Radio plays and serials EDUCATION Educational programmes, such as “h[…]
-
Страница 38
38 Singing along: Karaoke n 5 Adjust the microphone volume by turning MIC LEVEL. When you are done Turn MIC LEVEL to 0 and disconnect the microphone from MIX MIC, then press KARAOKE PON/MPX repeatedly so that “ h ” disappears. Mixing and recording sounds 1 Do the above steps 1 to 5. Then, insert a tape in deck B. 2 Press FUNCTION repeatedly to […]
-
Страница 39
39 Falling asleep to music — Sleep Timer You can let the system turn off at the preset time, so you can sleep to the music. You can preset the time to be turned off by 10 minutes. / Press SLEEP. Every time you press the button, the minute display (the turn-off time) changes as follows: AUTO n 90min n 80min n 70min n … n 10min n OFF n AUTO … W[…]
-
Страница 40
40 1 Prepare the music source you want to play. • CD: Insert a CD. To start from a specific track, make a programme (see “Programming the CD tracks”). • Tape: Insert an tape with the side you want to play facing forward. • Radio: Tune in the preset station you want (see “Step 3: Presetting radio stations”). 2 Adjust the volume. 3 Pres[…]
-
Страница 41
41 To timer-record, you must preset the radio station (see “Step 3: Presetting radio stations”) and set the clock (see “Step 2: Setting the time”) beforehand. 6 3,4,5 2 TIMER SELECT 1 Tune in the preset radio station (see “Listening to the radio”). 2 Press CLOCK/TIMER SET. “SET (DAILY 1)” appears. Æ‚ … „ »Æ ⁄ ⁄ ⁄ „ […]
-
Страница 42
42 To check the setting Press TIMER SELECT and turn the jog dial to select “REC”, then press ENTER/NEXT. To change the setting, start over from step 1. To cancel the timer operation Press TIMER SELECT and turn the jog dial to select “OFF”, then press ENTER/NEXT. Notes • When setting the timer-recording, set the equalizer display to anythi[…]
-
Страница 43
43 Precautions Cleaning the cabinet Use a soft cloth slightly moistened with mild detergent solution. To save a tape permanently To prevent a tape from being accidentally recorded over, break off the cassette tab from side A or B as illustrated. If you later want to reuse the tape for recording, cover the broken tab with adhesive tape. When you are[…]
-
Страница 44
44 T roubleshooting If you run into any problem using this stereo system, use the following check list. First, check that the power cord is connected firmly and the speakers are connected correctly and firmly. Should any problem persist, consult your nearest Sony dealer. General The display starts flashing as soon as you plug in the power cord even[…]
-
Страница 45
45 There is severe hum or noise. • A TV or VCR is placed too close to the stereo system. Move the stereo system away from the TV or VCR. The sound from the connected source is distorted. • If “VIDEO” appears in the display when you press FUNCTION, switch the display to “MD” (see “Notes: Connecting a VCR”). “0:00” flashes in the […]
-
Страница 46
46 Tape Deck The tape does not record. • No tape in the cassette holder. • The tab has been removed from the cassette (see “To save a tape permanently” on page 43). • The tape has reeled to the end. The tape does not record nor play or there is a decrease in sound level. • The heads are dirty. Clean them (see “Cleaning the tape heads?[…]
-
Страница 47
47 Tape player section Recording system 4-track 2-channel stereo Frequency response 60 – 13,000 Hz (±3 dB), (DOLBY NR OFF) using Sony TYPE I cassette 60 – 14,000 Hz (±3 dB), using Sony TYPE II cassette Wow and flutter ±0.15% W.Peak (IEC) 0.1% W.RMS (NAB) ±0.2% W.Peak (DIN) Tuner section FM stereo, FM/AM superheterodyne tuner FM tuner sectio[…]
-
Страница 48
48 Speaker Front Speaker (SS-L90V) Speaker system 4-way, 5-unit, bass-reflex type Speaker units Woofer: 17 cm, cone type Centre Tweeter: 5 cm, cone type Side Tweeter: 5 cm, cone type x2 Super Tweeter: 2 cm, dome type Nominal impedance 8 ohms Dimensions (w/h/d) Approx. 220 x 330 x 315 mm Mass Approx. 5 kg net per speaker Surround Speaker (SS-SR101) […]
-
Страница 49
49 Index L, M Loop 26 N Normal Play 11 O One Touch Play 12, 15, 17 P , Q Personal file 33 Playing a CD 11 a preset radio station 14 tracks in random order (Shuffle Play) 20 tracks in the desired order (Programme Play) 21 tracks repeatedly (Repeat Play) 19 Presetting radio stations 7 Preset tuning 14 Programme Play 21 Protecting recordings 43 PTY 36[…]
-
Страница 50
Sony Corporation Printed in Indonesia[…]
-
Page 1: Sony MHC-RX90
Mini Hi-Fi Component System ©1996 by Sony Corporation Operating Instructions 3-859-544-12(1) f MHC-RX90[…]
-
Page 2: Sony MHC-RX90
2 WARNING To prevent fire or shock hazard, do not expose the unit to rain or moisture. To avoid electrical shock, do not open the cabinet. Refer servicing to qualified personnel only. Do not install the appliance in a confined space, such as a bookcase or built-in cabinet. Laser component in this product is capable of emitting radiation exceeding t[…]
-
Page 3: Sony MHC-RX90
GB 3 T able of Contents Getting Started Step 1: Hooking up the system ………… 4 Step 2: Setting the time ……………………. 6 Step 3: Presetting radio stations ………. 7 Connecting optional AV components . 8 Basic Operations Playing a CD ………………………………….. 11 Recording a CD ……………………………… […]
-
Page 4: Sony MHC-RX90
4 1 1 2 1 3 4 1 1 Step 1: Hooking up the system Do the following procedure 1 to 4 to hook up your system using the supplied cords and accessories. Getting Started 2 Connect the speaker cords of surround speakers to the SURROUND SPEAKER jacks of the same colour . Keep the speaker cords away from the aerials to prevent noise. Connect the speakers. 1 […]
-
Page 5: Sony MHC-RX90
5 To attach the front speaker pads Attach the supplied front speaker pads to the bottom of the speakers to stabilize the speakers and prevent them from slipping. Connect the power cord to a wall outlet. Demo mode appears in the display. Deactivate the demo mode by pressing DISPLAY/DEMO when the system power is turned off. The demo mode is also deac[…]
-
Page 6: Sony MHC-RX90
6 Step 2: Setting the time You must set the time before using the timer functions. 1 Press CLOCK/TIMER SET. The hour indication flashes. 2 Turn the jog dial to set the hour. The clock is on a 24-hour system. 3 Press ENTER/NEXT. The minute indication flashes. 4 Turn the jog dial to set the minute. Æ‚ ⁄ „ 0) 1 3,5 2,4 Inserting two size AA (R6[…]
-
Page 7: Sony MHC-RX90
7 5 Press ENTER/NEXT. The clock starts working. Tips • If you’ve made a mistake, start over from step 1. • Setting the time deactivates the demo mode. If you want to display the demo mode, press DISPLAY/DEMO when the power is off. Note When setting the time, set the equalizer display to anything other than Spectrum analyzer pattern 3 (see “[…]
-
Page 8: Sony MHC-RX90
8 Connecting optional A V components To enhance your system, you can connect optional components. Refer to the instructions of each component. Connecting audio components Select one of the following two connections, depending on the equipment to be connected and method of connecting. Connecting an MD deck for digital recording You can record from C[…]
-
Page 9: Sony MHC-RX90
9 Connecting a super woofer speaker You can connect an optional super woofer speaker. Connecting a VCR Make sure to match the colour of the plugs and the connectors. To listen to the sound of the connected VCR, press FUNCTION repeatedly until “VIDEO” appears. Note If the sound is distorted when selecting “VIDEO”, switch to “MD” (see pre[…]
-
Page 10: Sony MHC-RX90
10 Connecting outdoor aerials Connect the outdoor aerial to improve the reception. FM aerial Connect the optional FM outdoor aerial. You can also use the TV aerial instead. AM aerial Connect a 6- to 15- meter (20- to 50- feet) insulated wire to the AM aerial terminal. Leave the supplied AM loop aerial connected. Important If you connect an outdoor […]
-
Page 11: Sony MHC-RX90
Basic Operations 11 Playing a CD — Normal play 1 Press § OPEN/CLOSE and place up to two CDs on the disc tray. If a disc is not placed properly it will not be recognized. To insert a third disc, press DISC SKIP EX-CHANGE to rotate the disc tray. 2 Press one of the DISC 1~3 buttons. The disc tray closes and play starts. If you press · (or · on t[…]
-
Page 12: Sony MHC-RX90
12 To Do this Stop play Press ( p on the remote). Pause Press · ( P on the remote). Press again to resume play. Select a track During play or pause, turn the jog dial clockwise (to go forward) or counterclockwise (to go back) and release it when you reach the desired track. Or press + (to go forward) or = (to go back) on the remote. Find a point i[…]
-
Page 13: Sony MHC-RX90
Basic Operations 13 Recording a CD — CD Synchro Recording With the side you want to record facing forward 2 4 DISC SKIP EX-CHANGE The CD SYNCHRO button lets you record from a CD to a tape easily. You can use TYPE I (normal) or TYPE II (CrO 2 ) tapes. The recording level is adjusted automatically. 1 Press § EJECT and insert a blank tape into deck[…]
-
Page 14: Sony MHC-RX90
14 Listening to the radio –– Preset Tuning Preset radio stations in the tuner’s memory first (see “Step 3: Presetting radio stations”). 3 2 1 Æ‚ … „ »Æ ⁄ ⁄ ⁄ „ 0) … „ »Æ POWER b B v V TUNER/BAND VOLUME STEREO/MONO = + VOL +/– n Turn counter- clockwise (or press = on the remote) for lower preset numbers. TUNED S[…]
-
Page 15: Sony MHC-RX90
Basic Operations 15 Recording from the radio You can record the radio programme on a tape by calling up a preset station. You can use TYPE I (normal) or TYPE II (CrO 2 ) tapes. The recording level is automatically adjusted. 1 Press TUNER/BAND to select the band you want. 2 Press TUNING MODE so that “PRESET” appears in the display. 3 Turn the jo[…]
-
Page 16: Sony MHC-RX90
16 Playing a tape You can use any type of tape, TYPE I (normal), TYPE II (CrO 2 ) or TYPE IV (metal) , since the deck automatically detects the tape type. To select either deck A or B, press DECK A or DECK B on the remote. 1 1 33 º/‚ 4 Press § EJECT and insert a blank tape into deck B. 5 Press r . Deck B stands by for recording. 6 Press EDIT/DI[…]
-
Page 17: Sony MHC-RX90
Basic Operations 17 Tips • Pressing · or ª when the power is off automatically turns the power on and starts tape playback if there is a tape in the deck (One Touch Play). • You can switch from another source to the tape deck just by pressing · or ª (Automatic Source Selection). • When you want to reduce the hiss noise in low- level high-[…]
-
Page 18: Sony MHC-RX90
18 Recording from a tape — High-speed Dubbing 3 Press EDIT/DIRECTION repeatedly to select A to record on one side. Select a (or RELAY) to record on both sides. 4 Press . Dubbing starts. To stop dubbing Press on deck A or B. Tips • When you dub on both sides, start recording from the front side. If you record from the reverse side, recording sto[…]
-
Page 19: Sony MHC-RX90
19 Using the CD display You can check the remaining time of the current track or that of the CD. Playing the CD tracks repeatedly –– Repeat Play This function lets you repeat a single CD or all CDs in normal play, Shuffle Play and Programme Play. The CD Player DISPLAY/DEMO / Press DISPLAY/DEMO during playback. Each time you press the button dur[…]
-
Page 20: Sony MHC-RX90
20 Playing the CD tracks in random order –– Shuffle Play You can play all the tracks on one CD or all CDs in random order. 1 Press FUNCTION repeatedly until “CD” appears in the display, then place a CD. 2 Press PLAY MODE repeatedly until “SHUFFLE” appears in the display. 3 Press 1/ALL DISCS to choose “1 DISC” or “ALL DISCS”. “[…]
-
Page 21: Sony MHC-RX90
21 Programming the CD tracks –– Programme Play You can make a programme of up to 32 tracks from all the CDs in the order you want them to be played. 3 Press one of the DISC 1~3 buttons to select a CD. 4 Turn the jog dial until the desired track appears in the display. 5 Press ENTER/NEXT. The track is programmed. The programme step number appear[…]
-
Page 22: Sony MHC-RX90
22 Playing CDs without interruption –– Non-Stop Play/Applause Mix You can play CDs without pausing between tracks or you can mix the sound of applause between tracks. To Press Check the CHECK on the remote programme repeatedly. After the last track, “CHECK END” appears. Clear a track from CLEAR on the remote in the end stop mode. Clear a sp[…]
-
Page 23: Sony MHC-RX90
23 Recording on a tape manually 5 Press on deck B. Recording starts. 6 Start playing the source to be recorded. To Press Stop recording on the deck B Pause recording on the deck B Tips • If you want to record from the reverse side, press ª so that ª (for reverse side) lights up. • When you want to reduce the hiss noise in low- level high-freq[…]
-
Page 24: Sony MHC-RX90
24 You can record tracks from all the CDs in the order you want. When programming, make sure the playing times for each side do not exceed the length of one side of the tape. Recording a CD by specifying track order — Programme Edit 1 Place a CD and insert a blank tape into deck B. 2 Press FUNCTION repeatedly until “CD” appears in the display[…]
-
Page 25: Sony MHC-RX90
25 Selecting tape length automatically —Tape Select Edit You can check the most suitable tape length for recording a CD. Note that you cannot use Tape Select Edit for discs containing more than 20 tracks. 1 Insert a CD. 2 Press FUNCTION repeatedly until “CD” appears in the display. 3 Press EDIT/DIRECTION once, so that “EDIT” flashes. The […]
-
Page 26: Sony MHC-RX90
26 Æ‚ ⁄ „ 0) POWER Looping part of a CD — Loop With the loop function, you can repeat part of a CD during playback. This lets you create original recordings. / Press and hold LOOP during playback at the point you want to start the Loop function, and release to resume normal play. To adjust the loop length Turn the jog dial while holding LO[…]
-
Page 27: Sony MHC-RX90
27 Æ‚ ⁄ „ 0) POWER W aving the equalizer — Wave With the Wave function, you can fluctuate the graphic equalizer automatically. This effect can be used with any source, but it cannot be recorded. / Press and hold WAVE to start the Wave function, and release to resume normal listening. To adjust the wave length Turn the jog dial while holdin[…]
-
Page 28: Sony MHC-RX90
28 Using the beat function With the beat function, you can create a variety of rhythms automatically. This effect can be used with any source, to create original recordings. 1 Press BEAT ON/OFF to make sure the indicator is off, then start playing a source. 2 Press BPM CONTROL repeatedly to obtain the beat speed you desire. Every time you press the[…]
-
Page 29: Sony MHC-RX90
29 You can reinforce the bass, create a more powerful sound, and listen with headphones. To reinforce bass (DBFB) Press DBFB*. Every time you press the button, the display changes as follows: DBFB n DBFB n display off “DBFB ” is more effective than “DBFB ” . * DBFB = Dynamic Bass Feedback For a powerful sound (GROOVE) Press GROOVE. The volu[…]
-
Page 30: Sony MHC-RX90
30 Selecting the audio emphasis The audio emphasis menu lets you select the sound characteristic according to the sound you are listening to. The personal file function (see “Making a personal audio emphasis file”) lets you store your own effects. 1 Press MUSIC, MOVIE, or GAME to select a menu. See the chart “Music menu options” below. The […]
-
Page 31: Sony MHC-RX90
31 Adjusting the audio emphasis You can adjust the audio emphasis using the graphic equalizer and surround effect. Adjusting the graphic equalizer You can adjust the sound by raising or lowering the levels of specific frequency ranges. Before operation, first select the audio emphasis you want for your basic sound. 1 Select the audio emphasis you w[…]
-
Page 32: Sony MHC-RX90
32 Activating the surround effect You can enjoy the surround effect. / Press SURROUND repeatedly so that “SUR ” appears in the display. Note When you choose other sound effects, the surround effects will be canceled. If you want to memorize the effect, store it into a personal file (see “Making a personal audio emphasis file”). Æ‚ … ?[…]
-
Page 33: Sony MHC-RX90
33 To call up the personal file 1 Press P FILE to display the last selected personal file. 2 Use the jog dial to select the personal file you desire. 3 Press ENTER/NEXT. Making a personal audio emphasis file —Personal file You can create a personal file of audio patterns (surround effect and graphic equalizer) and store them in the memory of the […]
-
Page 34: Sony MHC-RX90
34 NORMAL mode The surround speakers provide reverberation and reflective sound effects that emphasize the sound from the front speakers. WHISPER mode The sound from the front speakers is cut off and output from the surround speaker with its sound decreased. For instance, when you want to listen to the sound in bed, it is suitable to set the surrou[…]
-
Page 35: Sony MHC-RX90
35 SURROUND SPEAKER (R) SURROUND SPEAKER (L) FRONT SPEAKER (R) FRONT SPEAKER (L) LINK mode The same sound is output from the front speakers and surround speakers. For instance, when you want to listen to the same sound in two rooms, it is suitable to set the front speakers and the surround speakers in each room. FRONT ONLY mode No sound is output f[…]
-
Page 36: Sony MHC-RX90
36 Other Features What is the Radio Data System? Radio Data System (RDS) is a broadcasting service that allows radio stations to send additional information along with the regular programme signal. This tuner offers convenient RDS features like station name display and location of stations by programme type. RDS is available only on FM stations.* N[…]
-
Page 37: Sony MHC-RX90
37 5 Press ENTER/NEXT while the preset station number is flashing. To cancel PTY search Press PTY again. List of programme types (PTY) AFFAIRS Topical programmes that expand on current news. ALARM Emergency broadcasts. CULTURE Programmes about national or regional culture. DRAMA Radio plays and serials EDUCATION Educational programmes, such as “h[…]
-
Page 38: Sony MHC-RX90
38 Singing along: Karaoke n 5 Adjust the microphone volume by turning MIC LEVEL. When you are done Turn MIC LEVEL to 0 and disconnect the microphone from MIX MIC, then press KARAOKE PON/MPX repeatedly so that “ h ” disappears. Mixing and recording sounds 1 Do the above steps 1 to 5. Then, insert a tape in deck B. 2 Press FUNCTION repeatedly to […]
-
Page 39: Sony MHC-RX90
39 Falling asleep to music — Sleep Timer You can let the system turn off at the preset time, so you can sleep to the music. You can preset the time to be turned off by 10 minutes. / Press SLEEP. Every time you press the button, the minute display (the turn-off time) changes as follows: AUTO n 90min n 80min n 70min n … n 10min n OFF n AUTO … W[…]
-
Page 40: Sony MHC-RX90
40 1 Prepare the music source you want to play. • CD: Insert a CD. To start from a specific track, make a programme (see “Programming the CD tracks”). • Tape: Insert an tape with the side you want to play facing forward. • Radio: Tune in the preset station you want (see “Step 3: Presetting radio stations”). 2 Adjust the volume. 3 Pres[…]
-
Page 41: Sony MHC-RX90
41 To timer-record, you must preset the radio station (see “Step 3: Presetting radio stations”) and set the clock (see “Step 2: Setting the time”) beforehand. 6 3,4,5 2 TIMER SELECT 1 Tune in the preset radio station (see “Listening to the radio”). 2 Press CLOCK/TIMER SET. “SET (DAILY 1)” appears. Æ‚ … „ »Æ ⁄ ⁄ ⁄ „ […]
-
Page 42: Sony MHC-RX90
42 To check the setting Press TIMER SELECT and turn the jog dial to select “REC”, then press ENTER/NEXT. To change the setting, start over from step 1. To cancel the timer operation Press TIMER SELECT and turn the jog dial to select “OFF”, then press ENTER/NEXT. Notes • When setting the timer-recording, set the equalizer display to anythi[…]
-
Page 43: Sony MHC-RX90
43 Precautions Cleaning the cabinet Use a soft cloth slightly moistened with mild detergent solution. To save a tape permanently To prevent a tape from being accidentally recorded over, break off the cassette tab from side A or B as illustrated. If you later want to reuse the tape for recording, cover the broken tab with adhesive tape. When you are[…]
-
Page 44: Sony MHC-RX90
44 T roubleshooting If you run into any problem using this stereo system, use the following check list. First, check that the power cord is connected firmly and the speakers are connected correctly and firmly. Should any problem persist, consult your nearest Sony dealer. General The display starts flashing as soon as you plug in the power cord even[…]
-
Page 45: Sony MHC-RX90
45 There is severe hum or noise. • A TV or VCR is placed too close to the stereo system. Move the stereo system away from the TV or VCR. The sound from the connected source is distorted. • If “VIDEO” appears in the display when you press FUNCTION, switch the display to “MD” (see “Notes: Connecting a VCR”). “0:00” flashes in the […]
-
Page 46: Sony MHC-RX90
46 Tape Deck The tape does not record. • No tape in the cassette holder. • The tab has been removed from the cassette (see “To save a tape permanently” on page 43). • The tape has reeled to the end. The tape does not record nor play or there is a decrease in sound level. • The heads are dirty. Clean them (see “Cleaning the tape heads?[…]
-
Page 47: Sony MHC-RX90
47 Tape player section Recording system 4-track 2-channel stereo Frequency response 60 – 13,000 Hz (±3 dB), (DOLBY NR OFF) using Sony TYPE I cassette 60 – 14,000 Hz (±3 dB), using Sony TYPE II cassette Wow and flutter ±0.15% W.Peak (IEC) 0.1% W.RMS (NAB) ±0.2% W.Peak (DIN) Tuner section FM stereo, FM/AM superheterodyne tuner FM tuner sectio[…]
-
Page 48: Sony MHC-RX90
48 Speaker Front Speaker (SS-L90V) Speaker system 4-way, 5-unit, bass-reflex type Speaker units Woofer: 17 cm, cone type Centre Tweeter: 5 cm, cone type Side Tweeter: 5 cm, cone type x2 Super Tweeter: 2 cm, dome type Nominal impedance 8 ohms Dimensions (w/h/d) Approx. 220 x 330 x 315 mm Mass Approx. 5 kg net per speaker Surround Speaker (SS-SR101) […]
-
Page 49: Sony MHC-RX90
49 Index L, M Loop 26 N Normal Play 11 O One Touch Play 12, 15, 17 P , Q Personal file 33 Playing a CD 11 a preset radio station 14 tracks in random order (Shuffle Play) 20 tracks in the desired order (Programme Play) 21 tracks repeatedly (Repeat Play) 19 Presetting radio stations 7 Preset tuning 14 Programme Play 21 Protecting recordings 43 PTY 36[…]
-
Page 50: Sony MHC-RX90
Sony Corporation Printed in Indonesia[…]