Product Documents
RF Smart Bridge


SPECIFICATION

USER MANUAL

QUICK START
CE CERTIFICATION
ROHS REPORT
FCC CERTIFICATION
SONOFF RF-Bridge DOC
Physical Picture
RF Bridge PHYSICAL PICTURE V1
MORE INFORMATION
More information

В продолжении темы полоумного дома хочу напомнить, что самые недорогие и распространённые «умные» устройства — это RF, управляемые по радио со всяких пультов. Люстры и вспомогательное освещение, может занавески или гаражные ворота. Всякая пожарная сигнализация с RF тоже довольно распространённая штука. Кроме того RF устройства ещё и чуть ни самые энергоэффективные, вплоть до работы пульта без батареек, от энергии нажатия на кнопку. Можно, конечно, все их выбросить и накупить более модных аналогов, с WiFi, преферансом и арфистками. А можно устроить мост, который будет транслировать RF в WiFi и обратно.
Вот такой скучный, но очень важный кирпичик от Itead сегодня в студии. Встречайте, «дедушка передаст»
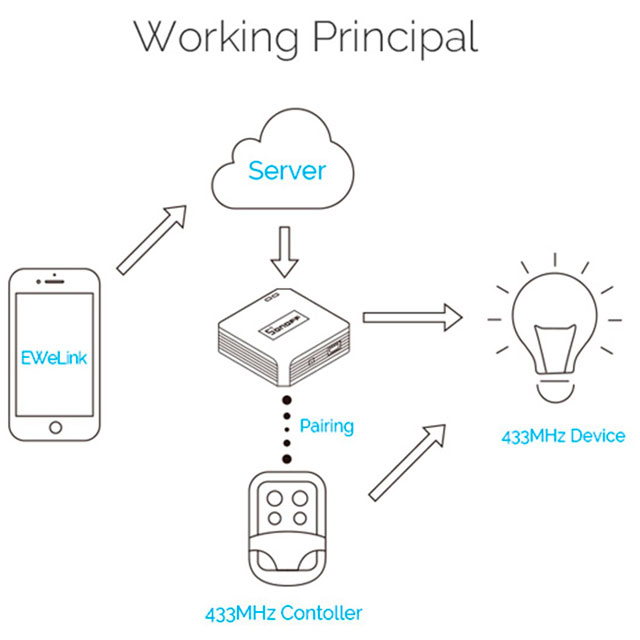
— устройство отдельно от других смысла не имеющее. Мост, подключающий 433 МГц радиочастотные устройства к единой сети через WiFi. С помощью этого моста можно включать-открывать голосом или со смартфона. Мост работает и на приём и на передачу. Способен заменить RF пульты, может принимать сигналы датчиков, сообщающих о событиях по радиоканалу. На одну коробочку — до 16 каналов.
Как почти у всех устройств Itead Sonoff есть выбор. Из коробки доступна родная экосистема с облаком, приложением, интеграцией с голосовыми помощниками Amazon и Google. Также доступны как минимум две сторонние прошивки с использованием MQTT.
Доставка
23 сентября 2017 отгрузка из Гонконга, 06 октября получено в Москве. Полный трек. При покупке у производителя доставка платная и не копеечная. Цена зависит от региона, определяемого по индексу и как-то хитро от состава заказанного.
Упаковка
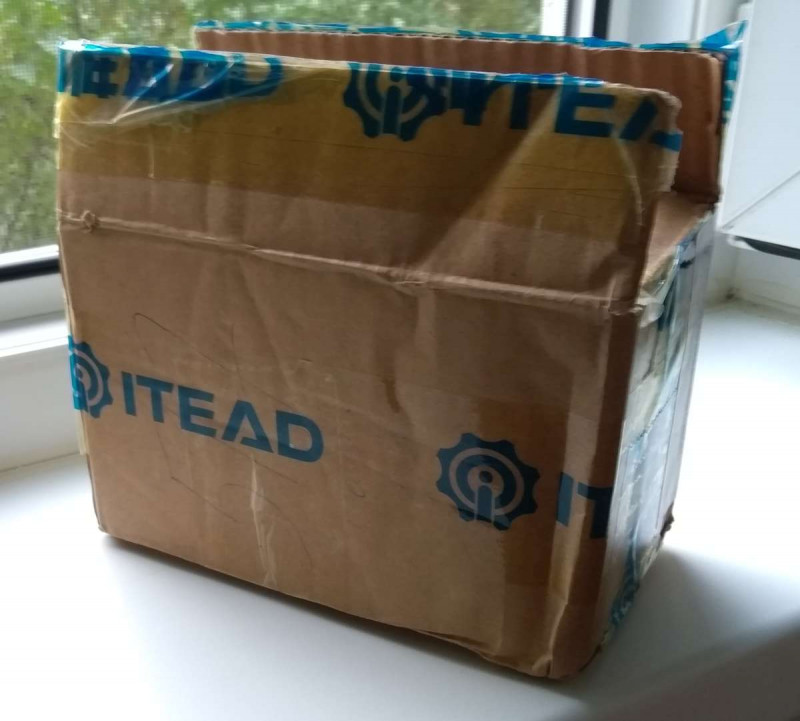
Транспортная упаковка — коробка из гофорокартона, ехало вместе с лампочкой Sonoff B1. Коммерческая упаковка как таковая пока отсутствует.
Упаковка
Внешний вид
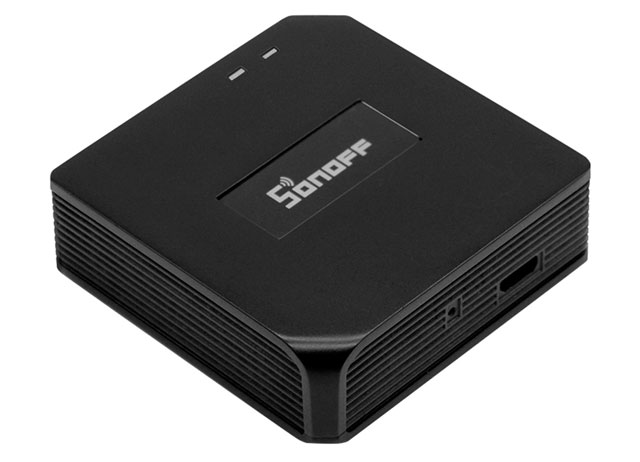
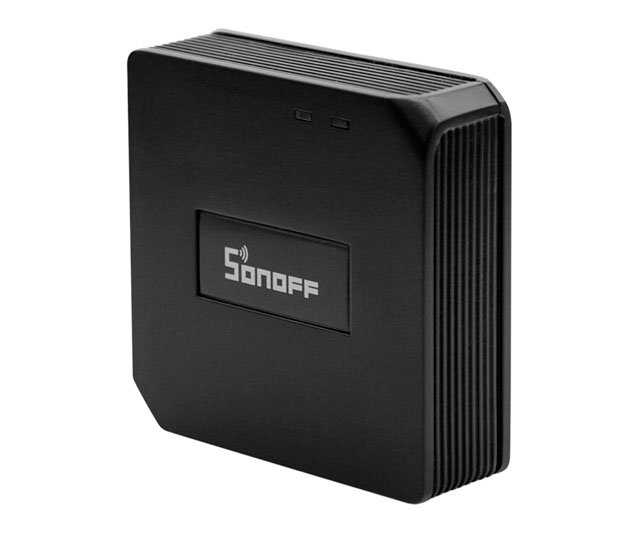
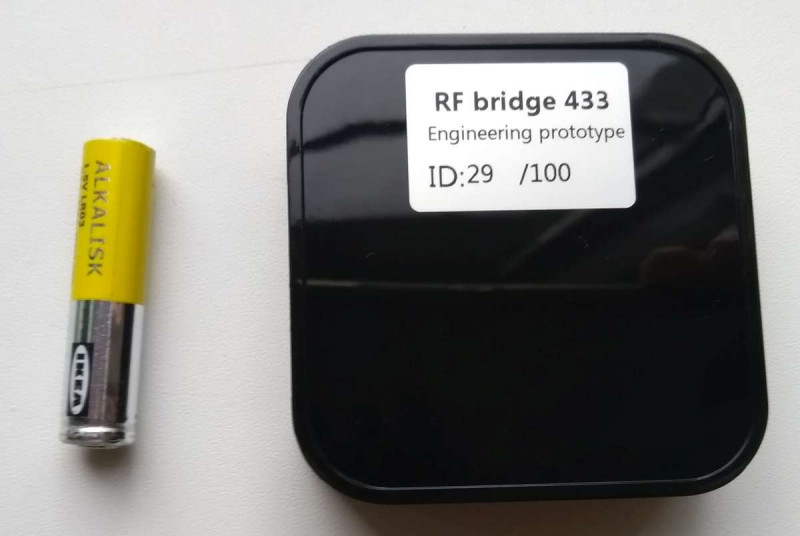
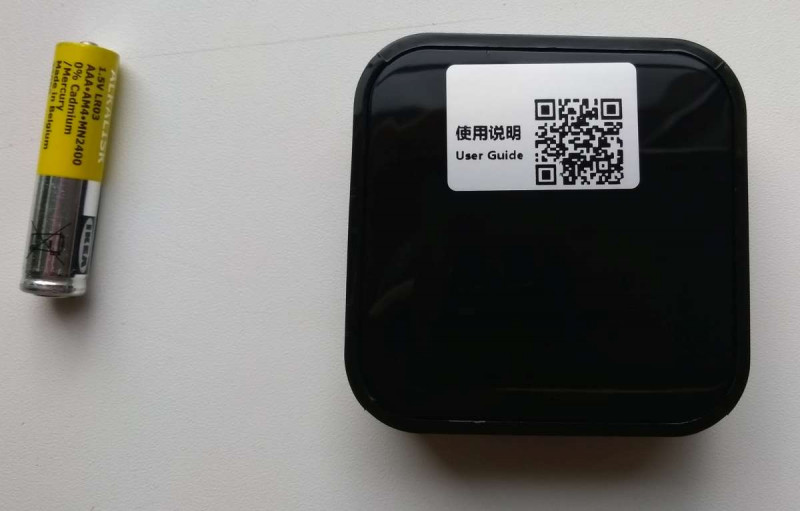
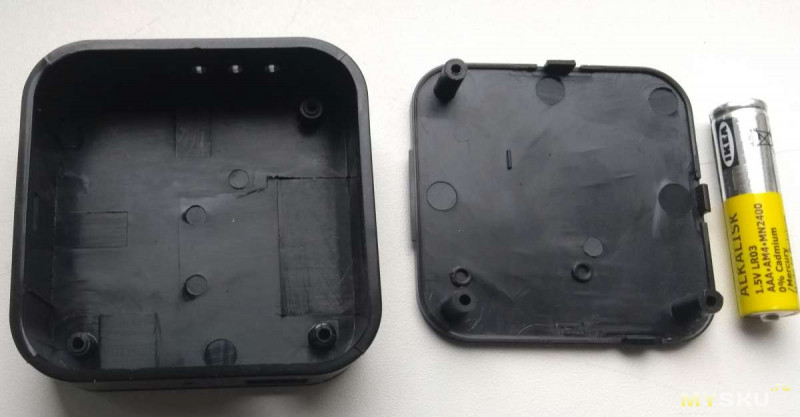
Чёрный параллелепипед со скруглёнными углами. Не сильно больше спичечного коробка. Батарейка AAA для масштаба.
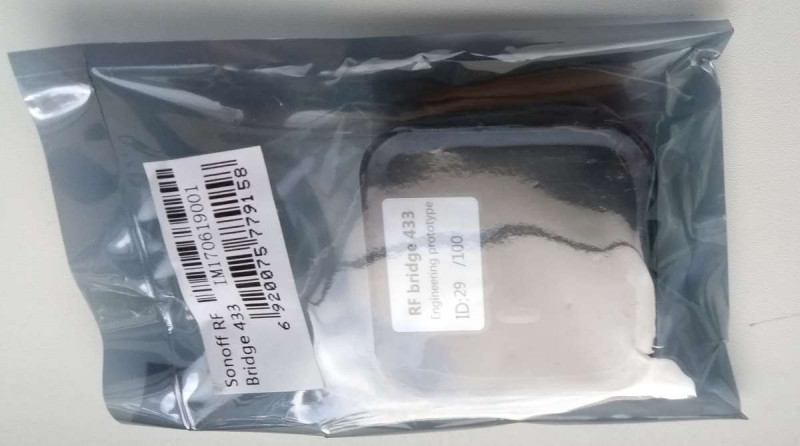
Как видите, мне в руки попал инженерный прототип. Так что это будет один из первых обзоров, если не первый.
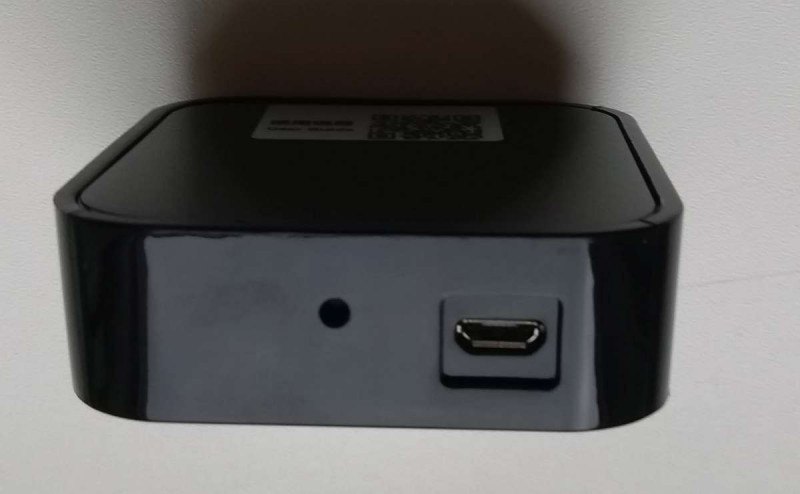
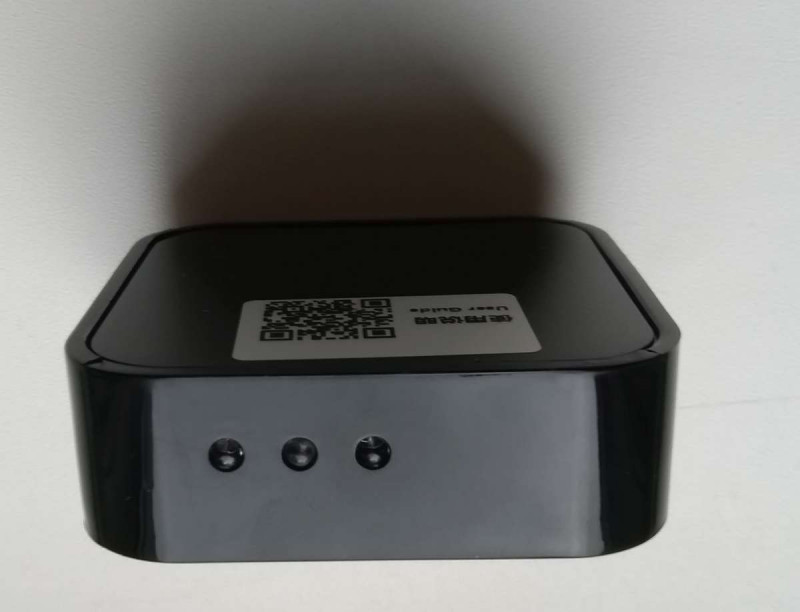
На одной из граней microUSB для питания и отверстие под кнопку для перевода устройства в режим настройки. на другой три светодиода, цвет и назначение:
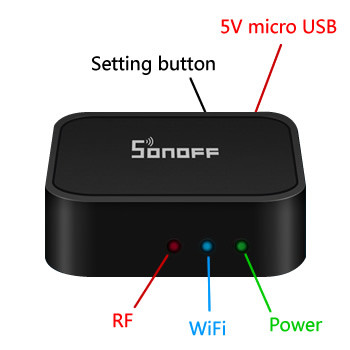
В комплекте больше ничего не пришло, даже мануала. Но я уверен, что для коммерческих поставок добавят USB кабель. Также будет картонная коробка с офсетной печатью, изображена на сайте. Кстати, русская версия сайта не просто уже есть, но неплохо переведена, явно человеком со знанием русского.
Англоязычный мануал
Спецификации
Рабочая частота 433 МГц
WiFi 2.4ГГц
Фиксированная частота, пульты с динамическим кодом не поддерживаются
Поддержка управления максимум 16 устройствами
Работает с Amazon Alexa и Google Nest
Питание 5В USB
Габариты 62 х 62 х 20
Масса 36 г
Чем устройство полезно
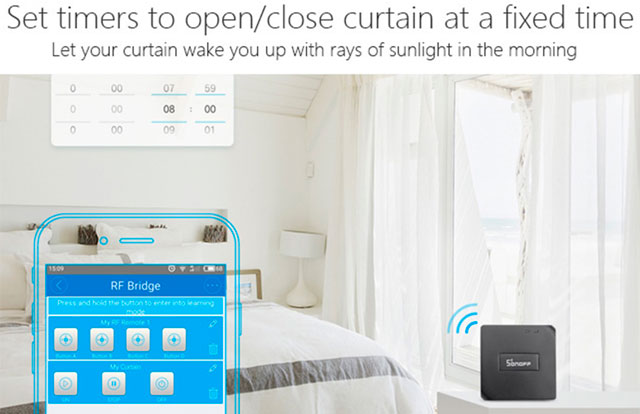
Маркетологи поработали, пожалуй остаётся только привести картинки с пояснениями
Внутренний мир
Вскрывается достаточно просто. На одной из сторон можно нащупать медиатором щель (Расположить устройство так, чтобы USB разъём и был слева и ниже, чем отверстие для кнопки настройки. Щель будет в верхней части.) Всунув туда медиатор, устройство легко и без повреждений можно вскрыть.
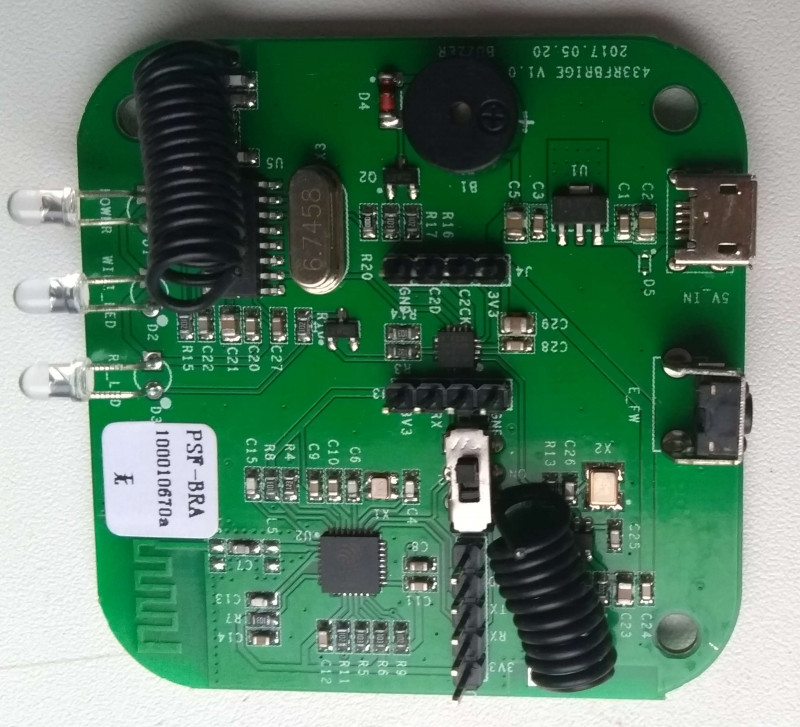
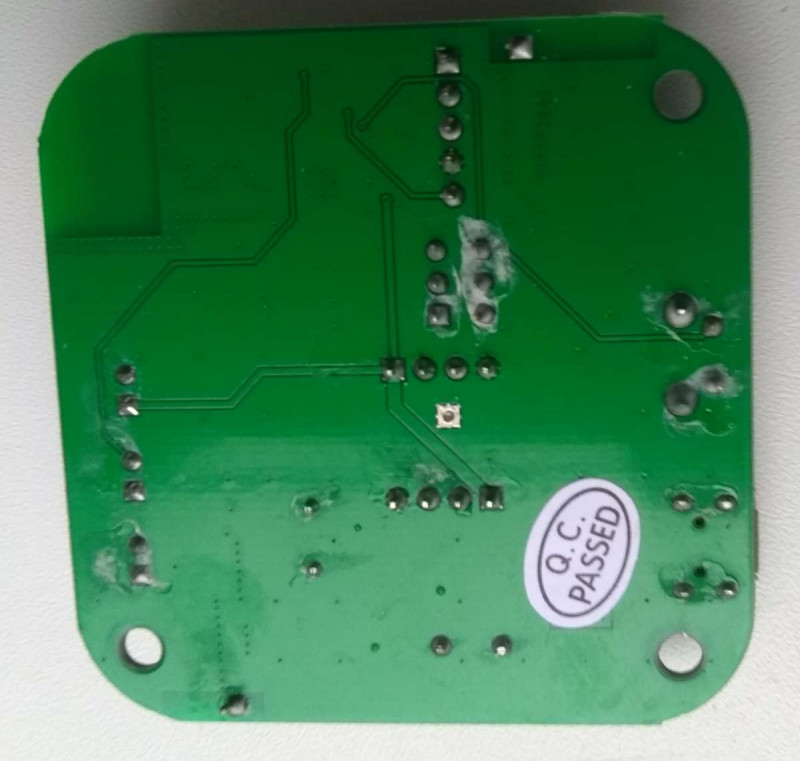
ESP8285 — главная микросхема. Целых три гребёнки распаяно. Думаю, на коммерческих экземплярах лишнее уберут. На обратной стороне есть белые пятна. Не флюс, а скорее остатки белой дряни из растворителя, которым флюс смывали.
Антенны две, полагаю, приёмник и передатчик. Под одной спряталась микросхема с маркировкой SYN470R / 1631. Даташит. RF приёмник. Что примечательно, 300-
450MHz. А ведь устройство по ТТХ 433 MHz.
Альтернативные прошивки
Те же проекты, которые были упомянуты в обзоре Sonoff 4CH Pro, содержат и прошивки для обозреваемого моста. Я вот думаю — устройство новейшее, а альтернативные прошивки уже есть, причём 2 шт. на выбор. И так по всем моделям. Единственное приходящее в голову объяснение — производитель сознательно передаёт необходимую информацию сторонним разработчикам. Достойная, редкая в наше время практика.
xoseperez/espurna
Свободное ПО, GNU General Public License
MQTT
REST API, Domoticz, Home Assistant
Заявлена интеграция с Alexa
Обновления по воздуху (OTA)
arendst/Sonoff-Tasmota
Свободное ПО, GNU General Public License
MQTT,
openHAB, Home Assistant, Domoticz, HomeBridge, SmartThings
Упомянута интеграция с Alexa
Обновления по воздуху (OTA)
Демонстрация
Не люблю видео, но тут без него никак. Макет состоит из
- RF выключателя на 4 канала (но в демонстрации задействую лишь один),
- нагрузки — лампочки
- RF пульта с кнопками
- обозреваемого моста Sonoff RF Bridge
- смартфона с приложением eWeLink, на котором за кадром настроил мост и дал одному из каналов произносимое имя
- Алексы Амазонской
Нагрузкой можно управлять с RF пульта, со смартфона по Интернет и голосом, тоже по Интернет. Обратите внимание, что мост как таковой даже не упоминается в командах, но работает прозрачно. У RF канала есть имя — его и используем.
Выводы
Мост работает из коробки как рекламировалось. Уже сама возможность заменить связку RF пультов кому-то доставит позитивные эмоции. Так что если вы понимаете зачем вам такое — товар однозначно рекомендую.
Но давайте пару слов на классическую тему на кой грех мигать лампочкой  После прошлого обзора с цветной лампочкой от Sonoff с управлением голосом, как и обещал, я выкроил час и научился запускать музыку из локальной библиотеки через Plex на любой Plex проигрыватель. На Андроиде и в браузере тестил. А сейчас в процессе приживления ИК пульта от Broadlink, который тоже как-то тут обозревал. Уже видно, что работать будет, хотя по корявости реализации тов. из Броадлинка и претендуют на абсолютных чемпионов мира. Вкрячить для Алексы отдельное кастрированное приложение, которое не просто знать не знает об основном, но и не позволяет основному приложению с устройством работать — это заявка. Ладно, основная идея — гонять кино-музыку по голосовым командам. Но не только — я теперь смогу свой тупой, но работящий, пылесос запускать хоть по таймеру, хоть по произволу. Как и планировалось — пылесос отдельно, мозг — отдельно. Ну а что там ещё — чем можно управлять по WiFi, RF или ИК? Думаю, поле приложения идей имеется. Причём — недорого. Глядя на ценник Phillips HUE тихо радуюсь и того Хью поминаю.
Понятие «умный дом» знакомо практически всем. Устройств и систем довольно много. Работают они не сами по себе, а под управлением центрального элемента. Одним из таких центральных хабов является Sonoff RF Bridge 433. Каковы его функции, как им управлять — мы и расскажем.
Концепция Умный дом
Современный умный дом — несколько устройств, объединенных в одну систему автоматизации жилища. Работают как автономно, по заданной программе, так и с удаленным управлением.
Что умеет Sonoff RF Bridge 433?
Это центральный хаб, который управляет другими девайсами умного дома.
Основные преимущества:
Может конвертировать радиосигналы на частоте 433 МГц для беспроводной сети WiFi. В приложении к iOS или Android прописываются четыре кнопки пульта, который работает на такой же частоте 433 МГц. Это дает возможность удаленного радиочастотного управления 16 различными устройствами в приложении на смартфоне по сети WiFi 2/3/4G.
Рекомендуем к прочтению: что такое и как можно применить 4-х канальное Wi-Fi реле Sonoff 4CH Pro.
Сонофф подходит для управления радиочастотными устройствами с частотой 433 МГц для взаимодействия девайсами такого же типа. Это:
Этот блок управления — сердце всех смарт-устройств от сонофф. Работает совместно с Wi-Fi роутером, что дает возможность удаленного контроля и управления всеми девайсами прописанными в системе.
Где купить
Приобрести прибор можно как в специализированном магазине, так и онлайн в Интернет-магазине. Во втором случае, особого внимания заслуживает бюджетный вариант приобретения изделий на сайте Алиэкспресс. Для некоторых товаров есть вариант отгрузки со склада в РФ, их можно получить максимально быстро, для этого при заказе выберите «Доставка из Российской Федерации»:
Внешний вид
Как всегда фирменное устройство управления:
- С прекрасным качеством работы.
- С эргономичным дизайном.
- С применением качественных материалов.
- Отличается простотой в применении.
Это параллелепипед черного цвета, не больше спичечного коробка. На фото снизу для наглядности он рядом с обычной круглой батарейкой формата ААА.

Сбоку можно увидеть вход microUSB для кабеля питания на 5 V и отверстие для сопряжения с телефоном через приложение eWeLink.

Управляется Sonoff RF Bridge микросхемой ESP8285. Для контактов с другими приборами Сонофф, есть две внутренних антенны — приемник и передатчик.

Подсоединение
Один RF-мост поддерживает работу до 4 RF ДУ пультов в программе eWeLink. Инструкций в интернете много. Сейчас давайте начнем его настраивать.
Устанавливаем на телефон приложение eWeLink.

Добавить устройство
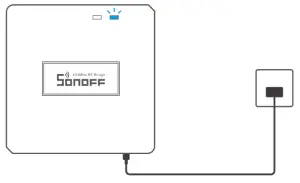
Создайте радиочастотный мост с помощью кабеля micro USB. Загорится зеленый светодиод.

Сопряжение
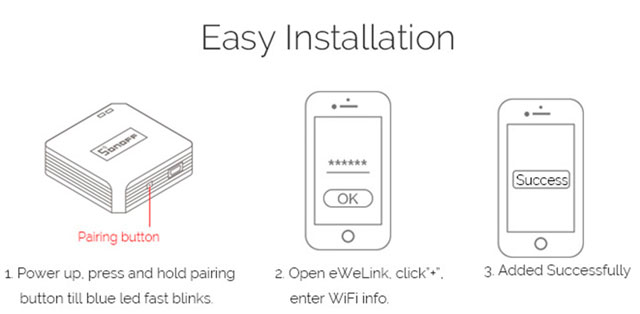
С помощью маленькой отвертки или спички нажмите и придержите клавишу сопряжения в течение 7 секунд, пока синий светодиод быстро не моргнет 3 раза.

Добавление учетной записи
На телефоне откройте eWeLink. Надавите «+».
- Для Android, выберите 1-ый значок, надавите кнопочку «Далее»;
- Для iOS, остановите свой выбор на соответствующем символе. В соответствии с мигающим световым диодом, надавите кнопочку «Далее».
EWeLink осуществит автоматический поиск и присоединится к устройству.

Введите свой сетевой идентификатор SSID и пароль:
- когда пароль задавать не собираетесь, оставляете это поле пустым.
Помните: eWeLink удерживает исключительно протокол связи 2/4 G и WiFi. 5G+WiFi не работает!

Дать название устройству для окончания сопряжения.
Возможно, прибор находится «в самостоятельном режиме» на eWeLink, тогда ему требуется некоторое время (1–2 минуты) для соединения в одну пару с маршрутизатором и сервером. Если светится зеленый световой диод, то механизм находится в режиме «онлайн». Когда eWeLink по-прежнему изображает «офлайн» — просто выключите программу eWeLink и перезапустите.
Добавить пульт ДУ
Подготовьте пульт с радиочастотой 433 МГц.

Войдите в интерфейс управления мостом RF. Нажмите «+», чтобы добавить RF-пульт.

Важно! Обратите внимание, что независимо от типа ВЧ пультов, максимальное число, которое вы можете добавить, составляет 4 (1–4 кнопки/занавес/будильник).

Если вы хотите добавить пульт дистанционного управления с 4 кнопками, выберите из выпадающего меню «4 кнопки» и нажмите кнопку. Подтвердить (Confirm). Затем вы увидите 4 кнопки устройства на интерфейсе. Как вы можете видеть, есть Button0, Button1, Button2, Button3. Вам нужно будет прописать клавиши с RF Remote button A B C D — каждую по отдельности.

Если вы желаете приплюсовать такие устройства как:
- инфракрасный датчик 433MHZ RF;
- датчик двери RF и так далее.
Для каждой кнопки прописывается свой сценарий.

Обучение с помощью кнопок RF
Надавите и удерживайте клавишу 0 на приложении, пока не прозвучит звуковой сигнал от RF-моста. Красный светодиод RF-моста начнет быстро мигать, что значит, что он находится в режиме обучения. Затем быстро надавите кнопочку «A» пульта ДУ. Вы услышите пару звуковых сигнальчиков, и красный световой диод моста RF мигнет дважды. Это обозначает, что процесс обучения завершился успешно. Кнопка 0 станет доступна для применения.

Если вы используете другой ДУ пульт RF для обучения с Button0, он перезапишет предыдущие коды. Повторите описанные выше шаги, чтобы изучить другие кнопки. Если не успеете завершить успешно процесс «обучения» в течение 1 минуты, он будет переведен в режим «таймаут» и выйдет из режима обучения.
Примечания:
- Держите расстояние между RF-мостом и RF-пультом в пределах 30 метров.
- Если вы желаете отменить кнопки сопряжения, удалите добавленный радиочастотный пульт дистанционного управления.
- Один RF-мост поддерживает добавление до 4-х пультов с дистанционным управлением.
Теперь один радиочастотный 433 может управляться с 4-х радиопультов на 433 МГц. Что успешно позволяет управлять до 16 радиоуправляемыми устройствами через приложение. Для этого достаточно взять в руки смартфон, выбрать программу синхронизации eWeLink и указать, что именно должна делать кнопка.
Заключение
Девайс стоимостью всего лишь в 10 $ способен существенно облегчить жизнь. Возможно некоторым не понравится родная прошивка устройства, в таких случаях всегда можно найти стороннюю (на момент написания их было около 10) с детальным описанием настройки и использования. Одной из самых популярных является Sonoff-Tasmota. Но и не стоит забывать, что все «умные» продукты обладают функцией дистанционного управления на частоте 433 МГц.
Видео по теме

433MHz RF Bridge
RF Bridge
User manual V1.1
Operating Instruction
1. Download the “eWeLink” APP
2. Power on
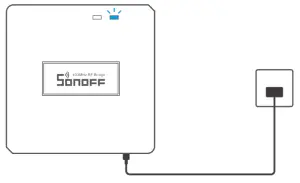
After powering on, the device will enter the quick pairing mode (Touch) during the first use. The Wi-Fi LED indicator changes in a cycle of two short and one long flash.
 The device will exit the quick pairing mode (Touch) if not paired within 3mins. If you want to enter this mode, please long press the pairing button for about 5s until the Wi-Fi LED indicator changes in a cycle of two short and one long flash and release.
3. Add Bridge
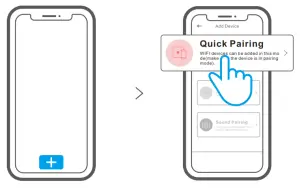
Tap “+” and select “Quick Pairing”, then operate following the prompt on the APP.
Compatible Pairing Mode
- If you fail to enter Quick Pairing Mode (Touch), please try “Compatible Pairing Mode ” to pair.
Long press the Pairing button for 5s until the Wi-Fi LED indicator changes in a cycle of two short flashes and one long flash and release. Long press the Pairing button for 5s again until the Wi-Fi LED indicator flashes quickly. Then, the device enters Compatible Pairing Mode.
2. Tap “+” and select “Compatible Pairing Mode ” on APP. Select Wi-Fi SSID with ITEAD-****** and enter the password 12345678, and then go back to eWeLink APP and tap “Next”. Be patient until pairing completes.
Add sub-devices
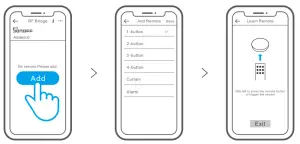
Tap “+” and select the remote controller type, then a “Beep” indicates that the device enters quick pairing mode. Proceed to operate on the sub-device to pair and
“Beep Beep” indicates that the pairing is successful.
Please refer to the user manual of the sub-device for the pairing method.
The device can add up to 16 sub-devices.
Specifications
| Model | RF Bridge/RF BridgeR2 |
| Input | 5V 1A |
| RF | 433.92MHz |
| Wi-Fi | IEEE 802.11 b/g/n 2.4GHz |
| Operating systems | Android & iOS |
| Working temperature | -10℃~40℃ |
| Material | RF Bridge: ABS V0/RF BridgeR2: PC V0 |
| Dimension | 62x62x20mm |
Product Introduction
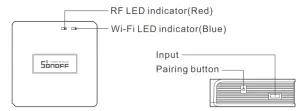
The device’s weight is less than 1 kg.
An installation height of less than 2 m is recommended.
LED indicator status instruction
| LED indicator status | Status instruction |
| Blue LED flashes (one long and two short) | Quick Pairing Mode |
| Blue LED flashes quickly | Compatible Pairing Mode (AP) |
| Blue LED keeps on | The device is connected successfully |
| Blue LED flashes quickly once | Unable to discover the router |
| Blue LED flashes quickly twice | Connect to the router but fail to connect to Wi-Fi |
| Blue LED flashes quickly three times | Upgrading |
| Red LED flashes quickly | Searching and adding … |
Features
This is a 433MHz RF bridge with multiple features that allows you to connect a variety of 433MHz wireless devices by switching 433MHz to Wi-Fi. You can set schedules, countdowns, alarm notifications, and more.
Factory Reset
Long press the pairing button for about 5s until the Wi-Fi LED indicator changes in a cycle of two short and one long flash and release, then the reset is successful. The device enters quick pairing mode (Touch).
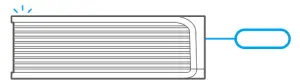
Please reset the device to factory defaults if you want to change the Wi-Fi network, then reconnect the new network.
Common Problems
Q: Why does my device stay “Offline”?
A: The newly added device needs 1 – 2mins to connect to Wi-Fi and network. If it stays offline for a long time, please judge these problems by the blue Wi-Fi indicator status:
1. The blue Wi-Fi indicator quickly flashes once per second, which means that the switch failed to connect your Wi-Fi:
① Maybe you have entered the wrong Wi-Fi password.
② Maybe there’s too much distance between the switch your router or the environment causes interference, consider getting close to the router. If failed, please add it again.
③ The 5G Wi-Fi network is not supported and only supports the 2.4GHz wireless network.
④ Maybe the MAC address filtering is open. Please turn it off.
If none of the above methods solved the problem, you can open the mobile data network on your phone to create a Wi-Fi hotspot, then add the device again.
2. Blue indicator quickly flashes twice per second, which means your device has connected to Wi-Fi but failed to connect to the server.
Ensure a steady enough network. If double flash occurs frequently, which means you access an unsteady network, not a product problem. If the network is normal, try to turn off the power to restart the switch.
FCC Warning
Changes or modifications not expressly approved by the party responsible for compliance could avoid the user’s authority to operate the equipment.
This device complies with part 15 of the FCC Rules. Operation is subject to the following two conditions: (1) This device may not cause harmful interference, and (2) this device must accept any interference received, including interference that may cause undesired operation.
FCC Radiation Exposure Statement:
This equipment complies with FCC radiation exposure limits set forth for an uncontrolled environment. This equipment should be installed and operated with a minimum distance20cm between the radiator & your body. This transmitter must not be co-located or operating in conjunction with any other antenna or transmitter.
Note:
This equipment has been tested and found to comply with the limits for a Class B digital device, pursuant to part 15 of the FCC Rules. These limits are designed to provide reasonable protection against harmful interference in a residential installation. This equipment generates, uses, and can radiate radio frequency energy and, if not installed and used in accordance with the instructions, may cause harmful interference to radio communications. However, there is no guarantee that interference will not occur in a particular installation. If this equipment does cause harmful interference to radio or television reception, which can be determined by turning the equipment off and on, the user is encouraged to try to correct the interference by one or more of the following measures:
— Reorient or relocate the receiving antenna.
— Increase the separation between the equipment and receiver.
— Connect the equipment into an outlet on a circuit different from that to which the receiver is connected.
— Consult the dealer or an experienced radio/TV technician for help.
Hereby, Shenzhen Sonoff Technologies Co., Ltd. declares that the radio equipment type RF Bridge/RF BridgeR2 is in compliance with Directive 2014/53/EU. The full text of the EU declaration of conformity is available at the following internet address: https://sonoff.tech/usermanuals
TX Frequency: (WiFi: 2412-2472MHz SRD: 433.92MHz)
RX Frequency: (WiFi: 2412-2472MHz SRD: 433.92MHz)
Output Power: 12.02dBm(802.11b), 11.18dBm(802.11g), 11.14dBm(802.11n20)
Shenzhen Sonoff Technologies Co., Ltd.
1001, BLDG8, Lianhua Industrial Park, shenzhen, GD, China
ZIP code: 518000 Website: sonoff.tech
MADE IN CHINA
The Sonoff RF Bridge has two separate chips to handle the Wi-Fi (ESP8285) and RF (EFM8BB1) communications respectively. It is used to send and receive codes with 433.9MHz frequency RF devices. Codes received from RF devices such as remote controls is passed to the onboard ESP8285 via the serial interface. The code data is relayed via MQTT. Similarly, the Bridge receives commands over Wi-Fi and sends the encoded data to the RF chip to control an RF device. Thus, the Sonoff RF Bridge «bridges» communications between RF and Wi-Fi.
Attention ⚠️️⚠️️⚠️️ There are now 3 versions of the Sonoff RF Bridge 433: the R1 , R2 V1.0 and R2 V2.2.
Users reported limited success flashing Tasmota to R2 V2.2.
RF firmware OB38S003 is available as tested with simple protocol receiving, but is incomplete and requires flasher tool.
Flash Tasmota~
Please read the Hardware Preparation article for general flashing instructions.
Access the serial interface available on the 5-pin header next to the switch as can be seen in the image.

To flash the ESP8285, first move the switch position towards the 5-pin header.
Connect the serial-to-USB adapter and press the button on the edge while powering the device in order to put the ESP8285 into programming mode in order to upload the Tasmota firmware.
After flashing the ESP8285, be sure to move the switch position away from the 5-pin header to restore the connection to the RF microcontroller.
Configure the device as usual and select module Sonoff Bridge (25). During normal operation the serial interface is used at 19200 baud to communicate with the RF microcontroller. Therefore serial logging (SerialLog 0) must be disabled.
IMPORTANT: In the Module configuration GPIO4 and GPIO5 must be left as 00 None On R2 versions of the Sonoff RF Bridge, a hardware modification is required in order to use these GPIOs.
Video tutorial by alsolh~

RF Firmware~
The RF chip has its own firmware. The device is shipped with Itead firmware which supports a limited set of RF devices limited to mostly just Sonoff devices (a single 24-bit RF protocol). Some later versions of the factory firmware will only relay received RF data once the transmitting device stops. This is fine for remote controls or devices such as door sensors. But for devices such as smoke detectors, this behavior is not acceptable.
Custom firmware is available for the RF chip which is commonly referred to as ‘Portisch’. By updating the firmware on the RF chip, new types of devices and new features become usable. It also relays the RF data when the data is received rather than waiting until the transmitter stops.
Tasmota supports the original Sonoff RF firmware and the Portisch firmware.
RF Firmware Upgrade~
The RF upgrade requires wiring the bridge and then flashing the firmware via the Tasmota web UI.
Attention ⚠️️⚠️️⚠️️ There are now 3 versions of the Sonoff RF Bridge 433: the R1 , R2 V1.0 and R2 V2.2.
R1

R2 V1.0 RF firmware flashing:

R2 V2.2 Read about it in Discussions : New Sonoff RF Bridge Board Layout (R2 v2.2)

Flashing RF Firmware~
- Make sure you have previously flashed a Tasmota binary built with
RF_FLASH. Refer to the builds table for pre-compiled binaries which include this feature. Otherwise the «Magic byte is not 0xE9» error will occur. - Set the module type to
Sonoff Bridge (25) - Connect two wires (this will be different depending on the
Sonoff RF Bridge 433hardware version):- For
R1: ConnectGPIO4 to C2CkandGPIO5 to C2D. - For
R2: ConnectGPIO4 to C2DandGPIO5 to C2Ck. ( The text on the R2 PCB silkscreen is switched. Therefore this is the same wiring as on the R1)
- For
- Switch the ON/OFF switch on the board to ‘OFF’ (to disconnect RF from ESP).
- Power up the bridge via the 3.3V & GND pins. (See below if you need to power the device through the USB power port)
-
Obtain the Portisch firmware file: (Clicking on the file link on the GitHub web site does not work since this will download the GitHub preview/content of the file rather than the raw file contents)
- Download the entire contents of the Tasmota GitHub project project via the green
Clone or Downloadbutton to ensure that the firmware hex files are downloaded properly. The firmware files are located in the./tools/fw_SonoffRfBridge_efm8bb1/folder. Select the newest available hex file. Otherwise you may geterror "Magic byte is not 0xE9". - As an alternative use wget/curl to download the raw file (https://github.com/arendst/Tasmota/tree/master/tools/fw_SonoffRfBridge_efm8bb1) directly. Select the newest available hex file. Otherwise you may get
error "Magic byte is not 0xE9". PowerShell example:
wget https://github.com/arendst/Tasmota/raw/master/tools/fw_SonoffRfBridge_efm8bb1/RF-Bridge-EFM8BB1-XXXXXXXX.hex -OutFile .\RF-Bridge-EFM8BB1-XXXXXXXX.hex - Download the entire contents of the Tasmota GitHub project project via the green
-
Go to the Web UI Firmware Upgrade > Upgrade by File Upload (introduced in v6.0.0a)
- In the file selection dialog, navigate to the folder on your computer where you saved the hex file from step 6.
- Click Start Upgrade. The flashing should complete within 60 seconds. Device will restart after upgrade completes.
- Disconnect wiring and put the ON/OFF switch on the board back to ‘ON’ to enable the RF again.
 The text on the R2 PCB silkscreen is switched. Therefore this is the same wiring as on the R1)
Hardware Preparation for USB powered flashing~
This section applies only to the R2 revision of the Sonoff RF Bridge
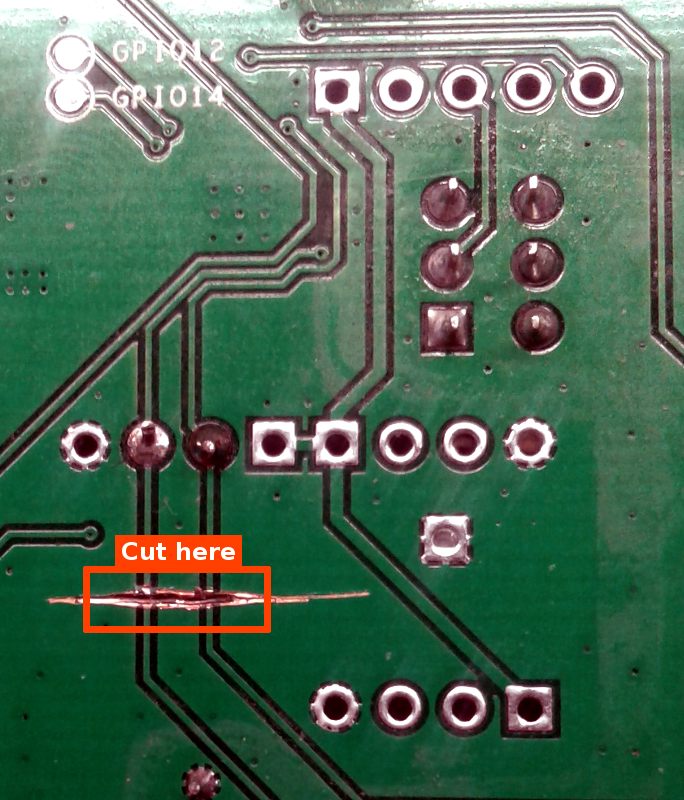
Apply this modification only if you intend to use USB for powering the device during flash process or if you want to use GPIO4 or GPIO5 for other purposes with the RF Bridge.
The R2 revision boards connect the GPIO4 and GPIO5 pins to the USB data lines of the power connector. Compliant USB chargers/power supplies are expected to short the two pins together, which is a problem. These lines are not used by the original firmware, nor by Tasmota. The traces toward the USB power connector need to be cut to avoid interference by the USB wiring. Removing these connections does not interfere with the normal Bridge functionality.
Operation~
The Sonoff RF Bridge is able to learn up to 16 different fixed code remote control commands as provided by PT2260, PT2262, PT2264 and EV1527 transmitters. It was not able to recognize the latest Klik Aan Klik Uit (KaKu) remote control signals but some people managed to use the fixed code KaKu devices like PAR-1000 receiver and PAT-103 transmitter.
Tasmota provides default remote control commands to all 16 keys so you can start using the bridge with a Sonoff 4Ch Pro or Sonoff RF device without having the bridge have to learn remote control commands.
See RF Bridge commands.
Portisch Firmware Specific Usage~
These sections only apply to the custom Portisch firmware.
Learning Commands with Portisch Firmware~
In order to learn Buttons from your remote, go to the Console of your RF Bridge. There, enter rfraw 177 and push the buttons on your remote. Repeat each button 2-3 times, as the signal may be different for each try. This will give you a so called B1 code of your button, which needs to be converted to a B0 code (see below).
Sending Commands with Portisch Firmware~
The commands learned with Portisch Firmware cannot be stored in device memory. Instead, they must be sent as a command.
Example using MQTT:
cmnd/sonoffRFBridge/Backlog RfRaw AAB0210314016703F924180101011001100110010101100110011001010110010101100255; RfRaw 0
Refer to issue #3973 for further information.
B1 to B0 Conversion Tools~
After learning how bitbucket works from the Portisch wiki, use one of these tools to help convert received B1 sniffing messages to the right ‘B0’ format to send in the ‘RfRaw’ command.
- Online
Process: - Enter
rfraw 177in the Sonoff Bridge web UI Console - Press a function (each Button 2-3 times) on your remote control
- Copy the JSON payload output from the Console and paste it in the online converter and click
Converte.g.,{"RfRaw":{"Data":"AA B1 03 07F9 0124 37DC 010101010101101001010101101010100102 55"}} -
The utility will return the resulting B0 string to use in setting up commands in the RF Bridge e.g.,
AA B0 1A 03 08 07F9 0124 37DC 010101010101101001010101101010100102 55 -
CLI (rename file from
BitBucketConverter.txttoBitBucketConverter.py)
In the command line give theB1message string and the retries value (in decimal): e.g.,BitBucketConverter.py "AA B1 04 07EB 0157 00FD 3EBC 010101010101101001010101101010100103 55" 20
Command Line : "AA B1 04 07EB 0157 00FD 3EBC 010101010101101001010101101010100103 55" 20 Result: RfRaw AAB01C041407EB015700FD3EBC01010101010110100101010110101010010355
- Batch
Process: - Enter
rfraw 177in the Sonoff Bridge web UI Console - Press each function (each Button 2-3 times) on your remote control
- Save everything from the console that happened after
rfraw 177to a text file - Run bitbuckedconverter.py -f console.txt
- Each line of console.txt will be converted into a B0 string and displayed
- Run bitbuckedconverter.py -f console.txt -e
- Each line of console.txt will be converted into a B0 string and sent to the Bridge
Then:
* If the device reacted as expected, you can enter a name of the button (e.g., «light»)
* Else enter nothing to try the next
* Repeat this until all lines have been tried
* The tool will create a list of buttons and their B0 codes that have worked (i.e. for which you have specified a name)
* In the end you can test all of these codes
- «Raw sniffing»
As suggested by the Portisch firmware, perform the following:
In the web UI Console, send RfRaw AAB155
This will result in two consecutive messages: 1. The first one tells you that you are using one of the new firmware commands 22:58:44 MQT: tele/sonoffRFbridge/RESULT = {"RfRaw":"ON"}
- The second one tells that the EFM8BB1 RF chip new firmware accepts the command and enters raw sniffing mode (‘A0’ means ‘ACK’)
22:58:44 MQT: tele/sonoffRFbridge/RESULT = {"RfRaw":{"Data":"AAA055"}}
After that keep pushing one of the buttons on the remote.
MQT: tele/sonoffRFbridge/RESULT = {"RfRaw":{"Data":"AAA055"}}
MQT: tele/sonoffRFbridge/RESULT = {"RfRaw":{"Data":"AA B1 04 07F0 0128 00F2 3822 010101010101101001010101101010100103 55"}}
MQT: tele/sonoffRFbridge/RESULT = {"RfRaw":{"Data":"AA B1 03 07F9 0124 37DC 010101010101101001010101101010100102 55"}}
MQT: tele/sonoffRFbridge/RESULT = {"RfRaw":{"Data":"AA B1 03 07F9 0124 37DC 010101010101101001010101101010100102 55"}}
MQT: tele/sonoffRFbridge/RESULT = {"RfRaw":{"Data":"AA B1 03 07F4 0126 37D2 010101010101101001010101101010100102 55"}}
MQT: tele/sonoffRFbridge/RESULT = {"RfRaw":{"Data":"AA B1 03 07F5 0127 37D2 010101010101101001010101101010100102 55"}}
MQT: tele/sonoffRFbridge/RESULT = {"RfRaw":{"Data":"AA B1 03 07F7 0125 37DC 010101010101101001010101101010100102 55"}}
MQT: tele/sonoffRFbridge/RESULT = {"RfRaw":{"Data":"AA B1 03 07F9 0125 37D2 010101010101101001010101101010100102 55"}}
MQT: tele/sonoffRFbridge/RESULT = {"RfRaw":{"Data":"AA B1 03 07F4 0123 37C8 010101010101101001010101101010100102 55"}}
MQT: tele/sonoffRFbridge/RESULT = {"RfRaw":{"Data":"AA B1 03 07F9 0124 37D2 010101010101101001010101101010100102 55"}}
MQT: tele/sonoffRFbridge/RESULT = {"RfRaw":{"Data":"AA B1 03 07FC 011E 37D2 010101010101101001010101101010100102 55"}}
MQT: tele/sonoffRFbridge/RESULT = {"RfRaw":{"Data":"AA B1 03 07F8 0125 37D2 010101010101101001010101101010100102 55"}}
MQT: tele/sonoffRFbridge/RESULT = {"RfRaw":{"Data":"AA B1 03 07F8 0124 37D2 010101010101101001010101101010100102 55"}}
MQT: tele/sonoffRFbridge/RESULT = {"RfRaw":{"Data":"AA B1 03 07F9 0125 37D2 010101010101101001010101101010100102 55"}}
MQT: tele/sonoffRFbridge/RESULT = {"RfRaw":{"Data":"AA B1 03 07F8 0122 37C8 010101010101101001010101101010100102 55"}}
MQT: tele/sonoffRFbridge/RESULT = {"RfRaw":{"Data":"AA B1 03 07F1 012D 37D2 010101010101101001010101101010100102 55"}}
MQT: tele/sonoffRFbridge/RESULT = {"RfRaw":{"Data":"AA B1 03 07F4 0123 37C8 010101010101101001010101101010100102 55"}}`
MQT: tele/sonoffRFbridge/RESULT = {"RfRaw":{"Data":"AA B1 03 07F8 0128 37C8 010101010101101001010101101010100102 55"}}
MQT: tele/sonoffRFbridge/RESULT = {"RfRaw":{"Data":"AA B1 03 07F9 0124 37D2 010101010101101001010101101010100102 55"}}
MQT: tele/sonoffRFbridge/RESULT = {"RfRaw":{"Data":"AA B1 03 07F4 0124 37C8 010101010101101001010101101010100102 55"}}
MQT: tele/sonoffRFbridge/RESULT = {"RfRaw":{"Data":"AA B1 03 07F9 0124 37C8 010101010101101001010101101010100102 55"}}
MQT: tele/sonoffRFbridge/RESULT = {"RfRaw":{"Data":"AA B1 03 07F4 0123 37D2 010101010101101001010101101010100102 55"}}
Notice that this sequence of messages all start with ‘AA’ then ‘B1′ and the last byte ’55’
The reason for pushing the remote button for several seconds is to get enough ‘AA B1 …… 55’ sequences to select the best one to be transmitted back.
Then discard the sequences with ‘data values’ not equal.
In the example ‘data values’ are the 010101010101101001010101101010100102 string.
Notice that before that ‘data values’ string there are several 2 byte values (they are called ‘buckets’); they are time values in microseconds. The number of ‘buckets’ is indicated in a previous byte (in the example a 3 or a 4).
In the example, discard the first message (it contains 4 buckets, whereas the rest have only 3 buckets). Examine the values on the buckets in order to choose the message where more buckets are ‘similar’.
For example messages with ‘37D2‘ in the third bucket are good candidates. Messages with ‘0124‘ in the second bucket are also good candidates. First bucket values are very similar; ‘07F8‘ can be a good one.
External Sources~
- Itead Product Page
- Itead Shop
- Itead Wiki
- RF Bridge 433 R2 Information
- New Sonoff RF Bridge Board Layout (R2 v2.2)
Sonoff RF Bridge 433 контроллер для автоматизации умного дома.
 Описание моста Sonoff RF Bridge 433МГц
Контроллер или мост Sonoff RF Bridge 433 позволяет контролировать беспроводные охранные датчики (датчики движения ПИК, магнитоконтакты), сообщать через приложение Ewelink на телефон о срабатывании извещателей, управлять WiFi устройствами (реле, выключатели, розетки, лампы), а также, сканирует пульты 433мГц и через приложение дублирует работу брелочков.
Прописываем пульт 433МГц в контроллер — появляется кнопка в приложении, которая дублирует кнопку на пульте. Теперь, находясь удаленно в интернете при нажатии на кнопку на телефоне контроллер выдает сигнал 433МГц такой же, как если бы Вы нажали на кнопку на пульте. Пока таких пультов можно прописать до 4 штук.
Контроллер может управлять устройствами по времени, по датчикам движения или открытия двери, по температурным изменениям. Более того, программа Ewelink позволяет строить логические условия, например, при срабатывании одного устройства, включается другое.
Технические характеристики Sonoff RF моста
- Поддерживает до 4 устройств дистанционного управления;
- Таймеры для включения/отключения устройств в фиксированное время;
- Wi-Fi 2,4 ГГц;
- Поддерживает пульты: 433Мгц (до 4-х);
- Источник питания: microUSB 5В;
- Габариты: 55х55х20мм;
- Работает с программами Alexa и Google Home.
Инструкция по установке программы и подключению датчиков к Sonoff RF Bridge 433
1) Устанавливаем на телефон приложение eWeLink. Можно скачать с помощью QR кода с картинки ниже.
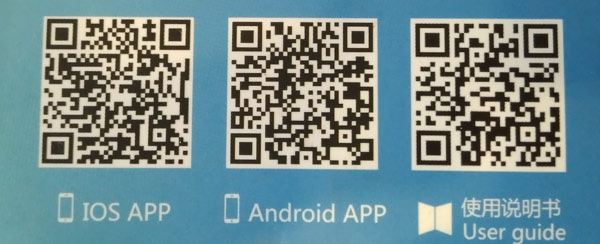
2) Для подключения RF брелоков 433МГц нужно удерживать кнопку контроллера несколько секунд и одновременно нажать на кнопку на пульте. А для добавления датчиков при нажатой кнопке контроллера, нужно создать движение перед датчиком движения (ПИК) или разомкнуть контакты магнитоконтакта — создать тревожную ситуацию.