
Занятие третье. Глобальные работы по водным и земляным ресурсам (масштаб области)
Ну, я думаю, вполне понятно, что такие территории руками не обрисуешь, поэтому сразу скажу, что главным и необходимым условием является наличие векторной информации, описывающей гидроресурсы, или что вы еще можете захотеть сделать. Причем, желательно, чтобы эта информация была свежей, точнее максимально приближенной к датам, когда проводилась съемка рельефа местности (в нашем случае съемка hgt), поскольку, в противном случае, если рядом с рекой есть горы (как в районе Самарской луки), то вы можете получить совсем не те результаты, которые ждете.
Я исходил из того, что у меня нашлись векторные карты Самарской области, где отдельно была описана гидрография крупных водоемов (Саратовское водохранилище и Жигулевское море), полигоны более мелких рек (Сок, Самара, Кинель и т.д.), полигоны островов, далее полигоны озер и слой с линиями рек.
На самом деле я описал далеко не все, которые у меня есть, а лишь те, которые будут употребляться в этом туторе.
Сразу оговорюсь, что, пока, задача была решить не все проблемы перерисовки гидроресурсов, поэтому лишь отдельно в самом конце буду оговаривать нюансы.
Требование к векторной информации следующее:
проекция и эллипсоид должны быть известными, а привязка и точность этих карт должна удовлетворять как нашим пожеланиям, так и нормально вписываться в рельеф.
У меня векторные слои исходно были в неземной проекции, но рядом телодвижений я смог их привести к UTM-N39/WGS84. Все эти вопросы я оставляю за рамками этого тутора в силу их уникальности в каждом отдельном случае.
Требуемые инструменты:
SBuilder 2.05 и
любая программа, которая позволит перевести вашу исходную векторную информацию в Geographic проекцию и WGS84 датум и в формат Surfer BLN. Второе сам сбилдер не умеет, а вот когда уже есть BLN например в UTM, то может перевести его в Geographic. Лучше, конечно, использовать что-то специализированное, например Global Mapper. Он может сделать и первое и второе, причем знает значительно больше исходных проекций, чем сбилдер. Но, вообще, первый раз я многое делал просто с помощью мапинфо. Переводил в нужную проекцию, экспортировал в MIF формат и потом, с помощью небольшой самописной программки на перле, переводил этот MIF в BLN, благо это не особо все сложно.
Теперь немного о том, как сбилдер трактует исходную информацию из BLN файлов. Изначально он ничего не знает и не хочет знать о том, что будет во входном файле (полигоны или линии). Более того, он съест всё и будет уже на ходу разбираться, что есть что. Если в наборе точек координаты первой и последней совпали, то это он сочтет полигоном, если нет – линией.
Немаловажный вопрос подстройки сбилдера под разделитель, который используется в вашем варианте BLN. Если разделитель не «,», то вам понадобиться открыть текстовым редактором SBuilder.ini и изменить значение BLNSeparator с запятой на BLNSeparator=tab.
И еще пара предупреждений. Сбилдеру все равно, сколько вы ему скормите полигонов или линий и он все равно сделает в итоге BGL, но вот Симу явно не все равно. При определенном количестве ему явно сносит башню, и он начинает рисовать фантастические пейзажи в виде колонн высотой до 20-30 километров, на которых растут деревца, или, наоборот, рисует огромные колодцы такой же глубины, в которых на дне так же растут деревца и текут речки 
Четко это количество я не оценивал и в описании Terrain SDK не искал, и даже не совсем уверен, что это вопрос количества, просто экспериментальным путем для себя понял, что лучше не валить в одну кучу (то есть в один файл полигонов или линий) разнородную информацию.
В итоге я решил разбить внутренности сценария на несколько секций, что дополнительно еще и облегчит постепенные доработки и багофиксы. В общем, у меня так и образовалось внутри одного сценария следующее подразделение:
smro0 – глобальный эксклюд для 8 слоя (береговых линий), один большой LWM полигон, который старается всю область превратить в землю, несколько описателей LC, там где это оказалось необходимо (например в районе Волжской ГЭС, около Тольятти, без этого не обошлось) и около сотни полигонов гидрографии крупных водоемов с достаточно большим количеством точек(10 тысяч и выше);
smro1 – эксклюд для 4 слоя (линии рек), и около двух тысяч полигонов гидрографии малых рек;
smro2 – около тысячи полигонов островов;
smro3 – чуть больше 6 тысяч полигонов озер;
smro4 – около двух тысяч речных линий.
В дальнейшем я планировал добавлять полигоны лесов, парков и других, уже VTP полигонов, так что нумерация может оказаться сдвинута, но в данном случае оставим все пока так.
Итак.
Создаем новый проект. Примерно задаем ему центр координат где-то в пределах охватываемой области, задаем название (например, просто smro), и папки, куда будем сваливать конечные BGL файлы. НЕ ЗАБЫВАЕМ про наличие у нас LC-информации, которую желательно размещать в папке отдельного сценария и без папки текстур. В моем случае я вообще выделил под весь этот сценарий отдельную папку. Далее, по желанию, можно подключить какую-то карту (или несколько), которая просто будет давать вам возможность приблизительно ориентироваться, если вы боитесь заблудиться
Я для этого сделал ориентировочную карту для Самарской луки и подключил несколько карт окрестностей аэродромов Самарской области, чтобы понимать, как содержимое сценария может повлиять на их окрестности.
Теперь можете сохранить этот проект в какое-то промежуточное название, поскольку все последующие, скорее всего, будут нарастать на этом минимуме. Главное, при использовании этого шаблона, не забывать править в свойствах проекта его имя и записывать, в дальнейшем, в файл с соответствующим названием.
Что мы для начала и делаем. Даем имя проекту smro0 и записываем сразу в файл с таким же названием. Далее необходимо создать несколько полигонов для исключения береговых линий. У меня почему-то не получилось сделать сразу один на всю область, возникали ошибки при компиляции (видимо и правда надо перечитать Terrain SDK :D, поэтому я сделал этот эксклюд из 6 кусочков. Переводим сбилдер в режим Polygon, рисуем нужный кусок, в свойствах полигона сообщаем, что это полигон исключений и вписываем одинокую цифру 8 в списке исключаемых слоев (что странно, но при таких глобальных работах, даже количество исключаемых слоев иногда влияло на возникновении ошибки при компиляции. Возможно это уже тонкости scasm’a). Далее рисуем один большой полигон вокруг всей области (возможно, потом его придется подогнать, чтобы он не делал лишнего) и сообщаем сбилдеру что это LWM полигон «земли». Запишите проект на всякий случай и можете скомпилировать, если есть желание оценить, где и какие в симе для вашего региона стоят ландклассы. Возможно, уже на этом этапе вы сможете понять, что где-то стоит LC воды, хотя в этом месте должна быть земля (или наоборот). Или захотите заменить ландклассу, в нужном месте, параметры. В моем случае пришлось в районе ГЭС около Тольятти, сделать пять или шесть клеточек с LC «земля» вместо водяных. Для этого переводим сбилдер в режим Land Class, ставим во всплывшем окне желаемые параметры и, не закрывая это окно, тыкаем в нужные клетки. Если настройки сбилдера по умолчанию, то вы будете видеть в нужных местах прямоугольники размером с LOD13 и с той текстурой, которую вы выбрали.
Вообще не забывайте регулярно записывать наработанное (но без злоупотребления, чтобы не затереть нерабочим вариантом рабочий  Хотя, надо сказать, что, пока мы ничего такого особенного не делали, что может повлиять на возникновение сожалений о несохраненном проекте.
После этого можно попытаться добавить полигоны крупных водоемов. Идем в меню File->Append…->Surfer BLN… Настраиваем параметры импортируемой информации. Например, для линий ставим ширину, тип текстуры и номер слоя, а для полигонов тип, в нашем случае LWM type = Water Mask, и обязательно задаем высоту импортируемых полигонов, если вы располагаете нужной информацией, или пишем в окошко высоты «−9999», если просто хотите чтобы вода легла по текущему мешу. При желании сразу, в пару к каждому полигону, можно получить замкнутую линию для береговой полосы (линии получат атрибуты, которые выставлялись при выборе параметров линий). Хотя могут быть нюансы с её направлением, так что может оказаться, что пенный прибой будет накатывать с берега на воду и придется очень много вносить исправлений. Но, в любом случае, окажутся куски линий, пересекающие дефолтную воду или то, что будет класться позже, поэтому без исправлений тут никак. В общем, выбор за вами. Если сразу не делать для каждого полигона линию, то можно потом написать небольшой скриптец (при наличии соответствующих скилзов), который берет полигоны из нужного блн-файла, делает из них линии и меняет на удобное нам направление.
Далее, по желанию, записываем проект, переводим сбилдер в режим указателя, выделяем все и пытаемся скомпилить. Если ошибок от сказма не будет, то можно попробовать загрузить сим и посмотреть что получилось.
Далее все вышеприведенное можно повторить для всех остальных видов входных данных, учитывая то, что для островов LWM полигон должен быть типа «земля»
Естественно, не забываем править имя проекта и писать при этом все полученное в файлы с другими названиями.
Теперь немного о том, что точно мне пришлось решать ручками.
Исходная векторная информация, которой я обладал, было абсолютно до барабана, какие требования к ней могут возникнуть у сима.
Соответственно, возникали всякие артефакты при отрисовке симом или воды или земли в некоторых местах. Опять хочу сказать, что читал Terrain SDK достаточно давно, поэтому не смогу с уверенностью сказать, было ли там что-либо о каких-то ограничениях, на которые я нарывался. Мне пришлось руками резать полигоны (и земли и воды) которые попадали в один и тот же LOD13, но с двух разных сторон (представьте себе незамкнутый бублик, который имеет начало и конец в одном прямоугольнике, но не весь в нем находится). Иначе этот LOD13 мог оказаться полностью заполненным землей или водой, в зависимости от типа неправильного полигона. В паре случаев такой полигон испортил несколько окружающих, в которые он попадал, хотя в них явно не было попадания с двух сторон. Ну, так или иначе, в ваших случаях это будет уже ваша проблема, с которой надо будет разбираться.
Справедливости ради замечу, что таких LOD13-ых мне пока на всей области попалось около 8 штук.
И есть еще одно замечание, которое обязательно надо учесть.
В моем случае, точнее в случае с волжской водой, у HGT явные проблемы. В них высота поверхности сильно плавает даже там, где Волга разливается достаточно широко. Я точно знаю, что высота уреза после ГЭС у нас 28 метров, а до ГЭС около 53 метров. В HGT же эти цифры (в среднем) 23 и 44. причем разброс в одном участке, размером около квадратного километра, может быть от 20 до 31, для поверхности ниже ГЭС.
Из-за этого вытекающие проблемы:
Если класть воду без задания её высоты в отдельных местах, то, в таких местах, на гидроплане делать нечего, да и вообще без слез не взглянешь на отдельные участки, где будет бугристая вода, или канавы по краям русла реки. Можно пробовать лечить FSDEM’ом, давая ограничение по минимальной высоте или просто приподнимая весь меш вверх, но, все равно, бугры на воде останутся.
Другой вариант – указать для таких крупных полигонов воды известную высоту, но тогда возникнут следующие противоречия. Острова сравняются с поверхностью воды, поскольку они будут класться уже на неё с исправленной высотой, и, в некоторых местах, вода может оказаться с превышением поверхности земли, в силу неточности трехсекундного меша.
В общем решать в каждом случае придется индивидуально, по крайней мере я уже точно знаю, что буду выкладывать на авсим.ру (когда вообще созрею и скорректированный меш, и разные варианты крупных водоемов, как с выравниванием воды, так и без. Так сказать, выбор будет за потребителем.
В заключении небольшой скриншот того что получилось в районе города Самара. Не обращайте внимание на эксперименты с лесами в районе аэродрома, это не в рамках этого тутора

Я не большой специалист в SBuilder, изучаю все методом «научного тыка»  У меня была похожая ситуация, я сделал так:
— создал полигон Exclude_All_Terrain_Items, размером побольше той области, которую хотел пририсовать. С английским я не дружу, но насколько я понял из тутора, какой бы ни была форма полигона exclude, она заключается в прямоугольник (bounding box)
— создал прямоугольный полигон hydro, размером ещё больше bounding box; вот в этом месте и пришлось помучиться: если сделать полигон чуть поменьше, чем надо — в FSX на границе полигона появляются полоски суши, если чуть больше — на стыке с дефолтной сушей появляются полоски воды. Честно говоря, я так и не понял в каком месте это «надо». В моём случае проблема решилась когда я нарисовал hydro-полигон точно по границам LOD13.
— третий и последний шаг — прорисовка полигона в том месте, где я затер дефолтную сушу и где есть желание добавить сушу; после чего сначала в контекстном меню этого полигона щелкнуть на «Set as hole…» (сделать дырку  ), а потом щелкнуть на границе hydro-полигона. Если после этого исчезла надпись возле курсора «click to select parent poly», значит дырка в hydro-полигоне проделана, соответственно в симе она будет выглядет как суша. Здесь тоже есть нюанс: если «дырка» выходит за пределы hydro-полигона — суша в симе не появится, а если наоборот — то будет полоска воды между дефолтной сушей и нарисованной. Чтобы этого не было, я при максимальном увеличении максимально приблизил границу «дырки» к границе hydro-полигона.
Может я где ошибаюсь, или сделал лишнее действие, но в моем случае все сработало.
All versions of SBuilder and SBuilderX are now freely available for personal and commercial projects!
This page is the ReadMe.txt file that comes with SBuilderX 3.13. Later versions, 3.14 and 3.15, included many additions to the operation of SBuilderX. Please refer to the forum here at PTSim for full information.
SBUILDERX — DESCRIPTION
This version of SBuilderX, version 3.13, is a scenery creation tool for FSX. SBuilderX produces the following types of scenery:
— Land and Water Class Scenery
— Photo Scenery
— Vector Scenery
— Exclusion Rectangles
— Objects Placement
— Ground Textured Polygons and Lines
— Generic Buildings
— Extrusion Bridges
To install SBuilderX, you run the file SBuilderX313.msi. The installer will check for all Windows components that are needed to run SBuilderX and instructs you if some of these components are not found.
I would like to express my gratitude to Luis Féliz-Tirado without whom many additions in this present edition were not possible. His tutorials, his carefully testing, his positive criticism and even is help in putting together many files of this program, are most appreciated. SBuilderX also benefited from the support of many FSX experts. Here is an incomplete list: João Hespanha, Richard Ludowise, José Lobo, Holger Sandmann, Scott Gridley, Luis Feliz Tirado, Scott Smart, Dick Boley, Ian Gallacher, Ross Casey, Lance Tucker, Mischa, and Arno Gerretsen. I am also grateful to Manfred Moldenhauer for Scasm, Pete Dowson for FSUIPC, Paul Henty for FsuipcClient, Jon Masterson for jmBglLib, and to the authors of the “Shapelib” software. Finally, I would like to thank the Microsoft FSX Aces Team for making FSX.
SBUILDERX — LICENSE AGREEMENT
You should carefully read the following terms and conditions before using SBuilderX. Unless you have a different license agreement signed by PTSIM your use of SBuilderX indicates your acceptance of this license agreement and warranty.
* COPYRIGHT
SBuilderX is copyright © 2007-2009 Luis Sá & PTSim. SBuilderX can be posted, distributed or made available for download providing that its original ZIP file is not modified. You can use SBuilderX in freeware scenery projects provided that you make a statement in the documentation of your project similar to this one: «SBuilderX, was used in the making of «. In order to use SBuilderX in a commercial project you need to contact PTSim at This email address is being protected from spambots. You need JavaScript enabled to view it..
* PLUG-INS
SBuilderX can be supplied to you with third party Plug-Ins that add the capacity to use background images downloaded from the Internet. If you use any of such Plug-Ins, you agree to comply with all applicable terms and conditions that such images may hold.
* DISCLAIMER OF WARRANTY
The software is furnished ‘AS IS’ and does not come with any implicit or explicit guarantee. The author declines any responsibility for contingent malfunctions, deceleration and any drawback that should arise using this software.

Modifying Default Airport Terrain with SBuilderX
Introduction
This tutorial describes the installation and use of a new tool, SBuilderX 3.1, to review
and modify airport terrain. This tutorial assumes that an AFCAD file has been developed
which has modified the airport geometry such that the default terrain no longer works
properly. There can be a couple of reasons for this:
MSFS put the airport in the wrong position
The airport has been modified since FSX was released
This tutorial follows and expands on a tutorial I wrote for using the FS9 version of
Sbuilder The airport worked on in the FS9 tutorial was Cleveland-Hopkins (KCLE) in
Ohio, USA. This airport has been fixed in FSX. For this tutorial, we will work on
another airport, Atlanta Hartsfield Airport (KATL). This airport has a new runway on the
south side, Rwy 10/28, which is not depicted in FSX.
Step 1: Obtain and Install Tools
SBuilderX requires the use of the FSX scenery design SDK tools, which are part of the
FSX Deluxe package. The SDK is installed separately from FSX from the DVD. After
installing the SDK, download and install the service pack SP1a from Microsoft, available
here:
http://www.fsinsider.com/downloads/Pages/FSXSoftwareDevelopmentKitUpdate.aspx
Note that some tools in the SDK operate within FSX, and will only run correctly if FSX
SP1 is installed. This is not a problem for the scenery design tools. Make sure to read
the release notes with the SDK and follow the instructions if you do not install the SDK
to the default location.
Installation and use of SBuilderX requires prior installation of the Microsoft msi installer
and .Net framework 2.0 (XP) or 3.0 (Vista or SP). If you install SBuilderX on your FSX
system that should not be a problem, but you should verify if you run a separate system
for development.
Latest full version of SBuilderX is here:
http://www.ptsim.com/SBuilderX/SBuilderX310.zip
Scenery object descriptions are being compiled at the time of this writing, but should be
available from the SBuilderX forum here (also for support issues):
http://ptsim.com/forum/forum.asp?FORUM_ID=22

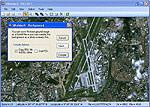
SBuilderX is distributed in a zipfile package. Extract the SBuilderX310.msi to a
temporary location, and double-click it to start the Microsoft Installer. This installer is
common to many programs. You will have to click through a license and select an
installation folder. Eventually you will see the program installation progress screen:
Start SBuilderX by double-clicking the desktop shortcut icon. It should take
some time to pull in some textures and then open to the main screen.
No progress dialog is provided during this step, so just wait for it to complete. SBuilderX
will also create copies of required SDK utilities (which is why the SDK must be installed
first). Once the necessary files have been created, the SBuilderX folder should look
something like this:

Several of these folders are related to placing 3d scenery objects. The tiles folder
will contain downloaded satellite or map images. The tools folder contains the copies of
the SDK tools, as well as the normal location for scenery files generated while running
SBuilderX.
The .txt files are configuration files which can be edited for advanced use, but aren’t
required in this tutorial. In the main SBuilderX folder is a configuration file, sbuilder.ini
which has some items that can be hand-edited. Many of the items are set within
SBuilderX, but there are some which currently must be set by editing this file. Note that
you must exit SBuilderX before editing this file or it will be written over by SBuilderX.

AutoLinePolyJoin is a powerfull featrue that can connect lines and polygons. If you are
finding that your sceenry is joining by mistake, you can set this to 0 to turn off. Also of
interest are MeasuringMeters and DecimalDegrees, which can be set to suit (I prefer
using decimal degrees, and in FSX it is now possible to edit fsx.cfg to get decimal degree
readings of positions.
Once SBuilderX finishes initial installation, you should see the main window:

You are provided an opportunity to contribute towards continued development of
SBuilderX.
One important feature of SBuilderX is the ability to download satellite and other imagery
for use in positioning scenery or the creation of photo scenery. Plug-ins for various map
servers are provided.
You should take care to read the distribution and use agreements at the server sites before
incorporating any imagery into your finished scenery projects. Also, experience has
shown that at least some of the imagery servers provide «throttling» based on the amount
of data downloaded, so you should be judicious in how much imagery you attempt to
download at any one time. It appears that the servers will «lock out» an IP address for
several days if too much data is accessed.
Step 2: Determine the scope of the problem and obtain FSX screenshot Default scenery in FSX is organized in a folder tree under \scenery\. There are a couple
of world-wide folders (Base, World, and Generic) and the rest are in regional folders.
The world is divided up into squares known as «LOD5». These LOD5 squares are
numbered and arranged into files for each type of scenery. In FSX these files have been
grouped into geographic area folders using the format xxyy where xx and yy are two-
digit integers starting at the northwest corner of the earth (90N, 180W). For our project,
we need to modify the flatten and airport background data for KATL. In a change from
FS9, all vector data for a LOD5 area are combined in a single CVXxxyy.bgl file. The xx
and yy here are the same as used in FS9. In FSX, the airport flattening and background
polygons have been combined into a single type, called airport boundary. The actual
functionality of the airport boundary is determined by the GUID assigned (this process is
transparent to an SBuilderX user) but it is possible to use one or more of the following
effects in an airport boundary polygon:
Set a flatten altitude (you must supply the elevation)
Change the landclass texture to an appropriate airport background (no option to
set a particular background texture as in FS9)
Exclude the display of landclass autogen.
At this point there are limited tools for reviewing the default (or addon) terrain data. The
best tool at the moment is the TMFViewer tool that is part of the SDK. I recommend

loading the world landclass file (worldlc.bgl) into tmfviewer first to orient yourself. You
can then pan and zoom into the area of interest. For us it is Atlanta Georgia. Tmfviewer
will provide a status line which indicates the terrain folder and LOD5 area for the cursor
location. Using this, we can determine that the default scenery is in folder 0302/scenery
with file name cvx2520.bgl. Here is what the airport boundary file looks like in
tmfviewer:
Note that the default files also place some landclass polygons (called «parks») shown in
green, in addition to the yellow airport boundary.
Start FSX and go to KATL. Select top-down view and slew mode. Slew/zoom as
necessary to get your project area in view. Press Cntrl-space bar to orient the view «north
up». (Always remember to do this before taking a screen shot or you can get rotated
images which are no good.)
Here is a shot of the default airport:


Step 3: A review of FSX scenery concepts Before starting our mod, a brief review of FS scenery. An airport is built up from several
components. The main types are terrain and scenery objects. Both consist of mesh (3d
models) and textures which are wrapped over the mesh.
The terrain mesh/model is defined in files commonly referred to as «mesh». This mesh
can be modified by flatten polygons. Flattens force the mesh to a single elevation within
their areas. (There is a sloped flatten, but that isn’t relevant to airports.)
Next, textures are wrapped over the mesh. FS provides for several layers of different
textures, which are placed one over the other. Only a few of the possible number are
used in the default files. The first texture is the landclass texture. In principle, you could
simply change the landclass texture to create an appropriate airport background. The
problem is that landclass textures cover a square 1.2 km area, which may not coincide
with the airport. Thus texture polygons can be used to locally modify the landclass
texture. These textures can be defined in two ways: FSX provides a set of pre-
established texture IDs, listed by GUIDs. Landclass textures are installed by using an
FSX «park» polygon with an appropriate landclass texture identified. FSX also
supports FS9 methods using a texture ID , or a specific bitmap. The texture ID provides
a convenient means of achieving a specific texture effect. Texture polygons can be
excluded. Exclusion works using the scenery.cfg priority system. For terrain, exclusion
specifies the layers to be excluded. This way, it is possible to exclude some texture
polygons while allowing others to remain.
Once the terrain component is completed, scenery objects can be placed. Airport scenery
consists of «flat» objects such as runways and taxiways, and 3d objects such as terminals.
An important part of the scenery engine is determining which objects are in view, and
which hidden. Improper setting of flatten elevation within an airport boundary can cause
texture «flickers» as the renderer can have difficulty determining what should be in view.
Step 4: Correct the Airport Boundary Now that the basics are out of the way, we can begin. In SBuilderX create a new project.
The only things in the new project that we need to consider at this point are the project
name which will be used in the filenames of the files we create, and the folder location,
which you can use for moving completed scenery from the SBuilderX work folder. It
can be helpful to create a development folder for your scenery project. Note that if you
right click on any empty part of the main project window, you can call up the project

properties. (If you attempt to select an object’s properties and «miss it», you will get this
too.)
When you have created a new project position the cursor in the location of KATL by
selecting the menu «View->go to position» and enter the geo location for KATL (you can
determine this from tmfviewer or FSX):
.
We will now obtain a background image for our development. First we will select the
best server. This may take some trial and error since each has its own image source. In
the menu select «Edit->preferences»

Here I have selected the Microsoft «virtual earth» server. Once selected click OK to
close. Now in the menu select «View->Show Background»
A checkmark will be placed next to the option and image tiles from Virtual Earth will fill
the display. At default the zoom level is 8, and appropriate resolution image tiles are
downloaded:

You can zoom in using the mouse wheel. I found zoom level 14 or 15 to be the best.
You can also pan by pressing and holding the mouse wheel and then dragging the display
position. As you pan, additional tiles are downloaded so the viewing area is always
covered.

You should pan sufficiently to obtain tile coverage for your area of interest, in this case
the KATL airport area. If no tiles are available for the zoom level you are using, you will
get a «missing tile» display

You will need to zoom in/out or try a different server. Once you have a suitable
background, save it as a «map» for future use, or possibly as photo-scenery. Zoom out so
your entire project area is visible, then use menu «File->Add map->From background»:
You will see this dialog:
You have a choice of zoom level offered and you can drag a selection box over the area
of coverage you want to reduce file size. Then click OK to create the map file. A bitmap
file with a cryptic name will be created in the SBuilderX «Work» folder, along with a text
file that contains the geographic extent of the map. This can be used for geolocating
(calibrating) the map in other software.

Note that areas with missing tile coverage are covered with «white» no-data tiles so that
the finished map is rectangular. Once you create a map, the background is automatically
de-selected from view, but you can reselect it from the menu if required.
At this point it is a good idea to save your work with menu «File -> Save Project As»:

The native format for SBuilderX projects is a binary file with an SBP extension.
Caution: SBP format files tend to not be transferable across program versions. To create
a project file for use in another version, or to combine projects, use the menu «File-
>Export->Sbuilder SBX». SBX is a text format containing the same information as the
SBP project file. SBX files can be imported using the «File->Import Sbuilder SBX»
menu. They are also useful for troubleshooting if you encounter problems.
Now you can create terrain. Click on the «poly» toolbar icon to enter poly mode.
First, we will exclude the existing default airport boundary. You do not have to be exact,
simply ensure that you overlap the area of the default polygon. Click on the map on a
position that overlaps the default grass area and then add points to the polygon by
clicking around the area we want to enclose. The polygon is automatically closed, so you
don’t have to return to the start point.

Hit «escape» key or right click to get out of edit mode. Now you have your polygon. If
you click on one of the points, you can edit the point or drag it to move it. If you click on
the edge of the poly, you can drag the whole polygon. Polygons are initially drawn as
yellow by default.
Now right click the edge of the polygon just created, to get the context menu with a
properties option.
Select Properties to get the Properties dialog for this polygon. The properties dialog for
each object is important, and you will often have to return to this dialog as you refine
your scenery.

There are 3 tabs in this dialog. The Vector Polys tab is used for FSX vector polygons. A
box on the left gives an idea of the texture appearance (n/a for exclusions). The scroll
box shows the various types of FSX polygons. Select
«Exclude_All_Airport_Boundaries»
(There is also an «exclude all» but that isn’t so useful for this project, since we still want
roads and streams in our project area). The Type box shows the color that will be used to
fill the polygon. This can be changed with the «color» selection. «info» is used for
polygon types that reference entries in terrain.cfg (exclusions do not). Smooth and
Sample are advanced features not discussed here. Experiment with these if desired.
On the general tab you can enter a label for the polygon. This is helpful when there are
many overlapping polygons.

Close the properties dialog by clicking OK.
You can again select the polygon by clicking its edge, and this time select transparency.
You can «reduce» transparency to see through your polygon to the map (or background).
Save your project.

Step 5: Correct the Airport Flatten/Boundary We will create a new flatten polygon in a similar manner. I prefer to make the flatten
separate from the rest of the airport boundary. I have found that having too large a flatten
can cause «plateau» problems, particularly with higher resolution mesh. I try to keep the
flatten as small as possible. Generally, it looks nicer to have the airport texture extend
over the flatten boundaries to natural borders.
Click on the «poly» tool to go into poly mode. Begin to construct a new polygon,
following the airport topography. Once you have completed the polygon, right click to
get the Properties dialog as before.
Select AB_Flatten (airport boundary flatten) and name the poly, then click OK. You
need to set the altitude for the flatten. At this point, there aren’t many tools for
determining default elevations for flattens. The best available is TCalcX_002. This tool
runs alongside FSX reporting position information at the user aircraft position. In the
case of airports, it is possible to look at the airport facility data «airport reference point»
using a tool such as Airport Design Editor or FSX planner. Alternatively you could
obtain elevations from FSX. To do this you must correct the reported elevation for the
height of the aircraft reference point above ground level when the aircraft you are using is
on the ground.
In the case of KATL, the airport ARP is at 312.724m. For the flatten elevation I used
312.74. Select the flatten polygon and right click then select ‘Set Altitude»

Use the «Apply constant altitude to Points» box and click «Set» then «Close».
Now repeat the process used to create the flatten polygon to draw the background texture
polygon. This polygon will be used to change the texture and also to exclude all the
autogen.
Again, use the Properties dialog to set the polygon type, in this case
AB_MaskClassMap_ExcludeAutoGen. MaskClassMap causes FSX to replace the
landclass tile texture that would normally be drawn with a comparable texture for an
airport. This can cause some problems when more than one landclass is placed within an
airport, since it can cause different textures to be drawn. Unlike FS9, where scenery
object exclusion rectangles would exclude autogen, in FSX you must use the airport
boundary for this. Here I have used the «View» menu to deselect the map so that the
polygons are easier to see:

At this point the three polygons making up the new airport boundary are completed.
Step 6: Compile, Install, and Test We need to compile our new polygons into a bgl file. We must select the polygons we
wish to compile. Click on the «Pointer» tool icon to enter pointer mode.
Use the menu «Select -> All polygons» to select all polygons for compiling. It is also
possible to drag a selection box to include only some polygons — useful for testing in
large projects.

We then select the Compile tool:
We can now compile our selected polygons. This brings up a dialog box.
In this case our only scenery is terrain vector, so the other options are grayed out. I
checked the «Copy BGL files to BGL folder» to copy the bgl to my project folder. An
alternative would be to set the project properties folder to an FSX scenery folder, such as
Addon scenery\Scenery, but my practice is to manually copy bgl files into FSX active
scenery.
The compilation will also create some files in the «Shapes» folder:

These are the ESRI shapefile format files required by the SDK shp2vec tool. The files
can also be loading into GIS software to analyze the scenery with other GIS data that
might be available.
We can load the file into tmfviewer to observe the results. Here the «exclusion» vector
layer has been turned off so the new backgrounds are visible.
We can now start FSX and test the result.

I found there was an area of «forest» with many autogen trees still present within my
boundary. I assumed this was due to a park polygon in UTX USA. I simply went back
to my project and crated a small park exclusion polygon to get rid of this.
At this point a new FSX «AFCAD» file could be installed. For this tutorial, I simply
reused an AFCAD file done for the «Frame Rate Friendly» FRF-KATL scenery for FS9.

Note that UTX-USA is installed in the FSX. It appears that the FRF version of Runway
10/28 is not perfectly positioned and could use some adjustment. (The freeway does run
under the runway though.)
It is worthwhile to inspect the effect of the flatten in-game to look for plateaus. It appears
there is some plateauing at the southeast corner of RWY 10:
I was concerned how this might look with higher resolution mesh, so I downloaded some
of the NED 1/3 second elevation DEM data from the USGS seamless server. I loaded the
mesh into a GIS tool, Global Mapper, and loaded the «shapefile» files created during the
compilation of the scenery. Looking at the overlay, it appears that the terrain around

Rwy10 must have been filled in to a degree. It also looks like there are some areas where
the flatten file could be fine-tuned.
I also loaded the NIMA DAFIF runway data shapefile. The NIMA data is useful for
checking positioning of airport elements. I also exported the mesh data into a Geotiff
(changing NAD83 datum from the USGS DEM to WGS84 that resample needs) and
compiled into mesh using the SDK resample tool. I installed the mesh and checked again
for plateaus but it didn’t seem to be appreciably worse.
And lastly! This provides some idea of the kinds of terrain modifications that can be done with
SBuilderX.
Thanks to Luis Sa, author of this excellent tool.
Scott Smart

Addendum: Correcting a bad airport elevation A common problem is that an airport is improperly charted, with the result that the airport
is sitting in a hole or on a plateau. It appears in the default FSX mesh, that Microsoft has
adjusted the mesh to fit the airport elevation. When addon mesh is installed, this
adjustment is lost. Higher resolution can make the effect worse. Here is airport LG0D
Polikhnitos in Greece:
The airport looks OK. But now add new mesh (this mesh was created from the CGIAR 3
sec SRTM v3 DEM data):
Obviously, not too good. Checking some online sources, I found all seem to agree that
the elevation of LG0D should be 650 ft (198.12m). Apparently, this is incorrect. I
looked at the DEM data in Google Earth and in my GIS software:

Looking at the elevations, it seems like 68m is a better fit for this airport. Using the same
method as in the KATL tutorial, I excluded the default airport boundary and created a
new flatten/boundary for the airport.

I installed the new cvx file into addon scenery and found this:
It appears nothing has changed. However, close inspection shows the new airport
boundary is in place, but the runway is still at the old elevation. Airport data is contained
within the APX files. These files contain information which FSX uses for both the visual
parts of an airport, and the «plumbing» of an airport. This «plumbing» controls things like

the behavior of the AI aircraft and the ATC commands. In FSX, parts of the airport such
as the runways have their own elevation settings, and FSX will draw them at the
indicated elevation, creating a «flatten» to meet the terrain. Fixing this problem requires
editing the airport data, both for the visual scenery and the «plumbing». This requires
creation of two files. One is similar to the AFCAD2 files used in FS9. This file will be
edited to have the airport reference point, runways, and starts all use the new elevation. It
is generally good to have the visual airport scenery slightly higher than the flatten, so I
used 68.05m (.05 above the flatten). A deleteAirport element is needed to tell FSX to
remove the default visual scenery. I used FSX Airport Design Engine (a program similar
to AFCAD but for FSX) to make these changes and placed the new bgl file into addon
scenery\scenery. This was the result:
The runway «flatten» has been removed, but now the runway is floating in the air. The
problem is that the way the «plumbing» functions work in FSX, data from the default
scenery area airports is read first and is used for setting up AI and other features. This is
done before any addon scenery files are read. The fix for this is to place a file with the
proper elevation data for LG0D in a default scenery area: \scenery\world\scenery\ is a
good choice. All that is needed is an airport file that places the airport reference point
elevation at the proper elevation; no runways or other elements are required. For LG0D,
the xml for this file looks like this:

This file is compiled with bglcomp and installed into \scenery\world\scenery\.
The final results:
SBuilder X, version 310, is a scenery creation tool that produces the following types of scenery; landclass and waterclass, photo scenery, vector scenery, exclusion rectangles, objects and macro placement, ground textured polygons. By Luis Sa.
Screenshot of the SBuilderX 310 program.
SBUILDERX310.ZIP contains 2 files:
- ReadMe.txt, the file that you are reading
- SBuilderX310.msi, an installer programme for SBuilderX
SBUILDERX — INSTALLATION
To install SBuilderX, you run the file SBuilderX310.msi. The installer will check for all Windows components that are needed to run SBuilderX and instructs you if some of these components are not found. You need to remove previous versions of this tool using the Windows Control Pannel. Please backup previous versions before installing this new one.
SBUILDERX — DESCRIPTION
The present version of SBuilderX, version 310, is a scenery creation tool for FSX. SBuilderX produces the following types of scenery:
- Land and Water Class Scenery
- Photo Scenery
- Vector Scenery
- Exclusion Rectangles
- Objects and Macro Placement
- Ground Textured Polygons
SBUILDERX — ACKNOWLEDGEMENTS
SBuilderX was not possible without the support of many FSX experts whose contribution is acknowledged. Here is an incomplete list: Joso Hespanha, Richard Ludowise, Josw Lobo, Holger Sandmann, Scott Gridley, Luis Feliz Tirado, Jon Masterson, Scott Smart, Dick Boley, Ian Gallacher, Ross Casey and Arno Gerretsen. I am also grateful to Manfred Moldenhauer for Scasm, Pete Dowson for FSUIPC, Paul Henty for FsuipcClient, and to the authors of the ‘Shapelib’ software. Finally I would like to thank the Microsoft FSX Aces Team for giving us FSX.
![]()
The archive sbuild31.zip has 4 files and directories contained within it.
File Contents
This list displays the first 500 files in the package. If the package has more, you will need to download it to view them.
| Filename/Directory | File Date | File Size |
|---|---|---|
| ReadMe.txt | 07.07.07 | 2.78 kB |
| SBuilderX310.msi | 07.07.07 | 8.60 MB |
| flyawaysimulation.txt | 10.29.13 | 959 B |
| Go to Fly Away Simulation.url | 01.22.16 | 52 B |
Installation of Add-on Aircraft/Scenery
Most of the freeware add-on aircraft and scenery packages in our file library come with easy installation instructions which you can read above in the file description. For further installation help, please see our Flight School for our full range of tutorials or view the README file contained within the download.
SBUILDERX 3.15
**************
The files contained in the archive SBX315.zip solve some
problems found when running SBuilderX 3.14 on Windows 10
operating systems. A full repository of the source code
can be found in:
https://github.com/LuisVSa/SBuilderX
SBuilderX 3.15 does not relay on any external DLL file to
read and write Esri shape files. A relevant number of
known bugs have been corrected as well as some enhancements
have been added.
INSTALLATION
************
You need to have a complete and running version of SBuilderX
3.14 installed in your system. Then you simply replace/add
the files contained in the present archive. It is advisable
that you create a backup copy of the files that will be
replaced by the present ones. A set of plugins for different
Tile Servers is included. The DLLs are of the anyCPU type
and were written by Richard Ludowise.
REQUIREMENTS
************
SBuilderX 3.15 is a Visual Basic programme and requires that
you have .NET Framework 4.7 installed in your system. If you have
not it installed, you can get it here:
https://www.microsoft.com/net/framework/versions/net47
DirectX3D version 9 also needs to exist in your system.
LIMITATIONS
***********
SBuilderX 3.15 was compiled with AnyCPU as target. Therefore it
runs as a 64-bit process on x64 machines and as a 32-bit process
on x86 machines. However, it uses slimDX.dll for which there
is no anyCPU version. If you are running on a x64 machine you need
to do nothing. If you are running on a x86 machine you should make
a backup copy of the file slimDX.dll and then rename the file
slimDX-x86.dll to slimDX.dll.