
- General
- OS details
- CPU info
- GPU extensions
- WiFi kernel messages
- build.prop
- Modules
- Memory map
| General Specifications | |
|---|---|
| Manufacturer | Rockchip |
| Model | Sofia 3GR Car |
| Firmware | 6.0.1; eng.hct.20170824.175111; SDK23 |
| CPU | 4 cores; sofia3gr; Max: 1200,0 MHz; Min: 416,0 MHz |
| Display | 1024 x 600; DPI: 240; Evaluated Size: 4,9″ |
| Touch screen | Multitouch 5 points |
| GPU | Mali-450 MP4; ARM; OpenGL ES-CM 1.1; OpenGL ES 2.0 |
| RAM | 2048 MB (1979 MB available) |
| Flash | 16 GB (14.676 GB actual); 0.391 GB; 16 GB (14.913 GB actual) (see memory map tab) |
| Communications | |
| Phone | GSM; Net: HSDPA |
| WiFi | iwlmvm |
| USB Host | Yes |
| Bluetooth | Yes |
| GPS | Yes |
| Advanced Features | |
| Front camera | Photo: 0.3 MP; Max: 704×480; Video: 0.3 MP; Max: 704×480; Focus: manual auto fixed infinity macro edof continuous-video continuous-picture; Flash modes: auto torch on off |
| Back camera | No |
| Sensors | MPL Raw Gyroscope (Invensense); range: 0…34,907; resolution: 0,001 (0,003%); power: 6,1mA; |
| MPL Accelerometer (Invensense); range: 0…19,613; resolution: 0,038 (0,196%); power: 0,139mA; | |
| MPL Magnetic Field (Invensense); range: 0…9830; resolution: 0,285 (0,003%); power: 10mA; | |
| MPL Rotation Vector (Invensense); range: 0…1; resolution: 0 (0,001%); power: 16,239mA; | |
| MPL Linear Acceleration (Invensense); range: 0…19,613; resolution: 0,038 (0,196%); power: 16,239mA; | |
| MPL Gravity (Invensense); range: 0…9,81; resolution: 0 (0%); power: 16,239mA; | |
| Vibrator | No |
| Supported languages | 185; Afrikaans; Aghem; Akan; Amharic; Arabic; Assamese; Asu; Azerbaijani; Basaa; Belarusian; Bemba; Bena; Bulgarian; Bambara; Bengali; Tibetan; Breton; Bodo; Bosnian; Catalan; Chiga; Cherokee; Czech; Welsh; Danish; Taita; German; Zarma; Lower Sorbian; Duala; Jola-Fonyi; Dzongkha; Embu; Ewe; Greek; English; Esperanto; Spanish; Estonian; Basque; Ewondo; Persian; Fulah; Finnish; Filipino; Faroese; French; Friulian; Western Frisian; Irish; Scottish Gaelic; Galician; Swiss German; Gujarati; Gusii; Manx; Hausa; Hawaiian; Hebrew; Hindi; Croatian; Upper Sorbian; Hungarian; Armenian; Indonesian; Igbo; Sichuan Yi; Icelandic; Italian; Japanese; Ngomba; Machame; Georgian; Kabyle; Kamba; Makonde; Kabuverdianu; Koyra Chiini; Kikuyu; Kazakh; Kako; Kalaallisut; Kalenjin; Khmer; Kannada; Korean; Konkani; Kashmiri; Shambala; Bafia; Colognian; Cornish; Kyrgyz; Langi; Luxembourgish; Ganda; Lakota; Lingala; Lao; Lithuanian; Luba-Katanga; Luo; Luyia; Latvian; Masai; Meru; Morisyen; Malagasy; Makhuwa-Meetto; Metaʼ; Macedonian; Malayalam; Mongolian; Marathi; Malay; Maltese; Mundang; Burmese; Nama; Norwegian; North Ndebele; Nepali; Dutch; Kwasio; Norwegian; Ngiemboon; Nuer; Nyankole; Oromo; Oriya; Ossetic; Punjabi; Polish; Pashto; Portuguese; Quechua; Romansh; Rundi; Romanian; Rombo; Russian; Kinyarwanda; Rwa; Sakha; Samburu; Sangu; Northern Sami; Sena; Koyraboro Senni; Sango; Tachelhit; Sinhala; Slovak; Slovenian; Inari Sami; Shona; Somali; Albanian; Serbian; Swedish; Swahili; Tamil; Telugu; Teso; Thai; Tigrinya; Tongan; Turkish; Tasawaq; Central Atlas Tamazight; Uyghur; Ukrainian; Urdu; Uzbek; Vai; Vietnamese; Vunjo; Walser; Soga; Yangben; Yiddish; Yoruba; Standard Moroccan Tamazight; Chinese; Zulu |
| Battery | Technology: Unknown; Voltage: 3800 |
| SD Version: | 1.1 7 |
KERNEL: Linux version 3.14.0+ (rocky@hctr930) (gcc version 4.6.4 (Ubuntu/Linaro 4.6.4-6ubuntu2) ) #55 SMP PREEMPT Tue Aug 22 14:39:47 CST 2017
CODENAME: REL
Mainboard: rk30sdk
BRAND: Android
CPU_ABI: x86
CPU_ABI2: armeabi-v7a
DEVICE: sofia3gr_car
DISPLAY: sofia3gr_car_64-userdebug 6.0.1 MMB29M eng.hct.20170824.175111 release-keys
FINGERPRINT: Android/sofia3gr_car_64/sofia3gr_car:6.0.1/MMB29M/hct08241754:userdebug/release-keys
HARDWARE: sofiaboard
ID: MMB29M
TAGS: release-keys
processor : 0
vendor_id : GenuineIntel
cpu family : 6
model : 93
model name : Genuine Intel(R) CPU @ 728
stepping : 1
microcode : 0x102
cpu MHz : 728.000
cache size : 512 KB
physical id : 0
siblings : 4
core id : 2
cpu cores : 4
apicid : 4
initial apicid : 4
fpu : yes
fpu_exception : yes
cpuid level : 11
wp : yes
flags : fpu vme de pse tsc msr pae mce cx8 apic sep mtrr pge mca cmov pat clflush mmx fxsr sse sse2 ss ht nx rdtscp lm constant_tsc arch_perfmon rep_good nopl xtopology pni pclmulqdq monitor ssse3 cx16 xtpr pdcm sse4_1 sse4_2 movbe popcnt aes lahf_lm 3dnowprefetch tsc_adjust smep erms mm_type_aliasing
bogomips : 898.66
clflush size : 64
cache_alignment : 64
address sizes : 32 bits physical, 48 bits virtual
power management:
processor : 1
vendor_id : GenuineIntel
cpu family : 6
model : 93
model name : Genuine Intel(R) CPU @ 728
stepping : 1
microcode : 0x102
cpu MHz : 728.000
cache size : 512 KB
physical id : 0
siblings : 4
core id : 3
cpu cores : 4
apicid : 6
initial apicid : 6
fpu : yes
fpu_exception : yes
cpuid level : 11
wp : yes
flags : fpu vme de pse tsc msr pae mce cx8 apic sep mtrr pge mca cmov pat clflush mmx fxsr sse sse2 ss ht nx rdtscp lm constant_tsc arch_perfmon rep_good nopl xtopology pni pclmulqdq monitor ssse3 cx16 xtpr pdcm sse4_1 sse4_2 movbe popcnt aes lahf_lm 3dnowprefetch tsc_adjust smep erms mm_type_aliasing
bogomips : 898.66
clflush size : 64
cache_alignment : 64
address sizes : 32 bits physical, 48 bits virtual
power management:
processor : 2
vendor_id : GenuineIntel
cpu family : 6
model : 93
model name : Genuine Intel(R) CPU @ 728
stepping : 1
microcode : 0x102
cpu MHz : 728.000
cache size : 512 KB
physical id : 0
siblings : 4
core id : 1
cpu cores : 4
apicid : 2
initial apicid : 2
fpu : yes
fpu_exception : yes
cpuid level : 11
wp : yes
flags : fpu vme de pse tsc msr pae mce cx8 apic sep mtrr pge mca cmov pat clflush mmx fxsr sse sse2 ss ht nx rdtscp lm constant_tsc arch_perfmon rep_good nopl xtopology pni pclmulqdq monitor ssse3 cx16 xtpr pdcm sse4_1 sse4_2 movbe popcnt aes lahf_lm 3dnowprefetch tsc_adjust smep erms mm_type_aliasing
bogomips : 898.66
clflush size : 64
cache_alignment : 64
address sizes : 32 bits physical, 48 bits virtual
power management:
processor : 3
vendor_id : GenuineIntel
cpu family : 6
model : 93
model name : Genuine Intel(R) CPU @ 728
stepping : 1
microcode : 0x102
cpu MHz : 728.000
cache size : 512 KB
physical id : 0
siblings : 4
core id : 0
cpu cores : 4
apicid : 0
initial apicid : 0
fpu : yes
fpu_exception : yes
cpuid level : 11
wp : yes
flags : fpu vme de pse tsc msr pae mce cx8 apic sep mtrr pge mca cmov pat clflush mmx fxsr sse sse2 ss ht nx rdtscp lm constant_tsc arch_perfmon rep_good nopl xtopology pni pclmulqdq monitor ssse3 cx16 xtpr pdcm sse4_1 sse4_2 movbe popcnt aes lahf_lm 3dnowprefetch tsc_adjust smep erms mm_type_aliasing
bogomips : 898.66
clflush size : 64
cache_alignment : 64
address sizes : 32 bits physical, 48 bits virtual
power management:
GL_EXT_debug_marker
GL_OES_texture_npot
GL_OES_vertex_array_object
GL_OES_compressed_ETC1_RGB8_texture
GL_EXT_compressed_ETC1_RGB8_sub_texture
GL_OES_standard_derivatives
GL_OES_EGL_image
GL_OES_depth24
GL_ARM_rgba8
GL_ARM_mali_shader_binary
GL_OES_depth_texture
GL_OES_packed_depth_stencil
GL_EXT_texture_format_BGRA8888
GL_OES_vertex_half_float
GL_EXT_blend_minmax
GL_OES_EGL_image_external
GL_OES_EGL_sync
GL_OES_rgb8_rgba8
GL_EXT_multisampled_render_to_texture
GL_EXT_discard_framebuffer
GL_OES_get_program_binary
GL_ARM_mali_program_binary
GL_EXT_shader_texture_lod
GL_EXT_robustness
GL_OES_depth_texture_cube_map
GL_KHR_debug
GL_ARM_shader_framebuffer_fetch
GL_ARM_shader_framebuffer_fetch_depth_stencil
GL_OES_mapbuffer
[ 4328.191930] init: Starting service `p2p_supplicant`…
[ 4328.193922] init: Created socket `/dev/socket/wpa_wlan0` with mode `660`, user `1010`, group `1010`
[ 4328.792137] IWL_IDI wifi-0: IDI Rx config: SGs 3, pages 512
[ 4328.792261] IWL_IDI wifi-0: Rx is configured in tasklet mode
[ 4328.795501] IWL_IDI wifi-0: iwl_idi_rx_init: finished.
[ 4328.797901] IWL_IDI wifi-0: iwl_idi_tx_init_sg_data: sg_list offset 0
[ 4328.798016] use uCode_load_mem_addr static memory.
[ 4328.798154] use uCode_load_mem_dma static dma.
[ 4328.819653] skip to free uCode_load_mem_addr static memory.
[ 4329.003707] IWL_IDI wifi-0: IDI Rx config: SGs 3, pages 512
[ 4329.003784] IWL_IDI wifi-0: Rx is configured in tasklet mode
[ 4329.010562] IWL_IDI wifi-0: iwl_idi_rx_init: finished.
[ 4329.014745] IWL_IDI wifi-0: iwl_idi_tx_init_sg_data: sg_list offset 0
[ 4329.014836] use uCode_load_mem_addr static memory.
[ 4329.014906] use uCode_load_mem_dma static dma.
[ 4329.044562] skip to free uCode_load_mem_addr static memory.
[ 4329.068761] IPv6: ADDRCONF(NETDEV_UP): wlan0: link is not ready
[ 4329.078155] cfg80211: World regulatory domain updated:
[ 4329.078234] cfg80211: DFS Master region: unset
[ 4329.078266] cfg80211: (start_freq — end_freq @ bandwidth), (max_antenna_gain, max_eirp)
[ 4329.078321] cfg80211: (2402000 KHz — 2482000 KHz @ 0 KHz, 20000 KHz AUTO), (600 mBi, 2200 mBm)
[ 4329.079490] cfg80211: Regulatory domain changed to country: GB
[ 4329.079544] cfg80211: DFS Master region: unset
[ 4329.079596] cfg80211: (start_freq — end_freq @ bandwidth), (max_antenna_gain, max_eirp)
[ 4329.079646] cfg80211: (2402000 KHz — 2482000 KHz @ 0 KHz, 20000 KHz AUTO), (600 mBi, 2200 mBm)
# begin build properties
# autogenerated by buildinfo.sh
ro.build.id=MMB29M
ro.build.display.id=sofia3gr_car_64-userdebug 6.0.1 MMB29M eng.hct.20170824.175111 release-keys
ro.build.version.incremental=eng.hct.20170824.175111
ro.build.version.sdk=23
ro.build.version.preview_sdk=0
ro.build.version.codename=REL
ro.build.version.all_codenames=REL
ro.build.version.release=6.0.1
ro.build.version.security_patch=2016-06-01
ro.build.version.base_os=
ro.build.date=Thu Aug 24 17:55:12 CST 2017
ro.build.date.utc=1503568512
ro.build.type=userdebug
ro.build.user=hct
ro.build.host=hctr930
ro.build.tags=release-keys
ro.build.flavor=sofia3gr_car_64-userdebug
ro.product.model=Sofia 3GR Car
ro.product.brand=Android
ro.product.name=sofia3gr_car_64
ro.product.device=sofia3gr_car
ro.product.board=rk30sdk
# ro.product.cpu.abi and ro.product.cpu.abi2 are obsolete,
# use ro.product.cpu.abilist instead.
ro.product.cpu.abi=x86
ro.product.cpu.abilist=x86,armeabi-v7a,armeabi
ro.product.cpu.abilist32=x86,armeabi-v7a,armeabi
ro.product.cpu.abilist64=
ro.product.manufacturer=Rockchip
ro.product.locale=en-US
ro.wifi.channels=
ro.board.platform=sofia3gr
# ro.build.product is obsolete; use ro.product.device
ro.build.product=sofia3gr_car
# Do not try to parse description, fingerprint, or thumbprint
ro.build.description=sofia3gr_car_64-userdebug 6.0.1 MMB29M eng.hct.20170824.175111 release-keys
ro.build.fingerprint=Android/sofia3gr_car_64/sofia3gr_car:6.0.1/MMB29M/hct08241754:userdebug/release-keys
ro.build.characteristics=tablet
# end build properties
#
# from device/rockchip/sofia3gr_car/system.prop
#
#
# system.prop
#
#rild.libpath=/system/lib/libreference-ril.so
#rild.libargs=-d /dev/ttyUSB2
# Default ecclist
persist.tegra.nvmmlite = 1
ro.audio.monitorOrientation=true
#NFC
debug.nfc.fw_download=false
debug.nfc.se=false
#add Rockchip properties here
ro.rk.screenoff_time=2147483647
ro.rk.screenshot_enable=true
ro.rk.homepage_base=http://www.google.com/webhp?client={CID}&source=android-home
ro.rk.install_non_market_apps=false
sys.rkadb.root=0
ro.rk.MassStorage=false
ro.rk.systembar.voiceicon=false
ro.rk.systembar.tabletUI=false
ro.rk.LowBatteryBrightness=false
ro.default.size=100
persist.sys.timezone=Asia/Shanghai
ro.product.locale=en-US
persist.sys.language=en
persist.sys.country=US
ro.product.usbfactory=rockchip_usb
ro.factory.tool=0
ro.sf.lcd_density=240
#force camera API 1
#camera2.portability.force_api=1
#enable camera TAF and FaceDetect ui
persist.camera.debug_ui=1
#enable auto create media_profiles.xml
sys_graphic.cam_hal.at_profiles=true
persist.service.low_level=0
#Sofia properties
ro.sofia_ota=true
ro.cpu.type=sofia3gr
#
# ADDITIONAL_BUILD_PROPERTIES
#
ro.sf.hwrotation=0
config.disable_acc=true
config.disable_reverse=true
sys_graphic.cam_sfEnabled.ver=true
ro.boot.selinux=disabled
ro.mem_optimise.enable=true
sys.dump.disable=true
ro.rk.product.build.module=car
ro.product.locale=en-US
ro.product.manufacturer9=HengChangTong
ro.product.model9=H660000
ro.product.customer=LM
ro.product.hostname=Android
ro.product.instruction=PDF
ro.product.gpspkname=
ro.product.screenclock=false
ro.product.videogesture=false
ro.product.weatherhost=yahoo
ro.product.customer.sub=LM2
ro.product.defaultlauncher=null
ro.product.drvingsafe=false
persist.display.landspace=true
ro.product.disCarNotifi=false
rf.product.recentshow=false
sys.ecar.enable=0
#
# ADDITIONAL_BUILD_PROPERTIES
#
ro.config.alarm_alert=Oxygen.ogg
ro.config.font_scale=1.0
ro.product.version=V1.0.0_sofia_1503.01_DEBUG
ro.product.ota.host=172.16.10.173:2300
ro.product.ota.host2=ota.rockchip.com.cn:2300
dalvik.vm.heapstartsize=8m
dalvik.vm.heapgrowthlimit=96m
dalvik.vm.heapsize=174m
dalvik.vm.heaptargetutilization=0.75
dalvik.vm.heapminfree=512k
dalvik.vm.heapmaxfree=2m
ro.config.enable.mtp_opt=true
persist.radio.multisim.config=ss
ro.config.set_language_by_sim=true
persist.service.low_level_freq=900000
persist.service.boost_freq=1040000
media.wfd.video-bitrate=5000000
persist.service.brightness=0
persist.sys.retract.lr=0
wifi.interface=wlan0
persist.audio.log=1
drm.service.enabled=true
camera.disable_zsl_mode=1
ro.hwui.texture_cache_size=36.0f
ro.hwui.text_large_cache_width=2048
ro.hwui.text_large_cache_height=1024
ro.sf.hwrotation=0
ro.opengles.version=131072
persist.sys.media.use-awesome=true
debug.hwui.render_dirty_regions=false
sys.hwc.compose_policy=6
sys.hwc.enable=1
persist.sys.ui.hw=true
ro.adb.secure=0
persist.sys.usb.config=mtp,adb
rild.libpath=/system/lib/librpc-ril.so
ro.ril.ecclist=112,911
ro.telephony.default_network=0
ro.tether.denied=false
persist.sys.strictmode.visual=0
persist.sys.strictmode.disable=1
persist.sys.alarm.fixed=300000
ro.sms.address_enable=false
ro.config.sim_switch=true
ro.config.accessibility=1
ro.config.favourite_channel=1
ro.config.offline_read=1
ro.config.power_off_alarm=1
ro.config.sheduled_power=1
ro.config.speed_dial=1
ro.config.builtin_cdrom=1
ro.config.charge_only=1
ro.config.black_list=0
ro.dalvik.vm.isa.arm=x86
ro.enable.native.bridge.exec=1
ro.sf.lcdc_composer=0
ro.config.ringtone=Ring_Synth_04.ogg
ro.config.notification_sound=pixiedust.ogg
ro.carrier=unknown
ro.setupwizard.mode=OPTIONAL
ro.com.google.gmsversion=6.0_r10
persist.sys.dalvik.vm.lib.2=libart
dalvik.vm.isa.x86.variant=silvermont
dalvik.vm.isa.x86.features=default
dalvik.vm.lockprof.threshold=500
net.bt.name=Android
dalvik.vm.stack-trace-file=/data/anr/traces.txt
ro.expect.recovery_id=0xff403babc2bb817777f4f9bc7e8a2c3ecb654eff000000000000000000000000
iwlmvm 247011 0 — Live 0x0000000000000000
iwlwifi 238356 1 iwlmvm, Live 0x0000000000000000
mac80211 583437 1 iwlmvm, Live 0x0000000000000000
cfg80211 504779 3 iwlmvm,iwlwifi,mac80211, Live 0x0000000000000000
compat 5045 4 iwlmvm,iwlwifi,mac80211,cfg80211, Live 0x0000000000000000
uvcvideo 75865 0 — Live 0x0000000000000000
videobuf2_vmalloc 3547 1 uvcvideo, Live 0x0000000000000000
RAM: 2048 MB (1979 MB available)
System RAM: 35.000MB
System RAM: 379.500MB
System RAM: 27.000MB
System RAM: 1536.000MB
shm-mem: 2.000MB
Flash: 16 GB (14.676 GB actual); 0.391 GB; 16 GB (14.913 GB actual)
mmcblk0: 14.676 GB
zram0: 0.391 GB
mmcblk1: 14.913 GB
| Find Similar devices | |
|---|---|
| Same CPU: | |
| Same Display resolution: | |
| Same ro.build.description: | |
Home Downloads Manual Rooting Credits My Mods Source code
Introduction
As the Sofia 3GR units are Intel units running x86 Android and the Rockchip PX5 units are ARM64 units running ARM64(/ARM8/ARM7/ARM) Android, we can’t use the same software. So read the correct instruction for your Sofia unit or PX5 unit.
(At this moment Joying sells the Intel SC9853i units. These units require a totally different way of rooting. See the XDA forum thread HowTo: Root Joying SC9853i Head Unit and download the developer.zip. It contains everyhing you need, including an extensive Readme.)
On Android 6.0.1 and Android 8.0.0 rooting requires 2 steps:
- First you need to «enable adb over wifi» which must be done on your Sofia 3GR or PX5 head unit, using my apk.
- After that you need to do the rooting itself from your pc/laptop.
On Android 5.1.1 (only relevant for the Sofia unit) you only need to do the rooting part on the laptop/pc.
Note: If your wireless network has a 2.4GHz and a 5GHz network, make sure your pc/laptop is on the 2.4GHz. Your unit only works on 2.4GHz and from experience I know that when your pc/laptop is on 5GHz, you often can’t connect, or you get a message like «device off-line» (technically this is complete nonsense. Your router should route fine between 2.4GHz and 5GHz but still it is more prone to issues, than with both units on the same frequency.)
On your head unit
- If you did not already downloaded my Joying Extra Tools apk, you should now download it from the Releases page onto your head unit.
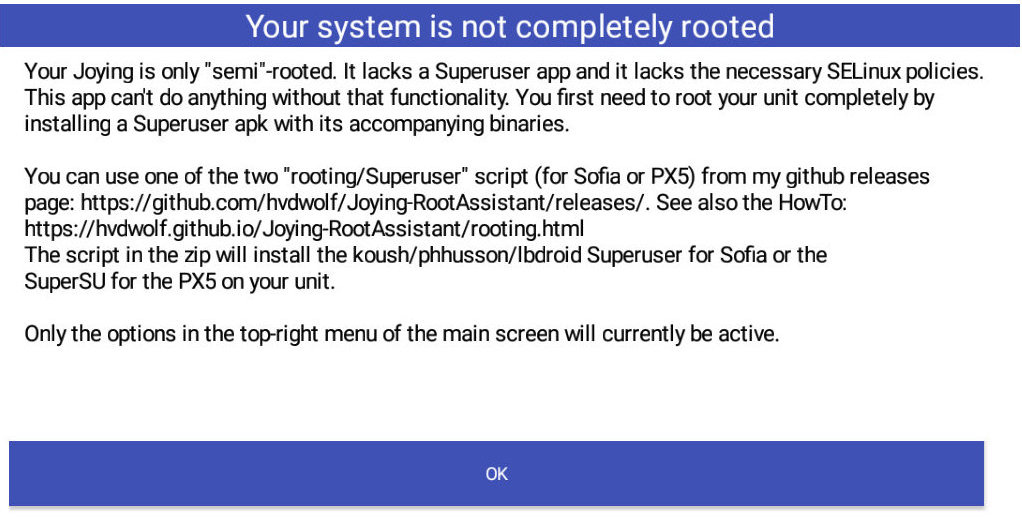
When you start the apk you will see the following screen:
Your unit is not fully rooted. You already knew this otherwise you would not try to root it. Simply press OK.
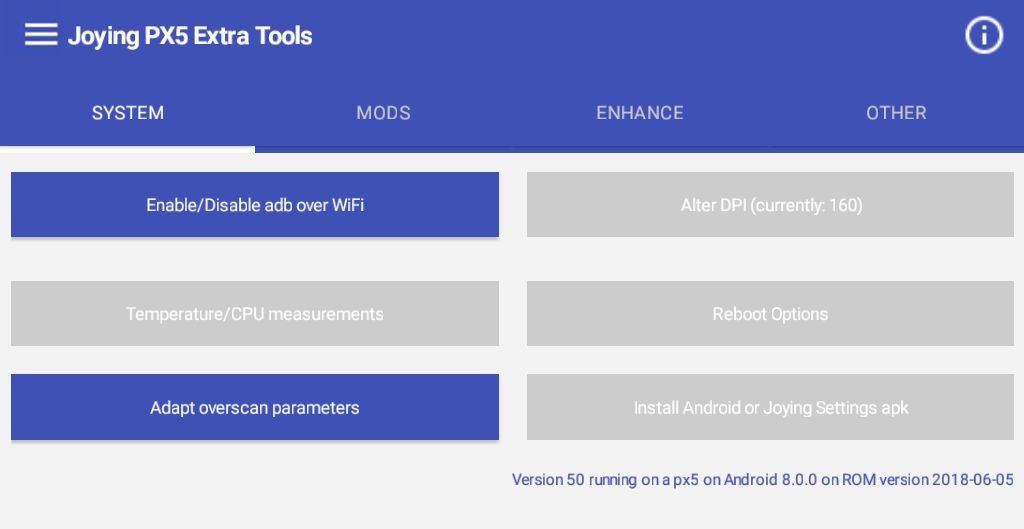
- Next you will see:
On Android 6.0.1 and Android 8.0.0, adb over wifi is by default disabled. To root your unit you need to have adb over Wifi enabled.
Use the button «Enable/Disable adb over WiFi».
You will get a popup with a short text and a line with «The current setting is:». If it is enabled, you don’t have to do anything. - Now you need to know the ip-address of your head unit. Tap the top-left menu button
 and select the option «My WiFi address».
You need the ip-address for the script on your laptop/pc.
You will see something like this:
 and select the option «My WiFi address».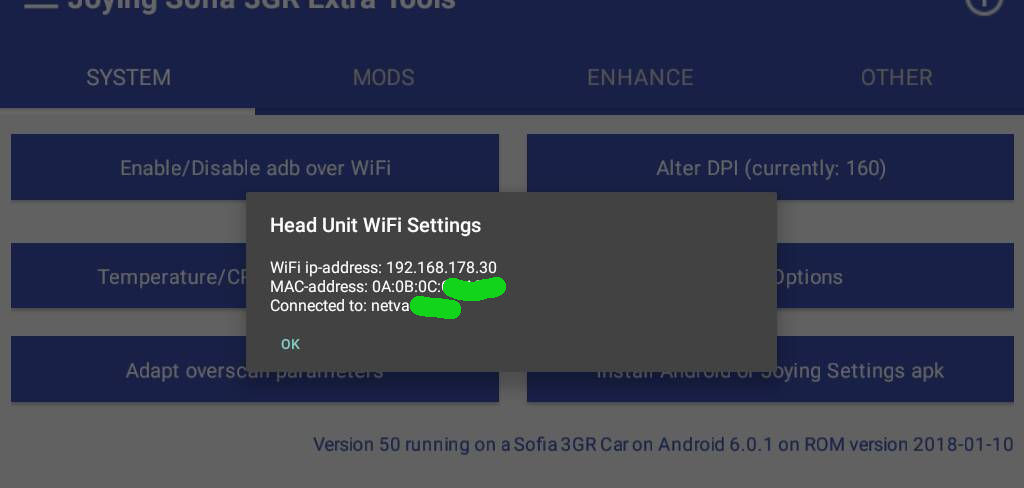
On your pc:
Linux only: First install adb via your package manager (like on Ubuntu/Debian like distributions: «sudo apt-get install adb»)
Steps on the Sofia 3 GR Intel units:
|
Steps on the Rockchip PX5-A53 ARM units:
|
You should now have the Superuser application working. This will allow you to give other apps root access as well. It also allows you to use my apk to install several mods and the Xposed framework.
ПРОШИВКИ И СОФТ ТОЛЬКО ДЛЯ НАШИХ МАГНИТОЛ. Если вы купили на ALIEXPRESS, мы вам не поможем, заказывайте магнитолы фабричного качества у нас на сайте, цены немного дороже, но качество изготовления и чипов лучше, работаем только с лучшими китайскими производителями Witson, Winca, Kaier, MEKEDE, Penhui, Zestech.
| Поставщик | Артикул | Прошивка | Пароль |
| Witson | (W2-Exxxx) | UI1 скачать | 3711 |
| Witson | (W2-BLxxxx) | PX6 скачать | 070305 / 1314 |
| Witson | (W2-BXxxxx) | PX6 скачать | 1314 |
| Witson | (W2-K5xxxx) | 3711 | |
| Witson | (W2-K6xxxx) | скачать Андроид 10 | 3711 |
| Witson | (W2-DKxxxx) | скачать | 3711 |
| Witson | (W2-DTxxxx) | скачать | 123456 |
| Witson | (W2-DHSxxxx) | скачать Android 10 | 3368, ui: 1818 |
| Witson | (W2-DHXxxxx) | 3368, ui: 7171 | |
| Witson | (W2-HB/Vxxxx) | Android 12 | 3368, ui: 8181 |
| Witson | (W2-DTFxxxx) | ||
| Witson | (W2-RVxxxx) | скачать Android 9 PX5 | 126 |
| Witson | (W2-RVFxxx) | скачать Android 10 PX5 | |
| Witson | (W2-Vxxxx) | скачать | 126 |
| Witson | (W2-RDxxxx) | 126 | |
| Witson | (W2-MKxxx) | Audi скачать | |
| Witson | (W2-TZxxx) | PX6 Tesla | 8861 |
| Witson | (W2-TTFxxx) | TS9 Tesla | 123456 |
| Witson | (W2-TKSxxx) | 8227 Tesla | 8888 |
| Winca | (W2-Wxxx) | PX5 A8 скачать | 126 |
| Winca | (W2-RLxxx) | S300 | 3368 |
| CGS | (AD-9xxxx) | Intel Sofia A5 скачать | 12345678 |
| YGZ | (CAxxxx) | скачать | |
| Canavie | (CIR-xxxx) | ||
| Penhui GHE | (T3) | T3 скачать | 7890 123456 8888 |
| Penhui GHE | (TS9) | TS9 скачать DSP скачать | |
| Penhui GHE | (TS10) | 7890 123456 8888 | |
| GHE | (DAxxxxx) | T3 A6 скачать | |
| Kaier | (SR-xxxx) | Tesla TS9 A8 скачать | 123456 |
| Kaier | (KR-xxxx) | TS9 | 1234 |
| Kaier | (KR-xxxx) | PX3 A8 2*32Gb скачать | |
| Kaier | (KR-xxxx) | Tesla PX3 A7 скачать | 123456 |
| Zestech | (PX30) | ||
| Zestech | (PX5) | скачать PX5 8 ядер |
EasyConnect.apk
Carplay.apk
Видеорегистратор DVR-012.apk инструкция скачать
Схема подключения китайской камеры
Схемы распиновки проводов питания
Схема подключения
Стандартная схема подключения универсальной 2din магнитолы, все штатные магнитолы имеют аналогичный набор проводов и штекеров, но в зависимости от марки автомобиля могут отличаться основным кабелем питания и иметь дополнительные провода:
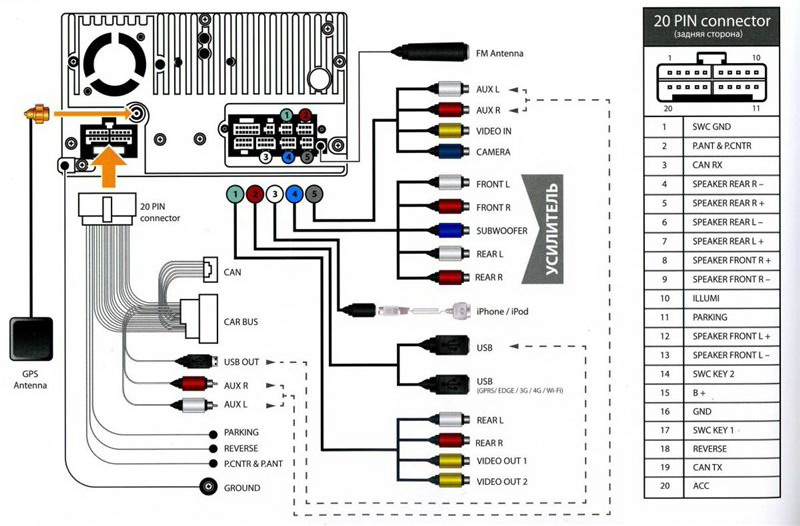
Рраспиновка кабеля питания по цветам:
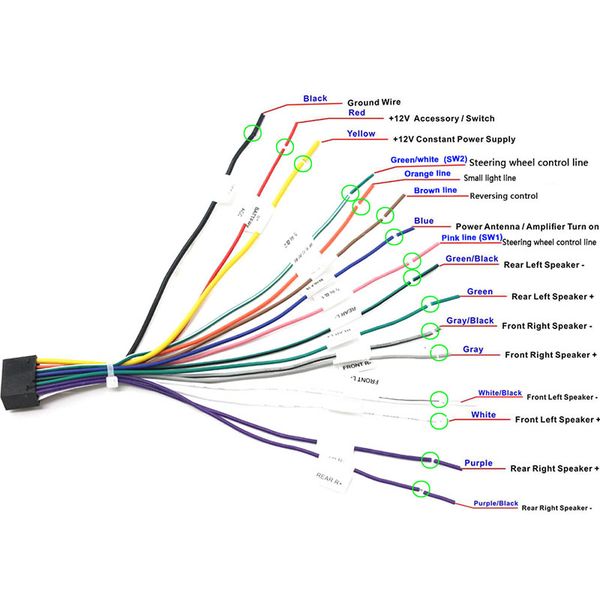
Для чего нужен CANBUS модуль
Если автомобиль высокой комплектации и имеет штатный усилитель либо штатную навигацию, или есть отображение климат контроля на дисплее и передача бортовых данных на экране оригинальной магнитолы, то нужно заказывать магнитолу с CANBUS модулем, это блок передает данные с бортового компьютера. Отвечает за работу кнопок на руле, управление и отображение климата на экране магнитолы, и работу штатной камеры.
Какие проблемы работы магнитолы в Автомобиле с Canbus модулем:
- После установки магнитолы не работает звук — проблема в основном в магнитолах где есть штатный усилитель — JBL, Harman Kardon, Infinity — необходимо в заводских настройках «Factory Setting» или «О планшете» ввести пароль и найти опцию «Cartype» или «Cantype» по русски «Выбрать автомобиль» и проверить как комплектация автомобиля программно установлена, возможно выбран другой автомобиль либо нужно поставить галочку в доп опции AMP (amplifer — усилитель).
- Не работают кнопки на руле — если в автомобиле есть Canbus, то скорее всего кнопки зависят от этого модуля, необходимо проверить какой выбран тип Cartype по аналогии с усилителем. Бывает другая проблема часть кнопок работает часть нет — нужно поменять провода Key1 Key2 местами.
- Не отображается климат контроль — проблема может быть в том что вообще Canbus нет в комплекте с магнитолой, климат на экране магнитолы отображается в том случае если оригинальная магнитола показывала эти данные, а на китайской магнитоле только по canbus, необходимо в заводских настройках «Factory Setting» или «О планшете» ввести пароль и найти опцию «Cartype» или «Cantype» по русски «Выбрать автомобиль» и проверить как комплектация автомобиля программно установлена.
- Не показывает температуру за бортом — необходимо в заводских настройках «Factory Setting» или «О планшете» ввести пароль и найти опцию «Cartype» или «Cantype» по русски «Выбрать автомобиль» и проверить как комплектация автомобиля программно установлена.
GPS антенна
После установки магнитолы в автомобиль убедитесь что GPS антенна установлена правильно, например на лобовое стекло, проверьте что GPS спутники работают, если же спутники программа не показывает скорее всего сигнал блокируется и нужно поменять расположение антенны.
Какие могут быть проблемы:
Если в течении эксплуатации магнитолы перестали ловить спутники мы рекомендуем проверить GPS модуль и чип. Установите с Play Market приложение GPS TEST, запустите, если показывает ваши координаты и скорость при движении значит модуль работает. В таком случае просто переустановите навигацию.
Если программа GPS тест не показывает скорость и координаты — проблема или в самой GPS антенне или GPS чипе в системе магнитолы. Поменять GPS Антенну не проблема, а чип придется менять электрику.
Всем привет!
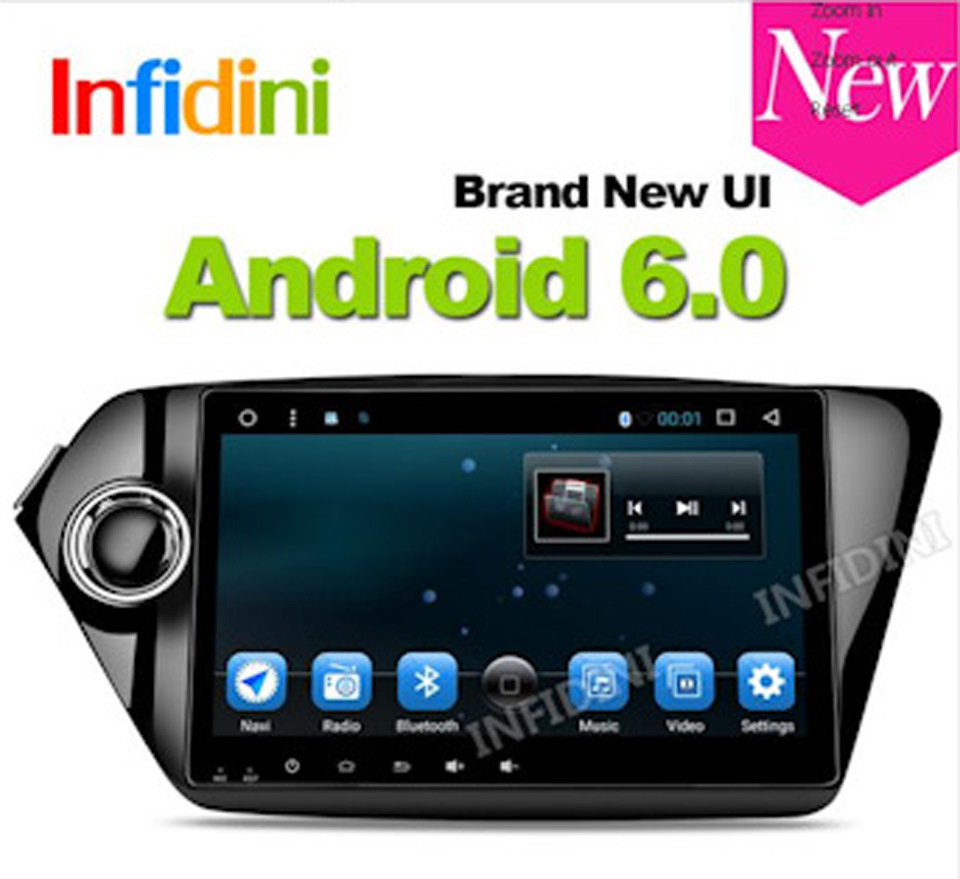
Недавно, зашёл на страничку ГУ в магазине Infidini, на сайте Aliexpress,
и увидел, что на картинке изменился лаунчер магнитолы, значит появилась новая версия прошивки, подумал я и написал сообщение продавцу
Долго ответа ждать не пришлось, на следующий день, Рита(продавец) прислала мне новую прошивку
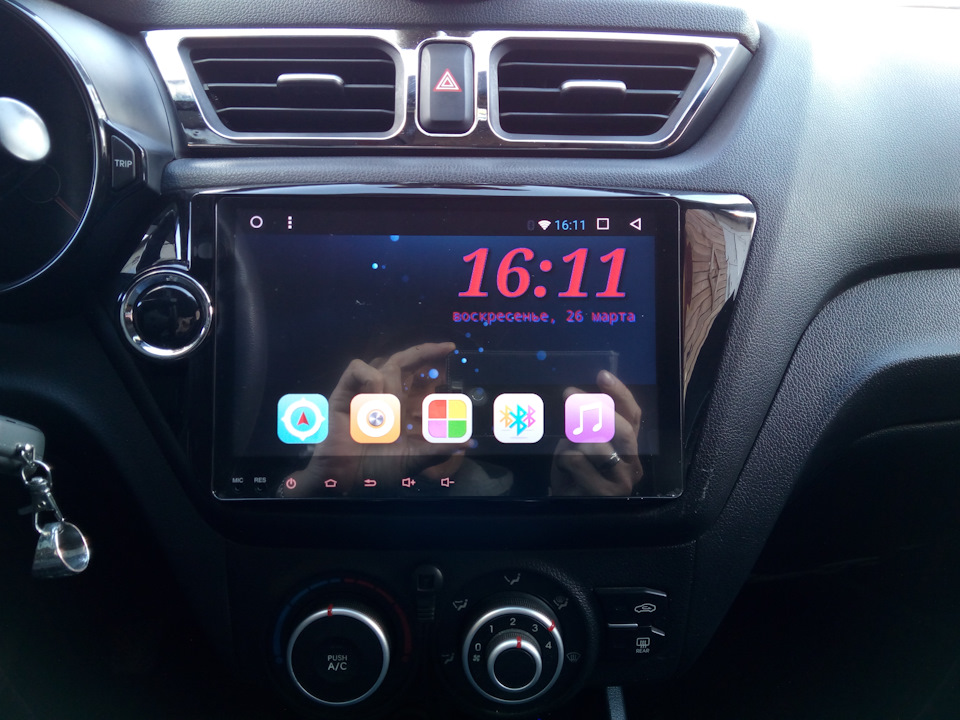
Ну а раз есть прошивка, надо шить:) )))
Инструкция по прошивке с профильного форума
— Берём USB флешку, либо карту microSD форматируем Fat32 со стандартным размером кластера или более. Настоятельно рекомендуются USB флешки и microSD карты малого размера 512Mb-1Гб-2Гб.
— Распаковываем архив ZIP, извлекаем файлы, кладем их в корень USB флешки либо карты microSD (без папки).
— Заходим в настройки, далее car setting, выбираем «Обновить систему», после будет предложен выбор с какого носителя обновить — USB либо microSD. выбираем тот носитель где находится прошивка и соглашаемся.
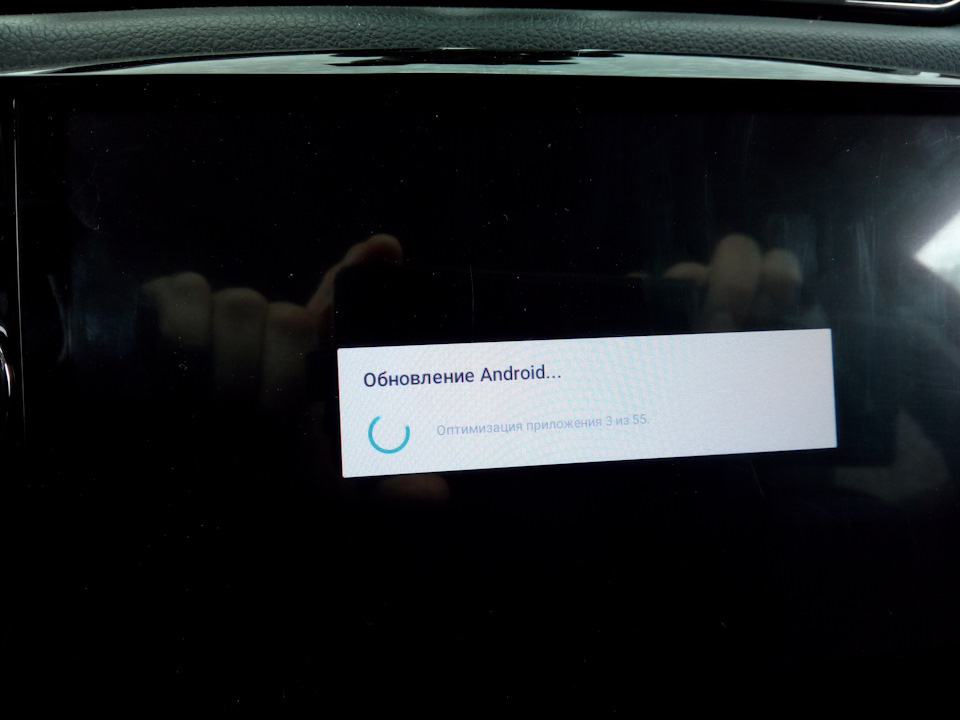
— В процессе прошивки ничего не трогаем (не выключаем зажигание, не включаем заднюю передачу и не открываем двери). Процесс займёт около 3-х минут. ГУ автоматически перезагрузится.
— После прошивки все настройки сохраняются.
.и теперь, всё это в картинках
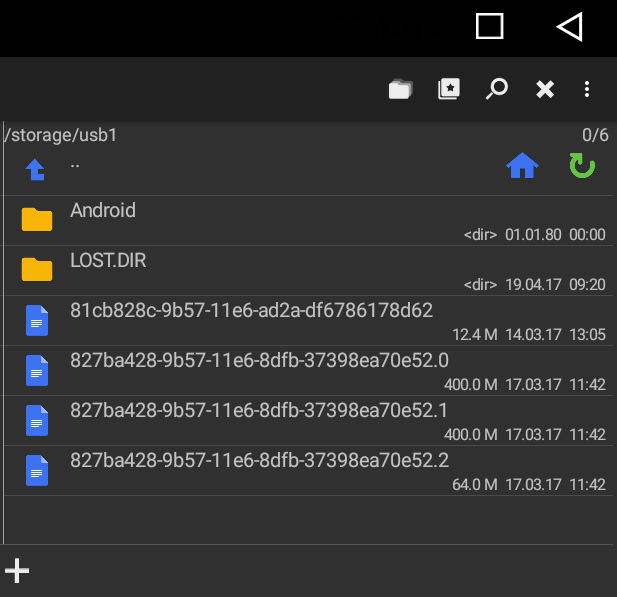
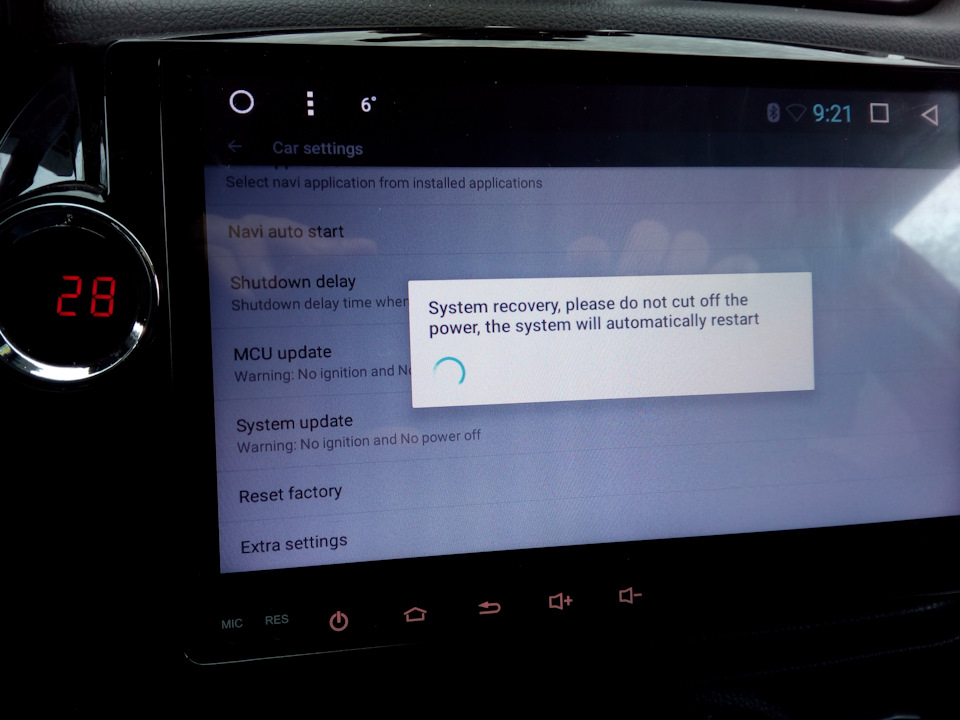
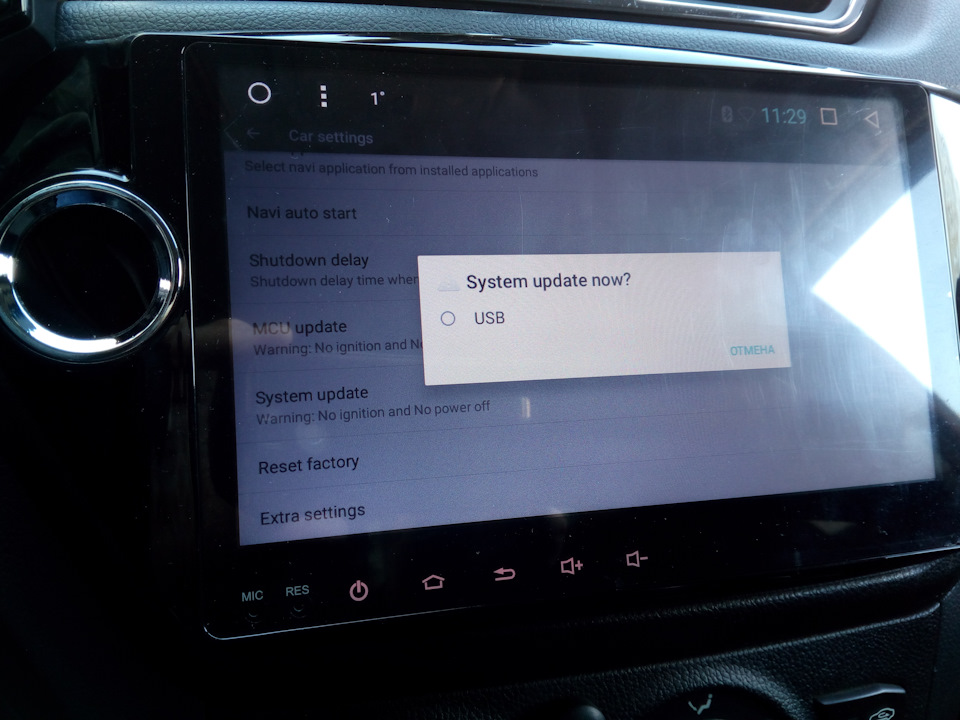
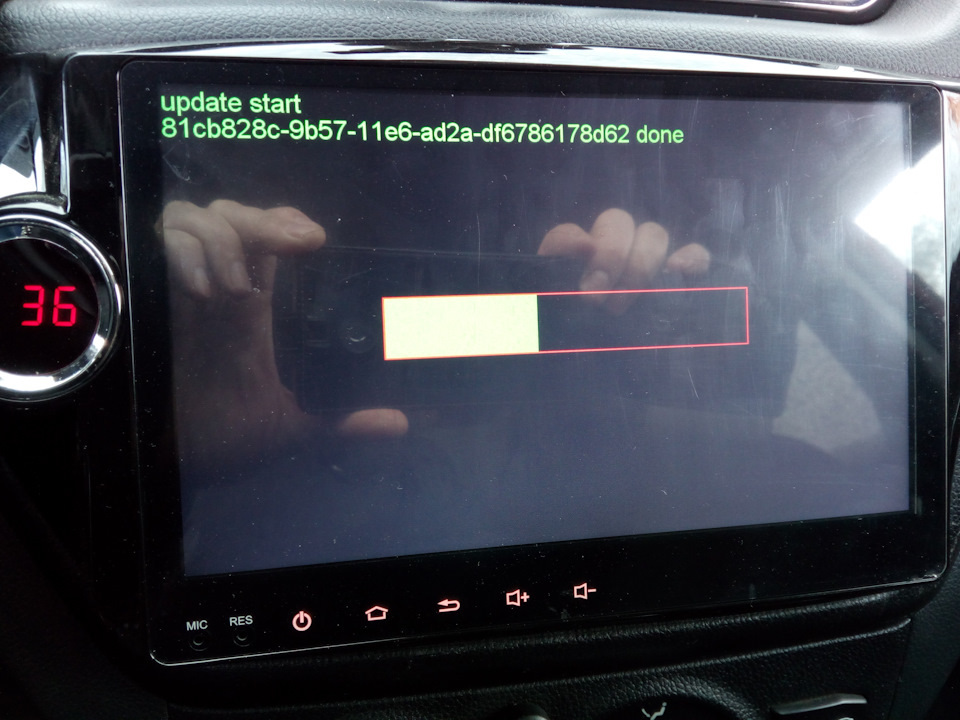
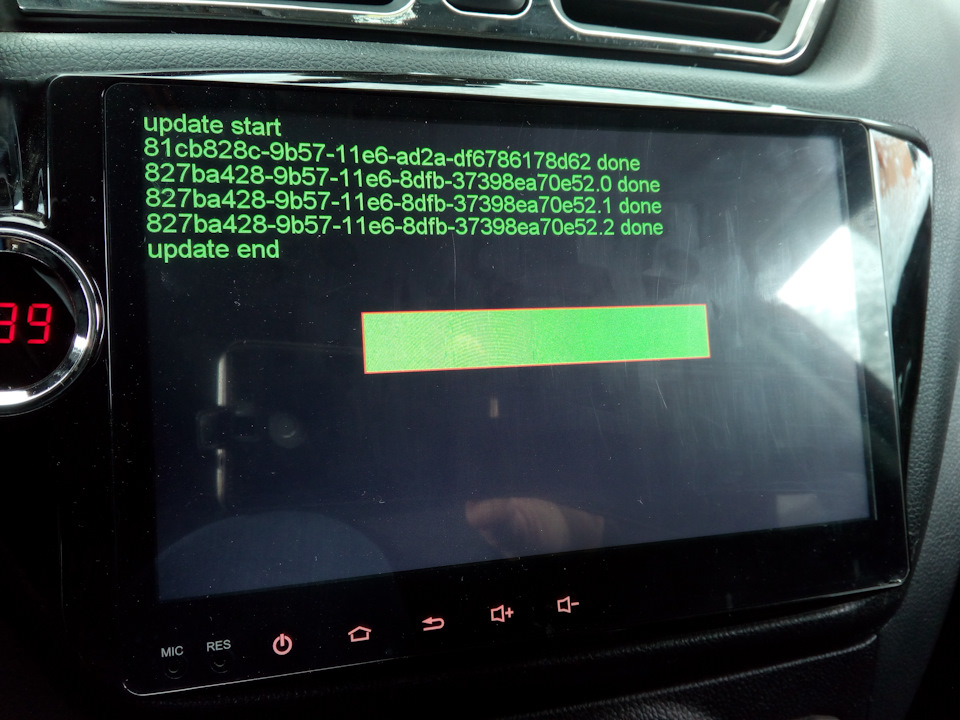
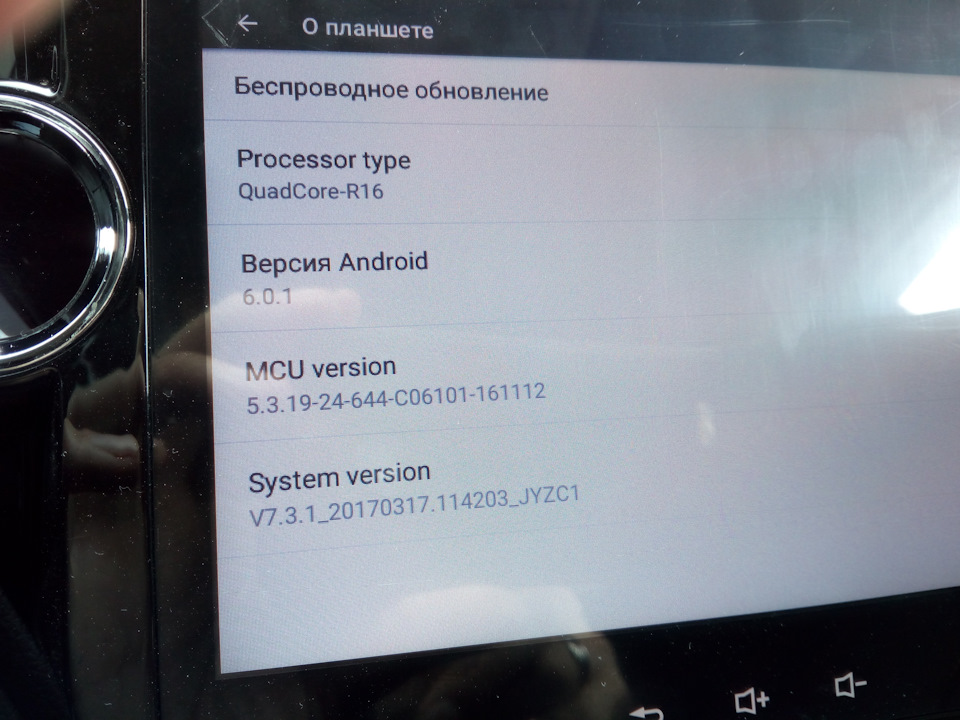
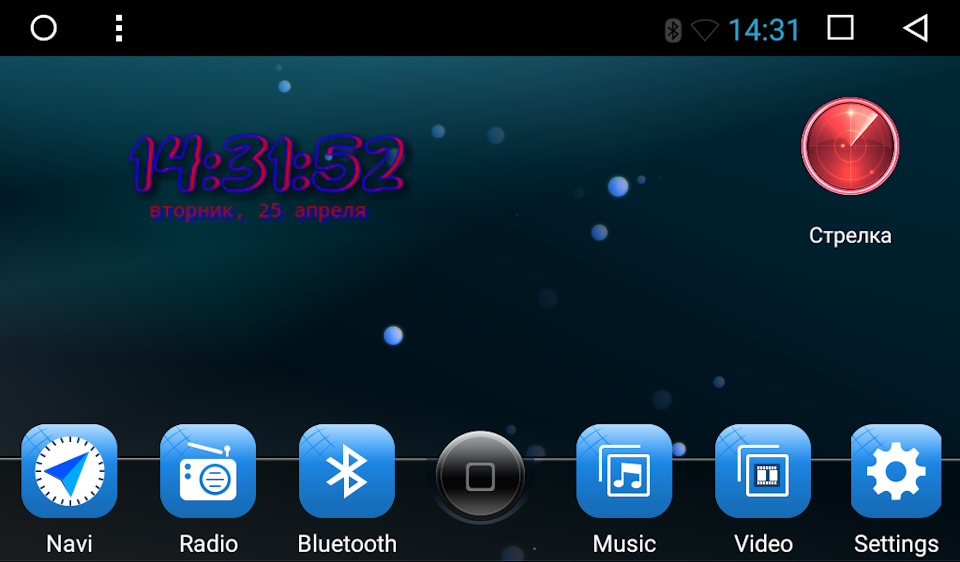
Первое, что бросается в глаза после загрузки — обновлённый лаунчер

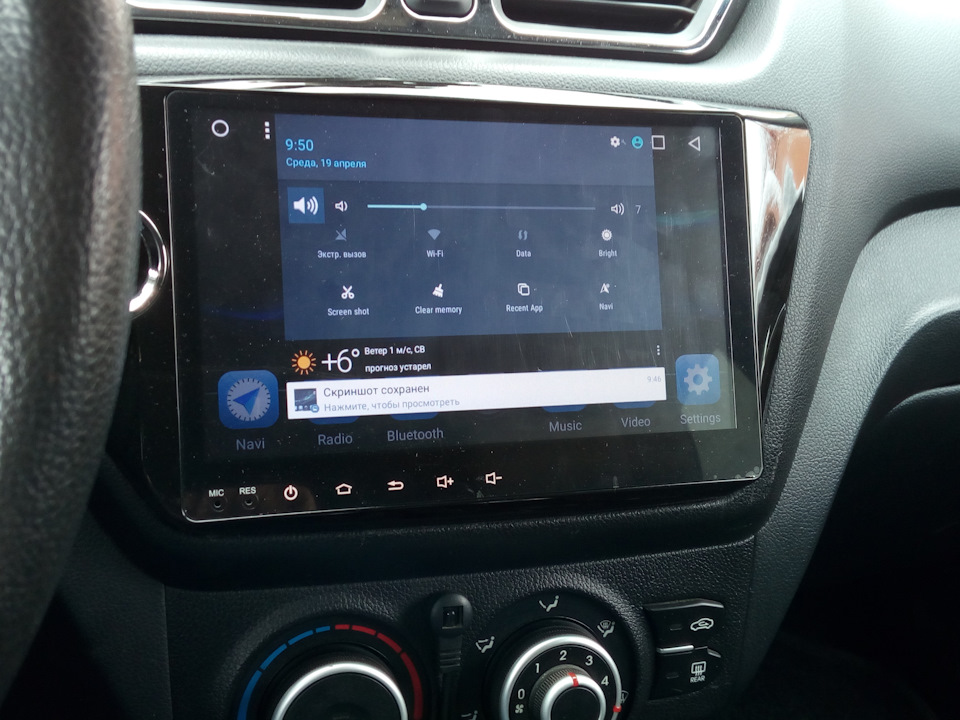
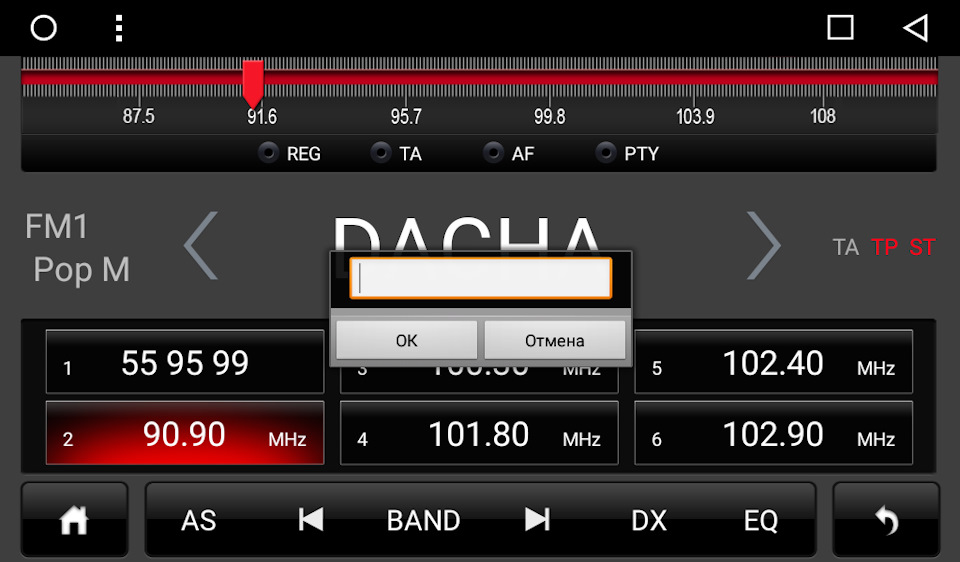
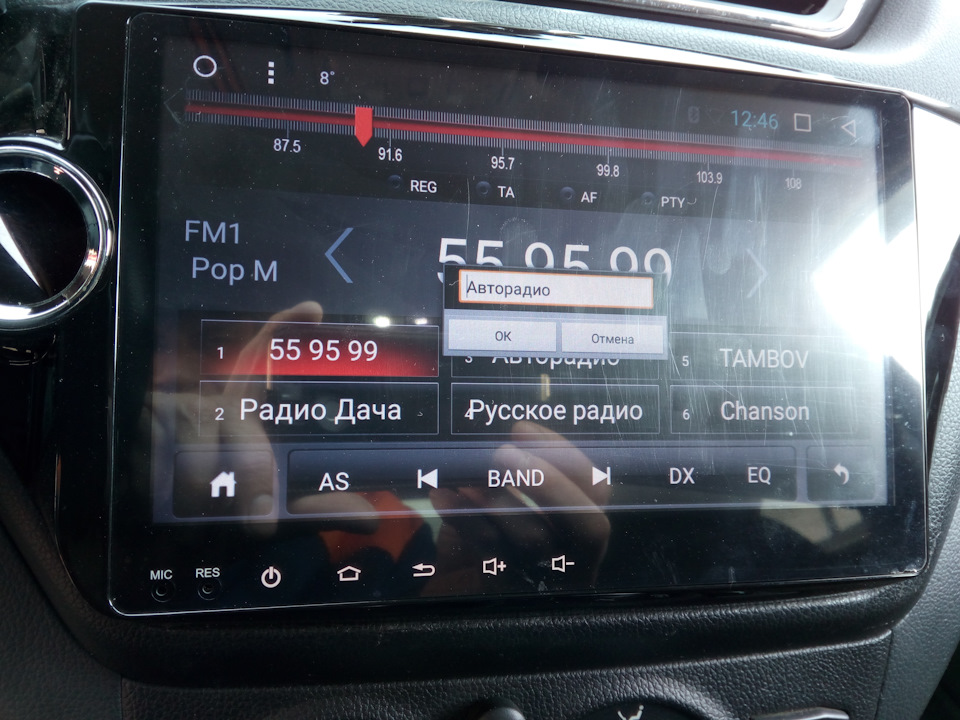
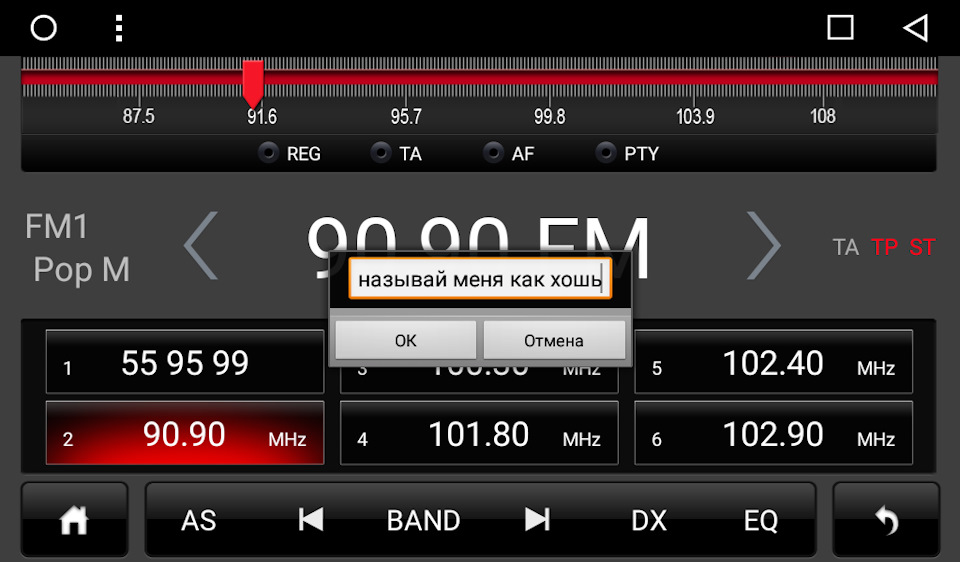
Так же, обновилась программа Радио, теперь переключение происходит по сохранённым каналам,
а не как ранее, шел поиск следующей частоты
(Радио обновлял ещё до прошивки),
а так же, появилась возможность переименовывать каналы по своему желанию
Запчасти на фото: 270317
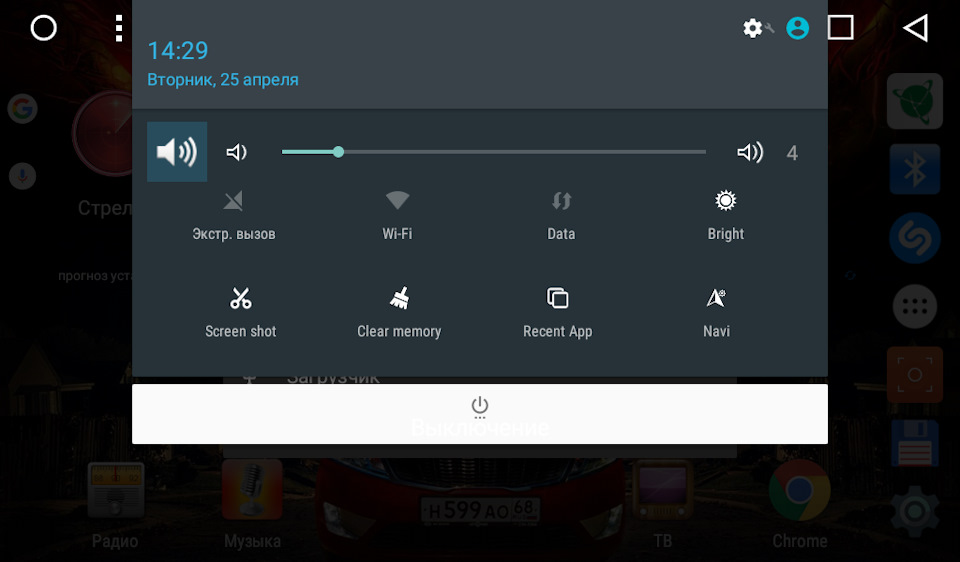
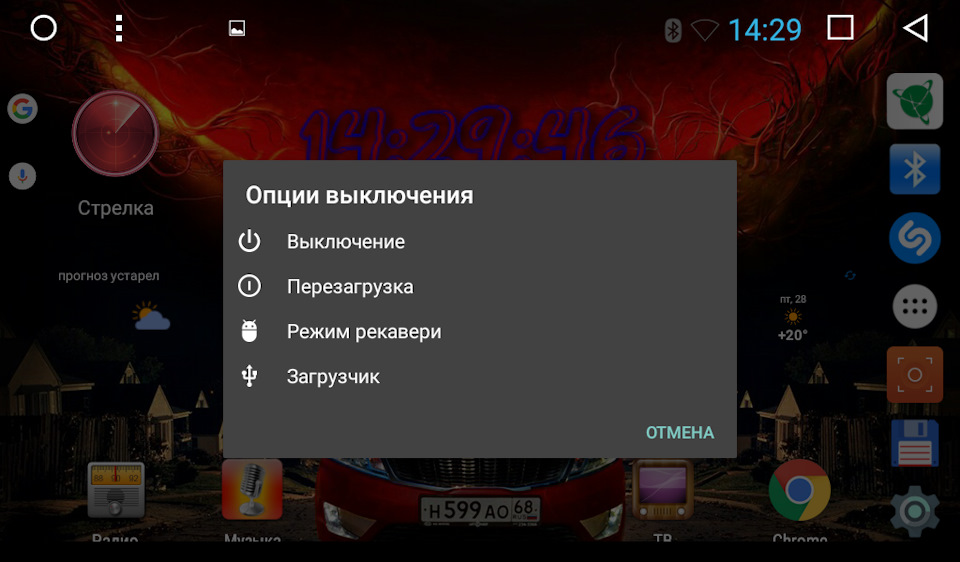
Ну а как же без Root доступа? без него нельзя использовать все возможности Андроида и полноценного функционирования многих программ
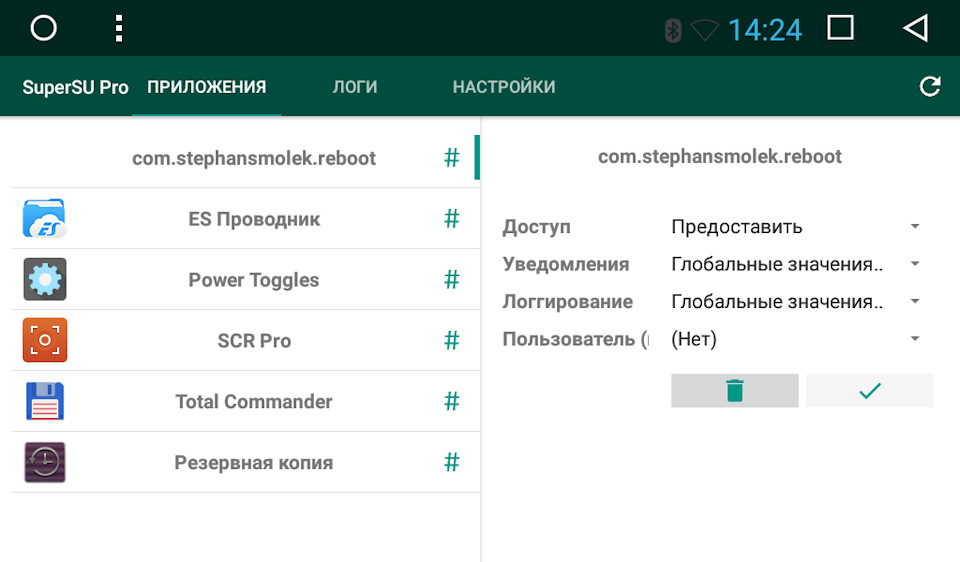
Ну и напоследок:
Помните, всё что вы делаете — вы делаете на свой страх и риск!

Free download and update Firmware with Rockchip Sofia 3gr Car Firmware
[SOLVED] update Rockchip Sofia 3gr Car Firmware Firmware Software latest version, supported android 5/13/11/10/7/8/12/6/9/4.
Rockchip Sofia 3gr Car Firmware Firmware Software
Free download software file on a android version: Android 11, Android 12, Android 7, Android 5, Android 4, Android 13, Android 6, Android 10, Android 9, Android 8.
| App Name: | FirmwareAndroid.APK |
| Last Update: | 05 September 2022 |
| Language pack: | English, Welsh, Kiche, Afrikaans |
| Version: | 2.4 |
| File Size: | 5.74 MB |
| File Type: | application/vnd.android.package-archive |
| Downloads: | 80 351 |
Watch video — Rockchip Sofia 3gr Car Firmware?
All rights reserved. Unauthorized reproduction, in whole or in part is strictly prohibited.
新建网页 1
JOYING Intel SOFIA Android Car Stereo Software Update

Note: this update page is only workable for android car radio with Intel SOFIA 3RG CPU, please contact us to confirm update file if you are not clear about your head unit system . otherwise the head unit will be damaged .
Following are the head unit model which workable for update .
Universal head unit :
JY-UM135N, JY-UM135N2 , JY-UM124N,JY-UM124N2, JY-UM138N, JY-UM138N2,JY-UM134N,JY-UM134N2 , JY-UM128N,JY-UM128N2
JY-UMS01N, JY-UMS01N2,JY-UMS02N,JY-UMS02N2, JY-UMS03N,JY-UMS03N2,JY-UMS04N
Toyota car head unit :
JY-TL121N2,JY-TL122N2,JY-TL123n2,JY-TL124N2, JY-TL135N2,JY-TL138N2,JY-TL139N2,
JY-TM121N2,JY-TM122N2,JY-TM123n2,JY-TM124N2, JY-TM135N2,JY-TM138N2,JY-TM139N2
VW car head unit :
JY-VL130N2, JY-VL131N2,JY-VL132N2, JY-VM130N2, JY-VM131N2,JY-VM132N2
Nissan car head unit :
JY-NL135N2 ,JY-NL124N2, JY-NL134N2, JY-NM135N2 ,JY-NM124N2, JY-NM134N2
Honda car head unit :
JY-HL121N2, JY-HL124N2,JY-HL135N2 , JY-HM121N2, JY-HM124N2,JY-HM135N2
Ford car head unit :
JY-FL121N2, JY-FL122N2 ,JY-FL123N2 , JY-FL124N2,JY-FL125N2 , JY-FM121N2, JY-FM122N2 ,JY-FM123N2 , JY-FM124N2,JY-Fm125N2
Jeep car head unit :
JY-JL001N2, JY-JM001N2
Audi car head unit :
JY-AL001N2,JY-AL003N2, JY-AM001N2,JY-AM003N2
Opel car head unit :
JY-OL001N2 , JY-OM001N2
Mazada car head unit :
JY-ML001N2 , JY-MM001N2
Chevy car head unit :
JY-CL001N2, JY-CM001N2
Mercedes Benz car head unit :
JY-MBM01N2
Important attention for your update :
1) you need to unzip the updated files on the Windows system firstly. and then copy them to the USB or SD card without any other folder . The USB or SD card need to be formatted as FAT32 .
and then insert USB or SD card into the head unit USB port or SD card slot, it will be updated automatically .
2) please do not unzip the files on the USB or SD card.
3) it is better to use the 32GB or less than 32gB USB or SD card .
Below updated files is (2018-1-26) version . please check :
Updated files for HD resolution 1024*600 :
MCU version is 9.20 or more later please click Here
MCU version is 5.25 or more earlier please click Here
Here is the video on how to update the system :
Updated files for HD resolution 800*480 :
MCU version is 9.20 or more later please click Here
MCU version is 5.25 or more earlier please click Here .
Here is the video on how to update the system :
Before you update the head unit, please backup all important things:
1) Copy maps from car stereo internal storage to SD card.
2) Go to car settings-enter password 3368-car model to check canbus protocol and record it.
3) Use a good quality SD card or USB to update it (format the SD card or USB as FAT32)
After you finish the update, you are required to do the below things:
1) Remap touch button on the front panel.
2) Touch calibration again.
3) Enter the Car Settings application-go to the lower right tab (the one with the screwdriver) click on it and enter 3368- go to the AMP Enable option and turn it off-Go to the EQ menu (second lower tab from right to left) of the car settings and now have the keyboard pitch option. Note: If your android car radio is with digital amplifier, please choose AMP (in).
4) Go to radio settings, turn on two option: auto sens and RDS. If you hear background noise after searching radio station, please turn off stereo option.
55) Pre-installed Z-link app in OEM. If you want to use carplay or android auto in Intel SOFIA car radio, you need to purchase JOYING Z-BOX. Apple carplay for iPhone: install Zlink apk, then connect USB carplay dongle by iPhone original data cable to Android car radio. Connect WiFi,and CarPlay function can work. Android auto for Android phones: install android auto app from Google play store and install Zlink apk in OEM, then connect USB carplay dongle by android phone original data cable to Android car radio. Connect Bluetooth, and android auto function can work.
6) If your android car radio is BMW, W, Audi or Opel, you need to set canbus protocol again like the one as before update.
NOTE:
1) Please contact us for correct DVR app after update
2) 2) If your car android car stereo is universal model, please do not choose canbus protocal even if have bought third-party canbus adapter.
3) If your car stereo is special model, front and parking sensor can work well after this update.
If you have any problems during updating , please contact info@joyingauto.com or support@joyingauto.com . we will help you .