
Краткое руководство HP Designjet 500, 510, 800
Инструкция пользователя HP Designjet 500, 510, 800 — Скачать инструкцию (Русский язык)
Приемы работы – Содержание
Панель управления 4
Дисплей панели управления 4
Меню панели управления 6
Примеры использования панели
управления 17
Управление печатью 23
Прерывание печати
страницы 23
Прерывание процесса
высыхания 24
Управление не напечатанными
страницами (в очереди) 25
Изменение порядка заданий в
очереди (команда “Move to
front”) 27
Удаление заданий из очереди 27
Управление печатью (продолжение)
Печать нескольких копий задания,
находящегося в очереди 28
Экономия бумаги с помощью
функции группирования 29
Замена картриджей с чернилами
и печатающих головок 31
Замена картриджей 33
Замена печатающих головок 36
Загрузка листовой бумаги 47
Выгрузка листовой бумаги 54
Загрузка рулонной бумаги 55
Установка нового рулона 55
Загрузка рулонной бумаги 58
Выгрузка рулонной бумаги 64
Инструкция пользователя HP Designjet 500, 510, 800 — Скачать инструкцию (Русский язык)
Руководства HP DesignJet 500 plus Размер файлов: 5243 KB, Язык: English, Формат: pdf, Платформа: Windows/Linux, Дата: 2017-01-21
На данной странице вы можете скачать руководства HP DesignJet 500 plus. Мы предлагаем вам ознакомиться с руководством пользователя, инструкцией по сервисному обслуживанию и ремонту.
Также здесь вы найдете список заказных номеров на комплектующие HP DesignJet 500 plus.
Все файлы предоставляются исключительно в ознакомительных целях. И не являютя руководством по ремонту, а направлены лишь на то чтобы помочь вам более детально ознакомиться с принципом построения устройства.
Содержимое представленных здесь руководств требуют от вас знания технического английского языка.
Если вы собираетесь скачать руководство по сервисному обслуживанию HP DesignJet 500 plus, иными словами сервис мануал, вы дожны обладать хотя бы минимальными познаниями в области электроники и пониманием базовых принципов работы электромеханических устройств.
Для просмотра руководств вам понадобится Adobe Acrobat Reader версии 9 и выше либо другая программа для просмотра pdf файлов.
В связи с популярностью информации представленной на сайте и ее бесплатного предоставления конечному пользователю, убедительная просьба использовать специальные программные продукты для многопотокового скачивания файлов.
Руководства для HP DesignJet 500 plus
- Руководство пользователя (User manual)
- Руководство по сервисному обслуживанию (Service manual)
- Руководство по ремонту (Repair manual)
- Перечень комплектующих (PartList)
The HP Designjet 500 Plus Printer is a versatile large format printer at
a great price, delivering outstanding line drawings and photo quality
renders with smooth tone transitions. The printer now supports
seamless HP-GL/2 printing.
HP Designjet 500 Plus Printer series
Ideal for architects, interior designers and professionals in engineering, construction and mechanical design, working from home
or in small offices in workgroups of up to 3 people who need affordable, high quality, large format printing up to A0+ size.
Get outstanding line drawings and photo quality renders fast and at a great price.
• Reduce your click-to-print time with built-in HP-GL/2 card processing the vector data in the printer.
• Save yourself time: no need to trim the plots with a 5 mm margin on all sides of a page.
• See a difference in quality with lines as thin as 0.04 mm and an accuracy of ± 0.2%.
• Visualise your work with photo quality renders using HP Colour Layering Technology and up to 1200 dpi resolution.
Save yourself time with this fast and easy-to-use printer and cut the overall running costs.
• Print speeds of up to 90 seconds per A1 line drawing and 7.9 m2 of full colour images per hour.
• Three portrait A3+ images (330 x 483 mm) fit side by side
1
.
• Easy-to-install drivers are intuitive to use; the control panel is simple to navigate.
• Unattended printing is hassle-free with modular 69 cc ink cartridges, long-life printheads, 45.7 m long media rolls, automatic
cutting and stacking of prints in the media
2
.
• USB and parallel ports, optional network card.
Get your colours right with the EFI Designer Edition XL RIP for HP Designjet 500ps Plus Printer.
• The EFI Designer Edition XL RIP for HP Designjet 500ps Plus Printer allows you to process complex graphic files and perform
colour management simultaneously.
• Get accurate results even without colour expertise using several pre-set modes.
• Preview JPEG, TIFF, PDF or Adobe
®
PostScript
®
3™ files, check the layout and media orientation and avoid trial errors.
• Cut printing time and costs with a nesting feature positioning the printouts efficiently on media.
• Get full support for Mac OS X system.
1
The printer comes in two sizes, with a media path that is either 1067 mm (42-inch) or 610 mm (24-inch) wide. Three portrait A3+ images (330 x 483 mm)
fit side by side only available on 42-inch model.
2
Stand and media bin are optional on the 610 mm model.
HP Designjet 500 Plus
(24-inch) Printer
HP Designjet 500 Plus
(42-inch) Printer
EFI Designer Edition XL RIP
for HP Designjet 500ps Plus
Printer
![]()
HP DesignJets 500, 510 and 800 Series Large-Format Printers
Service Manual

For HP Internal Use Only
©Copyright Hewlett-Packard Company 2000
This document contains proprietary information that is protected by copyright. All rights are reserved. No part of this document may be photocopied, reproduced, or translated to another language without the prior written consent of HewlettPackard Company.
First Edition, August 2000 Second Edition, November 2001 Third Edition, August 2008
Warranty
The information contained in this document is subject to change without notice.
Hewlett-Packard makes no warranty of any kind with regard to this material, including, but not limited to, the implied warranties of merchantability and fitness for a particular purpose.
Hewlett-Packard shall not be liable for errors contained herein or for incidental or consequential damages in connection with the furnishing, performance, or use of this material.
WARNING
The procedures described in this manual are to be performed by HP-qualified service personnel only.
Electrical Shock Hazard
Serious shock hazard leading to death or injury may result if you do not take the following precautions:
—Ensure that the ac power outlet (mains) has a protective earth (ground) terminal.
—Disconnect the Printer from the power source prior to performing any maintenance.
—Prevent water or any other liquids from running onto electrical components or circuits, or through openings in the enclosure.
Electrostatic Discharge
Refer to the beginning of Chapter 8 of this manual, for precautions you should take to prevent damage to the Printer circuits from electrostatic discharge.
Safety Symbols
General definitions of safety symbols are given immediately after the table of contents.
WARNING
The Warning symbol calls attention to a procedure, practice, or the like, which, if not correctly performed or adhered to, could result in personal injury. Do not proceed beyond a Warning symbol until the indicated conditions are fully understood and met.
CAUTION
The Caution symbol calls attention to an operating procedure, practice, or the like, which, if not correctly performed or adhered to, could result in damage to or destruction of part or all of the product. Do not proceed beyond a Caution symbol until the indicated conditions are fully understood and met.
Technical Marketing,
Barcelona Division, Hewlett-Packard Espanola, S.A. Avda. Graells, 501
08190 Sant Cugat del Valles Spain

HP DesignJets 500, 510 and 800 Series Large-Format Printers
Service Manual

Using this Manual
Purpose
This Service Manual contains information necessary to test, calibrate and service:
HP DesignJet 500 Printer — 24” Model (P/N C7769B)
HP DesignJet 500 Printer — 42” Model (P/N C7770B)
HP DesignJet 500PS Printer — 24” Model (P/N C7769C)
HP DesignJet 500PS Printer — 42” Model (P/N C7770C)
HP DesignJet 500Plus – 24” Model (P/N C7769F)
HP DesignJet 500Plus – 42” Model (P/N C7770F)
HP DesignJet 500Mono – 24” Model (P/N C7769E)
HP DesignJet 500Mono – 42” Model (P/N C7770E)
HP Designjet 510 – 24” Model (P/N CH336A)
HP Designjet 510 – 42” Model (P/N CH337A)
HP Designjet 510ps – 24” Model (P/N CJ996A)
HP Designjet 510ps – 42” Model (P/N CJ997A)
HP DesignJet 800 Printer — 24” Model (P/N C7779B)
HP DesignJet 800 Printer — 42” Model (P/N C7780B)
HP DesignJet 800PS Printer — 24” Model (P/N C7779C)
HP DesignJet 800PS Printer — 42” Model (P/N C7780C)
For information about using these printers, refer to the corresponding User and Quick Reference Guides.
Readership
The procedures described in this Service Manual are to be performed by HP Certified Service Personnel only.
Part Numbers
Part Numbers for Printer options, accessories and service parts are
|
2 |
HP DesignJets 500, 510 and 800 Series Printers Service Manual |

located in Chapter 7.
Conventions
A small arrow is used to indicate other parts of the Service Manual where you can find information related to the topic you are consulting.
|
HP DesignJets 500, 510 and 800 Series Printers Service Manual |
3 |

Table of Contents
Table of Contents
Troubleshooting 1-1
Introduction 1-2
Troubleshooting System Error Codes 1-2 Solving Print Quality Problems 1-3 Cover Sensors are not Working 1-3
The Line Sensor has Problems Detecting Media 1-3 Troubleshooting Paper-Axis Shutdowns 1-4 Problems with the Vacuum Fan 1-5
Vacuum suction much lower at high altitudes 1-5
HP-GL/2 color differences in different HP DesignJet Printers 1-6 Banding at variable extreme environmental conditions 1-6
The Priming Procedure Fails 1-7
Using the Power Switch LED to Troubleshoot 1-10 Using the Boot-Up Sequence to Troubleshoot 1-12
Using the Formatter/Accessory Card LEDs to Troubleshoot 1-14
System Error Codes 2-1
Introduction 2-2
Continuable and Non-Continuable Error Codes 2-2
System Error Codes — Explanation 2-2
Error Log Utility 2-5
Accessing the Error Log Utility 2-5
Ink Supplies Troubleshooting 3-1
What are the Ink Supplies? 3-2
Ink Cartridges 3-2
Printheads 3-3
Identifying the Components 3-3
General Information About the Ink Supplies 3-4
Some General Precautions When Handling the Ink Supplies 3-5
When Should You Replace the Ink Cartridges? 3-6
When Should You Replace the Printheads? 3-7
Obtaining Ink Cartridge Information 3-9
|
4 |
HP DesignJets 500, 510 and 800 Series Printers Service Manual |

Table of Contents
Obtaining Printhead Information 3-10
Ink Cartridge Status Messages 3-12
Ink Cartridge Status While Replacing 3-12 Printhead Status Messages 3-13
Printhead History Utility 3-14
Accessing the Printhead History Utility 3-14
Is the Printer Causing Repetitive Printhead Problems? 3-16 Is the User Replacing the Printheads too Early? 3-18 Troubleshooting Repetitive Ink Cartridge Messages 3-20 Troubleshooting Repetitive Printhead Error Messages 3-21 Printhead Error Codes 3-22
Summary of Solving Ink Supplies Problems 3-23
Service Tests and Utilities 4-1
Introduction 4-2
Phone Support 4-2
Diagnostics — Self Test 4-2
Service Tests (Diagnostics) 4-3
Entering the Service Tests Menu 4-4
Ink Supply Station 4-6
Carriage Movement 4-8
Paper Advance Test 4-10
Service Utilities 4-13
Entering the Service Utilities Menu 4-14
EEROM Setup 4-16
Turn Drive Roller 4-21
Unlock Carriage 4-22
Prime Tubes 4-23
Change Cutter 4-24
Change Ink Tubes 4-25
Printer Information 4-26
Service Calibrations 5-1
Entering the Service Calibrations Menu 5-3
Printhead Alignment (includes PPS Calibration) 5-5
Color Calibration 5-7
Advance Calibration 5-9
Factory Advance Calibration 5-11
|
HP DesignJets 500, 510 and 800 Series Printers Service Manual |
5 |

Table of Contents
Print Quality 6-1
Print Quality 6-2
Print Quality Troubleshooting Checklist 6-2 How to Use the Troubleshooting Procedure 6-4 What is the Troubleshooting Procedure? 6-4
Considerations for Using the Troubleshooting Procedure. 6-4 Performing the Troubleshooting Procedure 6-4 Troubleshooting Procedure Flowchart 6-7
No Printing Defects Found Using the Troubleshooting Procedure 6-8 Solving Color Accuracy problems 6-9
Color Consistency problems 6-9
Long Term Color Bleeding (Glossy Papers) 6-9 Media 6-10
There are Smears or Scratching on the Printed Media 6-10
Parts and Diagrams 7-1
Printer Support 7-2
Right Hand Cover 7-4
Left Hand Cover 7-6
Top Cover and Deflectors 7-8
Rollfeed Module 7-10
Back Platen Assembly 7-12
Electronics Module 7-14
Power Supply 7-16
Cutter Assemblies 7-18
Ink Delivery System 7-20
Service Station and Spittoon 7-22
Service Station Holder 7-24
Pinch-Wheel Assemblies 7-26
Scan-Axis Motor 7-28
Drive Roller Encoder Sensor 7-30
Print Platen Assembly 7-32
Carriage Assembly 7-34
Vacuum Fan 7-36
Interconnect Cable 7-38
Paper-Axis Motor 7-40
Drive Roller 7-42
Miscellaneous Items 7-44
|
6 |
HP DesignJets 500, 510 and 800 Series Printers Service Manual |

Table of Contents
Removal and Installation 8-1
Introduction 8-2
Safety Precautions 8-2
Electrostatic Discharge (ESD) Precautions 8-3
Required Tools 8-3
Screw Types 8-4
Left Hand Cover 8-5
Right Hand Cover 8-7
Front Panel 8-9
Window and Top Cover 8-10
Media Deflectors 8-11
Left End Roll-Feed 8-13
Right End Roll-Feed 8-15
Back Platen 8-17
Media Sensor 8-19
Formatter 8-20
LAN Card 8-21
Spittoon 8-23
Electronics Module 8-24
Power Supply 8-27
Scan-Axis Motor Assembly 8-29
Cutter Assembly 8-32
Left Encoder Holder 8-33
Cutter Bushing 8-35
Cutter Guide Bracket 8-36
Drive Roller Encoder Sensor 8-38
Trailing Cable 8-40
Ink Supply Station 8-48
Interconnect PCA 8-50
Service Station and Aerosol Fan 8-52
Cutter Guide 8-55
Print Platen 8-56
Service Station Holder 8-57
Interconnect Cable 8-59
Ink Supply Tubes 8-60
Vacuum Fan 8-64
Pinch-Arm 8-66
Pinch-Arm Mechanism 8-67
Pinch-Arm Lever 8-69
|
HP DesignJets 500, 510 and 800 Series Printers Service Manual |
7 |

Table of Contents
Pinch-Arm Sensor 8-71
Fork Idler, Tensioner and Idler Pulley 8-74
Encoder Strip 8-76
Carriage Assembly (Including Belt) 8-78
Paper-Axis Motor 8-84
Drive Roller 8-86
Gear Assemblies 8-92
Preventive Maintenance 9-1
Moisture on the Printer 9-2
Noisy Carriage Bushing 9-2
Belt Swelling 9-2
Cleaning the Printer 9-2
General Cleaning 9-2
Cleaning the Drive Roller/Print Platen 9-3
Scheduled Maintenance 9-3
Level of Printer Usage 9-3
Scan-Axis Maintenance 9-4
Functional Overview 10-1
Introduction 10-2
SKU Overview 10-2
Electrical System 10-3
Introduction 10-3
Hardware Description 10-3
Power Supply Unit (PSU) 10-5
Front Panel 10-6
Ink Delivery System (IDS) 10-7
Ink Supply Station (ISS) 10-7
Tubes Assembly 10-9
Service Station 10-10
Glossary
Index
|
8 |
HP DesignJets 500, 510 and 800 Series Printers Service Manual |
![]()
Troubleshooting 1
Introduction 1-2
Troubleshooting System Error Codes 1-3
Performing a Service Test on a Failed Assembly 1-3
Performing the Necessary Service Calibrations 1-3
Solving Print Quality Problems 1-4
The Printer does not Power ON 1-4
Cover Sensors are not Working 1-4
The Line Sensor has Problems Detecting Media 1-4
Troubleshooting Paper-Axis Shutdowns 1-5
Problems with the Vacuum Fan 1-6
Vacuum suction much lower at high altitudes 1-6
HP-GL/2 color differences in different HP DesignJet Printers 1-7
Banding at variable extreme environmental conditions 1-7
The Priming Procedure Fails 1-8
Using the Power Switch LED to Troubleshoot 1-11
Using the Boot-Up Sequence to Troubleshoot 1-13
How to Detect Problems Related to the Encoder Disk 1-17
|
HP DesignJets 500, 510 and 800 Series Printers Service Manual |
1-1 |
Troubleshooting
Guide to Troubleshooting the Printer
Introduction
This chapter will guide you through the relevant steps to take when troubleshooting the printer.
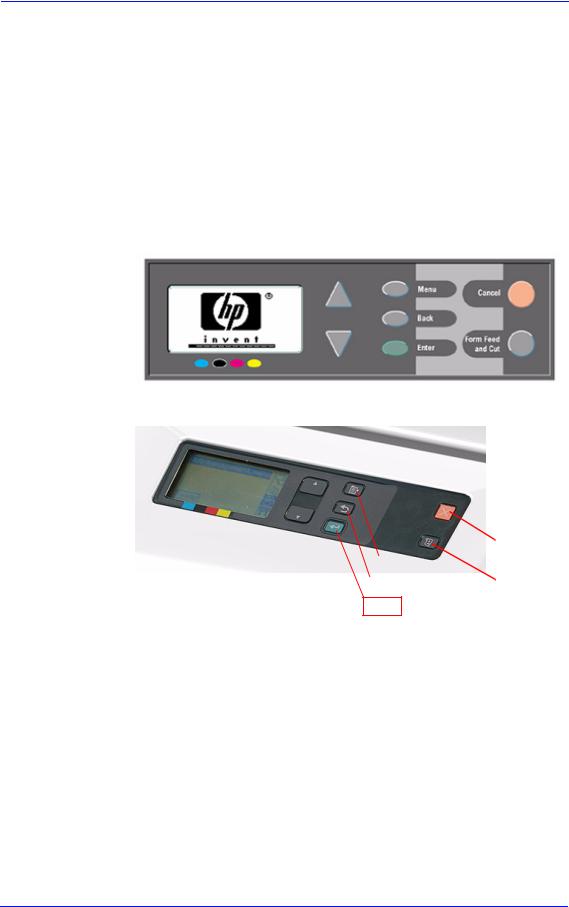
Front Panel Difference for the HP DesignJet 500, 510 and 800 Series Printers
Front Panel for the HP DesignJet 500 and 800 Series
Front Panel for the HP DesignJet 510 Series
|
Cancel |
|||||
|
Menu |
|||||
|
Form Feed |
|||||
|
Back |
and cut |
||||
Enter
|
1-2 |
HP DesignJets 500, 510 and 800 Series Printers Service Manual |

|
Troubleshooting |
|
|
The layout shown below will be used to refer to both types of |
|
|
NOTE |
|
|
front panels |
Troubleshooting System Error Codes
Chapter 2 — System Error Codes contains a list of system error codes and their respective descriptions and recommended corrective actions. Only try one recommended action at a time and check if the error code has disappeared.
Performing a Service Test on a Failed Assembly
If possible, always perform a Service Test on the component/ assembly that you are about to replace, just to make sure that is the component/assembly that has failed.
If the test on that component/assembly passes, you should NOT replace it.
For information on the Service Tests and how to use them see Chapter 4 — Service Tests and Utilities.
Performing the Necessary Service Calibrations
Is the printer calibrated correctly after replacing a component?
Remember that certain Calibrations are required even if an Assembly has been disassembled to gain access to another Assembly or Component.
For information on the Service Calibrations and how to use them see Chapter 5 — Service Calibrations.
|
HP DesignJets 500, 510 and 800 Series Printers Service Manual |
1-3 |

Troubleshooting
Solving Print Quality Problems
The Printer contains an internal Troubleshooting procedure which helps you to diagnose and resolve the possible source of any Image Quality or Line Quality defects. If Print Quality is poor before the minimum life expectancy of the Printhead has been reached, the Troubleshooting procedure should be performed which will determine whether the Printhead needs replacing or not after performing various levels of recovery actions.
For information on solving Print Quality problems see Chapter 6 —
Print Quality.
The Printer does not Power ON
1Check that the power cord is connected correctly to the Printer and to the Power Socket.
2Check that the Front-Panel Cable is correctly connected to the Interconnect PCA. Also make sure that the Front-Panel cable is not damaged.
3Check that the Interconnect Cable is properly connected at the both ends of the Printer.
Cover Sensors are not Working
1Check if the faulty sensor is installed correctly.
2Check if the cable for the faulty sensor is connected correctly.
3Replace the faulty Sensor (or the assembly that contains the Sensor).
The Line Sensor has Problems Detecting Media
1Check the type of media that is being used since the Line Sensor may have problems detecting transparent media or some types of Non-HP media. Try loading white HP media in to the Printer and check if the Line Sensor detects it.
2Excessive ink deposits on the Print Platen surface can fool the sensor by reflecting the light. Clean the Print Platen.
3The Line Sensor is damaged or faulty. Replace the Carriage Assembly Page 8-78.
|
1-4 |
HP DesignJets 500, 510 and 800 Series Printers Service Manual |

Troubleshooting
Troubleshooting Paper-Axis Shutdowns
A Paper-Axis shutdown can happen when the Printer detects that the Drive Roller is not moving but at the same time power is being supplied to the Paper-Axis Motor (which should be turning the Drive Roller).
The reasons for the Paper-Axis shutdown, and their solutions, are explained as follows:
1The Paper-Axis Motor does not respond to the electrical simulation.
It is possible to determine whether the Paper-Axis is faulty by performing the Paper Advance Test (Refer to Page 4-11). The Printer will move the Motor backwards and forwards and measure directly from the Motor Encoder whether the Paper-Axis Motor responded to the force. If the Paper-Axis Motor did not respond, the solution would be to replace the Paper-Axis Motor
Page 8-84.
2The Transmission Gears, which transmit the movement to the Drive Roller, are not turning. This problem could be caused either by blockage of the gears (caused by an obstacle) or by one of the gears being damaged. To solve the problem, try the following:
Remove the Back Platen Page 8-67 and check if there are any obstacles blocking the Gears. Remove the obstacles if necessary.
Remove the Back Platen Page 8-67 and check if the
Transmission Gears are damaged. If the Gears are damaged, replace the Gear Assemblies Page 8-92.
3The Drive Roller cannot move because of an obstacle or because it is damaged. To solve the problem, try the following:
Remove the Back Platen Page 8-67 and check if there are any obstacles blocking the Drive Roller. Remove the obstacles if necessary.
Remove the Back Platen Page 8-67 and check if the Drive
Roller is damaged. If the Drive Roller is damaged, replace the Drive Roller Page 8-86.
4The Drive Roller Encoder Sensor is faulty
It is possible to determine whether the Encoder Sensor is faulty by loading a sheet of paper from the front of the Printer. If the Drive Roller is working, the sheet will be loaded correctly, and the Printer will detect that media has been loaded (using the Media Sensor). Therefore the problem must be the Encoder Sensor and the solution would be to replace the Encoder Sensor
Page 8-38.
|
HP DesignJets 500, 510 and 800 Series Printers Service Manual |
1-5 |

Troubleshooting
Problems with the Vacuum Fan
If you have problems loading either Roll or Sheet Media, then there could be a problem with the Vacuum Fan. To verify if there really is a problem with the Vacuum Fan, try the following:
1With the Printer ON, open the Window of the Printer and place a sheet of HP High Gloss Photo Paper (must be D-Size), aligned with the blue lines on the Center Platen. If the Vacuum Fan holds the sheet in place, and then loads it correctly, then the Vacuum Fan functions correctly. If the Vacuum Fan does not hold the sheet in place (no suction), then try the following:
Check that the holes in the Center Platen are NOT blocked.
Check that the Vacuum Fan is installed correctly.
Replace the Vacuum Fan Page 8-64.
2If the Vacuum Fan held the sheet in place, but couldn’t correctly load it, then there could be a problem with the Drive Roller. In this case, replace the Drive Roller Page 8-86.
Vacuum suction much lower at high altitudes
Sometimes, at high altitudes, the vacuum force holding down the media will be lower, therefore the media will not be held in place properly causing:
Ink Smearing on the Media.
Printhead crashes against the Media.
Cut Sheet loading problems (high probability).
Roll Media loading problems (low probability).
The solution to this would be to change the Vacuum force by changing the Altitude setting. This can be done via the front panelSet-up Menu / Altitude.
|
1-6 |
HP DesignJets 500, 510 and 800 Series Printers Service Manual |

Troubleshooting
HP-GL/2 color differences in different HP DesignJet Printers
Color differences between one image printed on the HP DesignJet 500/510/800 Series and the rest of the DesignJet platforms are due to the different chemistry of the 500/510/800 series inks compared with the rest of the inks for other printers. This color variability among different HP DesignJet Series Printers has always been present. To solve the problem, try the following:
Perform the color calibration from the driver at the time of printing. However, that calibration is not very accurate but it may help in the most severe cases.
Some applications have color controls for the user to modify the image in order to obtain the desired colors.
Printing with PostScript reduces the problem significantly.
Avoid very long exposures to extreme environmental conditions after printing with glossy media (more than 12 hours at 80% humidity may result in severe changes in color).
Banding at variable extreme environmental conditions
Since the Accuracy Calibration has been done at normal environmental conditions, printing in extreme environmental conditions will cause banding because the advance of the Drive Roller does not correspond to the same conditions that the calibration was done in. To solve the problem, try the following:
Perform the Accuracy Calibration in the new environmental conditions (Refer to the User’s Guide).
|
HP DesignJets 500, 510 and 800 Series Printers Service Manual |
1-7 |

Troubleshooting
The Priming Procedure Fails
When the customer first receives the Printer, it is supplied with a set of four Start-up Printheads pre-installed in the Printhead Carriage. These Start-up Printheads are used for the priming of the tubes in the Ink Delivery System.
When the Printer is powered ON for the first time, the Printer will automatically perform the priming process. Without the priming process, the customer will NOT be able to use the Printer.
The initial startup assumes that the Start-up Printheads are installed, but the Printer cannot detect them because the Printer can only detect normal Printheads. If normal Printheads are installed during the initial startup, the Printer will request the User to remove them and check if they really have been removed. It will then request the User to install the Start-up Printheads.
Also the Printer will request the User to install the Ink Cartridges if they have not been installed already. If the Ink Cartridges contain less than 20cc of ink (the Ink Cartridges are encoded with the quantity of ink remaining) they will be rejected. Normally with a new Printer this should not be a problem since the Printer comes with Ink Cartridges that are full, but there maybe cases when the Ink Supply Tubes need to be replaced, in which case half empty Ink Cartridges may be used.
Once the Printer assumes that the Start-up Printheads and Ink Cartridges with enough ink are installed, the priming process will begin.
If the priming process is completed successfully, the Printer will directly proceed to the Printhead replacement procedure in order to replace the used Start-up Printheads with normal Printheads.
Once the priming process has started, it can fail due to 2 different problems:
The Ink Supply Tubes were not completely empty — This is the most common cause especially if the Printer has been powered ON and OFF several times with the Ink Cartridges installed since the initialization process performs at least one pumping cycle.
The Printer detects that one or more of the tubes cannot be detected as filled with ink — The most likely cause for this problem is Ink Cartridges with a faulty valve.
Even if the priming process fails, the Printer will try to verify whether the priming process has been completed by moving the Carriage to the access position and you will see the following
|
1-8 |
HP DesignJets 500, 510 and 800 Series Printers Service Manual |

Troubleshooting
message on the Front Panel:
Unable to prepare ink system.
Open window to check SETUP printheads
Open the Window and you will see the following message on the Front Panel:
1.Lift printhead cover
2.Check if there is ink inside printhead windows
3.Press ENTER to continue
Check for ink
Open the Carriage Cover and check if there is ink inside the Start-up Printheads. On the Front Panel you will see the following question and you will need to select the answer depending on whether the Start-up Printheads were filled with ink or not:
|
Are all printhead windows |
Menu |
||
|
filled with ink? |
Back |
||
|
ALL with some ink |
Enter |
||
|
NOT all with ink |
|||
If there is ink in all of the Start-up printheads, the Printer considers that the priming procedure has been completed successfully and will proceed to the Printhead replacement process.
If you select NOT all with ink the Printer will react differently depending on the source of the problem:
|
HP DesignJets 500, 510 and 800 Series Printers Service Manual |
1-9 |

Troubleshooting
If you need to reseat the Start-up Printheads, make sure you reinsert them in the same color slot in the Carriage.
The Printer will request you to reseat the Start-up Printheads (or in the case of missing Start-up Printheads you should install them or order new ones) and then retry the priming process (if the priming process fails 3 times because of the same problem, it will display a System Error). In this situation, the problem could be the following:
1The Start-up Printheads were not installed correctly or they are missing (one or all of them).
2The Start-up Printheads do not work properly and do not allow air to flow (one or all of them).
3The Ink Supply Station fails to pressurize the Ink Cartridges. To check this, perform the Ink Supply Station test Page 4-6.
4The Ink Supply Tubes are blocked, preventing the ink from flowing correctly.
If a System Error is displayed, try the following:
1The Ink Cartridge valve is broken so the Ink Cartridge should be replaced.
2The Start-up Printhead is not working properly and allows ink to flow outside.
3The Ink Supply Tube is leaking.
The last 2 cases will be more obvious because there will be a lot of ink in the Printer (around 20 cc of ink). Remove the Ink Cartridges and release the Tubes Bracket from the Ink Supply Station and check if there is ink in this area.
For more information on this problem, refer to System Error 93:10 on Page 2-19.
|
1-10 |
HP DesignJets 500, 510 and 800 Series Printers Service Manual |
![]()
Troubleshooting
Using the Power Switch LED to Troubleshoot |
|
|
In certain circumstances the LED located in the power switch |
|
|
(located on the left hand side of the Printer) can help to troubleshoot |
|
|
the Printer. The LED can be OFF, ON or flashing and using different |
|
|
combinations can indicate different problems. |
|
|
You should only use the LED to troubleshoot when the Printer |
|
|
NOTE |
|
|
does not Power up completely. The LED may flash in other |
|
|
circumstances which are completely normal and this does not |
|
|
mean that there is a problem with the Printer. |
LED is OFF — This indicates that the Power Supply Unit is completely dead. Try the following:
1Check that power cord is connected correctly to the Printer and to the Power Socket. Also make sure that you firmly press the Power Switch to the ON position.
2Replace the Power Supply Unit Page 8-27.
LED is ON (all the time) — This indicates that the Main PCA is completely dead. Replace the Electronics Module Page 8-24.
LED is Flashing continuously — A problem has been detected with the previous firmware upgrade. Try resending the firmware upgrade file.
LED Flashes twice every few seconds — The Printer cannot detect
|
HP DesignJets 500, 510 and 800 Series Printers Service Manual |
1-11 |

Troubleshooting
the Interconnect Cable. Try the following:
1Check that the Interconnect Cable is connected correctly to the Electronics Module and to the Interconnect PCA.
2If the Interconnect cable is connected correctly and the LED continues to flash twice then replace the Interconnect Cable Page 8-59.
LED Flashes 3 times every few seconds — The Printer cannot detect the Front Panel. Try the following:
1Check that the Front Panel is connected correctly to the Interconnect PCA.
2Check that the Interconnect Cable is properly connected at the both ends of the Printer.
3If the Front Panel is connected correctly and the LED continues to flash 3 times then replace the Front Panel Page 8-9.
4Replace the Interconnect Cable Page 8-59.
5Replace the Electronics Module Page 8-24.
LED Flashes 4 times every few seconds — This indicates that the Main PCA has failed. Replace the Electronics Module Page 8-24.
LED Flashes 5 times every few seconds — This indicates that the Main PCA has failed. Replace the Electronics Module Page 8-24.
|
1-12 |
HP DesignJets 500, 510 and 800 Series Printers Service Manual |

|
HP DesignJets 500, 510 and 800 Series Printers Service Manual |
1-13 |

|
1-14 |
HP DesignJets 500, 510 and 800 Series Printers Service Manual |

Troubleshooting
Using the Formatter/Accessory Card LEDs to Troubleshoot
In certain circumstances the LEDs located in the Formatter or HPGL/2 Accessory Card can help to highlight certain failures. There are 3 LEDs, Red, Yellow and Green and using different combinations can indicate different problems.
LED’s on the HP-GL/2
Accessory Card
The LED’s on the Formatter can be seen without having to remove the Left Hand Cover.
LED’s on the Formatter
The yellow LED (normally flashing) indicates that the Formatter/ Accessory Card is alive. If it stops flashing, it means that the Formatter/Accessory Card has failed and should be replaced.
The green LED indicates that there is power being supplied to the
|
HP DesignJets 500, 510 and 800 Series Printers Service Manual |
1-15 |

Troubleshooting
Formatter/Accessory Card. If the green LED is NOT lit and the LED in the Power Switch is ON, then it could mean that the Formatter/Accessory Card is badly connected or that the Printer if switched OFF. If after reseating the Formatter/Accessory Card, the problem persists, try the following:
1Switch the Printer OFF and remove the Formatter/Accessory Card BUT leaving the LAN Card installed (if available). Switch the Printer ON. If the Printer powers up correctly and the LAN Card works properly, then try step 2. If the LAN Card doesn’t work, then try step 3.
2Switch the Printer OFF and remove the LAN Card from the current slot and install the Formatter/Accessory Card in the same slot (that was previously used by the LAN Card). Switch the Printer ON and check if the green LED in the Formatter/Accessory Card is lit. If the green LED is NOT lit, it means that the Formatter/Accessory Card is faulty and should be replaced.
If the green LED is lit, then switch the Printer OFF and install the LAN Card in the vacant slot. Switch ON the Printer and check if the LAN Card works properly. If the LAN Card does NOT work, then
there is a problem with the Electronics Module and should be replaced Page 8-24.
3Switch the Printer OFF and remove the LAN Card. Switch ON the Printer and check if it initializes completely. If it initializes correctly
without any problems, then the problem could be with the Electronics Module and should be replaced Page 8-24.
4If the Printer does not even start to power up (i.e. nothing seen on the Front Panel and the LED in the Power Switch is NOT flashing) without the LAN Card nor the Formatter/Accessory Card, but the power switch LED is ON (all the time) the problem could be with the Electronics Module or the Power Supply Unit.
The red LED will flash a few times when the Printer is started up but if it stays lit (all the time) or flashes continuously, then this indicates that the Formatter/Accessory Card is faulty and should be replaced.
HP Designjet 510 Series printers will only include “HPGL/2 Accessory Card (Processor Card)” installed in the Left Slot of the Electronics Module.
|
1-16 |
HP DesignJets 500, 510 and 800 Series Printers Service Manual |
Troubleshooting
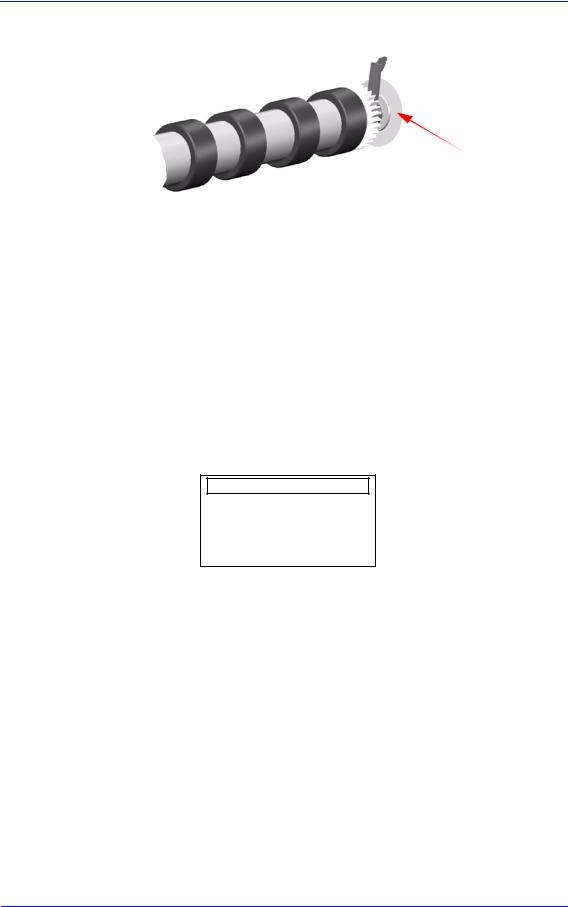
How to Detect Problems Related to the Encoder Disk
Encoder Disk
The following information will help you detect any problems related to the Encoder Disk:
Horizontal and periodic white lines, all of them with the same width depending on the failure mode. This is a clear indication that the Encoder Disk is damaged.
System Error 56:10 — This means that you have to replace the Drive Roller Encoder Sensor Page 8-38. But, if the problem persists, replace the Encoder Disk Assembly.
System Error 81:01 — This means a Paper-Axis shutdown. If this
error code appeared but was NOT caused by a paper jam, then perform the Paper Advance Test Page 4-11. If the Paper Advance Test fails during the third test, the Front Panel will display the following message:
Paper Advance test
System error 56:10
Roller encoder sensor failed
|
In this case, you should replace the Drive Roller Encoder Sensor |
|
|
Page 8-38. But, if the problem persists, replace the Encoder Disk |
|
|
Assembly. |
|
|
In order to remove the Encoder Disk, you must first remove the Drive |
|
|
NOTE |
|
|
Roller Page 8-86. |
|
|
Be very careful when assembling the Axle Spring because you could |
|
|
damage the Encoder Disk. |
|
|
Check that no air bubbles are trapped between the Encoder Disk and the |
|
|
hub once it is installed. |
|
HP DesignJets 500, 510 and 800 Series Printers Service Manual |
1-17 |

System Error Codes |
2 |
Introduction 2-2
Continuable and Non-Continuable Error Codes 2-2 System Error Codes — Explanation 2-2
Accessing the Error Log Utility 2-5 01:10 2-7 01:11 2-7 01:12 2-7 01:13 2-8 02:10 2-8 02:13 2-8 03:10 2-9 04:11 2-9
05:10 Warning (Only applicable to HP DesignJet 800 Series) 2-9 05:11 2-10 08:11 2-10 11:11 2-10 11:13 2-10 12:11 2-11 21:10 2-11 21:11 2-11 22:10 2-11 41:10 2-12 41:13 2-12 42:10 2-12 43:10 2-12 43:11 2-12 56:10 2-13 56:13 2-13 61:04 2-13 61:05 2-14 64:04 2-14 71:04 2-15 71:06 2-15 72:04 2-16 73:04 2-16 79:04 2-17 81:01 2-17 81:11 2-17 85:10 2-18 86:01 2-18 86:11 2-18 86:13 2-19 87:13 2-19 93:10 2-19
|
HP DesignJets 500, 510 and 800 Series Printers Service Manual |
2-1 |

System Error Codes
Introduction
System error codes are hexa-decimal based numbers generally caused by internal system errors. The following pages contain a list of system error codes and their respective descriptions and recommended corrective actions. Only try one recommended action at a time and check if the error code has disappeared.
Continuable and Non-Continuable Error Codes
Some of the Error Codes are continuable, which means you can press Enter on the front-panel and continue working with the Printer. Non-Continuable Error Codes do not allow you to continue working with the Printer, in this case power the Printer OFF and ON again and see if the System Error disappears. If the Error Code reappears, then the Printer requires an on-site visit in order to resolve the problem.
|
NOTE |
Even though the customer can continue working with a |
|
Continuable Error Code, an on-site visit should still be planned |
|
|
to troubleshoot the problem. |
System Error Codes — Explanation
System Error Codes consist of 4 digits which explain which component/system is failing and what action should be taken to resolve the problem.
The following table explains the first 2 digits of the System Error Code:
|
Code |
Component/System |
|
01 |
Main PCA/Electronics Module |
|
02 |
Carriage/Carriage PCA |
|
03 |
Power Supply Unit |
|
04 |
Network Card |
|
05 |
Formatter |
|
06 |
Hard Disk Drive |
|
07 |
Interconnect PCA |
|
08 |
Front Panel |
|
11 |
Trailing Cable |
|
12 |
Carriage Flex Circuit |
|
2-2 |
HP DesignJets 500, 510 and 800 Series Printers Service Manual |

|
System Error Codes |
||
|
Code |
Component/System |
|
|
17 |
Interconnect Cable |
|
|
21 |
Service Station |
|
|
22 |
Ink Supply Station |
|
|
23 |
Pressure System (APS) |
|
|
24 |
Ink Delivery System |
|
|
25 |
Spittoon |
|
|
31 |
Cutter |
|
|
32 |
Take-up Reel |
|
|
33 |
Sheet Feeder |
|
|
34 |
Dryer/Blower |
|
|
41 |
Paper-Axis Motor |
|
|
42 |
Scan-Axis Motor |
|
|
43 |
Vacuum Fan |
|
|
51 |
Window Sensor |
|
|
52 |
Drop Detector |
|
|
53 |
Media Sensor |
|
|
54 |
Pinch-Arm Sensor |
|
|
55 |
Line Sensor |
|
|
56 |
Drive Roller Encoder Sensor |
|
|
57 |
Ink Leak Detector |
|
|
58 |
Color Sensor |
|
|
59 |
Media Type Sensor |
|
|
61 |
Language Interpreting |
|
|
62 |
Input/Output through Parallel Port |
|
|
63 |
Input/Output through Network Card |
|
|
64 |
Input/Output through USB Port |
|
|
65 |
Input/Output |
|
|
71 |
Memory Management |
|
|
72 |
Generic Firmware |
|
|
73 |
Servo |
|
|
79 |
Assertion |
|
|
81 |
Media Advance |
|
|
82 |
Media Cut |
|
|
83 |
Single-Sheet Feeding |
|
|
84 |
Roll Feeding |
|
HP DesignJets 500, 510 and 800 Series Printers Service Manual |
2-3 |
![]()
System Error Codes
|
Code |
Component/System |
|
85 |
Media-Axis Encoder Reading |
|
86 |
Carriage Movement |
|
87 |
Scan-Axis Encoder Reading |
|
91 |
Printhead Firing |
|
92 |
Servicing |
|
93 |
Ink Pumping |
The following table explains the last 2 digits of the System Error Code:
|
Code |
Recovery Action |
Response |
|
|
00 |
Replace |
||
|
01 |
Reseat/Reconnect/Clean/Adjust (manually) |
Possiblefor |
|
|
02 |
Calibrate/Adjust (using Automatic Process) |
||
|
customer to |
|||
|
03 |
Power OFF |
||
|
perform |
|||
|
04 |
Upgrade System Firmware |
action |
|
|
05 |
Upgrade Driver |
||
|
06 |
Add Accessory |
||
|
07 |
Escalate |
||
|
08 |
Send Plot Again |
||
|
09 |
Wrong Part Installed |
||
|
10 |
Replace |
||
|
11 |
Reseat/Reconnect/Clean/Adjust (manually) |
||
|
12 |
Calibrate/Adjust (using Automatic Process) |
On-Site |
|
|
13 |
Power OFF |
||
|
visit |
|||
|
14 |
Upgrade System Firmware |
required |
|
|
15 |
Upgrade Driver |
||
|
16 |
Add Accessory |
||
|
17 |
Escalate |
||
|
18 |
Send Plot Again |
||
|
19 |
Wrong Part Installed |
|
2-4 |
HP DesignJets 500, 510 and 800 Series Printers Service Manual |

System Error Codes
Error Log Utility
The Error Log utility contains a record of the last 10 system error codes the Printer has experienced. The purpose of this information is to:
Determine whether the Printer is experiencing repetitive failures.
Determine whether the previous problems are causing the current failure in the printer.
Determine whether there are additional symptoms to the current system error code.
The information that is stored for each error code is:
The reported System error code.
The code line in the Firmware where the error was triggered.
The date when the error code was triggered.
Accessing the Error Log Utility
1Press the ↑or ↓key until the front panel displays the Setup Menu and then press Enter.
|
Menu |
||||
|
Set-up menu |
||||
|
Back |
||||
|
Press ENTER for |
||||
|
Set-up menu |
Enter |
2Press the ↑ or ↓ key until the front panel highlights Log. Press the
Enter key.
|
Set-up menu |
Menu |
||
|
Expansion cards |
|||
|
I/O set-up |
Back |
||
|
front panel |
|||
|
Altitude = 0-1000 m. |
|||
|
Log |
Enter |
||
|
HP DesignJets 500, 510 and 800 Series Printers Service Manual |
2-5 |

System Error Codes
3 Press the ↑ or ↓ key until the front panel highlights Errors. Press the Enter key.
|
Log |
Menu |
||
|
Back |
|||
|
Printheads |
|||
|
Errors |
Enter |
||
4 Press the ↑ or ↓ key until the front panel highlights the error code that you want to see information on. Press the Enter key.
|
Error log |
Menu |
||
|
Select for more info: |
|||
|
1 Error 21:10 |
Back |
||
|
2 Error 01:11 |
|||
|
3 Error 21:11 |
|||
|
4 Error 43:10 |
Enter |
||
|
5 The front panel displays information on the selected item. |
||||||
|
Error log |
||||||
|
Error code: 21:10 |
||||||
|
linefeed.c, 217 |
||||||
|
Date: 20-Sep-01 |
||||||
|
To view information on another Error Code, press BACK and |
||||||
|
NOTE |
||||||
|
the front panel will return to the previous screen |
|
2-6 |
HP DesignJets 500, 510 and 800 Series Printers Service Manual |

System Error:
Problem
Description:
Corrective Action:
System Error:
Problem
Description:
Corrective Action:
System Error:
Problem
Description:
Corrective Action:
System Error Codes
01:10
Electronics Module failure. The possible cause could be:
1.The Electronics Module is of the wrong type (a 16 MB Electronics Module will not work in a 24″ Model).
2.Reading, writing or initializing the EEROM failed.
3.One of the ASIC’s was not found within the Serial Bus that connects the Electronics Module to the Carriage Assembly.
4.One of the ASIC’s did not respond to the Serial Bus that connects the Electronics Module to the Carriage Assembly.
5.The Electronics Module is requesting a move to the Service Station while the previous move is still being completed.
6.The Electronics Module Cooling Fan has reached its current limit.
Replace the Electronics Module Page 8-24.
01:11
The Electronics Module Cooling Fan badly connected.
Reconnect the Cooling Fan (located on top of the Electronics Module). If the Cooling Fan continues to fail, check that the connector pins in the Electronics Module are NOT bent.
01:12
The EEROM is not configured correctly (the product number may be missing).
Configure the EEROM correctly using the EEROM setup utility Page 4-17.
|
HP DesignJets 500, 510 and 800 Series Printers Service Manual |
2-7 |

System Error Codes
System Error:
Problem
Description:
01:13
Electronics Module failure. The possible cause could be:
1.One of the ASIC’s in the Electronics Module is reporting that it is too hot.
2.The interruptions from the Scan-Axis servo or from the PaperAxis servo are not coming as regularly as they are expected or are coming too late.
Corrective Action: Try the following:
System Error:
Problem
Description:
Corrective Action:
System Error:
Problem
Description:
Corrective Action:
Switch the Printer Off and wait a few minutes. Switch the Printer On again and check if the Error Code has disappeared.
If the Error Code continues, replace the Electronics Module Page 8-24.
02:10
Carriage failure. The possible cause could be:
1. The Carriage PCA is not compatible with the rest of the Printer.
2.The Carriage ASIC has problems initializing.
3.The +2.5V reference voltage generated in the Carriage PCA is out of range.
4.One of the Carriage ASIC’s cannot be found within the Serial Bus that connects the Electronics Module to the Carriage.
5.One of the Carriage ASIC’s did not respond to the Serial Bus that connects the Electronics Module to the Carriage Assembly.
Replace the Carriage Assembly Page 8-78.
02:13
Carriage failure. The possible cause could be:
1. One of the ASIC’s in the Carriage is reporting that it is too hot.
Try the following:
Switch the Printer Off and wait a few minutes. Switch the Printer On again and check if the Error Code has disappeared.
If the Error Code continues, replace the Carriage Assembly Page 8-78.
|
2-8 |
HP DesignJets 500, 510 and 800 Series Printers Service Manual |

System Error:
Problem
Description:
Corrective Action:
System Error:
Problem
Description:
Corrective Action:
System Error:
Problem
Description:
Corrective Action:
System Error:
Problem
Description:
Corrective Action:
System Error:
Problem
Description:
Corrective Action:
System Error Codes
03:10
Power Supply failure.
Replace the Power Supply Unit Page 8-27.
04:11
LAN Card not detected.
Power OFF the Printer and reconnect the LAN Card.
05:09 Error (Only applicable to HP DesignJet 500 and 510 Series)
Formatter installed instead of HP-GL/2 Accessory Card.
Power OFF the Printer and remove the Formatter and install the HPGL/2 Accessory Card Page 8-20.
NOTE: If this Error Code appears on a DesignJet 800 Series Printer, then the model number configured in the Printer is incorrect (the Printer thinks it’s a DesignJet 500 Series Printer). In this case reconfigure the model number Page 4-17.
05:10 Warning (Only applicable to HP DesignJet 800 Series) Formatter not detected.
Power OFF the Printer and reseat the Formatter.
05:10 Error (Only applicable to HP DesignJet 800 Series) Formatter failure.
Power OFF the Printer and replace the Formatter Page 8-20.
|
HP DesignJets 500, 510 and 800 Series Printers Service Manual |
2-9 |

System Error Codes
System Error: |
05:10 Error (Only applicable to HP DesignJet 500 and 510 |
|
|
Series) |
||
|
Problem |
HP-GL/2 Accessory Card failure. |
|
|
Description: |
||
|
Corrective Action: |
Power OFF the Printer and replace the HP-GL/2 Accessory Card |
|
|
Page 8-20. |
||
System Error: |
05:11 |
|
|
Problem |
Formatter not detected. |
|
|
Description: |
||
|
Corrective Action: |
Power OFF the Printer and reconnect the Formatter. |
|
System Error: |
08:11 |
|
|
Problem |
Front Panel cannot be detected. |
|
|
Description: |
||
|
Corrective Action: |
Reconnect the Front Panel. |
|
System Error: |
11:11 |
|
|
Problem |
Trailing Cable badly connected. |
|
|
Description: |
||
|
Corrective Action: |
Reconnect the Trailing Cable correctly. |
|
System Error: |
11:13 |
|
|
Problem |
Problem with setting the voltage of the Printheads. |
|
|
Description: |
||
|
Corrective Action: |
Try the following: |
|
|
Check that the Trailing Cable is connected correctly at both ends. |
||
|
Replace the Trailing Cable Page 8-40. |
||
|
Replace the Carriage Assembly Page 8-78. |
|
2-10 |
HP DesignJets 500, 510 and 800 Series Printers Service Manual |

System Error Codes
System Error: |
12:11 |
|
Problem |
A short detected in the Carriage Assembly. |
|
Description: |
Corrective Action: Try the following:
Remove ALL the Printheads and clean the flex contacts on the Printheads and in the Carriage Assembly.
Replace ALL the Printheads.
Replace the Carriage Assembly Page 8-78.
System Error:
Problem
Description:
Corrective Action:
System Error:
Problem
Description:
Corrective Action:
21:10
Service Station failure. The possible cause could be:
1.The steps counted by the Service Station motor are not consistent with the expected length of the current movement.
2.The Aerosol Fan has reached its maximum current limit.
3.The Service Station motor has shutdown because of blockage.
Replace the Service Station/Aerosol Fan Assembly Page 8-52.
21:11
Service Station cannot be detected or the Service Station is badly adjusted.
Try the following:
Reconnect the Service Station Assembly.
Reposition the Service Station trip lever.
System Error:
Problem
Description:
Corrective Action:
22:10
Ink Supply Station failure. The possible cause could be:
1. Reading, writing or initializing the backup EEROM failed.
2.One of the out-of-ink sensors (located in the Ink Supply Station) is not reporting what it should during the initializing process while depressurizing.
Replace the Ink Supply Station Page 8-48.
|
HP DesignJets 500, 510 and 800 Series Printers Service Manual |
2-11 |

System Error Codes
System Error: |
41:10 |
|
|
Problem |
Paper-Axis Motor failure. |
|
|
Description: |
||
|
Corrective Action: |
Replace the Paper-Axis Motor Page 8-84. |
|
System Error: |
41:13 |
|
|
Problem |
Error in the Paper-Axis Motor Encoder quadrature. |
|
|
Description: |
||
|
Corrective Action: |
Try the following: |
System Error:
Problem
Description:
Corrective Action:
System Error:
Problem
Description:
Corrective Action:
System Error:
Problem
Description:
Corrective Action:
Switch the Printer Off and wait a few minutes. Switch the Printer On again and check if the Error Code has disappeared.
If the Error Code continues, replace the Paper-Axis Motor Page 8-84.
42:10
Scan-Axis Motor failure.
Replace the Scan-Axis Motor Page 8-29.
43:10
Vacuum Fan failure.
Replace the Vacuum Fan Page 8-64.
43:11
Vacuum Fan not detected.
Reconnect the Vacuum Fan.
|
2-12 |
HP DesignJets 500, 510 and 800 Series Printers Service Manual |

System Error Codes
System Error: |
56:10 |
|
|
Problem |
Drive Roller Encoder Sensor error. |
|
|
Description: |
||
|
Corrective Action: |
Try the following: |
|
|
Replace the Drive Roller Encoder Sensor Page 8-38. |
||
|
If the problem persists, replace the Encoder Disk Assembly. |
||
System Error: |
56:13 |
|
|
Problem |
Error in the Drive Roller Encoder Sensor quadrature. |
|
|
Description: |
||
|
Corrective Action: |
Try the following: |
|
|
Switch the Printer Off and wait a few minutes. Switch the Printer |
||
|
On again and check if the Error Code has disappeared. |
||
|
If the Error Code continues, replace the Drive Roller Encoder |
||
|
Sensor Page 8-38. |
||
System Error: |
61:04 |
|
|
Problem |
Firmware Error. |
|
|
Description: |
||
|
Corrective Action: |
Try the following: |
|
|
Switch the Printer Off and wait a few minutes. Switch the Printer |
||
|
On again and check if the Error Code has disappeared. |
||
|
If the Error Code reappears, check for a new Firmware release. |
||
|
If the new Firmware release does not solve the problem, or if new |
||
|
Firmware release was not available, then contact the HP |
||
|
Response Center (or directly to the Division) supplying the |
||
|
following information: |
||
|
– Model and Serial Number of the Printer. |
||
|
– Firmware release of the Printer (use the Printer Information |
||
|
utility Page 4-27). |
||
|
– The complete Error Code information, including the linefeed |
||
|
where the error occurred (use the Error Log utility to obtain this |
||
|
information Page 2-5). |
|
HP DesignJets 500, 510 and 800 Series Printers Service Manual |
2-13 |
![]()
System Error Codes
System Error: |
61:05 |
|
|
Problem |
Error Processing Job. This Error Code only appears in HP DesignJets |
|
|
Description: |
800 Series, or in the HP DesignJet 500 and 510 Series with an HP- |
|
|
GL/2 card installed, when processing either a PostScript or HP-GL/2 |
||
|
file. |
||
|
Corrective Action: |
Try the following: |
|
|
Switch the Printer Off and wait a few minutes. Switch the Printer |
||
|
On again and resend the file that you were trying to print. |
||
|
If the Error Code reappears after resending the file, then try |
||
|
generating the file again and try to print again. |
||
|
If the file that is causing this error is PostScript, check if it is |
||
|
Binary. If the file is Binary, use AppleTalk to send the file to the |
||
|
Printer. If AppleTalk is not being used to send the Binary file to |
||
|
the Printer, then change the PostScript settings to Binary through |
||
|
the Front Panel (Set-up menu / PS settings / Encoding / Binary). |
||
|
If the Error Code continues to reappear, check for a new release |
||
|
of the Driver. |
||
System Error: |
64:04 |
|
|
Problem |
Firmware Error (USB Port). |
Description:
Corrective Action: Try the following:
Switch the Printer Off and wait a few minutes. Switch the Printer On again and check if the Error Code has disappeared.
If the Error Code reappears, check for a new Firmware release.
If the new Firmware release does not solve the problem, or if new Firmware release was not available, then contact the HP Response Center (or directly to the Division) supplying the following information:
– Model and Serial Number of the Printer.
– Firmware release of the Printer (use the Printer Information utility Page 4-27).
– The complete Error Code information, including the linefeed where the error occurred (use the Error Log utility to obtain this information Page 2-5).
|
2-14 |
HP DesignJets 500, 510 and 800 Series Printers Service Manual |

|
System Error Codes |
||
System Error: |
71:04 |
|
|
Problem |
Problem allocating Memory. This Error Code only appears in HP |
|
|
Description: |
DesignJets 800 Series, or in the HP DesignJet 500 and 510 Series |
|
|
with an HP-GL/2 card installed. |
||
|
Corrective Action: |
Try the following: |
System Error:
Problem
Description:
Switch the Printer Off and wait a few minutes. Switch the Printer On again and check if the Error Code has disappeared.
If the Error Code reappears, check for a new Firmware release.
If the new Firmware release does not solve the problem, or if new Firmware release was not available, then contact the HP Response Center (or directly to the Division) supplying the following information:
–Model and Serial Number of the Printer.
–Firmware release of the Printer (use the Printer Information utility Page 4-27).
–The complete Error Code information, including the linefeed
where the error occurred (use the Error Log utility to obtain this information Page 2-5).
71:06
Out of Memory problem. This Error Code only appears in HP DesignJets 800 Series, or in the HP DesignJet 500 and 510 Series with an HP-GL/2 card installed, when processing either a PostScript or HP-GL/2 file.
Corrective Action: Try the following:
Look on your computer screen for error messages; some drivers allow you to choose a different printing mode and attempt to send the file again. If necessary, select Send Job as a Bitmap in the driver’s Troubleshooting menu (Services tab). This may slow down print speed.
If the problem persists, you can install extra memory on the HPGL/2 Accessory Card in your printer.
|
HP DesignJets 500, 510 and 800 Series Printers Service Manual |
2-15 |

System Error Codes
System Error: |
72:04 |
|
|
Problem |
Problem in the Scan-Axis (Firmware Error). |
|
|
Description: |
||
|
Corrective Action: Try the following: |
||
|
Switch the Printer Off and wait a few minutes. Switch the Printer |
||
|
On again and check if the Error Code has disappeared. |
||
|
If the Error Code reappears, check for a new Firmware release. |
||
|
If the new Firmware release does not solve the problem, or if new |
||
|
Firmware release was not available, then contact the HP |
||
|
Response Center (or directly to the Division) supplying the |
||
|
following information: |
||
|
– Model and Serial Number of the Printer. |
||
|
– Firmware release of the Printer (use the Printer Information |
||
|
utility Page 4-27). |
||
|
– The complete Error Code information, including the linefeed |
||
|
where the error occurred (use the Error Log utility to obtain this |
||
|
information Page 2-5). |
||
System Error: |
73:04 |
|
|
Problem |
Servo Error. |
Description:
Corrective Action: Try the following:
Switch the Printer Off and wait a few minutes. Switch the Printer On again and check if the Error Code has disappeared.
If the Error Code reappears, check for a new Firmware release.
If the new Firmware release does not solve the problem then replace the Electronics Module Page 8-24.
If the problem continues, contact the HP Response Center (or directly to the Division) supplying the following information:
– Model and Serial Number of the Printer.
– Firmware release of the Printer (use the Printer Information utility Page 4-27).
– The complete Error Code information, including the linefeed where the error occurred (use the Error Log utility to obtain this information Page 2-5).
|
2-16 |
HP DesignJets 500, 510 and 800 Series Printers Service Manual |

System Error Codes
System Error: |
79:04 |
|
|
Problem |
Firmware Error. |
|
|
Description: |
||
|
Corrective Action: |
Try the following: |
|
|
Switch the Printer Off and wait a few minutes. Switch the Printer |
||
|
On again and check if the Error Code has disappeared. |
||
|
If the Error Code reappears, check for a new Firmware release. |
||
|
If the new Firmware release does not solve the problem, or if new |
||
|
Firmware release was not available, then contact the HP |
||
|
Response Center (or directly to the Division) supplying the |
||
|
following information: |
||
|
– Model and Serial Number of the Printer. |
||
|
– Firmware release of the Printer (use the Printer Information |
||
|
utility Page 4-27). |
||
|
– The complete Error Code information, including the linefeed |
||
|
where the error occurred (use the Error Log utility to obtain this |
||
|
information Page 2-5). |
||
System Error: |
81:01 |
|
|
Problem |
Paper-Axis shutdown. |
|
|
Description: |
||
|
Corrective Action: |
If this error code appeared but was NOT caused by a paper jam, then |
|
|
try the following: |
||
|
Perform the Paper Advance Test Page 4-11. |
||
|
If the problem persists, replace the Encoder Disk Assembly. |
||
System Error: |
81:11 |
|
|
Problem |
Paper-Axis shutdown (during the Paper Advance test). |
|
|
Description: |
||
|
Corrective Action: |
Refer to Error Code 81:01. |
|
HP DesignJets 500, 510 and 800 Series Printers Service Manual |
2-17 |

System Error Codes
System Error: |
85:10 |
|
|
Problem |
Paper-Axis Encoder error. The Drive Roller Encoder Sensor cannot |
|
|
Description: |
find the zero position of the Encoder Disk. |
|
|
Corrective Action: |
Try the following: |
|
|
Replace the Drive Roller Encoder Sensor Page 8-38. |
||
|
If the Error Code continues, replace the Drive Roller Page 8- |
||
|
86. |
||
System Error: |
86:01 |
|
|
Problem |
Carriage-Axis shutdown. |
|
|
Description: |
||
|
Corrective Action: |
If this error code appeared but was NOT caused by a paper jam, then |
|
|
try the following: |
||
|
Too much friction in the Slider Rod. Enter the Printer Information |
||
|
utility ( Page 4-27) and check the Scan-Axis usage. If the |
||
|
percentage is close to 100%, then lubricate the Slider Rod. |
||
|
The Carriage is bumping into the Service Station. If the carriage |
||
|
is stuck at the right hand side of the Printer and cannot be moved |
||
|
out to the center of the Print Platen it is because the Service |
||
|
Station cannot uncap the Printheads. In this case replace the |
||
|
Service Station/Aerosol Fan Assembly Page 8-52. |
||
|
Perform the Carriage Movement test Page 4-8. |
||
System Error: |
86:11 |
|
|
Problem |
Carriage-Axis shutdown (during the Carriage Movement test). |
|
|
Description: |
||
|
Corrective Action: |
Refer to Error Code 86:01. |
|
2-18 |
HP DesignJets 500, 510 and 800 Series Printers Service Manual |

System Error Codes
System Error: |
86:13 |
|
Problem |
Carriage-Axis shutdown (Firmware Error). |
|
Description: |
Corrective Action: Try the following:
Switch the Printer Off and wait a few minutes. Switch the Printer On again and check if the Error Code has disappeared.
If the Error Code reappears, check for a new Firmware release.
If the new Firmware release does not solve the problem, or if new Firmware release was not available, contact the HP Response Center (or directly to the Division) supplying the following information:
–Model and Serial Number of the Printer.
–Firmware release of the Printer (use the Printer Information utility Page 4-27).
–The complete Error Code information, including the linefeed
where the error occurred (use the Error Log utility to obtain this information Page 2-5).
System Error: |
87:13 |
|
|
Problem |
Unable to read the Carriage Encoder Sensor. |
|
|
Description: |
||
|
Corrective Action: |
Try the following: |
|
|
Switch the Printer Off and wait a few minutes. Switch the Printer |
||
|
On again and check if the Error Code has disappeared. |
||
|
If the Error Code continues, replace the Carriage Assembly |
||
|
Page 8-78 or the Encoder Strip Page 8-76. |
||
System Error: |
93:10 |
|
|
Problem |
Ink System startup failed (also see Page 1-8 for more information). |
|
|
Description: |
||
|
Corrective Action: |
Try the following: |
|
|
Check for a leak in the Printer. If a leak is evident (there is ink on |
||
|
Printer components), replace the Ink Supply Tubes Page 8-60. |
||
|
Perform the Prime Tubes utility (Refer to Page 4-24) and check |
||
|
how long it takes to complete the procedure. If it takes too long to |
||
|
complete the procedure and there is no leak in the Printer, then |
||
|
replace the Ink Cartridges. If it takes a short time to complete the |
||
|
procedure, then replace the Ink Supply Tubes Page 8-60. |
|
HP DesignJets 500, 510 and 800 Series Printers Service Manual |
2-19 |

|
Ink Supplies |
3 |
|
Troubleshooting |
|
What are the Ink Supplies? 3-2
Ink Cartridges 3-2
Printheads 3-3
Identifying the Components 3-3
General Information About the Ink Supplies 3-4
Some General Precautions When Handling the Ink Supplies 3-5
When Should You Replace the Ink Cartridges? 3-6
When Should You Replace the Printheads? 3-7
Obtaining Ink Cartridge Information 3-9
Obtaining Printhead Information 3-10
Ink Cartridge Status Messages 3-13
Ink Cartridge Status While Replacing 3-13
Printhead Status Messages 3-14
Printhead History Utility 3-15
Accessing the Printhead History Utility 3-15
Is the Printer Causing Repetitive Printhead Problems? 3-17
Is the User Replacing the Printheads too Early? 3-19
Troubleshooting Repetitive Ink Cartridge Messages 3-21
Troubleshooting Repetitive Printhead Error Messages 3-22
Printhead Error Codes 3-23
Summary of Solving Ink Supplies Problems 3-24
|
HP DesignJets 500, 510 and 800 Series Printers Service Manual |
3-1 |

Ink Supplies Troubleshooting
What are the Ink Supplies?
For each of the four ink colors used in the Printer, there are two separate components: the Printhead and the Ink Cartridge. Both components are coded with an HP selection number to identify the correct replacement supplies.
|
Printhead |
Ink Cartridge |
|
69cc |
Ink Cartridges
The Ink Cartridges for the HP DesignJet 500, 510 and 800 Series
Printers require no maintenance or cleaning. As long as each Ink
Cartridge is inserted correctly into its slot, the ink will flow to the
Printheads.
The Ink Cartridges are number coded as follows:
HP No.10 for the Black Ink Cartridge (for the HP DesignJet 500 and 800 Series Printers only).
HP No.82 for the Black Ink Cartridge (for the HP DesignJet 510 Series Printers only).
HP No.82 for the Cyan, Magenta and Yellow Ink Cartridges.
|
NOTE |
It is also possible to use HP No.11 Ink Cartridges for the Cyan, |
|
Magenta and Yellow colors. The HP No.11 Ink Cartridges |
|
|
contain 33cc of ink. |
|
|
The front panel displays the status of the Ink Cartridge. With the |
|
|
front panel, detailed information can be checked on the Ink |
|
|
Cartridges, see page Page 3-9, Obtaining Ink Cartridge Information. |
|
3-2 |
HP DesignJets 500, 510 and 800 Series Printers Service Manual |

Ink Supplies Troubleshooting
Printheads
The Printheads are extremely durable and do not need to be replaced every time an Ink Cartridge is replaced. They are independent of the Ink Cartridges and will continue giving excellent image quality results even if the Ink Cartridges are low on ink. In order to know when to replace a Printhead, see page Page 3-7, When Should You Replace the Printheads?
The Printheads are number coded HP No.11 for ALL colors.
If you notice a decline in print quality such as lines or dots missing from text / graphics, go to page Page 6-4, Performing the Troubleshooting Procedure.
Identifying the Components
The following illustration will help you identify the components of the ink supplies.
|
HP DesignJets 500, 510 and 800 Series Printers Service Manual |
3-3 |

Ink Supplies Troubleshooting
General Information About the Ink Supplies
For optimum results from the printer and modular ink delivery system always follow these guidelines when handling the ink supplies:
Always install the Ink Cartridges and Printheads before the expiration date, which is on the packaging.
Install Ink Cartridges and Printheads in their color-coded slots.
Follow the instructions on the front panel of the Printer during installation.
Avoid unnecessary removal of the Ink Cartridges and Printheads.
When turning off the Printer always use the power Off button located on the left hand side of the Printer. The Printheads are then stored correctly which prevents them from drying out.
The Ink Cartridges should never be removed while the Printer is printing. They should only be removed when the Printer is ready for you to replace them. The front panel will guide you through the removal and installation procedure. See page Page 3-6, When Should You Replace the Ink Cartridges?
|
3-4 |
HP DesignJets 500, 510 and 800 Series Printers Service Manual |
![]()
i
?
hp designjet 500hp designjet 800
PocketGuide.book Page 2 Wednesday, June 28, 2000 1:34 PM
Приемы работы — Содержание
Панель управления 4
Дисплей панели управления 4 Меню панели управления 6 Примеры использования панели управления 17
Управление печатью 23
Прерывание печати страницы 23 Прерывание процесса высыхания 24
Управление не напечатанными страницами (в очереди) 25 Изменение порядка заданий в очереди (команда “Move to
front”) 27
Удаление заданий из очереди 27
Управление печатью (продолжение)
Печать нескольких копий задания, находящегося в очереди 28
Экономия бумаги с помощью функции группирования 29
Замена картриджей с чернилами и печатающих головок 31
Замена картриджей 33 Замена печатающих головок 36
Загрузка листовой бумаги 47
Выгрузка листовой бумаги 54
Загрузка рулонной бумаги 55
Установка нового рулона 55 Загрузка рулонной бумаги 58 Выгрузка рулонной бумаги 64
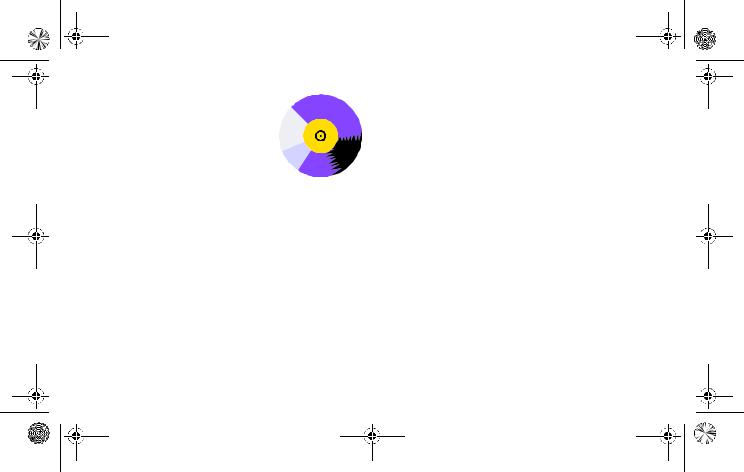
PocketGuide.book Page 3 Wednesday, June 28, 2000 1:34 PM
Более
подробная
информация
В руководстве User’s Reference Guide на компакт-диске Using
Your Printer подробно рассматриваются следующие вопросы.
•Типы бумаги и загрузка бумаги.
•Выбор чернил.
•Выбор размера бумаги.
•Настройка принтера.
•Уход за принтером.
•Комплектующие.
•Решение сложных проблем.
•Предметный указатель и глоссарий.
Многие разделы руководства User’s Reference Guide сопровождаются
демонстрацией выполнения описываемых процедур.
Дополнительную информацию о принтерах HP DesignJet, программном обеспечении и технической поддержке см. на Web-узлах HP по адресам:
www.hp.com/go/designjet
или
www.designjet-online.com
С другой стороны этого руководства описываются наиболее часто возникающие проблемы и способы их решения.
©2000 Hewlett-Packard Company Hewlett-Packard Company, Inkjet Commercial Division, Avda. Graells, 501,
08190 Sant Cugat del Vallès, Barcelona, Spain
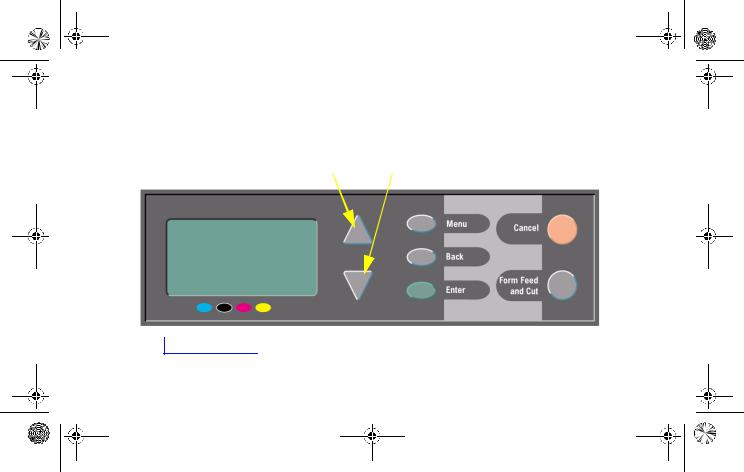
PocketGuide.book Page 4 Wednesday, June 28, 2000 1:34 PM
Дисплей панели управления
Панель управления расположена спереди принтера и является более предпочтительным средством управления по сравнению с программным обеспечением.
Кнопки Вверх (D) и Вниз (Ñ)
|
Область дисплея |
Кнопки управления |
|
4 Дисплей панели управления
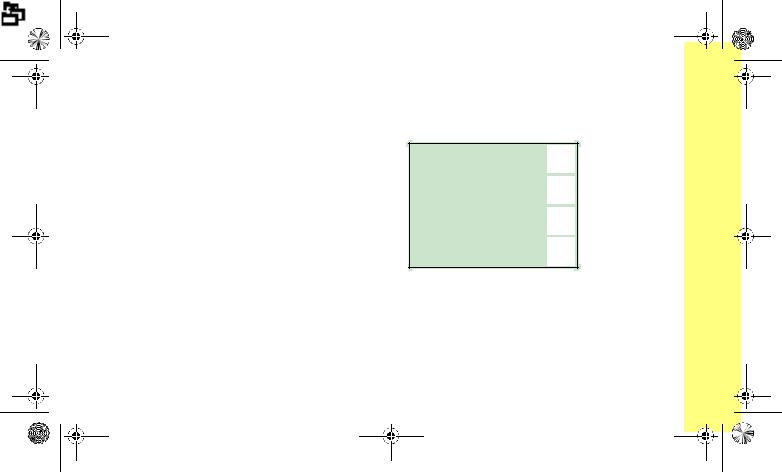
PocketGuide.book Page 5 Wednesday, June 28, 2000 1:34 PM
Кнопки дисплея
•Кнопки Вверх (D) и Вниз (Ñ) предназначены для перемещения по меню. Если все пункты меню не помещаются на дисплее, справа появится вертикальная полоса прокрутки. Если какой-либо пункт меню содержит подменю, справа от него будет
показан символ “ ”. Выбранное значение помечается “галочкой” (Ö).
•Кнопка Menu позволяет вернуться в главное меню. При этом изменения, не подтвержденные кнопкой Enter, будут проигнорированы.
•Кнопка Back предназначена для возврата к предыдущему экрану меню. При этом все изменения, не подтвержденные кнопкой Enter, будут проигнорированы.
•Кнопка Enter предназначена для выбора текущего пункта меню или перехода в под-
меню (в таблице, начинающейся на стр. 6, такие переходы показаны стрелкой ®).
Главное меню
Главное меню панели управления содержит четыре основных раздела, которые обозначаются пиктограммами. С помощью кнопки Menu можно всегда вернуться в главное меню и выбрать нужный раздел кнопками D и Ñ.
Paper (бумага)
Ink (чернила)
Job management (управление заданиями)
Set-up (настройка)
Кнопки управления
•Кнопка Cancel прерывает текущую операцию (печать или подготовку к печати).
•Кнопка Form Feed and Cut позволяет выгрузить лист бумаги или протянуть и обрезать рулонную бумагу.
Дисплей панели управления 5
П а н е л ь у п р а в л е н и я
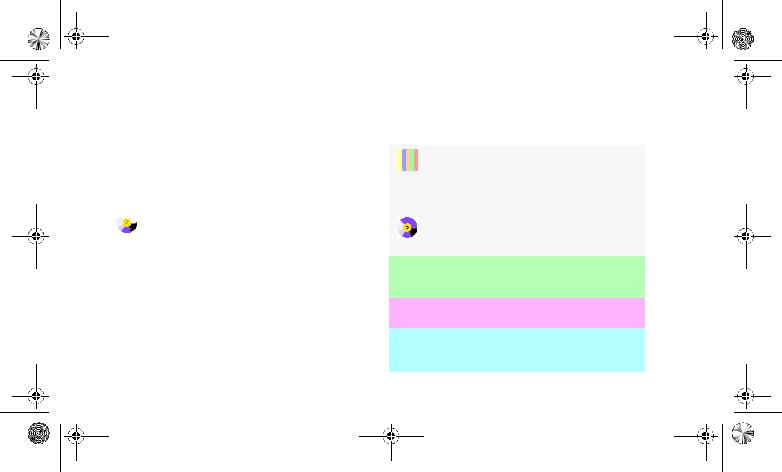
PocketGuide.book Page 6 Wednesday, June 28, 2000 1:34 PM
Меню панели управления
На страницах 7 — 16 перечислены все меню панели управления в алфавитном порядке. Справа приведены используемые в таблице обозначения.
 В руководстве User’s Reference Guide
на компакт-диске Using Your Printer
все пункты меню приведены в соответствии со структурой меню.
Примеры использования меню см. на стр. 17.
Замечание. PostScript-функции принтера HP DesignJet 500PS доступны при использовании прилагаемого PostScript-драйвера. Использование этих функций с помощью панели управления не поддерживается.
Обозначения в таблице
23Подробная информация приведена на странице этого руководства, указанной черным цветом, или на странице с другой
стороны руководства, указанной красным цветом (“Решение проблем”).
Подробная информация приведена в руководстве User’s Reference Guide
(с демонстрацией некоторых процедур).
Меню доступно только в принтерах с поддержкой PostScript или HP-GL/2 (HP DesignJet 500 с платой HP-GL/2, 800 и 800PS).
Меню доступно только в принтерах с поддержкой PostScript (HP DesignJet 800PS).
Меню доступно только в принтерах с поддержкой HP-GL/2 (HP DesignJet 500 с платой HP-GL/2, 800 и 800PS).
6 Меню панели управления

PocketGuide.book Page 7 Wednesday, June 28, 2000 1:34 PM
|
® |
Advance |
22 |
|
calibration |
||
|
® |
Align |
43 |
|
printheads |
||
|
® |
Altitude |
|
|
® Page format® Size® ANSI sizes |
||
|
® I/O setup® |
Appletalk |
|
|
Card ID® |
(зависит от платы) |
®Page format® Size® ARCH sizes
®PS settings®
Encoding® ASCII
|
® Drying time® |
Automatic |
||
® Graphic language® Automatic [только HP DesignJet серии 800]
® Page format® Size® Automatic
|
® PS settings® |
|||
|
Encoding® |
Automatic |
||
|
® Print quality® |
Best |
||
® Advanced options® Best quality settings
® PS settings®
Encoding® Binary
® Color settings® Color/Monochrome® True Black
® Front Panel® Buzzer (on/off)
Меню панели управления 7
П а н е л ь у п р а в л е н и я
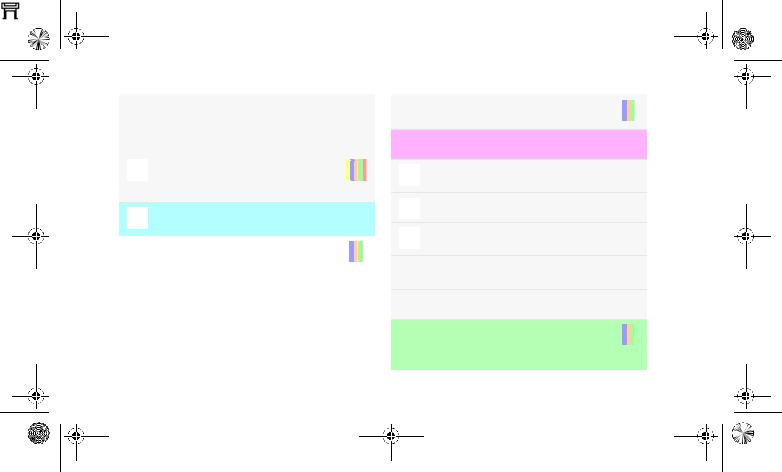
PocketGuide.book Page 8 Wednesday, June 28, 2000 1:34 PM
|
® Color calibration® |
Calibrate now |
||||
|
Color calibration |
|||||
|
® |
|||||
|
® |
Calibration |
22 |
|
(протяжка |
||
|
бумаги) |
® Graphic Language® CALS/G4
[только HP DesignJet серии 800]
|
® Queue/copies® |
Cancel |
||||||||
|
23 |
|||||||||
|
# Jobname® |
(печать или |
||||||||
|
ожидание) [только HP DesignJet серии 800] |
|||||||||
|
® I/O setup® |
Card ID |
||||||||
|
® I/O setup® |
Card setup |
||||||||
|
® Information® |
Ink cartridges |
||||||||
|
® |
Replace Ink |
|||
|
33 |
||||
|
cartridges |
||||
|
® Color settings® |
CMYK |
|||
|
® Color settings® |
Color/ |
|||
|
Monochrome |
||||
|
® |
Color calibration |
|||
|
® |
Color settings |
|||
|
(RGB, CMYK и др.) |
||||
|
® Color settings® |
||||
|
Rendering intent® |
Colorimetric |
|||
|
® Front Panel® |
Contrast |
|||
|
® Queue/copies® |
Reprints/ |
|||
|
28 |
||||
|
# Jobname® |
copies |
|||
[только HP DesignJet серии 800]
8 Меню панели управления
PocketGuide.book Page 9 Wednesday, June 28, 2000 1:34 PM
|
® |
Cutter (on/off) |
||||||||
|
Defects in |
|||||||||
|
® |
15 |
||||||||
|
images (Troubleshooting) |
|||||||||
|
® HP-GL/2 settings® |
Define palette |
||||||||
|
® Queue/copies® |
Delete (уже |
27 |
|||||||
|
# Jobname® |
напечатано) |
||||||||
[только HP DesignJet серии 800]
®Advanced options®
Best quality settings®Maximum detail
®Color settings®
CMYK® DIC
|
® I/O setup® |
DNS name |
||||
|
Card ID® |
(зависит от платы) |
||||
|
® Advanced options® |
|||||
|
Optimize for® |
Drawings/text |
||||
|
® |
Drying time |
|||
|
17 |
||||
|
(none, automatic, manual) |
||||
|
® PS settings® |
Encoding |
|||
|
(ASCII, Binary, Automatic) |
||||
|
® Log® |
Errors |
® Color settings®
CMYK® Euroscale
® Page format® Size® Extra print sizes
|
® Advance calibration |
Restore factory |
|
settings |
|
|
® Print quality® |
Fast |
® Advanced options® Fast quality settings
[только HP DesignJet серии 800]
Меню панели управления 9
П а н е л ь у п р а в л е н и я
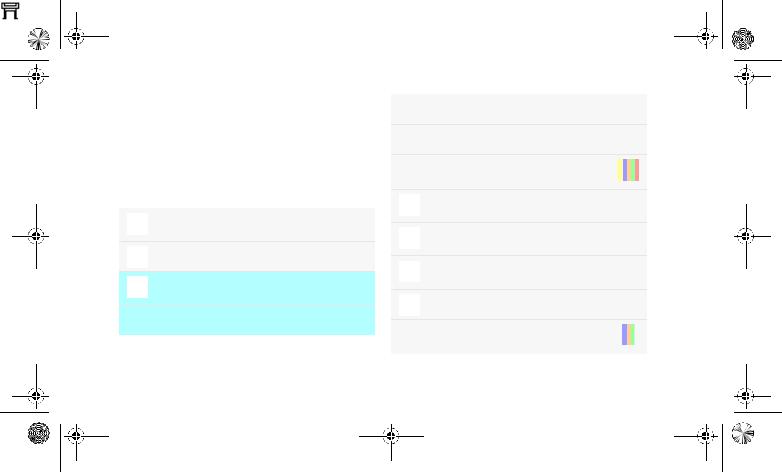
PocketGuide.book Page 10 Wednesday, June 28, 2000 1:34 PM
|
® PS settings® |
||||||
|
PS Scale® |
Fit to page |
|||||
|
® |
Front Panel |
|||||
|
(language, buzzer, contrast) |
||||||
|
Graphic language |
||||||
|
® |
||||||
|
(PS, HP-GL/2, CALS/G4, Automatic) |
||||||
|
[только HP DesignJet серии 800] |
||||||
® Color settings® Color/Monochrome® Grayscale
® Help
® Graphic Language® HP-GL/2
[только HP DesignJet серии 800]
|
® |
HP-GL/2 settings |
||||
|
® I/O setup® |
HW address |
||||
|
Card ID® |
(зависит от платы) |
||||
|
® |
I/O setup |
|
® I/O setup® |
I/O timeout |
|
® |
Image quality |
15 |
|
(Troubleshooting) |
|
® Advanced options® |
|||||
|
Optimize for® |
Images |
||||
|
® |
Information |
||||
|
(картриджи, головки) |
|||||
|
® |
Printer |
||||
|
Information |
|||||
|
® Information® |
Ink cartridges |
||||
|
Replace Ink |
|||||
|
33 |
|||||
|
cartridges |
|||||
10 Меню панели управления
![]()
PocketGuide.book Page 11 Wednesday, June 28, 2000 1:34 PM
|
Ink |
|||||
|
® Information® |
|||||
|
Ink cartridges® |
Ink levels |
||||
|
® Page format® Size® Inked area |
|||||
|
® I/O setup® |
IP address |
||||
|
Card ID® |
(зависит от платы) |
||||
|
® Page format® Size® ISO sizes |
|||||
|
® Page format® Size® JIS sizes |
|||||
|
Job management |
|||||
|
Queue/copies® |
Job name (задание |
и количество копий) [только принтеры с платой расширения]
|
® |
Graphic Language |
|
[только HP DesignJet серии 800] |
|
® Front Panel® |
Language |
|
|
(язык) |
||
|
® |
Load roll |
58 |
|
® |
Load sheet |
47 |
|
® |
Log |
||||
|
(головки, ошибки) |
|||||
|
® Drying time® |
Manual |
||||
|
17 |
|||||
|
® |
Select paper |
||||
|
( Media) type |
Меню панели управления 11
П а н е л ь у п р а в л е н и я
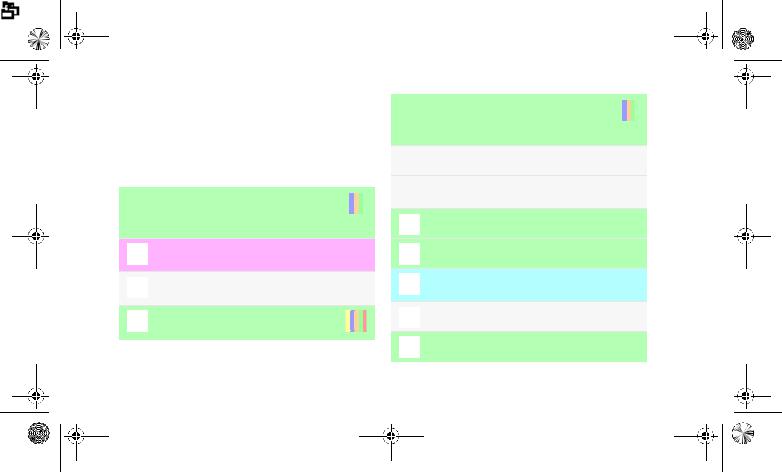
PocketGuide.book Page 12 Wednesday, June 28, 2000 1:34 PM
|
® HP-GL/2 settings® |
Merge (on/off) |
||||||||||
|
® Page format® |
Mirroring |
||||||||||
|
® Color settings® |
Color/ |
||||||||||
|
Monochrome |
|||||||||||
|
® Queue/copies® |
Move print to |
||||||||||
|
27 |
|||||||||||
|
# Jobname® |
top |
||||||||||
[только HP DesignJet серии 800]
|
® Color settings® |
|||
|
CMYK® |
Native CMYK |
||
|
® Color settings® |
|||
|
RGB® |
Native RGB |
||
|
® Nest settings® |
Nest (on/off) |
29 |
|
|
[только HP DesignJet серии 800] |
|||
|
® Nest settings® |
Nest |
|||
|
29 |
||||
|
wait time |
||||
|
[только HP DesignJet серии 800] |
||||
|
® Print quality® |
Normal |
® Advanced options® Optimize for (drawings/text/images)
® Page format® Size® Oversize prints
|
® |
Page format |
|
® HP-GL/2 settings® |
Palette |
|
(define, select) |
|
|
Paper (load, type) |
|
|
® Page format® |
Paper size |
12 Меню панели управления
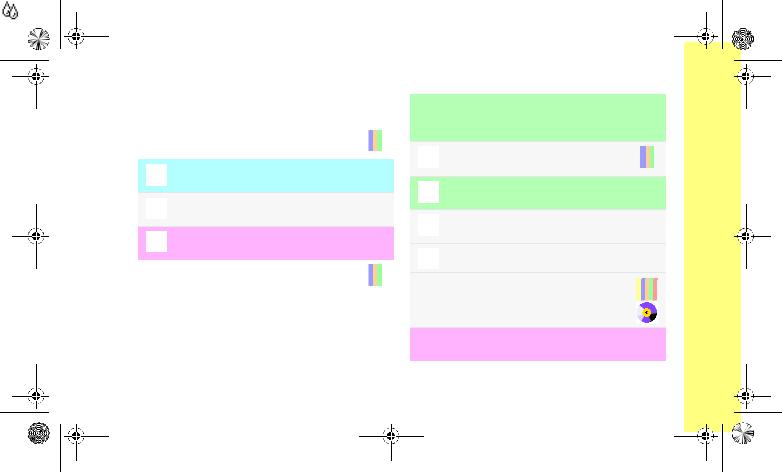
PocketGuide.book Page 13 Wednesday, June 28, 2000 1:34 PM
|
® |
Select paper type |
||||||||
|
® Advance calibration® Pattern |
|||||||||
|
22 |
|||||||||
|
(create, measure) |
|||||||||
® HP-GL/2 settings®
Define palette®…® Pen width, color
|
® Color settings® |
|
|
Rendering intent® |
Perceptual |
® Graphic Language® PostScript
[только HP DesignJet серии 800]
|
® Queue/copies® |
|||||||||
|
23 |
|||||||||
|
# Jobname® |
Print cancel |
||||||||
|
[только HP DesignJet серии 800] |
|||||||||
|
® Page format® |
Print (paper) size |
||||||||
|
® |
Print quality |
||||
|
(best, normal, draft; |
|||||
|
Set-Up®Advanced Options) |
|||||
|
® |
Print quality |
||||
|
15 |
|||||
|
(poor) (Troubleshooting) |
|||||
®Page format® Size® Printed area
–см. Inked area
|
® |
Printer |
|
information |
|
|
® Information® |
Printheads |
|
® |
Printheads |
36 |
|
(align, |
||
|
replace) |
||
|
® PS settings® |
PS scale |
|
|
(PostScript) |
Меню панели управления 13
П а н е л ь у п р а в л е н и я
PocketGuide.book Page 14 Wednesday, June 28, 2000 1:34 PM
|
® |
Print Quality |
|||||||||
|
(best, normal, draft) |
||||||||||
|
Quality of |
||||||||||
|
® |
15 |
|||||||||
|
images (Troubleshooting) |
||||||||||
|
Queue |
||||||||||
|
® |
25 |
|||||||||
|
(on/off) |
||||||||||
|
[только HP DesignJet серии 800] |
||||||||||
|
Queue/ |
||||||||||
|
® |
25 |
|||||||||
|
copies |
||||||||||
|
[только HP DesignJet серии 800] |
||||||||||
®Advanced options®
Fast quality settings®Reduced speed [только HP DesignJet серии 800]
|
® Color settings® |
Rendering intent |
||||
|
® |
Replace ink |
36 |
|
cartridges |
||
|
® |
Replace |
36 |
|
printheads |
||
|
® Queue/copies® |
Reprints/ |
||||
|
28 |
|||||
|
# Jobname® |
copies |
||||
®I/O setup® Card
setup® Advanced® Reset card
® Color settings® RGB
|
® |
Roll |
58 |
|
(load, |
||
|
unload) |
14 Меню панели управления

PocketGuide.book Page 15 Wednesday, June 28, 2000 1:34 PM
|
® Page format® |
Rotate (0°, 90°, |
||||
|
180°, 270°) |
|||||
|
® Color settings® |
|||||
|
Rendering intent® |
Saturation |
||||
|
® PS settings® |
PS Scale |
||||
|
(PostScript) |
|||||
|
Select paper type |
|||||
|
® |
|||||
|
® |
Sheet |
47 |
|
(load, |
||
|
unload) |
|
® Page format® |
Size (размер) |
||||
|
® Page format® |
Software |
||||
|
Size® |
(Automatic) |
||||
®Advanced options®
Fast quality settings®Reduced speed [только HP DesignJet серии 800]
®Color settings®
RGB® sRGB
|
® Color settings® |
|
|
CMYK® |
SWOP |
|
® Advanced options® |
|
|
Optimize for® |
Drawings/Text |
|
® I/O setup® |
I/O Timeout |
® Color settings®
CMYK® TOYO
®Troubleshooting 15
(качество)
Меню панели управления 15
П а н е л ь у п р а в л е н и я
PocketGuide.book Page 16 Wednesday, June 28, 2000 1:34 PM
|
® |
Unload roll |
64 |
|
® |
Unload |
54 |
|
sheet |
||
|
® Nest settings® |
Wait time |
29 |
16 Меню панели управления
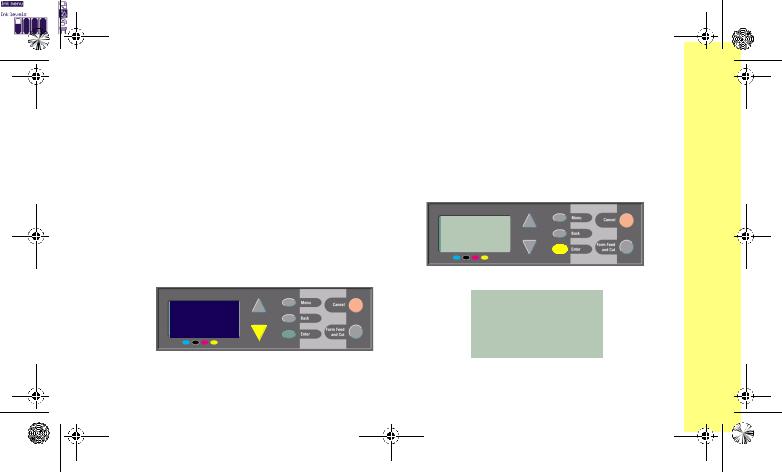
PocketGuide.book Page 17 Wednesday, June 28, 2000 1:34 PM
Примеры использования панели управления
Кнопки, которые необходимо нажимать, показаны на рисунках желтым цветом.
Установка времени высыхания чернил 2 минуты
1В таблице на стр. 9 структура меню показана следующим образом:
 ® Drying time
2По умолчанию в главном меню выделено меню Paper. Для перехода к меню Ink
( ) нажмите один раз кнопку Вниз (Ñ).
Теперь нажмите кнопку Enter…
…для входа в меню Ink:
Пиктограмма Ink будет выделена ( ).
).
Примеры использования панели управления 17
П а н е л ь у п р а в л е н и я
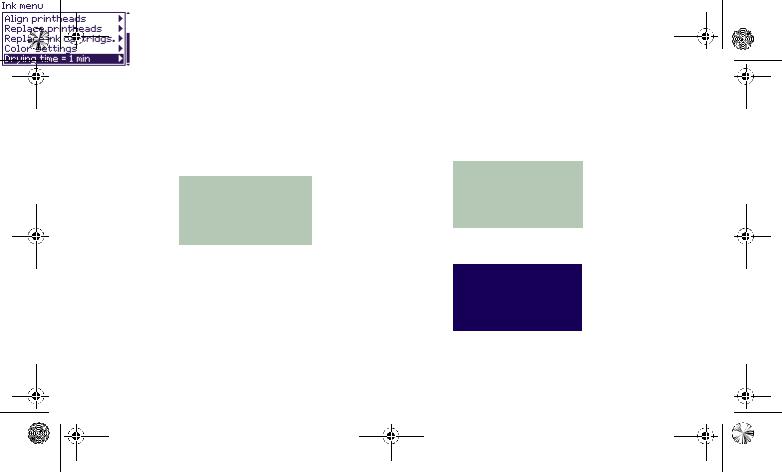
PocketGuide.book Page 18 Wednesday, June 28, 2000 1:34 PM
Полоса прокрутки в правой части экрана означает, что некоторые пункты меню не поместились на экране.
3Нажмите несколько раз кнопку Вниз (Ñ) пока не появится пункт Drying time.
Количество нажатий на кнопку Вниз зависит от:
•модели принтера (HP DesignJet 500 или 800);
•наличия платы расширения в принтере HP DesignJet 500;
•наиболее часто используемых пунктов меню.
4Нажмите кнопку Enter.
5Для перехода к пункту Manual дважды нажмите кнопку Вниз (Ñ). Теперь нажмите кнопку Enter…
…для входа в меню Manual (установка времени высыхания вручную):
18 Примеры использования панели управления
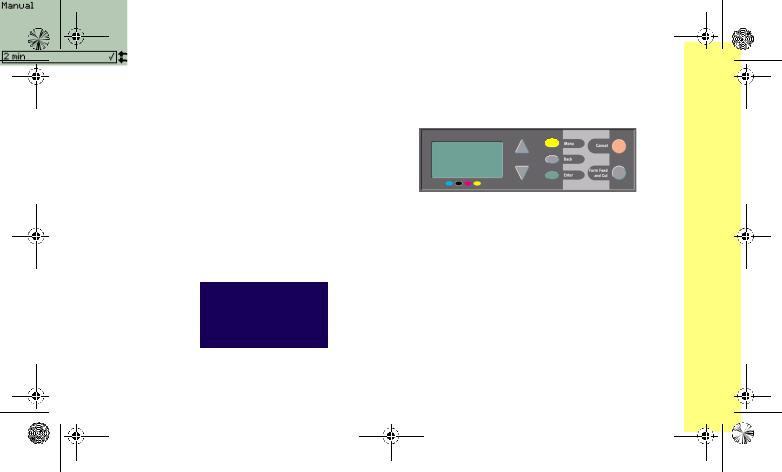
PocketGuide.book Page 19 Wednesday, June 28, 2000 1:34 PM
|
6 Для изменения времени высыхания с 1 min |
7 Для возврата в главное меню нажмите |
||||
|
(минуты) на 2 min нажмите кнопку Вверх |
кнопку Menu. |
||||
|
(D). Подтвердите изменение, нажав Enter. |
|||||
Если звуковой сигнал принтера включен, раздастся короткий сигнал, подтверждающий изменение. Справа от выбранного значения времени высыхания появится “галочка” (Ö).
Примеры использования панели управления 19
П а н е л ь у п р а в л е н и я
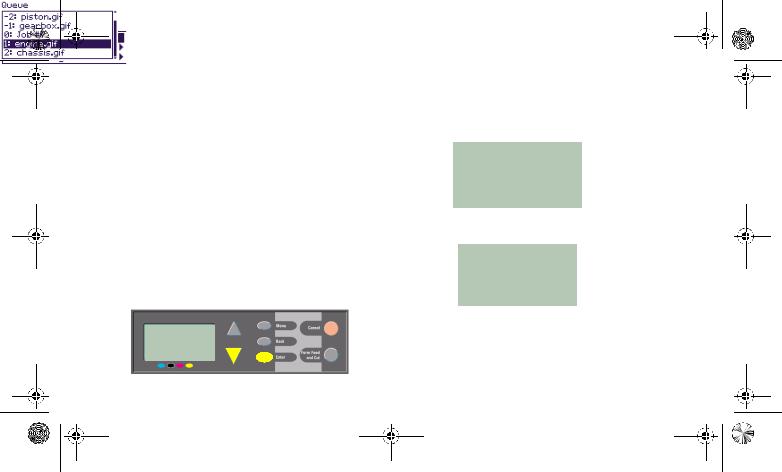
PocketGuide.book Page 20 Wednesday, June 28, 2000 1:34 PM
Печать трех дополнительных копий уже распечатанного задания
Этот раздел относится только к принтерам HP DesignJet 800 и 800PS. Информацию о принтерах HP DesignJet 500 с платой расширения см. на стр. 22.
1В таблице на стр. 8 структура меню показана следующим образом:
 ® Queue/Copies
2Чтобы перейти из меню Paper в меню
Job management ( ), два раза нажмите кнопку Вниз (Ñ). Для входа в меню Job management после выделения пиктограммы (
 ) нажмите Enter.
С помощью кнопок Вверх (D) или Вниз (Ñ) выберите пункт Queue/copies.
3Для входа в меню Queue/copies нажмите кнопку Enter.
Появится перечень всех заданий, посланных на печать. Распечатанные задания имеют отрицательный порядковый номер. Задания, ожидающие печати, имеют положительный номер.
20 Примеры использования панели управления
![]()
PocketGuide.book Page 21 Wednesday, June 28, 2000 1:34 PM
Предположим, что на экране показан список, аналогичный приведенному ниже. Тогда текущее задание на печать (“Job #7”) имеет порядковый номер 0.
4Предположим, что необходимо еще раз напечатать задание с номером -2, “piston.gif”.
Для выбора нужного задания несколько раз нажмите кнопку Вверх (D) или Вниз (Ñ),
затем нажмите кнопку Enter.
5Появится список возможных действий для выбранного задания. Выберите Reprints и нажмите Enter.
6Нажмите кнопку Вверх (D) для выбора цифры 3 (нужное количество копий) и подтвердите выбор, нажав Enter.
На экране снова появится список заданий. Задание, для которого только что было изменено количество копий, будет автоматически помещено в начало очереди.
Примеры использования панели управления 21
П а н е л ь у п р а в л е н и я
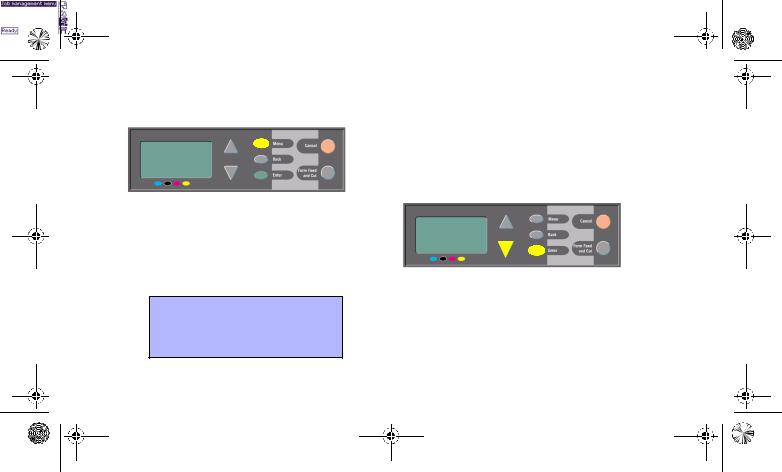
PocketGuide.book Page 22 Wednesday, June 28, 2000 1:34 PM
|
7 Для возврата в главное меню нажмите |
Повторная печать на принтере |
||||
|
кнопку Menu. |
HP DesignJet 500 |
||||
|
Убедитесь, что в принтере HP DesignJet 500 |
|||||
|
установлена плата расширения. |
|||||
|
1 Выберите меню Job management ( ) |
|||||
|
и нажмите Enter. |
|||||
|
Более подробную информацию о режимах |
|||||
|
очереди и группирования см. на стр. 25. |
|||||
Описанным способом можно переходить к любым пунктам меню, приведенным в таблице на стр. 6.
2Появиться сообщение Queue is empty (очередь пуста) или название задания. В последнем случае нажмите Enter для просмотра доступных функций (включая Reprints) и выполните пункт 5 на стр. 21.
22 Примеры использования панели управления

PocketGuide.book Page 23 Wednesday, June 28, 2000 1:34 PM
Прерывание печати страницы
|
1 Нажмите кнопку Cancel на панели управления. |
Для многостраничного задания или большого |
||
|
Принтер протянет бумагу, как при завершении |
файла отмена печати может занять больше |
||
|
печати. |
времени, чем для других файлов. |
||
|
Кнопка Cancel |
|||
Прерывание печати страницы 23
У п р а в л е н и е п е ч а т ь ю
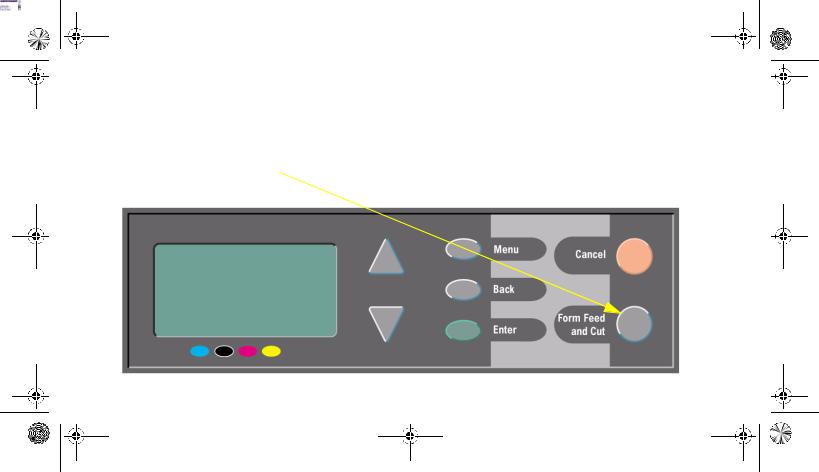
PocketGuide.book Page 24 Wednesday, June 28, 2000 1:34 PM
Прерывание процесса высыхания
При выполнении этой процедуры соблюдайте осторожность, т.к. не полностью высохшее изображение легко повредить.
|
1 Нажмите кнопку Form Feed and Cut на |
2 Принтер опустит бумагу в приемную |
||
|
панели управления. |
корзину. |
||
24 Прерывание процесса высыхания

PocketGuide.book Page 25 Wednesday, June 28, 2000 1:34 PM
Управление не напечатанными страницами (в очереди)
Режимы очереди и группирования доступны только на принтерах HP DesignJet 800. Повторная печать на принтерах серии 500 возможна только при установке специальной платы расширения (см. стр. 22).
Измените значение параметра Queueing (в меню
Job Management ( ) на On или Off.
Описание процедуры изменения параметров группирования распечаток (Nesting) см. на стр.
30, Включение функции группирования. При выключении принтера нераспечатанные
файлы, находящиеся в очереди, будут утеряны.
Режим очереди включен (ON)
Если режим очереди (Queueing) включен, принтер сохраняет файлы в очереди в порядке их получения. Если группирование (Nesting)
отключено (Off), то файлы печатаются в порядке получения, как только это становится возможным. Если группирование включено, то файлы печатаются после истечения времени ожидания либо после получения количества файлов, достаточного для заполнения бумаги по ширине. Уже распечатанные файлы можно снова напечатать. Более подробную информацию о группировании см. на стр. 29, Экономия бумаги с помощью функции группирования.
•Можно отправлять страницы на печать, не дожидаясь окончания печати текущей страницы.
•Страницы хранятся в очереди в порядке поступления в принтер.
•Страницами, находящимися в очереди, можно управлять, например, изменять их порядок или распечатывать повторно.
•Для экономии бумаги можно использовать функцию группирования (см. стр. 29).
Управление не напечатанными страницами (в очереди) 25
У п р а в л е н и е п е ч а т ь ю
PocketGuide.book Page 26 Wednesday, June 28, 2000 1:34 PM
•Во время печати текущей страницы принтер может получать и обрабатывать следующую.
Режим очереди отключен (OFF)
В этом случае принтер печатает файлы в порядке получения, не сохраняя их в очереди. Параметры группирования при этом не учитываются.
•Файлы печатаются в порядке получения и не сохраняются в очереди.
•Пока не будет завершена печать текущей страницы и принтер не перейдет в состояние готовности, все попытки отправить другие файлы на печать будут игнорироваться.
•Функция группирования в данном случае неприменима.
Если отключить режим очереди в то время, когда в ней есть страницы, эти страницы будут печататься и (если включено группирование), группироваться, пока очередь не опустеет.
Номер в очереди
Печатаемое в настоящий момент (текущее) задание имеет номер 0. Следующее задание имеет номер 1, затем 2 и т.д. Предыдущее задание имеет номер -1, предшествующее -2 и т.д.
|
–3 |
Уже напечатанные |
|||||
|
–2 |
задания |
|||||
|
–1 |
Текущее задание |
|||||
|
0 |
||||||
|
до 16 заданий |
||||||
|
1 |
||||||
|
2 |
Еще не напечатанные |
|||||
|
3 |
||||||
|
задания |
||||||
26 Управление не напечатанными страницами (в очереди)

PocketGuide.book Page 27 Wednesday, June 28, 2000 1:34 PM
Изменение порядка заданий в очереди (команда “Move to front”)
Чтобы произвольное задание было напечатано следующим, выделите его в очереди и выполните команду Move to front (переместить на верхний уровень очереди).
Если группирование включено (см. стр. 29,
Экономия бумаги с помощью функции группирования), то перемещенное задание может быть сгруппировано с другими. Если необходимо, чтобы выбранное задание было напечатано следующим и было на странице единственным, сначала отключите функцию группирования (Nesting Off), а затем выполните команду Move to front, чтобы переместить его на верхний уровень очереди.
Удаление заданий из очереди
При обычных обстоятельствах удалять напечатанное задание из очереди нет необходимости, т.к. оно “выпадает” из очереди по мере поступления новых файлов. Однако, если файл был отправлен на принтер по ошибке или необходимо предотвратить его повторную печать, удалите соответствующее задание из очереди с помощью команды Cancel.
Чтобы удалить еще не напечатанный файл, просто найдите его по номеру в очереди (см. стр. 26, Номер в очереди) и удалите его,
выбрав команду Cancel и нажав кнопку Enter. Если нужно прервать печать текущего задания (номер которого в очереди равен 0) и удалить его, сначала нажмите кнопку Cancel, а затем удалите его из очереди.
Управление не напечатанными страницами (в очереди) 27
У п р а в л е н и е п е ч а т ь ю
PocketGuide.book Page 28 Wednesday, June 28, 2000 1:34 PM
Печать нескольких копий задания, находящегося в очереди
Задание уже было
Что нужно делать
напечатано?
Да
Используйте меню Reprints (см. справа)
Нет
Используйте меню Copies (см. справа)
Во всех случаях задание должно быть в очереди.
Печать копий и повторная печать
Выберите нужное задание в очереди, а затем выберите Copies (печать копий) или Reprints (повторная печать) в меню Job Management
( ). С помощью кнопок со стрелками задайте нужное количество копий и нажмите Enter. Заданное число обозначает суммарное количество распечаток данной страницы. Например, если для еще не распечатанной страницы указать число 2, то будет напечатана одна исходная страница и одна ее копия. Если же указать число 2 для уже распечатанной страницы, то всего будет напечатано три страницы — одна исходная и две копии. Максимальное количество копий равно 99.
•Значение данного параметра имеет приоритет над любым значением того же параметра в ПО.
•Если был включен режим вращения (Rotate), то все копии также будут повернуты.
28 Печать нескольких копий задания, находящегося в очереди

PocketGuide.book Page 29 Wednesday, June 28, 2000 1:34 PM
Экономия бумаги с помощью функции группирования
Группирование страниц может использоваться только с рулонной бумагой.
Группирование означает, что страницы располагаются при печати рядом (а не последовательно), что позволяет сократить расход бумаги.
Когда принтер группирует страницы?
•В принтере должна быть загружена рулонная, а не листовая бумага.
•С помощью меню панели управления должен быть включен режим очереди (по умолчанию). См. стр. 25, Управление не напечатанными страницами (в очереди).
•С помощью меню панели управления должен быть включен режим группирования (установлено значение от 1 до 99 минут). См. стр. 30,
Включение функции группирования.
Какие страницы можно сгруппировать?
•Все страницы должны быть цветные (Color) или в оттенках серого (Grayscale). Возможна печать цветных страниц в оттенках серого.
•Все страницы должны иметь одинаковое разрешение.
•Все страницы должны быть рассчитаны на печать в одном режиме (Best, Normal, Draft).
•Все страницы должны иметь одинаковые поля (параметр Margin).
•Все страницы должны использовать один язык — HP-GL/2 или PostScript.
•Все страницы должны иметь одинаковую точность (параметр Page accuracy).
Автоматическое вращение страниц при группировании не выполняется.
Экономия бумаги с помощью функции группирования 29
У п р а в л е н и е п е ч а т ь ю
PocketGuide.book Page 30 Wednesday, June 28, 2000 1:34 PM
Включение функции группирования
|
Значение |
|
|
параметра |
Действия принтера |
|
Nest |
|
|
Off (откл.) |
Принтер не группирует страницы. |
|
99, … 2, 1 |
Выберите нужное значение. |
|
Число ознаПринтер будет просматривать |
|
|
чает время |
всю очередь для нахождения под- |
|
ожидания (в |
ходящих страниц. Применяемый |
|
минутах), |
алгоритм размещения страниц |
|
по истече- |
позволяет в большинстве случаев |
|
нии кото- |
сэкономить максимальное |
|
рого будет |
количество бумаги. Полученные |
|
выполнена |
схемы размещения страниц могут |
|
печать. |
отличаться в зависимости от |
|
размеров первой страницы. |
|
Какие страницы не вращаются?
Кроме очевидных случаев, связанных с физическими ограничениями размера рулона, принтер не сможет вращать также страницы, использующие язык HP-GL/2 и содержащие
растровые данные.
30 Экономия бумаги с помощью функции группирования
![]()
PocketGuide.book Page 31 Wednesday, June 28, 2000 1:34 PM
Картриджи и печатающие головки
Картриджи для струйной печати — это емкости с чернилами четырех цветов, расположенные под
крышкой в правой части принтера (см. следующую страницу).
Картридж для струйной печати
Печатающие головки предназначены для нанесения на бумагу мельчайших капель чернил. Они расположены под крышкой принтера.
Печатающая
головка
Замечание: Сервисные головки не предназначены для печати и используются только при настройке принтера.
Картриджи для струйной печати: HP No. 10 (черный) и HP No. 82 (голубой, пурпурный и желтый) Печатающие головки: HP No. 11 (черный, голубой, пурпурный и желтый)
Картриджи и печатающие головки 31
З а м е н а к а р т р и д ж е й и п е ч а т а ю щ и х г о л о в о к

PocketGuide.book Page 32 Wednesday, June 28, 2000 1:34 PM
|
Срок службы картриджей зависит от объема |
Печатающие головки и картриджи |
|
печати. Печатающие головки требуют замены |
|
|
только при ухудшении качества печати. При |
|
|
возникновении проблем см. раздел Проблемы |
|
|
с качеством печати в главе Решение проблем |
|
|
на стр. 16 данного Краткого руководства. |
|
32 Картриджи и печатающие головки

PocketGuide.book Page 33 Wednesday, June 28, 2000 1:34 PM
Замена картриджей
В случае необходимости замены картриджа на панели управления появится сообщение и четыре пиктограммы, обозначающие картриджи (слева направо) — голубой (·), черный (·), пурпурный (·) и желтый (·).
Пиктограммы могут иметь следующий вид.
Картридж исправен, пиктограмма отображает примерное количество оставшихся чернил. Если картридж полон, пиктограмма будет полностью черной.
Мигающая пиктограмма означает, что картридж отсутствует и его необходимо установить.
Мигающая пиктограмма с восклицательным знаком означает, что в соответствующем
картридже заканчиваются чернила и его необходимо как можно скорее заменить. При
этом в картридже может оставаться до 1/8 емкости чернил. Этого количества может хватить для печати нескольких больших изображений.
Мигающая пиктограмма с изображением бензоколонки означает, что картридж пуст и его необходимо заменить.
Мигающая перечеркнутая пиктограмма означает, что установлен неподходящий картридж и его необходимо заменить.
Замена картриджей 33
З а м е н а к а р т р и д ж е й и п е ч а т а ю щ и х г о л о в о к
 Loading…