
CD RDS RECEIVER
CD RDS ПРИЕМНИК
English Русский
FH-X360UB
Owner’s Manual
Руководство пользователя
Section
01
Before you start
Before you start
Thank you for purchasing this PIONEER
About this unit
If you experience problems
product
To ensure proper use, please read through this
The tuner frequencies on this unit are allocated
Should this unit fail to work properly, please con-
manual before using this product. It is especially
for use in Western Europe, Asia, the Middle
tact your dealer or nearest authorized PIONEER
important that you read and observe WARN-
East, Africa and Oceania. Use in other areas
Service Station.
INGs and CAUTIONs in this manual. Please
may result in poor reception. The RDS (radio
keep the manual in a safe and accessible place for
data system) function only works in areas that
future reference.
broadcast RDS signals for FM stations.
WARNING
! Do not attempt to install or service this
product by yourself. Installation or serv-
icing of this product by persons without
training and experience in electronic
equipment and automotive accessories
If you want to dispose this product, do not
may be dangerous and could expose you
mix it with general household waste. There is
to the risk of electric shock, injury or
a separate collection system for used elec-
other hazards.
tronic products in accordance with legislation
! Do not attempt to operate the unit while driv-
that requires proper treatment, recovery and
ing. Make sure to pull off the road and park
recycling.
your vehicle in a safe location before at-
tempting to use the controls on the device.
Private households in the member states of the
EU, in Switzerland and Norway may return their
CAUTION
used electronic products free of charge to desig-
! Do not allow this unit to come into contact
nated collection facilities or to a retailer (if you
with liquids. Electrical shock could result.
purchase a similar new one).
Also, damage to this unit, smoke, and over-
For countries not mentioned above, please con-
heating could result from contact with
tact your local authorities for the correct method
liquids.
of disposal.
! Always keep the volume low enough to hear
By doing so you will ensure that your disposed
outside sounds.
product undergoes the necessary treatment, re-
! Avoid exposure to moisture.
covery and recycling and thus prevent potential
negative effects on the environment and human
health.
CAUTION
This product is a class 1 laser product classi-
fied under the Safety of laser products, IEC
60825-1:2007.
2
En
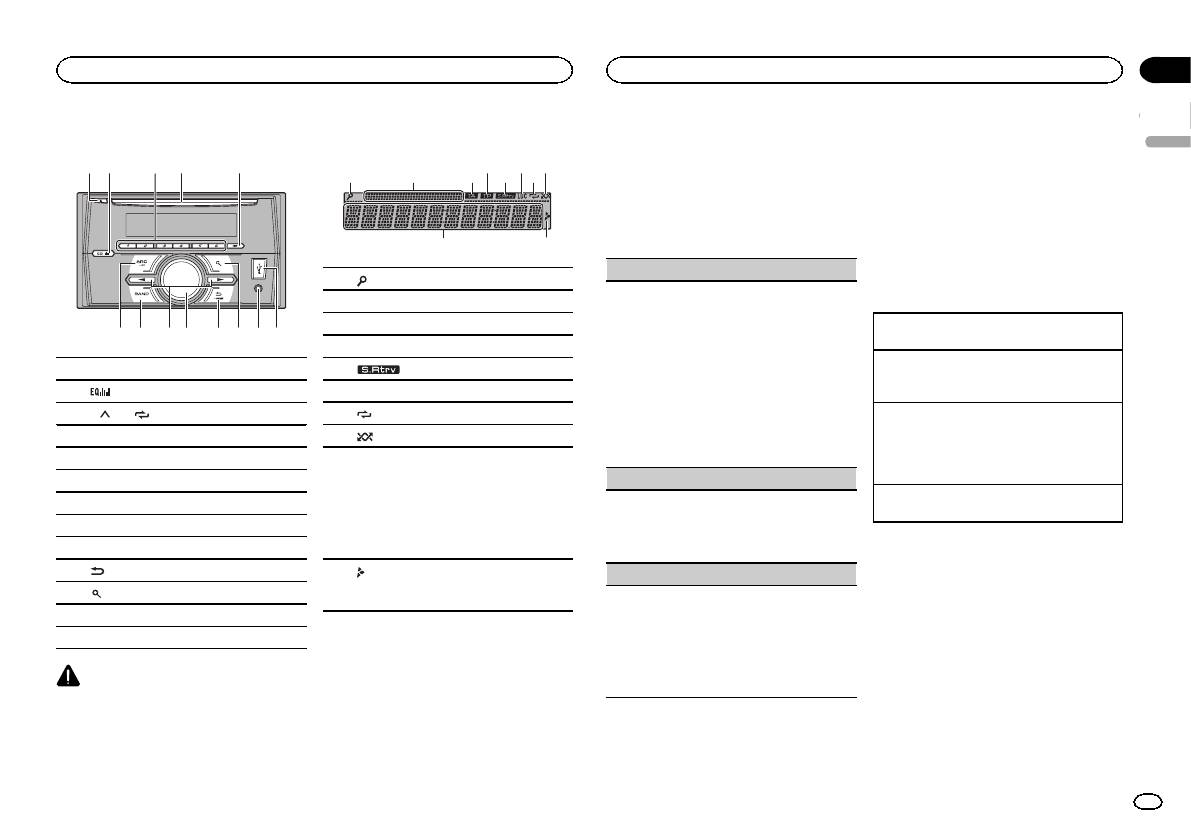
8 97 a c6 b d
Display indication
3
21 3 75
1 h (eject)
2
(equalizer)
3 1/
to 6/
4 Disc loading slot
5 DISP
6 SRC/OFF
7 BAND
8 c/d
9 MULTI-CONTROL (M.C.)
a
(back)/DIMMER (dimmer)
b
(list)
c AUX input jack (3.5 mm stereo jack)
d USB port
CAUTION
Use an optional Pioneer USB cable (CD-U50E)
to connect the USB storage device as any device
connected directly to the unit will protrude out
from the unit, which could be dangerous.
9
Section
Using this unit
Using this unit
02
# If you prefer not to set up at this time, turn M.C.
6 Press M.C. to select.
to switch to NO.
English
Notes
4 6 8
3 Press M.C. to select.
! You can set up the menu options from the
system menu and initial menu. For details
4 Follow these steps to set the menu.
about the settings, refer to System menu on
To proceed to the next menu option, you need to
page 6 and Initial menu on page 7.
a
confirm your selection.
! You can cancel set up menu by pressing
SRC/OFF.
LANGUAGE (multi-language)
1 (list)
This unit can display the text information from a
Basic operations
2 Sub information section
compressed audio file even for information em-
3 TA (traffic announcements)
bedded in English, Russian or Turkish.
Turning the unit on
! If the embedded language and the selected
1 Press SRC/OFF to turn the unit on.
4 TP (traffic program identification)
language setting are not the same, text infor-
Turning the unit off
5
(sound retriever)
mation may not display properly.
1 Press and hold SRC/OFF until the unit turns
! Some characters may not be displayed prop-
6 LOC (local seek tuning)
off.
erly.
7
(repeat)
1 Turn M.C. to select the desired setting.
Selecting a source
РУС (Russian)—TUR (Turkish)—ENG (Eng-
1 Press SRC/OFF to cycle between:
8
(random)
lish)
RADIO—CD—USB—AUX
Main information section
2 Press M.C. to confirm the selection.
! USB MTP displays while the MTP connection
! Tuner: band and frequency
is in use.
CLOCK SET (setting the clock)
! RDS: program service name, PTY infor-
Adjusting the volume
9
mation and other literal information
1 Turn M.C. to adjust hour.
1 Turn M.C. to adjust the volume.
! CD player and USB storage device:
2 Press M.C. to select minute.
elapsed playback time and text informa-
3 Turn M.C. to adjust minute.
Note
tion
4 Press M.C. to confirm the selection.
When this unit’s blue/white lead is connected to
the vehicle’s auto-antenna relay control termi-
FM STEP (FM tuning step)
a
Appears when a lower tier of folder or menu
nal, the vehicle’s antenna extends when this
exists.
Use FM STEP to set FM tuning step options (seek
unit’s source is turned on. To retract the anten-
step settings).
na, turn the source off.
1 Turn M.C. to select the FM tuning step.
100 (100 kHz)—50 (50 kHz)
Set up menu
2 Press M.C. to confirm the selection.
1 After installation of this unit, turn the
QUIT appears.
ignition switch to ON.
! The manual tuning step is fixed at 50 kHz.
SET UP appears.
5 To finish your settings, turn M.C. to select
2 Turn M.C. to switch to YES.
YES.
# If you do not use the unit for 30 seconds, the set
# If you prefer to change your setting again, turn
up menu will not be displayed.
M.C. to switch to NO.
En
3

CD RDS RECEIVER
CD RDS ПРИЕМНИК
Русский English
FH-X360UB
Owner’s Manual
Руководство пользователя

|
Section |
||||||||
|
01 |
Before you start |
Before you start |
||||||
|
Thank you for purchasing this PIONEER |
About this unit |
If you experience problems |
||||||
|
product |
The tuner frequencies on this unit are allocated |
Should this unit fail to work properly, please con- |
||||||
|
To ensure proper use, please read through this |
||||||||
|
for use in Western Europe, Asia, the Middle |
tact your dealer or nearest authorized PIONEER |
|||||||
|
manual before using this product. It is especially |
||||||||
|
East, Africa and Oceania. Use in other areas |
Service Station. |
|||||||
|
important that you read and observe WARN- |
||||||||
|
may result in poor reception. The RDS (radio |
||||||||
|
INGs and CAUTIONs in this manual. Please |
||||||||
|
data system) function only works in areas that |
||||||||
|
keep the manual in a safe and accessible place for |
||||||||
|
broadcast RDS signals for FM stations. |
||||||||
|
future reference. |
||||||||
|
WARNING |
||||||||
|
! Do not attempt to install or service this |
||||||||
|
product by yourself. Installation or serv- |
||||||||
|
icing of this product by persons without |
||||||||
|
training and experience in electronic |
||||||||
|
If you want to dispose this product, do not |
equipment and automotive accessories |
|||||||
|
may be dangerous and could expose you |
||||||||
|
mix it with general household waste. There is |
||||||||
|
to the risk of electric shock, injury or |
||||||||
|
a separate collection system for used elec- |
||||||||
|
other hazards. |
||||||||
|
tronic products in accordance with legislation |
||||||||
|
! Do not attempt to operate the unit while driv- |
||||||||
|
that requires proper treatment, recovery and |
||||||||
|
ing. Make sure to pull off the road and park |
||||||||
|
recycling. |
||||||||
|
your vehicle in a safe location before at- |
||||||||
|
tempting to use the controls on the device. |
Private households in the member states of the EU, in Switzerland and Norway may return their used electronic products free of charge to designated collection facilities or to a retailer (if you purchase a similar new one).
For countries not mentioned above, please contact your local authorities for the correct method of disposal.
By doing so you will ensure that your disposed product undergoes the necessary treatment, recovery and recycling and thus prevent potential negative effects on the environment and human health.
 CAUTION
!Do not allow this unit to come into contact with liquids. Electrical shock could result. Also, damage to this unit, smoke, and overheating could result from contact with liquids.
!Always keep the volume low enough to hear outside sounds.
!Avoid exposure to moisture.
CAUTION
This product is a class 1 laser product classified under the Safety of laser products, IEC 60825-1:2007.
 2
2 En
En
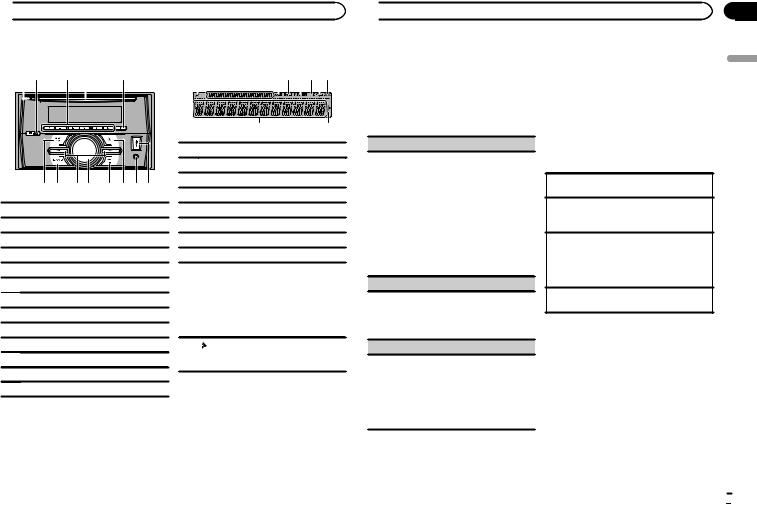
 Using this unit
|
Head unit |
Display indication |
||||||||||||
|
1 2 |
3 4 |
5 |
1 |
2 |
34 5 678 |
||||||||
6 7 8 9 a b c d
1h (eject)
2


 (equalizer)
31/ to 6/
to 6/
4Disc loading slot
5DISP
6SRC/OFF
7BAND
8c/d
9MULTI-CONTROL (M.C.)
a (back)/DIMMER (dimmer)
b (list)
cAUX input jack (3.5 mm stereo jack)
dUSB port
9a
1 (list)
2Sub information section
3TA (traffic announcements)
4TP (traffic program identification)
5 (sound retriever)
6LOC (local seek tuning)
7 (repeat)
8 (random)
Main information section
!Tuner: band and frequency
!RDS: program service name, PTY infor-
9mation and other literal information
!CD player and USB storage device: elapsed playback time and text information
aAppears when a lower tier of folder or menu exists.
Set up menu
 CAUTION
Use an optional Pioneer USB cable (CD-U50E) to connect the USB storage device as any device connected directly to the unit will protrude out from the unit, which could be dangerous.
1After installation of this unit, turn the ignition switch to ON.
SET UP appears.
2Turn M.C. to switch to YES.
# If you do not use the unit for 30 seconds, the set up menu will not be displayed.
 Using this unit
# If you prefer not to set up at this time, turn M.C. to switch to NO.
3Press M.C. to select.
4Follow these steps to set the menu.
To proceed to the next menu option, you need to confirm your selection.
LANGUAGE (multi-language)
This unit can display the text information from a compressed audio file even for information embedded in English, Russian or Turkish.
!If the embedded language and the selected language setting are not the same, text information may not display properly.
!Some characters may not be displayed prop-
erly.
1Turn M.C. to select the desired setting. РУС (Russian)—TUR (Turkish)—ENG (English)
2Press M.C. to confirm the selection.
CLOCK SET (setting the clock)
1Turn M.C. to adjust hour.
2Press M.C. to select minute.
3Turn M.C. to adjust minute.
4Press M.C. to confirm the selection.
FM STEP (FM tuning step)
Use FM STEP to set FM tuning step options (seek step settings).
1Turn M.C. to select the FM tuning step. 100 (100 kHz)—50 (50 kHz)
2Press M.C. to confirm the selection. QUIT appears.
! The manual tuning step is fixed at 50 kHz.
5 To finish your settings, turn M.C. to select YES.
# If you prefer to change your setting again, turn M.C. to switch to NO.
6 Press M.C. to select.
Notes
!You can set up the menu options from the system menu and initial menu. For details about the settings, refer to System menu on page 6 and Initial menu on page 7.
!You can cancel set up menu by pressing
SRC/OFF.
Basic operations
Turning the unit on
1 Press SRC/OFF to turn the unit on.
Turning the unit off
1Press and hold SRC/OFF until the unit turns off.
Selecting a source
1Press SRC/OFF to cycle between:
RADIO—CD—USB—AUX
!USB MTP displays while the MTP connection is in use.
Adjusting the volume
1 Turn M.C. to adjust the volume.
Note
When this unit’s blue/white lead is connected to the vehicle’s auto-antenna relay control terminal, the vehicle’s antenna extends when this unit’s source is turned on. To retract the antenna, turn the source off.
En
Section
02
English
 3
3

|
Section |
|||||
|
02 |
Using this unit |
||||
|
Frequently used menu |
! This unit’s AF (alternative frequencies |
||||
|
operations |
search) function can be turned on and off. |
||||
|
AF should be off for normal tuning operation |
|||||
|
(refer to AF (alternative frequencies search) |
|||||
|
Returning to the previous display |
|||||
|
on page 4). |
|||||
|
Returning to the previous list (the folder one level |
|||||
|
higher) |
Storing and recalling stations |
||||
|
1 Press /DIMMER. |
for each band |
||||
|
Returning to the ordinary display |
|||||
|
Using preset tuning buttons |
|||||
|
Canceling the main menu |
|||||
|
1 Press BAND. |
1 To store: Press and hold down one of the |
||||
|
Returning to the ordinary display from the list |
preset tuning buttons (1/ to 6/ ) until |
||||
|
the number stops flashing. |
|||||
|
1 Press BAND. |
|||||
|
2 To recall: Press one of the preset tuning |
|||||
|
Radio |
buttons (1/ to 6/ ). |
||||
|
Basic operations |
Switching the display |
Selecting a band
1Press BAND until the desired band (FM1, FM2, FM3 for FM or MW/LW) is displayed.
Switching preset stations 1 Press c or d.
!Select PCH (preset channel) under SEEK to use this function.
Manual tuning (step by step) 1 Press c or d.
!Select MAN (manual tuning) under SEEK to use this function.
Seeking
1Press and hold c or d, and then release.
You can cancel seek tuning by briefly pressing c or d.
While pressing and holding c or d, you can skip stations. Seek tuning starts as soon as you release c or d.
Notes
!For details about SEEK, refer to SEEK (left/ right key setting) on page 4.
 4
4 En
En
Selecting the desired text information
1Press DISP to cycle between the following:
!FREQUENCY (program service name or frequency)
!BRDCST INFO (program service name/PTY information)
!CLOCK (source name and clock)
Notes
!If the program service name cannot be acquired in FREQUENCY, the broadcast frequency is displayed instead. If the program service name is detected, the program service name will be displayed.
!Depending on the band, text information can be changed.
!Text information items that can be changed depend on the area.
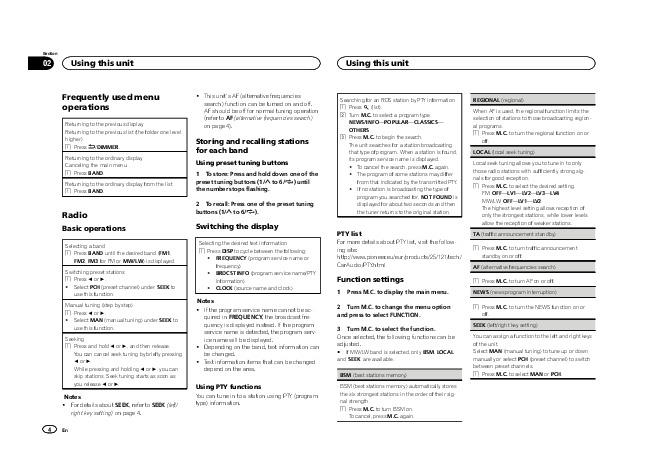
Using PTY functions
You can tune in to a station using PTY (program type) information.
 Using this unit
Searching for an RDS station by PTY information
1Press  (list).
2Turn M.C. to select a program type.
NEWS/INFO—POPULAR—CLASSICS— OTHERS
3Press M.C. to begin the search.
The unit searches for a station broadcasting that type of program. When a station is found, its program service name is displayed.
!To cancel the search, press M.C. again.
!The program of some stations may differ from that indicated by the transmitted PTY.
!If no station is broadcasting the type of program you searched for, NOT FOUND is displayed for about two seconds and then the tuner returns to the original station.
PTY list
For more details about PTY list, visit the following site: http://www.pioneer.eu/eur/products/25/121/tech/ CarAudio/PTY.html
Function settings
1Press M.C. to display the main menu.
2Turn M.C. to change the menu option and press to select FUNCTION.
3Turn M.C. to select the function.
Once selected, the following functions can be adjusted.
# If MW/LW band is selected, only BSM, LOCAL and SEEK are available.
BSM (best stations memory)
BSM (best stations memory) automatically stores the six strongest stations in the order of their signal strength.
1Press M.C. to turn BSM on. To cancel, press M.C. again.
REGIONAL (regional)
When AF is used, the regional function limits the selection of stations to those broadcasting regional programs.
1Press M.C. to turn the regional function on or off.
LOCAL (local seek tuning)
Local seek tuning allows you to tune in to only those radio stations with sufficiently strong signals for good reception.
1Press M.C. to select the desired setting. FM: OFF—LV1—LV2—LV3—LV4 MW/LW: OFF—LV1—LV2
The highest level setting allows reception of only the strongest stations, while lower levels allow the reception of weaker stations.
TA (traffic announcement standby)
1Press M.C. to turn traffic announcement standby on or off.
AF (alternative frequencies search)
1 Press M.C. to turn AF on or off.
NEWS (news program interruption)
1Press M.C. to turn the NEWS function on or off.
SEEK (left/right key setting)
You can assign a function to the left and right keys of the unit.
Select MAN (manual tuning) to tune up or down manually or select PCH (preset channel) to switch between preset channels.
1 Press M.C. to select MAN or PCH.

 Using this unit
|
CD/CD-R/CD-RW and USB |
Switching between compressed audio and CD-DA |
|
|
storage devices |
1 Press BAND. |
|
|
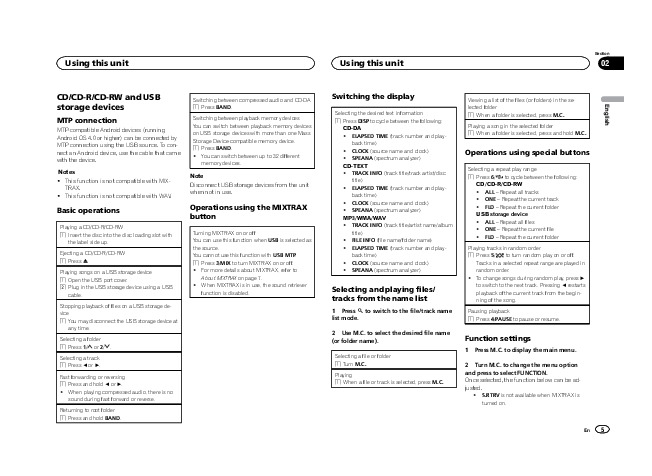
MTP connection |
Switching between playback memory devices |
|
|
You can switch between playback memory devices |
||
|
MTP-compatible Android devices (running |
||
|
on USB storage devices with more than one Mass |
||
|
Android OS 4.0 or higher) can be connected by |
||
|
Storage Device-compatible memory device. |
||
|
MTP connection using the USB source. To con- |
||
|
1 Press BAND. |
||
|
nect an Android device, use the cable that came |
||
|
! You can switch between up to 32 different |
||
|
with the device. |
||
|
memory devices. |
||
|
Notes |
||
|
Note |
||
|
! This function is not compatible with MIX- |
||
|
Disconnect USB storage devices from the unit |
||
|
TRAX. |
||
|
when not in use. |
||
|
! This function is not compatible with WAV. |
||
Basic operations
Playing a CD/CD-R/CD-RW
1Insert the disc into the disc loading slot with the label side up.
Ejecting a CD/CD-R/CD-RW
1 Press h.
Playing songs on a USB storage device
1Open the USB port cover.
2Plug in the USB storage device using a USB cable.
Stopping playback of files on a USB storage device
1You may disconnect the USB storage device at any time.
Selecting a folder
1 Press 1/ or 2/
or 2/ .
.
Selecting a track 1 Press c or d.
Fast forwarding or reversing 1 Press and hold c or d.
!When playing compressed audio, there is no sound during fast forward or reverse.
Returning to root folder 1 Press and hold BAND.
Operations using the MIXTRAX button
Turning MIXTRAX on or off
You can use this function when USB is selected as the source.
You cannot use this function with USB MTP. 1 Press 3/MIX to turn MIXTRAX on or off.
!For more details about MIXTRAX, refer to
About MIXTRAX on page 7.
!When MIXTRAX is in use, the sound retriever function is disabled.
 Using this unit
Switching the display
Selecting the desired text information
1Press DISP to cycle between the following:
CD-DA
!ELAPSED TIME (track number and playback time)
!CLOCK (source name and clock)
!SPEANA (spectrum analyzer)
CD-TEXT
!TRACK INFO (track title/track artist/disc title)
!ELAPSED TIME (track number and playback time)
!CLOCK (source name and clock)
!SPEANA (spectrum analyzer)
MP3/WMA/WAV
!TRACK INFO (track title/artist name/album title)
!FILE INFO (file name/folder name)
!ELAPSED TIME (track number and playback time)
!CLOCK (source name and clock)
!SPEANA (spectrum analyzer)
Selecting and playing files/ tracks from the name list
1Press  to switch to the file/track name list mode.
2Use M.C. to select the desired file name (or folder name).
Selecting a file or folder 1 Turn M.C.
Playing
1 When a file or track is selected, press M.C.
Viewing a list of the files (or folders) in the selected folder
1 When a folder is selected, press M.C.
Playing a song in the selected folder
1 When a folder is selected, press and hold M.C.
Operations using special buttons
Selecting a repeat play range
1Press 6/ to cycle between the following:
CD/CD-R/CD-RW
!ALL – Repeat all tracks
!ONE – Repeat the current track
!FLD – Repeat the current folder
USB storage device
!ALL – Repeat all files
!ONE – Repeat the current file
!FLD – Repeat the current folder
Playing tracks in random order
1Press 5/ to turn random play on or off. Tracks in a selected repeat range are played in
random order.
!To change songs during random play, press d to switch to the next track. Pressing c restarts playback of the current track from the beginning of the song.
Pausing playback
1 Press 4/PAUSE to pause or resume.
Function settings
1Press M.C. to display the main menu.
2Turn M.C. to change the menu option and press to select FUNCTION.
Once selected, the function below can be adjusted.
!S.RTRV is not available when MIXTRAX is turned on.
En
Section
02
English
 5
5

|
Section |
||||||||||
|
02 |
Using this unit |
|||||||||
|
S.RTRV (sound retriever) |
1 |
Press M.C. to display the setting mode. |
||||||||
|
Automatically enhances compressed audio and |
2 |
Turn M.C. to adjust the left/right speaker bal- |
||||||||
|
restores rich sound. |
ance. |
|||||||||
|
1 Press M.C. to select the desired setting. |
EQ SETTING (equalizer recall) |
|||||||||
|
1—2—OFF (off) |
||||||||||
|
1 is effective for low compression rates, and 2 |
1 |
Press M.C. to display the setting mode. |
||||||||
|
is effective for high compression rates. |
||||||||||
|
2 |
Turn M.C. to select the equalizer. |
|||||||||
|
POWERFUL—NATURAL—VOCAL—CUS- |
||||||||||
|
Audio adjustments |
TOM1—CUSTOM2—FLAT—SUPER BASS |
|||||||||
|
The equalizer band and equalizer level can be |
||||||||||
|
1 Press M.C. to display the main menu. |
customized when CUSTOM1 or CUSTOM2 is |
|||||||||
|
selected. |
||||||||||
|
2 Turn M.C. to change the menu option |
If selecting CUSTOM1 or CUSTOM2, complete |
|||||||||
|
the procedures outlined below. If selecting |
||||||||||
|
and press to select AUDIO. |
||||||||||
|
other options, press M.C. to return to the pre- |
||||||||||
|
3 Turn M.C. to select the audio function. |
vious display. |
|||||||||
|
! |
CUSTOM1 can be set separately for each |
|||||||||
|
Once selected, the following audio functions |
||||||||||
|
source. |
||||||||||
|
can be adjusted. |
||||||||||
|
! |
CUSTOM2 is a shared setting used in com- |
|||||||||
|
! |
FADER is not available when SUB.W/SUB.W |
|||||||||
|
mon for all sources. |
||||||||||
|
is selected in SP-P/O MODE. For details, refer |
||||||||||
|
3 |
Press M.C. to display the setting mode. |
|||||||||
|
to SP-P/O MODE (rear output and preout set- |
||||||||||
|
4 |
Press M.C. to cycle between the following: |
|||||||||
|
ting) on page 7. |
||||||||||
|
Equalizer band—Equalizer level |
||||||||||
|
! |
SUB.W and SUB.W CTRL are not available |
|||||||||
|
5 |
Turn M.C. to select the desired setting. |
|||||||||
|
when REAR/REAR is selected in |
||||||||||
|
Equalizer band: 80HZ—250HZ—800HZ— |
||||||||||
|
SP-P/O MODE. For details, refer to |
||||||||||
|
2.5KHZ—8KHZ |
||||||||||
|
SP-P/O MODE (rear output and preout set- |
||||||||||
|
Equalizer level: +6 to –6 |
||||||||||
|
ting) on page 7. |
||||||||||
|
! |
You can also switch the equalizer by pressing |
|||||||||
|
! |
SUB.W CTRL is not available when SUB.W is |
|||||||||
|
repeatedly. |
||||||||||
|
selected in OFF. For details, refer to SUB.W |
||||||||||
|
LOUDNESS (loudness) |
||||||||||
|
(subwoofer on/off setting) on page 6. |
||||||||||
|
! |
SLA is not available when FM is selected as |
Loudness compensates for deficiencies in the low- |
||||||||
|
the source. |
||||||||||
|
frequency and high-frequency ranges at low vol- |
||||||||||
|
ume. |
||||||||||
|
FADER (fader adjustment) |
||||||||||
|
1 |
Press M.C. to select the desired setting. |
|||||||||
|
1 Press M.C. to display the setting mode. |
OFF (off)—LOW (low)—MID (mid)—HI (high) |
|||||||||
|
SUB.W (subwoofer on/off setting) |
||||||||||
|
2 Turn M.C. to adjust the front/rear speaker bal- |
||||||||||
|
ance. |
||||||||||
|
BALANCE (balance adjustment) |
||||||||||
|
6 |
En |
 Using this unit
This unit is equipped with a subwoofer output which can be turned on or off.
1Press M.C. to select the desired setting. NOR (normal phase)—REV (reverse phase)— OFF (subwoofer off)
SUB.W CTRL (subwoofer adjustment)
Only frequencies lower than those in the selected range are outputted from the subwoofer.
1Press M.C. to display the setting mode.
2Press M.C. to cycle between the following: Cut-off frequency—Output level—Slope level Rates that can be adjusted will flash.
3Turn M.C. to select the desired setting. Cut-off frequency: 50HZ—63HZ—80HZ— 100HZ—125HZ—160HZ—200HZ
Output level: –24 to +6 Slope level: –12— –24
BASS BOOST (bass boost)
1Press M.C. to display the setting mode.
2Turn M.C. to select a desired level.
0 to +6 is displayed as the level is increased or decreased.
HPF SETTING (high pass filter adjustment)
Use this function when wanting to listen only to high-frequency sounds. Only frequencies higher than the high-pass filter (HPF) cutoff are output from the speakers.
1Press M.C. to display the setting mode.
2Press M.C. to cycle between the following: Cut-off frequency—Slope level
3Turn M.C. to select the desired setting. Cut-off frequency: OFF—50HZ—63HZ—80HZ
—100HZ—125HZ—160HZ—200HZ
Slope level: –12— –24
SLA (source level adjustment)
This function prevents the volume from changing too dramatically when the source switches.
!Settings are based on the FM volume level, which remains unchanged.
!The MW/LW volume level can also be adjusted with this function.
1Press M.C. to display the setting mode.
2Turn M.C. to adjust the source volume. Adjustment range: +4 to –4
System menu
 Important
PW SAVE (power saving) is canceled if the vehicle battery is disconnected and will need to be turned back on once the battery is reconnected. When PW SAVE (power saving) is off, depending on connection methods, the unit may continue to draw power from the battery if your vehicle’s ignition doesn’t have an ACC (accessory) position.
1Press M.C. to display the main menu.
2Turn M.C. to change the menu option and press to select SYSTEM.
3Turn M.C. to select the system menu function.
Once selected, the following system menu functions can be adjusted.
LANGUAGE (multi-language)
1Press M.C. to select the desired setting. РУС (Russian)—TUR (Turkish)—ENG (English)
CLOCK SET (setting the clock)

 Using this unit
1Press M.C. to display the setting mode.
2Press M.C. to select the segment of the clock display you wish to set.
Hour—Minute
3Turn M.C. to adjust the clock.
12H/24H (time notation)
1Press M.C. to select the desired setting. 12H (12-hour clock)—24H (24-hour clock)
AUTO PI (auto PI seek)
The unit can automatically search for a different station with the same programming, even during preset recall.
1 Press M.C. to turn Auto PI seek on or off.
AUX (auxiliary input)
Activate this setting when using an auxiliary device connected to this unit.
1 Press M.C. to turn AUX on or off.
DIMMER (dimmer)
1 Press M.C. to turn the dimmer on or off.
!You can also change the dimmer setting by pressing and holding  /DIMMER.
MUTE MODE (mute mode)
Sound from this system is automatically muted or attenuated when a signal from equipment with a mute function is received.
1Press M.C. to display the setting mode.
2Turn M.C. to select the desired setting.
!MUTE – Muting
!20dB ATT – Attenuation (20dB ATT has a stronger effect than 10dB ATT)
!10dB ATT – Attenuation
PW SAVE (power saving)
Switching this function on enables you to reduce the consumption of battery power.
!Turning on the source is the only operation allowed when this function is on.
1 Press M.C. to turn the power save on or off.
About MIXTRAX
MIXTRAX technology is used to insert a variety of sound effects in between songs, allowing you to experience your music as a nonstop mix complete with visual effects.
Notes
!Depending on the file/song, sound effects may not be available.
!Turn MIXTRAX off if the visual effects it produces have adverse effects on driving. Refer to Operations using the MIXTRAX button on page 5.
MIXTRAX menu
1Press M.C. to display the main menu.
2Turn M.C. to change the menu option and press to select MIXTRAX.
3Turn M.C. to select the MIXTRAX function.
Once selected, the following MIXTRAX functions can be adjusted. The function is enabled when MIXTRAX is on.
SHORT MODE (short playback mode)
You can select the length of the playback time.
1Press M.C. to display the setting mode.
2Turn M.C. to select the desired setting.
1.0MIN (1.0 minute)—1.5 MIN (1.5 minutes)—
2.0MIN (2.0 minutes)—2.5 MIN (2.5 minutes)
—3.0 MIN (3.0 minutes)—OFF (off)
|
Section |
||||||||
|
Using this unit |
02 |
|||||||
|
MIX PATTERN (mix pattern) |
FM STEP (FM tuning step) |
|||||||
|
The MIXTRAX special effects display changes with |
100 (100 kHz)—50 (50 kHz) |
English |
||||||
|
changes in the audio level. |
1 Press M.C. to select the FM tuning step. |
|||||||
|
1 Press M.C. to display the setting mode. |
||||||||
|
SP-P/O MODE (rear output and preout setting) |
||||||||
|
2 Turn M.C. to select the desired setting. |
||||||||
|
! |
SOUND LEVEL – The mix pattern changes |
The rear speaker leads output and the RCA output |
||||||
|
according to the sound level. |
||||||||
|
of this unit can be used to connect a full-range |
||||||||
|
! |
LOW PASS – The mix pattern changes ac- |
|||||||
|
speaker or subwoofer. Select a suitable option for |
||||||||
|
cording to the bass level. |
||||||||
|
your connection. |
||||||||
|
! |
RANDOM – The mix pattern changes ran- |
|||||||
|
1 Press M.C. to display the setting mode. |
||||||||
|
domly according to the sound level mode |
||||||||
|
2 Turn M.C. to select the desired setting. |
||||||||
|
and low pass mode. |
||||||||
|
! REAR/SUB.W – Select when there is a full- |
||||||||
|
DISP FX (display effect) |
range speaker connected to the rear speak- |
|||||||
|
The MIXTRAX special effects display can be turned |
er leads output and there is a subwoofer |
|||||||
|
connected to the RCA output. |
||||||||
|
on or off. |
||||||||
|
! |
SUB.W/SUB.W – Select when there is a |
|||||||
|
1 Press M.C. to select the desired setting. |
||||||||
|
subwoofer connected directly to the rear |
||||||||
|
ON (MIXTRAX special effects display)—OFF |
||||||||
|
speaker leads output without any auxiliary |
||||||||
|
(normal display) |
||||||||
|
amp and there is a subwoofer connected |
||||||||
|
CUT IN FX (manual cut-in effect) |
to the RCA output. |
|||||||
|
You can turn on or off the MIXTRAX sound effects |
! |
REAR/REAR – Select when there is a full- |
||||||
|
range speaker connected to the rear speak- |
||||||||
|
while manually changing tracks. |
||||||||
|
er leads output and the RCA output. |
||||||||
|
1 Press M.C. to select the desired setting. |
||||||||
|
If there is a full-range speaker connected to |
||||||||
|
ON (on)—OFF (off) |
||||||||
|
the rear speaker leads output and the RCA |
||||||||
|
output is not used, you may select either |
||||||||
|
Initial menu |
REAR/SUB.W or REAR/REAR. |
|||||||
|
1 Press and hold SRC/OFF until the unit |
System menu |
|||||||
|
turns off. |
|
2 |
Press and hold SRC/OFF until the main |
1 Press and hold SRC/OFF until the unit |
|
|
turns off. |
|||
|
menu appears in the display. |
|||
|
3 |
Turn M.C. to change the menu option |
2 Press and hold SRC/OFF until the main |
|
|
menu appears in the display. |
|||
|
and press to select INITIAL. |
|||
|
4 |
Turn M.C. to select the initial menu func- |
3 Turn M.C. to change the menu option |
|
|
and press to select SYSTEM. |
|||
|
tion. |
|||
Once selected, the following initial menu functions can be adjusted.
En  7
7
Section
02  Using this unit
03
4 Turn M.C. to select the system menu function.
For details, refer to System menu on page 6.
Using an AUX source
1Insert the stereo mini plug into the AUX input jack.
2Press SRC/OFF to select AUX as the source.
Note
AUX cannot be selected unless the auxiliary setting is turned on. For more details, refer to AUX
(auxiliary input) on page 7.
Switching the display
Selecting the desired text information
1Press DISP to cycle between the following:
!Source name
!Source name and clock
If an unwanted display appears
Turn off the unwanted display using the procedures listed below.
1Press M.C. to display the main menu.
2Turn M.C. to change the menu option and press to select SYSTEM.
3Turn M.C. to display DEMO OFF and press to select.
4Turn M.C. to switch to YES.
5Press M.C. to select.
 8
8 En
En
 Installation
Connections
 Important
!When installing this unit in a vehicle without an ACC (accessory) position on the ignition switch, failure to connect the red cable to the terminal that detects operation of the ignition key may result in battery drain.
|
F |
ON |
||
|
F |
|||
|
O |
S |
||
|
T |
|||
|
TR |
A |
||
|
ACC position |
No ACC position |
!Use of this unit in conditions other than the following could result in fire or malfunction.
—Vehicles with a 12-volt battery and negative grounding.
—Speakers with 50 W (output value) and 4 W to 8 W (impedance value).
!To prevent a short-circuit, overheating or malfunction, be sure to follow the directions below.
—Disconnect the negative terminal of the battery before installation.
—Secure the wiring with cable clamps or adhesive tape. Wrap adhesive tape around wiring that comes into contact with metal parts to protect the wiring.
—Place all cables away from moving parts, such as the shift lever and seat rails.
—Place all cables away from hot places, such as near the heater outlet.
—Do not connect the yellow cable to the battery by passing it through the hole to the engine compartment.
—Cover any disconnected cable connectors with insulating tape.
—Do not shorten any cables.
—Never cut the insulation of the power cable of this unit in order to share the power with other devices. The current capacity of the cable is limited.
—Use a fuse of the rating prescribed.
—Never wire the negative speaker cable directly to ground.
—Never band together negative cables of multiple speakers.
!When this unit is on, control signals are sent through the blue/white cable. Connect this cable to the system remote control of an external power amp or the vehicle’s auto-anten- na relay control terminal (max. 300 mA
12 V DC). If the vehicle is equipped with a glass antenna, connect it to the antenna booster power supply terminal.
!Never connect the blue/white cable to the power terminal of an external power amp. Also, never connect it to the power terminal of the auto antenna. Doing so may result in battery drain or a malfunction.
!The black cable is ground. Ground cables for this unit and other equipment (especially, high-current products such as power amps) must be wired separately. If they are not, an accidental detachment may result in a fire or malfunction.
This unit
|
1 |
2 3 |
4 5 |
1Antenna input
2Fuse (10 A)
3Power cord input
4Wired remote input
Hard-wired remote control adapter can be connected (sold separately).
5Rear output or subwoofer output

|
Section |
||
|
Installation |
Installation |
03 |
|
Power cord |
|||
|
3 |
4 |
||
|
2 |
5 |
6 |
1 |
|
3 |
4 |
||
|
7 |
5 |
6 |
|
|
8 |
|||
|
a |
|||
|
9 |
b |
||
|
e |
c |
||
|
d |
1To power cord input
2Depending on the kind of vehicle, the function of 3 and 5 may be different. In this case, be sure to connect 4 to 5 and 6 to
3.
3Yellow
Back-up (or accessory)
4Yellow
Connect to the constant 12 V supply terminal.
5Red
Accessory (or back-up)
6Red
Connect to terminal controlled by ignition switch (12 V DC).
7Connect leads of the same color to each other.
8Black (chassis ground)
9Blue/white
The pin position of the ISO connector will differ depending on the type of vehicle. Connect 9 and b when Pin 5 is an antenna control
type. In another type of vehicle, never connect 9 and b.
aBlue/white
Connect to system control terminal of the power amp (max. 300 mA 12 V DC).
bBlue/white
Connect to auto-antenna relay control terminal (max. 300 mA 12 V DC).
cYellow/black
If you use an equipment with Mute function, wire this lead to the Audio Mute lead on that equipment. If not, keep the Audio Mute lead free of any connections.
dSpeaker leads White: Front left +
White/black: Front left * Gray: Front right + Gray/black: Front right *
Green: Rear left + or subwoofer + Green/black: Rear left * or subwoofer * Violet: Rear right + or subwoofer + Violet/black: Rear right * or subwoofer *
eISO connector
In some vehicles, the ISO connector may be divided into two. In this case, be sure to connect to both connectors.
Notes
!Change the initial menu of this unit. Refer to
SP-P/O MODE (rear output and preout setting) on page 7.
The subwoofer output of this unit is monaural.
!When using a subwoofer of 70 W (2 W), be sure to connect the subwoofer to the violet and violet/black leads of this unit. Do not connect anything to the green and green/ black leads.
Power amp (sold separately)
Perform these connections when using the optional amplifier.
13
|
2 |
||
|
4 |
||
|
5 |
5 |
|
1System remote control Connect to Blue/white cable.
2Power amp (sold separately)
3Connect with RCA cables (sold separately)
4To Rear output or subwoofer output
5Rear speaker or subwoofer
Installation
 Important
!Check all connections and systems before final installation.
!Do not use unauthorized parts as this may cause malfunctions.
!Consult your dealer if installation requires drilling of holes or other modifications to the vehicle.
!Do not install this unit where:
—it may interfere with operation of the vehicle.
—it may cause injury to a passenger as a result of a sudden stop.
!The semiconductor laser will be damaged if it overheats. Install this unit away from hot places such as near the heater outlet.
!Optimum performance is obtained when the unit is installed at an angle of less than 60°.
60°
|
! When installing, to ensure proper heat dis- |
|||
|
persal when using this unit, make sure you |
English |
||
|
leave ample space behind the rear panel and |
|||
|
wrap any loose cables so they are not block- |
|||
|
ing the vents. |
|||
|
Leave ample |
5 cm |
||
|
space |
|||
|
5 cm 5cm |
!Use commercially available parts when installing.
How to install
This unit can be installed properly using either of the methods in the below list.
!Installation with the holder
!Installation using the screw holes on the side of the unit
Before installing this unit
1 Remove the trim ring.
1
1 Trim ring
En  9
9

Section
03  Installation
|
2 Insert the supplied extraction keys into |
1 |
|
both sides of the unit until they click into place.
2
3 Pull the unit out of the holder.
Remove the holder.
1
1Holder (factory-supplied part)
Installation with the holder
1Dashboard
2Holder (factory-supplied part)
2 Install this unit.
1
1 Dashboard
1 Install the holder into the dashboard.
After inserting the holder into the dashboard, select and bend the tabs appropriate to the thickness of the dashboard material. (Install this unit as firmly as possible using the top and bottom tabs. To secure this unit, bend the tabs 90 degrees.)
 Installation
3 Attach the trim ring.
1
1 Trim ring
Removing the holder
The procedure is the same as that for Before installing this unit. For details, refer to Before installing this unit on page 9.
1
2
3
4
1If the pawl gets in the way, bend it down.
2Factory radio mounting bracket
3Truss (5 mm × 8 mm) screws
4Dashboard or console
Installation using the screw holes on the side of the unit
% Fastening the unit to the factory radiomounting bracket.
Position the unit so that its screw holes are aligned with the screw holes of the bracket, and tighten the screws at three locations on each side.
10 En
 Loading…

Support for FH-X360UB | Pioneer
- Home
- Products
- Receivers
- Support for FH-X360UB
Support for FH-X360UB
Software & Firmware Downloads
There are no downloads available for this product.
Manuals
Search products on website
Страницы и текст этой инструкции
 Инструкция автомагнитолы Pioneer FH-X360UB
 Информация отображена на картинке
 Информация отображена на картинке
 Информация отображена на картинке
 Информация отображена на картинке
Как использовать наш сайт инструкций OnlineManuals.ru
Наша цель состоит в том, чтобы предоставить вам быстрый доступ к содержанию инструкции для автомагнитолы Pioneer FH-X360UB.
С помощью онлайн просмотра, Вы можете быстро просмотреть содержимое инструкции и найти решение проблемы с автомагнитолы Pioneer FH-X360UB.
Для Вашего удобства
Если листать руководство пользователя автомагнитолы Pioneer FH-X360UB прямо на сайте, не очень удобно для Вас, есть два возможных решения:
• Просмотр в полноэкранном режиме — легко просмотреть руководство пользователя (без загрузки его на свой компьютер), Вы можете использовать режим полноэкранного просмотра.
Для просмотра инструкции пользователя автомагнитолы Pioneer FH-X360UB на полном экране, используйте кнопку «Открыть в Pdf-viewer».
• Загрузка на компьютер — Вы можете также скачать Инструкция автомагнитолы Pioneer FH-X360UB на свой компьютер и сохранить его в файлах.
Многие люди предпочитают читать документы не на экране, а в печатной версии.
Возможность печати руководства пользователя также была предусмотрена на нашем сайте,
и вы можете использовать ее, нажав на иконку «печать» в Pdf-viewer.
Нет необходимости печатать все руководство автомагнитолы Pioneer FH-X360UB, можно выбрать только нужные страницы инструкции.
Section
Using this unit
Using this unit
02
# If you prefer not to set up at this time, turn M.C.
6 Press M.C. to select.
to switch to NO.
English
Notes
4 6 8
3 Press M.C. to select.
! You can set up the menu options from the
system menu and initial menu. For details
4 Follow these steps to set the menu.
about the settings, refer to System menu on
To proceed to the next menu option, you need to
page 6 and Initial menu on page 7.
a
confirm your selection.
! You can cancel set up menu by pressing
SRC/OFF.
LANGUAGE (multi-language)
1 (list)
This unit can display the text information from a
Basic operations
2 Sub information section
compressed audio file even for information em-
3 TA (traffic announcements)
bedded in English, Russian or Turkish.
Turning the unit on
! If the embedded language and the selected
1 Press SRC/OFF to turn the unit on.
4 TP (traffic program identification)
language setting are not the same, text infor-
Turning the unit off
5
(sound retriever)
mation may not display properly.
1 Press and hold SRC/OFF until the unit turns
! Some characters may not be displayed prop-
6 LOC (local seek tuning)
off.
erly.
7
(repeat)
1 Turn M.C. to select the desired setting.
Selecting a source
РУС (Russian)—TUR (Turkish)—ENG (Eng-
1 Press SRC/OFF to cycle between:
8
(random)
lish)
RADIO—CD—USB—AUX
Main information section
2 Press M.C. to confirm the selection.
! USB MTP displays while the MTP connection
! Tuner: band and frequency
is in use.
CLOCK SET (setting the clock)
! RDS: program service name, PTY infor-
Adjusting the volume
9
mation and other literal information
1 Turn M.C. to adjust hour.
1 Turn M.C. to adjust the volume.
! CD player and USB storage device:
2 Press M.C. to select minute.
elapsed playback time and text informa-
3 Turn M.C. to adjust minute.
Note
tion
4 Press M.C. to confirm the selection.
When this unit’s blue/white lead is connected to
the vehicle’s auto-antenna relay control termi-
FM STEP (FM tuning step)
a
Appears when a lower tier of folder or menu
nal, the vehicle’s antenna extends when this
exists.
Use FM STEP to set FM tuning step options (seek
unit’s source is turned on. To retract the anten-
step settings).
na, turn the source off.
1 Turn M.C. to select the FM tuning step.
100 (100 kHz)—50 (50 kHz)
Set up menu
2 Press M.C. to confirm the selection.
1 After installation of this unit, turn the
QUIT appears.
ignition switch to ON.
! The manual tuning step is fixed at 50 kHz.
SET UP appears.
5 To finish your settings, turn M.C. to select
2 Turn M.C. to switch to YES.
YES.
# If you do not use the unit for 30 seconds, the set
# If you prefer to change your setting again, turn
up menu will not be displayed.
M.C. to switch to NO.
En
3
More products and manuals for Car Multimedia Pioneer
| Models | Document Type |
|---|---|
|
GM-D8400M |
User Manual
86 pages |
|
AVIC-F220 |
User Manual
80 pages |
|
DEH-8400BT |
User Manual
36 pages |
|
DVH-P5000UB |
User Manual
85 pages |
|
AVIC-S2 RU |
User Manual
153 pages |
|
AVIC-HD1BT |
User Manual
170 pages |
|
AVIC-S2 RU |
User Manual
84 pages |
|
GM-D8604 |
User Manual
96 pages |
|
AVH-P6000DVD |
User Manual
120 pages |
|
GM-5200T |
User Manual
85 pages |
|
DEH-P9600MP |
User Manual
8 pages |
|
MVH-350BT |
User Manual
156 pages |
|
AVH-X8500BT |
User Manual
8 pages |
|
DEX-P99RS |
User Manual
75 pages |
|
AVH-P7500DVDII |
User Manual
98 pages |
|
AVIC-HD1BT |
User Manual
25 pages |
|
GM-X354 |
User Manual
76 pages |
|
AVIC-F220 |
User Manual
76 pages |
|
DEH-P7000UB |
User Manual
14 pages |
|
AVH-X3600DAB |
User Manual
8 pages |


