
Время на прочтение
4 мин
Количество просмотров 57K
Для настройки и развертывания корпоративных версий Office 2019 в вашей организации, включая Project и Visio (и других программ), используйте средство развертывания Office Deployment Tool (ODT).
Файлы установки для Office 2019 доступны непосредственно из сети CDN Office, т.е. пакеты Windows (MSI) больше не используется.
А по факту это значит, что на одном компьютере у тебя будет одна установка 2019 Office, и невозможно будет установить любой другой пакет Office.
Для примера: приобретен Office 2019 Standard, вы установили его на пользовательский компьютер и планируете установить Skype for Business Basic c помощью установщика MSI – это не будет работать. И, даже если вы выкачаете Skype for Business Click to Run пакет с офиса 365, он тоже не установится. Извините, повторюсь: может быть только одна установка Office 2019 на компьютер, независимо каким способом распространяется дополнительный продукт Office.
И так, вам нужно создать один пакет для развертывания Office 2019.
Загрузите средства развертывания Office из центра загрузки Майкрософт. После получения копии ODT вам необходимо создать файл конфигурации configuration.xml.
Можно создать несколько файлов configuration.xml, который будет использоваться с ODT.
Для чего это нужно: вы можете установить Office 2019 непосредственно из сети CDN Office, или можно загрузить файлы установки из сети CDN Office в папку в локальной сети, например, в общую папку и установить Office 2019 из этого расположения. Можно использовать различные методы для различных наборов компьютеров в вашей организации.
Для создания файла конфигурации рекомендую использовать Office Customization Tool. С помощью этого сайта вы можете сгенерировать файл ответов для Office 365 / Office 2019 с базовыми настройками такими как:
- версия архитектуры офиса;
- продукты, компоненты и языки;
- параметры установки (CDN Office или «Локальный источник»);
- тип лицензирования.
И дополнить его идентификаторами продуктов, поддерживаемых средством развертывания Office Deployment Tool. Вот основные из них:
Skype for Busies
Другие продукты
Официальная ссылка на поддерживаемые продукты (, которую я долго искал).
Установка Office 2019 с помощью средства развертывания Office
После получения ODT и создания конфигурационного файла configuration.xml можно установить Office 2019.
Откройте командную строку с повышенными привилегиями, перейдите к папке, в которой вы сохранили ODT и файл configuration.xml, и введите следующую команду для скачивания инсталляционного пакета в сетевую папку:
- setup /download configuration.xml
далее введите команду:
- setup /configure configuration.xml
для установки Office из сетевой папки или непосредственно из сети CDN Office. Ждите окончания установки Office.
По опыту скажу, что лучше протестировать установку пакета из сети CDN Office, а потом создавать локальный пакет.
На всякий случай привожу полный список команд ODT:
SETUP /download [path to configuration file]

SETUP /configure [path to configuration file]

SETUP /packager [path to configuration file] [output path]

SETUP /customize [path to configuration file]

SETUP /help
Руководство по развертыванию для Office 2019 от Microsoft .
Обратите внимание, что сайт Office Customization Tool уже содержит коды для Project/ Visio 2016, но их нет на сайте Product IDs that are supported by the Office Deployment Tool.
Microsoft такой Microsoft.
Надеюсь, что эта статья сэкономит ваше время.
Дополнение:
Теперь Office Deployment Tool может добавлять продукты в развернутый пакет, для примера: конфигурация добавления Skype for Business 2019 Basic в развернутый Office 2019 Standard.
<Configuration>
  <Info Description="Skype for Business 2019 (64-bit)" />
  <Add OfficeClientEdition="64" Channel="PerpetualVL2019">
    <Product ID="SkypeforBusiness2019Volume" PIDKEY="#####-#####-#####-#####-#####">
      <Language ID="en-us" />
    </Product>
  </Add>
  <RemoveMSI />
  <Display Level="Full" AcceptEULA="TRUE" />
</Configuration>
Windows OS Hub / MS Office / Office 2019 Deployment Guide for Enterprise Using Deployment Tool
The first thing an administrator can come across when deploying Office 2019 in an enterprise environment is that now you cannot download an Office 2019 installation ISO image via Volume Licensing Service Center (VLSC). Office 2019 installation files are now only available on the Office CDN (Content Delivery Network) on the Internet. Another surprise is that Office 2019 distribution is deployed using the Click to Run installer (like Office 365) instead of a usual MSI package. In this article we’ll look on how to prepare and deploy Enterprise version of Office 2019 in your corporate environment (manually, using GPO or SCCM).
Here are the main Office 2019 features you should know prior to deploying it in your company:
- You can install Office 2019 only on Windows 10 or Windows Server 2016/2019;
- Office 2019 installer is based on Click-to-Run (C2R) technology instead of the traditional MSI installer like the previous Office versions;
- You cannot use Office 2019 together with any of the previous Office versions or any of Office 365 apps (for example, you won’t be able to install Skype for Business Click to Run from Office 365);
- Office Deployment Tool (ODT) is now used to configure Office 2019 installation settings instead of the Office Customization Tool (OCT);
- The Office 2019 package is always installed on the system drive.
Before deploying Office 2019, get the Office product key from your account on the VLSC website (it may be a KMS host key or a MAK).
To deploy Office 2019 using Click-to-Run, you will need a special tool: Microsoft Office Deployment Tool – ODT (it is also used to deploy Office 365 ProPlus).
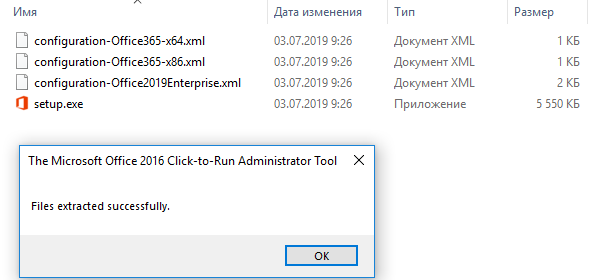
Download the Microsoft Office Deployment Tool (https://www.microsoft.com/en-us/download/details.aspx?id=49117), run the officedeploymenttool_12325-20288.exe and extract the contents of Office Click-to-Run Administrator Tool to a local folder on your computer.
As you can see, there are three sample XML files in the folder: configuration-Office365-x64.xml, configuration-Office365-x86.xml and configuration-Office2019Enterprise.xml. The setup.exe is used to download distribution files and run the Office package installation on a computer.

In this case, we do not need the Office 365 configuration files. Let’s look at configuration-Office2019Enterprise.xml file that contains the configuration example of Office 2019 Enterprise for the Volume License channel. Here is the XML file structure:
<Configuration>
 <Add OfficeClientEdition="64" Channel="PerpetualVL2019">
  <Product ID="ProPlus2019Volume">
   <Language ID="en-us" />
  </Product>
 <Product ID="VisioPro2019Volume">
   <Language ID="en-us" />
 </Product>
 <Product ID="ProjectPro2019Volume">
   <Language ID="en-us" />
  </Product>
  </Add>
 <!-- <RemoveMSI All="True" /> -->
 <!-- <Display Level="None" AcceptEULA="TRUE" /> -->
 <!-- <Property Name="AUTOACTIVATE" Value="1" /> -->
</Configuration>
Let’s consider the main parameters:
OfficeClientEdition="64"– install the 64-bit version of Office 2019;Channel="PerpetualVL2019– installation of Office 2019 with Volume License;<Language ID="en-us" />— install English edition of Office. To install the German version, you must specify de-de here;<!-- <RemoveMSI All="True" /> -->— prior to Office 2019 installation, remove all previous Office versions installed through Windows MSI. This parameter is commented out, but before you deploy Office 2019, you must enable it to prevent deployment errors;<Product ID="ProPlus2019Volume" PIDKEY="" >— you can specify the components of your Office package (ProPlus2019Volume, Standard2019Volume, ProjectPro2019Volume, ProjectStd2019Volume, VisioPro2019Volume, VisioStd2019Volume) to be installed. Specify your enterprise key (usually a MAK key) in the PIDKEY=”” parameter;- Using the
<ExcludeApp ID = "PowerPoint" />parameter you can install only selected Office apps (by default, the C2R installer installs all Office applications).
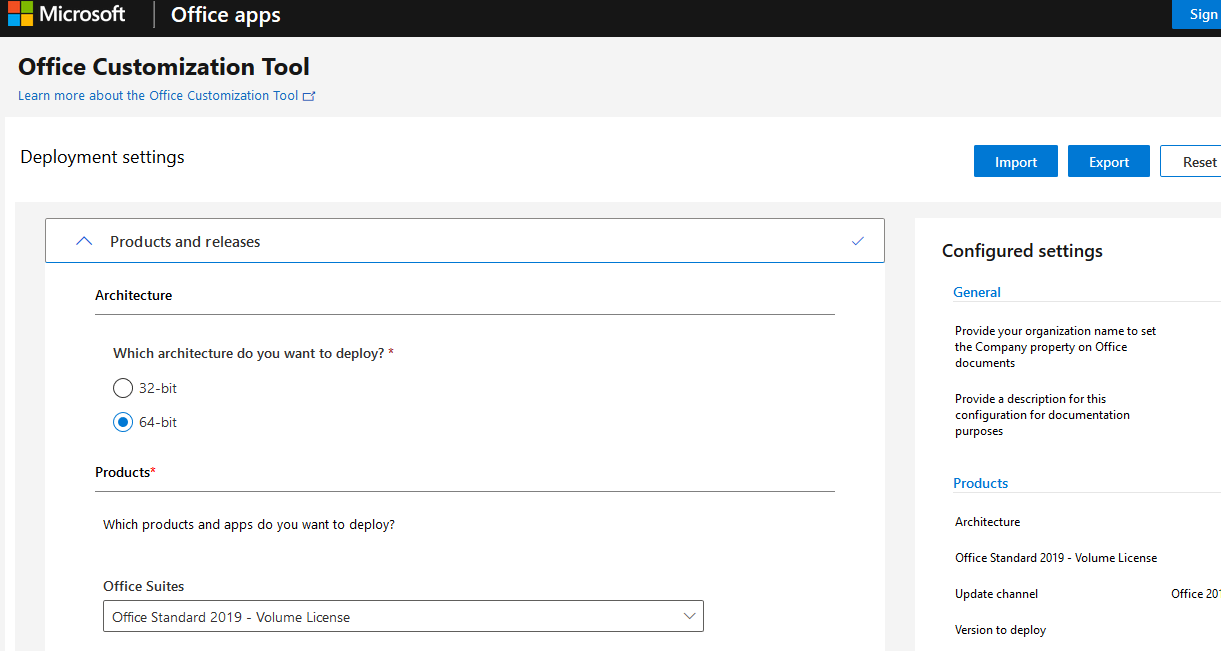
To make it more convenient for the administrators, Microsoft offers a simple graphic online wizard to create an XML file to deploy Office 2019/365 — https://config.office.com/.
To generate an XML file for Office 2019, select:
- Office Suites: Office Standard 2019 – Volume License
- Update channel: Office 2019 Perpetual Enterprise
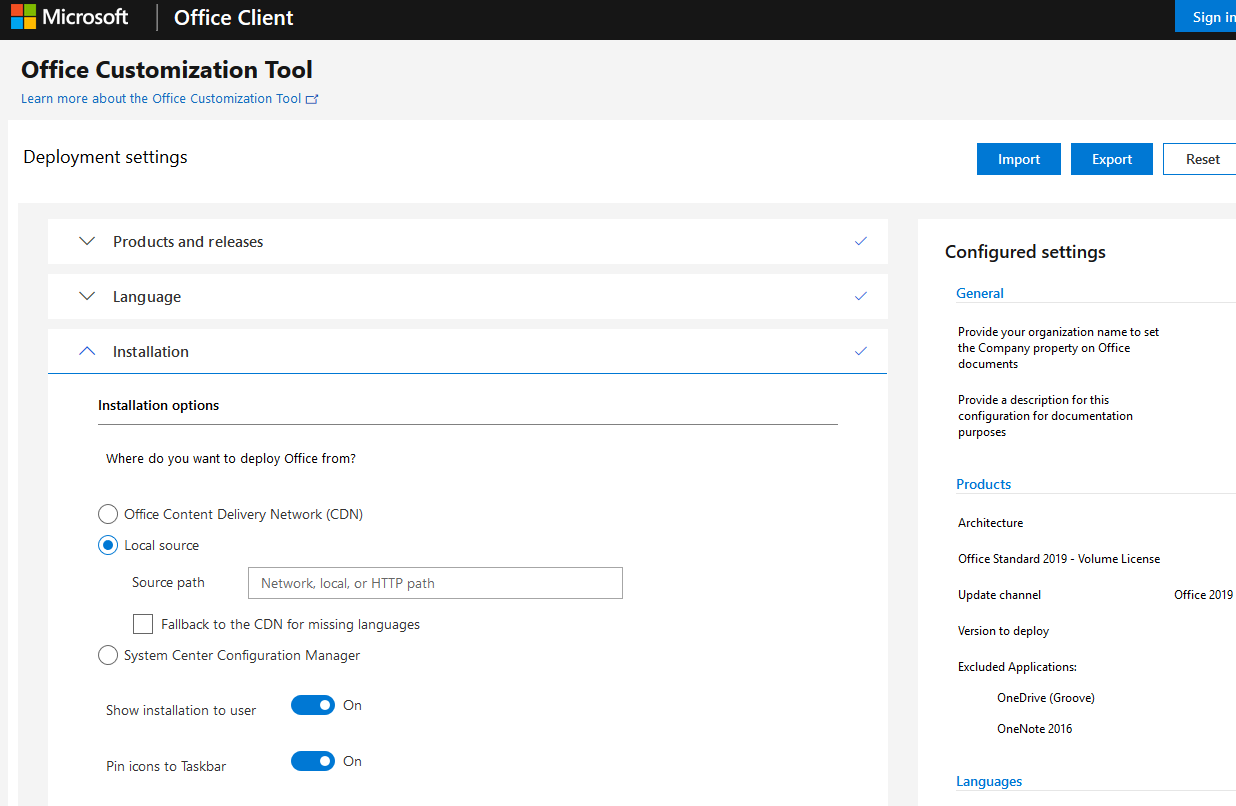
Also, you may specify that Office installation files must be taken from a shared folder in your local network instead of Microsoft CDN (Installation -> Local source -> Source path).
After you have filled in all forms, click Export, download the XML file and save in to the directory with the Office Deployment Tool.
After you have prepared the XML file, you can download the distribution files to install Office 2019. To do it, run this command:
Setup.exe /download configuration-Office2019Enterprise.xml

The distribution is downloaded in quiet mode. You will need the Internet access, files will be downloaded from the CDN Office network.
After the download is complete, the 2GB Office folder will appear in the Microsoft Office Deployment Tool directory (it contains CAB and DAT files to install Office 2019).
You can use this package to install Office 2019 on user computers. To make every computer use the local copy of Office 2019 installation files instead of downloading them from CDN, specify the path to the folder with Office installation files in the XML file. It is easier to copy the folder to your shared network folder. For example:
<Add SourcePath="\\mun-fs01\Apps\Office2019" OfficeClientEdition="64" Channel="PerpetualVL2019">
We recommend that you test the installation package directly from Office CDN cloud and, if successful, create a local package.
Now you can copy your Microsoft Office Deployment Tool with the XML files and Office 2019 distribution to your shared network folder or to the SCCM server.
To run Office 2019 installation, just run this command:
Setup.exe /configure configuration-Office2019Enterprise.xml

After Office 2019 Enterprise or any of its apps have been installed, you can activate the product using MAK, if you have not specified it in your XML file (File -> Account -> Product Information -> Change Product Key), or using your KMS server (How to install a KMS server to activate Office 2019?).
To further configure Office settings on user computers, you can use the Office administrative templates for GPO.
Первое, с чем может столкнуться администратор при развертывании Office 2019 в компании – теперь нельзя скачать установочный образ Office 2019 на сайте лицензирования Volume Licensing Service Center (VLSC). Установочные файлы Office теперь доступы в Интернете в сети Office CDN (Content Delivery Network). Другая неожиданность, дистрибутив Office 2019 теперь поставляется не в виде привычного MSI пакета, а распространяется через установщик Click to Run (как и Office 365). В этой статье мы рассмотрим особенности подготовки и развертывания корпоративной версии Office 2019 в сети предприятия (вручную, с помощью GPO или SCCM).
Основные особенности Office 2019, о которых нужно помнить перед началом развертыванием пакета в компании:
- Office 2019 можно установить только на Windows 10 или Windows Server 2016/2019;
- Установщик Office 2019 основан на технологии «Нажми и работай / Click-to-Run (C2R)», а не на классическом MSI установщике (как это было в предыдущих версиях Office);
- Нельзя одновременно использовать на компьютере Office 2019 и предыдущую версию Office или любой пакет из Office 365 (например, вы не сможете установить Skype for Business Click to Run из Office 365);
- Для настройки параметров установки Office 2019 теперь используется Office Deployment Tool (ODT) вместо привычной Office Customization Tool (OCT);
- Установка всегда выполняется на системный диск.
Перед началом развертывания Office 2019, скопируйте из своего личного кабинета на сайте VLSC ключ для установки продуктов из комплекта Office (это может быть ключ для активации KMS сервера, или MAK ключ многократной установки).
Для развертывания Office 2019 по технологии Click-to-Run нужно использовать специальную утилиту – средство развёртывания Microsoft Office Deployment Tool – ODT (также он используется для развертывания Office 365 ProPlus).
Скачайте Microsoft Office Deployment Tool (https://www.microsoft.com/en-us/download/details.aspx?id=49117), запустите файл officedeploymenttool_11901-20022.exe и распакуйте содержимое Office Click-to-Run Administrator Tool в локальный каталог на компьютере.
Как вы видите, в каталоге установке есть три XML файла c образцом конфигурации установки: configuration-Office365-x64.xml, configuration-Office365-x86.xml и configuration-Office2019Enterprise.xml. Программа setup.exe используется для запуска получения дистрибутива и запуска установки пакета Office на клиенте.
В данном случае нас не интересуют файлы конфигурации для Office 365 (в чем отличия Office 2016/2019 от Office 365). Перейдем к рассмотрению XML файла configuration-Office2019Enterprise.xml в котором содержится пример конфигурации Office 2019 Enterprise для канала Volume License. Рассмотрим структуру XML файла:
<Configuration>
<Add OfficeClientEdition="64" Channel="PerpetualVL2019">
<Product ID="ProPlus2019Volume">
<Language ID="en-us" />
</Product>
<Product ID="VisioPro2019Volume">
<Language ID="en-us" />
</Product>
<Product ID="ProjectPro2019Volume">
<Language ID="en-us" />
</Product>
</Add>
<!-- <RemoveMSI All="True" /> -->
<!-- <Display Level="None" AcceptEULA="TRUE" /> -->
<!-- <Property Name="AUTOACTIVATE" Value="1" /> -->
</Configuration>
Рассмотрим основные параметры:
-
OfficeClientEdition="64"
– установка 64 битной версии Office 2019; -
Channel="PerpetualVL2019
– установка Office 2019 по системе корпоративного лицензирования (Volume License); -
<Language ID="en-us" />
— установка английской редакции Office. Для формирования и установки русской версии нужно указать ru-ru; -
<!-- <RemoveMSI All="True" /> -->
— перед установкой Office 2019 необходимо удалить все старые версии Office, установленные через Windows MSI. Данный параметр закомментирован, но для перед развёртыванием Office 2019 его нужно включить, иначе вы столкнетесь с ошибками при развертывании; -
<Product ID="ProPlus2019Volume" PIDKEY="" >
— вы можете указать компоненты пакета Office (ProPlus2019Volume, Standard2019Volume, ProjectPro2019Volume, ProjectStd2019Volume, VisioPro2019Volume, VisioStd2019Volume), которые нужно установить. В параметре PIDKEY=»» можно указать ваш корпоративный ключ (обычно это MAK ключ); - С помощью директивы вид <ExcludeApp ID=»PowerPoint» /> вы можете устанавливать только выбранные приложения Office (по умолчанию C2R установщик ставит все приложения пакета Office).
Более подробно о параметрах XML файла установки Office 2019 в статье https://docs.microsoft.com/en-us/deployoffice/office2019/deploy#create-the-configurationxml.
После того, как вы сформировали XML файл, вы можете скачать дистрибутив для установки Office 2019. Для этого выполите команду:
Setup.exe /download configuration-Office2019Enterprise.xml

Загрузка дистрибутива выполняется в тихом режиме. Для загрузки нужен доступ в Интернет, файлы загружаются из сети CDN Office.
После окончания загрузки в каталоге Microsoft Office Deployment Tool появится каталог Office (содержит cab и dat файлы для установки Office 2019) размером около 2 Гб.
Полученный пакет можно использовать для установки Office 2019 на компьютеры пользователей. Но, чтобы каждый компьютер не загружал установочные файлы Office 2019 из сети CDN, а пользовался локальной копией, нужно в XML файле указать путь к каталогу с файлами установки Office. Проще всего их разместить в общей сетевой папке. Например:
<Add SourcePath="\\srv1\Distr\Apps\Office2019" OfficeClientEdition="64" Channel="PerpetualVL2019">
Обычно сначала рекомендуется протестировать установку пакета из сети CDN Office, и только после этого создавать локальный пакет.
Для удобства администраторов Microsoft предлагает воспользоваться простым графическим онлайн-мастером для создания XML файла при развёртывании Office 2019/365 — https://config.office.com/.
Для генерации XML файла для Office 2019 выберите:
- Office Suites: Office Standard 2019 – Volume License
- Update channel: Office 2019 Perpetual Enterprise
Так же вы можете указать, что установочный файлы Office нужно получать не из CDN сети Microsoft, а из сетевой папки внутри локальной сети.
После того, как вы заполнили все формы, нажмите Export, скачайте XML файл и поместите его в каталог с Office Deployment Tool.
Теперь вы можете скопировать каталог Microsoft Office Deployment Tool с xml файлами и дистрибутивом Office 2019 в сетевой каталог или на SCCM сервер.
Для начала установки Office2019 вам достаточно выполнить команду:
Setup.exe /configure configuration-Office2019Enterprise.xml
После окончания установки Office 2019 Enterprise или любого его пакета, вы можете активировать продукт с помощью MAK ключа многократной установки, если вы не указали его в XML файле (Файл -> Учетная запись -> Сведениями о продукте -> Изменить ключ продукта) или с помощь KMS сервера (как установить KMS сервер для активации Office 2019).
Для дальнейшей настройки параметров Office на компьютерах пользователей вы можете использовать административные шаблоны GPO.
by: ,
published: Nov 14, 2019,
updated: Dec 31, 2019, in
Contents
- Download the Deployment Tool
- Create the Configuration File
- Office 2019 Configuration File Basics
- Sample Office 2019 Configuration File
- Download and Install Office 2019 with the Deployment Tool
- Enter the License Key
- Alternative: Office 365
- More Information
Installing Office 2019 as a Microsoft MPN silver or gold partner is a little more complicated than it used to be. Partner Center has keys but does not directly offer installation media to download. This article lists the necessary steps to get Office 2019 on your machine(s) without assigning Office 365 licenses.
Download the Deployment Tool
- In Partner Center, browse to the entry for Office 2019.
- Switch the OS Type dropdown to 32/64 bit
- You should now see a download link for the Office 2019 Deployment Tool
- Run the downloaded deployment tool, specifying a folder in a temporary directory when asked to do so
Create the Configuration File
Office 2019 Configuration File Basics
In the next steps, you will use the deployment tool to download the version of Office 2019 that matches your license, language, and other requirements. The deployment tool uses XML configuration files as its input. The tool comes with three files that can serve as a basis for volume license and Office 365 customers. However, you may want to adjust the settings and create your own XML file for the next steps. Consult Microsoft’s documentation for the customization.
Please note that MPN partner licenses are volume licenses, so you need to use the following in your configuration: Channel="PerpetualVL2019" and Product ID="ProPlus2019Volume".
Sample Office 2019 Configuration File
For your reference, here is the file I used to download and install the US English version of Office 2019 x64 with German proofing tools:
<Configuration>
  <Add SourcePath="OfficeSources" OfficeClientEdition="64" Channel="PerpetualVL2019">
      <Product ID="ProPlus2019Volume">
         <Language ID="en-us" />
      </Product>
      <Product ID="ProofingTools">
        <Language ID="de-de" />
      </Product>
  </Add>
  <RemoveMSI />
  <Display Level="None" AcceptEULA="TRUE" />
</Configuration>
Download and Install Office 2019 with the Deployment Tool
- Navigate to the temporary directory you specified above
- Download the installation files for the Office 2019 version and language specified in the configuration file:
setup.exe /download configuration.xml
(this is going to take a while, even on a fast internet connection) - Install Office 2019 from the installation point specified in the configuration file:
setup.exe /configure configuration.xml
Enter the License Key
You can specify your Office 2019 license key in the configuration file. If you do not want to do that, start any of the Office applications and complete the activation.
Alternative: Office 365
Microsoft MPN partnerships also include licenses for Office 365. The silver partnership level, for example, comes with 25 licenses for Office 365 E3. You can assign them through this Partner Portal page. With individual user assignments in place, each employee can download and install Office 365 from their personal account page.
More Information
- Microsoft Docs: Deploy Office 2019 (for IT Pros)
About the Author
Helge Klein (ex CTP, MVP and vExpert) worked as a consultant and developer before founding vast limits, the uberAgent company. Helge applied his extensive knowledge in IT infrastructure projects and architected the user profile management product whose successor is now available as Citrix Profile Management. Helge is the author of the popular tools Delprof2 and SetACL. He has presented at Citrix Synergy, BriForum, E2EVC, Splunk .conf and many other events. Helge is very active in the IT community and has co-founded Virtualization Community NRW (VCNRW).
Read more
Today, QTit will guide you to download, install and deploy Click-to-Run versions of Office using the Office Deployment Tool (command-line tool).
Specifically in this article, I will guide in detail how to download and install Office Standard 2019.
➤ Download & Install Microsoft 365 Apps by Office Deployment Tool
➤ Fixed error code «Your Microsoft Exchange administrator has blocked the version of Outlook»
➠ Join QTitHow fanpage to be inspired by unique IT stories and share exciting technology experiences with a passionate IT community.
How to do:
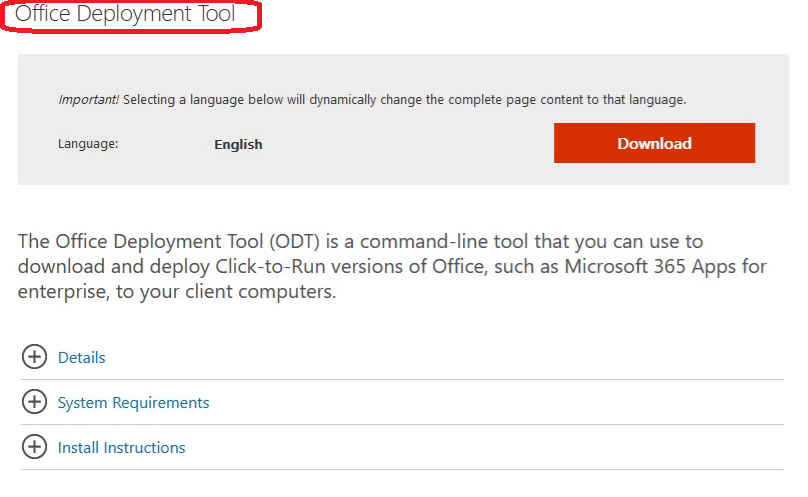
Step 1: Download the Office Deployment Tool at here.
(Note: Operating systems that support this Tool: Windows 10, Windows 8.1, Windows Server 2016, Windows Server 2019)
Step 2: Run Office Deployment Tool file that downloaded. After the installation is complete, find the folder containing this toolkit. As below:
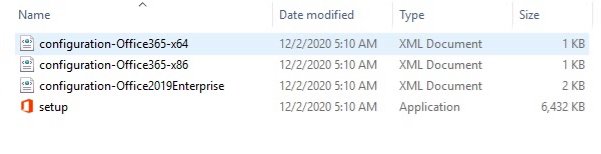
In this folder you will easily see the following files:
- Setup file
- Some XML configuration files. Here are some pre-built XML configuration files from Microsoft. You can use it to download and install Office 365, Office 2019 Enterprise.
However, in this article I will guide you to download and install the Office Standard 2019 version. Therefore, we must have standard XML configuration file to do it.
Step 3: Create a configuration file (.XML) for Office Standard 2019 with the instructions as below:
- Create a file with the name «config» and the extension «.xml»
- Insert the content into the newly created «config» file as follows:
<Configuration ID = «fc26921b-cd2c-478f-9267-4d8cc9fadffb»>
<Add OfficeClientEdition = «64» Channel = «PerpetualVL2019» ForceUpgrade = «TRUE»>
<Product ID = «Standard2019Volume» PIDKEY = «12345-67890-12345-67890-12345»>
<Language ID = «en-us» />
<ExcludeApp ID = «Groove» />
<ExcludeApp ID = «OneDrive» />
<ExcludeApp ID = «OneNote» />
<ExcludeApp ID = «Publisher» />
</Product>
</Add>
<Property Name = «SharedComputerLicensing» Value = «0» />
<Property Name = «PinIconsToTaskbar» Value = «TRUE» />
<Property Name = «SCLCacheOverride» Value = «0» />
<Updates Enabled = «TRUE» />
<RemoveMSI />
</Configuration>
If you cannot create this configuration file yourself, you can download it here to use it.
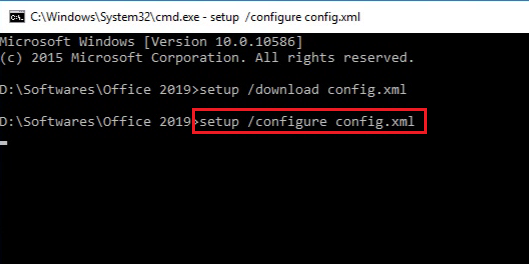
Step 4: On the folder path containing the setup.exe file, type CMD. The purpose of this is to help you launch the CMD in the correct path. As the image below:
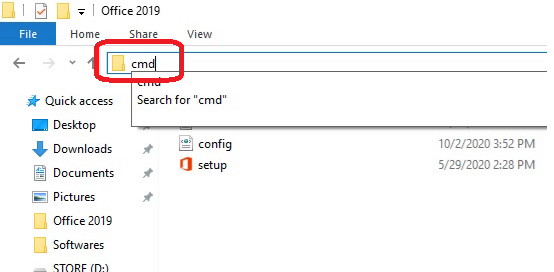 Run cmd on the link containing the setup file
 The command-line window appears with a link pointing to the folder containing the setup file
Step 5: Download Office Standard 2019 by typing the following command on the command-line window
setup /download config.xml
Note: Do not execute any other commands until the download command has finished. To realize this, see the following image:
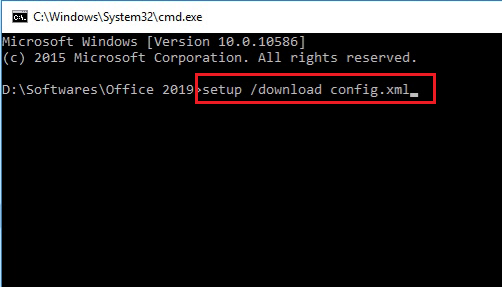 The download command in progress will look like this!
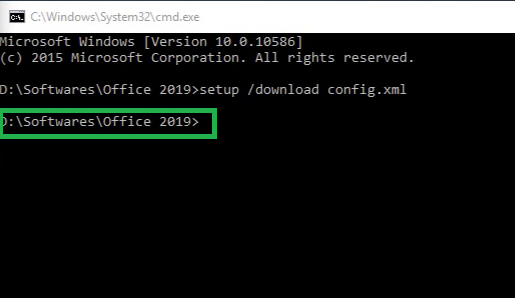 Download command DONE!
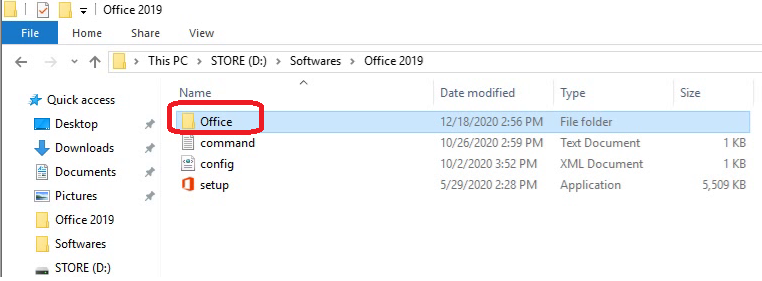
Office Folder after the download is completed (About 2GB of space)
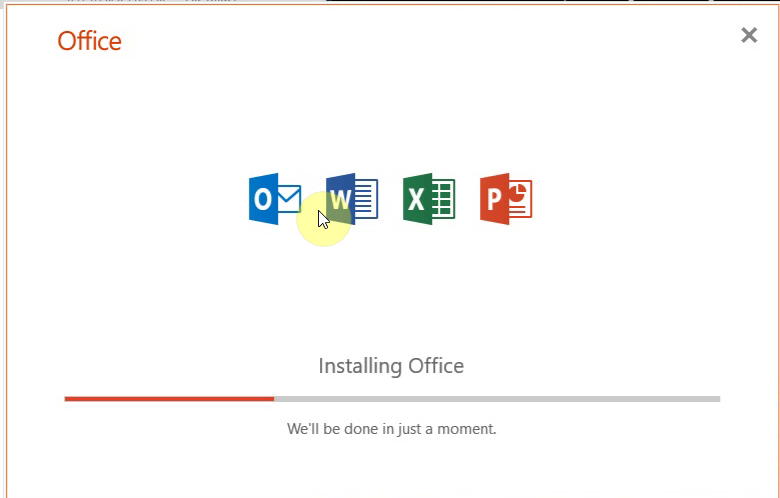
Step 6: After the download command is finished, install Office Standard 2019 using the following command on the available command-line window:
setup /configure config.xml
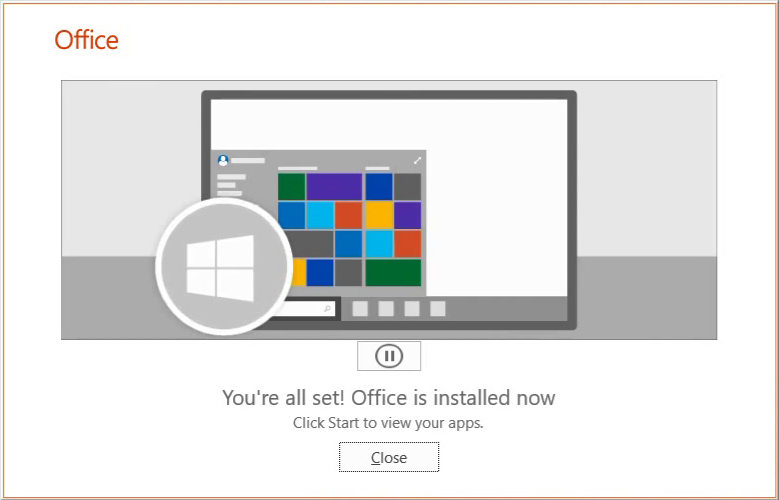
Now the installation will be done, you just need to wait until the process is finished.
P/s: If you want to download and install Office 365 or Office 2019 Enterprise, the way to do it will be the same, except you change the corresponding configuration file name (.XML) on the command-line command.
Conclusion:
Maybe at first you were quite surprised by Microsoft’s new way of downloading and installing, but it is really convenient when you deploy and install Office on many client computers in small and medium enterprises. In addition, using this tool is extremely safe & secure.
If you have any difficulties or questions, please comments below.
In addition, if you have any problems with your computer, please contact us directly through the QTitHow fanpage. We will try to help and answer you as soon as possible. Thank you!
Tags:
Office Deployment Tool, office deployment tool configuration xml, office 2019 standard download deployment tool, Deploy Office 2019, office deployment tool 2019, office deployment tool configuration, deployment guide for office 2019, office 2019 deployment tool download, Customize Your Office Installation With the Office Deployment Tool
Maybe you are interested!
➤ Download & Install Microsoft 365 Apps by Office Deployment Tool
➤ Fixed error code «Your Microsoft Exchange administrator has blocked the version of Outlook»
If you’re familiar with deploying Office 2016 or any previous version, then the first big change when looking into Office 2019 or Office 365 is that there is no longer an MSI installer. Office 2019/Office 365 is now only available as a ‘Click-to-Run’ installation, which means we’ll need to change how we package, deploy and update Office 2019 or Office 365. Links to sites used in this post:
- Download the Office Deployment Tool (ODT) from Microsoft here.
- Download Office 2019/365/2016 ADMX files for Group Policy
- Office 365 Client Configuration Service
Configuration of the Office 2019/Office 365 install is now done via an XML file. You can generate one on the Office 365 Client Configuration Service, however before you do you’ll need to be aware of some of the changes regarding how updates are handled in Office 2019/Office 365. If you currently use WSUS (Windows Server Update Services) then you’ll see that there’s an entry for Office 2019 and Office 365 in the product list, however in my testing this doesn’t actually do anything. Updates for Office 2019/Office 365 are handled completely differently due to the Click-to-Run installation. To manage updates, you can use SCCM, a local network path, or simply download the updates from the Office CDN (Content Distribution Network). When configuring your Office configuration XML file, you can specify the location that Office should get updates from. I’m going to be using a local network path for this post. Once Office is installed it will periodically check for updates from the location specified. You can keep this location up to date by using the Office Deployment Tool which I cover later in this post. Office 2019/Office 365 updates separately from Windows update, you can see all the Office scheduled tasks in Task Scheduler, under Microsoft/Office.
Preparation for Deployment of Office 2019/Office 365
- The first thing to do is to download the Office Deploy Tool (ODT) from Microsoft.
- Now we need to generate an Office configuration file using the Office 365 Client Configuration Service.
- Below is the configuration file I generated that I’m using for this walkthrough. With this file I will be:
- Deploying a volume licensed Office 2019 64-bit with Visio and Project Professional 2019.
- I’m excluding OneDrive, Groove, and OneNote.
- The Office 2019 installer will automatically remove older versions of Office applications.
- Licensing and activation will be via an Office 2019 KMS key and Active Directory-based activation.
|
|
Downloading Office 2019/Office 365
Once you have your Office configuration .XML file and the Office Deployment Tool we’re ready to download Office ready to install.
- Create a folder for your Office installation. For this example, I’m deploying Office 2019 64 bit, so I’ll create a folder called Office-19-x64.
- Once you’ve created the folder, put the Office Deployment Tool and Office configuration .XML in the folder.
- Open up a command line prompt and make sure the current directory is inside the Office folder you created.
- Run the following command to download Office from the Office CDN:
|
|
The Office Deployment Tool will download the Office products configured in the configuration file. If you specified a local network path for the install source location, the files will be downloaded to that location. The Office Deployment Tool will create a folder called Office. Whenever you run the above command, the Office Deployment Tool will sync the version of Office in the download location with the Office CDN for the configured version in the configuration file.
Installing Office 2019/Office 365
To install Office, we’ll need to run the Office Deployment Tool once again from the command line. If you haven’t already you should put the Office files downloaded previously, the Office Deployment Tool and the configuration file all in the same folder. Keep the downloaded Office files in the folder called Office.
On the computer you wish to deploy Office to, run the following command:
|
|
After some time, Office should be installed as per your preferences set in the configuration file.
Group Policy for Office 2019/Office 365
The ADMX files for Office 2019 and Office 365 are backwards compatible with Office 2016 and are available for download from Microsoft here.
If you have any questions or comments please leave them below.
-Mike