
Инструкции
| 1 | «Английский, Французский, Немецкий, Голландский (Краткое руководство пользователя)» | B59-2061-00_E.pdf | Загрузить | 1 783 кб |
| 2 | «Итальянский, Испанский, Португальский, Русский (Краткое руководство пользователя)» | B59-2062-00_E.pdf | Загрузить | 1 805 кб |
| 3 | Английский | IM329_Ref_E_en_00.pdf | Загрузить | 5 320 кб |
| 4 | Венгерский | IM329_Ref_E_hu_00.pdf | Загрузить | 5 273 кб |
| 5 | Голландский | IM329_Ref_E_nl_00.pdf | Загрузить | 5 253 кб |
| 6 | Испанский | IM329_Ref_E_es_00.pdf | Загрузить | 5 256 кб |
| 7 | Итальянский | IM329_Ref_E_it_00.pdf | Загрузить | 5 271 кб |
| 8 | Немецкий | IM329_Ref_E_de_00.pdf | Загрузить | 5 074 кб |
| 9 | Польский | IM329_Ref_E_pl_00.pdf | Загрузить | 5 290 кб |
| 10 | Португальский | IM329_Ref_E_pt_00.pdf | Загрузить | 5 254 кб |
| 11 | Русский | IM329_Ref_E_ru_00.pdf | Загрузить | 5 345 кб |
| 12 | Словенский | IM329_Ref_E_sl_00.pdf | Загрузить | 5 220 кб |
| 13 | Украинский | IM329_Ref_E_uk_00.pdf | Загрузить | 5 339 кб |
| 14 | Французский | IM329_Ref_E_fr_00.pdf | Загрузить | 5 278 кб |
| 15 | Хорватский | IM329_Ref_E_hr_00.pdf | Загрузить | 5 167 кб |
| 16 | Чешский | IM329_Ref_E_cs_00.pdf | Загрузить | 5 278 кб |
| 17 | Шведский | IM329_Ref_E_sv_00.pdf | Загрузить | 5 213 кб |
Инструкция по эксплуатации
Инструкция по эксплуатации (5,22 Mb)
Микропрограммное обеспечение
Список совместимых устройств iPod и iPhone
С помощью данного сайта можно проверить совместимость ресивера KENWOOD и адаптера интерфейса iPod.
Выберите iPod/iPhone и ресивер KENWOOD. Отобразятся информация о совместимости и модель адаптера, необходимая для подключения.
KNA-13HC Высокоскоростной HDMI-кабель
KCA-HD100 Высокоскоростной HDMI-кабель
KCA-iP103 USB-кабель для подключения iPod (аудио)
Кабель Lightning/USB Кабель Lightning/USB
Bluetooth Для прослушивания музыки через Bluetooth
KCA-iP302 Прямой видео/аудиокабель iPhone и iPod для визуальной модели KENWOOD
KCA-iP212 Прямой видео/аудиокабель iPhone и iPod для визуальной модели KENWOOD
KCA-iP202 Прямой видео/аудиокабель iPhone и iPod для визуальной модели KENWOOD
KCA-iP22F Прямой видео/аудиокабель iPhone и iPod для визуальной модели KENWOOD
KCA-iP102 Прямой аудиокабель iPhone и iPod для аудиомодели KENWOOD
KCA-iP301V Прямой видео/аудиокабель iPhone и iPod для визуальной модели KENWOOD
KCA-iP240V Прямой видео/аудиокабель iPhone и iPod для визуальной модели KENWOOD
KCA-iP101 Прямой аудиокабель iPhone и iPod для аудиомодели KENWOOD
KCA-iP300V Прямой видео/аудиокабель iPod для визуальной модели KENWOOD
KCA-iP100 Прямой аудиокабель iPod для аудиомодели KENWOOD
KCA-iP200 Прямой аудиокабель iPod для аудиомодели KENWOOD
KCA-iP500 Интерфейсный аудионабор iPod
KNA-i909 Интерфейсный видео/аудиокабель iPhone 3G/iPod для навигационной модели KENWOOD (Япония)
KNA-i990 Интерфейсный видео/аудиокабель iPod для навигационной модели KENWOOD (Япония)
KNA-i770 Интерфейсный видео/аудиокабель iPod для навигационной модели KENWOOD (Япония)
KNA-i77 Интерфейсный видео/аудиокабель iPod для навигационной модели KENWOOD (Япония)
Подключение iPod/iPhone
Вы не можете подключить iPod в качестве источника.
Подключайте следующим образом:
Для прослушивания музыки и просмотра видео
KNA-13HC + KCA-iP103
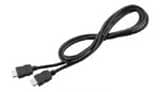 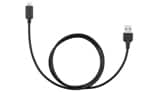 |
・Высокоскоростной HDMI-кабель
|

KNA-13HC
|
Высокоскоростной HDMI-кабель・Подключите устройство к iPod/iPhone с помощью рекомендуемого KENWOOD HDMI-кабеля и цифрового AV-адаптера Lightning фирмы Apple, кабель Lightning/USB (принадлежность iPod/iPhone).
・Требуются также настройки Bluetooth. |

KCA-HD100 + KCA-iP103
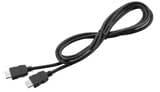 |
・Высокоскоростной HDMI-кабель
|

KCA-HD100
|
Высокоскоростной HDMI-кабель・Подключите устройство к iPod/iPhone с помощью рекомендуемого KENWOOD HDMI-кабеля и цифрового AV-адаптера Lightning фирмы Apple, кабель Lightning/USB (принадлежность iPod/iPhone).
・Требуются также настройки Bluetooth. |

KCA-iP302
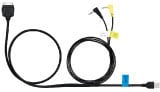 |
Прямой видео/аудиокабель iPhone и iPod для визуальной модели KENWOOD |
KCA-iP212
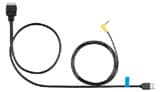 |
Прямой видео/аудиокабель iPhone и iPod для визуальной модели KENWOOD |
KCA-iP202
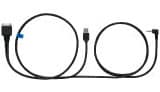 |
Прямой видео/аудиокабель iPhone и iPod для визуальной модели KENWOOD |
KCA-iP22F
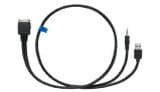 |
Прямой видео/аудиокабель iPhone и iPod для визуальной модели KENWOOD |
KCA-iP301V
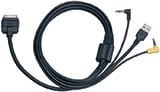 |
Прямой видео/аудиокабель iPhone и iPod для визуальной модели KENWOOD |
KCA-iP240V
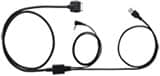 |
Прямой видео/аудиокабель iPhone и iPod для визуальной модели KENWOOD |
KCA-iP300V
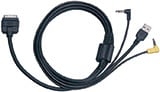 |
Прямой видео/аудиокабель iPod для визуальной модели KENWOOD |
KNA-i909
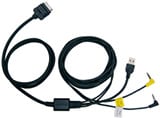 |
Интерфейсный видео/аудиокабель iPhone 3G/iPod для навигационной модели KENWOOD (Япония) |
Для прослушивания музыки
Включите модель
KCA-iP103
|
USB-кабель для подключения iPod (аудио) |
Кабель Lightning/USB
 |
Кабель Lightning/USB・ Во избежание повреждения кабеля Lightning/USB (принадлежность iPod/iPhone) от чрезмерного нагревания не храните его в автомобиле. |
Bluetooth
 |
Для прослушивания музыки через Bluetooth.・Для подключения требуются настройки Bluetooth. |
KCA-iP102
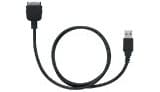 |
Прямой аудиокабель iPhone и iPod для аудиомодели KENWOOD |
KCA-iP101
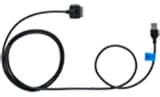 |
Прямой аудиокабель iPhone и iPod для аудиомодели KENWOOD |
KCA-iP100
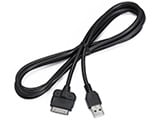 |
Прямой аудиокабель iPod для аудиомодели KENWOOD |
KCA-iP200
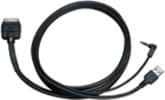 |
Прямой аудиокабель iPod для аудиомодели KENWOOD |
KCA-iP500
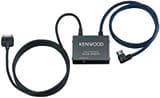 |
Интерфейсный аудионабор iPod
ЗамечанияОбщие примечания・Перед соединением KCA-iP500 с управляющим устройством KENWOOD, загрузите в ваш iPod только самую последнюю версию программного обеспечения с официального сайта Apple. ・Отображение информации зависит от возможностей дисплея головного устройства. ・В зависимости от подключенного управляющего устройства название источника может быть отображено как «»EXT-MEDIA»», «»*-MEDIA»» или CD-чейнджер («»CD-CH»» и т.д.). ・Функция DNPS (Установка названия диска) управляющего устройства невозможна с KCA-iP500. ・После подключения вашего iPod к KCA-iP500, первой песней в списке воспроизведения станет та, которую вы проигрывали при последнем использовании вашего iPod. На дисплее будет отображено «RESUMING» (Возобновление воспроизведения), поскольку правильное название песни и ее номер не могут быть указаны. |
 Вниз
Вниз Вверх
Вверх Вниз
Вниз Вверх
ВверхKNA-i990
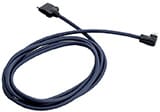 |
Интерфейсный видео/аудиокабель iPod для навигационной модели KENWOOD (Япония) |
KNA-i770
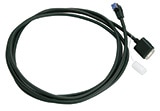 |
Интерфейсный видео/аудиокабель iPod для навигационной модели KENWOOD (Япония) |
KNA-i77
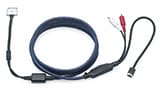 |
Интерфейсный видео/аудиокабель iPod для навигационной модели KENWOOD (Япония) |
Список функций iPod
| Адаптер интерфейса iPod |
Включите модель KNA-13HC KCA-HD100 KCA-iP103 Кабель Lightning/USB Bluetooth KCA-iP302 KCA-iP212 KCA-iP202 KCA-iP22F KCA-iP102 KCA-iP301V KCA-iP240V KCA-iP101 KCA-iP300V KCA-iP100 KCA-iP200 KNA-i909 KNA-i990 KNA-i770 KNA-i77 |
KCA-iP500 |
|
|---|---|---|---|
| Основные операции | |||
| Метки iTunes | HD Radio™ *1 | ||
| RBDS FM | |||
| SiriusXM *1 | |||
| Режим контроля приложения и iPod/ Режим контроля iPod вручную |
|||
| Эквалайзер iPod | |||
| Поиск по алфавиту | |||
| Пропуск при поиске | |||
| Связанный поиск | |||
| Внешний режим |
・да = функция поддерживается и подтверждена.
нет = Функция не поддерживается приемником KENWOOD.
Внимание
Use of the Made for Apple badge means that an accessory has been designed to connect specifically to the Apple product(s) identified in the badge, and has been certified by the developer to meet Apple performance standards. Apple is not responsible for the operation of this device or its compliance with safety and regulatory standards.
Apple, iPhone, iPod, iPod classic, iPod nano, iPod touch, and Lightning are trademarks of Apple Inc., registered in the U.S. and other countries. iPod mini is a trademark of Apple Inc.
 К началу страницы
Список совместимости устройств Bluetooth KENWOOD
На данном веб-сайте предоставлена информация о совместимости Вашего мобильного телефона и устройства KENWOOD.
Выберите свою модель KENWOOD и модель своего мобильного телефона. Будет отображена информация о совместимости.
Управляющие устройства, совместимые с устройством KENWOOD Bluetooth
| Пульт ДУ | Bluetooth | KCA-BT300/ KCA-BT200 | ||
|---|---|---|---|---|
| SW1: Преобразование символов дисплея *3 | SW2: Интерфейс | SW3: Год | ||
| *1 *2 | *5 *6 |
Список поддерживаемых совместимых мобильных телефонов
В списке совместимости подходящая версия прошивки Bluetooth отображается в строке <Версия прошивки KENWOOD Bluetooth>.
Если необходимо изменить прошивку, перейдите к <О программе обновления прошивки модуля Bluetooth>.
・да = функция поддерживается и подтверждена.
нет = функция недоступна.
Общие примечания
・Функции моделей, помещенных в таблицу, проверяются при определенных условиях в день выпуска.
Следует учесть, что рабочие характеристики могут отличаться от приведенных в таблице из-за модификации телефона после тестирования.
・Имейте, пожалуйста, в виду, что в список не вошли те модели сотовых телефонов, в отношении которых не была предоставлена информация или не были подтверждены рабочие параметры.
・Этот результат основан на испытании отдельных образцов каждой модели. Он не является показателем операционных характеристик всех устройств одной и той же модели.
・Для управления сотовым телефоном обратитесь, пожалуйста, к его инструкции по эксплуатации.
・KCA-BT300/KCA-BT200 поддерживает следующие профили.
HFP (Профиль Hands Free)
HSP (профиль головной гарнитуры) * HSP может обеспечивать или не обеспечивать соединение между сотовым телефоном и нашим модулем Bluetooth.
OPP (профиль Object Push)
PBAP (профиль доступа к телефонной книге)
SYNC (профиль синхронизации)
SPP (профиль последовательного порта)
A2DP (профиль продвинутого распределения аудиосигнала)
AVRCP (Профиль Audio/Video Remote Control)
・Изделия KENWOOD Bluetooth поддерживают следующие профили.
HFP (Профиль Hands Free)
HSP (профиль головной гарнитуры) * HSP может обеспечивать или не обеспечивать соединение между сотовым телефоном и нашим модулем Bluetooth.
OPP (профиль Object Push)
PBAP (профиль доступа к телефонной книге)
SYNC (профиль синхронизации)
SPP (профиль последовательного порта)
A2DP (профиль продвинутого распределения аудиосигнала)
AVRCP (Профиль Audio/Video Remote Control)
・Изделия KENWOOD Bluetooth поддерживают следующие профили.
HFP (Профиль Hands Free)
HSP (профиль головной гарнитуры) * HSP может обеспечивать или не обеспечивать соединение между сотовым телефоном и нашим модулем Bluetooth.
OPP (профиль Object Push)
PBAP (профиль доступа к телефонной книге)
SYNC (профиль синхронизации)
SPP (профиль последовательного порта)
・Во время вызова может генерироваться шум.
・Во время вызова может быть слышно громкое эхо.
・Во время приема вызова или переключения в режим преобразования может генерироваться шум.
・Для некоторых моделей сотовых телефонов может устанавливаться высокая громкость звонка или телефонной связи. Обязательно отрегулируйте громкость звука перед тем, как отправиться в путь.
・Некоторые модели не передают знак «+» (международное обозначение вызова) через интерфейс Bluetooth.
В этом случае список входящих вызовов KCA-BT300/KCA-BT200 не может быть использован для выполнения вызова.
・Некоторые модели не передают знак «+» (международное обозначение вызова) через интерфейс Bluetooth.
В этом случае список входящих вызовов изделий KENWOOD Bluetooth не может быть использован для выполнения вызова.
・Некоторые модели не передают знак «+» (международное обозначение вызова) через интерфейс Bluetooth.
В этом случае список входящих вызовов изделий KENWOOD Bluetooth не может быть использован для выполнения вызова.
・Некоторые модели выполняют вызов только при отображении режима ожидания звонка на дисплее.
・Если соединение с вашим сотовым телефоном не устанавливается, перезагрузите телефон.
・Не отключайте головное устройство при копировании телефонной книги.
・Некоторые модели не допускают копирования телефонной книги, хранящейся на SIM-карте.
В этом случае скопируйте телефоную книгу в память сотового телефона, а затем повторите передачу.
・Если контакты из телефонной книги не могут быть скопированы по одному, попробуйте скопировать телефонную книгу целиком.
・Не оставляйте сотовый телефон внутри автомобиля. Это может повредить телефон.
・В зависимости от соединения с сотовым телефоном может потребоваться некоторое время для удаления телефона из списка регистрации или переключения на другой сотовый телефон.
・Для телефонных номеров могут быть использованы следующие цифры и значки: от 0 до 9,+, *, #
Если используется символ, отличный от вышеперечисленных, телефонный номер не может быть передан правильно.
・В случае прерывания вызова с телефона, в котором отключена функция идентификации, имя и номер входящего абонента не будут отображаться правильно.
・Воспроизведение звука через A2DP (потоковое воспроизведение аудиосигнала) может быть прервано на несколько секунд после начала операции.
・Воспроизведение звука через A2DP (потоковое воспроизведение аудиосигнала) может быть прервано на несколько секунд после начала операции.
・TВ зависимости от типа используемого аудиоустройства, скорость реагирования на AVRCP (дистанционное управление) может снизиться.
・TВ зависимости от типа используемого аудиоустройства, скорость реагирования на AVRCP (дистанционное управление) может снизиться.
・При выполнении любой операции Bluetooth, такой как загрузка телефонной книги, во время воспроизведения аудиосигнала через A2DP, звук может прерваться.
・При выполнении любой операции Bluetooth, такой как загрузка телефонной книги, во время воспроизведения аудиосигнала через A2DP, звук может прерваться.
・Дата и время приема SMS-сообщения не могут быть синхронизированы с датой и временем приема вызова сотовым телефоном.
・В зависимости от комбинации устойств, подключенных к Bluetooth, аудиосигнал A2DP (потоковое воспроизведение звука) может прерваться во время воспроизведения.
・В зависимости от комбинации устойств, подключенных к Bluetooth, аудиосигнал A2DP (потоковое воспроизведение звука) может прерваться во время воспроизведения.
・В зависимости от типа подключенного сотового телефона аудиоустройство, подсоединенное к A2DP, может издавать звук при инициации вызова.
・В зависимости от типа подключенного сотового телефона аудиоустройство, подсоединенное к A2DP, может издавать звук при инициации вызова.
・В телефонной книге и SMS-сообщении символ \ (\) будет выглядеть как \\ (\\).
・Если с функцией распознавания голоса Voice Recognize используются субиндексы (например, мобильный и домашний тел.), вызов удаленных абонентов может нормально выполняться только при вводе субиндексов.
・Субиндексы, содержащиеся в телефонной книге, не обновляются путем загрузки информации в телефонную книгу.
О программе обновления прошивки модуля Bluetooth
Загрузите прошивку, совместимую с вашим телефоном.
Если мобильный телефон можно использовать без каких-либо затруднений, его прошивка не требует обновления.
Если текущая версия прошивки модуля KENWOOD Bluetooth неизвестна, см. раздел < Проверка версии прошивки>.
Проверка версии прошивки
 Руководство по применению (*** Kб)
Прошивка KENWOOD Bluetooth загружена
Характеристики аудио файлов
О форматах AAC, MP3 и WMA
Воспроизводимый файл AAC/MP3/WMA (здесь и далее называемый «аудиофайлом») и формат носителя информации имеют следующее ограничение. Не соответствующий спецификации аудио файл может воспроизводиться неправильно, либо могут неправильно отображаться имена файлов и папок.
Воспроизводимый аудио файл
| MP3 | Расширение | .mp3 |
|---|---|---|
| Формат | Аудио файл MPEG 1/2 с уровнем передачи данных 3 | |
| Скорость передачи данных | 8-320 кбит/с / переменная скорость передачи в битах | |
| Частота дискретизации | 8/ 11,025/ 12/ 16/ 22,05/ 24/ 32/ 44,1/ 48 кГц | |
| Joint STEREO |  |
|
| Тегирование ID3 (вер.1) | Вер1.0/ 1.1 (название/ исполнитель/ альбом) | |
| Тегирование ID3 (вер.2) | Версия 2.2/ 2.3/ 2.4 (Название/ Исполнитель/ Альбом: Не поддерживает показ изображений.) | |
| WMA | Расширение | .wma |
| Формат | Файл в соответствии с Windows Media Audio (кроме файла для Windows Media Player 9 или более поздней версии, в котором реализованы новые функции) |
|
| Скорость передачи данных | 32-192 кбит/с / переменная скорость передачи в битах | |
| Частота дискретизации | 32/ 44,1/ 48 кГц | |
| Файл DRM | — | |
| Профессиональный | — | |
| Без потерь | — | |
| Голос | — | |
| Тегирование WMA (описание содержимого) | (Название/исполнитель) |
|
| Тегирование WMA (расширенное описание содержимого) | (WM/название альбома) |
|
| AAC-LC | Расширение | .m4a |
| Формат | «.m4a» закодирован в формате AAC-LC. *1 | |
| Скорость передачи данных | 8-320 кбит/с | |
| Частота дискретизации | 16/ 22,05/ 24/ 32/ 44,1/ 48 кГц | |
| Файл DRM | — | |
| 2-канальный | |
|
| Многоканальный | — | |
| Тегирование ID3 (вер.2) | — | |
| Метаданные iTunes m4a (данные о композиции) | (Название/исполнитель/альбом) |
・Не присваивайте эти расширения другим файлам, не являющимся аудио файлами. Если присвоить это расширение файлу, который не является аудио файлом, он будет воспроизводиться и издавать громкий шум, в результате чего будут повреждены акустические системы.
・Файл с защитой от копирования не может воспроизводиться.
・Аудио файлы могут не воспроизводиться в зависимости от настроек программного обеспечения кодирования, вида устройства USB и/или условий записи.
・Данное устройство может быть несовместимо с обновленным стандартом формата сжатия и дополнительными характеристиками.
・В некоторых случаях возможен некорректный показ времени воспроизведения, что объясняется условиями записи аудио файла.
・Функция «Supreme» не применима для композиций, закодированных при переменной скорости передачи в битах.
・*1 Файл AAC соответствует файлу MPEG4 AAC (.m4a), закодированному программой iTunes.
Файловые системы воспроизводимых носителей информации
| CD-R/RW | Файловая система (Windows) | ISO 9660 Уровень 1/2 | |
|---|---|---|---|
| ISO 9660 Уровень 3 | — | ||
| Romeo | |
||
| Joliet | |
||
| Длинное имя файла | |
||
| Файловая система (Macintosh) | — | ||
| Файловая система (UNIX) | — | ||
| Дозаписываемый | *1 |
||
| Устройство USB | Файловая система (Windows) *2 | FAT16 | |
| FAT32 | |
||
| Файловая система (Macintosh) | — | ||
| Файловая система (UNIX) | — |
・Компакт-диски типа CD-RW, отформатированные программой записи быстрым способом, использоваться не могут.
・При записи максимального объема носителя CD-R/RW задается параметр «Disc at once» записывающего программного обеспечения.
・Рекомендуется использовать формат Joliet для файловой системы диска CD-R/RW. При использовании других файловых систем изображение может отображаться некорректно вследствие неподходящего рабочего режима.
・*1 При использовании дисков CD-DA/смешанных дисков с аудиофайлами данный аппарат воспроизводит только материал, записанный во время первой сессии.
・*2 Разбиение на разделы : не поддерживает (некоторые устройства USB могут иметь много разделов, невидимых в операционной системе Windows.)
・При невозможности воспроизвести диск CD-R/RW, записанный в формате CD-ROM MODE 2 (XA), перезапишите его с использованием формата записи CD-ROM MODE 1.
Ограничение структуры файла и папки
| CD-R/RW | Максимальное количество уровней каталогов | 8 |
|---|---|---|
| Максимальное количество папок | 50 | |
| Максимальное количество файлов в папке | 255 | |
| Максимальное количество файлов и папок | 512 | |
| Устройство USB | Максимальное количество уровней папок | 8 |
| Максимальное количество папок (на устройство) *1 | 255 | |
| Максимальное количество файлов (на папку) | 255 | |
| Максимальное количество файлов и папок (на устройство) | 65025 |
・Иногда воспроизведение начинается не сразу, и время ожидания зависит от условий записи (например, иерархии файлов и структуры папок).
・*1 Сюда относится корневая папка (папка верхнего уровня). Число папок, отображаемое на ПК, меньше на 1.
Максимальное количество отображаемых символов
| Имя файла/папки | 64 символа (Joliet: 32 символа) | |
|---|---|---|
| Тегирование MP3 ID3 | Вер. 1.x | 30 символов |
| Вер. 2.x | 60 символов | |
| Свойство содержимого WMA | 60 символов | |
| Сведения о композиции AAC | 60 символов |
・Количество символов зависит от размера в байтах.
・Имя файла/папки представляет собой количество символов, включая расширения.
・Данное устройство может показывать ID3 метки MP3 следующих версий: 1.0/ 1.1/ 2.2/ 2.3/ 2.4
・Тегирование AAC ID3 не может отображаться.
Порядок воспроизведения аудио файла
・Аудио файлы воспроизводятся в том порядке, в каком они были записаны программным обеспечением CD. Вы можете установить порядок воспроизведения, записав номера последовательности воспроизведения (например, от «01» до «99»), в начале имени файла.
・Аудио файлы воспроизводятся в порядке расположения имен файлов. Можно задать порядок воспроизведения файлов, пронумеровав файлы в папке. (устройство USB)
Пример
 К началу страницы
Об устройстве USB
Примечания по поводу использования устройства USB
Данное устройство может воспроизводить аудио файлы, хранимые во флэш-памяти или на цифровом аудиоплеере с портом USB (в настоящем документе эти устройства называются устройствами USB)
Следующие ограничения распространяются на виды и использование имеющихся в продаже устройств USB.
Имеющиеся устройства USB
| Стандарт USB | USB 1.1 / USB 2.0 |
|---|---|
| Скорость передачи | Максимальная скорость (12 Мбит/с) |
| Класс USB | Класс накопителя (устройство MSC) |
| Подкласс USB | SCSI |
| Протокол | Только для передачи массивов данных |
| Источник питания | Макс. 500 мА |
・Устройства USB класса массовой памяти:
Устройства USB, которые ПК может распознать как внешние устройства хранения без использования особого драйвера или программного приложения.
・Обратитесь к торговому агенту, чтобы уточнить, соответствует ли ваше устройство USB характеристикам USB класса массовой памяти.
・Использование неподдерживаемого устройства USB может привести к некорректному воспроизведению или отображению аудио файла.
Даже в случае использования устройства USB, соответствующего вышеуказанным характеристикам, аудио файлы могут не воспроизводиться корректно в зависимости от вида или состояния устройства USB.
・При использовании определенных устройств USB некоторые функции ограничены.
・Нормальный режим работы и питания не гарантируется для всех устройств USB.
О подключении устройства USB
・Не подключайте устройство USB непосредственно к соединителю USB на панели. Подключите его с помощью кабеля.
・При подключении устройства USB рекомендуется использовать CA-U1EX (дополнительная опция).
・При использовании кабеля, не совместимого с USB, нормальное воспроизведение не гарантируется. Подключение кабеля, общая длина которого превышает 5 м, может привести к некорректному воспроизведению.
・Вы не можете подключить устройство USB через концентратор USB.
 |
・Установите устройство USB в том месте, где оно не помешает вашему передвижению. ・Не оставляйте надолго устройство USB в транспортном средстве. Оно может повредиться или выйти из строя в результате действия прямого солнечного света, высокой температуры и т.д. ・Возьмите с собой резервные копии аудио файлов, используемых с данным устройством. Эти файлы можно стереть в зависимости от условий эксплуатации устройства USB. Мы не несем никакой ответственности за ущерб, понесенный в связи со стиранием хранящихся данных. ・Когда вы не используете устройство USB, крышка должна быть надета. |
Об эксплуатации устройства USB
・Эксплуатация устройства USB схожа с работой с аудио файлами, если не указано иначе.
・Источник USB распознается как источник CD на подключенном приборе.
К началу страницы
11FLIP_IM329_Ref_E_ru_00
Изделие изготовлено в Индонезии
© 2010 Kenwood Corporation All Rights Reserved.
KDC-BT61U
KDC-6051U
РAДИОПРИЕMНИК С KOMПAKT–ДИСKAMИ
ИHCTPУKЦИЯ ПO ЭKCПЛУATAЦИИ
Перед чтением данной инструкции нажмите на кнопку ниже и проверьте на сайте,
является ли ваша инструкция последней версией.
Проверить последнюю версию
KDC-BT61U
KDC-6051U
РAДИОПРИЕMНИК С KOMПAKT–ДИСKAMИ
ИHCTPУKЦИЯ ПO ЭKCПЛУATAЦИИ
Перед чтением данной инструкции нажмите на кнопку ниже и проверьте на сайте,
является ли ваша инструкция последней версией.
Изделие изготовлено в Индонезии
© 2010 Kenwood Corporation All Rights Reserved.
11FLIP_IM329_Ref_E_ru_00
Проверить последнюю версию

Содержание
Перед эксплуатацией 4
Использование аудиопроигрывателя
Bluetooth 26
Названия и функции компонентов 6
Подключение устройства Bluetooth
Основные принципы работы устройства
Общие операции 8
Операция настройки громкой связи 27
Подготовка к эксплуатации
Общие операции
Подключение устройства Bluetooth
Действия со списком меню
Прием вызова
Во время вызова
Операции с iPod/iPhone 10
Ожидание вызова
Основные операции
Другие функции
Поиск композиции путем обзора iPod
Вызов
Режим воспроизведения
Быстрый набор (Набор предварительно
Настройка iPod
введенного номера)
Выбор режима поиска
Вызов номера из телефонной книги
Прямой поиск
Вызов номера из журнала вызовов
Связанный поиск
Набор номера
Поиск по алфавиту
Голосовой набор номера
Пропуск при поиске
Регистрация в списке предустановленных
номеров
Пользовательский список воспроизведения
Отображение типа телефонного номера
Эксплуатация устройства USB 16
(категории)
Основные операции
Установки дисплея 32
Поиск файлов
Основные принципы работы устройства
Режим воспроизведения
Настройка дисплея
Настройка USB
Настройка режима дисплея на 5 строк, 3 строки
Пропуск при поиске
или по аналогии с iPod
Прямой поиск композиции
Настройка режима отображения анализатора
спектра
Работа системы воспроизведения с
Выбор цвета подсветки
компакт-диска/аудиофайла 19
Настройка индикатора дополнительного входа
Основные принципы работы устройства
Поиск композиции
Часы и прочие функции 38
Режим воспроизведения
Настройка часов и даты
Основные операции чейнджера компакт-дисков
Начальные настройки
(Дополнительно)
Настройка демонстрационного режима
Прямой поиск композиции
Приглушение звука при приеме телефонного
Прямой поиск диска
звонка
Передняя панель, обеспечивающая защиту
Прослушивание тюнера 22
против кражи
Основные принципы работы устройства
Настройка тюнера
Настройки звучания 42
Память фиксированных настроек станций
Настройка звучания
Автоматический ввод в память
Выбор фиксированных характеристик
Фиксированная настройка
эквалайзера
Настройка прямым доступом
Ручная настройка эквалайзера
PTY (Тип программы)
Выбор позиции прослушивания
Фиксированная настройка типа программы
Точная настройка позиции прослушивания
Изменение языка для функции PTY
Система двух зон
2
|
KDC-BT61U/ KDC-6051U

Настройка DSP 46
Вспомогательные принадлежности/
процедура установки 70
Выбор типа автомобиля
Настройка типа акустической системы
Подсоединение кабелей к гнездам
Точная настройка типа автомобиля
для подключения 72
Установка параметра X’Over
Память фиксированных звуковых настроек
Установка/Cнятие устройства 74
Вызов фиксированных звуковых настроек
Поиск и устранение неисправностей 76
Управление избранным 50
Память фиксированных настроек избранного
Технические характеристики 80
Вызов фиксированных настроек избранного
Удаление фиксированных настроек избранного
Настройка Bluetooth 52
Настройка Bluetooth
Регистрация устройства Bluetooth
Регистрация PIN кода
Выбор устройства Bluetooth, которое вы хотите
подключить
Удаление зарегистрированного устройства
Bluetooth
Загрузка телефонной книги
Добавление команды голосового набора
Установка голосовой команды для категории
SMS (Служба коротких сообщений) 60
Загрузка SMS
SMS (Служба коротких сообщений)
Оснoвные операции пульта
дистанционного управления 62
Приложение 64
Об аудиофайлах
Устройства iPod/iPhone, которые можно
подключить к данному ресиверу
Об устройстве USB
О приложении “KENWOOD Music Editor”
О сотовом телефоне
Об аудио-проигрывателях Bluetooth
Список меню
Элементы экранной индикации
Pyccкий
|
3
Перед эксплуатацией
2 ПРЕДУПРЕЖДЕНИЕ
Разъемы устройства и передней панели
• Воизбежаниезагрязнениянеприкасайтесь
Для предотвращения травм или
пальцами к разъемам устройства и передней
возгорания примите перечисленные
панели.
ниже меры предосторожности.
• Еслигнездаустройстваилипереднейпанели
Во избежание коротких замыканий никогда не
загрязнятся, протрите их чистой, мягкой, сухой
оставляйте металлические предметы (например,
тканью.
монеты или металлические инструменты) внутри
устройства.
Запотевание линзы
Включение автомобильного обогревателя при
Перед использованием
низкой температуре может привести к запотеванию
устройства необходимо отменить
или образованию конденсата на поверхности
демонстрационный режим!
линзы проигрывателя компакт-дисков. Конденсат,
Данное устройство первоначально установлено в
приводящий к запотеванию поверхности линзы,
демонстрационный режим.
может помешать воспроизведению дисков. В таком
При первом использовании данного устройства
случае извлеките диск и подождите, пока влага
отключите демонстрационный режим. См. раздел
не испарится. Если и после этого устройство не
<Настройка демонстрационного режима> (стр. 41).
сможет работать нормально, обратитесь к дилеру
компании Kenwood.
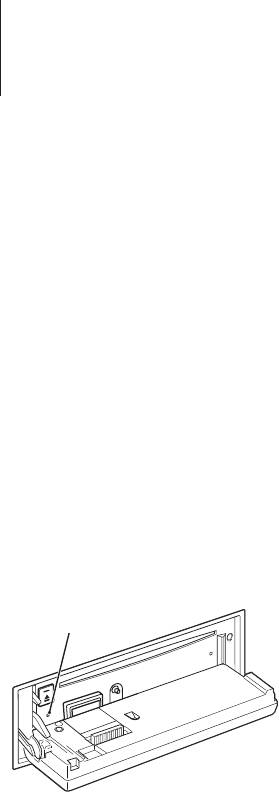
Сброс параметров устройств
Примечания
Если устройство или подключенное устройство
• Прилюбыхпроблемахвовремяустановки
(автомобильный чейнджер компакт-дисков и т. п.)
обращайтесь к дилеру компании Kenwood.
не работает надлежащим образом, нажмите кнопку
• Приприобретениидополнительныхаксессуаров
сброса. После нажатия кнопки сброса устройство
спросите дилера компании Kenwood, будут ли эти
возвращается к параметрам, установленным на
аксессуары работать с данной моделью в вашем
заводе.
регионе.
Кнопка сброса
• Отображаютсясимволы,соответствующие
стандарту ISO 8859-1.
• Отображаютсясимволы,соответствующие
стандарту ISO 8859-5 или ISO 8859-1. Для “Russian”
в разделе <Начальные настройки> (стр. 40)
установите “On”.
• Врегионах,гдеданнаяуслуганеподдерживается
ни одной радиостанцией, функция системы
радиоданных (Radio Data System) работать не
будет.
• Внастоящейинструкциииндикаторс
Чистка устройства
описанием означает отображение состояния.
Если передняя панель устройства испачкается,
Дополнительную информацию по отображаемому
протрите её мягкой сухой тканью, например
статусу см. в разделе <Основные принципы
силиконовой.
работы устройства> (стр. 32).
Если передняя панель сильно испачкается, удалите
• Иллюстрациидисплеяипанели,которые
загрязнение при помощи ткани, увлажненной
указываются в данной инструкции, являются
нейтральным чистящим средством, а потом снова
примерами, используемыми для более четкого
вытрите панель чистой, мягкой и сухой тканью.
разъяснения принципов работы элементов
¤
управления. Поэтому информация на дисплее,
• Нанесениеаэрозольныхчистящихсредств
представленная на этих иллюстрациях, может
непосредственно на устройство может повредить
отличаться от информации, отображаемой в
механические части. Протирание передней панели
действительности на дисплее конкретного
грубой тканью или использование активных чистящих
прибора, и некоторые иллюстрации на дисплее
средств наподобие растворителей или спирта может
могут оказаться неприменимыми.
поцарапать поверхность или стереть надписи.
4
|
KDC-BT61U/ KDC-6051U
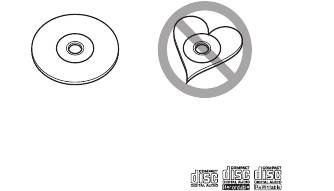
Обращение с компакт-дисками
• Некасайтесьзаписаннойповерхностикомпакт—
диска.
• Неприклеивайтенакомпакт-дискклейкую
ленту и т. п. и не используйте компакт-диск с
приклеенной на него лентой.
• Непользуйтесьаксессуарамидлянанесения
надписей на диски.
• Проводитечисткупонаправлениюотцентра
диска к его краю.
• Извлекаякомпакт-дискиизустройства,держите
их горизонтально.
• Еслицентральноеотверстиеиливнешнийкрай
компакт-диска имеет неровности, используйте
диск только после их удаления при помощи
шариковой ручки и т.п.
Компакт-диски, которые нельзя
использовать
• Компакт-дискинекруглойформы.
• Компакт-диски,имеющиеназаписанной
поверхности следы краски или загрязнения.
• Этоустройствоможетвоспроизводитьтолько
компакт-диски с отметкой
.
Диски, не имеющие такой отметки, могут
воспроизводиться неправильно.
• НельзявоспроизводитьдискиCD-RилиCD-RW,
которые не были финализированы. (Информацию
о процессе финализации можно найти в
инструкциях по эксплуатации программы записи
данныхCD-R/CD-RWизаписывающегоустройства
CD-R/CD-RW.)
• Использованиекомпакт-дисковдиаметром3
дюйма запрещено. Попытка вставить компакт—
диск с помощью адаптера может привести к
неисправности.
Pyccкий
|
5
-
Page 1: Kenwood KDC-6051U
11FLIP_IM329_Ref_E_en_00 © 2010 Kenwood Corporation All Rights Reser ved. KDC-B T61U KDC-6051U CD-RECEIVER INSTRUCTION MANU AL Before reading this manual, click the button below to check the latest edition and the modified pages. Check the latest edition[…]
-
Page 2: Kenwood KDC-6051U
2 | KDC-BT61U/ KDC-6051U Co ntents Before use 4 Component names and functions 6 General operation 7 Before Using Common Operation Menu List Operation iPod/iPhone Operation 8 Basic Operation Selecting a song by browsing iPod Play Mode iPod Setting Selecting the Search mode Direct Search Related Search Alphabet Search Skip Search My Playlist USB devi[…]
-
Page 3: Kenwood KDC-6051U
English | 3 DSP Setup 40 Car T ype Selec tion Speaker Setting Car T ype Fine Adjustments X’Over Setting Audio Preset Memor y Audio Preset Recall F avorite Contr ol 44 F avorite Preset Memor y F avorite Preset Recall F avorite Preset Memor y Delete Bluetooth Setup 46 Bluetooth Setting Registering Bluetooth device Registering PIN Code Selecting the[…]
-
Page 4: Kenwood KDC-6051U
4 | KDC-BT61U/ KDC-6051U Before use 2 W ARNING T o prev ent injur y or fire, take the following precautions: T o prevent a short circuit, never put or leave any metallic objec ts (such as coins or metal tools) inside the unit. Do not use this unit before canceling Demonstration mode! This unit is initially set on the Demonstration mode. When using […]
-
Page 5: Kenwood KDC-6051U
English | 5 Handling CDs • Donot touchthe recordingsur faceof theCD. • Donot sticktape etc.on theCD,oruse aCD with tape stuck on it. • Donot usedisc type accessories. • Cleanfrom thecenterof thedisc andmove outward. • Wh[…]
-
Page 6: Kenwood KDC-6051U
6 | KDC-BT61U/ KDC-6051U Co mponent name s and functions 1 Re lea se bu tt on T o drop the f aceplate dow n to open and CD ca n be inser ted or ej ec ted (press t he but ton) . 2 [ME NU] b utt on T o sele ct a s ong or s et func tio ns. See <Me nu List Ope ration> (pa ge 7) . 3 [DIS P] but to n T o change d isplay item (press th e but ton) . […]
-
Page 7: Kenwood KDC-6051U
English | 7 Before Using Exit of the Demonstration Mode T urn off the demonstration mode when you use it for the first time af ter installation. 1 Press the [ VOL] knob to quit the demonstration mode when the messages “ T o cancel D emo press the volume knob” are displayed (approx. 15 seconds). 2 T urn the [ VOL] knob to select “ YES” and p[…]
-
Page 8: Kenwood KDC-6051U
8 | KDC-BT61U/ KDC-6051U iPod /iPhone Oper ation SRC 4 MENU VOL DISP ¢ 38 / TI SEARCH MODE Basic Op era tion Playing iPod • Connect an iPod When connec ted, the source is switched automatically and a song starts playing. • Selec t iPod source Press the [SRC ] button. T urn the [VOL] knob and press it when the desired item is displayed . Select[…]
-
Page 9: Kenwood KDC-6051U
English | 9 Play Mode Y ou can selec t a Play Mode, such as Random play and Repeat play . 1 Select iPod source 2 Enter Menu List mode Press the [MENU] button. 3 T urn the [ VOL] knob and press it when the desired item is displayed. Select “Play Mode” . 4 Select the Play Mo de T urn the [ VOL] knob. Display Overview “Play Mode” “iP od by H[…]
-
Page 10: Kenwood KDC-6051U
10 | KDC-BT61U/ KDC-6051U iPod /iPhone Oper ation Selecting the Search mode Y ou can selec t the most suited search method for the desired song from 4 types of the S earch mode. Normal playing Display O verview “Direct Search” Y ou can quickly search the desired song by specifying its S earch item (artist, album, etc .) and character . Refer to[…]
-
Page 11: Kenwood KDC-6051U
English | 11 Related Search Searches for music of the same ar tist or genre as the one being played. 1 Play the music in iPod 2 Press the [ SEARCH MODE ] button. 3 Enter Related Search mode T urn the [ VOL] knob and press it when the desired item is displayed. Select “Related S earch ” . 4 Select the Search item T urn the [ VOL] knob and press […]
-
Page 12: Kenwood KDC-6051U
12 | KDC-BT61U/ KDC-6051U Skip S earch Y ou can scroll up or down according to the number of the selected S earch items so that you can quickly switch the display position. 1 Select iPod source 2 Enter browsing mode Press the [MENU] button. T urn the [ VOL] knob and press it when the desired item is displayed. Select “Music” > item. 3 Press […]
-
Page 13: Kenwood KDC-6051U
English | 13 Deleting a Song from the Playlist 1 Press the [ SEARCH MODE ] button. 2 Enter Delete Playlist mode T urn the [ VOL] knob and press it when the desired item is displayed. Select “Delete My Playlist” . 3 T urn the [ VOL] knob and press it when the desired item is displayed. Select ”Delete One” or ”Delete All” . Selecting “D[…]
-
Page 14: Kenwood KDC-6051U
14 | KDC-BT61U/ KDC-6051U USB de vice Opera tion Basic Op era tion Playing USB device • Connect a USB device When connec ted, the source is switched automatically and a song starts playing. • Selec t USB source Press the [SRC ] button. T urn the [VOL] knob and press it when the desired item is displayed . Select the “USB” display. ✍ SRC?[…]
-
Page 15: Kenwood KDC-6051U
English | 15 ¡! 1 2 ¡» ¡# Cancelling Menu List mode Press the [MENU] button for at least 1 second, and then press it again briefly . ⁄ • Whenyou searchasong inthe F ile Searchmode,the unit memorizes the position of the song being played after the search. T o set a different M enu item af ter searching[…]
-
Page 16: Kenwood KDC-6051U
16 | KDC-BT61U/ KDC-6051U Skip S earch Y ou can scroll up or down according to the number of the selected S earch items so that you can quickly switch the display position. 1 Select USB source 2 Enter File Search mode Press the [MENU] button. T urn the [ VOL] knob and press it when the desired item is displayed. Select “Music” > item. 3 Ente[…]
-
Page 17: Kenwood KDC-6051U
English | 17 Music C D/ A udio file Operati on Basic Op era tion Drop open the faceplate Press the Release button. ⁄ • Pushthefaceplate onthe leftside,and returnit toits former position. Disc play • A disc inserted. When inser ted, the source is switched automatically and a song is starts playing. When a[…]
-
Page 18: Kenwood KDC-6051U
18 | KDC-BT61U/ KDC-6051U Music C D/ A udio file Operati on Play Mode Y ou can selec t a Play Mode, such as Random play and Repeat play . 1 Select CD source 2 Enter Menu List mode Press the [MENU] button. 3 T urn the [ VOL] knob and press it when the desired item is displayed. Select “Play Mode” . 4 Select the Play Mo de T urn the [ VOL] knob. […]
-
Page 19: Kenwood KDC-6051U
English | 19 F unc tion of remote control Direct Music S earch Searching the music by entering the track number . 1 Enter Direct Music Search mode Press the [DIREC T ] button on the remote control . 2 Enter the music number Press the number buttons on the remote control . 3 Search the music Press the [ 4 ] or [ ¢ ] button. Cancelling Direct Music […]
-
Page 20: Kenwood KDC-6051U
20 | KDC-BT61U/ KDC-6051U T uner Opera tion Basic Op era tion Selecting T uner source Press the [SRC ] button. T urn the [VOL] knob and press it when the desired item is displayed . Select the “ T uner ” display. ✍ SRCS electmode 2:Pressingthe [SRC] button repeatedly switches source. Selecting the Receiving Band Press […]
-
Page 21: Kenwood KDC-6051U
English | 21 news bulletin volume is the same level that was set for T raffic Information. • Forced MONO Strong electrical fields (such as from power lines) may cause unstable sound quality when it is set to ON. I n such a situation, turn it OFF . Station Preset Memor y Putting a station in the memor y . 1 Select the radio band and tune in a desi[…]
-
Page 22: Kenwood KDC-6051U
22 | KDC-BT61U/ KDC-6051U T uner Opera tion PTY (Program T ype) Selecting the Program Type below and searching for a station. Program T ype Display Speech “Speech” Music “Music” News “News” Curr ent Affairs “ Affairs ” Information “Info” Sport “Sport” Educa tion “Educate ” Drama “Drama ” Cultur e “C ulture ” Scie[…]
-
Page 23: Kenwood KDC-6051U
English | 23 Bluetooth A udio Operatio n Connecting a Bluetooth Device Before use the Bluetooth device, you need to connect Bluetooth device to this unit. Pairing (Registering from Bluetooth devices) T o make your Bluetooth Audio player usable with this unit, you need to register it (pair ing). 1 T urn on this unit Press the [SRC ] button. 2 Start […]
-
Page 24: Kenwood KDC-6051U
24 | KDC-BT61U/ KDC-6051U Operatio n of hands-free pho ning F unc tion of KDC-BT61U KDC-6051U with KCA-BT300/ KCA-BT200 (Optional Accessory) Connecting a Bluetooth Device Before use the Bluetooth device, you need to connect Bluetooth device to this unit. The following 3 steps procedur e is necessar y . Step 1. Pairing (Registering from Bluetooth de[…]
-
Page 25: Kenwood KDC-6051U
English | 25 Answering another Incoming Call af ter T erminating the Curr ent Call Press the [SRC ] button. Continuing the Curren t Call 1 Press the [ VOL] k nob. 2 T urn the [ VOL] knob and press it when the desired item is displayed. Select “RE JECT ” . Answering the W aiting Call after T erminating the Current Call Press the [SRC ] button. S[…]
-
Page 26: Kenwood KDC-6051U
26 | KDC-BT61U/ KDC-6051U Operatio n of hands-free pho ning F unc tion of KDC-BT61U KDC-6051U with KCA-BT300/ KCA-BT200 (Optional Accessory) Calling a Number in the Phone Book 1 Enter Bluetooth mode KDC-BT61U Press the [ ] button. KDC-6051U Press the [ TI] button for at least 1 second. 2 Select the Phone Book mode T urn the [ VOL] knob and press it[…]
-
Page 27: Kenwood KDC-6051U
English | 27 F unc tion of KDC-6051U Make a V oice D ialing Call 1 Enter voice recognition mode Press the [ VOL] k nob for at least 1 second. 2 “PB Name?” is displayed . When a beep is heard, say the name within 2 seconds. 3 “PN T ype ” is displayed . When a beep is heard, say the category name within 2 seconds. 4 Make a c all Press the [ V[…]
-
Page 28: Kenwood KDC-6051U
28 | KDC-BT61U/ KDC-6051U Displa y Settings Basic Op era tion Switching display Press the [DISP] button. Mode Display T ype 5-line display mode Displays 4 to 5 lines of text. 3-line display mode Displays 2 to 3 lines of text. iPod-lik e display mode Displays like iPod. (iP od source only) Spectrum analyzer display mode Displays a line of text and t[…]
-
Page 29: Kenwood KDC-6051U
English | 29 “ILL UMI Effect” Sets whether the key illumination brightness is changed in conjunc tion with the key operation. “OFF”/ “ON” “ILL UMI MSC SYNC” Sets whether the key illumination color is changed in conjunc tion with the sound volume. “OFF”/ “ON” ( : F actor ysetting) 5 Make a setting • When the “ PU[…]
-
Page 30: Kenwood KDC-6051U
30 | KDC-BT61U/ KDC-6051U Displa y Settings Cust omization of 5-line Display Mode & 3-line Display Mode & iP od-like Display Mode Y ou can customize the display of the 5-line display mode, 3-line display mode, and iPod-like display mode. 1 Select the source Press the [SRC ] button. T urn the [VOL] knob and press it when the desired item is […]
-
Page 31: Kenwood KDC-6051U
English | 31 In Auxiliar y input source Source name (“Source Name”) Spectrum analyzer & Clock (“Speana/Clock”) Date (“Dat e”) Blank (“Blank”) In Standby Source name (“Source Name”) Date (“Dat e”) Clock (“Clock”) Blank (“Blank”) In Bluetooth audio source (KDC-BT61U/ KDC-6051U with KCA-BT300 (Optional Accessory) on[…]
-
Page 32: Kenwood KDC-6051U
32 | KDC-BT61U/ KDC-6051U Illumination Color Selec tion Selecting the Illumination Color of the panel. 1 Enter Menu List mode Press the [MENU] button. 2 Enter Illumination color selection mode T urn the [ VOL] knob and press it when the desired item is displayed. Select “Settings” > “DISP & ILLUMI” > “Color Select ” . 3 Select[…]
-
Page 33: Kenwood KDC-6051U
English | 33 6 Adjusting Date 1. T urn the [ VOL] k nob to adjust the year . 2. Press the [ ¢ ] button. 3. T urn the [ VOL] k nob to adjust the month. 4. Press the [ ¢ ] button. 5. T urn the [ VOL] k nob to adjust the day. 6. Press the [ VOL] knob. 7 Enter Date format mode T urn the [ VOL] knob and press it when the desired item is displayed. Sel[…]
-
Page 34: Kenwood KDC-6051U
34 | KDC-BT61U/ KDC-6051U Clock an d Ot her F unctions Initial S ettings Y ou can selec t following Initial Setting items. 1 Select the Standby Press the [SRC ] button. T urn the [VOL] knob and press it when the desired item is displayed . Select the “ST ANDBY ” display. ✍ SRCS electmode 2:Pressingthe [SRC] button repe[…]
-
Page 35: Kenwood KDC-6051U
English | 35 Theft Deterrent Fac eplate The faceplate of the unit can be detached and taken with you, helping to deter theft. Removing the Faceplat e 1 Press the Release button. Drop open the faceplate. 2 Drawing the faceplate to left side pull it to forward and remov e it. ¤ • Thefaceplateis aprecision pieceofequipment?[…]
-
Page 36: Kenwood KDC-6051U
36 | KDC-BT61U/ KDC-6051U Aud io Adj ustments “2Zone ” Sets the Dual Zone System. — Dual Zone Syst em (page 39) . “2Zone Select” “Preset” Sets the audio preset. — Audio Preset Memor y (page 42) . — Audio Preset Recall (page 43) . ( : F actor ysetting) 1 Select the source Press the [SRC ] button. T urn the [VOL] knob and press i[…]
-
Page 37: Kenwood KDC-6051U
English | 37 Manual Equalizer C ontrol Y ou can adjust following Equalizer Control items. Band Item Range “BAND1” (62.5 Hz) “GAIN” Band level -9 –+9 dB “EFCT” B ass Effect “ON”/ “OFF” “BAND2” (250 Hz) “GAIN” Band level -9 –+9 dB “BAND3” (1 kHz) “GAIN” Band level -9 –+9 dB “BAND4” (4 kHz) “GAIN” Band[…]
-
Page 38: Kenwood KDC-6051U
38 | KDC-BT61U/ KDC-6051U Aud io Adj ustments Listening Position Selec tion The sound environmen t can be compensated in accordance with the selected position. Accor ding to the listening position, select the position from the following settings. Compensation seat Display Not compensating. “ ALL ” Fr ont-Left seat “Front-L eft” Fr ont-Right[…]
-
Page 39: Kenwood KDC-6051U
English | 39 Dual Zone Sy stem Main source and sub source (Auxiliary input) output Fr ont channel and Rear channel separately . Display Overview “2Zone Rear V olume”* 1 Adjust the volume of Rear channel. “0” — “35” “Detailed S etup ” “2Zone ” Sets the Dual Zone System. “OFF”/ “ON” “2Zone Select”* 1 Specifies the de[…]
-
Page 40: Kenwood KDC-6051U
40 | KDC-BT61U/ KDC-6051U DSP Setup Car T ype Selection Y ou can compensate the delay of the sound arrival time by selecting your environmen t from the following car types. Display Overview “OFF” Not compensating. “C ompac t” Compact car “Sedan” Sedan “W agon” Station wagon “Minivan ” Minivan “SUV” Sport-utility vehicle “P[…]
-
Page 41: Kenwood KDC-6051U
English | 41 Reference point FRONT FRONT SUB-W REAR REAR 50cm 80cm 150cm +70cm +0cm +100cm 5 Exit Audio Control mode Press the [MENU] button for at least 1 second, and then press it again briefly . Car T ype F ine Adjustments Adjusting fine tuning of the speaker position compensation value specified at <Car T ype Selection> (page 40) . Displa[…]
-
Page 42: Kenwood KDC-6051U
42 | KDC-BT61U/ KDC-6051U DSP Setup Press the [MENU] button for at least 1 second, and then press it again briefly . Audio Preset Memor y Registering the value setup by Sound Contr ol. 1 Setup S ound Control Refer to the following operations to setup the Sound Control. — Car Type Selection (page 40) — Speaker Setting (page 40) - CarT ype F[…]
-
Page 43: Kenwood KDC-6051U
English | 43 Audio Preset Recall Recalling the sound setup registered by <Audio Preset Memory> (page 42) . 1 Select the source Press the [SRC ] button. T urn the [VOL] knob and press it when the desired item is displayed . Select a source other than “ST ANDBY ” . ✍ SRCS electmode 2:Pressingthe [SRC] button repeat[…]
-
Page 44: Kenwood KDC-6051U
44 | KDC-BT61U/ KDC-6051U F a vor ite Con trol • If thecontentsin iPodarechangedaf tertheF A VORITE registration, the list register ed in this unit becomes different from that in iPod. In this case, per form the F AVORITE registration again. F avor ite Preset Recall Retrieving an item registered to Fav orite. 1 En[…]
-
Page 45: Kenwood KDC-6051U
English | 45 Select “ YES ” . “Completed” is displayed. Exit Fa vorite Pr eset Memor y Delete mode.[…]
-
Page 46: Kenwood KDC-6051U
46 | KDC-BT61U/ KDC-6051U Bluetooth Setup Bluetooth S etting Y ou can selec t following Bluetooth Setting items. 1 Enter Bluetooth mode KDC-BT61U Press the [ ] button. KDC-6051U Press the [ TI] button for at least 1 second. ✍ Y ou can also selec t from “Settings” in M enu List mode. 2 T urn the [ VOL] knob and press it when the desired item i[…]
-
Page 47: Kenwood KDC-6051U
English | 47 ⁄ • If thetimeset inthe cell-phoneis shorter thanthatset in the unit, the former will be used. • Thisfunction doesnot workforcall waiting. • “Bluetooth HF/Audio” (Setting up the V oice Output Speakers) Select the speaker which is further from the microphon[…]
-
Page 48: Kenwood KDC-6051U
48 | KDC-BT61U/ KDC-6051U Bluetooth Setup F unc tion of KDC-BT61U KDC-6051U with KCA-BT300/ KCA-BT200 (Optional Accessory) Registering PIN C ode By operating the Bluetooth device, specify the PIN code necessar y for registering this unit. 1 Enter Bluetooth mode KDC-BT61U Press the [ ] button. KDC-6051U Press the [ TI] button for at least 1 second. […]
-
Page 49: Kenwood KDC-6051U
English | 49 Downloading the Phone Bo ok Download the phone book data from the cell- phone to this unit so that you can use the Phone Book of this unit. T o download automatically If the cell-phone supports a phone book synchronization function, the phone book is downloaded automatically after Bluetooth connection. ⁄ • Settingon the[…]
-
Page 50: Kenwood KDC-6051U
50 | KDC-BT61U/ KDC-6051U Bluetooth Setup F unc tion of KDC-BT61U KDC-6051U with KCA-BT300/ KCA-BT200 (Optional Accessory) F unc tion of KDC-6051U Adding a V oice Dialing Command Add a voice tag to the phone book for voice dialing. Y ou can register up to 35 voice tags. 1 Enter Bluetooth mode Press the [ TI] button for at least 1 second. ✍ Y ou c[…]
-
Page 51: Kenwood KDC-6051U
English | 51 6 Exit BT Settings mode Press the [ TI] button for at least 1 second. ⁄ • Setthe voicetag forallthe 5categories. Ifthe voicetag is not register ed for all the categories, the Phone book may not be recalled by voice command.[…]
-
Page 52: Kenwood KDC-6051U
52 | KDC-BT61U/ KDC-6051U SMS ( Short Message Service ) F unc tion of KDC-BT61U KDC-6051U with KCA-BT300/ KCA-BT200 (Optional Accessory) Downloading the SMS Download the short message (SMS) arrived at the cell-phone so that it can be read on this unit. 1 Enter Bluetooth mode KDC-BT61U Press the [ ] button. KDC-6051U Press the [ TI] button for at le[…]
-
Page 53: Kenwood KDC-6051U
English | 53 • Theshor tmessage cannotbedisplayed during downloading the SMS.[…]
-
Page 54: Kenwood KDC-6051U
54 | KDC-BT61U/ KDC-6051U Basic Oper ations of remote c ontrol A TT 0 — 9 SRC VOL FM AM EXIT 5 / ∞ AUD ENT DIRECT General control • V ol ume cont rol: [ VOL] • Source s ele ct : [SRC] • V ol ume re duce: [ A TT ] When the button is pressed again, the volume returns to the previous le vel. • Retur n to previ ous ite m: [ ] • Exi t from[…]
-
Page 55: Kenwood KDC-6051U
English | 55 Preparing the remote con trol unit Pull the batter y sheet out from the remote control unit to the direction of the arrow . Changing the battery of the remote contr ol unit Keep on slide Pull out CR2025 (+side) Use a commercially available button battery (CR2025). Inser t the battery with the + and – poles aligned properly , followin[…]
-
Page 56: Kenwood KDC-6051U
56 | KDC-BT61U/ KDC-6051U Appendix About Audio file • Playable Audio file AAC-LC (.m4a), MP3 (.mp3), WMA (.wma) • Playable disc media CD-R/R W/ROM • Playable disc file format ISO9660 Level1/2,Joliet, Romeo,Longfile name. Play able USB device USB mass storage class • Playable USB device file system F A T16[…]
-
Page 57: Kenwood KDC-6051U
English | 57 • NoUSB devicecomes withthis unit.Y ou needto purchase a commercially available USB device. • Whenconnec tingthe USBdevice,usage ofthe CA-U1EX(option) isrecommended. • Normalplayback isnot guaranteedwhen acable other than the USB compa[…]
-
Page 58: Kenwood KDC-6051U
58 | KDC-BT61U/ KDC-6051U Appendix Menu List Common function items Display Page “Clock & Date ” 33 “Clock Adjust” “Time Synchr onized” “Date Adjust” “Date Mode Select” “DISP & ILLUMI” – “Display Select” – “T ype Select” 30 , 31 “Side Selec t” 30 “T ext Selec t” “Graphic Select” 31 “Status ?[…]
-
Page 59: Kenwood KDC-6051U
English | 59 Function items app earing when the Music CD/ Audio file source is selected Display Page “Music” 17 “Play Mode” 18 “File Scan” “T rack Scan ” “Folder Random” “Disc Random” “Magazine Random” “File Repeat” “Folder Repeat” “T rack Repeat” “Disc Repeat” “Settings” – “Clock & Date ” ?[…]
-
Page 60: Kenwood KDC-6051U
60 | KDC-BT61U/ KDC-6051U Appendix Display Indicator items Source Display Overview General » A T T» Indicates that the attenuator is active. “F A V” Indicates that the F avorite can be regist ered. iPod/USB/ CD/CD Changer “CD•IN” Indicates that a disc is inserted. «SCAN» Indicates that the Scan function is ON. «SC[…]
-
Page 61: Kenwood KDC-6051U
English | 61 This Product is not installed by the manufacturer of a vehicle on the production line, nor by the professional importer of a vehicle into an EU Member State. Information on D isposal of Old Elec trical and Elec tronic Equipment and Batteries (applicable for EU countries that hav e adopted separate waste collection systems) Pr oducts an[…]
-
Page 62: Kenwood KDC-6051U
62 | KDC-BT61U/ KDC-6051U Ac cessor ies/ Instal lation Proc edure Ac cessories 1 ……….1 2 ……….2 3 * 3 m ……….1 * Accessory of KDC-BT61U Installation Procedure 1 T o prevent shor t circuits, remove the key from the ignition and disconnect the — terminal of the battery. 2 Make the proper input and output wire connections for each unit[…]
-
Page 63: Kenwood KDC-6051U
P .CONT ANT .CONT MUTE REMOTE CONT STEERING WHEEL REMOTE INPUT 1 2 3 4 5 6 7 8 1 2 3 4 5 6 7 8 L R L R Y ellow (Batter y wire) Red (Ignition wire) FM/AMantennainput( JASO) Antenna Cord Wiring harness (Accessory 1 ) If no connections are made, do not let the wire come out from the tab. Blue/White (Power control/ Antenna control wire) Brown […]
-
Page 64: Kenwood KDC-6051U
64 | KDC-BT61U/ KDC-6051U Co nnecting Wires to T ermin als Connector Function Guide Pin Numbers for ISO Connectors Cable Colour Functions External P ower Connector A-4 Y ellow Battery A-5 Blue/White Power Control A-6 Orange/White Dimmer A-7 Red Ignition (ACC) A-8 Black Earth (Ground) Connection Speaker Connector B-1 P urple Rear R ight (+) B-[…]
-
Page 65: Kenwood KDC-6051U
English | 65 Install ation/Remo ving the Uni t Installation Bend the tabs of the mounting sleeve with a screwdriver or similar utensil and attach it in place. ⁄ • Make surethatthe unitis installedsecurelyin place.If the unit is unstable, it may malfunction (for example, the sound may sk ip). ¤ C A UTION I[…]
-
Page 66: Kenwood KDC-6051U
Accessory of KDC-BT61U Installation the Microphone Unit 1 Check the installation position of the microphone (accessory 3 ). 2 Remove oil and other dirt from the installation sur face. 3 Install the microphone. 4 Wire the cable up to the unit with it secured at several positions using tape or the like. Fix a cable with a commercial item of tape. Pee[…]
-
Page 67: Kenwood KDC-6051U
English | 67 T roubleshootin g Guide Some func tions of this unit may be disabled by some settings made on this unit. ! • Ca nno t set u p the s ubwoo fer. • N o outp ut fr om th e subwo ofer. • Ca nno t set u p the s ubwoo fer po sit ion o f Man ual pos iti on se tti ng. ▲ • Th e Dua l zone f unc ti on is e nabl ed.?[…]
-
Page 68: Kenwood KDC-6051U
68 | KDC-BT61U/ KDC-6051U T roubleshootin g Guide Ha nds -f ree ? The han ds- free t alk vo lum e is low. The hand s-f ree ta lk vo lum e is se t at a lo w leve l. The h and s-f ree ta lk vol ume c an be a dju sted ind epe nde ntly. Ad just it du rin g han ds-f ree t alk . “M ic G ain” an d “ NR Lev el” <Bl ueto […]
-
Page 69: Kenwood KDC-6051U
English | 69 N/ADevice: • An unsupported USB device is connected. • Connection to the iPod has failed. Check that the connected iPod is an iPod that is supported. See <iPod/iPhone that can be connec ted to this unit> (page 56) for information on supported iPods. No Music Data/Error 15: • The connectedUS[…]
-
Page 70: Kenwood KDC-6051U
70 | KDC-BT61U/ KDC-6051U FM tuner sec tion Frequ enc y r ang e (5 0 kH z sp ac e) : 8 7. 5 MH z – 1 08. 0 MH z Usa bl e sen sit iv it y (S/ N = 2 6dB ) : 0 .7 μ V/7 5 Ω Qui et ing S en sit ivi ty (S/ N = 46 dB) : 1 .6 μ V/7 5 Ω Frequ enc y re spo nse (±3 .0 d B) : 3 0 H z?[…]
-
Page 71: Kenwood KDC-6051U
English | 71 • Specifications subject to change without notice. Audio section Ma xim um o utp ut p ower : 5 0W x 4 Out pu t pow er (D IN 4 532 4, + B=1 4.4 V ) : 3 0W x 4 Spe ak er I mp eda nc e : 4 – 8 Ω T on e ac tio n BAN D1 ( 60 H z) : ±9 dB BAN D2 ( 250[…]
-
Page 72: Kenwood KDC-6051U
This symbol mark indicates that Kenwood manufactured this product so as to decrease harmful influence on the environment. Svenska Härmed intygar Kenwood att denna KDC-BT61U stär l överensstämelse med de väsentliga egenskapskrav och övriga relevanta bestämmelser som framgår av direktiv 1999/5/EG. Suomi Kenwood vakuuttaa täten että KDC-BT6[…]
In the compatibility list, the suitable Bluetooth Firmware version is displayed in the <KENWOOD Bluetooth Firmware version> row.
If you need to change the firmware, proceed to <About the Bluetooth module firmware updater>.
・yes = Feature is supported and confirmed.
no = Function unavailable.
・The functions of the models listed on the table are checked under certain conditions at the date of issue.
Please note that performance may be different from the table above due to modification of phone specifications made after testing.
・Please note that the cell-phone models for which no information is provided, or whose operation capabilities are not confirmed are not listed.
・This result is based on the sample unit of each model used for testing. It does not prove the operation of all the units of the same model.
・For operation of the cell-phone, please refer to the cell phone instruction manual.
・KCA-BT300/KCA-BT200 is compatible with the following profiles.
HFP (Hands-Free Profile)
HSP (Headset Profile) * HSP may or may not be connectable from a cellphone to our Bluetooth device.
OPP (Object Push Profile)
PBAP(Phonebook Access Profile)
SYNC(Syncronization Profile)
SPP(Serial Port Profile)
A2DP(Advanced Audio Distribution Profile)
AVRCP(Audio/Video Remote Control Profile)
・KENWOOD Bluetooth Products are compatible with the following profiles.
HFP (Hands-Free Profile)
HSP (Headset Profile) * HSP may or may not be connectable from a cellphone to our Bluetooth device.
OPP (Object Push Profile)
PBAP(Phonebook Access Profile)
SYNC(Syncronization Profile)
SPP(Serial Port Profile)
A2DP(Advanced Audio Distribution Profile)
AVRCP(Audio/Video Remote Control Profile)
・KENWOOD Bluetooth Products are compatible with the following profiles.
HFP (Hands-Free Profile)
HSP (Headset Profile) * HSP may or may not be connectable from a cellphone to our Bluetooth device.
OPP (Object Push Profile)
PBAP(Phonebook Access Profile)
SYNC(Syncronization Profile)
SPP(Serial Port Profile)
・Noise may be produced during the call.
・Echoing may be heard loudly during the call.
・Noise may be produced when receiving a call or switching to conversation.
・The ring tone or phone volume may be set loud for some cell-phone models. Make sure to adjust the volume before driving.
・There are models which do not transfer «+»-mark (International call mark) with the Bluetooth connection.
In this case, the incoming call list of KCA-BT300/KCA-BT200 cannot be used for making a call.
・There are models which do not transfer «+»-mark (International call mark) with the Bluetooth connection.
In this case, the incoming call list of KENWOOD Bluetooth Products cannot be used for making a call.
・There are models which do not transfer «+»-mark (International call mark) with the Bluetooth connection.
In this case, the incoming call list of KENWOOD Bluetooth Products cannot be used for making a call.
・There are models which cannot make a call unless the standby display is shown.
・If connection with the cell-phone cannot be made, restart the cell-phone.
・Do not turn off the Head Unit while transferring the phone book.
・There are models where the phone book memorized in the SIM card cannot be transferred.
In this case, copy the phone book in the memory of the cell-phone, and then try to transfer.
・If a phone book cannot be transferred one by one, try to use the function of all phone book transfer.
・Do not leave the cell-phone inside the vehicle. This could damage the cell-phone.
・Depending on the connection with the cell-phone, it may take a while to delete the registration of the cell-phone or to switch to another cell-phone.
・The following numbers and characters can be used for phone numbers: 0 to 9,+, *, #
If a character other than the above is used, the phone number cannot be transferred correctly.
・If a call terminates from a phone with caller identification disabled, the caller name and number may not be displayed normally.
・Audio playing on A2DP (streaming audio) may be interrupted for seconds after its start.
・Audio playing on A2DP (streaming audio) may be interrupted for seconds after its start.
・The type of audio device used may result in a slow response on AVRCP (remote operation).
・The type of audio device used may result in a slow response on AVRCP (remote operation).
・If any Bluetooth operation, such as downloading a phonebook, is carried out while audio is playing on A2DP, the audio may be interrupted.
・If any Bluetooth operation, such as downloading a phonebook, is carried out while audio is playing on A2DP, the audio may be interrupted.
・The date and time of SMS reception may not be synchronized with those of call reception on the cellphone.
・Depending on the combination of devices connected on Bluetooth, A2DP audio (streaming audio) may be interrupted when it plays.
・Depending on the combination of devices connected on Bluetooth, A2DP audio (streaming audio) may be interrupted when it plays.
・Depending on the type of cellphone connected, the audio device connected on A2DP may sound at call origination.
・Depending on the type of cellphone connected, the audio device connected on A2DP may sound at call origination.
・In the phone book and on SMS, \ (\) will appear as \\ (\\).
・If subindexes (such as mobile and home) are used with Voice Recognize, remote subscribers may not be called up normally unless all the subindexes are entered.
・Subindex phonebook data is not updated by downloading phonebook data.

KDC-BT61U KDC-6051U
CD-RECEIVER
Quick Start Guide
AMPLI-TUNER LECTEUR DE CD
Guide de démarrage rapide
CD-RECEIVER
Kurzanleitung
CD RECEIVER
Snelstartgids
|
© 2010 Kenwood Corporation All Rights Reserved. |
B59-2061-00/00 (E0) |

|
Contents |
|
|
About the Quick Start Guide…………… |
2 |
|
Before use ………………………………………….. |
3 |
|
First step …………………………………………….. |
4 |
|
Basic Operations……………………………….. |
5 |
|
Playing Music (CD/USB/iPod)………….. |
6 |
|
Listening to the Radio ……………………… |
8 |
|
Hands-free phoning …………………………. |
9 |
|
Accessories ………………………………………. |
10 |
|
Installation Procedure ……………………. |
10 |
|
Before Installation…………………………… |
11 |
|
Connecting Wires to Terminals……… |
12 |
|
Installation/Removing the Unit…….. |
15 |
|
Installation the Microphone Unit … |
16 |
2 | Quick Start Guide
About the Quick Start
Guide
This Quick Start Guide explains the basic functions of this unit. For functions
not covered in this Guide, refer to the Instruction Manual (PDF file) contained in the included CD-ROM “Instruction Manual”. To refer to the Instruction Manual contained in the CD-ROM, a PC loaded with Microsoft® Windows XP/Vista/7 or Mac OS X® 10.4
or later is required in addition to Adobe® Reader™ 7.1 or Adobe® Acrobat® 7.1 or later. The Instruction Manual is subject to change for modification of specifications and so forth. You can download the latest version of the Instruction Manual from www.kenwood.com/cs/ce/.
¤CAUTION
•Keep battery out of reach of children and in original package until ready to use. Dispose of used batteries promptly. If swallowed contact physician immediately.
•Do not leave the battery near fire or under direct sunlight. A fire, explosion or excessive heat generation may result.
•Do not set the remote control in hot places such as on the dashboard.
•Danger of explosion if Lithium battery is incorrectly replaced. Replace only with the same or equivalent type.
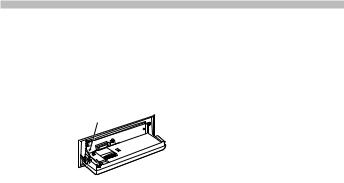
Reset button
Before use
2WARNING
To prevent injury or fire, take the following precautions:
To prevent a short circuit, never put or leave any metallic objects (such as coins or metal tools) inside the unit.
How to reset your unit
If this unit or the connected unit (auto disc changer, etc.) fails to operate
properly, press the Reset button. The unit returns to
factory settings when the Reset button is pressed.
Cleaning the Unit
If the faceplate of this unit is stained, wipe it with a clean soft dry cloth such as a silicon cloth.
If the faceplate is stained badly, wipe the stain off with a cloth moistened with a neutral cleaner, then wipe it again with a clean soft dry cloth.
Applying spray cleaner directly to the unit may affect its mechanical parts. Wiping the faceplate with a hard cloth or using a volatile liquid such as thinner or alcohol may scratch the surface or erase characters.
Unit and Faceplate Terminals
•To prevent deterioration, do not touch the terminals of the unit and faceplate with your fingers.
•If the terminals on the unit or faceplate get dirty, wipe them with a clean soft dry cloth.
Lens Fogging
When you turn on the car heater in cold weather, dew or condensation may form on the lens in the CD player of the unit.
Called lens fogging, this condensation on the lens may not allow CDs to play. In such a situation, remove the disc and wait for the condensation to evaporate. If the unit still does not operate normally after a while, consult your Kenwood dealer.
Notes
•If you experience problems during installation, consult your Kenwood dealer.
•When you purchase optional accessories, check with your Kenwood dealer to make sure that they work with your model and in your area.
•Characters that conform to ISO 8859-1 can be displayed.
•Characters that conform to ISO 8859-5 or ISO 8859-1 can be displayed. Set “Russian” of <Initial Settings> (page 34) (Instruction manual) to “On”.
•The Radio Data System feature won’t work where the service is not supported by any broadcasting station.
•In this document, the description indicator will light means a status is displayed. Refer to <Basic Operation> (page 28) (Instruction manual) for the details of the status display.
•The illustrations of the display and the panel appearing in this manual are examples used to explain more clearly how the controls are used. Therefore, what appears on the display in the illustrations may differ from what appears on the display on the actual equipment, and some of the illustrations on the display may be inapplicable.
English | 3
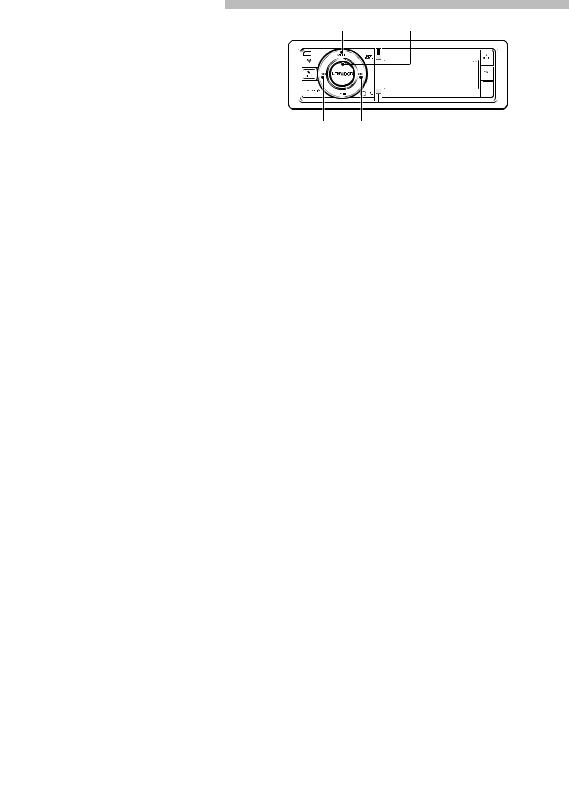
Turn the [VOL] knob to select “Date Mode select”, and then press the [VOL] knob.
Turn the [VOL] knob to select Date format, and then press the [VOL] knob.
Press the [MENU] knob for at least 1 second, and then press it again briefly to exit the Menu List mode.
First step
[MENU] [VOL]
[4]  [¢]
[¢]
Exit Demonstration Mode
Turn off the demonstration mode when you use it for the first time after installation.
1Press the [VOL] knob to quit the demonstration mode when the messages “To Cancel Demo Press the volume knob” are displayed (approx. 15 seconds).
2Turn the [VOL] knob to select “YES”, and then press the [VOL] knob.
The demonstration mode can also be canceled in the Menu List mode.
Refer to <Demonstration mode Setting> (page 35) of Instruction manual.
Adjusting the Date
1Press the [MENU] button to enter the Menu List mode.
2The item can be selected and determined as follows.
”Settings” “Clock & Date” “Date Adjust”
To select the item, turn the [VOL] knob. To determine the item, press the [VOL] knob.
3Press [4] or [¢] button to select year, month, or date to set.
4Turn the [VOL] knob to adjust the year, month, and date.
5Press the [MENU] button to finish the date adjusting.
6
4 | Quick Start Guide
|
Basic Operations |
|
|
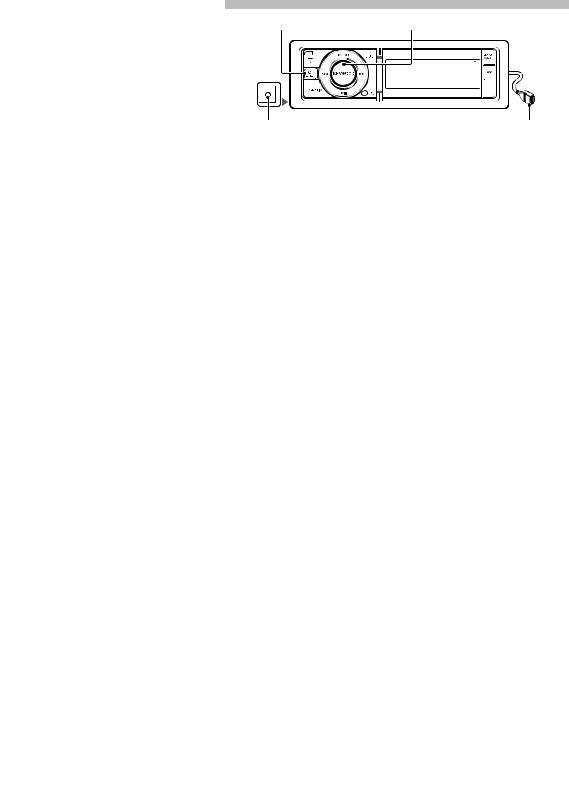
[SRC] |
[VOL] |
|
AUX |
|
|
Auxiliary input |
USB Terminal |
Power
Turns the power ON by pressing the [SRC] button.
Press the [SRC] button for at least 1 second to turn the power OFF.
Source selection
Press the [SRC] button and then turn the [VOL] knob. To determine the selected source, press the [VOL] knob.
Tuner (“TUNER”) Bluetooth Audio (“BT AUDIO”) (KDC-BT61U only) USB (“USB”) or iPod (“iPod”) CD (“CD”) Auxiliary Input (“AUX”) Standby (“STANDBY”)
Tuner…
Volume
Turn the [VOL] knob to adjust the sound volume.
USB terminal
USB device or iPod can be connected. CA-U1EX or KCA-iP101 (optional accessory) is recommended to connect a USB device or iPod.
Auxiliary input
Portable audio device can be connected with the stereo mini-plug (3.5 mm ø). Auxiliary input source is initially set to “OFF”. Set “Built in AUX” described in <Initial Settings> (page 34) (Instruction manual) to “ON”.
English | 5
Playing Music (CD/USB/iPod)
|
[Release] |
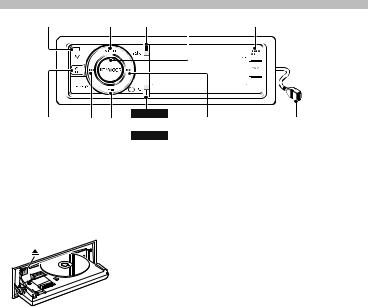
[MENU] [DISP] [VOL] |
[SEARCH MODE] |
KDC-BT61U
[SRC] [4] [38] [  ]
]
KDC-6051U
[TI]
Playing Disc
Press the [Release] button and drop open the faceplate.
Insert the disc in the Disc slot.
When inserted, the source is switched automatically and a song starts playing. Push the faceplate on the left side, and return it to its former position.
Playing USB device
Connect a USB device or iPod to the USB terminal.
When connected, the source is switched automatically and a song starts playing.
Selecting an Audio file folder
Fast Forward or Fast Backward of the Song
Press and hold the [4] or [¢] button to fast-forward or fast-backward the audio file containing songs (tracks or files).
Pause and play
Press the [38] button to pause or resume playing a song (track or file).
Press the [SEARCH MODE] button to select a next folder.
Selecting a Song
Press the [4] or [¢] button to select a song.
6 | Quick Start Guide
Music Search
Searching for the song you want to play.
1 Press the [MENU] button.
2Turn the [VOL] knob to select “Music”, and then press the [VOL] knob.
3 Search for music.
|
Operation type |
Operation |
|
|
Move between items |
Turn the [VOL] knob. |
|
|
Select an item |
Press the [VOL] knob. |
|
|
High Speed Search |
Press the [DISP] or [ |
] / |
|
[TI] button to scroll up or down |
||
|
by a page. |
||
|
Press the [DISP] or [ |
] / [TI] |
|
|
button for at least 1 second to |
||
|
continuously scroll up or down |
||
|
at high speed. Press the button |
||
|
again to stop scrolling. |
||
|
Return to previous item |
Press the [MENU] button. |
|
|
Return to Top menu |
Press the [MENU] button for at |
|
|
least 1 second. |
To cancel the music search operation of Audio file or iPod, press the [MENU] button for at least 1 second, and then press it again briefly.
Removing Disc
Press the [Release] button and drop open the faceplate.
Press the [0] button to eject a disc.
Removing USB device
Press the [38] button for at least 2 seconds to enter the USB Remove mode (“USB REMOVE” is displayed) and the USB device can be removed safely.
English | 7
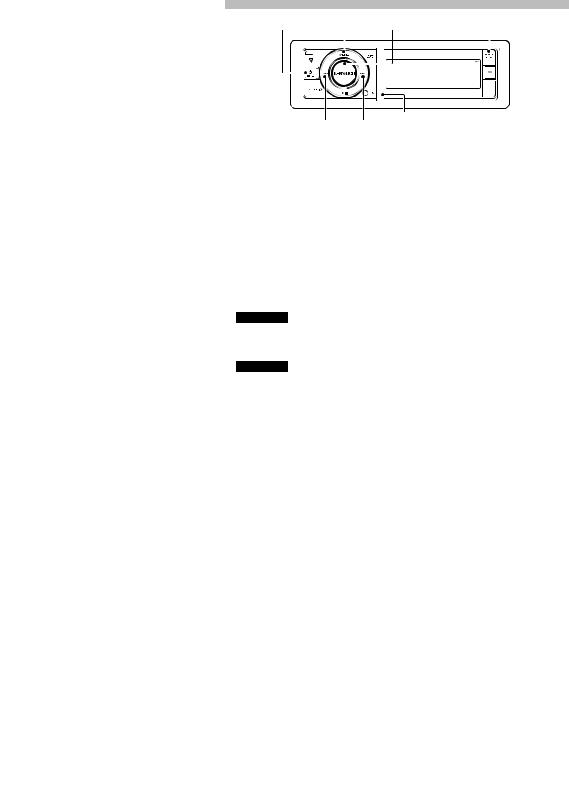
Listening to the Radio
|
[SRC] |
[MENU] [VOL] |
[SEARCH MODE] |
||||||||
|
[ |
] |
[ |
] |
KDC-6051U |
||||
|
4 |
¢ |
[TI] |
||||||
|
Selecting a Tuner source |
Station Preset Memory |
1 Press the [SRC] button.
2Turn the [VOL] knob to select “TUNER”, and then press the [VOL] knob.
Selecting the Band
Press the [SEARCH MODE] button to change the band in the order of FM1 FM2 FM3 AM.
Selecting a Station
Press the [4] or [¢] button to select the station you want to listen to.
Traffic information
KDC-BT61U
Press the [VOL] knob for at least 1 second to turns on or off the traffic information function alternately.
KDC-6051U
Press the [TI] button to turns on or off the traffic information function alternately.
If traffic bulletin starts when the function is ON, “Traffic INFO” is displayed and traffic information is received.
1Press the [4] or [¢] button to select the station you want to memory.
2 Press the [MENU] button.
3Turn the [VOL] knob to select “List & Memory”, and then press the [VOL] knob.
4Turn the [VOL] knob to select preset number (“1” – “6”), and then press the [VOL] knob for at least 2 seconds.
Recalling the stations in the memory
1 Press the [MENU] button.
2Turn the [VOL] knob to select “List & Memory”, and then press the [VOL] knob.
3Turn the [VOL] knob to select recall number (“1” – “6”), and then press the
[VOL] knob.
8 | Quick Start Guide
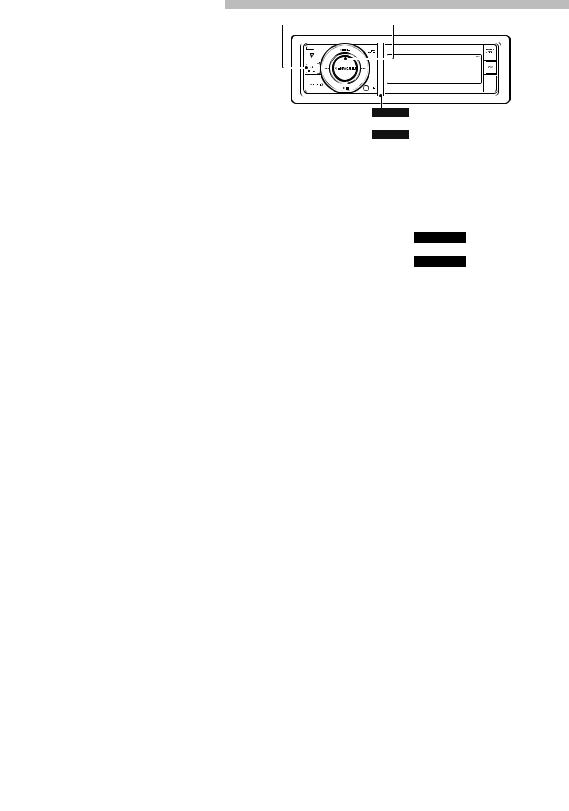
Function of KDC-BT61U/ KCA-BT300/ KCA-BT200 (Optional Accessory)
Hands-free phoning
|
[SRC] |
[VOL] |
|||
KDC-BT61U
[ ]
]
KDC-6051U
[TI]
Registering cell-phone
Register your Bluetooth cellphone in this unit.
1By operating the cell-phone, register the hands-free unit (pairing). Select
“KENWOOD BT CD/R-4P1”, “KCA-BT300” or “KCA-BT200” from the list of connected units.
2Enter the PIN code of this unit from the cellphone.
The PIN code of this unit is “0000” by default.
When registration of your cellphone is complete, the phone book of the
cellphone is automatically downloaded to this unit. (If the phone book has not been downloaded to this unit, operate the cellphone to download it.)
Calling a number in the Phone Book
Dial the phone number in the phone book of your cell phone.
If the phone book has not been downloaded to this unit, operate the cellphone to download it.
1 KDC-BT61U
Press the [ ] button.
KDC-6051U
Press the [TI] button for at least 1 second.
2Turn the [VOL] knob to select “Phonebook”, and then press the [VOL] knob.
3Turn the [VOL] knob to select initial of name, and then press the [VOL] knob.
4Turn the [VOL] knob to select phone number.
5 Press the [VOL] knob to dial.
Answering a Phone Call
Press the [VOL] knob.
Disconnecting a Call
Press the [SRC] button.
English | 9
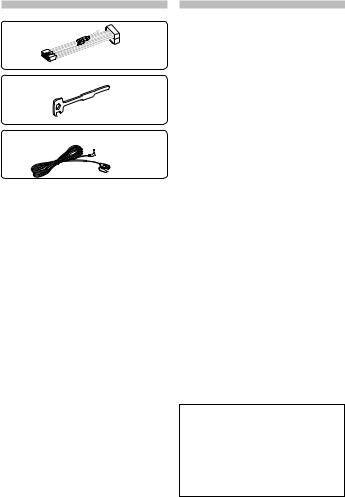
Accessories
1
…..1
2
…..2
3 (KDC-BT61U only)
…..1 (3m)
10 | Quick Start Guide
Installation Procedure
1.To prevent short circuits, remove the key from the ignition and disconnect the — terminal of the battery.
2.Make the proper input and output wire connections for each unit.
3.Connect the wire on the wiring harness.
4.Take Connector B on the wiring harness and connect it to the speaker connector in your vehicle.
5.Take Connector A on the wiring harness and connect it to the external power connector on your vehicle.
6.Connect the wiring harness connector to the unit.
7.Install the unit in your car.
8.Reconnect the — terminal of the battery.
9.Press the reset button.
¤CAUTION
Install this unit in the console of your vehicle.
Do not touch the metal part of this unit during and shortly after the use of the unit. Metal part such as the heat sink and enclosure become hot.
Before Installation
¤
•Mounting and wiring this product requires skills and experience. For safety’s sake, leave the mounting and wiring work to professionals.
•Make sure to ground the unit to a negative 12V DC power supply.
•Do not install the unit in a spot exposed to direct sunlight or excessive heat or humidity. Also avoid places with too much dust or the possibility of water splashing.
•Do not use your own screws. Use only the screws provided. If you use the wrong screws, you could damage the unit.
•If the power is not turned ON (“Protect” is displayed), the speaker wire may have a short-circuit or touched the chassis of the vehicle and the protection function may have been activated. Therefore, the speaker wire should be checked.
•Make sure that all wire connections are securely made by inserting jacks until they lock completely.
•If your vehicle’s ignition does not have an ACC position, or if the ignition wire is connected to a power source with constant voltage such as a battery wire, the power will not be linked with the ignition (i.e., it will not turn on and off along with the ignition). If you want to link the unit’s power with the ignition, connect the ignition wire to a power
source that can be turned on and off with the ignition key.
•Use a commercially available conversion connector if the connector does not fit in the vehicle connector.
•Insulate unconnected wires with vinyl tape or other similar material. To prevent a short circuit, do not remove the caps on the ends of the unconnected wires or the terminals.
•If the console has a lid, make sure to
install the unit so that the faceplate will not hit the lid when closing and opening.
•If the fuse blows, first make sure the wires aren’t touching to cause a short circuit, then replace the old fuse with one with the same rating.
•Connect the speaker wires correctly to the terminals to which they correspond. The unit may be damaged or fail to work if you share the — wires or ground them to any metal part in the car.
•After the unit is installed, check whether the brake lamps, blinkers, wipers, etc. on the car are working properly.
•Mount the unit so that the mounting angle is 30° or less.
•Reception may drop if there are metal objects near the Bluetooth antenna. (KDC-BT61U only)
Bluetooth antenna unit
For Good Reception
To assure good reception, note the following:
•Communicate with the cell-phone within the line-of-sight distance of 10 m (30
ft). The communication range becomes shorter depending on the surrounding environment. The communication range also becomes shorter when there is an obstacle between this unit and the cell-phone. The above maximum communication range (10 m) is not always assured.
•A broadcast station or walkie-talkie located nearby can interfere with communication due to too strong signal.
English | 11
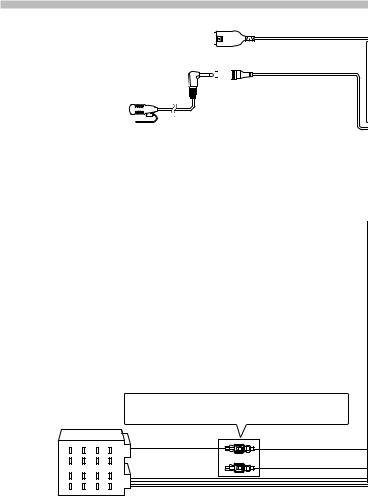
Connecting Wires to Terminals
|
⁄ Do not remove the cap when you |
USB connector (1m) |
||||||||||||||||||||||||||||||||
|
do not use the USB cable. The |
To USB device |
||||||||||||||||||||||||||||||||
|
connector will cause the unit to |
|||||||||||||||||||||||||||||||||
|
malfunction if it gets in touch with |
Microphone input (KDC-BT61U only) |
||||||||||||||||||||||||||||||||
|
any metallic part of the vehicle. |
|||||||||||||||||||||||||||||||||
|
Microphone |
|||||||||||||||||||||||||||||||||
|
(Accessory3) |
|||||||||||||||||||||||||||||||||
|
Connector Function Guide |
|||||||||||||||||||||||||||||||||
|
Pin Numbers for |
Cable Colour |
Functions |
|||||||||||||||||||||||||||||||
|
ISO Connectors |
|||||||||||||||||||||||||||||||||
|
External Power |
|||||||||||||||||||||||||||||||||
|
Connector |
|||||||||||||||||||||||||||||||||
|
A-4 |
Yellow |
Battery |
|||||||||||||||||||||||||||||||
|
A-5 |
Blue/White |
Power Control |
|||||||||||||||||||||||||||||||
|
A-6 |
Orange/White |
Dimmer |
|||||||||||||||||||||||||||||||
|
A-7 |
Red |
Ignition (ACC) |
|||||||||||||||||||||||||||||||
|
A-8 |
Black |
Earth (Ground) |
|||||||||||||||||||||||||||||||
|
Connection |
|||||||||||||||||||||||||||||||||
|
Speaker |
|||||||||||||||||||||||||||||||||
|
Connector |
|||||||||||||||||||||||||||||||||
|
B-1 |
Purple |
Rear Right (+) |
|||||||||||||||||||||||||||||||
|
B-2 |
Purple/Black |
Rear Right (–) |
|||||||||||||||||||||||||||||||
|
⁄ |
|||||||||||||||||||||||||||||||||
|
B-3 |
Gray |
Front Right (+) |
|||||||||||||||||||||||||||||||
|
B-4 |
Gray/Black |
Front Right (–) |
• |
Speaker Impedance: |
|||||||||||||||||||||||||||||
|
B-5 |
White |
Front Left (+) |
4 – 8 Ω |
||||||||||||||||||||||||||||||
|
B-6 |
White/Black |
Front Left (–) |
• |
USB terminal Maximum |
|||||||||||||||||||||||||||||
|
B-7 |
Green |
Rear Left (+) |
Supply current |
||||||||||||||||||||||||||||||
|
B-8 |
Green/Black |
Rear Left (–) |
: 500 mA |
||||||||||||||||||||||||||||||
|
⁄ See <Connecting the ISO Connector> (page 14). |
|||||||||||||||||||||||||||||||||
|
Yellow (A–4 Pin) |
Yellow (Battery wire) |
||||||||||||||||||||||||||||||||
|
Connector A |
8 |
6 |
4 |
2 |
|||||||||||||||||||||||||||||
|
7 |
5 |
3 |
1 |
Red (A–7 Pin) |
Red (Ignition wire) |
||||||||||||||||||||||||||||
|
Connector B |
8 |
6 |
4 |
2 |
|||||||||||||||||||||||||||||
|
7 |
5 |
3 |
1 |
12 | Quick Start Guide
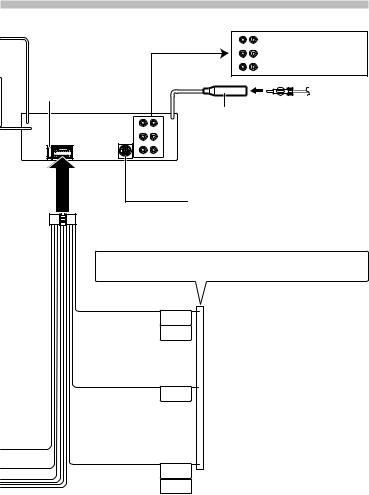
Rear output
R L
Front output
Sub Woofer output
Fuse (10A)
FM/AM antenna input (JASO)
RL
|
Wiring harness |
|
(Accessory1) |
 AUX input (Stereo)
Use the mini-plug which is stereo type and does not have any resistance.
To Kenwood disc changer/ External optional accessory
⁄To connect these leads, refer to the relevant instruction manuals.
If no connections are made, do not let the wire come out from the tab.
Blue/White (Power control/ Antenna control wire)
P.CONT
ANT.
CONT
Brown (Mute control wire)
MUTE
Light Blue/Yellow (Steering remote control wire)
REMOTE CONT
STEERING WHEEL
REMOTEINPUT
Connect either to the power control terminal when using the optional power amplifier, or to the antenna control terminal in the vehicle.
To connect the Kenwood navigation system, consult your navigation manual.
⁄Connect to the terminal that is grounded when either the telephone rings or during conversation. (KDC-6051U only)
To use the steering wheel remote control feature, an exclusive remote adapter (not supplied) that matches your car is required.
English | 13
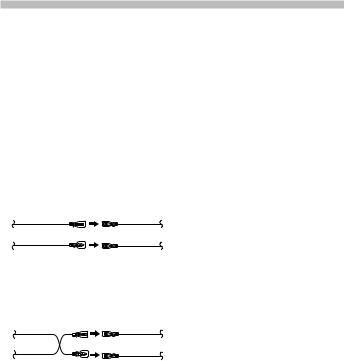
Connecting Wires to Terminals
Connecting the ISO Connector
The pin arrangement for the ISO connectors depends on the type of vehicle you drive. Make sure to make the proper connections to prevent damage to the unit.
The default connection for the wiring harness is described in 1 below. If the ISO connector pins are set as described in 2, make the connection as illustrated.
Please be sure to reconnect the cable as shown 2 below to install this unit to the Volkswagen vehicles etc.
1(Default setting) The A-7 pin (red) of the vehicle’s ISO connector is linked with the ignition, and the A-4 pin (yellow) is
connected to the constant power supply.
|
Ignition cable |
A-7 Pin |
|
(Red) |
(Red) |
|
Unit |
Vehicle |
|
Battery cable |
A-4 Pin |
|
(Yellow) |
(Yellow) |
2The A-7 pin (red) of the vehicle’s ISO connector is connected to the constant power supply, and the A-4 pin (yellow) is linked to the ignition.
|
Ignition cable |
A-7 Pin |
|
(Red) |
(Red) |
|
Unit |
Vehicle |
|
Battery cable |
A-4 Pin |
|
(Yellow) |
(Yellow) |
14 | Quick Start Guide
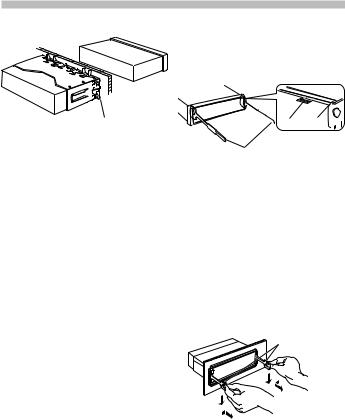
Installation/Removing the Unit
Installation
Bend the tabs of the mounting sleeve with a screwdriver or similar utensil and attach it in place.
⁄
•Make sure that the unit is installed securely in place. If the unit is unstable, it may malfunction (for example, the sound may skip).
Removing the hard rubber frame
1.Engage the catch pins on the removal tool and remove the two locks on the upper level.
Lift up and pull the frame forward as shown in the figure.

 Lock Catch
Removal tool (Accessory2)
2.When the upper level is removed, remove the lower two locations.
⁄
•The frame can be removed from the bottom side in the same manner.
Removing the Unit
1.Refer to the section <Removing the hard rubber frame> and then remove the hard rubber frame.
2.Remove the faceplate.
3.Insert the two removal tools deeply into the slots on each side, as shown.
4.Lower the removal tool toward the bottom, and pull out the unit halfway while pressing towards the inside.
Accessory2
¤
•Be careful to avoid injury from the catch pins on the removal tool.
5.Pull the unit all the way out with your hands, being careful not to drop it.
English | 15
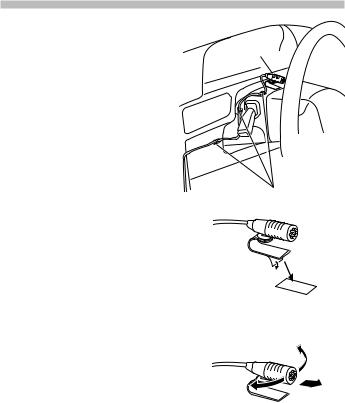
KDC-BT61U only
Installation the Microphone Unit
1.Check the installation position of the microphone (accessory 3).
|
2. |
Remove oil and other dirt from the |
Accessory3 |
|
installation surface. |
||
|
3. |
Install the microphone. |
|
|
4. |
Wire the cable up to the unit with it |
|
|
secured at several positions using tape or |
||
|
the like. |
⁄
• Install the microphone as far as possible from the cell-phone.
Fix a cable with a commercial item of tape.
Peel the release coated paper of doubleface adhesive tape to fix on the place shown above.
Adjust the direction of the microphone to the driver.
16 | Quick Start Guide
This Product is not installed by the manufacturer of a vehicle on the production line, nor by the professional importer of a vehicle into an EU Member State.
Information on Disposal of Old Electrical and Electronic Equipment and Batteries (applicable for EU countries that have adopted separate waste collection systems)
Products and batteries with the
symbol (crossed-out wheeled bin) cannot be disposed as household waste.
Old electrical and electronic equipment and batteries should be recycled at a facility capable of

 handling these items and their waste
byproducts.
Contact your local authority for details in locating a recycle facility nearest to
you.
Proper recycling and waste disposal will help conserve resources whilst preventing detrimental effects on our health and the environment.
Notice: The sign “Pb” below the symbol for batteries indicates that this battery contains lead.
The marking of products using lasers
CLASS 1
LASER PRODUCT
The label is attached to the chassis/case and says that the component uses laser beams that have been classified as Class 1. It means that the unit is utilizing laser beams that are of a weaker class. There is no danger of hazardous radiation outside the unit.
For Turkey
Bu ürün 26891sayılı Resmi Gazete’de yayımlanan Elektrikli ve Elektronik Eşyalarda Bazı Zararlı Maddelerin Kullanımının Sınırlandırılmasına Dair Yönetmeliğe uygun olarak üretilmiştir.
This product complies with Directive, Number 26891 regarding “REGULATION ON THE RESTRICTION OF THE USE OF CERTAIN HAZARDOUS SUBSTANCES IN ELECTRICAL AND ELECTRONIC EQUIPMENT”.
This symbol mark indicates that Kenwood manufactured this product so as to decrease harmful influence on the environment.
•The Bluetooth word mark and logos are owned by the Bluetooth SIG, Inc. and any use of such marks by Kenwood Corporation is under license. Other trademarks and trade names are those of their respective owners.
•The “AAC” logo is a trademark of Dolby Laboratories.
•iPod is a trademark of Apple Inc., registered in the U.S. and other countries.
•iPhone is a trademark of Apple Inc.
•“Made for iPod” means that an electronic accessory has been designed to connect specifically to iPod and has been certified by the developer to meet Apple performance standards.
•“Works with iPhone” means that an electronic accessory has been designed to connect specifically to iPhone and has been certified by the developer to meet Apple performance standards.
•Apple is not responsible for the operation of this device or its compliance with safety and regulatory standards.
•“Adobe Reader” is a trademark of Adobe Systems Incorporated.

|
Table des matières |
|
|
À propos du Guide de démarrage |
|
|
rapide …………………………………………….. |
18 |
|
Avant utilisation………………………………. |
19 |
|
Étape 1 ……………………………………………… |
20 |
|
Fonctionnement basique………………. |
21 |
|
Reproduire de la musique |
|
|
(CD/USB/iPod)………………………………. |
22 |
|
Écoute de la radio …………………………… |
24 |
|
Téléphonie mains libres…………………. |
25 |
|
Accessoires ………………………………………. |
26 |
|
Procédure d’installation…………………. |
26 |
|
Avant installation ……………………………. |
27 |
|
Connexion des câbles aux bornes .. |
28 |
|
Installation/Retrait de l’appareil …… |
31 |
|
Installation de l’unité de |
|
|
microphone …………………………………. |
32 |
18 | Guide de démarrage rapide
À propos du Guide de démarrage rapide
Ce Guide de démarrage rapide décrit les fonctions de base de cet appareil. Pour les fonctions non abordées dans ce Guide, reportez-vous au Mode d’emploi (fichier PDF) contenu dans le CD-ROM “Mode d’emploi” inclus.
Pour consulter le Mode d’emploi contenu dans le CD-ROM, un ordinateur doté de Microsoft® Windows XP/Vista/7 ou Mac OS X® 10.4 ou supérieur est nécessaire outre Adobe® Reader™ 7.1 ou Adobe® Acrobat® 7.1 ou supérieur.
Les spécifications et autres contenues dans le Mode d’emploi sont soumis à modification. Vous pouvez télécharger la dernière version du Mode d’emploi sur le site www.kenwood.com/cs/ce/.
¤ATTENTION
•Conservez les piles hors de portée des enfants dans leur conditionnement original jusqu’à leur utilisation. Débarrassez-vous des piles usagées rapidement. En cas d’ingestion, contactez un médecin immédiatement.
•Ne pas laisser la pile près d’une flamme ni en plein soleil. Cela pourrait provoquer un incendie, une explosion ou une surchauffe excessive.
•Ne pas poser la télécommande sur des endroits chauds, comme par exemple sur le tableau de bord.
•Danger d’explosion en cas de remplacement incorrect de la pile au lithium. Ne remplacer uniquement qu’avec le même type de pile ou son équivalent.
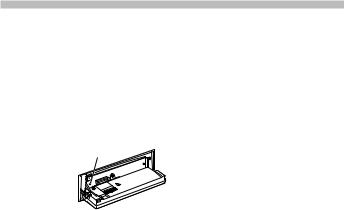
Avant utilisation
2AVERTISSEMENT
Pour éviter toute blessure et/ ou incendie, veuillez prendre les précautions suivantes :
Pour éviter tout court-circuit, ne posez jamais d’objets métalliques (telles que pièces ou outils métalliques à l’intérieur de l’unité.
|
Comment réinitialiser votre |
||
|
appareil |
Bouton de |
|
|
Si cet appareil |
||
|
réinitialisation |
||
|
ou l’appareil |
||
|
connecté (changeur |
||
|
de disques |
||
|
automatique, etc.) |
||
|
ne fonctionne |
||
|
pas correctement, |
appuyez sur le
bouton de réinitialisation. Les paramètres d’usine sont restaurés lorsque vous appuyez sur le bouton de réinitialisation.
Nettoyage de l’appareil
Si la façade de l’appareil est sale, nettoyezla à l’aide d’un chiffon doux propre, tel un chiffon en silicone.
Si la façade est très sale, nettoyez la saleté à l’aide d’un chiffon imbibé d’un nettoyant neutre, essuyez ensuite à l’aide d’un chiffon doux et sec.
L’application d’un vaporisateur directement sur l’appareil peut altérer ses pièces mécaniques. Nettoyer la façade à l’aide d’un chiffon dur ou d’un liquide volatile, tel que dissolvant ou alcool peut rayer la surface ou effacer les caractères.
Contacts de l’appareil et de la façade
•Afin d’éviter d’endommager les contacts de l’appareil et de la façade, ne les touchez pas avec les doigts.
•En cas de saleté sur les contacts de l’appareil ou de la façade, nettoyez à l’aide d’un chiffon doux et sec.
Condensation sur la lentille
Lorsque vous allumez le chauffage du véhicule par temps froid, de la buée ou de la condensation risque de se former sur la lentille du lecteur CD de l’appareil. Cette condensation peut rendre la lecture de CD impossible. Dans ce cas, retirez le disque et attendez que l’humidité s’évapore. Si l’appareil ne fonctionne pas normalement par la suite, consultez votre revendeur Kenwood.
Remarques
•Si vous rencontrez des problèmes pendant l’installation, consultez votre revendeur Kenwood.
•Lorsque vous achetez des accessoires en option, vérifiez auprès de votre revendeur Kenwood que ces accessoires fonctionnent avec votre modèle dans votre région.
•Des caractères conformes à l’ISO 8859-1 peuvent être affichés.
•Les caractères conformes à l’ISO 8859-5 ou l’ISO 8859-1 peuvent être affichés. Réglez “Russian” dans <Réglage initial> (page 38) (MODE D’EMPLOI) sur “On”.
•La fonctionnalité Radio Data System ne sera pas disponible si le service n’est pas pris en charge par une station de radiodiffusion.
•Dans ce document, l’indicateur de description qui s’allume signifie l’affichage d’un état. Reportez-vous à la section <Fonctionnement basique> (page 32) (MODE D’EMPLOI) pour plus d’informations sur l’affichage d’état.
•Les illustrations de l’affichage et du panneau apparaissant dans ce manuel sont des exemples utilisés pour expliquer avec plus de clarté comment les commandes sont utilisées. Il est donc possible que les illustrations d’affichage puissent être différentes de ce qui est réellement affiché sur l’appareil et aussi que certaines illustrations représentent des choses impossibles à réaliser en cours de fonctionnement.
Français | 19
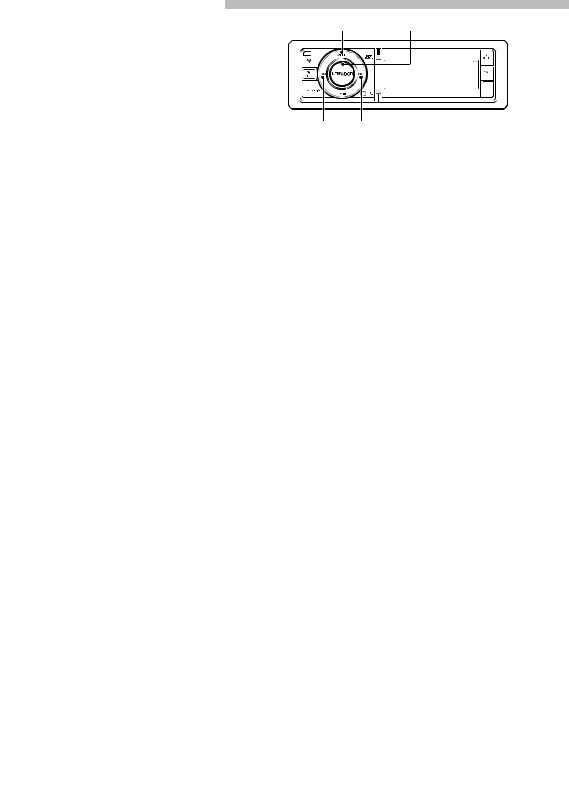
Étape 1
[MENU] [VOL]
[4]  [¢]
[¢]
Quitter le mode démonstration
La première fois que vous utilisez l’appareil après l’avoir installé, vous devez désactiver le mode de démonstration.
1Appuyez sur la molette [VOL] pour quitter le mode de démonstration lorsque le message “To Cancel Demo Press the volume knob” s’affiche (environ 15 secondes).
2Tournez la molette [VOL] pour sélectionner “YES”, puis appuyez sur la molette [VOL].
Le mode de démonstration peut également être désactivé dans le mode Liste des menus.
Reportez-vous à la section <Réglage du mode de démonstration> (page 39) dans le mode d’emploi.
Réglage de la date
1Appuyez sur la touche [MENU] pour entrer dans le mode Liste des menus.
2Sélectionnez et confirmez l’élément comme suit.
”Settings” “Clock & Date” “Date Adjust”
Pour sélectionner l’élément, tournez la molette [VOL]. Pour confirmer l’élément, appuyez sur la molette [VOL].
3Appuyez sur la touche [4] ou [¢] pour sélectionner l’année, le mois ou le jour.
4Tournez la molette [VOL] pour définir l’année, le mois et le jour.
5Appuyez sur la touche [MENU] pour terminer le réglage de la date.
6Tournez la molette [VOL] pour sélectionner “Date Mode select”, puis appuyez sur la molette [VOL].
7Tournez la molette [VOL] pour sélectionner le format de date format, puis appuyez sur la molette [VOL].
8Appuyez sur la touche [MENU] pendant au moins 1 seconde, puis appuyez à nouveau dessus brièvement pour quitter le mode Liste des menus.
20 | Guide de démarrage rapide
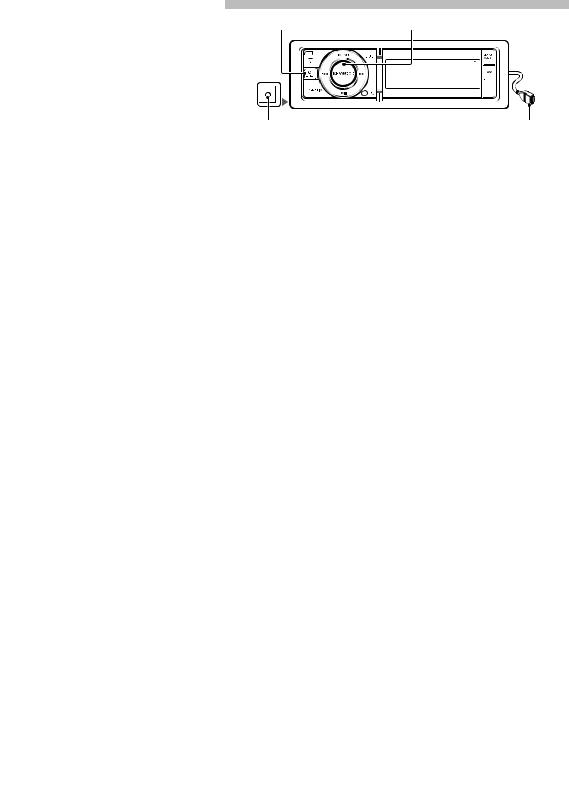
|
Fonctionnement basique |
|
|
[SRC] |
[VOL] |
|
AUX |
|
|
Entrée auxiliaire |
Prise USB |
Alimentation
L’appareil s’allume en appuyant sur la touche [SRC].
Appuyez sur la touche [SRC] pendant au moins 1 seconde pour éteindre l’appareil.
Sélection de la source
Appuyez sur la touche [SRC] et tournez la molette [VOL]. Pour confirmer la source sélectionnée, appuyez sur la molette [VOL].
Tuner (“TUNER”) Audio Bluetooth (“BT AUDIO”) (KDC-BT61U uniquement) USB (“USB”) ou iPod (“iPod”) CD (“CD”)Entrée auxiliaire Input (“AUX”) Veille (“STANDBY”) Tuner…
Volume
Entrée auxiliaire
Un dispositif audio portable peut être branché au mini-jack stéréo (ø 3,5 mm). La source d’entrée auxiliaire est réglée initialement sur “OFF” (arrêt). Réglez “Built in AUX”, tel que décrit dans la section <Réglage initial> (page 38) (mode d’emploi) sur “ON”.
Tournez la molette [VOL] pour régler le volume.
Prise USB
Vous pouvez connecter un périphérique USB ou un iPod.
Pour la connexion d’un périphérique USB ou d’un iPod, l’utilisation du câble CA-U1EX ou KCA-iP101 (accessoires en option) est recommandée.
Français | 21
 Loading…