
Перейти к контенту
Требуется руководство для вашей Geha Home and Office A3 Basic Ламинатор? Ниже вы можете просмотреть и загрузить бесплатно руководство в формате PDF. Кроме того, приведены часто задаваемые вопросы, рейтинг изделия и отзывы пользователей, что позволит оптимально использовать ваше изделие. Если это не то руководство, которое вы искали, – свяжитесь с нами.
Ваше устройство неисправно, и в руководстве отсутствует решение? Перейдите в Repair Café для получения бесплатных ремонтных услуг.
Руководство

Рейтинг
Сообщите нам, что вы думаете о Geha Home and Office A3 Basic Ламинатор, оставив оценку продукта. Хотите поделиться вашими впечатлениями от данного изделия или задать вопрос? Вы можете оставить комментарий в нижней части страницы.
Довольны ли вы данным изделием Geha?
Да Нет
Будьте первым, кто оценит это изделие
0 голоса
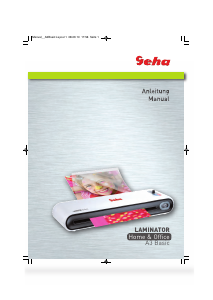
инструкцияGeha Home & Office A3 Basic

Anleitung
Manual
LAMINATOR
Home & Office
A3 Basic
Manual__A3Basic:Layout 1 08.09.10 17:56 Seite 1
Посмотреть инструкция для Geha Home & Office A3 Basic бесплатно. Руководство относится к категории ламинаторы, 1 человек(а) дали ему среднюю оценку 6.3. Руководство доступно на следующих языках: русский, английский. У вас есть вопрос о Geha Home & Office A3 Basic или вам нужна помощь? Задайте свой вопрос здесь
![]()
Главная
| Geha | |
| Home & Office A3 Basic | |
| ламинатор | |
| русский, английский | |
| Руководство пользователя (PDF) |
Не можете найти ответ на свой вопрос в руководстве? Вы можете найти ответ на свой вопрос ниже, в разделе часто задаваемых вопросов о Geha Home & Office A3 Basic.
Инструкция Geha Home & Office A3 Basic доступно в русский?
Не нашли свой вопрос? Задайте свой вопрос здесь
Страница: 1
25
ВВЕДЕНИЕ
Поздравляем Вас с покупкой этого ламинатора, с помощью которого Вы смо-
жете запечатывать свои любимые фотографии, письма и документы, а также
тонкие объекты до величины A3 в водонепроницаемую и герметичную оболочку.
Соблюдайте указания данного руководства по эксплуатации и сохраняйте его
для справок в будущем.
ВАЖНЫЕ УКАЗАНИЯ ПО ТЕХНИКЕ БЕЗОПАСНОСТИ
1. Внимательно прочитайте руководство по эксплуатации и все указания.
2. Следите за тем, чтобы не прикасаться к горячим поверхностям.
3. Никогда не погружайте кабель сетевого питания, сетевой штепсель
и т.д. в воду или другие жидкости. В противном случае имеется опасность
удара электрическим током.
4. Будьте особенно внимательны, когда устройство используется детьми или
вблизи от детей.
5. Отсоединяйте устройство от сети, когда в нем нет необходимости и
перед тем, как чистить его. Дайте ему охладиться, прежде чем вставлять
или вынимать части или чистить устройство.
6. Не используйте устройство при обнаружении повреждения кабеля сетевого
питания или сетевого штепселя, если устройство показывает сбои или
каким-либо образом повреждено. Отнесите его на ремонт в ближайшую
допущенную службу сервисного обслуживания.
7. При применении принадлежностей, которые не рекомендованы или
не предложены производителем, может существовать опасность
травмирования.
8. Не используйте устройство под открытым небом.
9. Используйте устройство исключительно по назначению.
10. Отключайте устройство, когда в нем нет необходимости длительное время.
11. Устройство нужно подключать по возможности в ближайшую штепсельную
розетку, которая должна быть легко доступна.
12. Не ламинируйте листов, которые содержат металл или проводящие
материалы.
13. Для предотвращения опасности запутаться или споткнуться о кабель,
устройство оснащено относительно коротким кабелем.
При применении удлинителя соблюдайте следующие указания:
a. Указанные для удлинительного кабеля электрические номинальные
данные должны по меньшей мере соответствовать электрическим
паспортным данным устройства.
b. Удлинительный кабель не должен свешиваться со стола или шкафа,
где дети могли бы потянуть за него, а другие споткнуться об него.
Manual__A3Basic:Layout 1 08.09.10 17:56 Seite 25
Страница: 2
26
ОБРАЩЕНИЕ С УСТРОЙСТВОМ
• Не рекомендуется ламинировать самопроявляющиеся фотографии.
• Фотографии перед ламинированием должны быть сухими.
• Не ламинируйте толстые или тяжелые документы, так как они могут
застрять в ламинаторе. Если что-нибудь застрянет в устройстве,
обращайтесь за ремонтом в местную допущенную службу сервисного
обслуживания.
• Ламинатор прочно наклеивает ламинирующую пленку на покрываемое
изделие. Позже удалить ламинирующую пленку невозможно.
• Не рекомендуется ламинировать ценные предметы коллекционирования
или изделия, которые Вы при необходимости позже хотели бы снова
освободить от пленки. Нельзя ламинировать монеты и толстые предметы
с помощью этого устройства.
1. Активируйте устройство нажатием движкового выключателя вправо или
влево соответственно температуре ламинирования, подходящей для
толщины пленки (Рис. 2). Зажигается красная лампочка.
2. Как только загорится синяя лампочка, устройство готово к ламинированию
(рисунок 1). Для прогрева устройства требуется около 3-5 минут.
3. Вставьте предмет ламинирования в оболочку для ламинирования и
выровняйте его в ней по центру. Следите за тем, чтобы документ или
фото находились как можно ближе к свариваемой кромке.
• Для этого ламинатора не требуется применения оболочки для протяжки
(Carrier).
• Ламинатор может обрабатывать оболочки для ламинирования толщиной
80-125 мкм и функционирует с большинством оболочек для горячего
ламинирования.
4. Введите свариваемую кромку оболочки для ламинирования прямо в
СЕРЕДИНУ ввода на ламинаторе.
5. Возьмите ламинированный предмет по окончании процесса
ламинирования на обратной стороне устройства.
6. Определенные сорта бумаги не ламинируются равномерно и кажутся
несколько тусклыми или мутными. В этом случае можно улучшить результат
ламинирования, повторно пропустив ламинированный документ через
ламинатор.
рис. 1
рис. 2
Manual__A3Basic:Layout 1 08.09.10 17:56 Seite 26
Страница: 3
27
7. Если ламинируемое изделие осталось в устройстве, нажмите клавишу
деблокировки (рис. 1) в верхней части устройства для остановки процесса
ламинирования. Затем вытяните подлежащий ламинированию документ в
направлении вперед из устройства.
ЧИСТКА И УХОД
Ремонтные работы, выходящие за рамки нормальной чистки и ухода, могут
выполняться только допущенной службой сервисного обслуживания.
Никогда не погружайте устройство в воду. Никогда сами не открывайте днище
устройства. Иначе существует опасность пожара и удара электрическим током.
В устройстве нет частей, которые могут обслуживаться пользователем самостоятельно.
Ремонт всегда нужно поручать допущенной службе сервисного обслуживания.
• При работе устройства держите руки и кабель сетевого питания вдалеке
от горячих частей устройства.
• Никогда не чистите устройство порошком для чистки, шабером или скребком.
• Используйте для чистки устройства только мягкую ткань.
ТЕХНИЧЕСКИЕ ДАННЫЕ
Напряжение 220-240 В, 50 Гц
Ток 1,0 A
Потребляемая мощность макс. 250 Вт
Толщина пленки 80-125 микрон
Макс. размер документа A3
Длительность разогрева прибл. 3-5 минут
Скорость ламинирования прибл. 300 мм /мин
Макс. толщина документа 0,6 мм
УТИЛИЗАЦИЯ
Символ с перечеркнутым мусоросборником указывает на то, что электрические
устройства не подлежат устранению вместе с нормальным домашним мусором.
Для экологически чистой утилизации просим сдавать это устройство в
допущенный пункт сбора ценных материалов.
ГАРАНТИЯ
Гарантийный срок на Ваше устройство составляет 24 месяца.
Обязательно сохраняйте квитанцию о покупке и упаковку завода-изготовителя.
При проблемах с устройством обращайтесь к своему торговому агенту.
Manual__A3Basic:Layout 1 08.09.10 17:56 Seite 27
Specifications:342/342658-a3_basic.pdf file (29 Nov 2022) |
Accompanying Data:
GEHA A3 BASIC Other PDF Manual (Updated: Tuesday 29th of November 2022 11:35:34 AM)
Rating: 4.9 (rated by 53 users)
Compatible devices: OFFICE X17 CD, A3 PREMIUM, CREATIVEBOARD, OFFICE X15 CD, S7 CD, OFFICE S15, X5, OFFICE X7 CD.
Recommended Documentation:
Text Version of Manual
(Ocr-Read Summary of Contents of some pages of the GEHA A3 BASIC Document (Main Content), UPD: 29 November 2022)
-
9, 9 CARE AND CLEANING Only authorised service teams should perform any servicing other than cleaning and user maintenance. Do not immerse in water. To reduce the risk of fire or electrical shock, do not remove the base. No user serviceable parts are inside. Repair should be done by authorised service personnel onl…
-
37, 37 INTRODUCERE Vă felicităm pentru achiziionarea acestui laminator cu ajutorul căruia putei sigila ermetic i etan atât fotografii, scrisori i documente, cât i obiecte subiri până la mărimea A3. Vă rugăm citii prezentele instruciuni de utilizare i păstrai-l …
-
4, 4 EINLEITUNG Wir gratulieren Ihnen zum Kauf dieses Laminiergeräts, mit dem Sie Ihre Lieblingsfotos, Rezepte, Briefe und Dokumente sowie dünne Objekte bis Größe A3 wasser- und luftdicht versiegeln können. Bitte beachten Sie die Hinweise in dieser Bedienungsanleitung und bewahren Sie diese zum sp�…
-
8, GEHA A3 BASIC 8 HOW TO USE THE APPLIANCE • We do not recommend laminating any type of self-developing photo. • Any photo to be laminated must be dry before processing. • Do not laminate any documents that appear thick or heavy, as they will get stuck in the laminator. If this occurs, please contact your local service centr…
-
30, GEHA A3 BASIC 30 RENGÖRING OCH SKÖTSEL Reparationer, som går utöver den normala rengöringen och underhållet får endast utföras av en godkänd kundtjänst. Apparaten får aldrig doppas i vatten. Öppna aldrig apparatens botten på egen hand. I annat fall finns risk för brand och elektriska stötar. Inne i apparaten finns in…
-
7, GEHA A3 BASIC 7 INTRODUCTION Congratulations on your purchase of the laminator. Now you can protect your favourite pho- tos, recipe cards, letters and legal size documents as well as other types of thin objects up to A3 size in a waterproof, airtight seal. Follow the instructions for proper use and keep this book for fu…
-
18, 18 NETTOYAGE ET ENTRETIEN Les réparations allant au-delà du nettoyage et de l’entretien normal doivent être uniquement effectuées par un service après-vente agréé.N’immergez jamais l’appareil dans l’eau. N’ouvrez jamais vous-même le fond de l’appareil. Risque de brûlure et d’électro…
-
GEHA A3 BASIC User Manual
-
GEHA A3 BASIC User Guide
-
GEHA A3 BASIC PDF Manual
-
GEHA A3 BASIC Owner’s Manuals
Recommended: CCZ254AT, USB 2.0 120GB, GroundDrill — 1


-
Weider Pro Pt 800 Bench
MANUALE DʼISTRUZIONINº del Modello WEEVBE1495.1Nº di SerieRiportare il numero di serie nellospazio soprastante per eventualicomunicazioni future.Etichettadel Nº. diSerieATTENZIONELeggere tutte le istruzioni e pre-cauzioni elencate in questomanuale prima di utilizzare que-sta attrezzatura. Conservare ilmanuale pe …
Pro Pt 800 Bench 16
-
Huawei CR52-SFUA
Quidway® NetEngine 80E Core Router Switch Fabric Unit Copyright ©2007 Huawei Technologies Co., Ltd. All rights reserved. http://www.huawei.com/products/datacomm/ 1 Quidway® NetEngine 80E Core Router Switch Fabric Unit The Switch Fabric Unit (SFU) on the Quidway® NetEngine 80E core router (“NE80E” hereinafte …
CR52-SFUA 1
-
Samsung HT-Z210
DVD RECEIVER DVDREMAINSTEP PAUSEPORTAUDIOP.BASSSUBTITLE2 remote control functions19PORT buttonPress to select the USB mode.20 OPEN/CLOSE button21TV/VIDEO buttonPress TV/VIDEO button to select the Videoinput on your TV.22RDS Selection buttons23CANCEL buttonUsed to cancel a wrong entry.24PAUSE buttonPress t …
HT-Z210 2
-
Philips DCM580
Register your product and get support atwww.philips.com/welcomeDCM580EN User manual 3DA Brugervejledning 21DE Benutzerhandbuch 39ES Manual del usuario 59FR Mode d’emploi 79IT Manuale utente 99NL Gebruiksaanwijzing 119SV Användarhandbok 139 …
DCM580 20
Popular Right Now:
Operating Impressions, Questions and Answers:
Download or browse on-line these Manual for GEHA A3 BASIC Other.
More Manuals:
In case you failed to obtain relevant information in this document, please, look through related operating manuals and user instructions for GEHA A3 BASIC.
Just click one of the links below to go to the selected manual:

Summary of Contents:
 |
[Page 1] GEHA A3 BASIC Anleitung Manual LAMINATOR Home & Office A3 Premium Manual__A3Premium:Layout 1 11.10.10 12:55 Seite 1 |
 |
[Page 2] GEHA A3 BASIC Laminierfolien Laminating Pouches www.geha.de Stärke für Format Stück Foliengröße in mm Thickness for format pieces size in mm 80 Mic 80 Mic 80 Mic 80 Mic 80 Mic 80 Mic 80 Mic 80 Mic 80 Mic 80 Mic 80 Mic 125 Mic 125 Mic 125 Mic 125 Mic 125 Mic… |
 |
[Page 3] GEHA A3 BASIC 3 D GB I E F NL UAE RUS S GR TR RO PL CN 4 7 10 13 16 19 22 25 28 31 34 37 40 43 Wählen Sie Ihre Sprache. Select your language. Manual__A3Premium:Layout 1 11.10.10 12:55 Seite 3 |
 |
[Page 4] GEHA A3 BASIC 4 EINLEITUNG Wir gratulieren Ihnen zum Kauf dieses Laminiergeräts, mit dem Sie Ihre Lieblingsfotos, Rezepte, Briefe und Dokumente sowie dünne Objekte bis Größe A3 wasser- und luftdicht versiegeln können. Bitte beachten Sie die Hinweise in diese… |
 |
[Page 5] GEHA A3 BASIC 5 UMGANG MIT DEM GERÄT • Wir raten davon ab, selbstentwickelnde Fotos zu laminieren. • Fotos müssen vor dem Laminieren trocken sein. • Laminieren Sie keine dicken oder schweren Dokumente, da diese im Laminiergerät stecken bleiben können. … |
 |
[Page 6] GEHA A3 BASIC 6 REINIGUNG UND PFLEGE Reparaturen, die über die normale Reinigung und Wartung hinausgehen, dürfen nur von einer zugelassenen Kundendienststelle ausgeführt werden. Tauchen Sie das Gerät niemals in Wasser. Öffnen Sie den Geräteboden niemals sel… |
 |
[Page 7] GEHA A3 BASIC 7 INTRODUCTION Congratulations on your purchase of the laminator. Now you can protect your favourite pho- tos, recipe cards, letters and legal size documents as well as other types of thin objects up to A3 size in a waterproof, airtight seal. Follow … |
 |
[Page 8] GEHA A3 BASIC 8 HOW TO USE THE APPLIANCE • We do not recommend laminating any type of self-developing photo. • Any photo to be laminated must be dry before processing. • Do not laminate any documents that appear thick or heavy, as they will get stuck in th… |
 |
[Page 9] GEHA A3 BASIC 9 CARE AND CLEANING Only authorised service teams should perform any servicing other than cleaning and user maintenance. Do not immerse in water. To reduce the risk of fire or electrical shock, do not remove the base. No user serviceable parts are in… |
 |
[Page 10] GEHA A3 BASIC 10 INTRODUZIONE Congratulazioni per l’acquisto della presente plastificatrice, con cui potrete sigillare a prova di acqua e aria le vostre foto preferite, lettere, documenti come pure oggetti sottili di dimensioni fino al formato A3. Vi preghiamo… |
 |
[Page 11] GEHA A3 BASIC 1 Interruttore (cold/off/hot) 2 Indicatore LED (indicatore di funzione) 3 Fondo dell’alloggiamento 4 Direzione di inserimento 5 Copertura decorata 6 Larghezza di plastificazione max. 7 Coperchio alloggiamento 8 Uscita documenti 9 Cavo di alimentazi… |
 |
[Page 12] GEHA A3 BASIC 12 PULIZIA E MANUTENZIONE Le riparazioni che esulano dalla normale pulizia e manutenzione possono essere eseguite esclusivamente da un centro di assistenza autorizzatoNon immergere mai l’apparecchio in acqua. Non aprire mai da soli la parte inferi… |
 |
[Page 13] GEHA A3 BASIC 13 INTRODUCCIÓN ¡Felicitaciones por su adquisición de este dispositivo laminador con el cual puede laminar sus fotos favoritas, cartas y documentos, así como objetos delgados en un tamaño hasta A4, en forma impermeable al aire y agua! Sírvase … |
 |
[Page 14] GEHA A3 BASIC 14 MANEJO DEL DISPOSITIVO • No recomendamos laminar fotos reveladas en casa. • Las fotos deben estar secas antes de comenzar con el laminado. • No se deben laminar documentos gruesos o pesados ya que estos podrían quedarse atrapados en el … |
 |
[Page 15] GEHA A3 BASIC 15 6. El objeto laminado debe retirarse después del proceso de laminado del lado posterior del dispositivo. 7. Algunos tipos de papel no se laminan en forma homogénea y presentan un aspecto levemente opaco o nebuloso. En este caso puede mejorars… |
 |
[Page 16] GEHA A3 BASIC 16 INTRODUCTION Félicitations pour l’achat de ce laminateur avec lequel vous allez pouvoir plastifier vos photos préférées, vos lettres et vos documents ainsi que des objets fins jusqu’à la taille A3 afin de les rendre étanches à l’eau … |
 |
[Page 17] GEHA A3 BASIC 1 Marche/ Arrêt (cold/off/hot) 2 Affichage DEL (indicateur de fonctionnement) 3 Fond du boîtier 4 Sens d’insertion 5 Cache 6 Largeur max. de laminage 7 Couvercle du boîtier 8 Sortie des documents 9 Câble électrique 10 Bouton de sélection pour… |
 |
[Page 18] GEHA A3 BASIC 18 NETTOYAGE ET ENTRETIEN Les réparations allant au-delà du nettoyage et de l’entretien normal doivent être uniquement effectuées par un service après-vente agréé.N’immergez jamais l’appareil dans l’eau. N’ouvrez jamais vous-même le… |
 |
[Page 19] GEHA A3 BASIC 19 INLEIDING Wij feliciteren u met de aankoop van dit lamineerapparaat, waarmee u uw favoriete foto’s, brieven en documenten evenals dunne objecten tot formaat A3 water- en luchtdicht kunt verzegelen. Gelieve de in deze gebruiksaanwijzing vermelde … |
 |
[Page 20] GEHA A3 BASIC 20 OMGANG MET HET APPARAAT • Wij raden af, zelfontwikkelende foto’s te lamineren. • Foto’s moeten vóór het lamineren droog zijn. • Lamineer geen dikke of zware documenten omdat deze in het lamineerapparaat kunnen blijven steken. Gelieve… |
 |
[Page 21] GEHA A3 BASIC 21 REINIGING EN ONDERHOUD Reparaties, die verder dan de normale reiniging en het onderhoud gaan, mogen uitsluitend door een erkende klantenservicedienst uitgevoerd worden.Dompel het apparaat nooit in water. Open de bodem van het apparaat nooit zelf. … |
 |
[Page 22] GEHA A3 BASIC 22 Manual__A3Premium:Layout 1 11.10.10 12:55 Seite 22 |
 |
[Page 23] GEHA A3 BASIC 23 1 Manual__A3Premium:Layout 1 11.10.10 12:55 Seite 23 |
 |
[Page 24] GEHA A3 BASIC 24 Manual__A3Premium:Layout 1 11.10.10 12:55 Seite 24 |
 |
[Page 25] GEHA A3 BASIC 25 ВВЕДЕНИЕ Поздравляем Вас с покупкой этого ламинатора, с помощью которого Вы смо- жете запечатывать свои любимые фотографии, письма и д�… |
 |
[Page 26] GEHA A3 BASIC 26 ОБРАЩЕНИЕ С УСТРОЙСТВОМ • Не рекомендуется ламинировать самопроявляющиеся фотографии. • Фотографии перед ламинированием должны бы… |
 |
[Page 27] GEHA A3 BASIC 27 6. Возьмите ламинированный предмет по окончании процесса ламинирования на обратной стороне устройства. 7. Определенные сорта бумаги н… |
 |
[Page 28] GEHA A3 BASIC 28 INLEDNING Vi gratulerar dig till köpet av denna lamineringsapparat, med vilken du kan försegla dina favoritfotografier, recept, brev och dokument och även andra tunna objekt vatten- och luft- tätt upp till storlek A3. Observera anvisningarna … |
 |
[Page 29] GEHA A3 BASIC 1 Till-/Frånslagsbrytare (cold/off/hot) 2 Lysdiod-indikering (funktionsindikering) 3 Apparathusets botten 4 Inmatningsriktning 5 Prydnadskåpa 6 Maximal lamineringsbredd 7 Kåpans lock 8 Dokumentutmatning 9 Nätkabel 10 Omkopplare för att ställa i… |
 |
[Page 30] GEHA A3 BASIC 30 RENGÖRING OCH SKÖTSEL Reparationer, som går utöver den normala rengöringen och underhållet får endast utföras av en godkänd kundtjänst. Apparaten får aldrig doppas i vatten. Öppna aldrig apparatens botten på egen hand. I annat fall fi… |
 |
[Page 31] GEHA A3 BASIC 31 ΕΙΣΑΓΩΓΗ Σασ συγχαίρουµε για την αγορά τησ µηχανήσ λαστικοοίησησ, µε τη βοήθεια τησ οοίασ µορείτε να σφραγίζετε υδατοστεγώσ και… |
 |
[Page 32] GEHA A3 BASIC 1 Διακότησ ενεργοοίησησ/αενεργοοίησησ (cold/off/hot) 2 Ένδειξη LED (ένδειξη λειτουργίασ) 3 Πάτοσ εριβλήµατοσ 4 Φορά εισόδου 5 Κάλυµµα διάτ�… |
 |
[Page 33] GEHA A3 BASIC ησησ (cold/off/hot) λαστικοοίησησ µροστά – ροσ τα ίσω) 33 7. Ορισµένα είδη χαρτιού δεν λαστικοοιούνται οµοιόµορφα και εµφανίζονται θο… |
 |
[Page 34] GEHA A3 BASIC 34 GİRİŞ Sevdiğiniz resimleri, mektupları, belgeleri ve ayrıca A3 boyutuna kadar olan ince ob- jeleri, su ve hava geçirmeyecek üzere, kaplayabileceğiniz bu laminasyon makinesini almış olduğunuz için sizi tebrik ediyoruz. Lütfen bu kull… |
 |
[Page 35] GEHA A3 BASIC 1 Açma/Kapatma anahtarı (cold/off/hot) 2 LED Göstergesi (şlev göstergesi) 3 Alt bölüm 4 Giriş yönü 5 Dekoratif kaplama 6 Azami laminasyon eni 7 Üst bölüm 8 Belge çıkışı 9 Kablo 10 Laminasyon film kalınlığının ayar an… |
 |
[Page 36] GEHA A3 BASIC 36 TEMİZLEME VE BAKIM Makinenin normal bir bakım ve temizleme dışındaki tüm tamir ve temizleme işleri, yalnızca yetkili bayilerde yapılmak zorundadır. Makineyi asla suya sokmayınız. Makinenin alt kapağını asla kendiniz açmayınız. … |
 |
[Page 37] GEHA A3 BASIC 37 INTRODUCERE Vă felicităm pentru achiziionarea acestui laminator cu ajutorul căruia putei sigila ermetic i etan atât fotografii, scrisori i documente, cât i obiecte subiri până la mărimea A3. Vă rugăm citii prezen… |
 |
[Page 38] GEHA A3 BASIC 38 UTILIZAREA APARATULUI • Vă recomandăm să nu laminai fotografii pe hârtie autorevelatoare. • Înainte de laminare fotografiile trebuie să fie uscate. • Nu laminai documente groase sau grele, existând pericolul ca acestea să ram… |
 |
[Page 39] GEHA A3 BASIC 39 CURĂȚARE ȘI ÎNGRIJIRE Orice reparaie care excede curăarea i îngrijirea curentă va fi executată de un centru de service autorizat. Nu introducei aparatul în apă în nici o împrejurare. Nu deschidei baza aparatului. Perico… |
 |
[Page 40] GEHA A3 BASIC 40 WSTĘP Gratulujemy zakupu laminatora, który umoliwia wodoszczelne i powietrzoszczelne impre- gnowanie ulubionych zdjęć, listów i dokumentów oraz cienkich przedmiotów o formatach A3 i mniejszych. Przestrzegaj wskazówek podanych w niniejsz… |
 |
[Page 41] GEHA A3 BASIC 41 UŻYWANIE URZĄDZENIA • Odradzamy laminowanie zdjęć samowywołujących. • Przed zalaminowaniem zdjęcie musi być suche. • Nie laminuj grubych ani ciękich dokumentów, które mogą się zablokować w laminatorze. Jeeli w urządzeni… |
 |
[Page 42] GEHA A3 BASIC 42 CZYSZCZENIE I PIELĘGNACJA Naprawy wykraczające poza zakres normalnego czyszczenia i konserwacji mogą być wykonywane tylko przez autoryzowany punkt serwisowy. Nigdy nie zanurzaj urządzenia w wodzie. Nigdy nie otwieraj samodzielnie podstawy ur… |
 |
[Page 43] GEHA A3 BASIC 43 Manual__A3Premium:Layout 1 11.10.10 12:55 Seite 43 |
 |
[Page 44] GEHA A3 BASIC 44 (cold/off/hot) Manual__A3Premium:Layout 1 11.10.10 12:55 Seite 44 |
 |
[Page 45] GEHA A3 BASIC 45 Manual__A3Premium:Layout 1 11.10.10 12:55 Seite 45 |
 |
[Page 46] GEHA A3 BASIC 46 Manual__A3Premium:Layout 1 11.10.10 12:55 Seite 46 |
 |
[Page 47] GEHA A3 BASIC 47 Manual__A3Premium:Layout 1 11.10.10 12:55 Seite 47 |
 |
[Page 48] GEHA A3 BASIC 48 www.geha.de Geha GmbH Alte Heeresstraße 25 — 27 D-59929 Brilon Germany 09/2010 86096060 Irrtümer vorbehalten Manual__A3Premium:Layout 1 11.10.10 12:55 Seite 48 |
![]()
LAMINATOR
Home & Office
A3 Basic

|
80 Mic |
Visitenkarte/V-card |
25 |
60 x 95 mm |
|
|
80 Mic |
Visitenkarte/V-card |
100 |
60 x 95 mm |
|
|
80 Mic |
Set* |
100* |
||
|
*Set:25xA4/ 25xA5/25x10x15/25xVistenkarte/V-card |
||||
|
2 x 125 MIC, GLOSSY |
||||
|
125 Mic |
A3 |
25 |
305 x 425 mm |
|
|
125 Mic |
A3 |
100 |
305 x 425 mm |
|
|
125 Mic |
A4 |
25 |
217 x 303 mm |
|
|
125 Mic |
A4 |
100 |
217 x 303 mm |
|
|
125 Mic |
A5 |
25 |
155 x 216 mm |
|
|
125 Mic |
A5 |
100 |
155 x 216 mm |
|
|
125 Mic |
10×15 |
25 |
110 x 160 mm |
|
|
125 Mic |
10×15 |
100 |
110 x 160 mm |
|
|
125 Mic |
Visitenkarte/V-card |
25 |
60 x 95 mm |
|
|
125 Mic |
Visitenkarte/V-card |
100 |
60 x 95 mm |
|
|
125 Mic |
Set* |
100* |
||
*Set:25xA4/ 25xA5/25x10x15/25xVistenkarte/V-card
www.geha.de

Wählen Sie Ihre Sprache. Select your language.
D4
GB 7
I10
E13
F16
|
NL |
19 |
|
22 |
|
|
UAE |
|
|
25 |
|
|
RUS |
|
S28
|
GR |
31 |
|
34 |
|
|
TR |
|
|
37 |
|
|
RO |
|
|
40 |
|
|
PL |
|
|
43 |
|
|
CN |
|
3

EINLEITUNG
Wir gratulieren Ihnen zum Kauf dieses Laminiergeräts, mit dem Sie Ihre Lieblingsfotos, Rezepte, Briefe und Dokumente sowie dünne Objekte bis Größe A3 wasserund luftdicht versiegeln können. Bitte beachten Sie die Hinweise in dieser Bedienungsanleitung und bewahren Sie diese zum späteren Nachschlagen auf.
WICHTIGE SICHERHEITSHINWEISE
1.Lesen Sie die Bedienungsanleitung und alle Hinweise aufmerksam.
2.Achten Sie darauf, heiße Flächen nicht zu berühren.
3.Tauchen Sie Netzkabel, Netzstecker usw. niemals in Wasser oder andere Flüssigkeiten. Es besteht sonst Stromschlaggefahr.
4.Geben Sie besonders Acht, wenn das Gerät von Kindern oder in der Nähe von Kindern genutzt wird.
5.Stecken Sie das Gerät aus, wenn es nicht benötigt wird und bevor Sie es reinigen. Lassen Sie es abkühlen, bevor Sie Teile einsetzen oder herausnehmen oder das Gerät reinigen.
6.Nutzen Sie das Gerät nicht, wenn Netzkabel oder Netzstecker Schäden aufweisen, das Gerät Funktionsstörungen zeigt oder in gleich welcher Weise beschädigt worden ist. Bringen Sie es zur Reparatur zum nächstgelegenen zugelassenen Kundendienst.
7.Bei Verwendung von Zubehör, das nicht vom Hersteller empfohlen bzw. angeboten wird, kann Verletzungsgefahr bestehen.
8.Verwenden Sie das Gerät nicht im Freien.
9.Verwenden Sie das Gerät ausschließlich für den bestimmungsgemäßen Zweck.
10.Schalten Sie das Gerät aus, wenn es längere Zeit nicht benötigt wird.
11.Das Gerät sollte an einer möglichst nahen Steckdose angeschlossen werden, die leicht zugänglich sein muss.
12.Laminieren Sie keine Blätter, die Metall oder leitende Materialien enthalten.
13.Um der Gefahr eines Verhedderns im oder Stolperns über das Kabel vorzubeugen, ist das Gerätekabel relativ kurz. Beachten Sie bei der Verwendung eines Verlängerungskabels bitte folgende Hinweise:
a.Die für das Verlängerungskabel angegebenen elektrischen Nenndaten müssen mindestens den elektrischen Nenndaten des Geräts entsprechen.
b.Das Verlängerungskabel darf nicht vom Tisch oder Schrank hängen, wo Kinder daran ziehen oder andere darüber stolpern könnten.
4

UMGANG MIT DEM GERÄT
•Wir raten davon ab, selbstentwickelnde Fotos zu laminieren.
•Fotos müssen vor dem Laminieren trocken sein.
•Laminieren Sie keine dicken oder schweren Dokumente, da diese
im Laminiergerät stecken bleiben können. Sollte etwas im Gerät stecken geblieben sein, wenden Sie sich zur Reparatur bitte an eine zugelassene Kundendienststelle vor Ort.
•Das Laminiergerät verklebt die Laminierfolie dauerhaft mit dem beschichteten Artikel. Die Laminierfolie kann später nicht wieder entfernt werden.
•Wir raten davon ab, wertvolle Sammlerobjekte oder Artikel, die Sie später ggf. wieder aus der Folie lösen möchten, zu laminieren. Münzen und dickere Gegenstände dürfen mit diesem Gerät nicht laminiert werden.
Abb. 2
Abb. 1
1.Aktivieren Sie das Gerät, indem Sie den Schiebeschalter entsprechend der für die Hüllenstärke geeigneten Laminiertemperatur nach rechts oder links drücken (Abb. 2). Das rote Lämpchen leuchtet auf.
2.Sobald das blaue Lämpchen leuchtet, ist das Gerät bereit für das Laminieren (Abb.1). Das Gerät benötigt etwa 3-5 Minuten, bis es aufgewärmt ist.
3.Geben Sie den zu laminierenden Gegenstand in die Laminierhülle und richten Sie ihn mittig darin aus. Achten Sie darauf, dass sich das Dokument oder Bild möglichst nahe an der Schweißkante befindet.
•Die Verwendung einer Transporthülle (Carrier) ist bei diesem Laminiergerät nicht erforderlich.
•Das Laminiergerät kann Laminierhüllen einer Stärke von 80-125 μm verarbeiten und funktioniert mit den meisten Heiß-Laminierhüllen.
4.Führen Sie die Schweißkante der Laminierhülle gerade in die MITTE des Einschubs am Laminiergerät.
5.Entnehmen Sie den laminierten Gegenstand nach Ende des Laminiervorgangs auf der Geräterückseite.
6.Bestimmte Papiersorten werden nicht gleichmäßig laminiert und erscheinen etwas trüb oder nebelig. In diesem Fall können Sie das Laminierergebnis verbessern, indem Sie das laminierte Dokument ein zweites Mal durch das Laminiergerät führen.
7.Ist Laminiergut im Gerät stecken geblieben, drücken Sie bitte die Deblockier-Taste (Abb. 1) oben am Gerät, um den Laminiervorgang zu stoppen. Ziehen Sie dann das zu laminierende Dokument nach vorne aus dem Gerät heraus.
5

REINIGUNG UND PFLEGE
Reparaturen, die über die normale Reinigung und Wartung hinausgehen, dürfen nur von einer zugelassenen Kundendienststelle ausgeführt werden. Tauchen Sie das Gerät niemals in Wasser.
Öffnen Sie den Geräteboden niemals selbst. Es besteht sonst Brandund Stromschlaggefahr. Im Gerät befinden sich keine Teile, die vom Anwender selbst gewartet werden können. Reparaturen sind immer einer zugelassenen Kundendienststelle zu überlassen.
•Halten Sie Ihre Hände und das Netzkabel im Betrieb des Geräts von heißen Geräteteilen fern.
•Reinigen Sie das Gerät niemals mit Scheuerpulver, Schabern oder Kratzern.
•Verwenden Sie zum Reinigen des Geräts nur ein weiches Tuch.
|
TECHNISCHE DATEN |
|
|
Spannung |
220-240 V, 50 Hz |
|
Strom |
1,0 A |
|
Leistungsaufnahme |
max. 250 W |
|
Folienstärke |
80-125 Mikrometer |
|
Max. Dokumentgröße |
A3 |
|
Aufwärmdauer |
ca. 3-5 Minuten |
|
Laminiergeschwindigkeit |
ca. 300 mm/min. |
|
Max. Dokumentstärke |
0,6 mm |
ENTSORGUNG
Das Symbol mit der durchgestrichenen Mülltonne weist darauf hin,
dass elektrische Geräte nicht im normalen Hausmüll entsorgt werden dürfen. Bitte bringen Sie dieses Gerät zur umweltfreundlichen Entsorgung zu einem zugelassenen Wertstoffhof.
GARANTIE
Die Garantiezeit für Ihr Gerät beträgt 24 Monate.
Bewahren Sie unbedingt den Kaufbeleg und die Originalverpackung auf. Bei einem Problem mit Ihrem Gerät wenden Sie sich bitte an Ihren Händler.
6

INTRODUCTION
Congratulations on your purchase of the laminator. Now you can protect your favourite photos, recipe cards, letters and legal size documents as well as other types of thin objects up to A3 size in a waterproof, airtight seal. Follow the instructions for proper use and keep this book for future reference.
IMPORTANT SAFETY NOTES
1.Read all instructions.
2.Do not touch hot surfaces.
3.To protect from risk of electrical hazards, do not immerse cord, plugs, etc. of the appliance in water or other liquid.
4.Closely supervise if necessary when any appliance is used by, or close to, children.
5.Unplug from the outlet when not in use and before cleaning.
Allow to cool before putting on or taking off parts, and before cleaning the appliance.
6.Do not operate any appliance with a damaged cord or plug or after the appliance malfunctions, or has been damaged in any manner. Return the appliance to the nearest authorised service facility.
7.The use of accessory attachments not recommended or sold by the appliance manufacturer may cause injuries.
8.Do not use outdoors.
9.Do not use appliance for other than intended use.
10.Turn the laminator off when not in use for prolonged periods of time.
11.The socket-outlet should be installed near the equipment and should easily be accessible.
12.Do not laminate sheets containing metal or conductive materials.
13.A short power cord is provided with this appliance to reduce hazards resulting from becoming entangled in, or tripping over, a longer cord. Extension cords may be used if care is exercised in their use. If an extension cord is used, the following must apply:
a.The marked electrical rating should at least be as high as the electrical rating of the appliance.
b.The extension cord should not drop over the counter top or table top where it can be pulled on by children or tripped over accidentally.
7

HOW TO USE THE APPLIANCE
•We do not recommend laminating any type of self-developing photo.
•Any photo to be laminated must be dry before processing.
•Do not laminate any documents that appear thick or heavy, as they will get stuck in the laminator. If this occurs, please contact your local service centre for servicing.
•This product bonds the laminate sleeve to the items processed. It is a permanent seal and cannot be removed.
•We do not recommend laminating any collector’s items of value or any item you
may wish to remove at a later date. Do not attempt to laminate coins or thicker items.
fig. 2
fig. 1
1.Activate the device by pushing the sliding switch to the right or left, depending on the temperature required for the actual pouch thickness (fig. 2). The red indicator light is on.
2.When the blue light comes on, the machine is ready for hot pouches lamination (fig. 1). The warm-up time takes approx. 3-5 minutes.
3.Place the item to be laminated into the laminating sleeve, centring it within the sleeve. Please make sure your document or picture is positioned as close to the sealed edge as possible.
•The laminator does not require the use of a carrier in order to operate.
•The laminator can laminate pouches from 80 microns to 125 microns. It works with most types of heat-sealing laminating pouches.
4.Insert the sealed edge of the laminating sleeve straight into the CENTRE of the laminator opening.
5.Remove the sleeve from the rear of the machine after is has stopped moving.
6.Some types of paper do not laminate evenly, or appear somewhat cloudy.
In such cases, the lamination can be fed through the machine a second time and the lamination process may be repeated.
7.If there is a jam, please press the ABS button located on the top of the machine (fig. 1). The laminator will stop then. Please pull out the laminating pouches with
one hand slowly.
8

CARE AND CLEANING
Only authorised service teams should perform any servicing other than cleaning and user maintenance. Do not immerse in water.
To reduce the risk of fire or electrical shock, do not remove the base. No user serviceable parts are inside. Repair should be done by authorised service personnel only.
•Keep your hands and the cord away from hot parts of the appliance during operation.
•Never clean with scrubbing powders or hard implements.
•Wipe clean with a soft cloth.
|
TECHNICAL DATA |
|
|
Voltage |
220-240 V, 50 Hz |
|
Current |
1.0 A |
|
Power |
max. 250 W |
|
Film thickness |
80-125 microns |
|
Max. document size |
A4 |
|
Warm-up time |
approx. 3-5 mins |
|
Laminating speed |
approx. 300 mm/min |
|
Max. document thickness |
0.6 mm |
DISPOSAL
The crossed out wheelie bin symbol on this product is to remind you that electrical products should not be disposed of with household waste.
Please dispose of in a responsible manner at an approved waste or recycling facility.
WARRANTY
The warranty period for your appliance is 24 months.
It is essential that you retain your proof of purchase and the original packaging. Should any problem arise with your appliance, please contact your dealer.
9

INTRODUZIONE
Congratulazioni per l’acquisto della presente plastificatrice, con cui potrete sigillare a prova di acqua e aria le vostre foto preferite, lettere, documenti come pure oggetti sottili di dimensioni fino al formato A3. Vi preghiamo di osservare le indicazioni contenute nel presente libretto d’istruzioni e di conservare quest’ultimo per una futura consultazione.
IMPORTANTI AVVERTENZE DI SICUREZZA
1.Leggere con attenzione le istruzioni per l’uso e tutte le avvertenze.
2.Fare attenzione a non toccare le superfici incandescenti.
3.Non immergere mai cavi di alimentazione, spine ecc. in acqua o altri liquidi. Vi è altrimenti il pericolo di scosse elettriche.
4.Prestare particolare attenzione quando l’apparecchio è azionato da bambini o usato nelle loro vicinanze.
5.Staccare l’alimentazione dell’apparecchio quando questo non è in uso e prima di pulirlo. Lasciarlo raffreddare prima di inserire o estrarre componenti o di procedere
con la pulizia.
6.Non usare l’apparecchio nel caso in cui il cavo di alimentazione o la spina presentino danni, l’apparecchio evidenzi malfunzionamenti o sia stato in qualche modo danneggiato. Per le riparazioni recarsi presso il centro di assistenza autorizzato
più vicino.
7.L’uso di accessori non consigliati e/o realizzati dal produttore può comportare il pericolo di ferimento.
8.Non utilizzare l’apparecchio all’aperto.
9.Impiegare l’apparecchio esclusivamente per l’uso previsto.
10.Spegnere l’apparecchio quando non viene utilizzato per periodi prolungati.
11.L’apparecchio deve essere collegato a una presa elettrica facilmente accessibile e più vicina possibile.
12.Non plastificare fogli che contengano metallo o materiali conduttori.
13.Per prevenire il rischio di impigliarsi o inciampare sul cavo, quest’ultimo è relativamente corto. In caso si usi un cavo di prolunga, osservare le seguenti indicazioni:
a.Le specifiche elettriche del cavo di prolunga devono quanto meno corrispondere a quelle dell’apparecchio.
b.Il cavo di prolunga non deve pendere dal tavolo o dall’armadio per evitare
che i bambini possano tirarlo o altri inciamparvi.
10
![]()
USO DELL‘APPARECCHIO
•Si sconsiglia di plastificare foto a sviluppo istantaneo.
•Le foto da plastificare devono essere asciutte.
•Non plastificare documenti spessi o pesanti, poiché questi potrebbero incastrarsi nella plastificatrice. Qualora qualcosa rimanga incastrato, rivolgersi a un centro di assistenza autorizzato per le riparazioni.
•La plastificatrice incolla in modo permanente una lamina di plastica all’oggetto rivestito. Tale lamina non potrà essere rimossa in seguito.
•Sconsigliamo di plastificare preziosi oggetti da collezione o articoli da cui si desideri poter eventualmente rimuovere in un secondo momento la lamina di plastica.
Il presente apparecchio non permette di plastificare monete e oggetti di spessore maggiore.
fig. 2
fig. 1
1.Accendere l’apparecchio spingendo l’interruttore a scorrimento verso destra o verso sinistra, a seconda della temperatura di plastificazione adeguata per lo spessore della busta (Fig. 2). Si accende il LED rosso.
2.Non appena si accende il LED blu, l’apparecchio è pronto per la plastificazione (fig. 1). Il riscaldamento dell’apparecchio richiede circa 3-5 minuti
3.Inserire l’oggetto da plastificare nell’apposita busta e allinearlo al centro di questa. Fare attenzione a che il documento o l’immagine si trovi il più vicino possibile al bordo.
•La presente plastificatrice non richiede l’uso di carrier.
•La plastificatrice può essere impiegata con la maggior parte delle buste per plastificazione a caldo di spessore compreso fra 80 e 125 micron.
4.Introdurre il bordo della busta esattamente al CENTRO della fessura di inserimento della plastificatrice.
5.Estrarre l’oggetto plastificato dal retro dell‘apparecchio al termine del processo di plastificazione.
6.Alcuni tipi di carta non vengono plastificati uniformemente e assumono quindi un aspetto opaco od offuscato. In questo caso è possibile migliorare il risultato introducendo una seconda volta l’oggetto già plastificato nella plastificatrice.
7.Se l’oggetto da plastificare si inceppa nell’apparecchio, premere il tasto di sblocco (fig. 1) collocato sulla parte superiore dell’apparecchio per fermare il processo di plastificazione. Estrarre quindi dall’apparecchio il documento da plastificare tirandolo in avanti.
11

PULIZIA E MANUTENZIONE
Le riparazioni che esulano dalla normale pulizia e manutenzione possono essere eseguite esclusivamente da un centro di assistenza autorizzatoNon immergere mai l’apparecchio in acqua. Non aprire mai da soli la parte inferiore dell’apparecchio. Sussiste il pericolo di incendi e scosse elettriche. All’interno dell’apparecchio non vi sono componenti che possano essere sottoposte a manutenzione da parte dell’utente. Affidare sempre le riparazioni a un centro di assistenza autorizzato.
•Non avvicinare le mani e il cavo di alimentazione alle parti calde della plastificatrice mentre questa è in funzione.
•Non pulire mai l’apparecchio con polvere abrasiva, lame o raschietti.
•Per la pulizia dell’apparecchio usare esclusivamente un panno morbido.
|
DATI TECNICI |
|
|
Tensione |
220-240 V, 50 Hz |
|
Corrente |
1,0 A |
|
Potenza assorbita |
max. 250 W |
|
Spessore film |
80-125 μm |
|
Formato max. documenti |
A3 |
|
Tempo di riscaldamento |
3-5 minuti circa |
|
Velocità di plastificazione |
300 mm/min. circa |
|
Spessore max. documenti |
0,6 mm |
SMALTIMENTO
Il simbolo raffigurante un bidone dell’immondizia sbarrato indica che gli apparecchi elettrici non possono essere smaltiti con i normali rifiuti domestici. Ai fini di uno smaltimento ecologico vi preghiamo di portare il presente apparecchio in una discarica autorizzata.
GARANZIA
La durata della garanzia per il vostro apparecchio è pari a 24 mesi.
È assolutamente necessario conservare lo scontrino d’acquisto e la confezione originale. In caso di problemi con il vostro apparecchio rivolgetevi al vostro rivenditore.
12

INTRODUCCIÓN
¡Felicitaciones por su adquisición de este dispositivo laminador con el cual puede laminar sus fotos favoritas, cartas y documentos, así como objetos delgados en un tamaño hasta A4, en forma impermeable al aire y agua! Sírvase observar las indicaciones en estas instrucciones de servicio y consérvelas para su posterior consulta.
IMPORTANTES INDICACIONES DE SEGURIDAD
1.Lea atentamente las instrucciones de servicio y todas las indicaciones.
2.Asegúrese de no tocar las superficies calientes.
3.Nunca sumerja el cable de red, el enchufe de red etc., en agua u otros líquidos. En caso contrario surge el riesgo de un golpe eléctrico.
4.Se ha de proceder con especial cuidado en caso de manipular el dispositivo cerca de niños.
5.Desenchufe el dispositivo en caso de no requerirlo o si desea limpiarlo. Déjelo enfriar antes de insertar o extraer piezas o bien antes de limpiarlo.
6.El dispositivo no debe utilizarse cuando el cable de red o el enchufe de red tenga algún tipo de fallo, cuando el dispositivo tenga fallos funcionales o bien cuando se encuentre con algún otro tipo de daño. En este caso debe ser entregado al servicio al cliente autorizado.
7.En caso de utilizar accesorios no recomendados o bien ofrecidos por el fabricante puede surgir el riesgo de lesiones.
8.El dispositivo no debe utilizarse a la intemperie.
9.El dispositivo debe utilizarse exclusivamente para el uso previsto.
10.Desactive el dispositivo en caso de no usarlo durante un tiempo prolongado.
11.El dispositivo debe conectarse con una tomacorriente relativamente cercana que debe ser fácilmente accesible.
12.No se deben laminar hojas que contienen metal o materiales conductivos.
13.Para prevenir el riesgo de enredarse o tropezarse con el cable, el cable de dispositivo ha sido concebido relativamente corto. En caso de usar un cable de extensión, deben observarse las siguientes indicaciones:
a.Los datos nominales eléctricos indicados para el cable de extensión deben cumplir como mínimo con los datos nominales eléctricos del dispositivo.
b.El cable de extensión no debe colgarse de la mesa o de un mueble cuando surge el riesgo que niños puedan tirarlo o bien tropezarse con él.
13

MANEJO DEL DISPOSITIVO
•No recomendamos laminar fotos reveladas en casa.
•Las fotos deben estar secas antes de comenzar con el laminado.
•No se deben laminar documentos gruesos o pesados ya que estos podrían quedarse atrapados en el dispositivo. En caso que algo quede atrapado en el dispositivo, sírvase dirigirse a un servicio al cliente autorizado para la reparación.
•El dispositivo laminador pega la lámina en forma duradera sobre el artículo recubierto. No es posible retirar posteriormente la lámina.
•No recomendamos laminar objetos de colección de alto valor o artículos de los cuales desea retirar nuevamente la lámina en un momento posterior. Con este dispositivo no está permitido el laminado de monedas u objetos más gruesos.
Fig. 2
Fig. 1
1.El dispositivo se activa desplazando el conmutador corredizo hacia la derecha o izquierda, en función de la temperatura de laminado requerida y el grosor de la envoltura (Fig. 2). Se enciende la lamparita roja.
2.El dispositivo está disponible para el laminado cuando se enciende la lamparita azul (Fig. 1). El dispositivo demora aprox. 3-5 minutos hasta terminar el calentamiento.
3.Inserte el objeto a laminar en la envoltura de laminado y ajústelo en forma centrada. Se ha de observar que el documento o la imagen se encuentre lo más cercano posible al borde de soldadura.
•En este dispositivo laminador no se requiere el uso de una envoltura de transporte (Carrier).
•El dispositivo laminador puede procesar envolturas de laminado con un grosor de 80-125 μm y funciona con la mayoría de las envolturas de laminado en caliente.
4.El borde de soldadura de la envoltura de laminado debe introducirse en forma recta en la inserción del dispositivo laminador.
5.El objeto laminado debe retirarse después del proceso de laminado del lado posterior del dispositivo.
6.Algunos tipos de papel no se laminan en forma homogénea y presentan un aspecto levemente opaco o nebuloso. En este caso puede mejorarse el resultado de laminado introduciendo el documento laminado por segunda vez en el dispositivo laminador.
7.En caso que un objeto a laminar se haya quedado atascado en el interior del dispositivo, debe pulsarse la tecla de desbloqueo (Fig. 1) ubicada en la parte superior del dispositivo para interrumpir el proceso de laminado. A continuación debe extraerse el documento a laminar, en la parte delantera del dispositivo.
14

LIMPIEZA Y CUIDADO
Las reparaciones que sobrepasan el nivel de limpieza y mantenimiento ordinarios, deben ser ejecutadas exclusivamente por un servicio al cliente autorizado.
¡El dispositivo no debe sumergirse nunca en agua! Queda estrictamente prohibido abrir la parte inferior del dispositivo. En caso contrario surge el riesgo de incendio y golpes eléctricos.
En el interior del dispositivo no se encuentran componentes que pueden ser mantenidos por el mismo usuario. Las reparaciones deben ser encargadas siempre a un servicio al cliente autorizado.
•Mantenga sus manos y el cable de red siempre a distancia de los componentes calientes del dispositivo cuando éste está encendido.
•El dispositivo no debe limpiarse nunca con polvos para fregar o rascadores.
•Para la limpieza del dispositivo debe usarse netamente un paño blando.
|
ESPECIFICACIONES TÉCNICAS |
|
|
Tensión |
220-240 V, 50 Hz |
|
Corriente |
1,0 A |
|
Consumo de potencia |
máx. 250 W |
|
Grosor de lámina |
80-125 micrómetros |
|
Tamaño máx. de documento |
A3 |
|
Tiempo de calentamiento |
aprox. 3-5 minutos |
|
Velocidad de laminado |
aprox. 300 mm/min. |
|
Grosor máx. de documento |
0,6 mm |
ELIMINACIÓN
El símbolo con el cubo de basura tachado indica que los dispositivos eléctricos no pueden ser eliminados conjuntamente con la basura doméstica ordinaria. Sírvaseentregar este dispositivo a una agencia autorizada de eliminación de residuosespeciales, para asegurar su eliminación amigable con el medio ambiente.
GARANTÍA
El período de garantía para su dispositivo es de 24 meses.
Resulta imprescindible conservar el comprobante de compra y el envase original.
En caso de un problema con su dispositivo sírvase dirigirse directamente a su distribuidor.
15
 Loading…
Download or browse on-line these Manual for GEHA A3 BASIC Other.
Summary of Contents:
 |
[Page 1] GEHA A3 BASIC Anleitung Manual LAMINATOR Home & Office A3 Basic Manual__A3Basic:Layout 1 08.09.10 17:56 Seite 1 |
 |
[Page 2] GEHA A3 BASIC www.geha.de Laminierfolien Laminating Pouches Stärke für Format Stück Foliengröße in mm Thickness for format pieces size in mm 80 Mic 80 Mic 80 Mic 80 Mic 80 Mic 80 Mic 80 Mic 80 Mic 80 Mic 80 Mic 80 Mic 125 Mic 125 Mic 125 Mic 125 Mic 125 Mic… |
 |
[Page 3] GEHA A3 BASIC 3 D GB I E F NL UAE RUS S GR TR RO PL CN 4 7 10 13 16 19 22 25 28 31 34 37 40 43 Wählen Sie Ihre Sprache. Select your language. Manual__A3Basic:Layout 1 08.09.10 17:56 Seite 3 |
 |
[Page 4] GEHA A3 BASIC 4 EINLEITUNG Wir gratulieren Ihnen zum Kauf dieses Laminiergeräts, mit dem Sie Ihre Lieblingsfotos, Rezepte, Briefe und Dokumente sowie dünne Objekte bis Größe A3 wasser- und luftdicht versiegeln können. Bitte beachten Sie die Hinweise in diese… |
 |
[Page 5] GEHA A3 BASIC 5 UMGANG MIT DEM GERÄT • Wir raten davon ab, selbstentwickelnde Fotos zu laminieren. • Fotos müssen vor dem Laminieren trocken sein. • Laminieren Sie keine dicken oder schweren Dokumente, da diese im Laminiergerät stecken bleiben können. … |
 |
[Page 6] GEHA A3 BASIC 6 REINIGUNG UND PFLEGE Reparaturen, die über die normale Reinigung und Wartung hinausgehen, dürfen nur von einer zugelassenen Kundendienststelle ausgeführt werden. Tauchen Sie das Gerät niemals in Wasser. Öffnen Sie den Geräteboden niemals sel… |
 |
[Page 7] GEHA A3 BASIC 7 INTRODUCTION Congratulations on your purchase of the laminator. Now you can protect your favourite pho- tos, recipe cards, letters and legal size documents as well as other types of thin objects up to A3 size in a waterproof, airtight seal. Follow … |
 |
[Page 8] GEHA A3 BASIC 8 HOW TO USE THE APPLIANCE • We do not recommend laminating any type of self-developing photo. • Any photo to be laminated must be dry before processing. • Do not laminate any documents that appear thick or heavy, as they will get stuck in th… |
 |
[Page 9] GEHA A3 BASIC 9 CARE AND CLEANING Only authorised service teams should perform any servicing other than cleaning and user maintenance. Do not immerse in water. To reduce the risk of fire or electrical shock, do not remove the base. No user serviceable parts are in… |
 |
[Page 10] GEHA A3 BASIC 10 INTRODUZIONE Congratulazioni per l’acquisto della presente plastificatrice, con cui potrete sigillare a prova di acqua e aria le vostre foto preferite, lettere, documenti come pure oggetti sottili di dimensioni fino al formato A3. Vi preghiamo… |
 |
[Page 11] GEHA A3 BASIC 11 USO DELL‘APPARECCHIO • Si sconsiglia di plastificare foto a sviluppo istantaneo. • Le foto da plastificare devono essere asciutte. • Non plastificare documenti spessi o pesanti, poiché questi potrebbero incastrarsi nella plastificatrice…. |
 |
[Page 12] GEHA A3 BASIC 12 PULIZIA E MANUTENZIONE Le riparazioni che esulano dalla normale pulizia e manutenzione possono essere eseguite esclusivamente da un centro di assistenza autorizzatoNon immergere mai l’apparecchio in acqua. Non aprire mai da soli la parte inferi… |
 |
[Page 13] GEHA A3 BASIC 13 INTRODUCCIÓN ¡Felicitaciones por su adquisición de este dispositivo laminador con el cual puede laminar sus fotos favoritas, cartas y documentos, así como objetos delgados en un tamaño hasta A4, en forma impermeable al aire y agua! Sírvase … |
 |
[Page 14] GEHA A3 BASIC 14 MANEJO DEL DISPOSITIVO • No recomendamos laminar fotos reveladas en casa. • Las fotos deben estar secas antes de comenzar con el laminado. • No se deben laminar documentos gruesos o pesados ya que estos podrían quedarse atrapados en el … |
 |
[Page 15] GEHA A3 BASIC 15 LIMPIEZA Y CUIDADO Las reparaciones que sobrepasan el nivel de limpieza y mantenimiento ordinarios, deben ser ejecutadas exclusivamente por un servicio al cliente autorizado. ¡El dispositivo no debe sumergirse nunca en agua! Queda estrictamente… |
 |
[Page 16] GEHA A3 BASIC 16 INTRODUCTION Félicitations pour l’achat de ce laminateur avec lequel vous allez pouvoir plastifier vos photos préférées, vos lettres et vos documents ainsi que des objets fins jusqu’à la taille A3 afin de les rendre étanches à l’eau … |
 |
[Page 17] GEHA A3 BASIC 17 UTILISATION DE L’APPAREIL • Nous vous déconseillons de plastifier des photos que vous avez développées vous-même. • Avant le processus de plastification, les photos doivent être sèches. • Ne plastifiez pas de documents épais ou lour… |
 |
[Page 18] GEHA A3 BASIC 18 NETTOYAGE ET ENTRETIEN Les réparations allant au-delà du nettoyage et de l’entretien normal doivent être uniquement effectuées par un service après-vente agréé.N’immergez jamais l’appareil dans l’eau. N’ouvrez jamais vous-même le… |
 |
[Page 19] GEHA A3 BASIC 19 INLEIDING Wij feliciteren u met de aankoop van dit lamineerapparaat, waarmee u uw favoriete foto’s, brieven en documenten evenals dunne objecten tot formaat A3 water- en luchtdicht kunt verzegelen. Gelieve de in deze gebruiksaanwijzing vermelde … |
 |
[Page 20] GEHA A3 BASIC 20 OMGANG MET HET APPARAAT • Wij raden af, zelfontwikkelende foto’s te lamineren. • Foto’s moeten vóór het lamineren droog zijn. • Lamineer geen dikke of zware documenten omdat deze in het lamineerapparaat kunnen blijven steken. Gelieve… |
 |
[Page 21] GEHA A3 BASIC 21 REINIGING EN ONDERHOUD Reparaties, die verder dan de normale reiniging en het onderhoud gaan, mogen uitsluitend door een erkende klantenservicedienst uitgevoerd worden.Dompel het apparaat nooit in water. Open de bodem van het apparaat nooit zelf. … |
 |
[Page 22] GEHA A3 BASIC 22 Manual__A3Basic:Layout 1 08.09.10 17:56 Seite 22 |
 |
[Page 23] GEHA A3 BASIC 23 Manual__A3Basic:Layout 1 08.09.10 17:56 Seite 23 |
 |
[Page 24] GEHA A3 BASIC 24 Manual__A3Basic:Layout 1 08.09.10 17:56 Seite 24 |
 |
[Page 25] GEHA A3 BASIC 25 ВВЕДЕНИЕ Поздравляем Вас с покупкой этого ламинатора, с помощью которого Вы смо- жете запечатывать свои любимые фотографии, письма и д�… |
 |
[Page 26] GEHA A3 BASIC 26 ОБРАЩЕНИЕ С УСТРОЙСТВОМ • Не рекомендуется ламинировать самопроявляющиеся фотографии. • Фотографии перед ламинированием должны бы… |
 |
[Page 27] GEHA A3 BASIC 27 7. Если ламинируемое изделие осталось в устройстве, нажмите клавишу деблокировки (рис. 1) в верхней части устройства для остановки проц�… |
 |
[Page 28] GEHA A3 BASIC 28 INLEDNING Vi gratulerar dig till köpet av denna lamineringsapparat, med vilken du kan försegla dina favoritfotografier, recept, brev och dokument och även andra tunna objekt vatten- och luft- tätt upp till storlek A3. Observera anvisningarna … |
 |
[Page 29] GEHA A3 BASIC 29 HANTERING AV APPARATEN • Vi avråder från laminering av självframtagande fotografier. • Fotografier skall vara torra innan de lamineras. • Laminera inga tjocka eller tunga dokument, eftersom dessa kan fastna i lamineringsapparaten. Om n�… |
 |
[Page 30] GEHA A3 BASIC 30 RENGÖRING OCH SKÖTSEL Reparationer, som går utöver den normala rengöringen och underhållet får endast utföras av en godkänd kundtjänst. Apparaten får aldrig doppas i vatten. Öppna aldrig apparatens botten på egen hand. I annat fall fi… |
 |
[Page 31] GEHA A3 BASIC 31 ΕΙΣΑΓΩΓΗ Σασ συγχαίρουµε για την αγορά τησ µηχανήσ λαστικοοίησησ, µε τη βοήθεια τησ οοίασ µορείτε να σφραγίζετε υδατοστεγώσ και… |
 |
[Page 32] GEHA A3 BASIC 32 Χειρισµός συσκευής • Δεν ροτείνουµε την λαστικοοίηση φωτογραφιών ου εµφανίσατε µόνοι σασ. • Οι φωτογραφίεσ ρέει να είναι στ… |
 |
[Page 33] GEHA A3 BASIC 33 ΚΑΘΑΡΙΣΜΟΣ ΚΑΙ ΦΡΟΝΤΙΔΑ Οι ειδιορθώσεισ, οι οοίεσ εξαλείφονται µε κανονικό καθαρισµό και συντήρηση, ειτρέε- ται να ραγµατοοι… |
 |
[Page 34] GEHA A3 BASIC 34 GİRİŞ Sevdiğiniz resimleri, mektupları, belgeleri ve ayrıca A3 boyutuna kadar olan ince ob- jeleri, su ve hava geçirmeyecek üzere, kaplayabileceğiniz bu laminasyon makinesini almış olduğunuz için sizi tebrik ediyoruz. Lütfen bu kull… |
 |
[Page 35] GEHA A3 BASIC 35 ALETIN KULLANIMI • Poloroid filimi gibi kendiliğinden gelişmeyle oluşan, yani anında geliştirilen fotoğrafların kaplanılmasını önermiyoruz. • Kaplama işleminden önce kaplanılacak fotoğrafların kuru olmasına dikkat ediniz. … |
 |
[Page 36] GEHA A3 BASIC 36 TEMİZLEME VE BAKIM Makinenin normal bir bakım ve temizleme dışındaki tüm tamir ve temizleme işleri, yalnızca yetkili bayilerde yapılmak zorundadır. Makineyi asla suya sokmayınız. Makinenin alt kapağını asla kendiniz açmayınız. … |
 |
[Page 37] GEHA A3 BASIC 37 INTRODUCERE Vă felicităm pentru achiziionarea acestui laminator cu ajutorul căruia putei sigila ermetic i etan atât fotografii, scrisori i documente, cât i obiecte subiri până la mărimea A3. Vă rugăm citii prezen… |
 |
[Page 38] GEHA A3 BASIC 38 UTILIZAREA APARATULUI • Vă recomandăm să nu laminai fotografii pe hârtie autorevelatoare. • Înainte de laminare fotografiile trebuie să fie uscate. • Nu laminai documente groase sau grele, existând pericolul ca acestea să ram… |
 |
[Page 39] GEHA A3 BASIC 39 CURĂȚARE ȘI ÎNGRIJIRE Orice reparaie care excede curăarea i îngrijirea curentă va fi executată de un centru de service autorizat. Nu introducei aparatul în apă în nici o împrejurare. Nu deschidei baza aparatului. Perico… |
 |
[Page 40] GEHA A3 BASIC 40 WSTĘP Gratulujemy zakupu laminatora, który umoliwia wodoszczelne i powietrzoszczelne impre- gnowanie ulubionych zdjęć, listów i dokumentów oraz cienkich przedmiotów o formatach A3 i mniejszych. Przestrzegaj wskazówek podanych w niniejsz… |
 |
[Page 41] GEHA A3 BASIC 41 UŻYWANIE URZĄDZENIA • Odradzamy laminowanie zdjęć samowywołujących. • Przed zalaminowaniem zdjęcie musi być suche. • Nie laminuj grubych ani ciękich dokumentów, które mogą się zablokować w laminatorze. Jeeli w urządzeni… |
 |
[Page 42] GEHA A3 BASIC 42 CZYSZCZENIE I PIELĘGNACJA Naprawy wykraczające poza zakres normalnego czyszczenia i konserwacji mogą być wykonywane tylko przez autoryzowany punkt serwisowy. Nigdy nie zanurzaj urządzenia w wodzie. Nigdy nie otwieraj samodzielnie podstawy ur… |
 |
[Page 43] GEHA A3 BASIC 43 Manual__A3Basic:Layout 1 08.09.10 17:56 Seite 43 |
 |
[Page 44] GEHA A3 BASIC 44 Manual__A3Basic:Layout 1 08.09.10 17:56 Seite 44 |
 |
[Page 45] GEHA A3 BASIC 45 Manual__A3Basic:Layout 1 08.09.10 17:56 Seite 45 |
 |
[Page 46] GEHA A3 BASIC 46 Manual__A3Basic:Layout 1 08.09.10 17:56 Seite 46 |
 |
[Page 47] GEHA A3 BASIC 47 Manual__A3Basic:Layout 1 08.09.10 17:56 Seite 47 |
 |
[Page 48] GEHA A3 BASIC 48 www.geha.de Geha GmbH Alte Heeresstraße 25 — 27 D-59929 Brilon Germany 09/2010 86096046 Irrtümer vorbehalten Manual__A3Basic:Layout 1 08.09.10 17:56 Seite 48 |
Report abuse
Libble takes abuse of its services very seriously. We’re committed to dealing with such abuse according to the laws in your country of residence. When you submit a report, we’ll investigate it and take the appropriate action. We’ll get back to you only if we require additional details or have more information to share.
Product:
Register
Register getting emails for Geha Home and Office A3 Basic Laminator at:
- new questions and answers
- new manuals
You will receive an email to register for one or both of the options.
Get your user manual by e-mail
Enter your email address to receive the manual of Geha Home and Office A3 Basic Laminator in the language / languages: English, German, Dutch, French, Italian, Polish, Swedish, Turkish, Spanish as an attachment in your email.
The manual is 2,12 mb in size.
You will receive the manual in your email within minutes. If you have not received an email, then probably have entered the wrong email address or your mailbox is too full. In addition, it may be that your ISP may have a maximum size for emails to receive.
The manual is sent by email. Check your email
If you have not received an email with the manual within fifteen minutes, it may be that you have a entered a wrong email address or that your ISP has set a maximum size to receive email that is smaller than the size of the manual.
The email address you have provided is not correct.
Please check the email address and correct it.
Your question is posted on this page
Would you like to receive an email when new answers and questions are posted? Please enter your email address.