
14.06.2018
Коляска «Кимба нео»: тонкая настройка под каждого ребенка
Количество показов: 5849
Дата изменения: 22.01.2020 14:40:00
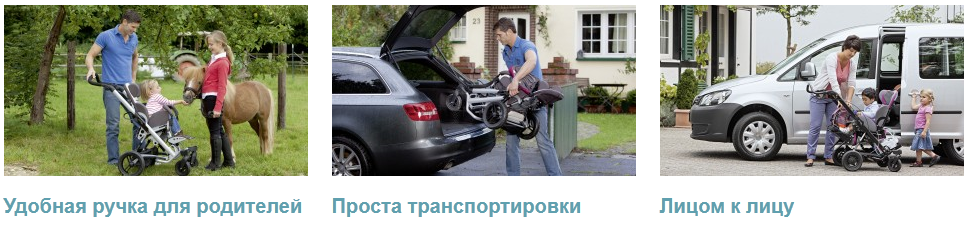
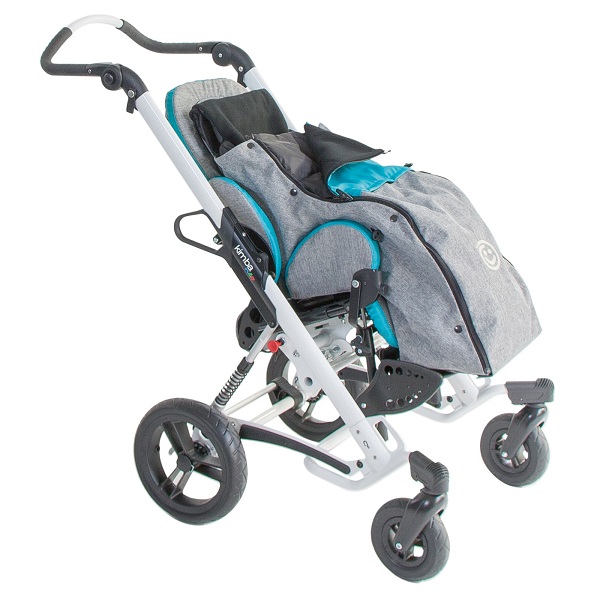
Рассмотрев коляску Kimba neo, я подумала: das auto – настолько в ней все продумано, прочно и надежно.
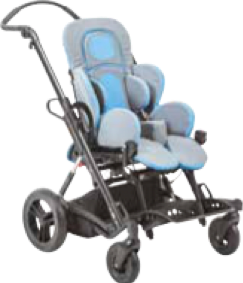
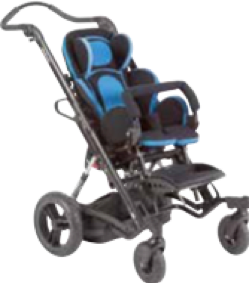
Коляска «Кимба» немецкой компании Otto Bokk адресована детям с тяжелыми и средней тяжести нарушениями двигательной активности. В ней:
- Параметры кресла можно настроить под ребенка. Кресло растет вместе с малышом.
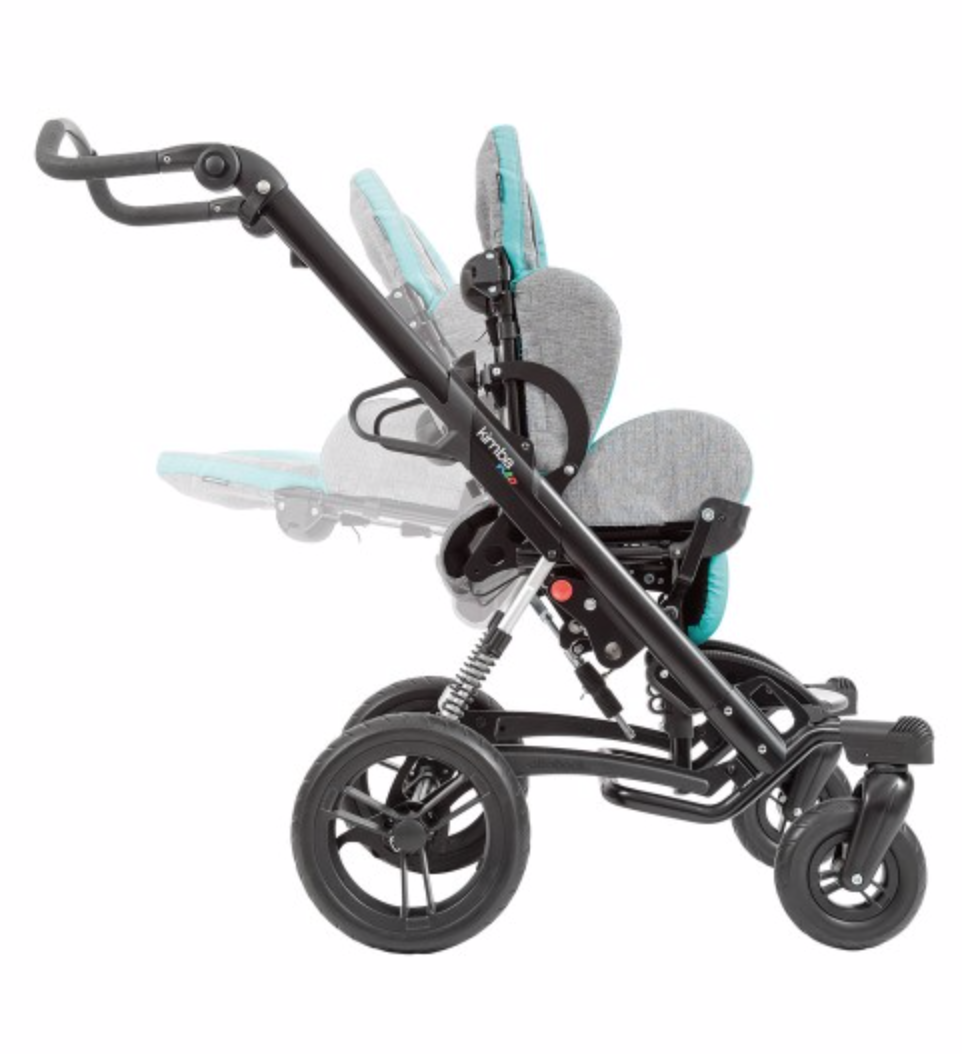
- Откидывается не только спинка, можно откинуть кресло, не меняя настроек.
- Кресло можно переставлять по ходу и против движения.
- Можно регулировать амортизационную пружину, чтобы подобрать мягкость ходя коляски.
- Диаметр, ширина и поворотный механизм колес обеспечивают хорошую проходимость коляски.
Поскольку в этой коляске важно именно кресло и его возможности, с него и начнем наш обзор.

Оглавление
- Как настроить параметры кресла под ребенка в коляске «Кимба нео».
- Чехлы коляски «Кимба нео».
- Как откинуть спинку или кресло в коляске «Кимба нео».
- Как переставить кресло в коляске «Кимба нео».
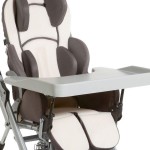
- Подножка.
- Как отрегулировать амортизационную пружину коляски «Кимба нео».
- Колеса и стояночный тормоз.
- Высота и угол наклона ручки
- Рама. Как сложить коляску «Кимба нео»
- Капюшон
- Аксессуары
Как настроить параметры кресла под ребенка в коляске «Кимба нео»
«Кимба нео» выпускается в двух размерах. Первый рассчитан на ребенка от 1 до 6 лет, второй – от 4 до 10 лет. В коляске регулируются:
• ширина и глубина сиденья,
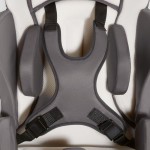
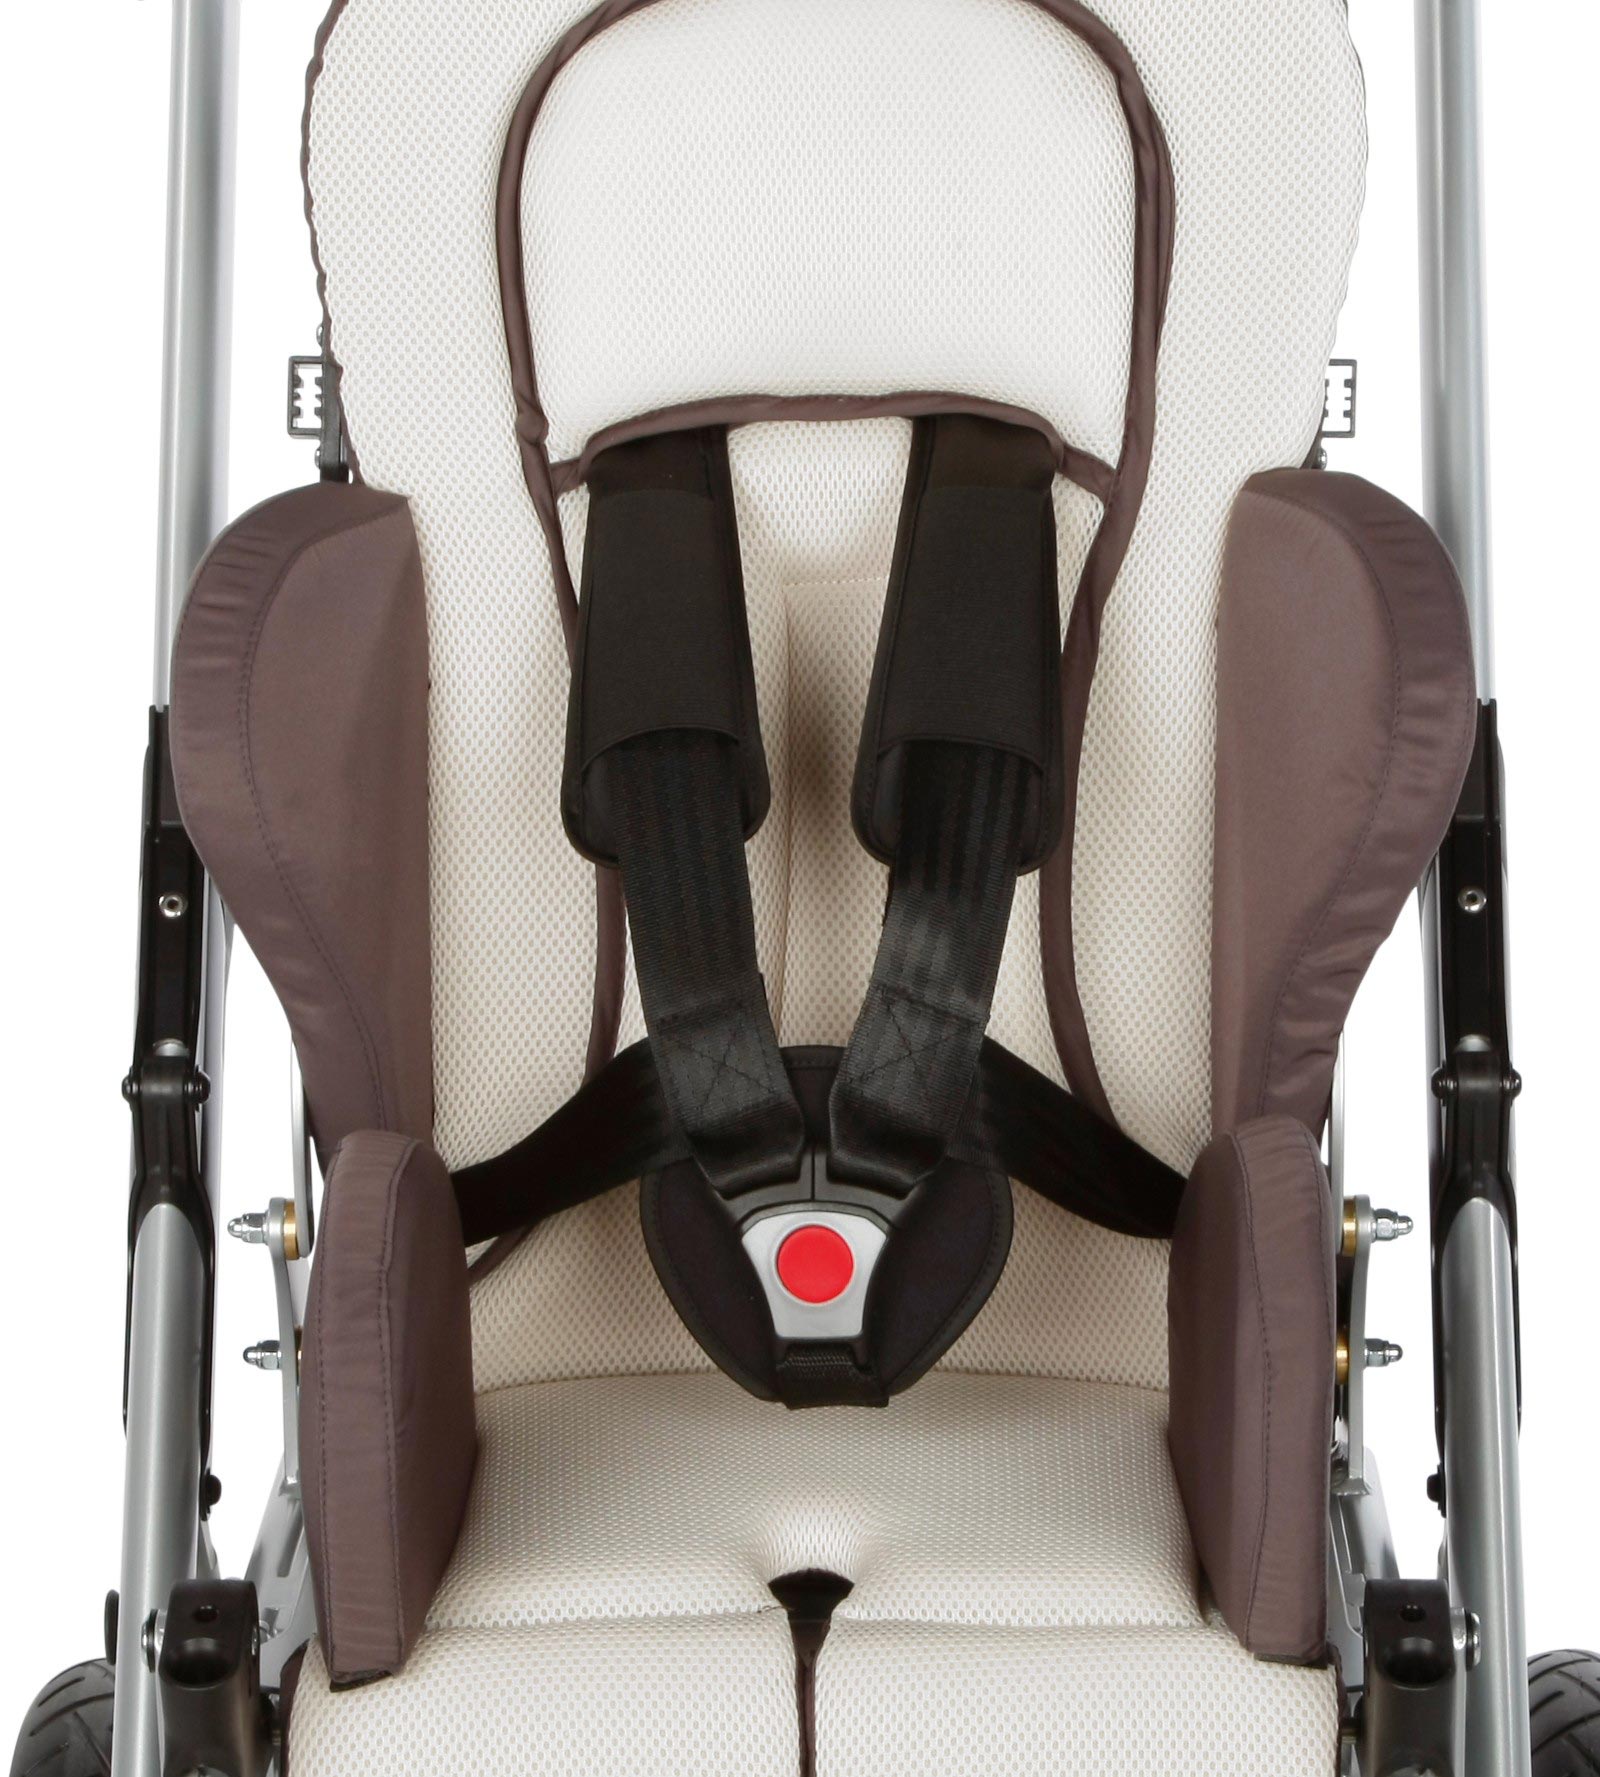
• ширина расположения боковых пелотов, которые поддерживают тело в вертикальном положении, не давая ребенку заваливаться на бок,
• ширина расположения пелотов, которые поддерживают голову, страхуя от непроизвольных движений,
• уровень расположения подножки,
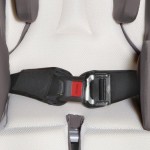
• уровень расположения плечевых ремней безопасности и степень их натяжения.
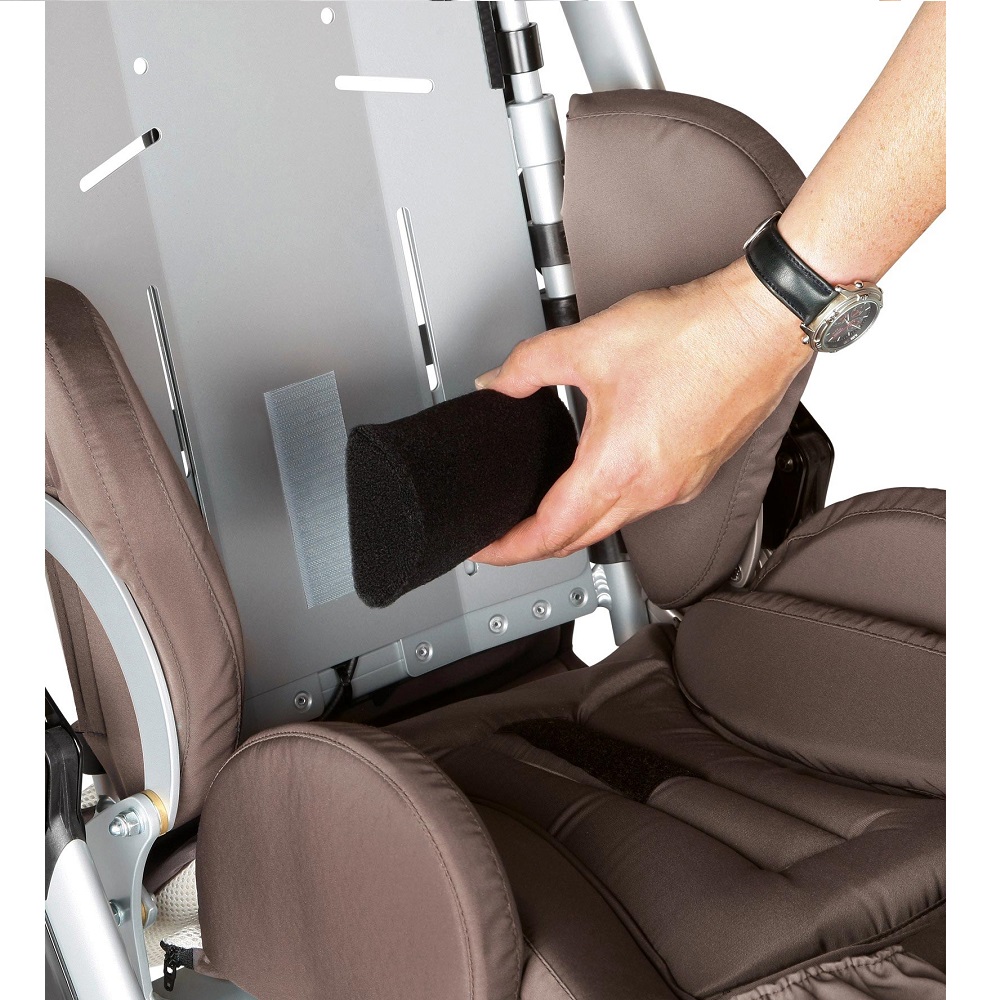
Эти параметры настраиваются вручную, поэтому настройка тонкая. Элементы кресла и боковые пелоты фиксируется болтами, чтобы изменить что-то, надо снять чехлы. Набор отверток прилагается.


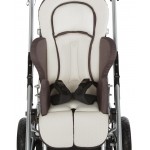
Чехлы коляски «Кимба нео»
Раз уж мы сняли чехлы, всмотримся в них. За счет своего объема они обеспечивают дополнительную защиту ребенка при непроизвольных движениях. Чехол сиденья и спинки дополнительно покрыт тканью-сеткой, которая обеспечивает циркуляцию воздуха.
Чехлы из микрофибры, пропускают воздух. Их можно снять и почистить влажной тряпкой или постирать в теплой воде (30°) мягким моющим средством. Сушить в теплом проветриваемом помещении, на солнце могут выгореть.


Как откинуть спинку или кресло в коляске «Кимба нео»
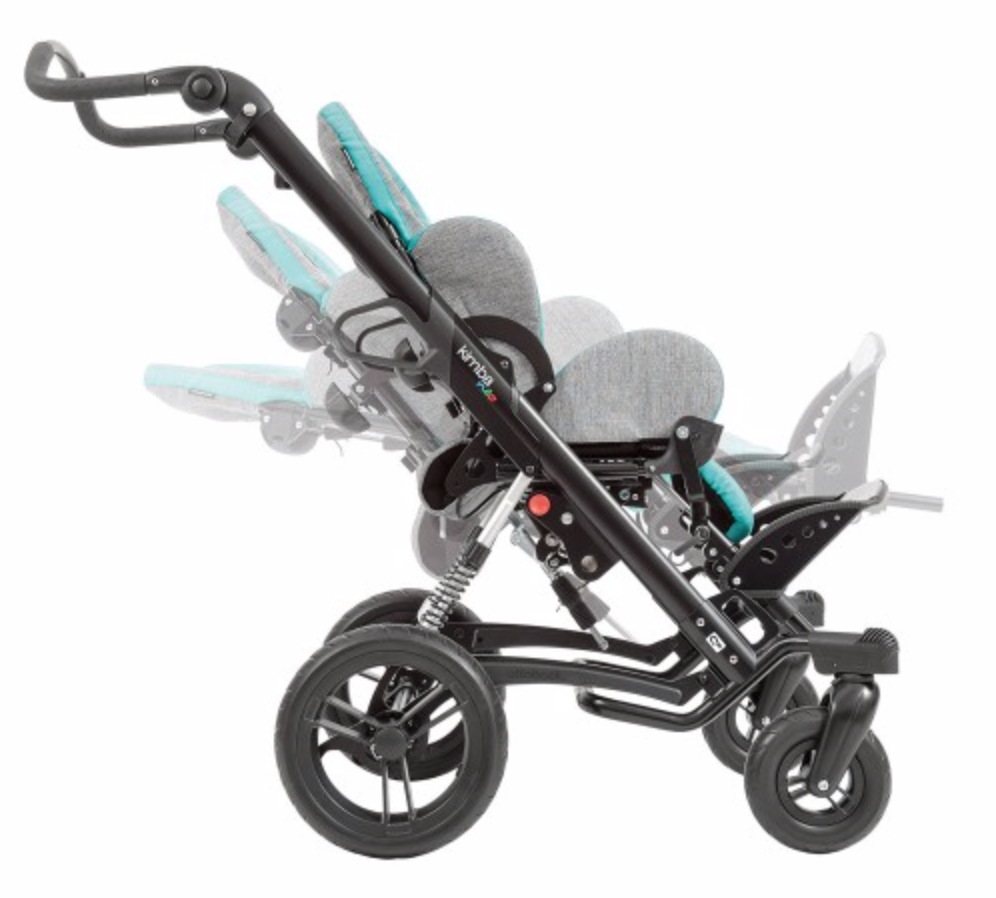
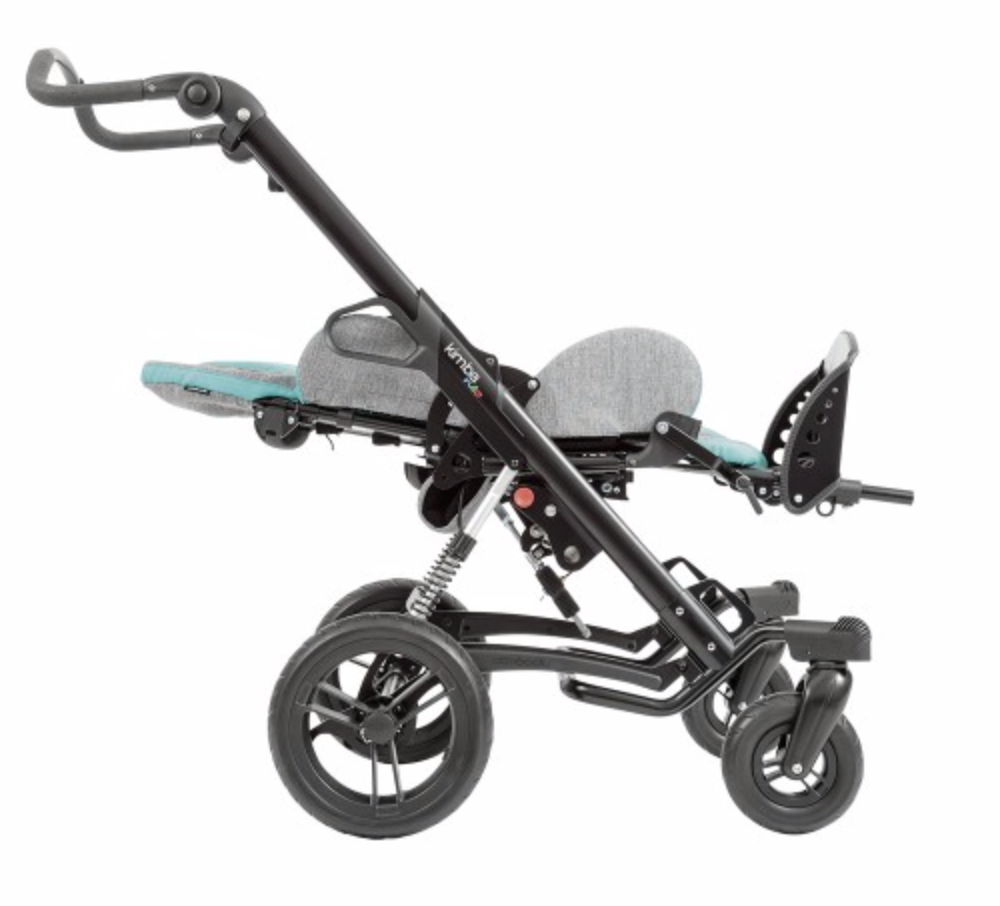
Спинка кресла в коляске «Кимба нео» опускается до горизонтального положения – удобно, когда нужно поменять памперс или переодеть ребенка. Чтобы откинуть спинку, надо за спинкой повернуть нижний винт влево. Выбрать нужный угол наклона, закрутить винт.


Детям с тяжелыми и средней тяжести поражениями двигательного аппарата важно поддерживать физиологически правильное положение тела, чтобы не развивались вторичные деформации и сколиозы. Важно именно предотвратить искривления позвоночника, потому что потом их невозможно исправить. Поэтому так важно, чтобы и откинувшись в кресле, кроха сохранял правильную позу – ровная спина, бедра перпендикулярно спине. Для таких случаев лучше, чтобы откидывалось кресло, а не спинка. В коляске «Кимба» такая функция есть. Чтобы откинуть кресло, надо повернуть вправо верхний винт сзади спинки, выбрать нужный угол наклона кресла, придерживая его за спинку и сиденье. Зафиксировать винт.
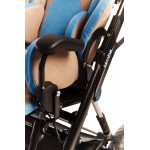
Как переставить кресло в коляске «Кимба нео»
Еще одна востребованная у родителей функция – возможность переставлять кресло по ходу или против движения, чтобы лучше видеть ребенка.
Чтобы переставить кресло, надо сделать четыре простых действия:
1) под креслом передвинуть влево рычаг,
2) отодвинуть стопорный захват, чтобы можно было поднять его над передней трубкой опоры,
3) откинуть кресло назад под углом 45°,
4) вынуть кресло из замка.
Один раз разобравшись, потом вы будете делать это легко.


Чтобы установить кресло, надо выполнить те же действия, но в другом порядке:
1) берем сиденье под углом 45°,
2) устанавливаем на заднюю трубку опоры,
3) передней частью кресла надавливаем на стопорный захват так, чтобы он зафиксировался над передней трубкой опоры со слышимым щелчком,
4) перемещаем вправо рычаг блокировки сиденья.
Проверяем.
О том, как переставить кресло, посмотрите в нашем видео с 3.30 минуты.
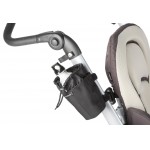
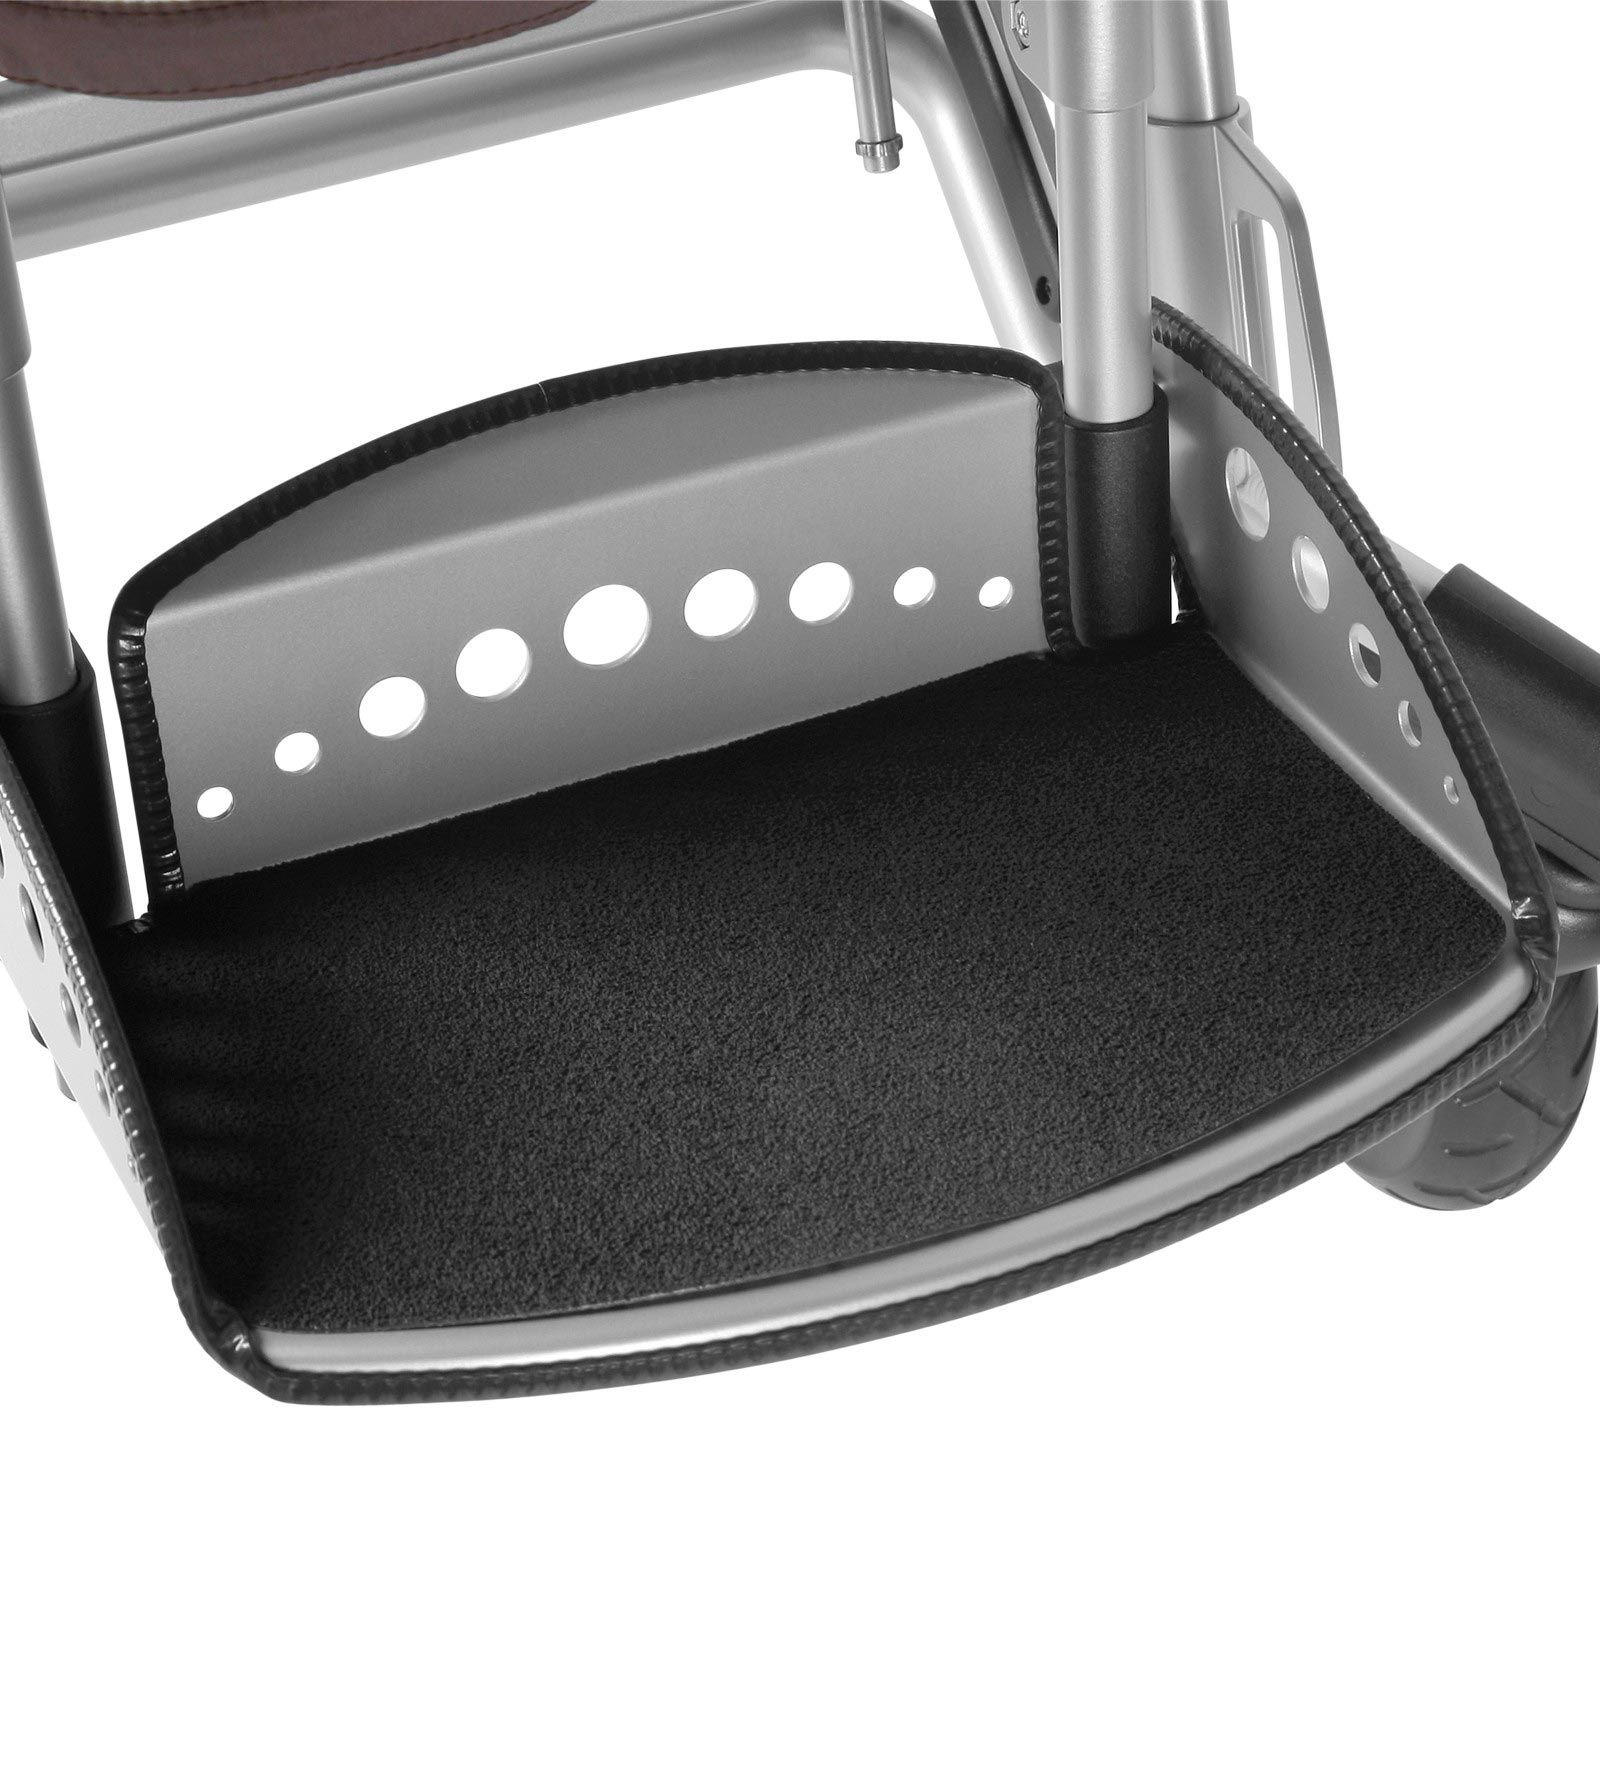
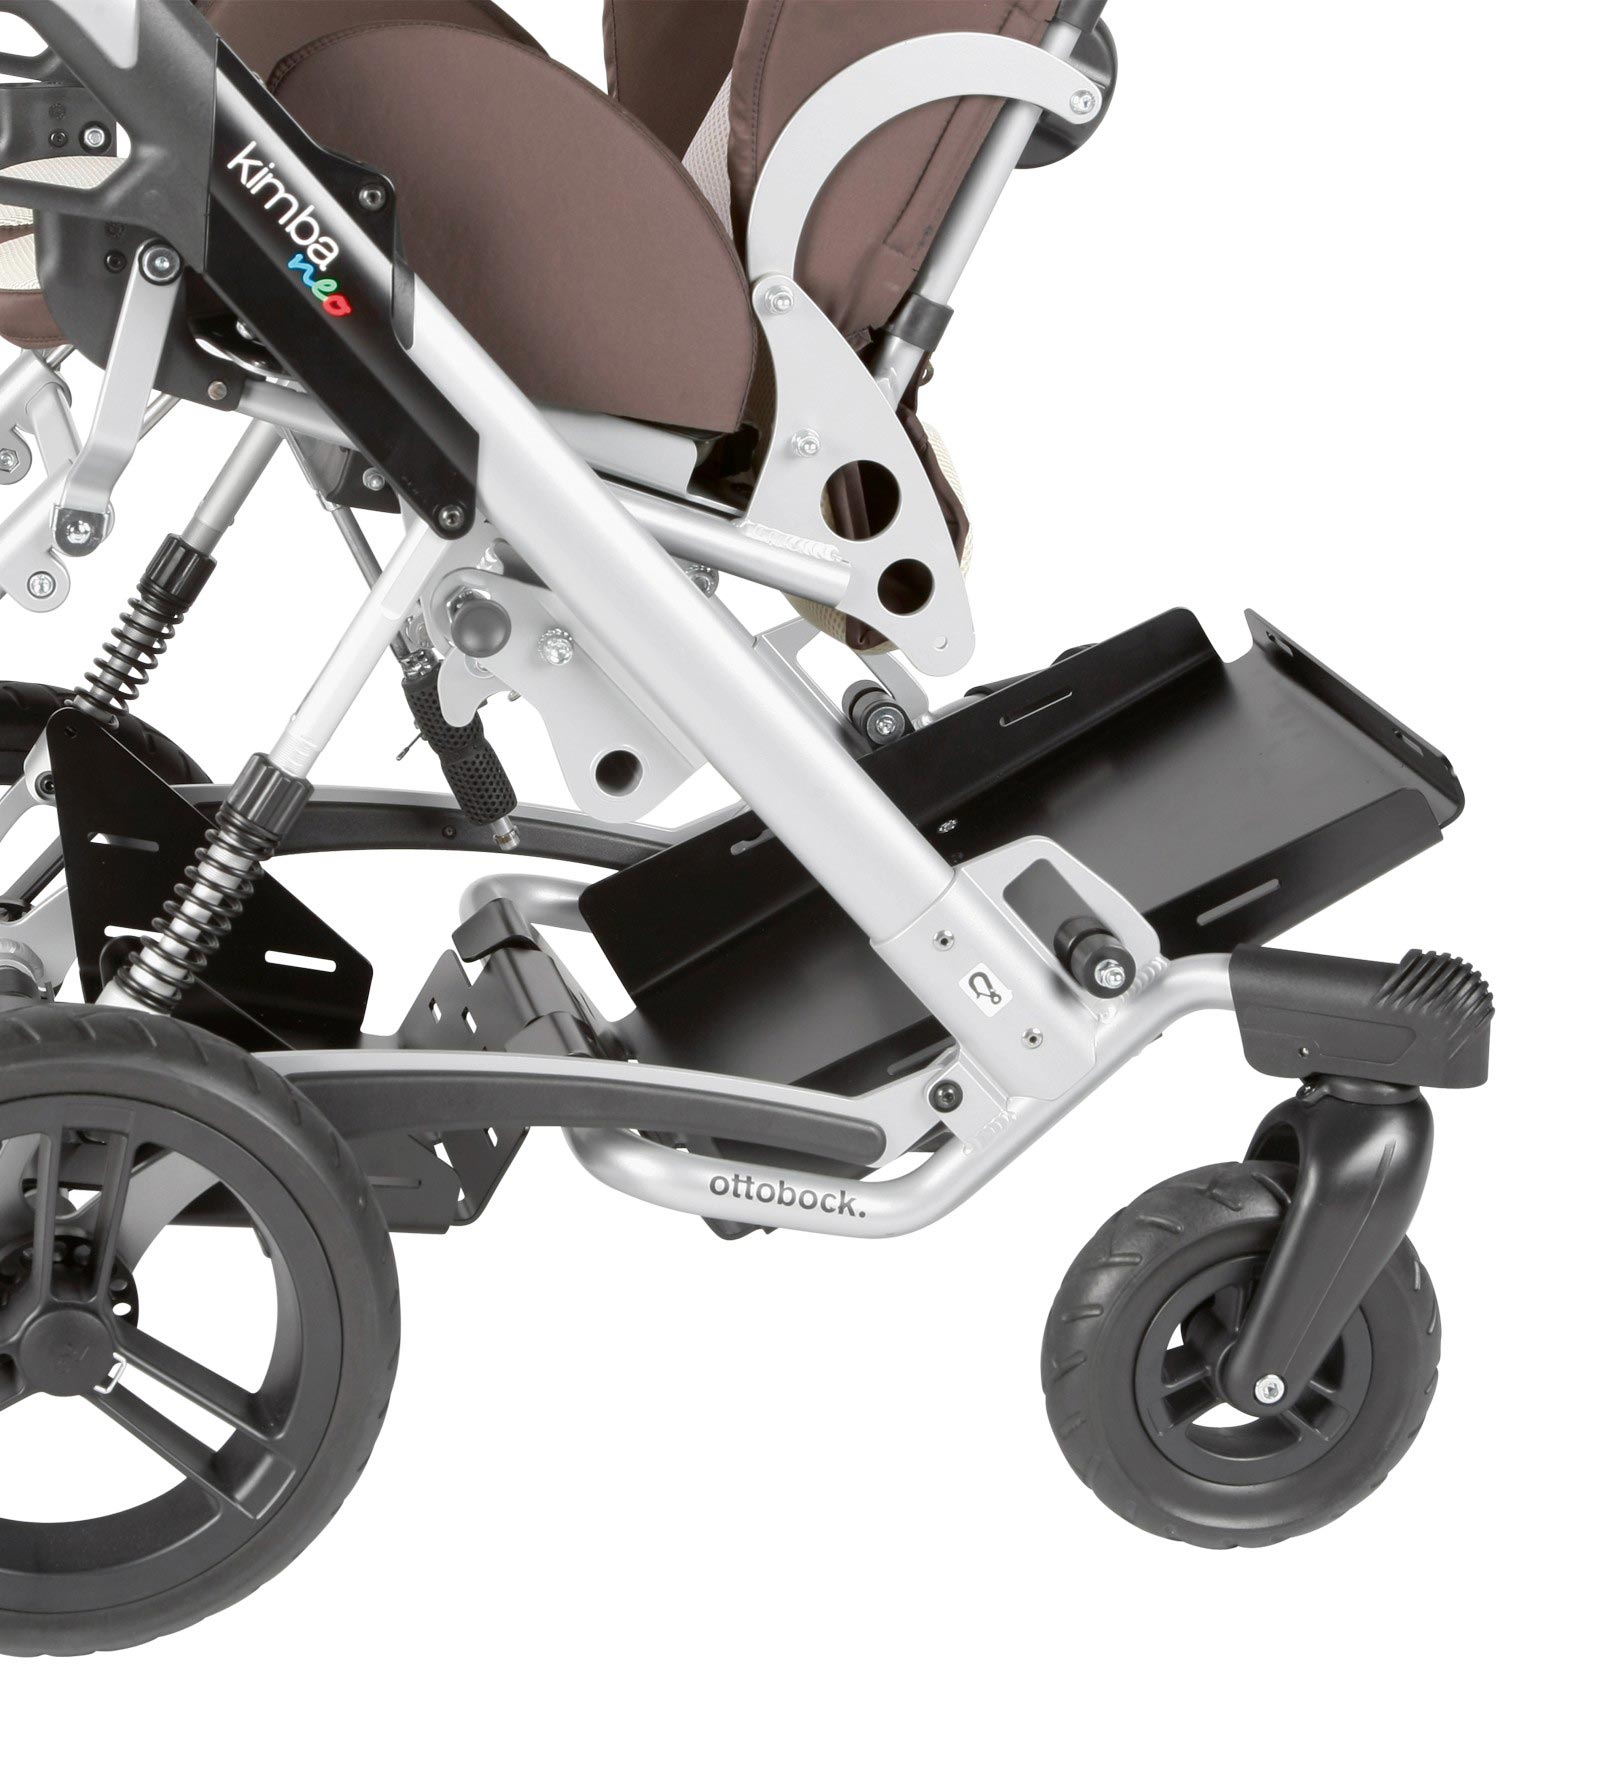
Подножка
Чтобы выбрать высоту подножки, нужно открутить болты с помощью отвертки. Сделать это лучше дома, до прогулки.
Чтобы изменить угол наклона подножки, надо открутить рычаг сбоку, выбрать нужное положение, закрутить рычаг.

Как отрегулировать амортизационную пружину коляски «Кимба нео»
Еще одна фишка коляски «Кимба нео» — возможность изменить жесткость амортизационных пружин. Регулировочные кольца пружины – на резьбе. Если покрутить кольцо, пружина может двигаться вниз, к колесам, или вверх. Чем длиннее пружина, тем мягче ход.

Колеса и стояночный тормоз
У «Кимбы» широкие литые колеса, передние диаметром 17 см, задние – 25 см.
Стояночный тормоз – единый, в виде планки. Планка вниз – коляска на тормозе, вверх – готова к движению.
Задние колеса быстросъемные. Чтобы снять колесо, надо оттянуть скобу в центре колеса и тянуть колесо с оси. Чтобы надеть колесо – задвинуть на ось до щелчка.


Передние колеса снабжены поворотным механизмом. Благодаря ему колеса вращаются вокруг вертикальной оси, что облегчает маневрирование. Но при движении по неровной поверхности поворотный механизм лучше зафиксировать – так будет удобнее идти. Чтобы зафиксировать поворотный механизм передних колес, надо рукой выдвинуть вперед механизм фиксации, чтобы убрать фиксацию — задвинуть назад.


Высота и угол наклона ручки
Высота ручки одинакова для обоих размеров коляски «Кимба нео» — от 71 до 116 см. Она регулируется с помощью угла наклона поперечной части. Чтобы изменить угол наклона, надо нажать на кнопки на периметре ручки и выбрать нужное положение. Щелчок сообщит, что положение зафиксировано.
Рама. Как сложить коляску «Кимба нео»
Коляска «Кимба нео» складывается пополам, как книжка.
Чтобы сложить коляску, не обязательно снимать кресло. Но в таком случае, мы изменим только общую высоту коляски. Чтобы сложить раму, надо:
1) опустить максимально вниз поперечную часть ручки,
2) потянуть ручки-рычаги на раме вверх. Направляющие выйдут из пазов, рама начнет складываться.
Коляска займет меньше места, если снять задние колеса.


Капюшон
У коляски «Кимба нео» он небольшой, но практичный с карманом для мелочей и светоотражающими элементами. Кроме того, есть прозрачное окошко с пологом, через которое можно наблюдать за малышом.
Полог с резинкой внизу хорошо защищает в непогоду и при холодном ветре. Его можно отстегнуть. Под ним сетчатая вставка, хорошо пропускающая воздух.
Чтобы установить капюшон, надо вставить застежку в замок до щелчка. Чтобы снять капюшон, нажать на застежку и продвинуть в замок.


Аксессуары
Коляску можно дополнительно укомплектовать элементами поддержки ребенка (различные варианты ремней безопасности, валики, поддерживающие подушки, полог на ножки, подлокотники) и аксессуарами (комнатное шасси, сумка, держатель для бутылочки и др.). Подробнее можно узнать на странице коляски.
 |
[Page 1] Otto Bock Kimba neo Kimba Neo, Kimba Cross, Kimba Inline Instructions for use ………………………………………………………………………………….. 3 |
 |
[Page 2] Otto Bock Kimba neo 2 Kimba Neo, Kimba Cross, Kimba Inline |
 |
[Page 3] Otto Bock Kimba neo Foreword1 6………………………………………………………………………………………………………………………………………….. Product description2 6……………………………………………………. |
 |
[Page 4] Otto Bock Kimba neo Push bar8.2.3 28………………………………………………………………………………………………………………………….. Adjusting the push bar8.2.3.1 28………………………………………………………. |
 |
[Page 5] Otto Bock Kimba neo Adjusting the wheel lock8.4.5.2 50………………………………………………………………………………………………………. Adjusting the wheelbase8.4.6 51…………………………………………………………… |
 |
[Page 6] Otto Bock Kimba neo 1 Foreword INFORMATION Date of last update: 2020-03-27 ► Please read this document carefully before using the product and observe the safety notices. ► Obtain instruction from the qualified personnel in the safe use of the product. ► Please con… |
 |
[Page 7] Otto Bock Kimba neo 1 Kimba Neo – outdoor mobility base for alternative seating systems with “swivelling” front wheels option 1 Plug-on rear wheel 6 Adjustable push bar 2 “Swivelling” front wheel (option) 7 Release handle, folding mechanism 3 Swivel lock 8 Se… |
 |
[Page 8] Otto Bock Kimba neo 2.2.2 Kimba Cross 2 Kimba Cross – outdoor mobility base for Kimba Neo seating unit and alternative seating systems 1 Frame 2 Front wheel (swivelling) 3 Front wheel (fixed) 4 Plug-on rear wheel/drum brake 5 Push bar 8 Product description Kimba Neo, … |
 |
[Page 9] Otto Bock Kimba neo 2.2.3 Kimba Inline 3 Kimba Inline – outdoor mobility base for Kimba Neo seating unit and alternative seating systems 1 Frame 2 Front wheel (swivelling) 3 Drum brake 4 Push bar 3 Intended use The safe use of the product can only be ensured in case … |
 |
[Page 10] Otto Bock Kimba neo The product may only be used with the options that are listed on the product order form. Ottobock assumes no liability for combinations with medical devices and/or accessories from other manufacturers outside the modular system. Combinations based … |
 |
[Page 11] Otto Bock Kimba neo WARNING Improper handling of packaging materials Risk of suffocation due to neglect of the duty to supervise ► Packaging materials must be kept out of the reach of children. Hazards when getting in CAUTION Wheel lock not engaged when getting in or … |
 |
[Page 12] Otto Bock Kimba neo CAUTION Incorrect centre of gravity setting Falling of the user due to extreme settings ► Check the standard adjustments of the rehab buggy for stability against tipping and the ergonomically correct sitting position of the user. Avoid any extreme … |
 |
[Page 13] Otto Bock Kimba neo Hazards due to fire, heat and cold CAUTION Extreme temperatures Hypothermia or burns due to contact with components, failure of components ► Do not expose the product to any extreme temperatures (e.g.direct sunlight, sauna, extreme cold). ► Do… |
 |
[Page 14] Otto Bock Kimba neo NOTICE Use under incorrect environmental conditions Damage to product due to corrosion or abrasion ► Do not use the product in salt water. ► Make sure that the wheel bearings are not damaged by sand or other particles. 4.4 Side effects The follow… |
 |
[Page 15] Otto Bock Kimba neo 4.6.1.2 Kimba Cross, Kimba Inline Label Meaning A Manufacturer’s product name B CE marking C Maximum load (see section “Technical data”) D Manufacturer information/address E Serial number 1) F Manufacturing date 2) G Symbol for medical device H… |
 |
[Page 16] Otto Bock Kimba neo Label Meaning WARNUNG/WARNING ATTENTION! Never leave your child unattended! ATTENTION! Never leave your child unattended! ATTENTION! This seating unit is unsuitable for children aged below 6 months! ATTENTION! This seating unit is unsuitable for chil… |
 |
[Page 17] Otto Bock Kimba neo 5.3.2 Storage during extended disuse The product must be stored in a dry place. Specific information for extended storage: see Page56. It is not necessary to disassemble the product. Maintain sufficient clearance from sources of heat. If the prod… |
 |
[Page 18] Otto Bock Kimba neo 4 5 6 INFORMATION Putting on the seat is described in the seating unit instructions for use (user). 6.1.2 Kimba Cross Unfolding the rehab buggy 1) Remove the transport locks and packaging material. 2) Remove the locking pin from the frame lug (see … |
 |
[Page 19] Otto Bock Kimba neo 9 10 Installing the rear wheels ► Press the quick-release axle and the wheel together into the axle retainer (see fig.11). 11 Installing the front wheel 1) Insert the front wheel with the splash guard into the fork and push it all the way to th… |
 |
[Page 20] Otto Bock Kimba neo Some parts of the equipment package are installed at the factory. The following components are included and have to be installed by qualified personnel: Roll bar 1) Mount the roll bar on the push bar (see fig.13). 2) Insert and tighten the Alle… |
 |
[Page 21] Otto Bock Kimba neo 15 16 Respirator platform mounting kit overview 17 1 T2 respirator platform 4 Bottom supports (with mounting materials) 2 T1 respirator platform 5 Hook-and-loop straps 3 Retaining bracket with mounting materials 6 Side supports (with mounting materia… |
 |
[Page 22] Otto Bock Kimba neo 4) Lift up the T2 respirator platform on the axle tube. Under the angle tabs, glue 2x loop strap in the size 50x50mm onto the axle tube (see fig.21). 5) Press the T2 respirator platform into place. → The T2 respir… |
 |
[Page 23] Otto Bock Kimba neo 24 25 6.2.2 Installation with a seat facing in the direction of travel Installing the T2 respirator platform 1) Glue the loop strap onto the front frame tube (see fig.18). INFORMATION: Trim the length to approx. 210mm for size 1 and approx. 2… |
 |
[Page 24] Otto Bock Kimba neo 3) Set the T1 respirator platform onto the front frame tube (see fig.31, item1). 4) Carefully press the clamp fittings of the supports onto the axle tube until they engage (see fig.31, item2/3). → The T1 respirator platform is insta… |
 |
[Page 25] Otto Bock Kimba neo 8 Use 8.1 Instructions for use • Attaching loads (e.g.backpacks) can adversely affect stability. Therefore, suspending additional loads on the product is not permitted. • The products in this series generally meet the minimum technical require… |
 |
[Page 26] Otto Bock Kimba neo 33 34 35 8.2.1.2 Alternative seating systems without own seat angle adjustment CAUTION Incorrect handling of the seat tilt Tipping over, falling out of the seating shell / seating system due to errors in handling the product ► Before operating the … |
 |
[Page 27] Otto Bock Kimba neo 36 37 8.2.2 Seating shell interface CAUTION Improperly installed seating shell Falling of the user due to improper assembly and incorrect settings ► Note that the producer/distributor is responsible for the user’s safety in case of using an in… |
 |
[Page 28] Otto Bock Kimba neo 38 1 2 39 8.2.3 Push bar CAUTION Lifting by removable components User tipping over, falling due to lifting by removable components ► The product may be lifted only by firmly welded or permanently attached components. It is particularly danger o… |
 |
[Page 29] Otto Bock Kimba neo NOTICE Incorrect use of the wheel lock Damage to wheels, loss of braking function due to incorrect operation ► Do not use the wheel lock whilst travelling. The product must be standing still before braking. ► Do not engage the wheel lock forceful… |
 |
[Page 30] Otto Bock Kimba neo 44 45 We recommend the following setting for the spring tension: User weight Marking* up to 10 kg up to 1st marking from the top up to 20 kg up to 2nd marking from the top up to 30 kg up to 3rd marking from the top up to 40 kg up to 4th marking from … |
 |
[Page 31] Otto Bock Kimba neo 8.2.7.3 Storage bag NOTICE Overloading Damage due to failure to observe specifications ► Observe the maximum load of the storage bag (see Page56). ► Please note that the maximum load of the overall product must not be exceeded even after loadi… |
 |
[Page 32] Otto Bock Kimba neo Installation tips • The couplings with the plastic straps face to the rear and are tightened securely to the rear lashing points (see fig.51, item1). • The plastic straps face inwards (see fig.51, item2). • The securing pins face fr… |
 |
[Page 33] Otto Bock Kimba neo • Installation of the large T1 respirator platform over the front wheels (see fig.53) – the user sits in the seat facing away from the direction of travel • Installation of the large T1 respirator platform over the rear wh… |
 |
[Page 34] Otto Bock Kimba neo INFORMATION The product can be equipped with the Kimba Neo seating unit or alternative seating systems. In this case, please observe the information in the separate instructions for use for the seating system. The rehab buggy must be prepared for tra… |
 |
[Page 35] Otto Bock Kimba neo WARNING Incorrect transport weight during use in vehicles for transporting persons with reduced mobility Serious injuries in case of accidents due to exceeding the allowable load ► During use in a vehicle for transporting persons with red… |
 |
[Page 36] Otto Bock Kimba neo 8.2.9.2 Using the product in a vehicle WARNING Positioning in vehicles for transporting persons with reduced mobility Serious injuries in case of accidents due to user error ► Positioning of the product in vehicles for transporting persons with re… |
 |
[Page 37] Otto Bock Kimba neo 2) The locking pin is disengaged (see fig.65, item1). The seat angle can now once again be adjusted by turning the top rotary knob. 64 65 8.2.9.4.2 Alternative seating systems Note the information in the previous section. 8.2.9.5 Adjusting and… |
 |
[Page 38] Otto Bock Kimba neo 68 8.2.9.5.2 Alternative seating systems Before using the product in a vehicle for transporting persons with reduced mobility, the back angle must be tilted back gently to an angle of approx. 95°. Note the information in the separate instructions fo… |
 |
[Page 39] Otto Bock Kimba neo 2 71 72 8.2.9.7 Securing the user in the product Information on correct transport safety of the user in the vehicle for transporting persons with reduced mobility • The straps of the personal restraint system must always be routed close to the use… |
 |
[Page 40] Otto Bock Kimba neo 30° 45° 75° 75 76 8.2.9.8 Restrictions for use WARNING Using the product with certain settings and/or installed options Severe injury in case of accidents due to options coming loose ► Before using the product in a vehicle for transport… |
 |
[Page 41] Otto Bock Kimba neo 8.3.2 Seating shell interface CAUTION Improperly installed seating shell Falling of the user due to improper assembly and incorrect settings ► Note that the producer/distributor is responsible for the user’s safety in case of using an individu… |
 |
[Page 42] Otto Bock Kimba neo 8.3.3.1 Adjusting the push bar height 1) Loosen the clamping lever on both sides. 2) Adjust the push bar to the desired height. 3) Tighten the clamping lever (see fig.79, item1). 79 8.3.3.2 Adjusting the push bar angle 1) Flip up the clip o… |
 |
[Page 43] Otto Bock Kimba neo 81 8.3.4.2 Adjusting the wheel lock 1) Loosen the counter nut (see fig.82, item1) 2) Turn the adjustment nut (see fig.82, item2) 3) Tighten the counter nut (see fig.82, item1). 82 8.3.5 Adjusting the seat angle 1) Loosen and ope… |
 |
[Page 44] Otto Bock Kimba neo 84 85 8.3.7 Use as a bicycle trailer CAUTION Risky operation Falling, tipping over backwards and to the side due to approaching obstacles incorrectly ► Test the driving behaviour of the linked bicycle and bicycle trailer in a safe environment befor… |
 |
[Page 45] Otto Bock Kimba neo 8.3.7.2 Coupling the trailer to the bicycle The instructions for connecting the trailer to the bicycle are written on a sticker which is attached to each draw-bar. The trailer draw-bar will additionally be secured to the bicycle frame with a safety s… |
 |
[Page 46] Otto Bock Kimba neo 1) Loosen the screw connection of the right rear axle and remove the nut and lock washers. 2) Put on the anti-tipper so that the fork of the anti-tipper engages with the crossbrace (see fig.91). 3) Guide the bore hole of the anti-tipper over th… |
 |
[Page 47] Otto Bock Kimba neo 2) Remove the quick-release axles from the rear wheels. 3) Open the eccentric lever of the front wheel. 4) Remove the front wheel with the splash guard from the fork. 5) Release the clip (see fig.10). 6) Pull the locking pin out of the hole i… |
 |
[Page 48] Otto Bock Kimba neo 8.4 Kimba Inline 8.4.1 Seating unit CAUTION Use of alternative seating systems Serious injuries to the user due to faulty operation ► The product can be equipped with the Kimba Neo seating unit or alternative seating systems. Observe the informatio… |
 |
[Page 49] Otto Bock Kimba neo 8.4.3 Adjusting the seat tilt 1) Release the clamping lever (see fig.99). 2) Set the seat angle to the desired position. CAUTION! With one hand, secure the occupant against falling out (e.g.by holding his/her upper body). 3) Tig… |
 |
[Page 50] Otto Bock Kimba neo 8.4.5 Wheel lock CAUTION Wheel lock not engaged when getting in or out Falling, tipping over of the user due to user error ► Before the user gets in or out, always engage and check the wheel lock. ► Engage the wheel lock to prevent the rehab bugg… |
 |
[Page 51] Otto Bock Kimba neo 103 8.4.6 Adjusting the wheelbase 1) Loosen the clamping wheels on both sides (see fig.104). 2) Press the two buttons on both sides simultaneously (see fig.104, item1). 3) Increase or decrease the wheelbase. 4) Tighten the clamping wheel… |
 |
[Page 52] Otto Bock Kimba neo 105 106 107 8.4.8 Use in vehicles for transporting persons with reduced mobility WARNING Improper use in vehicles for transporting persons with reduced mobility Risk of serious injury when using the product as a seat ► The product has not been app… |
 |
[Page 53] Otto Bock Kimba neo 108 8.5.2 Cleaning Clean the product regularly depending on the degree of soiling and frequency of use, at least 1xper month: 8.5.2.1 Cleaning by hand • Clean plastic parts, frame parts and the chassis and wheels with a mild cleaner and a damp c… |
 |
[Page 54] Otto Bock Kimba neo • This also applies if loose, worn, bent or damaged components, cracks in the frame or broken frame compon ents are identified. • Some maintenance tasks can be carried out to a certain extent by the user at home (see the sections «Mainten… |
 |
[Page 55] Otto Bock Kimba neo 10.2 Information on re-use CAUTION Used seat padding Functional and/or hygienic risks due to re-use ► Replace the seat padding if the wheelchair is to be re-used. The product is suitable for re-use. Similar to second-hand machines or vehicles, prod… |
 |
[Page 56] Otto Bock Kimba neo 12 Technical data 12.1 Kimba Neo Outdoor mobility base Size 1 Size 2 Overall width [mm] 600 670 Front wheel diameter, “swivelling” front wheels [mm/inch] 170/6.7 170/6.7 Rear wheel diameter [mm/inch] 280/11 280/11 Push handle height (min./m… |
 |
[Page 57] Otto Bock Kimba neo • Permitted load for the seating unit (max. 40kg) + own weight of the seating unit, size 1 (7.5kg) = 47.5kg. • Permitted load for the outdoor mobility base (max.50kg) – fully loaded seating unit/own weight (47.5kg) = 2… |
 |
[Page 58] Otto Bock Kimba neo Feature Threshold value (according to Regulation (EU) No.1300/2014) 700 (plus 50mm on each side for the hands when mov ing) Smallest wheels [«] approx. 3 or greater (according to the regulation, the smallest wheel must be able t… |
 |
[Page 59] Otto Bock Kimba neo Kundenservice/Customer Service Europe OttoBock HealthCare DeutschlandGmbH Max-Näder-Str. 15 · 37115 Duderstadt · Germany T+495527848-3433 · F+495527848-1460 hea[email protected] · www.ottobock.de Otto Bock Healthcare Pr… |
 |
[Page 60] Otto Bock Kimba neo Template-Version: SB_2016-10-21 · FM483 · SB_210x297 Ihr Fachhändler | Your specialist dealer Otto Bock Mobility Solutions GmbH Lindenstraße 13 · 07426 Königsee/Germany www.ottobock.com © Ottobock · 647H891=en_INT-06-2005 |
Table of Contents: Otto Bock Kimba neo Stroller Owner’s Manual
-
Otto Bock Kimba neo 30 | Ottobock Kimba neo
-
5.2.2.3 Four-point belt 14 1 Clip with rivet 5 Lap-belt part 2 Shoulder belt, left/right 6 Belt restraint 3 Belt pads 7 Adjustment buckle 4 Strap guide with attachment fitting 8 Belt buckle with release button Installing the four-point belt 1) Mount the strap guide (4) according to the chapter «Strap guide» (see Page10, see Fig.15, Pos. 1). 2) Rivet 2 clips (1) to the holes of the bottom back plate (see Fig.15, Pos. 2). 3) Run the shoulder belts (2) th
-
Otto Bock Kimba neo 5.2.2.2 Lap belt 9 1 Strap guide 4 Adjustment buckle 2 Attachment fitting 5 Belt pads 3 Belt restraint 6 Release button/belt buckle Mounting the lap belt 1) Mount the strap guide according to the chapter «Strap guide» (see Page10). 2) Pull the belt out of the belt restraint (3) (see Fig.10, Pos. 1). 3) Press the adjustment buckle (4) together and pull out the belt (see Fig.10, Pos. 2). INFORMATION: Make sure not to push the plastic part beyond the guidance in the metal part. 4) Pull out a belt pad (5). 5) Push the belt between the seat and the backrest through the half-moon-shaped connecting piece to the ba
-
3) Put the mounting screws through the slotted hole in the headrest support and through the hole in the back plate (see Fig.6). INFORMATION: If the headrest supports are to be mounted to the top holes (= mounting points of the back plate), the longer mounting screws, which come with the device, will have to be used instead of the regular mounting screws. 4) Fasten the headrest supports on the back of the back plate using the knurled nuts. 5) If necessary, adjus
-
Otto Bock Kimba neo 9.2 Information on re-use CAUTION Use of used seat upholstery Functional and hygiene risks for the skin ► Replace the seat upholstery if the wheelchair is to be re-used. The product is suitable for re-use. Similar to second-hand machines or cars, products that are being re-used are subject to increased strain. The characteristics and specifications must not change to an extent that would endanger the safety of patients and, if applicable, third parties during the lifespan of the product. Based on market observations and the current state of technology, the manufacturer has calculated that
-
Otto Bock Kimba neo Attaching the seat (multifunctional seating unit) INFORMATION The product can also be equipped with alternative seating systems. In this case, please observe the information in the separate instructions for use for the seating system. 1) Set the seat onto the rear tube of the seat adapter at an angle of approximately 45°. 2) Press the front edge of the seat onto the mobility base until the clutch audibly snaps into the front tube of the seat adapter. 3) Slide the seat lock to the left to close it (see Fig.2). 1 2 Attaching the padding (multifunctional seating unit) INFORMATION ► Mount the pads before installing th
-
Otto Bock Kimba neo Instructions for Use (Qualified Personnel) ……………………………………………………….. 3 Kimba neo
-
Otto Bock Kimba neo 31 32 5.2.3.5 Groin strap 33 1 Underside groin strap 4 Long attachment strap 2 Attachment strap with loop 5 Strap adjustment/plug connection 3 Free belt end for length adjustment 6 Leg strap Mounting the groin strap 1) Place the groin strap, underside (1) down, on the seat cushion; the attachment strap with the loop (2) must face backwards. 2) Run the attachment strap with the loop (2) between the back support and seat bottom and secure it under the seat bottom (see Fig.35). Use the screws/knurled nuts to adjust the depth/width of the seat (see Fig.3
-
Otto Bock Kimba neo Completing the installation ► If necessary, cut off protruding belt ends of the shoulder belts and melt the free ends by applying heat (such as from a lighter). → The five-point belt is installed properly if the latches can be clipped into the buckle (9). 5.2.3 Positioning aids 5.2.3.1 Thoracic supports 1) Run the proper sides of the thoracic supports through the padding. 2) Put the mounting screws through the slotted hole in the thoracic support and the back insert (see Fig.24, Pos. 1). 3) Fasten the thoracic supports on the back of the back insert using k
-
Otto Bock Kimba neo Kundenservice/Customer Service Europe OttoBock HealthCare DeutschlandGmbH Max-Näder-Str. 15 · 37115 Duderstadt · Germany T+49(0) 5527848-3433 · F+49(0) 5527848-1460 [email protected] · www.ottobock.de Otto Bock Healthcare Products GmbH Kaiserstraße 39 · 1070 Wien · Austria T +43(0) 1 5269548 · F +43(0) 1 5267985 [email protected] · www.ottobock.at Otto Bock Adria Sarajevo D.O.O. Omladinskih radnih brigada 5 71000 Sarajevo · Bosnia-Herzegovina T+387(0) 33766200 · F+387�
-
• Moving the belts in the 2 clips on the back plate (see Fig.35, Pos. 2/3) • Moving the belts in the strap adjustment at the leg straps (see Fig.33, Pos. 5/6) 6.4.6 Adjusting the pelvic band INFORMATION The application of the product is described in the Instructions for Use (User). The pelvic band can be adjusted as follows: • Moving the supports on the crossbar (see included Instructions for Use 647G129) • Sliding the band onto the plastic mounting rail (see included I
-
If the service life is reached, the user or a responsible attendant should contact the qualified personnel who fitted the product or the manufacturer’s service (see inside or outside of rear cover for address). 3 Safety 3.1 Explanation of Warning Symbols WARNING Warnings regarding possible risks of severe accident or injury. CAUTION Warnings regarding possible risks of accident or injury. NOTICE Warnings regarding possible technical damage. 3.2 General safety instructions WARNING Lack of instruction Risk of falling, tipping over ►
-
Outdoor mobility base Size 1 Size 2 Min. folded size with seat facing forward; seat tilted backwards 10°, back angle 100° (LxWxH) 90x60x53 97x67x59 Multifunctional seating unit Size 1 Size 2 Seat width 19 – 31 24 – 40 Seat depth 20 – 30 26 – 35 Back rest height 41 – 61 56 – 70 Backrest angle 80° – 180° 80° – 180° Height of slots for shoulder straps (min./max.) 30/45 30/45 Width of shoulder strap slots 5 5 Lower leg length 19 – 31 20 –
-
Otto Bock Kimba neo 1 Foreword INFORMATION Date of the last update: 2012-03-21 ► Please read this document carefully. ► Follow the safety instructions. INFORMATION Missing instructions for use can be downloaded from the homepage at www.ottobock.com or ordered directly from the manufacturer’s service (see back cover or inside back cover for addresses). The product was delivered as specified on the order form. Settings must be adjusted and the product must be fine- tuned according to the medical indications or the needs of th
-
6.6 Safety belts CAUTION Improper adjustments States of panic, falling of the user ► If the product is adjusted too tightly, it may lead to unnecessary pain or suffering of the user. Immediately modify the settings if you detect signs of discomfort or fear in the user when using the product. ► Adjusting the belt straps too loosely can cause them to slip upwards/downwards so that the user can slide into a position that is dangerous to him/her. In addition, the fastening snaps could open unintentionally if they slide against hard parts of cl
-
Otto Bock Kimba neo Mounting the lap-belt part (5) 1) Run the lap belt on the right (5) between the seat and the backrest through the half-moon-shaped connecting piece to the back, through the strap guide and let it hang (see Fig.18). 2) Mount the fixed strap guide (6) according to the chapter «Strap guide» (see Page10). 3) Run the lap belt on the left (5) between the seat and the backrest through the half-moon-shaped connecting piece to the back (see Fig.12). 4) String up the belt restraint (7). 5) Run the lap belt on the right (5) behind the seat through the adjustment buckle (8) and, to complete, through the belt restraint (
-
Headrest supports (multifunctional seating unit)6.3 24………………………………………………………………………….. Adjusting the headrest support6.3.1 24………………………………………………………………………………………………. Fitting the integrated headrests6.3.2 24………………………………………………………………………………………………. Positioning aids6.4 25…………………….
-
Otto Bock Kimba neo 10 11 12 13 12 | Ottobock Preparation for Use Kimba neo
-
Otto Bock Kimba neo 6.4 Positioning aids CAUTION Improper adjustments States of panic, falling of the user ► If the product is adjusted too tightly, it may lead to unnecessary pain or suffering of the user. Immediately modify the settings if you detect signs of discomfort or fear in the user when using the product. ► Adjusting the belt straps too loosely can cause them to slip upwards/downwards so that the user can slide into a position that is dangerous to him/her. In addition, the fastening snaps could open unintentionally if they slide against hard parts of clot
-
Otto Bock Kimba neo 41 42 6 Adjustments 6.1 Prerequisites WARNING Incorrect settings Risk of falling, tipping over or improper user posture due to incorrect settings ► Adjustments may be carried out only by qualified personnel. ► Only the settings described in these instructions for use may be carried out. ► Settings may only be changed within the allowable adjustment ranges; otherwise, the stability of the product may be impaired (see this chapter and the chapter «Appendixes»). If you have questions, contact the manu facturer’s service (se
-
Otto Bock Kimba neo Versandanschrift für Rücksendungen/Adress for Returns: Otto Bock Manufacturing Königsee GmbH Lindenstraße 13 · 07426 Königsee/Germany Ottobock has a certified Quality Management System in accordance with ISO 13485. Template-Version: 2012-04-05 Ihr Fachhändler | Your specialist dealer Otto Bock Mobility Solutions GmbH Lindenstraße 13 · 07426 Königsee/Germany T +49 (0) 69 9999 9393 · F +49 (0) 69 9999 9392 [email protected] · www.ottobock.com © Ottobock · 647G771=EN-05-1204
-
Otto Bock Kimba neo 3.4 Rating plate and warning labels 3.4.1 Rating plate Label Meaning A Type designation B Manufacturer article number C Maximum load capacity (see the chapter «Technical Data») D Manufacturer information/address/country of origin E Serial number F European Article Number/Global Trade Item Number G Read the instructions for use before using the product. The type label «Outdoor mobility base» is located on the back connecting tube of the base frame. The type label «Seating unit» is located on the bottom back plate. H CE marking – product safety according to EU guidelines 3.4.2 Warning Labels Label Meanin
-
Otto Bock Kimba neo Foreword1 5………………………………………………………………………………………………………………………………………….. Application2 5……………………………………………………………………………………………………………………………………….. Intended Use2.1 5………………………………………………………………………………………………….
-
5.2.3.3 Chest and shoulder support 27 1 Pair of clips with attachment fitting 4 Belt end of bottom attachment strap 2 Shoulder belt 5 Sewn-on clip 3 Bottom attachment strap 6 Pad Mounting the chest and shoulder support 1) Mount the strap guide according to the chapter «Strap guide» (see Page10). 2) Mount the pairs of clips (1) using mounting screws/knurled nuts in the slotted holes of the bottom back plate (see Fig.28, Pos. 1/see Fig.29, Pos. 1). 3) Place the chest and shoulder support on the seat bottom – the sewn-on clips (5) must point towards the seat bottom.
-
2 | Ottobock Kimba neo
-
28 29 5.2.3.4 Fixation vest 30 1 Clip with rivet 4 Bottom attachment strap 2 Shoulder belt 5 Buckle 3 Middle attachment strap 6 Pad Mounting the fixation vest 1) Rivet 6 clips (1) to the holes of the bottom back plate (see Fig.31, Pos. 1/see Fig.32, Pos. 1). 2) Place the fixation vest on the seat bottom — the buckles (5) must point towards the seat bottom. 3) Run the shoulder belts (2) through the padding/back plate (see Fig.16) and secure them in the clips (see Fig.32, Pos. 2). 4) Run the middle/bottom attachment straps (3/4) around the backrest tubes to t
-
Otto Bock Kimba neo 15 16 5.2.2.4 Five-point belt 17 1 Clip with rivet 6 Strap guide, fixed 2 Shoulder belt, left/right 7 Belt restraint 3 Belt pads 8 Adjustment buckle 4 Strap guide with attachment fitting 9 Crotch belt with buckle and adjustment buckle 5 Lap-belt part, left/right 10 Stop plate Installation start 1) Mount the loose strap guide on the right (4) according to the chapter «Strap guide» (see Page10). 2) Rivet 2 clips (1) to the holes of the bottom back plate (see Fig.15, Pos. 2). 3) Run the shoulder belts (2) thro
-
Otto Bock Kimba neo 6.2.1 Adjusting the Seat Depth 1) Loosen the 2 knurled nuts on the underside of the seat (see Fig.43, Pos. 1). 2) Adjust the seat depth by moving the footrest (see Fig.44). 3) Hand-tighten the knurled nuts. 43 44 6.2.2 Adjusting the seat width 1) Loosen the 4 knurled nuts on the underside of the seat (see Fig.45, Pos. 1). 2) Adjust the seat width by moving the hip supports (see Fig.46). This also allows for abducted settings. 3) Hand-tighten the knurled nuts. 45 46 6.2.3 Adjusting the backrest h
-
Otto Bock Kimba neo 34 35 5.2.3.6 Pelvic band For installation information, consult the instructions that come with the product. 5.2.3.7 Hook & loop foot straps Attach the hook-and-loop foot straps to the heel part of the footplate with two rivets or screws positioned beside one another. The holes must be inserted in the footplate accordingly. In addition, hook-and-loop foot straps can also be used for the forefoot area. 36 5.2.4 Armrests For mounting information, see the Instructions for Use (User) — reference number 647G770. 5.2.5 Tray For mounting information, see the Instructions for Use (User) — reference number 647G770. 5.2.6 Canopy adapter INFORMATION T
-
37 38 5.2.7 Rain cover For mounting information, see the Instructions for Use (User) — reference number 647G770. 5.2.8 Summer/winter slip sack NOTICE Incorrect attachment Damage to the product ► During the attachment, make sure that the product cannot grind against the wheels. 1) When needed, make a cut in the slip sack for putting through the lap belt (see Fig.39, Pos. 1), the abduct or/five-point belt (see Fig.39, Pos. 2) or the groin strap (see Fig.39, Pos. 3). 2) Fasten the attachment cords de
-
47 48 6.2.4 Further settings The following fitting tasks are described in more detail in the included Instructions for Use (User) – reference num ber 647G770: • Adjusting the back angle • Adjusting the seat angle (seat tilt) 6.3 Headrest supports (multifunctional seating unit) 6.3.1 Adjusting the headrest support 1) Open the zipper of the padding cap (see Fig.3) and push the padding behind the seat to the side. 2) Loosen the knurled nuts on the back of the
Questions, Opinions and Exploitation Impressions:
You can ask a question, express your opinion or share our experience of Otto Bock Kimba neo device using right now.
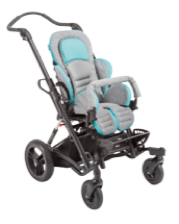
Коляска «Кимба НЕО» от Otto Bock — это универсальное и многофункциональное прогулочное средство передвижения для детей с ДЦП. Она полностью соответствует высочайшим критериям безопасности, эстетичности и комфорта, поэтому является отличным выбором для родителей, которые ищут для своего ребенка только лучшее.
Варианты исполнения:
Размер 1 (встроенный подголовник) — 230000 руб.
Размер 1 (регулируемый подголовник) — 233000 руб.
Размер 2 (встроенный подголовник) — 237000 руб.
Размер 2 (регулируемый подголовник) — 241000 руб.
Размер 1, 2 (под заказ из Германии) — 313000 руб.

Средство передвижения подстраивается под особенности каждого ребенка. Конструкцией инвалидного кресла-коляски предусмотрено множество регулировок — спинки, сиденья, подлокотников, подголовника, подножки и проч. Воспользовавшись ими, всего в несколько движений вы сможете устроить малыша в максимально корректной позе.
Даже в базовой комплектации коляска может использоваться как на улице, так и дома (при условии наличия соответствующего шасси). Вы также можете составить индивидуальную конфигурацию коляски в соответствии с особенностями вашего ребенка. Так, например, доступны комплектации с различными сиденьями. Наиболее популярные из них — «Сквигглз» и «Маугоу».
Каждому покупателю колясок для детей с ДЦП мы выдадим всю необходимую для предоставления в ФСС документацию. Это позволит вам получить компенсацию финансов, затраченных на приобретение средства передвижения.
Особенности инвалидной кресло-коляски Otto Bock Кимба Нео:
- Складной механизм. Одним движением вы можете сложить коляску для последующей транспортировки в автомобиле.
- Ручка для управления. Вы можете подстроить ее по своему росту.
- Сиденье коляски может быть переставлено на маневренное комнатное шасси, которое подстраивается под рост малыша. Также его можно установить таким образом, чтобы ребенок оказался к вам лицом.
- Передние колеса вращаются и имеют возможность фиксации. Это позволяет преодолевать сложные препятствия.
- На коляске установлены надежная тормозная система и амортизаторы. Это делает ее максимально безопасной и комфортной для ребенка.
Терапевтические эффекты коляски Otto Bock Кимба Нео:
Регулировки инвалидной кресло-коляски Otto Bock Kimba Neo:
- Спинка.
Регулируется по углу наклона, может быть приведена в горизонтальное положение. Это позволяет снизить нагрузку на позвоночник ребенка во время отдыха или, напротив, стимулировать мышцы в активном положении. Все настройки при этом сохраняются. Регулировка угла осуществляется плавно, благодаря чему ребенок не испытывает дискомфорт.
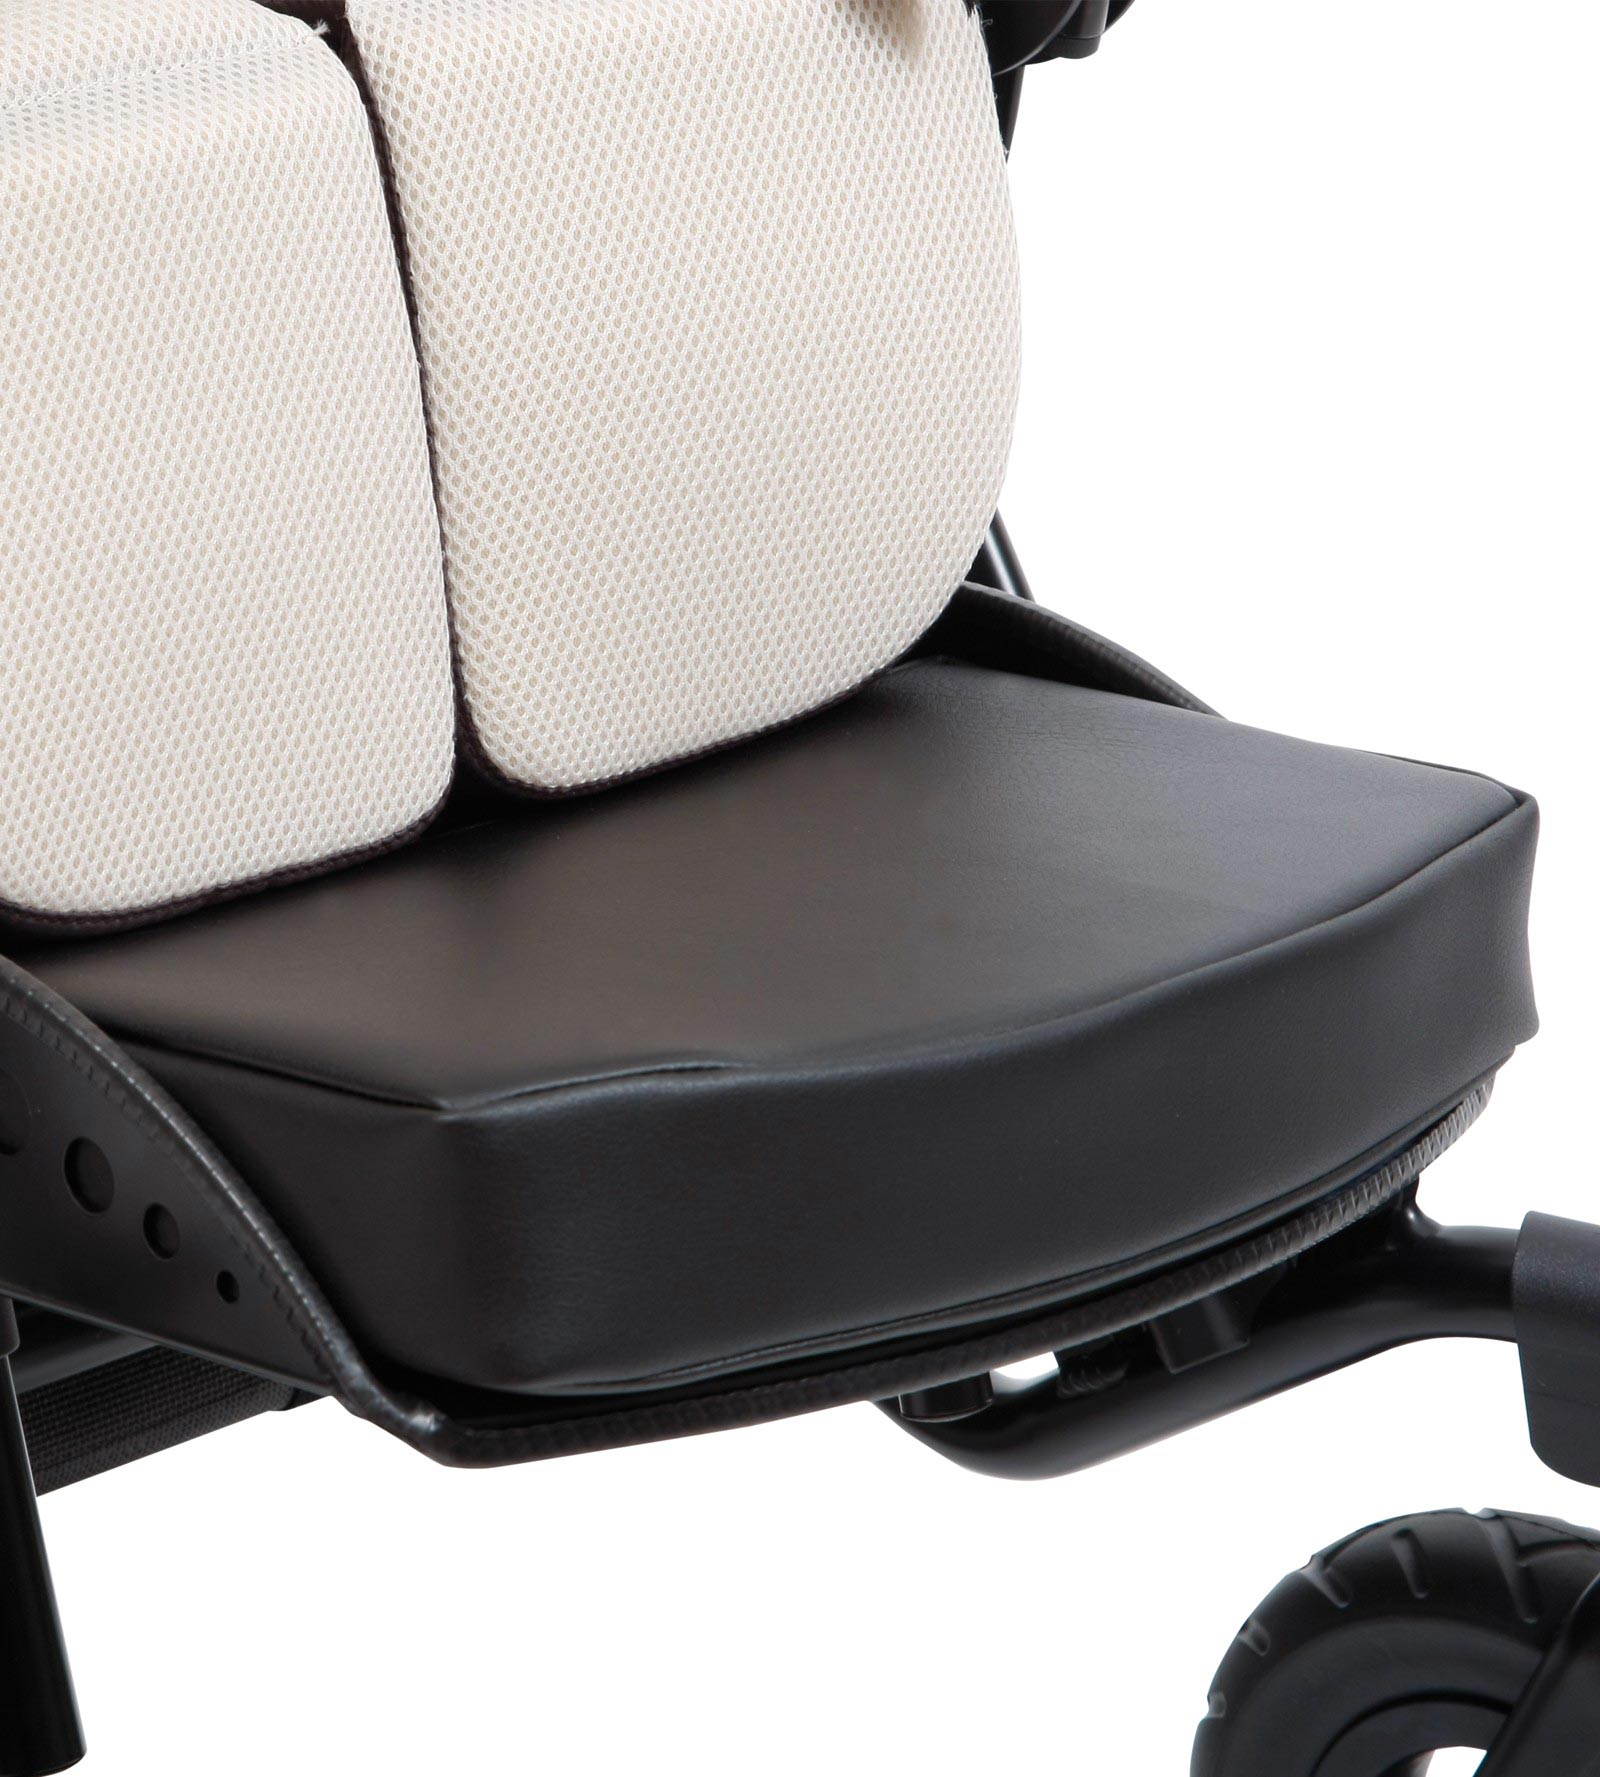
- Сиденье.
Плавно регулируется по ширине и глубине. Обеспечивает стабильную поддержку таза и туловища. Также имеется регулировка наклона сиденья отдельно от спинки, благодаря чему функциональные возможности коляски расширяются, а ее использование становится более комфортным.
- Подножка.
Регулируется по длине и углу наклона, таким образом подстраивая коляску под рост пользователя.
- Подголовник.
Так же, как и подножка, регулируется по высоте. Благодаря этому средство передвижения «растет» вместе с ребенком.
Вы можете купить коляску «Кимба НЕО» для детей с ДЦП в базовой комплектации, в которую входят:
- Многофункциональное сиденье;
- Прогулочное шасси с передними вращающимися колесами;
- Регулируемая ручка для сопровождающего лица;
- Блокиратор колес;
- Подголовник;
- Абдуктор;
- Подножка с регулировкой угла наклона в диапазоне от 0° до +90°;
- Пятиточечный ремень;
- Ремни на стопы;
- Крыша от дождя и солнца;
- Дождевик;
- Ручка-ограничитель для ребенка.
При необходимости можно установить на коляску Кимба нео дополнительные опции
 |
 |
 |
 |
|
Столик Необходимый аксессуар для детских колясок Кимба |
Столик прозрачный Столик прозрачный с бортиками |
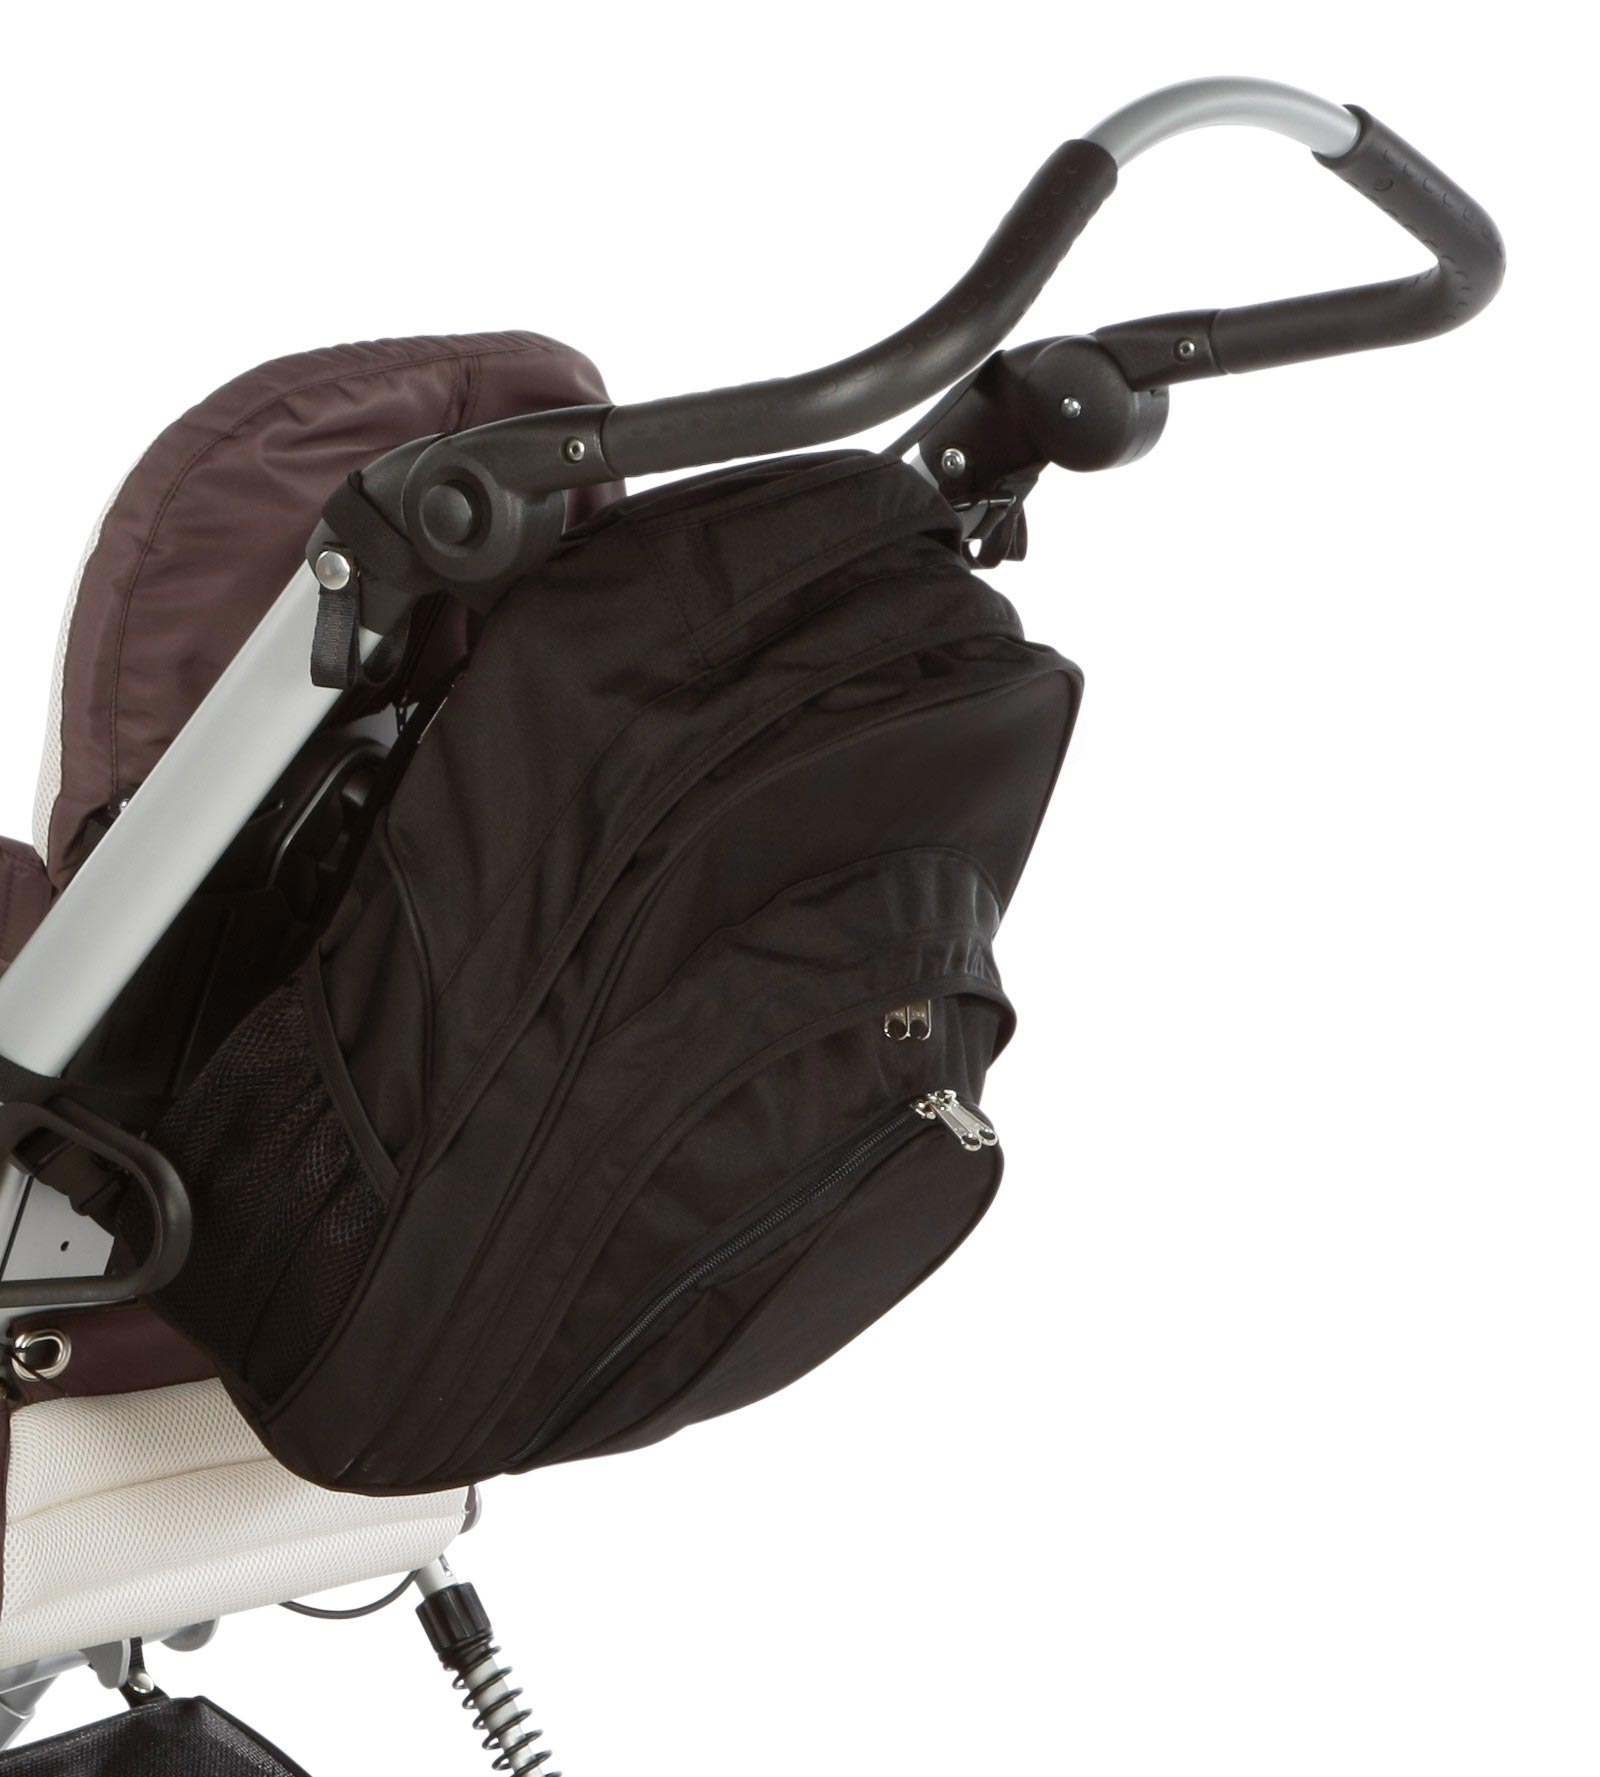
Сумка Сумка для памперсов и других вещей |
Зимний мешок Необходимый аксессуар в зимнее время |
 |
 |
 |
 |
|
Фиксатор туловища по типу майка |
Поясной ремень Служит для устойчивости пользователя в области таза |
Жилет для фиксации Служит для фиксации туловища в сидении |
Штаны для поддержки Служит для фиксации бёдер |
 |
 |
 |
 |
|
Подлокотники Аксессуар для удобства ребенка |
Подстаканник Удобный аксессуар. Крепится к раме коляски |
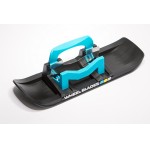
Лыжи для коляски Удобный зимний аксессуар |
Летний мешок |
 |
 |
 |
 |
|
Домашняя рама Съемная рама для колясок Кимба и Кимба Нео |
Валик для поясничного отдела |
Накладка на подножку (5 см) |
Рама с большими фиксированными колесами (для размера 1) |
 |
 |
 |
 |
|
Валик для шейного отдела |
4-точечный ремень |
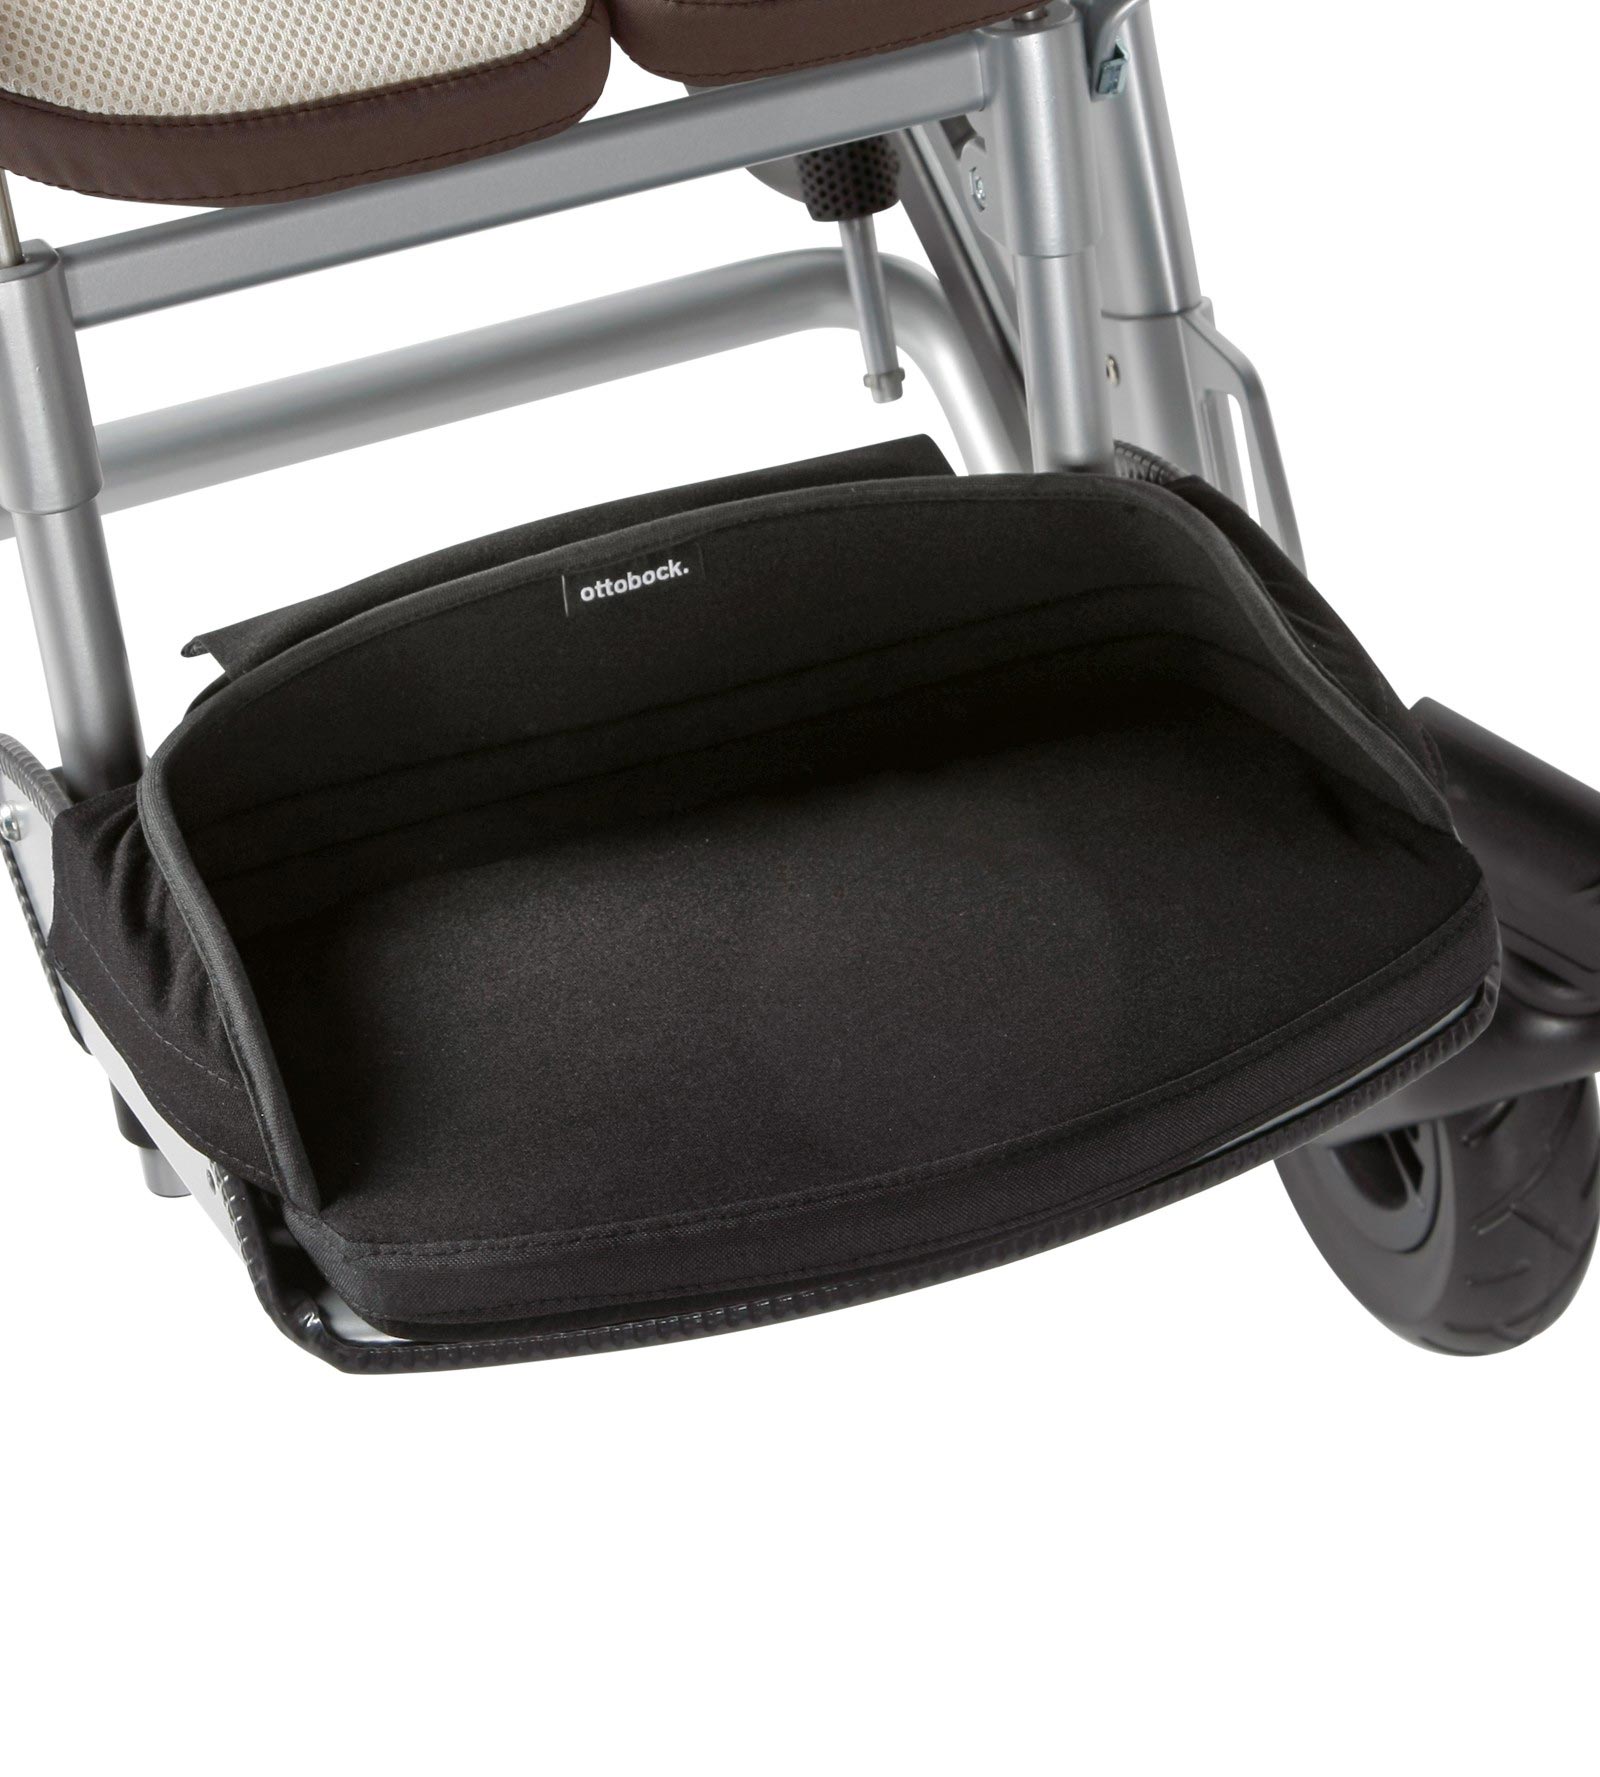
Непромокаемое покрытие |
Накладка мягкая на подножку |
 |
 |
 |
 |
|
Рюкзак |
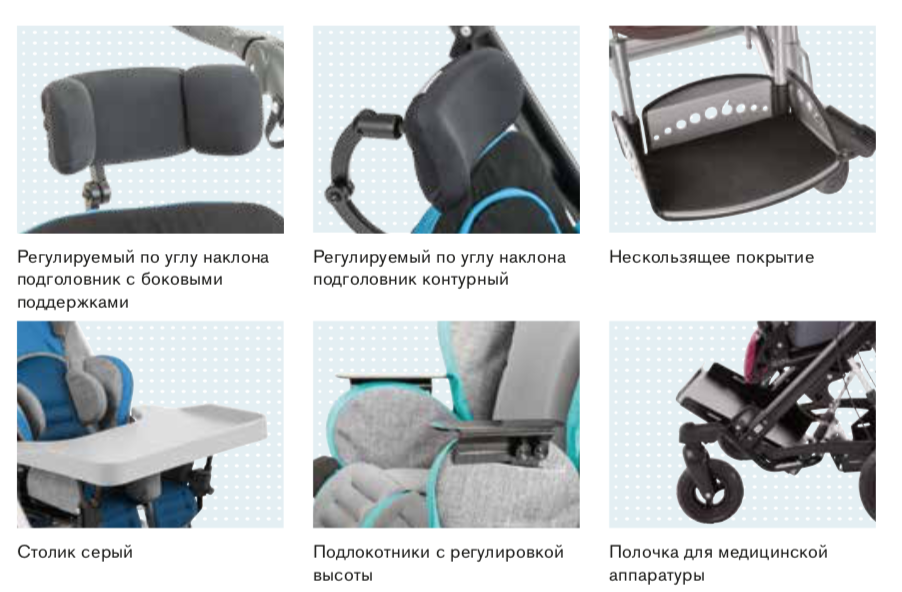
Нескользящее покрытие |
Techno подставка для второго ребенка |
Полочка для медицинской аппаратуры |
 |
|||
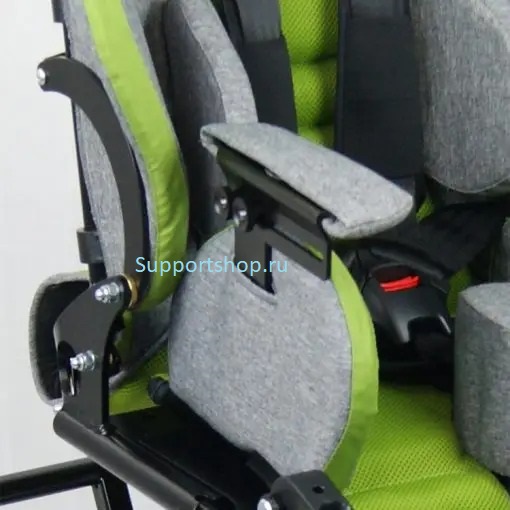
| Подлокотники регулируемые по высоте |
Коляска выпускается в двух типоразмерах: для детей возраста от 6 мес. до 6 лет и от 4 до 10 лет соответственно:
| Характеристики кресла | Размер 1 | Размер 2 |
|---|---|---|
| Максимальная нагрузка | 50 кг | 55 кг |
| Ширина сиденья | 20 — 30 см | 26 — 35 см |
| Глубина сиденья | 19 — 31 см | 24 — 40 см |
| Высота спинки | 41 — 61 см | 56 — 70 см |
| Угол наклона спинки | 80° — 180° | 80° 180° |
| Высота прорезей для ремней (плечи, мин/макс) | 30/45 см | 35/50 см |
| Высота подножки | 19-31 см | 20-37 см |
| Вес кресла | 7 кг | 8,5 кг |
| Размер в сложенном состоянии с боковыми поддержками (ДхШхВ) | 58х37х42 см | 59х43х58 см |
| Стандартная обшивка | Дышащий материал | |
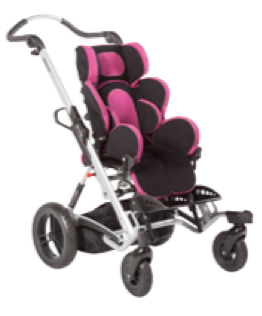
| Цветовая гамма | Нео*, Меланж** |
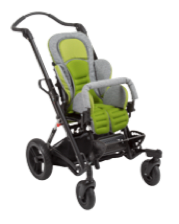
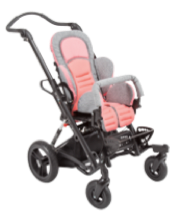
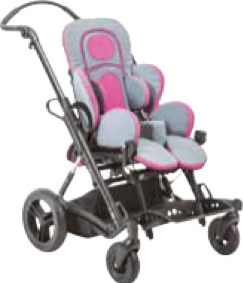
*Цветовая гамма Нео: розовый/серый, бирюзовый/серый, зеленый/серый
**Цветовая гамма Меланж: серый/серый
Прогулочное шасси:
| Характеристики шасси | Размер 1 | Размер 2 |
|---|---|---|
| Ширина | 60 см | 70 см |
| Максимальная нагрузка | 50 кг | 55 кг |
| Высота ручек для сопровождающего | 71 — 116 см | 71 — 116 см |
| Диаметр передних колес | 17 см | 17 см |
| Диаметр задних колес | 28 см | 28 см |
| Угол наклона сиденья | -10° до +35° | -10° до +35° |
| Вес шасси | 10.5 кг | 11.5 кг |
| Размер в сложенном состоянии без сиденья (ДхШхВ) | 79х60х47 см | 79х67х47 см |
| Мин. размер в сложенном состоянии по ходу движения | 90х60х53 см | 97х67х59 см |
Прогулочная коляска может быть адаптирована для перевозки двух малышей. Возможна также комплектация средства передвижения шасси с тремя колесами или комнатным шасси.
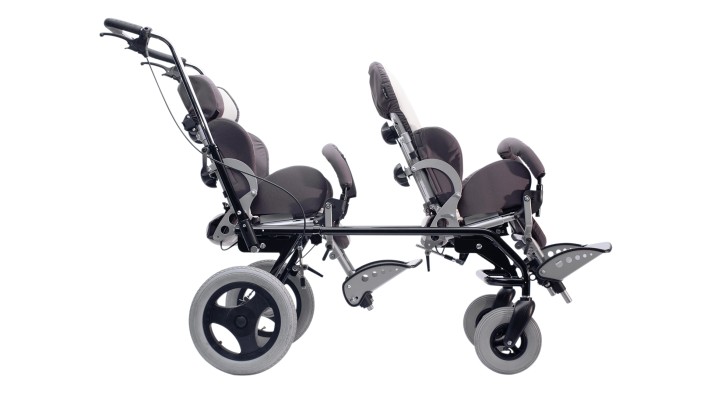
«Инлайн». Конструкцией коляски для двух детей предусмотрена регулировка рамы и возможность перестановки сидений вперед лицом и лицом друг к другу. В сложенном виде средство передвижения имеет компактные размеры, благодаря чему легко помещается в багажник машины.

«Кросс». Эта модификация коляски подходит для передвижения по пересеченной местности. Низкое положение центра тяжести, пневматические шины, барабанные тормоза, амортизаторы и упруго-эластичное сиденье обеспечивают безопасность езды.
Если вам нужна коляска «Кимба НЕО» для детей с ДЦП, закажите ее в нашем интернет-магазине по доступной цене с быстрой доставкой. Посмотреть и купить эту модель вы можете также в нашем шоу-руме в Москве. Кроме того, в нашем магазине представлен широкий выбор других колясок для детей с ДЦП.
Если у вас есть вопросы, звоните по телефонам +7 (495) 790-64-18 или 8 800 707-41-60. Наши консультации бесплатны.
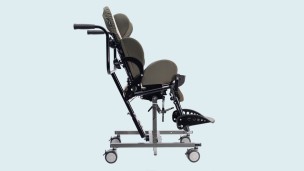
Описание
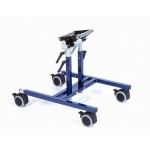
Кресло-коляска Отто Бок Кимба на комнатном шасси предназначена для детей в возрасте от 1 до 10 лет с тяжелыми нарушениями, нуждающимся в дополнительной поддержке. Данная модель имеет компактное, регулируемое по высоте шасси.
Инвалидная коляска для детей с дцп Кимба Нео комнатная. Версия коляски специально предназначенная для домашних условий и занятий с детьми с ДЦП в медицинских центрах. По мере роста ребенка коляска идеально адаптируется к его меняющейся анатомии: можно отрегулировать глубину и ширину сиденья, длину подножки и высоту спинки. Благодаря изменяемому углу наклона спинки и сиденья и регулировке высоты сиденья ребенок располагается не только комфортно, но и в соответствии с видом активности: игра, отдых, общение. Широкий набор позиционных фиксаторов помогает правильно расположить ребенка с любой формой ДЦП.
Высота шасси регулируемая в пределах 41 — 62 см
Особенности:
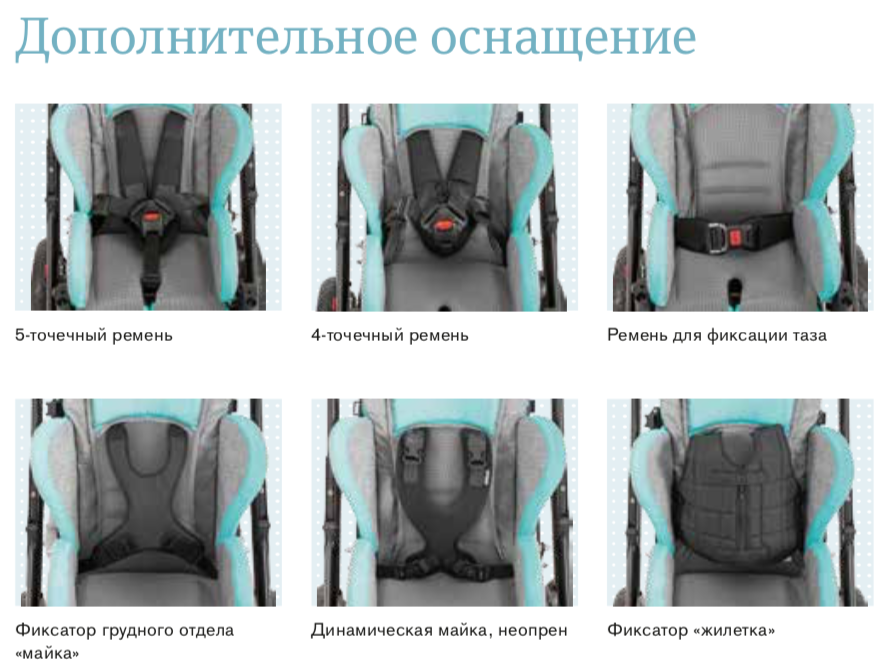
- Большой выбор дополнительного оснащения для позиционирования ребенка
- Индивидуальная настройка в соотвествии с изменениями роста и состояния здоровья ребенка, широкие возможности регулировок (ширина и глубина сиденья, высота спинки, длина подножки)
- Регулируемая по длине рама шасси
- Диаметр колес 7,5 см

Где и когда используется:
- Дома
- В образовательных учреждениях
Характеристика базовой комплектации:
- 2 размера
- Цвета: розовый / серый, бирюзовый / серый, салатовый / серый, синий / серый
- Подголовник встроенный
- Боковые поддержки туловища
- 5-точечный ремень
- Абдуктор
- Ручка-ограничитель
- Ремни на стопы с липучками
- Столик
- Компактное комнатное шасси
- Ручки для сопровождающего
- Плавные регулировки ширины и глубины сиденья
- Плавная регулировка угла наклона спинки и сиденья
- Подножка с регулировкой угла наклона
Цвета обшивки кресла:
Функциональность кресла
(показанно на прогулочной раме):
| Технические характеристики многофункционального кресла | Размер 1 | Размер 2 |
|---|---|---|
| Ширина сиденья | 19-31 см | 24-40 см |
| Глубина сиденья | 20-30 см | 26-35 см |
| Высота спинки | 41-61 см | 56-70 см |
| Изменение угла наклона спинки | 80°-180° | 80°-180° |
| Высота прорезей для ремней (плечи, мин/макс) | 30/45 см | 35/50 см |
| Высота подножки | 19-31 см | 20-37 см |
| Максимальный вес пользователя | 35 кг | 40 кг |
| Вес кресла | 7,5 кг | 8 кг |
| Размер в сложенном состоянии с боковыми поддержками (ДхШхВ) | 58х37х42 см | 59х43х58 см |
| Возраст | 1-6 лет | 4-10 лет |
| Стандартная обшивка | Дышащий материал | Дышащий материал |
Комплектации и цены на них:
- Комплектация 1 (сиденье, комнатное шасси, регулируемый подголовник, боковые поддержки туловища, абдуктор, пятиточечный ремень, ремни на стопы, столик)
- Комплектация 2(сиденье, комнатное шасси, спинка MPS (короткая), съемный регулируемый по углу наклона подголовник (контурный/трехсекционный), боковые поддержки туловища с функцией отведения, анатомические, абдуктор, майка неопреновая + тазовый фиксатор неопреновый, ремни на стопы, столик)
- Комплектация 3 (сиденье, комнатное шасси, подголовник, боковые поддержки туловища, подлокотники регулируемые по высоте, абдуктор, пятиточечный ремень, ремни на стопы, столик черный. Цвет — зелено-серый)
Перечень дополнительных опций (монтируются, устанавливаются на заводе в Германии):
- Комнатное шасси для сидения «Кимба» (можно легко менять в домашних условиях на прогулочное и обратно)
- Сиденье «Кимба» комнатное
- Шасси комнатное Leckey Hi-Low комнатное
- Колеса пневматические
- Бампер мягкий на раму
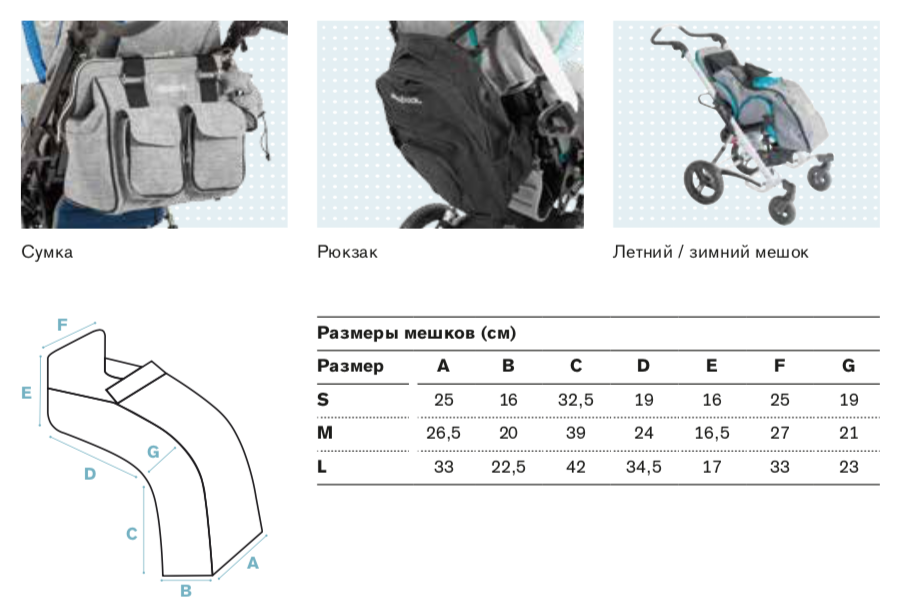
- Сумка для памперсов и др. вещей (черная/серый меланж)
- Подстаканник
- Платформа для ИВЛ стандартная
- Обшивка из микрофибры (серый/голубой, черный/голубой, серый/черничный, черный/черничный)
- Подножка с регулировкой угла наклона/белая
- Накладка на подножку противоскользящая
- Накладка на подножку мягкая
- Сандалии
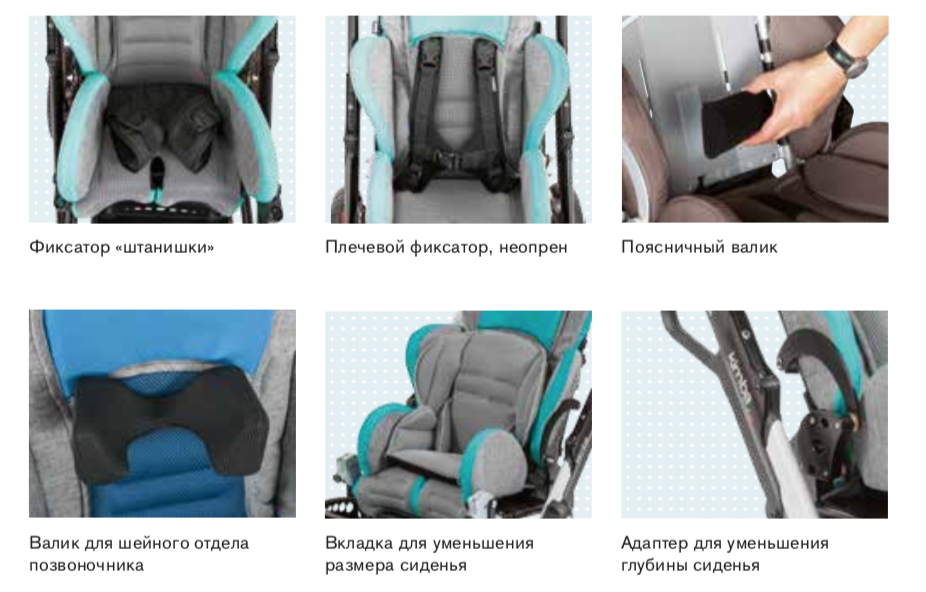
- Уменьшенная глубина сиденья
- Подголовник контурный с мягкой обшивкой S/M
- Подголовник трехсекционный с мягкой обшивкой S/M
- Боковые поддержки отводящиеся маленькие черные
- Ремень поясной с металлической пряжкой
- Ремень для фиксации таза с функцией затягивания
- Ремень для фиксации таза четырехточечныйс функцией затягивания
- Ремень пятиточечный — включен в базовую комлектацию, при заказе отдельно
- Фиксирующие штаны к Кимбе
- Фиксирующий жилет
- Фиксатор грудной (майка)
- Столик серый
- Cтолик прозрачный
- Люмбальный валик (крепится на спинку коляски, под спину ребенка)
- Валик под шею
- Непромокаемое сиденье
-
Зимний чехол
| Размер | 1 | 2 |
|---|---|---|
| Тип рамы: | Домашняя | |
| Тип опоры: | Опоры для сиденья | |
| Тип колёс: | Литые | |
| Регулировка высоты: | Стандарт | |
| Глубина сиденья: | 20 — 30 | 24 — 40 |
| Ширина сиденья: | 19 — 31 | 26 — 35 |
| Высота спинки: | 41 — 61 | 56 — 70 |
| Высота подножки: | 19 — 31 | 20 — 37 |
| Функционал: |
Регулировка угла наклона спинки |
|
| Вес: | 18 | 18.5 |
| Максимальный вес пользователя: | 50 | 55 |
| Общая ширина: | 45 | |
| Общая длина: | 62 — 78 | |
| Длина в сложенном виде: | 58 | 59 |
| Ширина в сложенном виде: | 37 | 43 |
| Высота в сложенном виде: | 42 | 58 |
Видео
Описание
Кресло-коляска Кимба предназначена для детей в возрасте от 6* мес до 10 лет с тяжелыми нарушениями, нуждающихся в дополнительной поддержке. Данная модель позволяет менять позу ребенка из активного в положение отдыха, индивидуально подстраивается и укомплектовывается в соответствии с его потребностями.
Особенности:
- Большой выбор дополнительного оснащения для позиционирования ребенка
- Индивидуальная настройка в соответствии с изменениями роста и состояния здоровья ребенка, широкие возможности регулировок (ширина и глубина сиденья, высота спинки, длина подножки)
- Использование в помещении и на улице в комбинации с различными шасси
- Индивидуальное изготовление в особых случаях (полочки для аппаратов ИВЛ, адаптер для креплениядетского Maxi-Cosi, барабанный тормоз для сопровождающего лица и другие аксессуары)
- Возможность размещения ребенка по направлению движения или лицом к сопровождающему
Где и когда используется:
- На улице, на прогулочном шасси
- Дома, на одном из комнатных вариантов шасси
*При комплектации с вкладкой для уменьшения размера сиденья и адаптером для уменьшения глубины сиденья.
Технические характеристики
| Шасси | Размер 1 | Размер 2 |
|---|---|---|
| Общая ширина | 60 см | 70 см |
| Диаметр переднего колеса, передние управляемые колеса | 17 см | 17 см |
| Диаметр заднего колеса | 28 см | 28 см |
| Высота ручки для сопровождающего лица (мин.-макс.) | 71-116 см | 71-116 см |
| Регулировка угла наклона сиденья (мин. /макс.) | от — 10° до +35° | от — 10° до +35° |
| Размер в сложенном состоянии без сиденья (ДхШхВ) | 79х60х47 см | 79х60х47 см |
| Возраст | 6 мес. — 6 лет | 4 — 10 лет |
| Многофункциональное кресло | Размер 1 | Размер 2 |
|---|---|---|
| Ширина сиденья | 20 – 30 см | 26 — 35 см |
| Глубина сиденья | 19 – 31 см | 24 — 40 см |
| Высота спинки | 41 – 61 см | 56 – 70 см |
| Изменение угла наклона спинки | от 80°до 180° | от 80°до 180° |
| Высота подножки | 19 — 31 см | 20 — 37 см |
| Вес кресла | 7 кг | 8,5 кг |
| Стандартная обшивка | Дышащий материал | |
| Цветовая гамма | Нео*, Меланж** |
*Цветовая гамма Нео: розовый/серый, бирюзовый/серый, зеленый/серый
**Цветовая гамма Меланж: серый/серый
Дополнительные опции
- Цвет: черничный / серый, синий / бежевый, желтый / бежевый
- Подголовник съемный регулируемый
- 4-точечный ремень / ремень для фиксации таза
- Фиксатор грудной на молнии «жилетка»
- Фиксатор грудной «майка»
- Фиксатор таза «штанишки»
- Валики для поясничного и шейного отделов
- Элемент, уменьшающий глубину сиденья (от 14 см)
- Накладка на подножку 5 см для уменьшения длины подножки
- Столик / подлокотники
- Обшивка / нескользящее покрытие на подножку
- Ремни для стоп
- Непромокаемая накладка
- Сумка для подгузников и мелочей / рюкзак
- Подставка для второго ребенка
- Летний /зимний мешок, 3 размера
- Полочка для медицинской аппаратуры
- Держатель бутылочки
- Сиденье комбинируется с различными вариантами шасси (прогулочным шасси на больших фиксированных колесах (только 1 размер), комнатным шасси)