
Node.js can be installed in different ways. This post highlights the most common and convenient ones. Official packages for all the major platforms are available at https://nodejs.org/download/.
One very convenient way to install Node.js is through a package manager. In this case, every operating system has its own. Other package managers for MacOS, Linux, and Windows are listed in https://nodejs.org/download/package-manager/
nvm is a popular way to run Node.js. It allows you to easily switch the Node.js version, and install new versions to try and easily rollback if something breaks. It is also very useful to test your code with old Node.js versions.
In any case, when Node.js is installed you’ll have access to the node executable program in the command line.
-
Главная
-
Инструкции
-
Node.js
-
Как установить Node.js на Windows: пошаговая инструкция
На JavaScript выполняется большая часть интерактивных элементов на сайтах и в мобильных приложениях. JavaScript отлично работает с HTML/CSS и интегрирован основные браузеры на рынке. Чистый JavaScript используется в вебе, а для общего применения JavaScript разработчики используют различные среды выполнения, например, Node.js.
Node.js — это среда выполнения кода JavaScript. Она позволяет использовать JavaScript как язык программирования общего назначения: создавать на нем серверную часть и писать полноценные десктопные приложения.
Основа Node.js — движок V8. Этот движок был разработан Google и используется в браузере Google Chrome. Он компилирует код JavaScript в машинный код, который понимает процессор. Однако, чтобы сделать из JavaScript язык общего назначения, одного движка недостаточно. Так, например, для создания серверной части нужно, чтобы язык умел работать с файлами, сетью и т.п. Для решения этой проблемы разработчики добавили к V8 дополнительные возможности, с помощью своего кода и сторонних библиотек. В итоге у них получился инструмент, который превращает JavaScript в язык общего назначения.
Node.js стала популярна среди разработчиков благодаря возможности создавать серверную и клиентскую часть на одном языке, скорости работы и NPM. В этом материале мы расскажем, как правильно установить Node.js на Windows 10.
Удаление старых версий
Перед установкой необходимо удалить старые версии среды выполнения, если они были ранее установлены. Наличие предыдущих версий может привести к возникновению конфликтов.
Проверим систему на наличие версий Node.js. Для этого в cmd (чтобы ее запустить, нажмите Win+R, введите cmd и нажмите Enter) выполняем команду nvm list:
C:\Users\Timeweb>nvm list
    18.9.0
    18.8.0
    16.17.0
Как видим, у нас установлено несколько версий. Удалим их:
- Выполняем команду
npm cache clean --force. - В «Установка и удаление программ» удаляем Node.js.
- Перезагружаем компьютер.
- Удаляем следующие каталоги. Некоторые из них могут существовать, а некоторые, наоборот, отсутствовать:
- C:\Program Files (x86)\Nodejs
- C:\Program Files\Nodejs
- C:\Users\{User}\AppData\Roaming\npm
- C:\Users\{User}\AppData\Roaming\npm-cache
- C:\Users\{User}\.npmrc
- C:\Users\{User}\AppData\Local\Temp\npm-*
- Возвращаемся в командную строку и выполняем
nvm uninstallк каждой версии, полученной с помощьюnvm list:
C:\Users\Timeweb>nvm uninstall 18.9.0
Uninstalling node v18.9.0... doneC:\Users\Timeweb>nvm uninstall 18.8.0
Uninstalling node v18.9.0... done
C:\Users\Timeweb>nvm uninstall 16.17.0
Uninstalling node v18.9.0... done
Дополнительно проверим, что версии удалены:
C:\Users\Timeweb>nvm list
No installations recognized.C:\Users\Timeweb>where node
ИНФОРМАЦИЯ: не удается найти файлы по заданным шаблонам.
C:\Users\Timeweb>where npm
ИНФОРМАЦИЯ: не удается найти файлы по заданным шаблонам.
С помощью nvm-windows
Node Version Manager или сокращенно NVM — это диспетчер версий Node.js. Возможно, во время работы вам придется использовать различные версии Node и переключаться между ними. Версии часто меняются, поэтому при работе рекомендуется использовать диспетчер версий.
NVM — самый распространенный диспетчер версий, но, к сожалению, в Windows он не доступен, и вместо него используется адаптированный вариант nvm-windows.
- Зайдите в репозиторий nvm-windows на github.
- Загрузите установщик
nvm-setup.exeпоследней версии диспетчера. - После загрузки осуществите установку.
- По окончании работы установщика откройте PowerShell от имени администратора и проверьте работоспособность NVM:
PS C:\Windows\system32 > nvm list
No installations recognized.
Теперь нужно выбрать версию Node.js, которую вы будете устанавливать на свой компьютер. Команда nvm list available покажет частичный список доступных для загрузки версий:

Если для вашего проекта не требуется определенная версия, то рекомендуется выбрать последний LTS-выпуск. Риск возникновения проблем при работе с такой версией минимален. Если же вы хотите протестировать нововведения и улучшенные возможности, то вы можете загрузить последнюю версию. При этом не стоит забывать, что риск возникновения проблем с новейшей версией выше.
Установим последний LTS. Возьмем номер версии из результата nvm list available и установим его с помощью nvm install:
PS C:\Windows\system32> nvm install 16.17.0
Downloading node.js version 16.17.0 (64-bit)...
Extracting...
Complete
Creating C:\Users\Timeweb\AppData\Roaming\nvm\tempDownloading npm version 8.15.0… Complete
Installing npm v8.15.0…
Installation complete. If you want to use this version, type
nvm use 16.17.0
Установка завершена. В ряде случаев при установке nvm-windows может возникнуть проблема: nvm не загрузит диспетчер пакетов NPM. В этом случае рекомендуем воспользоваться следующим способом установки.
Как установить node.js с помощью официального установщика
- Зайдите на официальный сайт nodejs.org в раздел «Загрузка».
- Выберите и загрузите нужную версию.
- По завершению загрузки откройте файл, после чего начнется установка.
- Следуйте инструкциям установщика.
Установка node.js в WSL2
Если вы хотите использовать Node.js вместе с Docker, планируете работать с командной строке Bash или просто любите Linux, то имеет смысл задуматься об установке среды выполнения в WSL2.
WSL (Windows Subsystem for Linux) — это программная прослойка для запуска приложений, созданных под Linux-системы, на ОС Windows. Возможно, вам уже приходилось работать в WSL с приложениями, у которых нет Windows-версий. Ранее мы уже рассматривали установку Node.js на Ubuntu 20.04. Поэтому в этом разделе будет размещена инструкция по установке WSL 2 — об установке Node.js на Ubuntu читайте в статье «Как установить Node.js в Ubuntu 20.04».
Алгоритм установки WSL2 в Windows 10 зависит от версии операционной системы. Чтобы её узнать, нажмите Win+R и введите winver. После этого откроется такое окно:
Алгоритм для версий старше 2004
В PowerShell от имени администратора выполняем следующие команды:
wsl --install
wsl --set-version Ubuntu 2
Для проверки результата воспользуемся командой wsl.exe -l -v:
PS C:\WINDOWS\system32> wsl.exe -l -v
  NAME      STATE           VERSION
* Ubuntu    Stopped         2
Алгоритм для версий младше 2004 (как минимум потребуется ОС версии 1903)
В PowerShell (от имени администратора) активируем подсистему Windows для Linux.
dism.exe /online /enable-feature /featurename:Microsoft-Windows-Subsystem-Linux /all /norestartЗатем активируем функцию виртуальной машины:
dism.exe /online /enable-feature /featurename: VirtualMachinePlatform /all /norestart После выполнения этих действий нужно перезагрузить компьютер.
Когда компьютера запустится, скачиваем и устанавливаем пакет обновлений ядра Linux. Загрузить его можно по здесь.
В PowerShell выберем 2 версию WSL в качестве основной:
wsl --set-default-version 2Теперь скачаем какую-нибудь операционную систему на Linux. Сделать это можно прямо магазине приложений Microsoft Store:
По окончании установки вы сможете зайти в консоль установленной системы через меню поиска:
Заключение
Node.js — это популярная среда разработки, которая используется множеством крупных компаний: PayPal, Yahoo, Ebay, General Electric, Microsoft и Uber. В рамках этого материала мы рассмотрели способы как установить Node.js на Windows 10.
Setting up the Node Development Environment
The Node can be installed in multiple ways on a computer. The approach used by you depends on the existing development environment in the system. There are different package installer for different environments. You can install Node by grabbing a copy of the source code and compiling the application. Another way of installing Node is by cloning the GIT repository in all the three environments and then installing it on the system.
Installing Node On Windows (WINDOWS 10):
You have to follow the following steps to install the Node.js on your Windows :
Step-1: Downloading the Node.js ‘.msi’ installer.
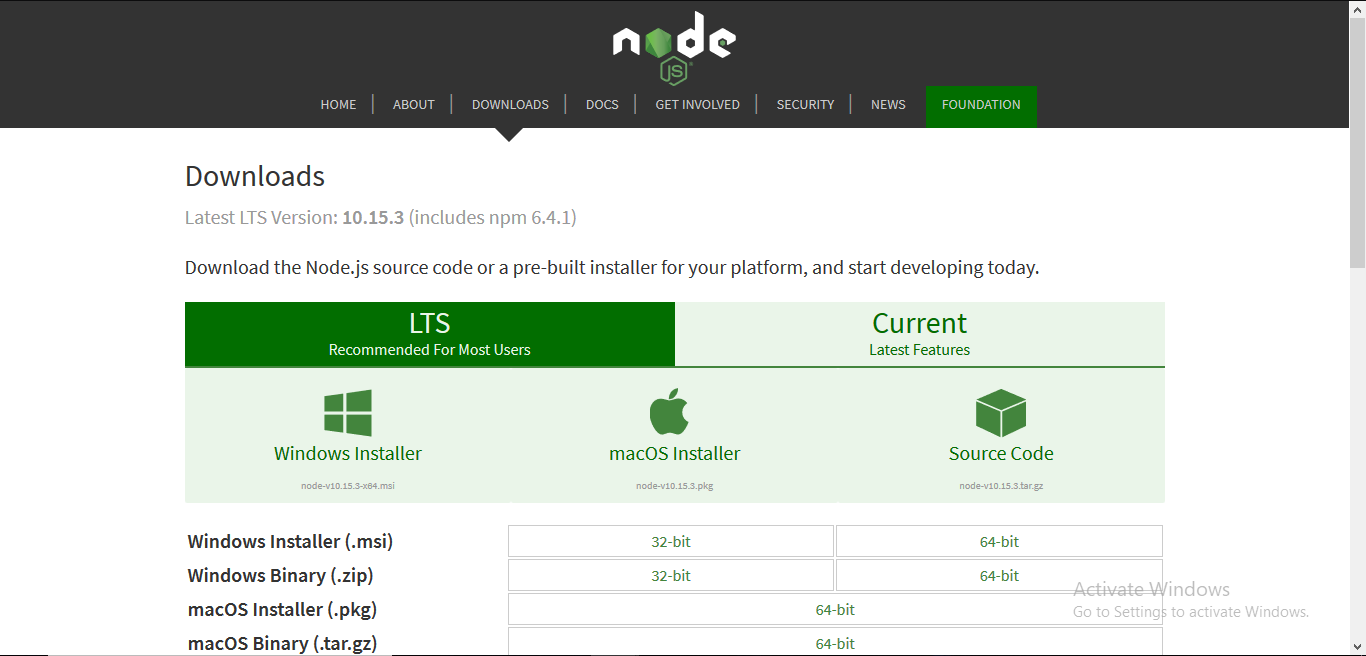
The first step to install Node.js on windows is to download the installer. Visit the official Node.js website i.e) https://nodejs.org/en/download/ and download the .msi file according to your system environment (32-bit & 64-bit). An MSI installer will be downloaded on your system.
 Step-2: Running the Node.js installer.
Now you need to install the node.js installer on your PC. You need to follow the following steps for the Node.js to be installed:-
- Double click on the .msi installer.
The Node.js Setup wizard will open.
- Welcome To Node.js Setup Wizard.
Select “Next”
- After clicking “Next”, End-User License Agreement (EULA) will open.
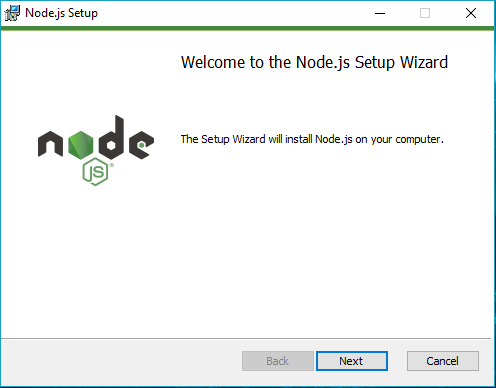
Check “I accept the terms in the License Agreement”
Select “Next”
- Destination Folder
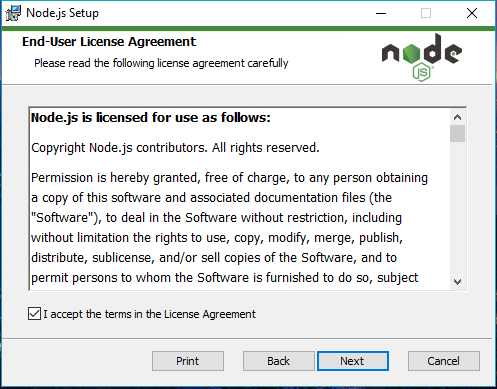
Set the Destination Folder where you want to install Node.js & Select “Next”
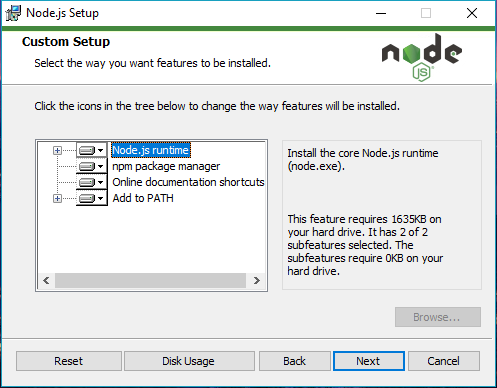
- Custom Setup
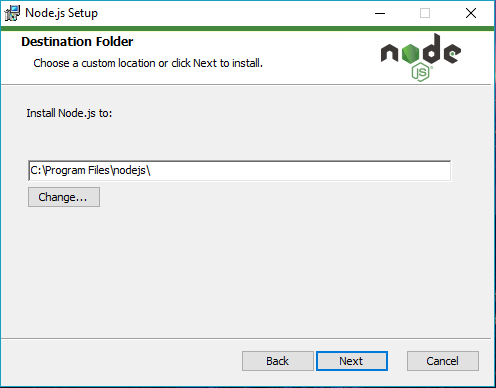
Select “Next”
- Ready to Install Node.js.
The installer may prompt you to “install tools for native modules”.
For more information on whether you need this, see here.
Select “Install”
- Installing Node.js.
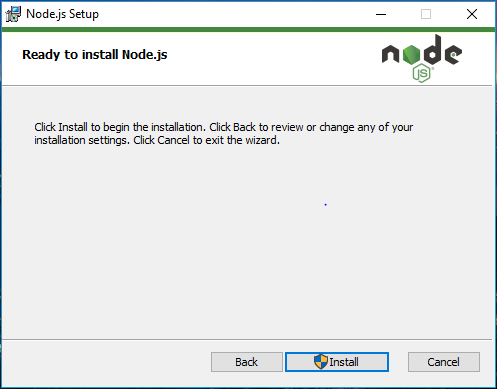
Do not close or cancel the installer until the install is complete
- Complete the Node.js Setup Wizard.
Click “Finish”

Step 3: Verify that Node.js was properly installed or not.
To check that node.js was completely installed on your system or not, you can run the following command in your command prompt or Windows Powershell and test it:-
C:\Users\Admin> node -v
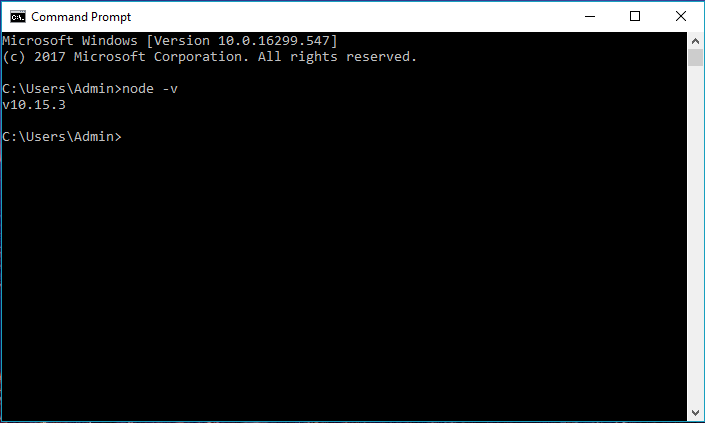
If node.js was completely installed on your system, the command prompt will print the version of the node.js installed.
If you get a message back saying node was not found, then add it to the path manually:
Adding to the path:
You should not need to do anything to the system variables, as the windows installer takes care of the system variables itself while installing through the .msi installer.
If you use any other format for installing node.js on your PC, you should put the system variable path for node.js as follows:
PATH : C:\Users\{username}\AppData\Roaming\npm C:\Program Files\{path to the nodejs folder}
for example:
PATH : C:\Users\admin\AppData\Roaming\npm C:\Program Files\nodejs
Note: After adding to the PATH, restart the command line, because PATH is only loaded when initializing new command line sessions.
Step 4: Updating the Local npm version.
The final step in node.js installed is the updation of your local npm version(if required) – the package manager that comes bundled with Node.js.
You can run the following command, to quickly update the npm
npm install npm –global // Updates the ‘CLI’ client
Whether you’re preparing for your first job interview or aiming to upskill in this ever-evolving tech landscape, GeeksforGeeks Courses are your key to success. We provide top-quality content at affordable prices, all geared towards accelerating your growth in a time-bound manner. Join the millions we’ve already empowered, and we’re here to do the same for you. Don’t miss out — check it out now!
Last Updated :
07 Mar, 2023
Like Article
Save Article
Node.js помогает JavaScript взаимодействовать с устройствами ввода-вывода через свой API и подключать разные внешние библиотеки (главное, делать это без фанатизма).
Перейдите на официальный сайт и скачайте последнюю стабильную версию с припиской LTS. На сайте есть версии и для Windows, и для macOS. Выглядит это примерно так:
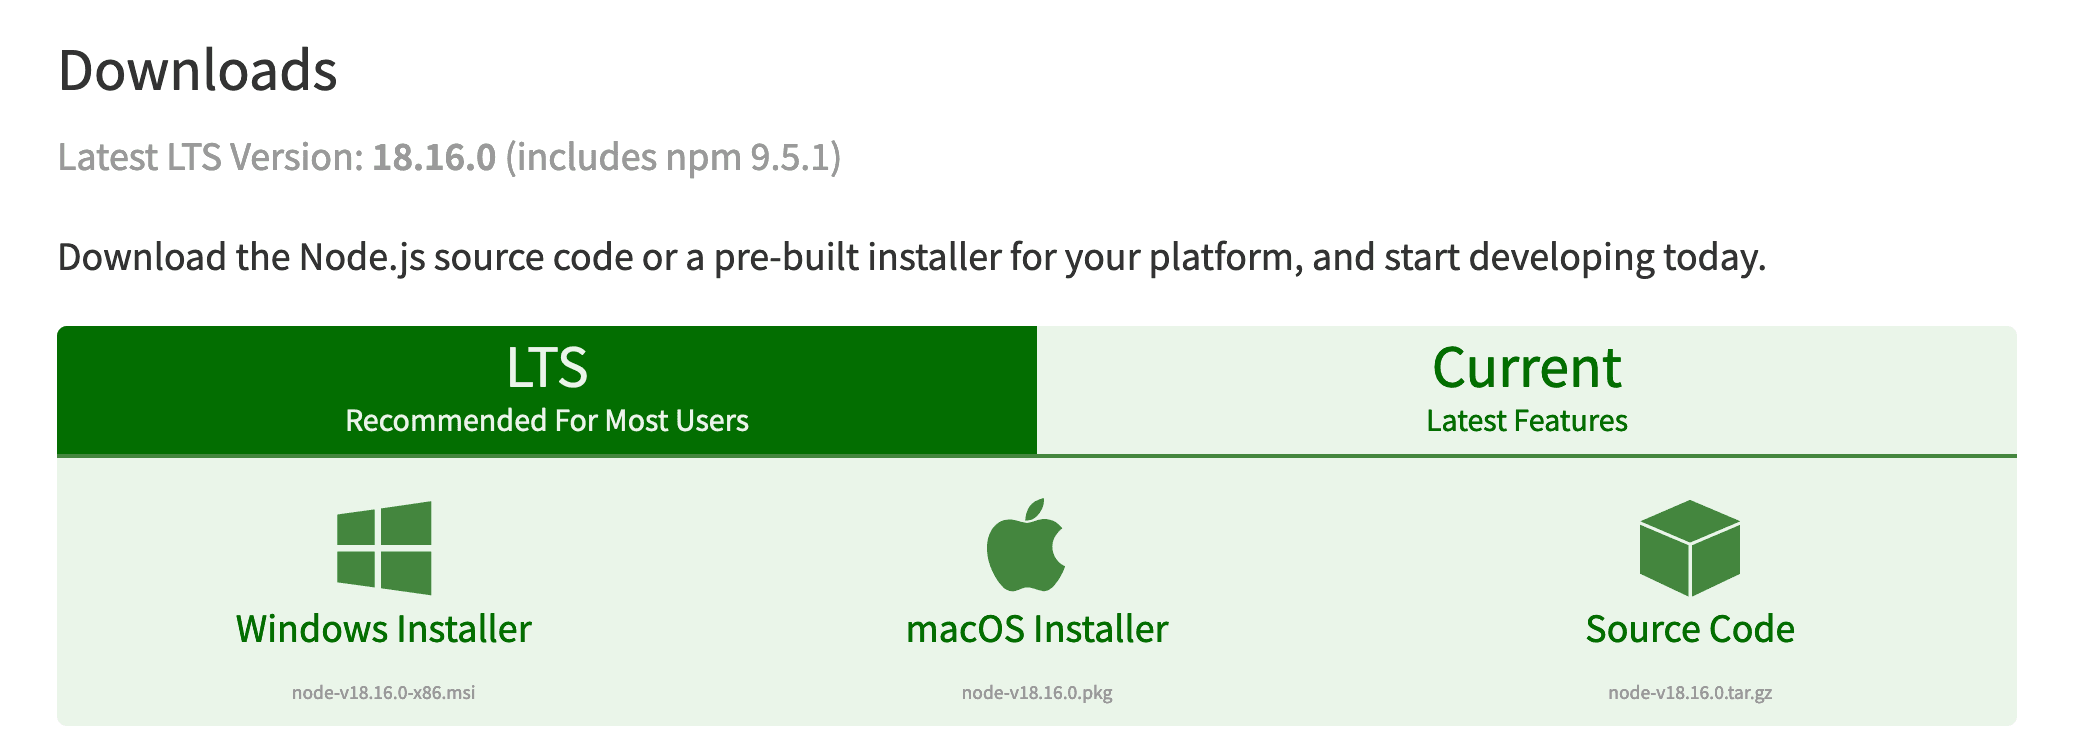
После загрузки запустите установщик и установите Node.js как любую другую программу (то есть Далее—Далее—Далее). Чтобы проверить, что Node.js установилась, и узнать версию, откройте терминал и введите две команды node -v и npm -v.
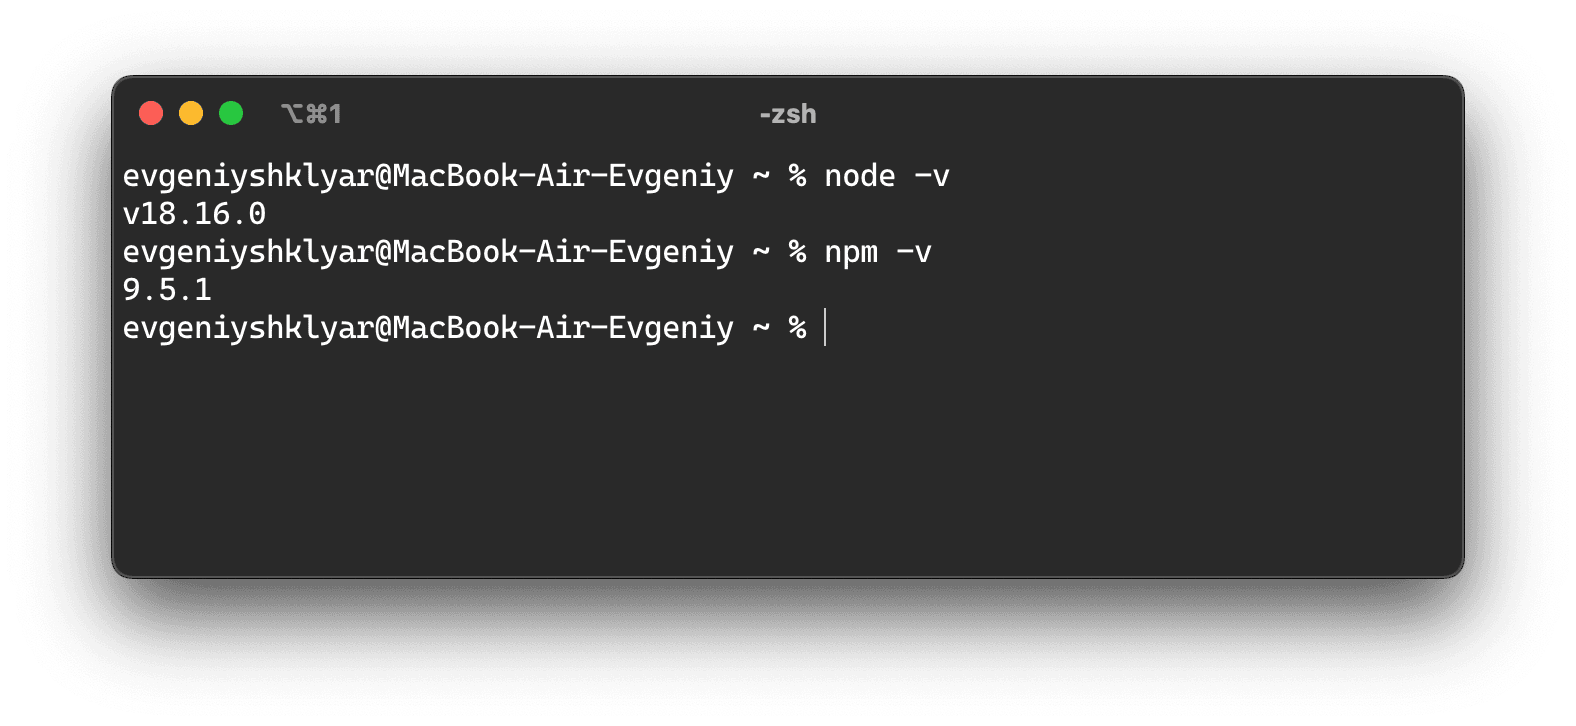
Вот и всё — можете пользоваться.
«Доктайп» — журнал о фронтенде. Читайте, слушайте и учитесь с нами.
ТелеграмПодкастБесплатные учебники

Генерация QR-кодов на JS в 4 шага. Node.js + qrcode
Сегодня сделаем простой REST API на Node.js и Express, который будет генерировать QR-коды для любой ссылки. Если у вас ещё не установлены Node.js и npm, установите их с официального сайта.
Читать дальше
ChatGPT не справляется
Притворитесь нейросетью и решите 101 задачку по JavaScript как можно быстрее.
Читать дальше

Знакомство с JavaScript
Теперь, когда вы знаете, как создать структуру веб-страницы с помощью HTML и оформить ее стилями с помощью CSS, пришло время оживить её с помощью JavaScript (JS). JavaScript — это мощный язык программирования, который используется для создания интерактивных и динамических веб-сайтов.
Вы можете добавить JavaScript в ваш HTML-документ двумя способами:
Встроенный JavaScript: непосредственно в HTML-документ, в тегах <script>:
<script>
  alert("Привет, мир!");
</script>
Внешний JavaScript: подключение внешнего .js файла к HTML-документу:
<script src="script.js"></script>
Читать дальше

Событие onclick в JS на примерах
Интерактивность — ключевой компонент любого современного сайта. И одним из наиболее часто используемых событий для создания интерактивности является событие onclick. В этой статье мы подробно разберёмся, что такое событие onclick, как его использовать и приведем примеры применения.
Событие onclick — это событие JavaScript, которое активируется, когда пользователь кликает на определенный элемент страницы. Это может быть кнопка, ссылка, изображение или любой другой элемент, на который можно нажать.
Читать дальше

Как перевернуть сайт. Самая короткая инструкция
Не представляем, зачем это может понадобиться, но не могли пройти мимо.
Никакой магии. Мы вызываем JavaScript-функцию rotateBody(), которая применяет свойство transform с значением rotate(180deg) к элементу <body>. Когда вы нажмете на кнопку «Перевернуть», всё, что находится внутри <body> будет повернуто на 180 градусов (то есть, встанет вниз головой)
function rotateBody() {
  document.body.style.transform = 'rotate(180deg)';
}

<button onclick="rotateBody()">Перевернуть</button>
Но такой код повернёт страницу только один раз. Если нужно, чтобы она возвращалась обратно при втором клике, усложним код:
let isRotated = false;

function rotateBody() {
  if (isRotated) {
    document.body.style.transform = 'rotate(0deg)';
    document.body.style.direction = "ltr";
  } else {
    document.body.style.transform = 'rotate(180deg)';
    document.body.style.direction = "rtl";
  }
  isRotated = !isRotated;
}
Надеемся, вы прочитали это описание до того, как нажать на кнопку.

Как узнать геолокацию: Geolocation API
Geolocation API позволяет сайтам запрашивать, а пользователям предоставлять свое местоположение веб-приложениям. Геолокация может использоваться для выбора города в интернет-магазине, отображения пользователя на карте или навигации в ближайший гипермаркет.
Основной метод Geolocation API — getCurrentPosition(), но есть и другие методы и свойства, которые могут пригодиться.
Читать дальше

Что такое localStorage и как им пользоваться
localStorage — это место в браузере пользователя, в котором сайты могут сохранять разные данные. Это как ящик для хранения вещей, которые не исчезнут, даже если вы выключите компьютер или закроете браузер.
До localStorage разработчики часто использовали cookies, но они были не очень удобны: мало места и постоянная передача данных туда-сюда. LocalStorage появился, чтобы сделать процесс более простым и эффективным.
Читать дальше

Случайное число из диапазона
Допустим, вам зачем-то нужно целое случайное число от min до max. Вот сниппет, который поможет:
function getRandomInRange(min, max) {
  return Math.floor(Math.random() * (max - min + 1)) + min;
}
- Math.random () генерирует случайное число между 0 и 1. Например, нам выпало число
0.54. - (max — min + 1): определяет количество возможных значений в заданном диапазоне.
10 - 0 + 1 = 11. Это значит, что у нас есть 11 возможных значений (0, 1, 2, … 10). - Math.random () * (max — min + 1): умножает случайное число на количество возможных значений:
0.54 * 11 = 5.94. - Math.floor (): округляет число вниз до ближайшего целого. Так,
Math.floor(5.94) = 5. - … + min: смещает диапазон так, чтобы минимальное значение соответствовало
min. Но в нашем примере, так какmin = 0, это не изменит результат. Пример:5 + 0 = 5. - Итак, в нашем примере получилось случайное число 5 из диапазона от 0 до 10.
Чтобы протестировать, запустите:
console.log(getRandomInRange(1, 10)); // Тест

В чём разница между var и let
Если вы недавно пишете на JavaScript, то наверняка задавались вопросом, чем отличаются var и let, и что выбрать в каждом случае. Объясняем.
var и let — это просто два способа объявить переменную. Вот так:
var x = 10;
let y = 20;
Переменная, объявленная через var, доступна только внутри «своей» функции, или глобально, если она была объявлена вне функции.
function myFunction() {
  var z = 30;
  console.log(z); // 30
}
myFunction();
console.log(z); // ReferenceError
Это может создавать неожиданные ситуации. Допустим, вы создаёте цикл в функции и хотите, чтобы переменная i осталась в этой функции. Если вы используете var, эта переменная «утечёт» за пределы цикла и будет доступна во всей функции.
Переменные, объявленные с помощью let доступны только в пределах блока кода, в котором они были объявлены.
if (true) {
  let a = 40;
  console.log(a); // 40
}
console.log(a); // ReferenceError
В JavaScript блок кода — это участок кода, заключённый в фигурные скобки {}. Это может быть цикл, код в условном операторе или что-нибудь ещё.
if (true) {
  let blockScoped = "Я виден только здесь";
  console.log(blockScoped); // "Я виден только здесь"
}

// здесь переменная blockScoped недоступна
console.log(blockScoped); // ReferenceError
Если переменная j объявлена в цикле с let, она останется только в этом цикле, и попытка обратиться к ней за его пределами вызовет ошибку.
Читать дальше

Быстрый гайд по if, else, else if в JavaScript
Допустим, вы собираетесь идти на прогулку. Если на улице солнечно, вы возьмёте с собой солнечные очки.
Это можно описать с помощью оператора if.
let weather = "sunny";

if (weather === "sunny") {
  console.log("Возьму солнечные очки");
}
А если погода не солнечная, а, скажем, дождливая, вы возьмете зонт.
Этот сценарий можно описать с помощью if-else.
let weather = "rainy";

if (weather === "sunny") {
  console.log("Возьму солнечные очки");
} else {
  console.log("Возьму зонт");
}
Условный оператор if-else if-else
Теперь представим, что у вас есть несколько вариантов транспорта для дороги на работу: машина, велосипед, общественный транспорт. Выбор будет зависеть от различных условий, например, погоды и времени суток. Логично, что в дождь безопаснее ехать на автобусе, а в хорошую погоду можно прокатиться на машине или велосипеде, если утро и пробки. То есть схема такая:
И всё это очень легко описывается кодом:
let weather = "sunny";
let time = "morning";

if (weather === "rainy") { // если дождь, то только так
  console.log("Еду на автобусе");
} else if (time === "morning") { // если не дождь и утро
  console.log("Еду на велике мимо пробок");
} else { // если второе не дождь и не утро
  console.log("Еду на машине");
}
Ветвление только может показаться сложным, но вообще оно очень логичное, если понять, какие действия после каких условий выполняются. Разберитесь один раз и поймёте на всю жизнь, 100%.
🐈
As with any programming language, platform, or tool that doesn’t come bundled with Windows, getting up and running with Node.js takes some initial setup before you can start hacking away. In my experience, though Node.js has a far better installation experience on Windows than virtually any other language, platform, or tool that I’ve tried to use — just run the installer, and you’re good to go.
In this quick tutorial, we’ll take a look at how to get Node.js installed on Windows. Once we’ve completed the entirety of the tutorial, you’ll be ready to take the next step with Node.js.
This guide covers installing Node.js on the following versions of Windows: Windows 7, Windows 8, Windows 8.1, and Windows 10. These are the versions that are consistently tested and supported by the Node.js build process at the time of writing.
Step 0: The Quick Guide (TL;DR) to Get Node.js Installed on Windows
Here’s the abbreviated guide, highlighting the major steps:
- Open the official page for Node.js downloads and download Node.js for Windows by clicking the «Windows Installer» option
- Run the downloaded Node.js
.msiInstaller — including accepting the license, selecting the destination, and authenticating for the install.- This requires Administrator privileges, and you may need to authenticate
- To ensure Node.js has been installed, run
node -vin your terminal — you should get something likev6.9.5 - Update your version of npm with
npm install npm --global- This requires Administrator privileges, and you may need to authenticate
- Congratulations — you’ve now got Node.js installed, and are ready to start building!
Step 1: Download the Node.js .msi Installer
As the first step to installing Node.js on Windows, you’ll need to download the installer. You’ll be able to grab the installer from the official downloads page for Node.js.
You’ll be able to download the Windows Node.js installer by clicking the Windows Installer option at the top of the page — when you click this, you’ll get an MSI installer download. Make sure to save it somewhere that you’ll be able to find it!
Step 2: Run the Node.js Installer
You’ve got the Windows Installer — great! Now, you need to install it on your PC. The installer is a pretty typical Wizard interface for installing software on Windows — there are a few steps to it, but you can have it done in under a minute. You can get through it by following the guide below:
- Welcome to the Node.js Setup Wizard
- Select
Next
- Select
- End-User License Agreement (EULA)
- Check
I accept the terms in the License Agreement - Select
Next
- Check
- Destination Folder
- Select
Next
- Select
- Custom Setup
- Select
Next
- Select
- Ready to install Node.js
- Select
Install - Note: This step requires Administrator privlidges.
- If prompted, authenticate as an Administrator
- Select
- Installing Node.js
- Let the installer run to completion
- Completed the Node.js Setup Wizard
- Click
Finish
- Click
Step 3: Verify that Node.js was Properly installed
To double check that Node.js was installed fully on your PC, you can test the following command in your Command Prompt (regardless of if you’re using cmd.exe, Powershell, or any other command prompt):
$ node -v
If Node.js was installed fully, the command prompt will print something similar to (but probably not exactly) this:
$ node -v // The command we ran - prints out the version of Node.js that's currently installed
v6.9.5 // The printed version of Node.js that's currently installed - v6.9.5 was the most current LTS release at the time of writing.
Step 4: Update the Local npm Version
As the final step in getting Node.js installed, we’ll update your version of npm — the package manager that comes bundled with Node.js.
Node.js always ships with a specific version of npm — Node.js doesn’t (and shouldn’t!) automatically update npm. The release cycle of the npm CLI client isn’t in sync with the Node.js releases. Because of this, there’s almost certainly going to be a newer version of npm available than the one that is installed as a default in any given Node release.
To quickly and easily update npm, you can run the following command:
npm install npm --global // Update the `npm` CLI client
Now you’ve got Node.js on Windows machine. It’s time to start exploring!
Luckily, we’ve got your back. We’ve written a bunch of articles to help you get started with Node.js! If you’re interested in exploring ES6, you should check out our article on some of the most exciting ES6 features in Node.js. If you’re interested in ways to collaborate with your team a bit better, you should check out our tutorial on using ESLint in projects to improve team collaboration through code standards. Maybe you’d just like to start deploying the applications you’re about to build? In that case, take a peek at our guide on how to deploy Node.js apps on Linux with systemd!
That said, if you want to keep in touch with Node.js and the surrounding ecosystem, you should go follow @NodeSource on Twitter! We’ll keep you updated with important news from the Node.js project, and share the best Node.js tutorials, guides, and tools that the community has to offer.
This post is for all javascript lovers. If you want to know “How to install node js and npm” in Windows and Ubuntu. You have landed on the right page. I have included all possible options to install node.js and npm in your favourite OS. These methods are really easy. All the commands output are also attached for your reference.
I am sure if you will follow this post step by step. You will be able to install node js and npm easily even if you are a newbie.
What will you learn in this post –
What is node Js and NPM
The NPM stands for the node package manager. It is the default package manager for Node.js. Basically, Node.js is a JavaScript runtime environment. Node.js allows developers to build scalable network application quickly. NPM is a client helps to access and browse the npm registry via the npm website. NPM registry is the repository of public and private packages online. Alternately, ied, pnpm, npmd and yarn can be used to access npm registry.
As per Wikipedia website –
npm, Inc. is a subsidiary of GitHub, an American multinational corporation that provides hosting for software development and version control with the usage of Git.

There are couple of ways to install node.js and npm in Windows.
- GUI (manual method)
- Using chocolatey (Powershell)
Please make a note, npm (node package manager) will auto install in windows 10 with node.js.
Step1:- Download node js
Download Node.js software from nodejs.org website. The latest LTS version is node-v14.15.3. Package npm is in-built. You don’t need to install it separately. If you own an old version of windows, select 32-bit version of node.js installer. Otherwise, choose 64-bit in all other cases.
I will select 64-bit version.

Step1.1
After download of node js completes. Visit your download directory.

Step2:- Install Node.js and npm
Double click installer node-v14.15.3-x64.msi. This will start Node Js installation wizard.
Click Next –

Step2.1
Select “I accept the terms in the license Agreement” box. It confirms that you agree with node.js end user license agreement. Click Next –

Step2.2
Select the destination folder for node.js installation. Default location of node.js is “C:\Program Files\nodejs\“. In case, you want to select a custom location. Click on change and browse for your preferred install location.
Select – Next.

Step2.3
Select node.js features. I will suggest you leave it default. Also, npm (node package manager) is part of features. So you don’t need to install it separately.
Space required to install these node js and npm features need 143MB capacity.
Following features will install by default –
- Node.js runtime
- Npm package manager
- Online documentation shortcuts
- Add to Path
Click Next

Step2.4
Choose an optional tool to compile native modules, if required. Some npm modules need to be compiled from C/C++. To install these modules, you will need python and Visual studio build tools.
Choose box “Automatically install the necessary tools option“. You can visit https://github.com/nodejs/node-gyp#on-windows to install it later manually. We will discuss the chocolatey software in the next section.
In my case, i have not selected this option.
Choose Next.

Step2.5
Now you are ready with final node js step. You can click “Back” to review or change your node.js installation settings.
Click Install.

Step2.6
Select “Yes” to allow windows to run Node.js.

Step2.7
Sit back and relax. it will take couple of minutes to complete node.js installation.

Step2.8
Click Finish. You are done with node.js installation now.

Step3:- Check Node.js and npm version
Step3.1
Open command prompt with “run as administrator”. Run node and npm command.
Check node js version
C:\> node -v
Check npm (node package manager) version
C:\> npm -v

In my case, node.js version is v14.15.3 and npm is 6.14.9
Nowadays Microsoft recommends to Node js and NPM installation in WSL (Windows Subsystem for Linux). Follow this post to learn WSL and how to install Ubuntu on Windows.
1.a:- How to uninstall node js in Windows 10
In case you have old version of node.js or npm installed and want to remove it. Follow these steps-
Step1: Open add remove programs
Go to “Add or remove programs” from search window. Click open.

Step2: Find and Uninstall node js
Find node.js and click uninstall.

it will take couple of minutes to get clean from machine.

It will also remove npm (node package manager).
Video – How to install Node js and npm in windows 10
2:- How to install node js in Windows using chocolatey {Powershell}
There is one more way to install node.js and npm using chocolatey. It is a software management solution. You will need PowerShell to run these commands.
Follow these commands one by one –
Step1:- Open PowerShell as admin
Type PowerShell in search box and open it as run as administrator.
Step2:- Set Execution policy
The execution policy is “restricted” by default in PowerShell. This policy will not allow you to run scripts. So you need to change it to “AllSigned“. So that it allows to download and run chocolatey commands.
C:\> Set-ExecutionPolicy AllSigned

Step3:- Download and Install Chocolatey using PowerShell script
Copy and paste this script to download and install chocolatey software in Windows. It will install the latest version of the chocolatey package.
It also download 7-zip tool and install it prior to extraction. You can safely ignore warnings while installing chocolatey.
C:\> Set-ExecutionPolicy Bypass -Scope Process -Force; iex ((New-Object System.Net.WebClient).DownloadString('https://chocolatey.org/install.ps1'))

If you get warning “Not setting tab completion: Profile file does not exist at <location>”. Make a folder on that location. it will help you to complete chocolatey commands using Tab. For example, I will make a folder in “C:\users\Dev\Documents\WindowsPowerShell\Microsoft.PowerShell_profile.ps1”.
Step4:- Install node.js using choco command
Run choco command to download and install node js and npm using PowerShell. You can use -Y option for the non-interactive run.
> choco install nodejs
Use –force option, in the case earlier node.js installation failed. This will install the latest node.js version available.
To install specific version, give details in command. For example, i have given version 12.10.0.
> choco install nodejs --version=12.10.0

Step5:- Check node js and npm version
Check node js version
> node --version
Check npm version
> npm --version

Step6 (optional):- Install angular CLI
This step is optional and only need to run, if you need angular CLI. NPM command will help to download and install angular package.
Open command prompt with “run as administrator” rights. Then run npm command to install angular/cli.
option i – to install package
-g option – for global in npm command.
> npm i -g @angular/cli

or use @version to install version, you need. For example 1.8.2
npm i -g @angular/cli@1.8.2
How to install node js in Linux
Node js can be installed in Linux using two ways. One is from the official repository and second from NodeSource repository. These steps are applicable to Ubuntu 18.04 and 20.04 distro.
1# How to install node js in Ubuntu 20.04 using Ubuntu repository
Installation of node js and npm in Ubuntu is a two-step process. It’s always recommended to install node js first. it’s really easy. Follow these steps –
Step1:- Open terminal and update Ubuntu repository
Open terminal with Ctrl + Alt + T and update repository.
$ sudo apt-get update

Step2:- Install node js using CLI
Run apt-get command to install nodejs package. Make a note, npm is suggested package.
$ sudo apt-get install nodejs

Step3:- Check Node version
Once installation done. Check node.js version
$ node -v
or
$ node --version

Step4:- Install npm in Ubuntu 20.04 using apt
Now let’s install node package manager (npm) which is required by Node Js.
$ sudo apt-get install npm

Step5:- Check npm version
Check npm version
$ sudo npm -v
or
$ sudo npm --version

How to uninstall node js in Ubuntu
Remove node js from Ubuntu using these simple steps –
Step1:- Open terminal and run remove node js from ubuntu
Open terminal Ctrl + Alt + T and run apt-get command
$ sudo apt-get remove nodejs

How to uninstall npm in Ubuntu
Step2:- Open the terminal and run remove npm
Open terminal Ctrl + Alt + T and run apt command to remove npm
$ sudo apt-get remove npm

2# How to install node js in Ubuntu using NodeSource repository
If you want to install a newer version of node.js and npm. Then you need to connect to NodeSource repository. Follow these simple steps-
Step1:- Open the terminal and update Ubuntu package manager
Open terminal and and run apt command to update package manager.
$ sudo apt-get update
Step2:- Install dependent python libraries
Install dependent Python libraries with apt-get command
$ sudo apt-get install python-software-properties
Step3:- Add node source PPA
Add node js repository to system. If you want to add it for version 14. Change 15.x to 14.x in command.
$ curl -sL https://deb.nodesource.com/setup_15.x | sudo -E bash -

Tip
If you get “curl” not found error. Install curl utility first.
$ sudo apt install curl

Step4:- Install node js and npm packages in Ubuntu 20.04
Install node js and npm in Ubuntu using apt-get command. You don’t need to install npm separately in this case. Checkout this post on more ways to install packages in Ubuntu.
$ sudo apt-get install -y nodejs

Step5:- Check Node and npm version in Ubuntu
Check node js version
node -v
or
node –version
Check npm (node package manager) version
npm -v
or
npm –version

Step6 (optional):- Install build essential tools
Install build tools to compile and install native add-ons. This is optional and depends on your need.
$ sudo apt-get install -y build-essential
So, you have installed node js and npm in Ubuntu successfully.
Video – How to install Node js and npm in Ubuntu 20.04
Frequently Asked Questions
Is node JS safe to install?
Yes, installing node js is safe. Make sure you download node js software from nodejs.org website or authentic vendor repository only.
How to install node js as Windows service?
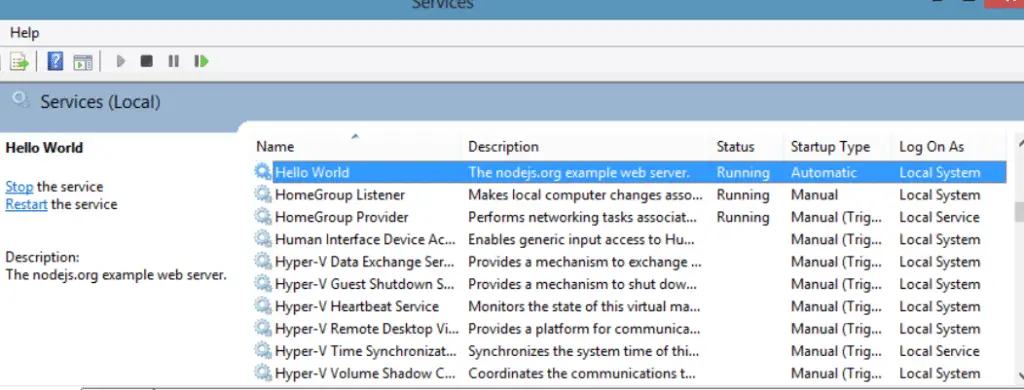
Download node-windows as a standalone module. The node-windows has a utility to run Node.js scripts as Windows services.
Which is the Best node js setup?
It’s always recommended to install latest (LTS) node js setup. Currently latest LTS version of node js is 14.15.3 (includes npm 6.14.9). LTS stands for long term support.
How to install the previous version of node js?
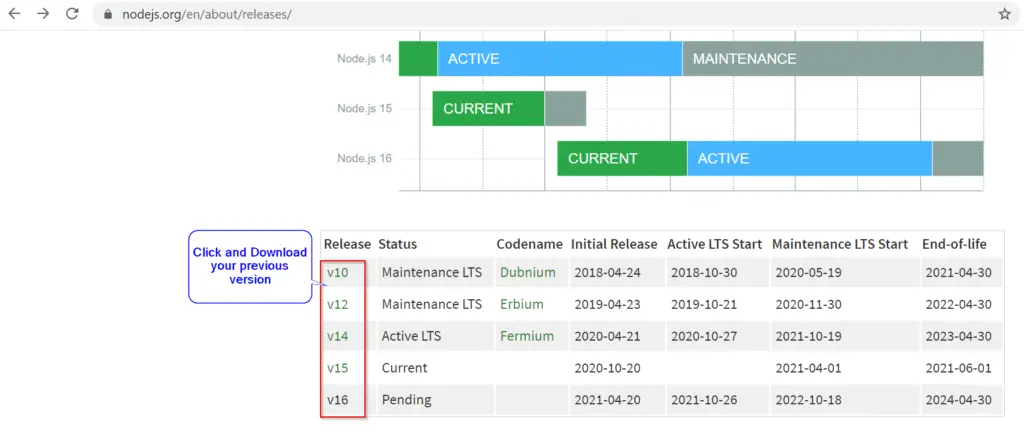
1.) Visit “https://nodejs.org/en/about/releases/”
2.) Scroll down and select your version
3.) Download and install.
Conclusion
There are multiple ways to download and install node js and npm in your favourite operating system. I have shown you the easiest ways to do it. You must be a happy soul and should be ready to work on your JavaScript. Let me know in comments if you still face any issue.
I will be happy to assist you.