
Обновление операционной системы на компьютере, особенно если это рабочий инструмент, всегда небольшая авантюра. Во-первых, необходимо точно убедиться, что весь необходимый вам софт оптимизирован под новую версию, иначе можно просто остаться без работы. А во-вторых, часто обновление приводит к проблемам с аккумулятором и просадкам производительности, что само по себе плохо. Поэтому я всегда всем советую не спешить с установкой крупных апдейтов на Мак до момента, пока все основные проблемы не будут решены.

Обновить Макбук значительно проще, чем любой компьютер на Windows.
❗️ПОДПИШИСЬ НА НАШ ДЗЕН. ТАМ КАЖДЫЙ ДЕНЬ ВЫХОДЯТ КРУТЫЕ СТАТЬИ
Лучше поизучать отзывы и только после этого принимать соответствующее решение. Если же вы уже уверены, что хотите обновить свой Мак, то в этом материале вы сможете найти информацию, как это можно сделать, как определить последнюю поддерживаемую версию macOS, и разбираемся, как обновить Safari отдельно от всей системы.
Как обновить Mac OS
В отличие от Windows, macOS всегда было очень легко обновить. Прошлым летом я перешел на ноутбук с Windows 11 и до сих пор не понимаю разницу между накопительными и обычными обновлениями. Зачем они нужны и по какому принципу компьютер загружает новые версии. На устройствах Apple все намного проще. Все свежие версии появляются в одном месте, и именно оттуда происходят все обновления. Правда, в зависимости от того, насколько старая macOS стоит на вашем компьютере раздел с обновлением может находиться в разных местах:
- В macOS Ventura:

Настройки в Вентуре очень похожи на iPad.
- Откройте системные настройки и перейдите в раздел “Основные”.
- Выберите пункт “Обновление ПО”.
- Отсюда скачайте новую версию системы и перезагрузите компьютер для установки.
- В macOS Monterey и более старых версиях:
- Откройте системные настройки.
- Выберите раздел “Обновление ПО”.
- Произведите загрузку новой версии системы и перезагрузите компьютер для установки.

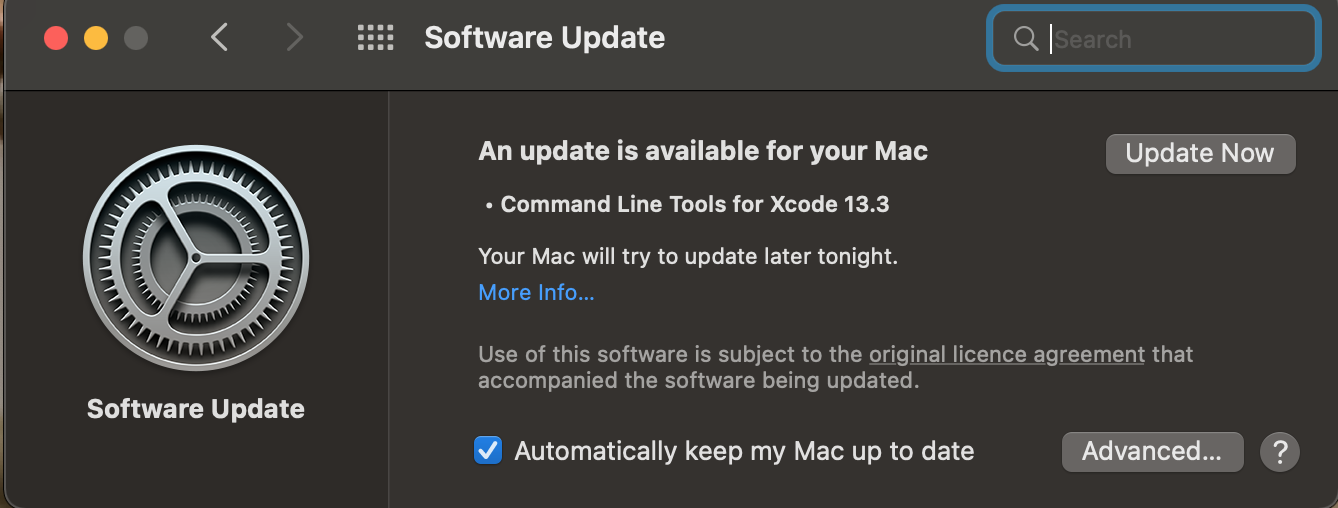
В разделе “Обновление ПО” можно найти всю информацию по обновлению.

Для загрузки просто нажмите “Обновить сейчас”.


❗️ПОДПИШИСЬ НА НАШ ТЕЛЕГРАМ-ЧАТ И ЗАДАВАЙ ВОПРОСЫ НАШИМ АВТОРАМ, НА КОТОРЫЕ ОНИ ОБЯЗАТЕЛЬНО ОТВЕТЯТ
Как видите, ничего сложного здесь нет. Все сконцентрировано в одном месте и позволяет очень легко устанавливать обновления. Хочется посоветовать Microsoft поучиться у Apple, как можно без всяких головняков обновлять компьютеры. В macOS все апдейты хотя бы выходят в один момент по всему миру и не надо гадать, когда он дойдет до вас.
Как обновить Сафари на Маке
К сожалению, иногда софт, который вы используете для какой-то своей работы, не позволяет обновить систему на новую версию. Но хотелось бы получить свежий браузер Safari. В таком случае можно установить только его и не переживать об остальных обновлениях:
- В macOS Monterey и более старых версиях:

Раньше можно было выбрать отдельную установку Сафари.
- Откройте системные настройки и выберите раздел “Обновление ПО”.
- Возле новой версии macOS нажмите кнопку “Подробнее”.
- Поставьте галочку на Safari и нажмите “Установить”.
- Либо на совсем старых версиях macOS перейдите в Mac App Store и через раздел “Обновления” установите только Safari.
- В macOS Ventura:

Safari Technology Preview отличается от обычной версии только сиреневым логотипом.
- В последней версии macOS установить Safari отдельно от операционки невозможно. Но можно скачать Safari Technology Preview со всеми новыми функциями. Просто перейдите на сайт Apple и загрузите соответствующий установочный файл.


❗️ПОДПИШИСЬ НА ТЕЛЕГРАМ-КАНАЛ СУНДУК АЛИБАБЫ, ЧТОБЫ ПОКУПАТЬ ТОЛЬКО ЛУЧШИЕ ТОВАРЫ С АЛИЭКСПРЕСС
У Safari Technology Preview немного другая иконка, но все основные функции абсолютно такие же, как в обычной версии. Просто сделайте его браузером по умолчанию и используйте все преимущества новой версии.
Какая последняя версия Mac OS для MacBook
Ну а чтобы понимать, какая версия macOS является последней для вашего Мака, вам необходимо определить, какая у вас модель компьютера. Не просто MacBook Pro или MacBook Air, а год выпуска. Делается это так:
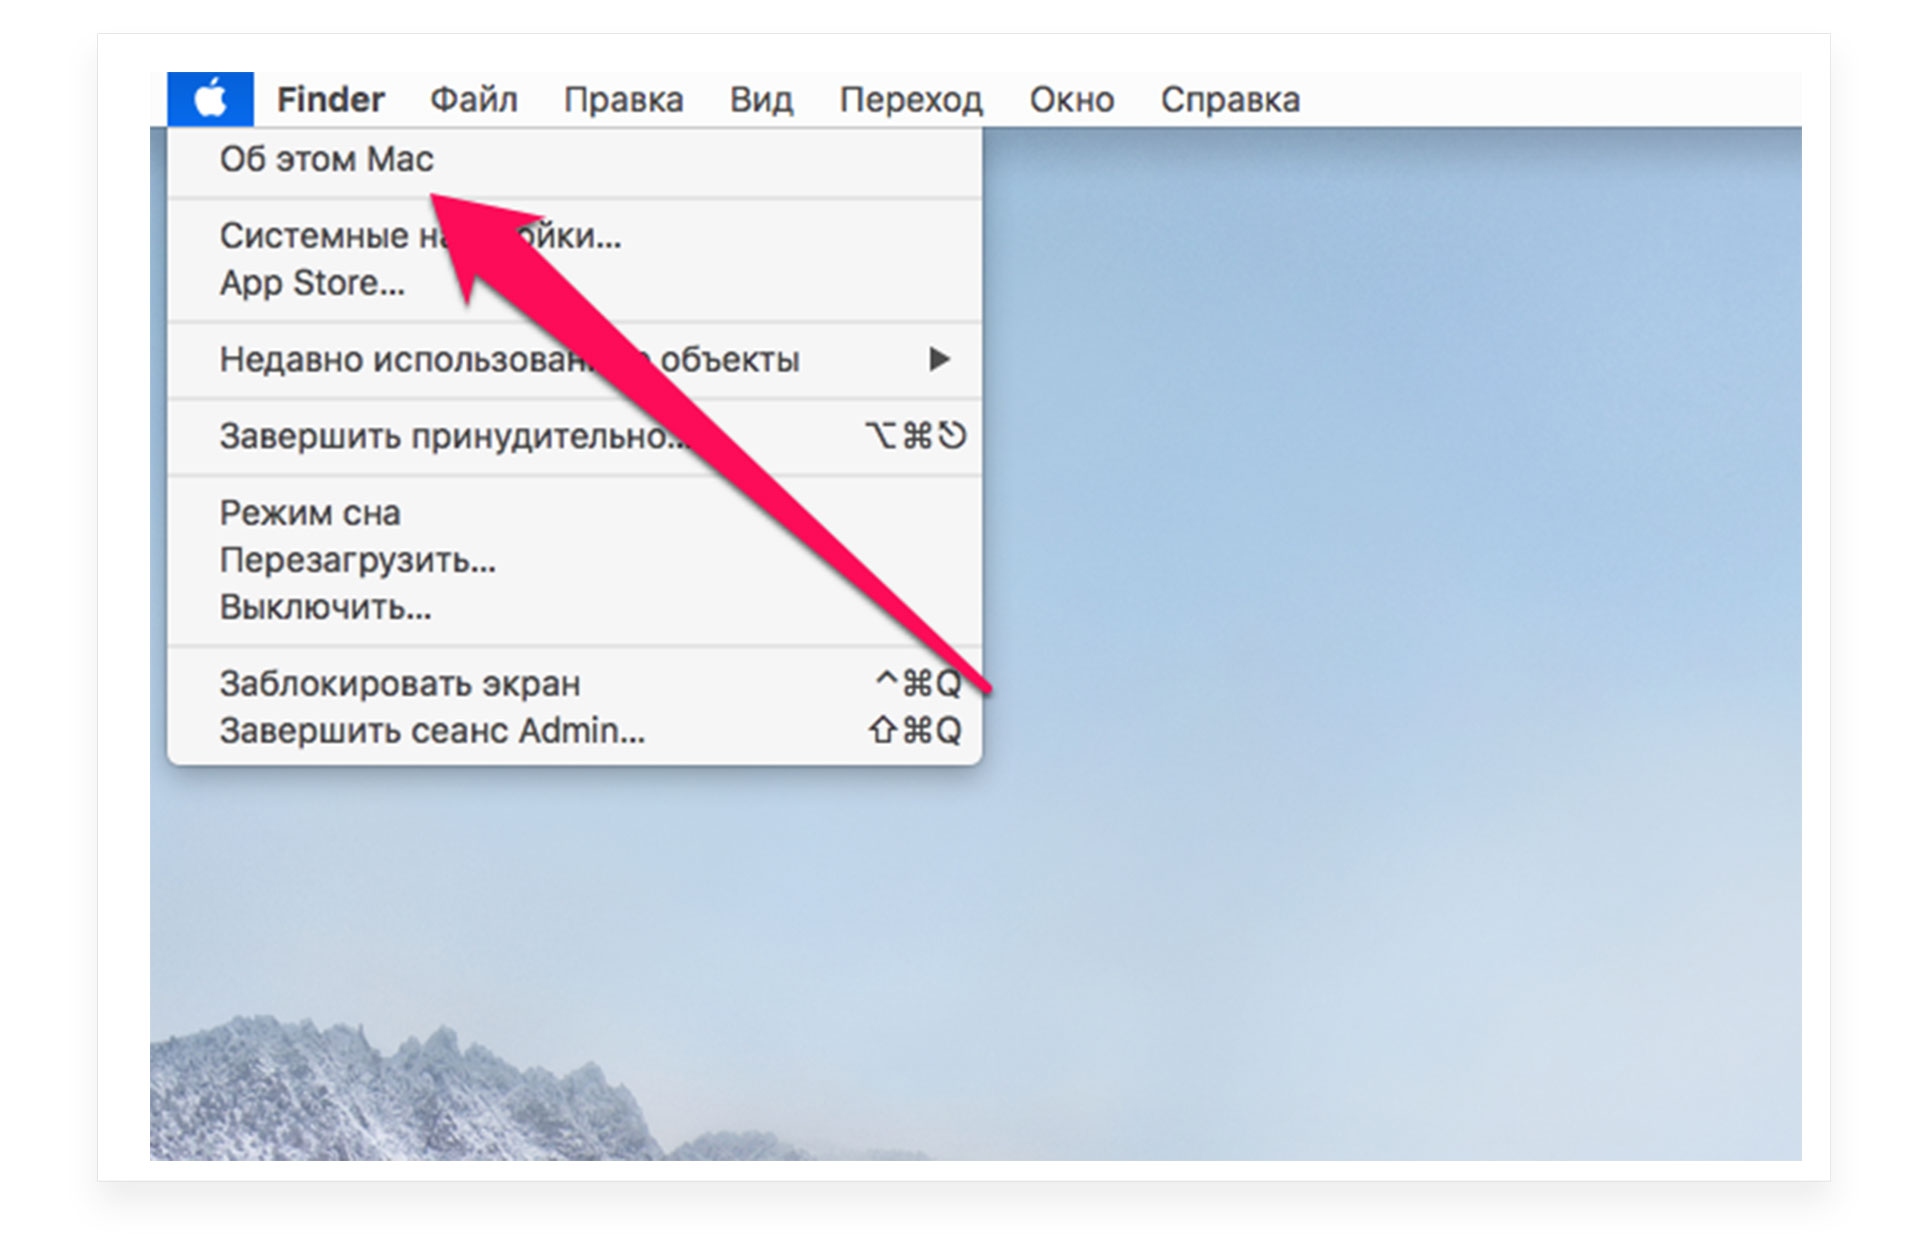
- Нажмите на логотип Apple в левом верхнем углу экрана.
- Выберите “Об этом Mac”.
- Под версией операционной системы будет написана модель вашего компьютера и год выхода модели.

В этом разделе можно найти много интересной информации про компьютер.

Модель компьютера определить очень просто.
Теперь вам просто необходимо в списке операционных систем и поддерживаемых моделей найти свой компьютер. Обратите внимание, что устройства на процессорах Apple не могут работать с macOS Catalina и более ранними версиями. Полный список выглядит так:
- macOS Ventura:
- MacBook 2017 или новее.
- MacBook Air 2018 или новее.
- MacBook Pro 2017 или новее.
- Mac mini 2018 или новее.
- iMac 2017 или новее.
- iMac Pro (все модели).
- Mac Pro 2019 или новее.
- Mac Studio (все модели).
- macOS Monterey:
- MacBook начала 2016 или новее.
- MacBook Air начала 2015 или новее.
- MacBook Pro начала 2015 или новее.
- Mac mini 2014 выпуска или новее.
- iMac 2015 или новее.
- iMac Pro 2017 и новее.
- Mac Pro конца 2013 и новее.
- Mac Studio (все модели).
- macOS Big Sur:
- MacBook начала 2015 или новее.
- MacBook Air 2013 или новее.
- MacBook Pro 2013 или новее.
- Mac mini 2014 или новее.
- iMac 2014 или новее.
- iMac Pro все модели.
- Mac Pro 2013 и 2019.
- macOS Catalina:
- MacBook (с 2015 по 2017).
- MacBook Air (с середины 2012 по 2019).
- MacBook Pro (середина 2012–2019).
- Mac mini (с конца 2012 по конец 2018).
- iMac (конец 2012–2019).
- iMac Pro (все модели).
- Mac Pro 2013.
- macOS Mojave:
- MacBook (с начала 2015 по 2017).
- MacBook Air (с середины 2012 по 2017).
- MacBook Pro (середина 2012–2018).
- Mac mini (с конца 2012 по конец 2018 ).
- iMac (конец 2012 – середина 2017).
- iMac Pro (все модели).
- Mac Pro (конец 2013, а также модели середины 2010 и середины 2012 с графическим процессором с поддержкой Metal).
- macOS High Sierra:
- MacBook (конец 2009–2017).
- MacBook Air (с конца 2010 по 2017).
- MacBook Pro (с середины 2010 по 2017).
- Mac mini (середина 2010–2014).
- iMac (конец 2009 г. – середина 2017).
- Mac Pro (середина 2010 и 2013).
- macOS Sierra:
- MacBook (конец 2009–2017).
- MacBook Air (с конца 2010 по 2017).
- MacBook Pro (середина 2010–2015).
- Mac mini (середина 2010–2014).
- iMac (конец 2009–2015).
- Mac Pro (середина 2010 и 2013).
- macOS El Capitan:
- MacBook (с начала 2015 по 2017).
- MacBook (конец 2008–2010).
- MacBook Air (конец 2008 – начало 2015).
- MacBook Pro (середина/конец 2007 – начало 2015).
- Mac mini (с начала 2009 по 2014).
- iMac (с середины 2007 до середины 2015).
- Mac Pro (2008, 2010, 2013).
- macOS Yosemite:
- MacBook (конец 2008–2010).
- MacBook Air (конец 2008 – середина 2013).
- MacBook Pro (13 дюймов, середина 2009 – середина 2014).
- MacBook Pro (15 дюймов, середина/конец 2007– середина 2014).
- MacBook Pro (17 дюймов, конец 2007–2011).
- Mac mini (с начала 2009 по 2012).
- iMac (с середины 2007 по середину 2014).
- Mac Pro (2008 и 2010, 2013).
- macOS Mavericks:
- MacBook (конец 2008–2010).
- MacBook Air (конец 2008 – середина 2013).
- MacBook Pro (середина 2007 – начало 2013).
- Xserve (начало 2009).
- Mac mini (с начала 2009 по 2012).
- iMac (середина 2007 — начало 2013).
- Mac Pro (начало 2008 и 2010).
Воспользуйтесь поиском по странице, чтобы найти свою модель компьютера. Так будет быстрее и проще. На примере моего iMac середины 2011 можете увидеть, что последней версией macOS для него стала High Sierra.
MacOSКомпьютеры Apple
Upgrade to macOS Big Sur
macOS Big Sur elevates the most advanced desktop operating system in the world to a new level of power and beauty. Experience Mac to the fullest with a refined new design. Enjoy the biggest Safari update ever. Discover new features for Maps and Messages. Get even more transparency around your privacy.
Chances are, your Mac can run macOS Big Sur
The following models are supported:
- MacBook (2015 or later)
- MacBook Air (2013 or later)
- MacBook Pro (Late 2013 or later)
- Mac mini (2014 or later)
- iMac (2014 or later)
- iMac Pro (2017 or later)
- Mac Pro (2013 or later)
To see which model you have, click the Apple icon in your menu bar and choose About This Mac.
Learn more about which models are compatible
Make sure you’re ready to upgrade.
Before you upgrade, we recommend that you back up your Mac. If your Mac is running OS X Mavericks 10.9 or later, you can upgrade directly to macOS Big Sur. You’ll need the following:
- OS X 10.9 or later
- 4GB of memory
- 35.5GB available storage on macOS Sierra or later*
- Some features require an Apple ID; terms apply.
- Some features require a compatible internet service provider; fees may apply.
Learn how to back up your Mac
Upgrading is free and easy
Upgrading from macOS Catalina 10.15 or Mojave 10.14?
Go to Software Update in System Preferences to find macOS Big Sur. Click Upgrade Now and follow the onscreen instructions.
Upgrading from an older version of macOS?
If you’re running any release from macOS 10.13 to 10.9, you can upgrade to macOS Big Sur from the App Store. If you’re running Mountain Lion 10.8, you will need to upgrade to El Capitan 10.11 first.
If you don’t have broadband access, you can upgrade your Mac at any Apple Store.
Learn more about how to upgrade
General Requirements
- OS X 10.9 or later
- 4GB of memory
- 35.5GB available storage on macOS Sierra or later*
- Some features require an Apple ID; terms apply.
- Some features require a compatible internet service provider; fees may apply.
Mac Hardware Requirements
For details about your Mac model, click the Apple icon at the top left of your screen and choose About This Mac. These Mac models are compatible with macOS Big Sur:
- MacBook (2015 or later)
- MacBook Air (2013 or later)
- MacBook Pro (Late 2013 or later)
- Mac mini (2014 or later)
- iMac (2014 or later)
- iMac Pro (2017 or later)
- Mac Pro (2013 or later)
Feature Requirements
Dictation, Voice Control, and Voice Memos
Requires a microphone (built‑in or external).
Spotlight Suggestions
Requires a broadband internet connection.
Gestures
Requires a Multi-Touch trackpad, Force Touch trackpad, Magic Trackpad, or Magic Mouse.
Force Touch gestures require a Force Touch trackpad.
VoiceOver gestures require a Multi-Touch trackpad, Force Touch trackpad, or Magic Trackpad.
Photo Booth
Requires a FaceTime or iSight camera (built‑in or external) or USB video class (UVC) camera.
FaceTime
Audio calls require a microphone (built‑in or external) and broadband internet connection.
Video calls require a built-in FaceTime camera, an iSight camera (built‑in or external), or a USB video class (UVC) camera, and broadband internet connection.
Apple TV
High dynamic range (HDR) video playback is supported by the following Mac models:
- MacBook Pro (2018 or later)
- iMac Pro (2017 or later)
- Mac Pro (2019) with Pro Display XDR
Dolby Atmos soundtrack playback is supported by the following Mac models:
- MacBook Air (2018 or later)
- MacBook Pro (2018 or later)
Sidecar
Supported by the following Mac models:
- MacBook (2016 or later)
- MacBook Air (2018 or later)
- MacBook Pro (2016 or later)
- Mac mini (2018 or later)
- iMac (late 2015 or later)
- iMac Pro (2017 or later)
- Mac Pro (2019)
Supported by all iPad models with Apple Pencil support:
- 12.9-inch iPad Pro
- 11-inch iPad Pro
- 10.5-inch iPad Pro
- 9.7-inch iPad Pro
- iPad (6th generation or later)
- iPad mini (5th generation)
- iPad Air (3rd and 4th generation)
Continuity Camera
Requires an iPhone or iPad that supports iOS 12 or later.
Continuity Sketch and Continuity Markup
Requires an iPhone with iOS 13 or later, or an iPad with iPadOS 13 or later.
Handoff
Requires an iPhone or iPad with a Lightning connector or with USB-C and iOS 8 or later.
Instant Hotspot
Requires an iPhone or iPad with cellular connectivity, a Lightning connector or USB-C, and iOS 8.1 or later. Requires Personal Hotspot service through your carrier.
Universal Clipboard
Requires an iPhone or iPad with a Lightning connector or with USB-C and iOS 10 or later.
Auto Unlock
Requires an Apple Watch with watchOS 3 or later, or an iPhone 5 or later.
Approve with Apple Watch
Requires an Apple Watch with watchOS 6 or later, or an iPhone 6s or later with iOS 13 or later.
Phone Calling
Requires an iPhone with iOS 8 or later and an activated carrier plan.
SMS
Requires an iPhone with iOS 8.1 or later and an activated carrier plan.
Home
Requires an iPhone with iOS 12 or later and a configured Home app.
AirDrop to iOS and iPadOS devices requires an iPhone or iPad with a Lightning connector, or with USB-C and iOS 7 or later.
AirPlay
AirPlay Mirroring requires an Apple TV (2nd generation or later).
AirPlay for web video requires an Apple TV (2nd generation or later).
Peer-to-peer AirPlay requires a Mac (2012 or later) and an Apple TV (3rd generation rev A, model A1469 or later) with Apple TV software 7.0 or later.
Time Machine
Requires an external storage device (sold separately).
Learn more
Maps electric vehicle routing
Requires an iPhone with iOS 14 and a compatible electric vehicle.
Boot Camp
Allows Boot Camp installations of Windows 10 on supported Mac models.
Learn more
Exchange Support
Requires Microsoft Office 365, Exchange 2016, Exchange 2013, or Exchange Server 2010. Installing the latest Service Packs is recommended.
Windows Migration
Supports OS X 10.7 or later and Windows 7 or later.
App Store
Available only to persons age 13 or older in the U.S. and many other countries and regions.
Photos
The improved Retouch tool is supported on the following Mac models:
- MacBook Pro (15-inch and 16-inch models) introduced in 2016 or later
- iMac (Retina 5K models) introduced in 2014 or later
- iMac (Retina 4K models) introduced in 2017 or later
- iMac Pro (2017 or later)
- Mac Pro introduced in 2013 or later
What’s Included
Applications
- Apple Books
- App Store
- Automator
- Calculator
- Calendar
- Chess
- Contacts
- Dictionary
- DVD Player
- FaceTime
- Find My
- Font Book
- Home
- Image Capture
- Launchpad
- Maps
- Messages
- Mission Control
- Music
- Notes
- Photo Booth
- Photos
- Podcasts
- Preview
- QuickTime Player
- Reminders
- Safari
- Siri
- Stickies
- Stocks
- System Preferences
- TextEdit
- Time Machine
- TV
- Voice Memos
Utilities and Features
- Activity Monitor
- AirPort Utility
- Audio MIDI Setup
- Bluetooth File Exchange
- Boot Camp Assistant
- ColorSync Utility
- Console
- Digital Color Meter
- Disk Utility
- Grapher
- Keychain Access
- Migration Assistant
- Screenshot
- Screen Time
- Script Editor
- Sidecar
- System Information
- Terminal
- VoiceOver Utility
Languages
- Arabic
- Catalan
- Simplified Chinese
- Traditional Chinese
- Traditional Chinese (Hong Kong)
- Croatian
- Czech
- Danish
- Dutch
- English (Australia)
- English (UK)
- English (U.S.)
- Finnish
- French
- French (Canada)
- German
- Greek
- Hebrew
- Hindi
- Hungarian
- Indonesian
- Italian
- Japanese
- Korean
- Malay
- Norwegian
- Polish
- Brazilian Portuguese
- Portuguese
- Romanian
- Russian
- Slovak
- Spanish
- Spanish (Latin America)
- Swedish
- Thai
- Turkish
- Ukrainian
- Vietnamese
14 Окт 2021

Apple часто выпускают обновления macOS. Вместе с новым программным обеспечением пользователь получает дополнительные возможности для стандартных программ ноутбука, поэтому важно обновлять свой MacBook. Давайте разберёмся, как обновить макбук до последней версии.
Узнаём версию macOS
Прежде чем приступить к обновлению операционной системы макбука, необходимо узнать текущую версию macOS. Для этого:
- Нажмите логотип «Apple» в левом углу экрана MacBook.
- Выберите пункт «Об этом Mac».
- На экране появится окно, кликните на меню «Обзор», чтобы посмотреть версию установленной системы.
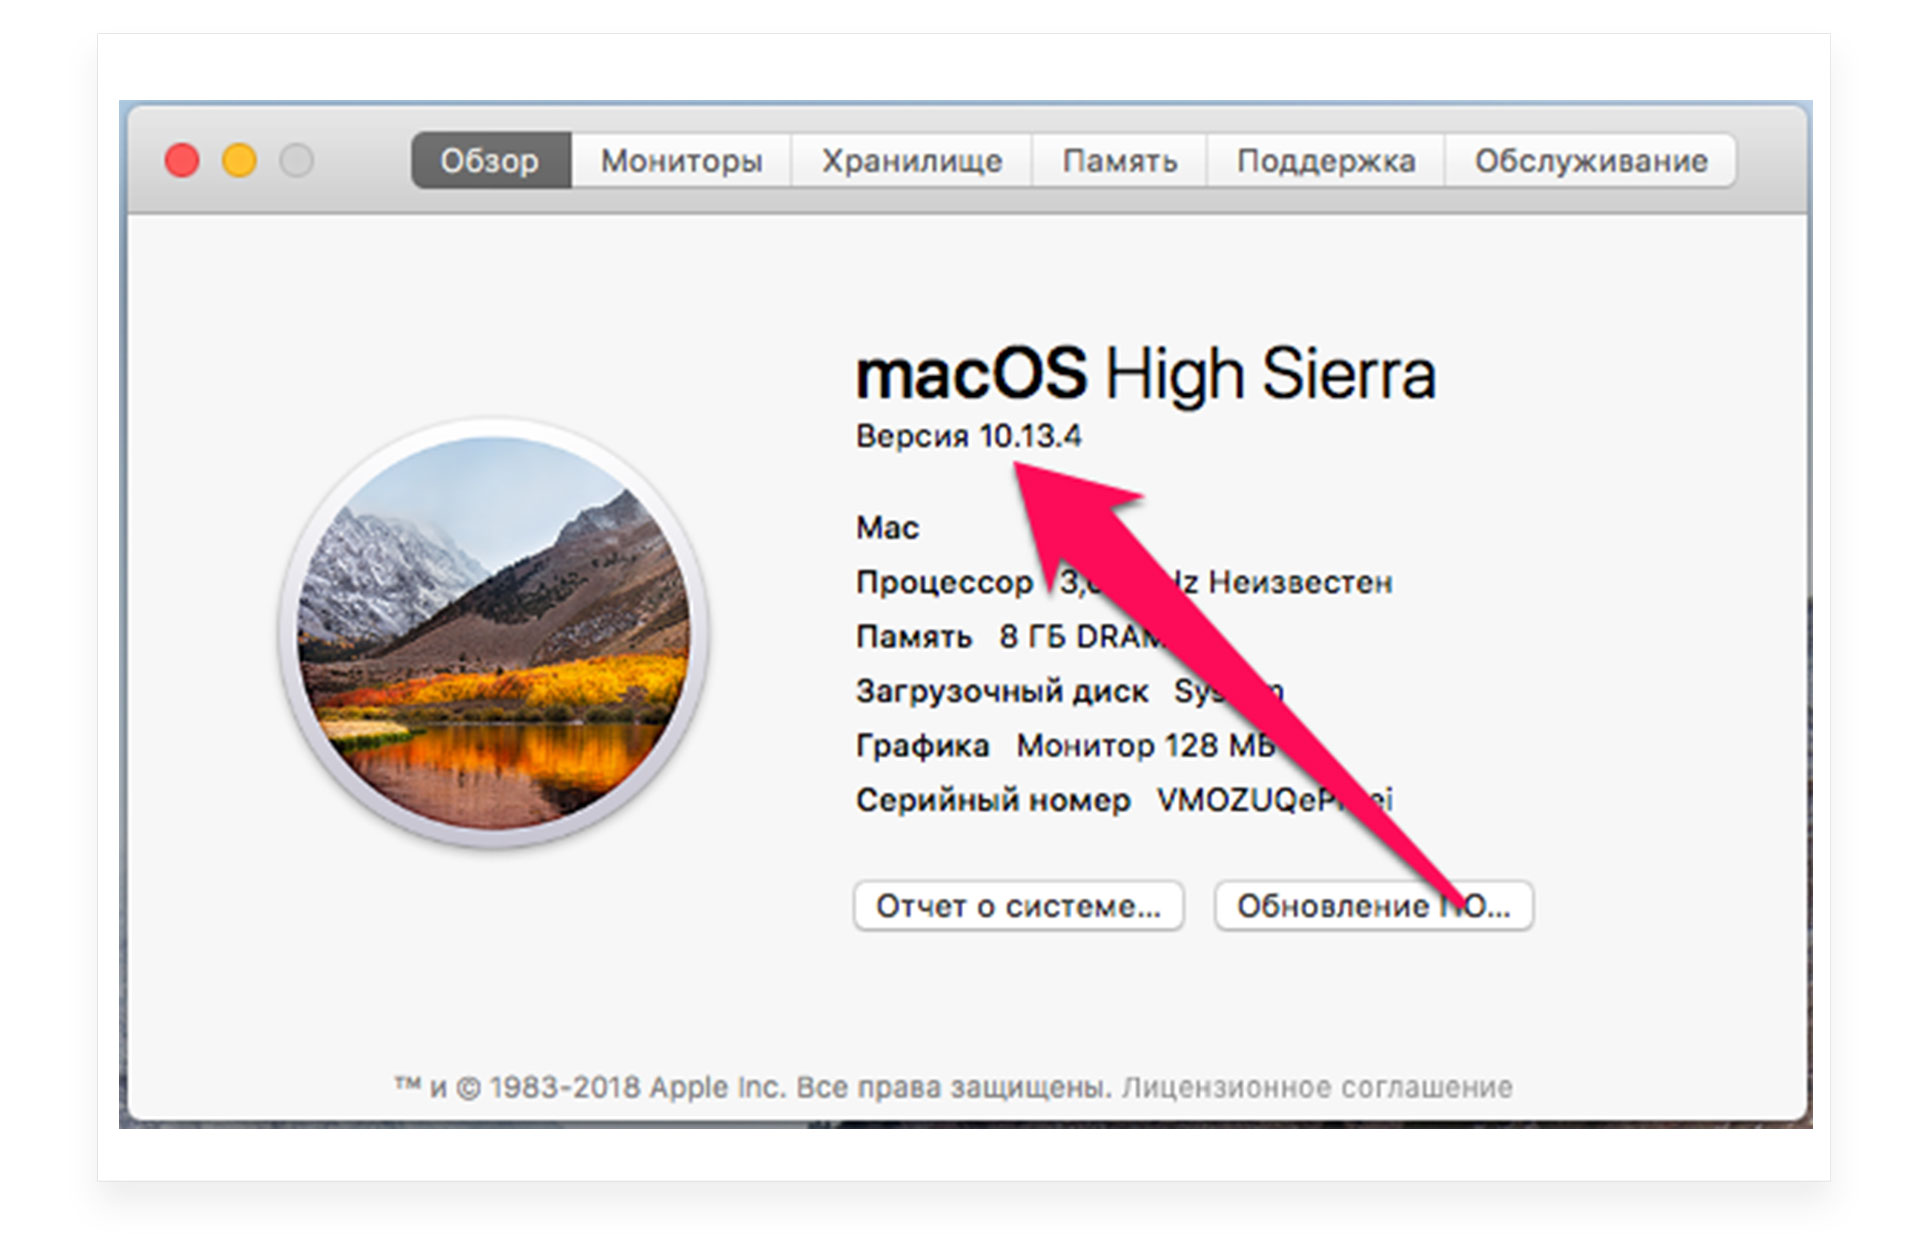
Если на MacBook установлена не последняя macOS, то давайте обновим устройство.
Свободное место для обновления
Перед обновлением MacBook убедитесь, что на устройстве достаточно свободного места для установки системы. Для скачивания новой версии macOS понадобится до 20 ГБ свободного пространства. Если вы хотите скачать новые версии установленной системы, то в этом случае будет достаточно около 4 ГБ свободного пространства. Если хранилище переполнено, то перед тем, как обновить устройство, сначала освободите память. Проверьте хранилище:
- Нажмите на меню «Apple» и выберите «Об этом Mac».
- Перейдите в раздел «Хранилище».

Перед любым способом установки или обновления macOS обязательно делайте резервную копию информацию. Это сохранит все ваши файлы в случае сбоя во время обновления и поможет максимально быстро восстановить всё необходимое, если что-то пойдет не так.
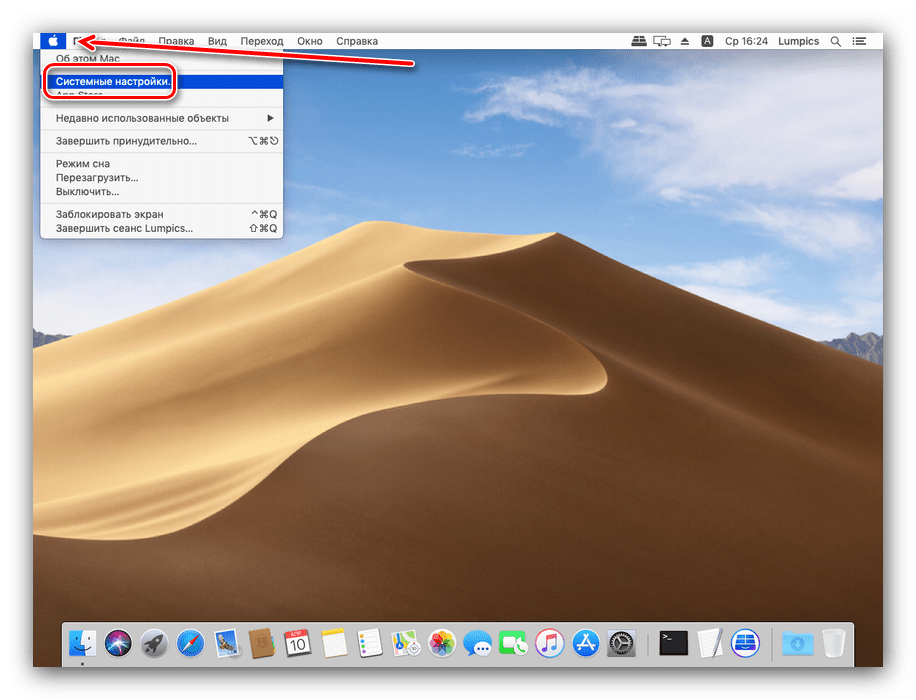
- Перейдите в меню Apple в углу экрана и нажмите «Системные настройки».
- Выберите «Обновление ПО».
- Нажмите «Обновить сейчас» или «Обновление ПО»:
- Если на экране отображается кнопка «Обновить сейчас», то это значит, что доступны последние обновления установленной версии ОП вашего MacBook.
- Если вы видите пункт ««Обновление ПО», то доступна новая последняя версия macOS для вашего макбука.

- Дождитесь установки программного обеспечения.
Восстановление системы
Существует альтернативный вариант апгрейда макбука — восстановление операционной системы. Если вы используете ноутбук прошлогодних моделей, то после нового обновления он может работать не так хорошо, как раньше. В таком случае можно откатить macOS и совершить восстановление предыдущей версии операционной системы:
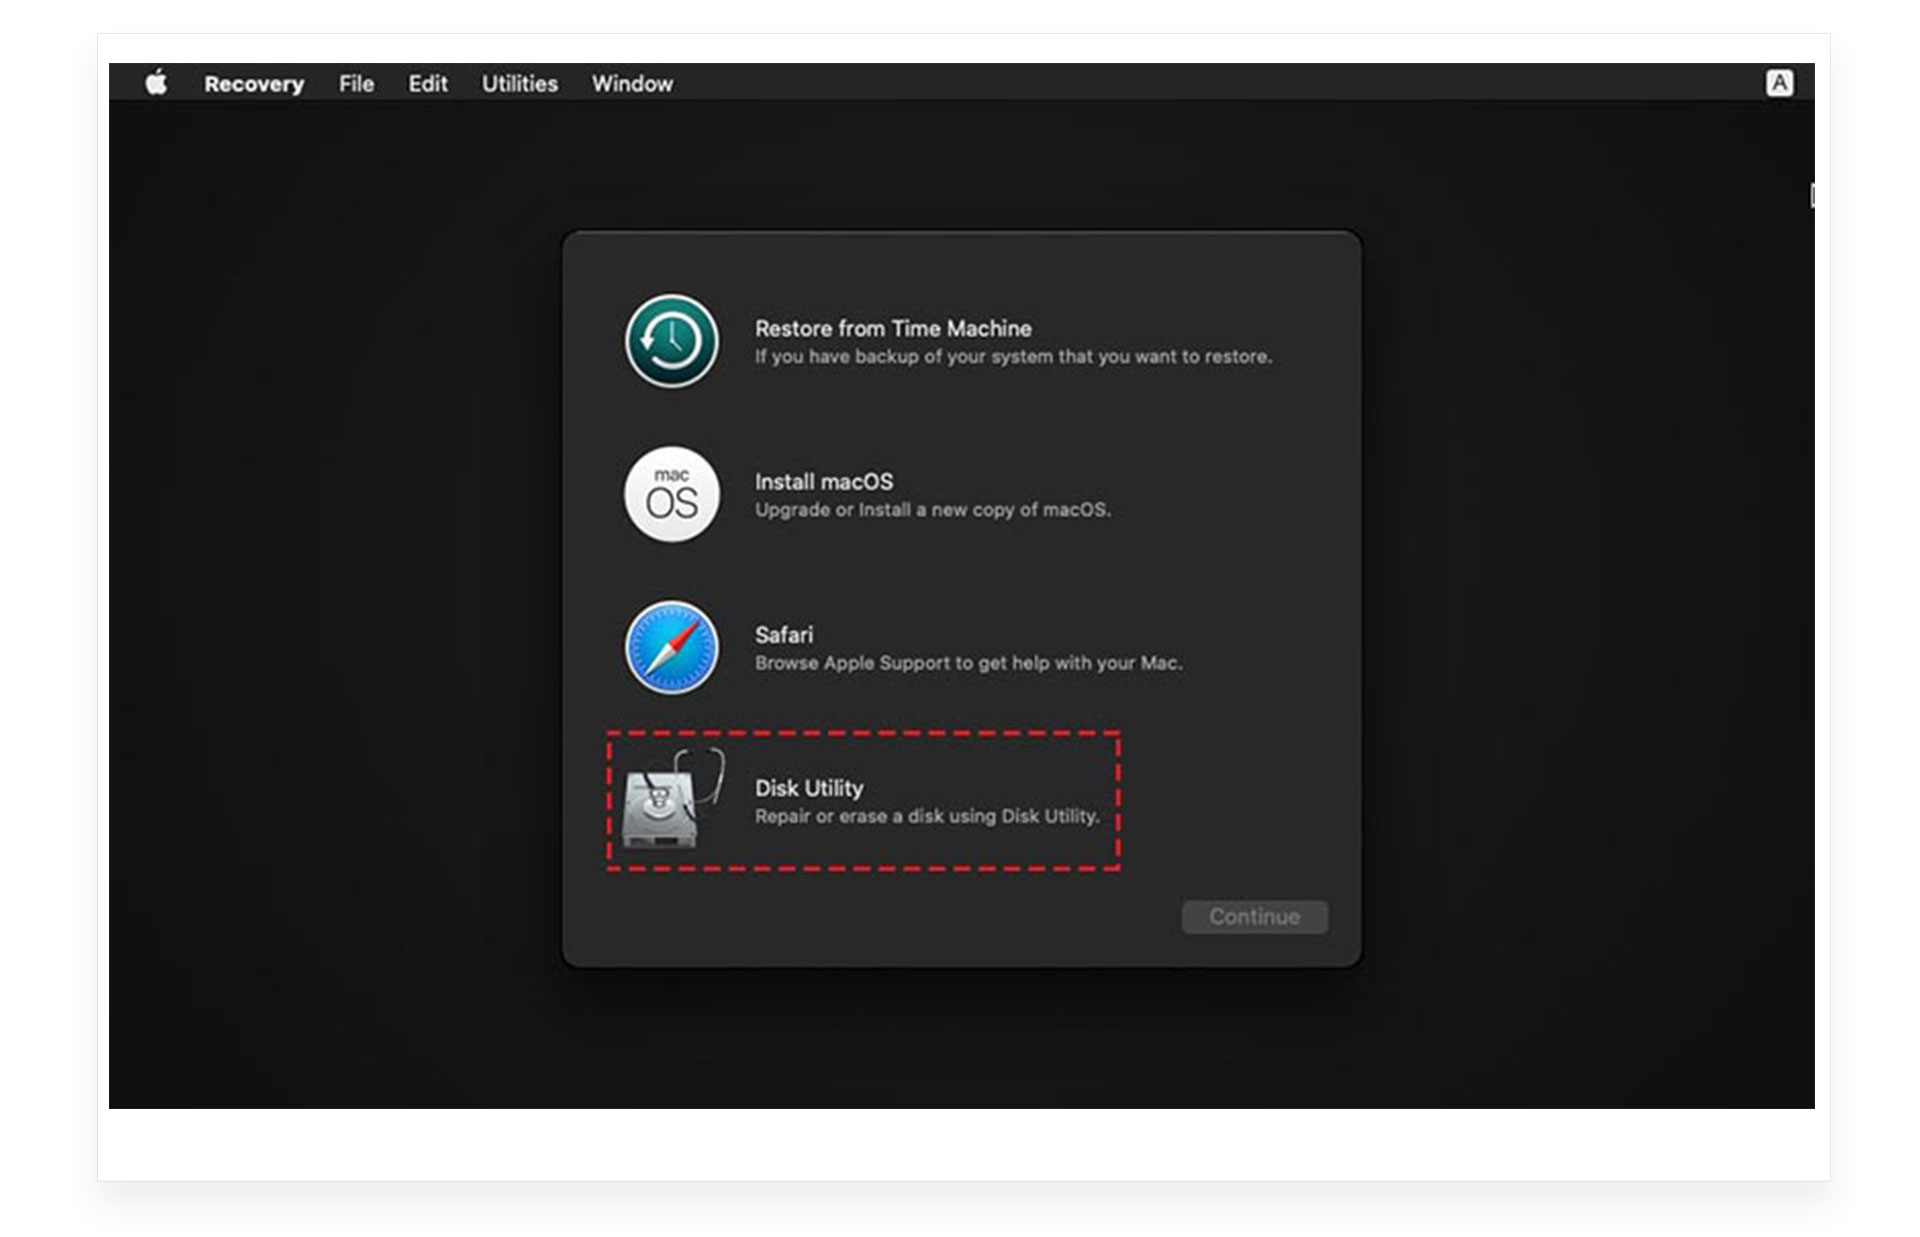
- Включите макбук и во время его загрузки зажмите горячие клавиши Command + R.
- Вы увидите на экране яблочный логотип или вращающийся глобус.
- Во всплывающем окне режима восстановления выберите «Переустановить macOS» и кликните «Продолжить».

- На экране макбука отобразятся шаги и подсказки, как правильно восстановить предыдущую версию операционной системы.
Полный рестарт макбука из AppStore
Есть возможность сделать полное обновление до последней версии системы через AppStore. Этот процесс занимает около часа времени, в зависимости от скорости интернет-соединения.
- Выберите последнюю версию операционной системы, которую поддерживает ваш макбук.
- Зайдите в приложение AppStore на MacBook.
- В строке поиска напишите название обновления, которое хотите установить на ноутбук, например, macOS Big Sur.
- Откройте страницу последней версии обновления и нажмите «получить» или выберите ярлык загрузки iCloud.
- Подождите загрузки обновления на MacBook.
- После того, как последнее обновление будет скачено на макбук, появится программа установки.
- Кликните «Продолжить» во всплывающем окне и следуйте подсказкам на экране.
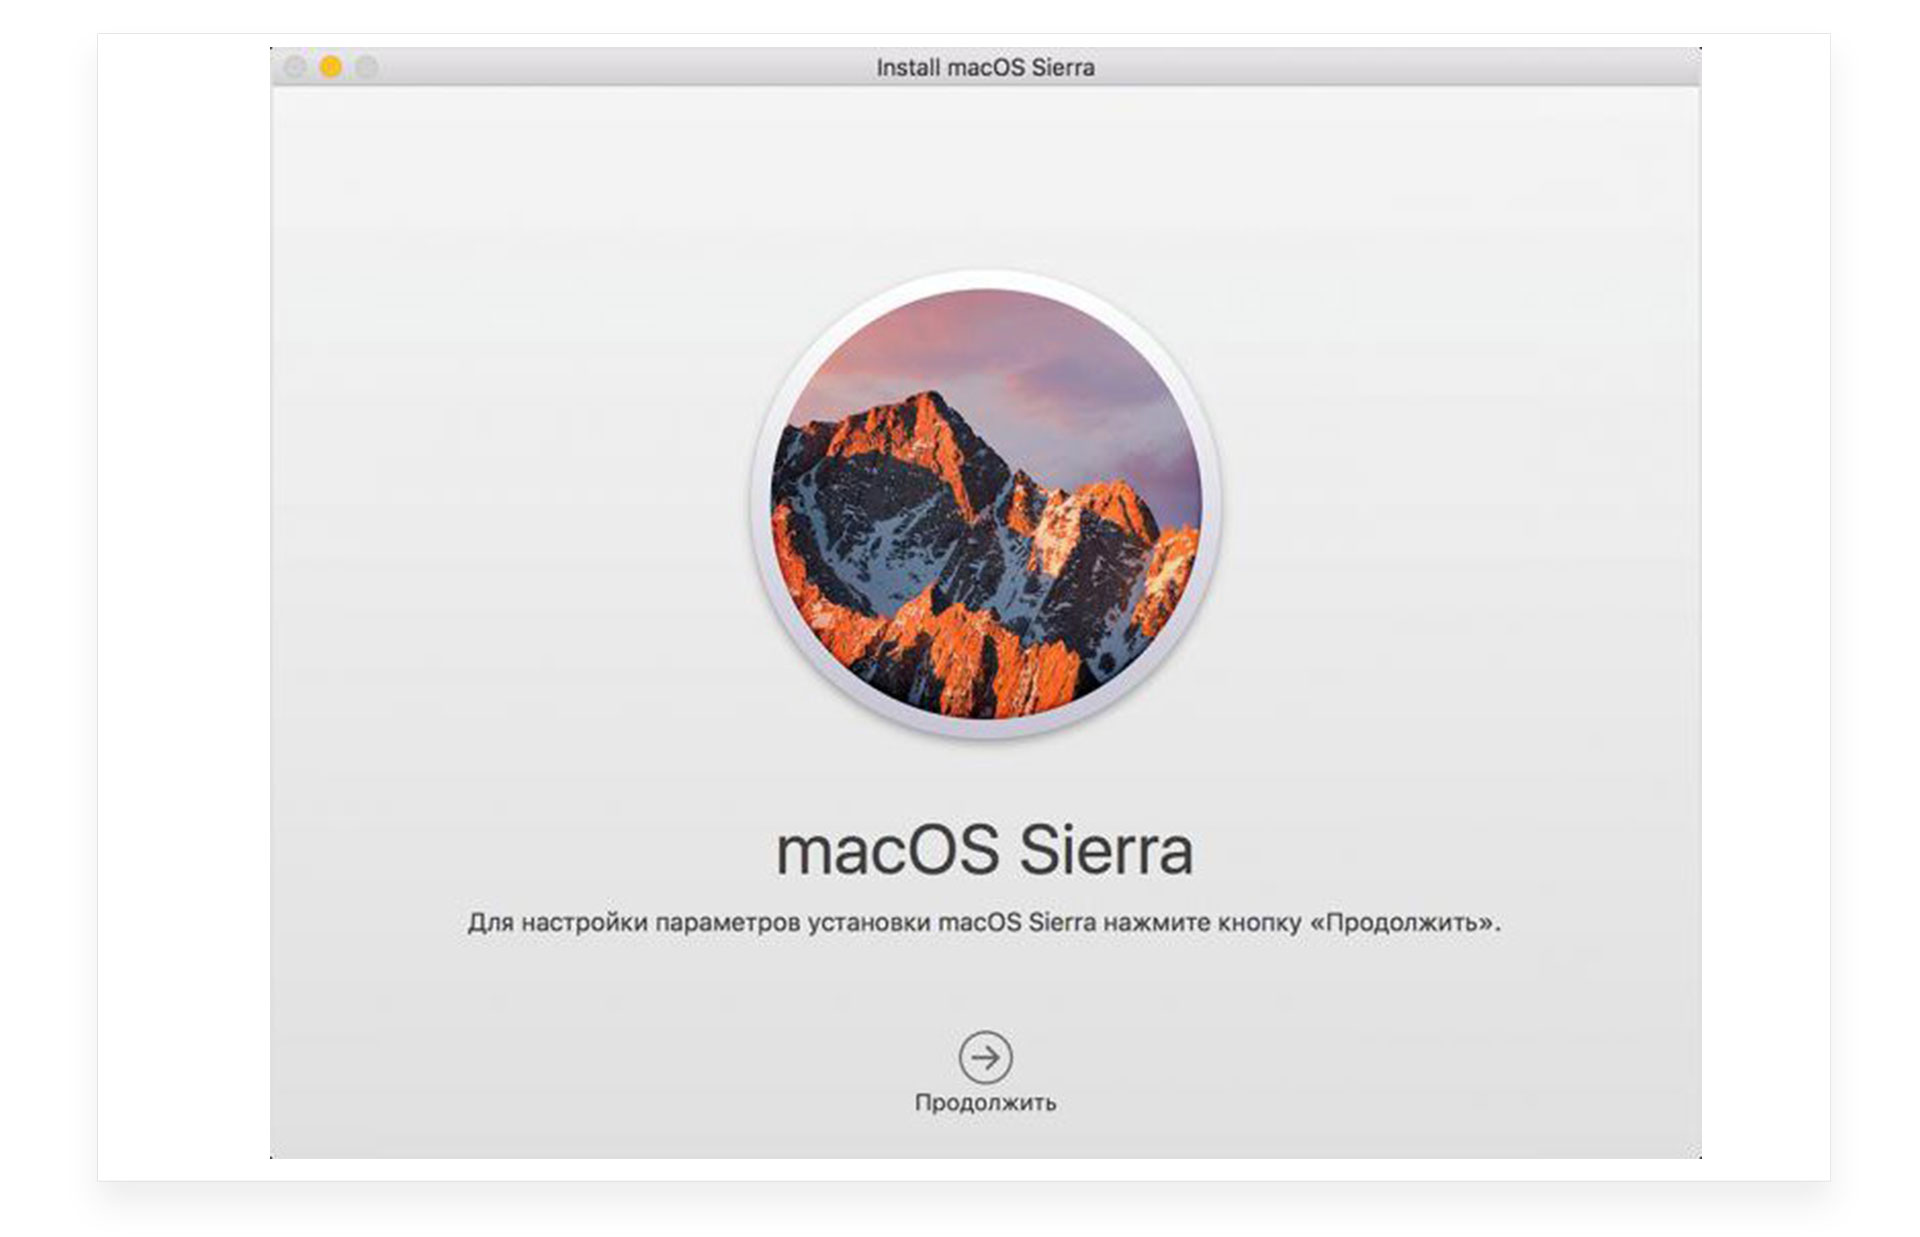
- Пока идёт установка, не выключайте макбук и не переводите его в спящий режим. Во время установки последней версии macOS макбук может перезагружаться, на экране может отображаться индикатор хода выполнения установки или не высвечиваться никакая информация.
После установки новой macOS вы будете получать уведомления, когда появятся новые версии системы.
Как обновить макбук с флешки?
- Для того, чтобы установить на ноутбук последнюю версию ОС, можно воспользоваться флешкой. Для этого вам понадобится USB-накопитель минимум на 16 ГБ памяти с наименованием «Untitled».
- Скачайте в AppStore последнюю версию операционной системы, подходящей для вашего MacBook, на флешку.
- Через программы MacDaddy Install Disk Creator или DiskMaker X переведите флешку в устройство для загрузки файлов.
- Если вы пользуетесь программой MacDaddy Install Disk Creator, то найдите свой USB-накопитель в перечисленных, выберите «Select the OS X Installer» і кликните на последнюю версию обновления. Для завершения форматирования кликните «Create Installer», и начнётся подготовка флешки.
- Если вы пользуетесь программой DiskMaker X, то выберите необходимую ОС и кликните «Erase then create a disk». После этого вся информация сотрётся с накопителя и начнётся его адаптация к дальнейшему процессу.
- После скачивания операционной системы на флешку установите USB-накопитель в макбук и выполните все подсказки по установке, которые появятся на экране.
Проблемы и их решения во время обновления Макбука
В процессе обновления системы могут возникать ошибки, изучите варианты их решения, чтобы избежать дальнейших проблем:
- Перезагрузите макбук.
- Проверьте, верную ли версию ОС вы выбрали для обновления.
- Повторите все действия для обновления устройства снова.
Восстановить ОС или обновить любую версию макбука не составит труда, если вы будете выполнять все действия последовательно. Система Apple интуитивно понятна, и во время всех процессов на экране будут отображаться необходимые шаги и подсказки. Все macOS появляются в AppStore и доступны для скачивания, и установки абсолютно бесплатно. Придерживайтесь всех подсказок, которые появляются во время обновления системы, не выключайте гаджет до момента окончания установки, и у вас получится самостоятельно обновить макбук до последней версии ОС.
Остались вопросы?
Поделиться:
At times, out-of-date software may be a real concern since it might be buggy or pose a security risk. Keeping your Mac software up to date is essential for this reason.
On the other hand, how can you ensure that your computer is always updated? So, let’s look at the most recent macOS update and how to enable updates for your Mac. And since there’s no one-size-fits-all maintenance option, let’s take a look at different MacOS updates and what suits you the best.
What is the Latest Version of macOS?
On October 25, 2021, Apple published macOS 12.0 Monterey, the most recent operating system version. While MacOS 13 is expected to arrive in October 2022. About once a year, Apple releases a new major version. The Mac App Store offers these updates for free. Known as macOS Monterey, the latest version of Apple’s Mac operating system is macOS 12.0. OS X 10.8 is Mac’s eighteenth major version.
Following are some of the new features that the new macOS update offers:
Universal Control lets you utilize a single mouse, trackpad, and keyboard to move information across Macs and the iPad. The Mac may be used as a speaker for multiroom music and can AirPlay movies, games, photographs, and more from an iPhone or iPad.
Safari features an optional new tab bar style that fades into the background and Tab Groups for combining active tabs to make switching between jobs easier. Tab Groups may be shared between devices.
FaceTime offers spatial audio, so voices sound like they’re coming from the screen, while Voice Isolation takes out background noise. Multiple call participants may use the Wide Spectrum sound mode. Portrait Mode blurs your backdrop like iPhone images.
With SharePlay, users may view movies and TV episodes, listen to music, and share their screens via FaceTime and third-party applications. Shared With You in Messages saves material in Photos, Safari, Podcasts, News, and Apple TV.
All iPhone shortcuts (and more) will be accessible on the Mac with macOS Monterey. Apple’s Shortcuts software is embedded throughout macOS to launch shortcuts from the menu bar, Finder, Spotlight, Siri, etc.
See More: macOS Version History
People adore Macs and hate them. You may criticize their OS, expensive gear, and slick, elite style. Let’s compare these Macs to find the best one for you.
Sierra (macOS 10.12)
Apple renames Sierra «macOS» Apple Watch unlocks a Mac, among other iOS advantages. A new Storage Optimization function provides a complete storage overview and space-saving tips. Siri!
High Sierra (macOS 10.13)
macOS High Sierra introduces HEIC and Apple File System (APFS), an enhanced replacement to HFS+. There are minor improvements to Safari, Mail, and Photo.
Mojave (macOS 10.14)
This update lets mac users change the screen colors to match their day-to-night schedule. iOS has additional applications like Stocks, News, and Home.
Catalina (macOS 10.15)
macOS Catalina splits iTunes into Music, Podcasts, and Movies. Sidecar lets you connect an iPad screen to your Mac, and developers can convert iOS programs to macOS.
Monterey (macOS 12.0)
macOS Monterey adds Shortcuts to automate your workflow using applications. Universal Control, a fluid transition between Mac and iOS devices (you can transfer your pointer between Mac and iPad), updated Safari with tab groups, and amazing FaceTime features.
![]()
MacOS Comparison: Monterey vs Big Sur
Do you want to upgrade your macOS to Monterey? What are the main differences between macOS Big Sur vs Monterey? Learn all about the new features and advancements of Monterey than Big Sur.
Why Should You Upgrade Your macOS to the Latest Version?
Apple releases a new version of its macOS operating system every year, and these upgrades are free to download and install. There are many good reasons to upgrade your macOS to the latest version. Whether you’re looking for better performance, new features, or compatibility with newer devices and software, upgrading is often a good idea.
- First, newer versions of macOS usually include performance improvements and bug fixes. Upgrading your macOS to the latest version can help your Mac run more smoothly and efficiently.
- Additionally, new versions of macOS often introduce new features that can make your life easier or help you be more productive. So if you’re looking for a reason to upgrade, performance and new features are two good ones.
- Finally, upgrading to the latest version of macOS helps ensure that your Mac will be compatible with the latest software and peripherals. If you’re using an older version of macOS, you may find that some newer apps and devices don’t work properly. Upgrading to the latest version can help solve this problem.
How to Upgrade to the Latest macOS?
Update or upgrade macOS and built-in programs like Safari using the Software Update feature. Back up your Mac before starting. Follow these instructions to install software updates.
Step 1: Choose System Preferences from the Apple menu.
Step 2: Select Software Update in System Preferences.
Step 3: Click Update/Upgrade Now:
If you want to know more solutions to upgrade macOS, please read the following article.
Everything You Should Know about macOS Update
Will Upgrade macOS Cause Data Loss?
In general, updating macOS doesn’t destroy user data. Preinstalled programs and settings are preserved. When a new major macOS version is introduced, many people upgrade.
However, upgrading macOS causes data loss can also occur if you have incompatible third-party software or peripheral connected to your computer during the upgrade process.
If there are unexpected circumstances during the upgrade process: for example, the computer runs out of power and suddenly crashes, causing the system upgrade to be unexpectedly interrupted. And if the upgrade takes too long, it may also cause data loss.
How to Recover Lost Data After macOS Update?
If you experience any data loss after upgrading your macOS, the first thing you should do is check for backups. If you don’t have any backups, you may be able to use data recovery software to recover lost files.
EaseUS Data Recovery Wizard is a powerful file recovery tool that’s simple. It’s packed with functionality, looks excellent, and requires no work. EaseUS Data Recovery Wizard is an amazing Mac data recovery alternative with an aesthetically beautiful and user-friendly UI. Not just appearances. The software can retrieve data from Time Machine backups.
It also has a file filter that helps you limit results, a bootable DVD option that lets you recover data even if your OS doesn’t start, and a «Recover to Cloud» tool that saves recovered files straight to Cloud storage.
Note: You can create a backup by clicking the «Disk Backup» on the left first. When the disk is damaged or the data on the disk is accidentally deleted or lost, you can get the data back from the backup image.
Step 1. Select the location
Select the disk where you lost data after updating to macOS Sonoma/Ventura/Monterey/Big Sur. Then, click «Search for lost files».

Step 2. Find lost data after the scan
EaseUS Data Recovery Wizard for Mac will immediately scan your selected disk volume and display the scanning results on the left pane. Use the file type and file path to find wanted data on Mac.

Step 3. Recover data after macOS update
Select the target files that were unknowingly lost during or after the update and click the «Recover» button to get them all back.

Final Thoughts
This article introduces you to the latest version of the macOS system and introduces you in detail on how to upgrade to the latest system and how to retrieve lost data. We highly suggest utilizing the EaseUS Data Recovery Wizard to recover lost data during the macOS upgrade. Even if you want to recover data from a formatted hard drive, EaseUS Data Recovery Wizard can also help you to do so.
Содержание:
- Особенности и требования новой версии
- Процедура обновления до macOS Mojave
- Возможные проблемы и их решения
- Заключение
- Вопросы и ответы: 4
Продвинутые пользователи компьютеров, как и специалисты по безопасности, рекомендуют использовать новейшие версии программного обеспечения, в том числе и операционных систем. Далее мы хотим рассказать о процедуре обновления iMac или MacBook до новейшей версии macOS.
Особенности и требования новой версии
Самой свежей на момент написания настоящей статьи является macOS Mojave 10.14.3, выпущенная в октябре 2018 г. Из заметных новшеств этот релиз принёс долгожданную тёмную тему оформления, более глубокую интеграцию ассистента Siri, средство систематизации файлов «Стеки», а также улучшенный инструментарий для снятия скриншотов. Общие системные требования для установки этого обновления выглядят так:
| Системные требования | |
|---|---|
| Версия OS X | 10.8 или новее |
| Оперативная память | 2 Гб |
| Свободное место на диске | 12,5 Гб |
Обратите внимание, что Мохаве получится установить не на все устройства Apple – убедитесь, что ваше соответствует списку далее.
| Устройство | Год выпуска |
|---|---|
| MacBook | 2015 г. или позже |
| MacBook Air | 2012 г. или позже |
| MacBook Pro | 2012 г. или позже |
| Mac mini | 2012 г. или позже |
| iMac | 2012 г. или позже |
| iMac Pro | 2013 г., 2010 г. и 2012 г. с видеокартой, поддерживающей технологию Metal |
| Mac Pro | 2013 г., 2010 г. и 2012 г. с видеокартой, поддерживающей технологию Metal |
Процедура обновления до macOS Mojave
Перед тем как перейти к обновлению, рекомендуем сделать резервную копию посредством Time Machine: во-первых, это поможет вернуть функциональность компьютеру в случае проблем с апдейтом; во-вторых, обезопасит важные данные; в-третьих, позволит откатиться, если обновление вас не устроит.
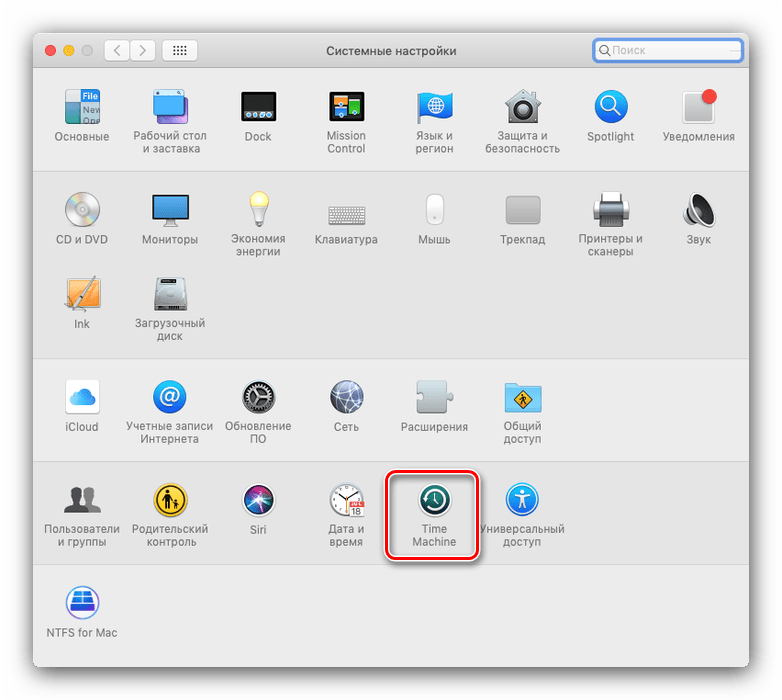
- Откройте меню Apple и выберите «Системные настройки».
- Найдите пункт «Time Machine» и воспользуйтесь им.
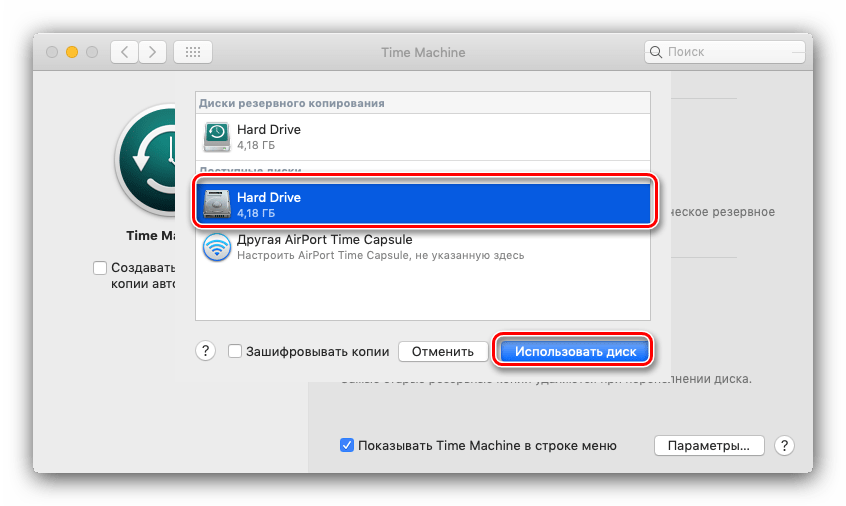
- Нажмите на пункт «Выбрать резервный диск». Используйте один из внутренних накопителей или подключите внешний, как рекомендует сама компания Эппл.
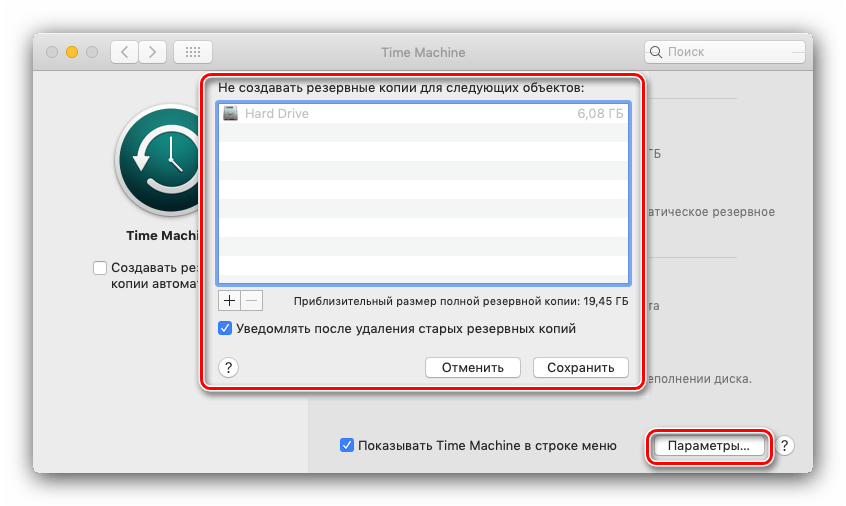
- В меню «Параметры» настройте процесс создания резервной копии.
- Дождитесь, пока бэкап будет создан.

Теперь можно приступать к обновлению.
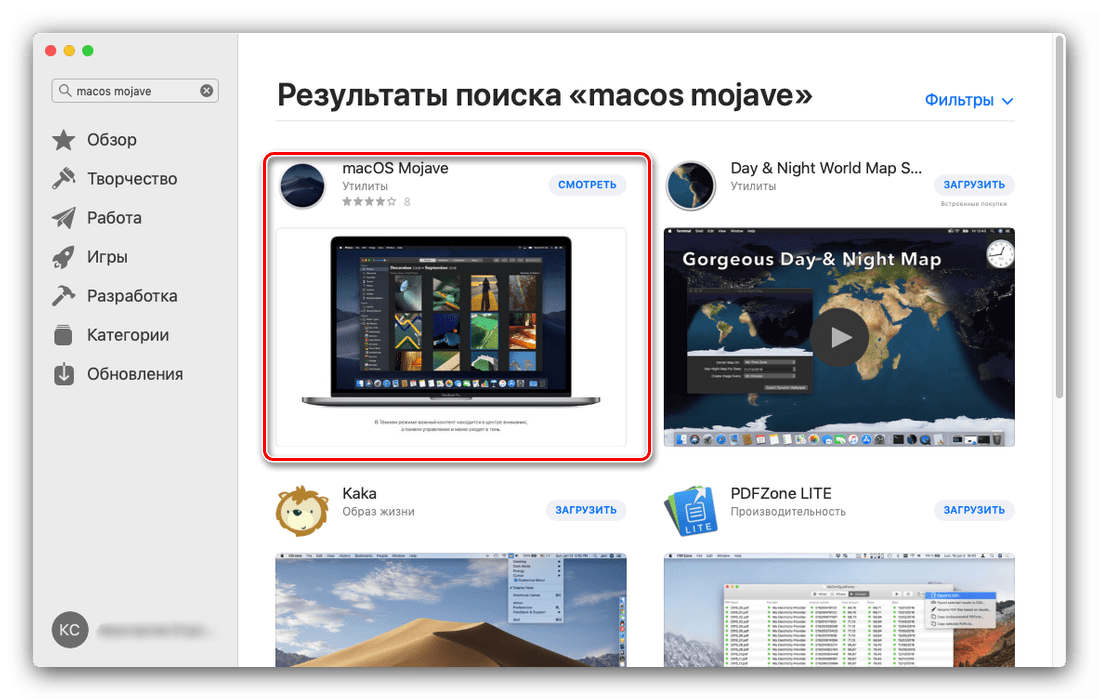
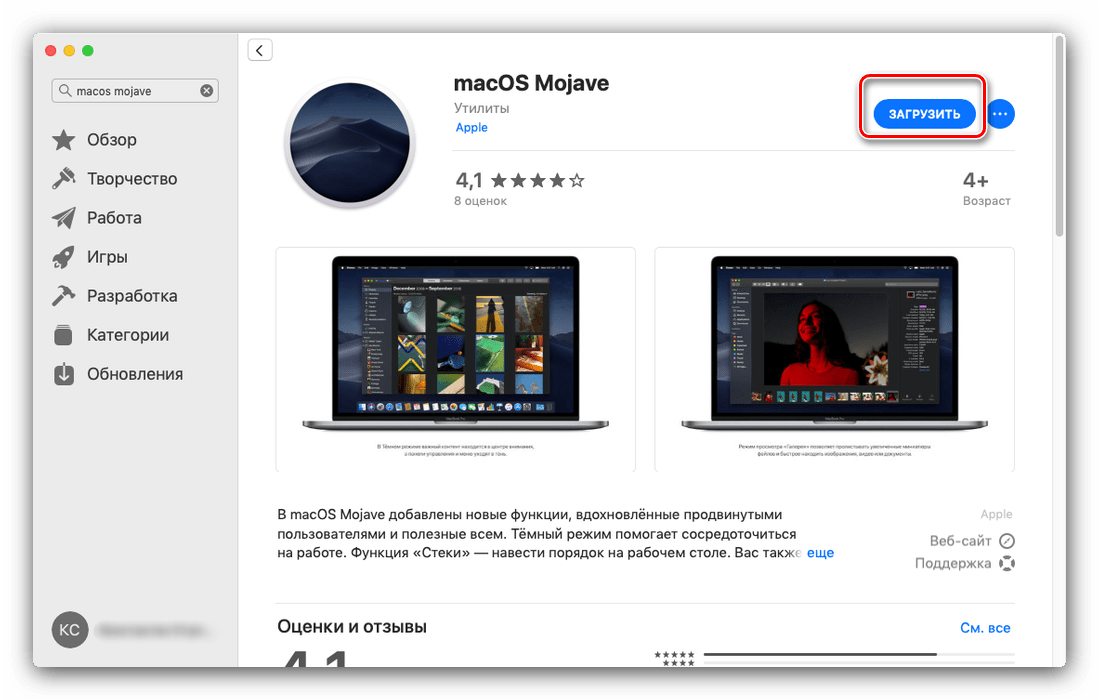
- Откройте Mac AppStore из панели Dock.
- Воспользуйтесь поиском, в который введите запрос macos mojave.

Выберите результат из категории «Утилиты».
- Нажмите на кнопку «Загрузить», чтобы начать скачивание установочного файла.
Обратите внимание! Инсталлятор имеет размер около 6 Гб, поэтому процесс загрузки может занять длительное время!
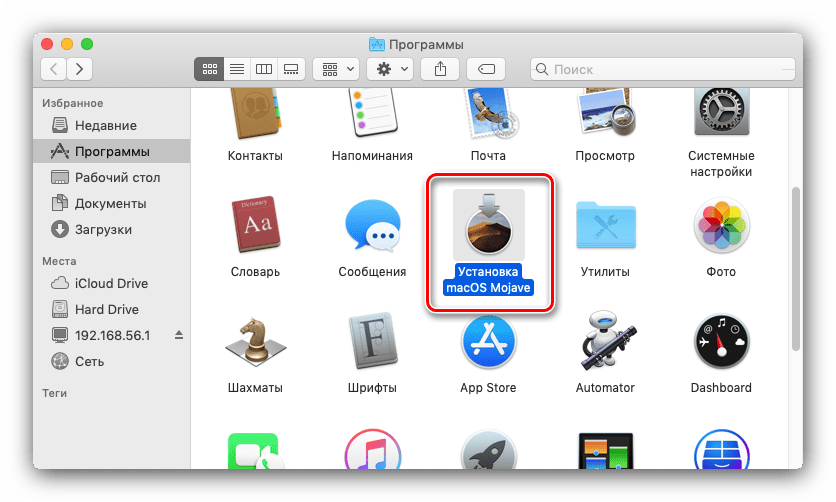
- По окончании загрузки откройте Finder и переходите к каталогу «Программы».

В них должен появиться новый пункт под названием «Установка macOS Mojave». Запустите это приложение.
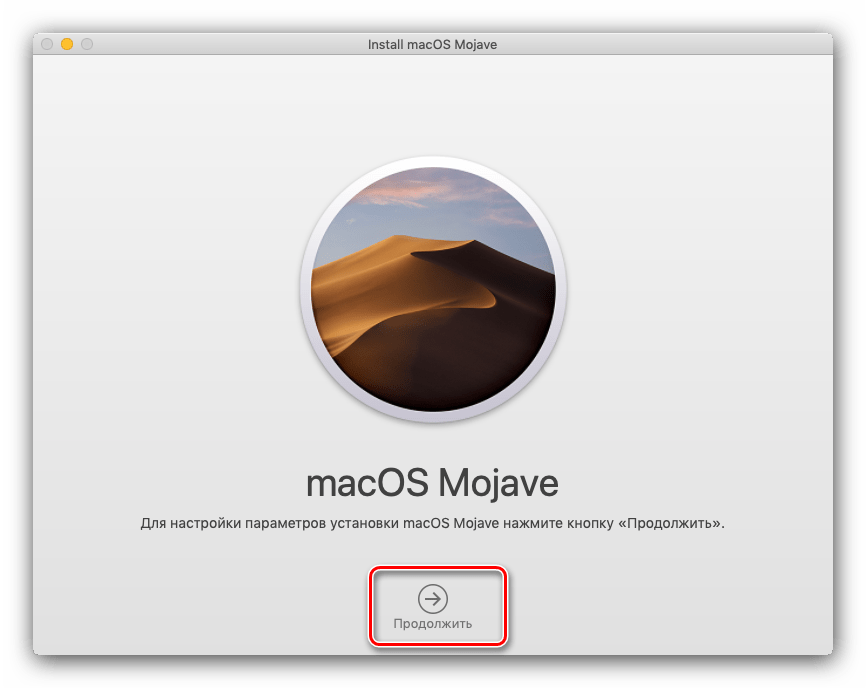
- Выберите пункт «Продолжить».

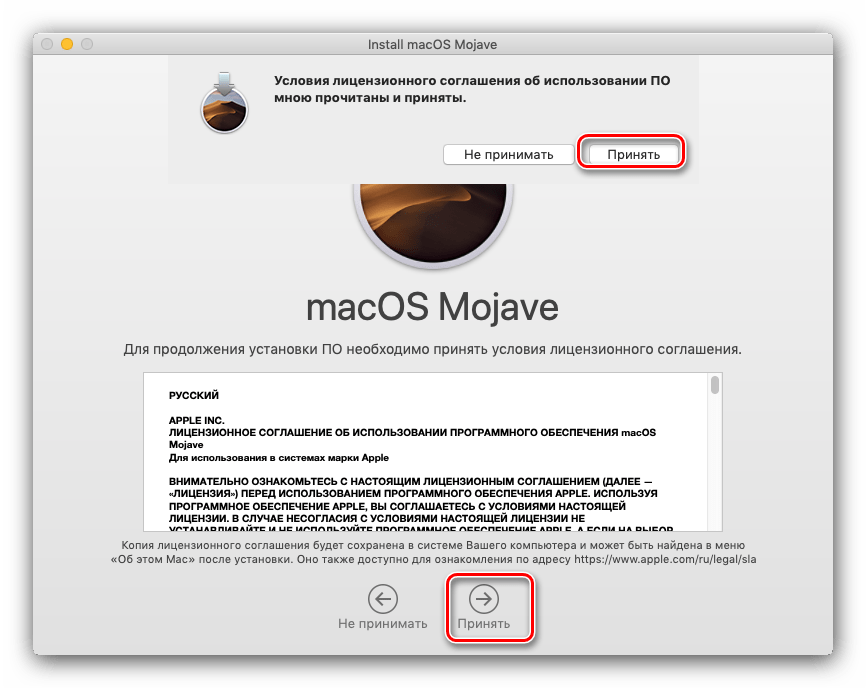
Также потребуется принять лицензионное соглашение.
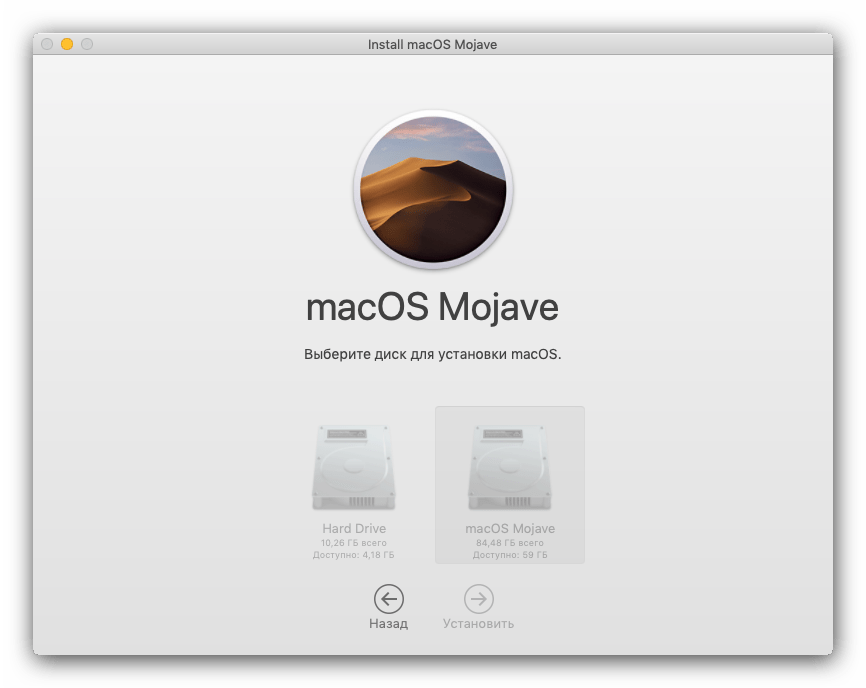
- Далее инсталлятор предложит выбрать диск для установки новой версии макОС. Чаще всего будет доступен основной накопитель, «macintosh HD», его и выбирайте.
- Начнётся процедура инсталляции новейшей версии. Она может занять некоторое время, до 30 минут. В процессе компьютер будет несколько раз перезагружен – не обращайте внимания, это нормально, нужно просто подождать.
- Как правило, обновление подхватывает все пользовательские настройки, поэтому после установки потребуется лишь ввести пароль администратора и выбрать светлое или тёмное оформление системы.


Готово – ваше устройство Apple обновлено до новейшией версии операционной системы.
Возможные проблемы и их решения
Некоторые пользователи могут столкнуться с трудностями в процессе загрузки или установки обновлений. Ниже мы опишем самые частые проблемы и методы их устранения.
Инсталлятор Mojave загружается слишком долго
В первую очередь проблема заключается в недостаточно быстром соединении с интернетом. Также зависать загрузка может при обрыве связи или проблемах с серверами Эппл. Последнее можно проверить по следующей ссылке.
Проверка статуса серверов Apple
Также есть резон использовать проводное соединение, а не Wi-Fi – просто подключите ваш компьютер к роутеру или вставьте кабель интернета в соответствующий разъём.
Инсталлятор выдаёт ошибку «macOS could not be installed on your computer»
Если инсталлятор новейшей макОС сообщает, что не может установить обновление, проделайте следующее:
- Закройте установщик сочетанием клавиш Command+Q.
- Проверьте, хватает ли на жестком диске/SSD свободного места: напоминаем, что для macOS Mojave нужно не менее 12,5 Гб пространства. Также не помешает проверить состояние накопителя посредством «Дисковой утилиты».
- Убедитесь, что характеристики целевого компьютера соответствуют системным требованиям устанавливаемого обновления.
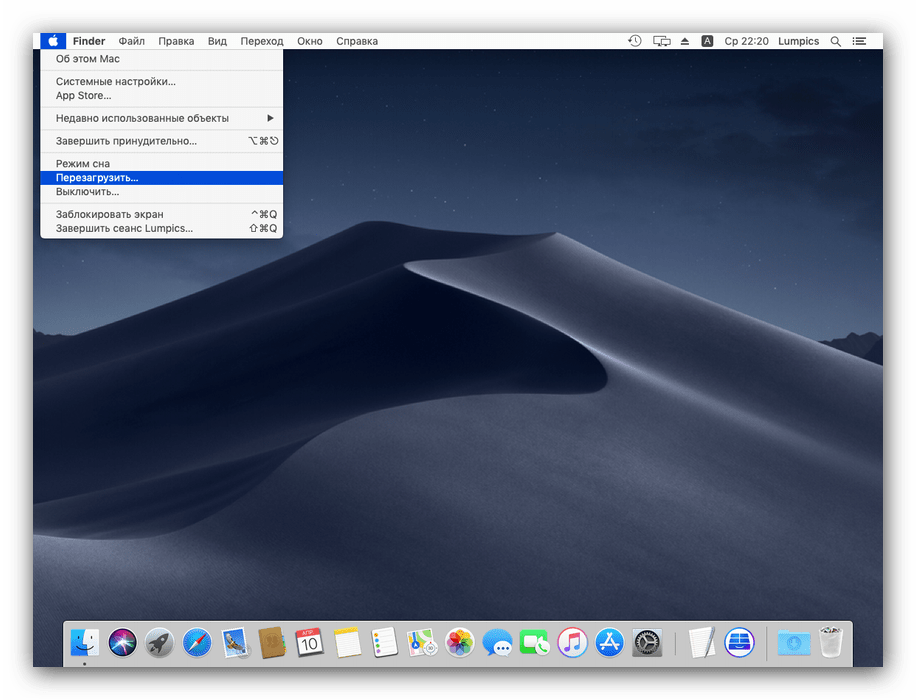
- Перезагрузите компьютер (меню Apple – «Перезагрузить…») и попробуйте запустить установку снова.
Если опять получаете ошибку, закройте инсталлятор и выключите компьютер. Затем включите снова, но на этот раз с зажатой клавишей Shift: это инициирует загрузку системы в «Безопасном режиме», где работают только важные системные компоненты. После полного включения устройства попробуйте провести процедуру инсталляции обновления.
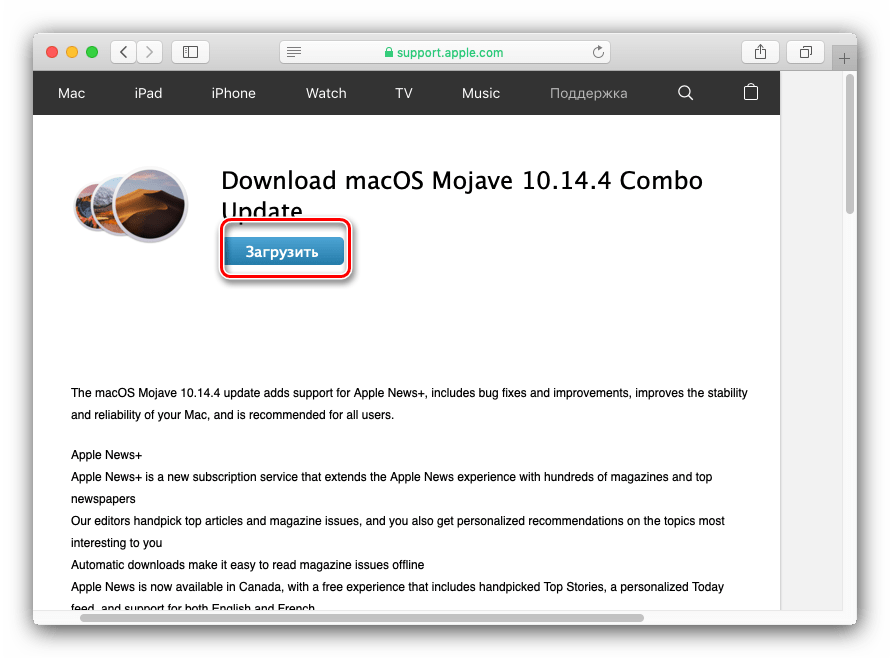
- Если «Безопасный режим» не помог, попробуйте установить Combo-версию обновления – скачать её можно с официального сайта Apple по ссылке далее.

Скачать Combo installer macOS Mojave
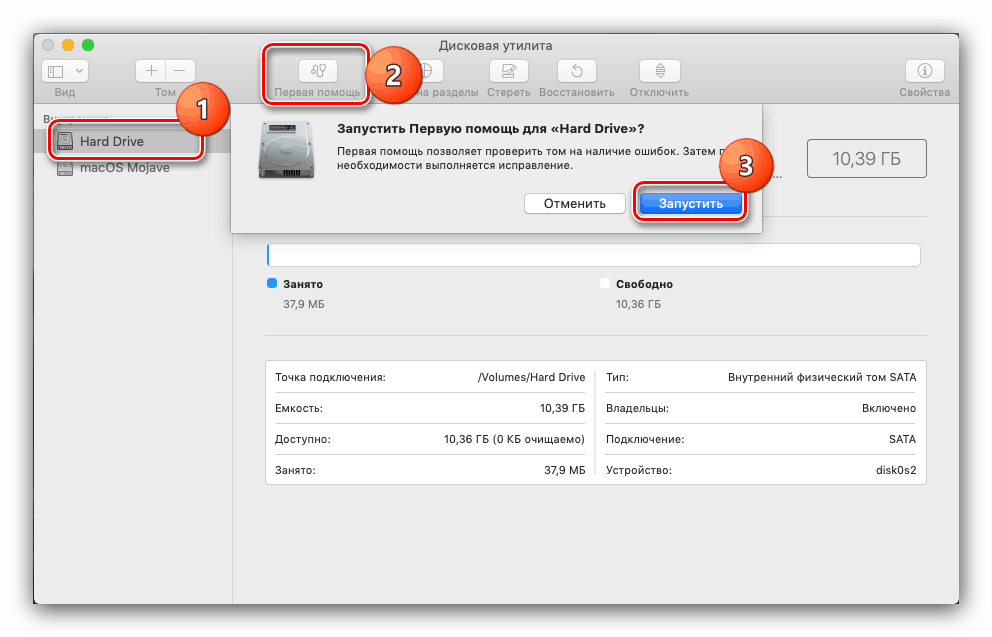
Урок: «Дисковая утилита» в macOS
Дело в том, что апдейт из AppStore неполный – в нём отсутствуют некоторые системные файлы. Эти данные могут быть повреждены на конечной системе, отчего их потребуется заменить. В этом и поможет Комбо-версия инсталлятора. Установка этого варианта ничем не отличается от обычной, но занимает чуть больше времени.
Установка прошла некорректно, компьютер не загружает систему
Если на последнем этапе инсталляции что-то пошло не так, и компьютер не может загрузиться в систему, зайдите в режим восстановления и восстановитесь из резервной копии либо переустановите ОС.
Подробнее:
Как восстановить macOS
Переустановка macOS
Заключение
Установка последней версии macOS представляет собой простую задачу, но при условии соответствия аппаратных характеристик устройства системным требованиям для апдейта.
Поделиться статьей:
Помогла ли Вам статья?
In this article you will find the following:
- How to update macOS on your Mac
- How to set your Mac to automatically update macOS
- How to update the apps on your Mac
- How to update all your Mac software instantly
- FAQ
- 1. Why can’t I update macOS on my Mac?
- 2. What is the latest version of macOS?
- 3. Is my Mac too old to update?
- 4. Should I update my Mac?
It’s important to regularly check for and install software updates on your Mac. Updates to macOS — the operating system on your Mac — might add new features to your computer, improve the power efficiency, or fix problematic software bugs.
But alongside the operating system, it’s also important to update the apps on your Mac to ensure everything is working as it should be.
In this guide, we’ll show you how to update macOS automatically. Also, we’ll take you through the process of updating your apps with a single click—the magic possible thanks to MacKeeper’s Update Tracker.
How to update macOS on your Mac
If you’re starting a new habit of upgrading your macOs, we’re glad to hear. Follow these steps to check for new Apple software updates on your Mac:
- Go to the Apple menu and choose About This Mac
- Click Software Update in the window that opens
- Check for available macOS updates. The System will search for new macOS updates, and you’ll need to wait a short while
- If it finds any, you’ll see it soon. Click Upgrade Now to download and install that update
- If the update is already downloaded, click Restart Now to install it instead.


Note from our experts: It could take anywhere between five minutes and five hours to download and install a new software update for your Mac, depending on the size of the update and the speed of your internet connection. When the update is downloaded, your Mac will prompt you to Restart so it can install the update.
How to set your Mac to automatically update macOS
It’s a good idea to tell your Mac to update macOS automatically, so you never need to worry about missing an important update.
To do this:
- Open the Software Update page in the System Preferences
- Check the box that says Automatically keep my Mac up to date.

How to update the apps on your Mac
Just like with the operating system, it’s also important to regularly update all the apps on your Mac. Installing the latest software updates for your Mac apps ensures you’ve all the latest features with none of the latest bugs.
Unfortunately, it’s not as easy to update all your apps as it is to update macOS. This is because you need to follow a separate process to update apps you got through the App Store and apps you got outside the App Store.
To update your Mac App Store apps:
- Open the App Store on your Mac
- Click Updates in the sidebar
- If any updates are available, click Update All to download and install them.

To update Mac apps you didn’t get through the App Store, you need to visit the developer’s website and download the latest updates there. It’s also possible these apps will prompt you to update when you open them.
How to update all your Mac software instantly
The easiest way to update the software for all your Mac apps is using the Update Tracker in MacKeeper. This handy tool scans your Mac to find all your apps, then checks those apps against MacKeeper’s database to find out if you’re running the latest update or not.
After scanning your Mac apps to find out which ones need updating, you can use MacKeeper to instantly start downloading and installing all the updates with a single click.
Alternatively, you can choose exactly which apps to update and which ones to leave alone, which is particularly useful if you don’t have the internet bandwidth to download too many updates at once.
To use the Update Tracker tool:
- Download and install MacKeeper on your Mac
- Click Update Tracker in the MacKeeper sidebar
- Click Scan for Updates and wait for MacKeeper to finish scanning your apps
- When the scan is complete, MacKeeper will show a list of the Mac apps you need to update. Click Update All to start updating all those apps at once.


FAQ
1. Why can’t I update macOS on my Mac?
There are several reasons you might be unable to update your Mac. However, in our experience, the most common reason is a lack of storage space. Your Mac needs to have enough free space to download the new update files before it can install them.
Aim to keep 15–20GB of free storage on your Mac for installing updates. Check out this guide if you need help clearing free space on your Mac.
2. What is the latest version of macOS?
At the time of updating our guide, Apple’s latest software version for the Mac is macOS Ventura 13.4. However, Apple regularly releases new point updates to improve efficiency and patch software bugs, so the exact numbers are likely to change pretty regularly.
3. Is my Mac too old to update?
If you can’t update your Mac, despite having plenty of free space to do so, it’s possible that your Mac is too old for this version of macOS. Over time, Apple stops releasing macOS updates for its oldest computers to avoid performance issues when the outdated hardware can’t keep up with the software.
It’s best to check on Apple’s website to find out which models of Mac are compatible with the latest version of macOS.
4. Should I update my Mac?
Our team strongly recommends you keep your Mac running the latest software updates. Not only does this get you access to the newest features, but it also means your Mac is protected against software bugs or security breaches.
That said, if you’re dependent on certain software for your work, you should only update your Mac if you know that software will still be compatible. After big macOS updates, it often takes a couple of months before every industry-standard software works reliably on that update.
Read more guides:
- How to See Mac Battery Time Remaining
- macOS Big Sur Features & Update Guide
- How to Delete an App from Mac
- How to Factory Reset MacBook Pro, MacBook Air or iMac
- How to Downgrade From macOS Catalina to Mojave
Written By
With over 5 years of supporting Mac users, Ruslana lives and breathes everything Mac. Tech expert, Apple lover, and well, a cutie. Say hi on LinkedIn!
With over 5 years of supporting Mac users, Ruslana lives and breathes everything Mac. Tech expert, Apple lover, and well, a cutie. Say hi on LinkedIn!