
Представленная ниже информация для ознакомления, а не для коммерческого использования.
Если что-то не открывается, пишите в личку. При репосте не забывайте ссылки на этот БЖ.
+++++++++++++++++++++++++++++++++++++++++++++++
+++++++++++++++++++++++++++++++++++++++++++++++
Руководство владельца Subaru Forester I (SF) — файл pdf
disk.yandex.ru/i/DtLIPRMqvXHX4g
Руководство по сервисному обслуживанию Subaru Forester I (SF) 1997-2001 MY — zip-архив
(Мультимедийная книга Subaru Forester с 1997 г.)
disk.yandex.ru/d/2LtfvY0NzRmzww
Subaru Forester с 1997 г. выпуска. Устройство Обслуживание Ремонт (Переработанное издание) — файл pdf
drive.google.com/file/d/0…4WWNjQzg/view?usp=sharing
+++++++++++++++++++++++++++++++++++++++++++++++
Руководство по техническому обслуживанию Subaru Forester II (SG) 2004 MY — файл pdf
yadi.sk/i/NKxH1DR4m68Wzg
Руководство по эксплуатации Subaru Forester II (SG) 2005 MY — файл pdf
drive.google.com/file/d/0…5MHJmYlk/view?usp=sharing
Руководство по эксплуатации Subaru Forester II (SG) 2007 MY — файл pdf
drive.google.com/file/d/0…zdi1Cb0E/view?usp=sharing
Руководство по обслуживанию Subaru Forester II (SG) 2008 MY — файл pdf
drive.google.com/file/d/0…5ell0MDg/view?usp=sharing
+++++++++++++++++++++++++++++++++++++++++++++++
Руководство по ремонту и эксплуатации Subaru Forester III (SH) 2009 MY — файл pdf
drive.google.com/file/d/0…SUkVMT2M/view?usp=sharing
Руководство по сервисному обслуживанию Subaru Forester III (SH) 2009 MY — сжатый архив
disk.yandex.ru/d/B96-Gk7pODUIYQ
drive.google.com/file/d/0…PR21RT2c/view?usp=sharing
Руководство по сервисному обслуживанию Subaru Forester III (SH) 2012 MY — zip-архив
yadi.sk/d/WyoA6UE8prtNW
+++++++++++++++++++++++++++++++++++++++++++++++
Руководство по сервисному обслуживанию Subaru Forester IV (SJ) 2014 MY — zip-архив
drive.google.com/file/d/0…ydE1vTEk/view?usp=sharing
или
disk.yandex.ru/d/ZmJB58ifGLEsRg
Руководство по эксплуатации Subaru Forester IV (SJ) 2014 MY — файл pdf
drive.google.com/file/d/0…kM1dnS00/view?usp=sharing
+++++++++++++++++++++++++++++++++++++++++++++++
Руководство по обслуживанию и ремонту Subaru Forester SK (SM G8240GR FORESTER 19MY, версия 002) — файл ISO в rar-архиве.
yadi.sk/d/nnaihovx9Le_dQ или drive.google.com/file/d/1…_mFo-IS9/view?usp=sharing
Взято здесь cloud.mail.ru/public/HRZT/mfMRZ48dH
Руководство по эксплуатации Subaru Forester V (SK) 2019 MY — файл pdf
yadi.sk/i/H3Eh8Lm1IYQYgA
Краткое руководство по эксплуатации Subaru Forester V (SK) 2019 MY — файл pdf
yadi.sk/i/Fe1V-7hYZE59pA
Eyesight Руководство SK — файл pdf
yadi.sk/i/hZXPw5enDtoTqw
Starlink Руководство SK — файл pdf
yadi.sk/i/yDhy1Qx86FDbbg
+++++++++++++++++++++++++++++++++++++++++++++++
+++++++++++++++++++++++++++++++++++++++++++++++
Инструкция по эксплуатации автомобиля Subaru Forester 2005 модельного года (SG) — файл pdf
drive.google.com/file/d/0…BZkhGTEU/view?usp=sharing
Инструкция по эксплуатации автомобиля Subaru Forester 2007 модельного года (SG) — файл pdf
drive.google.com/file/d/0…SMzFxSHc/view?usp=sharing
Инструкция по эксплуатации автомобиля Subaru Forester 2011 модельного года (SH) — файл pdf drive.google.com/file/d/0…Ib0lEbm8/view?usp=sharing
Инструкция по эксплуатации автомобиля Subaru Forester 2012 модельного года (SH) — файл pdf drive.google.com/file/d/0…0cEE1bDg/view?usp=sharing
Инструкция по эксплуатации автомобиля Subaru Forester 2013 модельного года (SJ) — файл pdf drive.google.com/file/d/0…LZEgxbGM/view?usp=sharing
Инструкция по эксплуатации автомобиля Subaru Forester 2014 модельного года (SJ) — файл pdf drive.google.com/file/d/0…tOWt4elk/view?usp=sharing
Инструкция по эксплуатации автомобиля Subaru Forester 2015 модельного года (SJ) — файл pdf
drive.google.com/file/d/0…WZkI5SWs/view?usp=sharing
Инструкция по эксплуатации автомобиля Subaru Forester 2016 модельного года (SJ) — файл pdf
drive.google.com/file/d/0…kS3FSQVU/view?usp=sharing
+++++++++++++++++++++++++++++++++++++++++++++++
Subaru Forester Owner’s Manuals (ENG) — руководства по эксплуатации Subaru Forester на английском языке
Subaru Forester I (SF) 1998 Owner’s Manual ENG yadi.sk/d/OApC-oKBFMhGo
Subaru Forester I (SF) 1999 Owner’s Manual ENG yadi.sk/d/V6d3vPaGFMi5X
Subaru Forester I (SF) 2000 Owner’s Manual ENG yadi.sk/d/1Kb7E0RLFMiAS
Subaru Forester I (SF) 2001 Owner’s Manual ENG yadi.sk/d/OeuIrbH-FMiE2
Subaru Forester I (SF) 2002 Owner’s Manual ENG yadi.sk/d/7dlwPQT5FMiHm
Subaru Forester II (SG) 2003 Owner’s Manual ENG yadi.sk/d/8B5M3PEuFMiNv
Subaru Forester II (SG) 2004 Owner’s Manual ENG yadi.sk/d/DTiMBz4WFMiTP
Subaru Forester II (SG) 2005 Owner’s Manual ENG yadi.sk/d/tG-w1PzAFMiYG
Subaru Forester II (SG) 2006 Owner’s Manual ENG yadi.sk/d/h8RcBfgFFMic2
Subaru Forester II (SG) 2007 Owner’s Manual ENG yadi.sk/d/5heDeXV3FMifh
Subaru Forester II (SG) 2008 Owner’s Manual ENG yadi.sk/d/KTL_5eO7FMikE
Subaru Forester III (SH) 2009 Owner’s Manual ENG yadi.sk/d/CEPVhIngFMipG
Subaru Forester III (SH) 2010 Owner’s Manual ENG yadi.sk/d/Ee_eL7omFMiti
Subaru Forester III (SH) 2011 Owner’s Manual ENG yadi.sk/d/1Jacl7TMFMizz
Subaru Forester III (SH) 2012 Owner’s Manual ENG yadi.sk/d/44rqNMDzFMj7A
Subaru Forester IV (SJ) 2013 Owner’s Manual ENG yadi.sk/d/k40hjMB8FMjAd
Subaru Forester IV (SJ) 2014 Owner’s Manual ENG yadi.sk/d/mTlbnLRoFMjEX
Subaru Forester V (SK) 2019 Owner’s Manual ENG yadi.sk/d/8BgNvdXr5ryIxg
+++++++++++++++++++++++++++++++++++++++++++++++
Subaru Forester 2001 Service Manual ENG yadi.sk/d/PQ4ylgUpFNzot взято здесь manualov.net/Subaru.php
Subaru Forester 2003 Service Manual ENG — файл pdf yadi.sk/i/Yd-Gbfua3E38PH взято здесь
www.drive2.ru/l/466065937657758129/
Subaru Forester 2004 Service Manual ENG yadi.sk/d/_BMMdFxqFP28v взято здесь manualov.net/Subaru.php
Subaru Forester 2007 Service Manual (ENG) yadi.sk/d/B6rTskG3cxMbq взято здесь manualov.net/Subaru.php
Subaru Forester 2007 Service Manual ENG yadi.sk/d/X4CZKXSDcxMGW взято здесь auto-b.ru/blog/Subaru/2065.html
Subaru Forester IV (SJ) 2014 MY Service Manual (ENG) yadi.sk/d/zl1LmYEebjUsr + дополнение по ремонту кузова yadi.sk/d/hcob_9VJBQkDZ
пароль к архивам: forestermoscowclub взято здесь forester-moscowclub.ru/showthread.php?p=694911
+++++++++++++++++++++++++++++++++++++++++++++++
Схемы электропроводки:
Subaru Forester I (SF) 1998 Wires Diagram Section (EN) Электросхемы дорестайл SF — файлы pdf в архиве
yadi.sk/d/aCZSAQ2GqQQxT или
drive.google.com/file/d/1…ziEs-HcU/view?usp=sharing
Subaru Forester I (SF) 2001 Wires Diagram Section (EN) Электросхемы рестайл SF — файлы pdf в архиве
yadi.sk/d/f7GjJ6MIqQR3m
Схема электропроводки Subaru Forester SG 02-05 дорестайл Русский мануал — файл pdf
yadi.sk/i/daoWHmQ_qQQW7 или
drive.google.com/file/d/0…d1jolSTlJMVlJZFMwMW8/view
Схема электропроводки Subaru Forester SG 06-08 рестайл Русский мануал — файл pdf
yadi.sk/i/LfAHumyGqQQWD
+++++++++++++++++++++++++++++++++++++++++++++++
Мануалы и аксессуары для других Subaru (cпасибо tarasusNN): здесь.
+++++++++++++++++++++++++++++++++++++++++++++++
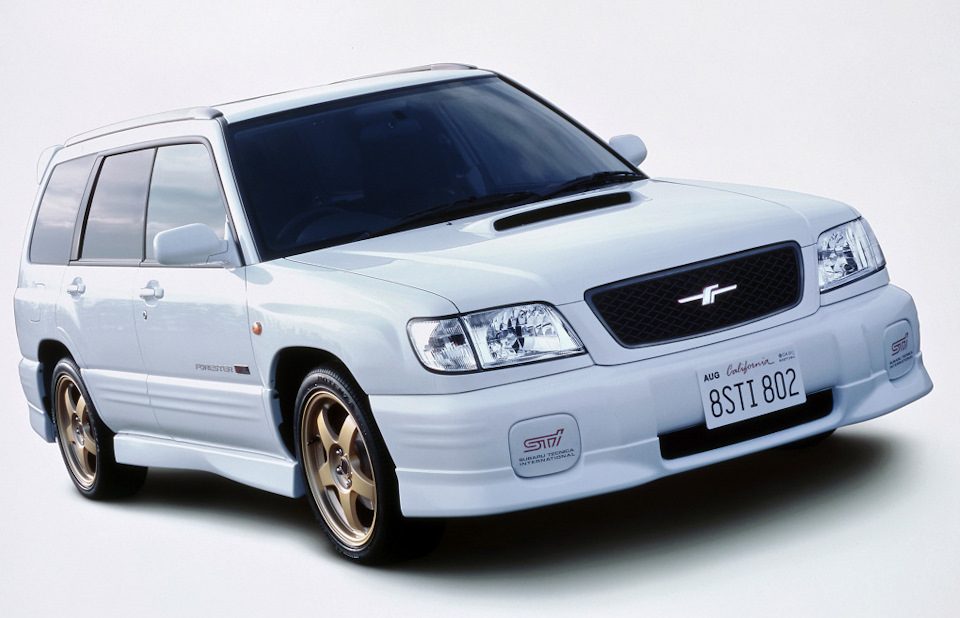
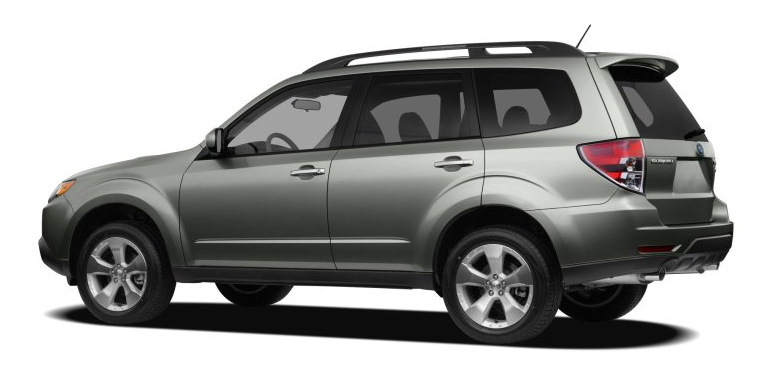


Foreword
Congratulations on choosing a SUBARU vehicle. This Owner’s Manual has all the information necessary to keep your SUBARU in excellent condition and to properly maintain the emission control system for minimizing emission pollutants. We urge you to read this manual carefully so that you may understand your vehicle and its operation. For information not found in this Owner’s Manual, such as details concerning repairs or adjustments, please contact the dealer from whom you purchased your SUBARU or the nearest SUBARU dealer.
The information, specifications and illustrations found in this manual are those in effect at the time of printing. FUJI HEAVY INDUSTRIES LTD. reserves the right to change specifications and designs at any time without prior notice and without incurring any obligation to make the same or similar changes on vehicles previously sold. This Owner’s Manual applies to all models and covers all equipment, including factory installed options. Some explanations, therefore may be for equipment not installed in your vehicle.
Please leave this manual in the vehicle at the time of resale. The next owner will need the information found herein.
FUJI HEAVY INDUSTRIES LTD., TOKYO, JAPAN
is a registered trademark of FUJI HEAVY INDUSTRIES LTD.
*C copyright 2008 FUJI HEAVY INDUSTRIES LTD.
This manual describes the following vehicle types.*
* The illustrated vehicle is one of the FORESTER series.

Audio
|
Antenna system ………………………………………….. |
5-2 |
|
Roof antenna ……………………………………………… |
5-2 |
|
FM reception………………………………………………. |
5-2 |
|
XMTM satellite radio reception (if equipped)…… |
5-2 |
|
Installation of accessories……………………………. |
5-4 |
|
Audio set ……………………………………………………. |
5-5 |
|
Type A audio set (if equipped) ……………………….. |
5-5 |
|
Type B audio set (if equipped) ……………………….. |
5-6 |
|
Power and sound controls …………………………… |
5-7 |
|
Power switch and volume control …………………… |
5-7 |
|
Sound control …………………………………………….. |
5-7 |
|
Adjustable level of each mode ……………………….. |
5-9 |
|
FM/AM radio operation ……………………………….. |
5-10 |
|
FM/AM selection…………………………………………. |
5-10 |
|
Tuning ……………………………………………………… |
5-10 |
|
Displaying radio PS (Program Service Name) and |
|
|
RT (Radio Text) ………………………………………… |
5-12 |
|
Station preset ……………………………………………. |
5-12 |
|
Satellite radio operation (if equipped) ………….. |
5-13 |
|
XMTM satellite radio …………………………………….. |
5-13 |
|
Sirius satellite radio ……………………………………. |
5-13 |
|
Satellite radio reception……………………………….. |
5-13 |
|
Displaying satellite radio ID of tuner ………………. |
5-13 |
|
Band selection …………………………………………… |
5-14 |
|
Channel and category selection ……………………. |
5-14 |
||
|
Channel preset ………………………………………….. |
5-16 |
||
|
Display selection ……………………………………….. |
5-16 |
||
|
CD player operation …………………………………… |
5-17 |
||
|
How to insert a CD (type A)………………………….. |
5-17 |
||
|
How to insert a CD(s) (type B)………………………. |
5-17 |
||
|
How to play back a CD ……………………………….. |
5-19 |
||
|
To select a track from its beginning……………….. |
5-19 |
||
|
5 |
|||
|
Fast-forwarding and fast-reversing ………………… |
5-20 |
||
|
Repeating |
5-21 |
||
|
Random playback ………………………………………. |
5-21 |
||
|
Scan ……………………………………………………….. |
5-22 |
||
|
Display selection ……………………………………….. |
5-22 |
||
|
Folder selection…………………………………………. |
5-23 |
||
|
How to eject a CD from the player (type A) ……… |
5-23 |
||
|
How to eject CDs from the player (type B) ………. |
5-24 |
||
|
When the following messages are displayed……. |
5-25 |
||
|
AUX unit operation …………………………………….. |
5-25 |
||
|
AUX jack ………………………………………………….. |
5-25 |
||
|
AUX inputs selection button…………………………. |
5-26 |
||
|
Audio control buttons (if equipped) …………….. |
5-26 |
||
|
MODE button…………………………………………….. |
5-26 |
||
|
Precautions to observe when handling a |
|||
|
compact disc…………………………………………… |
5-28 |

5-2 Audio
Antenna system
& Roof antenna
CAUTION
. Be sure to lower the antenna rod before entering garages, parking towers and other locations with low ceilings.
. Remove the antenna rod before washing your car at a car wash. If the antenna rod is left attached, it may scratch the roof.
. When reinstalling the removed antenna rod, be sure to fully tighten it.
1)Unscrew
2)Remove
The roof antenna is installed in the center at the rear part of the roof.
It is possible to remove the antenna rod by unscrewing it from its base.
& FM reception
Although FM is normally static free, reception can be affected by the surrounding area, atmospheric conditions, station strength and transmitter distance. Buildings or other obstructions may cause momentary static, flutter or station interference. If reception continues to be unsatisfactory, switch to a stronger station.
XMTM satellite radio reception (if equipped)
XMTM is a continental U.S. based satellite radio service that offers more than 160 coast to coast channels, including music, news, sports, talk and children’s programming. XMTM provides digital quality audio and text information, including song title and artist name. A service fee is required to receive the XMTM service. For more information, contact XMTM at www.xmradio.com or call 1-800-XM- RADIO (1-800-967-2346) for U.S., www.xmradio.ca or 1-877-GET-XMSR (1- 877-438-9677) for Canada.
The XMTM satellite radio receiver that is fitted to your vehicle receives the necessary signals from two specially designated satellites that are in a geostationary orbit over the equator. One satellite covers the east coast and the other covers the west coast. Both of them direct their signals north. These signals are then relayed throughout the USA by a network of ground repeater stations. The satellite radio signals are transmitted as “line of sight” signals. Line of sight signals can be blocked by objects such as buildings, but the network of repeater stations allows signal coverage within urban areas such as cities.
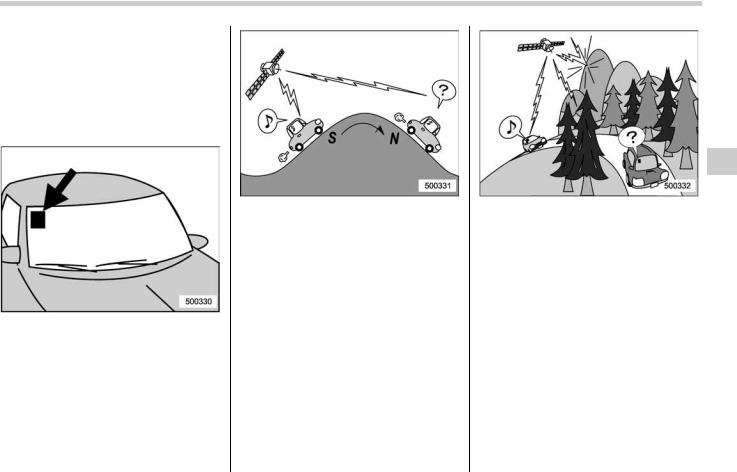
You may experience problems in receiving XMTM satellite radio signals in the following situations.
. If you are driving northward in a coastal area
You will notice that the XMTM satellite radio antenna is fixed to the upper right hand corner of your windshield.
The signal comes from the south and may not be able to reach the antenna in some circumstances when you are driving north.
Audio 5-3
. If you are driving in a tunnel or a covered parking area
. If you are driving beneath the top level of a multi-level freeway
. If you drive under a bridge
. If you are driving next to a tall vehicle (such as a truck or a bus) that blocks the signal
. If you are driving in a valley where the surrounding hills or peaks block the signal from the south
. If you are driving on a mountain road where the southern direction is blocked by mountains
. If you are driving in an area with tall trees that block the signal (33 ft (10 m) or more), for example on a road that goes through a dense forest
. The signal can become weak in some areas that are not covered by the repeater station network.
Please note that these may be other unforeseen circumstances when there are problems with the reception of XMTM satellite radio signals.

5-4 Audio
Installation of accessories
Always consult your SUBARU dealer before installing a citizen band radio or other transmitting device in your vehicle. Such devices may cause the electronic control system to malfunction if they are incorrectly installed or if they are not suited for the vehicle.
Audio set
Your SUBARU may be equipped with one of the following audio sets. See the pages indicated in this section for operating details.
& Type A audio set (if equipped)
Audio 5-5
The audio set will operate only when the ignition switch is in the “Acc” or “ON” position.
. Power and sound controls: refer to page 5-7
. Radio operation: refer to page 5-10
. Satellite radio operation (if equipped): refer to page 5-13
. CD (compact disc) player operation: refer to page 5-17
. AUX unit operation: refer to page 5-25
– CONTINUED –

5-6 Audio
& Type B audio set (if equipped)
The audio set will operate only when the ignition switch is in the “Acc” or “ON” position.
. Power and sound controls: refer to page 5-7
. Radio operation: refer to page 5-10
. Satellite radio operation (if equipped): refer to page 5-13
. CD (compact disc) player operation: refer to page 5-17
. AUX unit operation: refer to page 5-25

Power and sound controls
&Power switch and volume control
The dial is used for both power (ON/OFF) and volume control. The radio is turned ON and OFF by pushing the dial, and the volume is controlled by turning the dial.
& Sound control
! Tone and balance control
Each brief press of the sound control dial changes the control modes in the following sequence.
Choose the desired level for each mode by turning the sound control dial.
The control function returns to the tune/ track/channel control mode after approximately 5 seconds.
Audio 5-7
! Other sound setting controls
Each brief press of the “MENU” button changes the control modes in the following sequence.
Type A audio:
Type B audio:
Choose the desired settings for each mode by turning the sound control dial.
The control function returns to the tune/ track/channel control mode after approxi-
– CONTINUED –

5-8 Audio
mately 5 seconds.
! SVC setting
SVC (Speed Volume Control) is a function that automatically adjusts the volume according to the vehicle speed. As the vehicle speed increases, the audio volume automatically increases to match the vehicle speed, in order to create a pleasant listening environment even as the driving noise increases. The amount of this automatic volume change can be set in the range from OFF to 2. The initial setting is OFF.
! BEEP setting
A beep sound (operation sound) that occurs when the audio system is operated can be set ON/OFF. The initial setting is ON.
! SRS CS Auto setting (type B audio)
SRS CS Auto can be set ON/OFF. When this setting is ON, “ ” is displayed on the screen.
NOTE
SRS CS Auto creates a 5.1ch equivalent surround field using 10 speakers that are installed in the vehicle.
SRS CS Auto features:
1) Sound originating from door mount speakers can be heard at ear level
(built in SRS FOCUS effect).
2)Ultra rich bass sound can be obtained from standard door mount speakers (built in SRS TruBass effect).
3)Surround sound can be obtained from 2-channel stereo sources such as CD, MP3 and FM (built in SRS Circle Surround II effect).
4)SRS CS Auto can position the center channel image in the center of the vehicle’s windshield. This eliminates the need for a center speaker (built in SRS Circle Surround II phantom center and SRS FOCUS effects).
CS Auto, TruBass, FOCUS, Circle Sur- round-II, SRS and “ ” symbol are trademarks of SRS Labs, Inc.
CS Auto technology is incorporated under license from SRS Labs, inc.

Audio 5-9
& Adjustable level of each mode
|
Mode |
Range of levels |
Initial setting |
Turn counterclockwise |
Turn clockwise |
|||
|
(displayed) |
|||||||
|
Volume |
Volume control |
0 to 40 |
15 |
For less volume |
For more volume |
||
|
AUX volume control* |
0 to 40 |
15 |
For less volume |
For more volume |
|||
|
Tone and balance |
Bass control |
−8 to +8 |
0 |
For less bass sound |
For more bass sound |
||
|
Midrange control |
−8 to +8 |
0 |
For less midrange sound |
For more midrange sound |
|||
|
Treble control |
−8 to +8 |
0 |
For less treble sound |
For more treble sound |
|||
|
Balance |
L9 to R9 |
0 |
Right channel attenuated |
Left channel attenuated |
|||
|
Fader |
R9 to F9 |
0 |
Front attenuated |
Rear attenuated |
|||
|
Other settings |
SPEED VOLUME |
OFF to 2 |
OFF |
For less auto volume change |
For more auto volume change |
||
|
BEEP |
OFF to ON |
ON |
OFF |
ON |
|||
|
CS Auto (type B audio) |
OFF to ON |
OFF |
OFF |
ON |
|||
*Only when an AUX audio product is connected.

5-10 Audio
FM/AM radio operation
& FM/AM selection
Push the “FM AM” button when the radio is off to turn on the radio.
Push the “FM AM” button when the radio is on to select FM1, FM2, FM3 or AM reception.
Each brief press of the “FM AM” button changes the radio in the following sequence starting from the last radio band with you selected.
& Tuning
! Manual tuning
Turn the TUNE dial clockwise to increase the tuning frequency and turn the “TUNE” dial counterclockwise to decrease it.
Each time the dial is turned, the frequency interval can be changed between 10 kHz in the AM mode and 0.2 MHz in the FM mode.
! Stereo indicator
The stereo indicator “ST” will illuminate when an FM stereo broadcast is received.
! Seek tuning (SEEK)
If you press the “ ” or “ ” side of the SEEK button briefly, the radio will automatically search for a receivable station and stop at the first one it finds. This function may not be available, however, when radio signals are weak. In such a situation, perform manual tuning to select the desired station.
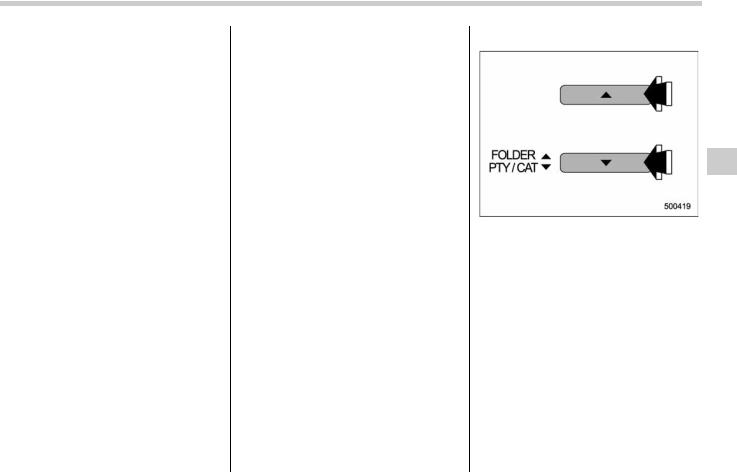
! Scan tuning (SCAN)
If you press the “SCAN” button, the radio will switch to the scan mode. In this mode, the radio scans through the radio band until a station is found. The radio will stop at the station for 5 seconds while displaying the frequency, after which scanning will continue until the entire band has been scanned.
Press the “SCAN” button again to cancel the SCAN mode and to stop at any displayed channel.
Automatic tuning may not function properly if the station reception is weakened by distance from the station or proximity to tall buildings and hills.
!PTY (Program type) group tuning (only FM reception)
Press the “PTY/CAT” button to change to the PTY selection mode. At this time, the PTY group that you are currently listening to will be displayed for 10 seconds. In PTY selection mode, “PTY” is displayed on the screen.
Audio 5-11
! PTY (Program type) group selection
In PTY selection mode, press the “PTY” button “ ” or “ ” to change the PTY group by one step at a time.
Pressing “ ” changes the PTY group up by one step. Pressing “ ” changes the PTY group down by one step.
This operation only changes the display. It does not change the station that is currently being received.
– CONTINUED –

5-12 Audio
! Seek in PTY (Program type) group
In the PTY selection mode, when the desired PTY group has been selected, pressing the “SEEK” button “ ” or “ ” seeks within that PTY group.
Pressing “ ” seeks up. Pressing “ ” seeks down.
The control function returns to the normal mode after approximately 10 seconds.
&Displaying radio PS (Program Service Name) and RT (Radio Text)
If the PS (Program Service Name) and/or RT (Radio Text) are available, pressing the “TEXT” button changes the display among PS, RT and frequency. The initial setting is “PS”.
NOTE
. The maximum number of characters that can be displayed for PS is 8.
. The maximum number of characters that can be displayed for RT is 64.
. If RT is 13 characters or longer, press and hold the “TEXT” button for 0.5 second or longer in order to change the page.
& Station preset
! How to preset stations
1.Press the “FM AM” button to select FM1, FM2, FM3 or AM reception.
2.Press the “ ” or “ ” side of the SEEK button or tune the radio manually until the desired station frequency is displayed.
3.Press one of the preset buttons for more than 1.5 seconds to store the frequency. If the button is pressed for less than 1.5 seconds, the preceding selection will remain in memory.
NOTE
. If the connection between the radio and battery is broken for any reason such as vehicle maintenance or radio removal, all stations stored in the preset buttons are cleared. If this occurs, it is necessary to reset the preset buttons.
. If a cell phone is placed near the radio, it may cause the radio to emit noise when it receives calls. This noise does not indicate a radio fault.
! Selecting preset stations
Presetting a station with a preset button allows you to select that station in a single operation. Up to six AM, FM1, FM2 and FM3 stations each may be preset.
Satellite radio operation (if equipped)
To receive satellite radio, it is necessary to install the SUBARU genuine satellite receiver (optional equipment) and to enter into a contract. For details, please contact your SUBARU dealer.
& XMTM satellite radio
XMTM is a continental U.S. based satellite radio service that offers more than 160 coast to coast channels, including music, news, sports, talk and children’s programming. XMTM provides digital quality audio and text information, including song title and artist name. A service fee is required to receive the XMTM service. For more information, contact XMTM at www.xmradio.com or call 1-800-XM- RADIO (1-800-967-2346) for U.S., www.xmradio.ca or 1-877-GET-XMSR (1- 877-438-9677) for Canada.
& Sirius satellite radio
Sirius satellite radio is a recent innovation that allows the listener to experience digital sound quality and to have a greater variety of channels to choose from (more than 160 channels with the relevant subscription).
Audio 5-13
Use of satellite radio (Sirius) requires a tuner, antenna and a service contract. For details, please contact your SUBARU dealer or visit Sirius Satellite Radio at www.sirius.com or call 1-888-539-SIRIUS (7474) for more information. Sirius, the Sirius dog logo, channel names and logos are trademarks of SIRIUS Satellite Radio Inc.
& Satellite radio reception
Satellite radio signals are best received in areas with a clear view of the open sky. In areas where there are tall buildings, trees, tunnels or other structures that may obstruct the signal of the satellites, there may be signal interruptions. Other circumstances that may result in signal loss include driving near a wall, steep cliff, hill or driving on the lower level of a multitiered road or inside of a parking garage. To help reduce this condition, satellite radio providers have installed groundbased repeaters in heavily populated areas. However, you may still experience reception problems in some areas.
&Displaying satellite radio ID of tuner
When you activate satellite radio, you should have your satellite radio tuner ID
– CONTINUED –
5-14 Audio
ready because each tuner is identified by its unique satellite radio tuner ID.
The satellite radio ID will be needed when you activate satellite radio and receive satellite radio customer support.
The satellite radio ID can be found on the audio display by tuning the channel to “0”. Turn the “CH” dial to select the satellite radio channel.
NOTE
For Sirius, change the display to an indication mode other than the channel number after performing the above operation.
& Band selection
Push the “SAT” button when the radio is
off to turn on the radio.
Push the “SAT” button when the radio is on to select SAT1, SAT2 or SAT3 reception.
&Channel and category selection
! Channel selection (type A)
Turn the “CH” dial clockwise to select the next channel and turn the “CH” dial counterclockwise to select the previous channel.
! Channel selection (type B)
When in the SAT mode, briefly press the “SEEK” button “ ” or “ ” to select the channel.

! Skip channel selection
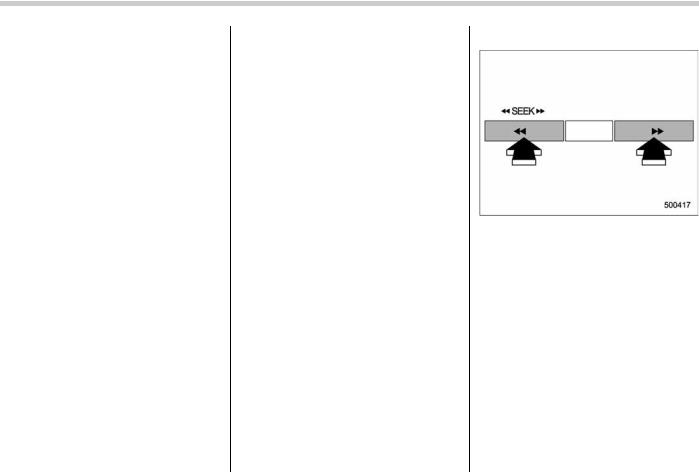
When in the SAT mode, press the “SEEK” button “ ” or “ ” continuously to change to the channel selection mode. Pressing the “SEEK” button “ ” changes the channel up by 10 steps each time. Pressing “ ” changes the channel down by 10 steps each time.
! Category selection
When in the SAT mode, press the “CAT” button “ ” or “ ” to change to the category search mode.
When in the category search mode, pressing the “CAT” button “ ” changes the category up by one step. Pressing “ ” changes the category down by one step. When a category is selected, turning the “CH” dial selects channels only within the selected category.
The control function returns to the normal mode after approximately 10 seconds.
Audio 5-15
! Channel scan
Press the “SCAN” button to change the radio to the SCAN mode. In this mode, under the selected category, the radio scans through the channel until a station is found. The radio will stop at the station for 5 seconds while displaying the channel number, after which scanning will continue until the entire channel has been scanned from the low end to the high end.
Press the “SCAN” button again to cancel the SCAN mode and to stop on any displayed channel.
– CONTINUED –

5-16 Audio
& Channel preset
! How to preset channels
1.Press the “SAT” button to select SAT1, SAT2 and SAT3 reception.
2.Select the desired channel.
3.Press one of the preset buttons for more than 1.5 seconds to store the channel. If the button is pressed for less than 1.5 seconds, the preceding selection will remain in memory.
NOTE
If the connection between the radio and battery is broken for any reason such as vehicle maintenance or radio removal, all channels stored in the preset buttons are cleared. If this occurs, it is necessary to reset the preset buttons.
! Selecting preset channels
Presetting a channel with a preset button allows you to select that channel in a single operation. Up to six SAT1, SAT2 and SAT3 channels each may be preset.
& Display selection
Press the “TEXT” button while receiving the satellite radio to change the display as follows:

CD player operation
NOTE
. Make sure to always insert a disc with the label side up. If a disc is inserted with the label side down, the player displays “CHECK DISC”.
Refer to the “When the following messages are displayed” section in this chapter.
. If a disc is inserted during a radio broadcast, the disc will interrupt the broadcast.
. After the last song finishes, the disc will automatically return to track 1 (the first track on the disc) and will automatically play back.
. The player is designed to be able to play music CD-Rs and music CD-RWs, but it may not be able to play certain ones.
. CDs (i.e., 8 cm/3 inch CDs) are not supported, and if inserted, they will be immediately ejected.
. The file (track) that has protected by copyright of WMA cannot be played, and the player will skip to the next file (track).
& How to insert a CD (type A)
Hold a disc with a finger in the center hole while gripping the edge of the disc, then insert it in to the slot (with the label side up) and the player will automatically pull the disc into position.
NOTE
DO NOT INSERT TWO DISCS INTO THE DISC INSERTION SLOT AT A TIME.
& How to insert a CD(s) (type B)
1. Briefly press the “LOAD” button. If the magazine in the player has an idle position where you can insert a disc, the disc number indicator associated with the idle position will blink.
If no indicator blinks, it means that there is
Audio 5-17
no idle position in the magazine.
2. When the “LOAD” indicator illuminates, insert the disc. Once you have inserted the disc, the “LOAD” indicator will turn off. The disc will then be automatically drawn in, and the player will begin to play back the first track of the disc.
. To insert more discs in succession, repeat Steps 1 and 2. The magazine will be loaded with discs in the ascending order of position number.
If you do not insert any disc in 15 seconds after you have pressed the “LOAD” button, the player will begin to play back the first track of the last disc you have inserted.
. The disc indicator steadily lights up if a disc is already inserted in the corresponding position of the magazine.
. While the player is in the loading mode, if you press “FM/AM”, “SAT” or “AUX” button, the player will enter the standby mode. Press the “CD” button to start playback.
– CONTINUED –

5-18 Audio
!Inserting a disc in a desired position
1. Briefly press the “LOAD” button. If the magazine in the player has an idle position where you can insert a disc, the disc number indicator associated with the idle position will blink.
The positions in the magazine the indicator of which steadily lights up are already loaded with discs.
2.Press the disc select button at the position where you want to insert a disc.
3.When the “LOAD” indicator illuminates, insert the disc. Once you have inserted the disc, the “LOAD” indicator will turn off. The disc will then be automatically drawn in, and the player will begin to play the first track on the disc.
. If you wish to insert another disc, repeat the procedure beginning with step 1.
If you do not insert any disc in 15 seconds after you have pressed the “LOAD” button, the player will begin to play back the first track of the last disc you have inserted.
. While the player is in the loading mode, if you press “FM/AM”, “SAT” or “AUX” button, the player will enter standby mode.
Press the “CD” button to start playback.
!Loading all the magazine (full disc loading mode)
1.If you continue to press the “LOAD” button for more than 1.5 seconds, the player will produce beep sound and will enter the full disc loading mode.
2.When the disc number indicator flashes and “ALL LOAD” indicator illuminates, insert a disc within 15 seconds. If a disc is successfully loaded during this period, the disc number indicator will stop blinking and will steadily light.
3.When the loading of a disc is complete, the next disc number indicator will blink. Then repeat Step 2.
4.When the magazine is filled with discs by repeating Steps 2 and 3, the player will

start playback of the discs, beginning with the one inserted first.
If you fail to insert any disc during each 15 seconds interval, the full disc loading mode will be canceled, and the player will start playback of the disc inserted first.
& How to play back a CD
! When there is no CD inserted
Insert a CD by referring to “How to insert a CD (type A)” / “How to insert a CD(s) (type B)”.
When a CD is loaded, the player will start playback of the CD, beginning with the first track.
! When CD is in the player (type A)
When the “CD” button is pressed, the
player will start playback.
! When there are CDs loaded (type B)
Press a desired one of the disc select buttons the disc number indicator of which steadily lights up. The player will then start playback of the selected CD, beginning with the first track.
If a disc that the player cannot read has been loaded, the player will display the message “CHECK DISC”.
Audio 5-19
&To select a track from its beginning
! Forward direction
Turn the “TRACK” dial clockwise to skip to the beginning of the next track/file (track). Each time the dial is turned, the indicated track/file (track) number will increase.
NOTE
In an MP3 or WMA folder, skipping past the last track/file (track) will take you back to the first track/file (track) in the folder.
– CONTINUED –
5-20 Audio
! Backward direction
Turn the “TRACK” dial counterclockwise to skip to the beginning of the current track/file (track). Each time the dial is turned, the indicated track/file (track) number will decrease.
NOTE
In an MP3 or WMA folder, skipping past the first track/file (track) will take you to the last track/file (track) in the folder.
&Fast-forwarding and fast-re- versing
! Fast-forwarding
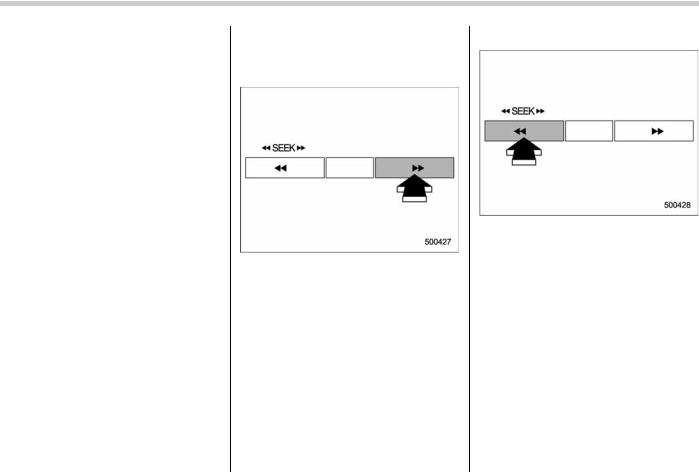
Press the “ ” side of the “SEEK” button continuously to fast-forward the disc/ folder.
Release the button to stop fast-forwarding.
NOTE
If you fast-forward to the end of the last track/file (track), fast-forwarding will stop and the player will start playback beginning with the first track/file (track).
! Fast-reversing
Press the “ ” side of the “SEEK” button continuously to fast-reverse the disc/ folder.
Release the button to stop fast-reversing.
NOTE
If you fast-reverse to the beginning of the first track/file (track), fast-reversing will stop and the player will start playback.

& Repeating
To repeat a track/file (track), briefly press the “RPT” button while the track/file (track) is playing.
Each time you briefly press the button, the mode changes in the following sequences.
Type A audio:
Type B audio:
NOTE
. The “RPT” indication refers to the repeat playback of a single track. It repeats the track that is playing.
. The “F-RPT” indication refers to the repeat playback of a folder. It repeats the all of the tracks in the folder. It is possible to select the function when the MP3/WMA format track is playing.
. The “D-RPT” indication refers to the repeat playback of a disc. It repeats the tracks on the CD. It is only possible to select this function for type B audio.
To cancel the track/file (track) repeat-play mode, briefly press the “RPT” button twice. The “RPT” indication will turn off, and the normal playback mode will be resumed.
NOTE
The repeat-play mode will be cancelled if you perform any of the following steps:
. Press the “RPT” button and select CANCEL
. Press the “ ” button
. Press the disc select button
. Press the “SCAN” button
. Press the “LOAD” button when there is free space in the CD magazine.
Audio 5-21
& Random playback
To playback a track/file(s) at random, press the “RPT” button for 0.5 second or longer while the track/file is playing.
Each time you press the button, the mode changes in the following sequences.
NOTE
. The “RDM” indication refers to the random playback of the tracks. It randomly repeats the tracks on the CD. It is possible to select the function when formats other than the MP3/WMA
– CONTINUED –

5-22 Audio
format CD is playing.
. The “F-RDM” indication refers to the random playback in the folder. It randomly repeats the tracks in the folder. It is possible to select the function when an MP3/WMA format track is playing.
. The “D-RDM” indication refers to the random playback of a disc. It randomly repeats the tracks in the CD. It is possible to select the function when an MP3/WMA format track is playing.
To cancel the random playback mode, press the “RPT” button again and select CANCEL.
The “RDM” indication will turn off, and the normal playback mode will be resumed.
NOTE
Random playback will be cancelled if you perform any of the following steps:
. Press the “RPT” button and select CANCEL
. Press the “ ” button
. Press the disc select button
. Press the “SCAN” button
. Press the “LOAD” button when there is free space in the CD magazine.
& Scan
The scan mode lets you listen to the first 10 seconds of each track/file in succession. Press the “SCAN” button to start scanning upward beginning with the track/ file(s) following the currently selected one. After all track/file(s) in the disk/folder have been scanned, normal playback will be resumed. To cancel the scan mode, press the “SCAN” button again.
NOTE
The scan mode will be cancelled if you perform any of the following steps:
. Press the “RPT” button
. Turn the “TRACK” dial
. Press the “ ” or “ ” side of the “FOLDER” button
. Press the “ ” button
. Press the disc select button
. Select the radio or AUX mode
. Press the “LOAD” button when there is free space in the CD magazine.
. Turn off the power of the audio equipment.
. Turn the ignition switch to the “LOCK” position.
& Display selection
If you press the “TEXT” button during playback, the indication will change to the next one in the following sequence.
For CD-DA:
For MP3/WMA:
! Page (track/folder title) scroll
If you press the “TEXT” button again for at least 0.5 second, the title will be scrolled so you can see all of it.
NOTE
The display is designed to show titles for up to 24 characters.
& Folder selection
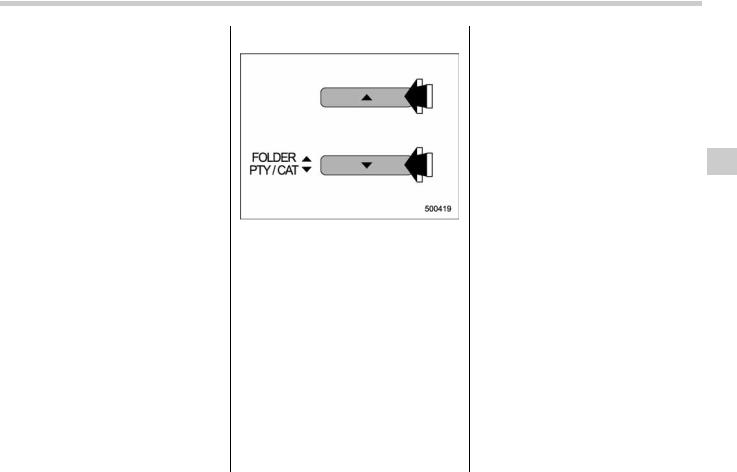
Press the “ ” side of the “FOLDER” button briefly to select the next folder. Press the “ ” side of the button briefly to go back to the previous folder. The folder title will be shown each time you press one of the buttons.
NOTE
. Selecting folders in this way is possible only within a single disc.
. Only MP3/WMA folders are recognized when an attempt to select the next or previous folder is made. If no appropriate folder exists on the disc, pressing the “ ” or “ ” side of the “FOLDER” button starts playback beginning with the first track/file (track).
Audio 5-23
&How to eject a CD from the player (type A)
When a disc is being played back or when a disc is in the player, press the eject button “ ”. The disc will be ejected.
NOTE
. Avoid driving the vehicle with a CD sticking out, because vibration might make it fall out.
. If the disc is left ejected for more than approximately 15 seconds after the ignition switch is turned to the “OFF” position, a disc protection function will operate, automatically reloading the disc. In this case, the disc is not played.
– CONTINUED –

5-24 Audio
&How to eject CDs from the player (type B)
! Ejecting a CD from the player
Of the discs loaded, you can select and remove only one disc.
1. Use the disc select button to select the disc to be ejected.
2. Briefly press the “ ” button. The selected disc will be ejected. The disc number indicator will flash at this time. When you remove the ejected disc, the disc number indicator will turn off.
To remove more discs in succession, repeat steps 1 and 2.
!Ejecting all discs from the player (all disc ejection mode)
1.If you continue to press the “ ” button, the player will produce beep sound and will enter the all disc ejection mode. At this time, the disc number indicator and “ALL EJECT” indicator will flash.
2.Remove the disc that has been ejected. The other discs loaded will then be ejected one after another. If you do not remove the disc that has been ejected, the “All disc ejection mode” will be canceled.
NOTE
. Avoid driving the vehicle with a CD sticking out, because vibration might make it fall out.
. If you press the “ ” button while

the player is in all disc ejection mode, the mode will be cancelled following ejection of the disc that is currently being ejected.
. If you press the “CD” button or “LOAD” button while the player is in all disc ejection mode, the player will draw in the discs that have been ejected and play them.
&When the following messages are displayed
If one of the following messages is displayed while operating the CD player, determine the cause based on the following information. If you cannot clear those messages, please contact your SUBARU dealer.
! When “PUSH EJECT” is displayed
Press the eject button to unload the disc. Check the disc for damage or deformation, and also check that the correct disc is inserted. Do not try to unload the disc forcibly. Single CDs (i.e., 8 cm/3 inch CDs) are not supported, and if inserted, they will be immediately ejected and this message will be displayed. If the disc cannot be unloaded or this message remains displayed, please contact your SUBARU dealer.
! When “CHECK DISC” is displayed
Press the eject button to unload the discs. Check that the disc is not damaged or scratched, and also check that the disc is inserted correctly. This message may appear when using some CD-RW discs. Check that the disc type (i.e., 8 cm/3 inch CDs are not supported) and data format are correct. This player can only play MP3 and WMA data formats. If the disc cannot be unloaded or this message remains displayed, please contact your SUBARU dealer.
Audio 5-25
AUX unit operation
& AUX jack
By connecting a commercial audio product to the vehicle, such as portable audio player, you can hear its sound via the vehicle’s speaker.
Connect the portable audio player and push the “AUX” button.
For the audio input jack, a stereo mini pin plug (3.5ø) can be connected. For detailed information, see the Owner’s Manual of the portable audio player.
– CONTINUED –
5-26 Audio
& AUX inputs selection button
Press the “AUX” button when the auxiliary audio input is off to turn on the auxiliary audio input.
NOTE
. The output sound of the portable audio player is not loud, and the sound via the vehicle’s speakers that are connected to the vehicle audio set is very small. If you turn up the volume of the audio set, the volume becomes louder. However, when you change the player to the other portable audio player, the sound may become a lot louder. Turn down the volume when you change between them.
. In some cases, when the sound volume of the portable audio player is
low, the sound becomes bad when you turn up the volume of the vehicle audio system. In this case, adjust the sound volume of the portable audio player.
. In some cases, noise occurs because of a bad connection between the portable player of the vehicle audio system or for the player.
Audio control buttons (if equipped)
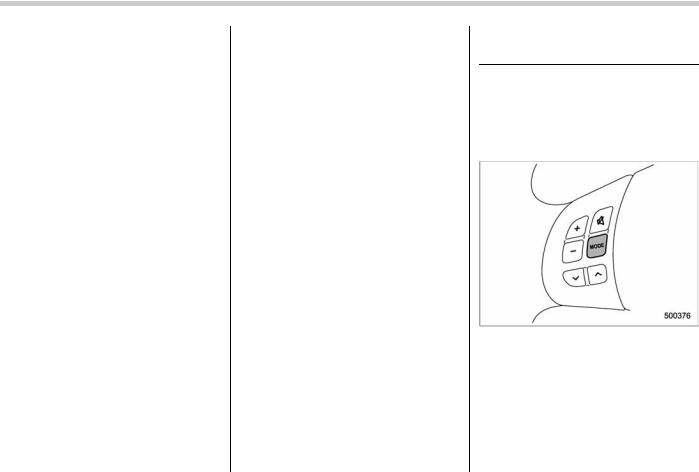
These buttons are located on the steering wheel. They allow the driver to control audio functions without taking his/her hands off the steering wheel.
& MODE button
This button is used to select the desired audio mode. Each time it is pressed, the mode changes to the next one in the following sequence:
*1: The frequency last received in the selected

waveband will be displayed.
*2: Only when a CD is in the player.
*3: Only when with an auxiliary audio product is connected.
! “ ” and “ ” buttons
! With radio mode selected
Press the “ ” button or “ ” button for a short time to skip to a preset channel, and press it for a long time to seek the next receivable station.
! With CD mode selected
Press the “ ” button to skip forward in the track/file (track) order. Press the “ ” button to skip backward in the track/file (track) order.
The track/file (track) number will be shown
on the audio display.
! With SAT mode selected
Press the “ ” button to skip forward in the channel order. Press the “ ” button to skip backward in the channel order. The channel will be shown on the audio display.
! Volume control buttons
Press the “+” button to increase the volume. Press the “−” button to reduce the volume.
A number indicating the volume will be shown on the audio display.
Audio 5-27
! MUTE button
Press this button if you wish to immediately cut the volume to zero.
The audio display will show “MUTE”.
If you press the button again, the original sound volume will return and “MUTE” turns off.

5-28 Audio
Precautions to observe when handling a compact disc
Use only compact discs (CDs, CD-Rs and CD-RWs) that have the mark shown in the following. Also, some compact discs cannot be played.
. You cannot use a DualDisc in the CD player. If you insert a DualDisc into the player, the disc may not come out again, possibly causing the player to malfunction.
. In cold and/or rainy weather, dew can form inside the CD player, preventing normal operation. If this happens, eject the CD and wait for the player to dry out.
. Skipping may occur when the CD player is subjected to severe vibration (for example, when the vehicle is driven on a rough surface).
. To remove a disc from the case, press the center of the case and hold both edges of the disc. If the disc surface is touched directly, contamination could cause poor tone quality. Do not touch the disc surface.
. Use a clean disc whenever possible. If

Audio 5-29
there are deposits, wipe the disc surface from the center outward with a dry, soft cloth. Be sure not to use a hard cloth, thinner, benzine, alcohol, etc.
. Do not use any disc that is scratched, deformed, or cracked. Also, do not use any disc that has a non-standard shape (for example, a heart shape). Malfunctions or problems might result.
. A disc is vulnerable to heat. Never keep it either in places exposed to direct sunlight, near heaters or in vehicles parked in the sun or on hot days.

—— — — — — — — — — — — — — — — — — — — — — — — — — — — — — — — — — — — — — — —
—— — — — — — — — — — — — — — — — — — — — — — — — — — — — — — — — — — — — — — —
—— — — — — — — — — — — — — — — — — — — — — — — — — — — — — — — — — — — — — — —
—— — — — — — — — — — — — — — — — — — — — — — — — — — — — — — — — — — — — — — —
—— — — — — — — — — — — — — — — — — — — — — — — — — — — — — — — — — — — — — — —
—— — — — — — — — — — — — — — — — — — — — — — — — — — — — — — — — — — — — — — —
—— — — — — — — — — — — — — — — — — — — — — — — — — — — — — — — — — — — — — — —
—— — — — — — — — — — — — — — — — — — — — — — — — — — — — — — — — — — — — — — —
—— — — — — — — — — — — — — — — — — — — — — — — — — — — — — — — — — — — — — — —
—— — — — — — — — — — — — — — — — — — — — — — — — — — — — — — — — — — — — — — —
—— — — — — — — — — — — — — — — — — — — — — — — — — — — — — — — — — — — — — — —
—— — — — — — — — — — — — — — — — — — — — — — — — — — — — — — — — — — — — — — —
—— — — — — — — — — — — — — — — — — — — — — — — — — — — — — — — — — — — — — — —

Interior equipment
|
Interior lights ………………………………………………. |
6-2 |
|
Dome light …………………………………………………. |
6-2 |
|
Cargo area light ………………………………………….. |
6-3 |
|
Map light……………………………………………………. |
6-3 |
|
Sun visors ………………………………………………….. |
6-4 |
|
Vanity mirror ………………………………………………. |
6-4 |
|
Storage compartment ………………………………….. |
6-4 |
|
Glove box ………………………………………………….. |
6-5 |
|
Center console……………………………………………. |
6-5 |
|
Overhead console ……………………………………….. |
6-6 |
|
Rear seat center table (if equipped) ………………… |
6-6 |
|
Coin tray……………………………………………………. |
6-7 |
|
Cup holders ………………………………………………… |
6-7 |
|
Front passenger cup holder…………………………… |
6-7 |
|
Rear passenger cup holder (if equipped)………….. |
6-8 |
|
Bottle holders ……………………………………………… |
6-8 |
||
|
Accessory power outlets ……………………………… |
6-9 |
||
|
Use with a cigarette lighter (dealer option)………. |
6-10 |
||
|
Floor mat …………………………………………………… |
6-11 |
||
|
Shopping bag hook ……………………………………. |
6-11 |
||
|
Coat hook………………………………………………….. |
6-11 |
||
|
Cargo area cover (dealer option)…………………. |
6-12 |
||
|
Using the cover …………………………………………. |
6-12 |
||
|
To remove the cover …………………………………… |
6-12 |
||
|
To install the cover housing |
6-13 |
||
|
6 |
|||
|
Cargo tie-down hooks ………………………………… |
6-13 |
||
|
Under-floor storage compartment |
|||
|
(if equipped) ……………………………………………. |
6-14 |

6-2 Interior equipment
Interior lights
When leaving your vehicle, make sure the light turns off to avoid battery discharge.
& Dome light
Vehicles with moonroof
Vehicles without moonroof
1)ON
2)DOOR
3)OFF
The dome light switch has three positions:
ON: The light stays on continuously. DOOR: The light illuminates when any of the doors or the rear gate is opened. The light remains on for several seconds and gradually turns off after all doors and the rear gate are closed or if the key is turned to the “ON” position.
The light also can be turned on by use of the remote keyless entry transmitter. Refer to the “Remote keyless entry system” section in chapter 2 for detailed information.
The setting of the period for which the light
stays on can be changed by a SUBARU dealer.
Contact your SUBARU dealer for details. OFF: The light stays off.
! OFF DELAY function
When the dome light switch is in the “DOOR” position, the dome light illuminates and gradually turns off when any of the following operations is performed.
. when the ignition switch is turned from the “Acc” to “LOCK” position
. when the doors are closed after the doors are open
. when the doors are unlocked using the remote keyless entry transmitter
The dome light turns off when one the following operations is performed.
. when the ignition switch is turned to the “ON” position
. when the doors are locked using the remote keyless entry transmitter

& Cargo area light
1)DOOR
2)OFF
3)ON
The cargo area light switch has three positions:
DOOR: The light illuminates when the rear gate is opened. The light remains illuminated for several seconds and turns off after the rear gate is closed.
OFF: The light stays off.
ON: The light stays on continuously.
& Map light
To turn on the map light, push the lens. To turn it off, push the lens again.
When leaving the vehicle, make sure the light is turned off to avoid battery discharge.
Interior equipment 6-3
! OFF DELAY function
The map light illuminates when any of the doors or the rear gate is opened. The light remains on for several seconds and gradually turns off after all doors and the rear gate are closed or if the key is turned to the “ON” position.
The setting of this function to operational/ non-operational status can be changed by a SUBARU dealer. Contact a SUBARU dealer for details.

6-4 Interior equipment
Sun visors
To block out glare, swing down the visors. To use the sun visor at a side window, swing it down and move it sideways.
& Vanity mirror
CAUTION
Keep the vanity mirror cover closed while the car is being driven to avoid being temporarily blinded by the glare of bright light.
To use the vanity mirror, swing down the sun visor and open the vanity mirror cover.
Storage compartment
CAUTION
. Always keep the storage compartment closed while driving to reduce the risk of injury in the event of a sudden stop or an accident.
. Do not store spray cans, containers with flammable or corrosive liquids or any other dangerous items in the storage compartment.

& Glove box
1)Lock
2)Unlock
To open the glove box, pull the handle. To close it, push the lid firmly upward.
To lock the glove box, insert the key and turn it clockwise. To unlock the glove box, insert the key and turn it counterclockwise.
& Center console
The center console box provides a storage space. In addition, the top of the console can be used as an armrest.
To use as an armrest:
1. Tip the console top forward from its vertical position.
2. Push the armrest part of the console top forward to the desired position. Adjust the position of the armrest to suit your
Interior equipment 6-5
driving position. Make sure the armrest is securely retained.
To return the console top to the vertical position, raise the console top.
CAUTION
Do not step or sit on the armrest, and do not place heavy objects on it. The armrest could break, and you could get hurt.
To use as storage space:
Raise the console top to the vertical position.
– CONTINUED –

6-6 Interior equipment
1)Pocket console
The pocket console can be used to store small items.
CAUTION
Be careful not to trap your hands between the console top and console box when raising and tipping the console top.
& Overhead console
To open the console, push on the console lid lightly and the lid will automatically open.
CAUTION
When your vehicle is in the sun or on a warm day, the inside of the overhead console heats up. Avoid storing plastic or other heat-vulner- able or flammable articles such as a lighter in the overhead console.
&Rear seat center table (if equipped)
To use the rear seat center table, pull the strap up.
The rear seat center table can be used as a storage space and as rear passenger

cup holders.
CAUTION
. Do not step or sit on the rear seat center table, and do not place heavy objects on it. The rear seat center table could break, and you could get hurt.
. When pulling out or returning the rear seat center table, make sure not to pinch fingers or other body parts.
& Coin tray
A coin tray is built in the center console.
Cup holders
CAUTION
Take care to avoid spills. Beverages, if hot, might burn you or your passengers. Spilled beverages may also damage upholstery, carpets or audio equipment.
& Front passenger cup holder
CAUTION
Do not pick up a cup from the cup holder or put a cup in the holder while you are driving, as this may distract you and lead to an accident.
Interior equipment 6-7
A dual cup holder is built in the center console, beside the parking brake lever.
The cup holder rear partition can be removed and placed on the front partition. This space can be used to store small items.
– CONTINUED –

6-8 Interior equipment
&Rear passenger cup holder (if equipped)
A dual cup holder is located on the rear seat center table.
Bottle holders
CAUTION
. Do not pick up a bottle from the bottle holder or put a bottle in the holder while you are driving, as this may distract you and lead to an accident.
. When placing a beverage in a door pocket, make sure it is capped. Otherwise, the beverage could spill when opening/closing the door or while driving and, if the beverage is hot, it could scald you.
The door pocket equipped on each door
trim can be used to hold beverage bottles and other items.

Accessory power outlets
Power outlet below the climate controls
Power outlet in the center console
Power outlet in the cargo area
Accessory power outlets are provided below the climate controls, in the center console and in the cargo area. Electrical power (12V DC) from the battery is available at any of the outlets when the ignition switch is in either the “Acc” or “ON” position.
You can use an in-vehicle electrical appliance by connecting it to an outlet. The maximum power rating of an appliance that can be connected varies among outlets as indicated below. Do not use an appliance which exceeds 120W for each outlet.
When using appliances connected to two outlets simultaneously, the total power consumed by them must not exceed 120W.
Interior equipment 6-9
CAUTION
. Do not attempt to use a cigarette lighter in the accessory power outlets.
. Do not place any foreign objects, especially metal ones such as coins or aluminum foil, into the accessory power outlet. That could cause a short circuit. Always put the cap on the accessory power outlet when it is not in use.
. Use only electrical appliances which are designed for 12V DC.
The maximum power rating of an appliance that can be connected varies among outlets as indicated below. Do not use an appliance which exceeds 120W for each outlet.
When using appliances connected to two outlets simultaneously, the total power consumed by them must not exceed 120W. Overloading the accessory power outlet can cause a short circuit. Do not use dual adapters or more than one electrical appliance.
. If the plug on your electric appli-
– CONTINUED –

6-10 Interior equipment
ance is either too loose or too tight for the accessory power outlet, this can result in a poor contact or cause the plug to get stuck. Only use plugs that fit properly.
. Use of an electric appliance in the accessory power outlet for a long period of time while the engine is not running can cause battery discharge.
. Before driving your vehicle, make sure that the plug and the cord on your electrical appliance will not interfere with your shifting gears and operating the accelerator and brake pedals. If they do, do not use the electrical appliance while driving.
&Use with a cigarette lighter (dealer option)
To use the accessory power outlet below the climate controls as a cigarette lighter socket, purchase the cigarette lighter plug, which is an optional accessory.
A cigarette lighter plug is available from your SUBARU dealer.
The cigarette lighter operates only when the ignition switch is in the “ON” or “Acc”
position.
To use the cigarette lighter, push in the knob and wait a few moments. It will automatically spring up when ready for use.
WARNING
To avoid being burned, never grasp the lighter by the end with the heating element. Doing so could result in injury and could also damage the heating element.
CAUTION
. Do not hold the lighter pushed in, because it will overheat.
. The electrical power socket located below the climate controls is originally designed to use a genuine SUBARU cigarette lighter plug. Do not use a non-genu- ine cigarette lighter plug in the socket. Doing so may cause a short-circuit and overheating, resulting in a fire.
. If the socket is ever used for a plug-in accessory such as a cell phone, that may damage the portion of the socket’s internal
mechanism that causes a cigarette lighter plug to “pop out” after its lighter element is heated. Therefore, do not place a cigarette lighter plug in a socket that has been used, even once, to power a plug-in accessory. Doing so may cause the plug to stick and overheat, creating a potential fire hazard.

Floor mat
A retaining pin is located on the driver’s side floor.
The floor mat is secured using the built-in grommets, by placing the grommets over the pins and pushing them downward.
CAUTION
Make sure the driver’s floor mat is placed back in its proper location and correctly secured on its retaining pins. Also, do not use more than one floor mat. If the floor mat slips forward and interferes with the movement of the pedals during driving, it could cause an accident.
Shopping bag hook
CAUTION
Do not hang items on the shopping bag hook that weigh 6 lbs (3 kg) or more.
A shopping bag hook is attached to each side of the cargo area.
Interior equipment 6-11
Coat hook
A coat hook is attached to each side of the cargo area.
CAUTION
Never hang anything on the coat hook that might obstruct the driver’s view or that could cause injury in sudden stops or in a collision. Do no hang items on the coat hook that weigh 6 lbs (3 kg) or more.

6-12 Interior equipment
Cargo area cover (dealer option)
The cargo area cover is provided for covering the cargo area and to protect its contents from direct sunlight. This cover is detachable to make room for additional cargo.
& Using the cover
To extend the cover, pull the end of the cover out of the housing, then insert its hooks into the catches as shown. To rewind it, unhook it from the catches and it will rewind automatically. You should hold on to the cover and guide it back into the cover housing while it is rewinding.
WARNING
Do not place anything on the extended cover. Putting excessive weight on the extended cover can break it and an object on the cover could tumble forward in the event of a sudden stop or collision. This could cause serious injury.
CAUTION
Be careful not to scratch the rear gate stays while extending and rewinding the cover.
Scratches on the stays could cause leakage of gas from the stays, which may result in their inability to hold the rear gate open.
& To remove the cover
1. Rewind the cover.
2.Push the switch that is next to the right end of the cover housing.
3.Take it off the retainer.

& To install the cover housing
1. Remove the cover of the retainers by prying on the edge with a flat-head screwdriver.
2. Insert the projections located on the
both ends of the sleeve into the recesses of the retainers.
Interior equipment 6-13
Cargo tie-down hooks
The cargo area is equipped with four tiedown hooks so that cargo can be secured with a cargo net or ropes.
When using the tie-down hooks, turn them down out of the storing recesses. When not in use, put the hooks up into the storing recesses.
– CONTINUED –

6-14 Interior equipment
CAUTION
The cargo tie-down hooks are designed only for securing light cargo. Never try to secure cargo that exceeds the capacity of the hooks. The maximum load capacity is 44 lbs (20 kg) per hook.
Under-floor storage compartment (if equipped)
The storage compartment is located under the floor of the cargo area, and it can be used to store small items. To open the lid, pull the tab up.
CAUTION
. Always keep the lids closed while driving to reduce the risk of injury in the event of a sudden stop or an accident.
. Do not store spray cans, containers with flammable or corrosive liquids or any other dangerous items in the storage compartment.

Starting and operating
|
Fuel ……………………………………………………………. |
7-2 |
|
Fuel requirements ……………………………………….. |
7-2 |
|
Fuel filler lid and cap……………………………………. |
7-3 |
|
State emission testing (U.S. only)…………………. |
7-6 |
|
Preparing to drive ……………………………………….. |
7-7 |
|
Starting the engine………………………………………. |
7-7 |
|
Manual transmission vehicle………………………….. |
7-7 |
|
Automatic transmission vehicle ……………………… |
7-8 |
|
Stopping the engine…………………………………….. |
7-9 |
|
Remote engine start system (dealer option)….. |
7-9 |
|
Starting your vehicle …………………………………… |
7-10 |
|
Remote start safety features …………………………. |
7-10 |
|
Entering the vehicle while it is running via remote |
|
|
start……………………………………………………….. |
7-10 |
|
Entering the vehicle following remote engine start |
|
|
shutdown………………………………………………… |
7-10 |
|
Pre-heating or pre-cooling the interior of the |
|
|
vehicle ……………………………………………………. |
7-11 |
|
Service mode …………………………………………….. |
7-11 |
|
Remote transmitter programming and |
|
|
programmable feature option………………………. |
7-11 |
|
System maintenance …………………………………… |
7-12 |
|
Manual transmission…………………………………… |
7-13 |
|
Shifting speeds ………………………………………….. |
7-14 |
|
Driving tips ……………………………………………….. |
7-14 |
|
Automatic transmission………………………………. |
7-15 |
|
Selector lever…………………………………………….. |
7-15 |
|
Selector lever reverse inhibiting function ………… |
7-17 |
|
Selection of manual mode ……………………………. |
7-18 |
|
Maximum speeds ……………………………………….. |
7-19 |
|
Driving tips ……………………………………………….. |
7-19 |
|
SPORT mode…………………………………………….. |
7-20 |
||
|
Shift lock release ……………………………………….. |
7-20 |
||
|
Power steering…………………………………………… |
7-21 |
||
|
Braking ……………………………………………………… |
7-21 |
||
|
Braking tips………………………………………………. |
7-21 |
||
|
Brake system ……………………………………………. |
7-22 |
||
|
Disc brake pad wear warning indicators …………. |
7-22 |
||
|
ABS (Anti-lock Brake System)…………………….. |
7-23 |
||
|
ABS system self-check ……………………………….. |
7-23 |
||
|
ABS warning light………………………………………. |
7-23 |
||
|
Electronic Brake Force Distribution (EBD) |
|||
|
system ……………………………………………………. |
7-24 |
||
|
7 |
|||
|
Steps to take if EBD system fails ………………….. |
7-25 |
||
|
Vehicle Dynamics Control system |
7-26 |
||
|
Vehicle Dynamics Control system monitor………. |
7-27 |
||
|
Vehicle Dynamics Control OFF switch ……………. |
7-29 |
||
|
Tire pressure monitoring system (TPMS) |
|||
|
(U.S.-spec. models)………………………………….. |
7-30 |
||
|
Parking your vehicle ………………………………….. |
7-31 |
||
|
Parking brake ……………………………………………. |
7-31 |
||
|
Parking tips ………………………………………………. |
7-32 |
||
|
Hill start assist system (MT vehicles) ………….. |
7-33 |
||
|
Hill start assist warning light………………………… |
7-34 |
||
|
Cruise control ……………………………………………. |
7-34 |
||
|
To set cruise control …………………………………… |
7-35 |
||
|
To temporarily cancel the cruise control…………. |
7-35 |
||
|
To turn off the cruise control………………………… |
7-36 |
||
|
To change the cruising speed ………………………. |
7-36 |
||
|
Cruise control indicator light………………………… |
7-37 |
||
|
Cruise control set indicator light …………………… |
7-38 |

7-2 Starting and operating
Fuel
CAUTION
Use of a fuel which is low in quality or use of an inappropriate fuel additive may cause engine damage.
& Fuel requirements
! Non-turbo models
The 2.5-liter non-turbo engine is designed to operate using unleaded gasoline with an octane rating of 87 AKI or higher.
! Turbo models
The 2.5-liter turbo engine is designed to operate using premium unleaded gasoline with an octane rating of 91 AKI or higher. If premium unleaded gasoline is not available, regular unleaded gasoline with an octane rating of 87 AKI or higher may be temporarily used. For optimum engine performance and driveability, it is required that you use premium grade unleaded gasoline.
NOTE
Be sure to use premium unleaded gasoline of 91 AKI or higher for turbo engine models. If other gasoline (lower
than 91 AKI) is used, knocking, reduced output and poor accelerator response will result.
! Fuel octane rating
This octane rating is the average of the Research Octane and Motor Octane numbers and is commonly referred to as the Anti Knock Index (AKI).
Using a gasoline with a lower octane rating can cause persistent and heavy knocking, which can damage the engine. Do not be concerned if your vehicle sometimes knocks lightly when you drive up a hill or when you accelerate. See your dealer or a qualified service technician if you use a fuel with the specified octane rating and your vehicle knocks heavily or persistently.
! Unleaded gasoline
The neck of the fuel filler pipe is designed to accept only an unleaded gasoline filler nozzle. Under no circumstances should leaded gasoline be used because it will damage the emission control system and may impair driveability and fuel economy.
!Gasoline for California-certified LEV
If your vehicle was certified to California’s low emission vehicle (LEV) standards as indicated on the underhood tune-up label,
it is designed to optimize engine and emission performance with gasoline that meets the clean burning low-sulfur California gasoline specifications. If you live in any other state than California, your vehicle will operate on gasoline meeting Federal specifications. Gasoline sold outside California is permitted to have higher sulfur levels, which may affect the performance of your vehicle’s catalytic converter and may produce a sulfur exhaust odor or smell. SUBARU recommends that you try a different brand of unleaded gasoline having lower sulfur to determine if the problem is fuel related before returning your vehicle to an authorized dealer for service.
! MMT
Some gasoline contains an octane-en- hancing additive called MMT (Methylcyclopentadienyl Manganese Tricarbonyl). If you use such fuels, your emission control system performance may deteriorate and the CHECK ENGINE warning light/Malfunction indicator lamp may turn on. If this happens, return to your authorized SUBARU Dealer for service. If it is determined that the condition is caused by the type of fuel used, repairs may not be covered by your warranty.

! Gasoline for cleaner air
Your use of gasoline with detergent additives will help prevent deposits from forming in your engine and fuel system. This helps keep your engine in tune and your emission control system working properly, and is a way of doing your part for cleaner air. If you continuously use a high quality fuel with the proper detergent and other additives, you should never need to add any fuel system cleaning agents to your fuel tank.
Many gasolines are now blended with materials called oxygenates. Use of these fuels can also help keep the air cleaner. Oxygenated blend fuels, such as MTBE (Methyl Tertiary Butyl ether) or ethanol (ethyl or grain alcohol) may be used in your vehicle, but should contain no more than 15% MTBE or 10% ethanol for the proper operation of your SUBARU.
In addition, some gasoline suppliers are now producing reformulated gasolines, which are designed to reduce vehicle emissions. SUBARU approves the use of reformulated gasoline.
If you are not sure what the fuel contains, you should ask your service station operators if their gasolines contain detergents and oxygenates and if they have
been reformulated to reduce vehicle emissions.
As additional guidance, only use fuels suited for your vehicle as explained in the following description.
. Fuel should be unleaded and have an octane rating no lower than that specified in this manual.
. Methanol (methyl or wood alcohol) is sometimes mixed with unleaded gasoline. Methanol can be used in your vehicle ONLY if it does not exceed 5% of the fuel mixture AND if it is accompanied by sufficient quantities of the proper cosolvents and corrosion inhibitors required to prevent damage to the fuel system. Do not use fuel containing methanol EXCEPT under these conditions.
. If undesirable driveability problems are experienced and you suspect they may be fuel related, try a different brand of gasoline before seeking service at your SUBARU dealer.
. Fuel system damage or driveability problems which result from the use of improper fuel are not covered under the SUBARU Limited Warranty.
CAUTION
Do not let fuel spill on the exterior surfaces of the vehicle. Because
Starting and operating 7-3
fuel may damage the paint, be sure to wipe off any spilled fuel quickly. Paint damage caused by spilled fuel is not covered under the SUBARU Limited Warranty.
& Fuel filler lid and cap
! Refueling
Only one person should be involved in refueling. Do not allow others to approach the area of the vehicle near the fuel filler pipe while refueling is in progress.
Be sure to observe any other precautions that are posted at the service station.
– CONTINUED –
 Loading…
Сборник руководств на английском языке по техническому обслуживанию и ремонту автомобиля Subaru Forester 1999-2002 годов выпуска.
- Автор: —
- Издательство: Fuji Heavy Industries Ltd.
- Год издания: —
- Страниц: —
- Формат: PDF
- Размер: 86,8 Mb
Сборник руководств на английском языке по техническому обслуживанию и ремонту автомобиля Subaru Forester 2002-2008 годов выпуска.
- Автор: —
- Издательство: Fuji Heavy Industries Ltd.
- Год издания: —
- Страниц: —
- Формат: PDF
- Размер: 529,4 Mb
Руководство на английском языке по техническому обслуживанию и ремонту автомобиля Subaru Forester 2014 модельного года.
- Автор: —
- Издательство: Fuji Heavy Industries Ltd.
- Год издания: —
- Страниц: 7222
- Формат: PDF
- Размер: 228,9 Mb
Руководство по эксплуатации и техническому обслуживанию автомобиля Subaru Forester первого поколения.
- Автор: —
- Издательство: Fuji Heavy Industries Ltd.
- Год издания: —
- Страниц: 152
- Формат: PDF
- Размер: 9,9 Mb
Руководство по техническому обслуживанию и ремонту автомобилей Subaru Forester 2008 года выпуска.
- Автор: —
- Издательство: Fuji Heavy Industries Ltd.
- Год издания: —
- Страниц: 3726
- Формат: PDF
- Размер: 54,7 Mb
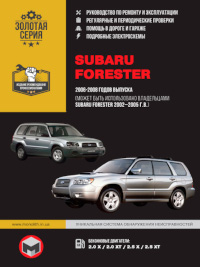
Руководство по эксплуатации и ремонту автомобиля Subaru Forester 2006-2008 годов выпуска с бензиновыми двигателями объемом 2,0/2,5 л.
- Автор: —
- Издательство: Монолит
- Год издания: —
- Страниц: 454
- Формат: —
- Размер: —
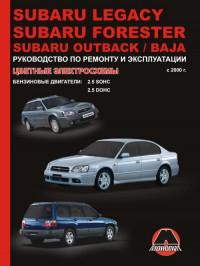
Руководство по эксплуатации и ремонту автомобилей Subaru Baja/Forester/Legacy/Outback с 2000 года выпуска с бензиновыми двигателями объемом 2,5 л.
- Автор: —
- Издательство: Монолит
- Год издания: —
- Страниц: 468
- Формат: —
- Размер: —
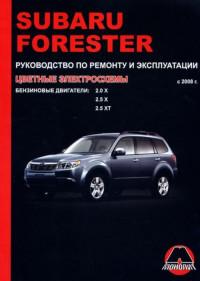
Руководство по эксплуатации и ремонту автомобиля Subaru Forester с 2008 года выпуска с бензиновыми двигателями объемом 2,0/2,5 л.
- Автор: —
- Издательство: Монолит
- Год издания: 2009
- Страниц: 306
- Формат: —
- Размер: —
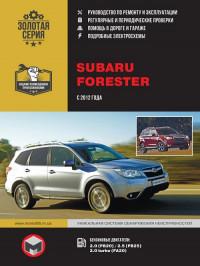
Руководство по эксплуатации и ремонту автомобиля Subaru Forester с 2012 года выпуска с бензиновыми двигателями объемом 2,0/2,5 л.
- Автор: —
- Издательство: Монолит
- Год издания: —
- Страниц: 538
- Формат: —
- Размер: —
Руководство по техническому обслуживанию и ремонту автомобиля Subaru Forester 2009 года выпуска.
- Автор: —
- Издательство: —
- Год издания: 2009
- Страниц: —
- Формат: HTML
- Размер: 281,2 Mb
Руководство по техническому обслуживанию и ремонту автомобиля Subaru Forester 2012 года выпуска.
- Автор: —
- Издательство: —
- Год издания: 2012
- Страниц: —
- Формат: HTML
- Размер: 171,8 Mb
уководство по техническому обслуживанию и ремонту автомобиля Subaru Forester 2014 года выпуска.
- Автор: —
- Издательство: —
- Год издания: 2014
- Страниц: —
- Формат: HTML
- Размер: 333,8 Mb
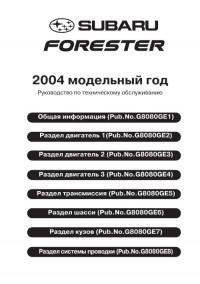
Руководство по техническому обслуживанию и ремонту автомобиля Subaru Forester 2004 модельного года.
- Автор: —
- Издательство: Fuji Heavy Industries Ltd.
- Год издания: —
- Страниц: 3612
- Формат: PDF
- Размер: 87,0 Mb
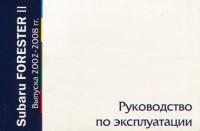
Руководство по эксплуатации и техническому обслуживанию автомобиля Subaru Forester 2002-2008 годов выпуска.
- Автор: —
- Издательство: MoToR
- Год издания: —
- Страниц: 250
- Формат: —
- Размер: —
Сборник руководств по эксплуатации и техническому обслуживанию автомобиля Subaru Forester второго поколения.
- Автор: —
- Издательство: Fuji Heavy Industries Ltd.
- Год издания: 2004/2006
- Страниц: 475/512
- Формат: PDF
- Размер: 17,0 Mb
Сборник руководств по эксплуатации и техническому обслуживанию автомобиля Subaru Forester третьего поколения.
- Автор: —
- Издательство: Fuji Heavy Industries Ltd.
- Год издания: 2010/2011/2011
- Страниц: 544/534/8
- Формат: PDF
- Размер: 24,0 Mb
Сборник руководств по эксплуатации и техническому обслуживанию автомобиля Subaru Forester четвертого поколения.
- Автор: —
- Издательство: Fuji Heavy Industries Ltd.
- Год издания: 2013-2016
- Страниц: —
- Формат: PDF
- Размер: 42,0 Mb
Руководство по эксплуатации и ремонту автомобилей Subaru Forester с 1997 и Subaru Legacy/Outback 1999-2003 годов выпуска.
- Автор: —
- Издательство: —
- Год издания: —
- Страниц: —
- Формат: HTML
- Размер: 127,1 Mb
Руководство по эксплуатации, техническому обслуживанию и ремонту автомобиля Subaru Forester 1997-2002 годов выпуска с бензиновыми двигателями.
- Автор: —
- Издательство: Автонавигатор
- Год издания: —
- Страниц: 536
- Формат: —
- Размер: —
Руководство по эксплуатации, техническому обслуживанию и ремонту автомобиля Subaru Forester с 2002 года выпуска с бензиновыми двигателями объемом 2,0/2,5 л.
- Автор: —
- Издательство: Автонавигатор
- Год издания: —
- Страниц: 552
- Формат: —
- Размер: —
Руководство по эксплуатации, техническому обслуживанию и ремонту автомобиля Subaru Forester 2008-2011 годов выпуска с бензиновыми двигателями объемом 2,0/2,5 л.
- Автор: —
- Издательство: Автонавигатор
- Год издания: —
- Страниц: 368
- Формат: —
- Размер: —
Руководство по эксплуатации, техническому обслуживанию и ремонту автомобиля Subaru Forester 2010-2013 годов выпуска с бензиновыми двигателями объемом 2,0/2,5 л.
- Автор: —
- Издательство: Автонавигатор
- Год издания: —
- Страниц: 506
- Формат: —
- Размер: —
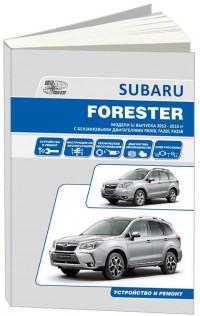
Руководство по эксплуатации, техническому обслуживанию и ремонту автомобиля Subaru Forester 2012-2016 годов выпуска с бензиновыми двигателями объемом 2,0/2,5 л.
- Автор: —
- Издательство: Автонавигатор
- Год издания: —
- Страниц: 516
- Формат: —
- Размер: —
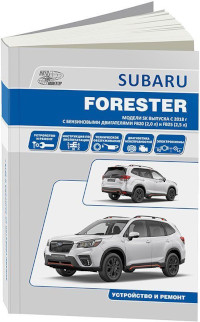
Руководство по эксплуатации, техническому обслуживанию и ремонту автомобиля Subaru Forester серии SK с 2018 года выпуска с бензиновыми двигателями объемом 2,0/2,5 л.
- Автор: —
- Издательство: Автонавигатор
- Год издания: —
- Страниц: 464
- Формат: —
- Размер: —
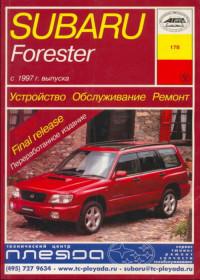
Руководство по техническому обслуживанию и ремонту автомобиля Subaru Forester с 1997 года выпуска.
- Автор: —
- Издательство: Арус
- Год издания: 2005
- Страниц: 203
- Формат: PDF
- Размер: 90,5 Mb
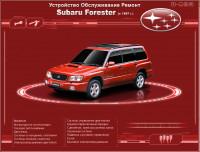
Мультимедийное руководство по техническому обслуживанию и ремонту автомобиля Subaru Forester с 1997 года выпуска.
- Автор: —
- Издательство: —
- Год издания: —
- Страниц: —
- Формат: —
- Размер: 115,0 Mb
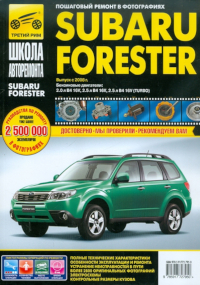
Руководство по эксплуатации, техническому обслуживанию и ремонту автомобиля Subaru Forester с 2008 года выпуска с бензиновыми двигателями объемом 2,0/2,5 л.
- Автор: —
- Издательство: Третий Рим
- Год издания: —
- Страниц: 312
- Формат: —
- Размер: —

Manufacturer: SUBARU, Model Year: 2009,
Model line: FORESTER,
Model: SUBARU FORESTER 2009 SH / 3.G
Pages: 384, PDF Size: 13.91 MB
Trending: child seat, height, start stop button, relay, coolant temperature, warning lights, jacking
Page 1 of 384

Page 2 of 384

Page 3 of 384

Page 4 of 384
Page 5 of 384
Page 6 of 384
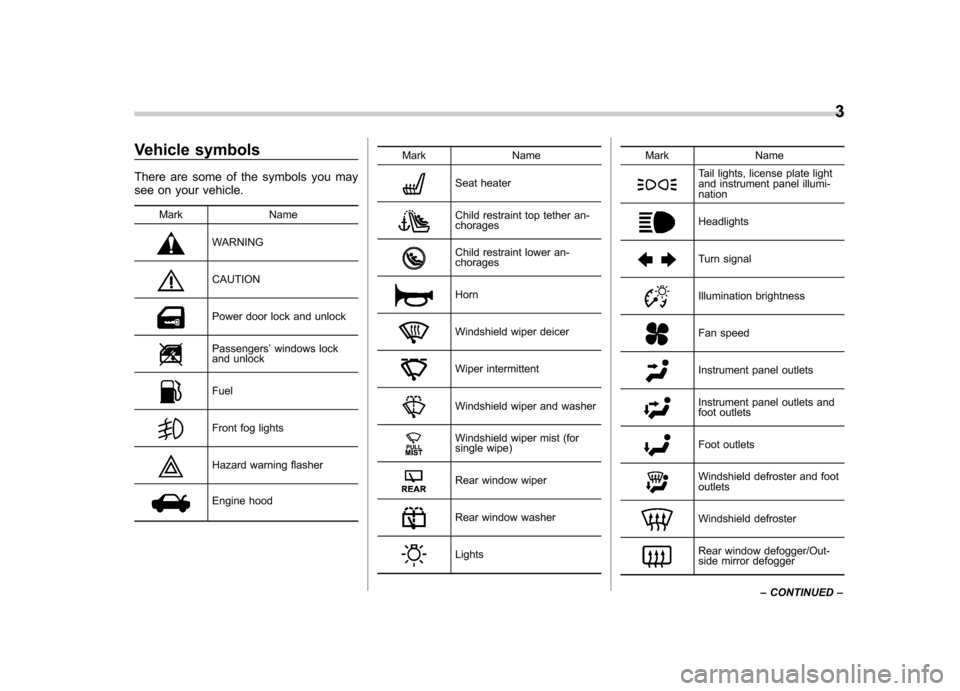
Page 7 of 384
Page 8 of 384
Page 9 of 384
Page 10 of 384
- Load next 10 pages
Trending: ECU, brakes, jacking, keyless, battery, transmission, tire type
View, print and download for free: SUBARU FORESTER 2009 SH / 3.G Owners Manual, 384 Pages, PDF Size: 13.91 MB. Search in SUBARU FORESTER 2009 SH / 3.G Owners Manual online. CarManualsOnline.info is the largest online database of car user manuals. SUBARU FORESTER 2009 SH / 3.G Owners Manual PDF Download.
All product names, logos, and brands are property of their respective owners.
Privacy Policy | About Us & Contact
Subaru Forester 2009 Owner’s Manual: Your Ultimate Guide to Operating and Maintaining Your Vehicle
The Subaru Forester 2009 is an impressive car that is known for its reliability, durability, and versatility. If you are a proud owner of this vehicle, then it is essential to know how to operate and maintain it properly. And there’s no better way to do that than by reading the Subaru Forester 2009 Owner’s Manual.
This manual is a comprehensive guide that covers everything you need to know about your vehicle. It includes essential information about the car’s specifications, features, and functions, as well as tips for troubleshooting common issues. The manual also provides instructions on how to properly maintain your vehicle, ensuring that it remains in top condition for years to come.
One of the most significant advantages of the Subaru Forester 2009 Owner’s Manual is that it helps you save money on repairs and maintenance. With the manual’s help, you can identify and fix minor issues before they become major problems that require expensive repairs. This way, you can prolong the life of your car while keeping your wallet intact.
The Subaru Forester 2009 Owner’s Manual is also an excellent resource for those who enjoy DIY maintenance. The manual provides step-by-step instructions for performing basic maintenance tasks, such as oil changes, tire rotations, and brake inspections. This way, you can save money on labor costs and learn valuable skills that will come in handy in the future.
In conclusion, the Subaru Forester 2009 Owner’s Manual is an indispensable guide for every Forester owner. It provides all the information you need to know about your vehicle, from its basic features to advanced functions. By following the manual’s instructions, you can keep your Forester running smoothly and efficiently for years to come, ensuring that you get the most out of your investment.
If you are a Subaru Forester 2009 owner, make sure to get your hands on the Owner’s Manual today! With this manual, you will have all the knowledge and tools you need to keep your car in top shape and enjoy a safe and comfortable driving experience.
Language: English
Format: PDF
Subaru Forester 2009 Owner’s Manual
Инструкции по эксплуатации
График обслуживания автомобилей Subaru
Скачать PDF
Инструкция по эксплуатации автомобиля SUBARU Impreza 2009МГ
Скачать PDF
Инструкция по эксплуатации автомобиля SUBARU Forester 2007МГ
Скачать PDF
Инструкция по эксплуатации автомобиля SUBARU Impreza 2007МГ
Скачать PDF
Инструкция по эксплуатации автомобиля SUBARU Legacy и SUBARU Outback 2007МГ
Скачать PDF
Инструкция по эксплуатации автомобиля SUBARU Impreza 2005МГ
Скачать PDF
Инструкция по эксплуатации автомобиля SUBARU Forester 2005МГ
Скачать PDF
Инструкция по эксплуатации автомобиля SUBARU Legacy 2005МГ
Скачать PDF