

BMW F-30. Руководство по эксплуатации.
Руководство по эксплуатации автомобилей BMW F-30 серии.
Данное руководство содержит важные указания по эксплуатации автомобилей BMW F-30 серии различных комплектаций.
Здесь также приводятся основные технические характеристики моделей данной серии.
— Руководство по эксплуатации комплекта подготовки под мобильный телефон. Содержит сведения о регистрации и использовании мобильного телефона в автомобиле.
— Руководство по эксплуатации радиоприемника. Описание радиоприемника и всех его функций.
— Руководство по эксплуатации бортового монитора. Описание бортового монитора, функции компьютера, навигационной системы, радио, телефона и т.п..
Отдельной брошюрой описаны системы помощи водителю, такие как:
— KAFAS
— Система управления дальним светом
— Предупреждение опасности перед перестроением
— Видеокамера кругового обзора
— Сигнализация аварийного сближения при парковке и парковочный ассистент
— DCC
— ACC Stop&Go
— Виртуальный дисплей
Формат PDF, язык Русский.


BMW F-30. Двигатель N13. Служба сервиса BMW.
Техническая документация содержащая сведения по двигателю BMW N13.
Данная брошюра содержит следующие разделы с подробным описанием:
Механическая часть двигателя
-Картер двигателя
-Кривошипно-шатунный механизм
-Привод распределительного вала
-Привод клапанов (Valvetronic)
Система подачи масла
-Масляный насос и регулировка давления
-Охдаждение и фильтрация масла
-Контроль уровня и давления масла
-Масляные форсунки
Система охлаждения
-Терморегулирующая система
-Термостат и принципы работы
Система впуска и выпуска ОГ
-Плёночный термоанемометрический расходомер воздуха
-Турбонагнетатель
-Выпускной коллектор и катализатор
Система подготовки рабочей смеси
Подача топлива
Электрооборудование двигателя и электросхемы
Формат PDF
Язык Русский
.

BMW F-30. Двигатель N55. Служба сервиса BMW.
Техническая документация содержащая важные сведения по двигателю BMW N55.
Данная брошюра содержит следующие разделы с подробным описанием:
Механическая часть двигателя;
-Картер двигателя
-Кривошипно-шатунный механизм
-Привод распределительного вала
-Привод клапанов (Valvetronic)
-VANOS
-Регулировка хода клапанов
Система подачи масла;
-Масляный насос и регулировка давления
-Охдаждение и фильтрация масла
-Контроль уровня и давления масла
-Масляные форсунки
Система охлаждения;
-Терморегулирующая система
-Термостат и принципы работы
Система впуска и выпуска ОГ;
-Плёночный термоанемометрический расходомер воздуха
-Турбонагнетатель
-Выпускной коллектор и катализатор
Система подготовки рабочей смеси
Подача топлива
Электрооборудование двигателя и электросхемы
-Регулировка давления наддува
-Датчик коленвала, давления масла
-Катушка зажигания и свеча зажигания
-Серводвигатель Valvetrinic.
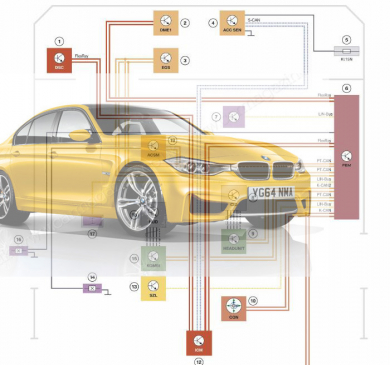
BMW F-30. Электросхемы.
В этой докуметнации отражены все электросхемы а также электрооборудования в BMW F-30, включающие в себя:
— Система электропитания.
— Передний электронный модуль (FEM)
— Задний электронный модуль (REM)
— Функции CAS
— Система комфортного доступа
— Центральный замок
— Снеклоподьёмники, наружние зеркала и сдвижной люк на крыше
— Внешнее освещение, освещение салона
— Сиденья
— Отопление и кондиционирование.
Формат PDF
Язык Русский.

BMW F-30. Привод. Служба сервиса BMW.
Брошюра содержит следующую информацию и тех.данные по приводу BMW F-30:
Двигатели N20, N55, N47TU
— Технические характеристики
— Диаграммы полной нагрузки
— Система контроля уровня масла
— Маркировки и обозначения
Подача топлива бензин/дизель
— Обзор системы
— Вентиляция топливного бака
Механическая и Автоматическая коробки передач
— МКПП I-Turbo, особенности и характеристики
— Блоки шестерён и система смазки с сухим картером
— Синхронизация
— АКПП GA8HP45Z, характеристики и обозначения
Карданные валы и полуоси, защита при столкновении.
Формат PDF
Язык Русский.

BMW F-30. Ходовая часть. Служба сервиса BMW.
Содержание брошюры включает в себя следующие разделы:
Передняя и задняя подвески;
— Характеристики и обслуживание
— Спортивная и адаптивные части М
— Система контроля давления в шинах (RDC)
Тормоза и рулевое управление;
— Электрический усилитель руля (EPS)
— Электросхемы
— Спортивное рулевое управление
— Регулировка рулевой колонки
Система управления динамикой;
— Система управления ходовой частью (ICM)
— Система динамического контроля устойчивости (DNC)
— Динамический круиз-контроль (DCC)
— Система регулировки жёсткости амортизаторов (EDC)
— Электросхемы всех узлов
Формат PDF
Язык Русский.


После прочтения руководства по эксплуатации раскрывается много интересных подробностей. Например, обнаружил, что в авто есть доводчики стекол. Чтобы воспользоваться данной функцией, нужно продолжительно нажать на кнопку запирания после постановки на охрану. Стекла автоматически закрываются. Держать нужно до полного закрытия.
Так как на просторах DRIVE2 руководства не обнаружил, выкладываю ссылку с ресурса BMW F30 CLUB.
Бонусом прикладываю ссылку на инструкцию по уходу за BMW.
Комментарии
13
Войдите или зарегистрируйтесь, чтобы писать комментарии, задавать вопросы и участвовать в обсуждении.

ссылка битая на основной мануал, перезалейте кто нибудь пж)


Прочитал как только купил машину. Но нужно делать поправку на комплектацию

Я езжу на Volkswagen Passat B8
Полезная литература, спасибо)

советую посмотреть на бмвклабе тему про кодирование, оттуда тоже можно почерпнуть какие ещё есть дополнительные функции в машине, а также те которые с завода есть но для нас заблокированы (и можно их разблокировать)


А с машиной мануал не дали ?)
Наверное в машине лежит. Встроенный в бошку точно есть.

а мне еще манагер при выдаче авто показал эти и другие функции, инструкция на клабе есть
Доброй души человек попался

В первом случае скачивается формат файла pdf, во втором случае исправил ссылку из depositfiles на я.диск, скачивается в формате pdf. В любом случае при скачивании фалов из интернета советую проверять антивирусом)

а почему ехе скачивается вирус засунул ?
Перейти к контенту
BMW F-30. Руководство по эксплуатации.
Руководство по эксплуатации автомобилей BMW F-30 серии.
Данное руководство содержит важные указания по эксплуатации автомобилей BMW F-30 серии различных комплектаций.
Здесь также приводятся основные технические характеристики моделей данной серии.
— Руководство по эксплуатации комплекта подготовки под мобильный телефон. Содержит сведения о регистрации и использовании мобильного телефона в автомобиле.
— Руководство по эксплуатации радиоприемника. Описание радиоприемника и всех его функций.
— Руководство по эксплуатации бортового монитора. Описание бортового монитора, функции компьютера, навигационной системы, радио, телефона и т.п..
Отдельной брошюрой описаны системы помощи водителю, такие как:
— KAFAS
— Система управления дальним светом
— Предупреждение опасности перед перестроением
— Видеокамера кругового обзора
— Сигнализация аварийного сближения при парковке и парковочный ассистент
— DCC
— ACC Stop&Go
— Виртуальный дисплей
Формат PDF, язык Русский.
BMW F-30. Двигатель N13. Служба сервиса BMW.
Техническая документация содержащая сведения по двигателю BMW N13.
Данная брошюра содержит следующие разделы с подробным описанием:
Механическая часть двигателя
-Картер двигателя
-Кривошипно-шатунный механизм
-Привод распределительного вала
-Привод клапанов (Valvetronic)
Система подачи масла
-Масляный насос и регулировка давления
-Охдаждение и фильтрация масла
-Контроль уровня и давления масла
-Масляные форсунки
Система охлаждения
-Терморегулирующая система
-Термостат и принципы работы
Система впуска и выпуска ОГ
-Плёночный термоанемометрический расходомер воздуха
-Турбонагнетатель
-Выпускной коллектор и катализатор
Система подготовки рабочей смеси
Подача топлива
Электрооборудование двигателя и электросхемы
Формат PDF
Язык Русский
.
BMW F-30. Двигатель N55. Служба сервиса BMW.
Техническая документация содержащая важные сведения по двигателю BMW N55.
Данная брошюра содержит следующие разделы с подробным описанием:
Механическая часть двигателя;
-Картер двигателя
-Кривошипно-шатунный механизм
-Привод распределительного вала
-Привод клапанов (Valvetronic)
-VANOS
-Регулировка хода клапанов
Система подачи масла;
-Масляный насос и регулировка давления
-Охдаждение и фильтрация масла
-Контроль уровня и давления масла
-Масляные форсунки
Система охлаждения;
-Терморегулирующая система
-Термостат и принципы работы
Система впуска и выпуска ОГ;
-Плёночный термоанемометрический расходомер воздуха
-Турбонагнетатель
-Выпускной коллектор и катализатор
Система подготовки рабочей смеси
Подача топлива
Электрооборудование двигателя и электросхемы
-Регулировка давления наддува
-Датчик коленвала, давления масла
-Катушка зажигания и свеча зажигания
-Серводвигатель Valvetrinic.
BMW F-30. Электросхемы.
В этой докуметнации отражены все электросхемы а также электрооборудования в BMW F-30, включающие в себя:
— Система электропитания.
— Передний электронный модуль (FEM)
— Задний электронный модуль (REM)
— Функции CAS
— Система комфортного доступа
— Центральный замок
— Снеклоподьёмники, наружние зеркала и сдвижной люк на крыше
— Внешнее освещение, освещение салона
— Сиденья
— Отопление и кондиционирование.
Формат PDF
Язык Русский.
BMW F-30. Привод. Служба сервиса BMW.
Брошюра содержит следующую информацию и тех.данные по приводу BMW F-30:
Двигатели N20, N55, N47TU
— Технические характеристики
— Диаграммы полной нагрузки
— Система контроля уровня масла
— Маркировки и обозначения
Подача топлива бензин/дизель
— Обзор системы
— Вентиляция топливного бака
Механическая и Автоматическая коробки передач
— МКПП I-Turbo, особенности и характеристики
— Блоки шестерён и система смазки с сухим картером
— Синхронизация
— АКПП GA8HP45Z, характеристики и обозначения
Карданные валы и полуоси, защита при столкновении.
Формат PDF
Язык Русский.
BMW F-30. Ходовая часть. Служба сервиса BMW.
Содержание брошюры включает в себя следующие разделы:
Передняя и задняя подвески;
— Характеристики и обслуживание
— Спортивная и адаптивные части М
— Система контроля давления в шинах (RDC)
Тормоза и рулевое управление;
— Электрический усилитель руля (EPS)
— Электросхемы
— Спортивное рулевое управление
— Регулировка рулевой колонки
Система управления динамикой;
— Система управления ходовой частью (ICM)
— Система динамического контроля устойчивости (DNC)
— Динамический круиз-контроль (DCC)
— Система регулировки жёсткости амортизаторов (EDC)
— Электросхемы всех узлов
Формат PDF
Язык Русский.
Страница 1 из 2
-
Stop hovering to collapse…
Click to collapse…
Hover to expand…
Нажмите, чтобы раскрыть…
-
Stop hovering to collapse…
Click to collapse…
Hover to expand…
Нажмите, чтобы раскрыть…
-
на английском пойдет?
на русском у меня только печатная есть.
Stop hovering to collapse…
Click to collapse…
Hover to expand…
Нажмите, чтобы раскрыть…
-
так она выводиться на монитор! не?!
Stop hovering to collapse…
Click to collapse…
Hover to expand…
Нажмите, чтобы раскрыть…
-
А зачем, простие? Или Вы читать надумали?

-
А че мануал при покупке больше не дают в приятной кожаной папке?
Stop hovering to collapse…
Click to collapse…
Hover to expand…
Нажмите, чтобы раскрыть…
-
Stop hovering to collapse…
Click to collapse…
Hover to expand…
Нажмите, чтобы раскрыть…
-
Stop hovering to collapse…
Click to collapse…
Hover to expand…
Нажмите, чтобы раскрыть…
-
Stop hovering to collapse…
Click to collapse…
Hover to expand…
Нажмите, чтобы раскрыть…
-
у тебя вроде 5, да? все ветки по ф30 куришь! Чак, как ты все успеваешь?!
Stop hovering to collapse…
Click to collapse…
Hover to expand…
Нажмите, чтобы раскрыть…
-
- Регистрация:
- 22 сен 2012
- Сообщения:
- 22
- Пол:
- Мужской
- Регион:
- Москва
-
на 149 странице указано что разъем USB есть в бардачке,
так ли это на самом деле????
Я считал что он идет как опция в центральном подлокотнике.
Stop hovering to collapse…
Click to collapse…
Hover to expand…
Нажмите, чтобы раскрыть…
-
В бардачке usb только с навигацией Professional. Что бы музычку на hdd закидывать.
Stop hovering to collapse…
Click to collapse…
Hover to expand…
Нажмите, чтобы раскрыть…
-
Года 3-4 назад искал инструкцию на Е70,не нашел,зарегился на bmw.ru и в личном кабинете оказалось много разных инструкций по Е70 в pdf. Для регистрации требуется VIN.
Может кто-нибудь из счастливых обладателей F30 зарегится там и выложит сюда?
Скоро будет год как модель появилась,а инструкции на русском в электронном виде всё нет.Сам жду машину в январе,если что…..
Stop hovering to collapse…
Click to collapse…
Hover to expand…
Нажмите, чтобы раскрыть…
-
Не угодал.не только с нави про идет в бордачке.
-
Нет ее там на русском сайте.
На английском мануал есть в сети.
Stop hovering to collapse…
Click to collapse…
Hover to expand…
Нажмите, чтобы раскрыть…
-
Спасибо
. Думаю,кроме кузова,существенных отличий нет.
Stop hovering to collapse…
Click to collapse…
Hover to expand…
Нажмите, чтобы раскрыть…
-
В русскоязычной нет раздел «Нивигация, Мультимедиа и т.д.», потому и тоньше.Кстати, может там и на навигацию есть мануал? Как нашел ссылку? Весь раздел просмотрел — безрезультатно
-
ну ты глазастый, Андрей. нашел ведь
Stop hovering to collapse…
Click to collapse…
Hover to expand…
Нажмите, чтобы раскрыть…
-
по колодкам я ответил тебе в другой ветке
Stop hovering to collapse…
Click to collapse…
Hover to expand…
Нажмите, чтобы раскрыть…
-
Stop hovering to collapse…
Click to collapse…
Hover to expand…
Нажмите, чтобы раскрыть…
-
кстати, да
Stop hovering to collapse…
Click to collapse…
Hover to expand…
Нажмите, чтобы раскрыть…
-
В этом раша мануале много чего нет; про мультимедию, навигацию, и про брелок-ключ нет информации про 4-ю кнопку и т. д.
Проси более полный -
Более полный на английском… И на Седан
Stop hovering to collapse…
Click to collapse…
Hover to expand…
Нажмите, чтобы раскрыть…
-
Но я русский. Я русский выучил только за то, что на нем разговаривал Ленин


 . Думаю,кроме кузова,существенных отличий нет.

Страница 1 из 2
Поделиться этой страницей
Instructions for use and maintenance
Overview
User manual
Vehicle maintenance
Specifications
Consumables for maintenance
Cautions and safety instructions when working on a car
Basic tools, measuring instruments and methods of working with them
Basic tool kit
Methods of working with measuring instruments
Gasoline engine N13, N20
Technical data
Cylinder head
Cylinder block
Gas distribution mechanism
Oil sump
Crankshaft
Service
Appendix to the chapter
N55 gasoline engine
Technical data
Cylinder head
Timing Drive
Service
Appendix to the chapter
Diesel engine
Technical data
Cylinder head
Cylinder block
Gas distribution mechanism
Oil sump
Crankshaft
Service
Appendix to the chapter
Engine power and control system
Petrol engine power system
Diesel engine power system
Service
Steering
Steering column
Power steering
Front steering wheel alignment
Rear wheel alignment
The values of the installation angles of the front steered and rear wheels
Appendix to the chapter
Body
Exterior
Interior
Glazing
Seats
Body dimensions
Appendix to the chapter
Air conditioning and heating
Specifications
Air conditioning and heating
System maintenance
Appendix to the chapter
Passive safety
General Information and Precautions
Airbags
Seat belts
Appendix to the chapter
Electric equipment of the engine
Recharging system
Launch system
Ignition system
Appendix to the chapter
Electrical equipment and electrical systems of the car
Audio system
Wireless connection
Sound signal
Window cleaners and washers
External and internal lighting system
Appendix to the chapter
Lubrication system
System diagnostics
Engine oil change
Oil pan
Engine oil temperature / pressure sensor
Removing and installing / replacing engine oil level sensor
Oil pump
Removing and installing / replacing additional oil cooler
Removing and installing / replacing liquid-oil heat exchanger
Appendix to the chapter
Cooling system
Service
Expansion tank
Coolant temperature sensor
Thermostat
Radiator
Fan cover with radiator cooling fan
Water pump
Cooler AGR (exhaust gas recirculation system)
Removing and installing / replacing additional oil cooler
Appendix to the chapter
Intake and exhaust system
Intake system
Exhaust system
Appendix to the chapter
Mechanical transmission
Gearbox assembly
Clutch
Rear axle reducer
Differential
Service
Appendix to the chapter
Automatic transmission
Automatic gearbox assembly
Removing and installing automatic transmission (GA8HP45Z)
Service
Appendix to the chapter
Drive shafts
Rear propeller shaft
Removing and installing drive shaft components
Appendix to the chapter
Chassis
Technical data
Front suspension
Rear suspension
Wheels and tires
Appendix to the chapter
Brake system
Brake system
Removing and installing brake system components
Front brake
Rear brake
Brake master cylinder
Brake lines
Vacuum brake booster
Electronic components of the brake system
BMW 3-Serie Limousine BMW 3-Serie Touring BMW 3-Serie Gran TurismoReference: Download pdf

11377599021 11377603979 New
Genuine Part Cylinder Head Valvetronic Timing Actuator Motor for BMW N20 N55 228i 320i 328i 428i
https://alii.pub/6l2n4t

Oil Quality Check Pen Brake Fluid Tester
BMW e90 e46 e39 f10 f30
BUY NOW
На чтение 4 мин. Просмотров 46 Опубликовано 28.04.2021
Bmw manuals – f10
BMW F-10
Руководство по эксплуатации бензин/дизель
Руководство по эксплуатации автомобилей BMW F-10 серии. Данное руководство содержит важные указания по эксплуатации автомобилей BMW F-10 серии 523i, 528i, 535i, 550i, 550i xDrive, 520d, 525d, 530d, 535d различных комплектаций. Здесь также приводятся основные технические характеристики моделей данной серии.
– Руководство по эксплуатации комплекта подготовки под мобильный телефон. Содержит сведения о регистрации и использовании мобильного телефона в автомобиле.
– Руководство по эксплуатации радиоприемника. Описание радиоприемника и всех его функций.
– Руководство по эксплуатации бортового монитора. Описание бортового монитора, функции компьютера, навигационной системы, радио, телефона и т.п..
Формат PDF, язык Русский, 345 стр.
Двигатель N13. Служба сервиса BMW.
Технический тренинг.
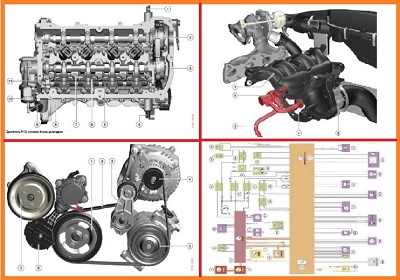
Техническая документация содержащая сведения по двигателю BMW N13.
Данная брошюра содержит следующие разделы с подробным описанием:
Механическая часть двигателя
-Картер двигателя
-Кривошипно-шатунный механизм
-Привод распределительного вала
-Привод клапанов (Valvetronic)
Система подачи масла
-Масляный насос и регулировка давления
-Охдаждение и фильтрация масла
-Контроль уровня и давления масла
-Масляные форсунки
Система охлаждения
-Терморегулирующая система
-Термостат и принципы работы
Система впуска и выпуска ОГ
-Плёночный термоанемометрический расходомер воздуха
-Турбонагнетатель
-Выпускной коллектор и катализатор
Система подготовки рабочей смеси
Подача топлива
Электрооборудование двигателя и электросхемы
Формат PDF
Язык Русский

Двигатель N55. Служба сервиса BMW.
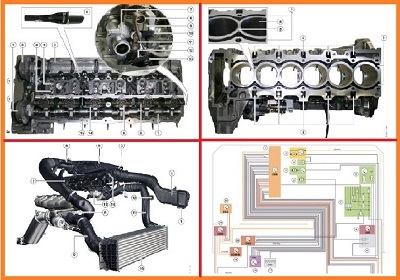
Техническая документация содержащая важные сведения по двигателю BMW N55.
Данная брошюра содержит следующие разделы с подробным описанием:
Механическая часть двигателя
-Картер двигателя
-Кривошипно-шатунный механизм
-Привод распределительного вала
-Привод клапанов (Valvetronic)
-VANOS
-Регулировка хода клапанов
Система подачи масла
-Масляный насос и регулировка давления
-Охдаждение и фильтрация масла
-Контроль уровня и давления масла
-Масляные форсунки
Система охлаждения
-Терморегулирующая система
-Термостат и принципы работы
Система впуска и выпуска ОГ
-Плёночный термоанемометрический расходомер воздуха
-Турбонагнетатель
-Выпускной коллектор и катализатор
Система подготовки рабочей смеси
Подача топлива
Электрооборудование двигателя и электросхемы
-Регулировка давления наддува
-Датчик коленвала, давления масла
-Катушка зажигания и свеча зажигания
-Серводвигатель Valvetrinic
Двигатель N47TU. Служба сервиса BMW.
Двигатель N47TU приходит на смену двигателю N47.
Поскольку двигатель N47TU может иметь
поперечное расположение, потребовались большие изменения.
В этой брошюре представлены только доработки/изменения,
предпринятые на продольном двигателе N47TU относительно
двигателя N47 для автомобилей BMW.
Данное издание содержит следующие разделы:
-Технические характеристики
-Механическая часть двигателя
-Ременный привод
-Система подачи масла
-Система впуска и система выпуска ОГ
-Система подготовки рабочей смеси
-Форсунки СRI2.2, CRI2.5
-Электрооборудование двигателя
Формат PDF, язык Русский
Двигатель N57TU-Super. Служба сервиса BMW.
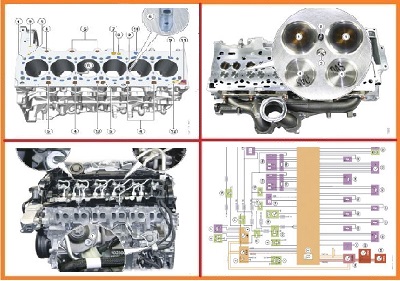
Двигатель N57TU Super расширяет линейку дизельных двигателей класса большой мощности.
Он задает новые стандарты динамики, расхода и мощности для рабочего объема три и более
литра. За основу взят двигатель N57TU, который уже предлагается на рынке в вариантах
N57D3001 и N57D30T1. Для получения чрезвычайных данных мощности и крутящего момента
потребовались определенные изменения и новшества.
Данное издание содержит следующие разделы:
-Механическая часть двигателя
-Система подачи масла
-Система охлаждения
-Система впуска и система выпуска ОГ
-Вакуумная система
-Система подготовки рабочей смеси
-Электрооборудование двигателя
Формат PDF, язык Русский
Bmw manuals – f30
BMW F-30
Электросхемы BMW F-30

В этой докуметнации отражены все электросхемы а также электрооборудования в BMW F-30, включающие в себя:
– Система электропитания.
– Передний электронный модуль (FEM)
BMW F-30 Служба сервиса BMW.
Технический тренинг – Привод.

Брошюра содержит следующую информацию и тех.данные по приводу BMW F-30:
Двигатели N20, N55, N47TU
– Технические характеристики
– Диаграммы полной нагрузки
– Система контроля уровня масла
– Маркировки и обозначения
Подача топлива бензин/дизель
– Обзор системы
– Вентиляция топливного бака
Механическая и Автоматическая коробки передач
– МКПП I-Turbo, особенности и характеристики
– Блоки шестерён и система смазки с сухим картером
– Синхронизация
– АКПП GA8HP45Z, характеристики и обозначения
Карданные валы и полуоси, защита при столкновении.
BMW F-30 Служба сервиса BMW.
Технический тренинг – Ходовая часть.

Содержание брошюры включает в себя следующие разделы:
Передняя и задняя подвески
– Характеристики и обслуживание
– Спортивная и адаптивные части М
– Система контроля давления в шинах (RDC)
Тормоза и рулевое управление
– Электрический уселитель руля (EPS)
– Электросхемы
– Спортивное рулевое управление
– Регулировка рулевой колонки
Система управления динамикой
– Система управления ходовой частью (ICM)
– Система динамического контроля устойчивости (DNC)
– Динамический круиз-контроль (DCC)
– Система регулировки жёсткости амортизаторов (EDC)
– Электросхемы всех узлов
Формат PDF
Язык Русский
Instructions for use and maintenance
Overview
User manual
Vehicle maintenance
Specifications
Consumables for maintenance
Cautions and safety instructions when working on a car
Basic tools, measuring instruments and methods of working with them
Basic tool kit
Methods of working with measuring instruments
Gasoline engine N13, N20
Technical data
Cylinder head
Cylinder block
Gas distribution mechanism
Oil sump
Crankshaft
Service
Appendix to the chapter
N55 gasoline engine
Technical data
Cylinder head
Timing Drive
Service
Appendix to the chapter
Diesel engine
Technical data
Cylinder head
Cylinder block
Gas distribution mechanism
Oil sump
Crankshaft
Service
Appendix to the chapter
Engine power and control system
Petrol engine power system
Diesel engine power system
Service
Steering
Steering column
Power steering
Front steering wheel alignment
Rear wheel alignment
The values of the installation angles of the front steered and rear wheels
Appendix to the chapter
Body
Exterior
Interior
Glazing
Seats
Body dimensions
Appendix to the chapter
Air conditioning and heating
Specifications
Air conditioning and heating
System maintenance
Appendix to the chapter
Passive safety
General Information and Precautions
Airbags
Seat belts
Appendix to the chapter
Electric equipment of the engine
Recharging system
Launch system
Ignition system
Appendix to the chapter
Electrical equipment and electrical systems of the car
Audio system
Wireless connection
Sound signal
Window cleaners and washers
External and internal lighting system
Appendix to the chapter
Lubrication system
System diagnostics
Engine oil change
Oil pan
Engine oil temperature / pressure sensor
Removing and installing / replacing engine oil level sensor
Oil pump
Removing and installing / replacing additional oil cooler
Removing and installing / replacing liquid-oil heat exchanger
Appendix to the chapter
Cooling system
Service
Expansion tank
Coolant temperature sensor
Thermostat
Radiator
Fan cover with radiator cooling fan
Water pump
Cooler AGR (exhaust gas recirculation system)
Removing and installing / replacing additional oil cooler
Appendix to the chapter
Intake and exhaust system
Intake system
Exhaust system
Appendix to the chapter
Mechanical transmission
Gearbox assembly
Clutch
Rear axle reducer
Differential
Service
Appendix to the chapter
Automatic transmission
Automatic gearbox assembly
Removing and installing automatic transmission (GA8HP45Z)
Service
Appendix to the chapter
Drive shafts
Rear propeller shaft
Removing and installing drive shaft components
Appendix to the chapter
Chassis
Technical data
Front suspension
Rear suspension
Wheels and tires
Appendix to the chapter
Brake system
Brake system
Removing and installing brake system components
Front brake
Rear brake
Brake master cylinder
Brake lines
Vacuum brake booster
Electronic components of the brake system

Owner’s Manual forVehicle
THE BMW 3 SERIES SEDAN.OWNER’S MANUAL.
The Ultimate DrivingMachine
THE BMW 3 SERIES SEDAN.OWNER’S MANUAL.
ContentsA-Z
Online Edition for Part no. 01 40 2 608 633 — 11 09 490


328i335i
Owner’s Manual for VehicleThank you for choosing a BMW.The more familiar you are with your vehicle, the better control youwill have on the road. We therefore strongly suggest:Read this Owner’s Manual before starting off in your new BMW.Also use the Integrated Owner’s Manual in your vehicle. It con‐tains important information on vehicle operation that will help youmake full use of the technical features available in your BMW. Themanual also contains information designed to enhance operatingreliability and road safety, and to contribute to maintaining thevalue of your BMW.Any updates made after the editorial deadline for the printed orintegrated Owner’s Manual are located in the appendix of theprinted quick reference for the vehicle.Supplementary information can be found in the additional bro‐chures in the onboard literature.We wish you a safe and enjoyable drive.BMW AG
Online Edition for Part no. 01 40 2 608 633 — 11 09 490

© 2011 Bayerische Motoren WerkeAktiengesellschaftMunich, GermanyReprinting, including excerpts, only with the writtenconsent of BMW AG, Munich.US English X/11, 11 09 490Printed on environmentally friendly paper, bleachedwithout chlorine, suitable for recycling.
Online Edition for Part no. 01 40 2 608 633 — 11 09 490

ContentsThe fastest way to find information on a partic‐ular topic or item is by using the index, refer topage 314.
6 Notes
At a glance12 Cockpit16 iDrive23 Voice activation system26 Integrated Owner’s Manual in the vehicle
Controls30 Opening and closing45 Adjusting55 Transporting children safely59 Driving70 Displays86 Lamps91 Safety104 Driving stability control systems109 Driving comfort134 Climate control141 Interior equipment148 Storage compartments
Driving tips156 Things to remember when driving159 Loading162 Saving fuel
Navigation168 Navigation system
Entertainment188 Tone190 Radio198 CD/multimedia
Communication220 Business mobile phone preparation
package228 Professional mobile phone preparation
package238 Office247 Contacts250 ConnectedDrive
Mobility260 Refueling262 Fuel263 Wheels and tires272 Engine compartment274 Engine oil276 Coolant277 Maintenance279 Replacing components290 Breakdown assistance296 Care
Reference302 Technical data306 Short commands of the voice activation
system314 Everything from A to Z
Online Edition for Part no. 01 40 2 608 633 — 11 09 490

NotesUsing this Owner’s ManualThe fastest way to find information on a partic‐ular topic is by using the index.An initial overview of the vehicle is provided inthe first chapter.
Updates made after the editorialdeadlineAny updates made after the editorial deadline forthe Owner’s Manuals are located in the appen‐dix of the printed quick reference for the vehicle.
Additional sources of informationShould you have any questions, your servicecenter will be glad to advise you at any time.Information on BMW, e.g., on technology, isavailable on the Internet: bmwusa.com.
Symbols Indicates precautions that must be followed
precisely in order to avoid the possibility of per‐sonal injury and serious damage to the vehicle.◄ Marks the end of a specific item of informa‐tion.»…» Identifies Control Display texts used to se‐lect individual functions.›…‹ Verbal instructions to use with the voice ac‐tivation system.››…‹‹ Identifies the answers generated by thevoice activation system.
Refers to measures that can be taken to helpprotect the environment.
Symbols on vehicle components Indicates that you should consult the rele‐
vant section of this Owner’s Manual for infor‐mation on a particular part or assembly.
Vehicle equipmentThis Owner’s Manual describes all models andall standard, country-specific and optionalequipment that is offered in the model series.Therefore, in this Owner’s Manual, equipment isalso described and illustrated that is not availa‐ble in your vehicle, e.g. because of the selectedoptional equipment or the country-specific var‐iants.This also applies for safety-related functionsand systems.For options and equipment not described in thisOwner’s Manual, please refer to the Supple‐mentary Owner’s Manuals.On right-hand drive vehicles, some controls arearranged differently than shown in the illustra‐tions.
Status of the Owner’s ManualThe manufacturer of your vehicle pursues a pol‐icy of constant development that is conceivedto ensure that our vehicles continue to embodythe highest quality and safety standards. In rarecases, therefore, the features described in thisOwner’s Manual may differ from those in yourvehicle.
Updates made after the editorialdeadlineAny updates made after the editorial deadline forthe Owner’s Manuals are located in the appen‐dix of the printed quick reference for the vehicle.
For your own safetyMaintenance and repairsAdvanced technology, e.g., the use of modernmaterials and high-performance electronics, re‐
Seite 6
Notes
6Online Edition for Part no. 01 40 2 608 633 — 11 09 490

quires suitable maintenance and repair meth‐ods.Therefore, have this work performed only by aBMW center or a workshop that works accord‐ing to BMW repair procedures with appropri‐ately trained personnel.
If this work is not carried out properly, there isthe danger of subsequent damage and relatedsafety hazards.
Parts and AccessoriesFor your own safety, use genuine parts and ac‐cessories approved by BMW. When you pur‐chase accessories tested and approved byBMW and Genuine BMW Parts, you simultane‐ously acquire the assurance that they have beenthoroughly tested by BMW to ensure optimumperformance when installed on your vehicle.BMW warrants these parts to be free from de‐fects in material and workmanship. BMW will notaccept any liability for damage resulting from in‐stallation of parts and accessories not approvedby BMW. BMW cannot test every product madeby other manufacturers to verify if it can be usedon a BMW safely and without risk to either thevehicle, its operation, or its occupants. GenuineBMW Parts, BMW Accessories and other prod‐ucts approved by BMW, together with profes‐sional advice on using these items, are availablefrom all BMW centers. Installation and operationof non-BMW approved accessories such asalarms, radios, amplifiers, radar detectors,wheels, suspension components, brake dustshields, telephones, including operation of anymobile phone from within the vehicle withoutusing an externally mounted antenna, or trans‐ceiver equipment, for instance, CBs, walkie-talkies, ham radios or similar accessories, maycause extensive damage to the vehicle, com‐promise its safety, interfere with the vehicle’selectrical system or affect the validity of theBMW Limited Warranty. See your BMW centerfor additional information. Maintenance, re‐placement, or repair of the emission control de‐vices and systems may be performed by any au‐
tomotive repair establishment or individualusing any certified automotive part.
California Proposition 65 WarningCalifornia laws require us to state the followingwarning:Engine exhaust and a wide variety of automobilecomponents and parts, including componentsfound in the interior furnishings in a vehicle, con‐tain or emit chemicals known to the State of Cal‐ifornia to cause cancer and birth defects and re‐productive harm. In addition, certain fluidscontained in vehicles and certain products ofcomponent wear contain or emit chemicalsknown to the State of California to cause cancerand birth defects or other reproductive harm.Battery posts, terminals and related accessoriescontain lead and lead compounds. Wash yourhands after handling. Used engine oil containschemicals that have caused cancer in laboratoryanimals. Always protect your skin by washingthoroughly with soap and water.
Service and warrantyWe recommend that you read this publicationthoroughly. Your vehicle is covered by the fol‐lowing warranties:▷ New Vehicle Limited Warranty.▷ Rust Perforation Limited Warranty.▷ Federal Emissions System Defect Warranty.▷ Federal Emissions Performance Warranty.▷ California Emission Control System Limited
Warranty.Detailed information about these warranties islisted in the Service and Warranty InformationBooklet for US models or in the Warranty andService Guide Booklet for Canadian models.Your vehicle has been specifically adapted anddesigned to meet the particular operating con‐ditions and homologation requirements in yourcountry and continental region in order to deliverthe full driving pleasure while the vehicle is op‐erated under those conditions. If you wish to op‐erate your vehicle in another country or region,
Seite 7
Notes
7Online Edition for Part no. 01 40 2 608 633 — 11 09 490

you may be required to adapt your vehicle tomeet different prevailing operating conditionsand homologation requirements. You shouldalso be aware of any applicable warranty limita‐tions or exclusions for such country or region. Insuch case, please contact Customer Relationsfor further information.
MaintenanceMaintain the vehicle regularly to sustain the roadsafety, operational reliability and the New Vehi‐cle Limited Warranty.Specifications for required maintenance meas‐ures:▷ BMW Maintenance system▷ Service and Warranty Information Booklet
for US models▷ Warranty and Service Guide Booklet for
Canadian modelsIf the vehicle is not maintained according tothese specifications, this could result in seriousdamage to the vehicle. Such damage is not cov‐ered by the BMW New Vehicle Limited War‐ranty.
Reporting safety defectsFor US customersThe following only applies to vehicles ownedand operated in the US.If you believe that your vehicle has a defectwhich could cause a crash or could cause injuryor death, you should immediately inform the Na‐tional Highway Traffic Safety AdministrationNHTSA, in addition to notifying BMW of NorthAmerica, LLC, P.O. Box 1227, Westwood, NewJersey 07675-1227, Telephone1-800-831-1117.If NHTSA receives similar complaints, it mayopen an investigation, and if it finds that a safetydefect exists in a group of vehicles, it may ordera recall and remedy campaign.
However, NHTSA cannot become involved inindividual problems between you, your dealer,or BMW of North America, LLC.To contact NHTSA, you may call the VehicleSafety Hotline toll-free at 1-888-327-4236(TTY: 1-800-424-9153); go to http://www.safe‐rcar.gov; or write to: Administrator, NHTSA, 400Seventh Street, SW., Washington, DC 20590.You can also obtain other information about mo‐tor vehicle safety from http://www.safercar.gov
For Canadian customersCanadian customers who wish to report asafety-related defect to Transport Canada, De‐fect Investigations and Recalls, may telephonethe toll-free hotline 1-800-333-0510. You canalso obtain other information about motor vehi‐cle safety from http://www.tc.gc.ca/roadsafety.
Seite 8
Notes
8Online Edition for Part no. 01 40 2 608 633 — 11 09 490

Seite 9
Notes
9Online Edition for Part no. 01 40 2 608 633 — 11 09 490

Online Edition for Part no. 01 40 2 608 633 — 11 09 490

At a glanceThese overviews of buttons, switches and
displays are intended to familiarize you with yourvehicle. You will also become quickly acquaintedwith the available control concepts and options.
Online Edition for Part no. 01 40 2 608 633 — 11 09 490

CockpitVehicle equipmentAll standard, country-specific and optionalequipment that is offered in the model series isdescribed in this chapter. Therefore, equipment
is also described that is not available in a vehicle,e. g., because of the selected optional equip‐ment or country variant. This also applies forsafety-related functions and systems.
All around the steering wheel
1 Roller sunblinds 432 Rear window safety switch 423 Power windows 414 Exterior mirror operation 525 Driver assistance systems
Active Blind Spot Detec‐tion 101
Collision warning 115
Lane departure warning 99
6 Lamps
Front fog lamps 89
Parking lamps 86
Low beams 86
Seite 12
At a glance Cockpit
12Online Edition for Part no. 01 40 2 608 633 — 11 09 490

Automatic headlamp con‐trol 87Daytime running lights 87Adaptive light control 88High-beam Assistant 88Instrument lighting 89
7 Steering column stalk, leftTurn signal 64
High beams, head‐lamp flasher 64
High-beam Assistant 88
Roadside parking lamps 87
Computer 81
8 Steering wheel buttons, leftStore speed 119
Resume speed 120
Cruise control on/off, interrupt‐ing 119
Active Cruise Control on/off, inter‐rupting 109
Increase distance 111
Reduce distance 111
9 Instrument cluster 7010 Steering wheel buttons, right
Entertainment source
Volume
Voice activation 23
Business mobile phone prepara‐tion package 220Professional mobile phone prepa‐ration package 228
11 Steering column stalk, rightWindshield wipers 65
Rain sensor 65
Clean the windshields and head‐lamps 66
12 Start/stop the engine and switchthe ignition on/off 60
Auto Start/Stop function 61
13 Horn14 Steering wheel heating 53
15 Adjust the steering wheel 5316 Unlock hood 273
Seite 13
Cockpit At a glance
13Online Edition for Part no. 01 40 2 608 633 — 11 09 490

All around the center console
1 Headliner 152 Control Display 163 Ventilation 1394 Hazard warning system 290
Central locking system 33
5 Glove compartment 1486 Radio 190
CD/multimedia 1987 Climate control 134
8 Controller with buttons 169 Parking brake 6310 PDC Park Distance Control 121
Backup camera 123Parking assistant 130Surround View 123
11 Driving Experience Switch 106
DSC Dynamic Stability Con‐trol 104
12 Transmission selector lever 67 67
Seite 14
At a glance Cockpit
14Online Edition for Part no. 01 40 2 608 633 — 11 09 490

All around the headliner
1 Emergency Request 290
2 Glass sunroof 43
3 Indicator lamp, front passengerairbag 93
4 Reading lamps 90
5 Interior lamps 90
Seite 15
Cockpit At a glance
15Online Edition for Part no. 01 40 2 608 633 — 11 09 490

iDriveVehicle equipmentAll standard, country-specific and optionalequipment that is offered in the model series isdescribed in this chapter. Therefore, equipmentis also described that is not available in a vehicle,e. g., because of the selected optional equip‐ment or country variant. This also applies forsafety-related functions and systems.
The conceptThe iDrive combines the functions of a multitudeof switches. Thus, these functions can be oper‐ated from a central location.
Using the iDrive during a tripTo avoid becoming distracted and posing
an unnecessary hazard to your vehicle’s occu‐pants and to other road users, never attempt touse the controls or enter information unless traf‐fic and road conditions allow this.◀
Controls at a glanceControls
1 Control Display2 Controller with buttons
The buttons can be used to open the menusdirectly. The controller can be used to selectmenu items and create the settings.
Control Display
Notes▷ To clean the Control Display, follow the care
instructions.▷ Do not place objects close to the Control
Display; otherwise, the Control Display canbe damaged.
Switching off
1. Press the button.2. «Switch off control display»
Switching onPress the controller again to switch the screenback on.
Controller with navigation systemSelect menu items and create settings.1. Turn.
Seite 16
At a glance iDrive
16Online Edition for Part no. 01 40 2 608 633 — 11 09 490

2. Press.
3. Move in four directions.
Buttons on controller
Press the button Function
MENU Open the main menu.
RADIO Opens the Radio menu.
MEDIA Opens the CD/Multimediamenu.
NAV Opens the Navigationmenu.
TEL Opens the Telephonemenu.
BACK Displays the previouspanel.
OPTION Opens the Options menu.
Controller without navigation systemSelect menu items and create settings.
1. Turn.
2. Press.
3. Move in two directions.
Buttons on controller
Press the button Function
MENU Open the main menu.
Audio Open audio menu last lis‐tened to, switch betweenaudio menus.
TEL Opens the Telephonemenu.
Seite 17
iDrive At a glance
17Online Edition for Part no. 01 40 2 608 633 — 11 09 490

Press the button Function
BACK Open previous panel.
OPTION Opens the Options menu.
Operating conceptOpening the main menu
Press the button.
The main menu is displayed.All iDrive functions can be called up via the mainmenu.
Selecting menu itemsMenu items shown in white can be selected.
1. Turn the controller until the desired menuitem is highlighted.
2. Press the controller.
Menu items in the Owner’s ManualIn the Owner’s Manual, menu items that can beselected are set in quotation marks, e.g.,»Settings».
Changing between panelsAfter a menu item is selected, e.g., «Radio», anew panel is displayed. Panels can overlap.▷ Move the controller to the left.
The current panel is closed and the previouspanel is displayed.The previous panel is opened again bypressing the BACK button. In this case, thecurrent panel is not closed.
▷ Move the controller to the right.A new panel is opened on top of the previousdisplay.
White arrows pointing to the left or right indicatethat additional panels can be opened.
View of an opened menuWhen a menu is opened, it generally opens withthe panel that was last selected in that menu. Todisplay the first panel of a menu:▷ Move the controller to the left repeatedly
until the first panel is displayed.▷ Press the menu button on the controller
twice.
Opening the Options menuPress the button.
The «Options» menu is displayed.
Seite 18
At a glance iDrive
18Online Edition for Part no. 01 40 2 608 633 — 11 09 490

Additional options: move the controller to theright repeatedly until the «Options» menu is dis‐played.
Options menuThe «Options» menu consists of various areas:▷ Screen settings, e.g., «Split screen».
This area remains unchanged.▷ Control options for the selected main menu,
e.g., for «Radio».▷ If applicable, further operating options for
the selected menu, e.g., «Store station».
Changing settings1. Select a field.2. Turn the controller until the desired setting
is displayed.
3. Press the controller.
Activating/deactivating the functionsSeveral menu items are preceded by a check‐box. It indicates whether the function is acti‐vated or deactivated. Selecting the menu itemactivates or deactivates the function.
The function is activated.
The function is deactivated.
Example: setting the clockSetting the clock
1. Press the button. The main menu isdisplayed.
2. Turn the controller until «Settings» is high‐lighted, and then press the controller.
3. If necessary, move the controller to the leftto display «Time/Date».
4. Turn the controller until «Time/Date» is high‐lighted, and then press the controller.
Seite 19
iDrive At a glance
19Online Edition for Part no. 01 40 2 608 633 — 11 09 490

5. Turn the controller until «Time:» is high‐lighted, and then press the controller.
6. Turn the controller to set the hours andpress the controller.
7. Turn the controller to set the minutes andpress the controller.
Status informationStatus fieldThe following information is displayed in the sta‐tus field at the top right:▷ Time.▷ Current entertainment source.▷ Sound output, on/off.▷ Wireless network reception strength.▷ Telephone status.▷ Traffic bulletin reception.
Status field symbolsThe symbols are grouped as follows.
Radio symbols
Symbol Meaning
Satellite radio is switched on.
Telephone symbols
Symbol Meaning
Incoming or outgoing call.
Missed call.
Wireless network receptionstrength Symbol flashes: searchingfor network.
Wireless network is not available.
Bluetooth is switched on.
Roaming is active.
Text message was received.
Check the SIM card.
SIM card is blocked.
SIM card is missing.
Enter the PIN.
Entertainment symbols
Symbol Meaning
CD/DVD player.
Music collection.
Gracenote® database.
AUX-IN port.
USB audio interface/mobile phoneaudio interface.
USB audio interface.
Mobile phone audio interface.
Additional symbols
Symbol Meaning
Spoken instructions are switched off.
Seite 20
At a glance iDrive
20Online Edition for Part no. 01 40 2 608 633 — 11 09 490

Split screenGeneral informationAdditional information can be displayed on theright side of the split screen, e.g., informationfrom the onboard computer.In the divided screen view, the so-called splitscreen, this information remains visible evenwhen you change to another menu.
Switching the split screen on and off
1. Press the button.2. «Split screen»
Selecting the display
1. Press the button.2. «Split screen»3. Move the controller until the split screen is
selected.4. Press the controller or select «Split screen
content».5. Select the desired menu item.
Programmable memorybuttonsGeneral informationThe iDrive functions can be stored on the pro‐grammable memory buttons and called up di‐rectly, e.g., radio stations, navigation destina‐
tions, phone numbers and entry points into themenu.The settings are stored for the remote controlcurrently in use.
Without navigation system andtelephoneOn the buttons, only radio stations, refer topage 197, can be stored.
Saving a function1. Highlight the function via the iDrive.
2. Press the desired button for morethan 2 seconds.
Running a functionPress the button.The function will run immediately. This
means, for example, that the number is dialedwhen a phone number is selected.
Displaying the button assignmentUse a finger to touch the buttons. Do not weargloves or use objects.The key assignment is displayed at the top edgeof the screen.
▷ To display short information: touch the but‐ton.
▷ To display detailed information: touch thebutton for an extended period.
Seite 21
iDrive At a glance
21Online Edition for Part no. 01 40 2 608 633 — 11 09 490

Deleting the button assignments1. Press buttons 1 and 8 simultaneously for
approx. five seconds.2. «OK»
Entering letters and numbersGeneral information1. Turn the controller: select letters or num‐
bers.2. Select additional letters or numbers if
needed.3. «OK»: confirm the entry.
Symbol Function
Press the controller: delete the letteror number.
Press the controller for an extendedperiod: delete all letters or numbers.
Enter a blank space.
Switching between cases, letters andnumbersDepending on the menu, you can switch be‐tween entering upper and lower case, lettersand numbers:
Symbol Function
Enter the letters.
Enter the numbers.
or Move the controller up.
Without navigation systemSelect the symbol.
Entry comparisonEntry of names and addresses: the selection isnarrowed down every time a letter is entered andletters may be added automatically.
The entries are continuously compared to thedata stored in the vehicle.▷ Only those letters are offered during the en‐
try for which data is available.▷ Destination search: town/city names can be
entered using the spelling of language avail‐able on the Control Display.
Seite 22
At a glance iDrive
22Online Edition for Part no. 01 40 2 608 633 — 11 09 490

Voice activation systemVehicle equipmentAll standard, country-specific and optionalequipment that is offered in the model series isdescribed in this chapter. Therefore, equipmentis also described that is not available in a vehicle,e. g., because of the selected optional equip‐ment or country variant. This also applies forsafety-related functions and systems.
The concept▷ Most functions that are displayed on the
Control Display can be operated by spokencommands via the voice activation system.The system prompts you to make your en‐tries.
▷ Functions that can only be used when thevehicle is stationary cannot be operated us‐ing the voice activation system.
▷ The system uses a special microphone onthe driver’s side.
▷ ›…‹ Verbal instructions in the Owner’sManual to use with the voice activation sys‐tem.
RequirementsVia the Control Display, set a language that isalso supported by the voice activation systemso that the spoken commands can be identified.Set the language, refer to page 84.
Using voice activationActivating the voice activation system
1. Press the button on the steeringwheel.
2. Wait for the signal.3. Say the command.
The command is displayed in the instrumentcluster.
This symbol in the instrument cluster indi‐cates that the voice activation system is active.If no other commands are available, operate thefunction in this case via iDrive.
Terminating the voice activationsystem
Briefly press the button on the steeringwheel or ›Cancel‹.
Possible commandsMost menu items on the Control Display can bevoiced as commands.The available commands depend on whichmenu is currently displayed on the Control Dis‐play.There are short commands for functions of themain menu.Some list entries, e.g. Phone book entries, canalso be selected via the voice activation system.Speak these list entries exactly as they are dis‐played in the respective list.
Having possible commands read aloudYou can have the available commands read outloud for you: ›Voice commands‹For example, if the «Settings» menu is displayed,the commands for the settings are read out loud.
Executing functions using shortcommandsFunctions on the main menu can be performeddirectly by means of short commands, nearly ir‐
Seite 23
Voice activation system At a glance
23Online Edition for Part no. 01 40 2 608 633 — 11 09 490

respective of which menu item is currently se‐lected, e.g., ›Vehicle status‹.List of short commands of the voice activationsystem, refer to page 306.
Help dialog for the voice activationsystemCalling up help dialog: ›Help‹Additional commands for the help dialog:▷ ›Help with examples‹: information about the
current operating options and the most im‐portant commands for them are announced.
▷ ›Help with voice activation‹: informationabout the principle of operation for the voiceactivation system is announced.
Example: playing back a CD1. Switch on the Entertainment sound output
if necessary.
2. Press the button on the steeringwheel.
3. ›C D and multimedia‹The medium last played is played back.
4. Press the button on the steeringwheel.
5. ›C D track …‹ e.g., CD track 4.
Setting the voice dialogYou can set whether the system should use thestandard dialog or a shorter version.In the shorter variant of the voice dialog, the an‐nouncements from the system are issued in anabbreviated form.On the Control Display:
1. «Settings»2. «Language/Units»
3. «Speech mode:»4. Select the setting.
Adjusting the volumeTurn the volume button while giving an instruc‐tion until the desired volume is set.▷ The volume remains constant even if the
volume of other audio sources is changed.▷ The volume is stored for the remote control
currently in use.
Notes on EmergencyRequestsDo not use the voice activation system to initiatean Emergency Request. In stressful situations,the voice and vocal pitch can change. This canunnecessarily delay the establishment of a tel‐ephone connection.Instead, use the SOS button, refer topage 290, in the vicinity of the interior mirror.
Environmental conditions▷ Say the commands, numbers, and letters
smoothly and with normal volume, empha‐sis, and speed.
▷ Always say commands in the language ofthe voice activation system.
▷ When selecting a radio station, use the com‐mon pronunciation of the station name:
Seite 24
At a glance Voice activation system
24Online Edition for Part no. 01 40 2 608 633 — 11 09 490

›Station …‹ e. g. Classic Radio station▷ Keep the doors, windows, and glass sun‐
roof closed to prevent noise interference.▷ Avoid making other noise in the vehicle
while speaking.
Seite 25
Voice activation system At a glance
25Online Edition for Part no. 01 40 2 608 633 — 11 09 490

Integrated Owner’s Manual in the vehicleVehicle equipmentAll standard, country-specific and optionalequipment that is offered in the model series isdescribed in this chapter. Therefore, equipmentis also described that is not available in a vehicle,e. g., because of the selected optional equip‐ment or country variant. This also applies forsafety-related functions and systems.
Integrated Owner’s Manual inthe vehicleThe integrated Owner’s Manual can be dis‐played on the Control Display. The equipmentand functions that are in the vehicle are descri‐bed therein.
Components of the integrated Owner’sManualThe integrated Owner’s Manual consists ofthree parts, which offer various levels of infor‐mation or access possibilities.
Quick Reference GuideLocated in the Quick Reference is important in‐formation for the operation of the vehicle, theoperation of basic vehicle functions or for whatto do in the event of a flat tire. This informationcan also be displayed during driving.
Search by picturesInformation and descriptions based on illustra‐tions can be searched via search by pictures.This is helpful, for example, if the description ofan outfitting package that cannot be named isneeded.
Owner’s ManualInformation and descriptions can be searchedby direct entry of a search term via the index.
Select components
1. Press the button.2. Turn the controller: open «Vehicle Info».3. Press the controller.4. Selecting desired range:
▷ «Quick reference»▷ «Search by pictures»▷ «Owner’s Manual»
Leafing through the Owner’s Manual
Page by page with link accessTurn the controller until the next or previouspage is displayed.
Page by page without link accessLeaf through the pages directly while skippingthe links.Highlight the symbol once. Now simply pressthe controller to leaf from page to page.
Leaf back.
Leaf forward.
Context help — Owner’s Manual to thetemporarily selected functionThe relevant information can be opened directly.
Seite 26
At a glance Integrated Owner’s Manual in the vehicle
26Online Edition for Part no. 01 40 2 608 633 — 11 09 490

Opening during operation via iDriveTo move directly from the application on theControl Display to the options menu:
1. Press the button or move the controllerto the right repeatedly until the «Options»menu is displayed.
2. «Display Owner’s Manual»
Opening when a Check Controlmessage is displayedDirectly from the Check Control message on theControl Display:»Display Owner’s Manual»
Changing between a function and theOwner’s ManualTo change from a function, e.g., radio, to theOwner’s Manual on the Control Display and toswitch between the two displays:
1. Press the button or move the controllerto the right repeatedly until the «Options»menu is displayed.
2. «Display Owner’s Manual»3. Select the desired page in the Owner’s
Manual.
4. Press the button again to return to thefunction displayed last.
5. Press the button to return to the pageof the Owner’s Manual displayed last.
To switch back and forth repeatedly betweenthe function displayed last and the page of theOwner’s Manual displayed last, repeat steps 4and 5. This opens a new panel every time.
Programmable memory buttons
General informationThe Owner’s Manual can be stored on the pro‐grammable memory buttons and called up di‐rectly.
Storing1. «Owner’s Manual» Select via the iDrive.
2. Press the desired button for morethan 2 seconds.
ExecutingPress the button.The Owner’s Manual is displayed im‐
mediately.
Seite 27
Integrated Owner’s Manual in the vehicle At a glance
27Online Edition for Part no. 01 40 2 608 633 — 11 09 490

Online Edition for Part no. 01 40 2 608 633 — 11 09 490

ControlsThis chapter is intended to provide you with
information that will give you complete control ofyour vehicle. All features and accessories that are
useful for driving and your safety, comfort andconvenience are described here.
Online Edition for Part no. 01 40 2 608 633 — 11 09 490

Opening and closingVehicle equipmentAll standard, country-specific and optionalequipment that is offered in the model series isdescribed in this chapter. Therefore, equipmentis also described that is not available in a vehicle,e. g., because of the selected optional equip‐ment or country variant. This also applies forsafety-related functions and systems.
Remote control/keyButtons on the remote control
1 Unlocking2 Locking3 Opening the trunk lid4 Panic mode in alarm system
General informationThe vehicle is supplied with two remote controlswith keys.Every remote control contains a replaceablebattery.The settings called up and implemented whenthe vehicle is unlocked depend on which remotecontrol is used to unlock the vehicle, PersonalProfile, refer to page 31.In addition, information about service require‐ments is stored in the remote control, Servicedata in the remote control, refer to page 277.
Integrated key
Press the button on the back of the remote con‐trol, arrow 1, and pull out the key, arrow 2.The integrated key fits the following locks:▷ Driver’s door.▷ Glove compartment on the front passenger
side.
The front passenger glove compartment con‐tains a switch for separately securing the trunklid, refer to page 38.
Replacing the battery
1. Take the integrated key out of the remotecontrol.
2. Push in the catch with the key, arrow 1.3. Remove the cover of the battery compart‐
ment; see arrow 2.4. Insert a battery of the same type with the
positive side facing upwards.5. Press the cover closed.
Seite 30
Controls Opening and closing
30Online Edition for Part no. 01 40 2 608 633 — 11 09 490

Take the used battery to a recycling cen‐ter or to your service center.
New remote controlsYou can obtain new remote controls from yourservice center.
Loss of the remote controlsLost remote controls can be blocked by yourservice center.
Emergency detection of remote controlIt is possible to switch on the ignition or start theengine in situations such as the following:▷ Interference of radio transmission to remote
control by external sources.▷ Discharged battery in the remote control.▷ Interference of radio transmission by mobile
devices in close proximity to the remotecontrol.
▷ Interference of radio transmission bycharger while charging items such as mobiledevices in the vehicle.
A Check Control message is displayed if an at‐tempt is made to switch on the ignition or startthe engine.
Starting the engine in case ofemergency detection of remote control
Automatic transmission: if a correspondingCheck Control message appears, hold the re‐mote control, as shown, against the marked areaon the steering column and press the Start/Stop
button within 10 seconds while pressing thebrake.Manual transmission: if a corresponding CheckControl message appears, hold the remote con‐trol, as shown, against the marked area on thesteering column and press the Start/Stop buttonwithin 10 seconds while pressing the clutch.
Personal ProfileThe concept
Personal Profile conceptYou can set several of your vehicle’s functionsto suit your personal needs and preferences.▷ The settings are automatically saved in the
profile currently activated.▷ When the vehicle is unlocked, the profile that
was last detected and called up with the re‐mote control is used.
▷ Your personal settings will be recognizedand called up again even if the vehicle hasbeen used in the meantime by someone elsewith another remote control.
The individual settings are stored for three Per‐sonal Profiles and one guest profile.
Transmitting the settingsYour personal settings can be taken with you toanother vehicle equipped with the Personal Pro‐file function. For more information, contact yourservice center.Transmission takes place via:▷ The USB interface in the glove compart‐
ment or the center console on a USB me‐dium.
Seite 31
Opening and closing Controls
31Online Edition for Part no. 01 40 2 608 633 — 11 09 490

Profile management
Opening the profilesA different profile can be called up than the oneassociated with the remote control currently inuse.
1. «Settings»2. «Profiles»
3. Select a profile.The profile that is opened is assigned to the re‐mote control currently in use.
Renaming profiles1. «Settings»2. «Profiles»
The current profile is selected.3. «Options» Open.4. «Rename current profile»
Resetting profilesThe settings of the active profile are reset totheir default values.
1. Switch on the ignition.2. «Settings»3. «Profiles»
The current profile is selected.4. «Options» Open.5. «Reset current profile»
Importing profilesExisting settings and contacts are overwrittenwith the imported profile.
1. «Settings»2. «Profiles»3. «Import profile»
4. USB interface: «USB device»
Exporting profilesMost settings of the active profile and the savedcontacts can be exported.This can be useful for storing and opening per‐sonal settings, e.g. if settings are accidentallychanged or deleted.
1. «Settings»2. «Profiles»3. «Export profile»4. USB interface: «USB device»
Seite 32
Controls Opening and closing
32Online Edition for Part no. 01 40 2 608 633 — 11 09 490

Using the guest profileThe guest profile can be used to make individualsettings without affecting the three PersonalProfiles.This can be useful for drivers who are using thevehicle temporarily and do not have their ownprofile.
1. «Settings»2. «Profiles»3. The current profile is selected.4. Open «Guest».5. Create the settings.Note: the guest profile cannot be renamed.
Display profile list during startThe profile list can be displayed during eachstart for selecting the desired profile.
1. «Settings»2. «Profiles»3. «Options» Open.4. «Display user list at startup»
Personal Profile settingsThe following functions and settings can bestored in a profile.More information on the settings can be foundunder:▷ Active Cruise Control: collision warning.▷ Exterior mirror position.▷ CD/Multimedia: audio source listened to
last.▷ Driving Experience Switch: sport program▷ Driver’s seat position: automatically re‐
trieved after unlocking.▷ Programmable memory buttons: assign‐
ment.▷ Head-up Display: selection, brightness, po‐
sition and rotation of the display.
▷ Headlamp courtesy delay feature: time set‐ting.
▷ Tone: tone settings.▷ Automatic climate control/Automatic cli‐
mate control with enhanced features: set‐tings.
▷ Navigation: map views, route criteria, voiceoutput on/off.
▷ Park Distance Control PDC: adjusting thesignal tone volume.
▷ Radio: stored stations, station listened tolast, special settings.
▷ Backup camera: selection of functions andtype of display.
▷ Side View: selection of the display type.▷ Language on the Control Display.▷ Lane departure warning: last setting, on/off.▷ Active Blind Spot Detection: last setting, on/
off.▷ Triple turn signal activation.▷ Daytime running lights: current setting.▷ Locking the vehicle: after a brief period or
after starting to drive.
Central locking systemThe conceptThe central locking system becomes activewhen the driver’s door is closed.The system simultaneously engages and re‐leases the locks on the following:▷ Doors.▷ Trunk lid.▷ Fuel filler flap.
Operating from the outside▷ Via the remote control.▷ Via the door handles of the driver’s and front
passenger doors.
Seite 33
Opening and closing Controls
33Online Edition for Part no. 01 40 2 608 633 — 11 09 490

The following takes place simultaneously whenlocking/unlocking the vehicle via the remotecontrol:▷ Depending on how the vehicle is equipped,
the theft protection is activated/deactivated.Theft protection prevents the doors frombeing unlocked using the lock buttons or thedoor opener.
▷ The welcome lamps, interior lamps andcourtesy lamps are switched on and off.
▷ The alarm system, refer to page 40, isarmed or disarmed.
Operating from the inside
Via the button for the central locking system.
If the vehicle has been locked from inside, thefuel filler flap remains unlocked.If an accident of a certain severity occurs, thecentral locking system unlocks automatically.The hazard warning system and interior lampscome on.
Opening and closing: from theoutsideUsing the remote control
General informationTake the remote control with youPeople or animals left unattended in a
parked vehicle can lock the doors from the in‐side. Always take the remote control with you
when leaving the vehicle so that the vehicle canthen be opened from the outside.◀
UnlockingPress the button.The vehicle is unlocked.
Welcome lamps, interior lamp and courtesylamps are switched on.
You can set how the vehicle is to be unlocked.The setting is stored for the remote control cur‐rently in use.
1. «Settings»2. «Door locks»3. «Unlock button:»
4. Select the desired function:▷ «Driver’s door only»
Only the driver’s door and the fuel fillerflap are unlocked. Pressing again un‐locks the entire vehicle.
▷ «All doors»The entire vehicle is unlocked.
Convenient openingThe remote control can be used to simultane‐ously open the windows and the glass sunroof.
Press and hold the button on the re‐mote control.
The windows and the glass sunroof open.Releasing the button stops the motion.
Seite 34
Controls Opening and closing
34Online Edition for Part no. 01 40 2 608 633 — 11 09 490

LockingPress the button on the remote control.
Locking from the outsideDo not lock the vehicle from the outside if
there are people in it, as the vehicle cannot beunlocked from inside without special knowl‐edge.◀
Switching on interior lamps andcourtesy lamps
Press the button on the remote controlwith the vehicle locked.
Panic modeYou can trigger the alarm system if you findyourself in a dangerous situation.
Press the button on the remote controlfor at least 3 seconds.
To switch off the alarm: press any button.
Opening the trunk lidPress the button on the remote controlfor approx. 1 second.
The trunk lid opens, regardless of whether it waspreviously locked or unlocked.During opening, the trunk lid pivots back and up.Ensure that adequate clearance is available be‐fore opening.In some vehicle equipment variants, the trunk lidcan only be opened using the remote control ifthe vehicle was unlocked first.To avoid locking yourself out of the vehicle, donot place the remote control into the cargo area.The trunk lid is locked again as soon as it ispushed closed.
Confirmation signals from the vehicle1. «Settings»2. «Door locks»
3. Deactivate or activate the desired confirma‐tion signals.▷ «Acoustic sig. lock/unlock»▷ «Flash when lock/unlock»
Retrieving the seat and mirror settingsThe driver’s seat and exterior mirror positionsused last are stored for the remote control cur‐rently in use.When the vehicle is unlocked, these positionsare automatically retrieved if this function wasactivated.
Pinch hazard when moving back the seatIf this function is used, first make sure that
the footwell behind the driver’s seat is empty.Otherwise, people can be injured or objectsdamaged when the seat is moved back.◀
The adjustment procedure is interrupted:▷ When a seat position switch is pressed.▷ When a button of the seat and mirror mem‐
ory is pressed.
Activating the setting1. «Settings»2. «Door locks»
Seite 35
Opening and closing Controls
35Online Edition for Part no. 01 40 2 608 633 — 11 09 490

3. «Last seat position auto.»
MalfunctionIf the vehicle can no longer be locked or un‐locked with the remote control, the battery maybe discharged or there may be interference fromexternal sources such as mobile phones, metalobjects, overhead power lines, transmissiontowers, etc.If this occurs, unlock or lock the vehicle at thedoor lock using the integrated key.
For US owners onlyThe transmitter and receiver units comply withpart 15 of the FCC/Federal CommunicationCommission regulations. Operation is governedby the following:FCC ID:▷ LX8766S.▷ LX8766E.▷ LX8CAS.▷ LX8CAS2.▷ MYTCAS4.Compliance statement:This device complies with part 15 of the FCCRules. Operation is subject to the following twoconditions:▷ This device may not cause harmful interfer‐
ence, and▷ this device must accept any interference re‐
ceived, including interference that maycause undesired operation.
Any unauthorized modifications or changes tothese devices could void the user’s authority tooperate this equipment.
Using the door lock
General information
Locking from the outsideDo not lock the vehicle from the outside if
there are people in it, as the vehicle cannot beunlocked from inside without special knowl‐edge.◀
The alarm system is triggered when the door isopened, if the vehicle is unlocked via the doorlock.In order to terminate this alarm, unlock vehiclewith the remote control, or switch on the igni‐tion, if necessary, by emergency detection of theremote control.
Only the driver’s door is unlocked or locked viathe door lock.
Locking the doors and trunk lidtogetherTo lock all doors and the trunk lid at once:
1. With the doors closed, lock the vehicle usingthe button for the central locking system inthe interior.
2. Unlock and open the driver’s or front pas‐senger door.
3. Lock the vehicle.▷ Lock the driver’s door using the
integrated key in the door lock, or
Seite 36
Controls Opening and closing
36Online Edition for Part no. 01 40 2 608 633 — 11 09 490

▷ Press down the lock button of the frontpassenger door and close the door fromthe outside.
The fuel filler flap can only be locked using theremote control.
Manual operationIf an electrical malfunction occurs, lock or unlockthe vehicle using the integrated key via the doorlock on the driver’s door.
Opening and closing: from theinsideLocking and unlocking
Pressing the buttons locks and unlocks thedoors and the trunk lid when the front doors areclosed, but they are not secured against theft.
The fuel filler flap remains unlocked.
Unlocking and opening▷ Either unlock the doors together using the
button for the central locking system andthen pull the door handle above the armrestor
▷ Pull the door opener twice individually oneach door: the first time unlocks the door,the second time opens it.
Automatic lockingThe setting is stored for the remote control cur‐rently in use.
1. «Settings»
2. «Door locks»3. Select the desired function:
▷ «Lock if no door is opened»The vehicle locks automatically after ashort period of time if a door is notopened.
▷ «Lock after start. to drive»The vehicle locks automatically afteryou drive away.
Trunk lidOpeningDuring opening, the trunk lid pivots back and up.Ensure that adequate clearance is available be‐fore opening.
Opening from the outside
▷ Press the button on the trunk lid.
▷ Press the button on the remotecontrol for approx. 1 second.
▷ With Comfort Access the trunk lid openswith no-touch activation, refer to page 39.
Seite 37
Opening and closing Controls
37Online Edition for Part no. 01 40 2 608 633 — 11 09 490

Opening from the insidePush the button in the driver’s footwell.
If the vehicle is stationary, the trunk lid opens ifit is not locked.
Closing
Recessed grips in the interior trim of the trunklid make it easier to pull down the lid.
Danger of pinchingMake sure that the closing path of the
trunk lid is clear; otherwise, injuries may result.◀
Do not place the remote control in thecargo area
Take the remote control with you and do notleave it in the cargo area; otherwise, the remotecontrol is locked inside the vehicle when thetrunk lid is closed.◀
Locking separatelyThe trunk lid can be locked separately with theswitch in the front passenger glove compart‐ment.
▷ Trunk lid secured, arrow 1.▷ Trunk lid not secured, ar‐
row 2.
Slide the switch into the arrow 1 position. Thissecures the trunk lid and disconnects it from thecentral locking system.
When the front passenger glove compartmentis locked, the tailgate cannot be accessed.This is beneficial when the vehicle is parked us‐ing valet service. The infrared remote controlcan be handed out without the key.
Emergency unlocking
Pull the handle inside the cargo area.The trunk lid unlocks.
Comfort AccessThe conceptThe vehicle can be accessed without activatingthe remote control.All you need to do is to have the remote controlwith you, e.g., in your jacket pocket.The vehicle automatically detects the remotecontrol when it is nearby or in the passengercompartment.Comfort Access supports the following func‐tions:▷ Unlocking/locking of the vehicle.▷ Unlocking of the trunk lid separately.▷ Open trunk lid with no-touch activation.▷ Starting the engine.
Functional requirements▷ There are no external sources of interfer‐
ence nearby.▷ To lock the vehicle, the remote control must
be located outside of the vehicle.
Seite 38
Controls Opening and closing
38Online Edition for Part no. 01 40 2 608 633 — 11 09 490

▷ The next unlocking and locking cycle is notpossible until after approx. 2 seconds.
▷ The engine can only be started if the remotecontrol is inside the vehicle.
Comparison with ordinary remotecontrolThe functions can be controlled by pressing thebuttons of the remote control or Comfort Ac‐cess.
Unlocking
Grasp the door handle on the driver’s or frontpassenger door completely, arrow 1. This cor‐responds to pressing the button.
Locking
Press the area on the door handle, arrow 2, withyour finger for approx. 1 second.This corresponds to pressing the button.To save battery power, ensure that the ignitionand all electronic systems and/or power con‐sumers are switched off before locking the ve‐hicle.
Convenient closingPress the area on the door handle, arrow 2, withthe finger and hold it down.In addition to locking, the windows and the glasssunroof are closed.
Monitor the closing processMonitor the closing process to ensure that
no one becomes trapped.◀
Unlocking the trunk lid separatelyPress the button on the exterior of the trunk lid.This corresponds to pressing the button.
Do not place the remote control in thecargo area
Take the remote control with you and do notleave it in the cargo area; otherwise, the remotecontrol is locked inside the vehicle when thetrunk lid is closed.◀
Open trunk lid with no-touch activationWith Comfort Access, the trunk lid can beopened with no-touch activation using the re‐mote control you are carrying.A sensor detects a directed foot motion in thecenter of the area at the rear of the car and thetrunk lid opens.During opening, the trunk lid pivots back and up.Ensure that adequate clearance is available be‐fore opening.
Do not touch vehicleWith the foot motion, make sure there is
steady stance and do not touch the vehicle; oth‐erwise, there is a danger of injury, e. g. from hotexhaust system parts.◀
1. Position in the center behind the vehicle.
Seite 39
Opening and closing Controls
39Online Edition for Part no. 01 40 2 608 633 — 11 09 490

2. Move foot in the direction of travel under‐neath the bumper and immediately back.
The trunk lid opens, regardless of whether it waspreviously locked or unlocked.
MalfunctionComfort Access may not function properly if itexperiences interference from external sourcessuch as mobile phones, metal objects, overheadpower lines, transmission towers, etc.In this case, open or close the vehicle using thebuttons on the remote control or use theintegrated key in the door lock.If there is a malfunction, open the trunk lid withthe remote control button or with the button onthe trunk lid.
Alarm systemThe conceptThe vehicle alarm system responds to:▷ Opening of a door, the hood or the trunk lid.▷ Movements in the vehicle.▷ Changes in the vehicle tilt, e.g., during at‐
tempts to steal a wheel or when towing thecar.
▷ Interruptions in battery voltage.The alarm system briefly indicates tampering:▷ By sounding an acoustic alarm.▷ By switching on the hazard warning system.▷ By flashing the daytime running lights.
Arming and disarming the alarmsystem
General informationWhen you lock or unlock the vehicle, either withthe remote control or at the door lock, the alarmsystem is armed or disarmed at the same time.
Door lock and armed alarm systemThe alarm system is triggered when the door isopened, if the vehicle is unlocked via the doorlock.In order to terminate this alarm, unlock vehiclewith the remote control or switch on the ignition,if necessary, by emergency detection of the re‐mote control.
Trunk lid and armed alarm systemThe trunk lid can be opened using the remotecontrol, even if the alarm system is armed.
Press the button on the remote controlfor approx. 1 second.
After the trunk lid is closed, it is locked andmonitored again by the alarm system. The haz‐ard warning system flashes once.In some vehicle equipment variants, the trunk lidcan only be opened using the remote control ifthe vehicle was unlocked first.
Panic modePress the button on the remote controlfor at least 3 seconds.
Switching off the alarm▷ Unlock the vehicle using the remote control.▷ With Comfort Access: if you are carrying the
remote control with you, pull on the doorhandle.
Seite 40
Controls Opening and closing
40Online Edition for Part no. 01 40 2 608 633 — 11 09 490

Indicator lamp on the interior rearviewmirror
▷ The indicator lamp flashes briefly every2 seconds:The system is armed.
▷ The indicator lamp flashes after locking:The doors, hood or trunk lid is not closedproperly, but the rest of the vehicle is se‐cured.After 10 seconds, the indicator lamp flashescontinuously. Interior motion sensor and tiltalarm sensor are not active.
▷ The indicator lamp goes out after unlocking:The vehicle has not been tampered with.
▷ The indicator lamp flashes after unlockinguntil the engine is started, but no longer thanapprox. 5 minutes:An alarm has been triggered.
Tilt alarm sensorThe tilt of the vehicle is monitored.The alarm system responds in situations suchas attempts to steal a wheel or when the car istowed.
Interior motion sensorThe windows and glass sunroof must be closedfor the system to function properly.
Avoiding unintentional alarmsThe tilt alarm sensor and interior motion sensorcan be switched off together, such as in the fol‐lowing situations:
▷ In automatic car washes.▷ In duplex garages.▷ During transport on car-carrying trains, at
sea or on a trailer.▷ When animals are to remain in the vehicle.
Switching off the tilt alarm sensor andinterior motion sensor
Press the remote control button againwithin 10 seconds as soon as the vehicle
is locked.The indicator lamp lights up for approx. 2 sec‐onds and then continues to flash.The tilt alarm sensor and interior motion sensorare switched off until the vehicle is locked again.
Power windowsGeneral information
Take the remote control with youTake the remote control with you when
leaving the vehicle so that children, for example,cannot operate the power windows and injurethemselves.◀
Opening
▷ Press the switch to the resistancepoint.The window opens while the switch is held.
Seite 41
Opening and closing Controls
41Online Edition for Part no. 01 40 2 608 633 — 11 09 490

▷ Press the switch beyond the resist‐ance point.The window opens automatically.
Pressing again stops the motion.Convenient opening, refer to page 34, via theremote control.
ClosingDanger of pinchingMonitor the closing process and make
sure that the closing path of the window is clear;otherwise, injuries may result.◀
▷ Pull the switch to the resistance point.The window closes while the switch is held.
▷ Pull the switch beyond the resistancepoint.The window closes automatically.
Pressing the switch stops the motion.Convenient operation, refer to page 34, via theremote control.Convenient closing, refer to page 39, with Com‐fort Access.
Pinch protectionIf the closing force exceeds a specific value as awindow closes, the closing action is interrupted.The window reopens slightly.
Danger of pinching even with pinch pro‐tection
Even with the pinch protection system, checkthat the window’s closing path is clear; other‐wise, the closing action may not stop in certainsituations, e.g., if thin objects are present.◀
No window accessoriesDo not install any accessories in the range
of movement of the windows; otherwise, thepinch protection system will be impaired.◀
Closing without the pinch protectionsystem
Danger of pinchingMonitor the closing process and make
sure that the closing path of the window is clear;otherwise, injuries may result.◀
For example, if there is an external danger or ifice on the windows prevents a window fromclosing normally, proceed as follows:
1. Pull the switch past the resistance point andhold it there.Pinch protection is limited and the windowreopens slightly if the closing force exceedsa certain value.
2. Pull the switch past the resistance pointagain within approx. 4 seconds and hold itthere.The window closes without pinch protec‐tion.
Safety switchThe safety switch in the driver’s door can beused to prevent children, for example, fromopening and closing the rear windows using theswitches in the rear.
Switching on and offPress the button.The LED lights up if the safety function
is switched on.
Safety switch for rear operationPress the safety switch when transporting
children in the rear; otherwise, injury may resultif the windows are closed without supervision.◀
Seite 42
Controls Opening and closing
42Online Edition for Part no. 01 40 2 608 633 — 11 09 490

Roller sunblindsRoller sunblind for rear window
General informationIf you are no longer able to move the roller sun‐blind for the rear window after having activatedit a number of times in a row, the system isblocked for a limited time to prevent overheat‐ing. Let the system cool.The roller sunblind for the rear window cannotbe moved at low interior temperatures.
Extending or retracting roller blind forrear window
Press the button.
Roller sunblinds for the rear sidewindowsPull out the roller sunblind at the loop and hookit onto the bracket.
Do not open the window while the rollersunblind is raised.
Do not open the window while the roller sunblindis raised; otherwise, there is a risk of damage athigh speeds that may result in personal injury.◀
Glass sunroof, poweredGeneral informationThe glass sunroof is operational when the igni‐tion is switched on.
Danger of pinchingMonitor the closing process and make
sure that the closing path of the glass sunroof isclear; otherwise, injuries may result.◀
Take the remote control with youTake the remote control with you when
leaving the vehicle so that children, for example,cannot operate the roof and injure themselves.◀
Tilting the glass sunroofPush switch upward briefly.▷ Closed roof is tilted open.▷ The opened roof closes until
it is in its tilted position. Thesliding visor stays completelyopen.
Opening/closing the glass sunroof andsliding visor together
▷ Slide switch back to the re‐sistance point and hold.Glass sunroof and sliding vi‐sor open together as long asthe switch is held down.
▷ Press switch back past the resistance point.The glass sunroof and sliding visor open au‐tomatically. Pressing the switch again stopsthe opening motion.
Analogously, the glass sunroof is closed by slid‐ing the switch forward.The sliding visor remains open and can beclosed by hand.Convenient operation, refer to page 34, via theremote control.Convenient closing, refer to page 39, with Com‐fort Access.
Pinch protection systemIf the closing force when closing the glass sun‐roof exceeds a certain value, the closing move‐ment is stopped, beginning at approximately the
Seite 43
Opening and closing Controls
43Online Edition for Part no. 01 40 2 608 633 — 11 09 490

middle of the opening in the roof, or from thetilted position during closing.The glass sunroof opens again slightly.
Danger of pinching even with pinch pro‐tection
Despite the pinch protection system, check thatthe roof’s closing path is clear; otherwise, theclosing action may not be interrupted in certainextreme situations, such as when thin objectsare present.◀
Closing without the pinch protectionsystemFor example, if there is an external danger, pro‐ceed as follows:
1. Press the switch forward beyond the resist‐ance point and hold.Pinch protection is limited and the roof re‐opens slightly if the closing force exceeds acertain value.
2. Press the switch forward again beyond theresistance point and hold until the roofcloses without pinch protection.
Initializing after a power failureAfter a power failure during the opening or clos‐ing process, the roof can only be operated to alimited extent.
Initializing the systemThe system can be initialized when the vehicleis stationary and the engine is running.During the initialization, the roof closes withoutpinch protection.
Danger of pinchingMonitor the closing process and make
sure that the closing path of the glass sunroof isclear; otherwise, injuries may result.◀
Press the switch up and hold ituntil the initialization is complete:▷ Initialization begins within
15 seconds and is completedwhen the sunroof is com‐pletely closed.
▷ The roof closes without pinch protection.
Seite 44
Controls Opening and closing
44Online Edition for Part no. 01 40 2 608 633 — 11 09 490

AdjustingVehicle equipmentAll standard, country-specific and optionalequipment that is offered in the model series isdescribed in this chapter. Therefore, equipmentis also described that is not available in a vehicle,e. g., because of the selected optional equip‐ment or country variant. This also applies forsafety-related functions and systems.
Sitting safelyThe ideal seating position can make a vital con‐tribution to relaxed, fatigue-free driving.The seating position plays an important role inan accident in combination with:▷ Safety belts, refer to page 48.▷ Head restraints, refer to page 49.▷ Airbags, refer to page 91.
SeatsGeneral information
Do not adjust the seat while drivingDo not adjust the driver’s seat while driv‐
ing, or the seat could respond with unexpectedmovement and the ensuing loss of vehicle con‐trol could lead to an accident.◀
Do not incline the backrest too far to therear
Also on the front passenger side, do not inclinethe backrest on the front passenger side too farto the rear during driving, or there is a risk ofslipping under the safety belt in the event of anaccident. This would eliminate the protectionnormally provided by the belt.◀
Manually adjustable seats
At a glance
1 Forward/backward2 Thigh support3 Seat tilt4 Backrest width5 Lumbar support6 Height7 Backrest tilt
Forward/backward
Pull the lever and slide the seat in the desireddirection.After releasing the lever, move the seat forwardor back slightly to make sure it engages prop‐erly.
Seite 45
Adjusting Controls
45Online Edition for Part no. 01 40 2 608 633 — 11 09 490

Height
Pull the lever and apply your weight to the seator lift it off, as necessary.
Backrest tilt
Pull the lever and apply your weight to the back‐rest or lift it off, as necessary.
Seat tilt
Pull the lever and move the seat to the desiredtilt. After releasing the lever, apply your weightto the seat or lift it off to make sure the seat en‐gages properly.
Electrically adjustable seats
At a glance
1 Seat and mirror memory2 Backrest width3 Lumbar support4 Backrest tilt5 Forward/backward, height, seat tilt
NoteThe seat setting for the driver’s seat is stored forthe remote control currently in use. When thevehicle is unlocked via the remote control, theposition is automatically retrieved if the function,refer to page 35, is activated for this purpose.
Adjustments in detail1. Forward/back.
Seite 46
Controls Adjusting
46Online Edition for Part no. 01 40 2 608 633 — 11 09 490

2. Height.
3. Seat tilt.
4. Backrest tilt.
Thigh support
Pull the lever at the front of the seat and adjustthe thigh support.
Lumbar supportThe curvature of the seat backrest can be ad‐justed in such a way that it supports the lumbarregion of the spine. The lower back and thespine are supported for upright posture.
▷ Press the front/rear section ofthe switch.The curvature is increased/decreased.
▷ Press the upper/lower sec‐tion of the switch.The curvature is shifted up/down.
Backrest widthChange the width of the backrestusing the side wings to adjust thelateral support.
Front seat heating
Switching onPress the button once for each temper‐ature level.
The maximum temperature is reached whenthree LEDs are lit.If the drive is continued within approx. 15 mi‐nutes, the seat heating is activated automati‐cally with the temperature selected last.
Seite 47
Adjusting Controls
47Online Edition for Part no. 01 40 2 608 633 — 11 09 490

Switching offPress the button longer.The LEDs go out.
Rear seat heating
Switching onPress the button once for each temper‐ature level.
The maximum temperature is reached whenthree LEDs are lit.If the drive is continued within approx. 15 mi‐nutes, the seat heating is activated automati‐cally with the temperature selected last.
Switching offPress the button longer.The LEDs go out.
Safety beltsSeats with safety beltThe vehicle has five seats, each of which isequipped with a safety belt.
Number of safety beltsYour vehicle has been fitted with five safety beltsfor the safety of you and your passengers. How‐ever, they can only offer protection when ad‐justed correctly.
NotesAlways make sure that safety belts are beingworn by all occupants before driving away.Although airbags enhance safety by providingadded protection, they are not a substitute forsafety belts.▷ The shoulder strap’s anchorage point will be
correct for adult seat occupants of everybuild if the seat is correctly adjusted.
▷ The two outer safety belt buckles,integrated into the rear seat, are for passen‐gers sitting on the left and right.
▷ The center rear seat belt buckle is solely in‐tended for the center passenger.
One person per safety beltNever allow more than one person to wear
a single safety belt. Never allow infants or smallchildren to ride on a passenger’s lap.◀
Putting on the beltLay the belt, without twisting, snugly
across the lap and shoulders, as close to thebody as possible. Make sure that the belt lies lowaround the hips in the lap area and does notpress on the abdomen. Otherwise, the belt canslip over the hips in the lap area in a frontal im‐pact and injure the abdomen.The safety belt must not lie across the neck, rubon sharp edges, be routed over solid or breaka‐ble objects, or be pinched.◀
Reduction of restraining effectAvoid wearing clothing that prevents the
belt from fitting properly, and pull the shoulderbelt periodically to readjust the tension acrossyour lap; otherwise, the retention effect of thesafety belt may be reduced.◀
Seite 48
Controls Adjusting
48Online Edition for Part no. 01 40 2 608 633 — 11 09 490

Buckling the belt
Make sure you hear the latch plate engage in thebelt buckle.
Unbuckling the belt1. Hold the belt firmly.2. Press the red button in the belt buckle.3. Guide the belt back into its reel.
Safety belt reminder for the driver’s andfront passenger seat
The indicator lamp flashes or lights upand a signal sounds. Make sure that thesafety belts are positioned correctly.
The safety belt reminder is active at speedsabove approx. 5 mph/8 km/h. It can also be ac‐tivated if objects are placed on the front pas‐senger seat.
Damage to safety beltsIn the case of strain caused by accidents ordamage:Have the safety belts, including the safety belttensioners, replaced and have the belt anchorschecked.
Checking and replacing safety beltsHave the work performed only by your
service center; otherwise, it cannot be ensuredthat this safety feature will function properly.◀
Front head restraintsCorrectly adjusted head restraintA correctly adjusted head restraint reduces therisk of injury to cervical vertebrae in the event ofan accident.
Adjusting the head restraintCorrectly adjust the head restraints of all
occupied seats; otherwise, there is an increasedrisk of injury in an accident.◀
HeightAdjust the head restraint so that its center is ap‐proximately at ear level.
DistanceAdjust the distance so that the head restraint isas close as possible to the back of the head.If necessary, adjust the distance by adjustingthe tilt of the backrest.
Adjusting the height
▷ To raise: pull.▷ To lower: press the button, arrow 1, and
push the head restraint down.
TiltThree different tilt positions are available.
Seite 49
Adjusting Controls
49Online Edition for Part no. 01 40 2 608 633 — 11 09 490

▷ Forward: pull the top edge of the head re‐straint forward, arrow 1.
▷ Back: press the button, arrow 2. The headrestraint folds as far back as possible.
RemovingThe head restraints cannot be removed.
Rear head restraintsCorrectly adjusted head restraintA correctly adjusted head restraint reduces therisk of injury to cervical vertebrae in the event ofan accident.
Adjusting the head restraintCorrectly adjust the head restraints of all
occupied seats; otherwise, there is an increasedrisk of injury in an accident.◀
HeightAdjust the head restraint so that its center is ap‐proximately at ear level.
Adjusting the height
▷ To raise: pull.▷ To lower: press the button, arrow 1, and
push the head restraint down.The center head restraint cannot be adjusted inelevation.
Folding down head restraintsExtending/retracting head restraintOnly fold down head restraint if no pas‐
sengers are in the rear. Fold out retracted headr‐ests again if passengers are being carried in therear; otherwise, there is increased risk of injuryin the event of an accident.◀
▷ To lower flaps: press the button, arrow 1,and press down the head restraint.
▷ Fold back up: pull up head restraints.
RemovingOnly remove the head restraint if no one will besitting in the seat in question.
Seite 50
Controls Adjusting
50Online Edition for Part no. 01 40 2 608 633 — 11 09 490

1. Pull the head restraint upward as far as pos‐sible.
2. Press the button, arrow 1, and pull the headrestraint out completely.
Before transporting passengersReinstall the head restraint before trans‐
porting anyone in the seat; otherwise, the pro‐tective function of the head restraint is unavail‐able.◀
Seat and mirror memoryGeneral information
Two different driver’s seat and exterior mirrorpositions can be stored and retrieved for eachremote control. Settings for the backrest widthand lumbar support are not stored in memory.
Storing1. Switch on the ignition.2. Set the desired position.
3. Press the button. The LED in thebutton lights up.
4. Press the desired button 1 or 2. The LEDgoes out.
If the M button is pressed accidentally:Press the button again.The LED goes out.
Calling up settingsDo not retrieve the memory while drivingDo not retrieve the memory setting while
driving, as an unexpected movement of the seator steering wheel could result in an accident.◀
Comfort function1. Open the driver’s door.2. Switch off the ignition.3. Briefly press the desired button 1 or 2.The corresponding seat position is performedautomatically.The procedure stops when a switch for adjust‐ing the seat or one of the buttons is pressed.
Safety mode1. Close the driver’s door or switch on the ig‐
nition.2. Press and hold the desired button 1 or 2 until
the adjustment procedure is completed.
Calling up of a seat positiondeactivatedAfter a brief period, the calling up of stored seatpositions is deactivated to save battery power.To reactivate calling up of a seat position:▷ Open and close the door or trunk lid.▷ Press a button on the remote control.▷ Press the Start/Stop button.
Seite 51
Adjusting Controls
51Online Edition for Part no. 01 40 2 608 633 — 11 09 490

MirrorsExterior mirrors
At a glance
1 Adjusting2 Left/right, Automatic Curb Monitor3 Fold in and out
General informationThe mirror on the passenger side is more curvedthan the driver’s side mirror.
Estimating distances correctlyObjects reflected in the mirror are closer
than they appear. Do not estimate the distanceto the traffic behind you based on what you seein the mirror, as this will increase your risk of anaccident.◀
Depending on how the vehicle is equipped, themirror setting is stored for the remote control inuse. When the vehicle is unlocked via the remotecontrol, the position is automatically retrieved ifthe setting for this function is active.
Selecting a mirrorTo change over to the other mirror:Slide the mirror changeover switch.
Adjusting electricallyThe setting corresponds to the directionin which the button is pressed.
Saving positionsSeat and mirror memory, refer to page 51
Adjusting manuallyIf an electrical malfunction occurs, for example,press the edges of the mirror glass.
Automatic Curb MonitorWhen the reverse gear is engaged, the mirrorglass tilts downward slightly on the front pas‐senger side. This improves your view of the curband other low-lying obstacles when parking, forexample.
Activating
1. Slide the mirror changeover switchto the driver’s side mirror position.
2. Engage transmission position R.
DeactivatingSlide the mirror changeover switch to the pas‐senger’s side mirror position.
Fold in and outPress the button.
Possible up to approx. 15 mph/20 km/h.For example, this is advantageous▷ In car washes.▷ In narrow streets.▷ For folding back mirrors that were folded
away manually.Mirrors that were folded in are folded out auto‐matically at a speed of approx. 25 mph/40 km/h.
Fold in the mirror in a car washBefore entering an automatic car wash,
fold in the exterior mirrors by hand or with thebutton; otherwise, they could be damaged, de‐pending on the width of the vehicle.◀
Seite 52
Controls Adjusting
52Online Edition for Part no. 01 40 2 608 633 — 11 09 490

Automatic heatingBoth exterior mirrors are automatically heatedwhenever the engine is running.
Automatic dimming featureBoth exterior mirrors are automatically dimmed.Photocells are used for control in the Interior rearview mirror, refer to page 53.
Interior rearview mirror
Reducing the blinding effect
From behind when driving at night: turn theknob.
Interior rearview mirror, automaticdimming feature
The concept
Photocells are used for control:▷ In the mirror glass.▷ On the back of the mirror.
Functional requirementFor proper operation:
▷ Keep the photocells clean.▷ Do not cover the area between the inside
rearview mirror and the windshield.
Steering wheelGeneral information
Do not adjust while drivingDo not adjust the steering wheel while
driving; otherwise, an unexpected movementcould result in an accident.◀
Adjusting
1. Fold the lever down.2. Move the steering wheel to the preferred
height and angle to suit your seating posi‐tion.
3. Fold the lever back.
Steering wheel heating
Switching on/offPress the button.
Seite 53
Adjusting Controls
53Online Edition for Part no. 01 40 2 608 633 — 11 09 490

▷ On: the LED lights up.▷ Off: the LED goes out.
Seite 54
Controls Adjusting
54Online Edition for Part no. 01 40 2 608 633 — 11 09 490

Transporting children safelyVehicle equipmentAll standard, country-specific and optionalequipment that is offered in the model series isdescribed in this chapter. Therefore, equipmentis also described that is not available in a vehicle,e. g., because of the selected optional equip‐ment or country variant. This also applies forsafety-related functions and systems.
The right place for childrenNote
Children in the vehicleDo not leave children unattended in the
vehicle; otherwise, they could endanger them‐selves and other persons, e.g., by opening thedoors.◀
Children should always be in the rearAccident research shows that the safest placefor children is in the back seat.
Transporting children in the rearOnly transport children younger than
13 years of age or shorter than 5 ft/150 cm in therear in child restraint fixing systems provided inaccordance with the age, weight and size of thechild; otherwise, there is an increased risk of in‐jury in an accident.Children 13 years of age or older must wear asafety belt as soon as a suitable child restraintfixing system can no longer be used, due to theirage, weight and size.◀
Children on the front passenger seatShould it ever be necessary to use a child re‐straint fixing system in the front passenger seat,make sure that the front, knee and side airbagson the front passenger side are deactivated. Au‐
tomatic deactivation of front passenger airbags,refer to page 93.
Deactivating the front passenger airbagsIf a child restraint fixing system is used in
the front passenger seat, the front passengerairbags must be deactivated; otherwise, there isan increased risk of injury to the child when theairbags are triggered, even with a child restraintfixing system.◀
Installing child restraint fixingsystemsBefore mountingBefore mounting child restraint fixing systems,ensure that the rear seat backrests are locked.
NotesManufacturer’s information for child re‐straint fixing systems
To select, mount and use child restraint fixingsystems, observe the information provided bythe system manufacturer; otherwise, the pro‐tective effect can be impaired.◀
On the front passenger seat
Deactivating airbagsAfter installing a child restraint fixing system inthe front passenger seat, make sure that thefront, knee and side airbags on the front pas‐senger side are deactivated.Deactivate the front passenger airbags auto‐matically, refer to page 93.
Deactivating the front passenger airbagsIf a child restraint fixing system is used in
the front passenger seat, the front passengerairbags must be deactivated; otherwise, there is
Seite 55
Transporting children safely Controls
55Online Edition for Part no. 01 40 2 608 633 — 11 09 490

an increased risk of injury to the child when theairbags are triggered, even with a child restraintfixing system.◀
Seat position and heightBefore installing a child restraint fixing system,move the front passenger seat as far back aspossible and adjust its height to the highest po‐sition to obtain the best possible position for thebelt and to offer optimal protection in the eventof an accident.Do not change the seat position and height afterthis.
Backrest widthAdjustable backrest width: before installing achild restraint fixing system in the front passen‐ger seat, open the backrest width completely.Do not change the backrest width again and donot call up a memory position.
Backrest width for the child seatBefore installing a child restraint fixing
system in the front passenger seat, the backrestwidth must be opened completely. Do notchange the adjustment after this; otherwise, thestability of the child seat will be reduced.◀
Child seat security
The rear safety belts and the front passengersafety belt can be locked against pulling out formounting the child restraint fixing systems.
Locking the safety belt1. Pull out the belt webbing completely.
2. Secure the child restraint fixing system withthe belt.
3. Allow the belt webbing to be pulled in andpull it taut against the child restraint fixingsystem. The safety belt is locked.
Unlocking the safety belt1. Unbuckle the belt buckle.2. Remove the child restraint fixing system.3. Allow the belt webbing to be pulled in com‐
pletely.
LATCH child restraint fixingsystemLATCH: Lower Anchors and Tether for Children.
NoteManufacturer’s information for LATCHchild restraint fixing systems
To mount and use the LATCH child restraint fix‐ing systems, observe the operating and safetyinformation from the system manufacturer; oth‐erwise, the level of protection may be reduced.◀
Mounts for the lower LATCH anchorsCorrectly engage the lower LATCH an‐chors
Make sure that the lower LATCH anchors haveproperly engaged and that the child restraint fix‐ing system is resting snugly against the back‐rest; otherwise, the degree of protection offeredmay be reduced.◀
Before mounting the LATCH child restraint fix‐ing system, pull the belt away from the child re‐straint fixing system.
Seite 56
Controls Transporting children safely
56Online Edition for Part no. 01 40 2 608 633 — 11 09 490

Without a through-loading system:Position
Mounts for the lower LATCH anchors are lo‐cated in the gap between the seat and backrest.
With a through-loading system:Position
Mounts for the lower LATCH anchors are lo‐cated behind the indicated covers.
Mounting LATCH child restraint fixingsystems1. Mount the child restraint fixing system; refer
to the operating instructions of the system.2. Ensure that both LATCH anchors are prop‐
erly connected.
Child restraint fixing system with atether strap
NoteLATCH mounting eyesOnly use the mounting eyes for the upper
LATCH retaining strap to secure child restraintfixing systems; otherwise, the mounting eyescould be damaged.◀
Mounting points
Depending on the vehicle equipment, there aretwo outer or three mounting points for child re‐straint fixing systems with a tether strap.
Retaining strap guideRetaining strapMake sure that the upper retaining strap is
not routed over the head restraints or sharpedges and is free of twisting on its way to theupper mounting point; otherwise, the belt can‐not properly secure the child restraint fixing sys‐tem in an accident.◀
Seite 57
Transporting children safely Controls
57Online Edition for Part no. 01 40 2 608 633 — 11 09 490

1 Direction of travel2 Head restraint.3 Hook for upper retaining strap4 Mounting point/eye5 Rear window shelf6 Seat backrest7 Upper retaining strap
Attaching the upper retaining strap tothe mounting point1. Remove the mounting point cover.2. Raise or remove head restraints.3. Guide the upper retaining strap between the
supports of the head restraint.4. Attach the hook of the retaining strap to the
mounting eye.5. Tighten the retaining strap by pulling it
down.6. Lower and lock head restraints as needed.
Locking the doors andwindowsRear doors
Push the locking lever on the rear doors down.The door can now be opened from the outsideonly.
Safety switch for the rearPress the button on the driver’s door ifchildren are being transported in the
rear.
This locks various functions so that they cannotbe operated from the rear: safety switch, refer topage 42.
Seite 58
Controls Transporting children safely
58Online Edition for Part no. 01 40 2 608 633 — 11 09 490

DrivingVehicle equipmentAll standard, country-specific and optionalequipment that is offered in the model series isdescribed in this chapter. Therefore, equipmentis also described that is not available in a vehicle,e. g., because of the selected optional equip‐ment or country variant. This also applies forsafety-related functions and systems.
Start/Stop buttonThe concept
Pressing the Start/Stop buttonswitches the ignition on or off andstarts the engine.Automatic transmission: the en‐gine starts if the brake is de‐
pressed when the Start/Stop button is pressed.Manual transmission: the engine starts if theclutch is depressed when the Start/Stop buttonis pressed.
Ignition onAutomatic transmission: press the Start/Stopbutton, and do not press on the brake pedal atthe same time.Manual-shift transmission: press the Start/Stopbutton, and do not press on the clutch pedal atthe same time.All vehicle systems are ready for operation.Most of the indicator and warning lamps in theinstrument cluster light up for varying lengths oftime.To save battery power when the engine is off,switch off the ignition and any unnecessaryelectronic systems/power consumers.The ignition switches off automatically:
▷ When the vehicle is locked, if the low beamsare switched on.
▷ Shortly before the battery is dischargedcompletely, so that the engine can still bestarted.
▷ If the engine is switched off and the ignitionis switched on, the system automaticallyswitches to the radio ready state when thedoor is opened if the lights are switched offor the daytime running lights are switchedon.If the engine is switched off and the ignitionis switched on, the system automaticallyswitches to the radio ready state when thedoor is opened if the lights are switched off.
Ignition offAutomatic transmission: press the Start/Stopbutton again, and do not press on the brakepedal at the same time.Manual-shift transmission: press the Start/Stopbutton again, and do not press on the clutchpedal at the same time.All indicator lamps in the instrument cluster goout.To save battery power when the engine is off,switch off the ignition and any unnecessaryelectronic systems/power consumers.
Transmission position P with the ignitionoff
When the ignition is switched off, position P isengaged automatically. When in an automaticcar wash, for example, ensure that the ignition isnot switched off accidentally.◀
Ignition automatically cuts off while the vehicleis stationary and the engine is stopped:▷ During locking, also with the low beams ac‐
tivated.
Seite 59
Driving Controls
59Online Edition for Part no. 01 40 2 608 633 — 11 09 490

▷ Shortly before the battery is dischargedcompletely, so that the engine can still bestarted. This function is only available whenthe low beams are switched off.
▷ When opening and closing the driver door, ifthe driver’s seat belt is unbuckled and thelow beams are switched off.
▷ While the driver’s seat belt is unbuckled, ifthe driver’s door is open and the low beamsare switched off.
When the ignition is switched off, by opening orclosing the driver’s door or unbuckling the driv‐er’s seat belt, the radio ready state remains ac‐tive.
Radio ready stateActivate radio ready state:▷ When the ignition is switched off: press ON/
OFF button on the radio.▷ When the engine is running: press START/
STOP button.Some electronic systems/power consumers re‐main ready for operation.Radio ready state switches off automatically:▷ After approx. 8 minutes.▷ When the vehicle is locked using the central
locking system.▷ Shortly before the battery is discharged
completely, so that the engine can still bestarted.
Starting the engineGeneral information
Enclosed areasDo not let the engine run in enclosed
areas; otherwise, breathing of exhaust fumesmay lead to loss of consciousness and death.The exhaust gases contain carbon monoxide, anodorless and colorless but highly toxic gas.◀
Unattended vehicleDo not leave the vehicle unattended with
the engine running; doing so poses a risk of dan‐ger.Before leaving the vehicle with the engine run‐ning, set the parking brake and place the trans‐mission in position P or neutral to prevent thevehicle from moving.◀
Frequent starting in quick successionAvoid repeated futile attempts at starting
the car and avoid starting the car frequently inquick succession. Otherwise, the fuel is notburned or is inadequately burned, and there isthe danger of overheating and damaging thecatalytic converter.◀
Do not wait for the engine to warm up while thevehicle remains stationary. Start driving at mod‐erate engine speeds.
Manual transmission
Starting the engine1. Depress the brake pedal.2. Press on the clutch and shift to neutral.3. Press the Start/Stop button.The ignition is activated automatically for a cer‐tain time and is stopped as soon as the enginestarts.
Automatic-Transmission
Starting the engine1. Depress the brake pedal.2. Press the Start/Stop button.The ignition is activated automatically for a cer‐tain time and is stopped as soon as the enginestarts.
Seite 60
Controls Driving
60Online Edition for Part no. 01 40 2 608 633 — 11 09 490

Engine stopGeneral information
Take the remote control with youTake the remote control with you when
leaving the vehicle so that children, for example,cannot start the engine.◀
Set the parking brake and further securethe vehicle as required
Set the parking brake firmly when parking; oth‐erwise, the vehicle could roll. On steep upwardand downward inclines, further secure the vehi‐cle, for example, by turning the steering wheel inthe direction of the curb. ◀
Before driving into a car washIn order for the vehicle to be able to roll into a carwash, heed the information regarding Washingin automatic car washes, refer to page 296.
Manual transmission
Switching off the engine1. With the vehicle at a standstill, press the
Start/Stop button.2. Shift into first gear or reverse.3. Set the parking brake.
Automatic-Transmission
Switching off the engine1. Engage transmission position P with the ve‐
hicle stopped.2. Press the Start/Stop button.
The engine is switched off.The radio ready state is switched on.
3. Set the parking brake.
Auto Start/Stop functionThe conceptThe automatic engine start-stop function helpssave fuel. The system switches off the engineduring a stop, e. g., in a traffic congestion or attraffic lights. The ignition remains switched on.The engine starts again automatically for drivingoff.
Automatic modeThe automatic engine start/stop function is op‐erational after each engine start.The function is activated above a certain speed.▷ Manual transmission: above 3 mph, approx.
5 km/h.▷ Automatic transmission: from 5 mph, ap‐
prox. 9 km/h.
Engine stopThe engine is switched off automatically duringa stop under the following conditions:Manual transmission:▷ Neutral is engaged and the clutch pedal is
not pressed.▷ The driver’s safety belt is buckled or the
driver’s door is closed.Automatic transmission:▷ The selector lever is in transmission position
D.▷ Brake pedal remains depressed while the
vehicle is stopped.▷ The driver’s safety belt is buckled or the
driver’s door is closed.The air flow of the air conditioner is reducedwhen the engine is switched off.
Seite 61
Driving Controls
61Online Edition for Part no. 01 40 2 608 633 — 11 09 490

Display in the instrument clusterThe READY display in the tach‐ometer signals that the AutoStart/Stop function is ready tostart the engine automatically.
NoteThe engine is not switched off automatically inthe following situations:▷ External temperature below approx. +37 ℉/
+3 ℃.▷ The external temperature is high and auto‐
matic climate control is running.▷ The passenger compartment has not yet
been heated or cooled to the required level.▷ The engine is not yet at operating tempera‐
ture.▷ The wheels are at a sharp angle or the steer‐
ing wheel is being turned.▷ After driving in reverse.▷ Fogging of the windows when the automatic
climate control is switched on.▷ The vehicle battery charge is very low.▷ The engine compartment lid is unlocked.▷ The parking assistant is activated.▷ Stop-and-go traffic.▷ The transmission selector lever is in position
N or S/M.
Starting the engineThe engine starts automatically under the fol‐lowing conditions:▷ Manual transmission:
The clutch pedal is pressed.▷ Automatic transmission:
By releasing the brake pedal.After the engine starts, accelerate as usual.
Safety modeAfter the engine switches off automatically, itwill not start again automatically if any one of thefollowing conditions are met.▷ The driver’s safety belt is unbuckled and the
driver’s door is open.▷ The hood was unlocked.Some indicator lamps light up for varyinglengths of time.The engine can only be started via the Start/Stop button.
NoteEven if driving away was not intended, the de‐activated engine starts up automatically in thefollowing situations:▷ Excessive warming of the passenger com‐
partment when the cooling function isswitched on.
▷ The steering wheel is turned.▷ Automatic transmission: the transmission
position is changed from D to N, R, or M/S.▷ Automatic transmission: the transmission
position is changed from P to N, D, R, or M/S.
▷ The vehicle begins rolling.▷ Fogging of the windows when the automatic
climate control is switched on.▷ The vehicle battery charge is very low.▷ Excessive cooling of the passenger com‐
partment when the heating is switched on.▷ Low brake vacuum pressure; this can occur,
for example, if the brake pedal is depresseda number of times in succession.
Preventing an automatic engine stopwith automatic transmission
The conceptTo make it possible to drive away very quickly,such as at an intersection, the automatic enginestop can be actively prevented.
Seite 62
Controls Driving
62Online Edition for Part no. 01 40 2 608 633 — 11 09 490

Preventing an engine stop using thebrake pedalThe engine stop can be actively preventedwithin one second after the vehicle comes to astandstill.▷ Immediately after the vehicle comes to a
standstill, briefly press the brake pedalforcefully.
▷ Then press the brake pedal with normalbraking force.
Activating/deactivating the systemmanually
Using the button
Press the button.
▷ LED comes on: Auto Start Stop function isdeactivated.The engine is started during an automaticengine stop.The engine can only be stopped or startedvia the Start/Stop button.
▷ LED goes out: Auto Start Stop function isactivated.
Switching off the vehicle during anautomatic engine stopDuring an automatic engine stop, the vehiclecan be switched off permanently, e.g., whenleaving it.
1. Press the Start/Stop button. The ignition isswitched off. The Auto Start/Stop functionis deactivated.
Automatic transmission: the transmissionposition P is engaged automatically.
2. Set the parking brake.
Engine start as usual via start/stop button.
Automatic deactivationIn certain situations, the Automatic Engine Start/Stop Function is deactivated automatically forsafety reasons, such as when the driver is de‐tected to be absent.
MalfunctionThe automatic engine start/stop function no lon‐ger switches of the engine automatically. ACheck Control message is displayed. It is pos‐sible to continue driving. Have the systemchecked.
Parking brakeApplyingThe lever automatically engages after beingpulled up.
Releasing
Raise lever slightly, press the button and guidethe lever down.
Seite 63
Driving Controls
63Online Edition for Part no. 01 40 2 608 633 — 11 09 490

NotesUse while drivingIf on a rare occasion it is necessary to use
the parking brake while driving, do not use ex‐cessive force when applying it. When using it,keep the button on the lever depressed.Otherwise, using excessive force when applyingthe parking brake may cause the rear wheels tolock, resulting in fishtailing.◀
To prevent corrosion and braking control on oneside only, lightly apply the parking brake period‐ically while coasting, if traffic conditions permit.The brake lamps will not light up if the parkingbrake is engaged.
Turn signal, high beams,headlamp flasherTurn signal
Do not fold in the exterior mirrorsDuring driving and during the operation of
the turn signals/warning flashers, do not fold inthe exterior mirror, or else the additional flasherlights in the exterior mirror do not have the pre‐scribed position and can only be poorly de‐tected.◀
Using turn signals
Press the lever beyond the resistance point.To switch off manually, press the lever to the re‐sistance point.
Unusually rapid flashing of the indicator lamp in‐dicates that a turn signal bulb has failed.
Triple turn signal activationPress the lever to the resistance point.The turn signal flashes three times.The function can be activated or deactivated:
1. «Settings»2. «Lighting»3. «Triple turn signal»
Signaling brieflyPress the lever to the resistance point and holdit there for as long as you want the turn signal toflash.
High beams, headlamp flasher
▷ High beams, arrow 1.▷ Headlamp flasher, arrow 2.
Seite 64
Controls Driving
64Online Edition for Part no. 01 40 2 608 633 — 11 09 490

Washer/wiper systemSwitching the wipers on/off and briefwipe
Do not switch on the wipers if frozenDo not switch on the wipers if they are fro‐
zen onto the windshield; otherwise, the wiperblades and the windshield wiper motor may bedamaged.◀
Switching on
Press the wiper levers up.The lever automatically returns to its initial po‐sition when released.▷ Normal wiping speed: press up once.
The wipers switch to intermittent operationwhen the vehicle is stationary.
▷ Fast wiping speed: press up twice or pressonce beyond the resistance point.The wipers switch to normal speed when thevehicle is stationary.
Switching off and brief wipe
Press the wiper levers down.
The lever automatically returns to its initial po‐sition when released.▷ Brief wipe: press down once.▷ To switch off normal wipe: press down once.▷ To switch off fast wipe: press down twice.
Intermittent operation or rain sensor
The conceptThe rain sensor automatically controls the timebetween wipes depending on the intensity ofthe rainfall. The sensor is located on the wind‐shield, directly behind the interior rearview mir‐ror.
Activating/deactivating
Press the button on the wiper lever.The LED in the steering column stalk lights up.
Deactivate the rain sensor in car washesDeactivate the rain sensor when passing
through an automatic car wash; otherwise, dam‐age could be caused by undesired wiper activa‐tion.◀
Seite 65
Driving Controls
65Online Edition for Part no. 01 40 2 608 633 — 11 09 490

Setting the frequency or sensitivity ofthe rain sensor
Turn the thumbwheel.
Clean the windshield, headlamps
Pull the lever.The system sprays washer fluid on the wind‐shield and activates the wipers briefly.
In addition, the headlamps are cleaned at regularintervals when the vehicle lights are switchedon.
Do not use the washer system at freezingtemperatures
Do not use the washers if there is any dangerthat the fluid will freeze on the windshield; oth‐erwise, your vision could be obscured. For thisreason, use antifreeze.Avoid using the washer when the reservoir isempty; otherwise, you could damage thepump.◀
Windshield washer nozzlesThe washer jets are automatically heated when‐ever the ignition is switched on.
Fold-out position of the wipersRequired when changing the wiper blades orunder frosty conditions, for example.
1. Switch off the ignition.2. Under frosty conditions, ensure that the
wiper blades are not frozen onto the wind‐shield.
3. Press the wiper lever up beyond the point ofresistance and hold it for approx. 3 seconds,until the wiper remains in a nearly verticalposition.
After the wipers are folded back down, the wipersystem must be reactivated.
Fold the wipers back downBefore switching the ignition on, fold the
wipers back down to the windshield; otherwise,the wipers may become damaged when they areswitched on.◀
1. Switch on the ignition.2. Press the wiper levers down. The wipers
move to their resting position and are readyfor operation.
Washer fluidGeneral information
Antifreeze for washer fluidAntifreeze is flammable. Therefore, keep
it away from sources of ignition.Only keep it in the closed original container andinaccessible to children.Follow the instructions on the container.◀
Washer fluid reservoirAdding washer fluidOnly add washer fluid when the engine is
cool, and then close the cover completely toavoid contact between the washer fluid and hotengine parts.
Seite 66
Controls Driving
66Online Edition for Part no. 01 40 2 608 633 — 11 09 490

Otherwise, there is the danger of fire and a riskto personal safety if the fluid is spilled.◀
All washer nozzles are supplied from one reser‐voir.Fill with water and – if required – with a washerantifreeze, according to the manufacturer’s rec‐ommendations.Mix the washer fluid before adding to maintainthe correct mixing ratio.
Manual transmissionShifting
Shifting into 5th or 6th gearWhen shifting into 5th or 6th gear, push
the gearshift lever to the right; otherwise inad‐vertent shifting into the 3rd or 4th gear couldlead to engine damage.◀
Reverse gearSelect only when the vehicle is stationary. Whenthe gearshift lever is pressed to the left, a slightresistance needs to be overcome.
Automatic transmission withSteptronicTransmission positions
D Drive, automatic positionPosition for normal vehicle operation. All for‐ward gears are available.
R is ReverseSelect only when the vehicle is stationary.
N is NeutralUse in automatic car washes, for example. Thevehicle can roll.When the ignition is switched off, refer topage 59, position P is engaged automatically.
P ParkSelect only when the vehicle is stationary. Thedrive wheels are blocked.P is engaged automatically:▷ After the engine is switched off, if the car is
in radio ready state, refer to page 60, or if theignition is switched off, refer to page 59, andif position R or D is engaged.
▷ With the ignition is off, if position N is en‐gaged.
▷ If the safety belt is unbuckled, the driver’sdoor is opened, and the brake pedal is notpressed while the vehicle is stationary andtransmission position R or D is engaged.
Before exiting the vehicle, make sure that posi‐tion P of the automatic transmission is engaged.Otherwise, the vehicle may begin to roll.
KickdownKickdown is used to achieve maximum drivingperformance. Press on the gas pedal beyond theresistance point at the full throttle position.
Engaging the transmission position▷ Transmission position P can only be disen‐
gaged if the engine is running and the brakepedal is pressed.
▷ With the vehicle stationary, press on thebrake pedal before shifting out of P or N;otherwise, the shift command will not beexecuted: shift lock.
Seite 67
Driving Controls
67Online Edition for Part no. 01 40 2 608 633 — 11 09 490

Depress the brake until you start driv‐ing
To prevent the vehicle from creeping afteryou select a driving position, maintain pres‐sure on the brake pedal until you are readyto start.◀
Engaging D, R and N
Briefly push the selector lever in the desired di‐rection, beyond a resistance point if necessary.After releasing the selector lever, it returns to itscenter position.
Press unlock button, in order to:▷ Engage R.▷ Shift out of P.
Engaging P
Press button P.
Sport program DS and manual mode M/S
Activating sport program DS
Push the selector lever to the left out of trans‐mission position D.DS is displayed in the instrument cluster.The sport program of the transmission is acti‐vated.
Activating the M/S manual modePush the selector lever to the left out of trans‐mission position D.Push the selector lever forward or backward.Manual mode becomes active and the gear ischanged.The engaged gear is displayed in the instrumentcluster, e.g., M1.▷ To shift down: press the selector lever for‐
ward.▷ To shift up: pull the selector lever rearwards.
Seite 68
Controls Driving
68Online Edition for Part no. 01 40 2 608 633 — 11 09 490

The vehicle only shifts up or down at appropriateengine and road speeds, e.g., it does not shiftdown if the engine speed is too high.The selected gear is briefly displayed in the in‐strument cluster, followed by the current gear.
Manual mode M/S: prevent automaticupshiftingOnce maximum engine speed is attained, M/Smanual mode is automatically upshifted asneeded.For vehicles with Sport automatic transmis‐sions, automatic shift operations are not per‐formed if one of the following conditions is met:▷ DSC deactivated.▷ TRACTION activated.▷ SPORT+ activated.In addition, the kickdown is deactivated.
Ending the sport program/manualmodePush the selector lever to the right.D is displayed in the instrument cluster.
Shift paddles for Sport automatictransmission
The shift paddles on the steering wheel allowyou to shift gears quickly while keeping bothhands on the steering wheel.If the shift paddles on the steering wheel areused to shift gears in automatic mode, the trans‐mission temporarily switches to manual mode.If the shift paddles are not used and the vehicleis not accelerated for a certain time, the system
switches back into automatic mode if the selec‐tor lever is in transmission position D.▷ Shift up: pull right shift paddle.▷ Shift down: pull left shift paddle.The vehicle only shifts up or down at appropriateengine and road speeds, e.g., it does not shiftdown if the engine speed is too high.The selected gear is briefly displayed in the in‐strument cluster, followed by the current gear.
Displays in the instrument clusterThe transmission position is dis‐played, e.g.: P.
Seite 69
Driving Controls
69Online Edition for Part no. 01 40 2 608 633 — 11 09 490

DisplaysVehicle equipmentAll standard, country-specific and optionalequipment that is offered in the model series isdescribed in this chapter. Therefore, equipment
is also described that is not available in a vehicle,e. g., because of the selected optional equip‐ment or country variant. This also applies forsafety-related functions and systems.
Instrument clusterOverview, instrument cluster
1 Fuel gauge 752 Speedometer3 Indicator/warning lamps 734 Tachometer 75
5 Engine oil temperature 756 Current fuel consumption 777 Electronic displays 728 Display/reset miles 76
Seite 70
Controls Displays
70Online Edition for Part no. 01 40 2 608 633 — 11 09 490

Overview, instrument cluster with enhanced features
1 Fuel gauge 752 Speedometer3 Indicator/warning lamps 734 Tachometer 75
5 Engine oil temperature 756 Current fuel consumption 777 Electronic displays 728 Display/reset miles 76
Seite 71
Displays Controls
71Online Edition for Part no. 01 40 2 608 633 — 11 09 490

Electronic displaysOverview, instrument cluster
1 Messages, e.g. Check Control 73Time 76Date 76External temperature 76Selection lists 80Service requirements 77
Miles/trip miles 76Computer 81
2 Transmission display 69Gear shift indicator 78
3 Status, Driving Experience Switch 106
Seite 72
Controls Displays
72Online Edition for Part no. 01 40 2 608 633 — 11 09 490

Overview, instrument cluster with enhanced features
1 Time 76External temperature 76Date 76Selection list, e.g., radio 80Speed limit detection 79Computer 81Miles/trip miles 76
Navigation display 1682 Energy recovery 77
Transmission display 69Current fuel consumption 77ECO PRO 163
3 Messages, e.g. Check Control 73Service requirements 77
Check ControlThe conceptThe Check Control system monitors functionsin the vehicle and notifies you of malfunctions inthe monitored systems.A Check Control message is displayed as acombination of indicator or warning lamps andtext messages in the instrument cluster and inthe Head-up Display.In addition, an acoustic signal may be output anda text message may appear on the Control Dis‐play.
Indicator/warning lamps
The indicator and warning lamps can light up ina variety of combinations and colors.
Seite 73
Displays Controls
73Online Edition for Part no. 01 40 2 608 633 — 11 09 490

Several of the lamps are checked for properfunctioning and light up temporarily when theengine is started or the ignition is switched on.
Overview: indicator/warning lamps
Symbol Function or system
Turn signal
Front fog lamps
Rear fog lamp
High beams
High-beam Assistant
Parking lamps, headlamp control
Active Cruise Control
Vehicle detection, Active CruiseControl
Collision warning
Adjustable speed limit
Cruise control
Lane departure warning
Symbol Function or system
DSC Dynamic Stability Control
DSC Dynamic Stability Control is de‐activated or DTC Dynamic TractionControl is activated
Tire Pressure MonitorFlat Tire Monitor
Safety belts
Airbag system
Steering system
Emissions
Parking brakeBrake system
In Canadian modelsParking brakeBrake system
Antilock Brake System ABS
Antilock Brake System ABS in Cana‐dian models
At least one Check Control messageis displayed or is stored (symbol indisplay)
Text messagesText messages in combination with a symbol inthe instrument cluster explain a Check Controlmessage and the meaning of the indicator andwarning lamps.
Seite 74
Controls Displays
74Online Edition for Part no. 01 40 2 608 633 — 11 09 490

Supplementary text messagesAddition information, such as on the cause of afault or the required action, can be called up viaCheck Control.The supplementary text of urgent messages isdisplayed on the Control Display automatically.
SymbolsDepending on the Check Control message, thefollowing functions can be selected.▷ «Owner’s Manual»
Display additional information about theCheck Control message in the integratedowner’s manual.
▷ «Service request»Contact the service partner.
▷ «Roadside Assistance»Contact Roadside Assistance.
Hiding Check Control messages
Press the computer button on the turn signallever.
▷ Some Check Control messages are dis‐played continuously and are not cleared un‐til the malfunction is eliminated. If severalmalfunctions occur at once, the messagesare displayed consecutively.These messages can be hidden for approx.8 seconds. After this time, they are dis‐played again automatically.
▷ Other Check Control messages are hiddenautomatically after approx. 20 seconds.
They are stored and can be displayed againlater.
Displaying stored Check Controlmessages1. «Vehicle Info»2. «Vehicle status»3. «Check Control»4. Select the text message.
Messages after trip completionSpecial messages that are displayed duringdriving are displayed again after the ignition isswitched off.
Fuel gaugeThe vehicle inclination maycause the display to vary.Notes on refueling, refer topage 260.
TachometerAlways avoid engine speeds inthe red warning field. In thisrange, the fuel supply is inter‐rupted to protect the engine.
Engine oil temperature▷ Cold engine: the pointer is at
the low temperature end.Drive at moderate engine andvehicle speeds.
▷ Normal operating tempera‐ture: the pointer is in the mid‐dle or in the left half of thetemperature display.
Seite 75
Displays Controls
75Online Edition for Part no. 01 40 2 608 633 — 11 09 490

▷ Hot engine: the pointer is at the high tem‐perature end. A Check Control message isdisplayed in addition.
Coolant temperatureShould the coolant, and with it the engine, be‐come too hot, a Check Control message is dis‐played.Check the coolant level, refer to page 276.
Odometer and trip odometer▷ Odometer, arrow 1.▷ Trip odometer, arrow 2.
Display/reset milesPress the knob.▷ When the ignition is switched
off, the time, external temper‐ature and odometer are dis‐played.
▷ When the ignition is switched on, the tripodometer is reset.
External temperatureExternal temperature warning
If the display drops to +37 ℉/+3 ℃, a signal sounds.A Check Control message is dis‐played.There is the increased danger of
ice.
Ice on roadsEven at temperatures above +37 ℉/+3 ℃,
there can be a risk of ice on roads.
Therefore, drive carefully on bridges and shadyroads, for example, to avoid the increased dan‐ger of an accident.◀
TimeThe time is displayed at the bot‐tom of the instrument cluster.Setting the time and time format,refer to page 83.
DateThe date is displayed in the in‐strument cluster.Setting the date and date format,refer to page 84.
RangeAfter the reserve range isreached:▷ A Check Control message is
displayed briefly.▷ The remaining range is
shown on the onboard com‐puter.
▷ When a dynamic driving style is used, suchas when cornering quickly, operation of theengine is not always ensured.
The Check Control message appears continu‐ously below a range of approx. 30 miles/50 km.
Refuel promptlyRefuel no later than at a range of 30 miles/
50 km, or operation of the engine is not ensuredand damage may occur.◀
Displaying the cruising range1. «Settings»2. «Info display»
Seite 76
Controls Displays
76Online Edition for Part no. 01 40 2 608 633 — 11 09 490

3. «Additional indicators»The range is displayed in the instrument cluster.
Current fuel consumptionInstrument cluster
Displays the current fuel con‐sumption. You can checkwhether you are currently drivingin an efficient and environmen‐tally-friendly manner.
Instrument cluster with enhancedfeatures
Displays the current fuel con‐sumption. You can checkwhether you are currently drivingin an efficient and environmen‐tally-friendly manner.
Displaying the current fuelconsumption1. «Settings»2. «Info display»3. «Additional indicators»The bar display for the current fuel consumptionis displayed in the instrument cluster.
Energy recoveryThe energy of motion of the ve‐hicle is converted to electrical en‐ergy while coasting. The vehiclebattery is partially charged andfuel consumption can be low‐
ered.
Service requirementsThe conceptThe driving distance or the time to the next serv‐ice is displayed briefly after the ignition isswitched on.The current service requirements can be readout from the remote control by the service spe‐cialist.
Display
Instrument clusterDisplay in the instrument cluster.
Instrument cluster with enhancedfeatures
Display in the instrument clusterwith expanded scope.
Detailed information on servicerequirementsMore information on the scope of service re‐quired can be displayed on the Control Display.
1. «Vehicle Info»2. «Vehicle status»3. «Service required»
Required maintenance procedures and le‐gally mandated inspections are displayed.
4. Select an entry to call up detailed informa‐tion.
Seite 77
Displays Controls
77Online Edition for Part no. 01 40 2 608 633 — 11 09 490

Symbols
Symbols Description
No service is currently required.
The deadline for service or a le‐gally mandated inspection isapproaching.
The service deadline has al‐ready passed.
Entering appointment datesEnter the dates for the required inspections.Ensure that the vehicle date and time are setcorrectly.
1. «Vehicle Info»2. «Vehicle status»3. «Service required»4. «§ Vehicle inspection»5. «Date:»6. Create the settings.7. Confirm.
The entered date is stored.
Automatic Service RequestData regarding the maintenance status or legallymandated inspections of the vehicle are auto‐matically transmitted to your service center be‐fore a service due date.You can check when your service center wasnotified.
1. «Vehicle Info»2. «Vehicle status»3. Open «Options».4. «Last Service Request»
Service historyPerform maintenance work at the service centerand have them recorded in the vehicle data. Theentries are like a service booklet of the docu‐mentation of regular maintenance.The entered maintenance work can be dis‐played on the Control Display. Function is avail‐able as soon as a maintenance operation hasbeen entered in the vehicle data.
1. «Vehicle Info»2. «Vehicle status»3. «Service required»4. «Service history»
Performed maintenance operations are dis‐played.
5. Select an entry to call up detailed informa‐tion.
Symbols
Symbols Description
Green: maintenance was performedon schedule.
Yellow: maintenance was per‐formed late.
Maintenance was not performed.
Gear shift indicatorThe conceptThe system recommends the most fuel efficientgear in the current driving situation.
DisplaysIndicators to shift up or down are displayed inthe instrument cluster.
Seite 78
Controls Displays
78Online Edition for Part no. 01 40 2 608 633 — 11 09 490

Symbols Description
Fuel efficient gear is engaged.
Shift up to fuel efficient gear.
Shift down to fuel efficient gear.
Shift into neutral.
Speed limit detection with NoPassing InformationThe concept
Speed limit detectionSpeed limit detection uses a symbol in theshape of a traffic sign to display the currentlydetected speed limit. The camera at the base ofthe interior rearview mirror detects traffic signsat the edge of the road as well as variable dis‐plays of sign gantries. Traffic signs with extrasymbols, e. g. during wet road conditions, arealso detected and compared with vehicle inte‐rior data, e. g. the rain sensor and are displayeddepending on the situation. The system consid‐ers the information stored in the navigation sys‐tem and also displays speed limits present onroutes without signs.
No Passing InformationNo Passing Information displays in the instru‐ment cluster the beginnings and ends of nopassing zones detected by the camera. The sys‐tem accounts for only the beginnings and endsof No Passing zones marked by signs.No display is shown:▷ In countries where No Passing zones are
primarily identified with road markings.
▷ On routes without signage.▷ Where there are railroad crossings, highway
markings or other situations where no sig‐nage is present, but passing would not bepermitted.
Switching on/off1. «Settings»2. «Info display»3. «Speed limit information»If speed limit detection is switched on, it can bedisplayed on the info display in the instrumentcluster via the onboard computer. No PassingInformation is displayed together with activatedspeed limit information.
DisplayThe following is displayed in the instrumentcluster.
Speed limit detection▷ Current speed limit.▷ No speed limit — for the Ger‐
man autobahn.▷ Speed limit detection is not
available.
Speed limit detection can also be displayed inthe Head-up Display.
No Passing Information▷ Start of No Passing zone.▷ End of No Passing zone.▷ No Passing Information not
available.
No Passing Information can also be displayed inthe Head-up Display.
Seite 79
Displays Controls
79Online Edition for Part no. 01 40 2 608 633 — 11 09 490

System limitsPersonal judgmentThe system cannot serve as a substitute
for the driver’s personal judgment of the trafficsituation.The system assists the driver and does not re‐place the human eye.◀
The system may not be fully functional and mayprovide incorrect information in the followingsituations:▷ In heavy fog, rain or snowfall.▷ When signs are concealed by objects.▷ When driving very close to the vehicle in
front of you.▷ When driving toward bright lights.▷ When the windshield behind the interior
rearview mirror is fogged over, dirty or cov‐ered by a sticker, etc.
▷ In the event of incorrect detection by thecamera.
▷ If the speed limits stored in the navigationsystem are incorrect.
▷ In areas not covered by the navigation sys‐tem.
▷ When roads differ from the navigation, e.g.due to changes in the road network.
▷ When passing buses or trucks with a speedsticker.
▷ If the traffic signs are non-conforming.▷ During the calibration process of the camera
immediately after vehicle shipment.
Camera
The camera is located near the base of the mir‐ror.Keep windshield clean and clear in the area infront of the interior rear view mirror.
Selection lists in theinstrument clusterThe conceptThe following can be displayed or operated us‐ing the buttons and the thumbwheel on thesteering wheel and the display in the instrumentcluster:▷ Current audio source.▷ Programs of the Driving Experience Switch.▷ Redial on telephone.▷ Activation of the voice activation system.
Display
Instrument cluster
Seite 80
Controls Displays
80Online Edition for Part no. 01 40 2 608 633 — 11 09 490

Instrument cluster with enhancedfeatures
Activating a list and creating thesetting
On the right side of the steering wheel, turn thethumbwheel to activate the corresponding list.Using the thumbwheel, select the desired set‐ting and confirm it by pressing the thumbwheel.
ComputerIndication in the info display
The information from the on‐board computer is shown in theinfo display in the instrumentcluster.
Calling up information on the infodisplay
Press the onboard computer button on the turnsignal lever.Information is displayed on the info display of theinstrument cluster.
Information at a glanceRepeatedly pressing the button on the turn sig‐nal lever calls up the following information on theinfo display:▷ Range.▷ Average fuel consumption.▷ Average speed.▷ Date.▷ Speed limit detection.▷ Time of arrival
When destination guidance is activated inthe navigation system.
▷ Distance to destinationWhen destination guidance is activated inthe navigation system.
▷ Arrow view of navigation systemWhen destination guidance is activated inthe navigation system.When the arrow view in the Head-up Displayis inactive.
▷ ECO PRO bonus range.
Seite 81
Displays Controls
81Online Edition for Part no. 01 40 2 608 633 — 11 09 490

Adjusting the info displayYou can select what information from the on‐board computer is to be displayed on the infodisplay of the instrument cluster.
1. «Settings»2. «Info display»3. Select the desired displays.
Information in detail
RangeDisplays the estimated cruising range availablewith the remaining fuel.It is calculated based on your driving style overthe last 20 miles/30 km.If there is only enough fuel left for less than45 miles/80 km, the color of the display changes.
Average fuel consumptionThis is calculated for the period during which theengine is running.The average fuel consumption is calculated onthe basis of various distances.
Average speedPeriods in which the vehicle is parked with theengine manually stopped do not enter into thecalculation of the average speed.
Resetting average valuesPress and hold the computer button on the turnsignal lever.
Distance to destinationThe distance remaining to the destination is dis‐played if a destination is entered in the naviga‐tion system before the trip is started.The distance to the destination is adopted au‐tomatically.
Time of arrivalThe estimated time of arrival isdisplayed if a destination is en‐tered in the navigation systembefore the trip is started.The time must be correctly set.
Speed limit detectionDescription of the speed limit detection, refer topage 79, function
Speed limitDisplay of a speed limit which, when reached,should cause a warning to be issued.Renewed warning if the vehicle speed drops be‐low the set speed limit once by at least 3 mph/5 km/h.
Displaying, setting or changing thelimit1. «Settings»2. «Speed»3. «Warning at:»
4. Turn the controller until the desired limit isdisplayed.
5. Press the controller.The speed limit is stored.
Activating/deactivating the limit1. «Settings»2. «Speed»
Seite 82
Controls Displays
82Online Edition for Part no. 01 40 2 608 633 — 11 09 490

3. «Warning»4. Press the controller.
Applying your current speed as thelimit1. «Settings»2. «Speed»3. «Select current speed»4. Press the controller.
The current vehicle speed is stored as thelimit.
Trip computerThere are two types of computer.▷ «Onboard info»: the values can be reset as
often as necessary.▷ «Trip computer»: the values provide an over‐
view of the current trip.
Resetting the trip computer1. «Vehicle Info»2. «Trip computer»3. «Reset»: all values are reset.
«Automatically reset»: all values are resetapprox. 4 hours after the vehicle comes to astandstill.
Display on the Control DisplayDisplay the computer or trip computer on theControl Display.
1. «Vehicle Info»2. «Onboard info» or «Trip computer»
Resetting the fuel consumption orspeed1. «Vehicle Info»2. «Onboard info»3. «Cons.» or «Speed»
4. «Yes»
Sport displaysIn the Control Display, the current values forpower and torque can be displayed.
Displaying sport displays in the ControlDisplay1. «Vehicle Info»2. «Sport displays»
Settings on the ControlDisplayTime
Setting the time1. «Settings»2. «Time/Date»
Seite 83
Displays Controls
83Online Edition for Part no. 01 40 2 608 633 — 11 09 490

3. «Time:»
4. Turn the controller until the desired hoursare displayed.
5. Press the controller.6. Turn the controller until the desired minutes
are displayed.7. Press the controller.The time is stored.
Setting the time format1. «Settings»2. «Time/Date»3. «Format:»4. Select the desired format.The time format is stored.
Date
Setting the date1. «Settings»2. «Time/Date»3. «Date:»4. Turn the controller until the desired day is
displayed.5. Press the controller.6. Make the necessary settings for the month
and year.The date is stored.
Setting the date format1. «Settings»2. «Time/Date»3. «Format:»4. Select the desired format.
The date format is stored.
Language
Setting the languageTo set the language on the Control Display:
1. «Settings»2. «Language/Units»3. «Language:»
4. Select the desired language.The setting is stored for the remote control cur‐rently in use.
Seite 84
Controls Displays
84Online Edition for Part no. 01 40 2 608 633 — 11 09 490

Units of measure
Setting the units of measureTo set the units for fuel consumption, route/dis‐tance and temperature:
1. «Settings»2. «Language/Units»3. Select the desired menu item.
4. Select the desired unit.The setting is stored for the remote control cur‐rently in use.
Brightness
Setting the brightnessTo set the brightness of the Control Display:
1. «Settings»2. «Control display»3. «Brightness»
4. Turn the controller until the desired bright‐ness is set.
5. Press the controller.
The setting is stored for the remote control cur‐rently in use.Depending on the light conditions, the bright‐ness control may not be clearly visible.
Assist system information
Display on the Control DisplayInformation on the Assist system can be dis‐played by activating Assist on the Control Dis‐play.
1. «Settings»2. «Control display»3. «Driver assistance info»
Seite 85
Displays Controls
85Online Edition for Part no. 01 40 2 608 633 — 11 09 490

LampsVehicle equipmentAll standard, country-specific and optionalequipment that is offered in the model series isdescribed in this chapter. Therefore, equipmentis also described that is not available in a vehicle,e. g., because of the selected optional equip‐ment or country variant. This also applies forsafety-related functions and systems.
At a glance
1 Rear fog lamps2 Front fog lamps3 Automatic headlamp control / Adaptive
Light Control / high-beam Assistant / wel‐come lamps / daytime running lights
4 Lamps off / daytime running lights5 Parking lamps / daytime running lights6 Low beams / welcome lamps / High-beam
Assistant7 Headlamp range control8 Instrument lighting
Parking lamps/low beams,headlamp controlGeneral informationSwitch position: 0,
If the driver door is opened with the ignitionswitched off, the exterior lighting is automati‐cally switched off at these switch settings:
Parking lampsSwitch position : the vehicle lamps lightup on all sides, e.g., for parking.Do not use the parking lamps for extended pe‐riods; otherwise, the battery may become dis‐charged and it would then be impossible to startthe engine.When parking, it is preferable to switch on theone-sided roadside parking lamps, refer topage 87.
Low beamsSwitch position with the ignition switchedon: the low beams light up.
Welcome lampsWhen parking the vehicle, leave the switch inposition or : the parking and interiorlamps light up briefly when the vehicle is un‐locked.
Activating/deactivating1. «Settings»2. «Lighting»3. «Welcome light»
The setting is stored for the remote control cur‐rently in use.
Seite 86
Controls Lamps
86Online Edition for Part no. 01 40 2 608 633 — 11 09 490

Headlamp courtesy delay featureThe low beams stay lit for a short while if theheadlamp flasher is switched on after the igni‐tion is switched off.
Setting the duration1. «Settings»2. «Lighting»3. «Pathway light.: s»
4. Set the duration.The setting is stored for the remote control cur‐rently in use.
Automatic headlamp controlSwitch position : the low beams are switchedon and off automatically, e.g., in tunnels, in twi‐light or if there is precipitation. The indicatorlamp in the instrument cluster lights up.A blue sky with the sun low on the horizon cancause the lights to be switched on.The low beams always stay on when the foglamps are switched on.
Personal responsibilityThe automatic headlamp control cannot
serve as a substitute for your personal judgmentin determining when the lamps should beswitched on in response to ambient lightingconditions.For example, the sensors are unable to detectfog or hazy weather. To avoid safety risks, youshould always switch on the lamps manually un‐der these conditions.◀
Daytime running lightsWith the ignition switched on, the daytime run‐ning lights light up in position 0, or .After the ignition is switched off, the parkinglamps light up in position .
Activating/deactivating1. «Settings»2. «Lighting»3. «Daytime running lamps»
The setting is stored for the remote control cur‐rently in use.
Roadside parking lamps
The vehicle can be illuminated on one side.
Switching onWith the ignition switched off, press the levereither up or down past the resistance point forapprox. 2 seconds.
Switching offBriefly press the lever to the resistance point inthe opposite direction.
Seite 87
Lamps Controls
87Online Edition for Part no. 01 40 2 608 633 — 11 09 490

Adaptive light controlThe conceptAdaptive light control is a variable headlampcontrol system that enables dynamic illumina‐tion of the road surface.Depending on the steering angle and other pa‐rameters, the light from the headlamp followsthe course of the road.In tight curves, e.g., on mountainous roads orwhen turning, one of the two front fog lamps isswitched on as a turning lamp. As a result theinside of the curve is better lighted.
ActivatingSwitch position with the ignition switchedon.The turning lamps are automatically switchedon depending on the steering angle or the useof turn signals.To avoid blinding oncoming traffic, the AdaptiveLight Control directs light towards the front pas‐senger side when the vehicle is at a standstill.When driving in reverse, only the turning lamp isactive.
MalfunctionA Check Control message is displayed.Adaptive light control is malfunctioning or hasfailed. Have the system checked as soon as pos‐sible.
High-beam AssistantThe conceptWhen the low beams are switched on, this sys‐tem automatically switches the high beams onand off or suppresses the light in the areas thatblind oncoming traffic. The procedure is con‐trolled by a sensor on the front of the interiorrearview mirror. The assistant ensures that thehigh beams are switched on whenever the traffic
situation allows. The driver can intervene at anytime and switch the high beams on and off asusual.
Activating
The High-beam Assistant can be activatedwhen the low beams are switched on.
1. Turn the light switch to or .2. Press the button on the turn signal lever, ar‐
row.The indicator lamp in the instrumentcluster lights up.When the low beams are on, the lights
are automatically brightened or dimmed.The system responds to light from oncomingtraffic and traffic driving ahead of you, and to ad‐equate illumination, e.g., in towns and cities.
The blue indicator lamp in the instru‐ment cluster lights up when the systemswitches on the high beams. Depending
on the version of the system in the vehicle, thehigh beams may not switch off for oncoming ve‐hicles, but may only be dimmed in the areas thatblind oncoming traffic. In this case, the blue in‐dicator light will stay on.
Seite 88
Controls Lamps
88Online Edition for Part no. 01 40 2 608 633 — 11 09 490

Switching the high beams on and offmanually
▷ High beams on, arrow 1.▷ High beams off/headlamp flasher, arrow 2.
The High-beam Assistant can be switched offwhen manually adjusting the light. To reactivatethe High-beam Assistant, press the button onthe turn signal lever.
System limitsPersonal responsibilityThe high-beam assistant cannot serve as
a substitute for the driver’s personal judgmentof when to use the high beams. Therefore, man‐ually switch off the high beams in situationswhere this is required to avoid a safety risk.◀
The system is not fully functional in situationssuch as the following, and driver interventionmay be necessary:▷ In very unfavorable weather conditions,
such as fog or heavy precipitation.▷ In detecting poorly-lit road users, such as
pedestrians, cyclists, horseback riders andwagons; when driving close to train or shiptraffic; and at animal crossings.
▷ In tight curves, on hilltops or in depressions,in cross traffic or half-obscured oncomingtraffic on freeways.
▷ In poorly-lit towns and cities and in the pres‐ence of highly reflective signs.
▷ At low speeds.
▷ When the windshield in front of the interiorrearview mirror is fogged over, dirty or cov‐ered with stickers, etc.
Camera
The camera is located near the base of the mir‐ror.Keep windshield clean and clear in the area infront of the interior rear view mirror.
Fog lampsFront fog lampsThe parking lamps or low beams must beswitched on.
Press the button. The green indicatorlamp lights up.
If the automatic headlamp control, refer topage 87, is activated, the low beams will comeon automatically when you switch on the frontfog lamps.
Instrument lightingAdjusting
The parking lamps or low beamsmust be switched on to adjust thebrightness.Adjust the brightness using thethumbwheel.
Seite 89
Lamps Controls
89Online Edition for Part no. 01 40 2 608 633 — 11 09 490

Interior lampsGeneral informationThe interior lamps, footwell lamps, entry lampsand courtesy lamps are controlled automati‐cally.The brightness of some of these lamps is influ‐enced by the thumbwheel for the instrumentlighting.
1 Interior lamps2 Reading lamp
Switching the interior lamps on and offPress the button.
To switch off permanently: press the button forapprox. 3 seconds.Switch back on: press button.
Reading lampsPress the button.
Reading lamps are located at the front and rearnext to the interior lamps.With the interior lamps shut off, the readinglamps cannot be switched on.
Ambient lightDepending on the equipment, the lighting canbe individually adjusted in the interior for somelights.
Selecting color scheme1. «Settings»2. «Lighting»3. «Ambient:»
4. Select the desired setting.If the color scheme of the line is selected and thewelcome lamps are activated, the welcomelamps are displayed in color when unlocking thevehicle.
Setting the brightnessThe brightness of the ambient light can be ad‐justed via the thumbwheel for the instrumentlighting but also independently of it.
1. «Settings»2. «Lighting»3. «Brightness»4. Adjust the brightness.
Seite 90
Controls Lamps
90Online Edition for Part no. 01 40 2 608 633 — 11 09 490

SafetyVehicle equipmentAll standard, country-specific and optionalequipment that is offered in the model series isdescribed in this chapter. Therefore, equipment
is also described that is not available in a vehicle,e. g., because of the selected optional equip‐ment or country variant. This also applies forsafety-related functions and systems.
Airbags
1 Front airbag, driver2 Front airbag, front passenger3 Head airbag
4 Side airbag5 Knee airbags
Front airbagsFront airbags help protect the driver and frontpassenger by responding to frontal impacts inwhich safety belts alone cannot provide ade‐quate restraint.
Side airbagsIn a lateral impact, the side airbag supports theside of the body in the chest and lap area.
Head airbagsIn a lateral impact, the head airbag supports thehead.
Knee airbagThe knee airbag supports the legs in a frontalimpact.
Seite 91
Safety Controls
91Online Edition for Part no. 01 40 2 608 633 — 11 09 490

Protective actionAirbags are not triggered in every impact situa‐tion, e.g., in less severe accidents or rear-endcollisions.
Information on how to ensure the optimalprotective effect of the airbags
▷ Keep at a distance from the airbags.▷ Always grasp the steering wheel on the
steering wheel rim, holding your hands atthe 3 o’clock and 9 o’clock positions, to keepthe danger of injury to your hands or arms aslow as possible if the airbag is triggered.
▷ There should be no people, animals, or ob‐jects between an airbag and a person.
▷ Do not use the cover of the front airbag onthe front passenger side as a storage area.
▷ Keep the dashboard and window on thefront passenger side clear, i.e., do not coverwith adhesive labels or coverings, and do notattach holders such as for navigation instru‐ments and mobile phones.
▷ Make sure that the front passenger is sittingcorrectly, i.e., keeps his or her feet and legsin the footwell; otherwise, leg injuries canoccur if the front airbag is triggered.
▷ Do not place slip covers, seat cushions orother objects on the front passenger seatthat are not approved specifically for seatswith integrated side airbags.
▷ Do not hang pieces of clothing, such as jack‐ets, over the backrests.
▷ Make sure that occupants keep their headsaway from the side airbag and do not restagainst the head airbag; otherwise, injuriescan occur if the airbags are triggered.
▷ Do not remove the airbag restraint system.▷ Do not remove the steering wheel.▷ Do not apply adhesive materials to the air‐
bag cover panels, cover them or modifythem in any way.
▷ Never modify either the individual compo‐nents or the wiring in the airbag system. Thisalso applies to steering wheel covers, thedashboard, the seats, the roof pillars and thesides of the headliner.◀
Even when all instructions are followed closely,injury from contact with the airbags cannot beruled out in certain situations.The ignition and inflation noise may lead toshort-term and, in most cases, temporary hear‐ing impairment in sensitive individuals.
In the case of a malfunction, deactivationand after triggering of the airbags
Do not touch the individual components imme‐diately after the system has been triggered; oth‐erwise, there is the danger of burns.Only have the airbags checked, repaired or dis‐mantled and the airbag generator scrapped byyour service center or a workshop that has thenecessary authorization for handling explosives.Non-professional attempts to service the sys‐tem could lead to failure in an emergency or un‐desired triggering of the airbag, either of whichcould result in injury.◀
Warnings and information on the airbags arealso found on the sun visors.
Functional readiness of the airbagsystem
When the ignition is switch on, the warn‐ing lamp in the instrument cluster lightsup briefly and thereby indicates the op‐
erational readiness of the entire airbag systemand the belt tensioner.
Airbag system malfunctioning▷ Warning lamp does not come on when the
ignition is turned on.▷ The warning lamp lights up continuously.
Seite 92
Controls Safety
92Online Edition for Part no. 01 40 2 608 633 — 11 09 490

When there is a malfunction, have the air‐bag system checked immediately
When there is a malfunction, have the airbagsystem checked immediately; otherwise, thereis a risk that the system does not function as ex‐pected in the event of an accident despite cor‐responding severity of the accident.◀
Automatic deactivation of the frontpassenger airbagsThe system determines whether the front pas‐senger seat is occupied by measuring the re‐sistance of the human body.The front, knee, and side airbag on the frontpassenger side are activated or deactivated ac‐cordingly.
Leave feet in the footwellMake sure that the front passenger keeps
his or her feet in the footwell; otherwise, the frontpassenger airbags may not function properly.◀
Child restraint fixing system in the frontpassenger seat
Before transporting a child on the front passen‐ger seat, see the safety notes and instructionsunder Children on the front passenger seat.◀
Malfunction of the automaticdeactivation systemWhen transporting older children and adults, thefront passenger airbags may be deactivated incertain sitting positions. In this case, the indica‐tor lamp for the front passenger airbags lightsup.In this case, change the sitting position so thatthe front passenger airbags are activated andthe indicator lamp goes out.If it is not possible to activate the airbags, havethe person sit in the rear.To make sure that the occupied seat cushioncan be evaluated correctly▷ Do not attach covers, cushions, ball mats or
other items to the front passenger seat un‐
less they are specifically recommended bythe manufacturer of your vehicle.
▷ Do not place any electronic devices on thepassenger seat if a child restraint system isto be installed on it.
▷ Do not place objects under the seat thatcould press against the seat from below.
Indicator lamp for the front passengerairbags
The indicator lamp for the front passenger air‐bags indicates the operating state of the frontpassenger airbags.The lamp indicates whether the airbags are ac‐tivated or deactivated.
▷ The indicator lamp lights upwhen a child who is properlyseated in a child restraint fix‐ing system intended for thatpurpose is detected on theseat or the seat is empty. Theairbags on the front passen‐ger side are not activated.
▷ The indicator lamp does not light up when,for example, a correctly seated person ofsufficient size is detected on the seat. Theairbags on the front passenger side are ac‐tivated.
Detected child seatsThe system generally detects children seated ina child seat, especially in the child seats thatwere required by NHTSA when the vehicle wasmanufactured. After installing a child seat, makesure that the indicator lamp for the front pas‐
Seite 93
Safety Controls
93Online Edition for Part no. 01 40 2 608 633 — 11 09 490

senger airbags lights up. This indicates that thechild seat has been detected and the front pas‐senger airbags are not activated.
Strength of the driver’s and frontpassenger airbagThe strength with which the driver’s and frontpassenger airbags are triggered depends on theposition of the driver’s and front passengerseats.To maintain the accuracy of this function overthe long-term, calibrate the front seats when acorresponding message appears on the ControlDisplay.
Calibrating the front seatsA corresponding message appears on the Con‐trol Display.
1. Move the respective seat forward all theway.
2. Move the respective seat forward again. Itmoves forward briefly.
3. Readjust the seat to the desired position.The calibration procedure is completed whenthe message on the Control Display disappears.If the message continues to be displayed, repeatthe calibration.If the message does not disappear after a repeatcalibration, have the system checked as soon aspossible.
Unobstructed area of movementEnsure that the area of movement of the
seats is unobstructed to avoid personal injury ordamage to objects.◀
Tire Pressure Monitor TPMThe conceptThe tire inflation pressure is measured in thefour mounted tires. The system notifies you if
there is a significant loss of pressure in one ormore tires.
Functional requirementsThe system must have been reset when the in‐flation pressure was correct; otherwise, reliablesignaling of a flat tire is not ensured. Always usewheels with TPM electronics to ensure that thesystem will operate properly. Reset the systemafter each correction of the tire inflation pres‐sure and after every tire or wheel change.
System limitsSudden tire damageSudden serious tire damage caused by
external influences cannot be indicated in ad‐vance.◀
The system does not operate correctly if it hasnot been reset. For example, a flat tire may beindicated despite correct tire inflation pres‐sures.The system is inactive and cannot indicate a flattire:▷ For a mounted wheel without TPM electron‐
ics.▷ When the TPM is disturbed by other sys‐
tems or devices with the same radio fre‐quency.
Status displayThe current status of the Tire Pressure MonitorTPM can be displayed on the Control Display,e.g., whether or not the TPM is active.
1. «Vehicle Info»2. «Vehicle status»3. «Tire Pressure Monitor — TPM»The status is displayed.
Status displayThe tire and system status is indicated by thecolor of the tires.
Seite 94
Controls Safety
94Online Edition for Part no. 01 40 2 608 633 — 11 09 490

A change in the tire inflation pressure duringdriving is taken into account.A correction is only necessary if this is indicatedby the TPM
Wheels, greenThe tire inflation pressure is equal to the targetstate.
One wheel is yellowA flat tire or major drop in inflation pressure inthe indicated tire.
All wheels are yellow▷ A flat tire or major drop in inflation pressure
in several tires.▷ The system was not reset after a wheel
change and thus warns based on the infla‐tion pressures initialized last.
▷ A flat tire in one or more tires while the sys‐tem is being reset.
Wheels, grayThe system cannot detect a flat tire. Reasons forthis may be:▷ TPM is being reset.▷ Disturbance by systems or devices with the
same radio frequency.▷ Malfunction.
Resetting the systemReset the system after each correction of thetire inflation pressure and after every tire orwheel change.
1. «Vehicle Info»2. «Vehicle status»3. «Reset»4. Start the engine — do not drive away.5. Reset the tire pressure using «Reset».6. Drive away.
The tires are shown in gray and «ResettingTPM…» is displayed.After driving for a few minutes, the set tire infla‐tion pressures are applied as set values. The re‐setting process is completed automatically dur‐ing driving. The tires are shown in green and»TPM active» is shown on the Control Display.The trip can be interrupted at any time. If youdrive away again, the process resumes auto‐matically.If a flat tire is detected during a reset, all tires aredisplayed in yellow.
Low tire pressure messageThe yellow warning lamp lights up. ACheck Control message is displayed.▷ There is a flat tire or a major loss in
tire inflation pressure.▷ The system was not reset after a wheel
change and thus warns based on the infla‐tion pressures initialized last.
1. Reduce your speed and stop cautiously.Avoid sudden braking and steering maneu‐vers.
2. Check whether the vehicle is fitted with reg‐ular tires or run-flat tires.Run-flat tires, refer to page 271, are labeledwith a circular symbol containing the lettersRSC marked on the tire sidewall.
Do not continue driving without run-flattires
Do not continue driving if the vehicle is notequipped with run-flat tires; continued drivingmay result in serious accidents.◀
When a low inflation pressure is indicated, DSCDynamic Stability Control is switched on if nec‐essary.
Actions in the event of a flat tire
Normal tires1. Identify the damaged tire.
Seite 95
Safety Controls
95Online Edition for Part no. 01 40 2 608 633 — 11 09 490

Do this by checking the air pressure in allfour tires.If the tire inflation pressure in all four tires iscorrect, the Tire Pressure Monitor may nothave been initialized. In this case, initializethe system.If an identification is not possible, pleasecontact the service center.
2. Rectify the flat tire.Use of tire sealant, e.g., the Mobility System,may damage the TPM wheel electronics. Inthis case, have the electronics checked atthe next opportunity and have them re‐placed if necessary.
Run-flat tires
Maximum speedYou can continue driving with a damaged tire atspeeds up to 50 mph/80 km/h.
Continued driving with a flat tireIf continuing to drive with a damaged tire:
1. Avoid sudden braking and steering maneu‐vers.
2. Do not exceed a speed of 50 mph/80 km/h.3. Check the air pressure in all four tires at the
next opportunity.If the tire inflation pressure in all four tires iscorrect, the Tire Pressure Monitor may nothave been initialized. In this case, initializethe system.
Possible driving distance with complete loss oftire inflation pressure:The possible driving distance after a loss of tireinflation pressure depends on the cargo loadand the driving style and conditions.For a vehicle containing an average load, thepossible driving distance is approx. 50 miles/80 km.When the vehicle is driven with a damaged tire,its handling characteristics change, e.g., re‐
duced lane stability during braking, a longerbraking distance, and altered self-steeringproperties. Adjust your driving style accord‐ingly. Avoid abrupt steering maneuvers or driv‐ing over obstacles, e.g., curbs, potholes, etc.Because the possible driving distance dependson how the vehicle is used during the trip, theactual distance may be smaller or greater de‐pending on the driving speed, road conditions,external temperature, cargo load, etc.
Continued driving with a flat tireDrive moderately and do not exceed a
speed of 50 mph/80 km/h.A loss of tire inflation pressure results in achange in the handling characteristics, e.g., re‐duced lane stability during braking, a longerbraking distance and altered self-steering prop‐erties.◀
Final tire failureVibrations or loud noises while driving can
indicate the final failure of the tire. Reduce speedand stop; otherwise, pieces of the tire couldcome loose and cause an accident. Do not con‐tinue driving, and contact your service center.◀
Message when the system was notresetA Check Control message is displayed.The system detected a wheel change but wasnot reset.Warnings regarding the current tire inflationpressure are not reliable.Check the tire inflation pressure and reset thesystem.
MalfunctionThe yellow warning lamp flashes andthen lights up continuously. A CheckControl message is displayed. No flat
tire can be detected.Display in the following situations:
Seite 96
Controls Safety
96Online Edition for Part no. 01 40 2 608 633 — 11 09 490

▷ A wheel without TPM electronics is fitted:have the service center check it if necessary.
▷ Malfunction: have the system checked byyour service center.
▷ TPM could not be fully reset. Reset the sys‐tem again.
▷ Disturbance by systems or devices with thesame radio frequency: after leaving the areaof the disturbance, the system automaticallybecomes active again.
Declaration according to NHTSA/FMVSS 138 Tire Pressure MonitoringSystemEach tire, including the spare (if provided)should be checked monthly when cold and in‐flated to the inflation pressure recommended bythe vehicle manufacturer on the vehicle placardor tire inflation pressure label. (If your vehicle hastires of a different size than the size indicated onthe vehicle placard or tire inflation pressure la‐bel, you should determine the proper tire infla‐tion pressure for those tires.) As an added safetyfeature, your vehicle has been equipped with atire pressure monitoring system (TPMS) that il‐luminates a low tire pressure telltale when oneor more of your tires is significantly under-in‐flated. Accordingly, when the low tire pressuretelltale illuminates, you should stop and checkyour tires as soon as possible, and inflate themto the proper pressure. Driving on a significantlyunder-inflated tire causes the tire to overheatand can lead to tire failure. Under-inflation alsoreduces fuel efficiency and tire tread life, andmay affect the vehicle’s handling and stoppingability. Please note that the TPMS is not a sub‐stitute for proper tire maintenance, and it is thedriver’s responsibility to maintain correct tirepressure, even if under-inflation has not reachedthe level to trigger illumination of the TPMS lowtire pressure telltale. Your vehicle has also beenequipped with a TPMS malfunction indicator toindicate when the system is not operating prop‐erly. The TPMS malfunction indicator is com‐bined with the low tire pressure telltale. When
the system detects a malfunction, the telltale willflash for approximately one minute and then re‐main continuously illuminated. This sequencewill continue upon subsequent vehicle start-upsas long as the malfunction exists. When the mal‐function indicator is illuminated, the system maynot be able to detect or signal low tire pressureas intended. TPMS malfunctions may occur fora variety of reasons, including the installation ofreplacement or alternate tires or wheels on thevehicle that prevent the TPMS from functioningproperly. Always check the TPMS malfunctiontelltale after replacing one or more tires orwheels on your vehicle to ensure that the re‐placement or alternate tires and wheels allowthe TPMS to continue to function properly.
FTM Flat Tire MonitorThe conceptThe system does not measure the actual infla‐tion pressure in the tires.It detects a pressure loss in a tire by comparingthe rotational speeds of the individual wheelswhile moving.In the event of a pressure loss, the diameter andtherefore the rotational speed of the corre‐sponding wheel change. This is detected andreported as a flat tire.
Functional requirementsThe system must have been initialized when thetire inflation pressure was correct; otherwise,reliable signaling of a flat tire is not ensured. In‐itialize the system after each correction of thetire inflation pressure and after every tire orwheel change.
System limitsSudden tire damageSudden serious tire damage caused by
external influences cannot be indicated in ad‐vance.◀
Seite 97
Safety Controls
97Online Edition for Part no. 01 40 2 608 633 — 11 09 490

A natural, even pressure loss in all four tires can‐not be detected. Therefore, check the tire infla‐tion pressure regularly.The system could be delayed or malfunction inthe following situations:▷ When the system has not been initialized.▷ When driving on a snowy or slippery road
surface.▷ Sporty driving style: slip in the drive wheels,
high lateral acceleration.▷ When driving with snow chains.
Status displayThe current status of the Flat Tire Monitor canbe displayed on the Control Display, e.g.,whether or not the FTM is active.
1. «Vehicle Info»2. «Vehicle status»3. «Flat Tire Monitor»The status is displayed.
InitializationThe initialization process adopts the set inflationtire pressures as reference values for the detec‐tion of a flat tire. Initialization is started by con‐firming the inflation pressures.Do not initialize the system when driving withsnow chains.
1. «Vehicle Info»2. «Vehicle status»3. «Reset»4. Start the engine — do not drive away.5. Start the initialization with «Reset».6. Drive away.The initialization is completed while driving,which can be interrupted at any time.The initialization automatically continues whendriving resumes.
Indication of a flat tireThe yellow warning lamp lights up. ACheck Control message is displayed.There is a flat tire or a major loss in tire
inflation pressure.
1. Reduce your speed and stop cautiously.Avoid sudden braking and steering maneu‐vers.
2. Check whether the vehicle is fitted with reg‐ular tires or run-flat tires.Run-flat tires, refer to page 271, are labeledwith a circular symbol containing the lettersRSC marked on the tire sidewall.
Do not continue driving without run-flattires
Do not continue driving if the vehicle is notequipped with run-flat tires; continued drivingmay result in serious accidents.◀
When a flat tire is indicated, DSC Dynamic Sta‐bility Control is switched on if necessary.
Actions in the event of a flat tire
Normal tires1. Identify the damaged tire.
Do this by checking the air pressure in allfour tires.If the tire inflation pressure in all four tires iscorrect, the Flat Tire Monitor may not havebeen initialized. In this case, initialize thesystem.If an identification is not possible, pleasecontact the service center.
2. Rectify the flat tire.
Run-flat tires
Maximum speedYou can continue driving with a damaged tire atspeeds up to 50 mph/80 km/h.
Seite 98
Controls Safety
98Online Edition for Part no. 01 40 2 608 633 — 11 09 490

Continued driving with a flat tireIf continuing to drive with a damaged tire:
1. Avoid sudden braking and steering maneu‐vers.
2. Do not exceed a speed of 50 mph/80 km/h.3. Check the air pressure in all four tires at the
next opportunity.If the tire inflation pressure in all four tires iscorrect, the Flat Tire Monitor may not havebeen initialized. In this case, initialize thesystem.
Possible driving distance with complete loss oftire inflation pressure:The possible driving distance after a loss of tireinflation pressure depends on the cargo loadand the driving style and conditions.For a vehicle containing an average load, thepossible driving distance is approx. 50 miles/80 km.When the vehicle is driven with a damaged tire,its handling characteristics change, e.g., re‐duced lane stability during braking, a longerbraking distance, and altered self-steeringproperties. Adjust your driving style accord‐ingly. Avoid abrupt steering maneuvers or driv‐ing over obstacles, e.g., curbs, potholes, etc.Because the possible driving distance dependson how the vehicle is used during the trip, theactual distance may be smaller or greater de‐pending on the driving speed, road conditions,external temperature, cargo load, etc.
Continued driving with a flat tireDrive moderately and do not exceed a
speed of 50 mph/80 km/h.A loss of tire inflation pressure results in achange in the handling characteristics, e.g., re‐duced lane stability during braking, a longerbraking distance and altered self-steering prop‐erties.◀
Final tire failureVibrations or loud noises while driving can
indicate the final failure of the tire. Reduce speedand stop; otherwise, pieces of the tire couldcome loose and cause an accident. Do not con‐tinue driving, and contact your service center.◀
Lane departure warningThe conceptStarting at a specific speed, this system alertsyou when the vehicle on streets with lane mark‐ings is about to leave the lane. Depending on thecountry-specific version of the vehicle, thespeed is between 35 mph/55 km/h and 45 mph/70 km/h. When switching on the system belowthis speed, a message appears in the instrumentcluster.The steering wheel begins vibrating gently in theevent of warnings. The time of the warning mayvary depending on the current driving situation.The system does not provide a warning if theturn signal is set before leaving the lane.
Switching on/off
Press the button.
▷ On: the LED lights up.▷ Off: the LED goes out.The state is stored for the remote control cur‐rently in use.
Seite 99
Safety Controls
99Online Edition for Part no. 01 40 2 608 633 — 11 09 490

Display
▷ Lines, arrow 1: the system is activated.▷ Arrows, arrow 2: at least one lane marking
was detected and warnings can be issued.
Issued warningIf you leave the lane and if a lane marking hasbeen detected, the steering wheel begins vi‐brating.If the turn signal is set before changing the lane,a warning is not issued.
End of warningThe warning ends:▷ Automatically after approx. 3 seconds.▷ When returning to your own lane.▷ When braking hard.▷ When using the turn signal.
System limitsPersonal responsibilityThe system cannot serve as a substitute
for the driver’s personal judgment of the courseof the road and the traffic situation.In the event of a warning, do not jerk the steeringwheel, as you may lose control of the vehicle.◀
The system may not be fully functional in thefollowing situations:▷ In heavy fog, rain or snowfall.▷ In the event of worn, poorly visible, merging,
diverging, or multiple lane markings such asin construction areas.
▷ When lane markings are covered in snow,ice, dirt or water.
▷ In tight curves or on narrow lanes.▷ When the lane markings are covered by ob‐
jects.▷ When driving very close to the vehicle in
front of you.▷ When driving toward bright lights.▷ When the windshield behind the interior
rearview mirror is fogged over, dirty or cov‐ered with stickers, etc.
▷ During the calibration process of the cameraimmediately after vehicle shipment.
Camera
The camera is located near the base of the mir‐ror.Keep windshield clean and clear in the area infront of the interior rear view mirror.
Seite 100
Controls Safety
100Online Edition for Part no. 01 40 2 608 633 — 11 09 490

Active Blind Spot DetectionThe concept
Two radar sensors below the rear bumper mon‐itor the area behind and next to the vehicle atspeeds above approx. 30 mph/50 km/h.The system indicates whether there are vehiclesin the blind spot, arrow 1, or approaching frombehind on the adjacent lane, arrow 2.The lamp in the exterior mirror housing lights updimly.
Before you change lanes after setting the turnsignal, the system issues a warning in the situa‐tions described above.The lamp in the housing of the exterior mirrorflashes and the steering wheel vibrates.
Switching on/off
Press the button.
▷ On: the LED lights up.▷ Off: the LED goes out.The system can issue warnings at speeds aboveapprox. 30 mph/50 km/h.
The state is stored for the remote control cur‐rently in use.
Display
Information stageThe dimmed lamp in the mirror housing indi‐cates when there are vehicles in the blind spotor approaching from behind.
WarningIf the turn signal is set while a vehicle is in thecritical zone, the steering wheel vibrates brieflyand the lamp in the mirror housing flashesbrightly.The warning stops when the turn signal isswitched off, or the other vehicle leaves the crit‐ical zone.
System limitsPersonal responsibilityThe system cannot serve as a substitute
for the driver’s personal judgment of the trafficsituation.In the event of a warning, do not jerk the steeringwheel, as you may lose control over the vehi‐cle.◀
The system may not be fully functional in thefollowing situations:▷ When a vehicle is approaching at a speed
much faster than your own.▷ In heavy fog, rain or snowfall.▷ In tight curves or on narrow lanes.
Seite 101
Safety Controls
101Online Edition for Part no. 01 40 2 608 633 — 11 09 490

Radar sensors
The radar sensors are located under the rearbumper.The system may not be fully functional in thefollowing situations:▷ Dirty or icy bumper.▷ Stickers on the bumper.A Check Control message is displayed when thesystem is not fully functional.
For US owners onlyThe transmitter and receiver units comply withpart 15 of the FCC/Federal CommunicationCommission regulations. Operation is governedby the following:FCC ID:▷ NBG009014A.Compliance statement:This device complies with part 15 of the FCCRules. Operation is subject to the following twoconditions:▷ This device may not cause harmful interfer‐
ence, and▷ this device must accept any interference re‐
ceived, including interference that maycause undesired operation.
Any unauthorized modifications or changes tothese devices could void the user’s authority tooperate this equipment.
Brake force displayThe concept
▷ During normal brake application, the outerbrake lamps light up.
▷ During heavy brake application, the innerbrake lamps light up in addition.
Active ProtectionThe conceptThe Active Protection safety package consistsof systems that are independent of each other:▷ PreCrash▷ PostCrash
PreCrash
The conceptThe system is used to detect critical driving sit‐uations that might lead to an accident. In in thesesituations, preventative protection measuresare automatically undertaken to minimize therisk in the event of an accident as much as pos‐sible.Critical driving situations may include:▷ Full application of the brakes.▷ Severe understeering.▷ Severe oversteering.If the vehicle includes the collision warning fea‐ture, impending collisions with vehicles driving
Seite 102
Controls Safety
102Online Edition for Part no. 01 40 2 608 633 — 11 09 490

ahead or stopped in front of you can also be de‐tected within the system’s range.
Personal responsibilityThe system cannot serve as a substitute
for the driver’s personal judgment of the trafficsituation. The system may not always detectcritical situations reliably and in a timely manner.Adapt speed to traffic situation and drive alertly;otherwise, a risk to safety may result.◀
FunctionAfter the safety belt is buckled, the front beltsare automatically tightened once after the vehi‐cle is driven is away.In critical driving situations, the following indi‐vidual functions become active:▷ The front belts are automatically tightened.▷ Automatic closing of the windows.▷ Automatic closing of the glass sunroof.After a critical driving situation without an acci‐dent, the front belts are loosened again. All othersystems can be restored to the desired setting.If the belt tension does not loosen automatically,stop the vehicle and unbuckle the belt using thered button in the buckle. Fasten the belt beforecontinuing on your trip.
PostCrashIn the event of an accident, the system can bringthe car to a halt automatically without interven‐tion by the driver in certain situations. This canreduce the risk of a further collision.Depressing the brake pedal can cause the vehi‐cle to brake harder. This interrupts automaticbraking. Depressing the accelerator pedal alsointerrupts automatic braking.After coming to a halt, the brake is released au‐tomatically. Secure the vehicle against rolling.
Seite 103
Safety Controls
103Online Edition for Part no. 01 40 2 608 633 — 11 09 490

Driving stability control systemsVehicle equipmentAll standard, country-specific and optionalequipment that is offered in the model series isdescribed in this chapter. Therefore, equipmentis also described that is not available in a vehicle,e. g., because of the selected optional equip‐ment or country variant. This also applies forsafety-related functions and systems.
Antilock Brake System ABSABS prevents locking of the wheels during brak‐ing.The vehicle remains steerable even during fullbrake applications, thus increasing activesafety.ABS is operational every time you start the en‐gine.
Brake assistantWhen you apply the brakes rapidly, this systemautomatically produces the maximum brakingforce boost. It thus helps to achieve the shortestpossible braking distance during full braking.This system utilizes all of the benefits providedby ABS.Do not reduce the pressure on the brake pedalfor the duration of the full braking.
DSC Dynamic StabilityControlThe conceptDSC prevents traction loss in the driving wheelswhen driving away and accelerating.DSC also recognizes unstable vehicle condi‐tions, such as fishtailing or nose-diving. Subject
to physical limits, DSC helps to keep the vehicleon a steady course by reducing engine speedand by applying brakes at individual wheels.
Adjust your driving style to the situationAn appropriate driving style is always the
responsibility of the driver.The laws of physics cannot be repealed, evenwith DSC.Therefore, do not reduce the additional safetymargin by driving in a risky manner.◀
Indicator/warning lampsThe indicator lamp flashes: DSC con‐trols the drive forces and brake forces.The indicator lamp lights up: DSC has
failed.
Deactivating DSC: DSC OFFWhen DSC is deactivated, driving stability is re‐duced during acceleration and when driving inbends.To increase vehicle stability, activate DSC againas soon as possible.
Deactivating DSCPress and hold the button, but not lon‐ger than approx. 10 seconds, until the
indicator lamp for DSC OFF lights up in the in‐strument cluster and DSC OFF is displayed.The DSC system is switched off.
Activating DSCPress the button.DSC OFF and the DSC OFF indicator
lamp go out.
Seite 104
Controls Driving stability control systems
104Online Edition for Part no. 01 40 2 608 633 — 11 09 490

Indicator/warning lampsWhen DSC is deactivated, DSC OFF is dis‐played in the instrument cluster.
The indicator lamp lights up: DSC is de‐activated.
DTC Dynamic TractionControlThe conceptThe DTC system is a version of the DSC in whichforward momentum is optimized.The system ensures maximum forward momen‐tum on special road conditions, e.g., unplowedsnowy roads, but driving stability is limited.It is therefore necessary to drive with appropri‐ate caution.You may find it useful to briefly activate DTC un‐der the following special circumstances:▷ When driving in slush or on uncleared,
snow-covered roads.▷ When rocking the vehicle or driving off in
deep snow or on loose surfaces.▷ When driving with snow chains.
Deactivating/activating DTC DynamicTraction ControlActivating the Dynamic Traction Control DTCprovides maximum traction on loose ground.Driving stability is limited during accelerationand when driving in bends.
Activating DTCPress the button.TRACTION is displayed in the instru‐
ment cluster and the indicator lamp for DSCOFF lights up.
Deactivating DTCPress the button again.TRACTION and the DSC OFF indicator
lamp go out.
Dynamic Damping ControlThe conceptThis system reduces undesirable vehicle mo‐tion when using a dynamic driving style or trav‐eling on uneven road surfaces.The system enhances driving dynamics andcomfort as required for the road surface anddriving style.
ProgramsThe system offers two different programs.The programs can be selected via Dynamic Driv‐ing Control, refer to page 106.
SPORTConsistently sporty control of the shock absorb‐ers for greater driving agility.
SPORT+Consistently sporty control of the shock absorb‐ers for greater driving agility when driving withlimited driving stabilization.
COMFORTBalanced control of the vehicle.
Variable sport steeringThe variable sport steering increases the steer‐ing angle of the front wheels at large steeringwheel angles, e.g., in tight curves or when park‐ing. Steering becomes more direct.It also varies the force required to turn thewheels in accordance with the vehicle speed.
Seite 105
Driving stability control systems Controls
105Online Edition for Part no. 01 40 2 608 633 — 11 09 490

This results in a sporty steering response. In ad‐dition, it becomes easier to steer during parkingand maneuvering.
Driving Experience SwitchThe conceptThe Driving Experience Switch can be used toadjust the certain characteristics of the vehicle.Various programs can be selected for this pur‐pose. The Driving Experience Switch and theDSC OFF buttons can each be used to activatea program.
Operating the programs
Press the button Program
DSC OFFTRACTION
SPORT+SPORTCOMFORTECO PRO
Automatic program changeThe system automatically switches to COM‐FORT in the following situations:▷ Failure of DSC Dynamic Damping Control.▷ The vehicle has a flat tire.▷ When activating cruise control in TRAC‐
TION or DSC OFF mode.
DSC OFFWhen DSC OFF, refer to page 104, is active,driving stability is limited during accelerationand when driving in bends.
TRACTIONWhen TRACTION is active, the vehicle has max‐imum traction on loose road surfaces. DTC Dy‐namic Traction Control, refer to page 105, is ac‐
tivated. Driving stability is limited duringacceleration and when driving in bends.
SPORT+Sporty driving with optimized chassis and sus‐pension with limited driving stabilization.The driver handles several of the stabilizationtasks.
Activating SPORT+Press the button repeatedly until SPORT+ ap‐pears in the instrument cluster and the DSC OFFindicator lamp lights up.
Automatic program changeWhen activating cruise control, the program au‐tomatically switches to SPORT mode.
Indicator/warning lampsSPORT+ is displayed in the instrument cluster.
The DSC OFF indicator lamp lights up.
SPORTSporty driving with optimized chassis and sus‐pension with maximum driving stabilization.The program can be configured to individualspecifications. The configuration is stored forthe remote control currently in use.
Activating SPORTPress button repeatedly until SPORT is dis‐played in the instrument cluster.
Configuring SPORTWhen the display is activated on the ControlDisplay, refer to page 107, the sport programcan be set to individual specifications.▷ Activate the sport program.▷ «Configure SPORT mode»▷ Configure the program.
Seite 106
Controls Driving stability control systems
106Online Edition for Part no. 01 40 2 608 633 — 11 09 490

Optionally, the sport program can be configuredbefore it is activated:
1. «Settings»2. «SPORT mode»
3. Configure the program.This configuration is retrieved when the sportprogram is activated.
COMFORTFor a balanced tuning with maximum driving sta‐bilization.
Activating COMFORTPress button repeatedly until COMFORT is dis‐played in the instrument cluster.
In certain situations, the system automaticallychanges to the NORMAL program, automaticprogram change, refer to page 106.
ECO PROConsistent tuning to minimize fuel consumptionfor maximum range with maximum driving sta‐bilization.Comfort functions and the engine controller areadjusted.The program can be configured to individualspecifications.
Activating ECO PROPress button repeatedly until ECO PROis displayed in the instrument cluster.
Configuring ECO PRO1. Activate ECO PRO.2. «Configure ECO PRO»
or
1. «Settings»2. «Driving mode»3. «Configure ECO PRO»Make the desired settings.
Displays
Program selectionPressing the button displays a listof the selectable programs.
Selected programThe selected program is dis‐played in the instrument cluster.
Display on the Control DisplayProgram changes can be displayed on the Con‐trol Display.
1. «Settings»
Seite 107
Driving stability control systems Controls
107Online Edition for Part no. 01 40 2 608 633 — 11 09 490

2. «Control display»
3. «Driving mode info»
Drive-off assistantThis system supports driving away on gradients.The parking brake is not required.
1. Hold the vehicle in place with the foot brake.2. Release the foot brake and drive away with‐
out delay.After the foot brake is released, the vehicle isheld in place for approx. 2 seconds.Depending on the vehicle load or when a traileris being used, the vehicle may roll back slightly.
Driving off without delayAfter releasing the foot brake, start driving
without delay, since the drive-off assistant willnot hold the vehicle in place for more than ap‐prox. 2 seconds and the vehicle will begin rollingback.◀
Seite 108
Controls Driving stability control systems
108Online Edition for Part no. 01 40 2 608 633 — 11 09 490

Driving comfortVehicle equipmentAll standard, country-specific and optionalequipment that is offered in the model series isdescribed in this chapter. Therefore, equipmentis also described that is not available in a vehicle,e. g., because of the selected optional equip‐ment or country variant. This also applies forsafety-related functions and systems.
Active Cruise Control withStop & Go function, ACCThe conceptThis system can be used to select a desiredspeed that the vehicle will maintain automati‐cally on clear roads.To the extent possible, the system automaticallyadjusts the speed to a slower vehicle ahead ofyou.The distance that the vehicle maintains to thevehicle ahead of you can be varied.For safety reasons, it depends on the speed.To maintain a certain distance, the system au‐tomatically decelerates, applies the brakeslightly, or accelerates again if the vehicle aheadbegins moving faster.If the vehicle ahead of you brakes to a halt, thesystem is able to detect this within the givensystem limits. If the vehicle ahead of your drivesaway again from a halt, your vehicle is able toaccelerate if operated accordingly.Even if some time passes before the vehicledrives away again, the BMW can still be accel‐erated automatically and simply.As soon as the road is clear, it accelerates to thedesired speed.The speed is also maintained on downhill gra‐dients, but may not be maintained on uphillslopes if engine power is insufficient.
Buttons at a glance
1 System on/off, interrupt2 Resume speed3 Store speed4 Reduce distance5 Store, maintain/change speed6 Increase distance
Switching on/off and interruptingcruise control
Switching onPress the button on the steering wheel.
The indicator lamps in the instrument clusterlight up and the mark in the speedometer is setto the current speed.Cruise control can be used.
Switching offDeactivated or interrupted systemIf the system is deactivated or interrupted,
actively intervene by braking and, if necessary,with evasive maneuvers; otherwise, there is thedanger of an accident occurring.◀
If switching off the system while stationary,press on the brake pedal at the same time.
Press the button.
Seite 109
Driving comfort Controls
109Online Edition for Part no. 01 40 2 608 633 — 11 09 490

▷ If active: press twice.▷ If interrupted: press once.The displays go out. The stored desired speedand distance are deleted.
InterruptingWhen active, press the button.
If interrupting the system while stationary, presson the brake pedal at the same time.The system is automatically interrupted if:▷ The brakes are applied.▷ Transmission position D is disengaged.▷ DTC Dynamic Traction Control is activated
or DSC is deactivated.▷ DSC is actively controlling stability.▷ The safety belt and the driver’s door are
opened when the vehicle is standing.▷ The system has not detected objects for an
extended period, e.g., on a road with very lit‐tle traffic without road edge line markings.
▷ Radar sensor is soiled.
Maintaining/storing the speedPress the button.or:
Press the rocker switch while the system is in‐terrupted.
When the system is switched on, the currentspeed is maintained and stored as the desiredspeed.
It is displayed in the speedometer and brieflydisplayed in the instrument cluster, Displays inthe instrument cluster, refer to page 111.When cruise control is maintained or stored,DSC Dynamic Stability Control is switched on, ifnecessary.
Changing, maintaining, and storing thespeedThe rocker switch can be pressed while the sys‐tem is interrupted to maintain and store the cur‐rent speed. DSC Dynamic Stability Control isswitched on, if necessary.
Adapting the desired speedAdapt the desired speed to the road con‐
ditions and be ready to brake at all times; other‐wise, there is the danger of an accident occur‐ring.◀
Speed differencesGreat speed differences with vehicles
driving ahead of you, e.g., when rapidly ap‐proaching a truck or when another vehicleswerves into your own lane, cannot be compen‐sated for by the system.◀
Press the rocker switch up or down repeatedlyuntil the desired speed is set.If active, the displayed speed is stored and thevehicle reaches the stored speed if the road isclear.▷ Each time the rocker switch is pressed to the
point of resistance, the desired speed in‐creases or decreases by approx. 1 mph/1 km/h.
Seite 110
Controls Driving comfort
110Online Edition for Part no. 01 40 2 608 633 — 11 09 490

▷ Each time the rocker switch is pressed pastthe point of resistance, the desired speedincreases or decreases by a maximum of5 mph/10 km/h. Max. adjustable speed:110 mph/180 km/h.
Hold the rocker switch in position to repeat theaction.
DistanceSelecting a distanceAdjust the distance according to the traffic
and weather conditions; otherwise, there is thedanger of an accident occurring. Maintain theprescribed safety distance.◀
Reduce distancePress the button repeatedly until thedesired distance is set.
The selected distance, refer to page 112, is dis‐played in the instrument cluster.
Increase distancePress the button repeatedly until thedesired distance is set.
The selected distance, refer to page 112, is dis‐played in the instrument cluster.
Calling up the desired speed anddistance
While drivingPress the button with the systemswitched on.
In the following cases, the stored speed value isdeleted and cannot be called up again:▷ When the system is switched off.▷ When the ignition is switched off.
While standingBefore leaving the vehicle, secure itagainst rolling.
Before leaving the vehicle with the engine run‐ning, engage position P of the automatic trans‐mission and apply the parking brake. Otherwise,the vehicle may begin to roll.◀
The system brought the vehicle to a completestandstill.▷ Green mark in the speedometer during a
brief idle phase:The vehicle ahead of you drives away whilethe mark is green: your vehicle accelerateswithout anything having to be done.
▷ Switch to orange of the mark in the speed‐ometer after approx. 2 sec.:The vehicle ahead of you drives away, whilethe mark is orange: in order to accelerate,briefly press the gas pedal or press the RESbutton or SET button.
Rolling bars in the distance indicator mean thatthe vehicle ahead of you has driven off.You actively braked your vehicle to a halt bypressing on the brake pedal and it is standingbehind another vehicle:
1. Press the button to call up a storeddesired speed.
2. Release the brake pedal.3. Press on the accelerator briefly, or press the
RES button or the rocker switch when thevehicle ahead of you drives away.
Displays in the instrument cluster
Desired speed▷ The marking lights up in
green: the system is active.▷ The marking lights up in or‐
ange: the system has beeninterrupted.
Seite 111
Driving comfort Controls
111Online Edition for Part no. 01 40 2 608 633 — 11 09 490

▷ The marking does not light up: the system isswitched off.
Brief status displaySelected desired speed.
If — appears briefly on the display for CheckControl messages, it is possible that the systemrequirements for operation are currently notmet.
Distance to vehicle ahead of youThe selected distance to the vehicle drivingahead of you is shown.
Distance display
Distance 1
Distance 2
Distance 3
Distance 4This value is set after the system isswitched on.
The system has been interrupted ordistance control is deactivated be‐cause the accelerator is beingpressed; a vehicle was not detected.
Distance control is deactivated be‐cause the accelerator is beingpressed; a vehicle was detected.
Rolling bars: the detected vehicle has drivenaway.
Indicator/warning lampsPersonal responsibilityThe indicator and warning lamps do not
relieve the driver of the responsibility to adapthis or her desired driving speed and style to thetraffic conditions.◀
Depending on how the vehicle is equip‐ped, the indicator lamp in the instrumentcluster indicates whether the system is
switched on.
The vehicle symbol lights up in orange:A vehicle has been detected ahead ofyou.
The vehicle symbol flashes orange:The conditions are not adequate for op‐erating the system.
The system was deactivated but applies thebrakes until you actively assume control bypressing on the brake pedal or accelerator.
The vehicle symbol flashes red and anacoustic signal sounds:You are requested to intervene by brak‐
ing or making an evasive maneuver.
System limits
Speed rangeBest results are achieved when using the sys‐tem on well-developed roads and highways.The desired speed can be selected between20 mph/30 km/h to 110 mph/180 km/h.The system can also be activated when station‐ary.Comply with the legal speed limit in every situa‐tion when using the system.
Seite 112
Controls Driving comfort
112Online Edition for Part no. 01 40 2 608 633 — 11 09 490

Detection range
The detection capacity of the system and theautomatic braking capacity are limited.Two-wheeled vehicles driving ahead of youfor instance might not be detected.
Limited detection capacityBecause of the limits to the detection ca‐
pacity, you should be alert at all times so that youcan intervene actively, if necessary; otherwise,there is the danger of an accident occurring.◀
DecelerationThe system does not decelerate when a sta‐tionary obstacle is located in the same lane, e.g.,a vehicle at a red traffic light or at the end of trafficcongestion.The system also does not respond to:▷ Pedestrians or similarly slow road users.▷ Red traffic lights.▷ Stationary objects.▷ Cross traffic.▷ Approaching traffic.
No warningsA warning may not be issued when ap‐
proaching a stationary or very slow-moving ob‐stacle. You must react yourself; otherwise, thereis the danger of an accident occurring.◀
Swerving vehicles
A vehicle driving in front of you is not detecteduntil it is completely within the same lane as yourvehicle.
Swerving vehiclesIf a vehicle driving ahead of you suddenly
swerves into your lane, the system may not beable to automatically restore the selected dis‐tance. This also applies to major speed differ‐ences to vehicles driving ahead of you, e.g.,when rapidly approaching a truck. When a vehi‐cle driving ahead of you is reliably detected, thesystem requests that the driver intervene bybraking and carrying out evasive maneuvers, ifnecessary. You must react yourself; otherwise,there is the danger of an accident occurring.◀
Unexpected lane change
If a vehicle ahead of you unexpectedly movesinto another lane from behind a stopped vehicle,you yourself must react, as the system does notreact to stopped vehicles.
Seite 113
Driving comfort Controls
113Online Edition for Part no. 01 40 2 608 633 — 11 09 490

Cornering
If the desired speed is too high for a curve, thespeed is reduced slightly in the curve, althoughcurves cannot be anticipated in advance. There‐fore, drive into a curve at an appropriate speed.In tight curves, situations may result due to therestricted detection range of the system inwhich a vehicle driving ahead of you may not bedetected at all, or not until after a considerabledelay.
When approaching a curve, the system may re‐act briefly to the vehicles in the next lane due tothe bend of the curve. Any deceleration of thevehicle by the system can be compensated forby briefly accelerating. After the acceleratorpedal is released, the system becomes activeagain and independently controls the speed.
Driving awayIn some situations, the vehicle cannot driveaway automatically, e.g., on steep inclines or be‐hind bumps in the road.
Radar sensor
Position
Radar sensor
Dirty or covered sensorA dirty or covered sensor may hinder the detec‐tion of vehicles.▷ If necessary, clean the radar sensor. Re‐
move layers of snow and ice carefully.▷ Do not cover the view field of the radar sen‐
sor.
MalfunctionThe system cannot be activated if the sensor isnot aligned correctly. This may be caused bydamage incurred during parking, for example.A Check Control message is displayed if thesystem fails.
For US owners onlyThe transmitter and receiver units comply withpart 15 of the FCC/Federal CommunicationCommission regulations. Operation is governedby the following:FCC ID:▷ OAYARS3-ACompliance statement:This device complies with part 15 of the FCCRules. Operation is subject to the following twoconditions:▷ This device may not cause harmful interfer‐
ence, and
Seite 114
Controls Driving comfort
114Online Edition for Part no. 01 40 2 608 633 — 11 09 490

▷ this device must accept any interference re‐ceived, including interference that maycause undesired operation.
Any unauthorized modifications or changes tothese devices could void the user’s authority tooperate this equipment.
NoteTo reduce electromagnetic effects, please useproperly.The standard SAR value is 2.0 W/kg; the testedvalue of this product is 0.751 W/kg.NCC declaration:
1. Companies or persons without authoriza‐tion should not change the frequency, in‐crease the power, or change the character‐istics or functions of the original design oflow-power radio frequency devices withtype approval.
2. Low-power radio frequency devices shouldnot impair legal communication or flightsafety. If this type of impairment is detected,the device should be switched off immedi‐ately. In this case, please contact the man‐ufacturer and only use the product after theproblem has been corrected.
3. The «legal communication» specified aboverefers to communication in accordance withtelecommunication regulations. Low-powerdevices should withstand interference fromlegal communication and ISM devices.
Collision warningThe conceptIf the vehicle does not include Active CruiseControl with Stop & Go, the collision warning iscontrolled via the camera in the base of the in‐terior rearview mirror.The system issues a two-phase warning of adanger of collision at speeds above approx.10 mph/15 km/h. The time of these warnings
may vary depending on the current driving sit‐uation.
In the process, vehicles in a similar direction ofmovement are observed if they are locatedwithin the detection range of the system.
When the vehicle is intentionally brought intocontact with a vehicle, the collision warning isdelayed to avoid false warnings.
Warning stages
PrewarningThis warning is issued, for example, when thereis the impending danger of a collision or the dis‐tance to the vehicle ahead is too small.
Acute warningWarning of the imminent danger of a collisionwhen the vehicle approaches another vehicle ata relatively high differential speed.
Switching the warning function on/off
Press the button
▷ On: the LED lights up.
Seite 115
Driving comfort Controls
115Online Edition for Part no. 01 40 2 608 633 — 11 09 490

▷ Off: the LED goes out.The state is stored for the remote control cur‐rently in use.
Configuring the warning timeAfter the warning function is switched on, thewarning time can be set via the iDrive. For a latewarning time, prewarning is deactivated.These settings have no effect on the time of thewarning from the Active Cruise Control thatprompts the driver to intervene or brake.
Display in the instrument clusterThe collision warning can be issued in the in‐strument cluster, in the Head-up Display, andacoustically.
Warning stages
Symbol Measure
The vehicle lights up red: prewarn‐ing.Increase distance.
The vehicle flashes red and anacoustic signal sounds: acute warn‐ing.You are requested to intervene bybraking or making an evasive maneu‐ver.
Adapting your speed and driving styleThe display does not relieve the driver of
the responsibility to adapt his or her drivingspeed and style to the traffic conditions.◀
System limitsBe alertDue to system limitations, warnings may
be not be issued at all, or may be issued late orimproperly. Therefore, always be alert and readyto intervene; otherwise, there is the danger of anaccident occurring.◀
Detection rangeThe detection capacity of the camera and thecollision warning has limitations.This may result in the warning not being issuedor being issued late.For example, the following situations may not bedetected:▷ Slow moving vehicles when you approach
them at high speed.▷ Vehicles that suddenly swerve in front of you
or sharply decelerating vehicles.▷ Vehicles with an unusual rear appearance.▷ Two-wheeled vehicles ahead of you.
Functional limitationsThe system may not be fully functional in thefollowing situations:▷ In heavy fog, rain, sprayed water or snowfall.▷ In tight curves.▷ If the camera view field or the front wind‐
shield are dirty or covered.▷ When driving toward bright lights.▷ In the case of vehicles with insufficiently visi‐
ble tail lamps.▷ In the case of partially covered vehicles.▷ Up to 10 seconds after the start of the en‐
gine, via the Start/Stop knob.▷ During the calibration process of the camera
immediately after vehicle shipment.
Prewarning sensitivityDepending on the set prewarning time, this mayresult in increased false warnings.
Seite 116
Controls Driving comfort
116Online Edition for Part no. 01 40 2 608 633 — 11 09 490

Camera
The camera is located near the base of the mir‐ror.Keep windshield clean and clear in the area infront of the interior rear view mirror.
Collision warning withbraking functionThe conceptIf the vehicle is equipped with Active CruiseControl with Stop & Go, the collision warning iscontrolled via the cruise control radar sensor.The system issues a two-phase warning of adanger of collision at speeds above approx.10 mph/15 km/h. The time of these warningsmay vary depending on the current driving sit‐uation.The collision warning is available even if cruisecontrol has been deactivated.
It responds to stationary or moving objects thatare within the detection range of the radar sys‐tem.
When the vehicle is intentionally brought intocontact with a vehicle, the collision warning isdelayed to avoid false warnings.
Warning stages
PrewarningThis warning is issued, for example, when thereis the impending danger of a collision or the dis‐tance to the vehicle ahead is too small.
Acute warning with braking functionWarning of the imminent danger of a collisionwhen the vehicle approaches another object ata relatively high differential speed.The acute warning prompts the driver to inter‐vene and, if there is the danger of a collision, isaccompanied by a braking intervention.The braking intervention is executed with lim‐ited braking force and for a brief period only. Theintervention cannot bring the vehicle to a com‐plete standstill.The braking intervention is executed only if DSCDynamic Stability Control is switched on.
Adapting your speed and driving styleThe acute warning does not relieve the
driver of the responsibility to adapt his or herdriving speed and style to the traffic condi‐tions.◀
The braking intervention can be interrupted bypressing on the accelerator or by actively mov‐ing the steering wheel.When towing or tow-starting the vehicle, switchoff the collision warning with braking function toprevent undesired interventions.The braking function is deactivated if the DSCDynamic Stability Control or DTC DynamicTraction Control is deactivated.
Seite 117
Driving comfort Controls
117Online Edition for Part no. 01 40 2 608 633 — 11 09 490

Switching the warning function on/off
Press the button
▷ On: the LED lights up.▷ Off: the LED goes out.The state is stored for the remote control cur‐rently in use.
Configuring the warning timeAfter the warning function is switched on, thewarning time can be set via the iDrive. For a latewarning time, prewarning is deactivated.These settings have no effect on the time of thewarning from the Active Cruise Control thatprompts the driver to intervene or brake.
Display in the instrument clusterThe collision warning can be issued in the in‐strument cluster, in the Head-up Display, andacoustically.
Warning stages
Symbol Measure
The vehicle lights up red: prewarn‐ing.Increase distance.
The vehicle flashes red and anacoustic signal sounds: acute warn‐ing.You are requested to intervene bybraking or making an evasive maneu‐ver.
Adapting your speed and driving styleThe display does not relieve the driver of
the responsibility to adapt his or her drivingspeed and style to the traffic conditions.◀
System limitsBe alertDue to system limitations, warnings may
be not be issued at all, or may be issued late orimproperly. Therefore, always be alert and readyto intervene; otherwise, there is the danger of anaccident occurring.◀
Detection rangeThe detection capacity of the radar sensor andthe collision warning has limitations.This may result in the warning not being issuedor being issued late.For example, the following situations may not bedetected:▷ Slow moving vehicles when you approach
them at high speed.▷ Vehicles that suddenly swerve in front of you
or sharply decelerating vehicles.▷ Vehicles with an unusual rear appearance.▷ Two-wheeled vehicles ahead of you.▷ Pedestrians.
Functional limitationsThe system may not be fully functional in thefollowing situations:▷ In heavy fog, rain, sprayed water or snowfall.▷ In tight curves.▷ If the radar sensor is dirty or covered.
Prewarning sensitivityDepending on the set prewarning time, this mayresult in increased false warnings.
Seite 118
Controls Driving comfort
118Online Edition for Part no. 01 40 2 608 633 — 11 09 490

Cruise controlThe conceptThe system is functional at speeds beginning atapprox. 20 mph/30 km/h.It maintains the speed that was set using thecontrol elements on the steering wheel.The system brakes on downhill gradients if en‐gine braking action is insufficient.
Unfavorable conditionsDo not use the system if unfavorable con‐
ditions make it impossible to drive at a constantspeed, for instance:▷ On curvy roads.▷ In heavy traffic.▷ On slippery roads, in fog, snow or rain, or on
a loose road surface.Otherwise, you could lose control of the vehicleand cause an accident.◀
Controls
At a glance
1 System on/off, interrupt2 Resume speed3 Store speed4 Store, maintain/change speed
Switching onPress the button on the steering wheel.
The marking in the speedometer is set to thecurrent speed.Cruise control can be used.
Switching offDeactivated or interrupted systemIf the system is deactivated or interrupted,
actively intervene by braking and, if necessary,with evasive maneuvers; otherwise, there is thedanger of an accident occurring.◀
Press the button.
▷ If active: press twice.▷ If interrupted: press once.The displays go out. The stored desired speedis deleted.
InterruptingWhen active, press the button.
The system is automatically interrupted if:▷ The brakes are applied.▷ The clutch pedal is depressed.▷ Transmission position D is disengaged.▷ DTC Dynamic Traction Control is activated
or DSC is deactivated.▷ DSC is actively controlling stability.
Maintaining/storing the current speedPress the button.
or
Seite 119
Driving comfort Controls
119Online Edition for Part no. 01 40 2 608 633 — 11 09 490

Press the rocker switch while the system is in‐terrupted.
When the system is switched on, the currentspeed is maintained and stored as the desiredspeed.It is displayed in the speedometer and brieflydisplayed in the instrument cluster, Displays inthe speedometer, refer to page 120.When cruise control is maintained or stored,DSC Dynamic Stability Control is switched on, ifnecessary.
Change, maintain speedThe rocker switch can be pressed while inter‐rupted to maintain and store the current speed.
Adapting the desired speedAdapt the desired speed to the road con‐
ditions and be ready to brake at all times; other‐wise, there is the danger of an accident occur‐ring.◀
Press the rocker switch up or down repeatedlyuntil the desired speed is set.If active, the displayed speed is stored and thevehicle reaches the stored speed if the road isclear.
▷ Each time the rocker switch is pressed to thepoint of resistance, the desired speed in‐creases or decreases by approx. 1 mph/1 km/h.
▷ Each time the rocker switch is pressed pastthe point of resistance, the desired speedincreases or decreases by a maximum of5 mph/10 km/h.
▷ Pressing the rocker switch to the resistancepoint and holding it accelerates or deceler‐ates the vehicle without requiring pressureon the accelerator. After the rocker switch isreleased, the vehicle maintains its finalspeed. Pressing the switch beyond the re‐sistance point causes the vehicle to accel‐erate more rapidly.
Resuming the desired speedPress the button.
The stored speed is reached and maintained.
Displays in the instrument cluster
Indicator lampDepending on how the vehicle is equip‐ped, the indicator lamp in the instrumentcluster indicates whether the system is
switched on.
Desired speed▷ The marking lights up in
green: the system is active.▷ The marking lights up in or‐
ange: the system has beeninterrupted.
▷ The marking does not light up: the system isswitched off.
Brief status displaySelected desired speed.
Seite 120
Controls Driving comfort
120Online Edition for Part no. 01 40 2 608 633 — 11 09 490

If — appears briefly on the display for CheckControl messages, it is possible that the systemrequirements for operation are currently notmet.
PDC Park Distance ControlThe conceptIn addition to the PDC Park Distance Control, thebackup camera, refer to page 123, can beswitched on.PDC supports you when parking. Objects thatyou are approaching slowly in front of or behindyour vehicle are indicated with:▷ Signal tones.▷ Visual display.
MeasurementMeasurements are made by ultrasound sensorsin the bumpers.The range is approx. 6 ft/2 m.An acoustic warning is first given:▷ By the front sensors and two rear corner
sensors at approx. 24 in/60 cm.▷ By the rear middle sensors at approx. 5 ft/
1.50 m.
System limitsCheck the traffic situation as wellPDC cannot serve as a substitute for the
driver’s personal judgment of the traffic situa‐tion. Check the traffic situation around the vehi‐cle with your own eyes. Otherwise, an accidentcould result from road users or objects locatedoutside of the PDC detection range.Loud noises from outside and inside the vehiclemay prevent you from hearing the PDC’s signaltone.◀
Avoid driving quickly with PDCAvoid approaching an object quickly.
Avoid driving away quickly while PDC is not yetactive.For technical reasons, the system may other‐wise be too late in issuing a warning.◀
Limits of ultrasonic measurementThe detection of objects can reach the physicallimits of ultrasonic measurement, e.g.:▷ With tow bars and trailer hitches.▷ With thin or wedge-shaped objects.▷ With low objects.▷ With objects with corners and sharp edges.Low objects already displayed, e.g., curbs, canmove into the blind area of the sensors before orafter a continuous tone sounds.High, protruding objects such as ledges may notbe detected.
False warningsPDC may issue a warning under the followingconditions even though there is no obstaclewithin the detection range:▷ In heavy rain.▷ When sensors are very dirty or covered in
ice.▷ When sensors are covered in snow.▷ On rough road surfaces.▷ In large buildings with right angles and
smooth walls, e.g., in underground garages.▷ In heavy exhaust.▷ Due to other ultrasound sources, e.g.,
sweeping machines, high pressure steamcleaners or neon lights.The malfunction is signaled by a continuoustone alternating between the front and rearspeakers. As soon as the malfunction due toother ultrasound sources is no longerpresent, the system is again fully functional.
Seite 121
Driving comfort Controls
121Online Edition for Part no. 01 40 2 608 633 — 11 09 490

Switching on automaticallySelect transmission position R with the enginerunning.
Automatic deactivation during forwardtravelThe system switches off when a certain drivingdistance or speed is exceeded.Switch the system back on if necessary.
Switching on/off manually
Press the button.
▷ On: the LED lights up.▷ Off: the LED goes out.
Signal tonesWhen approaching an object, an intermittenttone is sounded that indicates the position of theobject. For example, if an object is detected tothe left rear of the vehicle, a signal tone soundsfrom the left rear speaker.The shorter the distance to the object becomes,the shorter the intervals.If the distance to a detected object is less thanapprox. 12 in/30 cm, a continuous tone issounded.If objects are located both in front of and behindthe vehicle, an alternating continuous signal issounded.The intermittent tone is interrupted after approx.3 seconds:
▷ If the vehicle stops in front of an object thatis detected by only one of the corner sen‐sors.
▷ If moving parallel to a wall.The signal tone is switched off:▷ When the vehicle moves away from an ob‐
ject by more than approx. 4 in/10 cm.▷ When transmission position P is engaged.
VolumeYou can set the volume of the PDC signal tone,refer to page 189.The setting is stored for the remote control cur‐rently in use.
Visual warningThe approach of the vehicle to an object can beshown on the Control Display. Objects that arefarther away are displayed on the Control Dis‐play before a signal tone sounds.A display appears as soon as Park DistanceControl (PDC) is activated.If the backup camera image was selected last, itagain appears on the display. To switch to PDC:
1. «Rear view camera» Select the symbolon the Control Display.
2. Press the controller.The setting is stored for the remote control cur‐rently in use.
Zoom viewOn the left part of the display screen, the vehicleis shown enlarged.
Seite 122
Controls Driving comfort
122Online Edition for Part no. 01 40 2 608 633 — 11 09 490

▷ Forward gear or transmission position D en‐gaged: front area of the vehicle.
▷ Reverse gear or transmission position R en‐gaged: rear area of the vehicle.
MalfunctionA Check Control message is displayed.
On the Control Display, the areas in front of andbehind the vehicle are shaded. PDC has failed.Have the system checked.
To ensure full operability:▷ Keep the sensors clean and free of ice.▷ When using high-pressure washers, do not
spray the sensors for long periods and main‐tain a distance of at least 12 in/30 cm.
Surround ViewThe conceptSurround View includes the following systems:▷ Backup camera, refer to page 123▷ Side View, refer to page 127.▷ Top View, refer to page 126.
It assists the driver when parking, maneuveringand on blind driveways and intersections.
Backup cameraThe conceptThe backup camera provides assistance in park‐ing and maneuvering backwards. The area be‐hind the vehicle is shown on the Control Display.
System limitsCheck the traffic situation as wellCheck the traffic situation around the ve‐
hicle with your own eyes. Otherwise, an accidentcould result from road users or objects locatedoutside the picture area of the backup camera.◀
Detection of objectsHigh, protruding objects such as ledges
may not be detected by the backup camera.◀
Switching on automaticallySelect transmission position R with the enginerunning.The backup camera image is displayed if thesystem was switched on via the iDrive.
Automatic deactivation during forwardtravelThe system switches off when a certain drivingdistance or speed is exceeded.Switch the system back on if necessary.
Seite 123
Driving comfort Controls
123Online Edition for Part no. 01 40 2 608 633 — 11 09 490

Switching on/off manually
Press the button.
▷ On: the LED lights up.▷ Off: the LED goes out.The PDC is shown on the Control Display.Switch on the backup camera via the iDrive, referto page 125.
Assistance functions
Functional requirement▷ The backup camera is switched on.▷ The trunk lid is fully closed.
Pathway lines
▷ Can be shown in the backup camera imagewhen in transmission position R.
▷ Help you to estimate the space requiredwhen parking and maneuvering on levelroads.
▷ Are dependent on the current steering angleand are continuously adjusted to the steer‐ing wheel movements.
Show the parking aid lines, refer to page 125.
Turning circle lines
▷ Can be shown in the backup camera image.▷ Show the course of the smallest possible
turning circle on a level road.▷ Only one turning circle line is displayed
when the steering wheel is turned.
Show the parking aid lines, refer to page 125.
Parking using pathway and turningcircle lines1. Position the vehicle so that the turning circle
lines lead to within the limits of the parkingspace.
Seite 124
Controls Driving comfort
124Online Edition for Part no. 01 40 2 608 633 — 11 09 490

2. Turn the steering wheel to the point wherethe pathway line covers the correspondingturning circle line.
Obstacle marking
▷ Spatially-shaped markings can be shown inthe backup camera image.
Their colored steps match the markings of thePDC. This simplifies estimation of the distanceto the object shown.
Activating the assistance functionsMore than one assistance function can be activeat the same time.
Showing the parking aid lines «Parking aid lines»
Pathway and turning circle lines are displayed.
Showing the obstacle marking «Obstacle marking»
Spatially-shaped markings are displayed.
Display on the Control Display
Switching on the backup camera viaiDriveWith PDC activated:
«Rear view camera»The backup camera image is displayed. The set‐ting is stored for the remote control currently inuse.
BrightnessWith the backup camera switched on:
1. Select the symbol.2. Turn the controller until the desired setting
is reached and press the controller.
ContrastWith the backup camera switched on:
1. Select the symbol.2. Turn the controller until the desired setting
is reached and press the controller.
Camera
The camera lens is located in the handle of thetrunk lid. The image quality may be impaired bydirt.Clean the lens, refer to page 299.
Seite 125
Driving comfort Controls
125Online Edition for Part no. 01 40 2 608 633 — 11 09 490

Top ViewThe conceptTop View assists you in parking and maneuver‐ing. The area around the doors and the road areaaround the vehicle are shown on the ControlDisplay for this purpose.
Capturing the imageThe image is captured by two camerasintegrated in the exterior mirrors and by thebackup camera.The range is at least 7 ft/2 m to the side and rear.In this way, obstacles up to the height of the ex‐terior mirrors are detected early.
System limitsTop View cannot be used in the following situa‐tions:▷ With a door open.▷ With the trunk lid open.▷ With an exterior mirror folded in.▷ In poor light.A Check Control message is displayed in someof these situations.
Check the traffic situation as wellCheck the traffic situation around the ve‐
hicle with your own eyes. Otherwise, an accidentcould result from road users or objects locatedoutside the picture area of the cameras.◀
Switching on automaticallySelect transmission position R with the enginerunning.The Top View and PDC images are displayed ifthe system is switched on via iDrive.
Automatic deactivation during forwardtravelThe system switches off when a certain drivingdistance or speed is exceeded.
Switch the system back on if necessary.
Switching on/off manually
Press the button.
▷ On: the LED lights up.▷ Off: the LED goes out.If Top View is displayed, switch on the backupcamera via the iDrive, refer to page 127.
Visual warningThe approach of the vehicle to an object can beshown on the Control Display.When the distance to an object is small, a red baris shown in front of the vehicle, as it is in the PDCdisplay.
The display appears as soon as Top View is ac‐tivated.
If the backup camera image was selected last, itagain appears on the display. To switch to TopView:
«Rear view camera» Select the symbol onthe Control Display.
Seite 126
Controls Driving comfort
126Online Edition for Part no. 01 40 2 608 633 — 11 09 490

The setting is stored for the remote control cur‐rently in use.
Display on the Control Display
Switching on the backup camera viaiDriveWith Top View switched on:
«Rear view camera»The backup camera image is displayed. The set‐ting is stored for the remote control currently inuse.
BrightnessWith Top View switched on:
1. «Brightness»2. Turn the controller until the desired setting
is reached and press the controller.
ContrastWith Top View switched on:
1. «Contrast»2. Turn the controller until the desired setting
is reached and press the controller.
Displaying the turning circle andpathway lines▷ The static, red turning circle line shows the
space needed to the side of the vehiclewhen the steering wheel is turned all theway.
▷ The variable, green pathway line assists youin assessing the amount of space actuallyneeded to the side of the vehicle.The pathway line is dependent on the cur‐rent steering angle and is continuously ad‐justed with the steering wheel movement.
«Parking aid lines»Turning circle and pathway lines are displayed.
Cameras
The lenses of the Top View cameras are locatedat the bottom of the exterior mirror housings.The image quality may be impaired by dirt.Clean the lens, refer to page 299.
Side ViewThe conceptSide View provides an early look at cross trafficat blind driveways and intersections. Road usersconcealed by obstacles to the left and right ofthe vehicle can only be detected relatively latefrom the driver’s seat. To improve visibility, twocameras in the front of the vehicle record thetraffic situation on each side.
Capturing the imageTwo cameras integrated in the bumpers capturethe image.The cameras capture a maximum range of330 ft/100 m.
DisplayThe images from both cameras are shown si‐multaneously on the Control Display.
Check the traffic situation as wellCheck the traffic situation around the ve‐
hicle on blind driveways and intersections withyour own eyes. Otherwise, an accident could re‐sult from road users or objects located outsidethe picture area of the Side View cameras.◀
Seite 127
Driving comfort Controls
127Online Edition for Part no. 01 40 2 608 633 — 11 09 490

Switching on/off
Press the button.
Automatic deactivation during forwardtravelThe system switches off when a certain drivingdistance or speed is exceeded.Switch the system back on if necessary.
Display on the Control DisplayThe traffic area to the left and right is displayedon the Control Display.
Guidelines at the bottom of the image show theposition of the front of the vehicle.
BrightnessWith the Side View switched on:
1. «Brightness»2. Turn the controller until the desired setting
is reached and press the controller.
ContrastWith the Side View switched on:
1. «Contrast»2. Turn the controller until the desired setting
is reached and press the controller.
Cameras
The two camera lenses are located on the sidesof the bumper.The image quality may be impaired by dirt.Clean the lens, refer to page 299.
Head-up DisplayThe concept
This system projects important information intothe driver’s field of vision, e.g., the speed.In this way, the driver can get information with‐out averting his or her eyes from the road.
Display visibilityThe visibility of the displays in the Head-up Dis‐play is influenced by:
Seite 128
Controls Driving comfort
128Online Edition for Part no. 01 40 2 608 633 — 11 09 490

▷ Certain sitting positions.▷ Objects on the cover of the Head-up Dis‐
play.▷ Sunglasses with certain polarization filters.▷ Wet roads.▷ Unfavorable light conditions.If the image is distorted, check the basic set‐tings.
Switching on/off1. «Settings»2. «Head-up display»3. «Head-up display»
Switch the Head-up Display ON/OFF as re‐quired.
Display
1 Lane departure warning2 Active Cruise Control3 Desired speed4 Navigation system5 Speed
The collision warning, Night Vision pedestrianwarning, or Check Control messages are dis‐played briefly if needed.
Selecting displays in the Head-upDisplay1. «Settings»2. «Head-up display»
3. «Displayed information»4. Select the desired displays in the Head-up
Display.The settings are stored for the remote controlcurrently in use.
Setting the brightnessThe brightness is automatically adjusted to theambient light.The basic setting can be adjusted manually.
1. «Settings»2. «Head-up display»3. «Brightness»4. Turn the controller.
The brightness is adjusted.When the low beams are switched on, thebrightness of the Head-up Display can be addi‐tionally influenced using the instrument lighting,refer to page 89.The setting is stored for the remote control cur‐rently in use.
Adjusting the height1. «Settings»2. «Head-up display»3. «Height»4. Turn the controller.
The height is adjusted.The setting is stored for the remote control cur‐rently in use.
Setting the rotation1. «Settings»2. «Head-up display»3. «Rotation»4. Turn the controller.
Rotation is set.The setting is stored for the remote control cur‐rently in use.
Seite 129
Driving comfort Controls
129Online Edition for Part no. 01 40 2 608 633 — 11 09 490

Special windshieldThe windshield is part of the system.The shape of the windshield makes it possibleto display a precise image.A film in the windshield prevents double imagesfrom being displayed.Therefore, have the special windshield replacedby a service center only.
Parking assistantThe concept
This system assists the driver in parking parallelto the road.Ultrasound sensors measure parking spaces onboth sides of the vehicle.The parking assistant calculates the best pos‐sible parking line and takes control of steeringduring the parking procedure.When parking, also take note of the visual andacoustic information issued by the PDC and theparking assistant and accelerate or brake ac‐cordingly.A component of the parking assistant is the PDCPark Distance Control, refer to page 121.
Personal responsibilityThe parking assistant does not relieve the
driver of responsibility for the vehicle during theparking procedure.Watch the parking space and parking procedureclosely and intervene if necessary; otherwise,there is the danger of an accident.◀
Requirements
For measuring parking spaces▷ Maximum speed while driving forward ap‐
prox. 22 mph/35 km/h.▷ Maximum distance to row of parked vehi‐
cles: 5 ft/1.5 m.
Suitable parking space▷ Gap between two objects with a minimum
length of approx. 5 ft/1.5 m.▷ Minimum length: own vehicle length plus
approx. 4 ft/1.2 m.▷ Minimum depth: approx. 5 ft/1.5 m.
For parking procedureClosed doors.
Switching on
Using the button
Press the button.The LED lights up.
The current status of the parking space searchis indicated on the Control Display.
Parking assistant is activated automatically.
By engaging reverseThe current status of the parking space searchis indicated on the Control Display.Activate: «Parking Assistant» Select thesymbol in the Control Display.
Seite 130
Controls Driving comfort
130Online Edition for Part no. 01 40 2 608 633 — 11 09 490

Display on the Control Display
Activating/deactivating systems
Symbol Meaning
Gray: the system is not available.White: the system is available but notactivated.
The system is activated.
System status
Gray: the system is not activated.Parking space search.Blue: the system is activated. Asuitable parking space wasfound.
The parking procedure is active.Steering control has been seized.
Status of the parking space search
▷ Gray, arrow 1: parking space search.▷ Blue, arrow 2: parking space is suitable.
The vehicle is parked in the parking space ifthe parking procedure is active.
▷ No display: no parking space search.
Parking using the parking assistantPersonal responsibilityThe parking assistant does not relieve the
driver of responsibility for the vehicle during theparking procedure.Watch the parking space and parking procedureclosely and intervene if necessary; otherwise,there is the danger of an accident.◀
Check the traffic situation as wellLoud sounds outside and within the vehi‐
cle can drown out the signal tones of the parkingassistant and PDC.Check the traffic situation around the vehiclewith your own eyes; otherwise, there is the dan‐ger of an accident.◀
1. Switch on the parking assistant and activateit if necessary.The status of the parking space search is in‐dicated on the Control Display.
2. Follow the instructions on the Control Dis‐play.The end of the parking procedure is indi‐cated on the Control Display.
3. Adjust the parking position yourself if nec‐essary.
Notes▷ The parking assistant takes control of steer‐
ing for as long as the symbol for active park‐ing appears on the display.
▷ The system maneuvers the vehicle to posi‐tion it properly in smaller parking spaces, forexample.
▷ To achieve the best possible parking posi‐tion, wait for the automatic steering wheel
Seite 131
Driving comfort Controls
131Online Edition for Part no. 01 40 2 608 633 — 11 09 490

movement after the gear change when thevehicle is stationary.
▷ When parking in parking spaces on the driv‐er’s side, the corresponding turn signal mustbe set.
Interrupting manuallyThe parking assistant can be interrupted at anytime by:▷ Grasping the steering wheel and steering
yourself.▷ «Parking Assistant» Select the symbol on
the Control Display.
Interrupting automaticallyThe procedure is interrupted automatically:▷ If the vehicle speed exceeds approx. 6 mph/
10 km/h.▷ On snow-covered or slippery road surfaces
if necessary.▷ If doors are open.A Check Control message is displayed.
ContinuingAn interrupted parking procedure can be con‐tinued if necessary.Follow the instructions on the Control Display todo this.
Switching offThe system can be deactivated as follows:▷ Press the button.
▷ Switch off the ignition.
MalfunctionA Check Control message is displayed.The parking assistant failed. Have the systemchecked.
System limitsChanges to the parking spaceChanges to the parking space after it was
measured are not taken into account by the sys‐tem.Therefore, always be alert and ready to inter‐vene; otherwise, there is the danger of an acci‐dent occurring.◀
Transporting loadsLoads that extend beyond the perimeter
of the vehicle are not taken into account by thesystem during the parking procedure.Therefore, always be alert and ready to inter‐vene; otherwise, there is the danger of an acci‐dent occurring.◀
CurbsThe parking assistant may steer the vehi‐
cle over or onto curbs.Therefore, always be alert and ready to inter‐vene; otherwise, the wheels, tires, or the vehiclemay become damaged.◀
No parking assistanceThe parking assistant does not provide assis‐tance in parking.▷ In tight curves.
Functional limitationsThe system may not be fully functional in thefollowing situations:▷ When sensors are dirty or iced over.▷ In heavy fog, rain or snowfall.▷ On bumpy road surfaces such as gravel
roads.▷ When leaves or snow has collected in the
parking space.
Limits of ultrasonic measurementThe detection of objects can reach the physicallimits of ultrasonic measurement, e.g.:
Seite 132
Controls Driving comfort
132Online Edition for Part no. 01 40 2 608 633 — 11 09 490

▷ With tow bars and trailer hitches.▷ With thin or wedge-shaped objects.▷ With elevated, protruding objects such as
ledges or cargo.▷ With objects with corners and sharp edges.▷ With objects with a fine surface structure,
such as fences.The parking assistant may identify parkingspaces that are not suitable for parking.
Ultrasound sensors
The ultrasound sensors for measuring parkingspaces are located on the wheel arches.To ensure full operability:▷ Keep the sensors clean and free of ice.▷ When using high-pressure washers, do not
spray the sensors for long periods and main‐tain a distance of at least 12 in/30 cm.
Seite 133
Driving comfort Controls
133Online Edition for Part no. 01 40 2 608 633 — 11 09 490

Climate controlVehicle equipmentAll standard, country-specific and optionalequipment that is offered in the model series isdescribed in this chapter. Therefore, equipment
is also described that is not available in a vehicle,e. g., because of the selected optional equip‐ment or country variant. This also applies forsafety-related functions and systems.
Automatic climate control
1 Seat heating, left 472 Vent settings3 Rear window defroster4 Air flow5 AUTO program6 Temperature
7 Seat heating, right 478 Cooling function9 Recirculated-air mode10 Interior temperature sensor — always keep
clear
Seite 134
Controls Climate control
134Online Edition for Part no. 01 40 2 608 633 — 11 09 490

Climate control functions in detail
Manual air distributionTurn the wheel to select the de‐sired program.
▷ Windows.▷ Upper body region.▷ Windows, upper body region, and foot‐
well.▷ Footwell.
Defrosting windows and removingcondensationDirect the air distribution toward windows, in‐crease the air flow and temperature, and, if nec‐essary, use the cooling function.
Rear window defrosterPress the button.The rear window defroster switches off
automatically after a certain period of time.
Air flow, manualPress the left or right side of the button:decrease or increase air flow.
The air flow of the air conditioner may be re‐duced automatically to save battery power.
AUTO programPress the button.Air volume, air distribution, and tem‐
perature are controlled automatically.
Depending on the selected temperature andoutside influences, the air is directed to thewindshield, side windows, upper body, and intothe footwell.
The cooling function, refer to page 135, isswitched on automatically with the AUTO pro‐gram.
TemperatureTurn the wheel to set the desiredtemperature.
The automatic climate control reaches this tem‐perature as quickly as possible, if necessary byincreasing the cooling or heating output, andthen keeps it constant.Avoid rapidly switching between different tem‐perature settings. The automatic climate controlwill not have sufficient time to adjust the settemperature.
Cooling functionThe passenger compartment can only becooled with the engine running.
Press the button.The air is cooled and dehumidified and
– depending on the temperature setting –warmed again.
Depending on the weather, the windshield mayfog up briefly when the engine is started.The cooling function is switched on automati‐cally with the AUTO program.When using the automatic climate control, con‐densation water, refer to page 158, developsthat exits underneath the vehicle.
Recirculated-air modeYou can respond to unpleasant odors or pollu‐tants in the immediate environment by tempo‐rarily suspending the supply of outside air. Thesystem then recirculates the air currently withinthe vehicle.
Press the button repeatedly to selectan operating mode:
Seite 135
Climate control Controls
135Online Edition for Part no. 01 40 2 608 633 — 11 09 490

▷ LED off: outside air flows in continuously.▷ LED on, recirculated-air mode: the supply of
outside air into the vehicle is permanentlyblocked.
If the windows fog over, switch off recirculated-air mode and increase the air volume, if neces‐sary.
Continuous recirculated-air modeThe recirculated-air mode should not be
used for an extended period of time, as the airquality inside the vehicle deteriorates steadily.◀
Switching the system on/off
Switching offPress the left button at the minimumspeed.
Switching onPress any button except the seat heating but‐tons.
Microfilter, recirculated air filterThe microfilter removes dust and pollen fromthe incoming air.The recirculated-air filter removes dust from theinterior air in recirculated-air mode.These filters should be replaced during sched‐uled maintenance of your vehicle., refer topage 277
Automatic climate control with enhanced features
1 Seat heating, left 472 Temperature, left3 AUTO program
4 Display5 Maximum cooling6 Temperature, right
Seite 136
Controls Climate control
136Online Edition for Part no. 01 40 2 608 633 — 11 09 490

7 Seat heating, right 478 Cooling function9 Automatic recirculated-air control/recircu‐
lated-air mode10 Air distribution, right11 Air flow, AUTO intensity
12 Air distribution, left13 Rear window defroster14 Interior temperature sensor — always keep
clear15 Defrosting windows and removing conden‐
sation
Climate control functions in detail
TemperatureTurn the wheel to set the desiredtemperature.
The automatic climate control reaches this tem‐perature as quickly as possible, if necessary byincreasing the cooling or heating output, andthen keeps it constant.Avoid rapidly switching between different tem‐perature settings. The automatic climate controlwill not have sufficient time to adjust the settemperature.
AUTO programPress the button.Air volume, air distribution, and tem‐
perature are controlled automatically.
Depending on the selected temperature, AUTOintensity, and outside influences, the air is di‐rected to the windshield, side windows, upperbody, and into the footwell.The cooling function, refer to page 137, isswitched on automatically with the AUTO pro‐gram.At the same time, a condensation sensor con‐trols the program so as to prevent window con‐densation as much as possible.
Intensity of the AUTO programWith the AUTO program switched on, automaticcontrol of the air volume and air distribution canbe adjusted.
Press the left or right side of the button:decrease or increase the intensity.
The selected intensity is shown on the displayof the automatic climate control.
Maximum coolingPress the button.The system is set to the lowest tem‐
perature, maximum air flow and recirculated-airmode.
Air flows out of the vents for the upper body re‐gion. Open them for this purpose.The air is cooled fastest when the engine is run‐ning.The air flow can be adjusted when the programis active.
Cooling functionThe passenger compartment can only becooled with the engine running.
Press the button.The air is cooled and dehumidified and
– depending on the temperature setting –warmed again.
Depending on the weather, the windshield mayfog up briefly when the engine is started.The cooling function is switched on automati‐cally with the AUTO program.
Seite 137
Climate control Controls
137Online Edition for Part no. 01 40 2 608 633 — 11 09 490

When using the automatic climate control, con‐densation water, refer to page 158, developsthat exits underneath the vehicle.
Automatic recirculated-air control/recirculated-air modeYou can respond to unpleasant odors or pollu‐tants in the immediate environment by tempo‐rarily suspending the supply of outside air. Thesystem then recirculates the air currently withinthe vehicle.
Press the button repeatedly to selectan operating mode:
▷ LEDs off: outside air flows in continuously.▷ Left LED on, automatic recirculated-air con‐
trol: a sensor detects pollutants in the out‐side air and controls the shutoff automati‐cally.
▷ Right LED on, recirculated-air mode: thesupply of outside air into the vehicle is per‐manently blocked.
If the windows are fogged over, switch off therecirculated-air mode and press the AUTO but‐ton to utilize the condensation sensor. Makesure that air can flow onto the windshield.
Continuous recirculated-air modeThe recirculated-air mode should not be
used for an extended period of time, as the airquality inside the vehicle deteriorates steadily.◀
Manual air distributionPress the button repeatedly to select aprogram:
▷ Upper body region.▷ Upper body region and footwell.▷ Footwell.▷ Windows and footwell: driver’s side only.▷ Windows, upper body region and footwell:
driver’s side only.If the windows are fogged over, press the AUTObutton to utilize the condensation sensor.
Air volume, manualTo be able to manually adjust the air volume,switch off the AUTO program first.
Press the left or right side of the button:decrease or increase air volume.
The selected air volume is shown on the displayof the automatic climate control.The air volume of the automatic climate controlmay be reduced automatically to save batterypower.
Rear window defrosterPress the button.The rear window defroster switches off
automatically after a certain period of time.
Defrosting windows and removingcondensation
Press the button.Ice and condensation are quickly re‐
moved from the windshield and the front sidewindows.
The air volume can be adjusted when the pro‐gram is active.If the windows are fogged over, additionallyswitch on the cooling function or press theAUTO button to utilize the condensation sensor.
Switching the system on/off
Switching offPress the left button at the minimumspeed.
Switching onPress any button except the seat heating but‐tons.
Seite 138
Controls Climate control
138Online Edition for Part no. 01 40 2 608 633 — 11 09 490

Microfilter/activated-charcoal filter,recirculated-air filterThe microfilter removes dust and pollen fromthe incoming air.The activated-charcoal filter removes gaseouspollutants from the outside air that enters thevehicle.The recirculated-air filter removes dust from theinterior air in recirculated-air mode.These filters should be replaced during sched‐uled maintenance, refer to page 277, of yourvehicle.
VentilationFront ventilation
▷ Lever for changing the air flow direction, ar‐row 1.
▷ Thumbwheels for opening and closing thevents continuously, arrows 2.
▷ Thumbwheel to vary the temperature, ar‐row 3.Toward blue: colder.Toward red: warmer.
Adjusting the ventilation▷ Ventilation for cooling:
Adjust the vent to direct the air in your di‐rection, e.g., if the vehicle interior is hot fromthe sun.
▷ Draft-free ventilation:Adjust the vent to let the air flow past you.
Ventilation in the rear
▷ Thumbwheel for opening and closing thevents continuously, arrow 1.
▷ Thumbwheel to vary the temperature, ar‐row 2.Toward blue: colder.Toward red: warmer.
▷ Lever for changing the air flow direction, ar‐row 3.
Parked-car ventilationThe conceptThe parked-car ventilation ventilates the vehicleinterior and lowers its temperature, if necessary.The system can be switched on and off at anyexternal temperature, either directly or by usingtwo preset switch-on times. It remains switchedon for 30 minutes.Open the vents to allow air to flow out.Operation can be performed via iDrive.
Switching on/off directly1. «Settings»2. «Climate»3. «Activate parked-car vent.»
The symbol on the automatic climate controlflashes if the system is switched on.
Seite 139
Climate control Controls
139Online Edition for Part no. 01 40 2 608 633 — 11 09 490

Preselecting the switch-on time1. «Settings»2. «Climate»3. «Timer 1:» or «Timer 2:»4. Set the desired time.
Activating the switch-on time1. «Settings»2. «Climate»3. «Activate Timer 1» or «Activate Timer 2»
The symbol on the automatic climate controllights up when the switch-on time is activated.
The symbol on the automatic climate controlflashes when the system has been switched on.The system will only be switched on within thenext 24 hours. After that, it needs to reactivated.
Seite 140
Controls Climate control
140Online Edition for Part no. 01 40 2 608 633 — 11 09 490

Interior equipmentVehicle equipmentAll standard, country-specific and optionalequipment that is offered in the model series isdescribed in this chapter. Therefore, equipmentis also described that is not available in a vehicle,e. g., because of the selected optional equip‐ment or country variant. This also applies forsafety-related functions and systems.
Integrated universal remotecontrolThe conceptThe integrated universal remote control can op‐erate up to 3 functions of remote-controlled sys‐tems such as garage door drives or lighting sys‐tems. The integrated universal remote controlreplaces up to 3 different hand-held transmit‐ters. To operate the remote control, the buttonson the interior rearview mirror must be program‐med with the desired functions. The hand-heldtransmitter for the particular system is requiredin order to program the remote control.
During programmingDuring programming and before activat‐
ing a device using the integrated universal re‐mote control, ensure that there are no people,animals, or objects in the range of movement ofthe remote-controlled device; otherwise, thereis a risk of injury or damage.Also follow the safety instructions of the hand-held transmitter.◀
Before selling the vehicle, delete the storedfunctions for the sake of security.
CompatibilityIf this symbol is printed on the packagingor in the instructions of the system to becontrolled, the system is generally com‐
patible with the integrated universal remotecontrol.If you have any questions, please contact:▷ Your service center.▷ www.homelink.com on the Internet.HomeLink is a registered trademark of JohnsonControls, Inc.
Controls on the interior rearview mirror
▷ LED, arrow 1.▷ Buttons, arrow 2.▷ The hand-held transmitter, arrow 3, is re‐
quired for programming.
Programming
General information1. Switch on the ignition.2. Initial setup:
Press and hold the left and right button onthe interior rearview mirror simultaneouslyfor approximately 20 seconds until the LEDon the interior rearview mirror flashes. Thiserases all programming of the buttons onthe interior rearview mirror.
3. Hold the hand-held transmitter for the sys‐tem to be controlled approx. 1 to 3 in/2.5 to8 cm away from the buttons on the interiorrearview mirror. The required distance de‐pends on the manual transmitter.
Seite 141
Interior equipment Controls
141Online Edition for Part no. 01 40 2 608 633 — 11 09 490

4. Simultaneously press and hold the button ofthe desired function on the hand-held trans‐mitter and the button to be programmed onthe interior rearview mirror. The LED on theinterior rearview mirror will begin flashingslowly.
5. Release both buttons as soon as the LEDflashes more rapidly. When the LED flashesfaster, this indicates that the button on theinterior rearview mirror has been program‐med.If the LED does not flash faster after at least60 seconds, change the distance betweenthe interior rearview mirror and the hand-held transmitter and repeat the step. Severalmore attempts at different distances may benecessary. Wait at least 15 seconds be‐tween attempts.Canada: if programming with the hand-heldtransmitter was interrupted, hold down theinterior rearview mirror button and repeat‐edly press and release the hand-held trans‐mitter button for 2 seconds.
6. To program other functions on other but‐tons, repeat steps 3 to 5.
The systems can be controlled using the interiorrearview mirror buttons.
Special feature of the alternating-codewireless systemIf you are unable to operate the system after re‐peated programming, please check if the sys‐tem to be controlled features an alternating-code system.Read the system’s operating manual, or pressthe programmed button on the interior rearviewmirror longer. If the LED on the interior rearviewmirror starts flashing rapidly and then stays litconstantly for 2 seconds, the system featuresan alternating-code system. Flashing and con‐tinuous illumination of the LED will repeat forapproximately 20 seconds.
For systems with an alternating-code system,the integrated universal remote control and thesystem also have to be synchronized.Please read the operating manual of the systembeing set up for information on how to syn‐chronize the system.Synchronizing is easier with the aid of a secondperson.To synchronize:
1. Park the vehicle within range of the remote-controlled system.
2. Program the relevant button on the interiorrearview mirror as described.
3. Locate and press the synchronizing buttonon the system being programmed. You haveapprox. 30 seconds for the next step.
4. Hold down the programmed button on theinterior rearview mirror for approximately3 seconds and then release it. If necessary,repeat this work step up to three times in or‐der to finish synchronization. Once synchro‐nization is complete, the programmed func‐tion will be carried out.
Reprogramming individual buttons1. Switch on the ignition.2. Press and hold the interior rearview mirror
button to be programmed.3. As soon as the interior rearview mirror LED
starts flashing slowly, hold the hand-heldtransmitter for the system to be controlledapprox. 1 to 3 in/2.5 to 8 cm away from thebuttons on the interior rearview mirror. Therequired distance depends on the manualtransmitter.
4. Likewise, press and hold the button of thedesired function on the hand-held transmit‐ter.
5. Release both buttons as soon as the interiorrearview mirror LED flashes more rapidly.When the LED flashes faster, this indicatesthat the button on the interior rearview mir‐
Seite 142
Controls Interior equipment
142Online Edition for Part no. 01 40 2 608 633 — 11 09 490

ror has been programmed. The system canthen be controlled by the button on the in‐terior rearview mirror.If the LED does not flash faster after at least60 seconds, change the distance and repeatthe step. Several more attempts at differentdistances may be necessary. Wait at least15 seconds between attempts.Canada: if programming with the hand-heldtransmitter was interrupted, hold down theinterior rearview mirror button and repeat‐edly press and release the hand-held trans‐mitter button for 2 seconds.
ControlsBefore operationBefore operating a system using the
integrated universal remote control, ensure thatthere are no people, animals, or objects withinthe range of movement of the remote-controlledsystem; otherwise, there is a risk of injury ordamage.Also follow the safety instructions of the hand-held transmitter.◀
The system, such as the garage door, can beoperated using the button on the interior rear‐view mirror while the engine is running or whenthe ignition is started. To do this, hold down thebutton within receiving range of the system untilthe function is activated. The interior rearviewmirror LED stays lit while the wireless signal isbeing transmitted.
Deleting stored functionsPress and hold the left and right button on theinterior rearview mirror simultaneously for ap‐proximately 20 seconds until the LED flashesrapidly. All stored functions are deleted. Thefunctions cannot be deleted individually.
Digital compassAt a glance
1 Control button2 Mirror display
Mirror displayThe point of the compass is displayed in themirror when driving straight.
Operating conceptVarious functions can be called up by pressingthe control button with a pointed object, such asthe tip of a ballpoint pen or similar object. Thefollowing setting options are displayed in suc‐cession, depending on how long the control but‐ton is pressed:▷ Pressed briefly: turns display on/off.▷ 3 to 6 seconds: compass zone setting.▷ 6 to 9 seconds: compass calibration.▷ 9 to 12 seconds: left/right-hand steering
setting.▷ 12 to 15 seconds: language setting.
Setting the compass zonesSets the particular compass zones on the vehi‐cle so that the compass operates correctly; referto World map with compass zones.
Seite 143
Interior equipment Controls
143Online Edition for Part no. 01 40 2 608 633 — 11 09 490

World map with compass zones
Procedure1. Press and hold the control button for approx.
3 to 4 seconds. The number of the set com‐pass zone appears in the mirror.
2. To change the zone setting, press the con‐trol button quickly and repeatedly until thenumber of the compass zone correspondingto your location appears in the mirror.
The set zone is stored automatically. The com‐pass is ready for use again after approximately10 seconds.
Calibrating the digital compassThe digital compass must be calibrated in theevent of the following:▷ The wrong point of the compass is dis‐
played.▷ The point of the compass displayed does
not change despite changing the directionof travel.
▷ Not all points of the compass are displayed.
Procedure1. Make sure that there are no large metallic
objects or overhead power lines near the ve‐hicle and that there is sufficient room to drivearound in a circle.
2. Set the currently applicable compass zone.3. Press and hold the control button for approx.
6 to 7 seconds so that «C» appears on thedisplay. Next, drive in a complete circle atleast once at a speed of no more than 4 mph/7 km/h. If calibration is successful, the «C» isreplaced by the points of the compass.
Left/right-hand steeringThe digital compass is already set for right orleft-hand steering at the factory.
Setting the languagePress and hold the control button for approx. 12to 13 seconds. Briefly press the control buttonagain to switch between English «E» and Ger‐man «O».
Seite 144
Controls Interior equipment
144Online Edition for Part no. 01 40 2 608 633 — 11 09 490

The setting is stored automatically after approx‐imately 10 seconds.
Ashtray/cigarette lighterAshtray
Opening
Raise cover.
EmptyingTake out the insert.
LighterDanger of burnsOnly hold the hot lighter by its knob; oth‐
erwise, there is the danger of getting burned.Switch off the ignition and take the remote con‐trol with you when leaving the vehicle so thatchildren cannot use the lighter and burn them‐selves.◀
The lighter is located next to the ashtray.
Push in the lighter.The lighter can be removed assoon as it pops back out.
Connecting electrical devicesSocketsThe lighter socket can be used as a socket forelectrical equipment while the engine is runningor when the ignition is switched on. The totalload of all sockets must not exceed 140 watts at12 volts.Do not damage the socket by using unsuitableconnectors.
Front center console
Raise the cap and remove the cover or cigarettelighter.
In the front passenger footwell
Socket is located below the glove compartment.
Seite 145
Interior equipment Controls
145Online Edition for Part no. 01 40 2 608 633 — 11 09 490

Rear center console
Remove cover.
In the cargo area
The socket is located on the left side in the cargoarea.
Through-loading systemGeneral informationThe cargo area can be enlarged by folding downthe rear seat backrest.The rear seat backrest is divided at a ratio of 40–20–40.
Danger of pinchingBefore folding down the rear seat backr‐
ests, ensure that the area of movement of thebackrests is clear. In particular, ensure that noone is located in the area of movement and thatno one reaches into the area of movement of therear seat backrests when the middle section isfolded down. Otherwise, injury or damage mayresult.◀
Locking the backrestBefore carrying persons in the rear, en‐
gage and thereby lock the backrests, or the re‐straining effect of the safety belts during an ac‐cident may be limited.◀
Retract the head restraints if necessarybefore backrests are folded down
With folding head restraints, fold in the head re‐straints before folding down the backrests, ordamage may result.◀
Opening1. Unlock the belt lock of the center safety belt
in the rear using the latch plate of anothersafety belt.
2. Insert the latch plate at the end of the beltinto the specially designated fixture on therear window shelf.
3. Push the corresponding head restraintdown as far as it will go.
Seite 146
Controls Interior equipment
146Online Edition for Part no. 01 40 2 608 633 — 11 09 490

4. Pull the corresponding lever in the cargoarea to release the rear seat backrest.
5. The unlocked rear seat backrest moves for‐ward slightly. Fold the backrest forward bythe head restraint.
Closing1. Return the rear seat backrest to the upright
seating position and engage it.Ensure that the lock is securely en‐gaged
When folding back the backrest, be sure thatit locks in place securely. If it is not properlyengaged, transported cargo could enter thepassenger compartment during braking orevasive maneuvers and endanger the vehi‐cle occupants.◀
2. Release the latch plate from the fixture onthe rear window shelf and insert it into thebelt lock of the center safety belt. Make sureyou hear the latch plate engage.
To secure cargo, refer to page 160, with nets ordraw straps, the cargo area is fitted with lashingeyes.
Folding down the middle section1. Fold in the middle head restraint.2. Reach into the recess and pull the middle
section forward.
Seite 147
Interior equipment Controls
147Online Edition for Part no. 01 40 2 608 633 — 11 09 490

Storage compartmentsVehicle equipmentAll standard, country-specific and optionalequipment that is offered in the model series isdescribed in this chapter. Therefore, equipmentis also described that is not available in a vehicle,e. g., because of the selected optional equip‐ment or country variant. This also applies forsafety-related functions and systems.
NotesNo loose objects in the passenger com‐partment
Do not stow any objects in the passenger com‐partment without securing them; otherwise,they may present a danger to occupants for in‐stance during braking and avoidance maneu‐vers.◀
Do not place anti-slip mats on the dash‐board
Do not place anti-slip mats on the dashboard.The mat materials could damage the dash‐board.◀
Storage compartmentsThe following storage compartments are avail‐able in the vehicle interior:▷ Glove compartment on the front passenger
side, refer to page 148.▷ Without Smoker’s package: Front storage
compartment, in front of the cupholders, re‐fer to page 149.
▷ Storage compartment in the front centerarmrest, refer to page 149.
▷ Compartments in the doors, refer topage 149.
▷ Nets on the backrests of the front seats.
▷ Storage compartment in the rear centerconsole, refer to page 150.
Glove compartmentFront passenger side
Opening
Pull the handle.The light in the glove compartment switches on.The net in the glove compartment is providedfor stowing the storage tray for the cupholder,refer to page 150.
Close the glove compartment again im‐mediately
Close the glove compartment immediately afteruse while driving; otherwise, injury may occurduring accidents.◀
ClosingFold up the cover.
LockingThe glove compartment can be locked with anintegrated key to separately secure the trunk lid,refer to page 38, for example.After the glove compartment is locked, the re‐mote control can be handed over, such as at ahotel, without the integrated key, refer topage 30.
Seite 148
Controls Storage compartments
148Online Edition for Part no. 01 40 2 608 633 — 11 09 490

This prevents access to the glove compartmentand to the cargo area.
USB interface for data transfer
Connection for importing and exporting data onUSB devices, e.g.:▷ Personal Profile settings, refer to page 33.▷ Music collection, refer to page 205.
Observe the following when connecting:▷ Do not use force when plugging the con‐
nector into the USB interface.▷ Do not connect devices such as fans or
lamps to the USB interface.▷ Do not connect USB hard drives.▷ Do not use the USB interface to recharge
external devices.
Front storage compartment
Raise the lid to open it.
Compartments in the doorsDo not stow any breakable objectsDo not store any breakable objects, e. g.
glass bottles, in the compartments, or there isan increased risk of injury in the event of an ac‐cident.◀
Center armrestFrontA storage compartment is located in the centerarmrest between the front seats.
Opening
Raise the center arm rest.
RepositioningCenter armrest can be pushed in the longitudi‐nal direction. It engages in the end positions.
Seite 149
Storage compartments Controls
149Online Edition for Part no. 01 40 2 608 633 — 11 09 490

Connection for an external audiodevice
This can be used to connect an external audiodevice, such as an MP3 player.
▷ AUX-IN port, refer to page 210.▷ USB audio interface, refer to page 210.
Storage compartment in therearStorage compartment is located in the rear cen‐ter console.
CupholdersNotes
Shatter-proof containers and no hotdrinks
Use light and shatter-proof containers and donot transport hot drinks. Otherwise, there is theincreased danger of injury in an accident.◀
Unsuitable containersDo not forcefully push unsuitable contain‐
ers into the cupholders. This may result in dam‐age.◀
Front
Storage tray for front cupholdersThe cupholder with the storage tray can be usedfor additional storage. To do this, place the stor‐age tray in the cupholder.Only use the storage tray for small objects, suchas keys or the remote control.When not in use, stow the storage tray in theglove compartment net. Insert the storage trayinto the net so that the top surface faces up.Note the trapezoidal shape of the net and tray.
RearIn the center armrest.
Pull the center armrest forward at the strap.To open: press the button.To close: push both covers back in, one after theother.
Pushing back the coversPush back the covers before folding up the
center armrest; otherwise, the cupholder couldbecome damaged.◀
Seite 150
Controls Storage compartments
150Online Edition for Part no. 01 40 2 608 633 — 11 09 490

Clothes hooksThe clothes hooks are located in the grab han‐dles in the rear.
Do not obstruct viewWhen suspending clothing from the
hooks, ensure that it will not obstruct the driver’svision.◀
No heavy objectsDo not hang heavy objects from the hooks;
otherwise, they may present a danger to pas‐sengers during braking and evasive maneu‐vers.◀
Storage compartments in thecargo areaLeft storage compartmentA storage compartment is located on the leftside.
NetSmall objects can be stowed in the net on theleft side.
Right storage compartmentLocated on the right side is a storage compart‐ment for the onboard vehicle tool kit, refer topage 279, and first aid kit, refer to page 291.
Hooks/multi-function hook
A multi-function hook is located on each side ofthe cargo area. The multi-function hooks can beloaded up to a max. of 8.8 lbs/4 kg.
Light and suitable objects onlyOnly hang light bags or suitable objects
from the holders. Otherwise, there is a danger ofobjects flying about during braking and evasivemaneuvers.Only transport heavy luggage in the trunk if it hasbeen appropriately secured.◀
Retaining strapA retaining strap is available on the right side trimfor fastening small objects.
Lashing eyes in the cargo areaTo secure the cargo, refer to page 160, thereare four lashing eyes in the cargo area.
Floor netThe floor net can also be used to Secure theload, refer to page 160, and to store small parts.
Storage compartment under cargofloor panel
Maximum loadTo avoid damage to the vehicle, do not ex‐
ceed a maximum permitted load of 44 lbs/20 kgin the storage compartment under the cargofloor panel.◀
Seite 151
Storage compartments Controls
151Online Edition for Part no. 01 40 2 608 633 — 11 09 490

Raise the cargo floor panel, arrow 1, and latch attop, if necessary, arrow 2.
Partitioning the compartmentThe compartment can be divided using an at‐tachable partition.
Seite 152
Controls Storage compartments
152Online Edition for Part no. 01 40 2 608 633 — 11 09 490

Seite 153
Storage compartments Controls
153Online Edition for Part no. 01 40 2 608 633 — 11 09 490

Online Edition for Part no. 01 40 2 608 633 — 11 09 490

Driving tipsThis chapter provides you with information useful
in dealing with specific driving and operatingmodes.
Online Edition for Part no. 01 40 2 608 633 — 11 09 490

Things to remember when drivingVehicle equipmentAll standard, country-specific and optionalequipment that is offered in the model series isdescribed in this chapter. Therefore, equipmentis also described that is not available in a vehicle,e. g., because of the selected optional equip‐ment or country variant. This also applies forsafety-related functions and systems.
Breaking-in periodGeneral informationMoving parts need to be broken in to adjust toeach other.The following instructions will help achieve along vehicle life and good economy.
Engine and differentialAlways obey the official speed limit.
Up to 1,200 miles/2,000 kmDo not exceed the maximum engine and roadspeed:▷ For gasoline engine, 4,500 rpm and
100 mph/160 km/h.Avoid full-throttle operation and use of thetransmission’s kickdown mode for the initialmiles.
From 1,200 miles/2,000 kmThe engine and vehicle speed can gradually beincreased.
TiresDue to technical factors associated with theirmanufacture, tires do not achieve their full trac‐tion potential until after an initial breaking-in pe‐riod.
Drive conservatively for the first 200 miles/300 km.
Brake systemBrakes require an initial break-in period of ap‐prox. 300 miles/500 km to achieve optimizedcontact and wear patterns between brake padsand discs. Drive moderately during this break-inperiod.
Following part replacementThe same breaking in procedures should be ob‐served if any of the components mentionedabove have to be renewed in the course of thevehicle’s operating life.
General driving notesClosing the trunk lid
Drive with the trunk lid closedOnly drive with the tailgate closed; other‐
wise, in the event of an accident or braking orevasive maneuvers, passengers or other roadusers may be injured or the vehicle may be dam‐aged. In addition, exhaust fumes may enter thepassenger compartment.◀
If driving with the tailgate open cannot beavoided:▷ Close all windows and the glass sunroof.▷ Greatly increase the blower speed.▷ Drive moderately.
Hot exhaust systemHot exhaust systemHigh temperatures are generated in the
exhaust system.
Seite 156
Driving tips Things to remember when driving
156Online Edition for Part no. 01 40 2 608 633 — 11 09 490

Do not remove the heat shields installed andnever apply undercoating to them. When driv‐ing, standing at idle and while parking, take careto avoid possible contact between the hot ex‐haust system and any highly flammable materi‐als such as hay, leaves, grass, etc. Such contactcould lead to a fire, and with it the risk of seriouspersonal injury as well as property damage.Do not touch hot exhaust pipes; otherwise, thereis the danger of getting burned.◀
Mobile communication devices in thevehicle
Mobile communication devices in the ve‐hicle
It is advised that you do not use mobile commu‐nication devices, e.g., mobile phones, inside thevehicle without connecting them directly to theexternal antenna. Otherwise, the vehicle elec‐tronics and mobile communication devices caninterfere with each other. In addition, there is noassurance that the radiation generated duringtransmission will be discharged from the vehicleinterior.◀
HydroplaningOn wet or slushy roads, a wedge of water canform between the tires and road surface.This phenomenon is referred to as hydroplan‐ing. It is characterized by a partial or completeloss of contact between the tires and the roadsurface, ultimately undermining your ability tosteer and brake the vehicle.
HydroplaningWhen driving on wet or slushy roads, re‐
duce your speed to prevent hydroplaning.◀
Driving through waterDrive though calm water only if it is not deeperthan 9.8 inches/25 cm and at this height, nofaster than walking speed, up to 6 mph/10 km/h.
Adhere to water depth and speed limita‐tions
Do not exceed this water depth and walkingspeed; otherwise, the vehicle’s engine, the elec‐trical systems and the transmission may bedamaged.◀
Braking safelyYour vehicle is equipped with ABS as a standardfeature.Applying the brakes fully is the most effectiveway of braking in situations when this is neces‐sary.The vehicle maintains steering responsiveness.You can still avoid any obstacles with a minimumof steering effort.Pulsation of the brake pedal and sounds fromthe hydraulic circuits indicate that ABS is in itsactive mode.
Objects in the area around the pedalsNo objects in the area around the pedalsKeep floor mats, carpets, and any other
objects out of the area of motion of the pedals;otherwise, the function of the pedals could beimpeded while drivingDo not place additional floor mats over existingmats or other objects.Only use floor mats that have been approved forthe vehicle and can be properly fixed in place.Ensure that the floor mats are securely fastenedagain after they were removed for cleaning, forexample.◀
Driving in wet conditionsWhen roads are wet or there is heavy rain, brieflyexert gentle pressure on the brake pedal everyfew miles.Ensure that this action does not endanger otherroad users.The heat generated in this process helps dry thebrake discs and pads.
Seite 157
Things to remember when driving Driving tips
157Online Edition for Part no. 01 40 2 608 633 — 11 09 490

In this way braking efficiency will be availablewhen you need it.
HillsDrive long or steep downhill gradients in the gearin which the least braking is required. Otherwise,the brake system may overheat, resulting in areduction in the brake system efficiency.Automatic transmission:You can increase the engine’s braking effect byshifting down in the manual mode of the auto‐matic transmission.
Avoid load on the brakesAvoid placing excessive load on the brake
system. Light but consistent brake pressure canlead to high temperatures, brake wear and pos‐sibly even brake failure.◀
Do not drive in neutralDo not drive in neutral or with the engine
stopped, as doing so disables engine braking. Inaddition, steering and brake assist is unavailablewith the engine stopped.◀
Brake disc corrosionCorrosion on the brake discs and contaminationon the brake pads are furthered by:▷ Low mileage.▷ Extended periods when the vehicle is not
used at all.▷ Infrequent use of the brakes.Corrosion occurs when the minimum pressurethat must be exerted by the pads during brakeapplications to clean the discs is not reached.Should corrosion form on the brake discs, thebrakes will tend to respond with a pulsating ef‐fect that generally cannot be corrected.
Condensation under the parked vehicleWhen using the automatic climate control, con‐densation water develops that exits underneaththe vehicle.
Therefore, traces of condensed water under thevehicle are normal.
Seite 158
Driving tips Things to remember when driving
158Online Edition for Part no. 01 40 2 608 633 — 11 09 490

LoadingVehicle equipmentAll standard, country-specific and optionalequipment that is offered in the model series isdescribed in this chapter. Therefore, equipmentis also described that is not available in a vehicle,e. g., because of the selected optional equip‐ment or country variant. This also applies forsafety-related functions and systems.
General informationOverloading the vehicleTo avoid exceeding the approved carrying
capacity of the tires, never overload the vehicle.Overloading can lead to overheating and in‐creases the rate at which damage develops in‐side the tires. This could result in a sudden lossof tire inflation pressure.◀
No fluids in the trunkMake sure that fluids do not leak into the
trunk; otherwise, the vehicle may be damaged.◀
Determining the load limit
1. Locate the following statement on your ve‐hicle’s placard:▷ The combined weight of occupants and
cargo should never exceed XXX kg orYYY lbs. Otherwise, damage to the ve‐
hicle and unstable driving situations mayresult.
2. Determine the combined weight of thedriver and passengers that will be riding inyour vehicle.
3. Subtract the combined weight of the driverand passengers from XXX kilograms or YYYpounds.
4. The resulting figure equals the availableamount of cargo and luggage load capacity.For example, if the YYY amount equals1,000 lbs and there will be four 150 lbs pas‐sengers in your vehicle, the amount of avail‐able cargo and luggage load capacity is400 lbs: 1,000 lbs minus 600 lbs = 400 lbs.
5. Determine the combined weight of luggageand cargo being loaded on the vehicle. Thatweight may not safely exceed the availablecargo and luggage load capacity calculatedin Step 4.
Load
The maximum load is the sum of the weight ofthe occupants and the cargo.The greater the weight of the occupants, theless cargo that can be transported.
Seite 159
Loading Driving tips
159Online Edition for Part no. 01 40 2 608 633 — 11 09 490

Stowing cargo
▷ Heavy cargo: stow as far forward and as lowas possible, ideally directly behind the cargoarea separating wall.
▷ Very heavy cargo: when the rear seat is notoccupied, secure each of the outer safetybelts in the opposite buckle.
▷ Cover sharp edges and corners.▷ If necessary, fold down the rear backrests to
stow cargo.▷ Do not stack cargo above the top edge of the
backrests.▷ Place protective material around any sharp-
edged or pointed objects that could bumpagainst the rear window while the vehicle isin motion.
Securing cargoLashing eyes in the cargo area
To secure the cargo, there are four lashing eyesin the cargo area
Floor netThe floor net can also be used to Secure the loadand to store small parts.
Hook the floor net into the fittings in the cargoarea floor.
Securing cargo▷ Smaller and lighter items: secure with re‐
taining straps, the floor net or draw straps.▷ Larger and heavy objects: secure with cargo
straps.Attach the cargo straps, retaining straps or drawstraps to the lashing eyes in the cargo area.
Securing cargoAlways position and secure the cargo as
described above; otherwise, it can endanger thecar’s occupants if sudden braking or swervingbecomes necessary.Heavy or hard objects should not be carriedloose inside the car; otherwise, they could bethrown around as a result of hard braking, sud‐den swerves, etc., and endanger the occu‐pants.◀
Roof-mounted luggage rackNoteRoof racks are available as special accessories.
AttachmentFollow the installation instructions of the roofrack.
Seite 160
Driving tips Loading
160Online Edition for Part no. 01 40 2 608 633 — 11 09 490

Roof drip rail with flaps
The anchorage points are located in the roof driprail above the doors.Fold the cover outward.
LoadingBecause roof racks raise the vehicle’s center ofgravity when loaded, they have a major effect onvehicle handling and steering response.Therefore, note the following when loading anddriving:▷ Do not exceed the approved roof/axle loads
and the approved gross vehicle weight.▷ Distribute the roof load uniformly.▷ The roof load should not be too large in area.▷ Always place the heaviest pieces on the bot‐
tom.▷ Secure the roof luggage firmly, e.g., tie with
ratchet straps.▷ Drive smoothly. Avoid sudden acceleration
and braking maneuvers. Take corners gen‐tly.
Seite 161
Loading Driving tips
161Online Edition for Part no. 01 40 2 608 633 — 11 09 490

Saving fuelVehicle equipmentAll standard, country-specific and optionalequipment that is offered in the model series isdescribed in this chapter. Therefore, equipmentis also described that is not available in a vehicle,e. g., because of the selected optional equip‐ment or country variant. This also applies forsafety-related functions and systems.
General informationYour vehicle contains advanced technology forthe reduction of fuel consumption and emis‐sions.Fuel consumption depends on a number of dif‐ferent factors.The implementation of certain measures, driv‐ing style and regular maintenance can have aninfluence on fuel consumption and on the envi‐ronmental impact.
Remove unnecessary cargoAdditional weight increases fuel consumption.
Remove attached partsfollowing useRemove auxiliary mirrors, roof or rear luggageracks which are no longer required followinguse.Attached parts on the vehicle impair the aero‐dynamics and increase the fuel consumption.
Close the windows and glasssunroofDriving with the glass sunroof and windowsopen results in increased air resistance andraises fuel consumption.
Check the tire inflationpressure regularlyCheck and, if necessary, correct the tire inflationpressure at least twice a month and before start‐ing on a long trip.Low tire inflation pressure increases rolling re‐sistance and thus raises fuel consumption andtire wear.
Drive away without delayDo not wait for the engine to warm up while thevehicle remains stationary. Start driving rightaway, but at moderate engine speeds.This is the fastest way for the cold engine toreach its operating temperature.
Look well ahead when drivingAvoid unnecessary acceleration and braking.By maintaining a suitable distance to the vehicledriving ahead of you.Driving smoothly and looking ahead reducesfuel consumption.
Avoid high engine speedsUse 1st gear to get the vehicle in motion. Be‐ginning with 2nd gear, accelerate rapidly. Whenaccelerating, shift up before reaching high en‐gine speeds.
Seite 162
Driving tips Saving fuel
162Online Edition for Part no. 01 40 2 608 633 — 11 09 490

When you reach the desired speed, shift into thehighest applicable gear and drive with the en‐gine speed as low as possible and at a constantspeed.As a rule: driving at low engine speeds lowersfuel consumption and reduces wear.The gear shift indicator of your vehicle indicatesthe most fuel efficient gear.
Use coasting conditionsWhen approaching a red light, take your foot offthe accelerator and let the vehicle coast to a halt.On a downhill gradient, take your foot off the ac‐celerator and let the vehicle roll.The flow of fuel is interrupted while coasting.
Switch off the engine duringlonger stopsSwitch off the engine during longer stops, e.g.,at traffic lights, railroad crossings or in trafficcongestion.Fuel savings are achieved after the vehicle isswitched off for only approx. 4 seconds.
Switch off any functions thatare not currently neededFunctions such as seat heating and the rear win‐dow defroster require a lot of energy and con‐sume additional fuel, especially in city and stop-and-go traffic.Therefore, switch off these functions if they arenot actually needed.
Have maintenance carried outHave vehicles maintained regularly to achieveoptimal vehicle economy and operating life.Have the maintenance carried out by your serv‐ice center.
Please also note the BMW Maintenance Sys‐tem, refer to page 277.
ECO PROThe conceptECO PRO supports a driving style that saves onfuel consumption. For this purpose, the enginecontrol and comfort functions, e. g. the climatecontrol output, are adjusted.In addition, context-sensitive instructions canbe displayed that assist in driving in a mannerthat optimizes fuel consumption.The extension of the range that is achieved as aresult can be displayed in the instrument cluster.
Activating ECO PROPress button repeatedly until ECO PROis displayed in the instrument cluster.
Display in the instrument cluster
ECO PRO bonus rangeAn extension of the range can beachieved by an adjusted drivingstyle.This may be displayed as the bo‐nus range in the instrument clus‐
ter.
Driving styleIn the tachometer, a mark in thebar display indicates the currentefficiency of the driving style cor‐responding to the acceleratorpedal position.
▷ Blue display: efficient driving style as long asthe mark moves within the blue range.
▷ Gray display: adjust driving style, e. g. bybacking off the accelerator pedal.
Seite 163
Saving fuel Driving tips
163Online Edition for Part no. 01 40 2 608 633 — 11 09 490

The display switches to blue as soon as all con‐ditions for fuel-economy-optimized driving aremet.
ECO PRO Tip — driving instructionThe arrow indicates that the driv‐ing style can be adjusted to bemore fuel efficient by backing offthe accelerator.
Additional symbols
Symbol Measure
For efficient driving style, back off theaccelerator.
Reduce speed to the selected ECOPRO speed.
Automatic transmission: switch fromS to D or avoid manual shift interven‐tions.
Manual shift transmission: followshifting instructions.
Manual shift transmission: engageneutral for engine stop.
Configuring ECO PRO1. «Settings»2. «Driving mode»3. «Configure ECO PRO»4. Configure the program.
ECO PRO Tip▷ «ECO PRO limit:»:
Set ECO Pro speed at which an ECO PROTip is to be displayed.
▷ «ECO PRO speed warning»:A reminder is displayed if the set ECO PROspeed is exceeded.
ECO PRO climate control»ECO PRO climate control»The climate control is adjusted to be fuel-effi‐cient.The following settings are optimized:▷ Cooling or heat output of the automatic cli‐
mate control▷ Exterior mirror heating▷ Seat heating
ECO PRO PotentialThe percentage of potential savings that can beachieved with the current configuration is dis‐played.
Indications on the Control Display
EfficientDynamicsInformation on fuel consumption and technol‐ogy can be displayed during driving.
1. «Vehicle Info»2. «EfficientDynamics»
Displaying fuel consumption historyThe average fuel consumption can be displayedwithin an adjustable time frame.
«Consumption history»
Adjusting fuel consumption historytime frame
Select the symbol.
Seite 164
Driving tips Saving fuel
164Online Edition for Part no. 01 40 2 608 633 — 11 09 490

Resetting fuel consumption history1. «Options» Open.2. «Reset consumption history»
Displaying EfficientDynamics infoThe current efficiency can be displayed.
«EfficientDynamics Info»The following systems are displayed:▷ Automatic engine start/stop function.▷ Energy recovery.▷ Climate control output.
Seite 165
Saving fuel Driving tips
165Online Edition for Part no. 01 40 2 608 633 — 11 09 490

Online Edition for Part no. 01 40 2 608 633 — 11 09 490

NavigationThis chapter contains various examples of howthe navigation system can guide you reliably to
your destination.
Online Edition for Part no. 01 40 2 608 633 — 11 09 490

Navigation systemVehicle equipmentAll standard, country-specific and optionalequipment that is offered in the model series isdescribed in this chapter. Therefore, equipmentis also described that is not available in a vehicle,e. g., because of the selected optional equip‐ment or country variant. This also applies forsafety-related functions and systems.
General informationThe navigation system can determine the pre‐cise position of the vehicle, with the aid of sat‐ellites and vehicle sensors, and can reliablyguide you to every entered destination.Navigation data are stored in the vehicle and canbe updated.
Entries in stationary vehicleEnter data only when the vehicle is sta‐
tionary, and always give priority to the applicabletraffic regulations in the event of any contradic‐tion between traffic and road conditions and theinstructions issued by the navigation system.Failure to take to this precaution can place youin violation of the law and put vehicle occupantsand other road users in danger.◀
Starting navigation system
1. Press the button on the controller.2. «Navigation»
The navigation system can also be ac‐cessed directly with the button on the con‐
troller.
Destination inputManual destination entry
General informationThe system supports you in entering streetnames and house numbers by automaticallycompleting the entry and providing entry com‐parisons, refer to page 22.Stored town/city and street names can be calledup quickly.▷ If the existing entries should not be changed,
the entries for the state/province and town/city can be skipped.
▷ Destination guidance is started to the town/city center if no street is entered.
Entering a state/province1. «Navigation»2. «Enter address»
3. Select «State/Province» or the displayedstate/province.
Seite 168
Navigation Navigation system
168Online Edition for Part no. 01 40 2 608 633 — 11 09 490

Entering a town/city1. Select «Town/City/Postal Code» or the dis‐
played town/city.
2. Select letters, if necessary.The list is narrowed down further with eachentry.
3. Move the controller to the right.4. Select the town/city name from the list.If there are several towns/cities with the samename:
1. Change to the list of town/city names.2. Highlight the town/city.3. Select the town/city.
Entering the postal code1. Select «Town/City/Postal Code» or the dis‐
played town/city.2. Select the symbol.3. Select the numbers.4. Change to the list of postal codes and towns/
cities.5. Highlight the entry.6. Selecting an entry.
Entering a street and intersection1. Select «Street» or the displayed street.2. Enter a street and intersection in the same
way as you would enter a town/city.If there are several streets with the same name:
1. Change to the list of street names.2. Highlight the street.
3. Select the street.
Alternative: enter the street addressand house number1. Select «Street» or the displayed street.2. Enter the street as you would the town/city.3. «House number»4. Select the numbers.5. Change to the list of house numbers.6. Select a house number or range of house
numbers.
Street does not exist in the destinationcity/townThe desired street does not exist in the specifiedcity/town because it belongs to another part ofthe city/town.
1. «Navigation»2. «Enter address»3. Select «Street» or the displayed street.4. Change to the list of street names.5. Select «In» the displayed country.
All streets of the selected state/province areoffered. The associated town/city is dis‐played after the street name.
6. Select the letters.7. Change to the list of street names.8. Highlight the street.9. Select the street.
Seite 169
Navigation system Navigation
169Online Edition for Part no. 01 40 2 608 633 — 11 09 490

Starting destination guidance afterentering the destination1. «Accept destination»2. «Start guidance» or «Add as another
destination»Add, refer to page 175, a destination as afurther destination.
Address book
Selecting a destination from theaddress book1. «Navigation»2. «Address book»
Contacts with addresses are displayed ifthese have been checked as destinations.If the mobile phone does not display thecontacts with addresses, they must first bechecked as a destination, refer topage 248.
3. Select a contact in the list or, if desired, with»A-Z search».
4. «Business address» or «Home address»
Storing the destination in the addressbookAfter entering the destination, store the desti‐nation in the address book.
1. «Navigation»2. «Map»3. «Guidance»4. «Options» Open.
5. «Store as new contact» or «Add to existingcontact»
6. Select an existing contact, if available.7. «Business address» or «Home address»8. Enter «Last name» and, if necessary, «First
name».9. «Store in vehicle»
Storing the positionThe current position can be stored in the ad‐dress book.
1. «Navigation»2. «Options» Open.3. «Store position as contact» or «Add position
to contact»
4. Depending on the selection, choose an ex‐isting contact from the list. Select the typeof address and enter the first and last names.
5. «Store in vehicle»
Editing or deleting an address1. «Navigation»2. «Address book»
Seite 170
Navigation Navigation system
170Online Edition for Part no. 01 40 2 608 633 — 11 09 490

3. Highlight the entry.4. «Options» Open.5. «Edit in Contacts» or «Delete entry»
Using the home address as thedestinationThe home address must be stored. Specify thehome address, refer to page 247.
1. «Navigation»2. «Address book»3. «Home»
4. «Start guidance»
Last destinations
At a glanceThe destinations previously entered are storedautomatically.The destinations can be called up and used as adestination for destination guidance.
Calling up the last destination1. «Navigation»2. «Last destinations»
Starting destination guidance1. «Navigation»2. «Last destinations»3. Select the destination.4. «Start guidance»
Editing the destination1. «Navigation»2. «Last destinations»3. Highlight the destination.4. Open «Options».5. «Edit destination»
Deleting the last destinations1. «Navigation»2. «Last destinations»3. Highlight the destination.4. Open «Options».5. «Delete entry» or «Delete all last
destinations»
Special destinations
General informationEven with the most current navigation data, in‐formation regarding particular individual desti‐nations may have changed. For instance, certaingas stations may not be operating.
Opening the search for specialdestinationsTo select special destinations, e.g., hotels ortourist attractions:
1. «Navigation»2. «Points of Interest»3. Select the search function.
Online Search1. «Google™ Local Search»2. Select a special destination.
Seite 171
Navigation system Navigation
171Online Edition for Part no. 01 40 2 608 633 — 11 09 490

3. Select the symbol.4. «Start guidance»
A-Z search1. «A-Z search»2. «Town/City»
Select or enter the town/city.3. «Category»4. Select the category.5. «Category details»
For some special destinations, multiple cat‐egory details can be selected. Move thecontroller to the left to leave the categorydetails.
6. «Keyword»7. Enter the keyword.
A list of the special destinations is displayed.8. Select a special destination.
Details are displayed.If multiple details are stored, you can leafthrough the pages.If a phone number is available, a connectioncan be established if necessary.
9. Select the symbol.»Start guidance» or «Add as anotherdestination»Add, refer to page 175, a destination as afurther destination.
«Start search»: if a search term is not entered,the search is repeated with the previous searchterm.
Category search1. «Category search»2. «Town/City»
Select or enter the town/city.3. «Category»4. Select the category.5. «Category details»
For some special destinations, multiple cat‐egory details can be selected. Move thecontroller to the left to leave the categorydetails.
6. «Start search»A list of the special destinations is displayed.
7. Select a special destination.Details are displayed.If multiple details are stored, you can leafthrough the pages.If a phone number is available, a connectioncan be established if necessary.
8. Select the symbol.»Start guidance» or «Add as anotherdestination»Add, refer to page 175, a destination as afurther destination.
Display of special destinationsList of special destinations: special destinationsare organized by distance and are displayed witha directional arrow to the special destination.On the split screen, special destinations of theselected category are displayed in the map viewas symbols. The display depends on the scaleof the map and the category.
Destination entry via BMW AssistA connection is established to the Conciergeservice, refer to page 251.
1. «Navigation»2. «Enter address»3. «Options» Open.4. «BMW Assist dest. entry»
Seite 172
Navigation Navigation system
172Online Edition for Part no. 01 40 2 608 633 — 11 09 490

Displaying special destinations in themapTo display symbols of the special destinationsin the map view:
1. «Navigation»2. «Map»3. «Options» Open.4. «Display Points of Interest»5. Select the setting.
Destination entry by map
Selecting the destination1. «Navigation»2. «Map»
The current position of the vehicle is indi‐cated on the map.
3. «Interactive map»
4. Select the destination with crosshairs.▷ To change the scale: turn the controller.▷ To shift the map: move the controller in
the required direction.▷ To shift the map diagonally: move the
controller in the required direction andturn it.
Specifying the streetIf the system does not recognize a street, one ofthe following is displayed:▷ The name of a street nearby.▷ The county.▷ The coordinates of the destination.
Additional functionsAdditional functions are available on the inter‐active map after the controller is pressed.
▷ Select the symbol.»Start guidance» or «Add as anotherdestination»
▷ «Exit interactive map»: return to the mapview.
▷ «View in northern direction» or «View indriving direction»
▷ «Display destination»: the map sectionaround the destination is displayed.
▷ «Display current location»: the map sectionaround your current location is displayed.
▷ «Find points of interest»: the search for spe‐cial destinations is started.
Destination entry by voice
General information▷ Instructions for voice activation system, re‐
fer to page 23.▷ When making a destination entry by voice,
you can change between voice operationand iDrive.
▷ To have the available spoken instructionsread out loud: ›Voice commands‹
Saying the entries▷ The town/city, street, and house number
can be entered as a single command.▷ Countries, towns and cities, streets, and in‐
tersections can be said as whole words or
Seite 173
Navigation system Navigation
173Online Edition for Part no. 01 40 2 608 633 — 11 09 490

spelled in the language of the system. Setthe language, refer to page 84.Example: to enter a town/city in a US stateas a whole word, the language of the systemmust be English.
▷ Spell the entry if the spoken language andthe language of the system differ.
▷ Say the letters smoothly, and avoid exag‐gerating the pronunciation and insertinglengthy pauses between the letters.
▷ The options available for entering data de‐pend on the navigation data and the countryand language settings.
Entering an address in a command
1. Press the button on the steeringwheel.
2. ›Enter address‹3. Wait for a request from the system.4. Say the address in the suggested order.5. Continue making the entry as prompted by
the system.If necessary, individually name the separatecomponents of the address, e.g., the town/city.
Entering a town/city separatelyThe name of the town/city can be said as aword or spelled out.With the destination entry menu displayed:
1. Press the button on the steeringwheel.
2. ›City‹ or ›Spell city‹.3. Wait for the system to prompt you for the
town/city.4. Say the name of the town/city, or say at least
the first three letters.Depending on the entry, up to 20 towns/cit‐ies may be suggested.
5. Select the town/city.
▷ To select a recommended town/city: ›Yes‹
▷ To select a different town/city: ›Newentry‹
▷ Select an entry: ›Entry …‹ e.g., entry 2▷ To spell an entry: ›Spell city‹
6. Continue making the entry as prompted bythe system.
If there are several towns/cities with the samename:Towns/cities of the same name are grouped in alist and displayed as one location followed by anellipsis.
1. Select an entry: ›Yes‹ or ›Entry …‹ e.g., en‐try 2.
2. Select the desired town/city.
Entering a street or intersectionseparatelyEnter a street and intersection in the same wayas you would enter a town/city.
Entering a house number separatelyDepending on the data in the navigation system,house numbers up to number 2,000 can be en‐tered.
1. ›House number‹2. Say the house number.
Say each digit separately.3. Continue making the entry as prompted by
the system.
Planning a trip with intermediatedestinations
New tripA trip can be planned with several intermediatedestinations.
1. «Navigation»2. «Map»
Seite 174
Navigation Navigation system
174Online Edition for Part no. 01 40 2 608 633 — 11 09 490

3. Move the controller to the left if necessary.4. «Guidance»5. «Enter new destination»6. Select the type of destination entry.
7. Enter the intermediate destination.8. «Start guidance»
Entering intermediate destinationsA maximum of 30 intermediate destinations canbe entered for one trip.
1. «Enter new destination»2. Select the type of destination entry.3. Enter the intermediate destination.4. «Add as another destination»
The intermediate destination is entered inthe destination list and is highlighted.
5. Turn the controller until the intermediatedestination is located in the desired positionin the list.
6. Press the controller.
Starting the trip1. After all intermediate destinations are en‐
tered, highlight the first destination.If the second destination, for example, ishighlighted when destination guidance isstarted, the first destination is skipped.
2. «Start guidance» This symbol marks the active leg of the
trip.
Storing a tripUp to 30 trips can be stored in the trip list. Ifnecessary, delete existing trips to be able tostore new trips.
1. Open «Options».2. «Store trip»3. Enter the name.4. «OK»
Selecting a stored trip1. «Navigation»2. «Stored trips»3. Select a stored trip.4. «Start guidance»
Reversing the direction of travelIntermediate destinations are displayed in re‐verse order in the list.
1. «Map»2. «Guidance»3. Open «Options».4. «Reverse order of trip dest.»
Intermediate destination options1. «Map»2. «Guidance»3. «Display all trip destinations»4. Select an intermediate destination.
▷ «Edit destination»▷ «Reposition dest. in the trip»: move an
intermediate destination to another po‐sition in the list.
▷ «Delete dest. in the trip»▷ «Go to next dest. in the trip»
Some options are not available for certain trips.
Deleting a stored trip1. «Stored trips»2. Highlight the desired trip.
Seite 175
Navigation system Navigation
175Online Edition for Part no. 01 40 2 608 633 — 11 09 490

3. Open «Options».4. «Delete all trips» or «Delete trip»
Calling up the last trip1. «Navigation»2. «Stored trips»3. «Last trip»4. «Start guidance»
Destination guidanceStarting destination guidance1. «Navigation»2. Make a destination entry, refer to page 168.3. «Accept destination»4. «Start guidance»▷ The route is shown on the Control Display.▷ The distance to the destination/intermedi‐
ate destination and the estimated time of ar‐rival are displayed in the map view.
▷ The arrow view is shown in the instrumentcluster, in the Head-up Display, and on theControl Display where appropriate.
Terminating destination guidance1. «Navigation»2. «Map»3. «Guidance»4. «Stop guidance»
Continuing destination guidanceIf the destination was not reached during the lasttrip, destination guidance can be resumed.»Resume guidance»
Route criteria
General information▷ The route calculated can be influenced by
selecting certain criteria.
▷ The route criteria can be changed when thedestination is entered and during destina‐tion guidance.
▷ Road types are part of the navigation dataand are taken into consideration when plan‐ning a route, such as when avoiding high‐ways.
▷ The recommended route may differ from theroute you would take based on personal ex‐perience.
▷ The settings are stored for the remote con‐trol currently in use.
▷ Destination guidance with traffic bulletins,refer to page 182.
Changing the route criteria1. «Navigation»2. «Map»3. «Route preference»4. Select the criterion:
▷ «Fast route»: time-optimized route,being a combination of the shortest pos‐sible route and the fastest roads.
▷ «ECO PRO route»: optimized com‐bination of the fastest and shortestroute.
▷ «Short route»: short distance, irre‐spective of how fast or slow progress willbe.
▷ «Alternative routes»: if available, alter‐native routes are suggested during ac‐tive route guidance.
Seite 176
Navigation Navigation system
176Online Edition for Part no. 01 40 2 608 633 — 11 09 490

The individual suggestions are high‐lighted in color.
5. Specify additional criteria for the route, ifnecessary:▷ «Avoid highways»: highways are
avoided wherever possible.▷ «Avoid toll roads»: toll roads are avoided
wherever possible.▷ «Avoid ferries»: ferries are avoided
where possible.
RouteDifferent views of the route are available duringdestination guidance:▷ Arrow view in the instrument cluster and on
the Control Display.▷ List of route sections.▷ Map view, refer to page 178.▷ Arrow view in the Head-up Display.
Arrow viewThe following information is displayed duringdestination guidance:▷ Large arrow: current direction of travel.▷ Street name of the currently traveled street.▷ Small arrow: indicates the next change in di‐
rection.▷ Intersection view.▷ Lane information.▷ Traffic bulletins.▷ Distance to the next change in direction.▷ Street name at the next change in direction.
Lane informationOn multi-lane roads, the recommended lanesare marked in the arrow view by a triangle.▷ Solid triangle: best lane.▷ Empty triangle: possible lane. However, an‐
other lane change may be needed shortly.
Displaying list of route sectionsWhen the destination guidance is activated, alist of route sections can be displayed. The driv‐ing distances and traffic bulletins are displayedfor each route section.
1. «Navigation»2. «Route information»3. Highlight route section.
The route section is displayed on the splitscreen.
Bypassing a section of the routeCalculate a new route for a route section.
1. «Navigation»2. «Route information»3. «New route for»
4. Turn the controller. Enter the number ofmiles within which you would like to returnto the original route.
5. Press the controller.
Seite 177
Navigation system Navigation
177Online Edition for Part no. 01 40 2 608 633 — 11 09 490

Resuming the original routeIf the route section should no longer be by‐passed:
1. «Navigation»2. «Route information»3. «New route for:»4. «Remove blocking»
Gas station recommendationThe remaining range is calculated, and if nec‐essary gas stations along the route are dis‐played.Even with the most current navigation data, in‐formation regarding individual gas stations mayhave changed. For instance, certain gas stationsmay not be operating.
1. «Navigation»2. «Route information»3. «Recommended refuel»
A list of the gas stations is displayed.4. Highlight a gas station.
The position of the gas station is displayedon the split screen.
5. Select the gas station.6. Select the symbol.7. «Start guidance»: destination guidance to
the selected gas station is started.»Add as another destination»: the gas sta‐tion is added to the route.
Switching spoken instructions on/offThe setting is stored for the remote control cur‐rently in use.
1. «Navigation»2. «Map»3. «Voice instructions»
Repeating spoken instructions1. «Navigation»2. «Map»3. Highlight the symbol.4. Press the controller twice.
Volume of spoken instructionsTurn the volume button while giving an instruc‐tion until the desired volume is set.
Saving the spoken instructions on theprogrammable memory buttonsThe function for switching the spoken instruc‐tions on/off can be stored on a programmablememory button, refer to page 21, for quick ac‐cess.
Map viewSelecting the map view1. «Navigation»2. «Map»
At a glance
1 Function bar2 Route section with traffic obstruction3 Traffic sign for traffic obstruction4 Planned route5 Current location6 Upper status field7 Lower status field
Seite 178
Navigation Navigation system
178Online Edition for Part no. 01 40 2 608 633 — 11 09 490

Lines in the mapStreets and routes are displayed in different col‐ors and styles depending on their classification.Dashed lines represent railways and ferry con‐nections. Country borders are indicated by thinlines.
Traffic obstructionsSmall triangles along the planned route indicateroute sections with traffic obstructions, depend‐ing on the map scale. The direction of the trian‐gles indicates the direction of the obstruction.The traffic signs indicate the significance of theobstruction.▷ Red traffic sign: the obstruction affects the
planned route or direction.▷ Gray traffic sign: the obstruction does not
affect the planned route or direction.Traffic bulletins, refer to page 180.
Planned routeAfter destination guidance is started, the plan‐ned route is displayed on the map.
Status fieldsShow/hide: press the controller.▷ Upper status field: time, telephone, and en‐
tertainment details.▷ Lower status field: symbol for active desti‐
nation guidance, status of traffic bulletins,time of arrival, and distance to destination.
Function barThe following functions are available in the func‐tion bar:
Symbol Function
Start/end destination guidance.
Switch spoken instructions on/off.
Change the route criteria.
Symbol Function
Search for a special destination.
Display traffic bulletins.
Interactive map.
Set the map view.
Change the scale.
To change to the function bar, move the con‐troller to the left.
Changing the map section «Interactive map»
▷ To shift the map: move the controller in therequired direction.
▷ To shift the map diagonally: move the con‐troller in the required direction and turn it.
Changing the scale1. Select the symbol.2. To change the scale: turn the controller.
Automatically scaled map scaleIn the map view facing north, turn the controllerin any direction until the AUTO scale is dis‐played. The map shows the entire route be‐tween the current location and the destination.
Settings for the map viewThe settings are stored for the remote controlcurrently in use.
1. «Navigation»2. «Map»3. «Options» Open.4. «Settings»Set the map view.▷ «Day/night mode»
Select and create the necessary settingsdepending on the light conditions.
Seite 179
Navigation system Navigation
179Online Edition for Part no. 01 40 2 608 633 — 11 09 490

«Traffic conditions/gray map» active: thesetting is disregarded.
▷ «Satellite images»Depending on availability and resolution,satellite images are displayed in a scale ofapprox. 1 mile to 600 miles/2 km to1,000 km.
▷ «Perspective view in 3D»Prominent areas that are contained in thenavigation data are displayed on the map in3D.
▷ «Traffic conditions/gray map»The map is optimized for displaying trafficbulletins, refer to page 180. Symbols for thespecial destinations are no longer displayed.
Map view for split screenThe map view can be selected for the splitscreen independently from the main screen.
1. «Options» Open.2. «Split screen»3. Move the controller to the right repeatedly
until the split screen is selected.4. Select «Split screen content» or the scale.5. Select the map view.
▷ «Arrow display»▷ «Map facing north»▷ «Map direction of travel»▷ «Map view with perspective»▷ «Position»▷ «Exit ramp view»: selected blind drive‐
ways are displayed three dimensionally.Setting in some cases will affect the dis‐play in the Head-Up Display.
▷ «Traffic conditions/gray map»6. To change the scale: select the split screen
and turn the controller.
Traffic bulletinsAt a glance
General information▷ Display the traffic bulletins from radio sta‐
tions that broadcast the TI Traffic Informa‐tion of a traffic information service. Informa‐tion on traffic obstructions and hazards isupdated continuously.Certain BMW models equipped with navi‐gation have the capability to display real-time traffic information. If your system hasthis capability the following additional termsand conditions apply:An End-User shall no longer have the rightto use the Traffic Data in the event that theEnd-User is in material breach of the termsand conditions contained herein.A. Total Traffic Network, a division of ClearChannel Broadcasting, Inc. (“Total TrafficNetwork”) holds the rights to the traffic in‐cident data and RDS-TMC network throughwhich it is delivered. You may not modify,copy, scan or use any other method to re‐produce, duplicate, republish, transmit ordistribute in any way any portion of traffic in‐cident data. You agree to indemnify, defendand hold harmless BMW of North America,LLC. (“BMW NA”) and Total Traffic Net‐work, Inrix, Inc (and their affiliates) againstany and all claims, damages, costs or otherexpenses that arise directly or indirectly outof (a) your unauthorized use of the traffic in‐cident data or the RDS-TMC network, (b)your violation of this directive and/or (c) anyunauthorized or unlawful activities by you inconnection herewith.B. Total Traffic Network traffic data is infor‐mational only. User assumes all risk of use.Total Traffic Network, BMW NA, and theirsuppliers make no representations aboutcontent, traffic and road conditions, routeusability, or speed.
Seite 180
Navigation Navigation system
180Online Edition for Part no. 01 40 2 608 633 — 11 09 490

C. The licensed material is provided to li‐censee “as is,” and “where is”. Total TrafficNetwork, including, but not limited to, anyand all third party providers of any of the li‐censed material, expressly disclaims, to thefullest extent permitted by law, all warrantiesor representations with respect to the li‐censed material (including, without limita‐tion, that the licensed material will be error-free, will operate without interruption or thatthe traffic data will be accurate), express, im‐plied or statutory, including, without limita‐tion, the implied warranties of merchanta‐bility, non-infringement fitness for aparticular purpose, or those arising from acourse of dealing or usage of trade.D. Neither Total Traffic Network, Inrix, Inc. orBMW NA will be liable to you for any indirect,special, consequential, exemplary, or inci‐dental damages (including, without limita‐tion, lost revenues, anticipated revenues, orprofits relating to the same) arising from anyclaim relating directly or indirectly to use ofthe traffic data, and even if Total Traffic Net‐work, Inrix, Inc., or BMW NA are aware of thepossibility of such damages. These limita‐tions apply to all claims, including, withoutlimitation, claims in contract and tort (suchas negligence, product liability and strict li‐ability). Some states do not allow the exclu‐sion or limitation of incidental or consequen‐tial damages, so those particular limitationsmay not apply to you.
▷ The traffic bulletins are indicated on the mapby symbols.
▷ The traffic bulletins for the surrounding areaare stored in a list.
The symbol in the function bar of the mapview turns red if there are traffic bulletinsthat affect the calculated route.
Switching the reception on/off1. «Navigation»2. «Options» Open.
3. «Receive Traffic Info»
Opening the traffic bulletins1. «Navigation»2. «Map»3. «Traffic Info»
First the traffic bulletins for the calculatedroute are displayed. The traffic bulletins aresorted by their distance from the current po‐sition of the vehicle.
4. Select a traffic bulletin. «More information»: display additional
information.5. Scroll to the next or previous traffic bulletin
if required.
Traffic bulletins on the map
General information»Traffic conditions/gray map» Active: indicationon the control display is switched to shades ofgray. This enables a better view of the trafficbulletins. Day/night mode is not taken into ac‐count in this setting. Symbols and special des‐tinations are not displayed.
1. «Navigation»2. «Map»3. «Options» Open.4. «Settings»5. «Traffic conditions/gray map»
Symbols in the map viewDepending on the scale of the map and the lo‐cation of the traffic obstruction along the route,the symbols for the traffic obstructions are dis‐played.
Additional information in the map viewDepending on the map scale, a traffic obstruc‐tion’s length, direction, and impact are displayedin the map using triangles or gray bars along thecalculated route.
Seite 181
Navigation system Navigation
181Online Edition for Part no. 01 40 2 608 633 — 11 09 490

▷ Red: congestion.▷ Orange: stop-and-go traffic.▷ Yellow: heavy traffic.▷ Green: clear roads.▷ Gray: general traffic bulletins, e.g., construc‐
tion site.The displayed information depends on the par‐ticular traffic information service.
Filtering traffic bulletinsYou can set which traffic bulletins appear on themap.
1. «Navigation»2. «Map»3. «Options» Open.4. «Traffic Info categories»5. Select the desired categories.
Traffic bulletins of the selected category are dis‐played on the map.▷ Traffic bulletins that are relevant to the route
are always shown.▷ For your own safety, traffic bulletins that no‐
tify you of potentially dangerous situations,such as wrong-way drivers, cannot be hid‐den.
Destination guidance with trafficbulletins
General informationDetour suggestions from the navigation systemcan be manually accepted in the semi-dynamic
destination guidance. In the dynamic destina‐tion guidance, they are automatically acceptedin the route guidance.
Semi-dynamic destination guidanceWhen traffic bulletin reception is switched on,semi-dynamic destination guidance is active.The destination guidance system takes theavailable traffic information into account. A mes‐sage is displayed depending on the route, thetraffic bulletins, and the possible detour routes.When there is a traffic obstruction, if possible, adetour is offered.The top part of the message displays:▷ The symbol of the first traffic obstruction,
including the distance at which the trafficobstruction first occurs, if applicable.
▷ The overall length of the traffic obstructionson the route.
▷ The extended driving time due to the trafficobstructions.
The bottom part of the message displays:▷ The recommended detour with the distance
remaining until the detour starts.▷ The difference in the route length compared
to the original route.▷ Time gained using the detour compared to
the original route with the traffic obstruc‐tions.
With the Professional navigation system: in ad‐dition to displaying the original route in white,the split screen also displays the detour.
Accepting the detour «Detour»
In the event of special hazards, e. g., objects onthe road, a message is displayed without a de‐tour suggestion.
Seite 182
Navigation Navigation system
182Online Edition for Part no. 01 40 2 608 633 — 11 09 490

Detours can also be accepted if the traffic mes‐sages are called up in the list.
1. «Navigation»2. «Map»3. «Traffic Info»4. «Detour information»5. «Detour»
Dynamic destination guidanceThe route is automatically changed in the eventof traffic obstructions.▷ The system does not point out traffic ob‐
structions along the original route.▷ Traffic bulletins continue to be displayed on
the map.▷ Depending on road type and the kind and
extent of the traffic obstruction, the calcu‐lated route may lead through the traffic ob‐struction.
▷ Dangerous situations are displayed regard‐less of the setting.
Activating dynamic destination guidance1. «Navigation»2. «Options» Open.3. «Dynamic guidance»
Navigation dataInformation on the navigation data1. «Navigation»2. «Options» Open.3. «Navigation system version»: information on
the data version is displayed.
Updating the navigation data
General informationNavigation data are stored in the vehicle and canbe updated.
Current navigation data and the authorizationcode are available from your service center.▷ Depending on the data volume, a data up‐
date may take several hours.▷ Update during the trip to preserve battery.▷ During the update, only the basic functions
of the navigation system are available.▷ The status of the update can be viewed.▷ The system restarts after the update.▷ Remove the data carrier with the navigation
data after the update.
Performing an update1. Insert the navigation DVD into the DVD
player with the labeled side facing up.2. Follow the instructions on the Control Dis‐
play.3. Enter the navigation DVD authorization
code.4. Change the DVD, if necessary.After interrupting your trip, follow the instruc‐tions on the Control Display.
Viewing the status
1. Press the button.2. «Navigation update»
What to do if…▷ The current transmission position cannot be
displayed?The vehicle is located in an unrecognizedregion, is in a poor reception area, or thesystem is currently determining the posi‐tion. Reception is usually best when youhave an unobstructed view of the sky.
▷ The destination without street information isnot used for route guidance?When city has been input, no downtown canbe determined.
Seite 183
Navigation system Navigation
183Online Edition for Part no. 01 40 2 608 633 — 11 09 490

Input any street in the selected city and startdestination guidance.
▷ The destination is not used for route guid‐ance?The destination data is not contained in thenavigation data. Select a destination that isas close as possible to the original.
▷ Letters for destination input cannot be se‐lected?The stored data do not contain the data ofthe destination.Select a goal that is as close as possible tothe original.
▷ Is the map displayed in shades of gray?»Traffic conditions/gray map» Active: indi‐cation on the control display is switched toshades of gray. This enables a better view ofthe traffic bulletins.
▷ Spoken instructions are no longer outputduring route guidance in front of intersec‐tions?The area has not yet been fully recorded, oryou have left the recommended route andthe system requires a few seconds to cal‐culate a new route suggestion.
Seite 184
Navigation Navigation system
184Online Edition for Part no. 01 40 2 608 633 — 11 09 490

Seite 185
Navigation system Navigation
185Online Edition for Part no. 01 40 2 608 633 — 11 09 490

Online Edition for Part no. 01 40 2 608 633 — 11 09 490

EntertainmentThe chapter helps assure your enjoyment when
receiving radio and television stations and playingCDs, DVDs and tracks from the music collection.
Online Edition for Part no. 01 40 2 608 633 — 11 09 490

ToneVehicle equipmentAll standard, country-specific and optionalequipment that is offered in the model series isdescribed in this chapter. Therefore, equipmentis also described that is not available in a vehicle,e. g., because of the selected optional equip‐ment or country variant. This also applies forsafety-related functions and systems.
General informationThe sound settings are stored for the remotecontrol currently in use.
Treble, bass, balance, andfader▷ «Treble»: treble adjustment.▷ «Bass»: depth adjustment.▷ «Balance»: left/right volume distribution.▷ «Fader»: front/rear volume distribution.
Setting treble, bass, balance, and fader1. «CD/Multimedia», «Radio» or «Settings»2. «Tone»
3. Select the desired tone settings.
4. To adjust: turn the controller.5. To store: press the controller.
EqualizerSetting for individual audio frequency ranges.
Adjusting the equalizer1. «CD/Multimedia», «Radio» or «Settings»2. «Tone»3. «Equalizer»4. Select the desired setting.
5. To adjust: turn the controller.6. To store: press the controller.
Seite 188
Entertainment Tone
188Online Edition for Part no. 01 40 2 608 633 — 11 09 490

Multi-channel playback,surroundChoose between stereo and multi-channel play‐back, surround.
Setting multi-channel playback,surround1. «CD/Multimedia», «Radio» or «Settings»2. «Tone»3. «L7 Surround»
When surround is activated, multi-channel play‐back is simulated when a stereo audio track isplayed.LOGIC7 and LOGIC7 logo are registered trade‐marks of Lexicon, Inc., a Harman InternationalGroup company.
Volume▷ «Speed volume»: speed-dependent volume
control.▷ «PDC»: volume of the PDC signal compared
to the entertainment sound output.▷ «Gong»: volume of the signal, e. g., the safety
belt reminder, compared to the entertain‐ment sound output.
▷ «Microphone»: volume of the microphoneduring a phone call.
▷ «Loudspeak.»: volume of the loudspeakersduring a phone call.
The following volumes are only stored for therespective paired telephone: «Microphone»,»Loudspeak.».
Adjusting the volume1. «CD/Multimedia», «Radio» or «Settings»2. «Tone»3. «Volume settings»4. Select the desired volume setting.
5. To adjust: turn the controller.6. To store: press the controller.
Resetting the tone settings1. «CD/Multimedia», «Radio» or «Settings»2. «Tone»3. «Reset»
Seite 189
Tone Entertainment
189Online Edition for Part no. 01 40 2 608 633 — 11 09 490

RadioVehicle equipmentAll standard, country-specific and optionalequipment that is offered in the model series isdescribed in this chapter. Therefore, equipmentis also described that is not available in a vehicle,e. g., because of the selected optional equip‐ment or country variant. This also applies forsafety-related functions and systems.
Controls
1 Change entertainment sources2 Volume, on/off3 Programmable memory buttons or radio
station buttons4 Change station/track5 Eject CD/DVD6 CD/DVD drive7 Change wave band
Sound outputSwitching on/offWhen the ignition is switched off: press ON/OFFbutton on the radio.
MutingWhen the ignition is switched on or the engineis running: press the ON/OFF button on theradio.
AM/FM stationSelecting a station1. «Radio»2. «FM» or «AM»3. Select the desired station.
All saved stations are stored for the remote con‐trol currently in use.
Changing the stationPress the button.
Storing a station1. «Radio»2. «FM» or «AM»
Seite 190
Entertainment Radio
190Online Edition for Part no. 01 40 2 608 633 — 11 09 490

3. Highlight the desired station.
4. Press the controller for an extended period.5. Select the desired memory location.The stations are stored for the remote controlcurrently in use.With navigation system: the stations can also bestored on the programmable memory buttons,refer to page 21.
Selecting a station manuallyStation selection via the frequency.
1. «Radio»2. «FM» or «AM»3. «Manual»4. To select the frequency: turn the controller.
To store the station: press the controller for anextended period.
Renaming a stationA station with changing station names can berenamed.
1. «Radio»2. «FM» or «AM»
3. Select the desired station.4. «Options» Open.5. «Rename to:»
If necessary, wait until the desired name ap‐pears.
The selected station name is copied to the listof current stations and stored stations.
RDSRDS broadcasts additional information, such asthe station name, in the FM wave band.
Switching the RDS on/off1. «Radio»2. «FM»3. «Options» Open.4. «RDS»
The setting is stored for the remote control cur‐rently in use.
HD Radio™ receptionMany stations broadcast both analog and digitalsignals.License conditionsHD Radio™ technology manufactured under li‐cense from iBiquity Digital Corp. U. S. and For‐eign Patents. HD Radio™ and the HD and HDRadio logos are proprietary trademarks of iBiq‐uity Digital Corp.
Seite 191
Radio Entertainment
191Online Edition for Part no. 01 40 2 608 633 — 11 09 490

Activating/deactivating digital radioreception1. «Radio»2. «FM» or «AM»3. «Options» Open.4. «HD Radio Reception»The setting is stored for the remote control cur‐rently in use.
This symbol is displayed in the status linewhen the audio signal is digital.When setting a station with a digital signal, it maytake a few seconds before the station plays inHD quality.In areas in which the station is not continuouslyreceived in digital mode, the playback switchesbetween analog and digital reception. In thiscase, switch off digital radio reception.
Displaying additional informationSome stations broadcast additional informationon the current track, such as the name of the ar‐tist.
1. Select the desired station.2. «Options» Open.3. «Station info»
Selecting a substation This symbol indicates that a main station also
broadcasts additional substations. The stationname of the main station ends in HD1. Stationnames of the substations end in HD2, HD3, etc.
1. Select the desired station.2. Press the controller.3. Select the substation.When reception is poor, the substation is muted.
Satellite radioGeneral informationThe channels are offered in predefined pack‐ages. The packages must be enabled by tele‐phone.
Navigation bar overview
Symbol Function
Change the list view.
Select the category.
Direct channel entry
Timeshift
Open the My Favorites category/open a favorite.
Manage the favorites.
Traffic Jump
With navigation system: the functions of thenavigation bar symbols can also be stored on theprogrammable memory buttons, refer topage 21.They are stored.
Managing a subscriptionTo be able to enable or unsubscribe from thechannels, you must have reception. It is usuallyat its best when you have an unobstructed viewof the sky. The channel name is displayed in thestatus line.
Enabling channelsThe Unsubscribed Channels category containsall disabled channels.
1. «Radio»2. «Satellite radio»
Seite 192
Entertainment Radio
192Online Edition for Part no. 01 40 2 608 633 — 11 09 490

3. «Category»
4. Select the Unsubscribed Channels cate‐gory.
5. Select the desired channel.The phone number and an electronic serialnumber, ESN, are displayed.
6. Call the phone number to have the channelenabled.
You can unsubscribe from the channels againvia this phone number.
Unsubscribing from channels1. «Radio»2. «Satellite radio»3. «Options» Open.
4. «Manage subscription»
5. The phone number and an electronic serialnumber, ESN, are displayed.
6. Call Sirius to unsubscribe from the chan‐nels.
Selecting channelsYou can only listen to enabled channels.The selected channel is stored for the remotecontrol currently in use.
Via iDrive1. «Radio»2. «Satellite radio»3. Select «All channels» or the desired cate‐
gory.4. Select the desired channel.
Via the buttons on the center consolePress the button.The next channel is selected.
Seite 193
Radio Entertainment
193Online Edition for Part no. 01 40 2 608 633 — 11 09 490

Via direct channel entry1. «Radio»2. «Satellite radio»3. «Set channel»4. Turn the controller until the desired channel
is reached and press the controller.
Storing a channel1. «Radio»2. «Satellite radio»3. If necessary, open «All channels» or the de‐
sired category.4. Select the desired channel.5. Press the controller again.6. Press the controller again to confirm the
highlighted channel.
7. Select the desired memory location.The channels are stored for the remote controlcurrently in use.With navigation system: the stations can also bestored on the programmable memory buttons,refer to page 21.
Changing the list viewThe list view changes every time the first symbolon the navigation bar is pressed.Information on the channel is displayed.
Symbol Meaning
Channel name
Artist
Track
Selecting a category1. «Radio»2. «Satellite radio»3. «Category»4. Select the desired category.
TimeshiftApprox. one hour of the program being broad‐cast on the channel currently being listened tois stored in a buffer. Prerequisite: the signal mustbe available.The stored audio track can be played with a de‐lay following the live broadcast. When the bufferis full, the older tracks are overwritten. The buf‐fer is cleared when a new channel is selected.
Opening the timeshift function1. «Radio»2. «Satellite radio»3. «Replay — Time shift»
▷ The red arrow shows the current playbackposition.
▷ The time difference to the live broadcast isdisplayed next to the buffer bar.For live transmissions: «live».
Seite 194
Entertainment Radio
194Online Edition for Part no. 01 40 2 608 633 — 11 09 490

Timeshift menu
Symbol Function
Go to the live broadcast
Playback/pause
Next track
Previous track
Fast forward
Reverse
Automatic timeshift deactivated/ac‐tivated
Automatic timeshiftWhen the function is activated, audio playbackis stopped automatically in the event of:▷ Incoming and outgoing telephone calls.▷ Activation of the voice activation system.▷ Muting.The audio playback then continues with a timedelay.To activate:
1. «Radio»2. «Satellite radio»3. «Replay — Time shift»4. «Automatic time shift»To deactivate: «Automatic time shift».
Storing favoritesUp to 30 favorites can be stored in the favoriteslist. Available favorites are artist, track, game,league, and team.
Storing the artist, track, or gameIt is only possible to store favorites that are cur‐rently being broadcast. The channel informationmust be available.
1. «Radio»2. «Satellite radio»3. If necessary, open «All channels» or the de‐
sired category.4. Select the desired channel.5. Press the controller again.6. Select the artist, track, or game.
Storing the league or teamLeagues or teams can be added to the favoritesfrom a selection list.
1. «Radio»2. «Satellite radio»3. «Manage favorites»4. «Add sports information»
5. Select the league.6. Select «Add all teams» or the desired team.
Opening the favoritesIf an activated favorite is played back, the fol‐lowing message appears for approx. 20 sec‐onds: «Favorite alert!».
«Favorites»Select the symbol while the message is shown.
Seite 195
Radio Entertainment
195Online Edition for Part no. 01 40 2 608 633 — 11 09 490

The displayed favorite is played.If there is no message, the system changes tothe My Favorites category. All favorites currentlybeing broadcast can be selected from a list.
Managing the favorites
Activating/deactivating the favoritesFavorites can be activated and deactivatedglobally and individually.
1. «Satellite radio»2. «Manage favorites»3. Select «Activate alert» or the desired favor‐
ites.The setting is stored for the remote control cur‐rently in use.
Deleting favorites1. «Satellite radio»2. «Manage favorites»3. Highlight the desired favorite.4. «Options» Open.5. «Delete entry»
Traffic JumpTraffic and weather information for a selectedregion is broadcast every few minutes.
Selecting a region1. «Radio»2. «Satellite radio»3. «Options» Open.
4. «Set jump»5. Select the desired region.The region is stored for the remote control cur‐rently in use.
Activating/deactivating the jump1. «Radio»2. «Satellite radio»3. «Jump to:»Information for the selected region is broadcastas soon as it is available.A new panel opens.Canceling the Traffic Jump: «Cancel».
Symbol Meaning
Information will be broadcast shortly.
Information is currently being broad‐cast.
Select one of the symbols to deactivate TrafficJump.
Automatic updateAbout twice a year, Sirius performs an update ofthe channel names and positions. The updatetakes place automatically and may take severalminutes.
Notes▷ Reception may not be available in some sit‐
uations, such as under certain environmen‐tal or topographic conditions. The satelliteradio has no influence on this.
▷ The signal may not be available in tunnels orunderground garages; next to tall buildings;or near trees, mountains or other powerfulsources of radio interference.
Seite 196
Entertainment Radio
196Online Edition for Part no. 01 40 2 608 633 — 11 09 490

Stored stationsGeneral informationIt is possible to store up to 40 stations.
Calling up a station1. «Radio»2. «Presets»3. Select the desired station.
Storing a stationThe station currently selected is stored.
1. «Radio»2. «Presets»3. «Store station»
4. Select the desired memory location.The list of stored stations is stored for the re‐mote control currently in use.With navigation system and telephone: The sta‐tions can also be stored on the programmablememory buttons, refer to page 21.
Without navigation system andtelephone: On radio station buttons1. Select the desired station.
2. Press the desired button for morethan 2 seconds.
In order to call up a stored station, briefly presscorresponding button.
Deleting a station1. «Radio»2. «Presets»3. Select the desired station.4. «Options» Open.5. «Delete entry»
Seite 197
Radio Entertainment
197Online Edition for Part no. 01 40 2 608 633 — 11 09 490

CD/multimediaVehicle equipmentAll standard, country-specific and optionalequipment that is offered in the model series isdescribed in this chapter. Therefore, equipmentis also described that is not available in a vehicle,e. g., because of the selected optional equip‐ment or country variant. This also applies forsafety-related functions and systems.
Controls
1 Change entertainment sources2 Volume, on/off3 Programmable memory buttons or radio
station buttons4 Change station/track5 Eject CD/DVD6 CD/DVD drive7 Change wave band
Sound outputSwitching on/offWhen the ignition is switched off: press ON/OFFbutton on the radio.
MutingWhen the ignition is switched on or the engineis running: press the ON/OFF button on theradio.
CD/DVDPlayback
Loading the CD/DVD playerInsert the CD/DVD with the printed side up.Playback begins automatically.Reading can take a few minutes with com‐pressed audio files.
Starting playbackA CD/DVD is located in the CD/DVD player orDVD changer.
1. «CD/Multimedia»2. «CD/DVD»3. Select the desired CD or DVD.
Symbol Meaning
CD/DVD player
… DVD changer
Seite 198
Entertainment CD/multimedia
198Online Edition for Part no. 01 40 2 608 633 — 11 09 490

Playable formats▷ DVD: DVD-ROM, DVD-R, DVD+R, DVD-
RW, DVD+RW, DVD-R DL, DVD+R DL, DVDaudio (video part only), DVD video.
▷ CD: CD-ROM, CD-R, CD-RW, CD-DA, VCD,SVCD.
▷ Compressed audio files: MP3, WMA, AAC,M4A.
CD/DVD removal
1. Press the button.The CD/DVD is partially ejected.
2. Remove the CD/DVD.
Audio playback
Selecting the track using the buttonPress the button repeatedly until thedesired track is played.
Selecting a track via iDrive
Audio CDs
Select the desired track to begin playback.
CDs/DVDs with compressed audio filesDepending on the data, some letters and num‐bers of the CD/DVD may not be displayed cor‐rectly.
1. Select the directory if necessary.
To go up a level in the directory: move thecontroller to the left.
2. Select the desired track to begin playback.
Displaying information on the track
If information about a track has been stored, it isdisplayed automatically:▷ Interpret.▷ Album track.▷ Number of tracks on the CD/DVD.▷ File name of track.
Random playback1. «CD/Multimedia»2. «CD/DVD»
Seite 199
CD/multimedia Entertainment
199Online Edition for Part no. 01 40 2 608 633 — 11 09 490

3. Select the desired CD or DVD.4. «Options» Open.5. «Random»
All tracks of the CD/DVD are played back in ran‐dom order.
Fast forward/reversePress and hold the button.
Automatic repeatThe selected CDs or DVDs are repeated auto‐matically.
Video playback
Country codesOnly DVDs with the code of the home region canbe played back; also refer to the information onthe DVD.
Code Region
1 USA, Canada
2 Japan, Europe, Middle East, South Af‐rica
3 Southeast Asia
4 Australia, Central and South America,New Zealand
5 Northwest Asia, North Africa
6 China
0 All regions
PlaybackThe video image is displayed on the front Con‐trol Display up to a speed of approx. 2 mph/3 km/h; in some countries, it is only displayed if theparking brake is set or if the automatic trans‐mission is in position P.
DVD video1. «CD/Multimedia»2. «CD/DVD»3. Select a DVD with video content.4. «DVD menu»
VCD/SVCD1. «CD/Multimedia»2. «CD/DVD»3. Select a CD with video content.4. «Select track»5. Select the desired track.
Video menuTo open the video menu: turn the controller dur‐ing playback.Press the controller when «Back» is displayed.
Symbol Function
Open the DVD menu.
Start playback.
Pause
Stop
Next chapter
Seite 200
Entertainment CD/multimedia
200Online Edition for Part no. 01 40 2 608 633 — 11 09 490

Symbol Function
Previous chapter
Fast forward
Reverse
In fast forward/reverse: the speed increases ev‐ery time the controller is pressed. To stop, startplayback.
DVD menu1. If necessary, turn the controller to open the
video menu.2. «DVD menu»
The DVD menu is displayed. The display de‐pends on the contents of the DVD.
3. To select menu items: move the controllerand press it.
To change to the video menu: turn the controllerand press it.
DVD/VCD settingsFor some DVDs, settings can only be made viathe DVD menu; refer also to the information onthe DVD.
Selecting the languageThe languages that are available depend on theDVD.
1. Turn the controller during playback.2. Open «Options».
3. «Audio/language»
4. Select the desired language.
Selecting the subtitlesThe subtitles that are available depend on theDVD.
1. Turn the controller during playback.2. Open «Options».3. «Subtitles»4. Select the desired language or «Do not
display subtitles».
Setting the brightness, contrast and color1. Turn the controller during playback.2. Open «Options».3. «Display settings»
Seite 201
CD/multimedia Entertainment
201Online Edition for Part no. 01 40 2 608 633 — 11 09 490

4. «Brightness», «Contrast» or «Color»
5. Turn the controller until the desired settingis reached and press the controller.
Selecting the zoomDisplay the video image on the entire screen.
1. Turn the controller during playback.2. Open «Options».3. «Additional options»4. «Zoom mode»
Selecting a trackDVD video:
1. Turn the controller when the DVD menu isdisplayed.
2. Open «Options».3. «Additional options»4. «Select title»5. Select the desired track.VCD/SVCD:
1. «Select track»2. Select the desired track.
Selecting the camera angleThe availability of a different camera angle de‐pends on the DVD and the current DVD track.
1. Turn the controller during playback.2. Open «Options».3. «Additional options»4. «Viewing angle»5. Select the desired camera angle.
Opening the main menu, backThese functions are not contained on everyDVD. Therefore, they may not be available foruse.
DVD changer
In the cargo area
The DVD changer is stored behind the left sidetrim in the cargo area.
Controls and displays
1 Empty DVD compartments2 LED on DVD slot3 Buttons for DVD compartments
Seite 202
Entertainment CD/multimedia
202Online Edition for Part no. 01 40 2 608 633 — 11 09 490

4 DVD slot5 Fill DVD compartments
Filling the DVD compartmentsindividually
1. Press the button.The LED on the first empty compartmentflashes.
2. Select another compartment if necessary.3. Wait for the LEDs on the DVD slot to flash.4. Insert a single CD or DVD in the middle.
The CD/DVD is drawn in automatically andplaced into the selected compartment.
Sliding in CDs/DVDsDo not insert the CD/DVD until the LEDs
on the DVD slot are flashing; otherwise, the CD/DVD or the DVD changer could be damaged.Do not continue to push on the CD/DVD; thismay cause it to jam and prevent it from beingable to eject again.◀
Filling all empty DVD compartments
1. Hold the button down.The LEDs on the empty CD compartmentsflash.
2. Wait for the LEDs on the DVD slot to beginflashing and then insert each CD or DVD intothe center of the slot.The CDs/DVDs are drawn in automaticallyand placed into the vacant compartments.
Sliding in CDs/DVDsDo not insert the CD/DVD until the LEDs
on the DVD slot are flashing; otherwise, the CD/DVD or the DVD changer could be damaged.Do not continue to push on the CD/DVD; thismay cause it to jam and prevent it from beingable to eject again.◀
After they are inserted, it may take several mi‐nutes for the CDs/DVDs to be read in.
Removing a single CD/DVD
1. Press the button.2. Select the DVD compartment.
The CD/DVD is partially ejected.3. Remove the CD/DVD.
Removing all CDs/DVDs
1. Hold the button down.2. Remove the CDs/DVDs.
MalfunctionsIf the LEDs on the DVD slot and on the com‐partments are flashing rapidly, a malfunction hasoccurred.To eliminate the malfunction:
1. Press one of the following buttons:▷
▷
The CD/DVD last inserted is ejected.2. Remove the CD/DVD.The DVD changer is functional again after theLEDs stop flashing rapidly.
Audio playbackThe audio track of a DVD can be played backeven if video playback is not possible in the ve‐hicle.Only the main film without the previews or extrascan be played back.
Starting playbackA DVD is located in the DVD changer.
1. «CD/Multimedia»2. «CD/DVD»
Seite 203
CD/multimedia Entertainment
203Online Edition for Part no. 01 40 2 608 633 — 11 09 490

3. Select the desired DVD.
Selecting a chapter using the buttonPress the button repeatedly until thedesired chapter is played.
Selecting a chapter using iDrive1. «CD/Multimedia»2. «CD/DVD»3. Select the desired DVD.4. Select the desired chapter.
Fast forward/reversePress and hold the button.
Selecting the languageThe languages that are available depend on theDVD.
1. «CD/Multimedia»2. «CD/DVD»3. Select the desired DVD.4. Open «Options».5. «Audio/language»6. Select the desired language.
Notes
CD/DVD player and changerDo not remove the coverBMW CD/DVD players and changers are
officially designated Class 1 laser products. Donot operate if the cover is damaged; otherwise,severe eye damage may occur.◀
CDs and DVDsUse of CDs/DVDs
▷ Do not use self-recorded CDs/DVDswith labels applied, as these can be‐come detached during playback dueto heat buildup and can cause irrepar‐able damage to the device.
▷ Only use round CDs/DVDs with a standarddiameter of 4.7 in/12 cm and do not playCDs/DVDs with an adapter, e.g., single CDs;otherwise, the CDs or the adapter may jamand no longer eject.
▷ Do not use combined CDs/DVDs, e.g., DVDPlus, as the CDs/DVDs can jam and will nolonger eject.◀
General malfunctions▷ CD/DVD changers and players have been
optimized for performance in vehicles. Insome instances they may be more sensitiveto faulty CDs/DVDs than stationary deviceswould be.
▷ If a CD/DVD cannot be played, first checkwhether it has been inserted correctly.
HumidityHigh levels of humidity can lead to condensationon the CD/DVD or the laser’s scan lens, andtemporarily prevent playback.
Malfunctions involving individual CDs/DVDsIf malfunctions occur only with particular CDs/DVDs, this can be due to one of the followingcauses:
Home-recorded CDs/DVDs▷ Possible reasons for malfunctions with
home-recorded CDs/DVDs are inconsistentdata creation or recording processes, orpoor quality or old age of the blank CD/DVD.
▷ Only label CDs/DVDs on the upper side witha pen intended for this purpose.
Seite 204
Entertainment CD/multimedia
204Online Edition for Part no. 01 40 2 608 633 — 11 09 490

Damage▷ Avoid fingerprints, dust, scratches and
moisture.▷ Store CDs/DVDs in a sleeve.▷ Do not subject CDs/DVDs to temperatures
over 122 ℉/50 ℃, high humidity or directsunlight.
CDs/DVDs with copy protectionCDs/DVDs are often provided with a copy pro‐tection feature by the manufacturer. This canmean that some CDs/DVDs cannot be played orcan only be played to a limited extent.
MACROVISIONThis product contains copyrighted technologythat is based on multiple registered US patentsand the intellectual property of the MacrovisionCorporation and other manufacturers. The useof this copy protection must be approved byMacrovision. Media protected by this product -unless otherwise agreed with Macrovision — mayonly be used for private purposes. Copying ofthis technology is prohibited.
DTS Digital Surround™Manufactured under license under U.S.Patent Numbers: 5,451,942;
5,956,674; 5,974,380; 5,978,762; 6,487,535 &and other patents granted and registered in theUSA and worldwide. DTS and the logo are reg‐istered trademarks & DTS Digital Surround andthe DTS logos are trademarks of DTS Inc. ©DTS, Inc. All rights reserved.
Music collectionStoring music
General informationMusic tracks from CDs/DVDs and USB devicescan be stored in the music collection on a harddisc in the vehicle and played from there.
▷ Audio CD: tracks are converted into a com‐pressed audio format. If available, informa‐tion on the album, such as the artist, isstored as well.
▷ CD/DVD or USB device with compressedaudio files: the entire content of the CD/DVDor the USB device is stored in the vehicle asan album. The WMA, MP3, M4A, and AACformats are stored. Individual tracks and di‐rectories can be deleted later, Deleting atrack and directory, refer to page 209.Tracks with DRM copy protection can bestored but cannot be played back.
Backing up music dataRegularly back up the music data; other‐
wise, it could be lost if there is a fault on the harddisk.◀
Music recognition technology and re‐lated data are provided by Gracenote®.
Gracenote is the industry standard in music rec‐ognition technology and related content deliv‐ery. For more information, please visitwww.gracenote.com.CD and music-related data from Gracenote, Inc.,copyright © 2000-2009 Gracenote. GracenoteSoftware, copyright © 2000-2009 Gracenote.This product and service may practice one ormore of the following U.S. Patents: #5,987,525;#6,061,680; #6,154,773, #6,161,132,#6,230,192, #6,230,207, #6,240,459,#6,330,593, and other patents issued or pend‐ing. Some services supplied under license fromOpen Globe, Inc. for U.S. Patent: #6,304,523.
Storing from a CD/DVD1. Insert a CD or DVD into the CD/DVD player.2. «CD/Multimedia»3. «CD/DVD»
Seite 205
CD/multimedia Entertainment
205Online Edition for Part no. 01 40 2 608 633 — 11 09 490

4. Select the symbol for the CD/DVD player.5. «Store in vehicle»
The music collection is displayed and the firsttrack of the CD/DVD is played back. During thestorage process, the tracks are played in se‐quence.Observe the following during the storage proc‐ess:Do not switch to the CD/DVD player and do notremove the CD/DVD from the CD/DVD player asthis will interrupt the storage process. You canswitch to the other audio sources without inter‐rupting the storage process. Tracks from thecurrent CD/DVD that have already been storedcan be called up.
Interrupting storage1. «CD/Multimedia»2. «CD/DVD»3. «Storing…»
4. «Cancel storing»The storage process is interrupted and can becontinued at any time.
Continuing the storage process1. «CD/Multimedia»2. «CD/DVD»3. Select the symbol for the CD/DVD player.4. «Continue storing»Storage of the CD/DVD continues at the begin‐ning of the track at which storage was inter‐rupted.
Album informationDuring storage, information such as the name ofthe artist is stored with the track, if this informa‐tion is available in the vehicle database or on theCD.To update the database, contact your servicecenter.
Storing from a USB deviceTo store music, a suitable device must be con‐nected to the USB interface in the glove com‐partment.▷ Suitable devices: USB mass storage devi‐
ces, such as USB flash drives or MP3 playerswith a USB interface.
▷ Unsuitable devices: USB hard drives, USBhubs, USB memory card readers with mul‐tiple inserts, Apple iPod/iPhone. Music fromthe Apple iPod/iPhone can be played via theAUX-IN port in the center armrest.
▷ File systems: popular file systems for USBdevices are supported. FAT 32 is the rec‐ommended format.
1. Connect the USB device to the USB inter‐face in the glove compartment, refer topage 149.
2. «CD/Multimedia»3. «Music collection»4. «Options» Open.
Seite 206
Entertainment CD/multimedia
206Online Edition for Part no. 01 40 2 608 633 — 11 09 490

5. «Music data import/export»6. «Import music (USB)»
Playing music
Music searchAll tracks for which additional information hasbeen stored can be accessed by the musicsearch. Tracks without additional informationcan be called up via the corresponding album,refer to page 208.
1. «CD/Multimedia»2. «Music collection»3. «Music search»
4. Select the desired category.
5. Select the desired entry:
▷ Select «A-Z search», refer to page 22,and input the desired entry.
▷ Select the desired entry from the list.6. Select other categories if you wish.
The tracks found are listed in alphabeticalorder.Not all categories need to be selected. Forexample, to search for all tracks by a certainartist, call up that artist only. All of the tracksby that artist are then displayed.
7. «Start play»The list of tracks is repeated automatically.
Restarting the music search»New search»
Current playbackThe list of tracks that was generated last by themusic search, or the album that was selectedlast.
1. «CD/Multimedia»2. «Music collection»3. «Current playback»
4. Select the desired track, if necessary.
Top 50The 50 most frequently played tracks.
1. «CD/Multimedia»2. «Music collection»3. «Top 50″4. Select the desired track, if necessary.
Seite 207
CD/multimedia Entertainment
207Online Edition for Part no. 01 40 2 608 633 — 11 09 490

AlbumsAll stored albums, listed in order of their storagedates.
Symbol Format
Audio CD
Compressed audio files
1. «CD/Multimedia»2. «Music collection»3. Select the desired album.
Depending on the album, the tracks or thesubdirectories of the album are displayed.The first track is played automatically, if pos‐sible.
4. Change directories if needed to selecttracks.To go up a level in the directory: move thecontroller to the left.
Random playbackAll tracks of the selection are played back in ran‐dom order.
1. «CD/Multimedia»2. «Music collection»
3. Open «Options».4. «Random»
Managing music
Albums
Renaming an albumThe name of the album, if available, is automat‐ically entered when the album is stored. If thename is not available, it can be changed later ifdesired.
1. «CD/Multimedia»2. «Music collection»3. Highlight the desired album.4. Open «Options».5. «Rename album»
6. Select the letters individually.
Seite 208
Entertainment CD/multimedia
208Online Edition for Part no. 01 40 2 608 633 — 11 09 490

Deleting an albumAn album cannot be deleted while a track fromthat album is being played.
1. «CD/Multimedia»2. «Music collection»3. Highlight the desired album.4. Open «Options».5. «Delete album»
Deleting a track and directoryA track cannot be deleted while it is beingplayed.A directory cannot be deleted while a track fromthat directory is being played.
1. «CD/Multimedia»2. «Music collection»3. Highlight the directory or track.4. Open «Options».5. «Delete folder» or «Delete track»
Free memory capacityDisplay the free memory capacity in the musiccollection.
1. «CD/Multimedia»2. «Music collection»3. Open «Options».4. «Free memory»
Music collection
Backing up the music collectionThe entire music collection can be stored on aUSB device. Make sure there is enough freememory capacity on the USB device.Depending on the number of tracks, backing upthe music collection may take several hours.
Therefore, it is best to perform the backup dur‐ing a long trip.
1. Starting the engine.2. Connect the USB device to the USB inter‐
face in the glove compartment.3. «CD/Multimedia»4. «Music collection»5. Open «Options».6. «Music data import/export»
7. «Backup music on USB»
Storing the music collection in the vehicleWhen storing from the USB device, the existingmusic collection in the vehicle is replaced.
1. «CD/Multimedia»2. «Music collection»3. Open «Options».4. «Music data import/export»5. «Restore music from USB»
Seite 209
CD/multimedia Entertainment
209Online Edition for Part no. 01 40 2 608 633 — 11 09 490

Deleting the music collection1. «CD/Multimedia»2. «Music collection»3. Open «Options».4. «Delete music collection»
External devicesAt a glance
Symbol Meaning
AUX-IN port
USB audio interface
Mobile phone audio interface
Bluetooth audio
AUX-IN port
At a glance▷ For connecting audio devices, e.g., MP3
player. The sound is output on the vehicleloudspeakers.
▷ Recommendation: use medium tone andvolume settings on the audio device. Thetone depends on the quality of the audiofiles.
Connecting
The AUX-IN port is located in the center armrest.Connect the headphones or line-out connectorof the device to the jack plug.
Playback1. Connect the audio device, switch it on and
select a track on the audio device.2. «CD/Multimedia»3. If necessary. «External devices».4. «AUX front»The sound is played back on the vehicle loud‐speakers.
VolumeThe volume of the sound output is dependenton the audio device. If this volume differs mark‐edly from the volume of the other audio sources,it is advisable to adjust the volumes.
Adjusting the volume1. «CD/Multimedia»2. If necessary. «External devices».3. «AUX front»4. «Volume»
5. Turn the controller until the desired volumeis set and press the controller.
USB audio interface/mobile phoneaudio interface
At a glanceIt is possible to connect external audio devices.Operation can be performed via iDrive. Thesound is output on the vehicle loudspeakers.
Seite 210
Entertainment CD/multimedia
210Online Edition for Part no. 01 40 2 608 633 — 11 09 490

Connectors for external devices▷ Connection via USB audio interface: Apple
iPod/iPhone, USB devices, e.g., MP3 play‐ers, USB flash drives, or mobile phones thatare supported by the USB audio interface.
▷ Connection via snap-in adapter when equip‐ped with extended connectivity of the musicplayer in the mobile phone: Apple iPhone ormobile phones.Playback is only possible when there is noaudio device attached to the AUX-IN port.
Due to the large number of different audio devi‐ces available on the market, it cannot be ensuredthat every audio device/mobile phone is opera‐ble on the vehicle.Ask your service center about suitable audio de‐vices/mobile phones.
Audio filesStandard audio files can be played back:▷ MP3.▷ WMA.▷ WAV (PCM).▷ AAC, M4A.▷ Playback lists: M3U, WPL, PLS.
File systemsPopular file systems for USB devices are sup‐ported. FAT 32 is the recommended format.
Connection of Apple iPod/iPhone viaUSB audio interface
USB audio interface is located in the center arm‐rest.To connect the device, use the special cableadapter for the Apple iPod/iPhone, availablefrom your service center, or a flexible adaptercable.
Connect the Apple iPod/iPhonewith the AUX-IN port and USB in‐terface using the special cableadapter or with the USB interfaceusing the flexible adapter cable.
The Apple iPod/iPhone menu structure is sup‐ported by the USB audio interface.
Connection of a USB device via theUSB audio interface
USB audio interface is located in the center arm‐rest.Connect using a flexible adapter cable to protectthe USB audio interface and the USB deviceagainst physical damage.
Connect the USB device to theUSB interface.
After connecting for the first timeInformation on all music tracks, e.g. artist or typeof music, as well as playback lists are transmit‐ted into the vehicle. This may take some time,depending on the USB device and the numberof tracks.
Seite 211
CD/multimedia Entertainment
211Online Edition for Part no. 01 40 2 608 633 — 11 09 490

During transmission, the tracks can be called upvia the file directory.
Number of tracksInformation from up to four USB devices or forapprox. 16,000 or 36,000 tracks can be storedin the vehicle. If a fifth device is connected or ifmore than 16,000 or 36,000 tracks are stored,information on existing tracks may be deleted.
Copy protectionMusic tracks with integrated Digital Rights Man‐agement (DRM) cannot be played.
Playback1. «CD/Multimedia»2. «External devices»3. Select the or symbol.
The playback starts with the first track.On the split screen, the CD cover for the musictrack might be displayed after a few seconds.
Track searchSelection is possible via:▷ Playback lists.▷ Information: type of music, artist, and, if
available, composer, album, track.▷ In addition, for USB devices: file directory
and, if available, composer.Tracks are displayed if they have been saved inthe Latin alphabet.
Starting the track search1. «CD/Multimedia»2. «External devices»3. Select the or symbol.4. «Search»5. Select the desired category, e.g., «Genre» or
«Artist».All entries are displayed in a list.▷ Open «A-Z search» and input the de‐
sired entry. When a letter is entered, theresults are filtered using this letter as thefirst letter. If multiple letters are entered,all results that contain that sequence aredisplayed.
▷ Select the desired entry from the list.
6. Select other categories if you wish.Not all categories need to be selected. Forexample, if all of the tracks by a certain artistare to be displayed, call up that artist only.All of the tracks by that artist are then dis‐played.
7. «Start play»
Restarting a track search»New search»
Playback listsCalling up playback lists.
1. «CD/Multimedia»2. «External devices»3. Select the or symbol.4. «Playlists»
Seite 212
Entertainment CD/multimedia
212Online Edition for Part no. 01 40 2 608 633 — 11 09 490

Current playbackList of tracks currently being played.
1. «CD/Multimedia»2. «External devices»3. Select the or symbol.4. «Current playback»
Random playbackThe current list of tracks is played back in ran‐dom order.
1. «CD/Multimedia»2. «External devices»3. «Options» Open.4. «Random»
Fast forward/reversePress and hold the button.
Video playback
At a glanceVideo playback via snap-in adapter is possible.Operation can be performed via iDrive. Thesound is output on the vehicle loudspeakers.
PlaybackThe video image is displayed on the front Con‐trol Display up to a speed of approx. 2 mph/3 km/h; in some countries, it is only displayed if theparking brake is set or if the automatic trans‐mission is in position P.
1. «CD/Multimedia»2. «External devices»3. Select the symbol.4. «Video»5. Select the directory if necessary.
To go up a level in the directory: move thecontroller to the left.
6. Select the desired video file to begin play‐back.
Video menu
Symbol Function
Next video file
Previous video fileDouble-click on an icon to play backprevious video file.
NotesDo not expose the audio device to extreme en‐vironmental conditions, such as very high tem‐peratures; refer to the audio device operatinginstructions.Depending on the configuration of the audiofiles, e.g., bit rates greater than 256 kbit/s, thefiles may not play back correctly in each case.
Information on connection▷ The connected audio device is supplied with
a max. power of 500 mA if supported by thedevice. Therefore, do not additionally con‐nect the device to a socket in the vehicle;otherwise, playback may be compromised.
▷ Do not use force when plugging the con‐nector into the USB interface.
▷ Do not connect devices such as fans orlamps to the USB audio interface.
▷ Do not connect USB hard drives.▷ Do not use the USB audio interface to re‐
charge external devices.
Bluetooth audio
At a glance▷ Music files on external devices such as audio
devices or mobile phones can be playedback via Bluetooth.
Seite 213
CD/multimedia Entertainment
213Online Edition for Part no. 01 40 2 608 633 — 11 09 490

Use of a mobile phone as an audio source,refer to page 229.
▷ The sound is output on the vehicle loud‐speakers.
▷ The volume of the sound output is depend‐ent on the device. If necessary, adjust thevolume on the device.
▷ Up to four external devices can be pairedwith the vehicle.
Requirements▷ The device is suitable. Information under
www.bmwusa.com/bluetooth.▷ The device is ready for operation.▷ The ignition is switched on.▷ Bluetooth is activated on the vehicle, refer to
page 229, and on the device.▷ Bluetooth presettings must be made on the
device, such as for a connection withoutconfirmation or visibility; refer to the deviceoperating instructions.
▷ A number with at least four and a maximumof 16 digits is defined as the Bluetooth pass‐key. It is only required once for pairing.
Pairing and connectingPairing a deviceTo avoid becoming distracted and posing
an unnecessary hazard both to your own vehi‐cle’s occupants and to other road users, onlypair the device while the vehicle is stationary.◀
1. «CD/Multimedia»2. «Bluetooth® (audio)»3. If necessary, «Bluetooth® audio».4. «Add new phone»
The Bluetooth name of the vehicle is dis‐played.
5. Perform additional steps on the device, referto the device operating instructions: e.g.search for or connect the Bluetooth deviceor a new device.The Bluetooth name of the vehicle appearson the device display.
6. Select the Bluetooth name of the vehicle onthe device display.Prompt via iDrive or the device to enter thesame Bluetooth passkey.
7. Enter the passkey and confirm.
8. Select the desired functions with which thedevice is to be connected, e.g. «Audio».
9. «OK»
Seite 214
Entertainment CD/multimedia
214Online Edition for Part no. 01 40 2 608 633 — 11 09 490

If pairing was successful, the device is displayedas connected.White symbol : the device is active as an audiosource.If pairing was unsuccessful: What to do if…, referto page 216.
Connecting a specific deviceA device that has already been paired can beconnected as an active audio source.Connecting is not possible when data is ex‐changed via a mobile phone connected via Blue‐tooth.
RequirementsIf necessary, activate the audio connection ofthe desired device from the list of paired devi‐ces.
1. «CD/Multimedia»2. «Bluetooth® (audio)»3. If necessary, «Bluetooth® audio».4. Select the desired device from the list of
paired devices.5. «Options» Open.6. «Configure phone»7. «Audio»8. «OK»
Connecting the device1. «CD/Multimedia»2. «Bluetooth® (audio)»
3. If necessary, «Bluetooth® audio».4. Select the desired device from the list of
paired devices.
White symbol : the device is active as an audiosource.
Playback
General information▷ The display of music track information de‐
pends on the device.▷ Operation can takes place on the device or
iDrive.▷ Playback is interrupted when data is ex‐
changed via a mobile phone connected viaBluetooth.
Starting playback1. Connect the device.2. «CD/Multimedia»3. «External devices»4. Select the symbol.
5. Select the desired track from the list, if nec‐essary.
Seite 215
CD/multimedia Entertainment
215Online Edition for Part no. 01 40 2 608 633 — 11 09 490

Playback menuDepending on the particular device, some of thefunctions may not be available.
Symbol Function
Next trackFast forward: press and hold thesymbol.
Previous music trackReverse: press and hold the symbol.
Disconnecting the audio connection1. «CD/Multimedia»2. «Bluetooth® (audio)»3. Highlight the desired device.4. Open «Options».5. «Configure phone»
6. «Audio»7. «OK»
Unpairing a device1. «CD/Multimedia»2. «Bluetooth® (audio)»3. If necessary, «Bluetooth® audio».4. Highlight the device that is to be unpaired.5. Open «Options».6. «Remove phone from list»
What to do if…Information on suitable devices can be found atwww.bmwusa.com/bluetooth.
Suitable mobile phones, refer to page 228.The device is not supported by the vehicle.▷ Perform a software update, refer to
page 217, if needed.The device could not be paired or connected.▷ Do the Bluetooth passkeys on the device
and the vehicle match? Enter the samepasskey on the device and via iDrive.
▷ Did it take longer than 30 seconds to enterthe passkey? Repeat the pairing procedure.
▷ Are too many Bluetooth devices connectedto the device or vehicle? Delete connectionswith other devices if necessary.
▷ Is the mobile phone in power-save mode ordoes it have only a limited remaining batterylife? Charge the mobile phone in the snap-in adapter or via the charging cable.
▷ Depending on the mobile phone, it is possi‐ble that only one device can be connectedto the vehicle. Unpair the connected devicefrom the vehicle and pair and connect onlyone device.
▷ The device no longer reacts? Switch the de‐vice off and on again.
▷ Repeat the pairing procedure.Music cannot be played back.▷ Start the program for playing back music
data on the device and select a track on thedevice if necessary.
▷ Switch the radio off and on again.Music files can only be played back softly.▷ Adjust the volume settings on the device.Playback is disturbed when buttons are pressedor by other messages on the device.▷ Switch off the button tones and other signal
tones on the device.Playback is interrupted by a telephone call ortraffic bulletin and is not resumed automatically.▷ Switch the radio off and on again.Playback is not possible if the mobile phone isconnected both via Bluetooth Audio and via the
Seite 216
Entertainment CD/multimedia
216Online Edition for Part no. 01 40 2 608 633 — 11 09 490

extended connectivity of the music player in themobile phone.▷ Disconnect one of the two connections; for
example, disconnect the audio connection,refer to page 216, and restart playback.
If all points in this list have been checked and therequired function is still not available, pleasecontact the hotline or service center.
Software UpdateThe vehicle supports various external devicesdepending on the current software version. Witha software update, the vehicle can support newcell phones or new external device, for example.The updating of the software is done via:▷ USB.
Updates and related current information isavailable at www.bmw.com/update.
▷ TeleService.Existing software can be updated directly viathe vehicle.
Displaying the current versionThe currently installed software is displayed.
1. «Settings»2. «Software update»3. «Show current version»SelectDesired version to displayAdditional in‐formation.
Updating software via USBThe software may only be updated when the ve‐hicle is stationary.
1. Store the file for the software-update in themain director of a USB flash drive.
2. Insert the USB flash drive into the USB in‐terface of the USB audio interface in thecenter armrest. An update via the USB in‐terface in the glove compartment is not pos‐sible.
3. «Settings»
4. «Software update»5. «Update software»
6. «Start update»7. «OK»All listed software updates are installed.
Restoring the previous versionIf it should become necessary, the software ver‐sion prior to the last software update can be re‐stored.The previous version may only be restored whenthe vehicle is stationary.
1. «Settings»2. «Software update»3. «Restore previous version»4. «OK» Double-click.All listed software updates are removed.
NoteWhile the software is being updated or a previ‐ous version is being restoredBMW Assist, Officefunctions and the connected devices are tem‐porarily unavailable. Wait several minutes for thefunctions to become available again.
Seite 217
CD/multimedia Entertainment
217Online Edition for Part no. 01 40 2 608 633 — 11 09 490

Online Edition for Part no. 01 40 2 608 633 — 11 09 490

CommunicationAll of the options available to you for mobile
communication with family, friends, businesspartners, and service providers are described in
this chapter.
Online Edition for Part no. 01 40 2 608 633 — 11 09 490

Business mobile phone preparationpackageVehicle equipmentAll standard, country-specific and optionalequipment that is offered in the model series isdescribed in this chapter. Therefore, equipmentis also described that is not available in a vehicle,e. g., because of the selected optional equip‐ment or country variant. This also applies forsafety-related functions and systems.
At a glanceThe conceptAfter the mobile phone is paired once with thevehicle, the mobile phone can be operated viaiDrive, the steering wheel buttons and via voice-activated command.A paired mobile phone is automatically detectedas soon as it is located inside the vehicle, whenthe ignition is switched on.Up to four mobile phones can be paired.Certain functions may need to be enabled by themobile service provider.
Using the mobile phone while drivingMake entries only when traffic and road
conditions allow. Do not hold the mobile phonein your hand while you are driving; use thehands-free system instead. If you do not ob‐serve this precaution, you can endanger the ve‐hicle occupants and other road users.◀
Approved mobile phonesDetails on which mobile phones and externaldevices with a Bluetooth interface are sup‐ported by the mobile phone preparation pack‐age can be obtained at www.bmwusa.com/blue‐tooth.
Displaying the vehicle identificationnumber and software part numberThe vehicle identification number and softwarepart number are needed to determine which mo‐bile phones are supported by the mobile phonepreparation package. The software version ofthe mobile phone may also be required.
1. «Telephone»2. Open «Options».3. «Bluetooth® info»4. «Display system information»These approved mobile phones with a certainsoftware version, support the vehicle functionsdescribed below.Malfunctions may occur with other mobilephones or software versions.Do not operate a mobile phone that is connectedto the vehicle on the mobile phone keypad, asthis may lead to a malfunction.
NotesAt high temperatures, the charge function of themobile phone can be limited where appropriateand the functions are no longer executed.When the mobile phone is used via the vehicle,heed the operating manual of the mobile phone.
Pairing/unpairing the mobilephoneGeneral informationThe following functions are available:▷ Use of a mobile phone as a telephone.Functions supported by the mobile phone areshown as a symbol during pairing.White symbol: the function is active.
Seite 220
Communication Business mobile phone preparation package
220Online Edition for Part no. 01 40 2 608 633 — 11 09 490

Gray symbol: the function is inactive.
Symbol Function
Telephone.
Requirements▷ The mobile phone is suitable.▷ The mobile phone is ready for operation.▷ Bluetooth is activated in the vehicle, refer to
page 222, and on the mobile phone.▷ Bluetooth presettings may need to be made
on the mobile phone, e.g., for a connectionwithout confirmation or visibility, refer to themobile phone operating instructions.
▷ A number with at least four and a maximumof 16 digits was defined as the Bluetoothpasskey, depending on the mobile phone. Itis only required once for pairing.
▷ The ignition is switched on.
Pairing and connectingPairing the mobile phoneTo avoid becoming distracted and posing
an unnecessary hazard both to your own vehi‐cle’s occupants and to other road users, onlypair the mobile phone while the vehicle is sta‐tionary.◀
1. «Telephone»2. «Bluetooth® (phone)»
3. «Add new phone»The Bluetooth name of the vehicle is dis‐played.
4. To perform additional steps on the mobilephone, refer to the mobile phone operatinginstructions: e.g. search for or connect theBluetooth device or a new device.The Bluetooth name of the vehicle appearson the mobile phone display.
5. Select the Bluetooth name of the vehicle onthe mobile phone display.
6. You are prompted by the iDrive or mobilephone to enter the same Bluetooth passkey.Enter the passkey and confirm.orCompare the control number in the displayof the vehicle to the control number in thedisplay of the mobile phone. Confirm thecontrol number in the mobile phone and inthe vehicle.»OK»
7. Select the functions for which the mobilephone is to be used.
8. «OK»If the pairing was successful, the mobile phoneappears at the top of the list of mobile phones.Four mobile phones can be paired with the ve‐hicle at once.If pairing was unsuccessful: what to do if, referto page 222.
Following the initial pairing▷ The mobile phone is detected/connected in
the vehicle within a short period of timewhen the engine is running or the ignition isswitched on.
▷ After they have been identified, phone bookentries are transferred from the SIM cardand/or mobile phone to the vehicle; this de‐pends on the mobile phone.
▷ Four mobile phones can be paired.▷ Specific settings may be necessary in some
mobile phones, e.g., authorization or a se‐cure connection; refer to the mobile phoneoperating instructions.
Seite 221
Business mobile phone preparation package Communication
221Online Edition for Part no. 01 40 2 608 633 — 11 09 490

Activating/deactivating BluetoothBluetooth is not permitted everywhere. Complywith all safety guidelines and regulations.
1. «Telephone»2. «Options» Open.3. «Bluetooth®»
Connecting a particular mobile phoneIf more than one mobile phone is detected by thevehicle, the mobile phone at the top of the list isconnected. A different mobile phone can beconnected by selecting it.
1. «Telephone»2. «Bluetooth® (phone)»
All paired mobile phones are listed.3. Select the mobile phone that is to be con‐
nected.
Unpairing the mobile phone1. «Telephone»2. «Bluetooth® (phone)»
All paired mobile phones are listed.3. Highlight the mobile phone that is to be un‐
paired.4. «Options» Open.5. «Remove phone from list»
What to do if…Information on suitable mobile phones, refer topage 220.The mobile phone could not be paired or con‐nected.
▷ Is Bluetooth activated in the vehicle and onthe mobile phone? Activate Bluetooth in thevehicle and on the mobile phone.
▷ Do the Bluetooth passkeys on the mobilephone and the vehicle match? Enter thesame passkey on the mobile phone and viaiDrive.
▷ Do the control numbers on the mobile phoneand vehicle match? Select correct controlnumber on the mobile phone; repeat pairing,if necessary.
▷ Did it take longer than 30 seconds to enterthe passkey? Repeat the pairing procedure.
▷ Periods for confirming the control numberson the mobile phone longer than 30 sec‐onds? Repeat the pairing procedure.
▷ Are too many Bluetooth devices connectedto the mobile phone or vehicle? Delete con‐nections with other devices if necessary.
▷ Is the mobile phone in power-save mode ordoes it have only a limited remaining batterylife? Charge the mobile phone via the charg‐ing cable.
The mobile phone no longer reacts.▷ Switch the mobile phone off and on again.▷ Ambient temperatures too high or too low?
Do not subject the mobile phone to extremeambient temperatures.
Not all phone book entries are displayed.▷ Transmission of the phone book entries is
not yet complete.▷ It is possible that only the phone book en‐
tries of the mobile phone or the SIM card aretransmitted.
▷ It may not be possible to display phone bookentries with special characters.
▷ The number of phone book entries beingstored is too high.
The phone connection quality is poor.▷ The strength of the Bluetooth signal on the
mobile phone can be adjusted, dependingon the mobile phone.
Seite 222
Communication Business mobile phone preparation package
222Online Edition for Part no. 01 40 2 608 633 — 11 09 490

▷ Place mobile phone in the vicinity of the cen‐ter console.
If all points in this list have been checked and therequired function is still not available, pleasecontact the hotline or service center.
ControlsAdjusting the volumeTurn the knob until the desired volume is se‐lected. The setting is stored for the remote con‐trol currently in use.
Incoming call
Receiving callsIf the number of the caller is stored in the phonebook and is transmitted by the network, thename of the contact is displayed.
Accepting a call
Via iDrive «Accept»
Via the button on the steering wheelPress the button.
Via the instrument cluster»Accept»
Rejecting a call
Via iDrive «Reject»
Via the instrument cluster»Reject»
Ending a call
Via iDrive1. «Telephone»2. Select an active call.3. «Active calls»
Via the button on the steering wheelPress the button.
Via the instrument cluster»End call»
Entering a phone number
Dialing a numberWhen entering phone numbers, you can switchbetween entering letters and numbers.Service numbers can be entered more easily,e. g. 1-888-BMW-CARD.
1. «Telephone»2. «Dial number»
Seite 223
Business mobile phone preparation package Communication
223Online Edition for Part no. 01 40 2 608 633 — 11 09 490

3. Select the digits individually.
4. Convert to letters as required. Select the symbol.
Select the letters individually.5. Select the symbol.
Select symbol to convert to numbers.Phone numbers can also be entered by voice.Only numbers can be spoken.
Letter/number assignment
Letter Number
ABC 2
DEF 3
GHI 4
JKL 5
MNO 6
PQRS 7
TUV 8
WXYZ 9
Calls with multiple parties
General informationYou can switch between calls or connect twocalls to a single conference call. These functionsmust be supported by the mobile phone andservice provider.
Accepting a call while speaking toanother partyThis function might have to be activated by theservice provider and the mobile phone must beadjusted accordingly.If a second call comes in during an ongoing call,a call waiting signal sounds where appropriate.
«Accept»The call is accepted and the existing call is puton hold.
Establishing a second callEstablish an additional call during an active call.
1. «Telephone»2. «Active calls»3. «Hold»
The existing call is put on hold.
4. Dial the new phone number or select it froma list.
Switching between two calls, hold callThe active call is displayed in white.The call on hold is displayed in gray.
«Swap calls»The call on hold is resumed.
Establishing a conference callTwo calls can be connected to a single tele‐phone conference call.
1. Establish two calls.2. «Conference call»
Seite 224
Communication Business mobile phone preparation package
224Online Edition for Part no. 01 40 2 608 633 — 11 09 490

When terminating a conference call, both callsare ended. If one call is terminated by anotherparty, the other call can be continued.
Switching the microphone to muteWhen a call is active, the microphone can bemuted.
1. «Telephone»2. «Active calls»3. «Microphone mute»A microphone that has been switched to muteis automatically reactivated:▷ When a new connection is established.▷ When switching between call parties.
DTMF suffix dialingDTMF suffix dialing can be used for gaining ac‐cess to network services or for controlling devi‐ces, e.g., to make a remote inquiry of an answer‐ing machine. The DTMF code is needed for thispurpose.
1. «Telephone»2. Select the contact from a list or «Dial
number».3. «Keypad dialing»4. Enter the DTMF code via iDrive.
Phone book
DisplaysThe phone book accesses the contacts andshows all contacts for which a phone numberhas been stored. The entries can be selected tomake a call.
1. «Telephone»2. «Phone book»All contacts with a phone number are displayed.A symbol indicates the storage location of thecontacts.
Calling a contact
Symbol Meaning
Contact with one stored phone num‐ber.
Contact with more than one storedphone number.
Call not possible; mobile phone with‐out reception or network, or ServiceRequest is active.
For contacts with one stored phone number: se‐lect the required contact. The connection is es‐tablished.For contacts with more than one stored phonenumber: select the required contact and thephone number. The connection is established.
Editing a contactChanging the entries in «Contacts». When acontact is changed, the changes are not storedon the mobile phone. A copy of the entry isstored in the vehicle.
1. Highlight the contact.2. Open «Options».3. «Edit entry»The contact can be edited.
Seite 225
Business mobile phone preparation package Communication
225Online Edition for Part no. 01 40 2 608 633 — 11 09 490

Redialing
General informationThe list of dialed numbers in the mobile phoneis transmitted to the vehicle depending on themobile phone. The 20 phone numbers dialedlast are displayed. The sorting order of thephone numbers depends on the particular mo‐bile phone.
Dialing the number via the instrumentclusterThis is possible when there is no active call.
1. Press the button on the steeringwheel.
2. Select the desired phone number.The connection is established.
Dialing a number via iDrive1. «Telephone»2. «Redial»3. Select the desired entry.The connection is established.
Deleting a single entry or all entriesThe erasure of entries depends on the mobilephone.
1. Highlight the entry.2. «Options» Open.3. «Delete entry» or»Delete list»
Saving an entry in the contacts1. Highlight the entry.2. «Options» Open.3. «Store as new contact» or «Add to existing
contact»4. Select the contact, if necessary.5. Select the type of number: «Home»,
«Business», «Mobile» or «Other»
6. Complete the entries if necessary.7. «Store contact»
Received calls
Displaying callsThe list of incoming calls on the mobile phone istransmitted to the vehicle, depending on themobile phone. The 20 telephone calls that werelast received are displayed. The sorting orderand display of the phone numbers depend onthe particular mobile phone.
1. «Telephone»2. «Received calls»
Calling a number from the listSelecting an entry.The connection is established.
Deleting a single entry or all entriesThe erasure of entries depends on the mobilephone.
1. Highlight the entry.2. «Options» Open.3. «Delete entry» or»Delete list»
Saving an entry in the contacts1. Highlight the entry.2. «Options» Open.3. «Store as new contact» or «Add to existing
contact»4. Select the contact, if necessary.
Seite 226
Communication Business mobile phone preparation package
226Online Edition for Part no. 01 40 2 608 633 — 11 09 490

5. Select the type of number: «Home»,»Business», «Mobile» or «Other»
6. Complete the entries if necessary.7. «Store contact»
Hands-free system
General informationCalls that are being made on the hands-freesystem can be continued on the mobile phoneand vice versa.
From the mobile phone to the hands-free systemCalls that were begun outside of the Bluetoothrange of the vehicle can be continued on thehands-free system with the ignition switchedon.Depending on the mobile phone, the system au‐tomatically switches to the hands-free system.If the system does not switch over automatically,follow the instructions on the mobile phone dis‐play; refer also to the mobile phone operatinginstructions.
From the hands-free system to themobile phoneCalls that are made on the hands-free systemcan in some cases be continued on the mobilephone; this depends on the mobile phone.Follow the instructions on the mobile phone dis‐play; refer also to the mobile phone operatinginstructions.
Seite 227
Business mobile phone preparation package Communication
227Online Edition for Part no. 01 40 2 608 633 — 11 09 490

Professional mobile phone preparationpackageVehicle equipmentAll standard, country-specific and optionalequipment that is offered in the model series isdescribed in this chapter. Therefore, equipmentis also described that is not available in a vehicle,e. g., because of the selected optional equip‐ment or country variant. This also applies forsafety-related functions and systems.
At a glanceThe conceptMobile phones or other external devices such asaudio players can be connected to the vehiclevia Bluetooth.After these devices are paired once, they arerecognized automatically when the ignition isswitched on as soon as they are inside the ve‐hicle and can be operated via iDrive, the buttonson the steering wheel, and via voice activation.Depending on their functionality, external devi‐ces can be used via the vehicle as a telephoneor as an audio source.The telephone functions are described in thefollowing. Operation of the audio functions, referto page 213.Up to four external devices can be paired.Certain functions may need to be enabled by themobile phone provider or service provider.
Using the mobile phone while drivingMake entries only when traffic and road
conditions allow. Do not hold the mobile phonein your hand while you are driving; use thehands-free system instead. If you do not ob‐serve this precaution, you can endanger the ve‐hicle occupants and other road users.◀
Snap-in adapterThe snap-in adapter is used to:▷ Hold the mobile phone.▷ Recharge the battery.▷ Connect the mobile phone to an outside an‐
tenna of the vehicle.This provides for better network receptionand consistent sound quality.
Approved mobile phonesDetails on which mobile phones and externaldevices with a Bluetooth interface are sup‐ported by the mobile phone preparation pack‐age can be obtained at www.bmwusa.com/blue‐tooth.
Displaying the vehicle identificationnumber and software part numberThe vehicle identification number and softwarepart number are needed to determine which mo‐bile phones are supported by the mobile phonepreparation package. The software version ofthe mobile phone may also be required.
1. «Telephone»2. «Options» Open.3. «Bluetooth® info»4. «Display system information»These approved mobile phones with a certainsoftware version, support the vehicle functionsdescribed below.Malfunctions may occur with other mobilephones or software versions.Do not operate a mobile phone that is connectedto the vehicle on the mobile phone keypad, asthis may lead to a malfunction.
Seite 228
Communication Professional mobile phone preparation package
228Online Edition for Part no. 01 40 2 608 633 — 11 09 490

NotesAt high temperatures, the charge function of themobile phone can be limited where appropriateand the functions are no longer executed.When the mobile phone is used via the vehicle,heed the operating manual of the mobile phone.
Pairing/unpairing the mobilephoneGeneral informationThe following functions are available:▷ Use of a mobile phone as a telephone.▷ Use of a mobile phone as an additional tele‐
phone.▷ Use of a mobile phone as an audio source.▷ Use of an audio device as an audio source,
refer to page 214.
Requirements▷ The mobile phone is suitable.▷ The mobile phone is ready for operation.▷ Bluetooth is activated in the vehicle and on
the mobile phone.▷ Bluetooth presettings may need to be made
on the mobile phone, e.g., for a connectionwithout confirmation or visibility, refer to themobile phone operating instructions.
▷ Deactivate Bluetooth audio if necessary.▷ A number with at least four and a maximum
of 16 digits was defined as the Bluetoothpasskey. It is only required once for pairing.
▷ The ignition is switched on.
Activating/deactivating BluetoothBluetooth is not permitted everywhere. Complywith all safety guidelines and regulations.
1. «Telephone»2. «Options» Open.3. «Bluetooth®»
Additional functions
Activating/deactivating the additionalfunctionsActivate the functions before pairing to be ableto use them in the vehicle. Information on suit‐able mobile phones that support this function,refer to page 228.
1. «Telephone»2. «Bluetooth® (phone)»3. «Options» Open.4. «Configure Bluetooth®»5. Select the desired additional function.
▷ «Additional telephone»▷ «Office»▷ «Bluetooth® audio»
6. «OK»As long as an additional function is deactivated,it cannot be assigned to a telephone.
Additional telephoneA mobile phone can be used as an additionaltelephone.The additional telephone can be used to acceptincoming calls, refer to page 232. While a call isactive on the additional telephone, incomingcalls are displayed on the Control Display.
Audio sourceA mobile phone can be used as an audio source.
Pairing and connecting cell phonePairing the mobile phoneTo avoid becoming distracted and posing
an unnecessary hazard both to your own vehi‐cle’s occupants and to other road users, onlypair the mobile phone while the vehicle is sta‐tionary.◀
1. «Telephone»2. «Bluetooth® (phone)»
Seite 229
Professional mobile phone preparation package Communication
229Online Edition for Part no. 01 40 2 608 633 — 11 09 490

3. «Add new phone»The Bluetooth name of the vehicle is dis‐played.
4. To perform additional steps on the mobilephone, refer to the mobile phone operatinginstructions: e.g. search for or connect theBluetooth device or a new device.The Bluetooth name of the vehicle appearson the mobile phone display.
5. Select the Bluetooth name of the vehicle onthe mobile phone display.Prompt via iDrive or the mobile phone to en‐ter the same Bluetooth passkey.
6. Enter the passkey and confirm.
7. Select the functions for which the mobilephone is to be used.
8. «OK»If the pairing was successful, the mobile phoneappears at the top of the list of mobile phones.The functions supported by the mobile phoneand audio device are displayed as symbols whenpaired.White symbol: the function is active.Gray symbol: the function is inactive.
Symbol Function
Telephone.
Additional telephone.
Audio source.
Four mobile phones can be paired with the ve‐hicle at once. Three mobile phones can be con‐nected with the vehicle at once.If pairing was unsuccessful: What to do if…, referto page 231.
Following the initial pairing▷ The mobile phone is detected/connected in
the vehicle within a short period of timewhen the engine is running or the ignition isswitched on.
▷ The phone book entries of the telephonestored on the SIM card or mobile phone aretransmitted to the vehicle after detection,depending on the mobile phone.
▷ Four mobile phones can be paired.▷ Specific settings may be necessary in some
mobile phones, e.g., authorization or a se‐cure connection; refer to the mobile phoneoperating instructions.
Connecting a particular mobile phoneIf more than one mobile phone is detected by thevehicle, the mobile phone at the top of the list isconnected. If a different detected cell phone isconnected with the vehicle. A different mobilephone can be connected by selecting it.
1. «Telephone»2. «Bluetooth® (phone)»3. Select the mobile phone that is to be con‐
nected.The functions assigned to the mobile phone be‐fore unpairing are assigned to the mobile phonewhen it is reconnected. If the mobile phone isalready connected, these functions are deacti‐vated.
Configuring cell phoneAdditional functions can be activated or deacti‐vated for paired and connected mobile phones.
1. «Telephone»2. «Bluetooth® (phone)»
Seite 230
Communication Professional mobile phone preparation package
230Online Edition for Part no. 01 40 2 608 633 — 11 09 490

3. Highlight the mobile phone to be config‐ured.
4. «Options» Open.5. «Configure phone»6. At least one function must be selected.
▷ «Telephone»▷ «Additional telephone»▷ «Audio»
7. «OK»If a function is assigned to a mobile phone, thefunction will be deactivated where appropriatefor a mobile phone that is already connected andthe mobile phone will be unpaired.
Swapping the telephone and additionaltelephoneThe function of the telephone and additional tel‐ephone can be swapped automatically.
1. «Telephone»2. «Bluetooth® (phone)»3. «Swap phone/addit. phone»
Unpairing the mobile phone1. «Telephone»2. «Bluetooth® (phone)»3. Highlight the mobile phone that is to be un‐
paired.4. «Options» Open.5. «Remove phone from list»
What to do if…Information on suitable mobile phones, refer topage 228.The mobile phone could not be paired or con‐nected.▷ Is Bluetooth activated in the vehicle and on
the mobile phone? Activate Bluetooth in thevehicle and on the mobile phone.
▷ Do the Bluetooth passkeys on the mobilephone and the vehicle match? Enter the
same passkey on the mobile phone and viaiDrive.
▷ Did it take longer than 30 seconds to enterthe passkey? Repeat the pairing procedure.
▷ Are too many Bluetooth devices connectedto the mobile phone or vehicle? Delete con‐nections with other devices if necessary.
▷ Is the audio connection activated? Deacti‐vate the audio connection.
▷ Is the mobile phone in power-save mode ordoes it have only a limited remaining batterylife? Charge the mobile phone in the snap-in adapter or via the charging cable.
▷ Depending on the mobile phone, it is possi‐ble that only one cell phone can be con‐nected to the vehicle. Unpair the connectedcell phone from the vehicle and pair and con‐nect only one cell phone.
The mobile phone no longer reacts.▷ Switch the mobile phone off and on again.▷ Ambient temperatures too high or too low?
Do not subject the mobile phone to extremeambient temperatures.
The telephone functions are not available.▷ Is the mobile phone paired as an additional
telephone and is the additional telephonefunction deactivated? Activate the function.
▷ Is an outgoing call not possible? Connectthe mobile phone as a telephone.
No or not all phone book entries are displayed,or they are incomplete.▷ Transmission of the phone book entries is
not yet complete.▷ It is possible that only the phone book en‐
tries of the mobile phone or the SIM card aretransmitted.
▷ It may not be possible to display phone bookentries with special characters.
▷ The number of phone book entries beingstored is too high.
▷ Is the data volume of the contact too large,e.g., due to stored information such as
Seite 231
Professional mobile phone preparation package Communication
231Online Edition for Part no. 01 40 2 608 633 — 11 09 490

notes? Reduce the data volume of the con‐tact.
▷ Is the mobile phone connected as an audiosource or additional telephone? The mobilephone must be connected as a telephone.
The phone connection quality is poor.▷ The strength of the Bluetooth signal on the
mobile phone can be adjusted, dependingon the mobile phone.
▷ Insert the mobile phone into the snap-inadapter or place it in the area of the centerconsole.
▷ Adjust the volume of the microphone andloudspeakers separately.
If all points in this list have been checked and therequired function is still not available, contactthe hotline or service center.
ControlsAdjusting the volumeTurn the knob until the desired volume is se‐lected. The setting is stored for the remote con‐trol currently in use.The vehicle automatically adjusts the volume ofthe microphone on the telephone and the vol‐ume of the called party. Depending on the mo‐bile phone, the volumes may need to be ad‐justed. The settings can only be created duringa call and must be adjusted separately for eachtelephone. The settings are deleted when thetelephone is unpaired.
1. «Settings»2. «Tone»3. «Volume settings»4. Select the desired setting: «Microphone» or
«Loudspeak.»5. To adjust: turn the controller.6. To store: press the controller.
Incoming call
Receiving callsIf the number of the caller is stored in the phonebook and is transmitted by the network, thename of the contact is displayed. Otherwise,only the phone number is displayed.If more than one phone number is assigned to acontact, only the name of the contact is dis‐played.For calls on the additional telephone, the num‐ber is only displayed if it is transmitted by thenetwork.An incoming call to the additional telephone isautomatically rejected if there is an active call onthe other telephone.
Accepting a call
Via iDrive «Accept»
Via the button on the steering wheelPress the button.
Via the instrument cluster»Accept»
Rejecting a call
Via iDrive «Reject»
Seite 232
Communication Professional mobile phone preparation package
232Online Edition for Part no. 01 40 2 608 633 — 11 09 490

Via the instrument cluster»Reject»
Ending a call
Via iDrive «End call»
Via the button on the steering wheelPress the button.
Via the instrument cluster»End call»
Entering a phone number
Dialing a numberWhen entering phone numbers, you can switchbetween entering letters and numbers.Service numbers can be entered more easily,e. g. 1-888-BMW-CARD.
1. «Telephone»2. «Dial number»
3. Select the digits individually.
4. Convert to letters as required. Select the symbol.
Select the letters individually.5. Select the symbol.
Select symbol to convert to numbers.Phone numbers can also be entered by voice.Only numbers can be spoken.
Letter/number assignment
Letter Number
ABC 2
DEF 3
GHI 4
JKL 5
MNO 6
PQRS 7
TUV 8
WXYZ 9
Calls with multiple parties
General informationYou can switch between calls or connect twocalls to a single conference call. These functionsmust be supported by the mobile phone andservice provider.
Seite 233
Professional mobile phone preparation package Communication
233Online Edition for Part no. 01 40 2 608 633 — 11 09 490

Accepting a call while speaking toanother partyThis function might have to be activated by theservice provider and the mobile phone must beadjusted accordingly.If a second call comes in during an ongoing call,a call waiting signal sounds where appropriate.
«Accept»The call is accepted and the existing call is puton hold.
Establishing a second callEstablish an additional call during an active call.
1. «Telephone»2. «Active calls»3. «Hold»
The existing call is put on hold.
4. Dial the new phone number or select it froma list.
Switching between two calls, hold callThe active call is displayed in color.The call on hold is displayed in gray.
«Swap calls»The call on hold is resumed.
Establishing a conference callTwo calls can be connected to a single tele‐phone conference call.
1. Establish two calls.2. «Conference call»
When terminating a conference call, both callsare ended. If one call is terminated by anotherparty, the other call can be continued.
Switching the microphone to muteWhen a call is active, the microphone can bemuted.
1. «Telephone»2. «Active calls»3. «Microphone mute»A microphone that has been switched to muteis automatically reactivated:▷ When a new connection is established.▷ When switching between call parties.
DTMF suffix dialingDTMF suffix dialing can be used for gaining ac‐cess to network services or for controlling devi‐ces, e.g., to make a remote inquiry of an answer‐ing machine. The DTMF code is needed for thispurpose.
1. «Telephone»2. Select the contact from a list or «Dial
number».3. «Keypad dialing»4. Enter the DTMF code via iDrive.
Phone book
DisplaysThe phone book accesses the contacts andshows all contacts for which a phone numberhas been stored. The entries can be selected tomake a call.
1. «Telephone»2. «Phone book»A symbol indicates the storage location of thecontacts.
Seite 234
Communication Professional mobile phone preparation package
234Online Edition for Part no. 01 40 2 608 633 — 11 09 490

Calling a contact
Symbol Meaning
Contact with one stored phone num‐ber.
Contact with more than one storedphone number.
Call not possible; mobile phone with‐out reception or network, or ServiceRequest is active.
For contacts with one stored phone number: se‐lect the required contact. The connection is es‐tablished.For contacts with more than one stored phonenumber: select the required contact and thephone number. The connection is established.
Editing a contactChanging the entries in «Contacts». When acontact is changed, the changes are not storedon the mobile phone. A copy of the entry isstored in the vehicle.
1. Highlight the contact.2. Open «Options».3. «Edit entry»The contact can be edited.
Redialing
General informationThe list of dialed numbers in the mobile phoneis transmitted to the vehicle depending on themobile phone. The 20 phone numbers dialedlast are displayed. The sorting order of thephone numbers depends on the particular mo‐bile phone.
Dialing the number via the instrumentclusterThis is possible when there is no active call.
1. Press the button on the steeringwheel.
2. Select the desired phone number.The connection is established.
Dialing a number via iDrive1. «Telephone»2. «Redial»3. Select the desired entry and the phone num‐
ber if necessary.The connection is established.
Deleting a single entry or all entriesThe erasure of entries depends on the mobilephone.
1. Highlight the entry.2. «Options» Open.3. «Delete entry» or»Delete list»
Saving an entry in the contacts1. Highlight the entry.2. «Options» Open.3. «Store as new contact» or «Add to existing
contact»4. Select the contact, if necessary.5. Select the type of number: «Home»,
«Business», «Mobile» or «Other»
Seite 235
Professional mobile phone preparation package Communication
235Online Edition for Part no. 01 40 2 608 633 — 11 09 490

6. Complete the entries if necessary.7. «Store contact»
Received calls
Displaying callsThe 20 calls that were last received are dis‐played.
1. «Telephone»2. «Received calls»
Calling a number from the listSelecting an entry.The connection is established.
Deleting a single entry or all entriesThe erasure of entries depends on the mobilephone.
1. Highlight the entry.2. «Options» Open.3. «Delete entry» or»Delete list»
Saving an entry in the contacts1. Highlight the entry.2. «Options» Open.3. «Store as new contact» or «Add to existing
contact»4. Select the contact, if necessary.5. Select the type of number: «Home»,
«Business», «Mobile» or «Other»6. Complete the entries if necessary.7. «Store contact»
Hands-free system
General informationCalls that are being made on the hands-freesystem can be continued on the mobile phoneand vice versa.
From the mobile phone to the hands-free systemCalls that were begun outside of the Bluetoothrange of the vehicle can be continued on thehands-free system with the ignition switchedon.Depending on the mobile phone, the system au‐tomatically switches to the hands-free system.If the system does not switch over automatically,follow the instructions on the mobile phone dis‐play; refer also to the mobile phone operatinginstructions.
From the hands-free system to themobile phoneCalls that are made on the hands-free systemcan in some cases be continued on the mobilephone; this depends on the mobile phone.Follow the instructions on the mobile phone dis‐play; refer also to the mobile phone operatinginstructions.
Snap-in adapterGeneral informationDetailed information about snap-in adapter,which supports the functions of the mobilephone, available from the service center.
NotesAt high temperatures, the charge function of themobile phone can be limited where appropriateand the functions are no longer executed.When the mobile phone is used via the vehicle,heed the operating manual of the mobile phone.
Seite 236
Communication Professional mobile phone preparation package
236Online Edition for Part no. 01 40 2 608 633 — 11 09 490

Installation positionIn the center armrest.
Inserting the snap-in adapter1. Press the button and remove the cover.
2. Insert the snap-in adapter at the front, ar‐row 1, and press down, arrow 2, until it en‐gages.
Inserting the mobile phone1. Depending on the mobile phone, remove
the protective cap from the antenna con‐nector and from the USB connection of themobile phone.
2. Slide the mobile phone with the buttons fac‐ing up in the direction of the electrical con‐
nections, arrow 1, and push downward, ar‐row 2 until it engages.
Removing the mobile phone
Press the button and remove the mobile phone.
Seite 237
Professional mobile phone preparation package Communication
237Online Edition for Part no. 01 40 2 608 633 — 11 09 490

OfficeVehicle equipmentAll standard, country-specific and optionalequipment that is offered in the model series isdescribed in this chapter. Therefore, equipmentis also described that is not available in a vehicle,e. g., because of the selected optional equip‐ment or country variant. This also applies forsafety-related functions and systems.
At a glanceGeneral informationContacts, appointments, tasks, notes, text mes‐sages, and e-mails from the mobile phone canbe displayed on the Control Display if the mobilephone provides compatible support of thesefunctions and the necessary Bluetooth stand‐ards.Information about which mobile phones supportOffice functions can be found atwww.bmwusa.com/bluetooth. A limited numberof compatible mobile phones is available for Of‐fice.Contents are only displayed in full length whenthe vehicle is stationary.The mobile phone has read-access only.
Do not use Office while drivingTo avoid becoming distracted and posing
an unnecessary hazard to your vehicle’s occu‐pants and to other road users, never attempt touse the controls or enter information unless traf‐fic and road conditions allow this.◀
Requirements▷ A suitable mobile phone is paired with the
vehicle and connected. In some mobilephones, data access must be confirmed onthe mobile phone.
▷ The time, time zone, and date, refer topage 83, are correctly set on the ControlDisplay and on the mobile phone to correctlydisplay appointments, for example.
▷ Office is activated, refer to page 229.
UpdatingData are updated every time the mobile phoneis connected to the vehicle. Appointment en‐tries, tasks, notes and reminders can be updatedseparately.
1. «Office»2. «Current office», «Calendar», «Tasks»,
«Notes» or «Reminders»3. «Options» Open.4. «Update data»
Cell phone data are transmitted again to thevehicle.
Office informationThe number of unread messages and activetasks as well as the upcoming appointments aredisplayed.
1. «Office»2. «Current office»3. Select the desired entry to display details.
Seite 238
Communication Office
238Online Edition for Part no. 01 40 2 608 633 — 11 09 490

ContactsNoteIf equipped with Professional mobile phonepreparation package.
At a glanceContacts can be created and edited. The con‐tacts from the mobile phone are displayed aswell if this function is supported by the mobilephone. The phone numbers can be selected.Contacts can be created and edited. The con‐tacts from the mobile phone are displayed aswell if this function is supported by the mobilephone. Addresses can be adopted as destina‐tions for navigation and the phone numbers canbe dialed.
Displaying contacts
General information1. «Office»2. «Contacts»
All contacts are listed in alphabetical order. De‐pending on the number of contacts, an A-Zsearch is offered, refer to page 22.A symbol indicates the storage location of thecontacts:
Symbol Storage location
No symbol In the vehicle; the address has notbeen checked as a destination.
In the vehicle; the address hasbeen checked as a destination.
Mobile phone.
Dialing phone numbers1. Select the desired contact.2. Select the phone number.
The connection is established.
Editing a contact1. Select the desired contact.2. «Edit contact»
3. Change the entries.4. «Store contact in vehicle»When a contact is edited, the changes are notstored on the mobile phone. A copy of the entryis stored in the vehicle.
Selecting the contact as a navigationdestination1. Select the desired contact.2. Select the address.
When contacts from the mobile phone areused, the address may need to be matchedto the navigation data contained in the vehi‐cle. In this case:Correct the address.
Seite 239
Office Communication
239Online Edition for Part no. 01 40 2 608 633 — 11 09 490

3. «Start guidance» or «Add as anotherdestination»
Checking the address as a destinationAn address that is to be used for destinationguidance must match the navigation data con‐tained in the vehicle. The address can bechecked for this purpose.
1. Select the desired contact and highlight theaddress.
2. Open «Options».3. «Check as destination»4. Correct and store the address if necessary.If the address is corrected and stored, a copy ofit is stored in the vehicle. The address is notchanged on the mobile phone.
New contact
General informationA contact can have up to 8 phone numbers,2 addresses, 3 e-mail addresses and one Inter‐net address.
1. «Office»2. «Contacts»3. «Options» Open.4. «New contact»
5. The entry fields are still filled with the previ‐ous entries: «Delete input fields»
6. Fill in the entry fields: select the symbol nextto the entry field.
7. Enter the text and assign the contact type.
8. In the navigation system: enter address.Only addresses contained in the navigationdata in the vehicle can be entered. This en‐sures that destination guidance is possiblefor all addresses.If necessary, «Accept address».
9. «Store contact in vehicle»
Contact typesVarious contact types can be assigned to phonenumbers and addresses.
Symbol Meaning
Home phone number.
Business phone number.
Mobile phone number.
Other phone number.
Home address.
Business address.
Specifying the home addressA home address can be stored. It appears at thetop of the contact list.
1. «Home»2. Create a contact.3. «Store contact in vehicle»
Selecting the sorting order of thenamesNames can be displayed in a different order.
1. «Office»2. «Contacts»3. Open «Options».4. «Display: last, first name» or «Display: first,
last name»Depending on how the contacts were stored onthe mobile phone, the sorting order of the namesmay differ from the selected sorting order.
Seite 240
Communication Office
240Online Edition for Part no. 01 40 2 608 633 — 11 09 490

Show contact picturesPictures stored with the contacts are stored inthe vehicle when the mobile phone is connectedto the vehicle. The number of transmitted pic‐tures depends on the mobile phone. The mobilephone must support this function.
1. «Office»2. «Contacts»3. «Options» Open.4. «Configure Bluetooth®»5. «Show images»Display of all contact pictures is activated or de‐activated.
Exporting/importing contactsContacts can be exported and imported via thePersonal Profile, refer to page 31. The contactsstored in the vehicle are exported, but not thosefrom the mobile phone.
Deleting contactsOnly contacts that are stored in the vehicle aredeleted. The contacts on the mobile phone can‐not be deleted.
1. «Office»2. «Contacts»3. Highlight the contact.4. Open «Options».5. «Delete contact»or «Delete all contacts».6. If necessary «Yes»
MessagesGeneral informationWhether or not text messages and e-mails fromthe mobile phone are displayed depends onwhether transmission from the mobile phone tothe vehicle is supported. Text messages and e-mails may not be supported by the service pro‐vider, or the function may need to be enabled
separately. After the mobile phone is first paired,transmission may take several minutes. Mes‐sages are only displayed in full length when thevehicle is stationary. Messages from the addi‐tional telephone are not transmitted.
Displaying messages1. «Office»2. «Messages»A symbol identifies the type of message.
Symbol Message type
Text messages.
My Info
Message from the Concierge serv‐ice.
Message from BMW Info.
E-mail from mobile phone.
Filtering the message listThe message list can be filtered when more thanone type of message exists.
1. «Filter:»
2. Select the type of message.▷ «All»
All messages are displayed.▷ «E-mail»
Only e-mails from the mobile phone aredisplayed.
▷ «Service message»
Seite 241
Office Communication
241Online Edition for Part no. 01 40 2 608 633 — 11 09 490

Only messages from the BMW AssistConcierge service, My Info and BMWInfo are displayed.
▷ «Text message»Only text messages from the mobilephone are displayed.
Deleting messagesMessages from the Concierge service, My Info,and BMW Info can be deleted.Delete a message:
1. «Office»2. «Messages»3. Select the desired message.4. «Options» Open.5. «Delete message»Delete all messages:
1. «Office»2. «Messages»3. «Options» Open.4. «Delete all messages»
Text messages
Calling the sender of a text message1. Select the desired message.2. Select the symbol.
Saving the sender in the contacts1. Highlight the desired message.2. Open «Options».3. «Store as new contact» or «Add to existing
contact»
Using contact dataContact data from appointments, tasks, textmessages, e-mails and notes can be saved orselected, refer to page 245.
Reading the text message out loudRead the text message out loud, refer topage 245.
My Info
Selecting additional functionsAdditional functions are available when a mes‐sage is selected:
Symbol Function
«Start guidance» or «Add as anotherdestination»
«Call»If the message contains a number,the connection is established.
«Select phone number»If the message contains more thanone number, select the desired num‐ber from the list. The connection isestablished.
Message from the Concierge service
Storing an address1. Select the desired message.2. «Options» Open.3. «Store contact in vehicle»
Selecting additional functionsAdditional functions are available when a mes‐sage is selected:
Symbol Function
«Start guidance» or «Add as anotherdestination»
«Call»If the message contains a number,the connection is established.
Seite 242
Communication Office
242Online Edition for Part no. 01 40 2 608 633 — 11 09 490

Symbol Function
«Select phone number»If the message contains more thanone number, select the desired num‐ber from the list. The connection isestablished.
«Further information»Displaying additional information.
BMW Info
General informationMessages from BMW regarding service actionsand news from BMW.
Selecting additional functionsThe following functions are available when amessage is selected:
Symbol Function
«Start guidance» or «Add as anotherdestination»
«Call»If the message contains a number,the connection is established.
«Select phone number»If the message contains more thanone number, select the desired num‐ber from the list. The connection isestablished.
«Further information»Detailed information about a mes‐sage is displayed. This does not re‐sult in any costs.
Displaying e-mails1. «Office»2. «Messages»
3. Select the desired e-mail.
Displaying e-mail contactsIf the sender and recipient of an e-mail are trans‐mitted by the mobile phone, this information isdisplayed in the e-mail.
«Sender/Recipient»If the e-mail addresses are stored in the con‐tacts, the contact is displayed. Select the con‐tact to display details.If the e-mail addresses are not stored in the con‐tacts, only the e-mail address is displayed.
Using contact dataContact data from appointments, tasks, textmessages, e-mails and notes can be saved orselected, refer to page 245.
Deactivating the full displayWhen an e-mail is opened in the vehicle, the e-mail is fully transmitted to the vehicle. This mayresult in charges.
1. «Office»2. «Messages»3. «Options» Open.4. «Fully download e-mails»
Only a part of the email from the cell phoneis loaded into the vehicle.
Reading the e-mail out loudRead the e-mail out loud, refer to page 245.
CalendarDisplay the calendarAppointments during the last 20 and the next 50days can be displayed.
1. «Office»2. «Calendar»
Seite 243
Office Communication
243Online Edition for Part no. 01 40 2 608 633 — 11 09 490

The appointments on the current day aredisplayed.
Selecting the calendar day1. Select the date.
2. Select the desired day or date.▷ «Next day»▷ «Date:»▷ «Previous day»▷ «Today»
Display the appointment1. Select the desired appointment.2. Scroll through the appointment if neces‐
sary:▷ Turn the controller.▷ Select the symbol.
Using contact dataContact data from appointments, tasks, textmessages, e-mails and notes can be saved orselected, refer to page 245.
Reading the appointment out loudRead the appointment out loud, refer topage 245.
TasksDisplaying the task listDisplay tasks that are due within the next90 days.
1. «Office»2. «Tasks»
Sorting the task list1. Select the header in the task list.
2. Select the sorting criterion:▷ «Priority (!)»▷ «Subject»▷ «Due date»
Displaying the task1. Select the desired task.2. Scroll in the task if necessary:
▷ Turn the controller.▷ Select the symbol.
Using contact dataContact data from appointments, tasks, textmessages, e-mails and notes can be saved orselected, refer to page 245.
Reading the task out loudRead the task out loud, refer to page 245.
Seite 244
Communication Office
244Online Edition for Part no. 01 40 2 608 633 — 11 09 490

NotesDisplaying notes1. «Office»2. «Notes»
All notes are displayed.
Displaying the note1. Select the desired note.
2. Scroll in the note if necessary:▷ Turn the controller.▷ Select the symbol.
Using contact dataContact data from appointments, tasks, textmessages, e-mails and notes can be saved orselected, refer to page 245.
Reading the note out loudRead the note out loud, refer to page 245.
RemindersDisplaying remindersReminders of pending appointments and tasksare displayed. After an appointment or after atask is due, the reminder is no longer displayed.
1. «Office»2. «Reminders»3. Select the desired reminder.
The corresponding appointment or the task aredisplayed.
Using contact dataAt a glanceContact data from appointments, tasks, textmessages, emails and notes can be stored orselected.
Displaying contact or selecting phonenumber1. «Use contact data»2. Display the contact or select the phone
number:▷ Select the contact to display contact de‐
tails.▷ Select the phone number to establish a
connection directly.
Storing contact data1. «Use contact data»2. Highlight the phone number or e-mail ad‐
dress.3. «Options» Open.4. «Add to existing contact» or «Store as new
contact»
Reading out loudText messages, e-mails, appointment entries,tasks, and notes can be read out loud.
1. Select the desired message, appointment,task, or note.
2. Select the symbol.The following options are available during read‐ing:▷ «Pause»
Interrupt reading. Select again to restartreading.
Seite 245
Office Communication
245Online Edition for Part no. 01 40 2 608 633 — 11 09 490

▷ «Back to beginning»Start reading message again from the be‐ginning.
▷ Select the symbol.Skip a paragraph.
▷ Select the symbol.Go back one paragraph.
▷ To end reading, tilt the controller to the left.
What to do if…Information on suitable mobile phones, refer topage 228.Appointments, tasks, notes, text messages, ore-mails from the mobile phone are not dis‐played.▷ The mobile phone is not capable of the
missing function or is not connected cor‐rectly.
▷ The Office function is deactivated.▷ The mobile phone is connected as an addi‐
tional phone.▷ Appointments are older than 20 days or are
more than 50 days in the future.▷ The tasks have been marked as completed
or have a due date that lies more than90 days in the future.
▷ Depending on the number of stored ap‐pointments, task notes, and messages inthe mobile phone, not all are displayed in thevehicle.
Not all appointments and tasks from the mobilephone are displayed at the right time?▷ The time zone, time or date is incorrectly set
on the Control Display and mobile phone.The e-mail attachment is not displayed.▷ E-mails are transmitted without an attach‐
ment.Entries are not displayed in full length.
▷ Text were already transmitted from the mo‐bile phone in a shortened form.
▷ Synchronization between the mobile phoneand vehicle may take several minutes.
The contact pictures are not being displayed?▷ Up to 200 contact pictures can be stored in
the vehicle.The E-mail is displayed with a delay?▷ Check the e-mail settings on the mobile
phone and adjust if necessary.If all points in this list have been checked and therequired function is still not available, contactthe hotline or service center.
Seite 246
Communication Office
246Online Edition for Part no. 01 40 2 608 633 — 11 09 490

ContactsVehicle equipmentAll standard, country-specific and optionalequipment that is offered in the model series isdescribed in this chapter. Therefore, equipmentis also described that is not available in a vehicle,e. g., because of the selected optional equip‐ment or country variant. This also applies forsafety-related functions and systems.
NoteIf equipped with Business mobile phone prepa‐ration equipment package or without mobilephone preparation.
General informationContacts can be created and edited.Contacts can be created and edited. The con‐tacts from the mobile phone are displayed aswell if this function is supported by the mobilephone. Addresses can be adopted as destina‐tions for navigation and the phone numbers canbe dialed.
New contact1. «Contacts»2. «New contact»
3. The entry fields are still filled with the previ‐ous entries: «Delete input fields»
4. Fill in the entry fields: select the symbol nextto the entry field.
5. Enter the text, refer to page 22.6. In the navigation system: enter address.
Only addresses contained in the navigationdata in the vehicle can be entered. This en‐sures that destination guidance is possiblefor all addresses.
7. If necessary, «Store».8. «Store contact in vehicle»
Specifying the home addressA home address can be stored. It appears at thetop of the contact list.
1. «Home»2. Create a contact.3. «Store contact in vehicle»
My contactsGeneral informationA list of all contacts in the vehicle and mobilephone.
Displaying contacts1. «Contacts»
Seite 247
Contacts Communication
247Online Edition for Part no. 01 40 2 608 633 — 11 09 490

2. «My contacts»
All contacts are listed in alphabetical order. De‐pending on the number of contacts, an A-Zsearch is offered, refer to page 22.A symbol indicates the storage location of thecontacts:
Symbol Storage location
No symbol In the vehicle; the address has notbeen checked as a destination.
In the vehicle; the address hasbeen checked as a destination.
Mobile phone.
Dialing a phone number1. Select the desired contact.2. Select the phone number.
The connection is established.
Editing a contact1. Select the desired contact.2. «Edit contact»
3. Change the entries.
4. Move the controller to the left.5. «Yes»If a contact from the mobile phone is edited, thechanges are not stored on the mobile phone. Acopy of the entry is stored in the vehicle, and onlythis copy is displayed. Under certain circum‐stances, a contact entry with the same name iscreated.
Selecting the contact as a navigationdestination1. Select the desired contact.2. Select the address.
When contacts from the mobile phone areused, the address may need to be matchedto the navigation data contained in the vehi‐cle. In this case:Correct the address.
3. «Start guidance» or «Add as anotherdestination»
Checking the address as a destinationAn address that is to be used for destinationguidance must match the navigation data con‐tained in the vehicle. The address can bechecked for this purpose.
1. Select the desired contact and highlight theaddress.
2. «Options» Open.3. «Check as destination»4. Correct and store the address if necessary.If the address is corrected and stored, a copy ofit is stored in the vehicle. The address is notchanged on the mobile phone.
Selecting the sorting order of thenamesNames can be displayed in a different order.
1. «My contacts»2. «Options» Open.
Seite 248
Communication Contacts
248Online Edition for Part no. 01 40 2 608 633 — 11 09 490

3. «Display: last, first name» or «Display: first,last name»
Depending on how the contacts were stored onthe mobile phone, the sorting order of the namesmay differ from the selected sorting order.
Exporting/importing contactsContacts can be exported and imported via thePersonal Profile, refer to page 31.
Deleting contactsOnly contacts that are stored in the vehicle aredeleted. The contacts on the mobile phone can‐not be deleted.
1. «My contacts»2. Highlight the contact.3. «Options» Open.4. «Delete contact»or «Delete all contacts».
Seite 249
Contacts Communication
249Online Edition for Part no. 01 40 2 608 633 — 11 09 490

ConnectedDriveVehicle equipmentAll standard, country-specific and optionalequipment that is offered in the model series isdescribed in this chapter. Therefore, equipmentis also described that is not available in a vehicle,e. g., because of the selected optional equip‐ment or country variant. This also applies forsafety-related functions and systems.
BMW AssistGeneral informationBMW Assist provides you with certain services,e.g., transmission of the position data of yourvehicle to the BMW Assist Response Center ifan Emergency Request has been initiated.Many BMW Assist services depend on the indi‐vidually agreed upon contract.After your contract has expired, the BMW Assistsystem will be deactivated by the BMW AssistResponse Center without your having to visit aservice center. After the BMW Assist systemhas been deactivated, no BMW Assist serviceswill be available. The BMW Assist system can bereactivated by a service center after you sign anew contract.
Requirements▷ The installed BMW Assist system is logged
in to a wireless communications network.This network must be capable of transmit‐ting the services.
▷ To transmit position data, the vehicle mustbe able to determine the current position.
▷ To activate and update BMW Assist, a GPSsignal must be available.
▷ The BMW Assist service contract wassigned with your service center or with the
BMW Assist Response Center. Enablingmust have been completed.
▷ BMW Assist is activated.
Services offered▷ Emergency Request: when you press the
SOS button, a connection to the BMW As‐sist Response Center is established. TheBMW Assist Response Center then speakswith you and takes further steps to help you.
▷ Automatic Collision Notification: under cer‐tain conditions, a connection is establishedto the BMW Assist Response Center after aserious accident. If possible, the BMW As‐sist Response Center then speaks with youand takes further steps to help you.
▷ Enhanced Roadside Assistance: BMWRoadside Assistance can be contacted if as‐sistance is needed in the event of a break‐down. If possible, the vehicle and positiondata are transmitted in the process.
▷ Customer Relations: connection with Cus‐tomer Relations for information on all as‐pects of your vehicle.
▷ TeleService: data on your vehicle’s servicestatus or required inspections are transmit‐ted to your service center, either automati‐cally before a service due date or when yourequest a BMW service appointment.
▷ Remote Door Unlock: the BMW Assist Re‐sponse Center provides assistance if, for ex‐ample, the remote control is not availableand the vehicle needs to be opened.
▷ Stolen Vehicle Recovery: after you reportthat your vehicle was stolen to the police, theBMW Assist Response Center can deter‐mine its position.
▷ In addition to these services, the optionalConvenience Plan offers Concierge serviceand information for route planning, traffic,and weather. A limited number of calls can
Seite 250
Communication ConnectedDrive
250Online Edition for Part no. 01 40 2 608 633 — 11 09 490

be made via the BMW Assist ResponseCenter with Critical Calling if, for example,the mobile phone is not available or dis‐charged.Press the SOS button to contact the BMWAssist Response Center.
TeleServiceGeneral informationTeleService supports communication with yourservice center.▷ Data on the vehicle’s service requirements
can be sent directly to the service center. Inthis way, the service center can plan its workin advance. This shortens the duration of theservice appointment.
▷ In the event of a breakdown, data on the ve‐hicle’s condition can be sent directly toRoadside Assistance.
▷ The service varies by country.▷ Connection costs may ensue.▷ Services may be restricted abroad.
Requirements▷ BMW Assist is activated.▷ Wireless reception is available.▷ The ignition is switched on.
Using TeleServiceThe TeleServices are typically activated in thevehicle.Even if TeleService Customer Service is not ac‐tive, a voice contact to Roadside Assistance isstill possible.To continue using or to deactivate the services,please contact your service partner or the BMWcustomer hotline.
Concierge serviceGeneral informationThe BMW Assist Concierge service offers infor‐mation on events, gas stations or hotels, andprovides phone numbers and addresses. Hotelscan be booked directly by the BMW Assist Con‐cierge service. The Concierge service is part ofthe optional BMW Convenience Plan.
Starting the Concierge service1. «BMW Assist» or «ConnectedDrive»2. «Concierge»
3. «Start service»A voice connection is established with the BMWAssist Concierge service. Phone numbers andaddresses can be transmitted to the vehicle.
Roadside AssistanceAt a glanceBMW Roadside Assistance can be contacted ifassistance is needed in the event of a break‐down.Roadside Assistance can also be contacted viaa Check Control message, refer to page 75.
Start Roadside Assistance withoutBMW Assist or TeleServices1. «BMW Assist» or «ConnectedDrive»2. «Roadside Assistance»
Seite 251
ConnectedDrive Communication
251Online Edition for Part no. 01 40 2 608 633 — 11 09 490

The Roadside Assistance number is dis‐played. If the mobile phone is paired, a con‐nection is established to Roadside Assis‐tance.
Start Roadside Assistance with BMWAssist or TeleServices
General informationIf the vehicle is equipped with TeleServices,support is first offered through TeleService Di‐agnosis and, where applicable, then throughTeleService Help.
1. «BMW Assist» or «ConnectedDrive»2. «Roadside Assistance»3. «Start service»
TeleService DiagnosisTeleService Diagnosis enables the wirelesstransmission of detailed vehicle data that areimportant for vehicle diagnosis. These data aretransmitted automatically.After the data are transmitted, the voice con‐nection to Roadside Assistance is re-estab‐lished.
BMW SearchAt a glanceA business search can be opened via BMWSearch.License conditionsThis product contains NetFront Browser soft‐ware of ACCESS Co., Ltd. Copyright © 2007ACCESS Co., Ltd. All rights reserved.NetFront is a trademark or registered trademarkof ACCESS CO., LTD., in Japan and other coun‐tries.This software is based in part on the work of theIndependent JPEG Group.
Requirements▷ Subscription to the optional Convenience
Plan.▷ The date setting, refer to page 84, on the
Control Display is current.▷ The vehicle is located within wireless net‐
work coverage.
Starting BMW Search1. «BMW Assist» or «ConnectedDrive»2. «BMW Online»
3. If necessary, «OK».The BMW Search home page is displayed.
Operating BMW SearchTo start a search:▷ Turn the controller to highlight an element.▷ Press the controller to display an element.
Seite 252
Communication ConnectedDrive
252Online Edition for Part no. 01 40 2 608 633 — 11 09 490

Opening the start page1. «Options» Open.2. «Display start page»
Loading a new page1. «Options» Open.2. «Update»
Cancel1. «Options» Open.2. «Cancel loading»
Customer RelationsAt a glanceContact Customer Relations for information onall aspects of your vehicle.
Calling Customer Relations
Vehicles not equipped with BMWAssist or TeleService1. «BMW Assist» or «ConnectedDrive»2. «Customer Relations»The Customer Relations phone number is dis‐played. If the mobile phone is paired, a connec‐tion is established to Customer Relations.
Vehicles equipped with BMW Assist orTeleService1. «BMW Assist» or «ConnectedDrive»2. «Customer Relations»3. «Start service»
Service RequestAt a glanceSends information to your service partner to re‐quest the arrangement of a service appoint‐ment. The TeleService data is transmitted dur‐ing a Service Request. If possible, your servicepartner will establish contact with you.
Starting a Service Request1. «BMW Assist» or «ConnectedDrive»2. «Service Request»3. «Start service»
A Service Request can be started via a CheckControl message, refer to page 75.
Seite 253
ConnectedDrive Communication
253Online Edition for Part no. 01 40 2 608 633 — 11 09 490

Automatic Service RequestThe TeleService data necessary for servicingthe vehicle are automatically sent to your servicepartner prior to the service deadline. If possible,the service partner will contact you and a serviceappointment can be arranged.To check when your service partner was noti‐fied:
1. «Vehicle Info»2. «Vehicle status»
3. Open «Options».4. «Last Service Request»
TeleService ReportTransmits technical data that is evaluated for theongoing development of BMW products fromyour vehicle to BMW in regular intervals if nec‐essary.TeleService Report is activated in vehicles thatmeet certain technical requirements and have avalid Assist contract; this feature is free ofcharge.
Neither personal data nor position data is trans‐mitted.Indicate when the last TeleService Report wastransmitted:
1. «Vehicle Info»2. «Vehicle status»3. «Options» Open.4. «Last Teleservice Info»
TeleService Battery GuardTeleService Battery Guard continually checksthe battery charge level of the vehicle. If the bat‐tery charge level falls below a certain value, anotification is automatically sent to your servicepartner. If necessary, he will contact you to ar‐range a service appointment.TeleService Battery Guard is only available onvehicles with certain technical requirements andwith a valid BMW ConnectedDrive contract.
Services statusDisplaying available servicesDisplay of all services available in the vehicle.
1. «BMW Assist» or «ConnectedDrive»2. «Service Status»3. «Available services»
Update BMW OnlineManual update of TeleService and BMW Assist.
Seite 254
Communication ConnectedDrive
254Online Edition for Part no. 01 40 2 608 633 — 11 09 490

«Update BMW Assist»
Data transferDuring the updating of BMW services, displaythe status of the data transfer.
1. «BMW Assist» or «ConnectedDrive»2. «Options» Open.3. «Data transfer»
AppsAt a glanceCertain software applications of a suitable cellphone can be integrated in the vehicle. Thesesoftware applications are displayed on the Con‐trol Display.Operation can be performed via iDrive.
Requirements▷ The mobile phone is suitable.▷ The cell phone operating system supports
the software applications of Apps.▷ Software applications are installed on the
cell phone and ready to use.▷ Corresponding mobile wireless contract.
Any additionally incurred costs are not a partof Apps.
▷ Use only BMW approved software applica‐tions; otherwise, it may result in malfunc‐tions.
Information about suitable cell phones, availablesoftware applications and their installation canbe found at www.bmw.com/connectivity or atthe service center.
Create the entries.Make entries only when traffic and road
conditions allow. Otherwise, the vehicle occu‐pants and other road users may be put in dangerbecause of the distraction from driving.
For reasons of safety, some software applica‐tions are usable only while the vehicle is station‐ary.◀
Use apps1. Connect the cell phone via the snap-in
adapter or via the USB audio interface.2. «ConnectedDrive»3. Select the desired software application.
Displaying statusInformation about the currently available soft‐ware applications can be displayed.
1. «ConnectedDrive»2. «BMW apps»
PlugInSelected functions of the cell phone are dis‐played on the Control Display. Operation can beperformed via iDrive.
1. Connect cell phone via the snap-in adapter.2. «ConnectedDrive»3. «PlugIn»4. «Activate PlugIn»5. Navigate to the displayed functions via the
controller and select, for example, a desiredcategory or track.
Press button to switch within the cellphone functions to a higher level or back.
Press button twice to switch back to themain menu.
Notes▷ The ranges of Apps that can be displayed on
the Control Display depend on the range ofinstalled software applications on the cellphone.
▷ The data transmission of the software ap‐plications from the cell phone to the vehiclecan last some time. Some software applica‐
Seite 255
ConnectedDrive Communication
255Online Edition for Part no. 01 40 2 608 633 — 11 09 490

tions depend on the speed of the availableInternet connection of the cell phone.
▷ Some cell phones cannot simultaneouslyuse Apps and the Bluetooth hands-free sys‐tem.If necessary, restart the software applicationon the cell phone after a phone conversa‐tion.
Seite 256
Communication ConnectedDrive
256Online Edition for Part no. 01 40 2 608 633 — 11 09 490

Seite 257
ConnectedDrive Communication
257Online Edition for Part no. 01 40 2 608 633 — 11 09 490

Online Edition for Part no. 01 40 2 608 633 — 11 09 490

MobilityTo ensure that you remain mobile at all times, this
chapter supplies you with important informationon the topics of fuels and lubricants, wheels and
tires, service, maintenance, and RoadsideAssistance.
Online Edition for Part no. 01 40 2 608 633 — 11 09 490

RefuelingVehicle equipmentAll standard, country-specific and optionalequipment that is offered in the model series isdescribed in this chapter. Therefore, equipmentis also described that is not available in a vehicle,e. g., because of the selected optional equip‐ment or country variant. This also applies forsafety-related functions and systems.
General informationRefuel promptlyRefuel below a range of 30 miles/50 km;
otherwise, engine functions are not ensured anddamage may occur.◀
Fuel capOpening1. Briefly press the rear edge of the fuel filler
flap.
2. Turn the fuel cap counterclockwise.
3. Place the fuel cap in the bracket attached tothe fuel filler flap.
Closing1. Fit the cap and turn it clockwise until you
clearly hear a click.2. Close the fuel filler flap.
Do not pinch the retaining strapDo not pinch the retaining strap attached
to the cap; otherwise, the cap cannot be closedproperly and fuel vapors can escape.A message is displayed if the cap is loose ormissing.◀
Manually unlocking fuel filler flapIn the event of an electrical malfunction, for ex‐ample.
Seite 260
Mobility Refueling
260Online Edition for Part no. 01 40 2 608 633 — 11 09 490

1. Open the cover on the right side trim. To dothis, turn the cap.
2. Pull the green knob with the fuel pump sym‐bol. This releases the fuel filler flap.
Observe the following whenrefuelingThe fuel tank is full when the filler nozzle clicksoff the first time.
Handling fuelsObey safety regulations posted at the gas
station.◀
Seite 261
Refueling Mobility
261Online Edition for Part no. 01 40 2 608 633 — 11 09 490

FuelVehicle equipmentAll standard, country-specific and optionalequipment that is offered in the model series isdescribed in this chapter. Therefore, equipmentis also described that is not available in a vehicle,e. g., because of the selected optional equip‐ment or country variant. This also applies forsafety-related functions and systems.
Fuel qualityFuels that are marked on the gas pump as con‐taining metal must not be used.
Refuel only with unleaded gasoline with‐out metallic additives.
Do not refuel with any leaded gasoline or gaso‐line with metallic additives, e. g. manganese oriron, or permanent damage to the catalytic con‐verter and other components.◀
Do not refuel with ethanolDo not refuel with E85, i.e., fuel with an
ethanol content of 85 %, or with Flex Fuel, as thiswould damage the engine and fuel supply sys‐tem.◀
Required fuel
Gasoline with lower AKIThe minimum AKI Rating is 89.If you use gasoline with this minimum AKI Rat‐ing, the engine may produce knocking soundswhen starting at high outside temperatures.This has no effect on the engine life.
Minimum fuel gradeDo not use any gasoline below the mini‐
mum specified fuel grade; otherwise, enginedamage may occur.◀
Use high-quality brandsField experience has indicated significant differ‐ences in fuel quality: volatility, composition, ad‐ditives, etc., among gasolines offered for sale inthe United States and Canada.Fuels containing up to and including 10 % etha‐nol or other oxygenates with up to 2.8 % oxygenby weight, that is, 15 % MTBE or 3 % methanolplus an equivalent amount of co-solvent, will notvoid the applicable warranties with respect todefects in materials or workmanship.
Minimum fuel gradeThe use of poor-quality fuels may result in
driveability, starting and stalling problems es‐pecially under certain environmental conditionssuch as high ambient temperature and high al‐titude.Should you encounter driveability problemswhich you suspect could be related to the fuelyou are using, we recommend that you respondby switching to a recognized high-quality brandsuch as gasoline that is advertised as Top TierDetergent Gasoline.Failure to comply with these recommendationsmay result in unscheduled maintenance.◀
Seite 262
Mobility Fuel
262Online Edition for Part no. 01 40 2 608 633 — 11 09 490

Wheels and tiresVehicle equipmentAll standard, country-specific and optionalequipment that is offered in the model series isdescribed in this chapter. Therefore, equipmentis also described that is not available in a vehicle,e. g., because of the selected optional equip‐ment or country variant. This also applies forsafety-related functions and systems.
Tire inflation pressureSafety informationThe tire characteristics and tire inflation pres‐sure influence the following:▷ The service life of the tires.▷ Road safety.▷ Driving comfort.
Checking the pressureOnly check the tire inflation pressure when thetires are cold. This means after driving no morethan 1.25 miles/2 km or when the vehicle hasbeen parked for at least 2 hours. When the tiresare warm, the tire inflation pressure is higher.
Check the tire inflation pressure regularlyRegularly check the tire inflation pressure
and correct it as needed: at least twice a monthand before a long trip. If you fail to observe thisprecaution, you may be driving on tires with in‐correct tire pressures, a condition that may notonly compromise your vehicle’s driving stability,but also lead to tire damage and the risk of anaccident.◀
After correcting the tire inflation pressure:▷ Reinitialize the Flat Tire Monitor.▷ Reinitialize the Tire Pressure Monitor.
Pressure specificationsThe tire inflation pressure table, refer topage 264, contains all pressure specificationsfor the specified tire sizes at the ambient tem‐perature. Pressure specifications apply to ap‐proved tire sizes and recommended tire brands.This information can be obtained from yourservice center.To identify the correct tire inflation pressure,please note the following:▷ Tire sizes of your vehicle.▷ Maximum allowable driving speed.
Tire inflation pressures up to 100 mph/160 km/hFor speeds of up to 100 mph/160 km/h and foroptimum driving comfort, note the pressure val‐ues in the tire inflation pressure table, refer topage 264, and adjust as necessary.
These pressure values can also be found on thetire inflation pressure label on the driver’s doorpillar.
Maximum permissible speedDo not exceed 100 mph/160 km/h; other‐
wise, tire damage and accidents may result.◀
Seite 263
Wheels and tires Mobility
263Online Edition for Part no. 01 40 2 608 633 — 11 09 490

Tire inflation pressure values up to100 mph/160 km/h
320i
Tire size Pressure specificationsin bar/PSI
Specifications inbar/PSI with coldtires
225/50 R 17 94 V M+S A/S RSC225/50 R 17 94 VRSC225/50 R 17 94 H M+S RSC
2.2 / 32 2.2 / 32
225/45 R 18 91 V M+S RSC225/45 R 18 91 YRSC225/45 R 18 95 V M+S XL RSC
2.2 / 32 2.4 / 35
F: 225/50 R 17 94 WRSCR: 255/45 R 17 98 WRSC
2.2 / 32-
-2.2 / 32
F.: 225/45 R 18 91 YRSCR: 255/40 R 18 95 YRSC
2.2 / 32-
-2.2 / 32
F: 225/40 R 19 89 YRSCR: 255/35 R 19 92 YRSC
2.2 / 32-
-2.4/ 35
Tire size Pressure specificationsin bar/PSI
F: 225/35 R 20 90 YXL RSCR: 255/30 R 20 92 YXL RSC
2.4 / 35-
-2.8/ 41
Compact wheel:T 135/80 R 18 104M
Speed up to a max. of50 mph / 80 km/h4.2 / 60
328i
Tire size Pressure specificationsin bar/PSI
Specifications inbar/PSI with coldtires
225/50 R 17 94 V M+S A/S RSC225/50 R 17 94 WRSC225/50 R 17 94 H M+S RSC
2.2 / 32 2.2 / 32
225/45 R 18 91 V M+S A/S RSC225/45 R 18 91 YRSC225/45 R 18 95 V M+S XL RSC
2.2 / 32 2.4 / 35
F: 225/50 R 17 94 WRSCR: 255/45 R 17 98 WRSC
2.2 / 32-
-2.2 / 32
F: 225/45 R 18 91 YRSCR: 255/40 R 18 95 YRSC
2.2 / 32-
-2.2 / 32
Seite 264
Mobility Wheels and tires
264Online Edition for Part no. 01 40 2 608 633 — 11 09 490

Tire size Pressure specificationsin bar/PSI
F: 225/40 R 19 89 YRSCR: 255/35 R 19 92 YRSC
2.2 / 32-
-2.4 / 35
F: 225/35 R 20 90 YXL RSCR: 255/30 R 20 92 YXL RSC
2.4 / 35-
-2.8 / 41
Compact wheel:T 135/80 R 18 104M
Speed up to a max. of50 mph / 80 km/h4.2 / 60
335i
Tire size Pressure specificationsin bar/PSI
Specifications inbar/PSI with coldtires
225/45 R 18 91 V M+S A/S RSC225/45 R 18 91 YRSC225/45 R 18 95 V M+S XL RSC
2.2 / 32 2.6 / 38
F: 225/45 R 18 91 YRSCR: 255/40 R 18 95 YRSC
2.2 / 32-
-2.4 / 35
F: 225/40 R 19 89 YRSCR: 255/35 R 19 92 YRSC
2.4 / 35-
-2.6 / 38
Tire size Pressure specificationsin bar/PSI
F: 225/35 R 20 90 YXL RSCR: 255/30 R 20 92 YXL RSC
2.6 / 38-
-3.0 / 44
Compact wheel:T 135/80 R 18 104M
Speed up to a max. of50 mph / 80 km/h4.2 / 60
Tire inflation pressures at max. speedsabove 100 mph/160 km/h
Speeds above 100 mph/160 km/hIn order to drive at maximum speeds in ex‐
cess of 100 mph/160 km/h, please observe, and,if necessary, adjust tire pressures for speedsexceeding 100 mph/160 km/h from the relevanttable on the following pages. Otherwise tiredamage and accidents could occur.◀
Tire inflation pressure values over100 mph/160 km/h
320i
Tire size Pressure specificationsin bar/PSI
Specifications inbar/PSI with coldtires
225/50 R 17 94 V M+S A/S RSC225/50 R 17 94 VRSC225/50 R 17 94 H M+S RSC
2.2 / 32 2.7 / 39
Seite 265
Wheels and tires Mobility
265Online Edition for Part no. 01 40 2 608 633 — 11 09 490

Tire size Pressure specificationsin bar/PSI
225/45 R 18 91 V M+S RSC225/45 R 18 91 YRSC225/45 R 18 95 V M+S XL RSC
2.4 / 35 2.9 / 42
F: 225/50 R 17 94 WRSCR: 255/45 R 17 98 WRSC
2.2 / 32-
-2.2 / 32
F: 225/45 R 18 91 YRSCR: 255/40 R 18 95 YRSC
2.2 / 32-
-2.2 / 32
F: 225/40 R 19 89 YRSCR: 255/35 R 19 92 YRSC
2.2 / 32-
-2.5 / 36
F: 225/35 R 20 90 YXL RSCR: 255/30 R 20 92 YXL RSC
2.4 / 35-
-2.9 / 42
Compact wheelT 135/80 R 18 104M
Speed up to a max. of50 mph / 80 km/h4.2 / 60
328i
Tire size Pressure specificationsin bar/PSI
Specifications inbar/PSI with coldtires
225/50 R 17 94 V M+S A/S RSC225/50 R 17 94 WRSC225/50 R 17 94 H M+S RSC
2.3 / 33 2.8 / 41
225/45 R 18 91 V M+S RSC225/45 R 18 91 YRSC225/45 R 18 95 V M+S XL RSC
2.5 / 36 3.0 / 44
F: 225/50 R 17 94 WRSCR: 255/45 R 17 98 WRSC
2.3 / 33-
-2.5 / 36
F: 225/45 R 18 91 YRSCR: 255/40 R 18 95 YRSC
2.3 / 33-
-2.5 / 36
F: 225/40 R 19 89 YRSCR: 255/35 R 19 92 YRSC
2.5 / 36-
-2.7 / 39
F: 225/35 R 20 90 YXL RSCR: 255/30 R 20 92 YXL RSC
2.7 / 39-
-3.2 / 46
Compact wheelT 135/80 R 18 104M
Speed up to a max. of50 mph / 80 km/h4.2 / 60
Seite 266
Mobility Wheels and tires
266Online Edition for Part no. 01 40 2 608 633 — 11 09 490

335i
Tire size Pressure specificationsin bar/PSI
Specifications inbar/PSI with coldtires
225/45 R 18 91 V M+S RSC225/45 R 18 91 YRSC225/45 R 18 95 V M+S XL RSC
2.6 / 38 3.2 / 46
F: 225/45 R 18 91 YRSCR: 255/40 R 18 95 YRSC
2.6 / 38-
-2.8 / 41
F: 225/40 R 19 89 YRSCR: 255/35 R 19 92 YRSC
2.6 / 38-
-3.0 / 44
F: 225/35 R 20 90 YXL RSCR: 255/30 R 20 92 YXL RSC
2.8 / 41-
-3.4 / 49
Compact wheelT 135/80 R 18 104M
Speed up to a max. of50 mph / 80 km/h4.2 / 60
Tire identification marksTire size255/50 R 19 103 Y255: nominal width in mm50: aspect ratio in %R: radial tire code19: rim diameter in inches
103: load rating, not for ZR tiresY: speed rating, before the R on ZR tires
Speed letterT = up to 118 mph, 190 km/hH = up to 131 mph, 210 km/hV = up to 150 mph, 240 km/hW = up to 167 mph, 270 km/hY = up to 186 mph, 300 km/h
Tire Identification NumberDOT code: DOT xxxx xxx 3510xxxx: manufacturer code for the tire brandxxx: tire size and tire design3510: tire ageTires with DOT codes meet the guidelines of theU.S. Department of Transportation.
Tire ageDOT … 3510: the tire was manufactured in the35th week in 2010.
RecommendationRegardless of wear, replace tires at least every6 years.
Uniform Tire Quality GradingQuality grades can be found where applicableon the tire sidewall between tread shoulder andmaximum section width.For example: Treadwear 200; Traction AA;Temperature A
DOT Quality GradesTreadwearTraction AA A B CTemperature A B CAll passenger car tires must conform to FederalSafety Requirements in addition to thesegrades.
Seite 267
Wheels and tires Mobility
267Online Edition for Part no. 01 40 2 608 633 — 11 09 490

TreadwearThe treadwear grade is a comparative ratingbased on the wear rate of the tire when testedunder controlled conditions on a specified gov‐ernment test course. For example, a tire graded150 would wear one and one-half, 1 g, times aswell on the government course as a tire graded100. The relative performance of tires dependsupon the actual conditions of their use, however,and may depart significantly from the norm dueto variations in driving habits, service practicesand differences in road characteristics and cli‐mate.
TractionThe traction grades, from highest to lowest, areAA, A, B, and C.Those grades represent the tire’s ability to stopon wet pavement as measured under controlledconditions on specified government test surfa‐ces of asphalt and concrete. A tire marked C mayhave poor traction performance.The traction grade assigned to this tire is basedon straight-ahead braking traction tests, anddoes not include acceleration, cornering, hydro‐planing, or peak traction characteristics.
TemperatureThe temperature grades are A, the highest, B,and C, representing the tire’s resistance to thegeneration of heat and its ability to dissipateheat when tested under controlled conditionson a specified indoor laboratory test wheel. Sus‐tained high temperature can cause the materialof the tire to degenerate and reduce tire life, andexcessive temperature can lead to sudden tirefailure. The grade C corresponds to a level ofperformance which all passenger car tires mustmeet under the Federal Motor Vehicle SafetyStandard No. 109. Grades Band A representhigher levels of performance on the laboratorytest wheel than the minimum required by law.
Temperature grade for this tireThe temperature grade for this tire is es‐
tablished for a tire that is properly inflated andnot overloaded. Excessive speed, underinfla‐tion, or excessive loading, either separately or incombination, can cause heat buildup and pos‐sible tire failure.If necessary, have the vehicle towed.◀
RSC – Run-flat tiresRun-flat tires, refer to page 271, are labeled witha circular symbol containing the letters RSCmarked on the sidewall.
M+SWinter and all-season tires with better coldweather performance than summer tires.
Tire treadSummer tiresDo not drive with a tire tread depth of less than0.12 in/3 mm.There is an increased danger of hydroplaning ifthe tread depth is less than 0.12 in/3 mm.
Winter tiresDo not drive with a tire tread depth of less than0.16 in/4 mm.Below a tread depth of 0.16 in/4 mm, tires areless suitable for winter operation.
Seite 268
Mobility Wheels and tires
268Online Edition for Part no. 01 40 2 608 633 — 11 09 490

Minimum tread depth
Wear indicators are distributed around the tire’scircumference and have the legally requiredminimum height of 0.063 in/1.6 mm.
They are marked on the side of the tire with TWI,Tread Wear Indicator.
Tire damageGeneral informationInspect your tires often for damage, foreign ob‐jects lodged in the tread, and tread wear.
NotesDriving over rough or damaged road surfaces, aswell as debris, curbs and other obstacles cancause serious damage to wheels, tires and sus‐pension parts. This is more likely to occur withlow-profile tires, which provide less cushioningbetween the wheel and the road. Be careful toavoid road hazards and reduce your speed, es‐pecially if your vehicle is equipped with low-pro‐file tires.Indications of tire damage or other vehicle de‐fects:▷ Unusual vibrations during driving.▷ Unusual handling such as a strong tendency
to pull to the left or right.Damage can, e. g., be caused by driving overcurbs, road damage, or similar things.
In case of tire damageIf there are indications of tire damage, re‐
duce your speed immediately and have thewheels and tires checked right away; otherwise,there is the increased risk of an accident.Drive carefully to the next service center or tireshop.If necessary, have the vehicle towed.Otherwise, tire damage can be life-threateningfor vehicle occupants and other traffic partici‐pants.◀
Repair of tire damageFor safety reasons, the manufacturer of
your vehicle recommends that you do not havedamaged tires repaired; they should be re‐placed. Otherwise, damage can occur as a re‐sult.◀
Changing wheels and tiresMounting
Information on mounting tiresHave mounting and balancing performed
only by a service center or tire specialist.If this work is not carried out properly, there isthe danger of subsequent damage and relatedsafety hazards.◀
Wheel and tire combinationInformation on the correct wheel-tire combina‐tion and rim versions for your vehicle can be ob‐tained from your service center.Incorrect wheel and tire combinations impair thefunction of a variety of systems such as ABS orDSC.To maintain good handling and vehicle re‐sponse, use only tires with a single tread con‐figuration from a single manufacturer.Following tire damage, have the original wheeland tire combination remounted on the vehicleas soon as possible.
Seite 269
Wheels and tires Mobility
269Online Edition for Part no. 01 40 2 608 633 — 11 09 490

Approved wheels and tiresThe manufacturer of your vehicle recom‐
mends that you use only wheels and tires thathave been approved for your particular vehiclemodel.For example, despite having the same officialsize ratings, variations can lead to body contactand with it, the risk of severe accidents.The manufacturer of your vehicle cannot evalu‐ate non-approved wheels and tires to determineif they are suited for use, and therefore cannotensure the operating safety of the vehicle if theyare mounted.◀
Recommended tire brands
For each tire size, the manufacturer of your ve‐hicle recommends certain tire brands. Thesecan be identified by a star on the tire sidewall.With proper use, these tires meet the higheststandards for safety and handling.
New tiresDue to technical factors associated with theirmanufacture, tires do not achieve their full trac‐tion potential until after an initial breaking-in pe‐riod.Drive conservatively for the first 200 miles/300 km.
Retreaded tiresThe manufacturer of your vehicle does not rec‐ommend the use of retreaded tires.
Retreaded tiresPossibly substantial variations in the de‐
sign and age of the tire casing structures canlimit service life and have a negative impact onroad safety.◀
Winter tiresThe manufacturer of your vehicle recommendswinter tires for winter roads or at temperaturesbelow +45 ℉/+7 ℃.Although so-called all-season M+S tires do pro‐vide better winter traction than summer tires,they do not provide the same level of perform‐ance as winter tires.
Maximum speed of winter tiresIf the maximum speed of the vehicle is higherthan the permissible speed for the winter tires,then display a corresponding sign in the field ofvision. You can obtain this sign from the tire spe‐cialist or from your service center.
Maximum speed for winter tiresDo not exceed the maximum speed for the
winter tires; otherwise, tire damage and acci‐dents can occur.◀
Run-flat tiresIf you are already using run-flat tires, for yourown safety you should replace them only withthe same kind. No spare tire is available in thecase of a flat tire. Your service center will be gladto advise you.
Rotating wheels between axlesThe manufacturer of your vehicle advisesagainst swapping wheels between the front andrear axles.This can impair the handling characteristics.
StorageStore wheels and tires in a cool, dry place withas little exposure to light as possible.
Seite 270
Mobility Wheels and tires
270Online Edition for Part no. 01 40 2 608 633 — 11 09 490

Always protect tires against all contact with oil,grease and fuels.Do not exceed the maximum tire inflation pres‐sure indicated on the side wall of the tire.
Run-flat tiresLabel
RSC label on the tire sidewall.The wheels are composed of special rims andtires that are self-supporting, to a limited de‐gree.The support of the sidewall allows the tire to re‐main drivable to a restricted degree in the eventof a pressure loss.
Continued driving with a damaged tire, refer topage 99.
Changing run-flat tiresFor your own safety, only use run-flat tires. Nospare tire is available in the case of a flat tire. Yourservice center will be glad to advise you.
Snow chainsFine-link snow chainsOnly certain types of fine-link snow chains havebeen tested by the manufacturer of your vehicle,classified as road-safe and recommended.Consult your service center for more informa‐tion.
UseUse only in pairs on the rear wheels, equippedwith the tires of the following size:▷ 205/60 R 16.▷ 225/55 R 16.▷ 225/50 R 17.▷ 225/45 R 18.Follow the chain manufacturer’s instructions.Make sure that the snow chains are always suf‐ficiently tight. Retighten as needed according tothe chain manufacturer’s instructions.Do not initialize the Flat Tire Monitor aftermounting snow chains, as doing so may resultin incorrect readings.Do not initialize the Tire Pressure Monitor aftermounting snow chains, as doing so may resultin incorrect readings.When driving with snow chains, briefly activateDynamic Traction Control if necessary.
Maximum speed with snow chainsDo not exceed a speed of 30 mph/50 km/h whenusing snow chains.
Seite 271
Wheels and tires Mobility
271Online Edition for Part no. 01 40 2 608 633 — 11 09 490

Engine compartmentVehicle equipmentAll standard, country-specific and optionalequipment that is offered in the model series isdescribed in this chapter. Therefore, equipment
is also described that is not available in a vehicle,e. g., because of the selected optional equip‐ment or country variant. This also applies forsafety-related functions and systems.
Important features in the engine compartment
1 Jump-starting, negative terminal2 Vehicle identification number3 Washer fluid reservoir4 Jump-starting, positive terminal5 Engine compartment fuse box
6 Oil filler neck7 Coolant reservoir
The coolant reservoir for 6-cylinder and die‐sel engines is located on the opposite sideof the engine compartment.
Seite 272
Mobility Engine compartment
272Online Edition for Part no. 01 40 2 608 633 — 11 09 490

HoodNotes
Working in the engine compartmentNever attempt to perform any service or
repair operations on your vehicle without thenecessary professional technical training.If you are unfamiliar with the statutory guide‐lines, have any work on the vehicle performedonly by a service center.If this work is not carried out properly, there isthe danger of subsequent damage and relatedsafety hazards.◀
Never reach into the engine compartmentNever reach into the intermediate spaces
or gaps in the engine compartment. Otherwise,there is risk of injury, e.g. from rotating or hotparts.◀
Fold down wiper armBefore opening the hood, ensure that the
wiper arms are against the windshield, or thismay result in damage.◀
Opening the hood1. Pull lever in the interior:
Engine is released, arrow 1.
2. After the lever is released, pull the leveragain:Hood can be opened, arrow 2.
Indicator/warning lampsWhen the hood is opened, a Check Control mes‐sage is displayed.
Closing the hood
Let the hood drop from a height of approx. 16 in/40 cm and push down on it to lock it fully.The hood must audibly engage on both sides.
Hood open when drivingIf you see any signs that the hood is not
completely closed while driving, pull over imme‐diately and close it securely.◀
Danger of pinchingMake sure that the closing path of the
hood is clear; otherwise, injuries may result.◀
Seite 273
Engine compartment Mobility
273Online Edition for Part no. 01 40 2 608 633 — 11 09 490

Engine oilVehicle equipmentAll standard, country-specific and optionalequipment that is offered in the model series isdescribed in this chapter. Therefore, equipmentis also described that is not available in a vehicle,e. g., because of the selected optional equip‐ment or country variant. This also applies forsafety-related functions and systems.
General informationThe engine oil consumption is dependent on thedriving style and driving conditions.Therefore, regularly check the engine oil levelafter refueling.
Check oil levelThe conceptThe oil level is monitored electronically duringdriving and shown on the Control Display.If the oil level reaches the minimum level, acheck control message is displayed.
Displaying the oil level1. «Vehicle Info»2. «Vehicle status»3. «Engine oil level»
Possible messages▷ «Engine oil level OK»▷ «Engine oil at minimum. Add 1 quart of
engine oil!»Within the next 125 miles/200 km, a maxi‐mum of 1 US quart/liter oil.
▷ «Engine oil level below minimum. Add 1quart!»Immediately add 1 US quart/liter of oil.
Detailed measurementRequirements:▷ Vehicle is on a level road and the engine is
running at operating temperature.▷ Manual transmission: Shift lever in neutral
position clutch and gas pedal not de‐pressed.
▷ Automatic transmission: Selector lever intransmission position N or P and gas pedalnot depressed.
In order to perform a detailed measurement ofthe engine oil level:
1. «Vehicle Info»2. «Vehicle status»3. «Measure engine oil level»4. «Start measurement»The oil level is checked and displayed via a scale.During the detailed measurement, the idlespeed is increased somewhat.Duration: approx. 1 minute.
Adding engine oilFiller neck
When the indicator lights up in the instrumentcluster, add 1 US quart/liter of engine oil withinthe next 125 miles/200 km.
Seite 274
Mobility Engine oil
274Online Edition for Part no. 01 40 2 608 633 — 11 09 490

Do not add too much engine oilWhen too much engine oil is added, im‐
mediately have the vehicle checked, otherwise,this may cause engine damage.◀
Protect childrenKeep oil, grease, etc., out of reach of chil‐
dren and heed the warnings on the containersto prevent health risks.◀
Oil types for refillingNotes
No oil additivesOil additives may lead to engine damage.◀
Viscosity grades for engine oilsWhen selecting an engine oil, ensure that
the engine oil belongs to one of the viscositygrades SAE 0W-40, SAE 0W-30, SAE 5W-40,and SAE 5W-30 or malfunctions or engine dam‐age may occur.◀
The engine oil quality is critical for the life of theengine.Some types of oils in some cases are not avail‐able in all countries.
Approved oil types
Specification
BMW High Performance SAE 5W-30
BMW Longlife-01
BMW Longlife-01 FE
Additional information about the approvedtypes of oils can be requested from the servicecenter.
Alternative oil typesIf the approved engine oils are not available, upto 1 US quart/liter of an oil with the followingspecification can be added:
Specification
API SM or superior grade specification
Oil changeAn oil change should be carried out by yourservice center only.
Seite 275
Engine oil Mobility
275Online Edition for Part no. 01 40 2 608 633 — 11 09 490

CoolantVehicle equipmentAll standard, country-specific and optionalequipment that is offered in the model series isdescribed in this chapter. Therefore, equipmentis also described that is not available in a vehicle,e. g., because of the selected optional equip‐ment or country variant. This also applies forsafety-related functions and systems.
General informationDanger of burns from hot engineDo not open the cooling system while the
engine is hot; otherwise, escaping coolant maycause burns.◀
Suitable additivesOnly use suitable additives; otherwise, en‐
gine damage may occur. The additives areharmful to your health.◀
Coolant consists of water and additives.Not all commercially available additives are suit‐able for your vehicle. Ask your service center forsuitable additives.
Coolant levelChecking1. Let the engine cool.2. The coolant level is correct if it lies between
the minimum and maximum marks. Themarks are on the side of the coolant reser‐voir.
Adding engine oil1. Let the engine cool.2. Turn the cap of the coolant reservoir slightly
counterclockwise to allow any excess pres‐sure to dissipate, and then open it.
3. If the coolant is low, slowly add coolant up tothe specified level; do not overfill.
4. Turn the cap until there is an audible click.5. Have the cause of the coolant loss elimi‐
nated as soon as possible.
DisposalComply with the relevant environmentalprotection regulations when disposingof coolant and coolant additives.
Seite 276
Mobility Coolant
276Online Edition for Part no. 01 40 2 608 633 — 11 09 490

MaintenanceVehicle equipmentAll standard, country-specific and optionalequipment that is offered in the model series isdescribed in this chapter. Therefore, equipmentis also described that is not available in a vehicle,e. g., because of the selected optional equip‐ment or country variant. This also applies forsafety-related functions and systems.
BMW Maintenance SystemThe maintenance system directs you to re‐quired maintenance measures and thereby sup‐ports you in maintaining road safety and the op‐erational reliability of the vehicle.
Condition Based Service CBSSensors and special algorithms take into ac‐count the driving conditions of your vehicle.Based on this, Condition Based Service deter‐mines the maintenance requirements.The system makes it possible to adapt theamount of maintenance you need to your userprofile.Detailed information on service requirements,refer to page 77, can be displayed on the ControlDisplay.
Service data in the remote controlInformation on the required maintenance is con‐tinuously stored in the remote control. Yourservice center will read out this data and suggestthe right array of service procedures for your ve‐hicle.Therefore, hand your service specialist the re‐mote control that you used most recently.
Storage periodsStorage periods during which the vehicle bat‐tery was disconnected are not taken into ac‐count.If this occurs, have a service center update thetime-dependent maintenance procedures,such as checking brake fluid and, if necessary,changing the engine oil and the microfilter/acti‐vated-charcoal filter.
Service historyPerform maintenance work at the service centerand have them recorded in the vehicle data. Theentries are like a service booklet of the docu‐mentation of regular maintenance.Displaying entered maintenance work on theControl Display, refer to page 78.
Service and WarrantyInformation Booklet for USmodels and Warranty andService Guide Booklet forCanadian modelsPlease consult your Service and Warranty Infor‐mation Booklet for US models and Warranty andService Guide Booklet for Canadian models foradditional information on service requirements.Maintenance and repair should be performed byyour service center. Make sure to have regularmaintenance procedures recorded in the vehi‐cle’s Service and Warranty Information Bookletfor US models, and in the Warranty and ServiceGuide Booklet for Canadian models. These en‐tries are proof of regular maintenance.
Seite 277
Maintenance Mobility
277Online Edition for Part no. 01 40 2 608 633 — 11 09 490

Socket for OBD OnboardDiagnosisPosition
There is an OBD socket on the driver’s side forchecking the primary components in the vehicleemissions.
Emissions▷ The warning lamp lights up:
Emissions are deteriorating. Havethe vehicle checked as soon as pos‐sible.Canadian model: warning light indi‐cates the engine symbol.
▷ The warning lamp flashes under certain cir‐cumstances:This indicates that there is excessive misfir‐ing in the engine.Reduce the vehicle speed and have the sys‐tem checked immediately; otherwise, seri‐ous engine misfiring within a brief period canseriously damage emission control compo‐nents, in particular the catalytic converter.
Fuel capThe indicator lamp lights up.If the fuel cap is not properly tightened,the OBD system may conclude that fuel
vapor is escaping. If the cap is then tightened,the display should go out in a short time.
Data memoryYour vehicle records data relating to vehicle op‐eration, faults and user settings. These data arestored in the remote control and can be read outwith suitable devices, particularly when the ve‐hicle is serviced. The data obtained in this wayprovide valuable information for service proc‐esses and repair or for optimizing and develop‐ing vehicle functions further.In addition, if you signed a service contract forBMW Assist, certain vehicle data can be sentdirectly from the vehicle to facilitate the desiredservices.
Seite 278
Mobility Maintenance
278Online Edition for Part no. 01 40 2 608 633 — 11 09 490

Replacing componentsVehicle equipmentAll standard, country-specific and optionalequipment that is offered in the model series isdescribed in this chapter. Therefore, equipmentis also described that is not available in a vehicle,e. g., because of the selected optional equip‐ment or country variant. This also applies forsafety-related functions and systems.
Onboard vehicle tool kit
The onboard vehicle tool kit is located on theright side in the cargo area in a storage com‐partment. Open the cover.
Wiper blade replacementGeneral information
Do not fold down the wipers without wiperblades
Do not fold down the wipers if wiper blades havenot been installed; this may damage the wind‐shield.◀
Replacing the wiper blades1. To change the wiper blades, fold up, refer to
page 66, the wiper arms.2. Fold up and hold the wiper arm firmly.
3. Squeeze the retainer spring, arrow 1, andfold up the wiper blade, arrow 2.
4. Remove the wiper blade forward from thecatch.
5. Insert the new wiper blade in reverse orderof removal until it locks in place.
Risk of damageBefore opening the hood, ensure that the
wiper arms with the wiper blades are against thewindshield to prevent damage.◀
Lamp and bulb replacementGeneral informationLamps and bulbs make an essential contributionto vehicle safety.The manufacturer of the vehicle recommendsthat you entrust corresponding procedures tothe service center if you are unfamiliar with themor they are not described here.You can obtain a selection of replacement bulbsat the service center.
Danger of burnsOnly change bulbs when they are cool;
otherwise, there is the danger of gettingburned.◀
Seite 279
Replacing components Mobility
279Online Edition for Part no. 01 40 2 608 633 — 11 09 490

Working on the lighting systemWhen working on the lighting system, you
should always switch off the lights affected toprevent short circuits.To avoid possible injury or equipment damagewhen replacing bulbs, observe any instructionsprovided by the bulb manufacturer.◀
Do not perform work/bulb replacement onxenon headlamps
Have any work on the xenon lighting system, in‐cluding bulb replacement, performed only by aservice center. Due to the high voltage presentin the system, there is the danger of fatal injuriesif work is carried out improperly.◀
Do not touch the bulbsDo not touch the glass of new bulbs with
your bare hands, as even minute amounts ofcontamination will burn into the bulb’s surfaceand reduce its service life.Use a clean tissue, cloth or something similar, orhold the bulb by its base.◀
Light-emitting diodes (LEDs)Light-emitting diodes installed behind a coverserve as the light source for controls, display el‐ements and other equipment.These light-emitting diodes, which are relatedto conventional lasers, are officially designatedas Class 1 light-emitting diodes.
Do not remove the coversDo not remove the covers, and never stare
into the unfiltered light for several hours; other‐wise, irritation of the retina could result.◀
Headlamp glassCondensation can form on the inside of the ex‐ternal lamps in cool or humid weather. Whendriving with the light switched on, the conden‐sation evaporates after a short time. The head‐lamp glasses do not need to be changed.
If the headlamps do not dim despite driving withthe light switched on, increasing humidity forms,e. g. water droplets in the light, have the servicecenter check this.
Front lamps, bulb replacement
Halogen headlamps
1 Parking lamps2 High beams/headlamp flasher3 Low beams4 Turn signal5 Daytime running lights
Accessing the turn signals and low beamsFollow the General instructions on lamps andbulbs, refer to page 279.
1. In the wheel house, loosen the two bracketsand remove the cover.
Seite 280
Mobility Replacing components
280Online Edition for Part no. 01 40 2 608 633 — 11 09 490

Turn signal21-watt bulb, PY21W
1. If necessary, pull the inside trim of the wheelhouse slightly inward. Turn the bulb holdercounterclockwise and remove.
2. Press the bulb gently into the socket, turncounterclockwise and remove.
3. Install the new bulb and bulb holder in re‐verse order of removal.
4. Attach the cover to the wheel house.
Low beams55-watt bulb, H7
1. Turn the cap counterclockwise and remove.
2. Tilt the bulb down and then up to loosen itfrom the holder and remove.
3. Pull the connector off the bulb.4. Attach the connector to the new bulb.5. First insert the bulb at the top with the strap,
arrow 1, and then press down firmly, arrow 2.Make sure that the bulb snaps into place.
6. Close the headlamp housing with the cap.Make sure that the cap engages.
7. Attach the cover to the wheel house.
Seite 281
Replacing components Mobility
281Online Edition for Part no. 01 40 2 608 633 — 11 09 490

Accessing the daytime running lights, highbeams/headlamp flasher and parking lampsFollow the General instructions on lamps andbulbs, refer to page 279.
1. Open the hood, refer to page 273.2. Turn the cap counterclockwise and remove.
Parking lamps6-watt bulb, H6W
1. Turn the bulb holder counterclockwise andremove.
2. Press the bulb gently into the socket, turncounterclockwise and remove.
3. To insert the bulb and bulb holder, proceedin reverse order of removal. Make sure thatthe bulb holder snaps into place.
4. Close the headlamp housing with the cap.Make sure that the cap engages.
High beams/headlamp flasher55-watt bulb, H7
1. Tilt the bulb down and then up to loosen itfrom the holder and remove.
2. Pull the connector off the bulb.3. Attach the connector to the new bulb.4. First insert the bulb at the top with the strap,
arrow 1, and then press down firmly, arrow 2.Make sure that the bulb snaps into place.
5. Close the headlamp housing with the cap.Make sure that the cap engages.
Seite 282
Mobility Replacing components
282Online Edition for Part no. 01 40 2 608 633 — 11 09 490

Daytime running lights24-watt bulb, PW24W
1. If necessary, remove the high beam bulbconnector.
2. Remove the bulb holder.
3. Remove the bulb from the bulb holder.4. To insert the new bulb, proceed in reverse
order of removal. During insertion, the bot‐tom of the bulb holder must be facing down‐ward. Make sure that the bulb holder snapsinto place.
5. Attach the high beam bulb connector.6. Close the headlamp housing with the cap.
Make sure that the cap engages.
Xenon headlamps
Xenon headlampsBecause of the long life of these bulbs, the like‐lihood of failure is very low. Switching the lampson and off frequently shortens their life.If a xenon bulb fails, switch on the front fog lampsand continue the trip with great care. Complywith local regulations.
Do not perform work/bulb replacement onxenon headlamps
Have any work on the xenon lighting system, in‐cluding bulb replacement, performed only by aservice center. Due to the high voltage presentin the system, there is the danger of fatal injuriesif work is carried out improperly.◀
For checking and adjusting headlamp aim,please contact your BMW center.
Headlamps
1 Parking lamps/daytime running lights2 Low beams/high beams/headlamp flasher3 Turn signal
Low beams and high beams are designed withxenon technology.The parking lamps and daylight running lightsare made using LED technology.Contact your service center in the event of amalfunction.
Turn signalFollow the General instructions on lamps andbulbs, refer to page 279.
Seite 283
Replacing components Mobility
283Online Edition for Part no. 01 40 2 608 633 — 11 09 490

21-watt bulb, PY21W
1. In the wheel house, loosen the two bracketsand remove the cover.
2. If necessary, pull the inside trim of the wheelhouse slightly inward. Turn the bulb holdercounterclockwise and remove.
3. Press the bulb gently into the socket, turncounterclockwise and remove.
4. Install the new bulb and bulb holder in re‐verse order of removal.
5. Attach the cover to the wheel house.
Front fog lampsFollow the General instructions on lamps andbulbs, refer to page 279.35-watt bulb, H8
1. Use the back side of the screwdriver fromthe onboard vehicle tool kit to remove thethree wheel house panel screws, arrow 1.
Carefully raise the wheel house panel, ar‐row 2.
2. Pull off the bulb connector, arrow 1.Turn the bulb, arrow 2.Left side of vehicle: turn clockwise.Right side of vehicle: turn counterclockwise.Remove the bulb.
3. Insert the new bulb, connect the connectorand screw on the wheel house panel.
Turn signal in exterior mirrorFollow the General instructions on lamps andbulbs, refer to page 279.The turn signals feature LED technology. Con‐tact your service center in the event of a mal‐function.
Seite 284
Mobility Replacing components
284Online Edition for Part no. 01 40 2 608 633 — 11 09 490

Tail lamps, bulb replacement
At a glance
1 Turn signal2 Reversing lamp3 Inside brake lamp4 Tail lamps5 Outside brake lamp
Bulb replacement, exterior tail lamps
General informationFollow the General instructions on lamps andbulbs, refer to page 279.Turn signal: 21-watt bulb, P21WExterior brake lamp: 21-watt bulb, P21WThe tail lamps feature LED technology. Contactyour service center in the event of a malfunction.
Use caution when replacing the bulbUse caution and proceed one step at a
time when replacing the bulbs to prevent dam‐age to the tail lamps or vehicle.◀
Removing the exterior tail lamp1. Open trunk lid.2. Use the screwdriver from the onboard vehi‐
cle tool kit to loosen the screw, arrow 1, andremove the cover, arrow 2.
3. Use the screwdriver handle to loosen thetwo nuts, arrows 1 and 2, and remove. Thetail lamp is still attached to a rubber mounton the outside.
4. Grasp the inner edge of the tail lamp andcarefully swing it back and out of the rubbermount, arrow 1. Use your free hand to holdit in place in order to prevent the tail lampfrom coming loose suddenly. Make sure thatthe foam rubber sealing ring is on the cen‐tering pin, arrow 2.
Seite 285
Replacing components Mobility
285Online Edition for Part no. 01 40 2 608 633 — 11 09 490

5. Remove the connecting line from the clip onthe bulb holder.
6. Release the catch at the top on the connec‐tor of the connecting line and remove theconnector from the bulb holder.
Replacing the bulbs1. Loosen the four fasteners, arrow 1, on the
bulb holder and remove the bulb holder fromthe tail lamp, arrow 2.
2. Press the defective bulb gently into thesocket, turn counterclockwise and remove.
3. Proceed in the reverse order to insert thenew bulb and attach the bulb holder. Makesure that the bulb holder engages in all fas‐teners.
Installing the tail lamp1. Connect the connecting line to the tail lamp
and secure the bulb holder in the clip.2. Make sure that the sealing ring is on the
centering pin, arrow 2, and is not damaged.3. Position and firmly press the outer part of
the tail lamp onto the rubber mount, arrow 1and the inner part onto the centering com‐
ponent, arrow 2. Make sure that the tail lampengages in the rubber mount.
4. Screw the two nuts onto the tail lamp andmount the cover.
Lamps in the trunk lid
General informationFollow the General instructions on lamps andbulbs, refer to page 279.Reversing lamps: 21-watt bulb, P21WInner brake lamps: 21-watt bulb, H21W
Accessing the lamps1. Use the screwdriver from the onboard vehi‐
cle tool kit to loosen and completely removethe six screws on the trim.
2. Carefully loosen the trim from the trunk lid,starting at the edge and working toward thearea around the recessed grips. Make surethat the trim does not become stuck.
3. Carefully swing out the trim.
Seite 286
Mobility Replacing components
286Online Edition for Part no. 01 40 2 608 633 — 11 09 490

Replacing the reversing lamp and innerbrake lamp1. Loosen the two fasteners, arrow 1 and pull
down on the lamp holder to remove, arrow 2.
2. Press the defective bulb gently into thesocket, turn counterclockwise and remove.
3. Insert the new bulb.
Installing the bulb holder1. Slide the bulb holder onto the two guide
pins, arrow 1. Insert the two contacts, ar‐row 2, into the connections, arrow 3.
2. Press on the bulb holder. Make sure that thetwo exterior fasteners latch into place.
3. Swing the trim back onto the trunk lid andsecure.
Tail lamp, license plate lamp andcentral brake lampFollow the General instructions on lamps andbulbs, refer to page 279.The lamps feature LED technology. Contactyour service center in the event of a malfunction.
Changing wheelsNotesThe vehicle equipment does not include a sparetire.When using run-flat tires or tire sealants, a tiredoes not need to be changed immediately in theevent of pressure loss due to a flat tire.The tools for changing wheels are available asaccessories from your service center.
Jacking points for the vehicle jack
The jacking points for the vehicle jack are lo‐cated at the positions shown.
Vehicle batteryMaintenanceThe battery is maintenance-free, i.e., the elec‐trolyte will last for the life of the battery.Your service center will be glad to advise you onquestions regarding the battery.
Battery replacementUse approved vehicle batteries onlyOnly use vehicle batteries that have been
approved for your vehicle by the manufacturer;otherwise, the vehicle could be damaged andsystems or functions may not be fully availa‐ble.◀
After a battery replacement, have the batteryregistered on the vehicle by your service center
Seite 287
Replacing components Mobility
287Online Edition for Part no. 01 40 2 608 633 — 11 09 490

to ensure that all comfort functions are fullyavailable and that any Check Control messagesare no longer displayed.
Charging the batteryIn the vehicle, only charge the battery via thestarting aid terminals, refer to page 292, in theengine compartment with the engine off.
Power failureAfter a temporary power loss, some equipmentneeds to be reinitialized.Individual settings need to be reprogrammed:▷ Seat and mirror memory: store the positions
again.▷ Time: update.▷ Date: update.▷ Radio station: save again.▷ Navigation system: wait for the operability of
the navigation.
Disposing of old batteriesHave old batteries disposed of by yourservice center or bring them to a recy‐cling center.
Maintain the battery in an upright position fortransport and storage. Secure the battery sothat it does not tip over during transport.
FusesNotes
Replacing fusesNever attempt to repair a blown fuse and
do not replace a defective fuse with a substituteof another color or amperage rating; this couldlead to a circuit overload, ultimately resulting ina fire in the vehicle.◀
Plastic tweezers and information on the fusetypes and locations are stored in the fuse box inthe cargo area.
In the engine compartment1. Use the onboard vehicle toolkit to loosen the
three cover screws, arrow 1.
2. Pull up the holder, arrow 2.3. Remove the cover from one side, arrow 3.4. Press the four fasteners and remove the
cover.
Reattaching the covers1. When attaching the cover, make sure that all
four fasteners are engaged.2. Attach the cover under the rubber lip and
then thread it between the bars.
3. Press down on the holder and tighten thethree screws.
Seite 288
Mobility Replacing components
288Online Edition for Part no. 01 40 2 608 633 — 11 09 490

In the cargo area
Raise the cargo floor panel.
Information on the fuse types and locations isfound on a separate sheet.
Seite 289
Replacing components Mobility
289Online Edition for Part no. 01 40 2 608 633 — 11 09 490

Breakdown assistanceVehicle equipmentAll standard, country-specific and optionalequipment that is offered in the model series isdescribed in this chapter. Therefore, equipmentis also described that is not available in a vehicle,e. g., because of the selected optional equip‐ment or country variant. This also applies forsafety-related functions and systems.
Hazard warning flashers
The button is located in the center console.
Emergency RequestRequirements▷ Equipment version with full preparation
package mobile phone.An Emergency Request can be made, evenif no mobile phones are paired with the ve‐hicle.
▷ BMW Assist is activated.▷ The radio ready state is switched on.▷ The BMW Assist system is logged in to a
wireless communications network sup‐ported by BMW Assist.
▷ The Assist system is functional.Only press the SOS button in an emergency.
Emergency Request not guaranteedFor technical reasons, the Emergency Re‐
quest cannot be guaranteed under unfavorableconditions.◀
Service contract▷ After your contract with BMW Assist has ex‐
pired, the BMW Assist system can be deac‐tivated by the service center without youhaving to visit a workshop.After deactivation, an Emergency Requestis no longer possible.
▷ Under certain circumstances, the systemcan be reactivated by a service center afteryou sign a new contract.
Initiating an Emergency Request
1. Press the cover briefly to open it.2. Press the SOS button until the LED in the
button lights up.▷ The LED lights up: an Emergency Request
was initiated.If the situation allows, wait in your vehicleuntil the voice connection has been estab‐lished.
▷ The LED flashes if the connection to theBMW Assist Response Center has been es‐tablished.After the Emergency Request arrives at theBMW Assist Response Center, the BMW
Seite 290
Mobility Breakdown assistance
290Online Edition for Part no. 01 40 2 608 633 — 11 09 490

Assist Response Center contacts you andtakes further steps to help you.Even if you are unable to respond, the BMWAssist Response Center can take furthersteps to help you under certain circumstan‐ces.For this purpose, data that are used to de‐termine the necessary rescue measures,such as the current position of the vehicle ifit can be established, are transmitted to theBMW Assist Response Center.
▷ If the LED is flashing but the BMW AssistResponse Center cannot be heard on thehands-free system, the hands-free systemmay be malfunctioning. However, the BMWAssist Response Center may still be able tohear you.
Initiating an Emergency RequestautomaticallyUnder certain conditions, an Emergency Re‐quest is automatically initiated immediately aftera severe accident. Automatic Collision Notifica‐tion is not affected by pressing the SOS button.
Warning triangle
The warning triangle is located on the inside ofthe trunk lid.To remove, loosen the bracket.
First aid kit
The first aid kit is located in the cargo area in astorage compartment.
Some of the articles have a limited service life.Check the expiration dates of the contents reg‐ularly and replace any expired items promptly.
Roadside AssistanceService availabilityRoadside Assistance can be reached around theclock in many countries. You can obtain assis‐tance there in the event of a vehicle breakdown.
Roadside AssistanceThe Roadside Assistance, refer to page 251,phone number can be viewed on the iDrive or aconnection to Roadside Assistance can be es‐tablished directly.
Jump startingNotesIf the battery is discharged, an engine can bestarted using the battery of another vehicle andtwo jumper cables. Only use jumper cables withfully insulated clamp handles.To prevent personal injury or damage to bothvehicles, adhere strictly to the following proce‐dure.
Seite 291
Breakdown assistance Mobility
291Online Edition for Part no. 01 40 2 608 633 — 11 09 490

Do not touch live partsTo avoid the risk of potentially fatal injury,
always avoid all contact with electrical compo‐nents while the engine is running.◀
Preparation1. Check whether the battery of the other ve‐
hicle has a voltage of 12 volts. This informa‐tion can be found on the battery.
2. Switch off the engine of the assisting vehi‐cle.
3. Switch off any electronic systems/powerconsumers in both vehicles.
Bodywork contact between vehiclesMake sure that there is no contact be‐
tween the bodywork of the two vehicles; other‐wise, there is the danger of short circuits.◀
Starting aid terminalsConnecting orderConnect the jumper cables in the correct
order; otherwise, there is the danger of injuryfrom sparking.◀
The so-called starting aid terminal in the enginecompartment acts as the battery’s positive ter‐minal.Open the cover of the starting aid terminal.
The body ground or a special nut acts as thenegative terminal.
Connecting the cables1. Open the cover of the BMW starting aid ter‐
minal.2. Attach one terminal clamp of the positive
jumper cable to the positive terminal of thebattery, or to the corresponding starting aidterminal of the assisting vehicle.
3. Attach the other end of the cable to the pos‐itive terminal of the battery, or to the corre‐sponding starting aid terminal of the vehicleto be started.
4. Attach one terminal clamp of the negativejumper cable to the negative terminal of thebattery, or to the corresponding engine orbody ground of assisting vehicle.
5. Attach the other end of the cable to the neg‐ative terminal of the battery, or to the corre‐sponding engine or body ground of the ve‐hicle to be started.
Starting the engineNever use spray fluids to start the engine.
1. Start the engine of the assisting vehicle andlet it run for several minutes at an increasedidle speed.
2. Start the engine of the vehicle being startedin the usual way.If the first starting attempt is not successful,wait a few minutes before making anotherattempt in order to allow the discharged bat‐tery to recharge.
Seite 292
Mobility Breakdown assistance
292Online Edition for Part no. 01 40 2 608 633 — 11 09 490

3. Let both engines run for several minutes.4. Disconnect the jumper cables in the reverse
order.Check the battery and recharge if necessary.
Tow-starting and towingAutomatic transmission: transportingyour vehicle
NoteYour vehicle is not permitted to be towed.Therefore, contact a service center in the eventof a breakdown.
Do not have the vehicle towedHave your vehicle transported on a loading
platform only; otherwise, damage may occur.◀
Tow truck
Do not lift the vehicleDo not lift the vehicle by the tow fitting or
body and chassis parts; otherwise, damage mayresult.◀
Use the tow fitting screwed in at the front formaneuvering the vehicle only.
Manual transmissionGearshift lever in neutral position.
TowingFollow the towing instructionsFollow all towing instructions; otherwise,
vehicle damage or accidents may occur.◀
▷ Make sure that the ignition is switched on;otherwise, the low beams, tail lamps, turnsignals, and windshield wipers may be un‐available.
▷ Do not tow the vehicle with the rear axletilted, as the front wheels could turn.
▷ When the engine is stopped, there is nopower assist. Consequently, more forceneeds to be applied when braking and steer‐ing.
▷ Larger steering wheel movements are re‐quired.
Tow truck
Have your vehicle transported with a tow truckwith a so-called lift bar or on a flat bed.
Do not lift the vehicleDo not lift the vehicle by the tow fitting or
body and chassis parts; otherwise, damage mayresult.◀
Towing other vehicles
General informationLight towing vehicleYour vehicle must not be lighter than the
vehicle being towed; otherwise, it will not bepossible to control vehicle response.◀
Seite 293
Breakdown assistance Mobility
293Online Edition for Part no. 01 40 2 608 633 — 11 09 490

Attaching the tow bar/tow rope correctlyAttach the tow bar or tow rope to the tow
fitting; connecting it to other vehicle parts maycause damage.◀
▷ Switch on the hazard warning system, de‐pending on local regulations.
▷ If the electrical system has failed, clearlyidentify the vehicle being towed by placinga sign or a warning triangle in the rear win‐dow.
Tow barThe tow fittings used should be on the sameside on both vehicles.Should it prove impossible to avoid mountingthe tow bar at an offset angle, please observethe following:▷ Maneuvering capability is limited during cor‐
nering.▷ The tow bar will generate lateral forces if it
is secured with an offset.
Tow ropeWhen starting to tow the vehicle, make sure thatthe tow rope is taut.To avoid jerking and the associated stresses onthe vehicle components when towing, alwaysuse nylon ropes or nylon straps.
Attaching the tow rope correctlyOnly secure the tow rope on the tow fit‐
ting; otherwise, damage can occur when it is se‐cured on other parts of the vehicle.◀
Tow fitting
The screw-in tow fitting should always be car‐ried in the vehicle. It can be screwed in at thefront or rear of the BMW. It is in the onboard ve‐hicle tool kit located in a storage compartmenton the right side in the cargo area. Open thecover.
Tow fitting, information on use▷ Use only the tow fitting provided with
the vehicle and screw it all the way in.▷ Use the tow fitting for towing on paved roads
only.▷ Avoid lateral loading of the tow fitting, e.g.,
do not lift the vehicle by the tow fitting.Otherwise, damage to the tow fitting and the ve‐hicle can occur.◀
Screw threadPush out the cover by pressing on the top edge.
Front
Seite 294
Mobility Breakdown assistance
294Online Edition for Part no. 01 40 2 608 633 — 11 09 490

Rear
Tow-starting
Automatic transmissionDo not tow-start the vehicle.Due to the automatic transmission, the enginecannot be started by tow-starting.Have the cause of the starting difficulties rem‐edied.
Manual transmissionIf possible, do not tow-start the vehicle but startthe engine by jump-starting, refer to page 291.If the vehicle is equipped with a catalytic con‐verter, only tow-start while the engine is cold.
1. Switch on the hazard warning system andcomply with local regulations.
2. Ignition, refer to page 59, on.3. Engage third gear.4. Have the vehicle tow-started with the clutch
pressed and slowly release the clutch. Afterthe engine starts, immediately press on theclutch again.
5. Stop at a suitable location, remove the towbar or rope, and switch off the hazard warn‐ing system.
6. Have the vehicle checked.
Seite 295
Breakdown assistance Mobility
295Online Edition for Part no. 01 40 2 608 633 — 11 09 490

CareVehicle equipmentAll standard, country-specific and optionalequipment that is offered in the model series isdescribed in this chapter. Therefore, equipmentis also described that is not available in a vehicle,e. g., because of the selected optional equip‐ment or country variant. This also applies forsafety-related functions and systems.
Car washesNotes
Steam jets or high-pressure washersWhen using steam jets or high-pressure
washers, hold them a sufficient distance awayand use a maximum temperature of 140 ℉/60 ℃.Holding them too close or using excessivelyhigh pressures or temperatures can cause dam‐age or preliminary damage that may then lead tolong-term damage.Follow the operating instructions for the high-pressure washer.◀
Cleaning sensors/cameras with high-pressure washers
When using high-pressure washers, do notspray the exterior sensors and cameras, e.g.,Park Distance Control, for extended periods oftime and only from a distance of at least 12 in/30 cm.◀
Wash your vehicle frequently, particularly in win‐ter.Intense soiling and road salt can damage the ve‐hicle.
Automatic car washes
NotesNote the following:▷ Give preference to cloth car washes or those
that use soft brushes in order to avoid paintdamage.
▷ Make sure that the wheels and tires are notdamaged by the transport mechanisms.
▷ Fold in the exterior mirrors; otherwise, theymay be damaged, depending on the width ofthe vehicle.
▷ Deactivate the rain sensor, refer to page 65,to avoid unintentional wiper activation.
▷ In some cases, an unintentional alarm can betriggered by the interior motion sensor of thealarm system. Follow the instructions onavoiding an unintentional alarm, refer topage 41.
Guide rails in car washesAvoid car washes with guide rails higher
than 4 in/10 cm; otherwise, the vehicle bodycould be damaged.◀
Before driving into a car washIn order to ensure that the vehicle can roll in a carwash, take the following steps:Manual transmission:
1. Release the parking brake.2. Drive into the car wash.3. Shift to neutral.4. Switch the engine off.5. Switch on the ignition.Automatic transmission:
1. Release the parking brake, refer to page 63.2. Drive into the car wash.3. Depress the brake pedal as needed.
Seite 296
Mobility Care
296Online Edition for Part no. 01 40 2 608 633 — 11 09 490

4. Engage transmission position N.5. Switch the engine off. In this way, the igni‐
tion remains switched on, and a Check-Con‐trol message is displayed.
Transmission position P with the igni‐tion off
When the ignition is switched off, position Pis engaged automatically. When in an auto‐matic car wash, for example, ensure that theignition is not switched off accidentally.◀
The vehicle cannot be locked from the outsidewhen in transmission position N.A signal is sounded when an attempt is made tolock the vehicle.
Transmission positionTransmission position P is engaged automati‐cally:▷ When the ignition is switched off.▷ After approx. 15 minutes.
Headlamps▷ Do not rub dry and do not use abrasive or
caustic cleansers.▷ Soak areas that have been soiled e.g. due to
insects, with shampoo and wash off withwater.
▷ Thaw ice with deicing spray; do not use anice scraper.
After washing the vehicleAfter washing the vehicle, apply the brakesbriefly to dry them; otherwise, braking action canbe reduced and corrosion of the brake discs canoccur.
Vehicle careCar care productsBMW recommends using cleaning and careproducts from BMW, since these have beentested and approved.
Car care and cleaning productsFollow the instructions on the container.
When cleaning the interior, open the doors orwindows.Only use products intended for cleaning vehi‐cles.Cleansers can contain substances that are dan‐gerous and harmful to your health.◀
Vehicle paintRegular care contributes to driving safety andvalue retention.Environmental influences can act on the vehiclepaint. Tailor the frequency and extent of your carcare to these influences.
Leather careRemove dust from the leather often, using acloth or vacuum cleaner.Otherwise, particles of dust and road grimechafe in pores and folds, and lead to increasedwear and premature degradation of the leathersurface.To guard against discoloration, such as fromclothing, provide leather care roughly every twomonths.Clean light-colored leather more frequently be‐cause soiling on such surfaces is substantiallymore visible.Use leather care products; otherwise, dirt andgrease will gradually break down the protectivelayer of the leather surface.Suitable care products are available from theservice center.
Seite 297
Care Mobility
297Online Edition for Part no. 01 40 2 608 633 — 11 09 490

Upholstery material careVacuum regularly with a vacuum cleaner.If they are very dirty, e.g., beverage stains, use asoft sponge or microfiber cloth with a suitableinterior cleaner.Clean the upholstery down to the seams usinglarge sweeping motions. Avoid rubbing the ma‐terial vigorously.
Damage from Velcro® fastenersOpen Velcro® fasteners on pants or other
articles of clothing can damage the seat covers.Ensure that any Velcro® fasteners are closed.◀
Caring for special components
Light-alloy wheelsUse wheel cleaner, particularly during the wintermonths. Do not use aggressive, acidic, stronglyalkaline or abrasive cleaners, or steam jetsabove 140 ℉/60 ℃; follow the manufacturer’sinstructions.
Chrome surfacesCarefully clean components such as the radiatorgrille or door handles with an ample supply ofwater, possibly with shampoo added, particu‐larly when they have been exposed to road salt.
Rubber componentsAside from water, treat only with rubber cleans‐ers.When cleaning rubber seals, do not use any sil‐icon-containing car care products in order toavoid damage or reduced noise damping.
Fine wood partsClean fine wood facing and fine wood compo‐nents only with a moist rag. Then dry with a softcloth.
Plastic componentsThese include:
▷ Imitation leather surfaces.▷ Headliner.▷ Lamp lenses.▷ Instrument cluster cover.▷ Matte black spray-coated components.▷ Painted parts in the interior.Clean with a microfiber cloth.Lightly dampen the cloth with water.Do not soak the headliner.
Do not use cleansers that contain alcoholor solvents
Do not use cleansers that contain alcohol or sol‐vents, such as lacquer thinners, heavy-dutygrease removers, fuel, or such; this could lead tosurface damage.◀
Safety beltsDirty belt straps impede the reeling action andthus have a negative impact on safety.
Chemical cleaningDo not clean chemically; this can destroy
the webbing.◀
Use only a mild soapy solution, with the safetybelts clipped into their buckles.Do not allow the reels to retract the safety beltsuntil they are dry.
Floor carpets and floor matsNo objects in the area around the pedalsKeep floor mats, carpets, and any other
objects out of the area of motion of the pedals;otherwise, the function of the pedals could beimpeded while drivingDo not place additional floor mats over existingmats or other objects.Only use floor mats that have been approved forthe vehicle and can be properly fixed in place.Ensure that the floor mats are securely fastenedagain after they were removed for cleaning, forexample.◀
Seite 298
Mobility Care
298Online Edition for Part no. 01 40 2 608 633 — 11 09 490

Floor mats can be removed from the passengercompartment for cleaning.If the floor carpets are very dirty, clean with amicrofiber cloth and water or a textile cleaner. Toprevent matting of the carpet, rub back and forthin the direction of travel only.
Sensors/camerasTo clean sensors and cameras, use a cloth mois‐tened with a small amount of glass cleaner.
Displays/screensClean the displays with a microfiber cloth.
Cleaning displaysDo not use chemical or household cleans‐
ers.Keep all fluids and moisture away from the unit.Otherwise, they could affect or damage surfa‐ces or electrical components.Avoid pressing too hard when cleaning and donot use abrasive materials; otherwise, damagecan result.◀
Special feature on the Control DisplayIf necessary, a microfiber cloth dampened withglass cleaner can also be used for cleaning theControl Display.
Moisten microfiber cloth only slightlyMoisten microfiber cloth only slightly, oth‐
erwise, damage may result.◀
Suitable glass cleaners are available from theservice center.
Long-term vehicle storageYour service center can advise you on what toconsider when storing the vehicle for longerthan three months.
Seite 299
Care Mobility
299Online Edition for Part no. 01 40 2 608 633 — 11 09 490

Online Edition for Part no. 01 40 2 608 633 — 11 09 490

ReferenceThis chapter contains technical data, short
commands for the voice activation system, and anindex that will quickly take you to the information
you need.
Online Edition for Part no. 01 40 2 608 633 — 11 09 490

Technical dataVehicle equipmentAll standard, country-specific and optionalequipment that is offered in the model series isdescribed in this chapter. Therefore, equipment
is also described that is not available in a vehicle,e. g., because of the selected optional equip‐ment or country variant. This also applies forsafety-related functions and systems.
DimensionsWidth, height
1 Vehicle height without roof-mounted aerial:56.3 inches/1,430 mm
Vehicle height with roof-mounted aerial:56.7 inches/1,442 mm
2 Vehicle width, without mirrors: 71.3 inches/1,811 mm
3 Vehicle width with mirrors: 79.9 inches/2,031 mm
Seite 302
Reference Technical data
302Online Edition for Part no. 01 40 2 608 633 — 11 09 490

Length, wheel base
1 Wheel base: 110.6 inches/2,810 mm 2 Vehicle length: 182 inches/4,624 mm
Smallest turning circleDia.: 37 ft/11.3 m
Engine specificationsThe rated power outputs are established on thebasis of fuel grade AKI 91.
328i
Displacement cu in/cm³ 121.8/1,997
No. of cylinders 4
Maximum outputat engine speed
hprpm
2455,000–6,500
Maximum torqueat engine speed
lb ft/Nmrpm
258/3501,250–4,800
Seite 303
Technical data Reference
303Online Edition for Part no. 01 40 2 608 633 — 11 09 490

335i
Displacement cu in/cm³ 181.7/2,979
No. of cylinders 6
Maximum outputat engine speed
hprpm
3065,800–6,000
Maximum torqueat engine speed
lb ft/Nmrpm
295/4001,200–5,000
WeightsThe values preceding the slash apply to vehicleswith manual transmission; the values following
the slash apply to vehicles with automatic trans‐mission.
328i
Approved gross vehicle weight lbskg
4,409/4,4532,000/2,020
Load lbs/kg 903/410
Approved front axle load lbs/kg 2,061/935
Approved rear axle load lbs/kg 2,513/1,140
Approved roof load capacity lbs/kg 165/75
Trunk capacity cu ft/l 16.9/480
335i
Approved gross vehicle weight lbskg
4,541/4,5632,060/2,070
Load lbs/kg 903/410
Approved front axle load lbs/kg 2,160/980
Approved rear axle load lbs/kg 2,524/1,145
Approved roof load capacity lbs/kg 165/75
Cargo area capacity cu ft/l 16.9/480
Seite 304
Reference Technical data
304Online Edition for Part no. 01 40 2 608 633 — 11 09 490

Capacities
Notes
Fuel tank US gal/liters approx. 15.8/60 Fuel quality,refer topage 262
Windshield and headlampwasher system
US quarts/liters approx. 3.1/3
Seite 305
Technical data Reference
305Online Edition for Part no. 01 40 2 608 633 — 11 09 490

Short commands of the voice activationsystemVehicle equipmentAll standard, country-specific and optionalequipment that is offered in the model series isdescribed in this chapter. Therefore, equipmentis also described that is not available in a vehicle,e. g., because of the selected optional equip‐ment or country variant. This also applies forsafety-related functions and systems.
General informationInstructions for voice activation system, refer topage 23.To have the available spoken instructions readout loud: ›Voice commands‹
AdjustingVehicle
Function Command
Open the main menu. ›Main menu‹
Open the options. ›Options‹
Open the settings. ›Settings‹
Info display of the instrument cluster. ›Info Display‹
Settings on the Control Display. ›Control display‹
Open the time and date. ›Time and date‹
Open the language and units. ›Language and units‹
Open the speed limit. ›Speed‹
Open the light. ›Lighting‹
Open the door lock. ›Door locks‹
Open the profiles. ›Profiles‹
Open the Driving Mode menu. ›Driving mode‹
Open the ECO PRO menu. ›ECO PRO mode‹
Seite 306
Reference Short commands of the voice activation system
306Online Edition for Part no. 01 40 2 608 633 — 11 09 490

Equipment
Function Command
Open the air conditioning settings. ›Climate‹
Open the Head-up Display. ›head up display‹
Vehicle informationOwner’s Manual
Function Command
Open the Owner’s Manual. ›Display Owner’s Manual‹
Open the Quick Reference Guide. ›Quick reference‹
Open the index. ›Owner’s Manual‹
Open the search by pictures. ›Search by pictures‹
Computer
Function Command
Call up the onboard computer. ›Onboard info‹
Call up the trip computer. ›Trip computer‹
Vehicle
Function Command
Open the vehicle information. ›Vehicle info‹
Open the vehicle status. ›Vehicle status‹
Open the hybrid display. ›Hybrid‹
Open sport displays. ›Sport displays‹
Call up ECO PRO tips. ›ECO PRO Tips‹
Open EfficientDynamics menu. ›Efficient Dynamics‹
Split screen hybrid display. ›Splitscreen, Hybrid mode‹
EfficientDynamics split screen. ›Split screen Efficient Dynamics‹
Seite 307
Short commands of the voice activation system Reference
307Online Edition for Part no. 01 40 2 608 633 — 11 09 490

NavigationGeneral information
Function Command
Opens the Navigation menu. ›Navigation‹
Open the destination entry. ›Enter address‹
Enter the address. ›Enter address‹
Enter a town/city. ›City‹
Enter a state/province. ›State‹
Enter the postal code. ›Postal Code‹
Open destination guidance. ›Guidance‹
Start destination guidance. ›Start guidance‹
Terminate destination guidance. ›Stop guidance‹
Open the home address. ›Home address‹
Open the route criteria. ›Route preference‹
Open the route. ›Route information‹
Turn on spoken instructions. ›Switch on voice instructions‹
Repeat the spoken instruction. ›Repeat voice instructions‹
Turn off spoken instructions. ›Switch off voice instructions‹
Display the address book. ›Address book‹
Display the most recent destinations. ›Last destinations‹
Open the traffic bulletins. ›Traffic Info‹
Special destinations. ›Points of interest‹
Map
Function Command
Display the map. ›Map‹
Map facing north. ›Map facing north‹
Map facing the direction of travel. ›Map in direction of travel‹
Seite 308
Reference Short commands of the voice activation system
308Online Edition for Part no. 01 40 2 608 633 — 11 09 490

Function Command
Perspective map. ›Map perspective view‹
Automatic scaling of the map. ›Map with automatic scaling‹
Scale…feet. ›Map scale … feet‹
Scale…meters. ›Map scale … meters‹ e.g., map scale 100 meters
Scale…kilometers. ›Map scale … kilometers‹ e.g., map scale 5 kilo‐meters
Scale…miles. ›Map scale … miles‹ e.g., map scale 5 miles
Split screen settings
Function Command
Split screen. ›Switch on splitscreen‹
Switch off the split screen. ›Turn off split screen‹
Adjust the split screen. ›Split screen content‹
Split screen, map facing north. ›Split screen map facing north‹
Split screen, current position. ›Split screen current position‹
Split screen, facing the direction of travel. ›Split screen map in direction of travel‹
Split screen, perspective. ›Split screen perspective‹
Split screen, expanded intersection zoom. ›Splitscreen Exit ramp view‹
Split screen scale…feet. ›Split screen scale … feet‹ e.g., split screen scale100 feet
Split screen scale…meters. ›Split screen scale … meters‹ e.g., split screenscale 100 meters
Split screen scale…kilometers. ›Split screen scale … kilometers‹ e.g., split screenscale 5 kilometers
Split screen scale…miles. ›Split screen scale … miles‹ e.g., split screenscale 5 miles
Split screen, highlight the traffic situation. ›Split screen, Traffic conditions‹
Split screen, computer. ›Split screen on board info‹
Seite 309
Short commands of the voice activation system Reference
309Online Edition for Part no. 01 40 2 608 633 — 11 09 490

Function Command
Split screen, trip computer. ›Splitscreen trip computer‹
Split screen, scale automatically. ›Split screen automatic scaling‹
Destination guidance with intermediate destinations
Function Command
Enter a new destination. ›Enter address‹
Trip list. ›Stored trips‹
RadioFM
Function Command
Open a frequency. ›Frequency … megahertz‹ e.g., 93.5 megahertzor frequency 93.5
Open the radio. ›Radio‹
Open the FM stations. ›F M‹
Open the manual search. ›Manual‹
Select a frequency range. ›Select frequency‹
Open a station. ›Select station‹
AM
Function Command
Open a frequency. ›Frequency … Kilohertz‹ e.g., frequency 753 or753 kilohertz
Open the AM stations. ›A M‹
Open the manual search. ›Manual‹
Seite 310
Reference Short commands of the voice activation system
310Online Edition for Part no. 01 40 2 608 633 — 11 09 490

Satellite radio
Function Command
Open the satellite radio. ›Satellite radio‹
Switch on the satellite radio. ›Satellite radio on‹
Select a satellite radio channel. ›Select satellite radio‹ e.g., satellite radio channel2
Stored stations
Function Command
Open the stored stations. ›Presets‹
Choose a stored station. ›Select preset‹
Select a stored station. ›Preset …‹ e. g., stored station 2
CD/MultimediaCD/DVD drive
Function Command
Select a track. ›Track …‹ e.g., track 5or›C D track …‹ e.g., CD track 5
Play back a CD. ›C D on‹
Select a CD. ›Select C D‹
Select a CD and track. ›C D … track …‹ e.g., CD 3 track 5
Open the CD and Multimedia menus. ›C D and multimedia‹
CD and DVD. ›C D‹
Select a DVD. ›D V D …‹ e.g. DVD 3
Display the entertainment details on a splitscreen.
›Entertainment details‹
Seite 311
Short commands of the voice activation system Reference
311Online Edition for Part no. 01 40 2 608 633 — 11 09 490

Music collection
Function Command
Search for music, open a menu. ›Music search‹
Open the current playback. ›Current playback‹
Open the music collection. ›Music collection‹
Play back the music collection. ›Music collection on‹
Play back the most frequently played tracks. ›Top fifty‹
External devices
Function Command
Open the external devices. ›External devices‹
Open the Bluetooth devices. ›Bluetooth‹
AUX at front. ›AUX front‹
Tone
Function Command
Open the tone settings. ›Tone‹
Telephone
Function Command
Dial a phone number. ›Dial number‹
Opens the Telephone menu. ›Telephone‹
Display the phone book. ›Phonebook‹
Redialing. ›Redial‹
Display received calls. ›Received calls‹
List of messages. ›Messages‹
Open the Bluetooth devices. ›Bluetooth‹
Seite 312
Reference Short commands of the voice activation system
312Online Edition for Part no. 01 40 2 608 633 — 11 09 490

Office
Function Command
Open the Office menu. ›Office‹
Display Office Today. ›Current office‹
Display the contacts. ›Contacts‹
Display the messages. ›Messages‹
Display the calendar. ›Calendar‹
Display the tasks. ›Tasks‹
Display the reminders. ›Reminders‹
Contacts
Function Command
Select a name. ›Choose name‹
My contacts. ›My contacts‹
Open the contacts. ›Contacts‹
New contact. ›New contact‹
BMW Assist or ConnectedDrive
Function Command
Open BMW Assist.Open ConnectedDrive.
›B M W Assist‹›Connected Drive‹
Open BMW Search. ›B M W Online‹
Seite 313
Short commands of the voice activation system Reference
313Online Edition for Part no. 01 40 2 608 633 — 11 09 490

Everything from A to ZIndexAABS, Antilock Brake Sys‐
tem 104 ACC, Active Cruise Control
with Stop & Go 109 Activated-charcoal filter 139 Active Blind Spot Detec‐
tion 101 Active Cruise Control with
Stop & Go, ACC 109 Active Protection 102 Adaptive brake lights, refer to
Brake force display 102 Adaptive light control 88 Additional telephone 228 Additives, oil 275 Adjustments, seats/head re‐
straints 45 After washing vehicle 297 Airbags 91 Airbags, indicator/warning
light 92 Air circulation, refer to Recir‐
culated-air mode 135, 138 Air distribution,
manual 135, 138 Air drying, refer to Cooling
function 135, 137 Air flow, air conditioner 135 Air pressure, tires 263 Air vents, refer to Ventila‐
tion 139 Air volume, automatic climate
control 138 Alarm system 40 Alarm, unintentional 41 All around the center con‐
sole 14 All around the headliner 15
All around the steeringwheel 12
All-season tires, refer to Win‐ter tires 270
Alternating-code hand-heldtransmitter 142
Alternative oil types 275 AM/FM station 190 Announcement, navigation,
refer to Spoken instruc‐tions 178
Antifreeze, washer fluid 66 Antilock Brake System,
ABS 104 Anti-slip control, refer to
DSC 104 Applications 255 Appointments 243 Approved engine oils 275 Apps 255 Apps, video playback 213 Arrival time 82 Ash tray 145 Assistance, Roadside Assis‐
tance 291 Assistance when driving
off 108 Assist, BMW 250 Assist system information, on
Control Display 85 Audio playback 199 Audio playback, Blue‐
tooth 213 AUTO intensity 137 Automatic car wash 296 Automatic climate con‐
trol 134 Automatic climate control with
enhanced features 136 Automatic Cruise Control with
Stop & Go 109
Automatic Curb Monitor 52 Automatic deactivation, front
passenger airbags 93 Automatic headlamp con‐
trol 87 Automatic locking 37 Automatic recirculated-air
control 138 Automatic transmission with
Steptronic 67 AUTO program, automatic cli‐
mate control 137 AUTO program, climate con‐
trol 135 AUTO program, intensity 137 Auto Start/Stop function 61 AUX-IN port 210 Average fuel consumption 82 Average speed 82 Axle loads, weights 304
BBackrest curvature, refer to
Lumbar support 47 Backrest, width 47 Backup camera 123 Balance 188 Band-Aids, refer to First aid
kit 291 Bar for tow-starting/tow‐
ing 294 Bass 188 Battery replacement, vehicle
battery 287 Battery replacement, vehicle
remote control 30 Battery, vehicle 287 Belts, safety belts 48 Beverage holder, cu‐
pholder 150
Seite 314
Reference Everything from A to Z
314Online Edition for Part no. 01 40 2 608 633 — 11 09 490

Blinds, sun protection 43 Bluetooth audio 213 Bluetooth connection, activat‐
ing/deactivating 222, 229 BMW Assist 250 BMW Homepage 6 BMW Internet page 6 BMW Maintenance Sys‐
tem 277 BMW Search 252 Bottle holder, refer to Cu‐
pholder 150 Brake assistant 104 Brake discs, breaking in 156 Brake force display 102 Brake lamps, brake force dis‐
play 102 Brake lights, adaptive 102 Brake pads, breaking in 156 Braking, notes 157 Breakdown assis‐
tance 290, 291 Breaking in 156 Brightness of Control Dis‐
play 85 Bulb replacement 279 Bulb replacement, front 280 Bulb replacement, halogen
headlamps 280 Bulb replacement, rear 285 Bulb replacement, xenon
headlamps 283 Bulbs and lamps 279 Button, RES 111 Button, Start/Stop 59 Bypassing, refer to starting
aid 291
CCalendar 243 California Proposition 65
Warning 7 Camera, backup camera 125 Camera, care 299 Camera, Side View 128
Camera, Top View 127 Can holder, refer to Cu‐
pholder 150 Car battery 287 Car care products 297 Care, displays 299 Care, vehicle 297 Cargo 159 Cargo area, enlarging 146 Cargo area lid 37 Cargo area, storage compart‐
ments 151 Cargo straps, securing
cargo 160 Car key, refer to Remote con‐
trol 30 Carpet, care 298 Car wash 296 Catalytic converter, refer to
Hot exhaust system 156 CBS Condition Based Serv‐
ice 277 CD/DVD 198 CDs, storing 205 Cell phone 220, 228 Center armrest 149 Center console 14 Central locking system 33 Central screen, refer to Control
Display 16 Changes, technical, refer to
Safety 6 Changing parts 279 Changing wheels 287 Changing wheels/tires 269 Check Control 73 Children, seating position 55 Children, transporting
safely 55 Child restraint fixing sys‐
tem 55 Child restraint fixing system
LATCH 56 Child restraint fixing systems,
mounting 55 Child safety locks 58
Child seat, mounting 55 Child seats 55 Chrome parts, care 298 Cigarette lighter 145 Cleaning, displays 299 Climate control 134, 136 Clock 76 Closing/opening from in‐
side 37 Closing/opening via door
lock 36 Closing/opening with remote
control 34 Clothes hooks 151 Collision warning 115, 117 Combination switch, refer to
Turn signals 64 Combination switch, refer to
Wiper system 65 Comfort Access 38 COMFORT program, Dynamic
Driving Control 107 Compartments in the
doors 149 Compass 143 Computer 81 Concierge service 251 Condensation on win‐
dows 138 Condensation under the vehi‐
cle 158 Condition Based Service
CBS 277 Confirmation signal 35 Contacts 239, 0 Control Display 16 Control Display, settings 83 Controller 16, 17 Control systems, driving sta‐
bility 104 Convenient opening 34 Coolant 276 Coolant temperature 76 Cooling function 135, 137 Cooling, maximum 137 Cooling system 276
Seite 315
Everything from A to Z Reference
315Online Edition for Part no. 01 40 2 608 633 — 11 09 490

Corrosion on brake discs 158 Cruise control 119 Cruise control, active with
Stop & Go 109 Cruising range 76 Cupholder 150 Current fuel consumption 77 Current location, storing 170 Customer Relations 253
DDamage, tires 269 Damping control, dy‐
namic 105 Data, technical 302 Date 76 Daytime running lights 87 Defrosting, refer to defrosting
the windows 135 Defrosting, refer to Windows,
defrosting 138 Defrosting the windows 135 Destination distance 82 Destination guidance 176 Destination guidance with in‐
termediate destinations 174 Destination input, naviga‐
tion 168 Digital clock 76 Digital compass 143 Digital radio 191 Dimensions 302 Dimmable exterior mirrors 53 Dimmable interior rearview
mirror 53 Direction indicator, refer to
Turn signals 64 Displacement, engine 303 Display, ECO PRO 163 Display, electronic, instrument
cluster 72 Display in front wind‐
shield 128 Display lighting, refer to Instru‐
ment lighting 89
Displays 70 Displays, cleaning 299 Disposal, coolant 276 Disposal, vehicle battery 288 Distance control, refer to
PDC 121 Distance, selecting for
ACC 111 Distance to destination 82 Divided screen view, split
screen 21 Door lock, refer to Remote
control 30 Drive-off assistant 108 Drive-off assistant, refer to
DSC 104 Driving Experience
Switch 106 Driving instructions, breaking
in 156 Driving notes, general 156 Driving stability control sys‐
tems 104 Driving tips 156 DSC Dynamic Stability Con‐
trol 104 DTC Dynamic Traction Con‐
trol 105 DVD/CD 198 DVD/CD notes 204 DVD changer 202 DVD settings 201 DVDs, storing 205 DVD, video 200 Dynamic Damping Con‐
trol 105 Dynamic destination guid‐
ance 183 Dynamic Stability Control
DSC 104 Dynamic Traction Control
DTC 105
EECO PRO 163
EfficientDynamics 164 EfficientDynamics menu, refer
to ECO PRO 163 Electronic displays, instru‐
ment cluster 72 Electronic Stability Program
ESP, refer to DSC 104 Emergency detection, remote
control 31 Emergency release, door
lock 37 Emergency release, fuel filler
flap 260 Emergency Request 290 Emergency service, refer to
Roadside Assistance 291 Emergency start function, en‐
gine start 31 Emergency unlocking, trunk
lid 38 Energy Control 77 Energy recovery 77 Engine, automatic start/stop
function 61 Engine, automatic switch-
off 61 Engine compartment 272 Engine compartment, working
in 273 Engine coolant 276 Engine oil 274 Engine oil, adding 274 Engine oil additives 275 Engine oil change 275 Engine oil filler neck 274 Engine oil temperature 75 Engine oil types, alterna‐
tive 275 Engine oil types, ap‐
proved 275 Engine specifications 303 Engine start during malfunc‐
tion 31 Engine start, refer to Starting
the engine 60 Engine start, Starting aid 291
Seite 316
Reference Everything from A to Z
316Online Edition for Part no. 01 40 2 608 633 — 11 09 490

Engine stop 61 Engine temperature 75 Entering a car wash 296 Equalizer 188 Equipment, interior 141 ESP Electronic Stability Pro‐
gram, refer to DSC 104 Exchanging wheels/tires 269 Exhaust system 156 Exterior mirror, automatic dim‐
ming feature 53 Exterior mirrors 52 External devices 210 External start 291 External temperature dis‐
play 76 External temperature warn‐
ing 76 Eyes for securing cargo 160
FFader 188 Failure message, refer to
Check Control 73 False alarm, refer to Uninten‐
tional alarm 41 Fan, refer to Air flow 135 Fan, refer to Air volume 138 Fault displays, refer to Check
Control 73 Filler neck for engine oil 274 Fine wood, care 298 First aid kit 291 Fitting for towing, refer to Tow
fitting 294 Flat tire, changing wheels 287 Flat Tire Monitor FTM 97 Flat tire, Tire Pressure Monitor
TPM 94 Flat tire, warning lamp 95, 98 Flooding 157 Floor carpet, care 298 Floor mats, care 298 FM/AM station 190 Fogged up windows 135
Fold-out position, windshieldwipers 66
Foot brake 157 Front airbags 91 Front fog lamps 89 Front fog lamps, front, bulb re‐
placement 284 Front lamps 280 Front passenger airbags, au‐
tomatic deactivation 93 Front passenger airbags, indi‐
cator lamp 93 FTM Flat Tire Monitor 97 Fuel cap 260 Fuel consumption, current 77 Fuel consumption, refer to
Average fuel consump‐tion 82
Fuel filler flap 260 Fuel gauge 75 Fuel quality 262 Fuel, tank capacity 305 Fuse 288
GGarage door opener, refer to
Integrated universal remotecontrol 141
Gas station recommenda‐tion 178
Gear change, automatic trans‐mission 67
Gear shift indicator 78 General driving notes 156 Glass sunroof, powered 43 Glove compartment 148 Gong, volume equaliza‐
tion 189 GPS navigation 168 Gray display of the map 181 Gross vehicle weight, ap‐
proved 304 Gross weight, permissible for
trailer towing 304
HHandbrake, refer to parking
brake 63 Hand-held transmitter, alter‐
nating code 142 Hazard warning flashers 290 HD Radio 191 Head airbags 91 Headlamp control, auto‐
matic 87 Headlamp courtesy delay fea‐
ture 87 Headlamp flasher 64 Headlamp glass 280 Headlamps 280 Headlamps, care 297 Headlamp washer system 65 Headliner 15 Head restraints 45 Head restraints, front 49 Head restraints, rear 50 Head-up Display 128 Head-up Display, care 299 Heavy cargo, stowing 160 Height, vehicle 302 High-beam Assistant 88 High beams 64 High beams/low beams, refer
to High-beam Assistant 88 Hills 158 Hill start assistant, refer to
Drive-off assistant 108 Hints 6 Holder for beverages 150 Homepage 6 Hood 273 Horn 12 Hotel function, trunk lid 38 Hot exhaust system 156 House number, entering for
navigation 169 Hydroplaning 157
Seite 317
Everything from A to Z Reference
317Online Edition for Part no. 01 40 2 608 633 — 11 09 490

IIce warning, refer to External
temperature warning 76 Icy roads, refer to External
temperature warning 76 Identification marks, tires 267 Identification number, refer to
Important features in the en‐gine compartment 272
iDrive 16 Ignition key, refer to Remote
control 30 Ignition off 59 Ignition on 59 Indication of a flat tire 95, 98 Individual air distribu‐
tion 135, 138 Individual settings, refer to
Personal Profile 31 Inflation pressure, tires 263 Inflation pressure warning
FTM, tires 97 Info display, refer to Com‐
puter 81 Information on the navigation
data 183 Initializing, Flat Tire Monitor
FTM 98 Initializing, Tire Pressure Mon‐
itor TPM 95 Instrument cluster 70 Instrument cluster, electronic
displays 72 Instrument lighting 89 Integrated key 30 Integrated universal remote
control 141 Intensity, AUTO program 137 Interactive map 173 Interior equipment 141 Interior lamps 90 Interior lamps via remote con‐
trol 35 Interior motion sensor 41 Interior rearview mirror 53
Interior rearview mirror, auto‐matic dimming feature 53
Interior rearview mirror, com‐pass 143
Intermediate destinations 175 Internet page 6 Intersection, entering for navi‐
gation 169 Interval display, service re‐
quirements 77 iPod/iPhone 210
JJacking points for the vehicle
jack 287 Jack, refer to Vehicle jack 287 Joystick, automatic transmis‐
sion 67
KKey/remote control 30 Keyless Go, refer to Comfort
Access 38 Key Memory, refer to Personal
Profile 31 Kickdown, automatic trans‐
mission 67 Knee airbag 91
LLamp replacement 279 Lamp replacement, front 280 Lamp replacement, rear 285 Lamps 86 Lamps and bulbs 279 Lane departure warning 99 Lane margin, warning 99 Language on Control Dis‐
play 84 Lashing eyes, securing
cargo 160 LATCH child restraint fixing
system 56
Leather, care 297 LEDs, light-emitting di‐
odes 280 Length, vehicle 303 Letters and numbers, enter‐
ing 22 Light-alloy wheels, care 298 Light control 88 Light-emitting diodes,
LEDs 280 Lighter 145 Lighting 86 Lighting via remote control 35 Light switch 86 Load 159 Loading 159 Lock, door 36 Locking/unlocking from in‐
side 37 Locking/unlocking via door
lock 36 Locking/unlocking with re‐
mote control 34 Locking, automatic 37 Locking, central 33 Lock, power window 42 Locks, doors, and win‐
dows 58 Low beams 86 Low beams, automatic, refer to
High-beam Assistant 88 Lower back support 47 Luggage rack, refer to Roof-
mounted luggage rack 160 Lumbar support 47
MMaintenance 277 Maintenance require‐
ments 277 Maintenance, service require‐
ments 77 Maintenance system,
BMW 277
Seite 318
Reference Everything from A to Z
318Online Edition for Part no. 01 40 2 608 633 — 11 09 490

Malfunction displays, refer toCheck Control 73
Manual air distribu‐tion 135, 138
Manual air flow 135 Manual air volume 138 Manual mode, transmis‐
sion 68 Manual operation, backup
camera 124 Manual operation, door
lock 37 Manual operation, exterior mir‐
rors 52 Manual operation, fuel filler
flap 260 Manual operation, Park Dis‐
tance Control PDC 122 Manual operation, Side
View 128 Manual operation, Top
View 126 Manual transmission 67 Map, destination entry 173 Map in split screen 180 Map view 178 Marking on approved
tires 270 Marking, run-flat tires 271 Master key, refer to Remote
control 30 Maximum cooling 137 Maximum speed, display 79 Maximum speed, winter
tires 270 Measure, units of 85 Medical kit 291 Memory, seat, mirror 51 Menu, EfficientDynamics 164 Menu in instrument cluster 80 Menus, operating, iDrive 16 Menus, refer to iDrive operat‐
ing concept 18 Message list, traffic bulle‐
tins 180 Messages 241
Messages, refer to CheckControl 73
Microfilter 136, 139 Minimum tread, tires 269 Mirror 52 Mirror memory 51 Mobile communication devi‐
ces in the vehicle 157 Mobile phone 220, 228 Mode, ECO PRO 163 Modifications, technical, refer
to Safety 6 Moisture in headlamp 280 Monitor, refer to Control Dis‐
play 16 Mounting of child restraint fix‐
ing systems 55 MP3 player 210 Multifunction steering wheel,
buttons 12 Music collection 205 Music search 207 Music, storing 205
NNavigation 168 Navigation data 183 Neck restraints, front, refer to
Head restraints 49 Neck restraints, rear, refer to
Head restraints 50 New wheels and tires 269 No Passing Information 79 Notes 245 Number of cylinders, en‐
gine 303 Nylon rope for tow-starting/
towing 294
OOBD Onboard Diagnos‐
tics 278 Obstacle marking, backup
camera 125
Odometer 76 Office 238 Oil 274 Oil, adding 274 Oil additives 275 Oil change 275 Oil change interval, service re‐
quirements 77 Oil filler neck 274 Oil types, alternative 275 Oil types, approved 275 Old batteries, disposal 288 Onboard Diagnostics
OBD 278 Onboard monitor, refer to
Control Display 16 Onboard vehicle tool kit 279 Opening/closing from in‐
side 37 Opening/closing via door
lock 36 Opening/closing with remote
control 34 Operating concept, iDrive 16 Optional equipment, standard
equipment 6 Outside air, refer to Automatic
recirculated-air control 138 Overheating of engine, refer to
Coolant temperature 76
PPaint, vehicle 297 Pairing, mobile
phone 220, 229 Panic mode 35 Parallel parking assistant 130 Park Distance Control
PDC 121 Parked-car ventilation 139 Parked vehicle, condensa‐
tion 158 Parking aid, refer to PDC 121 Parking assistant 130 Parking brake 63
Seite 319
Everything from A to Z Reference
319Online Edition for Part no. 01 40 2 608 633 — 11 09 490

Parking lamps 86 Passenger side mirror, tilting
downward 52 Pathway lines, backup cam‐
era 124 PDC Park Distance Con‐
trol 121 Permissible axle load 304 Personal information 238 Personal Profile 31 Pinch protection system, glass
sunroof 43 Pinch protection system, win‐
dows 42 Plastic, care 298 PlugIn 255 Position, storing 170 Postal code, entering in navi‐
gation 169 Power failure 288 Power output, engine 303 Power sunroof, glass 43 Power windows 41 Pressure, tire air pres‐
sure 263 Pressure warning FTM,
tires 97 Profile, refer to Personal Pro‐
file 31 Programmable memory but‐
tons, iDrive 21 Protective function, glass sun‐
roof 43 Protective function, win‐
dows 42 Push-and-turn switch, refer to
Controller 16, 17
RRadiator fluid 276 Radio 190, 198 Radio-operated key, refer to
Remote control 30 Radio ready state 60 Radio stations buttons 197
Rain sensor 65 Random 199 Random playback 199 RDS 191 Reading out loud 245 Rear lamps 285 Rear socket 146 Rearview mirror 52 Rear window de‐
froster 135, 138 Recirculated-air filter 139 Recirculated air filter 136 Recirculated-air
mode 135, 138 Recommended tire
brands 270 Refueling 260 Remaining range 76 Reminders 245 Remote control/key 30 Remote control, malfunc‐
tion 36 Remote control, universal 141 Replacement fuse 288 Replacing parts 279 Replacing wheels/tires 269 Reporting safety defects 8 RES button 111 Reserve warning, refer to
Range 76 Resetting, Tire Pressure Mon‐
itor TPM 95 Retaining straps, securing
cargo 160 Retreaded tires 270 Roadside Assistance 251 Roadside parking lamps 87 Roller sunblinds 43 Roof load capacity 304 Roof-mounted luggage
rack 160 Rope for tow-starting/tow‐
ing 294 Route 177 Route criteria, route 176 Route, displaying 177
Routes, avoiding 176 Route section, bypassing 177 RPM, engine 303 RSC Run Flat System Compo‐
nent, refer to Run-flattires 271
Rubber components,care 298
Run-flat tires 271
SSafe braking 157 Safety 6 Safety belt reminder 49 Safety belts 48 Safety belts, care 298 Safety Package, refer to Active
Protection 102 Safety switch, windows 42 Safety systems, airbags 91 Satellite radio 192 Saving fuel 162 Scale, changing during navi‐
gation 179 Screen, refer to Control Dis‐
play 16 Screwdriver 279 Screw thread for tow fit‐
ting 294 Search, refer to BMW
Search 252 Seat and mirror memory 51 Seat belts, refer to Safety
belts 48 Seat heating, front 47 Seat heating, rear 48 Seating position for chil‐
dren 55 Seats 45 Selection list in instrument
cluster 80 Selector lever, automatic
transmission 67 Sensors, care 299 Service and warranty 7
Seite 320
Reference Everything from A to Z
320Online Edition for Part no. 01 40 2 608 633 — 11 09 490

Service history 78 Service requirements, Condi‐
tion Based Service CBS 277 Service requirements, dis‐
play 77 Service, Roadside Assis‐
tance 291 Settings on Control Dis‐
play 83 Settings, storing for seat, mir‐
ror 51 Shifting, automatic transmis‐
sion 67 Shifting, manual transmis‐
sion 67 Shift paddles on steering
wheel 69 Short commands 306 Side airbags 91 Side View 127 Signaling, horn 12 Signals when unlocking 35 Sitting safely 45 Size 302 Slide/tilt glass roof 43 Smallest turning circle 303 Snap-in adapter, mobile
phone 236 Snow chains 271 Socket 145 Socket, OBD Onboard Diag‐
nostics 278 Software applications,
iPhone 255 Software update 217 Spare fuse 288 Special destinations, naviga‐
tion 171 Specified engine oil
types 275 Speed, average 82 Speed limit detection 79 Speed limit detection, com‐
puter 82 Speed limit, setting 82
Speed Volume, volume equal‐ization 189
Split screen 21 Split screen map settings 180 Spoken instructions, naviga‐
tion 178 SPORT+ — program, Dynamic
Driving Control 106 Sport automatic transmis‐
sion 69 Sport displays, torque display,
performance display 83 SPORT program, Dynamic
Driving Control 106 Sport program, transmis‐
sion 68 Sport steering, variable 105 Stability control systems 104 Start/stop, automatic func‐
tion 61 Start/Stop button 59 Start function during malfunc‐
tion 31 Starting aid 291 Starting the engine 60 State/province, selecting for
navigation 168 Stations, stored 197 Station, storing 190 Status display, tires 94 Status information, iDrive 20 Status of Owner’s Manual 6 Steering wheel, adjusting 53 Steering wheel heating 53 Steptronic, automatic trans‐
mission 67 Stopping the engine 61 Storage compartment in the
rear 150 Storage compartments 148 Storage compartments, loca‐
tions 148 Storage, tires 270 Storing the vehicle 299 Street, entering for naviga‐
tion 169
Summer tires, tread 268 Supplementary text mes‐
sage 75 Surround View 123 Switch-on times, parked-car
ventilation 140 Switch, refer to Cockpit 12 Symbols 6
TTachometer 75 Tailgate 37 Tailgate, opening with no-
touch activation 39 Tailgate via remote control 35 Tail lamps 285 Tasks 244 Technical changes, refer to
Safety 6 Technical data 302 Telephone 220, 228 TeleService 251 Temperature, automatic cli‐
mate control 135, 137 Temperature display, external
temperature 76 Temperature, engine oil 75 Tempomat, refer to Active
Cruise Control 109 Terminal, jump-starting 292 Text messages 241 Text message, supplemen‐
tary 75 Theft alarm system, refer to
Alarm system 40 Theft protection, refer to Cen‐
tral locking system 33 Thigh support 47 Through-loading system 146 Tilt alarm sensor 41 Time of arrival 82 Tire damage 269 Tire identification marks 267 Tire inflation pressure 263
Seite 321
Everything from A to Z Reference
321Online Edition for Part no. 01 40 2 608 633 — 11 09 490

Tire inflation pressure monitor,refer to FTM 97
Tire Pressure MonitorTPM 94
Tires, changing 269 Tires, everything on wheels
and tires 263 Tires, run-flat tires 271 Tire tread 268 Toll roads, route 176 Tone 188 Tools 279 Top View 126 Torque, engine 303 Total vehicle weight 304 Tow fitting 294 Towing 293 Town/city, navigation 169 Tow-starting 293 Tow truck 293 TPM Tire Pressure Moni‐
tor 94 Traction control 105 TRACTION program, Dynamic
Driving Control 105 Traffic bulletins, naviga‐
tion 180 Transmission, automatic 67 Transmission, manual 67 Transporting children
safely 55 Tread, tires 268 Treble, tone 188 Trip computer 83 Triple turn signal activa‐
tion 64 Trip odometer 76 Truck for tow-starting/tow‐
ing 293 Trunk lid 37 Trunk lid, emergency unlock‐
ing 38 Trunk lid, hotel function 38 Trunk lid, opening with no-
touch activation 39
Trunk lid via remote con‐trol 35
Turning circle 303 Turning circle lines, backup
camera 124 Turn signals, operation 64 Turn signals, rear, bulb re‐
placement 285
UUnintentional alarm 41 Units of measure 85 Universal remote control 141 Unlock button, automatic
transmission 68 Unlocking/locking from in‐
side 37 Unlocking/locking via door
lock 36 Unlocking/locking with remote
control 34 Updates made after the edito‐
rial deadline 6 Updating software 217 Upholstery care 298 USB audio interface 210 USB interface 149
VVariable sport steering 105 Vehicle battery 287 Vehicle battery, replacing 287 Vehicle, breaking in 156 Vehicle care 297 Vehicle equipment 6 Vehicle identification number,
refer to Identification numberin the engine compart‐ment 272
Vehicle jack 287 Vehicle paint 297 Vehicle storage 299 Vehicle wash 296 Ventilation 139
Ventilation, refer to Parked-carventilation 139
Version of the navigationdata 183
Video playback 200 Video playback, iPhone 213 Video playback, snap-in
adapter 213 Voice activation, short com‐
mands 306 Voice activation system 23 Volume, setting 188
WWarning messages, refer to
Check Control 73 Warning triangle 291 Washer fluid 66 Washer fluid reservoir, ca‐
pacity 305 Washer nozzles, wind‐
shield 66 Washer system 65 Washing, vehicle 296 Water on roads 157 Weights 304 Welcome lamps 86 Wheel base, vehicle 303 Wheels, changing 269 Wheels, everything on wheels
and tires 263 Wheels, Flat Tire Monitor
FTM 97 Wheels, Tire Pressure Monitor
TPM 94 Width, vehicle 302 Window defroster,
rear 135, 138 Windows, powered 41 Windshield washer fluid 66 Windshield washer noz‐
zles 66 Windshield washer system 65 Windshield wiper 65
Seite 322
Reference Everything from A to Z
322Online Edition for Part no. 01 40 2 608 633 — 11 09 490

Windshield wipers, fold-outposition 66
Winter storage, care 299 Winter tires, suitable tires 270 Winter tires, tread 268 Wiper blades, replacing 279 Wiper fluid 66 Wiper system 65 Wood, care 298 Word match concept, naviga‐
tion 22 Wrench 279
XXenon headlamps, bulb re‐
placement 283
Seite 323
Everything from A to Z Reference
323Online Edition for Part no. 01 40 2 608 633 — 11 09 490


More about BMW
bmwusa.comThe Ultimate Driving
Machine
01 4
0 2
608
633
ue
*BL260863300W*
Online Edition for Part no. 01 40 2 608 633 — 11 09 490