
-
Драйверы
24
-
Инструкции по эксплуатации
43
Языки:

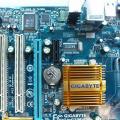
Gigabyte GA-G31M-ES2L инструкция по эксплуатации
(72 страницы)
- Языки:Венгерский, Греческий, Испанский, Итальянский, Немецкий, Польский, Португальский, Русский, Турецкий, Французский, Чешский
-
Тип:
PDF -
Размер:
18.6 MB -
Описание:
Installation Guidebook


На NoDevice можно скачать инструкцию по эксплуатации для Gigabyte GA-G31M-ES2L. Руководство пользователя необходимо для ознакомления с правилами установки и эксплуатации Gigabyte GA-G31M-ES2L. Инструкции по использованию помогут правильно настроить Gigabyte GA-G31M-ES2L, исправить ошибки и выявить неполадки.
На этой странице вы можете совершенно бесплатно скачать Руководство по эксплуатации GIGABYTE GA-G31M-ES2L (rev. 2.4).
У документа PDF Руководство по эксплуатации 40 страниц, а его размер составляет 9.41 Mb.
Читать онлайн Материнские платы GIGABYTE GA-G31M-ES2L (rev. 2.4) Руководство по эксплуатации

Скачать файл PDF «GIGABYTE GA-G31M-ES2L (rev. 2.4) Руководство по эксплуатации» (9.41 Mb)
Популярность:
7860 просмотры
Подсчет страниц:
40 страницы
Тип файла:
Размер файла:
9.41 Mb
Прочие инструкции GIGABYTE GA-G31M-ES2L (rev. 2.4)

Прочие инструкции GIGABYTE Материнские платы


Прочие инструкции GIGABYTE


Page 1 — GA-G31M-ES2C
GA-G31M-ES2LGA-G31M-ES2CLGA775 socket motherboard for Intel® Core™ processor family/Intel® Pentium™processor family/Intel® Celeron™ processor familyUs
Page 2 — May 20, 2010
Hardware Installation — 10 -1-4 Installing the MemoryRead the following guidelines before you begin to install the memory:• Make sure that the mothe
Page 4 — Table of Contents
Hardware Installation — 12 — Line In Jack (Blue) The default line in jack. Use this audio jack for line in devices such as an optical drive, walkman
Page 5 — Box Contents
— 13 — Hardware Installation1-7 Internal ConnectorsRead the following guidelines before connecting external devices:• First make sure your devices a
Page 7 — 1-2 Product Specications
— 15 — Hardware Installation3/4) CPU_FAN/SYS_FAN (Fan Headers) The motherboard has a 4-pin CPU fan header (CPU_FAN) and a 3-pin (SYS_FAN) system fan
Page 8
Hardware Installation — 16 -6) IDE (IDE Connector) The IDE connector supports up to two IDE devices such as hard drives and optical drives. Before a
Page 9 — 1-3-1 Installing the CPU
— 17 — Hardware Installation8) PWR_LED (System Power LED Header) This header can be used to connect a system power LED on the chassis to i
Page 10 — 1-4 Installing the Memory
Hardware Installation — 18 -10) F_PANEL (Front Panel Header) Connect the power switch, reset switch, speaker and system status indicator on the chas
Page 11 — 1-6 Back Panel Connectors
— 19 — Hardware Installation11) F_AUDIO (Front Panel Audio Header) ThefrontpanelaudioheadersupportsIntelHighDenitionaudio(HD)andAC&apos
Page 13 — 1-7 Internal Connectors
Hardware Installation — 20 -13) SPDIF_O (S/PDIF Out Header) This header supports digital S/PDIF out. Via an optional S/PDIF out cable, this header c
Page 14
— 21 — Hardware Installation15) CLR_CMOS (Clearing CMOS Jumper) Usethisjumper to clear the CMOS values(e.g.dateinformationand BIOS con
Page 15
BIOS Setup — 22 -To access the BIOS Setup program, press the <Delete> key during the POST when the power is turned on. To see more advanced B
Page 16 — 6) IDE (IDE Connector)
— 23 — BIOS Setup• IfyoudonotndthesettingsyouwantintheMainMenuorasubmenu,press<Ctrl>+<F1>toaccess more advanced optio
Page 17 — 9) BAT (Battery)
BIOS Setup — 24 — •Manual Allowsyoutomanuallyenterthespecicationsoftheharddrivewhentheharddrive access mode is set to CHS. (Fo
Page 18 — S3/S4/S5 Off
— 25 — BIOS Setup Hard Disk Boot Priority Speciesthesequenceofloadingtheoperatingsystemfromtheinstalledharddrives. First/Second/Third
Page 19
BIOS Setup — 26 — Virtualization Technology (Note) Enables or disables Intel Virtualization Technology. Virtualization enhanced by Intel Virtua
Page 20
— 27 — BIOS Setup On-Chip SATA Mode CongurestheintegratedSATAcontroller. Disabled Disables the integrated SATA controller. Auto
Page 21 — 2 GND
BIOS Setup — 28 — Onboard LAN Boot ROM Allows you to decide whether to activate the boot ROM integrated with the onboard LAN chip. (Default: Disab
Page 22 — Chapter 2 BIOS Setup
— 29 — BIOS Setup(Note) Supported on Windows 7/Vista operating system only. S3(STR) Enables the system to enter the ACPI S3 (Suspend to RAM) sle
Page 23 — 2-3 Standard CMOS Features
Copyright© 2010 GIGA-BYTE TECHNOLOGY CO., LTD. All rights reserved.The trademarks mentioned in this manual are legally registered to their respective
Page 25
— 31 — BIOS Setup Current Voltage(V) Vcore/DDR18V/+3.3V/+12V Displays the current system voltages. Current CPU Temperature Displays current CPU t
Page 26 — 2-5 Integrated Peripherals
BIOS Setup — 32 — Robust Graphics Booster Robust Graphics Booster (R.G.B.) helps to enhance the performance of the graphics chip and memory. Autoal
Page 27
— 33 — BIOS Setup FSB OverVoltage Control Allows you to set the Front Side Bus voltage. Normal Supplies the FSB voltage as required. (Default)
Page 29
— 35 — BIOS SetupPress <Enter> on this item and press the <Y> key. This exits the BIOS Setup without saving the changes made in BIOS Setup
Page 30 — 2-8 PC Health Status
Appendix — 36 -Regulatory StatementsRegulatory NoticesThis document must not be copied without our written permission, and the contents there
Page 31
— 37 — AppendixFinally, we suggest that you practice other environmentally friendly actions by understanding and using the energy-saving features of t
Page 32
Appendix — 38 -Contact UsGIGA-BYTE TECHNOLOGY CO., LTD.Address: No.6, Bau Chiang Road, Hsin-Tien, Taipei 231, Taiwan TEL: +886-2-8912-4000, FAX: +886-
Page 36 — Regulatory Statements
— 5 -GA-G31M-ES2L/GA-G31M-ES2C Motherboard LayoutKB_MSCPU_FANLGA775ATXGA-G31M-ES2L/GA-G31M-ES2CCD_INF_AUDIOAUDIOB_BIOSPCIE_1CIDDRII2DDRII1BATF_PANELAT
Page 37
Hardware Installation — 6 -1-1 Installation PrecautionsThe motherboard contains numerous delicate electronic circuits and components which can b
Page 38 — Contact Us
— 7 — Hardware Installation1-2 Product Specications j Only for GA-G31M-ES2L. k Only for GA-G31M-ES2C. CPU w Support for an Intel® Core™ 2 Ex
Page 39 — — 39 — Appendix
Hardware Installation — 8 — Internal w 1 x front panel header Connectors w 1 x front panel audio header w 1 x CD In connector w 1
Page 40 — Appendix — 40
— 9 — Hardware Installation(Note 1) Based on standard PC architecture, a certain amount of memory is reserved for system usage and therefore the ac
- Производитель
- Gigabyte
- Модель
- GA-G31M-ES2L
- Операционная система
-
- Неизвестная ОС
- Тип файла
-
- Инструкция
- Версия
-
2401
32-bit
Просмотреть содержимое архива
Вы нашли то, что искали?
Изображения
‹
›
×
Полезно
0 %
2
Commentary
Ваше имя
Посмотреть инструкция для Gigabyte GA-G31M-ES2L бесплатно. Руководство относится к категории материнские платы, 15 человек(а) дали ему среднюю оценку 8.5. Руководство доступно на следующих языках: английский. У вас есть вопрос о Gigabyte GA-G31M-ES2L или вам нужна помощь? Задайте свой вопрос здесь
Не можете найти ответ на свой вопрос в руководстве? Вы можете найти ответ на свой вопрос ниже, в разделе часто задаваемых вопросов о Gigabyte GA-G31M-ES2L.
Какая ширина Gigabyte GA-G31M-ES2L?
Какая толщина Gigabyte GA-G31M-ES2L?
Инструкция Gigabyte GA-G31M-ES2L доступно в русский?
Не нашли свой вопрос? Задайте свой вопрос здесь
-
Gigabyte GA-G31M-ES2L — page 1
GA-G31M-ES2L GA-G31M-ES2C LGA775 socket motherboard for Intel ® Core ™ processor family/ Intel ® Pentium ™ processor family/Intel ® Celeron ™ processor family User’s Manual Rev . 2401 12M E- G 31ME S2 L — 24 01R …
-
Gigabyte GA-G31M-ES2L — page 2
Motherboard GA-G31M-ES2L GA-G31M-ES2C May 20, 2010 May 20, 2010 Motherboard GA-G31M-ES2L/GA-G31M-ES2C …
-
Gigabyte GA-G31M-ES2L — page 3
Copyright © 2010 GIGA-BYTE TECHNOLOGY CO., L TD. All rights reserved. The trademarks mentioned in this manual are legally registered to their respective owners. Disclaimer Information in this manual is protected by copyright laws and is the property of GIGABYTE. Changes to the specifications and features in this manual may be made by GIGABYTE with …
-
Gigabyte GA-G31M-ES2L — page 4
— 4 — T able of Contents GA — G3 1M- ES2L /GA- G31 M — ES2C Motherb oard Layout …………………………………………. 5 Chapter 1 Hardware Inst allation …………………………………………………………………………. 6 1- 1 Inst allatio n Prec autio ns ……………………………………………………… …
-
Gigabyte GA-G31M-ES2L — page 5
— 5 — GA- G3 1 M — ES2L/GA- G3 1 M — ES 2C Mother board Lay out KB_MS CPU_F AN LGA775 A TX GA-G31M-ES2L/GA-G31M-ES2C CD_IN F_AUDIO AUDIO B_BIOS PCIE_1 CI DDRII2 DDRII1 BA T F_P ANEL A TX_12V Intel ® G31 Intel ® ICH7 SA T AII1 SA T AII3 SA T AII0 SA T AII2 PCI1 CODEC IDE CLR_CMOS M_BIOS COMA VGA USB PCIE_16 SPDIF_O F_USB1 F_USB2 SYS_F AN FDD AR813 …
-
Gigabyte GA-G31M-ES2L — page 6
Hardware Installation — 6 — 1- 1 Installation Pr ec autions Th e mo the rbo ar d co nta ins nume ro us d eli cat e e lec tro nic circ ui ts a nd c omp on ent s wh ic h ca n become damaged as a result of electrostatic discharge (ESD). Prior to installation, carefully read the user’s manual and follow these procedures: • Prio r to ins talla …
-
Gigabyte GA-G31M-ES2L — page 7
— 7 — Hardware Installation 1- 2 Product Specications j Only for GA-G31M-ES2L. k Only for GA-G31M-ES2C. CPU w Support for an Intel ® Core ™ 2 Extreme processor/Intel ® Core ™ 2 Quad processor/ I n t e l ® Core ™ 2 Duo processor/Intel ® Pentium ® processor/Intel ® Celeron ® processor in the LGA 775 package (Go to GIGABYTE’s webs …
-
Gigabyte GA-G31M-ES2L — page 8
Hardware Installation — 8 — Internal w 1 x front panel header Connectors w 1 x front panel audio header w 1 x CD In connector w 1 x S/PDIF Out header w 2 x USB 2.0/1.1 headers w 1 x power LED header w 1 x chassis intrusion header Back Panel w 1 x PS/2 keyboard port Connectors w 1 x PS/2 mouse port w 1 x parallel port …
-
Gigabyte GA-G31M-ES2L — page 9
— 9 — Hardware Installation (Note 1) Based on standard PC architecture, a certain amount of memory is reserved for system usage and therefore the actual memory size is less th an the stated amount. For example, 4 GB of memory size will instead be shown as 3.xx GB during system startup. (Note2) T ocongure7.1-channelaudio,you? …
-
Gigabyte GA-G31M-ES2L — page 10
Hardware Installation — 10 — 1- 4 Inst alling the Memor y Read the following guidelines before you begin to install the memory: • Make sure that the motherboard supports the memory . It is recommended that memory of the same capacity , brand, speed, and chips be used. (Go to GIGABYTE’s website for the latest supported memory speeds and memor …
-
Gigabyte GA-G31M-ES2L — page 11
— 1 1 — Hardware Installation 1-6 Back Panel Connectors PS/2 Keyboard and PS/2 Mouse Port Use the uppe r p ort (green) to c onnect a PS/2 mo use and the lower p ort (purple) t o c onnect a PS/2 keyboard. Parallel Port Use the parallel port to connect devices su ch as a printer , scanner and etc. The parallel port is als o called a printer port. Ser …
-
Gigabyte GA-G31M-ES2L — page 12
Hardware Installation — 12 — Line In Jack (Blue) The default line in jack. Use this audio jack for line in devices such as an optical drive, walkman, etc. Line Out Jack (Green) The default line out jack. Use this audio jack for a headphone or 2-channel speaker. This jack can be usedtoconnectfrontspeakersina4/5.1-channelaudio …
-
Gigabyte GA-G31M-ES2L — page 13
— 13 — Hardware Installation 1- 7 Internal Connectors Read the following guidelines before connecting external devices: • First make sure your devices are compliant with the connectors you wish to connect. • Bef ore inst allin g the dev ices, b e s ure to tu rn off the de vices a nd your co mpute r . Unp lug the power cord from the power …
-
Gigabyte GA-G31M-ES2L — page 14
Hardware Installation — 14 — A TX_12V: A TX_12V 1 3 2 4 DEBUG PO RT G.QBOFM 13 1 24 12 A TX A TX: PinNo. Denition 13 3.3V 14 -12V 15 GND 16 PS_ON (soft On/Off) 17 GND 18 GND 19 GND 20 -5V 21 +5V 22 +5V 23 +5V (Only for 2×12-pi n A TX) 24 GND (On ly f or 2x 12-p in A TX) PinNo. Denition 1 3.3V 2 3.3V 3 GND 4 +5V 5 GND 6 +5V 7 GND 8 …
-
Gigabyte GA-G31M-ES2L — page 15
— 15 — Hardware Installation 3/4) CPU_F AN/SYS_F AN (Fan Headers) The motherboa rd has a 4-pin CPU fan header (CPU_F AN) and a 3-pin (SYS_F AN) system fan header . Most fan headers possess a foolproof insertion design. When connecting a fan cable, be sure to connect it in the correct orientation (the black connector wire is the ground wire). The mo …
-
Gigabyte GA-G31M-ES2L — page 16
Hardware Installation — 16 — 6) IDE (IDE Connector) The IDE connector supports up to two IDE devices such as hard drives and optical drives. Before attach- ing the IDE cable, locate the foolproof groove on the connector . If you wish to connect two IDE devices, remember to set the jum pers and the cabling accordin g t o th e r ole of the IDE device …
-
Gigabyte GA-G31M-ES2L — page 17
— 17 — Hardware Installation
PWR_LED (System Power LED Header) This he ader can b e used to co nnect a sy stem pow er LED on th e chassi s to indic ate syst em power status. The LED is on when the system is operating. The LED keeps blinking when the system is in S1 sleep state. The LED is off when the system is in S3/S4 sleep state or powered of …
-
Gigabyte GA-G31M-ES2L — page 18
Hardware Installation — 18 — 10) F_P ANEL (Front Panel Header) Connect the power switch, reset switch, speaker and system status indicator on the chassis front panel to this header according to the pin assignments below. Note the positive and negative pins before con- necting the cables. • PW (Power Switch): Connects to the power …
-
Gigabyte GA-G31M-ES2L — page 19
— 19 — Hardware Installation 1 1) F_AUDIO (Front Panel Audio Header) ThefrontpanelaudioheadersupportsIn telHighDenitionaudio(HD)and AC’97audio.Y oum ayconnect your chassis front panel audio module to this header . Make sure the wire assignments of the module con — nector match the pin a …
-
Gigabyte GA-G31M-ES2L — page 20
Hardware Installation — 20 — 13) SPDIF_O (S/PDIF Out Header) This header supports digital S/PDIF out. Via an optional S/PDIF out cable, this header can connect to an audio device that supports digital audio in. For purchasing the optional S/PDIF out cable, please contact the local dealer . PinNo. Denition 1 Power 2 SPDIFO 3 GND 1 14) F_USB …
-
Gigabyte GA-G31M-ES2L — page 21
— 21 — Hardware Installation 15) CLR_CMOS (Clearing CMOS Jumper) Use this jumper to clear the CMOS values (e.g. date information and BIOS congurations) and reset the CMOS values to factory defaults. T o clear the CMOS values, place a jumper cap on the two pins to temporarily short the two pins …
-
Gigabyte GA-G31M-ES2L — page 22
BIOS Setup — 22 — T o access the BIOS Setup program, press the <Delete> key during the POST when the power is turned on. T o see more advanced BIOS Setup menu options, you can press <Ctrl> + <F1> in the main menu of the BIOS Setup program. T o upgrade the BIOS, use either the GIGABYTE Q-Flash or @BIOS utility . • Q-Flash allows …
-
Gigabyte GA-G31M-ES2L — page 23
— 23 — BIOS Setup • If you do not nd the settings you want in the Main Menu or a submenu, press <Ctrl>+<F1> to access more advanced options. • When the system is not stable as usual, select the Load Optimized Defaults item to set your system to its defaults. • The BIO …
-
Gigabyte GA-G31M-ES2L — page 24
BIOS Setup — 24 — • Manual Allowsyoutomanuallyenterthespecicationsoftheharddrivewhentheharddrive access mode is set to CHS . (For IDE Channel 0 Master/Slave only .) Access Mode Sets the hard drive access mode. (Default: Auto) The followingelds display your hard d …
-
Gigabyte GA-G31M-ES2L — page 25
— 25 — BIOS Setup Hard Disk Boot Priority Speciesthesequenceofloadingtheoperatingsystemfromtheinstalledharddrives. First/Second/Third Boot Device Speciesthebootorderfromtheavailabledevices. Password Check Species whether a password is required ever …
-
Gigabyte GA-G31M-ES2L — page 26
BIOS Setup — 26 — Virtualization T echnology (Note) En ab l es o r di sa b le s In te l Vi rt ua l iz at io n T e ch no l og y . Vi rt u al iz at io n e nh an ce d b y I n te l Vi rt ua li za t io n T ec hno log y w ill a llo w a pla tfor m to ru n mul tipl e ope rat ing s yste ms an d app lic atio ns in i nde pend ent partitions. With virtualizati …
-
Gigabyte GA-G31M-ES2L — page 27
— 27 — BIOS Setup On-Chip SA T A Mode CongurestheintegratedSA T Acontroller . Disabled Disables the integrated SA T A controller . Auto Lets the BIOS set SA T A devices to Combined or Enhanced mode. If your on- board SA T Acontroller is automatically congured to Combined mode, you can manua …
-
Gigabyte GA-G31M-ES2L — page 28
BIOS Setup — 28 — Onboard LAN Boot ROM Allows you to decide whether to activate the boot ROM integrated with the onboard LAN chip. (Default: Disabled) Onboard Serial Port 1 Enables or disables the rst serial port and species its base I/O address and corresponding interrupt. Options are: Auto …
-
Gigabyte GA-G31M-ES2L — page 29
— 29 — BIOS Setup (Note) Supported on Windows 7/Vista operating system only . S3(STR) Enables the system to enter the ACPI S3 (Suspend to RAM) sleep state (default). In S3 sleep state, the system appears to be off and consumes less power than in the S1 state. When sig — naled by a wake-up device or event, the system resumes to its working state exa …
-
Gigabyte GA-G31M-ES2L — page 30
BIOS Setup — 30 — Note: T o can cel the pas sword, pr ess <Ente r> on this it em. When pr ompted fo r the passw ord, pres s <Enter> again without entering the password to clear the password settings. AC Back Function Determines the state of the system after the return of power from an AC power loss. Soft-Off The system stays off upon th …
-
Gigabyte GA-G31M-ES2L — page 31
— 31 — BIOS Setup Current V oltage(V) Vcore/DDR18V/+3.3V/+12V Displays the current system voltages. Current CPU T emperature Displays current CPU temperature. Current CPU/SYSTEM F AN Speed (RPM) Displays current CPU/system fan speed. CPU Warning T emperature Se ts t he w ar ni ng t hr es ho ld f or C PU te mp er at ur e. W he n CP U te mp er at ur …
-
Gigabyte GA-G31M-ES2L — page 32
BIOS Setup — 32 — Robust Graphics Booster Robust Graphics Booster (R.G.B.) helps to enhance the performance of the graphics chip and memory . Auto allows the BIOS to automatically set the R.G.B. mode based on system congurations. Options are: Auto (default), Fast, T urbo. CPU Clock Ratio (Note) Allow …
-
Gigabyte GA-G31M-ES2L — page 33
— 33 — BIOS Setup FSB OverV oltage Control Allows you to set the Front Side Bus voltage. Normal Supplies the FSB voltage as required. (Default) +0.1V ~ +0.3V The adjustable range is from 0.1V to 0.3V . CPU V oltage Control Allows you to set the CPU voltage. Normal sets the CPU voltage as required. The adjustable range is dependent on the CPU being …
-
Gigabyte GA-G31M-ES2L — page 34
BIOS Setup — 34 — Press <Enter> on this item and type the password with up to 8 characters and then press <Enter>. Y ou will berequestedtoconrmthepassword.T ypethepasswordagainandpress<Enter>. The BIOS Setup program allows you to specify two separate passwords: Supervisor Password- When a …
-
Gigabyte GA-G31M-ES2L — page 35
— 35 — BIOS Setup Press <Enter> on this item and press the <Y> key . This exits the BIOS Setup without saving the changes made in BIOS Setup to the CMOS. Press <N> or <Esc> to return to the BIOS Setup Main Menu. 2-14 Exit Without Saving CMOS Setup Utility-Copyright (C) 1984-2009 A ward Software Abandon all Data Standard …
-
Gigabyte GA-G31M-ES2L — page 36
Appendix — 36 — Regulatory Statements Regulatory Notices This document must not be copied without ou r wri tten permission, and the contents there of must not be imparted to a third party nor be used for any unauthorized purpose. Contravention will be prosecuted. We believe that the information contained herein was accurate in all respects at the t …
-
Gigabyte GA-G31M-ES2L — page 37
— 37 — Appendix Finally , we suggest that you practice other environmentally friendly actions by understanding and using the energy-saving features of this product (where applicable), recycling the inner and outer packaging (including shipping containers) this product was delivered in, and by disposing of or recycling used batteries properly . With …
-
Gigabyte GA-G31M-ES2L — page 38
Appendix — 38 — Contact Us GIGA-BYTE TECHNOLOGY CO., L TD. Address: No.6, Bau Chiang Road, Hsin-Tien, T aipei 231, T aiwan TEL: +886-2-8912-4000, F AX: +886-2-8912-4003 T ech. and Non-T ech. Support (Sales/Marketing) : http://ggts.gigabyte.com.tw WEB address (English): http://www .gigabyte.com WEB address (Chinese): http://www .gigabyte.tw Y ou may …
-
Gigabyte GA-G31M-ES2L — page 39
— 39 — Appendix …
-
Gigabyte GA-G31M-ES2L — page 40
Appendix — 40 — …
-
Page 1
GA-G31M-ES2L/ GA-G31M-ES2C LGA775 socket motherboard for Intel Core processor family/ ® Intel Pentium processor family/Intel Celeron processor family ® ® ® ® User’s Manual Rev. 2001 12ME-G31MES2L-2001R… -
Page 3: Identifying Your Motherboard Revision
Copyright © 2009 GIGA-BYTE TECHNOLOGY CO., LTD. All rights reserved. The trademarks mentioned in this manual are legally registered to their respective owners. Disclaimer Information in this manual is protected by copyright laws and is the property of GIGABYTE. Changes to the specifications and features in this manual may be made by GIGABYTE without prior notice.
-
Page 4: Table Of Contents
Table of Contents Box Contents ……………………. 6 Optional Items……………………. 6 GA-G31M-ES2L/GA-G31M-ES2C Motherboard Layout ……….7 Block Diagram…………………… 8 Chapter 1 Hardware Installation ………………9 Installation Precautions ………………9 Product Specifications ………………10 Installing the CPU and CPU Cooler ………….. 13 1-3-1 Installing the CPU ………………..
-
Page 5
Chapter 3 Drivers Installation ………………53 Installing Chipset Drivers …………….53 Application Software ………………54 Technical Manuals ………………54 Contact ………………….55 System ………………….55 Download Center ……………….. 56 Chapter 4 Unique Features ………………57 Xpress Recovery2 ………………57 BIOS Update Utilities ………………60 4-2-1 Updating the BIOS with the Q-Flash Utility ………… -
Page 6: Box Contents
Box Contents GA-G31M-ES2L or GA-G31M-ES2C motherboard Motherboard driver disk User’s Manual One IDE cable Two SATA 3Gb/s cables I/O Shield • The box contents above are for reference only and the actual items shall depend on product package you obtain.
-
Page 7: Ga-G31M-Es2L/Ga-G31M-Es2C Motherboard Layout
GA-G31M-ES2L/GA-G31M-ES2C Motherboard Layout KB_MS ATX_12V CPU_FAN LGA775 R_USB AUDIO Intel ® F_AUDIO PCIE_1 AR8131 AR8132 B_BIOS M_BIOS PCIE_16 IT8718 PCI1 CODEC PCI2 Intel ICH7 ® SATAII3 SATAII2 SYS_FAN SATAII1 F_USB2 F_USB1 SATAII0 Only for GA-G31M-ES2L. Only for GA-G31M-ES2C. — 7 -…
-
Page 8: Block Diagram
(100 MHz) AR8132 4 SATA 3Gb/s Intel ® PCI Express Bus ICH7 8 USB Ports PCI Bus Floppy LPT Port IT8718 COM Port CODEC PS/2 KB/Mouse 2 PCI PCI CLK (33 MHz) Only for GA-G31M-ES2L. Only for GA-G31M-ES2C. — 8 -…
-
Page 9: Chapter 1 Hardware Installation
Chapter 1 Hardware Installation Installation Precautions The motherboard contains numerous delicate electronic circuits and components which can become damaged as a result of electrostatic discharge (ESD). Prior to installation, carefully read the user’s manual and follow these procedures: Prior to installation, do not remove or break motherboard S/N (Serial Number) sticker or •…
-
Page 10: Product Specifications
Integrated in the South Bridge Up to 8 USB 2.0/1.1 ports (4 on the back panel, 4 via the USB brackets connected to the internal USB headers) Only for GA-G31M-ES2L. Only for GA-G31M-ES2C. GA-G31M-ES2L/ES2C Motherboard — 10 -…
-
Page 11
Internal Connectors 1 x 24-pin ATX main power connector 1 x 4-pin ATX 12V power connector 1 x floppy disk drive connector 1 x IDE connector 4 x SATA 3Gb/s connectors 1 x CPU fan header … -
Page 12
(Note 5) Due to the hardware limitation, you must install the Intel Core 2 Extreme/ Core 2 Quad/ ® Core 2 Duo/ Pentium Dual-Core/ Celeron Dual-Core/ Celeron 400 Series CPU to enable support for Easy Energy Saver. GA-G31M-ES2L/ES2C Motherboard — 12 -… -
Page 13: Installing The Cpu And Cpu Cooler
Installing the CPU and CPU Cooler Read the following guidelines before you begin to install the CPU: • Make sure that the motherboard supports the CPU. (Go to GIGABYTE’s website for the latest CPU support list.) • Always turn off the computer and unplug the power cord from the power outlet before installing the CPU to prevent hardware damage.
-
Page 14
CPU notches with the socket alignment keys) and gently insert the CPU into position. Step 5: Once the CPU is properly inserted, replace the load plate and push the CPU socket lever back into its locked position. GA-G31M-ES2L/ES2C Motherboard — 14 -… -
Page 15: Installing The Cpu Cooler
1-3-2 Installing the CPU Cooler Follow the steps below to correctly install the CPU cooler on the motherboard. (The following procedure uses Intel boxed cooler as the example cooler.) ® Male Push Pin Direction of the Arrow Sign on the Male The Top Push Pin of Female…
-
Page 16: Installing The Memory
1. Dual Channel mode cannot be enabled if only one DDR2 memory module is installed. 2. When enabling Dual Channel mode with two memory modules, it is recommended that memory of the same capacity, brand, speed, and chips be used. GA-G31M-ES2L/ES2C Motherboard — 16 -…
-
Page 17: Installing A Memory
1-4-2 Installing a Memory Before installing a memory module , make sure to turn off the computer and unplug the power cord from the power outlet to prevent damage to the memory module. DDR2 DIMMs are not compatible to DDR DIMMs. Be sure to install DDR2 DIMMs on this motherboard.
-
Page 18: Installing An Expansion Card
Make sure the card is securely seated in the slot and does not rock. • Removing the Card: Gently push back on the lever on the slot and then lift the card straight out from the slot. GA-G31M-ES2L/ES2C Motherboard — 18 -…
-
Page 19: Back Panel Connectors
• When removing the cable, pull it straight out from the connector. Do not rock it side to side to prevent an electrical short inside the cable connector. Only for GA-G31M-ES2L. — 19 — Hardware Installation…
-
Page 20
To configure 7.1-channel audio, you need connect with the port of HD Audio standard via front panel and enable the multi-channel audio feature through the audio driver. Refer to the instructions on setting up a 2/4/5.1/7.1-channel audio configuration in Chapter 5, «Configur- ing 2/4/5.1/7.1-Channel Audio.» Only for GA-G31M-ES2C. GA-G31M-ES2L/ES2C Motherboard — 20 -… -
Page 21: Internal Connectors
Internal Connectors ATX_12V F_PANEL CPU_FAN F_AUDIO SYS_FAN CD_IN SPDIF_O F_USB1 / F_USB2 SATAII0 / 1 / 2 / 3 CLR_CMOS PWR_LED Read the following guidelines before connecting external devices: • First make sure your devices are compliant with the connectors you wish to connect. •…
-
Page 22
Pin No. Definition 3.3V 3.3V 3.3V -12V PS_ON(soft On/Off) Power Good 5V SB(stand by +5V) +12V +12V (Only for 2×12-pin ATX) +5V (Only for 2×12-pin ATX) 3.3V (Only for 2×12-pin ATX) GND (Only for 2×12-pin ATX) GA-G31M-ES2L/ES2C Motherboard — 22 -… -
Page 23
3/4) CPU_FAN/SYS_FAN (Fan Headers) The motherboard has a 4-pin CPU fan header (CPU_FAN) and a 3-pin (SYS_FAN) system fan header. Most fan headers possess a foolproof insertion design. When connecting a fan cable, be sure to connect it in the correct orientation (the black connector wire is the ground wire). The motherboard supports CPU fan speed control, which requires the use of a CPU fan with fan speed control design. -
Page 24
The SATA connectors conform to SATA 3Gb/s standard and are compatible with SATA 1.5Gb/s standard. Each SATA connector supports a single SATA device. Pin No. Definition SATAII3 SATAII2 SATAII1 SATAII0 Please connect the L-shaped end of the SATA 3Gb/s cable to your SATA hard drive. GA-G31M-ES2L/ES2C Motherboard — 24 -… -
Page 25: Battery
PWR_LED (System Power LED Header) This header can be used to connect a system power LED on the chassis to indicate system power status. The LED is on when the system is operating. The LED keeps blinking when the system is in S1 sleep state.
-
Page 26: F_Panel
LED, hard drive activity LED, speaker and etc. When connecting your chassis front panel module to this header, make sure the wire assign- ments and the pin assignments are matched correctly. GA-G31M-ES2L/ES2C Motherboard — 26 -…
-
Page 27: Cd In Connector
11) F_AUDIO (Front Panel Audio Header) The front panel audio header supports Intel High Definition audio (HD) and AC’97 audio. You may connect your chassis front panel audio module to this header. Make sure the wire assignments of the module connector match the pin assignments of the motherboard header. Incorrect connection between the module connector and the motherboard header will make the device unable to work or even damage it.
-
Page 28: Usb Headers
• Do not plug the IEEE 1394 bracket (2×5-pin) cable into the USB header. • Prior to installing the USB bracket, be sure to turn off your computer and unplug the power cord from the power outlet to prevent damage to the USB bracket. GA-G31M-ES2L/ES2C Motherboard — 28 -…
-
Page 29: Chassis Intrusion Header
15) CLR_CMOS (Clearing CMOS Jumper) Use this jumper to clear the CMOS values (e.g. date information and BIOS configurations) and reset the CMOS values to factory defaults. To clear the CMOS values, place a jumper cap on the two pins to temporarily short the two pins or use a metal object like a screwdriver to touch the two pins for a few seconds.
-
Page 30
GA-G31M-ES2L/ES2C Motherboard — 30 -… -
Page 31: Chapter 2 Bios Setup
Chapter 2 BIOS Setup BIOS (Basic Input and Output System) records hardware parameters of the system in the CMOS on the motherboard. Its major functions include conducting the Power-On Self-Test (POST) during system startup, saving system parameters and loading operating system, etc. BIOS includes a BIOS Setup program that allows the user to modify basic system configuration settings or to activate certain system features.
-
Page 32: Startup Screen
BIOS Setup settings. You can access Boot Menu again to change the first boot device setting as needed. <End>: Q-Flash Press the <End> key to access the Q-Flash utility directly without having to enter BIOS Setup first. GA-G31M-ES2L/ES2C Motherboard — 32 -…
-
Page 33: The Main Menu
Once you enter the BIOS Setup program, the Main Menu (as shown below) appears on the screen. Use arrow keys to move among the items and press <Enter> to accept or enter a sub-menu. (Sample BIOS Version: GA-G31M-ES2L A02) CMOS Setup Utility-Copyright (C) 1984-2009 Award Software …
-
Page 34
Exit Without Saving Abandon all changes and the previous settings remain in effect. Pressing <Y> to the confirmation message will exit BIOS Setup. (Pressing <Esc> can also carry out this task.) GA-G31M-ES2L/ES2C Motherboard — 34 -… -
Page 35: Standard Cmos Features
Standard CMOS Features CMOS Setup Utility-Copyright (C) 1984-2009 Award Software Standard CMOS Features Date (mm:dd:yy) Fri, May 8 2009 Item Help Time (hh:mm:ss) 10:31:24 Menu Level IDE Channel 0 Master [None] IDE Channel 0 Slave [None] IDE Channel 2 Master [None] …
-
Page 36
Base Memory Also called conventional memory. Typically, 640 KB will be reserved for the MS-DOS operating system. Extended Memory The amount of extended memory. Total Memory The total amount of memory installed on the system. GA-G31M-ES2L/ES2C Motherboard — 36 -… -
Page 37: Advanced Bios Features
Advanced BIOS Features CMOS Setup Utility-Copyright (C) 1984-2009 Award Software Advanced BIOS Features Hard Disk Boot Priority [Press Enter] Item Help First Boot Device [Floppy] Menu Level Second Boot Device [Hard Disk] Third Boot Device [CDROM] Password Check [Setup] HDD S.M.A.R.T.
-
Page 38
With virtualization, one computer system can function as multiple virtual systems. (Default: Enabled) (Note) This item is present only if you install a CPU that supports this feature. For more information about Intel CPUs’ unique features, please visit Intel’s website. GA-G31M-ES2L/ES2C Motherboard — 38 -… -
Page 39
Init Display First Specifies the first initiation of the monitor display from the installed PCI graphics card, PCI Express graphics card or the onboard VGA. Sets the PCI graphics card as the first display. (Default) Onboard Sets the onboard VGA as the first display. Sets PCI Express graphics card as the first display. -
Page 40: Integrated Peripherals
This value is dependent on the On-Chip SATA Mode and PATA IDE Set to settings. When PATA IDE Set to is configured to Ch. 1 Master/Slave, this option will be automatically set to Ch. 0 Master/Slave. GA-G31M-ES2L/ES2C Motherboard — 40 -…
-
Page 41: Usb Controller
SATA Port 1/3 Set to This value is dependent on the On-Chip SATA Mode and PATA IDE Set to settings. When PATA IDE Set to is configured to Ch. 0 Master/Slave, this option will be automatically set to Ch. 1 Master/Slave. USB Controller Enables or disables the integrated USB controller.
-
Page 42
Options are: 378/IRQ7 (default), 278/IRQ5, 3BC/IRQ7, Disabled. Parallel Port Mode Selects an operating mode for the onboard parallel (LPT) port. Options are: SPP (Standard Parallel Port)(default), EPP (Enhanced Parallel Port), ECP (Extended Capabilities Port), ECP+EPP. GA-G31M-ES2L/ES2C Motherboard — 42 -… -
Page 43: Power Management Setup
Power Management Setup CMOS Setup Utility-Copyright (C) 1984-2009 Award Software Power Management Setup ACPI Suspend Type [S3(STR)] Item Help Soft-Off by PWR-BTTN [Instant-Off] Menu Level PME Event Wake Up [Enabled] Power On by Ring [Enabled] Resume by Alarm [Disabled] x Date (of Month) Alarm Everyday x Time (hh:mm:ss) Alarm 0 : 0 : 0…
-
Page 44
Note: When this item is set to Enabled, the following four functions will become unavailable: PME event wake up, power on by mouse, power on by keyboard, and wake on LAN. (Note) Supported on Windows Vista operating system only. ® ® GA-G31M-ES2L/ES2C Motherboard — 44 -… -
Page 45: Pnp/Pci Configurations
PnP/PCI Configurations CMOS Setup Utility-Copyright (C) 1984-2009 Award Software PnP/PCI Configurations PCI1 IRQ Assignment [Auto] Item Help PCI2 IRQ Assignment [Auto] Menu Level : Move Enter: Select +/-/PU/PD: Value F10: Save ESC: Exit F1: General Help F5: Previous Values F6: Fail-Safe Defaults F7: Optimized Defaults PCI1 IRQ Assignment Auto…
-
Page 46: Pc Health Status
Enables or disables the CPU fan speed control function. Enabled allows the CPU fan to run at different speed according to the CPU temperature. You can adjust the fan speed with EasyTune based on system requirements. If disabled, CPU fan runs at full speed. (Default: Enabled) GA-G31M-ES2L/ES2C Motherboard — 46 -…
-
Page 47: Mb Intelligent Tweaker(M.i.t.)
MB Intelligent Tweaker(M.I.T.) CMOS Setup Utility-Copyright (C) 1984-2009 Award Software MB Intelligent Tweaker(M.I.T.) Robust Graphics Booster [Auto] Item Help (Note) CPU Clock Ratio [12X] Menu Level CPU Frequency 2.40GHz(200×12) CPU Host Clock Control [Disabled] x CPU Host Frequency (Mhz) PCI Express Frequency (Mhz) [Auto] Performance Enhance [Standard]…
-
Page 48
Allows you to set memory voltage. Normal Supplies the memory voltage as required. (Default) +0.1V ~ +0.4V Increases memory voltage by 0.1V to 0.4V at 0.1V increment. Note: Increasing memory voltage may result in damage to the memory. GA-G31M-ES2L/ES2C Motherboard — 48 -… -
Page 49
FSB OverVoltage Control Allows you to set the Front Side Bus voltage. Normal Supplies the FSB voltage as required. (Default) +0.1V ~ +0.3V Increases FSB voltage by 0.1V to 0.3V at 0.1V increment. CPU Voltage Control Allows you to set the CPU voltage. Normal sets the CPU voltage as required. The adjustable range is dependent on the CPU being installed. -
Page 50: Load Fail-Safe Defaults
Press <Enter> on this item and then press the <Y> key to load the optimal BIOS default settings. The BIOS defaults settings helps the system to operate in optimum state. Always load the Optimized defaults after updating the BIOS or after clearing the CMOS values. GA-G31M-ES2L/ES2C Motherboard — 50 -…
-
Page 51: Set Supervisor/User Password
2-12 Set Supervisor/User Password CMOS Setup Utility-Copyright (C) 1984-2009 Award Software Standard CMOS Features Load Fail-Safe Defaults Advanced BIOS Features Load Optimized Defaults Integrated Peripherals Set Supervisor Password Power Management Setup Set User Password PnP/PCI Configurations Save &…
-
Page 52: Save & Exit Setup
Press <Enter> on this item and press the <Y> key. This exits the BIOS Setup without saving the changes made in BIOS Setup to the CMOS. Press <N> or <Esc> to return to the BIOS Setup Main Menu. GA-G31M-ES2L/ES2C Motherboard — 52 -…
-
Page 53: Chapter 3 Drivers Installation
Chapter 3 Drivers Installation • Before installing the drivers, first install the operating system. • After installing the operating system, insert the motherboard driver disk into your optical drive. The driver Autorun screen is automatically displayed which looks like that shown in the screen shot below.
-
Page 54: Application Software
This page displays all the utilities and applications that GIGABYTE develops and some free software. You can click the Install button on the right of an item to install it. Technical Manuals This page provides GIGABYTE’s application guides, content descriptions for this driver disk, and the motherboard manuals. GA-G31M-ES2L/ES2C Motherboard — 54 -…
-
Page 55: Contact
Contact For the detailed contact information of the GIGABYTE Taiwan headquarter or worldwide branch offices, click the URL on this page to link to the GIGABYTE Website. System This page provides the basic system information. — 55 — Drivers Installation…
-
Page 56: Download Center
Download Center To update the BIOS, drivers, or applications, click the Download Center button to link to the GIGABYTE Web site. The latest version of the BIOS, drivers, or applications will be displayed. GA-G31M-ES2L/ES2C Motherboard — 56 -…
-
Page 57: Chapter 4 Unique Features
Chapter 4 Unique Features Xpress Recovery2 Xpress Recovery2 is a utility that allows you to quickly compress and back up your system data and perform restoration of it. Supporting NTFS, FAT32, and FAT16 file systems, Xpress Recovery2 can back up data on PATA and SATA hard drives and restore it. Before You Begin: •…
-
Page 58
Xpress Recovery2 will automatically create a new partition to store the backup image file. Step 1: Step 2: Select BACKUP to start backing up your hard When finished, go to Disk Management to drive data. check disk allocation. GA-G31M-ES2L/ES2C Motherboard — 58 -… -
Page 59
D. Using the Restore Function in Xpress Recovery2 Select RESTORE to restore the backup to your hard drive in case the system breaks down. The RESTORE option will not be present if no backup is created before. E. Removing the Backup Step 1: Step 2: If you wish to remove the backup file, select… -
Page 60: Bios Update Utilities
Copyright (C) 1984-2009, Award Software, Inc. G31M-ES2L A02 <DEL>: BIOS Setup <F9>: XpressRecovery2 <F12>: Boot Menu <End>: Qflash 05/08/2009-G31-ICH7-6A99OG0JC-00 Because BIOS flashing is potentially risky, please do it with caution. Inadequate BIOS flashing may result in system malfunction. GA-G31M-ES2L/ES2C Motherboard — 60 -…
-
Page 61
B. Updating the BIOS When updating the BIOS, choose the location where the BIOS file is saved. The follow procedure assumes that you save the BIOS file to a floppy disk. Step 1: 1. Insert the floppy disk containing the BIOS file into the floppy disk drive. In the main menu of Q-Flash, use the up or down arrow key to select Update BIOS from Drive and press <Enter>. -
Page 62
Load Optimized Defaults Press <Y> to load BIOS defaults Step 6: Select Save & Exit Setup and then press <Y> to save settings to CMOS and exit BIOS Setup. The procedure is complete after the system restarts. GA-G31M-ES2L/ES2C Motherboard — 62 -… -
Page 63: Updating The Bios With The @Bios Utility
4-2-2 Updating the BIOS with the @BIOS Utility A. Before You Begin: 1. In Windows, close all applications and TSR (Terminate and Stay Resident) programs. This helps prevent unexpected failures when performing a BIOS update. 2. During the BIOS update process, ensure the Internet connection is stable and do NOT interrupt the Internet connection (for example, avoid a power loss or switching off the Internet).
-
Page 64: Easytune 6
Incorrectly doing overclock/overvoltage may result in damage to the hardware components such as CPU, chipset, and memory and reduce the useful life of these components. Before you do the overclock/overvoltage, make sure that you fully know each function of EasyTune 6, or system instability or other unexpected results may occur. GA-G31M-ES2L/ES2C Motherboard — 64 -…
-
Page 65: Easy Energy Saver
Easy Energy Saver GIGABYTE Easy Energy Saver is a revolutionary technology that delivers unparalleled power (Note 1) savings with a click of the button. Featuring an advanced proprietary software design, GIGABYTE Easy Energy Saver is able to provide exceptional power savings and enhanced power efficiency without sacrificing computing performance.
-
Page 66
(Note 4) The total amount of power saved will be recorded until re-activated when only the Easy Energy Saver is under the enable status, and power savings meter is unable to reset to zero. (Note 5) Easy Energy Saver Meter will automatically reset when the total power saving reaches 99999999 Watts. GA-G31M-ES2L/ES2C Motherboard — 66 -… -
Page 67: Q-Share
Q-Share Q-Share is an easy and convenient data sharing tool. After configuring your LAN connection settings and Q-Share, you are able to share your data with computers on the same network, making full use of Internet resources. Directions for using Q-Share After installing Q-Share from the motherboard driver disk, go to Start>All Programs>GIGABYTE>…
-
Page 68: Time Repair
• Each storage volume can accommodate 64 shadow copies. When this limit is reached, the oldest shadow copy will be deleted and unable to be restored. Shadow copies are read-only so you cannot edit the contents of a shadow copy. GA-G31M-ES2L/ES2C Motherboard — 68 -…
-
Page 69: Chapter 5 Appendix
Chapter 5 Appendix Configuring Audio Input and Output 5-1-1 Configuring 2/4/5.1/7.1-Channel Audio The motherboard provides three audio jacks on the back panel which support 2/4/5.1/7.1 -channel audio. The pic- (Note) Line In ture to the right shows the default audio jack assignments. The integrated HD (High Definition) audio provides jack Front Speaker Out retasking capability that allows the user to change the func-…
-
Page 70
On the Speakers screen, click the Speaker Con- figuration tab. In the Speaker Configuration list, select Stereo, Quadraphonic, 5.1 Speaker, or 7.1 Speaker according to the type of speaker configura- tion you wish to set up. Then the speaker setup is completed. GA-G31M-ES2L/ES2C Motherboard — 70 -… -
Page 71
B. Configuring Sound Effect: You may configure an audio environment on the Sound Effects tab. C. Activating an AC’97 Front Panel Audio Module: If your chassis provides an AC’97 front panel audio module, to activate the AC’97 functionality, click the tool icon on the Speaker Configuration tab. -
Page 72: Installing The S/Pdif Out Cable (Optional)
1 of the SPDIF_O header. Incorrect connection may render the device unusable or even result in damage to the device. Step 2: Secure the metal bracket to the chassis back panel with a screw. GA-G31M-ES2L/ES2C Motherboard — 72 -…
-
Page 73
Step 3: Connect a S/PDIF coaxial cable or a S/PDIF optical cable (either one) to an external decoder for transmitting the S/PDIF digital audio signals. S/PDIF Coaxial Cable S/PDIF Optical Cable B. Configuring S/PDIF Out: On the Digital Output screen, click the Default Format tab and then select the sample rate and bit depth. Click OK to complete. -
Page 74: Configuring Microphone Recording
It is recommended that you set the volumes at a middle level. If you want to change the current sound input default device to microphone, right-click on Microphone and select Set Default Device. GA-G31M-ES2L/ES2C Motherboard — 74 -…
-
Page 75
Step 4: To raise the recording and playback volume for the microphone, click the Microphone Boost icon on the right of the Recording Volume slider and set the Microphone Boost level. Step 5: After completing the settings above, click Start, point to Programs, point to Accessories, and then click Sound Recorder to begin the sound recording. -
Page 76: Using The Sound Recorder
3. To stop recording audio, click the Stop Recording button Be sure to save the recorded audio file upon completion. B. Playing the Recorded Sound: You can play your recording in a digital media player program that supports your audio file format. GA-G31M-ES2L/ES2C Motherboard — 76 -…
-
Page 77: Troubleshooting
Troubleshooting 5-2-1 Frequently Asked Questions To read more FAQs for your motherboard, please go to the SupportMotherboardFAQ page on GIGABYTE’s website. Q: In the BIOS Setup program, why are some BIOS options missing? A: Some advanced options are hidden in the BIOS Setup program. Press <Delete> to enter BIOS Setup during the POST.
-
Page 78: Troubleshooting Procedure
Insert the graphics card. Connect the ATX main power cable and the 12V power cable. Turn on the power to start the computer. Make sure the graphics card is securely seated in the expansion slot and power connectors are firmly attached. (Continued…) GA-G31M-ES2L/ES2C Motherboard — 78 -…
-
Page 79
The power supply, When the computer is turned on, is the CPU cooler running? CPU or CPU socket might fail. The problem is verified and solved. The graphics card, expansion slot, or Check if there is display on your monitor. monitor might fail. -
Page 80: Regulatory Statements
If you need further assistance in recycling, reusing in your «end of life» product, you may contact us at the Customer Care number listed in your product’s user’s manual and we will be glad to help you with your effort. GA-G31M-ES2L/ES2C Motherboard — 80 -…
-
Page 81
Finally, we suggest that you practice other environmentally friendly actions by understanding and using the energy-saving features of this product (where applicable), recycling the inner and outer packaging (including shipping containers) this product was delivered in, and by disposing of or recycling used batteries properly. -
Page 82
GA-G31M-ES2L/ES2C Motherboard — 82 -… -
Page 83
TEL: +86-24-83992901 GIGA-BYTE SINGAPORE PTE. LTD. — Singapore FAX: +86-24-83992909 WEB address : http://www.gigabyte.sg GIGABYTE TECHNOLOGY (INDIA) LIMITED — India Thailand WEB address : http://www.gigabyte.in … -
Page 84
Russia WEB address : http://www.giga-byte.nl WEB address : http://www.gigabyte.ru GIGABYTE TECHNOLOGY FRANCE — France Poland WEB address : http://www.gigabyte.fr WEB address : http://www.gigabyte.pl…