
Инструкции
| 1 | Polish (Краткое руководство пользователя) Европа | B5K-0653-Polish30.pdf | Загрузить | 358 кб |
| 2 | Polish, Венгерский, Чешский, Хорватский (Инструкция по эксплуатации) Европа | B5A-3145-12b.pdf | Загрузить | 3 328 кб |
| 3 | Английский, Арабский (Инструкция по эксплуатации) Азия | B5A-3147-20.pdf | Загрузить | 1 223 кб |
| 4 | Английский, Французский, Испанский, Немецкий, Итальянский, Португальский, Голландский, Русский (Краткое руководство пользователя) Европа | B5K-0653-30.pdf | Загрузить | 2 332 кб |
| 5 | Английский, Французский, Немецкий, Голландский (Инструкция по эксплуатации) Европа | B5A-3145-10b.pdf | Загрузить | 3 337 кб |
| 6 | Венгерский (Краткое руководство пользователя) Европа | B5K-0653-Hungarian30.pdf | Загрузить | 358 кб |
| 7 | Греческий (Краткое руководство пользователя) Европа | B5K-0653-Greek30.pdf | Загрузить | 375 кб |
| 8 | Испанский, Итальянский, Португальский, Русский (Инструкция по эксплуатации) Европа | B5A-3145-11b.pdf | Загрузить | 3 367 кб |
| 9 | Норвежский (букмол) (Краткое руководство пользователя) Европа | B5K-0653-Norwegian30.pdf | Загрузить | 354 кб |
| 10 | Тайский Installation Manual | B5A-3147-10_TH.pdf | Загрузить | 1 167 кб |
| 11 | Украинский (Краткое руководство пользователя) Европа | B5K-0653-Ukrainian30.pdf | Загрузить | 381 кб |
| 12 | Хорватский (Краткое руководство пользователя) Европа | B5K-0653-Croatian30.pdf | Загрузить | 353 кб |
| 13 | Чешский (Краткое руководство пользователя) Европа | B5K-0653-Czech30.pdf | Загрузить | 358 кб |
| 14 | Шведский (Краткое руководство пользователя) Европа | B5K-0653-Swedish30.pdf | Загрузить | 367 кб |
| 15 | Шведский, Норвежский (букмол), Украинский, Греческий (Инструкция по эксплуатации) Европа | B5A-3145-13b.pdf | Загрузить | 3 441 кб |
Список совместимых устройств iPod и iPhone
С помощью данного сайта можно проверить совместимость ресивера KENWOOD и адаптера интерфейса iPod.
Выберите iPod/iPhone и ресивер KENWOOD. Отобразятся информация о совместимости и модель адаптера, необходимая для подключения.
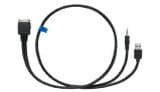
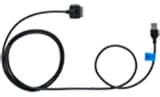
KNA-13HC Высокоскоростной HDMI-кабель
KCA-HD100 Высокоскоростной HDMI-кабель
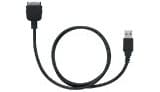
KCA-iP103 USB-кабель для подключения iPod (аудио)
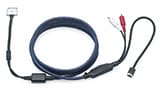
Кабель Lightning/USB Кабель Lightning/USB
Bluetooth Для прослушивания музыки через Bluetooth
KCA-iP302 Прямой видео/аудиокабель iPhone и iPod для визуальной модели KENWOOD
KCA-iP212 Прямой видео/аудиокабель iPhone и iPod для визуальной модели KENWOOD
KCA-iP202 Прямой видео/аудиокабель iPhone и iPod для визуальной модели KENWOOD
KCA-iP22F Прямой видео/аудиокабель iPhone и iPod для визуальной модели KENWOOD
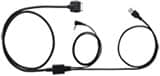
KCA-iP102 Прямой аудиокабель iPhone и iPod для аудиомодели KENWOOD
KCA-iP301V Прямой видео/аудиокабель iPhone и iPod для визуальной модели KENWOOD
KCA-iP240V Прямой видео/аудиокабель iPhone и iPod для визуальной модели KENWOOD
KCA-iP101 Прямой аудиокабель iPhone и iPod для аудиомодели KENWOOD
KCA-iP300V Прямой видео/аудиокабель iPod для визуальной модели KENWOOD
KCA-iP100 Прямой аудиокабель iPod для аудиомодели KENWOOD
KCA-iP200 Прямой аудиокабель iPod для аудиомодели KENWOOD
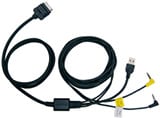
KCA-iP500 Интерфейсный аудионабор iPod
KNA-i909 Интерфейсный видео/аудиокабель iPhone 3G/iPod для навигационной модели KENWOOD (Япония)
KNA-i990 Интерфейсный видео/аудиокабель iPod для навигационной модели KENWOOD (Япония)
KNA-i770 Интерфейсный видео/аудиокабель iPod для навигационной модели KENWOOD (Япония)
KNA-i77 Интерфейсный видео/аудиокабель iPod для навигационной модели KENWOOD (Япония)
Подключение iPod/iPhone
Вы не можете подключить iPod в качестве источника.
Подключайте следующим образом:
Для прослушивания музыки и просмотра видео
KNA-13HC + KCA-iP103
  |
・Высокоскоростной HDMI-кабель
|

KNA-13HC
|
Высокоскоростной HDMI-кабель・Подключите устройство к iPod/iPhone с помощью рекомендуемого KENWOOD HDMI-кабеля и цифрового AV-адаптера Lightning фирмы Apple, кабель Lightning/USB (принадлежность iPod/iPhone).
・Требуются также настройки Bluetooth. |

KCA-HD100 + KCA-iP103
 |
・Высокоскоростной HDMI-кабель
|

KCA-HD100
|
Высокоскоростной HDMI-кабель・Подключите устройство к iPod/iPhone с помощью рекомендуемого KENWOOD HDMI-кабеля и цифрового AV-адаптера Lightning фирмы Apple, кабель Lightning/USB (принадлежность iPod/iPhone).
・Требуются также настройки Bluetooth. |

KCA-iP302
 |
Прямой видео/аудиокабель iPhone и iPod для визуальной модели KENWOOD |
KCA-iP212
 |
Прямой видео/аудиокабель iPhone и iPod для визуальной модели KENWOOD |
KCA-iP202
 |
Прямой видео/аудиокабель iPhone и iPod для визуальной модели KENWOOD |
KCA-iP22F
 |
Прямой видео/аудиокабель iPhone и iPod для визуальной модели KENWOOD |
KCA-iP301V
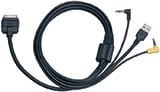 |
Прямой видео/аудиокабель iPhone и iPod для визуальной модели KENWOOD |
KCA-iP240V
 |
Прямой видео/аудиокабель iPhone и iPod для визуальной модели KENWOOD |
KCA-iP300V
 |
Прямой видео/аудиокабель iPod для визуальной модели KENWOOD |
KNA-i909
 |
Интерфейсный видео/аудиокабель iPhone 3G/iPod для навигационной модели KENWOOD (Япония) |
Для прослушивания музыки
Включите модель
KCA-iP103
|
USB-кабель для подключения iPod (аудио) |
Кабель Lightning/USB
Кабель Lightning/USB・ Во избежание повреждения кабеля Lightning/USB (принадлежность iPod/iPhone) от чрезмерного нагревания не храните его в автомобиле. |
Bluetooth
 |
Для прослушивания музыки через Bluetooth.・Для подключения требуются настройки Bluetooth. |
KCA-iP102
 |
Прямой аудиокабель iPhone и iPod для аудиомодели KENWOOD |
KCA-iP101
 |
Прямой аудиокабель iPhone и iPod для аудиомодели KENWOOD |
KCA-iP100
 |
Прямой аудиокабель iPod для аудиомодели KENWOOD |
KCA-iP200
 |
Прямой аудиокабель iPod для аудиомодели KENWOOD |
KCA-iP500
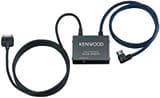 |
Интерфейсный аудионабор iPod
ЗамечанияОбщие примечания・Перед соединением KCA-iP500 с управляющим устройством KENWOOD, загрузите в ваш iPod только самую последнюю версию программного обеспечения с официального сайта Apple. ・Отображение информации зависит от возможностей дисплея головного устройства. ・В зависимости от подключенного управляющего устройства название источника может быть отображено как «»EXT-MEDIA»», «»*-MEDIA»» или CD-чейнджер («»CD-CH»» и т.д.). ・Функция DNPS (Установка названия диска) управляющего устройства невозможна с KCA-iP500. ・После подключения вашего iPod к KCA-iP500, первой песней в списке воспроизведения станет та, которую вы проигрывали при последнем использовании вашего iPod. На дисплее будет отображено «RESUMING» (Возобновление воспроизведения), поскольку правильное название песни и ее номер не могут быть указаны. |
KNA-i990
 |
Интерфейсный видео/аудиокабель iPod для навигационной модели KENWOOD (Япония) |
KNA-i770
 |
Интерфейсный видео/аудиокабель iPod для навигационной модели KENWOOD (Япония) |
KNA-i77
 |
Интерфейсный видео/аудиокабель iPod для навигационной модели KENWOOD (Япония) |
Внимание
Use of the Made for Apple badge means that an accessory has been designed to connect specifically to the Apple product(s) identified in the badge, and has been certified by the developer to meet Apple performance standards. Apple is not responsible for the operation of this device or its compliance with safety and regulatory standards.
Apple, iPhone, iPod, iPod classic, iPod nano, iPod touch, and Lightning are trademarks of Apple Inc., registered in the U.S. and other countries. iPod mini is a trademark of Apple Inc.
![]() К началу страницы
К началу страницы
Характеристики аудио файлов
О форматах AAC, MP3, WMA, WAV и FLAC
Воспроизводимый файл AAC/MP3/WMA/WAV/FLAC (здесь и далее называемый «аудио файлом») и формат носителя информации имеют следующее ограничение. Не соответствующий спецификации аудио файл может воспроизводиться неправильно, либо могут неправильно отображаться имена файлов и папок.
Воспроизводимый аудио файл
| MP3 | Расширение | .mp3 |
|---|---|---|
| Формат | Аудио файл MPEG 1/2 с уровнем передачи данных 3 | |
| Скорость передачи данных | 8-320 кбит/с / переменная скорость передачи в битах | |
| Частота дискретизации | 8/ 11,025/ 12/ 16/ 22,05/ 24/ 32/ 44,1/ 48 кГц | |
| Joint STEREO | ||
| Тегирование ID3 (вер.1) | Версия 1.0/ 1.1 (Название/ Исполнитель/ Альбом) | |
| Тегирование ID3 (вер.2) | Версия 2.2/ 2.3/ 2.4 (Название/ Исполнитель/ Альбом: Не поддерживает показ изображений.) | |
| WMA | Расширение | .wma |
| Формат | Файл в соответствии с Windows Media Audio (кроме файла для Windows Media Player 9 или более поздней версии, в котором реализованы новые функции) |
|
| Скорость передачи данных | 32-192 кбит/с / переменная скорость передачи в битах | |
| Частота дискретизации | 8/ 11,025/ 12/ 16/ 22,05/ 24/ 32/ 44,1/ 48 кГц | |
| Файл DRM | — | |
| Профессиональный | — | |
| Без потерь | — | |
| Голос | — | |
| Тегирование WMA (описание содержимого) | ||
| Тегирование WMA (расширенное описание содержимого) | ||
| AAC-LC | Расширение | .m4a, .aac |
| Формат | «.m4a» закодирован в формате AAC-LC. *1
«.aac» закодирован в формате AAC-LC. |
|
| Скорость передачи данных | 8-320 кбит/с / переменная скорость передачи в битах | |
| Частота дискретизации | 8/ 11,025/ 12/ 16/ 22,05/ 24/ 32/ 44,1/ 48 кГц | |
| Файл DRM | — | |
| 2-канальный | ||
| Многоканальный | — | |
| Тегирование ID3 (вер.2) | — | |
| Метаданные (данные о композиции) | — | |
| Метаданные iTunes m4a (данные о композиции) | ||
| WAV | Расширение | .wav |
| Формат | Аудио формат формы волны RIFF (только для LinearPCM) | |
| Частота дискретизации | 44,1 кГц | |
| Контрольная сумма | 16 бит | |
| Канал | Стерео/моно | |
| FLAC | Расширение | .flac |
| Формат | Free Lossless Audio Codec (FLAC) | |
| Частота дискретизации | 8/ 11,025/ 12/ 16/ 22,05/ 24/ 32/ 44,1/ 48/ 96 кГц | |
| Канал | Стерео/моно | |
| Контрольная сумма | 24 бит | |
| Уровень сжатия | 0/ 1/ 2/ 3/ 4/ 5/ 6/ 7/ 8 |
・Не присваивайте эти расширения другим файлам, не являющимся аудио файлами. Если присвоить это расширение файлу, который не является аудио файлом, он будет воспроизводиться и издавать громкий шум, в результате чего будут повреждены акустические системы.
・Файл с защитой от копирования не может воспроизводиться.
・Аудио файлы могут не воспроизводиться в зависимости от настроек программного обеспечения кодирования, вида устройства USB и/или условий записи.
・Данное устройство может быть несовместимо с обновленным стандартом формата сжатия и дополнительными характеристиками.
・В некоторых случаях возможен некорректный показ времени воспроизведения, что объясняется условиями записи аудио файла.
・Функция «Supreme» не применима для композиций, закодированных при переменной скорости передачи в битах.
・*1 Файл AAC соответствует файлу MPEG4 AAC (.m4a), закодированному программой iTunes.
・При воспроизведении файла WAVE звучание может оказаться прерывистым в зависимости от рабочих характеристик носителя информации.
Файловые системы воспроизводимых носителей информации
| Устройство USB | Файловая система (Windows) *1 | FAT12 | |
|---|---|---|---|
| FAT16 | |||
| FAT32 | |||
| Файловая система (Macintosh) | — | ||
| Файловая система (UNIX) | — |
・*1 Разбиение на разделы : не поддерживает (некоторые устройства USB могут иметь много разделов, невидимых в операционной системе Windows.)
Ограничение структуры файла и папки
| Устройство USB | Максимальное количество уровней папок | 8 |
|---|---|---|
| Максимальное количество папок (на папку) | 999 | |
| Максимальное количество папок (на устройство) *1 | 999 | |
| Максимальное количество файлов (на папку) | 999 | |
| Максимальное количество файлов и папок (на устройство) | 20480 |
・Иногда воспроизведение начинается не сразу, и время ожидания зависит от условий записи (например, иерархии файлов и структуры папок).
・*1 Сюда относится корневая папка (папка верхнего уровня). Число папок, отображаемое на ПК, меньше на 1.
Максимальное количество отображаемых символов
| Имя файла/папки | 64 символов | |
|---|---|---|
| Тегирование MP3 ID3 | Вер. 1.x | 30 символов |
| Вер. 2.x | 64 символов | |
| Свойство содержимого WMA | 64 символов | |
| Сведения о композиции AAC | 64 символов | |
| WAV | 64 символов | |
| FLAC | 64 символов |
・Количество символов зависит от размера в байтах.
・Имя файла/папки представляет собой количество символов, включая расширения.
・Данное устройство может показывать ID3 метки MP3 следующих версий: 1.0/ 1.1/ 2.2/ 2.3/ 2.4
・Тегирование AAC ID3 не может отображаться.
Порядок воспроизведения аудио файла
・Аудио файлы воспроизводятся в порядке расположения имен файлов. Можно задать порядок воспроизведения файлов, пронумеровав файлы в папке и записав их в папку.
Пример
![]() К началу страницы
К началу страницы
Об устройстве USB
Примечания по поводу использования устройства USB
Данное устройство может воспроизводить аудио файлы, хранимые во флэш-памяти или на цифровом аудиоплеере с портом USB (в настоящем документе эти устройства называются устройствами USB)
Следующие ограничения распространяются на виды и использование имеющихся в продаже устройств USB.
Имеющиеся устройства USB
| Стандарт USB | USB 1.1 / USB 2.0 |
|---|---|
| Скорость передачи | Максимальная скорость (12 Мбит/с) |
| Класс USB | Класс накопителя (устройство MSC) |
| Подкласс USB | SCSI |
| Протокол | Только для передачи массивов данных |
| Источник питания | Макс. 1,5 А (iPod/iPhone) / Макс. 500 мА (USB) |
・Устройства USB класса массовой памяти:
Устройства USB, которые ПК может распознать как внешние устройства хранения без использования особого драйвера или программного приложения.
・Обратитесь к торговому агенту, чтобы уточнить, соответствует ли ваше устройство USB характеристикам USB класса массовой памяти.
・Использование неподдерживаемого устройства USB может привести к некорректному воспроизведению или отображению аудио файла.
Даже в случае использования устройства USB, соответствующего вышеуказанным характеристикам, аудио файлы могут не воспроизводиться корректно в зависимости от вида или состояния устройства USB.
・При использовании определенных устройств USB некоторые функции ограничены.
・Нормальный режим работы и питания не гарантируется для всех устройств USB.
О подключении устройства USB
・При использовании кабеля, не совместимого с USB, нормальное воспроизведение не гарантируется. Подключение кабеля, общая длина которого превышает 5 м, может привести к некорректному воспроизведению.
・Вы не можете подключить устройство USB через концентратор USB.
|
・Установите устройство USB в том месте, где оно не помешает вашему передвижению. ・Не оставляйте надолго устройство USB в транспортном средстве. Оно может повредиться или выйти из строя в результате действия прямого солнечного света, высокой температуры и т.д. ・Возьмите с собой резервные копии аудио файлов, используемых с данным устройством. Эти файлы можно стереть в зависимости от условий эксплуатации устройства USB. Мы не несем никакой ответственности за ущерб, понесенный в связи со стиранием хранящихся данных. |
![]() К началу страницы
К началу страницы
Manuals
| 3 | English, Arabic (Instruction manual) Asia | B5A-3147-20.pdf | Download | 1,223 kB |
| 4 | English, French, German, Dutch (Instruction manual) Europe | B5A-3145-10b.pdf | Download | 3,337 kB |
| 5 | English, French, Spanish, German, Italian, Portuguese, Dutch, Russian (Quick Start Guide) Europe | B5K-0653-30.pdf | Download | 2,332 kB |
iPod and iPhone Compatibility List
This site can be used to check the compatibility between KENWOOD’s Receiver, and iPod interface adapter.
Select your iPod/iPhone and KENWOOD receiver. Compatibility information and the adapter model which is needed for the connection are displayed.
KNA-13HC High Speed HDMI cable
KCA-HD100 High Speed HDMI cable
KCA-iP103 USB Direct Connection Cable for iPod (Audio)
Lightning to USB Cable Lightning to USB Cable
Bluetooth To listen to music via Bluetooth
KCA-iP302 iPhone & iPod video/audio direct cable for KENWOOD visual model
KCA-iP212 iPhone & iPod video/audio direct cable for KENWOOD visual model
KCA-iP202 iPhone & iPod video/audio direct cable for KENWOOD visual model
KCA-iP22F iPhone & iPod video/audio direct cable for KENWOOD visual model
KCA-iP102 iPhone & iPod audio direct cable for KENWOOD audio model
KCA-iP301V iPhone & iPod video/audio direct cable for KENWOOD visual model
KCA-iP240V iPhone & iPod video/audio direct cable for KENWOOD visual model
KCA-iP101 iPhone & iPod audio direct cable for KENWOOD audio model
KCA-iP300V iPod video/audio direct cable for KENWOOD visual model
KCA-iP100 iPod audio direct cable for KENWOOD audio model
KCA-iP200 iPod audio direct cable for KENWOOD audio model
KCA-iP500 iPod audio interface kit
KNA-i909 iPhone 3G/iPod video/audio interface cable for KENWOOD navigation model (japan)
KNA-i990 iPod video/audio interface cable for KENWOOD navigation model (japan)
KNA-i770 iPod video/audio interface cable for KENWOOD navigation model (japan)
KNA-i77 iPod video/audio interface cable for KENWOOD navigation model (japan)
iPod/iPhone connection
You cannot connect iPod as a source.
Connect as follows:
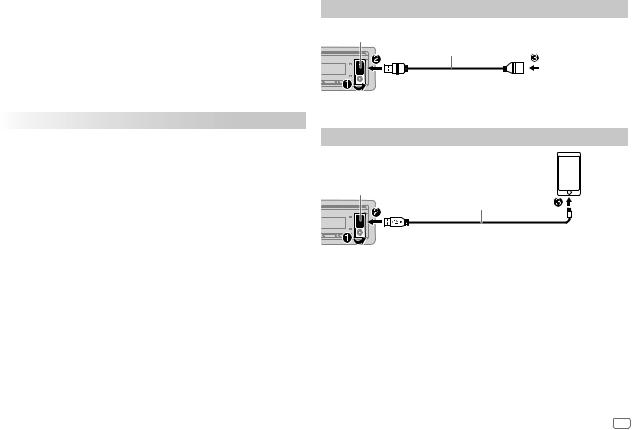
To listen music and watch video
KNA-13HC + KCA-iP103
  |
・High Speed HDMI cable
|

KNA-13HC
|
High Speed HDMI cable・Connect the unit and iPod /iPhone with listed KENWOOD HDMI cable and the Apple Lightning Digital AV Adapter, Lightning to USB Cable (accessory of the iPod/iPhone).
・The Bluetooth settings are also necessary. |

KCA-HD100 + KCA-iP103
 |
・High Speed HDMI cable
|

KCA-HD100
|
High Speed HDMI cable・Connect the unit and iPod /iPhone with listed KENWOOD HDMI cable and the Apple Lightning Digital AV Adapter, Lightning to USB Cable (accessory of the iPod/iPhone).
・The Bluetooth settings are also necessary. |

KCA-iP302
 |
iPhone & iPod video/audio direct cable for KENWOOD visual model |
KCA-iP212
 |
iPhone & iPod video/audio direct cable for KENWOOD visual model |
KCA-iP202
 |
iPhone & iPod video/audio direct cable for KENWOOD visual model |
KCA-iP22F
 |
iPhone & iPod video/audio direct cable for KENWOOD visual model |
KCA-iP301V
 |
iPhone & iPod video/audio direct cable for KENWOOD visual model |
KCA-iP240V
 |
iPhone & iPod video/audio direct cable for KENWOOD visual model |
KCA-iP300V
 |
iPod video/audio direct cable for KENWOOD visual model |
KNA-i909
 |
iPhone 3G/iPod video/audio interface cable for KENWOOD navigation model (japan) |
To listen music
Include model
KCA-iP103
|
USB Direct Connection Cable for iPod (Audio) |
Lightning to USB Cable
Lightning to USB Cable・ |
Bluetooth
 |
To listen to music via Bluetooth.・The Bluetooth settings are necessary for connection. |
KCA-iP102
 |
iPhone & iPod audio direct cable for KENWOOD audio model |
KCA-iP101
 |
iPhone & iPod audio direct cable for KENWOOD audio model |
KCA-iP100
 |
iPod audio direct cable for KENWOOD audio model |
KCA-iP200
 |
iPod audio direct cable for KENWOOD audio model |
KCA-iP500
 |
iPod audio interface kit
RemarkCommon notes・Before connecting KCA-iP500 to KENWOOD control unit, please make sure your iPod’s software is updated to the latest version which are possible to download from APPLE OFFICIAL WEBSITE. ・Data information is dependant on the Head Unit display capability. ・Depending on the connected control unit, source name may be displayed «EXT-MEDIA», «*-MEDIA» or CD Changer («CD-CH»etc.). ・DNPS function of the control unit cannot be operated with KCA-iP500. ・After connecting your iPod to the KCA-iP500, the first track played will be the track you played last with your iPod,and «RESUMING»will be displayed while playback, since the title number and title name can not be displayed correctly. |
KNA-i990
 |
iPod video/audio interface cable for KENWOOD navigation model (japan) |
KNA-i770
 |
iPod video/audio interface cable for KENWOOD navigation model (japan) |
KNA-i77
 |
iPod video/audio interface cable for KENWOOD navigation model (japan) |
Attention
Use of the Made for Apple badge means that an accessory has been designed to connect specifically to the Apple product(s) identified in the badge, and has been certified by the developer to meet Apple performance standards. Apple is not responsible for the operation of this device or its compliance with safety and regulatory standards.
Apple, iPhone, iPod, iPod classic, iPod nano, iPod touch, and Lightning are trademarks of Apple Inc., registered in the U.S. and other countries. iPod mini is a trademark of Apple Inc.
![]() Page Top
Page Top
Audio File Specification
About AAC, MP3, WMA, WAV and FLAC
The playable AAC/MP3/WMA/WAV/FLAC file (hereafter called Audio file) and the media format has the following limitation. The Audio file, which is not conforming to the specification, may not play normally, or the file and folder names may not display correctly.
Playable Audio file
| MP3 | Extension | .mp3 |
|---|---|---|
| Format | MPEG 1/2 Audio Layer 3 file | |
| Transfer bit rate | 8-320 kbps / Variable Bit Rate | |
| Sampling frequency | 8/ 11.025/ 12/ 16/ 22.05/ 24/ 32/ 44.1/ 48 kHz | |
| Joint STEREO | ||
| ID3 Tag (Ver.1) | Ver1.0/ 1.1 (Title/ Artist/ Album) | |
| ID3 Tag (Ver.2) | Ver2.2/ 2.3/ 2.4 (Title/ Artist/ Album : Does not support picture display.) | |
| WMA | Extension | .wma |
| Format | The file in accordance with Windows Media Audio (Except for the file for Windows Media Player 9 or after which applies the new functions) |
|
| Transfer bit rate | 32-192 kbps / Variable Bit Rate | |
| Sampling frequency | 8/ 11.025/ 12/ 16/ 22.05/ 24/ 32/ 44.1/ 48 kHz | |
| DRM file | — | |
| Professional | — | |
| Lossless | — | |
| Voice | — | |
| WMA Tag (Content Description) | ||
| WMA Tag (Extended Content Description) | ||
| AAC-LC | Extension | .m4a, .aac |
| Format | «.m4a» file encoded by AAC-LC format. *1
«.aac» file encoded by AAC-LC format. |
|
| Transfer bit rate | 8-320 kbps / Variable Bit Rate | |
| Sampling frequency | 8/ 11.025/ 12/ 16/ 22.05/ 24/ 32/ 44.1/ 48 kHz | |
| DRM file | — | |
| 2 channel | ||
| Multi channel | — | |
| ID3 Tag (Ver.2) | — | |
| Meta-data (Song Info.) | — | |
| iTunes m4a Meta-data (Song Info.) | ||
| WAV | Extension | .wav |
| Format | RIFF waveform Audio Format (only for LinearPCM) | |
| Sampling frequency | 44.1 KHz | |
| Bit count | 16 bit | |
| Channel | Stereo/Monaural | |
| FLAC | Extension | .flac |
| Format | Free Lossless Audio Codec (FLAC) | |
| Sampling frequency | 8/ 11.025/ 12/ 16/ 22.05/ 24/ 32/ 44.1/ 48/ 96 kHz | |
| Channel | Stereo/Monaural | |
| Bit count | 24 bit | |
| Compression level | 0/ 1/ 2/ 3/ 4/ 5/ 6/ 7/ 8 |
・Do not attach the extensions to files other than the Audio file. If the extension is attached, the file, which is not the Audio file, will play and outputs a loud noise, causing damage to the speaker.
・The files with copy protection cannot be played.
・Audio files cannot be played depending on the encoding software setting, USB device type, and/or recording conditions.
・The unit may not be compatible with upgrade of compression format standard and additional specifications.
・There are times when play time is not displayed correctly depending on the Audio file recording conditions.
・Supreme is not applied for songs that have been encoded at a variable bit rate.
・*1 AAC file corresponds to MPEG4 AAC file (.m4a) encoded with iTunes.
・Sound of WAVE file may be interrupted depending on the performance of the recording media.
Playable storage media file system
| USB device | File system (Windows) *1 | FAT12 | |
|---|---|---|---|
| FAT16 | |||
| FAT32 | |||
| File system (Macintosh) | — | ||
| File system (UNIX) | — |
・*1 Multi Partition : Not compatible (Some USB devices may have multiple partitions that will be invisible on Windows OS.)
Limitation of structure for the file and the folder
| USB device | Maximum number of folder layers | 8 |
|---|---|---|
| Maximum number of folders (per folder) | 999 | |
| Maximum number of folders (per device) *1 | 999 | |
| Maximum number of files (per folder) | 999 | |
| Maximum number of files and folders (per device) | 20480 |
・It may take time to start playing depending on the recording conditions such as file hierarchy and folder structure.
・*1 This includes the Root folder (the folder in the top level). The number of folders shown on your PC is less than it by 1.
The maximum number of characters for display
| File/Folder name | 64 characters | |
|---|---|---|
| MP3 ID3 Tag | Ver. 1.x | 30 characters |
| Ver. 2.x | 64 characters | |
| WMA Contents property | 64 characters | |
| AAC song information | 64 characters | |
| WAV | 64 characters | |
| FLAC | 64 characters |
・Number of characters is based on byte unit.
・File/Folder name is the number of the characters including the extensions.
・This unit can display the following versions of MP3 ID3 tag: version 1.0/ 1.1/ 2.2/ 2.3/ 2.4
・AAC ID3 Tag cannot be displayed.
Playing order of the Audio file
・Audio files are played in order of file names. You can specify the order of playback by numbering files in a folder and writing them by folder.
Example
![]() Page top
Page top
About USB device
Notes on Use of the USB device
This unit can play audio files stored in the flash memory and digital audio player that have a USB port (these devices are referred to as USB devices in this document).
The following restrictions are placed on the types and usage of available USB devices:
Available USB Devices
| USB standard | USB 1.1 / USB 2.0 |
|---|---|
| Transfer Speed | Full speed (Max. 12 Mbps) |
| USB class | Mass storage class (MSC device) |
| USB subclass | SCSI |
| Protocol | Bulk Only |
| Current supply | Max. 1.5 A (iPod/iPhone) / Max. 500 mA (USB) |
・USB Mass Storage Class:
USB devices that the PC can recognize as an external storage without using any special driver or application software.
・Contact the sales agent as to whether your USB device conforms to the USB mass storage class specs.
・Using an unsupported USB device can result in abnormal playback or display of the audio file.
Even if you use the USB device conforming to the above specs, audio files cannot be played normally depending on the type or condition of the USB device.
・Some of the functions is are limited with a certain USB device.
・Normal operation and power supply is not guaranteed against every USB devices.
About the Connection of the USB device
・Normal playback is not guaranteed when a cable other than the USB compatible cable is used. Connecting a cable whose total length is longer than 5 m can result in abnormal playback.
・You cannot connect a USB device via a USB hub.
|
・Install the USB device in the place where it will not prevent you from driving your vehicle properly. ・Do not leave the USB device in the vehicle for a long time. It can deform or damage due to direct sunlight, high temperature, etc. ・Take backups of the audio files used with this unit. The files can be erased depending on the operating conditions of the USB device. We shall have no compensation for any damage arising out of erasure of the stored data. |
![]() Page top
Page top
Код: 129253
Извините, товара сейчас нет в наличии
Бесплатная доставка
по Красноярску
Извините, товара сейчас нет в наличии
Новости интернет-магазина «Лаукар»:
Дополнительная информация в категории Автомагнитола:
В интернет-магазине бытовой техники «Лаукар» Вы можете скачать инструкцию к товару Автомагнитола Kenwood KMM-BT306 совершенно бесплатно.
Все инструкции, представленные на сайте интернет-магазина бытовой техники «Лаукар», предоставляются производителем товара.
Перед началом использования товара рекомендуем Вам ознакомиться с инструкцией по применению.
Для того чтобы скачать инструкцию, Вам необходимо нажать на ссылку «скачать инструкцию», расположенную ниже, а в случае, если ссылки нет,
Вы можете попробовать обратиться к данной странице позднее,
возможно специалисты интернет-магазина бытовой техники «Лаукар» еще не успели загрузить для скачивания инструкцию к товару:
Автомагнитола Kenwood KMM-BT306.

Фирма-производитель оставляет за собой право на внесение изменений в конструкцию, дизайн и комплектацию товара: Автомагнитола Kenwood KMM-BT306. Пожалуйста, сверяйте информацию о товаре с информацией на
официальном сайте компании производителя.
![]()
KMM-BT356 KMM-BT306 KMM-BT206
DIGITAL MEDIA RECEIVER
INSTRUCTION MANUAL
RÉCEPTEUR MULTIMÉDIA NUMÉRIQUE
MODE D’EMPLOI
DIGITAL-MEDIA-RECEIVER
BEDIENUNGSANLEITUNG
DIGITALE MEDIAONTVANGER
GEBRUIKSAANWIJZING
|
© 2019 JVCKENWOOD Corporation |
B5A-3145-10a (EN) |
Information on Disposal of Old Electrical and Electronic Equipment and Batteries (applicable for countries that have adopted separate waste collection systems)
Products and batteries with the symbol (crossed-out wheeled bin) cannot be disposed as household waste. Old electrical and electronic equipment and batteries should be recycled at a facility capable of handling these items and their waste byproducts.
Contact your local authority for details in locating a recycle facility nearest to you. Proper recycling and waste disposal will help conserve resources whilst preventing detrimental effects on our health and the environment.
Notice: The sign “Pb” below the symbol for batteries indicates that this battery contains lead.
Information sur l’élimination des anciens équipements électriques et électroniques et piles électriques (applicable dans les pays qui ont adopté des systèmes de collecte sélective)
Les produits et piles électriques sur lesquels le pictogramme (poubelle barrée) est apposé ne peuvent pas être éliminés comme ordures ménagères.
Les anciens équipements électriques et électroniques et piles électriques doivent être recyclés sur des sites capables de traiter ces produits et leurs déchets.
Contactez vos autorités locales pour connaître le site de recyclage le plus proche. Un recyclage adapté et l’élimination des déchets aideront à conserver les ressources et à nous préserver des leurs effets nocifs sur notre santé et sur l’environnement.
Remarque: Le symbole “Pb“ ci-dessous sur des piles électrique indique que cette pile contient du plomb.
Entsorgung von gebrauchten elektrischen und elektronischen Geräten und Batterien (anzuwenden in Ländern mit einem separaten Sammelsystem für solche Geräte)
Das Symbol (durchgestrichene Mülltonne) auf dem Produkt oder seiner Verpackung weist darauf hin, dass dieses Produkt nicht als normaler Haushaltsabfall behandelt werden darf, sondern an einer Annahmestelle für das Recycling von elektrischen und elektronischen Geräten und batterien abgegeben werden muss.
Durch Ihren Beitrag zur korrekten Entsorgung dieses Produktes schützen Sie die Umwelt und die Gesundheit Ihrer Mitmenschen.
Unsachgemässe oder falsche Entsorgung gefährden Umwelt und Gesundheit. Weitere Informationen über das Recycling dieses Produktes erhalten Sie von Ihrer Gemeinde oder den kommunalen Entsorgungsbetrieben.
Achtung: Das Zeichen „Pb“ unter dem Symbol fur Batterien zeigt an, dass diese Batterie Blei enthalt.
Informatie over het weggooien van elektrische en elektronische apparatuur en batterijen (particulieren)
Dit symbool geeft aan dat gebruikte elektrische, elektronische producten en batterijen niet bij het normale huishoudelijke afval mogen.
Lever deze producten in bij de aangewezen inzamelingspunten, waar ze gratis worden geaccepteerd en op de juiste manier worden verwerkt, teruggewonnen en hergebruikt.
Voor inleveradressen zie www.nvmp.nl, www.ictmilieu.nl, www.stibat.nl. Wanneer u dit product op de juiste manier als afval inlevert, spaart u waardevolle hulpbronnen en voorkomt u potentiële negatieve gevolgen voor de volksgezondheid en het milieu, die anders kunnen ontstaan door een onjuiste verwerking van afval.
Opgelet: Het teken “Pb” onder het teken van de batterijen geeft aan dat deze batterij lood bevat.
For Israel
i

Declaration of Conformity with regard to the RE Directive 2014/53/EU Declaration of Conformity with regard to the RoHS Directive 2011/65/EU
Manufacturer:
JVCKENWOOD Corporation
3-12, Moriya-cho, Kanagawa-ku, Yokohama-shi, Kanagawa, 221-0022, JAPAN
EU Representative:
JVCKENWOOD Europe B.V.
Amsterdamseweg 37, 1422 AC UITHOORN, THE NETHERLANDS
Déclaration de conformité se rapportant à la directive RE 2014/53/EU Déclaration de conformité se rapportant à la directive RoHS 2011/65/EU
Fabricant:
JVCKENWOOD Corporation
3-12, Moriya-cho, Kanagawa-ku, Yokohama-shi, Kanagawa, 221-0022, JAPAN
Représentants dans l’UE:
JVCKENWOOD Europe B.V.
Amsterdamseweg 37, 1422 AC UITHOORN, THE NETHERLANDS
Konformitätserklärung in Bezug auf die RE-Vorschrift 2014/53/EU Konformitätserklärung in Bezug auf die RoHS-Vorschrift 2011/65/EU
Hersteller:
JVCKENWOOD Corporation
3-12, Moriya-cho, Kanagawa-ku, Yokohama-shi, Kanagawa, 221-0022, JAPAN
EU-Vertreter:
JVCKENWOOD Europe B.V.
Amsterdamseweg 37, 1422 AC UITHOORN, Niederlande
Conformiteitsverklaring met betrekking tot de RE-richtlijn van de Europese Unie (2014/53/EU) Conformiteitsverklaring met betrekking tot de RoHS richtlijn van de Europese Unie (2011/65/EU)
Fabrikant:
JVCKENWOOD Corporation
3-12, Moriya-cho, Kanagawa-ku, Yokohama-shi, Kanagawa, 221-0022, JAPAN
EU-vertegenwoordiger:
JVCKENWOOD Europe B.V.
Amsterdamseweg 37, 1422 AC UITHOORN, Nederland
ii

English
Hereby, JVCKENWOOD declares that the radio equipment “KMM-BT356/KMM-BT306/ KMM-BT206” is in compliance with Directive 2014/53/EU.
The full text of the EU declaration of conformity is available at the following internet address: http://www.kenwood.com/cs/ce/eudoc/
Français
Par la présente, JVCKENWOOD déclare que l’équipement radio « KMM-BT356/KMM-BT306/ KMM-BT206 » est conforme à la directive 2014/53/UE.
L’intégralité de la déclaration de conformité UE est disponible à l’adresse Internet suivante : http://www.kenwood.com/cs/ce/eudoc/
Deutsch
Hiermit erklärt JVCKENWOOD, dass das Funkgerät “KMM-BT356/KMM-BT306/KMM-BT206” der Richtlinie 2014/53/EU entspricht.
Der volle Text der EU-Konformitätserklärung steht unter der folgenden Internetadresse zur Verfügung: http://www.kenwood.com/cs/ce/eudoc/
Nederlands
Hierbij verklaart JVCKENWOOD dat de radioapparatuur “KMM-BT356/KMM-BT306/ KMM-BT206” in overeenstemming is met Richtlijn 2014/53/EU.
De volledige tekst van de EU-verklaring van overeenstemming is te vinden op het volgende internetadres: http://www.kenwood.com/cs/ce/eudoc/
Italiano
Con la presente, JVCKENWOOD dichiara che l΄apparecchio radio “KMM-BT356/KMM-BT306/ KMM-BT206” è conforme alla Direttiva 2014/53/UE.
Il testo integrale della dichiarazione di conformità UE è disponibile al seguente indirizzo internet: http://www.kenwood.com/cs/ce/eudoc/
Español
Por la presente, JVCKENWOOD declara que el equipo de radio “KMM-BT356/KMM-BT306/ KMM-BT206” cumple la Directiva 2014/53/EU. El texto completo de la declaración de conformidad con la UE está disponible en la siguiente dirección de internet: http://www.kenwood.com/cs/ce/eudoc/
Português
Deste modo, a JVCKENWOOD declara que o equipamento de rádio “KMM-BT356/KMM-BT306/ KMM-BT206” está em conformidade com a Diretiva 2014/53/UE.
O texto integral da declaração de conformidade da UE está disponível no seguinte endereço de internet: http://www.kenwood.com/cs/ce/eudoc/
Polska
Niniejszym, JVCKENWOOD deklaruje, że sprzęt radiowy “KMM-BT356/KMM-BT306/KMM-BT206” jest zgodny z dyrektywą 2014/53/UE.
Pełny tekst deklaracji zgodności EU jest dostępny pod adresem: http://www.kenwood.com/cs/ce/eudoc/
Český
Společnost JVCKENWOOD tímto prohlašuje, že rádiové zařízení “KMM-BT356/KMM-BT306/ KMM-BT206” splňuje podmínky směrnice 2014/53/EU.
Plný text EU prohlášení o shodě je dostupný na následující internetové adrese: http://www.kenwood.com/cs/ce/eudoc/
Magyar
JVCKENWOOD ezennel kijelenti, hogy a „KMM-BT356/KMM-BT306/KMM-BT206“ rádióberendezés megfelel a 2014/53/EU irányelvnek.
Az EU konformitási nyilatkozat teljes szövege az alábbi weboldalon érhető el: http://www.kenwood.com/cs/ce/eudoc/
Svenska
Härmed försäkrar JVCKENWOOD att radioutrustningen “KMM-BT356/KMM-BT306/ KMM-BT206” är i enlighet med direktiv 2014/53/EU.
Den fullständiga texten av EU-försäkran om överensstämmelse finns på följande Internetadress: http://www.kenwood.com/cs/ce/eudoc/
Suomi
JVCKENWOOD julistaa täten, että radiolaite “KMM-BT356/KMM-BT306/KMM-BT206” on direktiivin 2014/53/EU mukainen. EU-vaatimustenmukaisuusvakuutusvaatimus löytyy kokonaisuudessaan seuraavasta internetosoitteesta: http://www.kenwood.com/cs/ce/eudoc/
Slovensko
S tem JVCKENWOOD izjavlja, da je radijska oprema » KMM-BT356/KMM-BT306/KMM-BT206 « v skladu z Direktivo 2014/53/EU.
Celotno besedilo direktive EU o skladnosti je dostopno na tem spletnem naslovu: http://www.kenwood.com/cs/ce/eudoc/
Slovensky
Spoločnosť JVCKENWOOD týmto vyhlasuje, že rádiové zariadenie „KMM-BT356/KMM-BT306/ KMM-BT206“ vyhovuje smernici 2014/53/EÚ.
Celý text EÚ vyhlásenia o zhode nájdete na nasledovnej internetovej adrese: http://www.kenwood.com/cs/ce/eudoc/
Dansk
Herved erklærer JVCKENWOOD, at radioudstyret “KMM-BT356/KMM-BT306/KMM-BT206” er i overensstemmelse med Direktiv 2014/53/EU. EU-overensstemmelseserklæringens fulde ordlyd er tilgængelig på følgende internetadresse: http://www.kenwood.com/cs/ce/eudoc/
Ελληνικά
Με το παρόν, η JVCKENWOOD δηλώνει ότι ο ραδιοεξοπλισμός «KMM-BT356/KMM-BT306/ KMM-BT206» συμμορφώνεται με την Οδηγία 2014/53/ΕΕ.
Το πλήρες κείμενο της δήλωσης συμμόρφωσης της ΕΕ είναι διαθέσιμο στην ακόλουθη διεύθυνση στο διαδίκτυο: http://www.kenwood.com/cs/ce/eudoc/
iii

Eesti
Käesolevaga JVCKENWOOD kinnitab, et „KMM-BT356/KMM-BT306/KMM-BT206“ raadiovarustus on vastavuses direktiiviga 2014/53/EL.
ELi vastavusdeklaratsiooni terviktekst on kättesaadav järgmisel internetiaadressil: http://www.kenwood.com/cs/ce/eudoc/
Latviešu
JVCKENWOOD ar šo deklarē, ka radio aparatūra „KMM-BT356/KMM-BT306/KMM-BT206” atbilst direktīvas 2014/53/ES prasībām.
Pilns ES atbilstības deklarācijas teksts ir pieejams šādā tīmekļa adresē: http://www.kenwood.com/cs/ce/eudoc/
Lietuviškai
Šiuo JVCKENWOOD pažymi, kad radijo įranga „KMM-BT356/KMM-BT306/KMM-BT206“ atitinka 2014/53/EB direktyvos reikalavimus.
Visą EB direktyvos atitikties deklaracijos tekstą galite rasti šiuo internetiniu adresu: http://www.kenwood.com/cs/ce/eudoc/
Malti
B’dan, JVCKENWOOD jiddikjara li t-tagħmir tar-radju “KMM-BT356/KMM-BT306/KMM-BT206” huwa konformi mad-Direttiva 2014/53/UE.
It-test kollu tad-dikjarazzjoni ta’ konformità huwa disponibbli fl-indirizz intranet li ġej: http://www.kenwood.com/cs/ce/eudoc/
HRVATSKI / SRPSKI JEZIK
JVCKENWOOD ovim izjavljuje da je radio oprema “KMM-BT356/KMM-BT306/KMM-BT206” u skladu s Direktivom 2014/53/EU.
Cjeloviti tekst deklaracije Europske unije o usklađenosti dostupan je na sljedećoj internet adresi: http://www.kenwood.com/cs/ce/eudoc/
ROMÂNĂ
Prin prezenta, JVCKENWOOD declară că echipamentul radio “KMM-BT356/KMM-BT306/ KMM-BT206” este în conformitate cu Directiva 2014/53/UE.
Textul integral al declarației de conformitate UE este disponibil la urmatoarea adresă de internet: http://www.kenwood.com/cs/ce/eudoc/
БЪЛГАРСКИ
С настоящото JVCKENWOOD декларира, че радиооборудването на “KMM-BT356/KMM-BT306/ KMM-BT206” е в съответствие с Директива 2014/53/ЕС.
Пълният текст на ЕС декларацията за съответствие е достъпен на следния интернет адрес: http://www.kenwood.com/cs/ce/eudoc/
Turkish
Burada, JVCKENWOOD “KMM-BT356/KMM-BT306/ KMM-BT206” radyo ekipmanının 2014/53/AB Direktifine uygun olduğunu bildirir.
AB uyumluluk deklarasyonunun tam metni aşağıdaki internet adresinde mevcuttur. http://www.kenwood.com/cs/ce/eudoc/
Русский
JVCKENWOOD настоящим заявляет, что радиооборудование «KMM-BT356/KMM-BT306/ KMM-BT206» соответствует Директиве 2014/53/EU.
Полный текст декларации соответствия ЕС доступен по следующему адресу в сети Интернет: http://www.kenwood.com/cs/ce/eudoc/
Українська
Таким чином, компанія JVCKENWOOD заявляє, що радіообладнання «KMM-BT356/KMM-BT306/ KMM-BT206» відповідає Директиві 2014/53/EU. Повний текст декларації про відповідність ЄС можна знайти в Інтернеті за такою адресою: http://www.kenwood.com/cs/ce/eudoc/
SOFTWARE LICENSE AGREEMENT
The software embedded in the Product (hereinafter the «Licensed Software») provided by Licensor is copyrighted to or sublicensable by the Licensor, and this Agreement provides for the terms and conditions which Users shall follow in order to use the Licensed Software.
The User shall use the Licensed Software by agreeing with the terms of this Software License Agreement. This Agreement shall be deemed completed at the time the User (hereinafter the «User») initially used the Product in which the «Licensed Software» is embedded.
The Licensed Software may include the software which has been licensed to the Licensor directly or indirectly from any third party. In such case, some third parties require the Users to follow their
conditions for use separately from this Software License Agreement. Such software shall not be subject to this Agreement, and the Users are urged to read the «Important Notice concerning the Software» to be provided separately below.
|
Article 1 |
General Provision |
The Licensor shall grant to the User a non-exclusive and non-transferable (other than the exceptional case referred to in Article 3, Paragraph 1) licensed to use the Licensed Software within the country of the User. (the country where the User bought the Product (hereinafter the «Country»)
1.The license granted under this Agreement shall be the right to use the Licensed Software in the Product.
2.The User shall not duplicate, copy, modify, add, translate or otherwise alter, or lease the Licensed Software and any related documents, whether in whole or in part.
3.The use of the Licensed Software shall be limited to personal purpose, and the Licensed Software shall not be distributed, licensed or sub-licensed whether it is for commercial purpose or not.
4.The User shall use the Licensed Software according to the directions described in the operation manual or help file, and is prohibited to use or duplicate any data in a manner violating the Copyright Law or any other laws and regulations by applying whole or a part of the Licensed Software.
|
Article 3 |
Conditions for Grant of License |
1.When the User transfers the Product, it may also transfer the license to use the Licensed Software embedded in the Product (including any related materials, updates and upgrades) on condition that no original, copies or related materials continue in the possession of the User, and that the User shall cause the transferee to comply with this Software License Agreement.
2.The User shall not carry out reverse engineering, disassembling, decompiling or any other code analysis works in connection with the Licensed Software.
iv

Article 4 Right pertaining to the Licensed Software
Any and all copyrights and other rights pertaining to the Licensed Software and related documents shall belong to the Licensor or the original holder of the right who granted to the Licensor the license or sublicense for the Licensed Software (hereinafter the «Original Rightholder»), and the User shall not be
entitled to any right other than the license granted hereunder, in respect of the Licensed Software and any related documents.
|
Article 5 |
Indemnification of Licensor |
1.Neither the Licensor nor the Original Rightholder shall be liable for any damage incurred by the User or any third party due to the exercise of the license granted to the User under this Agreement, unless otherwise restricted by law.
2.The Licensor will offer no guarantee for the merchantability, convertibility and consistency with certain objective of the Licensed Software.
|
Article 6 |
Liability to Third Party |
If any dispute has arisen with any third party due to an infringement upon a copyright, patent or any other intellectual property right that was caused by the User’s use of the Licensed Software, the User shall settle such dispute at its own cost and hold the Licensor and the Original Rightholder harmless from any inconvenience it may cause.
|
Article 7 |
Confidentiality |
The User shall keep the confidentiality of such portion of the Licensed Software, related documents thereof or any other information to be granted under this Agreement, as well as the conditions of this Agreement as has not yet entered the public domain, and shall not disclose or divulge the same to any third party without approval of the Licensor.
In case the User falls under any of the events described in the following items, the Licensor may immediately terminate this Agreement or claim that the User compensates for the damage incurred by the Licensor due to such event:
(1)when the User violated any provision of this Agreement; or
(2)when a petition has been filed against the User for an attachment, provisional attachment, provisional disposition or any other compulsory execution.
Article 9 Destruction of the Licensed Software
If this Agreement is terminated pursuant to the provision of Article 8, the User shall destroy the Licensed Software, any related documents and copies thereof within two (2) weeks from such date of termination.
Article 10 Protection of Copyright
1.The copyright and all the other intellectual property rights relating to the Licensed Software shall belong to the Licensor and the Original Rightholder, and in no event shall they be under the ownership of the User.
2.The User shall, whenever it uses the Licensed Software, comply with any laws relating to the copyright and other intellectual property rights.
Article 11 Export Restriction
1.It is prohibited to export the Licensed Software and any related documents outside the country of the User (including transmission thereof outside the country of the User via Internet of other communication tools).
2.The User shall understand that the Licensed Software shall be subject to the export restrictions adopted by the country of User and any other countries.
3.The User shall agree that the software will be subject to any and all applicable international and domestic laws (including the export control regulation of the country of User and any other countries, and any restrictions concerning the end-users, the use by end-users and importing countries to be provided by the country of User and any other countries, and any other governmental authorities).
1.In the event any part of this Agreement is invalidated by operation of law, the residual provisions shall continue in force.
2.Matters not stipulated in this Agreement or any ambiguity or question raised in the construction of this Agreement shall be provided or settled upon good-faith consultation between the Licensor and the User.
3.The Licensor and the User hereby agree that this Agreement is governed by the laws of Japan, and any dispute arising from, and relating to the rights and obligations under, this Agreement shall be submitted to the exclusive jurisdiction of the Tokyo District Court for its first instance.
v

Important Notice concerning the Software
-jansson
Copyright (c) 2009-2012 Petri Lehtinen <petri@digip.org>
Permission is hereby granted, free of charge, to any person obtaining a copy of this software and associated documentation files (the «Software»), to deal in the Software without restriction, including without limitation the rights to use, copy, modify, merge, publish, distribute, sublicense, and/or sell copies of the Software, and to permit persons to whom the Software is furnished to do so, subject to the following conditions:
The above copyright notice and this permission notice shall be included in all copies or substantial portions of the Software.
THE SOFTWARE IS PROVIDED «AS IS», WITHOUT WARRANTY OF ANY KIND, EXPRESS OR IMPLIED, INCLUDING BUT NOT LIMITED TO THE WARRANTIES OF MERCHANTABILITY, FITNESS FOR A PARTICULAR PURPOSE
AND NONINFRINGEMENT. IN NO EVENT SHALL THE AUTHORS OR COPYRIGHT HOLDERS BE LIABLE FOR ANY CLAIM, DAMAGES OR OTHER LIABILITY, WHETHER IN AN ACTION OF CONTRACT, TORT OR OTHERWISE, ARISING FROM, OUT OF OR IN CONNECTION WITH THE SOFTWARE OR THE USE OR OTHER DEALINGS IN THE SOFTWARE.
-cJSON
Copyright (c) 2009 Dave Gamble
Permission is hereby granted, free of charge, to any person obtaining a copy of this software and associated documentation files (the «Software»), to deal in the Software without restriction, including without limitation the rights to use, copy, modify, merge, publish, distribute, sublicense, and/or sell copies of the Software, and to permit persons to whom the Software is furnished to do so, subject to the following conditions:
The above copyright notice and this permission notice shall be included in all copies or substantial portions of the Software.
THE SOFTWARE IS PROVIDED «AS IS», WITHOUT WARRANTY OF ANY KIND, EXPRESS OR IMPLIED, INCLUDING BUT NOT LIMITED TO THE WARRANTIES OF MERCHANTABILITY, FITNESS FOR A PARTICULAR PURPOSE
AND NONINFRINGEMENT. IN NO EVENT SHALL THE AUTHORS OR COPYRIGHT HOLDERS BE LIABLE FOR ANY CLAIM, DAMAGES OR OTHER LIABILITY, WHETHER IN AN ACTION OF CONTRACT, TORT OR OTHERWISE, ARISING FROM, OUT OF OR IN CONNECTION WITH THE SOFTWARE OR THE USE OR OTHER DEALINGS IN THE SOFTWARE.
-CMP
The MIT License (MIT)
Copyright (c) 2014 Charles Gunyon
Permission is hereby granted, free of charge, to any person obtaining a copy of this software and associated documentation files (the «Software»), to deal in the Software without restriction, including without limitation the rights to use, copy, modify, merge, publish, distribute, sublicense, and/or sell copies of the Software, and to permit persons to whom the Software is furnished to do so, subject to the following conditions:
The above copyright notice and this permission notice shall be included in all copies or substantial portions of the Software.
THE SOFTWARE IS PROVIDED «AS IS», WITHOUT WARRANTY OF ANY KIND, EXPRESS OR IMPLIED, INCLUDING BUT NOT LIMITED TO THE WARRANTIES OF MERCHANTABILITY, FITNESS FOR A PARTICULAR PURPOSE
AND NONINFRINGEMENT. IN NO EVENT SHALL THE AUTHORS OR COPYRIGHT HOLDERS BE LIABLE FOR ANY CLAIM, DAMAGES OR OTHER LIABILITY, WHETHER IN AN ACTION OF CONTRACT, TORT OR OTHERWISE, ARISING FROM, OUT OF OR IN CONNECTION WITH THE SOFTWARE OR THE USE OR OTHER DEALINGS IN THE SOFTWARE.
nanopb
Copyright (c) 2011 Petteri Aimonen <jpa at nanopb.mail.kapsi.fi>
This software is provided ‘as-is’, without any express or implied warranty. In no event will the authors be held liable for any damages arising from the use of this software.
Permission is granted to anyone to use this software for any purpose, including commercial applications, and to alter it and redistribute it freely, subject to the following restrictions:
1.The origin of this software must not be misrepresented; you must not claim that you wrote the original software. If you use this software in a product, an acknowledgment in the product documentation would be appreciated but is not required.
2.Altered source versions must be plainly marked as such, and must not be misrepresented as being the original software.
3.This notice may not be removed or altered from any source distribution.
vi

sha2
AUTHOR: Aaron D. Gifford — http://www.aarongifford.com/
Copyright (c) 2000-2001, Aaron D. Gifford
All rights reserved.
You may obtain a copy of the license at https://opensource.org/licenses/BSD-3-Clause
THE SOFTWARE IS PROVIDED «AS IS», WITHOUT WARRANTY OF ANY KIND, EXPRESS OR IMPLIED, INCLUDING BUT NOT LIMITED TO THE WARRANTIES OF MERCHANTABILITY, FITNESS FOR A PARTICULAR PURPOSE
AND NONINFRINGEMENT. IN NO EVENT SHALL THE AUTHORS OR COPYRIGHT HOLDERS BE LIABLE FOR ANY CLAIM, DAMAGES OR OTHER LIABILITY, WHETHER IN AN ACTION OF CONTRACT, TORT OR OTHERWISE, ARISING FROM, OUT OF OR IN CONNECTION WITH THE SOFTWARE OR THE USE OR OTHER DEALINGS IN THE SOFTWARE.
Posix
Copyright (c) 1990, 1993
The Regents of the University of California. All rights reserved.
Redistribution and use in source and binary forms, with or without modification, are permitted provided that the following conditions are met:
1.Redistributions of source code must retain the above copyright notice, this list of conditions and the following disclaimer.
2.Redistributions in binary form must reproduce the above copyright notice, this list of conditions and the following disclaimer in the documentation and/or other materials provided with the distribution.
3.All advertising materials mentioning features or use of this software must display the following acknowledgement:
This product includes software developed by the University of California, Berkeley and its contributors.
4.Neither the name of the University nor the names of its contributors may be used to endorse or promote products derived from this software without specific prior written permission.
Copyright (C) 1993 by Sun Microsystems, Inc. All rights reserved.
Developed at SunPro, a Sun Microsystems, Inc. business.
Permission to use, copy, modify, and distribute this software is freely granted, provided that this notice is preserved.
Copyright (C) 1991-2, RSA Data Security, Inc. Created 1991. All rights reserved.
License to copy and use this software is granted provided that it is identified as the “RSA Data Security, Inc. MD4 Message-Digest Algorithm” in all material mentioning or referencing this software or this function.
Copyright (c) 1995, 1996 Carnegie-Mellon University. All rights reserved.
Author: Chris G. Demetriou
Permission to use, copy, modify and distribute this software and its documentation is hereby granted, provided that both the copyright notice and this permission notice appear in all copies of the software, derivative works or modified versions, and any portions thereof, and that both notices appear in supporting documentation.
CARNEGIE MELLON ALLOWS FREE USE OF THIS SOFTWARE IN ITS «AS IS» CONDITION. CARNEGIE MELLON DISCLAIMS ANY LIABILITY OF ANY KIND FOR ANY DAMAGES WHATSOEVER RESULTING FROM THE USE OF THIS SOFTWARE.
Carnegie Mellon requests users of this software to return to
Software Distribution Coordinator or Software.Distribution@CS.CMU.EDU
School of Computer Science
Carnegie Mellon University
Pittsburgh PA 15213-3890
any improvements or extensions that they make and grant Carnegie the rights to redistribute these changes.
License is also granted to make and use derivative works provided that such works are identified as «derived from the RSA Data Security, Inc. MD4 Message-Digest Algorithm» in all material mentioning or referencing the derived work.
RSA Data Security, Inc. makes no representations concerning either the merchantability of this software or the suitability of this software for any particular purpose. It is provided «as is» without express or implied warranty of any kind.
Copyright (c) 1993 Martin Birgmeier
All rights reserved.
You may redistribute unmodified or modified versions of this source code provided that the above copyright notice and this and the following conditions are retained.
This software is provided «as is», and comes with no warranties of any kind. I shall in no event be liable for anything that happens to anyone/anything when using this software.
These notices must be retained in any copies of any part of this documentation and/or software.
vii

T-Kernel 2.0
This product uses the source code of T-Kernel 2.0 under T-License 2.0 granted by T-Engine Forum (www.tron.org)
BSD-3-Clause
Copyright (c) 2000-2001, Aaron D. Gifford All rights reserved.
You may obtain a copy of the license at https://opensource.org/licenses/BSD-3-Clause
THE SOFTWARE IS PROVIDED «AS IS», WITHOUT WARRANTY OF ANY KIND, EXPRESS OR IMPLIED, INCLUDING BUT NOT LIMITED TO THE WARRANTIES OF MERCHANTABILITY, FITNESS FOR A PARTICULAR PURPOSE
AND NONINFRINGEMENT. IN NO EVENT SHALL THE AUTHORS OR COPYRIGHT HOLDERS BE LIABLE FOR ANY CLAIM, DAMAGES OR OTHER LIABILITY, WHETHER IN AN ACTION OF CONTRACT, TORT OR OTHERWISE, ARISING FROM, OUT OF OR IN CONNECTION WITH THE SOFTWARE OR THE USE OR OTHER DEALINGS IN THE SOFTWARE.
LFS Subsystem
Copyright The Regents of the University of California. All rights reserved.
You may obtain a copy of the license at https://directory.fsf.org/wiki/License:BSD-4-Clause
THE SOFTWARE IS PROVIDED «AS IS», WITHOUT WARRANTY OF ANY KIND, EXPRESS OR IMPLIED, INCLUDING BUT NOT LIMITED TO THE WARRANTIES OF MERCHANTABILITY, FITNESS FOR A PARTICULAR PURPOSE
AND NONINFRINGEMENT. IN NO EVENT SHALL THE AUTHORS OR COPYRIGHT HOLDERS BE LIABLE FOR ANY CLAIM, DAMAGES OR OTHER LIABILITY, WHETHER IN AN ACTION OF CONTRACT, TORT OR OTHERWISE, ARISING FROM, OUT OF OR IN CONNECTION WITH THE SOFTWARE OR THE USE OR OTHER DEALINGS IN THE SOFTWARE.
Accordo2 Player
Apache License
Licensed under the Apache License,
Version 2.0, January 2004(the «License»);
You may obtain a copy of the license at
http://www.apache.org/licenses/LICENSE-2.0
THE SOFTWARE IS PROVIDED «AS IS», WITHOUT WARRANTY OF ANY KIND, EXPRESS OR IMPLIED, INCLUDING BUT NOT LIMITED TO THE WARRANTIES OF MERCHANTABILITY, FITNESS FOR A PARTICULAR PURPOSE
AND NONINFRINGEMENT. IN NO EVENT SHALL THE AUTHORS OR COPYRIGHT HOLDERS BE LIABLE FOR ANY CLAIM, DAMAGES OR OTHER LIABILITY, WHETHER IN AN ACTION OF CONTRACT, TORT OR OTHERWISE, ARISING FROM, OUT OF OR IN CONNECTION WITH THE SOFTWARE OR THE USE OR OTHER DEALINGS IN THE SOFTWARE.
viii
Contents
|
Before Use……………………………………………………………………………………. |
3 |
|
Basics …………………………………………………………………………………………… |
4 |
|
Getting Started ……………………………………………………………………………. |
5 |
|
1 Select the display language and cancel the demonstration |
|
|
2 Set the clock and date |
|
|
3 Set the other optional settings |
|
|
Radio ……………………………………………………………………………………………. |
8 |
|
USB/iPod ……………………………………………………………………………………… |
9 |
|
Spotify ……………………………………………………………………………………….. |
12 |
|
AUX…………………………………………………………………………………………….. |
13 |
|
Using Other Applications…………………………………………………………… |
14 |
|
KENWOOD Remote application |
|
|
Tuneln Radio/Tuneln Radio Pro |
|
|
Bluetooth® …………………………………………………………………………………. |
15 |
|
Bluetooth – Connection |
|
|
Bluetooth – Mobile phone |
|
|
Bluetooth – Audio |
|
|
AMAZON ALEXA ………………………………………………………………………… |
21 |
|
Audio Settings……………………………………………………………………………. |
23 |
|
Display Settings …………………………………………………………………………. |
27 |
|
Installation/Connection …………………………………………………………….. |
29 |
|
References …………………………………………………………………………………. |
32 |
|
Maintenance |
|
|
More information |
|
|
Change the display information |
|
|
Troubleshooting………………………………………………………………………… |
34 |
|
Specifications …………………………………………………………………………….. |
37 |
How to read this manual
•The displays and faceplates shown in this manual are examples used to provide clear explanations of the operations. For this reason, they may be different from the actual displays or faceplates.
•Operations are explained mainly using buttons on the faceplate of


 .
.
•English indications are used for the purpose of explanation. You can select the display language from the [FUNCTION] menu. (Page 7)
•[XX] indicates the selected items.
•(Page XX) indicates references are available on the stated page.
This symbol on the product means there are important operating and maintenance instructions in this manual. Be sure to carefully read instructions in this manual.
2ENGLISH
![]()
Before Use
IMPORTANT
•To ensure proper use, please read through this manual before using this product. It is especially important that you read and observe Warnings and Cautions in this manual.
•Please keep the manual in a safe and accessible place for future reference.
 WARNING
•Do not operate any function that takes your attention away from safe driving.
•Do not ingest the battery, Chemical Burn Hazard.
The remote control supplied with this product contains a coin/button cell battery.
If the coin/button cell battery is swallowed, it can cause severe internal burns in just 2 hours and can lead to death.
Keep new and used batteries away from children.
If the battery compartment does not close securely, stop using the product and keep it away from children.
If you think batteries might have been swallowed or placed inside any part of the body, seek immediate medical attention.
 CAUTION
Volume setting:
•Adjust the volume so that you can hear sounds outside the car to prevent accidents.
•Lower the volume before playing digital sources to avoid damaging the speakers by the sudden increase of the output level.
General:
•Avoid using the external device if it might hinder safe driving.
•Make sure all important data has been backed up. We shall bear no responsibility for any loss of recorded data.
•Never put or leave any metallic objects (such as coins or metal tools) inside the unit to prevent a short circuit.
•USB rating is indicated on the main unit. To view, detach the faceplate. (Page 4)
•Depending on the types of cars, the antenna will automatically extend when you turn on the unit with the antenna control wire connected (page 31). Turn off the unit or change the source to STANDBY when parking at a low ceiling area.
Remote control (RC-406):
•Do not leave the remote control in hot places such as on the dashboard.
•Risk of fire or explosion if the battery is replaced by an incorrect type. Ensure to replace only with the same type.
•Risk of fire, explosion or the leakage of flammable liquid or gas if the battery is left in an extremely high temperature surrounding environment and/or subjected extremely low air pressure. The battery pack or batteries shall not be exposed to excessive heat such as sunshine, fire or the like.
•Risk of fire, explosion or the leakage of flammable liquid or gas if the battery is disposed into fire or a hot oven, recharged, shorted, mechanically crushed or cut of the battery.
•If spilled fluid comes in contact with your eyes or on clothing, immediately rinse with water and consult a physician.
ENGLISH 3
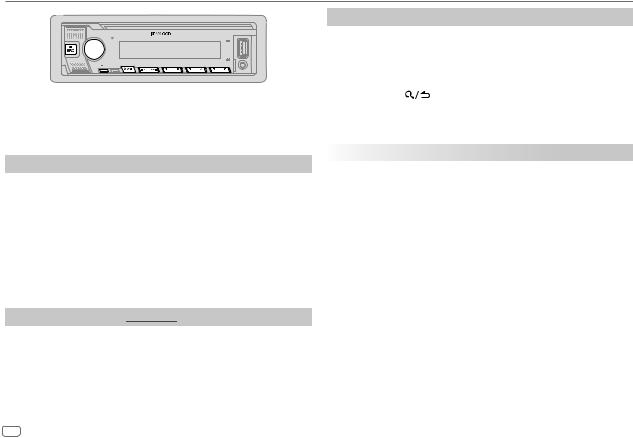
Basics
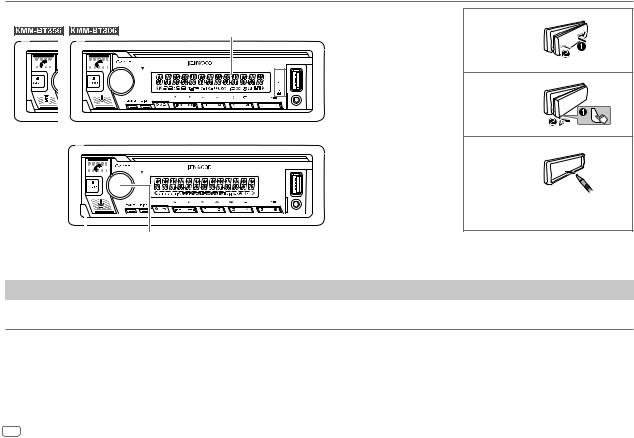
Faceplate
Display window*
Lights up when
 Bluetooth connection is
  established. (Page 16)
|
Detach button |
Volume knob |
||||||
|
* Only for illustration purpose. |
|||||||
|
To |
On the faceplate |
||||||
|
Turn on the power |
Press BSRC. |
||||||
|
• Press and hold to turn off the power. |
Attach
Detach
How to reset
Reset the unit within 5 seconds after detaching the faceplate.
|
Adjust the volume |
Turn the volume knob. |
|
|
Select a source |
• |
Press BSRC repeatedly. |
|
• |
Press BSRC, then turn the volume knob within 2 seconds. |
|
|
Change the display information |
Press DISP repeatedly. (Page 33, 34) |
|
4ENGLISH
Basics
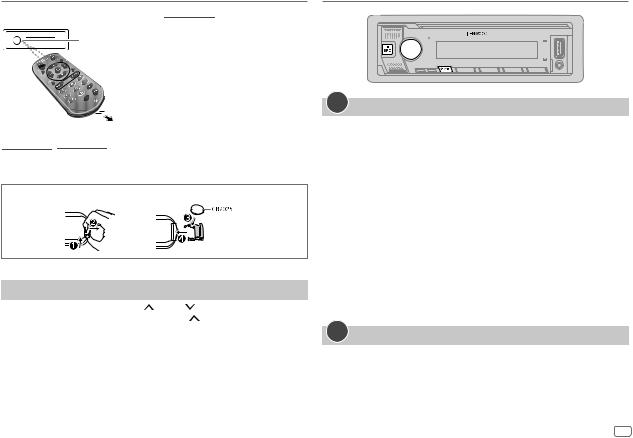
Remote control (RC-406) (supplied for 


 )
)
Remote sensor (Do not expose to bright sunlight.)

 Pull out the insulation sheet when

 using for the first time.


 /
/


 : Remote control functions are not available.
How to replace the battery
|
To |
On the remote control |
|
Adjust the volume |
Press VOL or VOL . |
|
• Press and hold VOL to continuously increase |
|
|
the volume to 15. |
|
|
Press ATT during playback to attenuate the sound. |
|
|
• Press again to cancel. |
|
|
Select a source |
Press SRC repeatedly. |
|
Turn off the power |
Press and hold SRC to turn off the power. |
|
( Pressing SRC does not turn on the power. ) |
|
Getting Started
1Select the display language and cancel the demonstration
When you turn on the power for the first time (or [FACTORY RESET] is set to [YES], see page 7), the display shows: “SEL LANGUAGE”  “PRESS”
  “VOLUME KNOB”
1Turn the volume knob to select [EN] (English) / [RU] (Russian) / [SP] (Spanish) / [FR] (French) / [GE] (German), then press the knob.
[EN] is selected for the initial setup.
Then, the display shows: “CANCEL DEMO”  “PRESS”
  “VOLUME KNOB”.
2Press the volume knob again.
[YES] is selected for the initial setup.
3Press the volume knob again.
“DEMO OFF” appears.
Then, the display shows the selected crossover type: “2-WAY X ’ OVER” or “3-WAY X ’ OVER”
•To change the crossover type, see “Change the crossover type” on page 7.
2Set the clock and date
1 Press the volume knob to enter [FUNCTION].
2 Turn the volume knob to select [CLOCK], then press the knob.
ENGLISH 5
Getting Started
To adjust the clock
3 Turn the volume knob to select [CLOCK ADJUST], then press the knob.
4Turn the volume knob to make the settings, then press the knob.
Set the time in the order of “Hour”  “Minute”.
5 Turn the volume knob to select [CLOCK FORMAT], then press the knob. 6 Turn the volume knob to select [12H] or [24H], then press the knob.
To set the date
7 Turn the volume knob to select [DATE FORMAT], then press the knob.
8Turn the volume knob to select [DD/MM/YY] or [MM/DD/YY], then press the knob.
9 Turn the volume knob to select [DATE SET], then press the knob.
10Turn the volume knob to make the settings, then press the knob.
Set the date in the order of “Day”  “Month”
  “Year” or “Month”
  “Day”
“Day”  “Year”.
11Press and hold 
 to exit.
To return to the previous setting item, press 
 .
.
3Set the other optional settings
You can only set the following items while the unit is in STANDBY source.
1 Press BSRC repeatedly to enter STANDBY.
2 Press the volume knob to enter [FUNCTION].
3Turn the volume knob to select an item (see the following table), then press the knob.
|
4 |
Repeat step 3 until the desired item is selected or activated. |
|
|
5 |
Press and hold |
to exit. |
To return to the previous setting item, press
 .
.
Default: [XX]
[AUDIO CONTROL]
[SWITCH PREOUT] (For  : Applicable only if [X’OVER] is set to [2WAY].) (Page 7)
[REAR]/[SUB-W]: Selects whether rear speakers or a subwoofer are connected to the line out terminals on the rear (through an external amplifier). (Page 32)
[DISPLAY]
|
[EASY MENU] |
(For |
/ |
) |
|||
|
When entering [FUNCTION]… |
||||||
|
[ON]: [ZONE 1] illumination changes to white color. ; |
||||||
|
[OFF]: [ZONE 1] illumination remains as [COLOR SELECT] color. |
||||||
|
(Page 28) |
||||||
|
• [ZONE 2] illumination changes to light blue color when you enter |
||||||
|
[FUNCTION], irregardless of the [EASY MENU] setting. |
||||||
|
• Refer to the illustration on page 27 for zone identification. |
||||||
|
[TUNER SETTING] |
||||||
|
[PRESET TYPE] |
[NORMAL]: Memorizes one station for each preset button in each band |
|||||
|
(FM1/FM2/FM3/MW/LW). ; [MIX]: Memorizes one station for each preset |
||||||
|
button, regardless of the selected band. |
||||||
|
[SYSTEM] |
||||||
|
[KEY BEEP] |
(Applicable only if [X’OVER] is set to [2WAY].) (Page 7) |
|||||
|
[ON]: Activates the keypress tone. ; [OFF]: Deactivates. |
||||||
|
[SOURCE SELECT] |
||||||
|
[SPOTIFY SRC] |
[ON]: Enables SPOTIFY/SPOTIFY BT in source selection. ; [OFF]: Disables. |
|||||
|
(Page 12) |
||||||
|
[BT AUDIO SRC] |
[ON]: Enables BT AUDIO in source selection. ; [OFF]: Disables. (Page 20) |
|||||
|
[BUILT-IN AUX] |
[ON]: Enables AUX in source selection. ; [OFF]: Disables. (Page 13) |
|||||
6ENGLISH

Getting Started
[P-OFF WAIT] Applicable only when the demonstration mode is turned off.
Sets the duration when the unit will automatically turn off (while in standby mode) to save the battery.
[20M]: 20 minutes ; [40M]: 40 minutes ; [60M]: 60 minutes ; [– – –]: Cancels
[F/W UPDATE]
[UPDATE SYSTEM]
|
[F/W UP xxxx] |
[YES]: Starts upgrading the firmware. ; [NO]: Cancels (upgrading is not |
||
|
activated). |
|||
|
For details on how to update the firmware, visit |
|||
|
<www.kenwood.com/cs/ce/>. |
|||
|
[FACTORY RESET] |
[YES]: Resets the settings to default (except the stored station). ; |
||
|
[NO]: Cancels. |
|||
|
[ENGLISH] |
|||
|
[РУССКИЙ] |
Select the display language for [FUNCTION] menu and music information |
||
|
[ESPANOL] |
|||
|
if applicable. |
|||
|
By default, [ENGLISH] is selected. |
|||
|
[FRANCAIS] |
|||
|
[DEUTSCH] |
Change the crossover type
1 Press B SRC repeatedly to enter STANDBY.
2Press and hold number buttons 4 and 5 to enter crossover select.
The current crossover type appears.
3Turn the volume knob to select “2WAY” or “3WAY”, then press the knob.
4Turn the volume knob to select “YES” or “NO”, then press the knob.
The selected crossover type appears.
•To cancel, press and hold 
 .
.
•To adjust the selected crossover settings, see page 24.
 CAUTION
Select a crossover type according to how the speakers are connected. (Page 31, 32)
If you select a wrong type:
•The speakers may damage.
•The output sound level may be extremely high or low.
ENGLISH 7
Radio
•“ST” indicator lights up when receiving an FM stereo broadcast with sufficient signal strength.
•The unit switches to FM alarm automatically when receiving an alarm signal from FM broadcast.
Search for a station
1 Press BSRC repeatedly to select RADIO.
2Press BAND repeatedly (or press #FM+/*AM– on the remote control) to select FM1/FM2/FM3/MW/LW.
3Press S / T (or press S / T (+) on the remote control) to search for a station.
You can store up to 18 stations for FM and 6 stations for MW/LW.
•To store a station: Press and hold one of the number buttons (1 to 6).
•To select a stored station: Press one of the number buttons (1 to 6) (or press one of the number buttons (1 to 6) on the remote control).
Direct Access Tuning (for  using the remote control)
1 Press DIRECT to enter Direct Access Tuning.
2 Press the number buttons to enter a station frequency. 3 Press ENT IW to search for a station.
•To cancel, press  or DIRECT.
•If no operation is done for 10 seconds after step 2, Direct Access Tuning is automatically canceled.
Other settings
1 Press the volume knob to enter [FUNCTION].
2Turn the volume knob to select an item (see the following table), then press the knob.
3Repeat step 2 until the desired item is selected/activated or follow the instructions stated on the selected item.
|
4 Press and hold |
to exit. |
To return to the previous setting item, press 
 .
.
|
Default: [XX] |
|
|
[TUNER SETTING] |
|
|
[SEEK MODE] |
Selects the searching method for S / T buttons when pressed. |
|
[AUTO1]: Automatically search for a station. ; [AUTO2]: Search for a preset |
|
|
station. ; [MANUAL]: Manually search for a station. |
|
|
[LOCAL SEEK] |
[ON]: Searches only stations with good reception. ; [OFF]: Cancels. |
|
• Settings made are applicable only to the selected source/station. Once |
|
|
you change the source/station, you need to make the settings again. |
|
|
[AUTO MEMORY] |
[YES]: Automatically starts memorizing 6 stations with good reception. ; |
|
[NO]: Cancels. |
|
|
• Selectable only if [NORMAL] is selected for [PRESET TYPE]. (Page 6) |
|
|
[MONO SET] |
[ON]: Improves the FM reception, but the stereo effect will be lost. ; |
|
[OFF]: Cancels. |
|
|
[NEWS SET] |
[ON]: The unit will temporarily switch to News Programme if available. ; |
|
[OFF]: Cancels. |
|
|
[REGIONAL] |
[ON]: Switches to another station only in the specific region using the “AF” |
|
control. ; [OFF]: Cancels. |
|
|
[AF SET] |
[ON]: Automatically searches for another station broadcasting the same |
|
program in the same Radio Data System network with better reception |
|
|
when the current reception is poor. ; [OFF]: Cancels. |
|
8ENGLISH
|
[TI] |
[ON]: Allows the unit to temporarily switch to Traffic Information if |
|
|
available (“TI” indicator lights up) while listening to all sources except in |
||
|
MW/LW. ; [OFF]: Cancels. |
||
|
[PTY SEARCH] |
1 |
Turn the volume knob to select the available Program Type (see the |
|
following “Available Program Type for [PTY SEARCH]”), then press the |
||
|
2 |
knob. |
|
|
Turn the volume knob to select the PTY language ([ENGLISH]/ |
||
|
3 |
[FRENCH]/[GERMAN]), then press the knob. |
|
|
Press S / T to start searching. |
||
|
[CLOCK] |
||
|
[TIME SYNC] |
[ON]: Synchronizes the unit’s time to the Radio Data System station time. ; |
|
|
[OFF]: Cancels. |
||
•[LOCAL SEEK]/[MONO SET]/[NEWS SET]/[REGIONAL]/[AF SET]/[TI]/[PTY SEARCH] is selectable only when the band is FM1/FM2/FM3.
•If the volume is adjusted during reception of traffic information or news bulletin, the adjusted volume is memorized automatically. It will be applied the next time traffic information or news bulletin is turned on.
Available Program Type for [PTY SEARCH]
[SPEECH]: [NEWS], [AFFAIRS], [INFO] (information), [SPORT], [EDUCATE], [DRAMA], [CULTURE], [SCIENCE], [VARIED], [WEATHER], [FINANCE], [CHILDREN], [SOCIAL], [RELIGION], [PHONE IN], [TRAVEL], [LEISURE], [DOCUMENT]
[MUSIC]: [POP M] (music), [ROCK M] (music), [EASY M] (music), [LIGHT M] (music), [CLASSICS], [OTHER M] (music), [JAZZ], [COUNTRY], [NATION M] (music), [OLDIES], [FOLK M] (music)
The unit will search for the Program Type categorized under [SPEECH] or [MUSIC] if selected.
Connect a USB device
|
USB input terminal |
CA-U1EX (max.: 500 mA) |
|
(optional accessory)*1 |
 USB device
The source changes to USB automatically and playback starts.
Connect an iPod/iPhone
iPod/ iPhone
|
USB input terminal |
KCA-iP103 (optional accessory)*2 |
|
or accessory of the iPod/iPhone*1 |
The source changes to iPod USB automatically and playback starts.
• You can also connect iPod/iPhone via Bluetooth. (Page 16)
*1 Do not leave the cable inside the car when not in use. *2 KCA-iP103: Lightning type
ENGLISH 9

USB/iPod
|
To |
On the faceplate |
On the remote control |
|
|
Play back/pause |
Press 6 IW. |
Press ENT IW. |
|
|
Reverse/Fast-forward |
Press and hold |
Press and hold |
|
|
S / T. |
S / T (+). |
||
|
Select a file |
Press S / T. |
Press S / T (+). |
|
|
Select a folder*1 |
Press 2 |
/ 1 . |
Press #FM+/ AM–. |
|
Repeat play*2 |
Press 4 |
repeatedly. |
|
|
[FILE REPEAT]/[FOLDER REPEAT]/[ALL REPEAT]: MP3/ |
|||
|
WMA/AAC/WAV/FLAC file |
|||
|
[REPEAT ONE]/[REPEAT ALL]/[REPEAT OFF]: iPod |
|||
|
Random play*2 |
Press 3 |
repeatedly. |
|
|
[FOLDER RANDOM]/[RANDOM OFF]: MP3/WMA/AAC/ |
|||
|
WAV/FLAC file |
|||
|
[SHUFFLE ON]/[SHUFFLE OFF]: iPod |
|||
|
Press and hold 3 to select [ALL RANDOM]*1. |
|||
|
*1 This does not work for iPod. |
|||
|
*2 For iPod: Applicable only when [MODE OFF] is selected. |
Select music drive
While in USB source, press 5 repeatedly.
Stored songs in the following drive will be played back.
•Selected internal or external memory of a smartphone (Mass Storage Class).
•Selected drive of a multiple drive device.
You can also select the music drive from the [FUNCTION] menu.
1 Press the volume knob to enter [FUNCTION].
2 Turn the volume knob to select [USB], then press the knob.
3 Turn the volume knob to select [MUSIC DRIVE], then press the knob.
4Turn the volume knob to select [DRIVE CHANGE], then press the knob.
The next drive ([DRIVE 1] to [DRIVE 4]) is selected automatically and playback starts.
5 Repeat step 1 to step 4 to select the following drives. 6 Press and hold 
 to exit.
To return to the previous setting item, press 
 .
.
Select control mode
While in iPod USB source (or iPod BT source), press 5 repeatedly.
[MODE ON]: Control iPod/iPhone using the iPod/iPhone itself. However, you can still perform play/pause, file skip, fast-forward or fast-reverse from this unit.
[MODE OFF]: Control iPod/iPhone from this unit.
Direct Music Search (for  using the remote control)
1 Press DIRECT.
2 Press the number buttons to enter a file number. 3 Press ENT IW to search for music.
10 ENGLISH

USB/iPod
•To cancel, press or DIRECT.
•Not available if Random Play is selected.
•Not applicable for iPod USB.
Select a file to play
 From a folder or list
• For iPod, applicable only when [MODE OFF] is selected. (Page 10)
1 Press 
 .
.
2 Turn the volume knob to select a folder/list, then press the knob.
3Turn the volume knob to select a file, then press the knob.
Selected file starts playing.
 Quick search (applicable only for USB source)
If you have many files, you can search through them quickly.
1 Press 
 .
.
2 Turn the volume knob to select a folder/list, then press the knob. 3 Turn the volume knob quickly to browse through the list quickly.
4Turn the volume knob to select a file, then press the knob.
Selected file starts playing.
 Skip search (applicable only for iPod USB source and iPod BT source)
If you have many files in the selected list, you can perform the following to search for a file by skipping through the list at a rate selected in [SKIP SEARCH].
• For iPod, applicable only when [MODE OFF] is selected. (Page 10)
|
1 |
Press |
. |
|
2 |
Turn the volume knob to select a list, then press the knob. |
3Press S / T to search at a preset skip search ratio.
•Pressing and holding S / T searches at a 10% ratio irregardless of the [SKIP SEARCH] settings.
4Turn the volume knob to select a file, then press the knob.
Selected file starts playing.
[SKIP SEARCH] setting
|
1 |
Press the volume knob to enter [FUNCTION]. |
|
|
2 |
Turn the volume knob to select [USB], then press the knob. |
|
|
3 |
Turn the volume knob to select [SKIP SEARCH], then press the knob. |
|
|
4 |
Turn the volume knob to select the skip search ratio, then press the |
|
|
knob. |
||
|
[0.5%] (default)/[1%]/[5%]/[10%] |
||
|
5 |
The skip search ratio is shown as a percentage of the total files. |
|
|
Press and hold |
to exit. |
 Alphabet search (applicable only for iPod USB source and iPod BT source)
You can search for a file according to the first character.
• For iPod, applicable only when [MODE OFF] is selected. (Page 10)
|
1 |
Press |
. |
|
2 |
Turn the volume knob to select a list, then press the knob. |
|
|
3 |
Turn the volume knob quickly to enter character search. |
|
|
4 |
Turn the volume knob to select the character. |
|
|
5 |
• Select “ *” to search for a character other than A to Z, 0 to 9. |
|
|
Press S / T to move to the entry position. |
||
|
6 |
• You can enter up to 3 characters. |
|
|
Press the volume knob to start searching. |
7Turn the volume knob to select a file, then press the knob.
Selected file starts playing.
•To return to the root folder/first file/top menu, press 5. (Not applicable for BT AUDIO source.)
•To return to the previous setting item, press
 .
.
•To cancel, press and hold
 .
.
ENGLISH 11
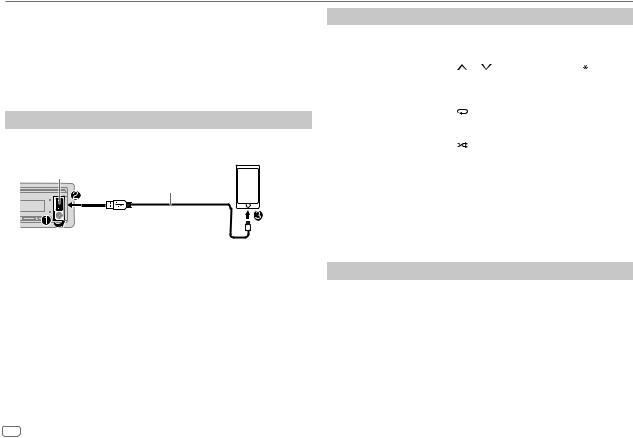
Spotify
You can listen to Spotify on iPhone/iPod touch (via Bluetooth or via USB input terminal) or Android device (via Bluetooth).
Preparation:
•Install the latest version of the Spotify application on your device (iPhone/ iPod touch or Android device), then create an account and log in to Spotify.
•Select [ON] for [SPOTIFY SRC] in [SOURCE SELECT]. (Page 6)
Start listening
1 Start up the Spotify application on your device.
2 Connect your device to the USB input terminal.
|
USB input terminal |
KCA-iP103 (optional accessory)*1 or |
iPhone/ |
|
iPod touch |
||
|
accessory of the iPhone/iPod touch*2 |
||
You can also connect the iPhone/iPod touch or Android device via Bluetooth. (Page 16)
•Make sure the USB input terminal is not connected to any device when you connect via Bluetooth.
3Press BSRC repeatedly to select SPOTIFY (for iPhone/iPod touch) or SPOTIFY BT (for Android device).
Broadcast starts automatically.
|
To |
On the faceplate |
On the remote control |
|||
|
Play back/pause |
Press 6 IW. |
Press ENT IW. |
|||
|
Skip a track |
Press S*3 / T. |
Press S*3 / T (+). |
|||
|
Select thumbs up or |
Press 2 |
/ 1 . |
Press #FM+/ AM–. |
||
|
thumbs down*4 |
|||||
|
Start radio |
Press and hold 5. |
||||
|
Repeat play*5 |
Press 4 |
repeatedly. |
|||
|
[REPEAT ALL], [REPEAT ONE]*3, [REPEAT OFF] |
|||||
|
Random play*5 |
Press 3 |
repeatedly*3. |
|||
|
[SHUFFLE ON], [SHUFFLE OFF] |
|||||
|
*1 |
KCA-iP103: Lightning type |
||||
|
*2 |
Do not leave the cable inside the car when not in use. |
||||
|
*3 |
Available for premium account users only. |
||||
|
*4 |
This feature is available for tracks in Radio only. If thumbs down is selected, the current track is |
||||
|
skipped. |
|||||
|
*5 |
Available for tracks in Playlists only. |
Save favorite song information
While listening to the Radio on Spotify…
Press and hold the volume knob.
“SAVED” appears and the information is stored to “Your Music” or “Your Library” on your Spotify account.
To unsave, repeat the same procedure.
“REMOVED” appears and the information is removed from “Your Music” or “Your Library” on your Spotify account.
12 ENGLISH
![]()
Spotify
Search for a song or station
1 Press 
 .
.
2Turn the volume knob to select a list type, then press the knob.
The list types displayed differ depending on the information sent from Spotify.
3Turn the volume knob (or press J / K on the remote control) to select the desired song or station.
4Press the volume knob (or press ENT IW on the remote control) to confirm.
You can browse through the list quickly by turning the volume knob quickly.
To cancel, press and hold 
 .
.
AUX
You can listen to music from a portable audio player via the auxiliary input jack.
Preparation:
Select [ON] for [BUILT-IN AUX] in [SOURCE SELECT]. (Page 6)
Start listening
1 Connect a portable audio player (commercially available).
Auxiliary input jack
Portable audio player
3.5 mm stereo mini plug with “L” shaped connector (commercially available)
2 Press BSRC repeatedly to select AUX.
3 Turn on the portable audio player and start playback.
Set the name of the external device
While listening to a portable audio player connected to the unit…
|
1 |
Press the volume knob to enter [FUNCTION]. |
|
2 |
Turn the volume knob to select [SYSTEM], then press the knob. |
|
3 |
Turn the volume knob to select [AUX NAME SET], then press the knob. |
|
4 |
Turn the volume knob to select an item, then press the knob. |
|
5 |
[AUX] (default)/[DVD]/[PORTABLE]/[GAME]/[VIDEO]/[TV] |
|
Press and hold |
to exit. |
To return to the previous setting item, press 
 .
.
ENGLISH 13

Using Other Applications
KENWOOD Remote application
You can control the KENWOOD car receiver from iPhone/iPod touch (via Bluetooth or via USB input terminal) or Android device (via Bluetooth) using KENWOOD Remote application.
• For more information, visit <http://www.kenwood.com/cs/ce/>.
Preparation:
Install the latest version of KENWOOD Remote application on your device before connecting.
Start using KENWOOD Remote application
1 Start up the KENWOOD Remote application on your device.
2Connect your device.
•For Android device:
Pair the Android device with this unit via Bluetooth. (Page 16)
•For iPhone/iPod touch:
Connect iPhone/iPod touch to the USB input terminal. (Page 9) (or)
Pair the iPhone/iPod touch with this unit via Bluetooth. (Page 16) (Make sure the USB input terminal is not connected to any device.)
3Select the device to use from the [FUNCTION] menu.
See the following “Settings to use KENWOOD Remote application”.
By default, [ANDROID] is selected. To use iPhone/iPod touch, select [YES] for
[IOS].
•For 


 /
/


 , “R.APP” indicator lights up when KENWOOD Remote application is connected.
Settings to use KENWOOD Remote application
1 Press the volume knob to enter [FUNCTION].
2Turn the volume knob to select an item (see the following table), then press the knob.
3 Repeat step 2 until the desired item is selected/activated. 4 Press and hold 
 to exit.
To return to the previous setting item, press 
 .
.
|
Default: [XX] |
||
|
[REMOTE APP] |
||
|
[SELECT] |
Selects the device ([IOS] or [ANDROID]) to use the application. |
|
|
[IOS] |
[YES]: Selects iPhone/iPod touch to use the application via Bluetooth or |
|
|
connected via USB input terminal. ; [NO]: Cancels. |
||
|
If [IOS] is selected, select iPod BT source (or iPod USB source if your iPhone/ |
||
|
iPod touch is connected via USB input terminal) to activate the application. |
||
|
• The connectivity of the application will be interrupted or disconnected if: |
||
|
– You change from iPod BT source to any playback source connected via |
||
|
the USB input terminal. |
||
|
– You change from iPod USB source to iPod BT source. |
||
|
[ANDROID] |
[YES]: Selects Android device to use the application via Bluetooth. ; |
|
|
[NO]: Cancels. |
||
|
[ANDROID LIST] |
Selects the Android device to use from the list. |
|
|
• Displayed only when [ANDROID] of [SELECT] is set to [YES]. |
||
14 ENGLISH
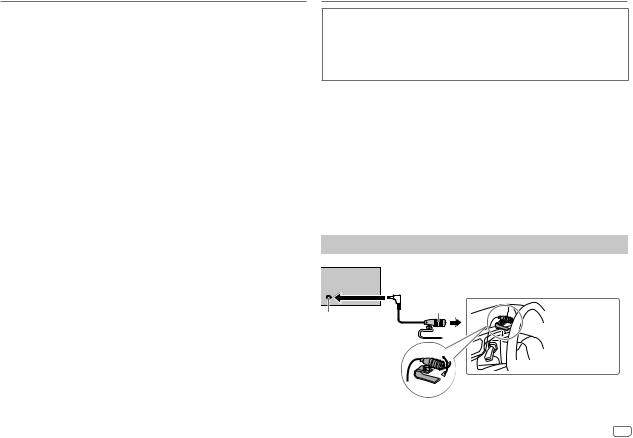
Using Other Applications
|
[STATUS] |
Shows the status of the selected device. |
|
[IOS CONNECTED]: You are able to use the application using the iPhone/ |
|
|
iPod touch connected via Bluetooth or USB input terminal. |
|
|
[IOS NOT CONNECTED]: No iOS device is connected to use the application. |
|
|
[ANDROID CONNECTED]: You are able to use the application using the |
|
|
Android device connected via Bluetooth. |
|
|
[ANDROID NOT CONNECTED]: No Android device is connected to use the |
|
|
application. |
|
TuneIn Radio/TuneIn Radio Pro
While listening to TuneIn Radio or TuneIn Radio Pro, connect the iPhone/ iPod touch to the USB input terminal of the unit so that the unit will output the sound from these applications.
Bluetooth®
•Depending on the Bluetooth version, operating system and the firmware version of your mobile phone, Bluetooth features may not work with this unit.
•Be sure to turn on the Bluetooth function of the device to make the following operations.
•Signal conditions vary depending on the surroundings.
Bluetooth — Connection
Supported Bluetooth profiles
–Hands-Free Profile (HFP)
–Advanced Audio Distribution Profile (A2DP)
–Audio/Video Remote Control Profile (AVRCP)
–Serial Port Profile (SPP)
–Phonebook Access Profile (PBAP)
Supported Bluetooth codecs
–Sub Band Codec (SBC)
–Advanced Audio Coding (AAC)
Connect the microphone
|
Rear panel |
||
|
Microphone |
||
|
Microphone |
(supplied) |
|
|
Secure using cord |
||
|
input jack |
||
|
clamps (not supplied) |
||
|
if necessary. |
||
|
Adjust the |
||
|
microphone angle |
ENGLISH 15
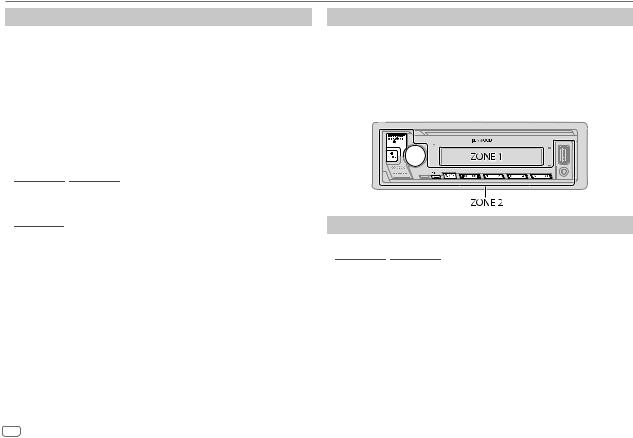
Bluetooth®
Pair and connect a Bluetooth device for the first time
1 Press BSRC to turn on the unit.
2Search and select the name of your receiver (“KMM-BT356”/ “KMM-BT306”/“KMM-BT206”) on the Bluetooth device.
“PAIRING”  “PASS XXXXXX”
  “Device name”
  “PRESS”
  “VOLUME KNOB” appears on the display.
•For some Bluetooth devices, you may need to enter the Personal Identification Number (PIN) code immediately after searching.
3Press the volume knob to start pairing.
“PAIRING OK” appears when pairing is completed.
Once pairing is completed, Bluetooth connection is established automatically.
• /
/ : “BT1” and/or “BT2” indicator on the faceplate lights up.
“

 ” indicator lights up to show the strength of the battery and signal of the connected device.
•


 : “BT1” and/or “BT2” indicator on the display window lights up.
•This unit supports Secure Simple Pairing (SSP).
•Up to five devices can be registered (paired) in total.
•Once the pairing is completed, the Bluetooth device will remain registered in the unit even if you reset the unit. To delete the paired device, see
[DEVICE DELETE] on page 19.
•A maximum of two Bluetooth phones and one Bluetooth audio device can be connected at any time. To connect or disconnect the registered device, see [PHONE SELECT] or [AUDIO SELECT] in [BT MODE]. (Page 19)
However, while in BT AUDIO source, you can connect to five Bluetooth audio devices and switch between these five devices. (Page 20)
•Some Bluetooth devices may not automatically connect to the unit after pairing. Connect the device to the unit manually.
•Refer to the instruction manual of the Bluetooth device for more information.
Auto Pairing
When you connect iPhone/iPod touch to the USB input terminal, pairing request (via Bluetooth) is automatically activated if [AUTO PAIRING] is set to [ON]. (Page 19)
Press the volume knob to pair once you have confirmed the device name.
Bluetooth — Mobile phone
Receive a call
When there is an incoming call:
•


 /
/


 :
:
[ZONE 2] illuminates in green color and flashes.
•The unit answers the call automatically if [AUTO ANSWER] is set to a selected time. (Page 17)
|
During a call: |
||||
|
• |
/ |
: |
||
|
[ZONE 1] illuminates according to the settings made for [DISPLAY] |
||||
|
(page 28) and [ZONE 2] illuminates in green color. |
||||
|
• |
If you turn off the unit or detach the faceplate, Bluetooth is disconnected. |
16 ENGLISH
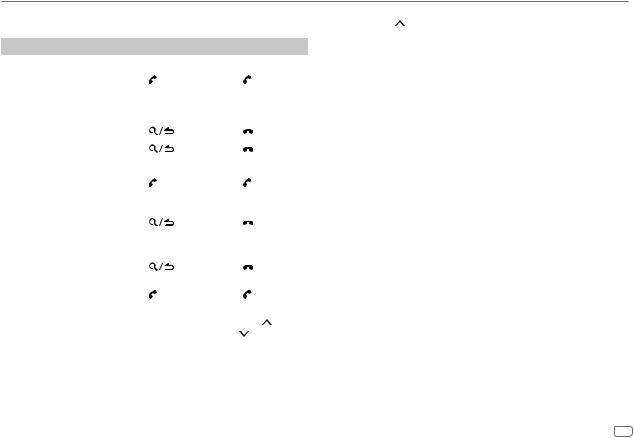
Bluetooth®
The following operations may differ or be unavailable depending on the connected phone.
|
To |
On the faceplate |
On the remote control |
||
|
First incoming call… |
||||
|
Answer a call |
Press |
or the |
Press . |
|
|
volume knob or |
||||
|
one of the number |
||||
|
buttons (1 to 6). |
||||
|
Reject a call |
Press |
. |
Press . |
|
|
End a call |
Press |
. |
Press . |
|
|
While talking on the first incoming call… |
||||
|
Answer another |
Press . |
Press . |
||
|
incoming call and hold |
||||
|
the current call |
||||
|
Reject another incoming |
Press |
. |
Press . |
|
|
call |
||||
|
While having two active calls… |
||||
|
End current call and |
Press |
. |
Press . |
|
|
activate held call |
||||
|
Swap between the |
Press . |
Press . |
||
|
current call and held call |
||||
|
Adjust the phone |
Turn the volume |
Press VOL *2 or |
||
|
volume*1 |
knob during a call. |
VOL during a call. |
||
|
[00] to [35] (Default: [15]) |
||||
|
Switch between hands- |
Press 6 IW during |
( Not available ) |
||
|
free and private talk |
a call. |
|||
|
modes*3 |
|
*1 |
This adjustment will not affect the volume of the other sources. |
|
|
*2 |
Press and hold VOL |
to continuously increase the volume to 15. |
|
*3 |
Operations may vary according to the connected Bluetooth device. |
 Improve the voice quality
While talking on the phone…
1 Press the volume knob to enter [FUNCTION].
2Turn the volume knob to select an item (see the following table), then press the knob.
3 Repeat step 2 until the desired item is selected or activated. 4 Press and hold 
 to exit.
To return to the previous setting item, press 
 .
.
|
Default: [XX] |
|
|
[MIC GAIN] |
[LEVEL –10] to [LEVEL +10] ([LEVEL –4]): The sensitivity of the |
|
microphone increases as the number increases. |
|
|
[NR LEVEL] |
[LEVEL –5] to [LEVEL +5] ([LEVEL 0]): Adjust the noise reduction level |
|
until the least noise is being heard during a phone conversation. |
|
|
[ECHO CANCEL] |
[LEVEL –5] to [LEVEL +5] ([LEVEL 0]): Adjust the echo cancellation |
|
delay time until the least echo is being heard during a phone conversation. |
|
 Make the setting for answering a call
1 Press to enter Bluetooth mode.
2 Turn the volume knob to select [SETTINGS], then press the knob.
3 Turn the volume knob to select [AUTO ANSWER], then press the knob.
4Turn the volume knob to select the time (in seconds) for the unit to answer the call automatically, then press the knob.
[01] to [30], or select [OFF] to cancels. (Default: [OFF])
5 Press and hold
 to exit.
To return to the previous setting item, press
 .
.
ENGLISH 17
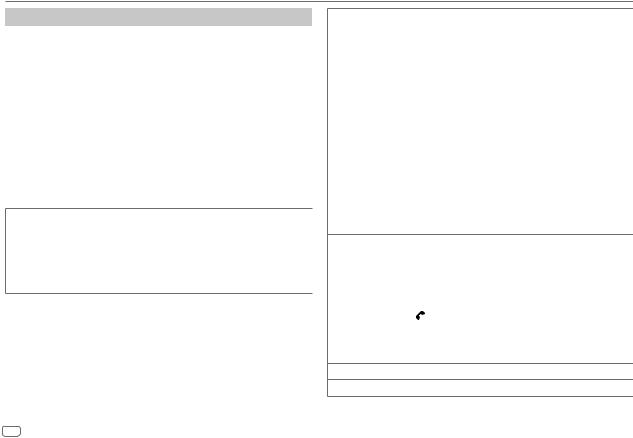
Bluetooth®
Make a call
You can make a call from the call history, phonebook, or dialing the number. Call by voice is also possible if your mobile phone has the feature.
1Press to enter Bluetooth mode.
“(First device name)” appears.
•If two Bluetooth phones are connected, press  again to switch to the other phone.
“(Second device name)” appears.
2Turn the volume knob to select an item (see the following table), then press the knob.
3Repeat step 2 until the desired item is selected/activated or follow the instructions stated on the selected item.
4 Press and hold 
 to exit.
To return to the previous setting item, press 
 .
.
[CALL HISTORY] (Applicable only if the phone supports PBAP.)
1Press the volume knob to select a name or a phone number.
•“I” indicates call received, “O“ indicates call made, “M” indicates call missed.
•Press DISP to change the display category (NUMBER or NAME).
•“NO DATA” appears if there is no recorded call history or call number. 2 Press the volume knob to call.
[PHONE BOOK] (Applicable only if the phone supports PBAP.)
1Turn the volume knob quickly to enter alphabet search mode (if the phonebook contains many contacts).
The first menu (ABCDEFGHIJK) appears.
•To go to the other menu (LMNOPQRSTUV or WXYZ1 ), press 2
  /
/
1  .
.
•To select the desired first letter, turn the volume knob or press
S / T, then press the knob.
Select “1” to search with numbers and select “ ” to search with symbols. 2 Turn the volume knob to select a name, then press the knob.
3Turn the volume knob to select a phone number, then press the knob to call.
•For using phonebook with this unit, make sure to allow access to or transfer from your smartphone. Depending on the connected phone, the process may be different.
•Contacts are categorized as: HM (home), OF (office), MO (mobile), OT (other), GE (general)
•This unit can display only non-accent letters. (Accent letters such as “Ú” are shown as “U”.)
[NUMBER DIAL] 1 Turn the volume knob to select a number (0 to 9) or character ( , #, +).
2Press S / T to move the entry position.
Repeat step 1 and step 2 until you finish entering the phone number.
3 Press the volume knob to call.
|
(or using the remote control) |
||
|
1 |
Press the number buttons (0 to 9) to enter the phone number. |
|
|
2 |
Press to call. |
|
|
[VOICE] |
Speak the name of the contact you want to call or the voice command to |
|
|
control the phone functions. (See also “Make a call using voice recognition” |
||
|
on page 19.) |
[LOW]/[MID]/[FULL]: Shows the strength of the battery.*
[NO SIGNAL]/[LOW]/[MID]/[MAX]: Shows the strength of the current received signal.*
* Functionality depends on the type of the phone used.
18 ENGLISH
Bluetooth®
 Make a call using voice recognition
1Press and hold  to activate the voice recognition of the connected phone.
2Speak the name of the contact you want to call or the voice command to control the phone functions.
•Supported Voice Recognition features vary for each phone. Refer to the instruction manual of the connected phone for details.
Store a contact in memory
You can store up to 6 contacts into the number buttons (1 to 6).
1 Press to enter Bluetooth mode.
2Turn the volume knob to select [CALL HISTORY], [PHONE BOOK] or [NUMBER DIAL], then press the knob.
3Turn the volume knob to select a contact or enter a phone number.
If a contact is selected, press the volume knob to show the phone number.
4Press and hold one of the number buttons (1 to 6).
“STORED” appears when the contact is stored.
To erase a contact from the preset memory, select [NUMBER DIAL] in step 2, store a blank number in step 3 and proceed to step 4.
Make a call to a registered number
1 Press to enter Bluetooth mode.
2 Press one of the number buttons (1 to 6).
3Press the volume knob to call.
“NO MEMORY” appears if there is no contact stored.
Bluetooth mode settings
1 Press the volume knob to enter [FUNCTION].
2Turn the volume knob to select an item (see the following table), then press the knob.
3Repeat step 2 until the desired item is selected/activated or follow the instructions stated on the selected item.
|
4 Press and hold |
to exit. |
To return to the previous setting item, press 
 .
.
Default: [XX]
[BT MODE]
[PHONE SELECT]
[AUDIO SELECT]
Selects the phone or audio device to connect or disconnect. “ ” appears in front of the device name when connected. “
 ” appears in front of the current playback audio device.
•You can connect a maximum of two Bluetooth phones and one Bluetooth audio device at a time.
|
[DEVICE DELETE] |
1 |
Turn the volume knob to select a device to delete, then press the knob. |
|
2 |
Turn the volume knob to select [YES] or [NO], then press the knob. |
|
|
[PIN CODE EDIT] |
Changes the PIN code (up to 6 digits). |
|
|
(0000) |
1 |
Turn the volume knob to select a number. |
|
2 |
Press S / T to move the entry position. |
|
|
3 |
Repeat step 1 and step 2 until you finish entering the PIN code. |
|
|
Press the volume knob to confirm. |
||
|
[RECONNECT] |
[ON]: The unit is automatically reconnect when the last connected |
|
|
Bluetooth device is within the connectable range. ; [OFF]: Cancels. |
||
|
[AUTO PAIRING] |
[ON]: The unit is automatically paired with the supported Bluetooth device |
|
|
(iPhone/iPod touch) when it is connected through USB input terminal. |
Depending on the operating system of the connected device, this function may not work. ; [OFF]: Cancels.
ENGLISH 19
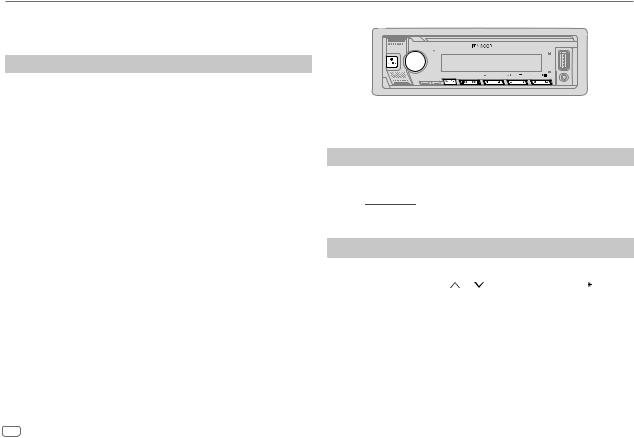
Bluetooth®
|
[INITIALIZE] |
[YES]: Initializes all the Bluetooth settings (including stored pairing, |
|
phonebook, and etc.). ; [NO]: Cancels. |
|
Bluetooth test mode
You can check the connectivity of the supported profile between the Bluetooth device and the unit.
• Make sure there is no Bluetooth device paired.
1Press and hold .
.
“PLEASE PAIR YOUR PHONE PIN 0000” appears on the display.
2Search and select the name of your receiver (“KMM-BT356”/ “KMM-BT306”/“KMM-BT206”) on the Bluetooth device.
3Operate the Bluetooth device to confirm pairing.
“TESTING” flashes on the display.
The connectivity result (OK or NG) appears after the test.
|
PAIRING: |
Pairing status |
|
HF CNT: |
Hands-Free Profile (HFP) compatibility |
|
AUD CNT: |
Advanced Audio Distribution Profile (A2DP) compatibility |
|
PB DL: |
Phonebook Access profile (PBAP) compatibility |
To cancel test mode, press and hold BSRC to turn off the unit.
Bluetooth — Audio
While in BT AUDIO source, you can connect to five Bluetooth audio devices and switch between these five devices.
Listen to the audio player via Bluetooth
1Press BSRC repeatedly (or press SRC on the remote control) to select
BT AUDIO.
• For 


 : Pressing
  enters BT AUDIO directly.
2 Operate the audio player via Bluetooth to start playback.
|
To |
On the faceplate |
On the remote control |
|
Play back/pause |
Press 6 IW. |
Press ENT IW. |
|
Select group or |
Press 2 / 1 . |
Press #FM+/ AM–. |
|
folder |
||
|
Reverse skip/ |
Press S / T. |
Press S / T (+). |
|
Forward skip |
||
|
Reverse/Fast-forward |
Press and hold S / T. |
Press and hold S / |
|
T (+). |
||
20 ENGLISH

Bluetooth®
|
To |
On the faceplate |
|
|
Repeat play |
Press 4 |
repeatedly. |
|
[ALL REPEAT], [FILE REPEAT], [GROUP REPEAT]*, |
||
|
[REPEAT OFF] |
||
|
Random play |
Press and hold 3 to select [ALL RANDOM] |
|
|
or [GROUP RANDOM]*. |
||
|
• Press 3 |
to select [RANDOM OFF]. |
|
|
Select a file from a folder/list |
Refer to “Select a file to play” on page 11. |
|
|
Switch between connected |
Press 5. |
|
|
Bluetooth audio devices |
(Pressing the “Play” key on the connected |
|
|
device itself also causes switching of sound |
||
|
output from the device.) |
||
* Depending on the connected device, some devices may not support this feature.
Operations and display indications may differ according to their availability on the connected device.
Listen to iPod/iPhone via Bluetooth
You can listen to the songs on the iPod/iPhone via Bluetooth on this unit.
Press BSRC repeatedly to select iPod BT.
•You can operate the iPod/iPhone in the same way as iPod/iPhone via USB input terminal. (Page 9)
•If you plug in an iPod/iPhone to the USB input terminal while listening to iPod BT source, the source automatically changes to iPod USB source. Press BSRC to select iPod BT source if the device is still connected via Bluetooth.
AMAZON ALEXA (for 


 /
/


 )
)
Alexa is the cloud-based voice service developed by Amazon. You can ask Alexa to play music, get weather reports, traffic information, control smart home devices, shop on Amazon, search the internet, set reminders and more.
Preparation:
•Create an account at <www.amazon.com>.
•Install the latest version of the Alexa mobile application on your device (iPhone/iPod touch or Android device), then log in to the application.
•Be sure to enable the internet connection on your smartphone.
Setup for the first time
For Android device
1 Pair your device with this unit via Bluetooth. (Page 16) 2 Start up the Alexa mobile application on your device.
3Pair this unit to Alexa mobile application.
Perform Option A or Option B.
For iPhone/iPod touch
1 Pair your device with this unit via Bluetooth. (Page 16) 2 Start up the Alexa mobile application on your device.
3Press  on the unit to enter ALEXA source.
•You may also press B SRC repeatedly to select iPod BT source.
4 Pair this unit to Alexa mobile application.
Perform Option A or Option B.
Option A: Direct Link
Access the following URL or scan the QR code with your smartphone:
https://www.kenwood.com/car/alexa
Option B: Manual Pairing
1 Start up the Alexa mobile application and go to the “Devices” tab. 2 Tap the “ + ” icon at the top right corner.
ENGLISH 21
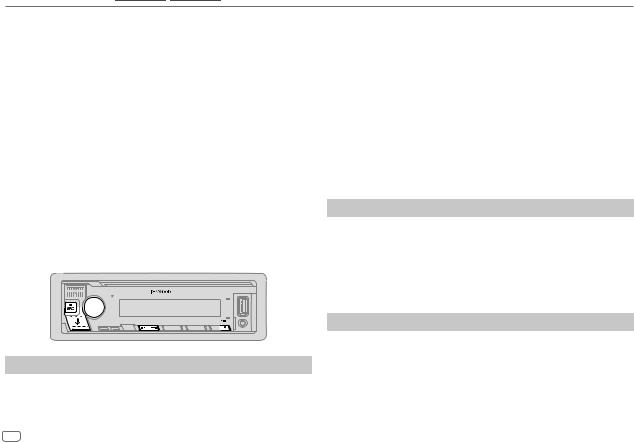
AMAZON ALEXA (for  /
/


 )
)
3 Tap “Add Device”.
4Tap “Automotive Accessory” or “Headphones” from the list of device types.
5Tap the name of your receiver (“KMM-BT306”/“KMM-BT206”) and follow the instructions.
Once the setup process is completed, the Alexa mobile application will establish a connection with this unit.
•The Alexa connection can be disconnected if:
–A2DP profile is disconnected
–Bluetooth is disconnected
–This unit is turned off
–Any other conditions depending on the connected device.
To establish Alexa connection again, reconnect the A2DP profile.
•Alexa connection cannot be established again if you:
–Reinstall Alexa mobile application
–Delete the paired device and perform pairing again (for Android device) To establish Alexa connection again, perform the setup process again.
•You can check the Alexa connection from the Alexa mobile application.
If the name of this unit appears on the screen of “ALL DEVICES”, you do not need to perform setup process again.
Basic operations
Once Alexa connection is established…
1Press  on the unit to speak with Alexa.
The display shows: “ALEXA”  “LISTENING…”.
22 ENGLISH
2Communicate with Alexa via the connected microphone. (Page 15)
“THINKING…” appears when Alexa is processing your voice input. “SPEAKING…” appears while Alexa is responding to your voice input. “ALEXA” or display information such as playing time, song title, etc. appears while Alexa is in idle state.
•To return to the previous source before ALEXA, press BSRC (or press SRC on the remote control).
•To activate Alexa, press  .
.
•To cancel current listening state, press  .
.
•To cancel current thinking/speaking states and go to listening state, press  .
.
•Only one Alexa connection can be connected at one time.
•“DISCONNECTED” appears if the unit is disconnected from Alexa mobile application or the Bluetooth connection is disconnected.
Start listening
While in Alexa idle state…
1Press  on the unit to activate Alexa.
The display shows: “LISTENING…”.
2 Communicate with Alexa via the connected microphone. (Page 15)
3During music playback in ALEXA source, you can perform the following operations:
|
To |
On the faceplate |
On the remote control |
|
Play back/pause |
Press 6 IW. |
Press ENT IW. |
|
Reverse skip/Forward skip |
Press S / T. |
Press S / T (+). |
During music playback, press  to pause the music and activate Alexa. You can now start to communicate with Alexa.
![]()
Audio Settings
1 Press the volume knob to enter [FUNCTION].
2Turn the volume knob to select an item (see the following table), then press the knob.
3 Repeat step 2 until the desired item is selected or activated. 4 Press and hold 
 to exit.
(or using the remote control)
1 Press AUD to enter [AUDIO CONTROL].
2 Press J/ K to select an item, then press ENT IW.
|
To return to the previous setting item, press |
. |
|
|
Default: [XX] |
||
|
[AUDIO CONTROL] |
||
|
[SUB-W LEVEL] |
[LEVEL –50] to [LEVEL +10] ([LEVEL 0]): Adjusts the subwoofer output |
|
|
level. |
||
|
[EASY EQ] |
Adjusts your own sound settings. |
|
|
• The settings are stored to [USER] in [PRESET EQ]. |
||
|
• The settings made may affect the current settings of [MANUAL EQ]. |
||
|
[SW]: [LEVEL –50] to [LEVEL +10] |
(Default: [LEVEL 0] |
|
|
[BASS]: [LEVEL –9] to [LEVEL +9] |
[LEVEL 0] |
|
|
[MID]: [LEVEL –9] to [LEVEL +9] |
[LEVEL 0] |
|
|
[TRE]: [LEVEL –9] to [LEVEL +9] |
[LEVEL 0]) |
|
[MANUAL EQ] |
Adjusts your own sound settings for each source. |
||
|
• The settings are stored to [USER] in [PRESET EQ]. |
|||
|
• The settings made may affect the current settings of [EASY EQ]. |
|||
|
[62.5HZ] |
[LEVEL] |
[LEVEL –9] to [LEVEL +9] ([LEVEL 0]): Adjusts the |
|
|
level to memorize for each source. |
|||
|
(Before making an adjustment, select the source you |
|||
|
want to adjust.) |
|||
|
[BASS EXTEND] |
[ON]: Turns on the extended bass. ; [OFF]: Cancels. |
||
|
[100HZ]/[160HZ]/ |
[LEVEL –9] to [LEVEL +9] ([LEVEL 0]): Adjusts the level to memorize |
||
|
[250HZ]/[400HZ]/ |
for each source. |
||
|
[630HZ]/[1KHZ]/ |
(Before making an adjustment, select the source you want to adjust.) |
||
|
[1.6KHZ]/[2.5KHZ]/ |
|||
|
[4KHZ]/[6.3KHZ]/ |
|||
|
[10KHZ]/[16KHZ] |
|||
|
[Q FACTOR] |
[1.35]/[1.50]/[2.00]: Adjusts the quality factor. |
||
|
[PRESET EQ] |
[NATURAL]/[ROCK]/[POPS]/[EASY]/[TOP40]/[JAZZ]/[POWERFUL]/ |
||
|
[USER]: Selects a preset equalizer suitable to the music genre. |
|||
|
• When the display demonstration is activated ([ON] is selected |
|||
|
initially, page 28), [ROCK] is automatically selected as the |
|||
|
[PRESET EQ]. |
|||
|
– If you set [DEMO MODE] to [OFF] (page 28), [NATURAL] is |
|||
|
selected as the default setting for [PRESET EQ]. |
|||
|
(Select [USER] to use the settings made in [EASY EQ] or |
|||
|
[MANUAL EQ].) |
|||
|
[BASS BOOST] |
[LV1] to [LV5]: Selects your preferred bass boost level. ; [OFF]: Cancels. |
||
|
[LOUDNESS] |
[LV1]/[LV2]: Selects your preferred low or high frequencies boost to |
||
|
produce a well-balanced sound at low volume. ; [OFF]: Cancels. |
|||
|
[SUBWOOFER SET] |
[ON]: Turns on the subwoofer output. ; [OFF]: Cancels. |
||
|
[FADER] |
(Not applicable if 3-way crossover is selected.) |
||
|
[R15] to [F15] ([0]): Adjusts the front and rear speaker output balance. |
|||
ENGLISH 23

Audio Settings
|
[BALANCE] |
[L15] to [R15] ([0]): Adjusts the left and right speaker output balance. |
|
|
[VOLUME OFFSET] |
[–15] to [+6] ([0]): Presets the initial volume level of each source by |
|
|
comparing to the FM volume level. |
||
|
(Before adjustment, select the source you want to adjust.) |
||
|
[SOUND EFFECT] |
||
|
[SOUND RECNSTR] |
(Not applicable for RADIO source and AUX source.) |
|
|
(Sound |
[ON]: Creates realistic sound by compensating the high-frequency |
|
|
reconstruction) |
components and restoring the rise-time of the waveform that are lost in |
|
|
audio data compression. ; [OFF]: Cancels. |
||
|
[SPACE ENHANCE] |
(Not applicable for RADIO source.) |
|
|
[SML]/[MED]/[LRG]: Virtually enhances the sound space. ; |
||
|
[OFF]: Cancels. |
||
|
[SND REALIZER] |
[LV1]/[LV2]/[LV3]: Virtually makes the sound more realistic. ; |
|
|
[OFF]: Cancels. |
||
|
[STAGE EQ] |
[LOW]/[MID]/[HI]: Virtually adjusts the sound position heard from the |
|
|
speakers. ; [OFF]: Cancels. |
||
|
[DRIVE EQ] |
[ON]: Boosts the frequency to reduce the noise heard from outside the |
|
|
car or running noise of the tyres. ; [OFF]: Cancels. |
||
|
[SPEAKER SIZE] |
Depending on the crossover type you have selected (see “Change the |
|
|
crossover type” on page 7), 2-way crossover or 3-way crossover |
||
|
[X ‘ OVER] |
setting items will be shown. (See the following “Crossover settings”.) |
|
|
By default, 2-way crossover type is selected. |
||
|
[DTA SETTINGS] |
For settings, see “Digital Time Alignment settings” on page 26. |
|
|
[CAR SETTINGS] |
||
•


 : For 2-way crossover: [SUB-W LEVEL]/[SUBWOOFER SET] is selectable only if [SWITCH PREOUT] is set to [SUB-W]. (Page 6)
•[SUB-W LEVEL] is selectable only when [SUBWOOFER SET] is set to [ON]. (Page 23)
Crossover settings
Below are the available setting items for 2-way crossover and 3-way crossover.
SPEAKER SIZE
Selects according to the connected speaker size for optimum performance.
•The frequency and slope settings are automatically set for the crossover of the selected speaker.
•If [NONE] is selected for the following speaker in [SPEAKER SIZE], the [X ‘ OVER] setting of the selected speaker is not available.
–2-way crossover: [TWEETER] of [FRONT]/[REAR]/[SUBWOOFER]
–3-way crossover: [WOOFER]
X ‘ OVER (crossover)
•[FRQ]/[F-HPF FRQ]/[R-HPF FRQ]/[SW LPF FRQ]/[HPF FRQ]/[LPF FRQ]: Adjusts the crossover frequency for the selected speakers (high pass filter or low pass filter).
If [THROUGH] is selected, all signals are sent to the selected speakers.
•[SLOPE]/[F-HPF SLOPE]/[R-HPF SLOPE]/[SW LPF SLOPE]/[HPF SLOPE]/[LPF SLOPE]: Adjusts the crossover slope.
Selectable only if a setting other than [THROUGH] is selected for the crossover frequency.
•[SW LPF PHASE]/[PHASE]: Selects the phase of the speaker output to be in line with the other speaker output.
•[GAIN LEFT]/[GAIN RIGHT]/[F-HPF GAIN]/[R-HPF GAIN]/[SW LPF GAIN]/[GAIN]: Adjusts the output volume of the selected speaker.
24 ENGLISH

Audio Settings
 2-way crossover setting items
[SPEAKER SIZE]
|
[FRONT] |
[SIZE] |
[8CM]/[10CM]/[12CM]/[13CM]/[16CM]/[17CM]/ |
|
[18CM]/[4×6]/[5×7]/[6×8]/[6×9]/[7×10] |
||
|
[TWEETER] |
[SMALL]/[MIDDLE]/[LARGE]/[NONE] |
|
|
(not connected) |
||
|
[REAR] |
[8CM]/[10CM]/[12CM]/[13CM]/[16CM]/[17CM]/[18CM]/[4×6]/ |
|
|
[5×7]/[6×8]/[6×9]/[7×10]/[NONE] (not connected) |
[SUBWOOFER]*1*2 [16CM]/[20CM]/[25CM]/[30CM]/[38CM OVER]/[NONE]
(not connected)
[X ‘ OVER]
|
[TWEETER] |
[FRQ] |
[1KHZ]/[1.6KHZ]/[2.5KHZ]/[4KHZ]/[5KHZ]/ |
|
|
[6.3KHZ]/[8KHZ]/[10KHZ]/[12.5KHZ] |
|||
|
[GAIN LEFT] |
[–8] to [0] |
||
|
[GAIN RIGHT] |
[–8] to [0] |
||
|
[FRONT HPF] |
[F-HPF FRQ] |
[30HZ]/[40HZ]/[50HZ]/[60HZ]/[70HZ]/[80HZ]/ |
|
|
[90HZ]/[100HZ]/[120HZ]/[150HZ]/[180HZ]/ |
|||
|
[220HZ]/[250HZ]/[THROUGH] |
|||
|
[F-HPF SLOPE] |
[–6DB]/[–12DB]/[–18DB]/[–24DB] |
||
|
[F-HPF GAIN] |
[–8] to [0] |
||
|
[REAR HPF] |
[R-HPF FRQ] |
Configure the settings for the rear speakers similarly to |
|
|
[R-HPF SLOPE] |
|||
|
the front speakers. |
|||
|
[R-HPF GAIN] |
|||
|
[SUBWOOFER |
[SW LPF FRQ] |
[30HZ]/[40HZ]/[50HZ]/[60HZ]/[70HZ]/[80HZ]/ |
|
|
LPF]*1*2 |
[90HZ]/[100HZ]/[120HZ]/[150HZ]/[180HZ]/ |
||
|
[220HZ]/[250HZ]/[THROUGH] |
|||
|
[SW LPF SLOPE] |
[–6DB]/[–12DB]/[–18DB]/[–24DB] |
||
|
[SW LPF PHASE] |
[REVERSE] (180°)/[NORMAL] (0°) |
||
|
[SW LPF GAIN] |
[–8] to [0] |
||
|
3-way crossover setting items |
|||
|
[SPEAKER SIZE] |
|||
|
[TWEETER] |
[SMALL]/[MIDDLE]/[LARGE] |
||
|
[MID RANGE] |
[8CM]/[10CM]/[12CM]/[13CM]/[16CM]/[17CM]/[18CM]/[4×6]/ |
||
|
[5×7]/[6×8]/[6×9] |
|||
|
[WOOFER]*2 |
[16CM]/[20CM]/[25CM]/[30CM]/[38CM OVER]/[NONE] |
||
|
(not connected) |
|||
|
[X ‘ OVER] |
|||
|
[TWEETER] |
[HPF FRQ] |
[1KHZ]/[1.6KHZ]/[2.5KHZ]/[4KHZ]/[5KHZ]/ |
|
|
[6.3KHZ]/[8KHZ]/[10KHZ]/[12.5KHZ] |
|||
|
[SLOPE] |
[–6DB]/[–12DB] |
||
|
[PHASE] |
[REVERSE] (180°)/[NORMAL] (0°) |
||
|
[GAIN] |
[–8] to [0] |
||
ENGLISH 25

Audio Settings
|
[MID RANGE] |
[HPF FRQ] |
[30HZ]/[40HZ]/[50HZ]/[60HZ]/[70HZ]/[80HZ]/[90HZ]/ |
|
|
[100HZ]/[120HZ]/[150HZ]/[180HZ]/[220HZ]/[250HZ]/ |
|||
|
[THROUGH] |
|||
|
[HPF SLOPE] |
[–6DB]/[–12DB] |
||
|
[LPF FRQ] |
[1KHZ]/[1.6KHZ]/[2.5KHZ]/[4KHZ]/[5KHZ]/[6.3KHZ]/ |
||
|
[8KHZ]/[10KHZ]/[12.5KHZ]/[THROUGH] |
|||
|
[LPF SLOPE] |
[–6DB]/[–12DB] |
||
|
[PHASE] |
[REVERSE] (180°)/[NORMAL] (0°) |
||
|
[GAIN] |
[–8] to [0] |
||
|
[WOOFER]*2 |
[LPF FRQ] |
[30HZ]/[40HZ]/[50HZ]/[60HZ]/[70HZ]/[80HZ]/[90HZ]/ |
|
|
[100HZ]/[120HZ]/[150HZ]/[180HZ]/[220HZ]/[250HZ]/ |
|||
|
[THROUGH] |
|||
|
[SLOPE] |
[–6DB]/[–12DB] |
||
|
[PHASE] |
[REVERSE] (180°)/[NORMAL] (0°) |
||
|
[GAIN] |
[–8] to [0] |
||
*1 For 


 : Selectable only when [SWITCH PREOUT] is set to [SUB-W]. (Page 6) *2 Selectable only when [SUBWOOFER SET] is set to [ON]. (Page 23)
Digital Time Alignment settings
Digital Time Alignment sets the delay time of the speaker output to create a more suitable environment for your vehicle.
•For more information, see “Determining the delay time automatically” on page 27.
[DTA SETTINGS]
|
[POSITION] |
Selects your listening position (reference point). |
|
|
[ALL]: Not compensating ; [FRONT RIGHT]: Front right seat ; |
||
|
[FRONT LEFT]: Front left seat ; [FRONT ALL]: Front seats |
||
|
• [FRONT ALL] is displayed only when [2-WAY X’OVER] is selected. |
||
|
(Page 7) |
||
|
[DISTANCE] |
[0CM] to [610CM]: Fine adjust the distance to compensate. |
|
|
(Before making an adjustment, select the speaker you want to adjust.) |
||
|
[GAIN] |
[–8DB] to [0DB]: Fine adjust the output volume of the selected |
|
|
speaker. |
||
|
(Before making an adjustment, select the speaker you want to adjust.) |
||
|
[DTA RESET] |
[YES]: Resets the settings ([DISTANCE] and [GAIN]) of the selected |
|
|
[POSITION] to default. ; [NO]: Cancels. |
||
|
[CAR SETTINGS] |
Identify your car type and rear speaker location in order to make the |
|
|
adjustment for [DTA SETTINGS]. |
||
|
[CAR TYPE] |
[COMPACT]/[FULL SIZE CAR]/[WAGON]/[MINIVAN]/[SUV]/ |
|
|
[MINIVAN(LONG)]: Selects the type of vehicle. ; |
||
|
[OFF]: Not compensating. |
||
|
[R-SP LOCATION] |
Selects the location of the rear speakers in your vehicle to calculate the |
|
|
furthest distance from the listening position selected (reference point). |
•[DOOR]/[REAR DECK]: Selectable only when [CAR TYPE] is selected as [OFF], [COMPACT], [FULL SIZE CAR], [WAGON] or [SUV].
•[2ND ROW]/[3RD ROW]: Selectable only when [CAR TYPE] is selected as [MINIVAN] or [MINIVAN(LONG)].
•Before making an adjustment for [DISTANCE] and [GAIN] of [DTA SETTINGS], select the speaker you want to adjust:
When 2-way crossover is selected:
[FRONT LEFT]/[FRONT RIGHT]/[REAR LEFT]/[REAR RIGHT]/[SUBWOOFER]
–You can only select [REAR LEFT], [REAR RIGHT] and [SUBWOOFER] if a setting other than [NONE] is selected for [REAR] and [SUBWOOFER] of [SPEAKER SIZE]. (Page 25)
26 ENGLISH

Audio Settings
When 3-way crossover is selected:
[TWEETER LEFT]/[TWEETER RIGHT]/[MID LEFT]/[MID RIGHT]/[WOOFER]
–You can only select [WOOFER] if a setting other than [NONE] is selected for
[WOOFER] of [SPEAKER SIZE]. (Page 25)
•[R-SP LOCATION] of [CAR SETTINGS] is selectable only if:
–2-way crossover is selected. (Page 7)
–A setting other than [NONE] is selected for [REAR] of [SPEAKER SIZE]. (Page 25)
Determining the delay time automatically
If you specify the distance from the currently set listening position to every speaker, the delay time will be automatically calculated.
1 Set [POSITION] and determine the listening position as the reference point (the reference point for [FRONT ALL] will be the center between the right and left in the front seats).
2 Measure the distances from the reference point to the speakers.
3 Calculate the distance between the furthest speaker (subwoofer on the illustration) and other speakers.
4 Sets the [DISTANCE] calculated in step 3 for individual speakers.
5 Adjusts [GAIN] for individual speakers.
Example: When [FRONT ALL] is selected as the listening position.
Display Settings
Zone identification for color settings and brightness settings
Zone identification for brightness setting
Set the dimmer
Press and hold DISP to turn on or off the dimmer.
•Once you press and hold this button, [DIMMER] setting (page 28) will be overwritten.
ENGLISH 27

Display Settings
Change the display settings
1 Press the volume knob to enter [FUNCTION].
2Turn the volume knob to select an item (see the following table), then press the knob.
3Repeat step 2 until the desired item is selected/activated or follow the instructions stated on the selected item.
|
4 Press and hold |
to exit. |
To return to the previous setting item, press 
 .
.
Default: [XX]
[DISPLAY]
|
[COLOR SELECT] |
(For |
/ |
) |
|||
|
Selects illumination colors for [ALL ZONE], [ZONE 1] and [ZONE 2] |
||||||
|
separately. |
||||||
|
1 |
Select a zone. (See the illustration on page 27.) |
|||||
|
2 |
Select a preset color for the selected zone. |
|||||
|
Default: [VARIABLE SCAN] |
||||||
|
To make your own color, select [CUSTOM R/G/B]. The color you have made |
||||||
|
will be stored in [CUSTOM R/G/B]. |
||||||
|
1 |
Press the volume knob to enter the detailed color adjustment. |
|||||
|
2 |
Press S/T to select the color ([R]/[G]/[B]) to adjust. |
|||||
|
3 |
Turn the volume knob to adjust the level ([0] to [9]), then press the knob. |
|||||
|
[DIMMER] |
Dims the illumination. |
|||||
|
[ON]: Dimmer is turned on. |
||||||
|
[OFF]: Dimmer is turned off. |
||||||
|
[DIMMER TIME]: Set the time to turn on dimmer and to turn off dimmer. |
||||||
|
1 |
Turn the volume knob to adjust the [ON] time, then press the knob. |
|||||
|
2 |
Turn the volume knob to adjust the [OFF] time, then press the knob. |
|||||
|
Default: [ON]: [18:00] ; [OFF]: [6:00] |
|
[BRIGHTNESS] |
Sets the brightness for day and night separately. |
|||||
|
1 [DAY]/[NIGHT]: Select day or night. |
||||||
|
2 Select a zone. (See the illustration on page 27.) |
||||||
|
3 [LVL00] to [LVL31]: Set the brightness level. |
||||||
|
[TEXT SCROLL] |
[ONCE]: Scrolls the display information once. ; [AUTO]: Repeats scrolling at |
|||||
|
5-second intervals. ; [OFF]: Cancels. |
||||||
|
[LEVEL METER] |
(For |
/ |
) |
|||
|
[ON]: Shows the level meter on the display window (as shown below). ; |
||||||
|
[OFF]: Cancels. |
||||||
|
Level meter |
||||||
|
[CLOCK] |
||||||
|
[CLOCK DISPLAY] |
[ON]: The clock time is shown on the display even when the unit is turned |
|||||
|
off. ; [OFF]: Cancels. |
||||||
|
[DEMO MODE] |
[ON]: Activates the display demonstration automatically if no operation is |
|||||
|
done for about 15 seconds. ; [OFF]: Deactivates. |
||||||
Preset color:
[INITIAL COLOR]/[VARIABLE SCAN]/[CUSTOM R/G/B]/[RED1]/[RED2]/[RED3]/[PURPLE1]/ [PURPLE2]/[PURPLE3]/[PURPLE4]/[BLUE1]/[BLUE2]/[BLUE3]/[SKYBLUE1]/[SKYBLUE2]/ [LIGHTBLUE]/[AQUA1]/[AQUA2]/[GREEN1]/[GREEN2]/[GREEN3]/[YELLOWGREEN1]/ [YELLOWGREEN2]/[YELLOW]/[ORANGE1]/[ORANGE2]/[ORANGERED]
28 ENGLISH

Installation/Connection
This section is for the professional installer.
For safety’s sake, leave wiring and mounting to professionals. Consult the car audio dealer.
 WARNING
•The unit can only be used with a 12 V DC power supply, negative ground.
•Disconnect the battery’s negative terminal before wiring and mounting.
•Do not connect Battery wire (yellow) and Ignition wire (red) to the car chassis or Ground wire (black) to prevent a short circuit.
•To prevent short circuit:
–Insulate unconnected wires with vinyl tape.
–Be sure to ground this unit to the car’s chassis again after installation.
–Secure the wires with cable clamps and wrap vinyl tape around the wires that comes into contact with metal parts to protect the wires.
 CAUTION
•Install this unit in the console of your vehicle. Do not touch the metal parts of this unit during and shortly after use of the unit. Metal parts such as the heat sink and enclosure become hot.
•Do not connect the wires of speakers to the car chassis or Ground wire (black), or connect them in parallel.
•Mount the unit at an angle of less than 30°.
•If your vehicle wiring harness does not have the ignition terminal, connect Ignition wire (red) to the terminal on the vehicle’s fuse box which provides 12 V DC power supply and is turned on and off by the ignition key.
•Keep all cables away from heat dissipate metal parts.
•After the unit is installed, check whether the brake lamps, blinkers, wipers, etc. on the car are working properly.
•If the fuse blows, first make sure the wires are not touching car’s chassis, then replace the old fuse with one that has the same rating.
Part list for installation
|
(A) Faceplate (×1) |
(B) Trim plate (×1) |
|
(C) Mounting sleeve (×1) |
(D) Wiring harness (×1) |
(E) Extraction key (×2)
Basic procedure
1Remove the key from the ignition switch, then disconnect the  terminal of the car battery.
2Connect the wires properly.
See “Wiring connection” on page 31.
3Install the unit to your car.
See “Installing the unit (in-dash mounting)” on page 30.
4 Connect the  terminal of the car battery.
5 Press BSRC to turn on the power.
6 Detach the faceplate and reset the unit within 5 seconds. (Page 4)
ENGLISH 29

Installation/Connection
|
Installing the unit (in-dash mounting) |
Removing the unit |
|||
|
1 |
Detach the faceplate. |
|||
|
2 |
Remove the trim plate. |
|||
|
3 |
Insert the extraction keys deeply into the slots on each side, then |
|||
|
follow the arrows as shown on the illustration. |
||||
|
Do the required wiring. |
||
|
(Page 31) |
||
|
Hook on the top side |
||
|
Orientate the trim |
Dashboard of your car |
|
|
plate as illustrated |
||
|
before fitting. |
Bend the appropriate tabs to hold the sleeve firmly in place.
30 ENGLISH

Installation/Connection
Wiring connection
If your car does not have an ISO terminal:
We recommend installing the unit with a commercially available custom wiring harness specific for your car and leave this job to professionals for your safety. Consult your car audio dealer.
Connecting the ISO connectors on some VW/Audi or Opel (Vauxhall) automobiles
You may need to modify the wiring of the supplied wiring harness as illustrated below.
|
A7 (Red) |
Ignition wire (Red) |
||
|
Vehicle |
Unit |
||
|
A4 (Yellow) |
Battery wire (Yellow) |
||
|
Default wiring |
|||
|
Pin |
Color and function (for ISO connectors) |
||
|
A4 |
Yellow |
: |
Battery |
|
A5 |
Blue/White*1 |
: |
Power control |
|
A7 |
Red |
: |
Ignition (ACC) |
|
A8 |
Black |
: |
Earth (ground) connection |
|
B1 |
Purple ] |
: |
Rear speaker (right) |
|
B2 |
Purple/black [ |
For 3-way crossover: Tweeter (right) |
|
|
B3 |
Gray ] |
: |
Front speaker (right) |
|
B4 |
Gray/black [ |
For 3-way crossover: Mid range speaker (right) |
|
|
B5 |
White ] |
: |
Front speaker (left) |
|
B6 |
White/black [ |
For 3-way crossover: Mid range speaker (left) |
|
|
B7 |
Green ] |
: |
Rear speaker (left) |
|
B8 |
Green/black [ |
For 3-way crossover: Tweeter (left) |
 Antenna terminal Fuse (10 A)


Yellow (Battery wire)
Red (Ignition wire)
Red (A7)
Yellow (A4)
If no connections are made, do not let the wire come out from the tab.
Light blue/yellow
(Steering remote control wire)
Blue/White*2
(Power control wire/ Antenna control wire)
Brown
(Mute control wire)
STEERING WHEEL REMOTE INPUT
REMOTE CONT
ANT CONT
P. CONT
MUTE
To the steering wheel remote control adapter
To the power control terminal when using the optional power amplifier or to the antenna control terminal in the vehicle
To connect the Kenwood navigation system, refer your navigation manual
NOTE: Total output for Blue/White wire (*1) + (*2) is 12 V  350 mA
ISO connectors
ENGLISH 31

Installation/Connection
Connect external components
No Part
1Microphone input jack (Page 15)
2Output terminals (See the following “Connect external amplifiers via output terminals”.)
Connect external amplifiers via output terminals
When connecting an external amplifier to the output terminals of this unit, securely connect the amplifier ground wire to the car chassis to prevent damage to the unit.
|
Model |
Output terminals |
2-way crossover |
3-way crossover |
|
/ |
REAR: |
Rear output |
Tweeter output |
|
FRONT: |
Front output |
Mid Range output |
|
|
SW: |
Subwoofer output |
Woofer output |
|
|
REAR/SW: |
Rear/subwoofer output |
Woofer output |
References
Maintenance
Cleaning the unit
Wipe off dirt on the faceplate with a dry silicone or soft cloth.
Cleaning the connector
Detach the faceplate and clean the connector gently
with a cotton swab. Be careful not to damage the
connector.
Connector (on the reverse side of the faceplate)
More information
For: – Latest firmware updates and latest compatible item list
–KENWOOD original application
–Any other latest information Visit <www.kenwood.com/cs/ce/>.
Playable files
•For USB mass storage class device:
MP3 (.mp3), WMA (.wma), AAC (.aac), AAC (.m4a), WAV (.wav), FLAC (.flac)
•Playable USB device file system: FAT12, FAT16, FAT32
Even when audio files comply with the standards listed above, playback may be impossible depending on the types or conditions of media or devices.
•For detailed information and notes about the playable audio files, visit <www.kenwood.com/cs/ce/audiofile/>.
About USB devices
•You cannot connect a USB device via a USB hub.
•Connecting a cable whose total length is longer than 5 m may result in abnormal playback.
•This unit cannot recognize a USB device whose rating is other than 5 V and exceeds 1.5 A.
32 ENGLISH
![]()
References
About iPod/iPhone
•Made for
–iPod touch (6th generation)
–iPhone 5S, 6, 6 Plus, 6S, 6S Plus, SE, 7, 7 Plus, 8, 8 Plus, X, XS, XS MAX, XR (iOS 12.1 or later)
•It is not possible to browse video files on the “Videos” menu in [MODE OFF].
•The song order displayed on the selection menu of this unit may differ from that of the iPod/ iPhone.
•You cannot operate iPod if “KENWOOD” or “ ” is displayed on iPod.
•Depending on the version of the operating system of the iPod/iPhone, some functions may not operate on this unit.
About Spotify
•Spotify application supports:
–iPhone 5S, 6, 6 Plus, 6S, 6S Plus, SE, 7, 7 Plus 8, 8 Plus, X, XS, XS MAX, XR (iOS 12.1 or later)
–iPod touch (6th generation)
–Android OS 4.0.3 or above
•Spotify is a third party service, therefore the specifications are subject to change without prior notice. Accordingly, compatibility may be impaired or some or all of the services may become unavailable.
•Some functions of Spotify cannot be operated from this unit.
•For issues using the application, please contact Spotify at <www.spotify.com>.
About AMAZON ALEXA
•Alexa is a third party service, therefore the specifications are subject to change without prior notice. Accordingly, compatibility may be impaired or some or all of the services may become unavailable.
Change the display information
(For 


 /
/ )
)
Each time you press DISP, the display information changes.
•If the information is unavailable or not recorded, “NO TEXT”, “NO INFO”, or other information (eg. station name) appears or display will be blank.
|
Main display |
|||||||||||||
|
Clock time |
Level meter (Page 28) |
||||||||||||
|
Source name |
Display information: Main display |
||||||||||||
|
STANDBY |
Source name |
Date |
back to the beginning |
||||||||||
|
RADIO |
Frequency |
Date back to the beginning |
|||||||||||
|
For FM Radio Data System stations only: |
|||||||||||||
|
Station name/Program type |
Radio text |
Radio text+ Radio text+ song |
|||||||||||
|
title/Radio text+ artist |
Frequency |
Date |
back to the beginning |
||||||||||
|
USB |
For MP3/WMA/AAC/WAV/FLAC files: |
||||||||||||
|
Song title/Artist |
Album title/Artist |
Folder name |
File name |
Playing |
|||||||||
|
time Date |
back to the beginning |
||||||||||||
|
iPod USB / iPod BT |
When [MODE OFF] is selected (page 10): |
||||||||||||
|
Song title/Artist |
Album title/Artist |
Playing time |
Date |
back to the |
|||||||||
|
beginning |
|||||||||||||
|
SPOTIFY/ |
Context title |
Song title |
Artist |
Album title Playing time |
Date |
||||||||
|
SPOTIFY BT |
back to the beginning |
||||||||||||
|
BT AUDIO/ |
Song title/Artist |
Album title/Artist |
Playing time |
Date |
back to the |
||||||||
|
ALEXA |
beginning |
||||||||||||
|
AUX |
Source name |
Date |
back to the beginning |
||||||||||
ENGLISH 33

References
(For  )
)
Each time you press DISP, the display information changes.
•If the information is unavailable or not recorded, “NO TEXT”, “NO INFO”, or other information (eg. station name) appears or display will be blank.
|
Main display |
|||||||||||
|
Source name |
Display information: Main display |
||||||||||
|
STANDBY |
Source name/Clock |
Clock |
back to the beginning |
||||||||
|
RADIO |
Source name/Clock |
Frequency Clock |
back to the beginning |
||||||||
|
For FM Radio Data System stations only: |
|||||||||||
|
Source name/Clock |
Station name/Program type |
Radio text |
|||||||||
|
Radio text+ |
Radio text+ song title/Radio text+ artist Frequency |
||||||||||
|
Clock |
back to the beginning |
||||||||||
|
USB |
For MP3/WMA/AAC/WAV/FLAC files: |
||||||||||
|
Source name/Clock |
Song title/Artist |
Album title/Artist |
Folder name |
||||||||
|
File name |
Playing time |
Clock |
back to the beginning |
||||||||
|
iPod USB / iPod BT |
When [MODE OFF] is selected (page 10): |
||||||||||
|
Source name/Clock |
Song title/Artist |
Album title/Artist |
Playing time |
||||||||
|
Clock |
back to the beginning |
||||||||||
|
SPOTIFY/ |
Source name/Clock |
Context title |
Song title |
Artist |
Album title |
||||||
|
SPOTIFY BT |
Playing time |
Clock |
back to the beginning |
||||||||
|
BT AUDIO/ |
Source name/Clock |
Song title/Artist |
Album title/Artist |
Playing time |
|||||||
|
ALEXA |
Clock |
back to the beginning |
|||||||||
|
AUX |
Source name/Clock |
Clock |
back to the beginning |
||||||||
Troubleshooting
|
Symptom |
Remedy |
||
|
Sound cannot be heard. |
• Adjust the volume to the optimum level. |
||
|
• Check the cords and connections. |
|||
|
“MISWIRING CHECK WIRING |
Turn the power off, then check to be sure the terminals of |
||
|
THEN PWR ON” appears. |
the speaker wires are insulated properly. Turn the power |
||
|
on again. |
|||
|
“PROTECTING SEND SERVICE” |
Send the unit to the nearest service center. |
||
|
appears. |
|||
|
General |
Source cannot be selected. |
Check the [SOURCE SELECT] setting. (Page 6) |
|
|
• Sound cannot be heard. |
Clean the connectors. (Page 32) |
||
|
• The unit does not turn on. |
|||
|
• Information shown on the |
|||
|
display is incorrect. |
|||
|
The unit does not work at all. |
Reset the unit. (Page 4) |
||
|
Correct characters are not |
• This unit can only display uppercase letters, numbers, |
||
|
displayed. |
and a limited number of symbols. |
||
|
• Depending on the display language you have selected |
|||
|
(page 7), some characters may not be displayed |
|||
|
correctly. |
|||
|
Radio |
• Radio reception is poor. |
Connect the antenna firmly. |
|
|
• Static noise while listening |
|||
|
to the radio. |
|||
|
Playback order is not as |
The playback order is determined by the order in which |
||
|
USB/iPod |
intended. |
file name were recorded (USB). |
|
|
Elapsed playing time is not |
This depends on the recording process earlier (USB). |
||
|
correct. |
|||
|
“READING” keeps flashing. |
• Do not use too many hierarchical levels and folders. |
||
|
• Reattach the device (USB/iPod/iPhone). |
|||
34 ENGLISH

Troubleshooting
|
Symptom |
Remedy |
|||
|
“UNSUPPORTED DEVICE” |
• Check whether the connected USB device is compatible |
|||
|
appears. |
with this unit and ensure the file systems are in |
|||
|
supported formats. (Page 32) |
||||
|
• Reattach the USB device. |
||||
|
“UNRESPONSIVE DEVICE” |
Make sure the USB device is not malfunction and reattach |
|||
|
appears. |
the USB device. |
|||
|
“USB HUB IS NOT |
This unit cannot support a USB device connected via a |
|||
|
SUPPORTED” appears. |
USB hub. |
|||
|
• The source does not |
The USB port is drawing more power than the design |
|||
|
change to “USB” when |
limit. Turn the power off and unplug the USB device. |
|||
|
you connect a USB device |
Then, turn on the power and reattach the USB device. |
|||
|
while listening to another |
If this does not solve the problem, turn the power off and |
|||
|
USB/iPod |
source. |
on (or reset the unit) before replacing with another USB |
||
|
• “USB ERROR” appears. |
device. |
|||
|
The iPod/iPhone does not |
• Check the connection between this unit and iPod/iPhone. |
|||
|
turn on or does not work. |
• Disconnect and reset the iPod/iPhone using hard reset. |
|||
|
“LOADING” appears when |
This unit is still preparing the iPod/iPhone music list. It |
|||
|
you enter search mode by |
may take some time to load, try again later. |
|||
|
pressing |
. |
|||
|
“NA FILE” |
Make sure the media (USB) contain supported audio files. |
|||
|
(Page 32) |
||||
|
“COPY PRO” |
A copy-protected file is played (USB). |
|||
|
“NO DEVICE” |
Connect a device (USB/iPod/iPhone), and change the |
|||
|
source to USB or iPod USB again. |
||||
|
“NO MUSIC” |
Connect a device (USB/iPod/iPhone) that contains |
|||
|
playable audio files. |
||||
|
Symptom |
Remedy |
||
|
USB/iPod |
“iPod ERROR” |
• |
Reconnect the iPod. |
|
“MEMORY FULL” |
• |
You have reached the maximum storage limit of your |
|
|
Reset the iPod. |
|||
|
iPod/iPhone. |
|||
|
“DISCONNECTED” |
USB is disconnected from the head unit. Please make |
||
|
sure the device is connected properly through USB. |
|||
|
“CONNECTING” |
• |
Connected via USB input terminal: The device is |
|
|
Spotify |
connecting to the head unit. Please wait. |
||
|
Please check Bluetooth connection and make sure both |
|||
|
• Connected via Bluetooth: The Bluetooth is disconnected. |
|||
|
the device and unit are paired and connected. |
|||
|
“CHECK APP” |
The Spotify application is not connected properly or user |
||
|
is not login. End the Spotify application and restart. Then, |
|||
|
log in to your Spotify account. |
|||
|
No Bluetooth device is |
• |
Search from the Bluetooth device again. |
|
|
detected. |
• |
Reset the unit. (Page 4) |
|
|
Bluetooth pairing cannot |
• |
Make sure you have entered the same PIN code to both |
|
|
be made. |
the unit and Bluetooth device. |
||
|
Bluetooth® |
• Delete pairing information from both the unit and |
||
|
the Bluetooth device, then perform pairing again. |
|||
|
(Page 16) |
|||
|
Echo or noise is heard during |
• |
Adjust the microphone unit’s position. (Page 15) |
|
|
a phone conversation. |
• |
Check the [ECHO CANCEL] setting. (Page 17) |
|
|
Phone sound quality is poor. |
• |
Reduce the distance between the unit and the Bluetooth |
|
|
device. |
|||
|
• Move the car to a place where you can get a better signal |
|||
|
reception. |
ENGLISH 35

Troubleshooting
|
Symptom |
Remedy |
||
|
Voice calling method is not |
• Use voice calling method in a more quiet environment. |
||
|
successful. |
• Reduce the distance from the microphone when you |
||
|
speak the name. |
|||
|
• Make sure the same voice as the registered voice tag is |
|||
|
used. |
|||
|
Sound is being interrupted or |
• Reduce the distance between the unit and the Bluetooth |
||
|
skipped during playback of a |
audio player. |
||
|
Bluetooth audio player. |
• Turn off, then turn on the unit and try to connect again. |
||
|
• Other Bluetooth devices might be trying to connect to the |
|||
|
unit. |
|||
|
The connected Bluetooth |
• Check whether the connected Bluetooth audio player |
||
|
audio player cannot be |
supports Audio/Video Remote Control Profile (AVRCP). |
||
|
controlled. |
(Refer to the instructions of your audio player.) |
||
|
Bluetooth® |
• Disconnect and connect the Bluetooth player again. |
||
|
“NOT SUPPORT” |
The connected phone does not support Voice Recognition |
||
|
feature or phonebook transfer. |
|||
|
“NO ENTRY”/“NO PAIR” |
There is no registered device connected/found via |
||
|
Bluetooth. |
|||
|
“ERROR” |
Try the operation again. If “ERROR” appears again, check |
||
|
if the device supports the function you have tried. |
|||
|
“NO INFO”/“NO DATA” |
Bluetooth device cannot get the contact information. |
||
|
“HF ERROR XX”/ |
Reset the unit and try the operation again. If this does not |
||
|
“BT ERROR” |
solve the problem, consult your nearest service center. |
||
|
“SWITCHING NG” |
The connected phones might not support phone |
||
|
switching feature. |
|||
|
The Bluetooth connection |
Delete the unused registered Bluetooth device from the |
||
|
between the Bluetooth |
unit. (Page 19) |
||
|
device and the unit is |
|||
|
unstable. |
|||
Symptom
|
No response from Alexa after |
|
|
the voice input. |
|
|
Wrong response from Alexa. |
|
|
ALEXA |
“DISCONNECTED” |
|
AMAZON |
reconnect to Alexa mobile |
|
Not able to connect or |
|
|
application. |
|
Remedy
Amazon cloud was unable to analyze the voice input.
Alexa misunderstood what was said or did not catch the entire request or sentence spoken. Please try again. (Page 21)
Be sure to connect your smartphone to the unit via Bluetooth. (Page 16)
•Be sure the audio device is connected via Bluetooth. Select the audio device from [AUDIO SELECT] in [BT MODE]. (Page 19)
•Perform the one-time setup process again. See “Setup for the first time” on page 21.
•Turn off, then turn on the unit and try to connect again.
•For iOS device, make sure ALEXA source or iPod BT source is selected.
36 ENGLISH

Specifications
|
FM |
Frequency Range |
87.5 MHz — 108.0 MHz (50 kHz step) |
|||
|
Usable Sensitivity |
0.71 μV/75 Ω |
||||
|
(S/N = 30 dB) |
|||||
|
Quieting Sensitivity |
2.0 μV/75 Ω |
||||
|
(DIN S/N = 46 dB) |
|||||
|
Tuner |
Frequency Response (±3 dB) |
30 Hz — 15 kHz |
|||
|
Signal-to-Noise Ratio (MONO) |
64 dB |
||||
|
Stereo Separation (1 kHz) |
40 dB |
||||
|
MW |
Frequency Range |
531 kHz — 1 611 kHz (9 kHz step) |
|||
|
(AM) |
|||||
|
Usable Sensitivity (S/N = 20 dB) |
28.2 μV |
||||
|
LW |
Frequency Range |
153 kHz — 279 kHz (9 kHz step) |
|||
|
(AM) |
|||||
|
Usable Sensitivity (S/N = 20 dB) |
50.0 μV |
||||
|
USB Standard |
USB 1.1, USB 2.0 (High speed) |
||||
|
File System |
FAT12/16/32 |
||||
|
Maximum Supply Current |
DC 5 V |
1.5 A |
|||
|
Frequency Response (±1 dB) |
20 Hz — 20 kHz |
||||
|
Signal-to-Noise Ratio |
98 dB (1 kHz) |
||||
|
USB |
Dynamic Range |
93 dB |
|||
|
Channel Separation |
92 dB |
||||
|
MP3 Decode |
Compliant with MPEG-1/2 Audio Layer-3 |
||||
|
WMA Decode |
Compliant with Windows Media Audio |
||||
|
AAC Decode |
AAC-LC “.aac”, “.m4a” files |
||||
|
WAV Decode |
Linear-PCM |
||||
|
FLAC Decode |
FLAC file (Up to 96 kHz/24 bit) |
||||
|
Auxiliary |
Frequency Response (±3 dB) |
20 Hz — 20 kHz |
|
|
Input Maximum Voltage |
1 000 mV |
||
|
Input Impedance |
30 kΩ |
||
|
Version |
Bluetooth 4.2 |
||
|
Frequency Range |
2.402 GHz — 2.480 GHz |
||
|
Bluetooth |
RF Output Power (E.I.R.P.) |
+4 dBm (MAX), Power Class 2 |
|
|
Profile |
HFP 1.7.1 (Hands-Free Profile) |
||
|
Maximum Communication Range |
Line of sight approx. 10 m |
||
|
A2DP (Advanced Audio Distribution Profile) |
|||
|
AVRCP 1.6.1 (Audio/Video Remote Control Profile) |
|||
|
PBAP (Phonebook Access Profile) |
|||
|
SPP (Serial Port Profile) |
|||
|
Maximum Output Power |
50 W × 4 |
||
|
Audio |
|||
|
(at less than 1 % THD) |
22 W × 4 |
||
|
Full Bandwidth Power |
|||
|
Speaker Impedance |
4 Ω — 8 Ω |
||
ENGLISH 37

Specifications
Tone Action
Audio
Preout Level/Load
Preout Impedance
Band 1: 62.5 Hz ±9 dB
Band 2: 100 Hz ±9 dB
Band 3: 160 Hz ±9 dB
Band 4: 250 Hz ±9 dB
Band 5: 400 Hz ±9 dB
Band 6: 630 Hz ±9 dB
Band 7: 1 kHz ±9 dB
Band 8: 1.6 kHz ±9 dB
Band 9: 2.5 kHz ±9 dB
Band 10: 4 kHz ±9 dB
Band 11: 6.3 kHz ±9 dB
Band 12: 10 kHz ±9 dB
Band 13: 16 kHz ±9 dB


 : 5 000 mV/10 kΩ


 /
/ : 2 500 mV/10 kΩ
≤ 600 Ω
|
General |
Operating Voltage |
|
|
Installation Size (W × H × D) |
||
|
Net Weight (includes Trimplate, |
||
|
Mounting Sleeve) |
||
Subject to change without notice.
12 V DC car battery
182 mm × 53 mm × 100 mm
0.6 kg
38 ENGLISH

Table des matieres
|
Avant l’utilisation ………………………………………………………………………… |
3 |
|
Fonctionnement de base …………………………………………………………….. |
4 |
|
Prise en main ……………………………………………………………………………….. |
5 |
|
1 Sélectionne la langue d’affichage et annule la démonstration |
|
|
2 Réglez l’horloge et la date |
|
|
3 Réglage des autres réglages optionnels |
|
|
Radio……………………………………………………………………………………………. |
8 |
|
USB/iPod ……………………………………………………………………………………… |
9 |
|
Spotify ……………………………………………………………………………………….. |
12 |
|
AUX…………………………………………………………………………………………….. |
13 |
|
Utilisation d’autres applications………………………………………………… |
14 |
|
Application KENWOOD Remote |
|
|
Tuneln Radio/Tuneln Radio Pro |
|
|
Bluetooth® …………………………………………………………………………………. |
15 |
|
Bluetooth – Connexion |
|
|
Bluetooth – Téléphone portable |
|
|
Bluetooth – Audio |
|
|
AMAZON ALEXA…………………………………………………………………………. |
21 |
|
Réglages audio…………………………………………………………………………… |
23 |
|
Réglages d’affichage………………………………………………………………….. |
27 |
|
Installation/Connexion………………………………………………………………. |
29 |
|
Références………………………………………………………………………………….. |
32 |
|
Entretien |
|
|
Plus d’informations |
|
|
Changez l’information sur l’affichage |
|
|
Guide de dépannage …………………………………………………………………. |
34 |
|
Spécifications …………………………………………………………………………….. |
37 |
Comment lire ce manuel
•Les affichages et les façades montrés dans ce mode d’emploi sont des exemples utilisés pour offrir une explication claire des opérations. Pour cette raison, ils peuvent différer des affichages et des façades réels.
•Les opérations sont expliquées principalement en utilisant les touches de la façade du 


 .
.
•Les indications en anglais sont utilisées dans un but explicatif. Vous pouvez choisir la langue d’affichage à partir du menu [FUNCTION]. (Page 7)
•[XX] indique les éléments choisis.
•(Page XX) indique que des références sont disponibles aux page citées.
Ce symbole sur le produit indique que ce mode d’emploi contient d’importantes instructions d’utilisation et d’entretien. Assurez-vous de lire attentivement les instructions de ce mode d’emploi.
2FRANÇAIS

Avant l’utilisation
IMPORTANTES
•Pour utiliser correctement l’appareil, veuillez ce manuel complément avant de l’utiliser. Il est particulièrement important que vous lisiez et acceptiez les avertissements et les précautions de ce manuel.
•Veuillez garder ce manuel dans un endroit sûr et accessible pour une utilisation future.
 MISE EN GARDE
•N’utilisez aucune fonction qui risque de vous distraire de la conduite sure de votre véhicule.
•Ne pas ingérer la pile. Risque de brûlures chimiques.
La télécommande fournie avec ce produit contient une pile bouton.
Une ingestion de la pile bouton risque de provoquer de graves brûlures internes en seulement 2 heures ; brûlures qui risquent d’entraîner le décès.
Conservez les piles neuves et usagées hors de portée des enfants.
Si le compartiment des piles ferme mal, n’utilisez plus le produit et conservez-le hors de portée des enfants.
Si vous pensez que des piles ont été ingérées ou insérées dans une quelconque partie du corps, contactez immédiatement un médecin.
 AVERTISSEMENT
Réglage du volume:
•Ajustez le volume de façon à pouvoir entendre les sons extérieurs à la voiture afin d’éviter tout risque d’accident.
•Réduisez le volume avant de reproduire des sources numériques afin d’éviter d’endommager les enceintes par la soudaine augmentation du niveau de sortie.
Généralités:
•Éviter d’utiliser le périphérique extérieur s’il peut gêner une conduite en toute sécurité.
•Assurez-vous que toutes les données importantes ont été sauvegardées. Nous ne pouvons pas être tenu responsable pour toute perte des données enregistrées.
•Veuillez faire en sorte de ne jamais mettre ou laisser d’objets métalliques (tels que des pièces ou des outils) dans l’appareil, afin d’éviter tout risque de courtcircuit.
•La classe USB est indiquée sur l’appareil principal. Pour le voir, détachez la façade. (Page 4)
•En fonction du type de voiture, l’antenne s’étendra automatiquement quand vous mettrez l’appareil sous tension si le câble de commande d’antenne est connecté (page 31). Mettez l’appareil hors tension ou changez la source sur STANDBY quand vous vous garez dans un parking avec un plafond bas.
Télécommande (RC-406):
•Ne laissez pas la télécommande dans des endroits exposés à la chaleur, comme sur le tableau de bord par exemple.
•Risque d’incendie ou d’explosion si la pile est remplacée par un type incorrect. Assurez-vous de la remplacer uniquement par une pile de même type.
•Risque d’incendie, d’explosion ou de fuite de liquide ou de gaz inflammable si la pile est laissée dans un environnement ambiant à des températures extrêmement élevées et/ou soumise à une pression d’air extrêmement faible. Le boîtier de la pile ou les piles ne doivent pas être exposés à des chaleurs excessives telles que les rayons du soleil, du feu, etc.
•Risque d’incendie, d’explosion ou de fuite de liquide ou de gaz inflammable si la pile est jetée dans un feu ou dans un four chaud, si elle est rechargée, courtcircuitée, écrasée mécaniquement ou coupée.
•Si le liquide qui fuit entre en contact avec vos yeux ou vos vêtements, rincez-les immédiatement à l’eau et consultez un médecin.
FRANÇAIS 3

|
Fonctionnement de base |
|
|
Façade |
Attachez |
|
Fenêtre d’affichage* |
|
|
S’allume quand la |
|
|
connexion Bluetooth est |
|
|
établie. (Page 16) |
|
|
Détachez |
|
Comment réinitialiser |
||
|
Réinitialisez l’appareil en moins de |
||
|
5 secondes après avoir détaché la façade. |
||
|
Touche de |
Bouton de volume |
|
|
détachement |
||
|
* Uniquement à des fins d’illustration. |
||
|
Pour |
Sur la façade |
|
|
Mettez l’appareil sous tension |
Appuyez sur BSRC. |
|
|
• Maintenez la touche enfoncée pour mettre l’appareil hors tension. |
||
|
Ajustez le volume |
Tournez le bouton de volume. |
|
|
Sélectionner la source |
• Appuyez répétitivement sur BSRC. |
|
|
• Appuyez sur BSRC, puis tournez le bouton de volume avant 2 secondes. |
||
|
Changez l’information sur l’affichage |
Appuyez répétitivement sur DISP. (Page 33, 34) |
4FRANÇAIS
 Loading…