
Страницы и текст этой инструкции
 Инструкция автомагнитолы JVC KD-BT11
 Информация отображена на картинке
 Информация отображена на картинке
 Информация отображена на картинке
 Информация отображена на картинке
Как использовать наш сайт инструкций OnlineManuals.ru
Наша цель состоит в том, чтобы предоставить вам быстрый доступ к содержанию инструкции для автомагнитолы JVC KD-BT11.
С помощью онлайн просмотра, Вы можете быстро просмотреть содержимое инструкции и найти решение проблемы с автомагнитолы JVC KD-BT11.
Для Вашего удобства
Если листать руководство пользователя автомагнитолы JVC KD-BT11 прямо на сайте, не очень удобно для Вас, есть два возможных решения:
• Просмотр в полноэкранном режиме — легко просмотреть руководство пользователя (без загрузки его на свой компьютер), Вы можете использовать режим полноэкранного просмотра.
Для просмотра инструкции пользователя автомагнитолы JVC KD-BT11 на полном экране, используйте кнопку «Открыть в Pdf-viewer».
• Загрузка на компьютер — Вы можете также скачать Инструкция автомагнитолы JVC KD-BT11 на свой компьютер и сохранить его в файлах.
Многие люди предпочитают читать документы не на экране, а в печатной версии.
Возможность печати руководства пользователя также была предусмотрена на нашем сайте,
и вы можете использовать ее, нажав на иконку «печать» в Pdf-viewer.
Нет необходимости печатать все руководство автомагнитолы JVC KD-BT11, можно выбрать только нужные страницы инструкции.
Перейти к контенту
Автомагнитолы JVC

- Размер инструкции: 3.03 Мб
- Формат файла: pdf
Если вы потеряли инструкцию от автомагнитолы JVC KD-BT11, можете скачать файл для просмотра на компьютере или печати.
Инструкция для автомагнитолы JVC KD-BT11 на русском языке. В руководстве описаны возможности и полезные функции, а также правила эксплуатации. Перед использованием внимательно ознакомьтесь с инструкцией.
Чтобы не читать всю инструкцию вы можете выполнить поиск по содержимому внутри инструкции и быстро найти необходимую информацию. Рекомендации по использованию помогут увеличить срок службы автомагнитолы JVC KD-BT11. Если у вас появилась проблема, то найдите раздел с описанием неисправностей и способами их решения. В нем указаны типичные поломки и способы их решения.

CD RECEIVER
RECEPTOR CON CD
RÉCEPTEUR CD
FRANÇAIS ESPAÑOL ENGLISH
For canceling the display demonstration, see page 4.
Para cancelar la demostración en pantalla, consulte la página 4.
Pour annuler la démonstration des affichages, référez-vous à la page 4.
For installation and connections, refer to the separate manual. Para la instalación y las conexiones, refiérase al manual separado.
Pour l’installation et les raccordements, se référer au manuel séparé.
INSTRUCTIONS
MANUAL DE INSTRUCCIONES
MANUEL D’INSTRUCTIONS
For customer Use:
Enter below the Model No. and Serial No. which are located on the top or
bottom of the cabinet. Retain this information for future reference.
Model No.
Serial No.
GET0506-001A
[J]

ENGLISH
Thank you for purchasing a JVC product.
Please read all instructions carefully before operation, to ensure your complete understanding and to obtain the best possible performance from the unit.
INFORMATION (For U.S.A.)
This equipment has been tested and found to comply with the limits for a Class B digital device, pursuant to Part 15 of the FCC Rules. These limits are designed to provide reasonable protection against harmful interference in a residential installation. This equipment generates, uses, and can radiate radio frequency energy and, if not
installed and used in accordance with the instructions, may cause harmful interference to radio communications. However, there is no guarantee that interference will not occur in a particular installation. If this equipment does cause harmful interference to radio or television reception, which can be determined by turning the equipment off and on, the user is encouraged to try to correct the interference by one or more of the following measures:
–Reorient or relocate the receiving antenna.
–Increase the separation between the equipment and receiver.
–Connect the equipment into an outlet on a circuit different from that to which the receiver is connected.
–Consult the dealer or an experienced radio/TV technician for help.
Caution:
Changes or modifications not approved by JVC could void the user’s authority to operate the equipment.
IMPORTANT FOR LASER PRODUCTS
1.CLASS 1 LASER PRODUCT
2.CAUTION: Do not open the top cover. There are no user serviceable parts inside the unit; leave all servicing to qualified service personnel.
|
3. |
CAUTION: (For U.S.A.) |
Visible and/or invisible class II laser radiation when open. Do not stare into beam. |
|
(For Canada) |
Visible and/or invisible class 1M laser radiation when open. Do not view directly with |
|
|
optical instruments. |
||
|
4. |
REPRODUCTION OF LABEL: CAUTION LABEL, PLACED OUTSIDE THE UNIT. |
[European Union only]
Warning:
If you need to operate the unit while driving, be sure to look around carefully or you may be involved in a traffic accident.
For safety…
•Do not raise the volume level too much, as this will block outside sounds, making driving dangerous.
•Stop the car before performing any complicated operations.
Temperature inside the car…
If you have parked the car for a long time in hot or cold weather, wait until the temperature in the car becomes normal before operating the unit.
2

 How to reset your unit
•Your preset adjustments will also be erased (except the registered Bluetooth device, see pages 10 and 11).
 How to forcibly eject a disc
•Be careful not to drop the disc when it ejects.
•If this does not work, reset your unit.
 How to use the M MODE button
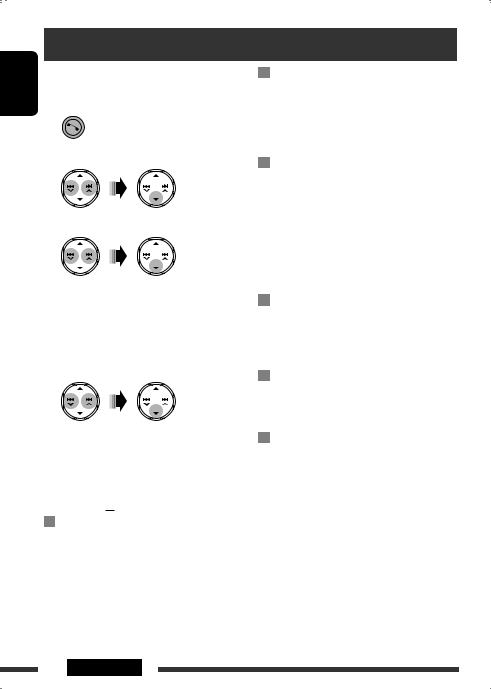
If you press M MODE, the unit goes into functions mode, then the number buttons and 5/∞buttons will work as different function buttons.
Ex.: When number button 2 works as MO (monaural) button.
To use these buttons for their original functions, press M MODE again.
•Waiting for about 5 seconds without pressing any of these buttons will automatically cancels the functions mode.
Caution on volume setting:
Discs produce very little noise compared with other sources. Lower the volume before playing a disc to avoid damaging the speakers by the sudden increase of the output level.
|
CONTENTS |
|
|
INTRODUCTIONS |
|
|
Preparation………………………………………….. |
4 |
|
OPERATIONS |
|
|
Basic operations……………………………………. |
5 |
|
• Using the control panel…………………………. |
5 |
|
• Using the remote controller (RM-RK50)…… |
6 |
|
Listening to the radio…………………………….. |
8 |
|
Disc operations……………………………………… |
9 |
|
Using the Bluetooth® devices………………….. |
10 |
|
• Using the Bluetooth cellular phone ………… |
12 |
|
• Using the Bluetooth audio player …………… |
14 |
|
EXTERNAL DEVICES |
|
|
Listening to the HD Radio™ Broadcast ……… |
15 |
|
Listening to the CD changer ……………………. |
16 |
|
Listening to the satellite radio ………………… |
17 |
|
Listening to the iPod……………………………… |
19 |
|
Listening to the other external |
|
|
components………………………………………. |
20 |
|
SETTINGS |
|
|
Selecting a preset sound mode ……………….. |
21 |
|
General settings—PSM ………………………… |
23 |
|
Bluetooth settings ………………………………… |
26 |
|
Title assignment …………………………………… |
27 |
|
REFERENCES |
|
|
More about this unit ……………………………… |
27 |
|
Troubleshooting……………………………………. |
31 |
|
Maintenance………………………………………… |
35 |
|
Specifications……………………………………….. |
36 |
For detaching/attaching the control panel, see page 30.
ENGLISH
3

ENGLISH
Preparation
 Cancel the display demonstration and set the clock
• See also page 23.
|
1 |
Turn on the power. |
|
2 |
Enter the PSM settings. |
|
3 |
Cancel the display demonstrations |
|
Select “DEMO,” then “DEMO OFF.” |
|
|
Set the clock |
|
|
Select “CLOCK HOUR,” then adjust the hour. |
|
|
Select “CLOCK MIN” (minute), then adjust the minute. |
|
|
4 |
Finish the procedure. |
|
When the power is turned off: Check the current clock time |
|||
|
When the power is turned on: Change the display information of the current source |
|||
|
FM/AM |
Frequency =Clock =Station name*1 =(back to the beginning) |
||
|
CD/CD-CH |
Audio CD/CD Text: Current track number with the elapsed playing time =Current track number |
||
|
with the clock time =Disc title/performer*2 =Track title*2 =(back to the beginning) |
|||
|
MP3/WMA: Current track number with the elapsed playing time =Current track number with |
|||
|
the clock time =Album name/performer (folder name)*3 =Track title (file name)*3 =(back |
|||
|
to the beginning) |
|||
|
BLUETOOTH |
Current track number with the elapsed playing time =Current track number with the clock time |
||
|
=Album name/performer =Track title =(back to the beginning) |
|||
|
HD RADIO |
Clock =Call Sign*4 =Frequency =Title/artist/album name of the current segment*5 =(back |
||
|
to the beginning) |
|||
|
SIRIUS/XM |
Clock =Category name =Channel name =Artist name =Composer name*6 =Song/ |
||
|
program name/title =(back to the beginning) |
|||
|
IPOD |
Folder name =Track name =Current track number with the elapsed playing time =Current |
||
|
track number with the clock time =(back to the beginning) |
|||
|
*1 |
If no title is assigned to a station, “NO NAME” appears. To assign a title to a station, see page 27. |
||
|
*2 |
If the current disc is an audio CD, “NO NAME” appears. |
||
|
*3 |
If an MP3/WMA file does not have Tag information or “TAG DISPLAY” is set to “TAG OFF” (see page 25), folder name |
||
|
and file name appear. |
|||
|
*4 |
“****-FM” or “****” appears when no Call Sign is received. |
||
|
*5 |
“NO TEXT” appears when no text is received. |
||
|
*6 |
Only for SIRIUS Satellite radio. |
4INTRODUCTIONS

Basic operations
Using the control panel 
ENGLISH
1• FM/AM: Select preset station.
•HD RADIO: Select channel.
•SIRIUS/XM: Select category.
•CD/CD-CH: Select folder.
•IPOD: Enter the main menu/Pause playback/ Confirm selection.
2 Eject disc.
3• Turn on the power.
•Turn off the power [Hold].
•Attenuate the sound (if the power is on). 4 Volume control [Turn].
5• FM/AM:Select the bands.
•BLUETOOTH (AUDIO): Start playback
6 Loading slot
7 Display window
8 Select the sound mode.
9 Change the display information. p Detach the panel.
q• Enter Bluetooth menu
• Display the last called number [Hold].
w• FM/AM/HD RADIO/SIRIUS/XM: Search for station/channel.
•CD/CD-CH/IPOD: Select track.
•BLUETOOTH (AUDIO): Reverse skip/Forward skip.
eSelect the source.
FM/AM*1 =SIRIUS*2/XM*2 =CD*2 = CD-CH*2/IPOD*2 (or EXT INPUT) =BLUETOOTH
=AUX IN =(back to the beginning)
r• Adjust the sound mode.
•Enter the PSM settings [Hold]. t • Enter functions mode.
Press M MODE, then one of the following buttons (within 5 seconds)…
MO : Turn on/off monaural reception. SSM : Automatic station presetting [Hold]. RPT : Select repeat play.
RND : Select random play. 5/∞ : Skip 10 tracks.
•Activate Voice Dialing [Hold].
y• FM/AM/HD RADIO/SIRIUS/XM: Select preset station/channel.
•CD/CD-CH: Select folder/track/disc (for CD changer).
•BLUETOOTH (PHONE): Dial preset phone number*3.
u AUX (auxiliary) input jack
*1 When the HD Radio tuner box is connected, the built-in tuner of this unit will be disable. To listen to the HD Radio broadcast, refer to “Listening to the radio” on page 8. For more features, see page 15.
*2 You cannot select these sources if they are not ready or not connected.
*3 For storing preset phone number, see page 14.
Continued on the next page
OPERATIONS 5

Display window
ENGLISH
|
1 |
Status of Bluetooth device |
7 |
Playback mode / item indicators— RND (random), |
|||
|
(Device number, [1 – 5]; signal strength, [0 – 3]*; |
(disc), |
(folder), RPT (repeat) |
||||
|
battery reminder, [0 – 3]*) |
8 |
Tuner reception indicators—ST (stereo), |
||||
|
* As the number increases, the signal/battery power |
MO (monaural) |
|||||
|
becomes stronger. |
9 |
HOLD indicator |
||||
|
2 |
Tr (track) indicator |
p HD (HD Radio) indicator |
||||
|
3 |
Source display / Track number / Folder number / |
q LOUD (loudness) indicator |
||||
|
Time countdown indicator |
w EQ (equalizer) indicator |
|||||
|
4 |
Bluetooth indicator |
e Disc information indicators— |
||||
|
5 |
Playback source indicators—CH (CD changer), DISC |
TAG (Tag information), |
(folder), |
(track/file) |
||
|
6 |
Sound mode (iEQ: intelligent equalizer) indicators |
r Main display |
||||
|
—CLASSIC, HIP HOP, JAZZ, ROCK, POPS, USER |
Using the remote controller (RM-RK50) 
Installing the lithium coin battery (CR2025)
For USA-California Only:
This product contains a CR Coin Cell Lithium Battery which contains Perchlorate Material—special handling may apply.
See www.dtsc.ca.gov/hazardouswaste/perchlorate
Before using the remote controller:
•Aim the remote controller directly at the remote sensor on the unit.
•DO NOT expose the remote sensor to bright light (direct sunlight or artificial lighting).
Remote sensor
6

1• Turns the power on if pressed briefly or attenuates the sound when the power is on.
•Turns the power off if pressed and held.
2• Changes the FM/AM bands with 5U.
•Changes the preset stations with D ∞.
•Changes the folder of the MP3/WMA.
•While playing an MP3 disc on an MP3-compatible CD changer:
–Changes the disc if pressed briefly.
–Changes the folder if pressed and held.
•While listening to the satellite (SIRIUS or XM) radio:
–Changes the categories.
•While listening to an Apple iPod:
–Pauses or resumes playback with D ∞.
–Enters the main menu with 5U.
(Now 5U/D ∞/2R/F 3work as the menu selecting buttons.)*
* 5U : Returns to the previous menu.
D ∞ : Confirms the selection.
3 Adjusts the volume level.
4 Selects the sound mode (iEQ: intelligent equalizer).
5 Selects the source.
6For Bluetooth cellular phone:
–Answers calls if pressed briefly.
–Rejects calls if pressed and held.
|
7 • Searches for stations if pressed briefly. |
|
|
• Fast-forwards or reverses the track if pressed and |
|
|
held. |
ENGLISH |
|
• Changes the tracks if pressed briefly. |
|
|
• While listening to the satellite radio: |
|
|
– Changes the channels if pressed briefly. |
|
|
– Changes the channels rapidly if pressed and |
|
|
held. |
|
|
• While listening to an iPod (in menu selecting |
|
|
mode): |
|
|
– Selects an item if pressed briefly. (Then, press |
|
|
D ∞to confirm the selection.) |
|
|
– Skips 10 items at a time if pressed and held. |
|
|
• Reverse skip/forward skip for Bluetooth audio. |
Warning (to prevent accidents and damage):
•Do not install any battery other than CR2025 or its equivalent.
•Do not leave the remote controller in a place (such as dashboards) exposed to direct sunlight for a long time.
•Store the battery in a place where children cannot reach.
•Do not recharge, short, disassemble, heat the battery, or dispose of it in a fire.
•Do not leave the battery with other metallic materials.
•Do not poke the battery with tweezers or similar tools.
•Wrap the battery with tape and insulate when throwing away or saving it.
OPERATIONS 7

ENGLISH
Listening to the radio
|
1 |
Select “FM/AM.” |
|||||||||||
|
2 |
Select the bands. |
|||||||||||
|
3 |
Search for a station to listen—Auto Search. |
|||||||||||
|
Manual Search: Hold either one of the buttons until “M” flashes on the display, then press |
||||||||||||
|
it repeatedly. |
||||||||||||
|
• When receiving an FM stereo broadcast with sufficient signal strength, “ST” lights up |
||||||||||||
|
on the display. |
||||||||||||
 When an FM stereo broadcast is hard to receive
Reception improves, but stereo effect will be lost.
• “MO” lights up on the display.
To restore the stereo effect, repeat the same procedure. “MONO OFF” appears and “MO” goes off.
 FM station automatic presetting —SSM (Strong-station Sequential Memory)
You can preset up to six stations for each band.
1 While listening to an FM station…
2
Local FM stations with the strongest signals are searched and stored automatically in the selected FM band.
•If an HD Radio tuner box is connected, you can also search and store the AM station automatically.
 Manual presetting
Ex.: Storing FM station of 92.50MHz into preset number 4 of the FM1 band.
1 

2 
3
Preset number flashes for a while.
To listen to a preset station
or
8

Disc operations
All tracks will be played repeatedly until you change the To stop play and eject the disc source or eject the disc. 
• Press SRC to listen to another playback source.
Prohibiting disc ejection
To cancel the prohibition, repeat the same procedure.
Pressing (or holding) the following buttons allows
you…
|
[Press] |
Select track |
|
[Hold] |
Reverse/fast-forward |
|
track |
|
|
MP3: Select folder |
|
|
Locate particular folder*2 |
|
|
(for MP3/WMA disc) or track |
|
|
(Number buttons)*1 directly |
*1 Press to select number 1 to 6; hold to select number 7 to 12.
*2 It is required that folders be assigned with 2-digit numbers at the beginning of their folder names—01, 02, 03, and so on.
After pressing M MODE, press the following buttons…
Skip 10 tracks
MP3/WMA: Within the same folder
TRACK RPT:
Repeat current track
FOLDER RPT:
MP3: Repeat current folder
FOLDER RND:
MP3: Randomly play all tracks of current folder, then tracks of next folders
ALL RND:
Randomly play all tracks
•To cancel repeat play or random play, select “RPT OFF” or “RND OFF.”
ENGLISH
OPERATIONS 9
ENGLISH
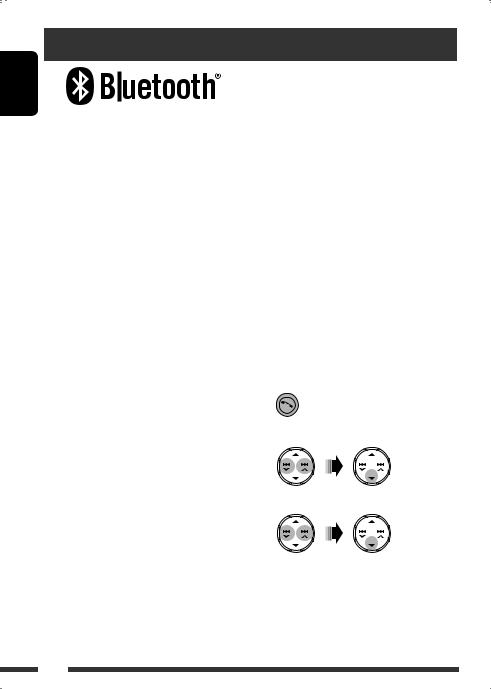
Using the Bluetooth® devices
Bluetooth is a short-range wireless radio communication technology for the mobile device such as mobile phones, portable PCs, and other devices. The Bluetooth devices can be connected without cables and communicate with each other.
•Refer to the list (included in the box) to see the countries where you may use the Bluetooth® function.
Bluetooth profile
This unit supports the following Bluetooth profiles; HFP (Hands-Free Profile) 1.5
OPP (Object Push Profile) 1.1
A2DP (Advanced Audio Distribution Profile) 1.2 AVRCP (Audio/Video Remote Control Profile) 1.3
Features
You can operate Bluetooth devices through the unit as follows:
•Receiving a call
•Making a call—from phonebook, from call history (dialed number/received call), by dialing number, by preset numbers, by voice command
•Informing you of the arrival of a text message
•Play back a Bluetooth audio player
 Connecting a Bluetooth device for the first time
Pairing and PIN code
When you connect a Bluetooth device to the unit for the first time, make pairing between the unit and the device. Pairing allows Bluetooth devices to communicate with each other.
To make pairing, you may need to enter the PIN (Personal Identification Number) code of your Bluetooth device you want to connect.
•Once the connection is established, it is registered in the unit even if you reset the unit. Up to five devices can be registered in total.
•Only one device for Bluetooth phone and one for Bluetooth audio can be connected at a time.
•To use the Bluetooth function, you need to turn on Bluetooth function of the device.
Preparation: Operate the device to turn on its Bluetooth function.
1 While listening to a source…
2 Select “DEVICE.”
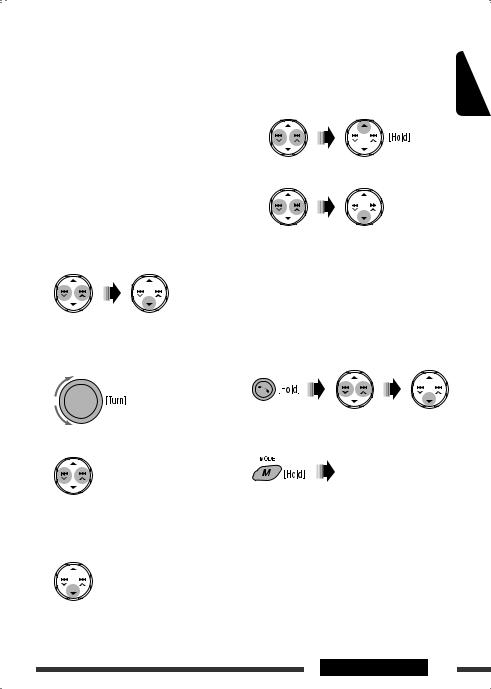
|
Refer also to the instructions supplied with the |
3 Select “NEW PAIRING.” |
|
Bluetooth device. |
4 Enter a PIN (Personal Identification Number) code to the unit.
• You can enter any number you like (1-digit to 16-digit number). [Initial: 0000]
* Some devices have their own PIN code. Enter the specified PIN code to the unit.
10
![]()
1Move to the next (or previous) number position.
2 Select a number.
3Repeat steps 1and 2until you finish entering a PIN code.
4 Confirm the entry.
5Operate the target Bluetooth device, (while “WAIT PAIR” is flashing on the display).
On the device to be connected, enter the same PIN code you have just entered for this unit. “PAIRING” flashes, then “PAIRING OK” appears on the display when the connection is established. Now you can use the device through the unit.
The device remains registered even after you disconnect the device. Use “CNNCT PHONE” or “CNNCT AUDIO” (or activate “AUTO CNNCT”) to connect the same device from next time on. (See the following and page 26.)
Deleting a registered device
Perform steps 1 and 2 on page 10, then…
1 Select “DELETE PAIR.”
2Select a device you want to delete, then select “YES.”
Connecting a registered device (PHONE/ AUDIO)
Perform steps 1 and 2 on page 10, then…
1 Select “CNNCT PHONE” or “CNNCT AUDIO.”
2 Select a device you want.
“CONNECTING” flashes, then “CONNECTED” appears on the display when the device is connected.
You can set the unit to connect the Bluetooth device automatically when the unit is turned on. (See “AUTO CNNCT” on page 26.)
Disconnecting a device (PHONE/AUDIO)
Perform steps 1 and 2 on page 10, then…
Select “DISCN PHONE” or “DISCN AUDIO.”
“DISCONNECT” appears on the display.
ENGLISH
OPERATIONS 11

ENGLISH
Using the Bluetooth cellular phone 
|
1 |
— |
Establish the connection with a device. |
|
(See pages 10 and 11.) |
||
|
2 |
Enter Bluetooth menu. |
|
|
3 |
Select “CALL,” then make a call or settings using the |
|
|
“SETTINGS” menu. |
||
|
(See the following and page 26.) |
When a call comes in….
The source is automatically changed to “BLUETOOTH,” then “RCV CALL” (receive call) and the phone number appear alternately.
When “AUTO ANSWER” is activated….
The unit answers the incoming calls automatically, see page 26.
•When “AUTO ANSWER” is deactivated, press any button (except 


 and 0) to answer the incoming call.
•You can adjust the microphone volume level (see page 26).
To end the call
Hold any button (except 


 and 0).
Answering a waiting call
If your cellular phone is equipped with the call waiting function, you can put the current call on hold and answer the waiting call.
Press any button (except 


 and 0).
•To restore the on-hold call, press any button (except 


 and 0) again.
•When you end one call, you can connect to the other.
When a text message comes in….
If the cellular phone is compatible with text message notification via Bluetooth and “MSG NOTICE” (message notice) is set to “ON” (see page 26), the unit rings and “RCV MESSAGE” (receiving message) appears on the display to inform you of the message arrival.
•You cannot read, edit, or send a text message through the unit.
 Making a call
1 While listening to a source…
2 Select “CALL.”
3Select a method to make a call.
•DIALED*: Shows the phone numbers you have dialed =go to the following step.
•RECEIVED*: Shows the received calls =go to the following step.
12
•PHONEBOOK: Shows the 1st listed name/phone number of the phone book of the unit =go to the following step. To transfer the phone book memory, see page 26.
•PRESET: Shows the list of preset numbers. = go to the following step.
•DIAL NUMBER: Shows the phone number entry screen =“How to enter phone number” (see the following).
•VOICE DIAL (Only when the connected cellular phone has the voice recognition system): Speak the name (registered words) you want to call.
*Displays only when the dialed or received number is made through the unit.
4Select the name/phone number you want to call.
How to enter phone number
1 Select a number.
2 Move the entry position.
3Repeat steps 1and 2until you finish entering the number.
To delete the phone numbers
|
• Make sure that the Bluetooth phone is connected. |
ENGLISH |
||
|
1 |
Display the phone number you want to |
||
|
delete by using one of the “CALL” items. |
|||
|
2 |
Select the phone number (or name). |
3 Select “DELETE” or “DELETE ALL.”
|
DELETE: |
Deletes the selected phone number. |
DELETE ALL: Deletes the phone number listed in step 1.
• To cancel, press 5.
Direct operations to redial / Voice Dialing
You can use the following functions regardless of the current source.
To redial
To activate Voice Dialing
You can make a call by your voice.
Speak the name (registered words) you want to call slowly and clearly.
4 Confirm the entry.
Continued on the next page
OPERATIONS 13

ENGLISH
Presetting the phone number
You can preset up to six phone numbers.
1Display the phone number you want to preset by using one of the “CALL” items.
2 Select a phone number.
3 Select a preset number to store.
To call a preset number
While in Bluetooth source….
•You can also call a preset number using “PRESET” of the “CALL” items (see page 13).
Switching conversation media (the unit/ cellular phone)
During a phone call conversation….
Then, continue your conversation using the other media.
Using the Bluetooth audio player 
• Operations and display indications differ depending on their availability on the connected audio player.
|
Select “BLUETOOTH.” |
||
|
• Pressing |
can enter the Bluetooth menu directly. |
|
|
Establish the connection with a Bluetooth audio player. |
||
|
— |
If playback does not start automatically, operate the Bluetooth audio |
|
|
player to start playback. |
||
|
[Press] |
Reverse skip/forward skip |
|
[Hold] |
Reverse search/forward |
|
search |
Select group/folder
Start/pause playback
After pressing M MODE, press the following buttons…
Select repeat play
Select random play
Bluetooth Information:
•Refer also to pages 10 and 11 for registering/ connecting/disconnecting/deleting a registered device.
If you wish to receive more information about Bluetooth, visit the following JVC web site: <http:// www.jvc-victor.co.jp/english/car/>.
14

Listening to the HD Radio™ Broadcast
Before operating, connect HD Radio tuner box, KT-HD300 (separately purchased) to the CD changer jack on the rear of the unit. (Refer also to page 8 for basic radio operations.)
What is HD Radio Technology?
HD Radio Technology can deliver high-quality digital sound—AM digital will have FM-like quality (in stereo) and FM digital will have CD-like quality—with static-free and clear reception. Furthermore, stations can offer text and data, such as artist names and song titles.
• When the HD Radio tuner box is connected, it can also receive conventional analog broadcasts.
 When receiving an HD Radio
station…
|
[Lights up] |
When digital audio is broadcast |
|
[Flashes] |
When analog audio is broadcast |
|
HD |
 Changing HD Radio reception mode
While receiving an HD Radio broadcast, the unit tunes to digital or analog audio automatically due to the receiving condition.
1 While listening to an HD Radio station…
Station Call Sign appears.
 When receiving HD Radio multicast 2
channels…
First four letters of Call Sign Channel number
|
[Lights up] |
When holding the digital reception |
|
[Flashes] |
When holding the analog reception |
ENGLISH
Select your desired channel.
“LINKING” appears while linking to a multicast channel.
 Searching for HD Radio stations only
1
2 
DIGITAL: Tuning to digital audio only
ANALOG: Tuning to analog audio only
AUTO: [Initial] Switch between digital and analog audio automatically
•If no sound can be heard from the selected setting, change the setting to ANALOG or DIGITAL.
•The setting automatically changes to AUTO if you tuned in to or change to another station, or if you turned off the power.
•This setting cannot take effect for the conventional FM/AM stations.
•If the radio station forces the reception mode to digital, “HOLD” flashes.
EXTERNAL DEVICES 15

ENGLISH
Listening to the CD changer
It is recommended to use a JVC MP3-compatible CD changer (separately purchased) with your unit. You can connect a CD changer to the CD changer jack on the rear of the unit.
• You can only play conventional CDs (including CD Text) and MP3 discs.
Preparation: Make sure “CHANGER” is selected for the external input setting, see page 25.
|
1 |
Select “CD-CH.” |
|||
|
2 |
Select a disc to start playing. |
– 6. |
||
|
[Press] |
For selecting disc number 1 |
|||
|
[Hold] |
For selecting disc number 7 |
– 12. |
||
|
[Press] |
Select track |
|
[Hold] |
Reverse/fast-forward track |
MP3: Select folders
After pressing M MODE, press the following buttons…
Skip 10 tracks
MP3: Within the same folder
TRACK RPT:
Repeat current track
FOLDER RPT:
MP3: Repeat all tracks of current folder
DISC RPT:
Repeat all tracks of the current disc
FOLDER RND:
MP3: Randomly play all tracks of the current folder, then tracks of the next folder
DISC RND:
Randomly play all tracks of current disc
ALL RND:
Randomly play all tracks of the discs in the magazine
•To cancel repeat play or random play, select “RPT OFF” or “RND OFF.”
16

Listening to the satellite radio
Before operating, connect either one of the following (separately purchased) to the CD changer jack on the rear of this unit.
•JVC SIRIUS Satellite radio interface, KS-SRA100, for listening to the SIRIUS Satellite radio.
•JVC Smart Digital Adapter, XMDJVC100, for listening to the XM Satellite radio.
GCI (Global Control Information) update
•If channels are updated after subscription, updating starts automatically. “UPDATING” flashes and no sound can be heard.
•Update takes a few minutes to complete.
•During update, you cannot operate your satellite radio.
ENGLISH
Activate your SIRIUS subscription after connection
1
2
SIRIUS Satellite radio starts updating all the SIRIUS channels.
Once completed, SIRIUS Satellite radio tunes in to the preset channel, CH184.
3 Check your SIRIUS ID, see page 24.
4Contact SIRIUS on the internet at <http://activate.siriusradio.com/> to activate your subscription, or you can call SIRIUS toll-free at 1-888-539-SIRIUS (7474).
“SUB UPDT PRESS ANY KEY” scrolls on the display once subscription has been completed.
Activate your XM subscription after connection
•Only Channel 0, 1, and 247 are available before activation.
1
2
XMDirect™ Universal Tuner Box starts updating all the XM channels. “Channel 1” is tuned in automatically.
3Check your XM Satellite radio ID labelled on the casing of the XMDirect™ Universal Tuner
Box, or tune in to “Channel 0” (see page 18).
4Contact XM Satellite radio on the internet at <http://xmradio.com/activation/> to activate your subscription, or you can call 1-800-XM-RADIO (1-800-967-2346).
Once completed, the unit tunes in to one of the available channels (Channel 4 or higher).
Continued on the next page
EXTERNAL DEVICES 17
ENGLISH
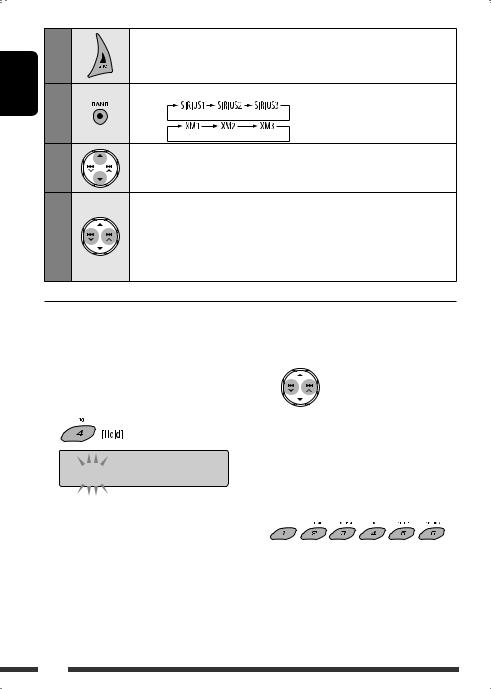
Select “SIRIUS” or “XM.”
Select the bands.
SIRIUS:
XM:
Select a category.
SIRIUS: If you select “ALL,” you can tune in to all the channels of all categories.
Select a channel to listen.
•Holding the button changes the channels rapidly.
•While searching, invalid and unsubscribed channels are skipped.
XM: If you do not select a channel within 15 seconds, category selected in step 3 is canceled. You can select all channels of all categories now (including noncategorised channels).
 Storing channels in memory
You can preset six channels for each band.
Ex.: Storing channels into preset number 4
1 Tune in to a channel you want.
2

 ROCK
ROCK
Checking the XM Satellite radio ID
While selecting “XM1,” “XM2,” or “XM3,” select “Channel 0.”
The display alternately shows “RADIO ID” and the 8-digit (alphanumeric) ID number.
To cancel the ID number display, select any channel other than “Channel 0.”
To select preset channel
18

Listening to the iPod
Before operating, connect the Interface adapter for iPod, KS-PD100 (separately purchased) to the CD changer jack on the rear of the unit.
Preparation: Make sure “CHANGER” is selected for the external input setting, see page 25.
|
1 |
Select “IPOD.” |
|
2 |
Select a song to start playing. |
ENGLISH
 Selecting a track from the menu
1 Enter the main menu.
This mode will be canceled if no operations are done for about 5 seconds.
2 Select the desired menu.
PLAYLISTS ÔARTISTS ÔALBUMS Ô SONGS ÔGENRES ÔCOMPOSERS Ô(back to the beginning)
3Confirm the selection.
•To move back to the previous menu, press 5.
•If a track is selected, playback starts automatically.
•Holding 4 /¢
/¢ can skip 10 items at a time.
Pause/stop playback
• To resume playback, press the button again.
|
[Press] |
Select tracks |
|
[Hold] |
Reverse/fast-forward track |
After pressing M MODE, press the following buttons…
ONE RPT:
Functions the same as “Repeat One” of the iPod.
ALL RPT:
Functions the same as “Repeat All” of the iPod.
ALBUM RND*:
Functions the same as “Shuffle
Albums” of the iPod.
SONG RND:
Functions the same as “Shuffle
Songs” of the iPod.
•To cancel repeat play or random play, select “RPT OFF” or “RND OFF.”
*Functions only if you select “ALL” in “ALBUMS” of the main “MENU.”
EXTERNAL DEVICES 19
ENGLISH
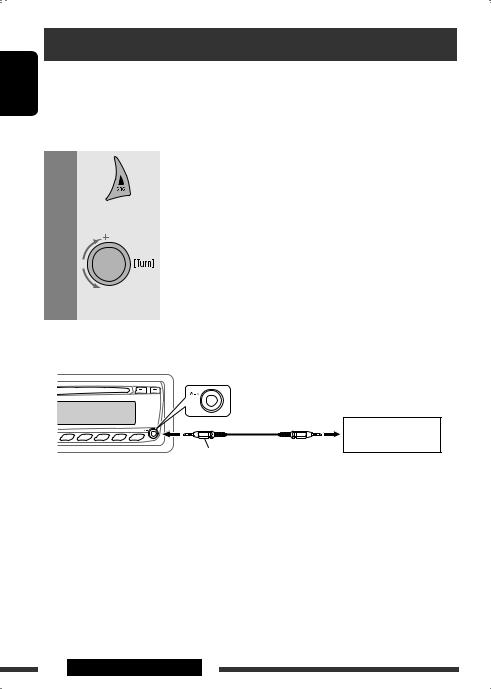
Listening to the other external components
You can connect an external component to:
•CD changer jack on the rear of this unit using the following adapters (separately purchased):
–Line Input Adapter, KS-U57
–AUX Input Adapter, KS-U58
Preparation: Make sure “EXT INPUT” is selected for the external input setting, see page 25.
• AUX (auxiliary) input jack on the control panel.
|
1 |
Select “EXT INPUT” or “AUX IN.” |
|||
|
2 |
— |
Turn on the connected component and start playing the source. |
||
|
3 |
Adjust the volume. |
|||
|
4 |
— |
Adjust the sound as you want (see pages 21 and 22). |
Connecting an external component to the AUX input jack
Portable audio player, etc.
3.5 mm (3/16”) stereo mini plug (not supplied)
20 EXTERNAL DEVICES
![]()
Selecting a preset sound mode
You can select a preset sound mode suitable to the music genre (iEQ: intelligent equalizer).
Preset value setting for each sound mode
|
Sound |
Preset value |
|||||||||||||
|
BASS (bass) |
MID (mid-range) |
TRE (treble) |
LOUD |
|||||||||||
|
mode |
||||||||||||||
|
(loudness) |
||||||||||||||
|
Freq. |
Level |
Q |
Freq. |
Level |
Q |
Freq. |
Level |
Q |
||||||
|
USER |
60 Hz |
00 |
Q1.25 |
1.0 kHz |
00 |
Q1.25 |
10.0 kHz |
00 |
Fix |
|||||
|
ROCK |
100 Hz |
+03 |
Q1.0 |
1.0 kHz |
00 |
Q1.25 |
10.0 kHz |
+02 |
Fix |
|||||
|
CLASSIC |
80 Hz |
+01 |
Q1.25 |
1.0 kHz |
00 |
Q1.25 |
10.0 kHz |
+03 |
Fix |
OFF |
||||
|
POP |
100 Hz |
+02 |
Q1.25 |
1.0 kHz |
+01 |
Q1.25 |
10.0 kHz |
+02 |
Fix |
|||||
|
HIP HOP |
60 Hz |
+04 |
Q1.0 |
1.0 kHz |
–02 |
Q1.0 |
10.0 kHz |
+01 |
Fix |
|||||
|
JAZZ |
80 Hz |
+03 |
Q1.25 |
1.0 kHz |
00 |
Q1.25 |
10.0 kHz |
+03 |
Fix |
|||||
|
Freq.: Frequency |
Q: Quality slope |
|||||||||||||
ENGLISH
 Storing your own sound mode
You can adjust the sound modes and store your own adjustments in memory.
•The adjustment you make will be stored for the currently selected sound mode (iEQ) including “USER.”
1 Select a sound mode.
2Enter the adjustment mode.
This mode will be canceled if no operations are done for about 5 seconds.
3 Select a tone.
4Adjust the sound elements of the selected tone.
1 Adjust the frequency.
2 Adjust the level.
Continued on the next page
SETTINGS 21

ENGLISH
3 Adjust the quality slope (Q).
|
Sound |
Range/selectable items |
||
|
elements |
BASS |
MID |
TRE |
|
Frequency |
60 Hz |
500 Hz |
10.0 kHz |
|
80 Hz |
1.0 kHz |
12.5 kHz |
|
|
100 Hz |
1.5 kHz |
15.0 kHz |
|
|
200 Hz |
2.5 kHz |
17.5 kHz |
|
|
Level (LVL) |
–06 to |
–06 to |
–06 to |
|
+06 |
+06 |
+06 |
|
|
Q |
Q1.0 |
Q0.5 |
Fix |
|
Q1.25 |
Q0.75 |
||
|
Q1.5 |
Q1.0 |
||
|
Q2.0 |
Q1.25 |
||
BASS: Bass MID: Mid-range TRE: Treble
5Repeat steps 3 and 4 to adjust other sound tones.
The adjustment made will be stored automatically.
 Adjusting the sound
You can adjust the sound characteristics to your preference.
1
2
|
FADER*2 |
R06 to F06 |
|
Adjust the front and rear speaker |
|
|
balance. |
|
|
BALANCE*3 |
L06 to R06 |
|
Adjust the left and right speaker |
|
|
balance. |
|
|
LOUD*4 (loudness) |
LOUD ON or |
|
Boost low and high frequencies to |
LOUD OFF |
|
produce a well-balanced sound at a |
|
|
low volume level. |
|
|
SUB.W*1 (subwoofer) |
00 to 08, |
|
Adjust the subwoofer output level. |
initial: 04 |
|
VOL ADJ (volume adjust) |
–05 to +05, |
|
Adjust the volume level of each source |
initial: 00 |
|
(except FM), compared to the FM |
|
|
volume level. The volume level will |
|
|
automatically increase or decrease |
|
|
when you change the source. |
•Before making an adjustment, select the source you want to adjust.
|
VOLUME |
00 to 50 or |
|
Adjust the volume. |
00 to 30*5 |
*1 Displayed only when “L/O MODE” is set to “SUB.W” (see page 24).
*2 If you are using a two-speaker system, set the fader level to “00.”
*3 This adjustment will not affect the subwoofer output. *4 Loudness setting will be applied to all sound modes. *5 Depending on the amplifier gain control setting. (See
page 25 for details.)
22

General settings—PSM
|
You can change PSM (Preferred Setting Mode) items |
3 |
Adjust the PSM item selected. |
|||
|
listed in the table below and on pages 24 and 25. |
|||||
|
1 |
Enter the PSM settings. |
||||
|
2 |
4 |
Repeat steps 2 and 3 to adjust other PSM |
|||
|
Select a PSM item. |
|||||
|
items if necessary. |
|||||
|
5 |
Finish the procedure. |
ENGLISH
|
Indications |
Item |
Setting, [reference page] |
||
|
( |
: Initial) |
|||
|
DEMO |
• |
DEMO ON |
: The display demonstration will be activated automatically if no |
|
|
Display |
operation is done for about 20 seconds, [4]. |
|||
|
demonstration |
• |
DEMO OFF |
: Cancels. |
|
|
CLOCK DISP*1 |
• |
CLOCK ON |
: The clock time is always shown on the display when the power is |
|
|
Clock display |
turned off. |
|||
|
• |
CLOCK OFF |
: Cancels; pressing DISP will show the clock time for about 5 seconds |
||
|
when the power is turned off, [4]. |
||||
|
CLOCK HOUR |
1 – 12 |
[Initial: 1 (1:00)], [4]. |
||
|
Hour adjustment |
||||
|
CLOCK MIN |
00 – 59 |
[Initial: 00 (1:00)], [4]. |
||
|
Minute adjustment |
||||
*1 If the power supply is not interrupted by turning off the ignition key of your car, it is recommended that you select “CLOCK OFF” to save the car’s battery.
Continued on the next page
SETTINGS 23

|
Indications |
Item |
Setting, [reference page] |
|||||||
|
ENGLISH |
( |
: Initial) |
|||||||
|
CLOCK ADJ*2 |
• |
OFF |
: |
Cancels. |
|||||
|
• |
AUTO |
: |
The built-in clock is automatically adjusted using the clock data |
||||||
|
Clock adjustment |
provided via the satellite radio channel. |
||||||||
|
TIME ZONE*2, *3 |
— |
: |
Select your residential area from one of the time zones for clock |
||||||
|
Time zone |
adjustment. |
||||||||
|
EASTERN, ATLANTIC, NEWFOUND, ALASKA, PACIFIC, MOUNTAIN, |
|||||||||
|
CENTRAL |
|||||||||
|
DST*2, *3 |
• |
DST ON |
: |
Activates daylight savings time if your residential area is subject to |
|||||
|
Daylight savings |
DST. |
||||||||
|
time |
• |
DST OFF |
: |
Cancels. |
|||||
|
SID*4 |
— |
: |
Your SIRIUS identification number scrolls on the display 5 seconds |
||||||
|
SIRIUS ID |
after “SID” is selected, [17]. |
||||||||
|
DIMMER |
• |
AUTO |
: Dims the display and button illumination when you turn on the |
||||||
|
Dimmer |
headlights. |
||||||||
|
• |
ON |
: |
Activates dimmer. |
||||||
|
• |
OFF |
: |
Cancels. |
||||||
|
SCROLL*5, *6 |
• |
ONCE |
: |
Scrolls the displayed information once. |
|||||
|
Scroll |
• |
AUTO |
: |
Repeats scrolling (at 5-second intervals). |
|||||
|
• |
OFF |
: |
Cancels. |
||||||
|
• |
Pressing DISP for more than one second can scroll the display |
||||||||
|
regardless of the setting. |
|||||||||
|
L/O MODE |
• |
REAR |
: |
Select if the REAR LINE OUT terminals are used for connecting the rear |
|||||
|
Line output mode |
speakers (through an external amplifier). |
||||||||
|
• |
SUB.W |
: |
Select if the REAR LINE OUT terminals are used for connecting a |
||||||
|
subwoofer (through an external amplifier). |
|||||||||
|
SUB.W FREQ*7 |
• |
LOW |
: |
Frequencies lower than 90 Hz are sent to the subwoofer. |
|||||
|
Subwoofer cutoff |
• |
MID |
: |
Frequencies lower than 135 Hz are sent to the subwoofer. |
|||||
|
frequency |
• |
HIGH |
: |
Frequencies lower than 180 Hz are sent to the subwoofer. |
|||||
|
SUB.W PHASE*7 |
• |
180 DEG |
: |
Select either “0 DEG” or “180 DEG” which reproduces a better sound. |
|||||
|
Subwoofer phase |
• |
0 DEG |
|||||||
|
*2 |
Displayed only when SIRIUS Satellite radio or XM Satellite radio is connected. |
||||||||
|
*3 |
Displayed only when “CLOCK ADJ” is set to “AUTO.” |
||||||||
|
*4 |
Displayed only when SIRIUS Satellite radio is connected. |
||||||||
|
*5 |
Some characters or symbols will not be shown correctly (or will be blanked) on the display. |
||||||||
|
*6 |
Not applicable to HD Radio text scrolling. |
||||||||
|
*7 |
Displayed only when “L/O MODE” is set to “SUB.W.” |
24

|
Indications |
Item |
Setting, [reference page] |
|||
|
( |
: Initial) |
||||
|
EXT INPUT*8,*9 |
• |
CHANGER |
: To connect a JVC CD changer, [16], or an Apple iPod, [19]. |
||
|
External input |
• |
EXT INPUT |
: To connect portable audio player to the CD changer jack, [20]. |
||
|
TAG DISPLAY |
• |
TAG ON |
: Shows the Tag information while playing MP3/WMA tracks. |
||
|
Tag display |
• |
TAG OFF |
: Cancels. |
||
|
AMP GAIN |
• |
LOW POWER |
: VOLUME 00 – VOLUME 30. (Select this if the maximum power of the |
||
|
Amplifier gain |
speaker is less than 50 W to avoid damaging the speaker.) |
||||
|
control |
• |
HIGH POWER |
: VOLUME 00 – VOLUME 50. |
||
|
IF BAND |
• |
AUTO |
: Increases the tuner selectivity to reduce interference noises between |
||
|
Intermediate |
adjacent stations. (Stereo effect may be lost.) |
||||
|
frequency band |
• |
WIDE |
: Subject to interference noises from adjacent stations, but sound |
||
|
quality will not be degraded and the stereo effect will remain. |
|||||
|
AREA |
• |
AREA US |
: When using in North/Central/South America. AM/FM intervals are set |
||
|
Tuner channel |
to 10 kHz/200 kHz. |
||||
|
interval |
• |
AREA EU |
: When using in any other areas. AM/FM intervals are set to 9 kHz/ |
||
|
50 kHz (100 kHz during auto search). |
|||||
|
• |
AREA SA |
: When using in South American countries where FM interval is |
|||
|
100 kHz. AM interval is set to 10 kHz. |
|||||
|
*8 |
Displayed only when one of the following sources is selected—FM, AM, CD, BLUETOOTH, AUX IN. |
||||
|
*9 |
Not required for HD Radio broadcast/SIRIUS/XM tuners. |
ENGLISH
SETTINGS 25
ENGLISH
Bluetooth settings
You can change the settings listed on the right column according to your preference.
1 Enter the Bluetooth menu.
2 Select “SETTINGS.”
3 Select a setting item.
AUTO CNNCT =AUTO ANSWER = MSG NOTICE*1 =MIC SETTING =
PHONEBOOK =INITIALIZE =INFORMATION
=(back to the beginning)
4 Change the setting accordingly.
•If “PHONEBOOK” is selected in step 3, enter the PIN code both for this unit and Bluetooth phone (see pages 10 and 11: steps 4 and 5), then press 5to exit.
Setting menu ( : Initial)
AUTO CNNCT (connect)
When the unit is turned on, the connection is established automatically with…
OFF: No Bluetooth device.
LAST: The last connected Bluetooth device.
AUTO ANSWER
ON: The unit answers the incoming calls automatically.
OFF: The unit does not answer the calls automatically. Answer the calls manually.
REJECT: The unit rejects all incoming calls.
MSG NOTICE (message notice)
ON*1: The unit informs you of the arrival of a message by ringing and displaying “RCV MESSAGE” (receiving message).
OFF: The unit does not inform you of the arrival of a message.
 MIC SETTING (microphone setting) Adjust the built-in microphone volume, [LEVEL 01/02/03].
PHONEBOOK
Load the phone book of the Bluetooth phone to the unit. (You can load up to 50 phone numbers.)
•Before using this function, make sure that the Bluetooth phone is connected.
INITIALIZE
YES: Initialize all settings you have made in the Bluetooth menu.
NO: Return to the previous screen.
INFORMATION
NAME: Name of the unit (as shown on Bluetooth devices).
ADDRESS: Address of the unit.
VERSION: Hardware and software versions of the Bluetooth module.
PHONE NAME*2: Name of the connected Bluetooth phone.
AUDIO NAME*2: Name of the connected Bluetooth audio player.
*1 If the connected Bluetooth phone does not support text message notification (via Bluetooth), the unit will not receive any notification upon the arrival of a text message.
*2 Appears only when a Bluetooth phone/audio player is connected.
26 SETTINGS

Title assignment
You can assign titles to 30 station frequencies (FM and AM) using 8 characters (maximum) for each title.
•When HD Radio tuner box is connected, this feature will be disable.
1Select a station you want to assign a title (see also page 8).
2 Show the title entry screen.
More about this unit
 Basic operations
Turning on the power
•By pressing SRC on the unit, you can also turn on the power. If the source is ready, playback also starts.
Turning off the power
•If you turn off the power while listening to a track, playback will start from where it had been stopped previously next time you turn on the power.
ENGLISH
3Assign a title.
1 Select a character.
2Move to the next (or previous) character position.
3Repeat steps 1and 2until you finish entering the title.
4 Finish the procedure.
To erase the entire title
In step 2 above…
 Tuner operations
Storing stations in memory
•During SSM search…
–All previously stored stations are erased and the stations are stored anew.
–Received stations are preset in No. 1 (lowest frequency) to No. 6 (highest frequency).
–When SSM is over, the station stored in No. 1 will be automatically tuned in.
•When storing a station manually, the previously preset station is erased when a new station is stored in the same preset number.
 Disc operations
Caution for DualDisc playback
•The Non-DVD side of a “DualDisc” does not comply with the “Compact Disc Digital Audio” standard. Therefore, the use of Non-DVD side of a DualDisc on this product may not be recommended.
General
•This unit has been designed to reproduce CDs/CD Texts, and CD-Rs (Recordable)/CD-RWs (Rewritable) in audio CD (CD-DA), MP3 and WMA formats.
Continued on the next page
SETTINGS & REFERENCES 27

ENGLISH
•When a disc is inserted upside down, “PLEASE” and “EJECT” appear alternately on the display. Press 0to eject the disc.
•In this manual, words “track” and “file” are interchangeably used.
•While fast-forwarding or reversing on an MP3 or WMA disc, you can only hear intermittent sounds.
•If you change the source while listening to a disc, playback stops.
Next time you select “CD” as the playback source, playback will start from where it had been stopped previously.
•After ejecting a disc, “NO DISC” appears and you cannot operate some of the buttons. Insert another disc or press SRC to select another playback source.
•If the ejected disc is not removed within 15 seconds, it is automatically inserted into the loading slot again to protect it from dust. Playback starts automatically.
Playing a CD-R or CD-RW
•Use only “finalized” CD-Rs or CD-RWs.
•This unit can only play back files of the same type as those detected first if a disc includes both audio CD (CD-DA) files and MP3/WMA files.
•This unit can play back multi-session discs; however, unclosed sessions will be skipped while playing.
•Some CD-Rs or CD-RWs may not play back on this unit because of their disc characteristics, or for the following reasons:
–Discs are dirty or scratched.
–Moisture condensation has occurred on the lens inside the unit.
–The pickup lens inside the unit is dirty.
–The files on the CD-R/CD-RW are written using the “Packet Write” method.
–There are improper recording conditions (missing data, etc.) or media conditions (stained, scratched, warped, etc.).
•CD-RWs may require a longer readout time since the reflectance of CD-RWs is lower than that of regular CDs.
•Do not use the following CD-Rs or CD-RWs:
–Discs with stickers, labels, or a protective seal stuck to the surface.
–Discs on which labels can be directly printed by an ink jet printer.
Using these discs under high temperature or high humidity may cause malfunctions or damage to the unit.
Playing an MP3/WMA disc
•This unit can play back MP3/WMA files with the extension code <.mp3> or <.wma> (regardless of the letter case—upper/lower).
•This unit can show the names of albums, artists (performer), and Tag (Version 1.0, 1.1, 2.2, 2.3, or 2.4) for MP3 files and for WMA files.
•This unit can display only one-byte characters. No other characters can be correctly displayed.
•This unit can play back MP3/WMA files meeting the conditions below:
–Bit rate of MP3: 32 kbps — 320 kbps
–Sampling frequency of MP3:
48 kHz, 44.1 kHz, 32 kHz (for MPEG-1) 24 kHz, 22.05 kHz, 16 kHz (for MPEG-2)
–Bit rate of WMA:
32 kbps — 192 kbps
–Disc format: ISO 9660 Level 1/Level 2, Romeo, Joliet, Windows long file name
•The maximum number of characters for file/folder names vary depending on the disc format used (includes 4 extension characters—<.mp3> or <.wma>).
–ISO 9660 Level 1: up to 12 characters
–ISO 9660 Level 2: up to 31 characters
–Romeo*: up to 128 characters
–Joliet*: up to 64 characters
–Windows long file name*: up to 128 characters
* The parenthetic figure is the maximum number of characters for file/folder names in case the total number of files and folders is 271 or more.
•This unit can recognize a total of 512 files, 200 folders, and 8 hierarchical levels.
28

•This unit can play back files recorded in VBR (variable bit rate).
Files recorded in VBR have a discrepancy in the elapsed time display, and do not show the actual elapsed time. In particular, this difference becomes noticeable after performing the search function.
•This unit cannot play back the following files:
–MP3 files encoded in MP3i and MP3 PRO format.
–MP3 files encoded in an inappropriate format.
–MP3 files encoded with Layer 1/2.
–WMA files encoded in lossless, professional, and voice format.
–WMA files which are not based upon Windows Media® Audio.
–WMA files copy-protected with DRM.
–Files which have data such as AIFF, ATRAC3, etc.
•The search function works but search speed is not constant.
 Bluetooth operations
General
•While driving, do not perform complicated operation such as dialing the numbers, using phone book, etc. When you perform these operations, stop your car in a safe place.
•Some Bluetooth devices may not be able to connect to this unit depending on the Bluetooth version of the device.
•Some operations and display information may be different according to the connected phone.
•This unit may not work for some Bluetooth devices.
•Connecting condition may vary depending on the circumstances around you.
•When the unit is turned off, the device is disconnected.
Warning messages for Bluetooth operations
•ERROR CNNCT (Error Connection):
The device is registered but the connection has failed. Connect the device again. (See page 11.)
•ERROR
Try the operation again. If “ERROR” appears again, check if the device supports the function you have tried.
|
• |
PLEASE WAIT |
|
|
The unit is preparing to use the Bluetooth function. If |
||
|
• |
the message does not disappear, turn off and turn on |
ENGLISH |
|
PLS RESET |
||
|
the unit, then connect the device again (or reset the |
||
|
unit). |
||
|
Reset the unit and try the operation again. If |
||
|
“PLS RESET” appears again, consult your nearest JVC |
||
|
car audio dealers. |
 HD Radio reception
•Many HD Radio stations also offer more than one channel of programming. This service is called multicasting.
•During SSM search, all stations including conventional FM/AM stations are searched and stored for the selected band.
•To find HD Radio stations in your area, visit www. hdradio.com <http://www.hdradio.com/>.
 Satellite radio
•You can also connect the JVC SIRIUS radio PnP (Plug and Play), using the JVC SIRIUS radio adapter, KS-U100K (not supplied) to the CD changer jack on the rear.
By turning on/off the power of the unit, you can turn on/off the JVC PnP. However, you cannot control it from this unit.
•To know more about SIRIUS Satellite radio or to sign up, visit <http://www.sirius.com>.
•For the latest channel listings and programming information, or to sign up for XM Satellite radio, visit <http://www.xmradio.com>.
 iPod
iPod
•You can control the following types of iPods through the interface adapter.
–iPod with dock connector (3rd Generation)
–iPod with Click Wheel (4th Generation)
–iPod mini
–iPod photo
Continued on the next page
REFERENCES 29

|
– iPod nano*1 |
||
|
– iPod video (5th Generation)*2 |
||
|
ENGLISH |
*1 |
When you connect the iPod nano to the interface |
|
*2 |
It is not possible to browse video files on the |
adapter, be sure to disconnect the headphones; otherwise, no sound is heard.
“Videos” menu while the iPod is connected to the interface adapter.
•If the iPod does not play correctly, please update your iPod software to the latest version. For details about updating your iPod, visit <http://www.apple.com>.
•When you turn on this unit, the iPod is charged through this unit.
•While the iPod is connected, all operations from the iPod are disabled. Perform all operations from this unit.
•The text information may not be displayed correctly.
•If the text information includes more than 11 characters, it scrolls on the display. This unit can display up to 40 characters.
Notice:
When operating an iPod, some operations may not be performed correctly or as intended. In this case, visit the following JVC web site: <http://www.jvc. co.jp/english/car/support/ks-pd100/index.html>
 Title assignment
•If you try to assign titles to more than 30 station frequencies, “NAME FULL” appears. Delete unwanted titles before assignment.
 General settings—PSM
•“AUTO” setting for “DIMMER” may not work correctly on some vehicles, particularly on those having a control dial for dimming.
In this case, change the “DIMMER” setting to any other than “AUTO.”
•If you change the “AMP GAIN” setting from “HIGH POWER” to “LOW POWER” while the volume level is set higher than “VOLUME 30,” the unit automatically changes the volume level to “VOLUME 30.”
Detaching the control panel
Attaching the control panel
•Microsoft and Windows Media are either registered trademarks or trademarks of Microsoft Corporation in the United States and/or other countries.
•The Bluetooth word mark and logos are owned by the Bluetooth SIG, Inc. and any use of such marks by Victor Company of Japan, Limited (JVC) is under
license. Other trademarks and trade names are those of their respective owners.
•HD Radio™ and the HD Radio Ready logo are proprietary trademarks of iBiquity Digital Corp.
•“SIRIUS” and the SIRIUS dog logo are registered trademarks of SIRIUS Satellite Radio Inc.
•XM and its corresponding logos are registered trademarks of XM Satellite Radio Inc.
•“SAT Radio,” the SAT Radio logo and all related marks are trademarks of SIRIUS Satellite Radio Inc., and XM Satellite Radio, Inc.
•iPod is a trademark of Apple Inc., registered in the U.S. and other countries.
30
![]()
Troubleshooting
What appears to be trouble is not always serious. Check the following points before calling a service center.
|
Symptoms |
Remedies/Causes |
|
|
General |
• Sound cannot be heard from the speakers. |
• Adjust the volume to the optimum level. |
|
• Check the cords and connections. |
||
|
• The unit does not work at all. |
Reset the unit (see page 3). |
|
|
FM/AM |
• SSM automatic presetting does not work. |
Store stations manually. |
|
• Static noise while listening to the radio. |
Connect the antenna firmly. |
|
|
• Disc cannot be played back. |
Insert the disc correctly. |
|
|
• CD-R/CD-RW cannot be played back. |
• Insert a finalized CD-R/CD-RW. |
|
|
• Tracks on the CD-R/CD-RW cannot be |
• Finalize the CD-R/CD-RW with the component which |
|
|
skipped. |
you used for recording. |
|
|
playback |
||
|
• Disc can neither be played back nor ejected. |
• Unlock the disc (see page 9). |
|
|
• Eject the disc forcibly (see page 3). |
||
|
Disc |
• Disc sound is sometimes interrupted. |
• Stop playback while driving on rough roads. |
|
• Change the disc. |
||
|
• Check the cords and connections. |
||
|
• “NO DISC” appears on the display. |
Insert a playable disc into the loading slot. |
|
|
• “PLEASE” and “EJECT“ appear alternately |
This occurs sometimes due to over-heating. Eject the disc |
|
|
on the display. |
or change to another playback source. |
|
|
• Disc cannot be played back. |
• Use a disc with MP3/WMA tracks recorded in a format |
|
|
compliant with ISO 9660 Level 1, Level 2, Romeo, or |
||
|
playback |
Joliet. |
|
|
file names. |
||
|
• Add the extension code <.mp3> or <.wma> to the |
||
|
MP3/WMA |
||
|
• Noise is generated. |
WMA tracks.) |
|
|
Skip to another track or change the disc. (Do not add the |
||
|
extension code <.mp3> or <.wma> to non-MP3 or |
||
|
• A longer readout time is required |
Do not use too many hierarchical levels and folders. |
|
|
(“READING” keeps flashing on the display). |
||
ENGLISH
Continued on the next page
REFERENCES 31

|
Symptoms |
Remedies/Causes |
|
• Tracks do not play back in the order you |
The playback order is determined when the files are |
|
have intended them to play. |
recorded. |
|
• The elapsed playing time is not correct. |
This sometimes occurs during playback. This is caused by |
|
how the tracks are recorded on the disc. |
|
|
• The correct characters are not displayed |
This unit can only display letters (upper case), numbers, |
|
(e.g. album name). |
and a limited number of symbols. |
|
• The unit cannot be detected by the |
• Search from the Bluetooth device again. |
|
Bluetooth device. |
• Reset the unit. When “WAIT PAIR” appears on the |
|
display, search from the Bluetooth device again. |
|
|
• The unit does not make pairing with the |
Enter the same PIN code for both the unit and target |
|
Bluetooth device. |
device. |
|
• Phone sound quality is poor. |
• Reduce the distance between the unit and the |
|
Bluetooth cellular phone. |
|
|
• Move the car to a place where you can get a better |
|
|
signal reception. |
|
|
• The sound is interrupted or skipped during |
• Reduce the distance between the unit and the |
|
playback of a Bluetooth audio player. |
Bluetooth audio player. |
|
• Disconnect the device connected for “PHONE.” |
|
|
• Turn off, then turn on the unit. |
|
|
• When the sound is not yet restored: Connect the |
|
|
player again. |
|
|
• The connected audio player cannot be |
• Check whether the connected audio player supports |
|
controlled. |
AVRCP (Audio Video Remote Control Profile). |
|
(Operations depend on the connected audio player.) |
|
|
• Disconnect and connect the Bluetooth player again. |
|
|
• The unit does not response when you tried |
You may have tried to copy the same entries (as stored) |
|
to copy the phone book to the unit. |
to the unit. Press 5to exit. |
32

HD Radio reception
CD changer
Satellite radio
|
Symptoms |
Remedies/Causes |
||
|
• Sound quality changes when receiving |
Fix the reception mode either to “DIGITAL” or “ANALOG” |
ENGLISH |
|
|
HD Radio stations. |
(see page 15). |
||
|
• No sound can be heard. |
• “ANALOG” is selected when receiving all digital |
||
|
broadcast of HD Radio station. Select “DIGITAL” or |
|||
|
“AUTO” (see page 15). |
|||
|
• “DIGITAL” is selected when receiving weak digital |
|||
|
signals or receiving conventional radio broadcast. |
|||
|
Select “ANALOG” or “AUTO” (see page 15). |
|||
|
• “RESET 8” appears on the display. |
Reconnect this unit and the HD Radio tuner box correctly, |
||
|
then reset the unit. |
|||
|
• “NO DISC” appears on the display. |
Insert a disc into the magazine. |
||
|
• “NO MAGAZINE” appears on the display. |
Insert the magazine. |
||
|
• “RESET 8” appears on the display. |
Connect this unit and the CD changer correctly and press |
||
|
the reset button of the CD changer. |
|||
|
• “RESET 1” – “RESET 7” appears on the |
Press the reset button of the CD changer. |
||
|
display. |
|||
|
• The CD changer does not work at all. |
Reset the unit (see page 3). |
||
|
• “CALL 1-888-539-SIRIUS TO SUBSCRIBE” |
Starts subscribing to SIRIUS Satellite radio (see page 17). |
||
|
scrolls on the display while listening to the |
|||
|
SIRIUS Satellite radio. |
|||
|
• No sound can be heard. “UPDATING” |
The unit is updating the channel information and it takes |
||
|
appears on the display. |
a few minutes to complete. |
||
|
• Either “NO SIGNAL” scrolls or “NO SIGNL” |
Move to an area where signals are stronger. |
||
|
appears on the display. |
|||
•Either “NO ANTENNA” scrolls or “ANTENNA” Connect the antenna firmly. appears on the display.
|
• “NO CHANNEL” appears on the display |
No broadcast on the selected channel. |
|
for about 5 seconds, then returns to the |
Select another channel or continue listening to the |
|
previous display while listening to the |
previous channel. |
|
SIRIUS Satellite radio. |
Continued on the next page
REFERENCES 33

ENGLISH
|
Symptoms |
Remedies/Causes |
||
|
• “NO (information)*” scrolls on the display |
No text information for the selected channel. |
||
|
while listening to the SIRIUS Satellite radio. |
|||
|
• “——” appears on the display while |
|||
|
listening to the XM Satellite radio. |
|||
|
• “——” appears on the display for about |
Selected channel is no longer available or is |
||
|
radio |
2 seconds, then returns to the previous |
unauthorized. |
|
|
channel while listening to the XM Satellite |
Select another channel or continue listening to the |
||
|
Satellite |
radio. |
previous channel. |
|
|
• “OFF AIR” appears on the display while |
Selected channel is not broadcasting at this time. |
||
|
listening to the XM Satellite radio. |
Select another channel or continue listening to the |
||
|
previous channel. |
|||
|
• “LOADING” appears on the display while |
The unit is loading the channel information and audio. |
||
|
listening to the XM Satellite radio. |
Text information are temporarily unavailable. |
||
|
• “RESET 8” appears on the display. |
Reconnect this unit and the satellite radio correctly and |
||
|
• Satellite radio does not work at all. |
reset this unit. |
||
|
• The iPod does not turn on or does not work. |
• Check the connecting cable and its connection. |
||
|
• Update the firmware version. |
|||
|
• Charge the battery. |
|||
|
• The sound is distorted. |
Deactivate the equalizer either on this unit or the iPod. |
||
|
• “NO IPOD” appears on the display. |
• Check the connecting cable and its connection. |
||
|
• Charge the battery. |
|||
|
• Playback stops. |
The headphones are disconnected during playback. |
||
|
iPod |
Restart the playback operation (see page 19). |
||
|
• No sound can be heard when connecting |
• Disconnect the headphones from the iPod nano. |
||
|
an iPod nano. |
• Update the firmware version of the iPod nano. |
||
|
• “NO FILES” appears on the display. |
No tracks are stored. Import tracks to the iPod. |
||
|
• “RESET 1” – “RESET 7” appears on the |
Disconnect the adapter from both this unit and iPod. |
||
|
display. |
Then, connect it again. |
||
|
• “RESET 8” appears on the display. |
Check the connection between the adapter and this unit. |
||
|
• The iPod’s controls do not work after |
Reset the iPod. |
||
|
disconnecting from this unit. |
* NO CATEGORY, NO ARTIST, NO COMPOSER, and NO SONG/PROGRAM.
34
 Loading…
ENGLISH
ESPAÑOL
FRANÇAIS
CD RECEIVER
KD-BT11
RECEPTOR CON CD
KD-BT11
RÉCEPTEUR CD
KD-BT11
For canceling the display demonstration, see page 4.
Para cancelar la demostración en pantalla, consulte la página 4.
Pour annuler la démonstration des affichages, référez-vous à la page 4.
For installation and connections, refer to the separate manual.
Para la instalación y las conexiones, refiérase al manual separado.
Pour l’installation et les raccordements, se référer au manuel séparé.
INSTRUCTIONS
MANUAL DE INSTRUCCIONES
MANUEL D’INSTRUCTIONS
GET0506-001A
[J]
For customer Use:
Enter below the Model
No. and Serial No. which
are located on the top or
bottom of the cabinet. Retain
this information for future
reference.
Model No.
Serial No.
Pentru utilizarea de către
clienţi:
Introduceţi mai jos numărul
şi seria modelului, localizate în
partea de sus sau de jos a cutiei.
Păstraţi aceste informaţii pentru a
le consulta şi mai târziu.
Nr. modelului
Nr. de serie
RADIO CD
Pentru a opri derularea mesajelor pe afişaj, vezi pagina 4.
Pentru instrucţiuni de instalare şi conectare, consultaţi manualul
separat.
MANUAL DE
INSTRUCŢIUNI
ENGLISH
ESPAÑOL
FRANÇAIS
CD RECEIVER
KD-BT11
RECEPTOR CON CD
KD-BT11
RÉCEPTEUR CD
KD-BT11
For canceling the display demonstration, see page 4.
Para cancelar la demostración en pantalla, consulte la página 4.
Pour annuler la démonstration des affichages, référez-vous à la page 4.
For installation and connections, refer to the separate manual.
Para la instalación y las conexiones, refiérase al manual separado.
Pour l’installation et les raccordements, se référer au manuel séparé.
INSTRUCTIONS
MANUAL DE INSTRUCCIONES
MANUEL D’INSTRUCTIONS
GET0506-001A
[J]
For customer Use:
Enter below the Model
No. and Serial No. which
are located on the top or
bottom of the cabinet. Retain
this information for future
reference.
Model No.
Serial No.
ROM
ÂNĂ
-
Страница 1
ENGLISH ESPAÑOL FRANÇAIS CD RECEIVER KD-BT11 RECEPTOR CON CD KD-BT11 RÉCEPTEUR CD KD-BT11 For canceling the display demonstration, see page 4. Para cancelar la demostración en pantalla, consulte la página 4. Pour annuler la démonstration des affichages, référez-vous à la page 4. For installation and connections, refer to the separate manua[…]
-
Страница 2
ENGLISH 2 Thank you for purchasing a JVC product. Please read all instructions carefully before operation, to ensure your complete understanding and to obtain the best possible performance from the unit. INFORMATION (For U.S.A.) This equipment has been tested and found to comply with the limits for a Class B digital device, pursuant to Part 15 of t[…]
-
Страница 3
ENGLISH 3 How to reset your unit • Your preset adjustments will also be erased (except the registered Bluetooth device, see pages 10 and 11). How to forcibly eject a disc • Be careful not to drop the disc when it ejects. • If this does not work, reset your unit. How to use the M MODE button If you press M MODE, the unit goes into functions mo[…]
-
Страница 4
ENGLISH 4 INTRODUCTIONS Preparation Cancel the display demonstration and set the clock • See also page 23. 1 Turn on the power. 2 Enter the PSM settings. 3 Cancel the display demonstrations Select “DEMO,” then “DEMO OFF.” Set the clock Select “CLOCK HOUR,” then adjust the hour. Select “CLOCK MIN” (minute), then adjust the minute. […]
-
Страница 5
ENGLISH 5 OPERATIONS Basic operations Using the control panel r • Adjust the sound mode. • Enter the PSM settings [Hold]. t • Enter functions mode. Press M MODE, then one of the following buttons (within 5 seconds)… MO : Turn on/off monaural reception. SSM : Automatic station presetting [Hold]. RPT : Select repeat play. RND : Select random […]
-
Страница 6
ENGLISH 6 Before using the remote controller: • Aim the remote controller directly at the remote sensor on the unit. • DO NOT expose the remote sensor to bright light (direct sunlight or artificial lighting). Installing the lithium coin battery (CR2025) For USA-California Only: This product contains a CR Coin Cell Lithium Battery which contains[…]
-
Страница 7
ENGLISH 7 OPERATIONS 1 • Turns the power on if pressed briefly or attenuates the sound when the power is on. • Turns the power off if pressed and held. 2 • Changes the FM/AM bands with 5 U. • Changes the preset stations with D ∞ . • Changes the folder of the MP3/WMA. • While playing an MP3 disc on an MP3-compatible CD changer: – Cha[…]
-
Страница 8
ENGLISH 8 • If an HD Radio tuner box is connected, you can also search and store the AM station automatically. Manual presetting Ex.: Storing FM station of 92.50MHz into preset number 4 of the FM1 band. 1 2 3 To listen to a preset station or Listening to the radio 1 Select “FM/AM.” 2 Select the bands. 3 Search for a station to listen—Auto S[…]
-
Страница 9
ENGLISH 9 OPERATIONS To stop play and eject the disc • Press SRC to listen to another playback source. Prohibiting disc ejection To cancel the prohibition, repeat the same procedure. Disc operations Pressing (or holding) the following buttons allows you… [Press] Select track [Hold] Reverse/fast-forward track MP3: Select folder (Number buttons) […]
-
Страница 10
ENGLISH 10 Connecting a Bluetooth device for the first time Pairing and PIN code When you connect a Bluetooth device to the unit for the first time, make pairing between the unit and the device. Pairing allows Bluetooth devices to communicate with each other. To make pairing, you may need to enter the PIN (Personal Identification Number) code of yo[…]
-
Страница 11
ENGLISH 11 OPERATIONS 1 Move to the next (or previous) number position. 2 Select a number. 3 Repeat steps 1 and 2 until you finish entering a PIN code. 4 Confirm the entry. 5 Operate the target Bluetooth device, (while “WAIT PAIR” is flashing on the display). On the device to be connected, enter the same PIN code you have just entered for this […]
-
Страница 12
ENGLISH 12 Using the Bluetooth cellular phone 1 — Establish the connection with a device. (See pages 10 and 11.) 2 Enter Bluetooth menu. 3 Select “CALL,” then make a call or settings using the “SETTINGS” menu. (See the following and page 26.) When a call comes in…. The source is automatically changed to “BLUETOOTH,” then “RCV CALL[…]
-
Страница 13
ENGLISH 13 OPERATIONS • PHONEBOOK : Shows the 1st listed name/phone number of the phone book of the unit = go to the following step. To transfer the phone book memory, see page 26. • PRESET : Shows the list of preset numbers. = go to the following step. • DIAL NUMBER : Shows the phone number entry screen = “How to enter phone number” (see[…]
-
Страница 14
ENGLISH 14 Using the Bluetooth audio player • Operations and display indications differ depending on their availability on the connected audio player. 1 Select “BLUETOOTH.” • Pressing can enter the Bluetooth menu directly. 2 — Establish the connection with a Bluetooth audio player. If playback does not start automatically, operate the Blu[…]
-
Страница 15
ENGLISH 15 EXTERNAL DEVICES When receiving an HD Radio station… When receiving HD Radio multicast channels… Select your desired channel. “LINKING” appears while linking to a multicast channel. Searching for HD Radio stations only 1 2 Changing HD Radio reception mode While receiving an HD Radio broadcast, the unit tunes to digital or analog […]
-
Страница 16
ENGLISH 16 [Press] Select track [Hold] Reverse/fast-forward track MP3: Select folders After pressing M MODE, press the following buttons… Skip 10 tracks MP3: Within the same folder TRACK RPT : Repeat current track FOLDER RPT : MP3: Repeat all tracks of current folder DISC RPT : Repeat all tracks of the current disc FOLDER RND : MP3: Randomly play[…]
-
Страница 17
ENGLISH 17 EXTERNAL DEVICES Listening to the satellite radio Activate your SIRIUS subscription after connection 1 2 SIRIUS Satellite radio starts updating all the SIRIUS channels. Once completed, SIRIUS Satellite radio tunes in to the preset channel, CH184. 3 Check your SIRIUS ID, see page 24. 4 Contact SIRIUS on the internet at <http://activate[…]
-
Страница 18
ENGLISH 18 1 Select “SIRIUS” or “XM.” 2 Select the bands. SIRIUS: XM: 3 Select a category. SIRIUS: If you select “ALL,” you can tune in to all the channels of all categories. 4 Select a channel to listen. • Holding the button changes the channels rapidly. • While searching, invalid and unsubscribed channels are skipped. XM: If you d[…]
-
Страница 19
ENGLISH 19 EXTERNAL DEVICES Listening to the iPod Selecting a track from the menu 1 Enter the main menu. This mode will be canceled if no operations are done for about 5 seconds. 2 Select the desired menu. PLAYLISTS Ô ARTISTS Ô ALBUMS Ô SONGS Ô GENRES Ô COMPOSERS Ô (back to the beginning) 3 Confirm the selection. • To move back to the previ[…]
-
Страница 20
ENGLISH 20 EXTERNAL DEVICES Listening to the other external components You can connect an external component to: • CD changer jack on the rear of this unit using the following adapters (separately purchased): – Line Input Adapter , KS-U57 – AUX Input Adapter , KS-U58 Preparation: Make sure “EXT INPUT” is selected for the external input se[…]
-
Страница 21
ENGLISH 21 SETTINGS 3 Select a tone. 4 Adjust the sound elements of the selected tone. 1 Adjust the frequency. 2 Adjust the level. Selecting a preset sound mode You can select a preset sound mode suitable to the music genre (iEQ: intelligent equalizer). Preset value setting for each sound mode Sound mode Preset value BASS (bass) MID (mid-range) TRE[…]
-
Страница 22
ENGLISH 22 FADER * 2 Adjust the front and rear speaker balance. R06 to F06 BALANCE * 3 Adjust the left and right speaker balance. L06 to R06 LOUD * 4 (loudness) Boost low and high frequencies to produce a well-balanced sound at a low volume level. LOUD ON or LOUD OFF SUB.W * 1 (subwoofer) Adjust the subwoofer output level. 00 to 08, initial: 04 VOL[…]
-
Страница 23
ENGLISH 23 SETTINGS 3 Adjust the PSM item selected. 4 Repeat steps 2 and 3 to adjust other PSM items if necessary. 5 Finish the procedure. You can change PSM (Preferred Setting Mode) items listed in the table below and on pages 24 and 25. 1 Enter the PSM settings. 2 Select a PSM item. General settings — PSM Indications Item ( : Initial) Setting, […]
-
Страница 24
ENGLISH 24 Indications Item ( : Initial) Setting, [reference page] CLOCK ADJ * 2 Clock adjustment • AUTO • OFF : The built-in clock is automatically adjusted using the clock data provided via the satellite radio channel. : Cancels. TIME ZONE * 2, * 3 Time zone — : Select your residential area from one of the time zones for clock adjustment. E[…]
-
Страница 25
ENGLISH 25 SETTINGS Indications Item ( : Initial) Setting, [reference page] EXT INPUT * 8, * 9 External input • CHANGER • EXT INPUT : To connect a JVC CD changer, [16], or an Apple iPod, [19]. : To connect portable audio player to the CD changer jack, [20]. TAG DISPLAY Tag display • TAG ON • TAG OFF : Shows the Tag information while playing[…]
-
Страница 26
ENGLISH 26 SETTINGS AUTO ANSWER ON : The unit answers the incoming calls automatically. OFF : The unit does not answer the calls automatically. Answer the calls manually. REJECT : The unit rejects all incoming calls. MSG NOTICE (message notice) ON * 1 : The unit informs you of the arrival of a message by ringing and displaying “RCV MESSAGE” (re[…]
-
Страница 27
ENGLISH 27 SETTINGS & REFERENCES Continued on the next page Title assignment You can assign titles to 30 station frequencies (FM and AM) using 8 characters (maximum) for each title. • When HD Radio tuner box is connected, this feature will be disable. 1 Select a station you want to assign a title (see also page 8). 2 Show the title entry scre[…]
-
Страница 28
ENGLISH 28 • When a disc is inserted upside down, “PLEASE” and “EJECT” appear alternately on the display. Press 0 to eject the disc. • In this manual, words “track” and “file” are interchangeably used. • While fast-forwarding or reversing on an MP3 or WMA disc, you can only hear intermittent sounds. • If you change the sourc[…]
-
Страница 29
ENGLISH 29 REFERENCES • This unit can play back files recorded in VBR (variable bit rate). Files recorded in VBR have a discrepancy in the elapsed time display, and do not show the actual elapsed time. In particular, this difference becomes noticeable after performing the search function. • This unit cannot play back the following files: – MP[…]
-
Страница 30
ENGLISH 30 • Microsoft and Windows Media are either registered trademarks or trademarks of Microsoft Corporation in the United States and/or other countries. • The Bluetooth word mark and logos are owned by the Bluetooth SIG, Inc. and any use of such marks by Victor Company of Japan, Limited (JVC) is under license. Other trademarks and trade na[…]
-
Страница 31
ENGLISH 31 REFERENCES Continued on the next page Troubleshooting What appears to be trouble is not always serious. Check the following points before calling a service center. Symptoms Remedies/Causes General • Sound cannot be heard from the speakers. • Adjust the volume to the optimum level. • Check the cords and connections. • The unit doe[…]
-
Страница 32
ENGLISH 32 Symptoms Remedies/Causes MP3/WMA playback • Tracks do not play back in the order you have intended them to play. The playback order is determined when the files are recorded. • The elapsed playing time is not correct. This sometimes occurs during playback. This is caused by how the tracks are recorded on the disc. • The correct cha[…]
-
Страница 33
ENGLISH 33 REFERENCES Continued on the next page Symptoms Remedies/Causes HD Radio reception • Sound quality changes when receiving HD Radio stations. Fix the reception mode either to “DIGITAL” or “ANALOG” (see page 15). • No sound can be heard. • “ANALOG” is selected when receiving all digital broadcast of HD Radio station. Selec[…]
-
Страница 34
ENGLISH 34 Symptoms Remedies/Causes Satellite radio • “NO (information)*” scrolls on the display while listening to the SIRIUS Satellite radio. • “——” appears on the display while listening to the XM Satellite radio. No text information for the selected channel. • “——” appears on the display for about 2 seconds, then returns[…]
-
Страница 35
ENGLISH 35 REFERENCES How to clean the connectors Frequent detachment will deteriorate the connectors. To minimize this possibility, periodically wipe the connectors with a cotton swab or cloth moistened with alcohol, being careful not to damage the connectors. Moisture condensation Moisture may condense on the lens inside the unit in the following[…]
-
Страница 36
ENGLISH 36 AUDIO AMPLIFIER SECTION Power Output: 20 W RMS × 4 Channels at 4 Ω and ≤ 1% THD+N Signal-to-Noise Ratio: 80 dBA (reference: 1 W into 4 Ω) Load Impedance: 4 Ω (4 Ω to 8 Ω allowance) Tone Control Range: Bass: ±12 dB (60 Hz, 80 Hz, 100 Hz, 200 Hz) Mid-range: ±12 dB (500 Hz, 1.0 kHz, 1.5 kHz, 2.5 kHz) Treble: ±12 dB (10.0 kHz[…]
-
Страница 37
ENGLISH 37 REFERENCES CD PLAYER SECTION Type: Compact disc player Signal Detection System: Non-contact optical pickup (semiconductor laser) Number of Channels: 2 channels (stereo) Frequency Response: 5 Hz to 20 000 Hz Dynamic Range: 96 dB Signal-to-Noise Ratio: 98 dB Wow and Flutter: Less than measurable limit MP3 Decoding Format: (MPEG1/2 Audio La[…]
-
Страница 38
2 ESPAÑOL Muchas gracias por la compra de un producto JVC. Como primer paso, por favor lea detenidamente este manual para comprender a fondo todas las instrucciones y obtener un máximo disfrute de esta unidad. IMPORTANTE (EE.UU.) Este equipo se ha sometido a todo tipo de pruebas y cumple con las normas establecidas para dispositivos de Clase B, d[…]
-
Страница 39
3 ESPAÑOL Cómo reposicionar su unidad • Sus ajustes preestablecidos también serán borrados (excepto el dispositivo Bluetooth registrado, consulte las páginas 10 y 11). Cómo expulsar el disco por la fuerza • Tenga cuidado de no dejar caer el disco al ser expulsado. • Si esto no funciona, intente reposicionar su receptor. Cómo usar el bo[…]
-
Страница 40
4 INTRODUCCIÓN ESPAÑOL Preparativos Cancele la demostración en pantalla y ponga el reloj en hora • Consulte también la página 23. 1 Encienda la unidad. 2 Introduzca los ajustes PSM. 3 Cancele las demostraciones en pantalla. Seleccione “DEMO” y, a continuación, “DEMO OFF”. Ponga el reloj en hora Seleccione “CLOCK HOUR” y, seguida[…]
-
Страница 41
5 OPERACIONES ESPAÑOL Operaciones básicas Uso del panel de control r • Ajusta el modo de sonido. • Introduzca los ajustes PSM [Sostener]. t • Entra al modo de funciones. Pulse M MODE y luego uno de los botones siguientes (en menos de 5 segundos)… MO : Activa/desactiva la recepción monaural. SSM : Preajuste automático de emisoras [Sosten[…]
-
Страница 42
6 ESPAÑOL Antes de utilizar el control remoto: • Apunte el control remoto directamente hacia el sensor remoto del receptor. • NO exponga el sensor remoto a una luz brillante (luz solar directa o iluminación artificial). Instalación de la pila botón de litio (CR2025) Sólo para EE.UU.-California: Este producto contiene una batería de litio […]
-
Страница 43
7 OPERACIONES ESPAÑOL 1 • La unidad se enciende al pulsarlo brevemente o el sonido se atenúa cuando está encendida. • La unidad se apaga si lo pulsa y mantiene pulsado. 2 • Cambia las bandas FM/AM mediante 5 U. • Cambia las emisoras preajustadas mediante D ∞ . • Cambia la carpeta de MP3/WMA. • Mientras se reproduce un disco MP3 en […]
-
Страница 44
8 ESPAÑOL • Si el sintonizador de HD Radio está conectado, también puede buscar y almacenar las emisoras AM automáticamente. Preajuste manual Ej.: Para guardar una emisora FM que transmite en 92,50MHz en el número de preajuste 4 de la banda FM1. 1 2 3 Para escuchar una emisora preajustada o Para escuchar la radio 1 Selecciona “FM/AM”. 2 […]
-
Страница 45
9 OPERACIONES ESPAÑOL Para detener la reproducción y expulsar el disco • Pulse SRC para escuchar otra fuente de reproducción. Prohibición de la expulsión del disco Para cancelar la prohibición, repita el mismo procedimiento. Operaciones de los discos Pulsando (o sosteniendo) los siguientes botones usted podrá… [Pulse] Seleccionar la pist[…]
-
Страница 46
10 ESPAÑOL Conexión de un dispositivo Bluetooth por primera vez Apareamiento y código PIN Cuando se conecta por primera vez un dispositivo Bluetooth a la unidad, efectúe el apareamiento entre la unidad y el dispositivo. El apareamiento permite la comunicación entre dispositivos Bluetooth. Para realizar el apareamiento, es posible que deba ingr[…]
-
Страница 47
11 OPERACIONES ESPAÑOL 1 Muévase a la posición del número siguiente (o anterior). 2 Selecciona un número. 3 Repita los pasos 1 y 2 hasta terminar de introducir un código PIN. 4 Confirme la entrada. 5 Opere el dispositivo Bluetooth de destino, (mientras “WAIT PAIR” destella en la pantalla). En el dispositivo que se desea conectar, ingrese […]
-
Страница 48
12 ESPAÑOL Usar el teléfono celular Bluetooth 1 — Establezca la conexión con un dispositivo. (Consulte las páginas 10 y 11). 2 Acceda al menú Bluetooth. 3 Seleccione “CALL”, luego haga una llamada o realice ajustes utilizando el menú “SETTINGS”. (Véase lo siguiente y la página 26). Cuando entra una llamada… La fuente cambia auto[…]
-
Страница 49
13 OPERACIONES ESPAÑOL • PHONEBOOK : Muestra el primer nombre/ número telefónico de la guía telefónica de la unidad = vaya al paso siguiente. Para transferir la memoria de la guía telefónica, consulte la página 26. • PRESET : Muestra la lista de números preajustados. = vaya al paso siguiente. • DIAL NUMBER : Muestra la pantalla de en[…]
-
Страница 50
14 ESPAÑOL OPERACIONES Y DISPOSITIVOS EXTERNOS Uso del reproductor de audio Bluetooth • Las operaciones y las indicaciones en pantalla difieren según el reproductor de audio conectado. 1 Seleccione “BLUETOOTH”. • Si presiona , podrá introducir directamente el menú Bluetooth. 2 — Establezca la conexión con un reproductor de audio Blue[…]
-
Страница 51
15 ESPAÑOL DISPOSITIVOS EXTERNOS Cuando se recibe una emisora HD Radio… Cuando recibe canales de transmisión múltiple con HD Radio… Seleccione el canal que desea. Aparece “LINKING” mientras se enlaza con un canal multicast. Para buscar emisoras de HD Radio solamente 1 2 Para cambiar el modo de recepción de HD Radio Cuando recibe una tra[…]
-
Страница 52
16 ESPAÑOL [Pulse] Seleccionar la pista [Sostener] Retroceso/avance rápido de pista MP3: Selecciona carpetas Tras pulsar M MODE , pulse los siguientes botones… Saltar 10 pistas MP3: Dentro de la misma carpeta TRACK RPT : Repetir la pista actual FOLDER RPT : MP3: Repite todas las pistas de la carpeta actual DISC RPT : Repite todas las pistas del[…]
-
Страница 53
17 DISPOSITIVOS EXTERNOS ESPAÑOL Para escuchar la radio satelital Active la suscripción de SIRIUS después de la conexión 1 2 La radio satelital SIRIUS comienza a actualizar todos los canales SIRIUS. Una vez finalizada la actualización, la radio satelital SIRIUS sintoniza en un canal preajustado, CH184. 3 Verifique su SIRIUS ID, consulte la pá[…]
-
Страница 54
18 ESPAÑOL 1 Seleccione “SIRIUS” o “XM”. 2 Selecciona las bandas. SIRIUS: XM: 3 Seleccione una categoría. SIRIUS: Si selecciona “ALL”, puede sintonizar todos los canales de todas las categorías. 4 Seleccione el canal de audición. • Al mantener pulsado el botón, los canales se cambian rápidamente. • Durante la búsqueda, se omi[…]
-
Страница 55
19 DISPOSITIVOS EXTERNOS ESPAÑOL Para escuchar el iPod Seleccionar una pista en el menú 1 Ingrese al menú principal. Este modo se cancelará si no se efectúa ninguna operación durante unos 5 segundos. 2 Seleccione el menú deseado. PLAYLISTS Ô ARTISTS Ô ALBUMS Ô SONGS Ô GENRES Ô COMPOSERS Ô (vuelta al comienzo) 3 Confirme la selección. […]
-
Страница 56
20 DISPOSITIVOS EXTERNOS ESPAÑOL Escuchando otros componentes externos Podrá conectar un componente externo a: • Jack del cambiador de CD de la parte trasera de esta unidad utilizando los siguientes adaptadores (vendidos separadamente): – Adaptador de entrada de línea , KS-U57 – Adaptador de entrada AUX , KS-U58 Preparativos: Asegúrese de[…]
-
Страница 57
21 AJUSTES ESPAÑOL 3 Seleccione un tono. 4 Ajuste los elementos de sonido del tono seleccionado. 1 Ajuste la frecuencia. 2 Ajuste el nivel. Selección de un modo de sonido preajustado Podrá seleccionar un modo de sonido preajustado adecuado al género musical (iEQ: ecualizador inteligente). Configuración del valor preajustado para cada modo de s[…]
-
Страница 58
22 ESPAÑOL FADER * 2 Ajusta el balance de los altavoces delanteros y traseros. R06 a F06 BALANCE * 3 Ajusta el balance de los altavoces izquierdo y derecho. L06 a R06 LOUD * 4 (sonoridad) Refuerza las frecuencias altas y bajas para producir un sonido bien balanceado a bajos niveles de volumen. LOUD ON o LOUD OFF SUB.W * 1 (subwoofer) Ajusta el niv[…]
-
Страница 59
23 AJUSTES ESPAÑOL 3 Ajuste la opción de PSM seleccionada. 4 Repita los pasos 2 y 3 para ajustar las otras opciones de PSM, si fuera necesario. 5 Finalice el procedimiento. Podrá cambiar las opciones de PSM (Modo de ajustes preferidos) listadas en la tabla de abajo y en las páginas 24 y 25. 1 Introduzca los ajustes PSM. 2 Seleccione una opción[…]
-
Страница 60
24 ESPAÑOL Indicaciones Opción ( : Inicial) Ajuste, [página de referencia] CLOCK ADJ * 2 Ajuste del reloj • AUTO • OFF : El reloj incorporado se ajustará automáticamente gracias a los datos de reloj suministrados mediante el canal de radio satelital. : Se cancela. TIME ZONE * 2, * 3 Zona horaria — : Para el ajuste del reloj, seleccione s[…]
-
Страница 61
25 AJUSTES ESPAÑOL Indicaciones Opción ( : Inicial) Ajuste, [página de referencia] EXT INPUT * 8, * 9 Entrada externa • CHANGER • EXT INPUT : Para conectar un cambiador de CD JVC [16] o un iPod Apple [19]. : Para conectar un reproductor de audio portátil al jack del cambiador de CD, [20]. TAG DISPLAY Visualización de etiqueta • TAG ON ?[…]
-
Страница 62
26 AJUSTES ESPAÑOL AUTO ANSWER ON : La unidad contesta automáticamente las llamadas entrantes. OFF : La unidad no contesta las llamadas automáticamente. Contesta la llamada manualmente. REJECT : La unidad rechaza todas las llamadas entrantes. MSG NOTICE (aviso de mensaje) ON * 1 : La unidad le informa la llegada de un mensaje emitiendo un pitido[…]
-
Страница 63
27 AJUSTES Y REFERENCIAS ESPAÑOL Continúa en la página siguiente Asignación de título Puede asignar títulos a 30 frecuencias de emisoras (FM y AM), con un máximo de 8 carácteres para cada título. • Cuando el sintonizador de HD Radio esté conectado, esta característica se deshabilitará. 1 Selecciona la emisora a la que desea asignarle […]
-
Страница 64
28 ESPAÑOL • Cuando se inserta un disco al revés, “PLEASE” y “EJECT” aparecerán alternativamente en la pantalla. Pulse 0 para sacar el disco. • En este manual, las palabras “pista” y “archivo” se utilizan indistintamente. • Durante el avance rápido o el retroceso de un disco MP3 o WMA, podrá escuchar sólo sonidos intermi[…]
-
Страница 65
29 REFERENCIAS ESPAÑOL • Este receptor puede reproducir archivos grabados en VBR (velocidad variable de bits). Los archivos grabados en VBR presentan una discrepancia en la visualización del tiempo transcurrido, y no muestran el tiempo transcurrido real. Especialmente, esta diferencia se hace evidente después de realizar la función de búsque[…]
-
Страница 66
30 ESPAÑOL • Microsoft y Windows Media son marcas registradas o bien marcas comerciales de Microsoft Corporation en los Estados Unidos y/u otros países. • La marca Bluetooth y sus logotipos son propiedad de Bluetooth SIG, Inc., y cualquier uso de los mismos por Victor Company of Japan, Limited (JVC) se realiza bajo licencia. Otras marcas y no[…]
-
Страница 67
31 REFERENCIAS ESPAÑOL Continúa en la página siguiente Localización de averías Lo que aparenta ser una avería podría resolverse fácilmente. Verifique los siguientes puntos antes de llamar al centro de servicio. Síntomas Soluciones/Causas General • No se puede escuchar el sonido a través de los altavoces. • Ajuste el volumen al nivel ?[…]
-
Страница 68
32 ESPAÑOL Síntomas Soluciones/Causas Reproducción de MP3/WMA • Las pistas no se reproducen en el orden de reproducción intentado por usted. Se ha determinado el orden de reproducción durante la grabación de los archivos. • El tiempo de reproducción transcurrido no escorrecto. Esto sucede a veces durante la reproducción. Esto depende de[…]
-
Страница 69
33 REFERENCIAS ESPAÑOL Continúa en la página siguiente Síntomas Soluciones/Causas Recepción de HD Radio • La calidad del sonido cambia cuando se reciben emisoras HD Radio. Fije el modo de recepción en “DIGITAL” o “ANALOG” (consulte la página 15). • El sonido no se escucha. • Se selecciona “ANALOG” cuando se reciben todas la[…]
-
Страница 70
34 ESPAÑOL Síntomas Soluciones/Causas Radio satelital • “NO (information)*” (sin información) se desplaza por la pantalla mientras escucha la radio satelital SIRIUS. • La señal “——” aparece en la pantalla mientras escucha la radio satelital XM. No hay información de texto para el canal seleccionado. • La señal “——” apa[…]
-
Страница 71
35 REFERENCIAS ESPAÑOL Cómo limpiar los conectores Un desmontaje frecuente producirá el deterioro de los conectores. Para reducir esta posibilidad al mínimo, limpie periódicamente los conectores con un palillo de algodón, teniendo cuidado de no dañar los conectores. Condensación de humedad Podría condensarse humedad en el lente del interio[…]
-
Страница 72
36 ESPAÑOL SECCIÓN DEL AMPLIFICADOR DE AUDIO Salida de potencia: 20 W RMS × 4 canales a 4 Ω y ≤ 1% THD+N Relación señal a ruido: 80 dBA (referencia: 1 W en 4 Ω) Impedancia de carga: 4 Ω (tolerancia de 4 Ω a 8 Ω) Gama de control de tono: Graves: ±12 dB (60 Hz, 80 Hz, 100 Hz, 200 Hz) Rango medio: ±12 dB (500 Hz, 1,0 kHz, 1,5 kHz, 2[…]
-
Страница 73
37 REFERENCIAS ESPAÑOL SECCIÓN DEL REPRODUCTOR DE CD Tipo: Reproductor de discos compactos Sistema de detección de señal: Captor óptico sin contacto (láser semiconductor) Número de canales: 2 canales (estereofónicos) Respuesta de frecuencias: 5 Hz a 20 000 Hz Gama dinámica: 96 dB Relación señal a ruido: 98 dB Lloro y trémolo: Inferior a[…]
-
Страница 74
2 FRANÇAIS Merci pour avoir acheté un produit JVC. Veuillez lire attentivement toutes les instructions avant d’utiliser l’appareil afin de bien comprendre son fonctionnement et d’obtenir les meilleures performances possibles. Précautions: Tout changement ou modification non approuvé par JVC peut annuler l’autorité de l’utilisateur d?[…]
-
Страница 75
3 FRANÇAIS Comment réinitialiser votre appareil • Vous ajustements préréglés sont aussi effacés (sauf le périphérique Bluetooth enregistré, voir pages 10 et 11). Comment forcer l’éjection d’un disque • Faites attention de ne pas faire tomber le disque quand il est éjecté. • Si cela ne fonctionne pas, essayez de réinitialiser […]
-
Страница 76
4 INTRODUCTIONS FRANÇAIS Préparation Annulez la démonstration des affichages et réglez l’horloge • Référez-vous aussi à la page 23. 1 Mise sous tension de l’appareil. 2 Accédez aux réglages PSM. 3 Annulez de la démonstration des affichages Choisissez “DEMO”, puis “DEMO OFF”. Réglez l’horloge Choisissez “CLOCK HOUR”, p[…]
-
Страница 77
5 FONCTIONNEMENT FRANÇAIS Opérations de base Utilisation du panneau de commande r • Ajustement du mode sonore. • Accédez aux réglages PSM [Maintenez pressée]. t • Accès au mode de fonction. Appuyez sur M MODE, puis sur une des touches suivantes (avant 5 secondes)… MO : Mise en/hors service de la réception monophonique. SSM : Prérég[…]
-
Страница 78
6 FRANÇAIS Avant d’utiliser la télécommande: • Dirigez la télécommande directement sur le capteur de télécommande de autoradio. • N’EXPOSEZ PAS le capteur de télécommande à une forte lumière (lumière directe du soleil ou éclairage artificiel). Mise en place de la pile-bouton au lithium (CR2025) Pour Californie des États-Unis s[…]
-
Страница 79
7 FONCTIONNEMENT FRANÇAIS 1 • Appuyez brièvement sur cette touche pour mettre l’appareil sous tension ou atténuer le son si l’appareil est déjà sous tension. • Maintenez cette touche pressée pour mettre l’appareil hors tension. 2 • Changez les bandes FM/AM avec 5 U. • Changez les stations préréglées avec D ∞ . • Change le[…]
-
Страница 80
8 FRANÇAIS • Si un tuner HD Radio est connecté, vous pouvez aussi rechercher et mémoriser les stations AM automatiquement. Préréglage manuel Ex.: Mémorisation de la station FM de fréquence 92.50MHz sur le numéro de préréglage 4 de la bande FM1. 1 2 3 Pour écouter une station préréglée ou Écoute de la radio 1 Choisissez “FM/AM”.[…]
-
Страница 81
9 FONCTIONNEMENT FRANÇAIS Pour arrêter la lecture et éjecter le disque • Appuyez sur SRC pour écouter une autre source de lecture. Interdiction de l’éjection du disque Pour annuler l’interdiction, répétez la même procédure. Opérations des disques Appuyer ou (maintenir pressées) les touches suivantes vous permet de… [Appuyez sur l[…]
-
Страница 82
10 FRANÇAIS Connexion d’un périphérique Bluetooth pour la première fois Pairage et code PIN Quand vous connecter un périphérique Bluetooth à l’appareil pour la première fois, faites les pairage entre l’appareil et le périphérique. Le pairage permet aux périphériques Bluetooth de communiquer entre eux. Pour réaliser le pairage, vo[…]
-
Страница 83
11 FONCTIONNEMENT FRANÇAIS 1 Déplacez-vous à la position du chiffre suivant (ou précédent). 2 Choisissez un nombre. 3 Répétez les étapes 1 et 2 jusqu’à ce que le code PIN soit entré complètement. 4 Vérifiez l’entrée. 5 Utilisez l’appareil cible Bluetooth (pendant que “WAIT PAIR” clignote sur l’écran). Sur le périphérique[…]
-
Страница 84
12 FRANÇAIS Utilisation d’un téléphone portable Bluetooth 1 — Établissez la connexion avec un périphérique. (Voir les pages 10 et 11). 2 Affichez le menu Bluetooth. 3 Choisissez “CALL”, puis passez un appel ou faites des réglages en utilisant le menu “SETTINGS”. (Référez-vous à ce qui suit et à la page 26.) Quand un appel arr[…]
-
Страница 85
13 FONCTIONNEMENT FRANÇAIS • PHONEBOOK : Affiche le premier nom/numéro de téléphone du répertoire téléphonique de l’appareil = passez à l’étape suivante pour transférer la mémoire du répertoire téléphonique, voir page 26. • PRESET : Affiche la liste des numéros préréglés. = passez à l’étape suivante. • DIAL NUMBER : […]
-
Страница 86
14 OPÉRATIONS FRANÇAIS Utilisation d’un lecteur audio Bluetooth • Les opérations et les indications de l’affichage diffèrent en fonction de leur disponibilité sur le lecteur audio connecté. 1 Choisissez “BLUETOOTH”. • Appuyer sur permet d’afficher directement le menu Bluetooth. 2 — Établissez la connexion avec un leteur audio[…]
-
Страница 87
15 APPAREILS EXTÉRIEURS FRANÇAIS Lors de la réception d’une station HD Radio… Lors de la réception de canaux multiplex HD Radio… Choisissez le canal souhaité. “LINKING” apparaît pendant la liaison à un canal multiplex. Recherche de station HD Radio uniquement 1 2 Changement du mode de réception HD Radio Lors de la réception d’u[…]
-
Страница 88
16 FRANÇAIS [Appuyez sur la touche] Sélection d’une plage [Maintenez pressée] Recherche rapide de plage vers l’arrière/vers l’avant MP3: Sélection de dossiers Après avoir appuyé sur M MODE, appuyez sur les touches suivantes… Sauter 10 plages MP3: À l’intérieur du même dossier TRACK RPT : Répéter la plage actuelle FOLDER RPT : […]
-
Страница 89
17 APPAREILS EXTÉRIEURS FRANÇAIS Écoute de la radio satellite Activez votre suscription SIRIUS après la connexion 1 2 La radio satellite SIRIUS commence à mettre à jour tous les canaux SIRIUS. Une fois terminé, la radio satellite SIRIUS accorde le canal préréglé CH184. 3 Vérifiez votre numéro d’identification SIRIUS (SIRIUS ID), réf?[…]
-
Страница 90
18 FRANÇAIS 1 Choisissez “SIRIUS” ou “XM”. 2 Sélection de la bande. SIRIUS: XM: 3 Choisissez une catégorie. SIRIUS: Si vous choisissez “ALL”, vous pouvez accorder tous les canaux de toutes les catégories. 4 Choisissez un canal à écouter. • Maintenir la touche pressée permet de changer les canaux rapidement. • Pendant la reche[…]
-
Страница 91
19 APPAREILS EXTÉRIEURS FRANÇAIS Écoute de iPod Sélection d’une plage à partir du menu 1 Entrez dans le menu principal. Ce mode est annulé si aucune opération n’est réalisée pendant environ 5 secondes. 2 Choisissez le menu souhaité. PLAYLISTS Ô ARTISTS Ô ALBUMS Ô SONGS Ô GENRES Ô COMPOSERS Ô (retour au début) 3 Validez le choix[…]
-
Страница 92
20 APPAREILS EXTÉRIEURS FRANÇAIS Écoute d’un autre appareil extérieur Vous pouvez connecter un appareil extérieur à: • la prise de changeur de CD à l’arrière de cet appareil en utilisant les adaptateurs suivants (vendus séparément): – Adaptateur d’entrée de ligne , KS-U57 – Adaptateur d’entrée auxiliaire , KS-U58 Préparat[…]
-
Страница 93
21 RÉGLAGES FRANÇAIS 3 Choisissez une tonalité. 4 Ajustez les éléments sonores de la tonalité choisie. 1 Ajustez la fréquence. 2 Ajustez le niveau. Sélection d’un mode sonore préréglé Vous pouvez sélectionner un mode sonore préréglé adapté à votre genre de musique (iEQ: égaliseur intelligent). Valeur préréglée pour chaque mod[…]
-
Страница 94
22 FRANÇAIS FADER * 2 Ajustez la balance avant-arrière des enceintes. R06 à F06 BALANCE * 3 Ajustez la balance gauche-droite des enceintes. L06 à R06 LOUD * 4 (loudness) Accentue les basses et hautes fréquences pour produire un son plus équilibré aux faibles niveaux de volume. LOUD ON ou LOUD OFF SUB.W * 1 (caisson de grave) Ajuste le niveau[…]
-
Страница 95
23 RÉGLAGES FRANÇAIS 3 Ajustez l’option PSM choisie. 4 Répétez les étapes 2 et 3 pour ajuster les autres options PSM si nécessaire. 5 Terminez la procédure. Vous pouvez changer les options PSM (mode des réglages préférés) du tableau ci-dessous et des pages 24 et 25. 1 Accédez aux réglages PSM. 2 Choisissez une option PSM. Réglages g[…]
-
Страница 96
24 FRANÇAIS Indications Élément ( : Réglage initial) Réglage, [page de référence] CLOCK ADJ * 2 Ajustement de l’horloge • AUTO • OFF : L’horloge intégrée est ajustée automatiquement en utilisant les données d’horloge fournies par le cana de la radio satellite. : Annulation. TIME ZONE * 2, * 3 Fuseau horaire — : Choisissez vot[…]
-
Страница 97
25 RÉGLAGES FRANÇAIS Indications Élément ( : Réglage initial) Réglage, [page de référence] EXT INPUT * 8, * 9 Entrée extérieure • CHANGER • EXT INPUT : Pour connecter un changeur de CD JVC, [16], ou un iPod Apple, [19]. : Pour connecter un lecteur audio portable à la prise de changeur de CD, [20]. TAG DISPLAY Affichage des balises ?[…]
-
Страница 98
26 RÉGLAGES FRANÇAIS AUTO ANSWER ON : L’appareil répond automatiquement aux appels entrant. OFF : L’appareil ne répond pas automatiquement aux appels entrant. Répondez aux appels manuellement. REJECT : L’appareil refuse tous les appels entrants. MSG NOTICE (notification de message) ON * 1 : L’appareil vous informe de l’arrivée d’u[…]
-
Страница 99
27 RÉGLAGES ET RÉFÉRENCES FRANÇAIS Suite à la page suivante Affectation d’un titre Vous pouvez affecter un titre à 30 fréquences de station (FM et AM) et 8 caractères (maximum) pour chaque titre. • Quand le tuner HD Radio est connecté, cette fonctionnalité n’est pas disponible. 1 Choisissez la station à laquelle vous souhaitez affe[…]
-
Страница 100
28 FRANÇAIS • Si un disque est inséré à l’envers, “PLEASE” et “EJECT” apparaissent alternativement sur l’affichage. Appuyez sur 0 pour éjecter le disque. • Dans ce manuel, les mots “plage” et “fichier” sont utilisés de façon interchangeable. • Lors de l’avance ou du retour rapide d’un disque MP3 ou WMA, vous ne […]
-
Страница 101
29 RÉFÉRENCES FRANÇAIS • Cet auroradio peut reproduire les fichiers enregistrés au mode VBR (débit binaire variable). Les fichiers enregistrés au mode VBR affichent une durée écoulée différente et ne montrent pas la durée écoulée actuelle correcte. Cette différence devient particulièrement importante après avoir réalisé une rech[…]
-
Страница 102
30 FRANÇAIS • Microsoft et Windows Media est une marque déposée ou une marque de commerce de Microsoft Corporation aux États-Unis et/ou dans les autres pays. • La marque du mot et les logos Bluetooth sont la propriété de Bluetooth SIG, Inc. et toute utilisation de ces marques par Victor Company of Japan, Limited (JVC) est faite sous licen[…]
-
Страница 103
31 RÉFÉRENCES FRANÇAIS Suite à la page suivante Guide de dépannage Ce qui apparaît être un problème n’est pas toujours sérieux. Vérifiez les points suivants avant d’appeler un centre de service. Symptôme Remèdes/Causes Généralités • Aucun son n’est entendu des enceintes. • Ajustez le volume sur le niveau optimum. • Vérif[…]
-
Страница 104
32 FRANÇAIS Symptôme Remèdes/Causes Lecture MP3/WMA • Les plages ne sont par reproduites dans l’ordre dans lequel vous vouliez les reproduire. L’ordre de lecture est déterminé quand les fichiers sont enregistrés. • La durée de lecture écoulée n’est pascorrecte. Cela se produit quelque fois pendant la lecture. C’est causé par l[…]
-
Страница 105
33 RÉFÉRENCES FRANÇAIS Suite à la page suivante Symptôme Remèdes/Causes Réception HD Radio • La qualité du son change lors de la réception de stations HD Radio. Fixez le mode de réception sur “DIGITAL” ou “ANALOG” (voir page 15). • Aucun son n’est entendu. • “ANALOG” est choisi lors de la réception d’une station HD […]
-
Страница 106
34 FRANÇAIS Symptôme Remèdes/Causes Radio satellite • “NO (information)*” défile sur l’affichage lors de l’écoute de la radio satellite SIRIUS. • “——” apparaît sur l’affichage lors de l’écoute de la radio satellite XM. Il n’y a pas de texte d’information pour le canal choisi. • “——” apparaît sur l’affic[…]
-
Страница 107
35 RÉFÉRENCES FRANÇAIS Comment nettoyer les connecteurs Un détachement fréquent détériorera les connecteurs. Pour minimiser ce problème, frottez périodiquement les connecteurs avec un coton tige ou un chiffon imprégné d’alcool, en faisant attention de ne pas endommager les connecteurs. Condensation d’humidité De la condensation peut[…]
-
Страница 108
36 FRANÇAIS SECTION DE L’AMPLIFICATEUR AUDIO Puissance de sortie: 20 W RMS × 4 canaux à 4 Ω et avec ≤ 1% THD+N Rapport signal sur bruit: 80 dBA (référence: 1 W pour 4 Ω) Impédance de charge: 4 Ω (4 Ω à 8 Ω admissibles) Plage de commande de tonalité: Graves: ±12 dB (60 Hz, 80 Hz, 100 Hz, 200 Hz) Médiums: ±12 dB (500 Hz, 1,0 […]
-
Страница 109
37 RÉFÉRENCES FRANÇAIS SECTION DU LECTEUR CD Type: Lecteur de disque compact Système de détection du signal: Capteur optique sans contact (laser semi- conducteur) Nombre de canaux: 2 canaux (stéréo) Réponse en fréquence: 5 Hz à 20 000 Hz Plage dynamique: 96 dB Rapport signal sur bruit: 98 dB Pleurage et scintillement: Inférieur à la lim[…]
-
Страница 110
Having TROUBLE with operation? Please reset your unit Refer to page of How to reset your unit Still having trouble?? USA ONLY Call 1-800-252-5722 http://www.jvc.com We can help you! EN, SP, FR 1207DTSMDTJEIN © 2007 Victor Company of Japan, Limited Rear_KD-BT11[J]f.indd 2 Rear_KD-BT11[J]f.indd 2 11/30/07 2:16:10 PM 11/30/07 2:16:10 PM[…]
-
Страница 111
Instructions CD RECEIVER KD-BT11[…]