
![]()

Foreword
GUID-2F2D27F5-65B6-4D66-A0F7-BF158B86DF44
Your INFINITI represents a new way of thinking about vehicle design. It integrates advanced engineering and superior craftsmanship with a simple, refined aesthetic sensitivity associated with traditional Japanese culture.
The result is a different notion of luxury and beauty. The car itself is important, but so is the sense of harmony that the vehicle evokes in its driver, and the sense of satisfaction you feel with the INFINITI — from the way it looks and drives to the high level of retailer service.
To ensure that you enjoy your INFINITI to the fullest, we encourage you to read this Owner’s Manual immediately. It explains all of the features, controls and performance characteristics of your INFINITI; it also provides important instructions and safety information.
A separate Warranty Information Booklet is included in your Owner’s literature portfolio. The INFINITI Service and Maintenance Guide explains details about maintaining and servicing your vehicle. Always carry it with you when you take your vehicle to an INFINITI retailer. The Warranty Information Booklet contents provide complete information about all
warranties covering this vehicle, the requirements to keep the warranties in effect as well as the INFINITI Roadside Assistance program.
Additionally, a separate Customer Care and Lemon Law Information Booklet will explain how to resolve any concerns you may have with your vehicle, as well as clarify your rights under your state’s lemon law.
In addition to factory installed options, your vehicle may also be equipped with additional accessories installed by INFINITI or by your INFINITI retailer prior to delivery. It is important that you familiarize yourself with all disclosures, warnings, cautions and instructions concerning proper use of such accessories prior to operating the vehicle and/or accessory. See an INFINITI retailer for details concerning the particular accessories with which your vehicle is equipped.
READ FIRST — THEN DRIVE SAFELY
GUID-528982C0-019C-4EF8-8549-CC460F948AB8
Before driving your vehicle, read your Owner’s Manual carefully. This will ensure familiarity with controls and maintenance requirements, assisting you in the safe operation of your vehicle.
 WARNING
IMPORTANT SAFETY INFORMATION REMINDERS!
Follow these important driving rules to help ensure a safe and comfortable trip for you and your passengers!
.NEVER drive under the influence of alcohol or drugs.
.ALWAYS observe posted speed limits and never drive too fast for conditions.
.ALWAYS give your full attention to driving and avoid using vehicle features or taking other actions that could distract you.
.ALWAYS use your seat belts and appropriate child restraint systems. Pre-teen children should be seated in the rear seat.

.ALWAYS provide information about the proper use of vehicle safety features to all occupants of the vehicle.
.ALWAYS review this Owner’s Manual for important safety information.
ON-PAVEMENT AND OFF-ROAD DRIVING
This vehicle will handle and maneuver differently from an ordinary passenger car because it has a higher center of gravity. As with other vehicles with features of this type, failure to operate this vehicle correctly may result in loss of control or an accident. Be sure to read “On-pavement and off-road driving precautions”, “Avoiding collision and rollover” and “Driving safety precautions” in the “5. Starting and driving” section of this manual.
MODIFICATION OF YOUR VEHICLE
This vehicle should not be modified. Modification could affect its performance, safety or durability, and may even violate governmental regulations. In addition, damage or performance problems resulting from modification will not be covered under the INFINITI warranties.
WHEN READING THE MANUAL
GUID-4053DB0D-5096-4FC3-8F65-27A0002AFC45
This manual includes information for all features and equipment available on this model. Features and equipment in your vehicle may vary depending on model, trim level, options selected, order, date of production, region or availability. Therefore, you may find information about features or equipment that are not included or installed on your vehicle.
All information, specifications and illustrations in this manual are those in effect at the time of printing. INFINITI reserves the right to change specifications, performance, design or component suppliers without notice and without obligation.
|
From |
update or |
|
revise |
with |
|
the |
currently |
available. Please carefully read and retain with this manual all revision updates sent to you by INFINITI to ensure you have access to accurate and up-to-date information regarding your vehicle. Current versions of vehicle Owner’s Manuals and any updates can also be found in the Owner section of the INFINITI website at https:// owners.infinitiusa.com/owners/navigation/manualsandGuides. If you have questions concerning any information in your Owner’s Manual, contact INFINITI Consumer Affairs. See the INFINITI CUSTOMER CARE PROGRAM page in this Owner’s Manual for contact information.


INFINITI CUSTOMER CARE PROGRAM
GUID-4A402CC9-0FAB-48DE-A23E-64DA7062EA77
INFINITI CARES …
Both INFINITI and your INFINITI retailer are dedicated to serving all your automotive needs. Your satisfaction with your vehicle and your INFINITI retailer are our primary concerns.Your INFINITI retailer is always available to assist you with all your automobile sales and service needs.
However, if there is something that your INFINITI retailer cannot assist you with or you would like to provide INFINITI directly with comments or questions, please contact our (INFINITI’s) Consumer Affairs Department using our toll-free number:
For U.S. customers 1-800-662-6200
For Canadian customers 1-800-361-4792
The Consumer Affairs Department will ask for the following information:
.Your name, address, and telephone number
.Vehicle identification number (on dash panel)
. Date of purchase
. Current odometer reading
. Your INFINITI retailer’s name
. Your comments or questions OR
You can write to INFINITI with the information on the left at:
For U.S. customers INFINITI Division
Nissan North America, Inc. Consumer Affairs Department P.O. Box 685003
Franklin, TN 37068-5003 or via e-mail at:
nnaconsumeraffairs@nissan-usa. com
For Canadian customers INFINITI Division Nissan Canada Inc. 5290 Orbitor Drive
Mississauga, Ontario L4W 4Z5 or via e-mail at:
information.centre@nissancanada. com
If you prefer, visit us at: www.infinitiUSA.com (for U.S. customer) or www.infiniti.ca (for Canadian customers)
We appreciate your interest in INFINITI and thank you for buying a quality INFINITI vehicle.


 Illustrated table of contents
Safety — Seats, seat belts and supplemental restraint system
 Instruments and controls
 Pre-driving checks and adjustments
Monitor, climate, audio, phone and voice recognition systems
 Starting and driving
 In case of emergency
 Appearance and care
 Maintenance and do-it-yourself
 Technical and consumer information
  Index
Index


0 Illustrated table of contents
|
Seats, seat belts and Supplemental Restraint |
Instrument panel ………………………………………… |
0-9 |
|
|
System (SRS) ……………………………………………… |
0-2 |
Meters and gauges ……………………………………. |
0-10 |
|
Exterior front ………………………………………………. |
0-3 |
Engine compartment………………………………….. |
0-11 |
|
Exterior rear ……………………………………………….. |
0-5 |
VQ37VHR engine ………………………………….. |
0-11 |
|
Passenger compartment ……………………………….. |
0-6 |
Warning and indicator lights ……………………….. |
0-12 |
|
Cockpit………………………………………………………. |
0-7 |
![]()
SEATS, SEAT BELTS AND SUPPLEMENTAL RESTRAINT SYSTEM (SRS)
GUID-F3FFAE0C-D43A-43BA-A95E-BC6C67C179DC
8.Rear armrest (P.1-7)
9.Rear seats (P.1-4)
— Child restraints (P.1-21)
10.Front seat-mounted side-impact supplemental air bags (P.1-42)
11.Seat belt pretensioner (P.1-53)
12.Occupant classification sensor (pattern sensor) (P.1-47)
13.Front passenger air bag status light (P.1-49)
|
SSI0417 |
|||
|
1. |
Rear seat power folding/return switch |
5. |
Roof-mounted curtain side-impact |
|
(Page 1-4) |
supplemental air bags (P.1-42) |
||
|
2. |
Child restraint anchor points (for top |
6. |
Supplemental front-impact air bags |
|
tether strap child restraint) (P.1-38) |
(P |
||
|
3. |
Head restraints (P.1-7) |
7. |
for |
4.Seat belts (P.1-12)
0-2 Illustrated table of contents

EXTERIOR FRONT
GUID-C0DAB6C4-2638-4210-92D1-C51ED7B201A0
1.Front view camera (if so equipped) (P.4-31)
2.Hood (P.3-16)
3.Headlights and turn signal lights (P.2-34)
— Bulb replacement (P.8-27)
JVC0844X 
— Adaptive Front lighting System (AFS) (if so equipped) (P.2-37)
4.Windshield wiper and washer (P.2-31)
—
7.Power windows (P.2-51)
8.Outside mirrors (P.3-23)
—Side view camera (if so equipped) (P.4-31)
—Welcome light (P.2-55)
9.Corner sensors (if so equipped)
—Around View® Monitor (if so equipped) (P.4-31)
—Sonar system (if so equipped) (P.5-94)
10.Center sensors (if so equipped)
—Sonar system (if so equipped) (P.5-94)
11.Recovery hook (P.6-14)
12.Daytime running lights (P.2-37)
13.Fog lights (P.2-39)
14.Tires
—Wheel and tires (P.8-29, P.9-8)
—Flat tire (P.6-3)
—Tire Pressure Monitoring System (TPMS) (P.2-14, P.5-5)
15.Doors
—Keys (P.3-2)
—Door locks (P.3-4)
—Intelligent Key system (P.3-7)
—Remote keyless entry system
(P.3-13)
Illustrated table of contents 0-3

16. Side turn signal lights (P.2-39)
0-4 Illustrated table of contents

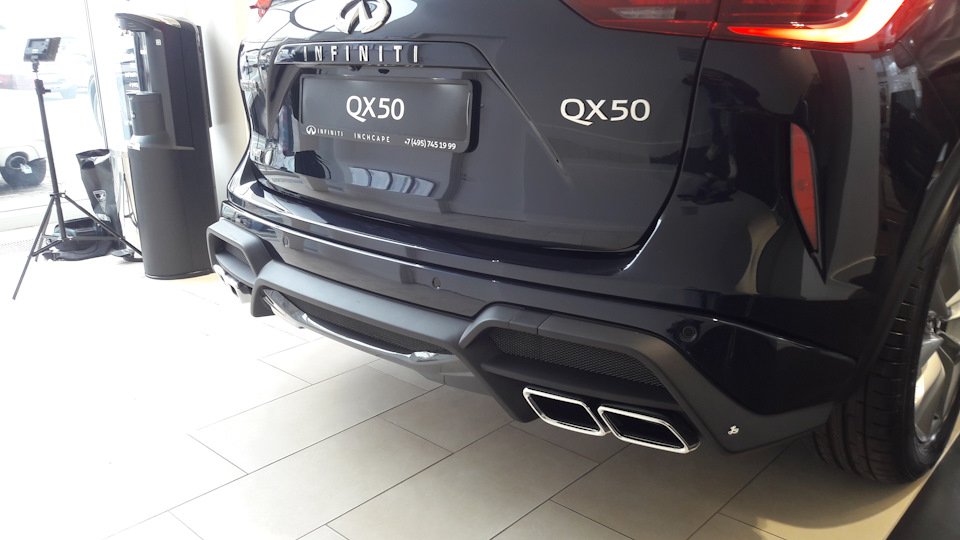
EXTERIOR REAR
|
GUID-22C3CD44-5E1E-4FA8-BA99-B089AFCA0ADD |
— Around View® Monitor (if so |
|
equipped) (P.4-31) |
|
|
— Sonar system (if so equipped) |
|
|
(P.5-94) |
|
|
8. |
Center sensors (if so equipped) |
|
— Sonar system (if so equipped) |
|
|
(P.5-94) |
|
|
9. |
Rear combination lights (bulb replace- |
|
ment) (P.8-25) |
|
|
10. |
Fuel-filler door (P.3-18) |
|
— Fuel information (P.9-3) |
|
|
11. |
Child safety rear door locks (P.3-6) |
JVC0845X 
1.Rearview camera (P.4-24, P.4-31)
2.Lift gate (P.3-17)
—Intelligent Key system (P.3-7)
—Remote keyless entry system (P.3-13)
3.Rear window defroster (P.2-33)
4.High-mounted stop light (P.8-25)
5.Rear window wiper and washer (P.2-33)
—
6.
7.
Illustrated table of contents 0-5

PASSENGER COMPARTMENT
|
GUID-FE9DADD4-463D-4664-925C-6329D4E54F5A |
8. |
Map light (P.2-56) |
|
9. |
Sunglasses holder (P.2-46) |
|
|
10. |
Inside rearview mirror (P.3-22) |
|
|
— HomeLink® (if so equipped) |
||
|
(P.2-59) |
||
|
11. |
Cargo cover (if so equipped) (P.2-49) |
|
|
12. |
Rear cup holders (P.2-45) |
|
|
13. |
Console box |
|
|
— Power outlet (P.2-44) |
||
|
— USB memory operation (P.4-83) |
||
|
— iPod® player operation (P.4-92) |
||
|
14. |
Front cup holders (P.2-45) |
SSI0401 
1.Coat hooks (P.2-48)
2.Seat-mounted jacket hanger (if so equipped) (P.2-47)
3.Rear personal light (P.2-57)
4.Power window controls (P.2-51)
0-6 Illustrated table of contents
— Outside mirror remote control switch (P.3-23)
5.Automatic drive positioner switch (if so
6.
7.

COCKPIT
GUID-A35345A9-ABF1-4847-AB93-479406197157
1.TRIP/RESET switch for twin trip odometer (P.2-7)
2.Instrument brightness control switch (P.2-38)
3.Headlight, fog light and turn signal switch (P.2-34)
SSI0623 
4.Trip computer switch (P.2-26)
5.Windshield wiper and washer switch (P.2-31)
—Forward Collision Warning (FCW) (P.5-77)
—Lane Departure Warning (LDW) (P.5-20)
—Blind Spot Warning (BSW)
(P.5-29)
7.Hood release handle (P.3-16)
8.Intelligent Key port (P.5-13)
9.Vehicle Dynamic Control (VDC) OFF switch (P.5-102)
10.Intelligent Brake Assist (IBA) off switch (if so equipped) (P.2-42)
11.Electric tilting/telescopic steering wheel lever (if so equipped) (P.3-20)
12.Steering-wheel-mounted controls (Left side)
—For audio system (P.4-96)
—For Bluetooth® Hands-Free Phone System (with navigation system)
(P.4-99)
—For Bluetooth® Hands-Free Phone System (without navigation system) (P.4-110)
—For INFINITI Voice Recognition System (if so equipped) (P.4-124)
13.Manual tilting/telescopic steering wheel lever (if so equipped) (P.3-20)
Illustrated table of contents 0-7

14.Steering wheel
—Horn (P.2-39)
—Driver supplemental air bag (P.1-42)
15.Steering-wheel-mounted controls (right side)
—Cruise control switches (P.5-39)
—Intelligent Cruise Control (ICC) switches (if so equipped) (P.5-41)
—Lane Departure Prevention (LDP) switch (if so equipped) (P.5-20)
—Distance Control Assist (DCA) switch (if so equipped) (P.5-63)
16.Center-console-mounted controls
—Heated seat switches (P.2-40)
—Rear seat power return switches (if so equipped) (P.1-4)
—SNOW mode switch (P.2-42)
0-8 Illustrated table of contents

INSTRUMENT PANEL
|
GUID-422CC4D1-5AAE-4B93-824E-764A57BE67BE |
tem (with navigation system) (P.4-99) |
||||
|
— Bluetooth® Hands-Free Phone Sys- |
|||||
|
tem (without navigation system) |
|||||
|
(P.4-110) |
|||||
|
— Around View® Monitor (if so |
|||||
|
equipped) (P.4-31) |
|||||
|
— RearView Monitor (if so equipped) |
|||||
|
(P.4-24) |
|||||
|
8. |
Front passenger supplemental air bag |
||||
|
(P.1-42) |
|||||
|
9. |
Fuse box cover (P.8-22) |
||||
|
10. |
Parking brake (P.5-19) |
||||
|
11. |
Push-button ignition switch (P.5-10) |
||||
|
12. |
Front passenger air bag status light |
||||
|
(P.1-47) |
|||||
|
13. |
Power outlet (P.2-44) |
||||
|
14. |
Rear window defroster switch (P.2-33) |
||||
|
15. |
Automatic climate control system |
||||
|
(P.4-53) |
|||||
|
16. |
Audio system (P.4-61) |
||||
|
SSI0624 |
17. |
Glove box lid release handle (P.2-46) |
|||
|
1. |
Side ventilator (P.4-53) |
7. Center multi-function control panel |
*: Refer to the separate Navigation System |
||
|
2. |
Meters and gauges (P.2-6) |
— N a v i g a t i o n s y s t e m * |
( i f s o |
Owner’s Manual. |
|
|
3. |
Center ventilator (P.4-53) |
equipped) |
|||
|
4. |
Center display (P.4-3) |
— |
setting |
||
|
5. |
Clock (P.2-43) |
||||
|
6. |
Hazard warning flasher switch (P.6-2) |
— |
Sys- |
Illustrated table of contents 0-9

METERS AND GAUGES
GUID-3BE4B18C-D795-4C40-8E5B-093AD417BB16
1.Tachometer (P.2-8)
2.Warning/Indicator lights (P.2-10)
3.Speedometer (P.2-7)
4.Engine coolant temperature gauge (P.2-8)
5.Vehicle information display (P.2-20)/
0-10 Illustrated table of contents
SIC4694 
Odometer/twin trip odometer (P.2-7)
6.Fuel gauge (P.2-9)

ENGINE COMPARTMENT
GUID-EF23FE20-8F03-4ECF-8994-21E622466F96
VQ37VHR ENGINE
GUID-9FE81907-5330-41E6-B1C6-50A7EB4C237F
1. Fuse/fusible link holder (P.8-22)
2. Battery (P.8-15)
3. Radiator filler cap (P.8-7)
4. Engine oil dipstick (P.8-9)
5. Engine oil filler cap (P.8-9)
11. Coolant reservoir (P.8-7)
SSI0388 
6.Brake fluid reservoir (P.8-13)
7.Window washer fluid reservoir (P.8-14)
8.Power steering fluid reservoir (P.8-12)
9.Air
10.
Illustrated table of contents 0-11
![]()
WARNING AND INDICATOR LIGHTS
GUID-51FCA61D-4AC4-45D9-AAF2-51D6E1DAD39F
|
Warning |
Name |
Page |
|
|
light |
|||
|
All-Wheel Drive (AWD) warning |
2-11 |
||
|
light (AWD models) |
|||
|
Anti-lock Braking System (ABS) |
2-11 |
||
|
warning light |
|||
|
Automatic Transmission check |
2-11 |
||
|
warning light |
|||
|
Blind Spot Warning (BSW) sys- |
|||
|
tem warning light (if so |
2-11 |
||
|
equipped) |
|||
|
Brake warning light |
2-12 |
||
|
Charge warning light |
2-12 |
||
|
Distance Control Assist (DCA) |
|||
|
system warning light (orange) |
2-12 |
||
|
(if so equipped) |
|||
|
Engine oil pressure warning |
2-13 |
||
|
light |
|||
|
Intelligent Cruise Control (ICC) |
|||
|
system warning light (orange) |
2-13 |
||
|
(if so equipped) |
|||
|
Intelligent Key warning light |
2-13 |
||
|
Lane Departure Warning (LDW) |
|||
|
indicator light (orange) (if so |
2-13 |
||
|
equipped) |
|||
|
Low tire pressure warning light |
2-14 |
0-12 Illustrated table of contents
|
Warning |
Name |
Page |
|
|
light |
|||
|
Low washer fluid warning light |
2-15 |
||
|
Master warning light |
2-15 |
||
|
Preview Function warning light |
2-15 |
||
|
(orange) (if so equipped) |
|||
|
Seat belt warning light |
2-15 |
||
|
Supplemental air bag warning |
2-16 |
||
|
light |
|||
|
Vehicle Dynamic Control (VDC) |
2-16 |
|
|
warning light |
||
Name
Adaptive Front lighting System (AFS) indicator light (if so equipped)
Automatic Transmission position indicator light
 Exterior light indicator
Front fog light indicator light
Front passenger air bag status light
 High beam indicator light
Intelligent Brake Assist (IBA) off indicator light (if so equipped)
Lane Departure Prevention (LDP) ON indicator light (green) (if so equipped)
Malfunction Indicator Light (MIL)
 Security indicator light
Turn signal/hazard indicator lights
Vehicle Dynamic Control (VDC) off indicator light
Page
2-16
2-17
2-17
2-17
2-17
2-17
2-17
2-17
2-18
2-18
2-19
2-19

1 Safety — Seats, seat belts and supplemental restraint system
|
Seats ………………………………………………………… |
1-2 |
|
Front seats……………………………………………… |
1-3 |
|
Rear seats………………………………………………. |
1-4 |
|
Armrest………………………………………………….. |
1-7 |
|
Head restraints/headrests…………………………….. |
1-7 |
|
Adjustable head |
|
|
restraint/headrest components ………………….. |
1-8 |
|
Non-adjustable head |
|
|
restraint/headrest components ………………….. |
1-8 |
|
Remove………………………………………………….. |
1-9 |
|
Install ……………………………………………………. |
1-9 |
|
Adjust ……………………………………………………. |
1-9 |
|
Front-seat active head restraint………………… |
1-11 |
|
Seat belts ………………………………………………… |
1-12 |
|
Precautions on seat belt usage ………………… |
1-12 |
|
Pregnant women ……………………………………. |
1-14 |
|
Injured persons……………………………………… |
1-14 |
|
Three-point type seat belt ……………………….. |
1-14 |
|
Seat belt extenders………………………………… |
1-17 |
|
Seat belt maintenance ……………………………. |
1-18 |
|
Child safety………………………………………………. |
1-18 |
|
Infants …………………………………………………. |
1-19 |
|
Small children……………………………………….. |
|
|
Larger children………………………………………. |
|
Child restraints…………………………………………. |
1-21 |
|
Precautions on child restraints ……………….. |
1-21 |
|
Lower Anchors and Tethers for CHildren |
|
|
(LATCH) system…………………………………….. |
1-23 |
|
Rear-facing child restraint installation |
|
|
using LATCH ………………………………………… |
1-26 |
|
Rear-facing child restraint installation using |
|
|
the seat belts ………………………………………. |
1-28 |
|
Forward-facing child restraint installation |
|
|
using LATCH ………………………………………… |
1-31 |
|
Forward-facing child restraint installation |
|
|
using the seat belts………………………………. |
1-34 |
|
Booster seats ………………………………………. |
1-39 |
|
Supplemental restraint system…………………….. |
1-42 |
|
Precautions on supplemental |
|
|
restraint system …………………………………… |
1-42 |
|
INFINITI Advanced Air Bag System |
|
|
(front seats)…………………………………………. |
1-47 |
|
Front seat-mounted side-impact |
|
|
supplemental air bag and roof-mounted |
|
|
curtain side-impact supplemental air |
|
|
bag systems………………………………………… |
1-52 |
|
Seat belts with pretensioners (front seats)…. |
1-53 |
|
air bag warning labels……….. |
1-55 |
|
air bag warning light …………. |
1-55 |
|
and replacement procedure ………….. |
1-56 |

SEATS
GUID-9A857634-92CF-4F7D-BCEB-B42451D73ADA
SSS0133 
 WARNING
.Do not ride in a moving vehicle when the seatback is reclined. This can be dangerous. The shoulder belt will not be against your body. In an accident, you could be thrown into it and receive neck or other serious injuries. You could also slide under the lap belt and receive serious internal injuries.
.For the most effective protection when the vehicle is in motion, the seat should be upright. Always sit well back and
upright in the seat with both feet on the floor and adjust the seat properly. See “Precautions on seat belt usage” (P.1-
12).
.After adjustment, gently rock in the seat to make sure it is securely locked.
.Do not leave children unattended inside the vehicle. They could unknowingly activate switches or controls. Unattended children could become involved in serious accidents.
1-2 Safety — Seats, seat belts and supplemental restraint
vehicle and/or its systems, do not leave children, people who require the assistance of others or pets unattended in your vehicle. Additionally, the temperature inside a closed vehicle on a warm day can quickly become high enough to cause a significant risk of injury or death to people and pets.
.The seatback should not be reclined further than necessary for comfort. Seat belts are most effective when the passenger sits well back and straight up in the seat. If the seat back is reclined, the risk of sliding under the lap belt and being injured is increased.

FRONT SEATS
GUID-A7227AED-0D9E-438D-ADD1-167C5F3D272E
Front power seat adjustment
GUID-8D8880C3-170A-4BCC-8AA5-9C4A7D6E6645
Operating tips:
GUID-D73A39BF-43C8-459F-9C24-47B7F579C407
.The power seat motor has an auto-reset overload protection circuit. If the motor stops during operation, wait 30 seconds, then reactivate the switch.
.Do not operate the power seat switch for a long period of time when the engine is off. This will discharge the battery.
See “Automatic drive positioner” (P.3-25) for the seat position memory function (if so equipped).
 CAUTION
When adjusting the seat positions, be sure not to contact any moving parts to avoid possible injuries and/or damages.
Forward and backward:
GUID-D73A39BF-43C8-459F-9C24-47B7F579C407
Moving the switch *1 forward or backward will slide the seat forward or backward to the desired position.
SSS1051 
back can be reclined to allow occupants to rest when the vehicle is stopped and the transmission is in the P (Park) position.
Reclining:
GUID-D73A39BF-43C8-459F-9C24-47B7F579C407
Move the recline switch *2 backward until the desired angle is obtained. To bring the seatback forward again, move the switch *2 forward.
The reclining feature allows adjustment of the seatback for occupants of different
|
sizes |
obtain |
|
proper |
on |
|
seat |
seat- |
|
— Seats, seat belts and supplemental restraint system 1-3 |

SSS1052 
Seat lifter:
GUID-D73A39BF-43C8-459F-9C24-47B7F579C407
Push the front or rear end of the switch up or down to adjust the angle or height of the seat.
Lumbar support (driver’s seat):
GUID-D73A39BF-43C8-459F-9C24-47B7F579C407
The lumbar support feature provides lower back support to the driver.
SSS1028 
Type A (if so equipped)
Type A (if so equipped)
Push the front *1 or back *2 end of the switch to adjust the seatback lumbar area.
1-4 Safety — Seats, seat belts and supplemental restraint
SSS0836 
Type B (if so equipped)
Type B (if so equipped)
Move the lever *1 up or down to adjust the seatback lumbar area.
REAR SEATS
GUID-C43447B4-B708-48A6-BC0F-2BF26C6EBAF1
 CAUTION
.When folding or returning the seatback
(s)to the upright position, to avoid injury to yourself and others:
—Make sure that the seat path is clear before moving the seat.

GUID-D73A39BF-43C8-459F-9C24-47B7F579C407
.When operating the rear power seatback return, make sure that the vehicle is stopped and the transmission is in the P (Park) position.
.Make sure the lid of the rear seat cup holders is closed before folding the rear seatback.
 WARNING
.Never allow anyone to ride in the cargo area or on the rear seat when it is in the fold-down position. Use of these areas by passengers without proper restraints could result in serious injury in an accident or sudden stop.
.When returning the seatbacks to the upright position, be certain they are completely secured in the latched position. If they are not completely secured, passengers may be injured in an accident or sudden stop.
.Properly secure all cargo to help prevent it from sliding or shifting. Do not place cargo higher than the seatbacks. In a sudden stop or collision, unsecured cargo could cause personal injury.
position.
SSS0828 
Type A (if so equipped)
Power folding
GUID-910CAAF9-7121-4A85-8CA9-ACD497522A28
Luggage room switch (Type A) (if so equipped):
Push the front side of the switch *1 located on the right side or left side of the luggage room. The corresponding rear seatback will be folded down automatically.
Push and hold the rear side of the switch *2 . The corresponding rear seatback will be returned automatically. A beep sounds
|
once |
rise up |
|
while |
sounds |
|
twice |
in |
|
— Seats, seat belts and supplemental restraint system 1-5 |

GUID-D73A39BF-43C8-459F-9C24-47B7F579C407
SSS0853 
Type B (if so equipped)
Luggage room switch (Type B) (if so equipped):
Push the front side of the switch *1 located on the right side or left side of the luggage room. The corresponding rear seatback will be folded down automatically.
SSS0829 
Center console switch (if so equipped):
GUID-D73A39BF-43C8-459F-9C24-47B7F579C407
Push and hold the switch located on the center console. The corresponding rear seatback will be returned automatically. A beep sounds once and the rear seatback will rise up while holding the switch. A beep sounds twice when the seatback is fully returned in position.
SSS0830 
Manual folding
GUID-EB52B528-82B6-47A8-AC67-01FCCBCACAB9
Pull the lever *A located on the right side or left side of the seatback before folding down the corresponding seatback.
Part of the release lever is marked with a red indicator. The red indicator is visible if the seatback is not fully latched.
Return the rear seatback manually until it securely locks in position. Make sure the red indicator on the release lever is not visible when the seats are in the upright and latched position.
1-6 Safety — Seats, seat belts and supplemental restraint

SSS0837 
ARMREST
GUID-C9B51513-CEC7-4852-8B1E-5E0DA04256CF
Rear armrest
GUID-C0961244-B3C7-45D0-BAD5-2730F0F82436
Pull the tab and draw the armrest forward until it is horizontal.
HEAD RESTRAINTS/HEADRESTS
GUID-B86D195F-8DA5-4362-B2AE-8E6B54D0C827
 WARNING
Head restraint/headrest supplement the other vehicle safety systems. They may provide additional protection against injury in certain rear end collisions. Adjustable head restraints/headrests must be adjusted properly, as specified in this section. Check the adjustment after someone else uses the seat. Do not attach anything to the head restraint/headrest stalks or remove the head restraint/headrest. Do not use the seat if the head restraint/headrest has been removed. If the head restraint/headrest was removed, reinstall and properly adjust the head restraint/headrest before an occupant uses the seating position. Failure to follow these instructions can reduce the effectiveness of the head restraint/headrest. This may increase the risk of serious injury or death in a collision.
JVR0140X 
The illustration shows the seating positions equipped with head restraint/headrest.
 Indicates the seating position is equipped with a head restraint.
 Indicates the seating position is equipped with a headrest.
+ Indicates the seating position is not equipped with a head restraint or headrest (if applicable).
.Your vehicle is equipped with a head restraint/headrest that may be integrated, adjustable or non-adjustable.
— Seats, seat belts and supplemental restraint system 1-7

.Adjustable head restraints/headrests have multiple notches along the stalk to lock them in a desired adjustment position.
.The non-adjustable head restraints/ headrests have a single locking notch to secure them to the seat frame.
.Proper Adjustment:
—For the adjustable type, align the head restraint/headrest so the center of your ear is approximately level with the center of the head restraint/headrest.
—If your ear position is still higher than the recommended alignment, place the head restraint/headrest at the highest position.
.If the head restraint/headrest has been removed, ensure that it is reinstalled and locked in place before riding in that designated seating position.
SSS0992 
 JVR0203X
|
ADJUSTABLE HEAD RESTRAINT/ |
NON-ADJUSTABLE HEAD RE- |
||
|
HEADREST COMPONENTS |
STRAINT/HEADREST COMPONENTS |
||
|
GUID-31E01E3B-6950-4D1F-A175-E1E7090970EE |
GUID-F3BCF8AF-09BA-4CFF-9243-2B91278727A2 |
||
|
1. |
Removable head restraint/headrest |
1. |
Removable head restraint/headrest |
|
2. |
Multiple notches |
2. |
Single notch |
|
3. |
Lock knob |
3. |
Lock knob |
|
4. |
Stalks |
4. |
Stalks |
1-8 Safety — Seats, seat belts and supplemental restraint

SSS1037 
REMOVE
GUID-C9782491-976A-4F87-BAA1-662E24B1C9CD
Use the following procedure to remove the head restraint/headrest.
1.Pull the head restraint/headrest up to the highest position.
2.Push and hold the lock knob.
3.Remove the head restraint/headrest from the seat.
4.Store the head restraint/headrest properly in a secure place so it is not loose in the vehicle.
5.Reinstall and properly adjust the head restraint/headrest before an occupant uses the seating position.
SSS0996 
INSTALL
GUID-3FC43157-3A84-487C-81EC-49E9C4171CFE
1.Align the head restraint/headrest stalks with the holes in the seat. Make sure that the head restraint/headrest is facing the correct direction. The stalk
with the adjustment notches *1 must be installed in the hole with the lock knob *2 .
2.Push and hold the lock knob and push the head restraint/headrest down.
3.Properly adjust the head restraint/
SSS0997 
ADJUST
GUID-9419019A-7D7D-419E-9CB9-FA06547300BD
For adjustable head restraint/headrest
Adjust the head restraint/headrest so the center is level with the center of your ears. If your ear position is still higher than the recommended alignment, place the head restraint/headrest at the highest position.
— Seats, seat belts and supplemental restraint system 1-9
![]()
JVR0259X 
For non-adjustable head restraint/headrest
Make sure the head restraint/headrest is positioned so the lock knob is engaged in the notch before riding in that designated seating position.
SSS1035 
Type A (if so equipped)
Raise
GUID-D8A5A53D-B5B4-47F8-8894-73BB247EAAE5
To raise the head restraint/headrest, pull it up.
SSS1037 
Type B (if so equipped)
To raise the head restraint, push and hold the lock knob. Then pull it up.
Make sure the head restraint/headrest is positioned so the lock knob is engaged in the notch before riding in that designated seating position.
1-10 Safety — Seats, seat belts and supplemental restraint

SSS1036 
Lower
GUID-2EC86CEC-540F-4B9C-9939-359F5569D155
To lower, push and hold the lock knob and push the head restraint/headrest down.
Make sure the head restraint/headrest is positioned so the lock knob is engaged in the notch before riding in that designated seating position.
Active Head Restraints operate only in certain rear-end collisions. After the collision, the head restraints return to their original positions.
Adjust the Active Head Restraints properly as described earlier in this section.
SSS0508 
FRONT-SEAT ACTIVE HEAD RE-
STRAINT
GUID-DC5E8063-3B9A-4C83-A93E-0B9331F19AA9
The Active Head Restraint moves forward utilizing the force that the seatback receives from the occupant in a rear-end collision. The movement of the head restraint helps support the occupant’s head by reducing its backward movement and helping absorb some of the forces that may lead to whiplash-type injuries.
Active Head Restraints are effective for
|
collisions |
speeds in |
|
which |
occurs |
|
most. |
|
|
Seats, seat belts and supplemental restraint system 1-11 |

SEAT BELTS
GUID-BEB968BC-6620-42F7-8A91-E9D0666C9E43
PRECAUTIONS ON SEAT BELT USAGE
GUID-53033382-24C5-452D-A530-C795862757C9
If you are wearing your seat belt properly adjusted, and you are sitting upright and well back in your seat with both feet on the floor, your chances of being injured or killed in an accident and/or the severity of injury may be greatly reduced. INFINITI strongly encourages you and all of your passengers to buckle up every time you drive, even if your seating position includes a supplemental air bag.
Most U.S. states and Canadian provinces
or territories specify that seat belts be SSS0136A worn at all times when a vehicle is being
driven.
SSS0134A 
1-12 Safety — Seats, seat belts and supplemental restraint

 WARNING
.Every person who drives or rides in this vehicle should use a seat belt at all times. Children should be properly restrained in the rear seat and, if appropriate, in a child restraint.
.The seat belt should be properly adjusted to a snug fit. Failure to do so may reduce the effectiveness of the entire restraint system and increase the chance or severity of injury in an accident. Serious injury or death can occur if the seat belt is not worn properly.
.Always route the shoulder belt over your shoulder and across your chest. Never put the belt behind your back, under your arm or across your neck. The belt should be away from your face and neck, but not falling off your shoulder.
.Position the lap belt as low and snug as possible AROUND THE HIPS, NOT THE WAIST. A lap belt worn too high could increase the risk of internal injuries in an accident.
.Be sure the seat belt tongue is securely fastened to the proper buckle.
.Do not wear the seat belt inside out or twisted. Doing so may reduce its effectiveness.
.Do not allow more than one person to use the same seat belt.
.Never carry more people in the vehicle than there are seat belts.
.If the seat belt warning light glows continuously while the ignition is turned ON with all doors closed and all seat belts fastened, it may indicate a malfunction in the system. Have the system checked by an INFINITI retailer.
.No changes should be made to the seat belt system. For example, do not modify the seat belt, add material or install devices that may change the seat belt routing or tension. Doing so may affect the operation of the seat belt system. Modifying or tampering with the seat belt system may result in serious personal injury.
.Once a seat belt pretensioner has activated, it cannot be reused and must be replaced together with the retractor. See
.
an INFINITI retailer.
.All seat belt assemblies, including retractors and attaching hardware, should be inspected after any collision by an INFINITI retailer. INFINITI recommends that all seat belt assemblies in use during a collision be replaced unless the collision was minor and the belts show no damage and continue to operate properly.
Seat belt assemblies not in use during a collision should also be inspected and replaced if either damage or improper operation is noted.
.All child restraints and attaching hardware should be inspected after any collision. Always follow the restraint manufacturer’s inspection instructions and replacement recommendations. The child restraints should be replaced if they are damaged.
by
Seats, seat belts and supplemental restraint system 1-13

PREGNANT WOMEN
GUID-34B1EAA1-81E6-4B34-B00D-1AB9B55FA469
INFINITI recommends that pregnant women use seat belts. The seat belt should be worn snug, and always position the lap belt as low as possible around the hips, not the waist, and place the shoulder belt over your shoulder and across your chest. Never run the lap/shoulder belt over your abdominal area. Contact your doctor for specific recommendations.
INJURED PERSONS
|
GUID-D3A30BB2-C1AB-4477-9B1E-B1196CD7356B |
||
|
SSS0016 |
INFINITI recommends that injured persons |
|
|
use seat belts, depending on the injury. |
||
|
Check with your doctor for specific recom- |
||
|
mendations. |
THREE-POINT TYPE SEAT BELT
GUID-004C5D80-4BDE-4C70-9F77-DE306C2FAD11
|
WARNING |
||
|
. Every person who drives or rides in this |
||
|
vehicle should use a seat belt at all |
||
|
times. |
||
|
. Do not ride in a moving vehicle when the |
||
|
seatback is reclined. This can be danger- |
||
|
SSS0014 |
ous |
against |
|
be |
||
other
1-14 Safety — Seats, seat belts and supplemental restraint
serious injuries. You could also slide under the lap belt and receive serious internal injuries.
.For the most effective protection when the vehicle is in motion, the seat should be upright. Always sit well back and upright in the seat with both feet on the floor and adjust the seat belt properly.
.Do not allow children to play with the seat belts. Most seating positions are equipped with Automatic Locking Retractor (ALR) mode seat belts. If the seat belt becomes wrapped around a child’s neck with the ALR mode activated, the child can be seriously injured or killed if the seat belt retracts and becomes tight. This can occur even if the vehicle is parked. Unbuckle the seat belt to release the child. If the seat belt can not be unbuckled or is already unbuckled, release the child by cutting the seat belt with a suitable tool (such as a knife or scissors) to release the seat belt.

SSS0292 
Fastening the seat belts
GUID-EDEF82E3-50C4-46E5-A0B1-4A503AC8324B
1.Adjust the seat. (See “Seats” (P.1-2).)
2.Slowly pull the seat belt out of the retractor and insert the tongue into the buckle until you hear and feel the latch engage.
.The retractor is designed to lock during a sudden stop or on impact. A slow pulling motion permits the belt to move, and allows you some freedom of movement in the seat.
.If the seat belt cannot be pulled from its fully retracted position, firmly pull the belt and release it. Then
smoothly pull the belt out of the retractor.
SSS0290 
3.Position the lap belt portion low and snug on the hips as shown.
4.Pull the shoulder belt portion toward the retractor to take up extra slack. Be sure the shoulder belt is routed over your shoulder and across your chest.
The front passenger and rear passenger seating positions’ three-point seat belts have two modes of operation:
. Emergency Locking Retractor (ELR)
. Automatic Locking Retractor (ALR)
The Emergency Locking Retractor (ELR) mode allows the seat belt to extend and retract to allow the driver and passengers
Seats, seat belts and supplemental restraint system 1-15

some freedom of movement in the seat. The ELR locks the seat belt when the vehicle slows down rapidly or during impacts.
The Automatic Locking Retractor (ALR) mode (child restraint mode) locks the seat belt for child restraint installation.
When the ALR mode is activated the seat belt cannot be extended again until the seat belt tongue is detached from the buckle and fully retracted. The seat belt returns to the ELR mode after the seat belt fully retracts. For additional information, see “Child restraints” (P.1-21).
The ALR mode should be used only for child restraint installation. During normal seat belt use by a passenger, the ALR mode should not be activated. If it is activated it may cause uncomfortable seat belt tension.
 WARNING
When fastening the seat belts, be certain that seatbacks are completely secured in the latched position. If they are not completely secured, passengers may be injured in an accident or sudden stop.
SSS0326 
Unfastening the seat belts
GUID-D5F3D151-11FD-44D8-B128-1BA29635EBAC
To unfasten the seat belt, push the button on the buckle. The seat belt automatically retracts.
Checking seat belt operation
GUID-33F7B0AA-1CAD-468A-83BD-FFBF5BAD3B99
Seat belt retractors are designed to lock seat belt movement by two separate methods:
.When the belt is pulled quickly from the retractor.
. When the vehicle slows down rapidly.
1-16 Safety — Seats, seat belts and supplemental restraint
.Grasp the shoulder belt and pull forward quickly. The retractor should lock and restrict further belt movement.
If the retractor does not lock during this check or if you have any question about seat belt operation, see an INFINITI retailer.

SSS0294A 
Shoulder belt height adjustment
(for front seats)
GUID-23A7A0D7-8B4E-44F4-AC03-87AE8E8AAB03
The shoulder belt anchor height should be adjusted to the position best for you. (See “Precautions on seat belt usage” (P.1-12).)
To adjust, push the button *A , and then move the shoulder belt anchor to the desired position, so that the belt passes over the center of the shoulder. The belt should be away from your face and neck, but not falling off of your shoulder. Release the adjustment button to lock the shoulder belt anchor into position.
 WARNING
.After adjustment, release the adjustment button and try to move the shoulder belt anchor up and down to make sure it is securely fixed in position.
.The shoulder belt anchor height should be adjusted to the position best for you. Failure to do so may reduce the effectiveness of the entire restraint system and increase the chance or severity of
|
injury in an accident. |
SSS0671 |
Rear center seat belt
GUID-F71B588D-3EC7-4673-824D-5D114C4DEE22
The center seat belt buckle is identified by the CENTER mark. The center seat belt tongue can be fastened only into the center seat belt buckle.
SEAT BELT EXTENDERS
GUID-2E03C044-A450-40D9-842F-829896DD2E7E
If, because of body size or driving position, it is not possible to properly fit the lapshoulder belt and fasten it, an extender that is compatible with the installed seat belts is available that can be purchased. The extender adds approximately 8 in (200 mm) of length and may be used for either the driver or front passenger seating
Seats, seat belts and supplemental restraint system 1-17

position. See an INFINITI retailer for assistance with purchasing an extender if an extender is required.
 WARNING
.Only INFINITI seat belt extenders, made by the same company which made the original equipment seat belts, should be used with the INFINITI seat belts.
.Adults and children who can use the standard seat belt should not use an extender. Such unnecessary use could result in serious personal injury in the event of an accident.
.Never use seat belt extenders to install child restraints. If the child restraint is not secured properly, the child could be seriously injured in a collision or a sudden stop.
until they are completely dry.
.If dirt builds up in the shoulder belt guide of the seat belt anchors, the seat belts may retract slowly. Wipe the shoulder belt guide with a clean, dry cloth.
.Periodically check to see that the seat belt and the metal components such as buckles, tongues, retractors, flexible wires and anchors work properly. If loose parts, deterioration, cuts or other damage on the webbing is found, the entire seat belt assembly should be replaced.
SEAT BELT MAINTENANCE
GUID-C578281C-EE09-4F4F-93E0-01FA0317A11F
.To clean the seat belt webbing, apply a mild soap solution or any solution recommended for cleaning upholstery or carpets. Then, wipe with a cloth and allow the seat belts to dry in the shade. Do not allow the seat belts to retract
1-18 Safety — Seats, seat belts and supplemental restraint
CHILD SAFETY
GUID-3EBC3DB8-1395-4216-9688-3BD09C97F155
 WARNING
Do not allow children to play with the seat belts. Most seating positions are equipped with Automatic Locking Retractor (ALR) mode seat belts. If the seat belt becomes wrapped around a child’s neck with the ALR mode activated, the child can be seriously injured or killed if the seat belt retracts and becomes tight. This can occur even if the vehicle is parked. Unbuckle the seat belt to release the child. If the seat belt can not be unbuckled or is already unbuckled, release the child by cutting the seat belt with a suitable tool (such as a knife or scissors) to release the seat belt.
Children need adults to help protect them. They need to be properly restrained.
In addition to the general information in this manual, child safety information is available from many other sources, including doctors, teachers, government traffic safety offices, and community organizations. Every child is different, so be sure to learn the best way to transport your child.

There are three basic types of child restraint systems:
. Rear-facing child restraint
. Front-facing child restraint
. Booster seat
The proper restraint depends on the child’s size. Generally, infants up to about 1 year and less than 20 lb (9 kg) should be placed in rear-facing child restraints. Front-facing child restraints are available for children who outgrow rear-facing child restraints and are at least 1 year old. Booster seats are used to help position a vehicle lap/ shoulder belt on a child who can no longer use a front-facing child restraint.
 WARNING
Infants and children need special protection. The vehicle’s seat belts may not fit them properly. The shoulder belt may come too close to the face or neck. The lap belt may not fit over their small hip bones. In an accident, an improperly fitting seat belt could cause serious or fatal injury. Always use appropriate child restraints.
All U.S. states and Canadian provinces or territories require the use of approved child restraints for infants and small children. (See “Child restraints” (P.1-21).)
Also, there are other types of child restraints available for larger children for additional protection.
INFINITI recommends that all pre-teens and children be restrained in the rear seat. According to accident statistics, children are safer when properly restrained in the rear seat than in the front seat.
This is especially important because your vehicle has a supplemental restraint system (air bag system) for the front passenger. (See “Supplemental restraint system” (P.1-42).)
INFANTS
GUID-BC2707F1-5B93-41FC-B2CB-253DE02255F7
Infants up to at least 1 year old should be placed in a rear-facing child restraint. INFINITI recommends that infants be placed in child restraints that comply with Federal Motor Vehicle Safety Standards or Canadian Motor Vehicle Safety Standards. You should choose a child restraint which fits the
installation
and use
SMALL CHILDREN
GUID-24BE0B66-730C-4BA6-A383-DF5CB44D581B
Children that are over 1 year old and weigh at least 20 lbs (9 kg) should remain in a rear-facing child restraint as long as possible up to the height or weight limit of the child restraint. Children who outgrow the height or weight limit of the rear-facing child restraint and are at least 1 year old should be secured in a forward-facing child restraint with a harness. Refer to the manufacturer’s instructions for minimum and maximum weight and height recommendations. INFINITI recommends that small children be placed in child restraints that comply with Federal Motor Vehicle Safety Standards or Canadian Motor Vehicle Safety Standards. You should choose a child restraint that fits your vehicle and always follow the manufacturer’s instructions for installation and use.
LARGER CHILDREN
GUID-03A38D12-7EA0-4BD7-AF69-1D5D51557208
Children should remain in a forward-facing child restraint with a harness until they reach the maximum height or weight limit allowed by the child restraint manufacturer.
Once a child outgrows the height or weight limit of the harness-equipped forward-
Seats, seat belts and supplemental restraint system 1-19
![]()
facing child restraint, INFINITI recommends that the child be placed in a commercially available booster seat to obtain proper seat belt fit. For a seat belt to fit properly, the booster seat should raise the child so that the shoulder belt is properly positioned across the chest and the top, middle portion of the shoulder. The shoulder belt should not cross the neck or face and should not fall off the shoulder. The lap belt should lie snugly across the lower hips or upper thighs, not the abdomen. A booster seat can only be used in seating positions that have a three-point type seat belt. The booster seat should fit the vehicle seat and have a label certifying that it complies with Federal Motor Vehicle Safety Standards or Canadian Motor Vehicle Safety Standards.
A booster seat should be used until the child can pass the seat belt fit test below:
.Are the child’s back and hips against the vehicle seatback?
.Is the child able to sit without slouching?
.Do the child’s knees bend easily over the front edge of the seat with feet flat on the floor?
.Can the child safely wear the seat belt (lap belt low and snug across the hips
and shoulder belt across mid-chest and shoulder)?
.Is the child able to use the properly adjusted head restraint/headrest?
.Will the child be able to stay in position for the entire ride?
1-20 Safety — Seats, seat belts and supplemental restraint
JVR0473X 
If you answered no to any of these questions, the child should remain in a booster seat using a three-point type seat belt.
NOTE:
Laws in some communities may follow different guidelines. Check local and state regulations to confirm your child is using the correct restraint system before traveling.

 WARNING
Never let a child stand or kneel on any seat and do not allow a child in the cargo area. The child could be seriously injured or killed in a sudden stop or collision.
CHILD RESTRAINTS
GUID-B60DFF65-A507-4ECD-AFB2-0C7E9D8EA0A3
PRECAUTIONS ON CHILD RE-
STRAINTS
GUID-68368E0F-2E51-4528-A64A-5F7C6BAA3696
 WARNING
. Failure to follow the warnings and instructions for proper use and installation of child restraints could result in serious injury or death of a child or other passengers in a sudden stop or collision:
— The child restraint must be used and
SSS0099 installed properly. Always follow all of the child restraint manufacturer’s
instructions for installation and use.
— Infants and children should never be held on anyone’s lap. Even the strongest adult cannot resist the forces of a collision.
— Do not put a seat belt around both a child and another passenger.
— INFINITI recommends that all child restraints be installed in the rear seat. Studies show that children are safer when properly restrained in the
rear seat than in the front seat. If you SSS0100 must install a forward-facing child
restraint in the front seat, see “For-
Seats, seat belts and supplemental restraint system 1-21

ward-facing child restraint installation using the seat belts” (P.1-34).
—Even with the INFINITI Advanced Air Bag System, never install a rearfacing child restraint in the front seat. An inflating air bag could seriously injure or kill a child. A rear-facing child restraint must only be used in the rear seat.
—Be sure to purchase a child restraint that will fit the child and vehicle. Some child restraints may not fit properly in your vehicle.
—Child restraint anchor points are designed to withstand loads from child restraints that are properly fitted.
—Never use the anchor points for adult seat belts or harnesses.
—A child restraint with a top tether strap should not be used in the front passenger seat.
—Keep seatbacks as upright as possible after fitting the child restraint.
—Infants and children should always be placed in an appropriate child restraint while in the vehicle.
.When the child restraint is not in use, keep it secured with the LATCH system or a seat belt. In a sudden stop or collision, loose objects can injure occupants or damage the vehicle.
 CAUTION
A child restraint in a closed vehicle can become very hot. Check the seating surface and buckles before placing a child in the child restraint.
This vehicle is equipped with a universal child restraint anchor system, referred to as the LATCH (Lower Anchors and Tethers for CHildren) system. Some child restraints include rigid or webbing-mounted attachments that can be connected to these anchors.
For details, see “Lower Anchors and Tethers for CHildren (LATCH) system” (P.1- 23).
If you do not have a LATCH compatible child restraint, can be used.
1-22 Safety — Seats, seat belts and supplemental restraint
straints for infants and small children of various sizes. When selecting any child restraint, keep the following points in mind:
.Choose only a restraint with a label certifying that it complies with Federal Motor Vehicle Safety Standard 213 or Canadian Motor Vehicle Safety Standard 213.
.Check the child restraint in your vehicle to be sure it is compatible with the vehicle’s seat and seat belt system.
.If the child restraint is compatible with your vehicle, place your child in the child restraint and check the various adjustments to be sure the child restraint is compatible with your child. Choose a child restraint that is designed for your child’s height and weight. Always follow all recommended procedures.
.If the combined weight of the child and child restraint is less than 65 lbs (29.5 kg), you may use either the LATCH anchors or the seat belt to install the child restraint (not both at the same time).
.If the combined weight of the child and child restraint is greater than 65 lbs

(29.5 kg), use the vehicle’s seat belt (not the lower anchors) to install the child restraint.
.Be sure to follow the child restraint manufacturer’s instructions for installation.
All U.S. states and Canadian provinces or territories require that infants and small children be restrained in an approved child restraint at all times while the vehicle is being operated. Canadian law requires the top tether strap on front-facing child restraints to be secured to the designated anchor point on the vehicle.
SSS0839 
LATCH system lower anchor locations
Lower Anchors and Tethers for
CHildren (LATCH) SYSTEM
GUID-5956E400-4E3E-4487-A1A5-57F06541E11C
Your vehicle is equipped with special anchor points that are used with the LATCH (Lower Anchors and Tethers for CHildren) system compatible child restraints. This system may also be referred to as the ISOFIX or ISOFIX compatible system. With this system, you do not have to use a vehicle seat belt to secure the child restraint unless the combined weight of
|
the child |
65 lbs |
|
(29.5 |
of the |
|
child |
than 65 |
lbs (29.5 kg), use the vehicle’s seat belt (not the lower anchors) to install the child restraint. Be sure to follow the child restraint manufacturer’s instructions for installation.
The LATCH anchor points are provided to install child restraints in the rear outboard seating positions only.
LATCH lower anchor
GUID-A144813C-2A0D-47F9-BEED-72C898E46E3B
 WARNING
Failure to follow the warnings and instructions for proper use and installation of child restraints could result in serious injury or death of a child or other passengers in a sudden stop or collision:
.Attach LATCH system compatible child restraints only at the locations shown in the illustration.
.Do not secure a child restraint in the center rear seating position using the LATCH lower anchors. The child restraint will not be secured properly.
.Inspect the lower anchors by inserting your fingers into the lower anchor area. Feel to make sure there are no obstruc-
Seats, seat belts and supplemental restraint system 1-23

tions over the anchors such as seat belt webbing or seat cushion material. The child restraint will not be secured properly if the lower anchors are obstructed.
Child restraint anchorages are designed to withstand only those loads imposed by correctly fitted child restraints. Under no circumstances are they to be used to attach adult seat belts, or other items or equipment to the vehicle. Doing so could damage the child restraint anchorages. The child restraint will not be properly installed using the damaged anchorage, and a child could be seriously injured or killed in a collision.
SSS0840 
LATCH lower anchor location
LATCH lower anchor point locations
GUID-ECC4D1CF-0E92-4147-AA0E-11919C6465E9
The LATCH lower anchors are located at the rear of the seat cushion near the seatback. A label is attached to the seatback to help you locate the LATCH lower anchors.
1-24 Safety — Seats, seat belts and supplemental restraint
SSS0643 
LATCH webbing-mounted attachment
Installing child restraint LATCH an-
chor attachments
GUID-D6B8524C-8FF5-44D8-9628-D94CB2545778
LATCH compatible child restraints include two rigid or webbing-mounted attachments that can be connected to two anchors located at certain seating positions in your vehicle. With this system, you do not have to use a vehicle seat belt to secure the child restraint. Check your child restraint for a label stating that it is compatible with LATCH. This information may also be in the instructions provided by the child restraint manufacturer.

SSS0644 
LATCH rigid-mounted attachment
The child restraint top tether strap must be used when installing the child restraint with the LATCH lower anchor attachments or seat belts.
When installing a child restraint, carefully read and follow the instructions in this manual and those supplied with the child restraint.
SSS0841 
Top tether anchor
GUID-885F10F6-0288-4A53-8004-877F6CC82635
 WARNING
.Child restraint anchorages are designed to withstand only those loads imposed by correctly fitted child restraints. Under no circumstances are they to be used to attach adult seat belts, or other items or equipment to the vehicle. Doing so could damage the child restraint anchorages. The child restraint will not be properly
.If the cargo cover (if so equipped) contacts the top tether strap when it is attached to the top tether anchor, remove the cargo cover from the vehicle or secure it on the cargo floor below its attachment location. If the cargo cover is not removed, it may damage the top tether strap during a collision.
.Do not allow cargo to contact the top tether strap when it is attached to the top tether anchor. Properly secure the cargo so it does not contact the top tether strap. Cargo that is not properly secured or cargo that contacts the top tether strap may damage the top tether strap during a collision. Your child could be seriously injured or killed in a collision if the child restraint top tether strap is damaged.
Top tether anchor point locations:
GUID-D73A39BF-43C8-459F-9C24-47B7F579C407
Anchor points are located on the back of each seatback for all three seating positions of the rear seat as shown.
Seats, seat belts and supplemental restraint system 1-25

REAR-FACING CHILD RESTRAINT IN-
STALLATION USING LATCH
GUID-1088690A-8FC1-46CB-854D-5E32E597080D
Refer to all Warnings and Cautions in the “Child safety” (P.1-18) and “Child restraints” (P.1-21) before installing a child restraint.
Do not use the lower anchors if the combined weight of the child and the child restraint exceeds 65 lbs (29.5 kg). If the combined weight of the child and the child restraint is greater than 65 lbs (29.5 kg), use the vehicle’s seat belt (not the lower anchors) to install the child restraint. Be sure to follow the child restraint manufacturer’s instructions for installation.
Follow these steps to install a rear-facing child restraint using the LATCH system:
1.Position the child restraint on the seat. Always follow the child restraint manufacturer’s instructions.
|
SSS0648 |
SSS0649 |
|
Rear-facing web-mounted — step 2 |
Rear-facing rigid-mounted — step 2 |
2.Secure the child restraint anchor attachments to the LATCH lower anchors. Check to make sure the LATCH attachment is properly attached to the lower anchors.
1-26 Safety — Seats, seat belts and supplemental restraint

SSS0639
Rear-facing — step 3
3.For child restraints that are equipped with webbing-mounted attachments, remove any additional slack from the anchor attachments. Press downward and rearward firmly in the center of the child restraint with your hand to compress the vehicle seat cushion and seatback while tightening the webbing of the anchor attachments.
all child restraints fit in all types of vehicles.
5. Check to make sure the child restraint is properly secured prior to each use. If the child restraint is loose, repeat steps 1 through 4.
SSS0650
Rear-facing — step 4
4.After attaching the child restraint, test it before you place the child in it. Push it from side to side while holding the child restraint near the LATCH attachment path. The child restraint should not move more than 1 inch (25 mm), from side to side. Try to tug it forward and check to see if the LATCH attachment holds the restraint in place. If the restraint is not secure, tighten the LATCH attachment as necessary, or put the restraint in another seat and test it
|
again |
different |
|
child |
using |
|
the |
. Not |
|
Seats, seat belts and supplemental restraint system 1-27 |

air bag and status light” (P.1-49).
SSS0100 
REAR-FACING CHILD RESTRAINT IN-
STALLATION USING THE SEAT BELTS
GUID-7659E753-5018-4FA3-A3A6-25C8378555F1
 WARNING
The three-point seat belt with Automatic Locking Retractor (ALR) must be used when installing a child restraint. Failure to use the ALR mode will result in the child restraint not being properly secured. The restraint could tip over or be loose and cause injury to a child in a sudden stop or collision. Also, it can change the operation of the front passenger air bag. See “Front passenger
1-28 Safety — Seats, seat belts and supplemental restraint
SSS0100 
Rear-facing — step 1
Refer to all Warnings and Cautions in the “Child safety” (P.1-18) and “Child restraints” (P.1-21) before installing a child restraint.
Do not use the lower anchors if the combined weight of the child and the child restraint exceeds 65 lbs (29.5 kg). If the combined weight of the child and the child restraint is greater than 65 lbs (29.5 kg), use the vehicle’s seat belt (not the lower anchors) to install the child restraint. Be sure to follow the child restraint manufacturer’s instructions for installation.

Follow these steps to install a rear-facing child restraint using the vehicle seat belts in the rear seats:
1.Child restraints for infants must be used in the rear-facing direction and therefore must not be used in the front seat. Position the child restraint on the seat. Always follow the restraint manufacturer’s instructions.
SSS0654 
Rear-facing — step 2
2. Route the seat belt tongue through the child restraint and insert it into the buckle until you hear and feel the latch engage. Be sure to follow the child restraint manufacturer’s instructions for belt routing.
SSS0655
Rear-facing — step 3
3.Pull the shoulder belt until the belt is fully extended. At this time, the seat belt retractor is in the Automatic Locking Retractor (ALR) mode (child restraint mode). It reverts to the Emergency Locking Retractor (ELR) mode when the seat belt is fully retracted.
Seats, seat belts and supplemental restraint system 1-29
Бесконечное тщеславие Синей бесконечности вывело ее уже в Топ-2 среди фиников второго поколения. Это тревожит, поскольку перспектива возглавить рейтинг должна пугать всех, кто не знает точно, что он будет делать, если его возглавит. Поэтому для торможения этого процесса считаю необходимым всем владельцам QX-50 2G ознакомиться с видеоинструкцией от Major Avto.
Всем ведь полезно узнать (мне, например), как установить буксировочный крюк или отключить подушку безопасности переднего пассажира. Да и отрегулировать высоту открытия багажника никому не повредит. Особенно тем, кто за 190 см и любит мерить простор заднего ряда, сидя «сам за собой».
У меня на это времени нет. После создания ТОП-100 за 100 лет
www.drive2.ru/b/552885025…92454/?from=blog#comments, логично составить список Топ-100 по-русски. Ведь не только AC/DС нужен в дороге водителям фиников и их пассажирам. Пусть пассажирка справа никогда не догадывается, что ее подушка безопасности давно отключена. Строго по инструкции.
Хорошее руководство по эксплуатации
Законодательство обязывает продавца передать покупателю, вместе с товаром, руководство по эксплуатации Infiniti QX50 — 2016. Отсутствие инструкции либо неправильная информация, переданная потребителю, составляют основание для рекламации в связи с несоответствием устройства с договором. В законодательстве допускается предоставлении руководства в другой, чем бумажная форме, что, в последнее время, часто используется, предоставляя графическую или электронную форму инструкции Infiniti QX50 — 2016 или обучающее видео для пользователей. Условием остается четкая и понятная форма.
Что такое руководство?
Слово происходит от латинского «instructio», тоесть привести в порядок. Следовательно в инструкции Infiniti QX50 — 2016 можно найти описание этапов поведения. Цель инструкции заключается в облегчении запуска, использования оборудования либо выполнения определенной деятельности. Инструкция является набором информации о предмете/услуге, подсказкой.
К сожалению немного пользователей находит время для чтения инструкций Infiniti QX50 — 2016, и хорошая инструкция позволяет не только узнать ряд дополнительных функций приобретенного устройства, но и позволяет избежать возникновения большинства поломок.
Из чего должно состоять идеальное руководство по эксплуатации?
Прежде всего в инструкции Infiniti QX50 — 2016 должна находится:
— информация относительно технических данных устройства Infiniti QX50 — 2016
— название производителя и год производства оборудования Infiniti QX50 — 2016
— правила обслуживания, настройки и ухода за оборудованием Infiniti QX50 — 2016
— знаки безопасности и сертификаты, подтверждающие соответствие стандартам
Почему мы не читаем инструкций?
Как правило из-за нехватки времени и уверенности в отдельных функциональностях приобретенных устройств. К сожалению само подсоединение и запуск Infiniti QX50 — 2016 это слишком мало. Инструкция заключает ряд отдельных указаний, касающихся функциональности, принципов безопасности, способов ухода (даже то, какие средства стоит использовать), возможных поломок Infiniti QX50 — 2016 и способов решения проблем, возникающих во время использования. И наконец то, в инструкции можно найти адресные данные сайта Infiniti, в случае отсутствия эффективности предлагаемых решений. Сейчас очень большой популярностью пользуются инструкции в форме интересных анимаций или видео материалов, которое лучше, чем брошюра воспринимаются пользователем. Такой вид инструкции позволяет пользователю просмотреть весь фильм, не пропуская спецификацию и сложные технические описания Infiniti QX50 — 2016, как это часто бывает в случае бумажной версии.
Почему стоит читать инструкции?
Прежде всего здесь мы найдем ответы касательно конструкции, возможностей устройства Infiniti QX50 — 2016, использования отдельных аксессуаров и ряд информации, позволяющей вполне использовать все функции и упрощения.
После удачной покупки оборудования/устройства стоит посвятить несколько минут для ознакомления с каждой частью инструкции Infiniti QX50 — 2016. Сейчас их старательно готовят или переводят, чтобы они были не только понятными для пользователя, но и чтобы выполняли свою основную информационно-поддерживающую функцию.
-
Infiniti QX50 (2013) — page 1
2013 Infiniti EX Owner’s M anual Printing: July 2012 (14) / OM3E 0J50U0 / Print ed in U.S.A. For y our safety , re ad car efully and keep in thi s v ehicle. 2013 Infiniti EX 1184806 EX OM EN.indd 1 6/26/12 7:44 AM …
-
Infiniti QX50 (2013) — page 2
Y our INFINITI represents a new way of thinking about vehicle design. It integrates advanced engineering and superior crafts- manship with a simple, refined aesthetic sensitivity associated with traditional Ja- panese culture. The result is a different notion of luxury and beauty. The car itself is important, but so is the sense of harmony that the …
-
Infiniti QX50 (2013) — page 3
. AL WAYS provide information about the proper use of vehicle safety features to all occupants of the vehicle. . AL WAYS r eview this Owner ’ s Manual for important safety information. ON-P AVEMENT AND OFF-ROAD DRIVING This vehicle will handle and maneuver differently from an ordinary passenger car because it has a higher center of gravity. As wi …
-
Infiniti QX50 (2013) — page 4
SIC0697 If you see the symbol above, it means “ Do not do this ” or “ Do not let this happen ” . If you see a symbol similar to those above in an illustration, it means the arrow points to the front of the vehicle. Arrows in an illustration that are similar to those above indicate movement or action. Arrows in an illustration that are simil …
-
Infiniti QX50 (2013) — page 5
INFINITI CUSTOMER CARE PROGRAM INFINITI CARES … Both INFINITI and your INFINITI retailer are dedicated to serving all your automotive needs. Y our satisfaction with your vehicle and your INFINITI retailer are our primary concerns. Y our INFINITI retailer is always available to assist you with all your automobile sales and service needs. However, …
-
Infiniti QX50 (2013) — page 6
Illustrated table of contents 0 Safety — Seats, seat belts and supplemental restraint system 1 Instruments and controls Pre-driving chec ks and adjustments Monitor, climate, audio, phone and voice rec ognition systems Starting and driving In case of emergency Appearance and c are Maintenance and do-it-yourself T echnical and c onsumer information …
-
Infiniti QX50 (2013) — page 7
…
-
Infiniti QX50 (2013) — page 8
0 Illustrated table of c ontents Seats, seat belts and Supplemental Restraint System (SRS) ………………………………………………. 0-2 Exterior front ………………………………………………. 0-3 Exterior rear………………………………………………… 0-4 Passenger compartment ……………………… …
-
Infiniti QX50 (2013) — page 9
0-2 Illustrated table of cont ents SSI0417 1. Rear seat power folding/return switch (Page 1-4) 2. Child restraint anchor points (for top tether strap child restraint) (P .1-33) 3. Head restraints (P .1-6) 4. Seat belts (P .1-11) 5 . Roof-mounted curtain side-impact supplemental air bags (P .1-37) 6. Supplemental front-impact air bags (P .1-37) 7. L …
-
Infiniti QX50 (2013) — page 10
SSI0383 1. Hood (P . 3-17) 2. Headlight and turn signal (P .2-34) — Bulb replacement (P .8-28) — Adaptive Front lighting System (AFS) (if so equipped) (P .2-37) 3. Windshield wiper and washer (P .2-32) — Maintenance (P .8-20) 4. Moonroof (if so equipped) (P .2-54) 5. Roof rack (if so equipped) (P .2-51) 6. Power windows (P .2-52) 7. Outside m …
-
Infiniti QX50 (2013) — page 11
0-4 Illustrated table of cont ents JVC0192X 1. Rearview camera (P .4-24, P .4-31) 2. Lift gate (P .3-18) — Intelligent Key system (P . 3-7) — Remote keyless entry system (P .3-14) 3. Rear window defroster (P .2-34) 4. High-mounted stop light (bulb repla- cement) (P .8-26) 5. Rear window wiper and washer (P .2-33) — Maintenance (P .8-21) 6. An …
-
Infiniti QX50 (2013) — page 12
SSI0401 1. Coat hooks (P .2-49) 2. Seat-mounted jac ket hanger (if so equipped) (P .2-48) 3. Rear personal light (P .2-57) 4. Power window controls (P .2-52) — Outside mirror remote control switch (P . 3-24) 5. Automatic drive positioner switch (if so equipped) (P .3-26) 6. Sun visors (P .3-22) 7. Moonroof switch (if so equipped) (P .2-54) 8. Map …
-
Infiniti QX50 (2013) — page 13
0-6 Illustrated table of cont ents SSI0623 1. TRIP/RESET switch for twin trip od- ometer (P .2-7) 2. Instrument brightness control switch (P .2-38) 3. Headlight, fog light and turn signal switch (P .2-34) 4. T rip computer switch (P .2-26) 5. Windshield wiper and washer switch (P .2-32) 6 . Warning systems switc h (if so equipped) — Forward Colli …
-
Infiniti QX50 (2013) — page 14
— Horn (P .2-40) — Driver supplemental air bag (P .1-37) 15. Steering-wheel-mounted controls (right side) — Cruise control switc hes (P . 5-34) — Intelligent Cruise Control (IC C) switches (if so equipped) (P .5-36) — Lane Departure Prevention (LDP) switch (if so equipped) (P . 5-19) — Distance Control Assist (DCA) switch (if so equippe …
-
Infiniti QX50 (2013) — page 15
0-8 Illustrated table of cont ents SSI0624 1. Side ventilator (P .4-43) 2. Meters and gauges (P .2-6) 3. Center ventilator (P .4-43) 4. Center display (P .4-3) 5. Cloc k (P .2-44) 6. Hazard warning flasher switc h (P .6-2) 7. Center multi-function control panel — Navigation system* (if so equipped) — V ehicle information and setting buttons (P …
-
Infiniti QX50 (2013) — page 16
SIC4694 1. T achometer (P .2-8) 2. Warning/Indic ator lights (P .2-10) 3. Speedometer (P .2-7) 4. Engine coolant temperature gauge (P .2-8) 5. Dot matrix liquid crystal display (P .2-20)/Odometer/twin trip odometer (P .2-7) 6. Fuel gauge (P .2-9) Illustrated table of cont ents 0-9 METERS AND GAUGES …
-
Infiniti QX50 (2013) — page 17
0-10 Illustrated table of cont ents SSI0388 VQ37VHR ENGINE 1. Fuse/fusible link holder (P .8-22) 2. Battery (P .8-15) 3. Radiator filler cap (P .8-8) 4. Engine oil dipstick (P .8-10) 5. Engine oil filler cap (P .8-10) 6. Brake fluid reservoir (P .8-13) 7. Window washer fluid reservoir (P .8-14) 8. Power steering fluid reservoir (P .8-13) 9. Air cle …
-
Infiniti QX50 (2013) — page 18
Warning light Name Page All-Wheel Drive (AWD) warning light (AWD models)* 2-11 Anti-lock Braking System (ABS) warning light 2-11 Automatic Transmission c heck warning light 2-11 Blind Spot Warning (BSW) sys- tem warning light* 2-11 Brake warning light 2-11 Charge warning light 2-12 Distance Control Assist (DCA) system warning light (orange)* 2-12 E …
-
Infiniti QX50 (2013) — page 19
0-12 Illustrated table of cont ents MEMO …
-
Infiniti QX50 (2013) — page 20
1 Safety — Seats, seat belts and supplemental restraint syst em Seats …………………………………………………………. 1-2 Front seats ……………………………………………… 1-3 Rear seats ………………………………………………. 1-4 Head restraints………………………………………… …
-
Infiniti QX50 (2013) — page 21
1-2 Safety — Seats, seat belts and supplemental restraint system SSS0133 WARNING . Do not ride in a moving vehicle when the seatback is reclined. This can be danger- ous. The shoulder belt will not be against your body. In an accident, you could be thrown into it and receive nec k or other serious injuries. Y ou could also slide under the lap bel …
-
Infiniti QX50 (2013) — page 22
FRONT SEA TS Front power seat adjustment Operating tips: . The power seat motor has an auto-reset overload protection circuit. If the motor stops during operation, wait 30 sec- onds, then reactivate the switch. . Do not operate the power seat switch for a long period of time when the engine is off. This will discharge the battery. See “ Automatic …
-
Infiniti QX50 (2013) — page 23
1-4 Safety — Seats, seat belts and supplemental restraint system SSS1052 Seat lifter: Push the front or rear end of the switch up or down to adjust the angle or height of the seat. Lumbar support (driver ’ s seat): The lumbar support feature provides lower back support to the driver. SSS1028 T ype A T ype A Push the front * 1 or back * 2 end of …
-
Infiniti QX50 (2013) — page 24
. When operating the rear power seatbac k return, make sure that the vehicle is stopped and the transmission is in the P (Park) position. . Make sure the lid of the rear seat cup holders is closed before folding the rear seatback. WARNING . Never allow anyone to ride in the cargo area or on the rear seat when it is in the fold-down position. Use of …
-
Infiniti QX50 (2013) — page 25
1-6 Safety — Seats, seat belts and supplemental restraint system SSS0829 C enter console switc h (if so equipped): Push and hold the switch located on the center console. The corresponding rear seatback will be returned automatically . A beep sounds once and the rear seatback will rise up while holding the switch. A beep sounds twice when the sea …
-
Infiniti QX50 (2013) — page 26
JVR0051X The illustration shows the seating posi- tions equipped with head restraints and headrest. The head restraints are adjusta- ble. Indicates the seating position is equipped with a head restraint. + Indicates the seating position is equipped with a headrest. SSS0992 Components 1. Head restraint 2. Adjustment notches 3. Lock knob 4. Stalks SS …
-
Infiniti QX50 (2013) — page 27
1-8 Safety — Seats, seat belts and supplemental restraint system SSS0993 T o raise the head restraint, pull it up. SSS0994 T o lower, push and hold the lock knob and push the head restraint down. SSS0995 Removal Use the following procedure to remove the adjustable head restraints. 1. Pull the head restraint up to the highest position. 2. Push and …
-
Infiniti QX50 (2013) — page 28
seating position. SSS0996 Install 1. Align the head restraint stalks with the holes in the seat. Make sure that the head restraint is facing the correct direction. The stalk with the adjustment notches * 1 must be installed in the hole with the lock knob * 2 . 2. Push and hold the lock knob and push the head restraint down. 3. Properly adjust the h …
-
Infiniti QX50 (2013) — page 29
1-10 Safety — Seats, seat belts and supplemental restraint system Active Head Restraints operate only in certain rear-end collisions. After the colli- sion, the head restraints return to their original positions. Adjust the Active Head Restraints properly as described earlier in this section. SSS0837 ARMREST Rear armrest Pull the tab and draw the …
-
Infiniti QX50 (2013) — page 30
PRECAUTIONS ON SEA T BEL T USAGE If you are wearing your seat belt properly adjusted, and you are sitting upright and well back in your seat with both feet on the floor, your chance s of being injured or killed in an accident and/or the severity of injury may be greatly reduced. INFINITI strongly encourages you and all of your passengers to buckle …
-
Infiniti QX50 (2013) — page 31
1-12 Safety — Seats, seat belts and supplemental restraint system WARNING . Every person who drives or rides in this vehicle should use a seat belt at all times. Children should be properly re- strained in the rear seat and, if appro- priate, in a child restraint. . The seat belt should be properly ad- justed to a snug fit. Failure to do so may r …
-
Infiniti QX50 (2013) — page 32
SSS0016 SSS0014 PREGNANT WOMEN INFINITI recommends that pregnant women use seat belts. The seat belt should be worn snug, and always position the lap belt as low as possible around the hips, not the waist, and place the shoulder belt over your shoulder and across your chest. Never run the lap/shoulder belt over your abdominal area. Contact your doc …
-
Infiniti QX50 (2013) — page 33
1-14 Safety — Seats, seat belts and supplemental restraint system SSS0292 Fastening the seat belts 1. Adjust the seat. (See “ Seats ” earlier in this section.) 2. Slowly pull the seat belt out of the retractor and insert the tongue into the buck le until you hear and feel the latch engage. . The retractor is designed to loc k during a sudden …
-
Infiniti QX50 (2013) — page 34
some freedom of movement in the seat. The ELR locks the seat belt when the vehicle slows down rapidly or during impacts. The Automatic Locking Retractor (ALR) mode (child restraint mode) loc ks the seat belt for child restraint installation. When the ALR mode is activated the seat belt cannot be extended again until the seat belt tongue is detached …
-
Infiniti QX50 (2013) — page 35
1-16 Safety — Seats, seat belts and supplemental restraint system SSS0294A Shoulder belt height adjustment (for front seats) The shoulder belt anc hor height should be adjusted to the position best for you. (See “ Precautions on seat belt us age ” earlier in this section.) T o adjust, push the button * A , and then move the shoulder belt anc …
-
Infiniti QX50 (2013) — page 36
position. See an INFINITI retailer for assis- tance with purchasing an extender if an extender is required. WARNING . Only INFINITI seat belt extenders, made by the same company whic h made the original equipment seat belts, should be used with the INFINITI seat belts. . Adults and children who can use the standard seat belt should not use an exten …
-
Infiniti QX50 (2013) — page 37
1-18 Safety — Seats, seat belts and supplemental restraint system . Rear-facing c hild restraint . Front-facing c hild restraint . Booster seat The proper restraint depends on the child ’ s size. Generally, infants up to about 1 year and less than 20 lb (9 kg) should be placed in rear-facing child restraints. Front-facing child restraints are a …
-
Infiniti QX50 (2013) — page 38
facing c hild restraint, INFINITI recommends that the child be placed in a commercially available booster seat to obtain proper seat belt fit. For a seat belt to fit properly, the booster seat should raise the child so that the shoulder belt is properly posi- tioned across the chest and the top, middle portion of the shoulder. The shoulder belt sho …
-
Infiniti QX50 (2013) — page 39
1-20 Safety — Seats, seat belts and supplemental restraint system PRECAUTIONS ON CHILD RE- STRAINTS WARNING . Failure to follow the warnings and instructions for proper use and installa- tion of child restraints could result in serious injury or death of a c hild or other passengers in a sudden stop or collision: — The child re straint must be …
-
Infiniti QX50 (2013) — page 40
Several manufacturers offer c hild restraints for infants and small c hildren of various sizes. When selecting any child restraint, keep the following points in mind: . Choose only a restraint with a label certifying that it complies with Federal Motor V ehicle Safety Standard 213 or Canadian Motor V ehicle Safety Stan- dard 213. . Check the c hild …
-
Infiniti QX50 (2013) — page 41
1-22 Safety — Seats, seat belts and supplemental restraint system SSS0840 LA TCH lower anc hor location LA TCH lower anchor point locations The LA TCH anc hors are located at the rear of the seat cushion near the seatback. A label is attac hed to the seatback to help you locate the LA TCH anc hors. SSS0643 LA TCH webbing-mounted attac hment Insta …
-
Infiniti QX50 (2013) — page 42
SSS0841 T op tether anc hor WARNING . If the cargo cover (if so equipped) contacts the top tether strap when it is attached to the top tether anchor, remove the cargo cover from the vehicle or secure it on the cargo floor below its attachment locati on. If the cargo cover is not removed, it may damage the top tether strap during a collision. . Do n …
-
Infiniti QX50 (2013) — page 43
1-24 Safety — Seats, seat belts and supplemental restraint system SSS0649 Rear-facing rigid-mounted — step 2 SSS0639 Rear-facing — step 3 3. For child restraints that are equipped with webbing-mounted attachments, remove any additional slack from the anchor attac hments. Press downward and rearward firmly in the center of the child restraint …
-
Infiniti QX50 (2013) — page 44
applicable). Not all child restraints fit in all types of vehicles. 5. Check to make sure the child restraint is properly secured prior to each use. If the child restraint is loose, repeat steps 1 through 4. SSS0100 REAR-FACING CHILD RESTRAINT IN- ST ALLA TION USING THE SEA T BEL TS WARNING The three-point seat belt with Automatic Locking Retractor …
-
Infiniti QX50 (2013) — page 45
1-26 Safety — Seats, seat belts and supplemental restraint system SSS0654 Rear-facing — step 2 2. Route the seat belt tongue through the child restraint and insert it into the buck le until you hear and feel the latch engage. Be sure to follow the child restraint manufacturer ’ s instructions for belt routing. SSS0655 Rear-facing — step 3 3 …
-
Infiniti QX50 (2013) — page 46
SSS0657 Rear-facing — step 5 5. Remove any additional slack from the seat belt; press downward and rear- ward firmly in the center of the child restraint to compress the vehicle seat cushion and seatback while pulling up on the seat belt. SSS0658 Rear-facing — step 6 6. After attaching the c hild restraint, test it before you place the child in …
-
Infiniti QX50 (2013) — page 47
1-28 Safety — Seats, seat belts and supplemental restraint system SSS0645 Forward-f acing web-mounted — step 2 2. Secure the child restraint anc hor at- tachments to the LA TCH lower anchors. Check to make sure the LA TCH attach- ment is properly attached to the lower anchors. If the child restraint is equipped with a top tether strap, route th …
-
Infiniti QX50 (2013) — page 48
SSS0647 Forward-f acing — step 4 4. For child restraints that are equipped with webbing-mounted attachments, remove any additional slack from the anchor attac hments. Press downward and rearward firmly in the center of the child restraint with your knee to co m- press the vehicle seat cushion and seatback while tightening the webbing of the ancho …
-
Infiniti QX50 (2013) — page 49
1-30 Safety — Seats, seat belts and supplemental restraint system SSS0640 Forward-f acing (front passenger seat) — step 1 Refer to all Warnings and Cautions in the “ Child safety ” and “ Child restraints ” sec- tions before installing a child restraint. Follow these steps to install a forward- facing c hild restraint using the vehicle s …
-
Infiniti QX50 (2013) — page 50
anchor . SSS0651 Forward-f acing — step 4 4. Pull the shoulder belt until the belt is fully extended. At this time, the seat belt retractor is in the Automatic Lock- ing Retractor (ALR) mode (child restraint mode). It reverts to Emergency Locking Retractor (ELR) mode when the seat belt is fully retracted. SSS0652 Forward-f acing — step 5 5. All …
-
Infiniti QX50 (2013) — page 51
1-32 Safety — Seats, seat belts and supplemental restraint system SSS0653 Forward-f acing — step 6 6. Remove any additional slack from the seat belt; press downward and rear- ward firmly in the center of the child restraint with your knee to compress the vehicle seat cushion and seatback while pulling up on the seat belt. 7. Tighten the tether …
-
Infiniti QX50 (2013) — page 52
SSS0676 Forward-f acing — step 10 10. If the child restraint is installed in the front passenger seat, place the ignition switch in the ON position. The front passenger air bag status light should illuminate. If this light is not illuminated, see “ Front passenger air bag and status light ” in this section. Move the child restraint to another …
-
Infiniti QX50 (2013) — page 53
1-34 Safety — Seats, seat belts and supplemental restraint system 2. Secure the top tether strap to the tether anchor point on the back of seatback behind the child restraint. 3. Refer to the appropriate child restraint installation procedure steps in this section before tightening the tether strap. If you have any questions when installing a top …
-
Infiniti QX50 (2013) — page 54
LRS0453 . Check the booster seat in your vehicle to be sure it is compatible with the vehicle ’ s seat and seat belt system. . Make sure the child ’ s head will be properly supported by the booster seat or vehicle seat. The seatbac k must be at or above the center of the c hild ’ s ears. For example, if a low bac k booster seat * 1 is chosen, …
-
Infiniti QX50 (2013) — page 55
1-36 Safety — Seats, seat belts and supplemental restraint system SSS0640 1. If you must install a booster seat in the front seat, move the seat to the rea r- most position. 2. Position the booster seat on the seat. Only place it in a forward-facing direc- tion. Always follow the booster seat manufacturer ’ s instructions. LRS0454 Front passeng …
-
Infiniti QX50 (2013) — page 56
SSS0676 7. If the booster seat is installed in the front passenger seat, push the ignition switch to the ON position. The front passenger air bag status light may or may not illuminate depending on the size of the c hild and the type of booster seat used. (See “ Front passenger air bag and status light ” later in this section.) PRECAUTIONS ON S …
-
Infiniti QX50 (2013) — page 57
1-38 Safety — Seats, seat belts and supplemental restraint system SSS0131 SSS0132 WARNING . The front air bags ordinarily will not inflate in the event of a side impact, rear impact, rollover, or lower severity frontal collision. Always wear your seat belts to help reduce the risk or severity of injury in various kinds of accidents. . The front p …
-
Infiniti QX50 (2013) — page 58
wheel or instrument panel. Always use the seat belts. . The driver and front passenger seat belt buckles are equipped with sensors that detect if the seat belts are fast ened. The Advanced Air Bag System monitors the severity of a collision and seat belt usage then inflates the air bags as needed. Failure to properly wear seat belts can increase th …
-
Infiniti QX50 (2013) — page 59
1-40 Safety — Seats, seat belts and supplemental restraint system SSS0099 SSS0100 WARNING . Never let childr en ride unrestrained or extend their hands or fac e out of the window. Do not attempt to hold them in your lap or arms. Some examples of dangerous riding positions are shown in the illustrations. . Children may be severely injured or kille …
-
Infiniti QX50 (2013) — page 60
SSS0140 SSS0162 SSS0159 WARNING Front seat-mounted side-impact supplemen- tal air bags and roof-mounted curtain side- impact supplemental air bags: . The side air bags and curtain air bags ordinarily will not inflate in the event of a frontal impact, re ar impact, rollover or lower severity side collision. Always wear your seat belts to help reduce …
-
Infiniti QX50 (2013) — page 61
1-42 Safety — Seats, seat belts and supplemental restraint system SSS0854 1. Crash zone sensor 2. Supplemental front-impact air bag modules (INFINITI Advanced Air Bags) 3. Front seat-mounted side-impact sup- plemental air bag modules 4. Occupant classification sensor (pat- tern sensor) 5. Occupant classification system con- trol unit 6 . Roof-mou …
-
Infiniti QX50 (2013) — page 62
dual stage air bag inflators. The system monitors information from the crash zone sensor, the Air bag Control Unit (ACU), the diagnosis sensor unit, seat belt buckle sensors and the occupant classific ation sensor (pattern sensor). Inflator operation is based on the severity of a collision and seat belt usage for the driver . For the front passenge …
-
Infiniti QX50 (2013) — page 63
1-44 Safety — Seats, seat belts and supplemental restraint system SSS0676 Front passenger air bag status light Front passenger air bag and status light WARNING The front passenger air bag is designed to automatically turn OFF under some condi- tions. Read this section carefully to learn how it operates. Proper use of the seat, seat belt and child …
-
Infiniti QX50 (2013) — page 64
may be turned OFF , however, if the occupant does not sit in the seat properly (for example, by not sitting upright, by sitting on an edge of the seat, or by otherwise being out of position), this could cause the sensor to turn the air bag OFF . Always be sure to be seated and wearing the seat belt properly for the most effective protection by the …
-
Infiniti QX50 (2013) — page 65
1-46 Safety — Seats, seat belts and supplemental restraint system meter and gauges area will blink. Have the system chec ked by an INFINITI retailer. Other supplemental front-impact air bag precautions WARNING . Do not place any objects on the steering wheel pad or on the instrument panel. Also, do not place any objects between any occupant and t …
-
Infiniti QX50 (2013) — page 66
the air bag system. . A cracked windshield should be re placed immediately by a qualified repair facility. A cracked windshield could affect the function of the supplemental air bag system. * The SRS wiring harness connectors are yellow and orange for easy identification. When selling your vehicle, we request that you inform the buyer about the sup …
-
Infiniti QX50 (2013) — page 67
1-48 Safety — Seats, seat belts and supplemental restraint system air bags do not provide restraint to the lower body. The seat belts should be correctly worn and the driver and passenger seated upright as far as practical away from the side air bags. Rear seat passengers should be seated as far away as practical from the door finishers and side …
-
Infiniti QX50 (2013) — page 68
SEA T BEL TS WITH PRETENSIONERS (front seats) WARNING . The pretensioners cannot be reused after activation. They must be replaced to- gether with the retractor and buckle as a unit. . If the vehicle becomes involved in a collision but a pretensioner is not activated, be sure to have the preten- sioner system c heck ed and, if necessary , replaced …
-
Infiniti QX50 (2013) — page 69
1-50 Safety — Seats, seat belts and supplemental restraint system SSS1016 SUPPLEMENT AL AIR BAG WARNING LABELS Warning labels about the supplemental front-impact air bag systems are placed in the vehicle as shown in the illustration. SRS air bag The warning labels * 1 are located on the surface of the sun visors. SPA1097 SUPPLEMENT AL AIR BAG WAR …
-
Infiniti QX50 (2013) — page 70
REP AIR AND REPLACEMENT PROCE- DURE The front air bags, side air bags, curtain air bags and pretensioners are designed to activate on a one-time-only basis. As a reminder, unless it is damaged, the sup- plemental air bag warning light will remain illuminated after inflation has occurred. Repair and replacement of these systems should be done only b …
-
Infiniti QX50 (2013) — page 71
1-52 Safety — Seats, seat belts and supplemental restraint system MEMO …
-
Infiniti QX50 (2013) — page 72
2 Instruments and c ontr ols Coc kpit ………………………………………………………. 2-3 Instrument panel …………………………………………. 2-5 Meters and gauges ………………………………………. 2-6 Speedometer and odometer ………………………. 2-7 T achometer …………………………… …
-
Infiniti QX50 (2013) — page 73
Luggage hooks ………………………………………. 2-49 Cargo cover (if so equipped)…………………….. 2-50 Roof rack (if so equipped) ……………………….. 2-51 Windows ………………………………………………….. 2-52 Power windows ……………………………………… 2-52 Moonroof (if so equipped …
-
Infiniti QX50 (2013) — page 74
SSI0623 1. TRIP/RESET switch for twin trip od- ometer (P .2-7) 2. Instrument brightness control switch (P .2-38) 3. Headlight, fog light and turn signal switch (P .2-34) 4. T rip computer switch (P .2-26) 5. Windshield wiper and washer switch (P .2-32) 6 . Warning systems switc h (if so equipped) — Forward Collision W arning (FCW) (P .5- 71) — …
-
Infiniti QX50 (2013) — page 75
2-4 Instruments and contr ols 14. Steering wheel — Horn (P .2-40) — Driver supplemental air bag (P .1-37) 15. Steering-wheel-mounted controls (right side) — Cruise control switc hes (P . 5-34) — Intelligent Cruise Control (IC C) switches (if so equipped) (P .5-36) — Lane Departure Prevention (LDP) switch (if so equipped) (P . 5-19) — Di …
-
Infiniti QX50 (2013) — page 76
SSI0624 1. Side ventilator (P .4-43) 2. Meters and gauges (P .2-6) 3. Center ventilator (P .4-43) 4. Center display (P .4-3) 5. Cloc k (P .2-44) 6. Hazard warning flasher switc h (P .6-2) 7. Center multi-function control panel — Navigation system* (if so equipped) — V ehicle information and setting buttons (P .4-10) — Bluetooth ® Hands-Free …
-
Infiniti QX50 (2013) — page 77
2-6 Instruments and contr ols SIC4694 1. T achometer (P .2-8) 2. Warning/Indic ator lights (P .2-10) 3. Speedometer (P .2-7) 4. Engine coolant temperature gauge (P .2-8) 5. Dot matrix liquid crystal display (P .2-20)/Odometer/twin trip odometer (P .2-7) 6. Fuel gauge (P .2-9) *: The needle indicators in the speed- ometer, tachomete r, engine coolan …
-
Infiniti QX50 (2013) — page 78
SIC4695 Speedometer SPEEDOMETER AND ODOMETER Speedometer The speedometer indicates vehicle speed in miles per hour (MPH) and kilometers per hour (km/h). SIC3259 Odometer/twin trip odometer Odometer/twin trip odometer The odometer * 1 and twin trip odometer * 2 are displayed on the dot matrix crystal display when the ignition switch is in the ON pos …
-
Infiniti QX50 (2013) — page 79
2-8 Instruments and contr ols JVI0513X T ACHOMETER The tachometer indic ates engine speed in revolutions per minute (RPM). Do not rev the engine into the red zone * 1 . CAUTION When engine speed approaches the red zone, shift to a higher gear or reduce engine speed. Operating the engine in the red zone may cause serious engine damage. SIC4697 ENGIN …
-
Infiniti QX50 (2013) — page 80
SIC4698 FUEL GAUGE The gauge indicates the approximate fuel level in the tank. The gauge may move slightly during braking, turning, acceleration, or going up or down hills. The gauge needle returns to E (Empty) after the ignition switch is pushed to the OFF position. Refill the fuel tank before the gauge registers “ E ” (Empty). The low fuel wa …
-
Infiniti QX50 (2013) — page 81
2-10 Instruments and controls All-Wheel Drive (AWD) warning light (AWD models)* Intelligent Key warning light Exterior light indicator Anti-lock Braking System (ABS) warning light Lane departure warning light (orange)* Front fog light indicator light Low tire pressure warning light Front passenger air bag status light Automatic transmission check w …
-
Infiniti QX50 (2013) — page 82
WARNING LIGHTS All-Wheel Drive (AWD) warning light (AWD models) The warning light comes on when the ignition switch is pushed to ON. It turns off soon after the engine is starte d. If the AWD system malfunctions, or the diameter of the front and the rear wheels are different, the warning light will either remain illuminated or blink. (See “ All- …
-
Infiniti QX50 (2013) — page 83
2-12 Instruments and controls Parking brake indic ator: When the ignition switch is in the ON position, the light comes on when the parking brake is applied. Low brake fluid warning light: When the ignition switch is in the ON position, the light warns of a low brake fluid level. If the light comes on while the engine is running with the parking br …
-
Infiniti QX50 (2013) — page 84
Engine oil pressure warning light This light warns of low engine oil pressure. If the light flickers or comes on during normal driving, pull off the road in a safe area, stop the engine immediately and call an INFINITI retailer or other authorized repair shop. The engine oil pressure warning light is not designed to indicate a low oil level. Use th …
-
Infiniti QX50 (2013) — page 85
2-14 Instruments and controls except the spare. The low tire pressure warning light warns of low tire pressure or indicates that the TPMS is not functioning properly. After the ignition switch is pushed ON, this light illuminates for about 1 second and turns off. Low tire pressure warning: If the vehicle is being driven with low tire pressure, the …
-
Infiniti QX50 (2013) — page 86
possible for tire replacement and/or system resetting. . Replacing tires with those not originally specified by INFINITI could affect the proper operation of the TPMS. CAUTION . The TPMS is not a substitute for the regular tire pressure c heck. Be sure to chec k the tire pressure regularly. . If the vehicle is being driven at speeds of less than 16 …
-
Infiniti QX50 (2013) — page 87
2-16 Instruments and controls bag warning light will turn off after about 7 seconds if the supplemental front air bag and supplemental side air bag, curtain side-impact air bag systems and/or pre- tensioner seat belt are operational. If any of the following conditions occur , the front air bag, side air bag, curtain air bag and pretensioner systems …
-
Infiniti QX50 (2013) — page 88
transmission does not shift to the selected gear due to a transmission protection mode, the A T position indicator light will blink and a buzzer will sound. (See “ Automatic transmission ” in the “ 5. Starting and driving ” section.) Exterior light indicator This indicator illuminates when the head- light switch is turned to the AUTO , or p …
-
Infiniti QX50 (2013) — page 89
2-18 Instruments and controls running, it may indicate a potential emis- sion control malfunction. The malfunction indicator light may also come on steady if the fuel-filler cap is loose or missing, or if the vehicle runs out of fuel. Check to make sure the fuel-filler cap is installed and closed tightly, and that the vehicle has at least 3 US gall …
-
Infiniti QX50 (2013) — page 90
V ehicle Dynamic C ontrol (VDC) off indicator light The light comes on when the vehicle dynamic control off switc h is pushed to OFF . This indicates that the vehicle dynamic control system and traction control system are not operating. AUDIBLE REMINDERS Key reminder chime A chime will sound if the driver side door is opened while the ignition swit …
-
Infiniti QX50 (2013) — page 91
2-20 Instruments and controls SIC3252 The dot matrix liquid crystal display * 1 is located between the tachometer and the speedometer, and it displays the auto- matic transmission position indicator, the Intelligent Cruise Control (IC C) system (if so equipped), the Distance Control Assist (DCA) system (if so equipped) information, the Intelligent …
-
Infiniti QX50 (2013) — page 92
JVI0339X Instruments and contr ols 2-21 …
-
Infiniti QX50 (2013) — page 93
2-22 Instruments and controls INDICA TORS FOR OPERA TION 1. Engine start operation indicator This indicator appears when the selector lever is in the P (Park) position. This indicator means that the engine will start by pushing the ignition switch with the brake pedal depressed. 2. Intelligent Key insertion indicator This indicator appears when the …
-
Infiniti QX50 (2013) — page 94
8. Parking brake release warning This warning appears when the vehicle speed is above 4 MPH (7 km/h) and the parking brake is applied. 9. Low fuel warning This warning appears when the fuel level in the tank is getting low. Refuel as soon as it is convenient, preferably before the fuel gauge reaches the empty (E) position. There is a small reserve …
-
Infiniti QX50 (2013) — page 95
2-24 Instruments and controls 17. Intelligent Cruise C ontrol (IC C) system MAIN switch indicator (if so equipped) The Intelligent Cruise Control (IC C) system main switch indic ator (CRUISE) is displayed when the ICC main switc h is pushed. When the main switch is pushed again, the indicator disappears. While the CRUISE indicator is displayed, the …
-
Infiniti QX50 (2013) — page 96
INDICA TORS FOR MAINTENANCE 1. Engine oil replacement indicator This indicator appears when the customer set time comes for c hanging the engine oil. Y ou can set or reset the distance for changing the engine oil. (See “ T rip compu- ter ” later in this section.) 2. Oil filter replacement indicator This indicator appears when the customer set t …
-
Infiniti QX50 (2013) — page 97
2-26 Instruments and controls SIC4075 SIC3625 TRIP C OMPUTER Switches for the trip computer are loca ted on the right side of the combination meter panel. T o operate the trip computer, push the side or front of the switc hes as shown above. * A switch * B switch When the ignition switch is pushed to the ON position, modes of the trip computer can …
-
Infiniti QX50 (2013) — page 98
Current fuel consumption ? Average fuel consumption and speed ? Elapsed time and trip odometer ? Distance to empty (dte) ? Outside air temperature (ICY) ? Setting ? Warning c heck 1. Current fuel consumption The current fuel consumption mode shows the current fuel consumption. 2. Average fuel consumption (MPG or l (liter)/100 km) and speed (MPH or …
-
Infiniti QX50 (2013) — page 99
2-28 Instruments and controls affected by road or engine heat, wind directions and other driving conditions. The display may differ from the actual outside temperature or the temperature displayed on various signs or billboards. 6. Setting Setting cannot be made while driving. A message “ Setting can only be operated when stopped ” is also disp …
-
Infiniti QX50 (2013) — page 100
SIC2133 Y our vehicle has two types of security systems, as follows: . V ehicle security system . INFINITI V ehicle Immobilizer System The security condition will be shown by the security indicator light. VEHICLE SECURITY SYSTEM The vehicle security system provides visual and audio alarm signals if someone opens the doors, hood, or lift gate when t …
-
Infiniti QX50 (2013) — page 101
2-30 Instruments and controls 5. Confirm that the security indicator light comes on. The security indicator light stays on for about 30 seconds. The vehicle security system is now pre- armed. After about 30 seconds the vehicle security system automatically shifts into the armed phase. The security light begins to flash once every approximately 3 se …
-
Infiniti QX50 (2013) — page 102
cause undesired operation of the device. SIC2045 Security indicator light The security indicator light is located on the meter panel. It indicates the status of the INFINITI V ehicle Immobilizer System. The light blinks after the ignition switch was in the ACC, OFF and L OCK position. This function indicates the security sys- tems equipped on the v …
-
Infiniti QX50 (2013) — page 103
2-32 Instruments and controls WARNING In freezing temperatures the washer solu- tion may freeze on the window and obscure your vision which may lead to an accident. Warm the window with the defroster before you wash the window. CAUTION . Do not operate the washer continuously for more than 30 seconds. . Do not operate the washer if the reservoir ta …
-
Infiniti QX50 (2013) — page 104
(For example, when the vehicle speed is high, the intermittent operation speed will be faster.) T o turn this function on and off, see “ How to use SETTING button ” in the “ 4. Monitor, climate, audio, phone and voice re- cognition systems ” section. * 2 Low — continuous low speed opera- tion * 3 High — continuous high speed opera- tion …
-
Infiniti QX50 (2013) — page 105
2-34 Instruments and controls SIC3239 T o defog/defrost the rear window glass and outside mirrors, start the engine and push the switch * 1 on. The indicator light * 2 will come on. Push the switc h again to turn the defroster off. It will automatically turn off in approx i- mately 15 minutes. CAUTION When cleaning the inner side of the rear window …
-
Infiniti QX50 (2013) — page 106
SIC3267 HEADLIGHT SWITCH Lighting * 1 T urn the switch to the position: The front parking, side marker, tail, license plate and instrument lights will come on. * 2 T urn the switch to the position: Headlights will come on and all the other lights remain on. SIC3268 Autolight system The autolight system allows the headlights to be set so they turn o …
-
Infiniti QX50 (2013) — page 107
2-36 Instruments and controls SAA0642A Be sure not to put anything on top of the photo sensor * A located on the top of the instrument panel. The photo sensor con- trols the autolight; if it is cover ed, the photo sensor reacts as if it is dark and the headlights will illuminate. Automatic headlights off delay: Y ou can keep the headlights on for u …
-
Infiniti QX50 (2013) — page 108
Battery saver system A chime will sound when the driver side door is opened with the light switch in the or position and the ignition switch in the ACC, OFF or L OCK position. When the headlight switch is in the or position while the ignition switch is in the ON position, the lights will automati- cally turn off within a period of time after the ig …
-
Infiniti QX50 (2013) — page 109
2-38 Instruments and controls the number of occupants in the vehicle, the load the vehicle is carrying and the road conditions. If the AFS OFF indicator light blinks after the ignition switch has been pushed to the ON position, this may indicate that the AFS is not functioning properly. Have the system chec ked by an INFINITI retailer. When the eng …
-
Infiniti QX50 (2013) — page 110
to the − side. When reac hing the minimum brightness, “ MIN ” appears on the display * 3 . However, “ MIN ” does not appear during the nighttime. The dot matrix liquid crystal display returns to the normal display under the following conditions: . when the instrument brightness control switch is not operated for more than 5 seconds. . whe …
-
Infiniti QX50 (2013) — page 111
2-40 Instruments and controls SIC3629 T o sound the horn, push the center pad area of the steering wheel. WARNING Do not disassemble the horn. Doing so could affect proper operation of the supple- mental front air bag system. T ampering with the supplemental front air bag system may result in serious personal injury. WARNING Do not use or allow oc …
-
Infiniti QX50 (2013) — page 112
SSS0911 The front seats are warmed by built-in heaters. The switc hes located on the center console can be operated independently of each other . 1. Start the engine. 2. Turn the cont rol knob * A to the right * 1 and select the desired heat range. . For high heat, turn the knob to the right * 1 . . For low heat, turn the knob to the left * 2 . . T …
-
Infiniti QX50 (2013) — page 113
2-42 Instruments and controls Spot Warning (BSW) indicator lights, lo- cated next to the outside mirrors, when the radar sensors detect a vehicle in the detection zone. If the turn signal is activated in the direction of the detected vehicle, a chime sounds twice and the BSW indicator light will flash. (See “ Blind Spot Warning (BSW) system ” i …
-
Infiniti QX50 (2013) — page 114
SIC3844 The vehicle should be driven with the Intelligent Brake Assist (IBA) system on for most driving conditions. The Intelligent Brake Assist (IBA) system will sound a warning chime to alert the driver when the vehicle is traveling too close to the vehicle ahead and will apply the brake control if necessary. T o turn off the system, push the IBA …
-
Infiniti QX50 (2013) — page 115
2-44 Instruments and controls SIC3325 If the power supply is disconnected, the clock will not indicate the correct time. Readjust the time. ADJUSTING THE TIME 1. T o set the cloc k forward, push the button * 1 . 2. T o set the clock bac kward, push the button * 2 . 3. T o move forward or backward faster, push and hold the button more than 5 seconds …
-
Infiniti QX50 (2013) — page 116
The power outlet is used for powering electrical acc essories such as cellular telephones. CAUTION . The outlet and plug may be hot during or immediately after use. . Do not use with accessories that exc eed a 12 volt, 120W (10A) power draw. Do not use double adapters or more than one electrical accessory. . Use power outlet with the engine run- ni …
-
Infiniti QX50 (2013) — page 117
2-46 Instruments and controls SIC3632 Front T o open the cup holder, push the knob * 1 . The flap * A will be folded down when inserting a large container. T o hold a taller container, push the button * 2 . The upper bottom will be folded up. SIC3633 Rear The cup holders for rear passengers are located on the rear ce nter armrest. T o open the cup …
-
Infiniti QX50 (2013) — page 118
. Do not leave glasses in the sunglasses holder while parking in direct sunlight. The heat may damage the glasses. SIC3866 GL OVE BOX WARNING Keep glove box lid closed while driving to help prevent injury in an accident or a sudden stop. T o open the glove box, pull the handle * 1 . T o close, push the lid in until the lock latches. T o lock * 2 /u …
-
Infiniti QX50 (2013) — page 119
2-48 Instruments and controls SIC4687 C ONSOLE BOX T o open the console box, push the button * 1 . T o close, push the lid down until latched. The inner tray (if so equipped) can be positioned to the front or rear * 2 . Make sure that the arrow mark on the tray points toward the front and the bosses * A are aligned in the slits. SIC3663 CARD HOLDER …
-
Infiniti QX50 (2013) — page 120
SIC3248 C OA T HOOKS The coat hooks are equipped beside the rear personal lights. CAUTION Do not place items which are more than 2 lb (1 kg) on the hook. SIC4072 LUGGAGE HOOKS WARNING . Always make sure that the cargo is properly secured. Use the suitable r opes and hooks. . Unsecured cargo can become dangerous in an accident or sudden stop. CAUTIO …
-
Infiniti QX50 (2013) — page 121
2-50 Instruments and controls SIC3636 CARGO C OVER (if so equipped) The cargo cover keep s the contents in the cargo area hidden from the outside. T o use the cargo cover, pull it out and hang both sides on the hooks * 1 . SIC3637 T o stow the cargo cover, remove it from the hooks and hold until it is retracted. Make sure that the cargo cover is sn …
-
Infiniti QX50 (2013) — page 122
straps to help prevent it from sliding or shifting. Do not place cargo higher than the seatbacks. In a sudden stop or collision, unsecured cargo could ca use personal injury. . If the cargo cover contacts the top tether strap when it is attached to the top tether anchor, re move the cargo cover from the vehicle or secure it on the cargo floor below …
-
Infiniti QX50 (2013) — page 123
2-52 Instruments and controls CAUTION Use care when placing or removing items from the roof rack. If you cannot comfortably lift the items onto the roof rac k from the ground, use a ladder or stool. POWER WINDOWS WARNING . Make sure that all passengers have their hands, etc. inside the vehicle while it is in motion and before closing the win- dows. …
-
Infiniti QX50 (2013) — page 124
Locking passengers ’ windows When the lock button * C is pushed in, only the driver side window can be opened or closed. Push it in again to can cel. SIC3241 Passenger side power window switch The passenger side switch will open or close only the corresponding window. T o open or close the window, push down or pull up the switch and hold it. SIC3 …
-
Infiniti QX50 (2013) — page 125
2-54 Instruments and controls Auto reverse function WARNING There are some small distances immediately before the closed position which cannot be detected. Make sure that all passengers have their hands, etc., inside the vehicle before closing the window. If the control unit detects something caught in the window as it is closing, the window will b …
-
Infiniti QX50 (2013) — page 126
AUTOMA TIC MOONROOF The moonroof only operates when the ignition switch is in the ON position. The automatic moonroof is operational for about 45 seconds, even if the ignition switch is pushed to the OFF position. If the driver ’ s door or the passenger ’ s door is opened during this period of about 45 seconds, power to the moonroof is can- cel …
-
Infiniti QX50 (2013) — page 127
2-56 Instruments and controls switch. Depending on the environment or driving conditions, the auto reverse function may be activated if an impact or load similar to something being caught in the moonroof occurs. If the moonroof does not operate If the moonroof does not operate properly, perform the following procedure to initi- alize the moonroof o …
-
Infiniti QX50 (2013) — page 128
SIC3249 MAP LIGHTS Push the button as illustrated to turn the light on or off. SIC3250 PERSONAL LIGHTS Rear Push the button as illustrated to turn the light on or off. SIC3251 INTERIOR LIGHT C ONTROL SWITCH The interior light control switc h has three positions: ON, DOOR and OFF . ON position When the switch is in the ON position * 1 the map lights …
-
Infiniti QX50 (2013) — page 129
2-58 Instruments and controls . ignition switch is switc hed to the L OCK position — remain on for about 15 seconds. . doors are unlocked by pushing the UNL OCK button on the Intelligent Key or door handle request switch with the ignition switch in the L OCK position — remain on for about 15 seconds. . any door is opened and then closed with th …
-
Infiniti QX50 (2013) — page 130
SIC2925 When the switch is in the DOOR position * A , the light illuminates while the lift gate is opened. When the lift gate is closed, the light will turn off. When the switch is in the OFF position * B , the light will turn off. The light will turn off aft er a period of time when the lights remain illuminated to prevent the battery from bec omi …
-
Infiniti QX50 (2013) — page 131
2-60 Instruments and controls PROGRAMMING HomeLink ® If you have any questions or are having difficulty programming your HomeLink ® buttons, refer to the HomeLink ® web site at: www.homelink.com or call 1-800-355- 3515. NOTE: It is also recommen ded that a new battery be placed in the hand-held transmitter of the device being programmed to HomeL …
-
Infiniti QX50 (2013) — page 132
JVI0429X 3 . Press and hold the programmed HomeLink ® button and observe the indicator light. . If the indicator light * 1 is solid/ continuous, programming is com- plete and your device should acti- vate when the HomeLink ® button is pressed and released. . If the indicator light * 1 blinks rapidly for two seconds and then turns to a solid/conti …
-
Infiniti QX50 (2013) — page 133
2-62 Instruments and controls button. During programming, your hand- held transmitter may automatically stop transmitting. Continue to press and hold the desired HomeLink ® button while you press and re-press ( “ cycle ” ) your hand- held transmitter every two seconds until the frequency signal has been learned. The HomeLink ® indicator light …
-
Infiniti QX50 (2013) — page 134
2. The indicator light will begin to flash after 20 seconds. Without releasing the HomeLink ® button, proceed with “ Pro- gramming HomeLink ® ” — Step 1. For questions or comments, contact HomeLink ® at: www.homelink.com or 1- 800-355-3515. The HomeLink ® Universal T ransceiver but- ton has now been reprogrammed. The new device can be activ …
-
Infiniti QX50 (2013) — page 135
2-64 Instruments and controls MEMO …
-
Infiniti QX50 (2013) — page 136
3 Pre-driving c hec ks and adjustments Keys ………………………………………………………….. 3-2 Intelligent Key …………………………………………. 3-2 V alet hand-off………………………………………….. 3-3 Doors ………………………………………………………… 3-4 Locking with mec …
-
Infiniti QX50 (2013) — page 137
3-2 Pre-driving c hecks and adjustment s A key number plate is supplied with your keys. Record the key number and keep it in a safe place (suc h as your wallet), not in the vehicle. If you lose your keys, see an INFINITI retailer for duplicates by using the key number. INFINITI does not record any key numbers so it is very important to keep track o …
-
Infiniti QX50 (2013) — page 138
— Do not change or modify the In- telligent Key . — Do not use a magnet key holder. — Do not place the Intelligent Key near an electric appliance such as a television set or personal computer. — Do not allow the Intelligent Key to come into contact with water or salt water, and do not wash it in a washing machine. This could affect the syst …
-
Infiniti QX50 (2013) — page 139
3-4 Pre-driving c hecks and adjustments WARNING . Always have the doors loc ked while driving. Along with the use of seat belts, this provides greater safet y in the event of an accident by helping to prevent persons from being thrown from the vehicle. This also helps keep children and others from unintentionally opening the doors, and will help ke …
-
Infiniti QX50 (2013) — page 140
SPA1814 L OCKING WITH INSIDE L OCK KNOB T o lock the door individually , move the inside lock knob to the loc k position * 1 . T o unlock, move the inside loc k knob to the unlock position * 2 . Be sure not to leave the Intelligent Key inside the vehicle. SPA2300 L OCKING WITH POWER DOOR LOCK SWITCH Operating the power door lock switc h will lock o …
-
Infiniti QX50 (2013) — page 141
3-6 Pre-driving c hecks and adjustments 3. Within 20 seconds of performing Step 2, push and hold the power door lock switch to the position (UNLOCK) for more than 5 seconds. 4. When activated, the hazard indicator will flash twice. When deactivated, the hazard indicator will flash once. 5. The ignition switch must be placed in the OFF and ON positi …
-
Infiniti QX50 (2013) — page 142
WARNING . Radio waves could adversely affect electric medical equipment. Those who use a pacemaker should contact the electric medical equipment manufacturer for the possible influences before use. . The Intelligent Key transmits radio waves when the buttons are pushed. The FAA advises that the radio waves may affect aircraft navigation and com- mu …
-
Infiniti QX50 (2013) — page 143
3-8 Pre-driving c hecks and adjustments CAUTION . Do not allow the Intelligent Key , which contains electrical components, to come into contact with water or sal t water. This could affect the system function. . Do not drop the Intelligent Key. . Do not strike the Intelligent Key sharply against another object. . Do not change or modify the Intelli …
-
Infiniti QX50 (2013) — page 144
SPA2074 INTELLIGENT KEY OPERATING RANGE The Intelligent Key functions can only be used when the Intelligent Key is within the specified operating range from the request switch * 1 . When the Intelligent Key battery is dis- charged or strong radio waves are present near the operating location, the Intelligent Key system ’ s operating range becomes …
-
Infiniti QX50 (2013) — page 145
3-10 Pre-driving c hecks and adjustment s you carry the key with you and then lock the doors. . Do not pull the door handle before pushing the door handle request switch. The door will be unlocked but will not open. Release the door handle once and pull it again to open the door. . The Intelligent Key system (opening/ closing doors with the door ha …
-
Infiniti QX50 (2013) — page 146
When you carry the Intelligent Key with you, you can lock or unlock all doors by pushing the door handle request switc h (driver ’ s or front passenger ’ s) * A or the lift gate request switch * B within the range of operation. When you lock or unlock the doors or the lift gate, the hazard indicator will flash and the horn (or the outside chime …
-
Infiniti QX50 (2013) — page 147
3-12 Pre-driving c hecks and adjustment s See “ Troubleshooting guide ” later in this section and “ Dot matrix liquid crystal display ” in the “ 2. Instruments and con- trols ” section. …
-
Infiniti QX50 (2013) — page 148
TROUBLESHOOTING GUIDE Symptom Possible cause Action to take When pushing the ignition switch to stop the engine The SHIFT P warning appears on the display and the inside warning chime sounds con- tinuously. The selector lever is not in the P (Park) position. Shift the selector lever to the P (Park) position. When opening the driver ’ s door to ge …
-
Infiniti QX50 (2013) — page 149
3-14 Pre-driving c hecks and adjustment s WARNING The Intelligent Key transmits radio waves when the buttons are pushed. The FAA advises that the radio waves may affect aircraft navigation and communication sys- tems. Do not operate the Intelligent K ey while on an airplane. Make sur e that the buttons are not operated unintentionally when the unit …
-
Infiniti QX50 (2013) — page 150
2. Close all the doors and the lift gate. 3. Push the LOCK button * 1 on the Intelligent Key. 4. All the doors, the lift gate and fuel-filler door will lock. 5. The hazard indicator flashes twic e and the horn chirps once. *: Doors will lock with the Intelligent Key while the ignition switch is in the AC C or ON position. Unlocking doors and fuel-f …
-
Infiniti QX50 (2013) — page 151
3-16 Pre-driving c hecks and adjustment s button is pushed, neither the hazard indicator nor the horn operates. Hazard indicator and horn mode: DOOR LOCK DOOR UNLOCK Intelligent Key system (Using door handle request switch) HAZARD — twice OUTSIDE CHIME — twice HAZARD — once OUTSIDE CHIME — once Remote keyless entry system (Using or button) HAZARD — …
-
Infiniti QX50 (2013) — page 152
Switching proc edure: T o switch the haz ard indicator and horn (chime) operation, push the L OCK * 1 and UNL OCK * 2 buttons on the In- telligent Key simultaneously for more than 2 seconds. . When the hazard indicator mode is set, the hazard indicator flashes 3 times. . When the hazard indicator and horn mode is set, the hazard indicator flashes o …
-
Infiniti QX50 (2013) — page 153
3-18 Pre-driving c hecks and adjustment s WARNING . Always be sure the lift gate has been closed securely to prevent it from open- ing while driving. . Do not drive with the lift gate open. This could allow dangerous exhaust gases to be drawn into the vehicle. See “ Precau- tions when starting and driving ” in the “ 5. Starting and driving ? …
-
Infiniti QX50 (2013) — page 154
SPA1562A OPENING THE FUEL -FILLER DOOR T o open the fuel-filler door, unloc k the fuel- filler door by using one of the following operations, then push the left side of the door. . Push the door handle request switch with the Intelligent Key carried with you. . Push the UNL OCK button on the Intelli- gent Key. . Insert the mechanical key into the d …
-
Infiniti QX50 (2013) — page 155
3-20 Pre-driving chec ks and adjustments damage. . Insert the cap straight into the fuel-filler tube, then tighten the fuel-filler cap until a single click is heard. Failure to tighten the fuel-filler cap properly may cause the malfunction indicator light (MIL) to illuminate. If the light illuminates because the fuel-filler cap is loose or missing, …
-
Infiniti QX50 (2013) — page 156
tightening the fuel-filler cap. WARNING . Do not adjust the steering wheel while driving. Y ou could lose control of your vehicle and cause an accident. . Do not adjust the steering wheel any closer to you than is necessary for proper steering operation and comfort. The driver ’ s air bag inflates with great force. If you are unrestrained, leanin …
-
Infiniti QX50 (2013) — page 157
3-22 Pre-driving chec ks and adjustments SPA2456 ELECTRIC OPERA TION (if so equipped) Tilt or telescopic operation Move the lever to adjust the steering wheel up or down, forward or rearward to the desired position. Entry/Exit function operation (if so equipped): The automatic drive positioner system will make the steering wheel move up auto- matic …
-
Infiniti QX50 (2013) — page 158
2. T o block glare from the side, remove the main sun visor from the center mount and swing the visor to the side * 2 . 3. Slide the sun visor * 3 in or out as needed. SPA2447 INSIDE MIRROR Adjust the height and the angle of the inside mirror to the desired position. SPA2143 Manual anti-glare type The night position * 1 will reduce glare from the h …
-
Infiniti QX50 (2013) — page 159
3-24 Pre-driving chec ks and adjustments SPA2450 Automatic anti-glare type The inside mirror is designed so that it automatically c hanges reflection according to the intensity of the headlights of the following vehicle. The anti-glare system will be automatically turned on when the ignition switch is pushed to the ON position. When the anti-glare …
-
Infiniti QX50 (2013) — page 160
Adjusting outside mirrors The outside mirror control switc h is located on the armrest. The outside mirror will operate only when the ignition switch is in the AC C or ON position. T urn the switch right or left to select the right or left side mirror * 1 , then adjust using the control switch * 2 . Defrosting outside mirrors The outside mirrors wi …
-
Infiniti QX50 (2013) — page 161
3-26 Pre-driving chec ks and adjustments SIC3869 VANIT Y MIRROR T o use the front vanity mirror, pull down the sun visor and pull up the cover. The automatic drive positioner system has three features: . Entry/exit function . Seat synchroniz ation function . Memory storage ENTRY/EXIT FUNCTION This system is designed so that the driver ’ s seat an …
-
Infiniti QX50 (2013) — page 162
Initialize entry/exit function If the battery cable is disconnected, or if the fuse opens, the entry/exit function will not work though this function was set on before. In such a case, after connecting the battery or replacing with a new fuse, open and close the driver ’ s door more than two times after the ignition switch is turned from the ON p …
-
Infiniti QX50 (2013) — page 163
3-28 Pre-driving chec ks and adjustments holding the SET switch for more than 10 seconds while the ignition switc h is in the AC C position. The indicator lights on the memory switches (1 and 2) will blink once when the function is canceled, and the indic ator lights will blink twice when the function is activated. MEMORY STORAGE Two positions for …
-
Infiniti QX50 (2013) — page 164
Selecting the memorized position 1. Move the selector lever to the P (Park) position. 2. Use one of the following methods to move the driver ’ s seat, the outside mirrors and the steering wheel. . Push the ignition switch to the ON position and push the memory switch (1 or 2) fully for at least 1 second. . Within 45 seconds of opening the driver …
-
Infiniti QX50 (2013) — page 165
3-30 Pre-driving chec ks and adjustments MEMO …
-
Infiniti QX50 (2013) — page 166
4 Monitor, climat e, audio, phone and voic e rec ogni- tion systems Safety note …………………………………………………. 4-3 Center multi-function control panel …………………. 4-3 How to use INFINITI controller…………………….. 4-6 How to use touch screen (models with navigation system) ……………………… …
-
Infiniti QX50 (2013) — page 167
Steering-wheel-mounted controls for audio…. 4-90 Antenna ……………………………………………….. 4-92 Car phone or CB radio ………………………………… 4-93 Bluetooth ® Hands-Free Phone System (models with navigation system) …………………………………….. 4-93 Regulatory information ……………….. …
-
Infiniti QX50 (2013) — page 168
WARNING . Do not disassemble or modify this system. If you do, it may result in accidents, fire, or electric shock. . Do not use this system if you notice any abnormality, suc h as a froz en screen or lack of sound. Continued use of the system may result in accident, fire or electric shock. . In case you notic e any foreign object in the system har …
-
Infiniti QX50 (2013) — page 169
4-4 Monitor, climate, audio, phone and voic e recognition systems SAA1524 Models without navigation system (T ype A) 1. “ AUX ” button (P .4-53) 2. “ RADIO AM·FM ” band select button (P .4-53) 3. INFINITI controller (P .4-6) 4. “ OFF ” brightness control and display ON/OFF button (P .4-10) 5. “ INFO ” vehicle information button (P …
-
Infiniti QX50 (2013) — page 170
SAA2103 Models without navigation system (T ype B) 1. “ DISC·AUX ” selector button (P .4-53) 2. “ CAMERA ” Around View Monitor dis- play (P .4-31) 3. INFINITI controller (P .4-6) 4. “ OFF ” brightness control and display ON/OFF button (P .4-10) 5. “ INFO ” vehicle information button (P .4-10) 6. “ RADIO AM·FM ” band select but …
-
Infiniti QX50 (2013) — page 171
4-6 Monitor, climate, audio, phone and voic e recognition systems HOW TO USE INFINITI CONTROLLER Choose an item on the display using the main directional buttons * 2 (or additional directional buttons * 6 with navigation system) or center dial * 3 , and push the ENTER button * 1 for operation. If you push the BACK button * 4 before the setup is com …
-
Infiniti QX50 (2013) — page 172
SAA2473 T ouc h screen operation With this system, the same operations as those for the INFINITI controller are possi- ble using the touch screen operation. Selecting the item: T ouch an item to select it. To select the “ Audio ” settings, touch the “ Audio ” area * 1 on the screen. T ouch the BACK * 2 button to return to the previous scree …
-
Infiniti QX50 (2013) — page 173
4-8 Monitor, climate, audio, phone and voic e recognition systems . Delete: Deletes the last character that has been input with one touch. Push and hold the button to delete all of the char- acters. . OK: Completes c haracter inputs. T ouc h screen maintenance If you clean the display screen, use a dry, soft cloth. If additional cleaning is neces- …
-
Infiniti QX50 (2013) — page 174
SAA2477 Models with navigation system JVH0179M Models without navigation system HOW TO SELECT MENUS ON THE SCREEN V ehicle functions are viewed on the display screen in menus. To select each key item, highlight the preferred item using the INFINITI controller and push the ENTER button. Whenever a menu selection is made or menu item is highlighted, …
-
Infiniti QX50 (2013) — page 175
4-10 Monitor, climate, audio, phone and voic e recognition systems HOW TO USE STA TUS BUTTON Y ou can c heck information related to the audio, climate control system, fuel con- sumption and navigation system (if so equipped) by pushing the STA TUS button repeatedly. HOW TO USE BRIGHTNESS CON- TROL AND DISPLAY ON/OFF BUTTON Push the “ OFF ” butt …
-
Infiniti QX50 (2013) — page 176
V ehicle information display 1. Push the INFO button on the control panel. 2. Select an item from the INFO menu. 3. After viewing or adjusting the informa- tion on the following screens, push the BACK button to return to the INFO menu. See the separate Navigation System Own- er ’ s Manual for the following items: . Where am I? . T raffic Info . W …
-
Infiniti QX50 (2013) — page 177
4-12 Monitor, climate, audio, phone and voic e recognition systems Fuel Economy information The approximate distance to empty, aver- age fuel economy and current fuel econo- my will be displayed for reference. T o reset the average fuel economy (Avg Fuel Econ), select the “ Reset Fuel Eco ” or “ Reset ” key . If the “ Fuel Eco History ” …
-
Infiniti QX50 (2013) — page 178
Maintenance information The maintenance intervals can be dis- played for the engine oil, oil filter, tire and other reminders. T o set a maintenance interval, select a preferred item from the list. Y ou can also set to display a message to remind you that the maintenance needs to be performed. The following example shows how to set the engine oil m …
-
Infiniti QX50 (2013) — page 179
4-14 Monitor, climate, audio, phone and voic e recognition systems SAA2483 Others information (models with navigation system) The Others information display will appear when pushing the INFO button and select- ing the “ Others ” key. GPS Position: For the details of this item, see the separate Navigation System Owner ’ s Man- ual. V oice Reco …
-
Infiniti QX50 (2013) — page 180
SAA2485 Models with navigation system SAA2740 Models without navigation system Audio settings The display as illustrated will appear when pushing the SETTING button and selecting the “ Audio ” key . Bass/T reble/Balance/F ade: T o adjust the speaker tone quality and sound balance, select the “ Bass ” , “ Treble ” , “ Balance ” or ? …
-
Infiniti QX50 (2013) — page 181
4-16 Monitor, climate, audio, phone and voic e recognition systems Phone settings (models with navi- gation system) For details of the “ Phone ” settings, see “ Bluetooth ® Hands-Free Phone System (models with navigation system) ” later in this section. Bluetooth ® settings (models with navigation system) For details of the “ Bluetooth …
-
Infiniti QX50 (2013) — page 182
V olume level. JVH0176M Switch Beeps settings (models without navigation system) The “ Switch Beeps ” screen will appear when pushing the SETTING button, select- ing the “ Switch Beeps ” key with the INFINITI controller and pushing the ENTER button. Switch Beeps: When this item is turned to ON, you will hear a beep sound when you use a butt …
-
Infiniti QX50 (2013) — page 183
4-18 Monitor, climate, audio, phone and voic e recognition systems SAA2486 Display settings (models with na- vigation system) The display as illustrated will appear when pushing the SETTING button and selecting the “ Display ” key . Display Adjustment: T o adjust the display settings, select the “ Display Adjustment ” key . The following se …
-
Infiniti QX50 (2013) — page 184
T o turn on the screen, set this item to the “ ON ” position or push the “ OFF ” button. Brightness/C ontrast/Backgrou nd Color: T o adjust the brightness, contrast and background color of the screen, select the appropriate “ Brightness ” , “ Contrast ” or “ Background C olor ” key and push the ENTER button. Then, you can adjust …
-
Infiniti QX50 (2013) — page 185
4-20 Monitor, climate, audio, phone and voic e recognition systems CAMERA settings (if so equipped) The “ CAMERA ” screen will appear when pushing the SETTING button, selecting the “ Camera ” key with the INFINITI controller and pushing the ENTER button. For the details about the camera system operation, see “ Rearview monitor ” later i …
-
Infiniti QX50 (2013) — page 186
JVH0182M Models without navigation system The display illustrated will appear when pushing the SETTING button and selecting the “ Comfort ” key . This key does not appear on the display until the ignition switch is pushed to the ON position. Auto Interior Illumination: When this item is turned on, the interior lights will illuminate if any door …
-
Infiniti QX50 (2013) — page 187
4-22 Monitor, climate, audio, phone and voic e recognition systems SAA2490 Models with navigation system SAA1092 Models without navigation system Language & Units settings The Language & Units settings display will appear when pushing the SETTING button, selecting the “ Language & Units ” key with the INFINITI controller and pushing …
-
Infiniti QX50 (2013) — page 188
SAA2491 Image Viewer (models with naviga- tion system) The image files in the USB memory will be displayed. T o display the Image Viewer, push the SETTING button, select the “ Other ” key and then select the “ Image Viewer ” key . The image of the selected file is displayed on the right side of the screen. When a number of folders are inclu …
-
Infiniti QX50 (2013) — page 189
4-24 Monitor, climate, audio, phone and voic e recognition systems file. . (Previous) Select the “ ” key to display the previous file. Setting the Image Viewer: The Image Viewer setting display will appear when selecting the “ Settings ” key on the full screen display. The following settings are available for the full screen display. . Slid …
-
Infiniti QX50 (2013) — page 190
. Do not put anything on the RearView camera. The RearView camera is in- stalled above the license plate. . When washing the vehicle with high- pressure water , be sure not to spray it around the camera. Otherwise, water may enter the camera unit causing water condensation on the lens, a malfunction, fire or an electric shoc k. . Do not strike the …
-
Infiniti QX50 (2013) — page 191
4-26 Monitor, climate, audio, phone and voic e recognition systems . The displayed lines will appear slightly off to the right because the RearView camera is not installed in the rear cent er of the vehicle. . The distance guide line and the vehicle width guide line should be used as a reference only when the vehicle is on a level paved surface. Th …
-
Infiniti QX50 (2013) — page 192
SAA1898 3. Slowly back up the vehicle adjusting the steering wheel so that the predic- tive course lines * B enter the parking space * C . 4. When the back of the vehicle enter the parking space * C , maneuver the steer- ing wheel to make the vehicle width guide lines * D parallel to the parking space * C . 5. When the vehicle is parked in the spac …
-
Infiniti QX50 (2013) — page 193
4-28 Monitor, climate, audio, phone and voic e recognition systems actual distance. For example, the display shows 3 ft (1 m) to the place * A , but the actual 3 ft (1 m) distance on the hill is the place * B . Note that any object on the hill is further than it appears on the monitor. SAA1979 Backing up on a steep downhill When backing up the vehi …
-
Infiniti QX50 (2013) — page 194
SAA1923 Backing up near a projecting object The predictive course lines * A do not touch the object in the display . However, the vehicle may hit the object if it projects over the actual backing up course. SAA1980 Backing up behind a projecting object The position * C is shown further than the position * B in the display. However , the position * …
-
Infiniti QX50 (2013) — page 195
4-30 Monitor, climate, audio, phone and voic e recognition systems SAA2606 PREDICTIVE C OURSE LINE SETTINGS T o turn ON or OFF the predictive course line display, push the SETTING button, select the “ Camera ” key and push the ENTER button. Predictive C ourse Lines: When this item is turned on, the predictive course lines will be displayed on t …
-
Infiniti QX50 (2013) — page 196
dampened with mild detergent diluted with water. When you push the CAMERA button or shift the selector lever into the R (Reverse) position while the ignition switch is in the ON position, the Around View Monitor operates. The monitor displays various views of the position of the vehicle. Available views: . Bird-Eye View The surrounding view of the …
-
Infiniti QX50 (2013) — page 197
4-32 Monitor, climate, audio, phone and voic e recognition systems monitor * 2 . WARNING . The Around View Monitor is a conveni- ence but it is not a substitute for proper vehicle operation because it has areas where objects cannot be viewed. Always look out the windows and chec k to be sure that it is safe to move before operating the vehicle. Alw …
-
Infiniti QX50 (2013) — page 198
SAA3311 : Shift the selector lever : Select the “ Wide ” , “ Side ” or “ To p ” key on the screen. : Push the CAMERA button * A : Original screen before the Around View Monitor is operated * B : Rear view/bird ’ s-eye view screen * C : Rear view/front-side view screen * D : Rear-wide view screen * E : Front view/bird ’ s-eye view sc …
-
Infiniti QX50 (2013) — page 199
4-34 Monitor, climate, audio, phone and voic e recognition systems . The view on the screen on the passen- ger ’ s side switches to the front-side view * C when the CAMERA button is pushed * 3 . When the CAMERA button is pushed again * 5 , the rear-wide view * D is displayed. When the CAMERA button is pushed again * 7 , the view on the screen on …
-
Infiniti QX50 (2013) — page 200
The vehicle width and predictive course lines are wider than the actual width and course. SAA1840 Front view SAA1896 Rearview Front and rearview Guiding lines, which indicate the vehicle width and distances to objects with re- ference to the vehicle body line * A , are displayed on the monitor. Distance guide lines: Indicate distances from the vehi …
-
Infiniti QX50 (2013) — page 201
4-36 Monitor, climate, audio, phone and voic e recognition systems WARNING . The distance between objects viewed in the rearview differs from actual distance because a wide-angle lens is used. Objects in the rearview will appear visually opposite than when viewed in the rearview and outside mirrors. . On a snow-covered or slippery road, there may b …
-
Infiniti QX50 (2013) — page 202
without navigation) turned on, the non- viewable area * 2 is highlighted in yellow for 7 seconds after the bird-eye view is displayed. When the corner of the vehicle moves closer to an object, the corner sonar indicator * 3 appears. WARNING . Objects in the bird-eye view will appear further than the actual distance because the bird-eye view is a ps …
-
Infiniti QX50 (2013) — page 203
4-38 Monitor, climate, audio, phone and voic e recognition systems when a corner of the vehicle moves closer to an object. The corner sonar indicator * 4 can be turned off. See “ Around view monitor settings ” later in this section. CAUTION The turn signal light may look lik e the side- of-vehicle line. This is not a malfunction. SAA2629 Rear-w …
-
Infiniti QX50 (2013) — page 204
SAA1978 DIFFERENCE BETWEEN PREDICTIVE AND ACTUAL DIST ANCES Moving to a steep uphill When moving the vehicle up a hill, the distance guide lines and the vehicle width guide lines are shown closer than the actual distance. For example, the display shows 3 ft (1.0 m) to the place * A , but the actual 3 ft (1.0 m) distance on the hill is the place * B …
-
Infiniti QX50 (2013) — page 205
4-40 Monitor, climate, audio, phone and voic e recognition systems the place * B . Note that any object on the hill is viewed in the monitor closer than it appears. SAA1923 Moving near a projecting object The predictive course lines * A do not touch the object in the display . However, the vehicle may hit the object if it projects over the actual m …
-
Infiniti QX50 (2013) — page 206
actual moving course. CAMERA AIDING CORNER SONAR FUNCTION When the corner of the vehicle moves closer to the object while the Around View Monitor is displayed, an indicator is displayed and a tone is sounded by the corner sonar function to warn the driver. The color of the co rner sonar indicator and the pattern of the tone vary according to the di …
-
Infiniti QX50 (2013) — page 207
4-42 Monitor, climate, audio, phone and voic e recognition systems SAA3649 Models with navigation system SAA3328 Models without navigation system AROUND VIEW MONITOR SETTINGS T o set up the Around View Monitor to your preferred settings, push the SETTING button, select the “ Camera ” key and push the ENTER button. Predictive C ourse Lines: When …
-
Infiniti QX50 (2013) — page 208
tion. . When strong light directly shines on the camera, objects may not be displayed clearly. This is not a malfunction. . The screen may flicker under fluores- cent light. This is not a malfunction. . The colors of objects on the Around View Monitor may differ somewhat from those of the actual object. . Objects on the monitor may not be clear and …
-
Infiniti QX50 (2013) — page 209
4-44 Monitor, climate, audio, phone and voic e recognition systems SAA0564B Rear Open or close, and adjust the air flow direction of ventilators. : This symbol indicates that the vents are closed. : This symbol indicates that the vents are open. WARNING . The air conditioner cooling function operates only when the engine is run- ning. . Do not leav …
-
Infiniti QX50 (2013) — page 210
Y ou can individually set the driver and front passenger side temperature using each temperature control button. SAA1527 T ype A AUTOMA TIC CLIMA TE CONTROL (T ype A) Automatic operation 1. “ AUTO ” automatic climate control ON button/T emperature control dial (dri- ver side) 2. “ A/C ” air conditioner ON/OFF button 3. “ ” fan speed inc …
-
Infiniti QX50 (2013) — page 211
4-46 Monitor, climate, audio, phone and voic e recognition systems inside temperature, air flow distribution and fan speed after the preferred tempera- ture is set manually. 1. Push the “ AUTO ” button on. (The indicator on the button will illuminate and AUTO will be displayed.) 2. Turn the temperature control dial (dri- ver side) to set the de …
-
Infiniti QX50 (2013) — page 212
Push the “ AUTO ” button to return to automatic control of the fan speed. Air flow control: Push the “ MODE ” button to change the air flow mode. : Air flows from center and side ventilators. : Air flows from center and side ventilators and foot outlets. : Air flows mainly from foot outlets. : Air flows from defroster and foot outlets. T em …
-
Infiniti QX50 (2013) — page 213
4-48 Monitor, climate, audio, phone and voic e recognition systems SAA3568 T ype B AUTOMA TIC CLIMA TE CONTROL (Type B) Automatic operation (AUTO) 1. “ AUTO ” automatic climate control ON button/T emperature control dial (dri- ver side) 2. “ A/C ” air conditioner ON/OFF button 3. “ ” fan speed increase button 4. “ ” front defroster …
-
Infiniti QX50 (2013) — page 214
ture. (The DUAL indicator light will illuminate and “ DUAL ” will appear on the display.) . T o set separate desired tempera- tures for the driver and front pas- senger, push the “ DUAL ” button, the indicator light illuminates, and then turn the corresponding temperature control dial. . T o cancel the separate temperature setting, push the …
-
Infiniti QX50 (2013) — page 215
4-50 Monitor, climate, audio, phone and voic e recognition systems Manual operation The manual mode can be used to control the heater and air conditioner to your desired settings. T o turn off the heater and air conditioner, push the “ OFF ” button. Fan speed control: Push the fan speed cont rol button “ ” to increase the fan speed. Push th …
-
Infiniti QX50 (2013) — page 216
SAA2734 Models with navigation system SAA2735 Models without navigation system Ion control: This unit generates highly concentrated Plasmacluster ® ions into the air blown from the ventilators and reduces odor absorbed into the interior trim. The high-density Plasmacluster ® ions gen- erated in the air conditioner ’ s air stream not only suppre …
-
Infiniti QX50 (2013) — page 217
4-52 Monitor, climate, audio, phone and voic e recognition systems OPERA TING TIPS When the engine coolant temperature and outside air temperature are low, the air flow from the foot outlets may not operate. This is not a malfunction. After the coolant temperature warms up, air will flow nor- mally from the foot outlets. SAA1983 The sunload sensor …
-
Infiniti QX50 (2013) — page 218
an experienced technician with the proper equipment. AUDIO OPERA TION PRE CAUTIONS Radio Push the ignition switch to the AC C or ON position and push the radio band select button to turn on the radio. If you listen to the radio with the engine not running, the ignition switch should be pushed to the AC C position. Radio reception is affected by sta …
-
Infiniti QX50 (2013) — page 219
4-54 Monitor, climate, audio, phone and voic e recognition systems SAA0306 FM radio reception: Range: FM range is normally limited to 25 to 30 miles (40 to 48 km), with monaural (single channel) FM having slightly more range than stereo FM. External influences may sometimes interfere with FM station reception even if the FM station is within 25 mil …
-
Infiniti QX50 (2013) — page 220
SAA0480 Compact Disc (CD) player . Do not force a compact disc into the CD insert slot. This could damage the CD and/or CD changer/player. . T rying to load a CD with the CD door closed could damage the CD and/or CD changer. . During cold weather or rainy days, the player may malfunction due to the humidity. If this occurs, remove the CD and dehumi …
-
Infiniti QX50 (2013) — page 221
4-56 Monitor, climate, audio, phone and voic e recognition systems Gracenote: NOTE: . The information contained in the Grace- note Database is not fully guaranteed. . The service of the Gracenote Database on the Internet may be stopped with- out prior notice for maintenance. End-User License Agreement USE OF THIS PRODUCT IMPLIES ACCEP- T ANCE OF TH …
-
Infiniti QX50 (2013) — page 222
LIMITED TO, IMPLIED WARRANTIES OF MERCHANT ABILITY , FITNESS FOR A PARTI- CULAR PURPOSE, TITLE, AND NON-INFRIN- GEMENT. GRACENOTE DOES NOT WARRANT THE RESUL TS THA T WILL BE OBT AINED BY YOUR USE OF THE GRACENOTE SOFTWARE OR ANY GRACENO TE SERVER. IN NO CASE WILL GRACENOTE BE LIABLE FOR ANY CONSE QUENTIAL OR INCIDENTAL DAMAGES OR FOR ANY L OST PROF …
-
Infiniti QX50 (2013) — page 223
4-58 Monitor, climate, audio, phone and voic e recognition systems ity. If this occurs, remove the CD/DV D and dehumidify or ventilate the player completely . . The player may skip while driving on rough roads. . The CD/DVD player sometimes cannot function when the passenger compart- ment temperature is extremely high. Decrease the temperature befo …
-
Infiniti QX50 (2013) — page 224
permit from Macrovision Corporation is not issued. . Modifying or disassembling is prohib- ited. . Dolby digital is manufactured under license from Dolby Laboratories, Inc. . Dolby and the double D mark “ ” are trademarks of Dolby Laboratories, Inc. . DTS and D TS Digital Surround “ ” are registered trademarks of Digital Theater Systems, In …
-
Infiniti QX50 (2013) — page 225
4-60 Monitor, climate, audio, phone and voic e recognition systems device. USB devices should be purchased separately as necessary . This system cannot be used to format USB devices. To format a USB device, use a personal computer. In some states/area, the USB device for the front seats plays only sound without images for regulatory reasons, even w …
-
Infiniti QX50 (2013) — page 226
Compressed Audio Files (MP3/ WMA/AAC) Explanation of terms: . MP3 — MP3 is short for Moving Pictures Experts Group Audio Layer 3. MP3 is the most well known compressed digital audio file format. This format allows for near “ CD quality ” sound, but at a fraction of the size of normal audio files. MP3 conversion of an audio track can reduce th …
-
Infiniti QX50 (2013) — page 227
4-62 Monitor, climate, audio, phone and voic e recognition systems SAA2494 Playback or der: . The folder names of folders not contain- ing compressed audio files are not shown in the display. . If there is a file in the top level of a disc/ USB, “ Root Folder ” is displayed. . The playback order is the order in which the files were written by t …
-
Infiniti QX50 (2013) — page 228
Specification c hart: Supported media CD, CD-R, CD-RW, DVD-ROM *5, DVD±R*5, DVD±RW*5, DVD±R DL*5, USB2.0 Supported file systems CD, CD-R, CD-RW , DVD-ROM*5, DVD±R*5, DVD±RW*5, DVD±R DL*5: ISO9660 LEVEL1, ISO9660 LEVEL2, Romeo, Joliet * ISO9660 Level 3 (packet writing) is not supported. * Files saved using the Live File System component (on a …
-
Infiniti QX50 (2013) — page 229
4-64 Monitor, climate, audio, phone and voic e recognition systems *3 Available codes depend on what kind of media, versions and information are going to be displayed. *4 When VBR files are played, the playbac k time may not be displayed correctly . *5 Models with navigation system …
-
Infiniti QX50 (2013) — page 230
T roubleshooting guide: Symptom Cause and Countermeasure Cannot play Check if the disc or USB device was inserted correctly. Check if the disc is scratc hed or dirty. Check if there is condens ation inside the player, and if there is, wait until the condensation is gone (about 1 hour) before using the player. If there is a temperature increase erro …
-
Infiniti QX50 (2013) — page 231
4-66 Monitor, climate, audio, phone and voic e recognition systems Compressed Video Files (models with navigation system) Explanation of terms: . DivX ® — DivX ® refers to the DivX ® codec owned by DivX, Inc. used for a lossy compression of video based on MPEG- 4. . AVI — A VI stands for Audio Video Interleave. It is a standard file format origi …
-
Infiniti QX50 (2013) — page 232
Requirement for Supporting Video Playback: Media CD, CD-R, CD-RW, DVD , DVD±R, DVD±RW , DVD±RW DL, USB 2.0 Memory File Systems CD, CD-R, CD-RW , DVD, DVD±R, DVD±RW , DVD±RW DL ISO9660 LEVEL1, ISO9660 LEVEL2, Romeo, Joliet, UDF Bridge (UDF1.02 +ISO9660), UDF1.5, UDF2.0 — ISO9660 Level 3 (packet writing) is not supported. — Files saved using th …
-
Infiniti QX50 (2013) — page 233
4-68 Monitor, climate, audio, phone and voic e recognition systems module to prevent tone quality degra- dation and wireless connection disrup- tion. . While an audio device is connected through a Bluetooth ® wireless connec- tion, the battery power of the device may discharge quic ker than usual. . This system supports the Bluetooth ® Audio Dist …
-
Infiniti QX50 (2013) — page 234
No satellite radio reception is available unless a SiriusXM Satellite Radio subscrip- tion is active. The audio control buttons are also located on the center multi-function control panel. JVH0132X Models with navigation system 1. AM·FM·SA T band select button 2. DISC·AUX button SAA2922 Models without navigation system (T ype A) 1. AUX/Satellite …
-
Infiniti QX50 (2013) — page 235
4-70 Monitor, climate, audio, phone and voic e recognition systems SAA2101A Models without navigation system (T ype B) 1. RADIO AM·FM band select button 2. DISC·AUX button For all operation precautions, see “ Audio operation precautions ” earlier in this sec- tion. The satellite radio mode requires an active SiriusXM Satellite Radio subscript …
-
Infiniti QX50 (2013) — page 236
If another audio source is playing when the radio band select button is turned to ON, the audio source will automatic ally be turned off and the last radio channel played will come on. When the stereo broadcast signal is weak, the radio will automatically change from stereo to monaural reception. radio (FM/AM/SA T) band select (models with navigati …
-
Infiniti QX50 (2013) — page 237
4-72 Monitor, climate, audio, phone and voic e recognition systems 1. Choose the radio band using the radio band select button. 2. T une to the desired station/channel using the SEEK·CA T , TRACK, SCAN button or the radio TUNE knob. 3. Push and hold the desired station preset button * 1 to * 6 until the radio mutes. 4. The station indicator will t …
-
Infiniti QX50 (2013) — page 238
Do not use 3.1 in (8 cm) discs. or PLAY: When the DISC·AUX or DISC button is pushed with the system off and the CD loaded, the system will turn on and the CD will start to play. When the DISC·AUX or DISC button is pushed with the CD loaded and the radio playing, the radio will automatically be turned off and the CD will start to play. Menu (model …
-
Infiniti QX50 (2013) — page 239
4-74 Monitor, climate, audio, phone and voic e recognition systems REPEA T (RPT), RANDOM (RDM): When the RPT button is pushed while the CD is played, the play pattern can be changed as follows: (CD) (CD with compressed audio files) Disc EJECT: When the Disc EJECT button is pushed with the CD loaded, the CD will be ejected. When this button is pushe …
-
Infiniti QX50 (2013) — page 240
INFINITI controller. After c hanges have been made push the BACK button to save the setting. SAA2497 Playing a DVD DISC·AUX button: Park the vehicle in a safe loc ation for the front seat occupants to operate the DVD drive while watching the images. Push the DISC·AUX button on the instru- ment panel and turn the display to the DV D mode. When a D …
-
Infiniti QX50 (2013) — page 241
4-76 Monitor, climate, audio, phone and voic e recognition systems / Next/Previous Chapter: Select the “ ” or “ ” key to skip the chapter(s) of the disc forward/bac kward. The chapters will advanc e/go back the number of times this key is selected. / Commer cial Skip: This function is only for DVD- VIDEO, DVD- VR. Select the “ ” or “ …
-
Infiniti QX50 (2013) — page 242
Angle (DVD-VIDE O): If the DVD contains different angles (such as moving images), the current image angle can be switched to another one. Select the “ Angle ” key. The angle will change eac h time the “ + ” side or “ − ” side is selected. Angle Mark (DVD-VIDE O): When this item is turned on, an angle mark will be shown on the bottom o …
-
Infiniti QX50 (2013) — page 243
4-78 Monitor, climate, audio, phone and voic e recognition systems CAUTION . Depending on size and shape of USB device, the console lid may not fully close. Do not force co nsole lid closed as this may damage USB device. . Do not force the USB device into the USB port. Inserting the USB device tilted or up-side-down into the port may damage the USB …
-
Infiniti QX50 (2013) — page 244
Audio file operation or PLAY: When the DISC·AUX or AUX button is pushed with the system off and the USB memory inserted, the system will turn on. If another audio source is playing and a USB memory is inserted, push the DISC·AUX or AUX button repeatedly until the center display c hanges to the USB memory mode. Next/Previous File and Fast Forward/ …
-
Infiniti QX50 (2013) — page 245
4-80 Monitor, climate, audio, phone and voic e recognition systems SAA2502 Menu (models with navigation system): There are some options available during playback. Select one of the following options that are displayed on the screen if necessary . Refer to the following infor- mation for each item. . Movie Playback Switch to the movie playbac k mode …
-
Infiniti QX50 (2013) — page 246
mode. Operation keys: T o operate the USB memory, select the desired key displayed on the operation screen using the INFINITI controller. Pause Select the “ ” key to pause the movie file. T o resume playing the movie file, select the “ ” key. Play Select the “ ” key to start playing a movie file, for example, after pausing a movie file. …
-
Infiniti QX50 (2013) — page 247
4-82 Monitor, climate, audio, phone and voic e recognition systems Input the number to be searched and select the “ OK ” key. The specified folder/file will be played. . Display T o adjust the image quality of the screen, select the preferred adjustment items. . DRC DRC (Dynamic Range Compression) automatically adjusts the soundtrac k volume le …
-
Infiniti QX50 (2013) — page 248
may cause undesired operation of the device. . This Class B digital apparatus meets all requirements of the Canadian Interfer- ence-Causing Equipment Regulations. Bluetooth ® trademark: Bluetooth ® is a trademark owned by Bluetooth SIG, Inc., and licensed to Clarion C o., Ltd. SAA2505 Connecting procedure 1. Push the SETTING button and select the …
-
Infiniti QX50 (2013) — page 249
4-84 Monitor, climate, audio, phone and voic e recognition systems SAA2507 3. A confirmation screen will be dis- played. Select “ No ” . Note: Selecting “ Ye s ” will only connect the hands free phone portion of a Bluetooth ® device. SAA3005 4. Choose a PIN code to use with the compatible Bluetooth ® audio device using the number input sc …
-
Infiniti QX50 (2013) — page 250
SAA2510 Audio main operation Push the ignition switch to the AC C or ON position. Then, push the DISC·AUX button repeatedly to switch to the Bluetooth ® audio mode. If the system has been turned off while the Bluetooth ® audio device was playing, pushing the ON·OFF/VOL control knob will start the Bluetooth ® audio device. The ability to pause, …
-
Infiniti QX50 (2013) — page 251
4-86 Monitor, climate, audio, phone and voic e recognition systems Pause Select the “ ” key to pause the Blue- tooth ® audio device. Select this k ey again to resume playing. Play Mode: The play mode setting display will appear when the “ Menu ” key is selected. Choose the preferred play mode from the following items. . Shuffle Choose “ …
-
Infiniti QX50 (2013) — page 252
see “ Bluetooth ® Hands-Free Phone System (models with navigation system) ” later in this section. SAA3472 iPod ® PLAYER OPERA TION Connecting iPod ® Open the console lid and con nect the iPod ® cable to the USB connector. The battery of the iPod ® is charged while the connection to the vehicle. Depending on the version of the iPod ® , th …
-
Infiniti QX50 (2013) — page 253
4-88 Monitor, climate, audio, phone and voic e recognition systems Compatibility The following models are available: Models with navigation system: . Fifth generation iPod ® (version 1.2. 3 or later) . iPod Classic ® (version 1.1.1 or later) . First generation iPod touch ® (version 2.0.0 or later) . Second generation iPod touc h ® (version 1.2. …
-
Infiniti QX50 (2013) — page 254
Next/Previous T rack and F ast Forward/Rewind: When the FF or REW button is pushed for more than 1.5 seconds while the iPod ® is playing, the iPod ® will play while fast forwarding or rewinding. When the button is released, the iPod ® will return to the normal play speed. When the FF or REW button is pushed for less than 1. 5 seconds while the i …
-
Infiniti QX50 (2013) — page 255
4-90 Monitor, climate, audio, phone and voic e recognition systems trial use. . A new disc may be rough on the inner and outer edges. Remove the rough edges by rubbing the inner and outer edges with the side of a pen or pencil as illustrated. USB memory . Do not touch the terminal portion of the USB memory. . Do not place heavy objects on the USB m …
-
Infiniti QX50 (2013) — page 256
next station. . Pushing the menu control switch will show the list of preset stations. SiriusXM Satellite Radio: . Tilting up/down for less than 1.5 seconds will scroll up or down through the preset channel. . Tilting up/down for more than 1.5 seconds will go to the next or previous category. . Pushing the menu control switch will show the XM Menu. …
-
Infiniti QX50 (2013) — page 257
4-92 Monitor, climate, audio, phone and voic e recognition systems ANTENNA Window antenna The antenna pattern is printed inside the rear window. CAUTION . Do not place metalized film near the rear window glass or attach any metal parts to it. This may cause poor rec eption or noise. . When cleaning the inside of the rear window, be car eful not to …
-
Infiniti QX50 (2013) — page 258
When installing a car phone or a CB radio in your vehicle, be sure to observe the following cautions, otherwise the new equipment may adversely affect the elec- tronic control modules and electronic con- trol system harness. WARNING . A cellular phone should not be used for any purpose while driving so full atten- tion may be given to vehicle opera …
-
Infiniti QX50 (2013) — page 259
4-94 Monitor, climate, audio, phone and voic e recognition systems Once a cellular phone is connected to the in-vehicle phone module, no phone con- necting procedure is required anymore. Y our phone is automatic ally connected with the in-vehicle phone module when the ignition switch is pushed to the ON position with the registered cellular phone t …
-
Infiniti QX50 (2013) — page 260
. Keep the interior of the vehicle as quiet as possible to hear the caller ’ s voice clearly as well as to minimize its echoes. . If reception between callers is unclear, adjusting the incoming or outgoing call volume may improve the clarity. REGULA TORY INFORMA TION FC C Regulatory information . CAUTION: T o maintain compliance with FC C ’ s R …
-
Infiniti QX50 (2013) — page 261
4-96 Monitor, climate, audio, phone and voic e recognition systems JVH0253X C ONNECTING PROCEDURE 1. Push the button, and select the “ Connect Phone ” key . SAA2520 2. When a PIN code appears on the screen, operate the compatible Blue- tooth ® cellular phone to enter the PIN code. The connecting procedure of the cellu- lar phone varies accordi …
-
Infiniti QX50 (2013) — page 262
SAA2521 1. Push the button and select the “ V ehicle Phonebook ” key. 2. Select the “ Add New ” key at the top of the screen. SAA2522 3. Choose the method for entering the phonebook entry. For this example, select “ Enter Number by Keypad ” . 4. Enter the digits and select the “ OK ” key . (See “ How to use touch screen (models wi …
-
Infiniti QX50 (2013) — page 263
4-98 Monitor, climate, audio, phone and voic e recognition systems options instead of “ Enter Number by Key- pad ” in step 3. . Copy from Call History The system will show a list of incoming, outgoing or missed calls that were downloaded from the connected cellu- lar phone (depending on the phone ’ s compatibility). Select one of these entrie …
-
Infiniti QX50 (2013) — page 264
tags allow easy dialing using the INFINITI V oice Recognition system. (See “ INFINITI Voice Reco gnition system (models with navigation system) ” later in this section.) T o delete an entry, select the “ Delete ” key at step 3. SAA2524 MAKING A CALL T o make a call, follow this procedure. 1. Push the button on the steering wheel. The “ PH …
-
Infiniti QX50 (2013) — page 265
4-100 Monitor, climate, audio, phone and voic e recognition systems . Dial Number Input the phone number manually using the keypad displayed on the screen. (See “ INFINITI Voice Recognition system (models with navigation sys- tem) ” earlier in this section.) SAA2525 RECEIVING A CALL When you hear a phone ring, the display will change to the inc …
-
Infiniti QX50 (2013) — page 266
SAA3587 DURING A CALL There are some options available during a call. Select one of the following displayed on the screen if necessary . . Hang up Finish the call. . Use Handset T ransfer the call to the cellular phone. . Mute Mute your voice to the person. . Keypad Using the touch tone, send digits to the connected party for using services such as …
-
Infiniti QX50 (2013) — page 267
4-102 Monitor, climate, audio, phone and voic e recognition systems Download Handset Phonebook Download the contacts registered in a Bluetooth ® cellular phone. Availability of this function depends on each cellular phone. The memory downloading proce- dure from the cellular phone also varies according to each cellular phone. See cellular phone Ow …
-
Infiniti QX50 (2013) — page 268
TROUBLESHOOTING GUIDE The system should respond correctly to all voice commands without difficulty . If problems are encountered, try the following solutions. Where the solutions are listed by number, try each solution in turn, starting with number 1, until the problem is resolved. Symptom Solution The system fails to interpret the com- mand correc …
-
Infiniti QX50 (2013) — page 269
4-104 Monitor, climate, audio, phone and voic e recognition systems WARNING . Use a phone after stopping your vehicle in a safe location. If you have to use a phone while driving, exercise extreme caution at all times so full attention may be given to vehicle operation. . If you find yourself unable to devote full attention to vehicle operation whi …
-
Infiniti QX50 (2013) — page 270
. Immediately after the ignition switch is pushed to the “ ON ” position, it may be impossible to receive a cal l for a short period of time. . Do not place the cellular phone in an area surrounded by metal or far away from the in-vehicle phone module to prevent tone quality degradation and wireless connection disruption. . While a cellular pho …
-
Infiniti QX50 (2013) — page 271
4-106 Monitor, climate, audio, phone and voic e recognition systems Bluetooth trademark: Bluetooth ® is a trademark owned by Bluetooth SIG, Inc., and licensed to Visteon Cor- poration. SAA2642 C ONTROL BUTTONS 1. PHONE SEND button Push the button to initiate a VR session or answer an incoming call. Y ou can also use the button to skip through syst …
-
Infiniti QX50 (2013) — page 272
Before starting: T o get the best performance out of the V oice Recognition System, observe the following: . Keep the interior of the vehicle as quiet as possible. Close the windows to eliminate the surrounding noises (traf- fic noises, vibration sounds, etc.), which may prevent the system from recognizing the voice comma nds cor- rectly. . Wait un …
-
Infiniti QX50 (2013) — page 273
4-108 Monitor, climate, audio, phone and voic e recognition systems command recognition mode . 4. The system acknowledges the com- mand and announces the next set of available commands. 5. After the tone sounds, speak the phone number. 6. When you have finished speaking the phone number, the system repeats it back and announces the available comman …
-
Infiniti QX50 (2013) — page 274
2. The system replies “ please say a command after the beep. Available commands are: Ca ll, Phonebook, Re- cent Calls, C onnect Phone or Help ” . 3. Give your instructions to the system by saying: “ Dial John ” for example ( “ John ” must have been previously set as a voice tag for John ’ s phone number) or “ Dial One ” if John is …
-
Infiniti QX50 (2013) — page 275
4-110 Monitor, climate, audio, phone and voic e recognition systems List of voice commands: COMMAND ACTION “ Call/Dial ”“ <name> ” Dials the specified <name>. “ Call/Dial ”“ Redial ” Dials the last number. “ Call ”“ <number> ” Dials the specified <number>. “ Phonebook ”“ <name> ” Display …
-
Infiniti QX50 (2013) — page 276
SAA2575 P AIRING PROCEDURE Up to 5 cellular phones can be registered. 1. Push the button on the steering wheel. The system announces the available commands. 2. Speak: “ Connect Phone ” . The system acknowledges the co mmand and an- nounces the next set of available commands. SAA2576 3. Speak: “ Add Phone ” . The system ac- knowledges the co …
-
Infiniti QX50 (2013) — page 277
4-112 Monitor, climate, audio, phone and voic e recognition systems SAA2578 5. The system asks the user to speak a name for the phone. Speak: “ Ye s ” . The system acknowl- edges the command and registers the cellular phone. If the name is too long or too short, the system tells the user, then prompts the user for a name again. Also, if more th …
-
Infiniti QX50 (2013) — page 278
SAA2580 MAKING A CALL T o make a call, follow the procedures below. 1. Push the button on the steering wheel. A tone will sound. 2. Speak: “ Call ” . The system acknowl- edges the command and announces the next set of available commands. 3. Speak the registered person ’ s name. The system acknowledges the com- mand and announces the next set …
-
Infiniti QX50 (2013) — page 279
4-114 Monitor, climate, audio, phone and voic e recognition systems call. . “ Mute on/off ”— Use the Mute com- mand to mute the user ’ s voice so the other party cannot hear it. Use the mute command again to unmute the user ’ s voice. . “ Transfer Handset ”— Use the T ransfer Handset command to transfer the call from the Bluetooth ? …
-
Infiniti QX50 (2013) — page 280
SAA2583 Phonebook . (a name) Use the name command to seek the name and locations registered in the phonebook in alphabetical order. When the system acknowledges the alphabet the user spoke, the system announces all registered names and locations beginning with that alphabet. Playback of the list can be stopped at any time by pressing a button on th …
-
Infiniti QX50 (2013) — page 281
4-116 Monitor, climate, audio, phone and voic e recognition systems SAA2584 Recent Calls . Incoming Use the Incoming command to make a call viewing the list of incoming cal ls. . Missed Use the Missed command to make a call viewing the list of missed calls. . Outgoing Use the Outgoing command to make a call viewing the list of outgoing calls. . Red …
-
Infiniti QX50 (2013) — page 282
existing phone. If the user tries to connect a phone that has already been connected to the vehicle system, the system announces the name that the phone is already using. The connecting procedure will then be cancell ed. The Add Phone command is not avail- able when the vehicle is moving. . Select Phone Use the Select Phone command to select a phon …
-
Infiniti QX50 (2013) — page 283
4-118 Monitor, climate, audio, phone and voic e recognition systems 2. Sit in the driver ’ s seat with the engine running, the parking brake on, and the transmission in Park. 3. Press the button. 4. Speak: “ Help ” . The system acknowl- edges the command and announces the next set of available commands. 5. Speak: «V oice Adaptation» …
-
Infiniti QX50 (2013) — page 284
when Alternate Command Mode is active, try using the Speaker Adaptation Function available in that mode. Otherwise, it is recommended that Alternate Command Mode be turned off and Standard Mode be used for the best recognition perfor- mance. For the voice commands for the navigation system, refer to the Navigation System Owner ’ s Manual of your …
-
Infiniti QX50 (2013) — page 285
4-120 Monitor, climate, audio, phone and voic e recognition systems SAA2531 1. Push the INFO button on the instrument panel. 2. Select the “ Others ” key. 3. Select the “ Voice Reco gnition ” key . 4. Select the “ User Guide ” key. 5. Select a preferred item. Y ou can skip step s 1 and 3 above if you say “ Help ” . Available items: …
-
Infiniti QX50 (2013) — page 286
V oice Recognition. SAA2534 Let ’ s Practice This mode helps learn how to use the INFINITI V oice Rec ognition system. 1. Select the “ Let ’ s Practice ” key. 2. After the message screen appears, push the T ALK switch on the steering wheel. 3. Speak the displayed number after the tone. The evaluation screen will be displayed and the result …
-
Infiniti QX50 (2013) — page 287
4-122 Monitor, climate, audio, phone and voic e recognition systems USING THE SYSTEM Initialization When the ignition switch is pushed to the ON position, INFINITI V oice Recognition is initialized, whic h may take up to one minute. When completed, the system is ready to accept voice commands. If the T ALK switch is pushed before the initialization …
-
Infiniti QX50 (2013) — page 288
SAA2535 2. A list of commands appears on the screen, and the system announces, “ Would you like to acc ess Phone, Navigation, Information, Audio or Help? ” . 3. After the tone sounds and the icon on the screen changes from to , speak a command. Selecting the “ Practice ” key will start the practice mode. See “ Let ’ s Practice ” earli …
-
Infiniti QX50 (2013) — page 289
4-124 Monitor, climate, audio, phone and voic e recognition systems of phone digit entry can improve recogni- tion performance. When speaking a house number, speak the number “ 0 ” as “ zero ” . If the letter “ o (Oh) ” is included in the house number, it will not be recognized as the number “ 0 (zero) ” even if you speak “ oh ” …
-
Infiniti QX50 (2013) — page 290
Command List Category C ommand: Command Action Phone Operates the Phone function Navigation Operates the Navigation function Information Displays the vehicle Information function Audio Operates the Audio function. Help Displays User Guide . Phone Command: Command Action Dial Number Makes a call to a spoken phone number up to 10 digits. V ehicle Pho …
-
Infiniti QX50 (2013) — page 291
4-126 Monitor, climate, audio, phone and voic e recognition systems Command Action Previous Destinations Sets a route to a previous destination. . Information Command: Command Action Fuel Economy Displays fuel economy information. Maintenance Displays maintenance information. Traffic Information Displays the [Info On Route] screen when a route to t …
-
Infiniti QX50 (2013) — page 292
V oice command examples T o use the INFINITI Voic e Recognition function, speaking one command is some- times sufficient, but at other times it is necessary to speak two or more c om- mands. As examples, some additional basic operations by voice comma nds are described here. For navigation system commands, see the separate Navigation System Owner ? …
-
Infiniti QX50 (2013) — page 293
4-128 Monitor, climate, audio, phone and voic e recognition systems SAA2536 4. Speak “ Dial Number ” . SAA2537 5. Speak “ 800 ” . Selecting the “ Manual Controls ” key switches the screen to the keypad to input the phone number manually. SAA2538 6. The system announces, “ Please say the next three digits or dial, or say change number. …
-
Infiniti QX50 (2013) — page 294
SAA2539 8. The system announces, “ Please say the last four digits ” or say change number . 9. Speak “ 6200 ” . SAA2540 10. The system announces, “ Dial or Change Number? ” 11. Speak “ Dial ” . 12. The system makes a call to 800-662- 6200. NOTE: . Y ou can also speak “ 800-662-6200 ” (10 continuous digits) or “ 662-6200 ” (7 …
-
Infiniti QX50 (2013) — page 295
4-130 Monitor, climate, audio, phone and voic e recognition systems SAA1588 Example 2 — Placing an international call to the phone number 011-81-111-222-3333: 1. Push the TALK switch located on the steering wheel. SAA2535 2. The system announces, “ Would you like to access Phone, Navigation, Informa- tion or Help? ” 3. Speak “ Phone ” . SAA …
-
Infiniti QX50 (2013) — page 296
SAA2541 5. Speak “ 011811112223333 ” . SAA2542 6. Speak “ Dial ” . 7. System makes a call to 011-81-111- 222-3333. NOTE: Any digit input format is available in the International Number input process. INFINITI VOICE REC OGNITION AL — TERNA TE COMMAND MODE The following section is applicable when Alternate Command Mode is activated. When Alte …
-
Infiniti QX50 (2013) — page 297
4-132 Monitor, climate, audio, phone and voic e recognition systems Activating Alternate Command Mode When the Standard Mode is active, perform the following steps to switc h to the Alternate Command Mode. 1. Push the SETTING button on the instru- ment panel. 2. Highlight the “ Others ” key. 3. Highlight the “ Voice Recog nition ” key . SAA …
-
Infiniti QX50 (2013) — page 298
SAA2545 5. Select a category from the list. SAA2546 6. Select an item. 7. If necessary, scroll the screen using the INFINITI controller to view the entire list. 8. Press the BACK button to return to the previous screen. Monitor, climate, audio, phone and voice recognition systems 4-133 …
-
Infiniti QX50 (2013) — page 299
4-134 Monitor, climate, audio, phone and voic e recognition systems Command List Phone C ommands: Command Action Dial Number Makes a call to a spoken phone number. V ehicle Phonebook Makes a call to a contact that is stored in the V ehicle Phonebook. Handset Phonebook Makes a call to a contact that is stored in the mobile phone. Call History Incomi …
-
Infiniti QX50 (2013) — page 300
Navigation Commands: Command Action Destination Home Sets a route to your home that is stored in the Address Book. Address Searches for a location by the street address specified, and sets a route to the location. Places Sets a route to a facility near the current vehicle location. Address Book Searches for stored information in the Address Book. P …
-
Infiniti QX50 (2013) — page 301
4-136 Monitor, climate, audio, phone and voic e recognition systems Information Commands: Command Action Fuel Economy Displays fuel economy information. Maintenance Displays maintenance information. Where am I? Displays your current location. Traffic Information Displays the [Info On Route] screen when a route to the destination is set. Displays th …
-
Infiniti QX50 (2013) — page 302
Audio Commands: Command Action CD Starts to play a CD. FM Turns to the FM band, selecting the station last played. AM T urns to the AM band, selecting the station last played. XM T urns to the SiriusXM Satellite Radio band, selecting the channel last played. USB Turns on the USB memory. Bluetooth ® Audio Turns on the Bluetooth ® audio player. Mon …
-
Infiniti QX50 (2013) — page 303
4-138 Monitor, climate, audio, phone and voic e recognition systems Help Commands: Command Action Command List Navigation Commands Displays the navigation command list. Phone Commands Displays the phone command list. Audio Commands Displays the audio command list. Information Com- mands Displays the information command list. Help Commands Displays …
-
Infiniti QX50 (2013) — page 304
General C ommands: Command Action Go back Corrects the last recognition result to return to the previous screen Exit Cancels V oice Recognition Monitor, climate, audio, phone and voice recognition systems 4-139 …
-
Infiniti QX50 (2013) — page 305
4-140 Monitor, climate, audio, phone and voic e recognition systems SAA2547 Displaying user guide Y ou can confirm how to use voice com- mands by accessing a simplified User Guide, which co ntains basic instructions and tutorials for several voice commands. 1. Push the INFO button on the instrument panel. 2. Select the “ Others ” key using the …
-
Infiniti QX50 (2013) — page 306
. When the air conditioner is in the AUTO mode, the fan speed decreases auto- matically for easy recogni tion. . Wait until a tone sounds before speak- ing a command. . Speak in a natural voice without paus- ing between words. SAA1588 Giving voice command 1. Push and release the TALK switch located on the steering wheel. SAA2548 2. A list of comman …
-
Infiniti QX50 (2013) — page 307
4-142 Monitor, climate, audio, phone and voic e recognition systems Repeat the command in a clear voice. . Push the BACK button once to return to the previous screen. . If you want to cancel the command, push and hold the TALK switch for 1 second. The message “ V oice can- celed ” will be announced. . T o skip the voice guidance function and gi …
-
Infiniti QX50 (2013) — page 308
SAA2549 Speaker adaptation function (for Alternate Command Mode) The voice recognition system has a func- tion to learn the user ’ s voice for better voice recognition performance . The system can memorize the voice s of up to three persons. Having the system learn the user ’ s voice: 1. Push the SETTING button on the instru- ment panel and sel …
-
Infiniti QX50 (2013) — page 309
4-144 Monitor, climate, audio, phone and voic e recognition systems SAA2552 8. The system requests that you repeat a command after a tone. 9. After the tone sounds and the icon on the screen changes from to , speak the command that the system requested. 10. When the system has recognized the voice command, the voice of the user is learned. Push the …
-
Infiniti QX50 (2013) — page 310
Minimize voice feedback (for Alter- nate Command Mode) T o minimize the voice feedback from the system, perform the following steps. 1. Push the SETTING button on the instru- ment panel. 2. Select the “ Others ” key. 3. Select the “ Voice Reco gnition ” key . 4. Select the “ Minimize V oice Feedback ” key . 5. The setting is turned to O …
-
Infiniti QX50 (2013) — page 311
4-146 Monitor, climate, audio, phone and voic e recognition systems TROUBLESHOOTING GUIDE The system should respond correctly to all voice comma nds without difficulty. If problems are encountered, follow the solutions given in this guide for the appropriate error. Where the solutions are listed by number, try each solution in turn, starting with n …
-
Infiniti QX50 (2013) — page 312
5 Starting and driving Precautions when starting and driving …………….. 5-3 Exhaust gas (carbon monoxide) ………………….. 5-3 Three-way catalyst ……………………………………. 5-3 Tire Pressure Monitoring System (TPMS)………. 5-4 Avoiding collision and rollover……………………. 5-6 On-pavement and off-road dri …
-
Infiniti QX50 (2013) — page 313
Conventional (fixed speed) cruise control mode …………………………………………. 5-55 Preview function (for Intelligent Cruise Control system equipped models) ……………………….. 5-58 Distance Control Assist (DCA) system (if so equipped) …………………………………………….. 5-59 Precautions on Distance Con …
-
Infiniti QX50 (2013) — page 314
WARNING . Do not leave children or adults who would normally require the support of others alone in your vehicle. Pets should not be left alone either. They could accidentally injure themselves or others through inadvertent operation of the vehicle. Also, on hot, sunny days, temperatures in a closed vehicle could quick ly become high enough to caus …
-
Infiniti QX50 (2013) — page 315
5-4 Starting and driving cause a fire. CAUTION . Do not use leaded gasoline. Deposits from leaded gasoline seriously reduc e the three-way catalyst ’ s ability to help reduce exhaust pollutants. . Keep your engine tuned up. Malfunctions in the ignition, fuel injection, or elec- trical systems can cause overric h fuel flow into the three-way catal …
-
Infiniti QX50 (2013) — page 316
Additional information . The TPMS does not monitor the tire pressure of the spare tire. . The TPMS will activate only when the vehicle is driven at speeds above 16 MPH (25 km/h). Also, this system may not detect a sudden drop in tire pressure (for example a flat tire while driving). . The low tire pressure warning light does not automatically turn …
-
Infiniti QX50 (2013) — page 317
5-6 Starting and driving proper operation of the TPMS. . Do not inject any tire liquid or aerosol tire sealant into the tires, as this may cause a malfunction of the tire pr essure sensors. CAUTION . The TPMS may not function properly when the wheels are equipped with tire chains or the wheels are buried in snow. . Do not place metalized film or an …
-
Infiniti QX50 (2013) — page 318
to do so. Seat belts help reduce the risk of injury in collisions and rollovers. In a rollover crash, an unbelted or improperly belte d person is significantly more like ly to be injured or killed than a person properly wearing a seat belt. ON-P AVEMENT AND OFF-ROAD DRIVING PRECAUTIONS Utility vehicles have a significantly higher rollover rate than …
-
Infiniti QX50 (2013) — page 319
5-8 Starting and driving visually inspect the tires for wear and damage. See “ Wheels and tires ” in the “ 8. Maintenance and do-it-yourself ” section of this manual. If a tire rapidly loses air pressure or “ blows-out ” while driving maintain control of the vehicle by following the procedure below. Please note that this procedure is on …
-
Infiniti QX50 (2013) — page 320
ALL -WHEEL DRIVE (AWD) DRIVING SAFETY PRE CAUTIONS (for AWD models) WARNING . Do not drive beyond the performanc e capability of the tires, even with AWD engaged. Accelerating quickly , sharp steering maneuvers or sudden braking may cause loss of control. . Always use tires of the same type, size, brand, construction (bias, bias-belted or radial), …
-
Infiniti QX50 (2013) — page 321
5-10 Starting and driving SSD0436 OPERA TING RANGE FOR ENGINE ST ART FUNCTION The Intelligent Key can only be used for starting the engine when the Intelligent Key is within the specified operating range * 1 . When the Intelligent Key battery is almost discharged or strong radio waves are present near the operating location, the Intelligent Key sys …
-
Infiniti QX50 (2013) — page 322
to L OCK until the selector lever is moved to the P (Park) position. When the ignition switch cannot be switched toward the L OCK position, pro- ceed as follows: 1. Move the selector lever into the P (Park) position. 2. Push the ignition switch to the OFF position. The ignition switch position indicator will not illuminate. 3. Open the door. The ig …
-
Infiniti QX50 (2013) — page 323
5-12 Starting and driving SSD0785 INTELLIGENT KEY BA TTERY DIS- CHARGE If the battery of the Intelligent Key is almost discharged, the guide light * B of the Intelligent Key port * A blinks and the indicator appears on the dot matrix liquid crystal display. (See “ Dot matrix liquid crystal display ” in the “ 2. Instruments and controls ” se …
-
Infiniti QX50 (2013) — page 324
1. Apply the parking brake. 2. Move the selector lever to the P (Park) or N (Neutral) position. (P is recom- mended.) The starter is designed not to operate unless the selector lever is in either of the above positions. 3. Push the ignition switch to the ON position. Depress the brake pedal and push the ignition switch to start the engine. T o star …
-
Infiniti QX50 (2013) — page 325
5-14 Starting and driving AUTOMA TIC TRANSMISS ION 7 speed automatic transmission The automatic transmission in your vehicle is electronically controlled by a transmis- sion control module to produce maximum efficiency and smooth operation. Shown on the following pages are the recommended operating procedures for this transmission. Follow these pro …
-
Infiniti QX50 (2013) — page 326
SSD0712 Selector lever T o move the selector lever, : Push the button while depressing the brake pedal, : Push the button, : Just move the selector lever. Shifting After starting the engine, fully depress the brake pedal and shift the selector lever from P (Park) to R (Reverse), N (Neutral), D (Drive), DS (Drive Sport) or Manual shift mode position …
-
Infiniti QX50 (2013) — page 327
5-16 Starting and driving DS (Drive Sport) mode Move the selector lever from D (Drive) to the left into the manual shift gate. The transmission position indicator in the meter shows “ DS ” . In the DS (Drive Sport) mode, the transmis- sion changes to the “ sporty ” driving shift operation, creating a more aggressive acceleration feeling tha …
-
Infiniti QX50 (2013) — page 328
range. Accelerator downshift — In D (Drive) position — For passing or hill climbing, fully depress the accelerator pedal to the floor. This shifts the transmission down into the lower gear, depending on the vehicle speed. Fail-safe When the fail-safe operation occurs, note that the transmission will be locked in any of the forward gears acc ord …
-
Infiniti QX50 (2013) — page 329
5-18 Starting and driving Contr ol on downhill roads: The adaptive shift control system shifts to a low gear that suits the degree of the slope, and uses the engine braking to reduce the number of times that the brake must be used. Contr ol on winding roads: A low gear is maintained on continuous curves that involve repeated acceleration and decele …
-
Infiniti QX50 (2013) — page 330
SPA2331 T o apply: Fully depress the parking brake pedal * 1 . T o release: 1. Firmly apply the foot brake * 2 . 2. Depress the parking brake pedal * 1 and the parking brake will be released. 3. Before driving, be sure the brake warning light goes out. The Lane Departure Warning (LDW) sys- tem/Lane Departure Prevention (LDP) sys- tem will operate w …
-
Infiniti QX50 (2013) — page 331
5-20 Starting and driving The LDW and LDP systems monitor the lane markers on the traveling lane using the camera unit * 1 located inside the front map light cover. When the camera unit detects that the vehicle is traveling close to either the left or the right of the traveling lane, the lane departure warning light * 2 on the instrument panel blin …
-
Infiniti QX50 (2013) — page 332
. When traveling close to the vehicle in front of you, which obstructs the lane camera unit detection range. . When rain, snow or dirt adheres to the windshield in front of the lane camera unit. . When the headlights are not bright due to dirt on the lens or if the aiming is not adjusted properly. . When strong light enters the lane camera unit. (F …
-
Infiniti QX50 (2013) — page 333
5-22 Starting and driving systems ON indicator * 1 on the warning systems switch illuminates. To cancel the LDW system, push the warning systems switch. The warning systems ON indicator will turn off. To turn on the system, push the warning systems switch again. This switch will turn on and off the LDW , BSW and FCW systems at the same time. In the …
-
Infiniti QX50 (2013) — page 334
— When driving without normal tire conditions (for example, tire wear, low tire pressure, installation of spare tire, tire chains, non-standard wheels). — When the vehicle is equipped with nonoriginal brake parts or suspen- sion parts. . If the LDP system malfunctions, it will cancel automatically . The lane departure warning light (orange) on …
-
Infiniti QX50 (2013) — page 335
5-24 Starting and driving SSD0672 LDP ON indicator light (green)/ Warning light (orange) LDP system operation The LDP system provides a lane departure warning and brake control assistanc e when the vehicle is driven at speeds of approxi- mately 45 MPH (70 km/h) and above. When the vehicle approaches either the left or the right side of the travelin …
-
Infiniti QX50 (2013) — page 336
SSD0884 SSD0885 Changing the dynamic driver as- sistance switch settings 1. Push the SETTING * 1 button and high- light the “ Driver Assistance ” key on the display using the INFINITI controller. Then push the ENTER * 2 button. 2. Highlight the “ Dynamic Assistance set- tings ” key , and push the ENTER * 2 button. SSD0886 3. T o set the LDP …
-
Infiniti QX50 (2013) — page 337
5-26 Starting and driving Automatic deactivation Condition A: The warning and assist functions of the LDP system are not designed to work under the following conditions: . When you operate the lane change signal and change the traveling lanes in the direction of the signal. (The LDP system will be deactivated for approxi- mately 2 seconds after the …
-
Infiniti QX50 (2013) — page 338
SSD0453 LANE CAMERA UNIT MAINTENANCE The lane camera unit * 1 for the LDW/LDP system is located inside the map light cover. T o keep the proper operation of the LDW/LDP systems and prevent a system malfunction, be sure to observe the follow- ing: . Always keep the windshield clean. . Do not attach a stick er (including transparent material) or inst …
-
Infiniti QX50 (2013) — page 339
5-28 Starting and driving SSD1155 The BSW system uses radar sensors * A installed near the rear bumper to detect other vehicles beside your vehicle in an adjacent lane. SSD1030 Detection zone The radar sensors can detect vehicles on either side of your vehicle within the detection zone shown as illustrated. This detection zone starts from the outsi …
-
Infiniti QX50 (2013) — page 340
SSD1086 BSW indicator light SSD1156 Warning syst ems switch SSD1029 BSW system warning light BSW SYSTEM OPERA TION If the radar sensors detect a vehicle in the detection zone, the BSW indicator light next to the outside mirror will illuminate in the direction of the detected vehicle. If the turn signal is then activated, the BSW indicator light fla …
-
Infiniti QX50 (2013) — page 341
5-30 Starting and driving return to ON. WARNING Excessive noise (for example, audio system volume, open vehicle window) will interfere with the chime sound, and it may not be heard. . The radar sensors may not be able to detect and activate BSW when certain objects are present such as: — Pedestrians, bicycles, animals — Several types of vehicle …
-
Infiniti QX50 (2013) — page 342
SSD1031 If the driver activates the turn signal, then the BSW indicator light flashes and a chime will sound twice. NOTE: If the driver activates the turn signal before a vehicle enters the det ection zone, the BSW indicator light will flash but no chime will sound when the other vehicle is detected. SSD1032 NOTE: If you accelerate from a stop with …
-
Infiniti QX50 (2013) — page 343
5-32 Starting and driving SSD1034 If the driver activates the turn signal while another vehicle is in the detection zone, then the BSW indicator light flashes and a chime will sound twice. SSD1036 NOTE: When overtaking several vehicles in a row, the vehicles after the first vehicle may not be detected if they are traveling close together. …
-
Infiniti QX50 (2013) — page 344
SSD1037 Entering from the side The BSW indicator light illuminates if a vehicle enters the detection zone from either side. NOTE: The radar sensors may not detect a vehicle which is traveling at about the same speed as your vehicle when it ente rs the detec- tion zone. SSD1038 If the driver activates the turn signal, then the BSW indicator light fl …
-
Infiniti QX50 (2013) — page 345
5-34 Starting and driving SSD1155 SYSTEM MAINTENANCE The two radar sensor units * A for the BSW system are located near the rear bumper. Always keep the area near the radar sensors clean. Do not attach stic kers (including transparent material), install accessories or apply additional paint near the radar sensors. Do not strike or damage the area a …
-
Infiniti QX50 (2013) — page 346
. in heavy traffic or in traffic that varies in speed . on winding or hilly roads . on slippery roads (rain, snow, ice, etc.) . in very windy areas Doing so could cause a loss of vehicle control and re sult in an accident. SSD0600 1. AC CELERA TE/RESUME switc h 2. COAST/SET switc h 3. CANCEL switch 4. MAIN (ON·OFF) switch CRUISE CONTROL OPERA TION …
-
Infiniti QX50 (2013) — page 347
5-36 Starting and driving cruising speed, the cruise control will disengage. T urn the MAIN switch off once and then turn it on again. . The cruise control will automatically cancel if the vehicle slows more than 8 MPH (13 km/h) below the set speed. . If you move the selector lever to the N (Neutral) position, the cruise control will be canceled. T …
-
Infiniti QX50 (2013) — page 348
accidents or to control the vehicle ’ s speed in emergency situations. Do not use cruise control except in appropriate road and traffic conditions. . In the conventional (fixed speed) cruise control mode, a warning c hime will not sound to warn you if you are too close to the vehicle ahead. Pay special attention to the distance between your vehic …
-
Infiniti QX50 (2013) — page 349
5-38 Starting and driving SELECTING THE VEHICLE- TO- VEHI- CLE DISTANCE C ONTROL MODE T o choose the vehicle-to-vehicle distance control mode * 1 , quickly push and release the MAIN switch * A . VEHICLE- TO- VEHICLE DISTANCE C ONTROL MODE In the vehicle-to-vehicle distance control mode, the Intelligent Cruise Control (ICC) system automatically main …
-
Infiniti QX50 (2013) — page 350
. Oncoming vehicles in the same lane . Motorcycles traveling offset in the travel lane WARNING . As there is a performance limit to the distance control function, never rely solely on the Intelligent Cruise Control system. This system does not correct careless, inattentive or absent-minded driving, or overcome poor visibility in rain, fog, or other …
-
Infiniti QX50 (2013) — page 351
5-40 Starting and driving SSD0701 VEHICLE- TO- VEHICLE DISTANCE C ONTROL MODE OPERA TION Always pay attention to the operation of the vehicle and be ready to manually control the proper following distance. The vehicle-to-vehicle distance control mode of the Intelligent Cruise Control (ICC) system may not be able to maintain the selected distance be …
-
Infiniti QX50 (2013) — page 352
ough. If this occurs, the IC C system will sound a warning chime and blink the system display to notify the driver to take necessary action. The system will cancel and a warning chime will sound if the speed is below approximately 15 MPH (24 km/h) and a vehicle is not detected ahead. The system will also disengage when the vehicle goes above the ma …
-
Infiniti QX50 (2013) — page 353
5-42 Starting and driving SSD0252 The detection zone of the ICC sensor is limited. A vehicle ahead must be in the detection zone for the vehicle-to-vehicle distance detection mode to maintain the selected distance from the vehicle ahead. A vehicle ahead may move outside of the detection zone due to its position within the same lane of travel. Motor …
-
Infiniti QX50 (2013) — page 354
SSD0253 When driving on some roads, suc h as winding, hilly, curved, narrow roads, or roads which are under construction, the IC C sensor may detect vehicles in a different lane, or may temporarily not detect a vehicle traveling ahead. This may cause the IC C system to dec elerate or accelerate the vehicle. The detection of vehicles may also be aff …
-
Infiniti QX50 (2013) — page 355
5-44 Starting and driving SSD0900 Intelligent cruise control switch The system is operated by a MAIN switch and four control switc hes, all mounted on the steering wheel. 1. ACCELERA TE/RESUME switch: Resumes set speed or increases speed incrementally. 2. COAST/SETT switc h: Sets desired cruise speed, reduces speed incrementally. 3. CANCEL switch: …
-
Infiniti QX50 (2013) — page 356
4. Indicates your vehicle 5. Set vehicle speed indicator: Indicates the set vehicle speed. For Canadian models, the speed is displayed in km/h. 6. Intelligent Cruise C ontrol system warn- ing light (orange): The light comes on if there is a malfunction in the ICC system. SSD0607 When the ignition switch is pushed to the ON position, the indicators …
-
Infiniti QX50 (2013) — page 357
5-46 Starting and driving SSD0902 T o set cruising speed, accelerate your vehicle to the desired speed, push the COAST/SET switc h and release it. (V ehicle ahead detection indicator, set distance indicator and set vehicle speed indicator come on.) Tak e your foot off the accelerator pedal. Y our vehicle will maintain the set speed. SSD0784 When th …
-
Infiniti QX50 (2013) — page 358
SSD0614 When the C OAST/SET switch is pushed under the following conditions, the system cannot be set. A warning chime will sound and the IC C indicators will blink. . When the SNOW mode switch is ON (T o use the ICC system, turn off the SNOW mode switch, push the MAIN switch to turn off the ICC and reset the ICC switc h by pressing the MAIN switch …
-
Infiniti QX50 (2013) — page 359
5-48 Starting and driving SSD0610 1. System set display with vehicle ahead 2. System set display without vehicle ahead System operation WARNING Normally when controlling the distance to a vehicle ahead, this system automatically accelerates or decel erates your vehicle according to the speed of the vehicle ahead. Depress the accelerator to properly …
-
Infiniti QX50 (2013) — page 360
the IC C system is in operation, the system controls the distance to that vehicle. When a vehicle is no longer detected under approximately 15 MPH (24 km/h), the system will be canceled. SSD0611 When passing another vehicle, the set speed indicator will flash when the vehicle speed exceeds the set speed. The vehicle detect indicator will turn off w …
-
Infiniti QX50 (2013) — page 361
5-50 Starting and driving T o reset at a slower cruising speed, use one of the following methods: . Lightly tap the brake pedal. When the vehicle attains the desired speed, push the COAST/SET switch and release it. . Push and hold the C OAST/SET switch. The set vehicle speed will decrease by approximately 5 MPH (5 km/h for Canada). . Push, then qui …
-
Infiniti QX50 (2013) — page 362
SSD0613B . The distance to the vehicle ahead will change acc ording to the vehicle speed. The higher the vehicle speed, the longer the distance. . If the engine is stopped, the set distance becomes “ long ” . (Eac h time the engine is started, the initial setting becomes “ long ” .) Approach warning If your vehicle comes closer to the vehic …
-
Infiniti QX50 (2013) — page 363
5-52 Starting and driving SSD0284A NOTE: The approach warning c hime may sound and the system display may blink when the ICC sensor detects some reflectors * A which are fitte d on vehicles in other lanes or on the side of the road. This may cause the ICC system to decelerate or acc elerate the vehicle. The ICC sensor may det ect these reflectors w …
-
Infiniti QX50 (2013) — page 364
SSD0614 Warning light and display Condition A: Under the following conditions, the Intelli- gent Cruise Control system is automatically canceled. The chime will sound and the system will not be able to be set. . When the VDC system is turned off . When the VDC or ABS (including the traction control system) operates . When a tire slips . When the SN …
-
Infiniti QX50 (2013) — page 365
5-54 Starting and driving SSD0621 Condition C: When the ICC system is not operating properly, the c hime sounds and the system warning light (orange) will come on. Action to take: If the warning light comes on, park the vehicle in a safe place. Turn the engine off, restart the engine, resume driving and set the IC C system again. If it is not possi …
-
Infiniti QX50 (2013) — page 366
INFINITI retailer. . Do not attach a stick er (including transparent material) or install an accessory near the sensor. This could cause failure or malfunction. C ONVENTIONAL (fixed speed) CRUISE C ONTROL MODE This mode allows driving at a speed between 25 to 90 MPH (40 to 144 km/h) without keeping your foot on the accel- erator pedal. WARNING . In …
-
Infiniti QX50 (2013) — page 367
5-56 Starting and driving SSD0618 Conventional (fixed speed) cruise control mode display and indica- tors The display is located between the speed- ometer and tachometer. 1. MAIN switch indicator: Indicates that the MAIN switch is ON. 2. Cruise set switch indicator: Displays while the vehicle speed is controlled by the conventional (fixed speed) cr …
-
Infiniti QX50 (2013) — page 368
set your desired cruising speed. Pushing the MAIN switch again will turn the system completely off. When the ignition switch is pushed to the OFF position, the system is also automati- cally turned off. To use the Intelligent Cruise Control again, quick ly push and release the MAIN switch (vehicle-to-vehicle distance control mode) or push and hold …
-
Infiniti QX50 (2013) — page 369
5-58 Starting and driving . Push and hold the C OAST/SET switch. Release the switch when the vehicle slows down to the desired speed. . Push, then quickly release the COAST/ SET switch. Eac h time you do this, the set speed will decrease by about 1 MPH (1.6 km/h). T o resume the preset speed, push and release the ACCELERA TE/RESUME switch. The vehi …
-
Infiniti QX50 (2013) — page 370
The Distance C ontrol Assist (DCA) system brakes and moves the acc elerator pedal upward according to the distance from and the relative speed of the vehicle ahead to help assist the driver to maintain a following distance. WARNING . Always drive carefully and attentively when using the Distance C ontrol Assist system. Read and understand the Own- …
-
Infiniti QX50 (2013) — page 371
5-60 Starting and driving The detection range of the sensor is approximately 390 ft (120 m) ahead. WARNING . This system is only an aid to assist the driver and is not a collision warning or avoidance device. It is the driver ’ s responsibility to stay alert, drive safely and be in control of the vehicle at all times. . This system will not adapt …
-
Infiniti QX50 (2013) — page 372
SSD0701 DIST ANCE C ONTROL ASSIST OP- ERA TION Always pay attention to the operation of the vehicle and be ready to manually decelerate to maintain the proper following distance. The Distance Control Assist (DCA) system may not be able to decelerate the vehicle under some circumstances. The DCA system uses a sensor * A located on the front of the v …
-
Infiniti QX50 (2013) — page 373
5-62 Starting and driving The DCA system does not control vehicle speed or warn you when you approach stationary and slow moving vehicles. Y ou must pay attention to vehicle operation to maintain proper distance from vehicles ahead. SSD0252 The detection zone of the sensor is limited. A vehicle ahead must be in the detection zone for the system to …
-
Infiniti QX50 (2013) — page 374
SSD0253 When driving on some roads, suc h as winding, hilly, curved, narrow roads, or roads which are under construction, the sensor may detect vehicles in a different lane, or may temporarily not detect a vehicle traveling ahead. This may cau se the system to work inappropriately. The detection of vehicles may also be affected by vehicle operation …
-
Infiniti QX50 (2013) — page 375
5-64 Starting and driving The light comes on if there is a malfunction in the DCA system. SSD0907 Operating Distance C ontrol Assist (DCA) system T o turn on the DCA system, push the dynamic driver assistance switc h on the steering wheel after starting the engine. The Distance C ontrol Assist (DCA) system switch indicator light in the dot matrix l …
-
Infiniti QX50 (2013) — page 376
SSD0884 SSD0885 Setting DCA system to ON/OFF: 1. Push the SETTING * 1 button and high- light the “ Driver Assistance ” key on the display using the INFINITI controller. Then push the ENTER * 2 button. 2. Highlight the “ Dynamic Assistance set- tings ” key , and push the ENTER * 2 button. SSD0886 3. T o set the DCA system to on or off, highl …
-
Infiniti QX50 (2013) — page 377
5-66 Starting and driving SSD0771 Under the following conditions, the Dis- tance C ontrol Assist system will not oper- ate and the Distance Control Assist (DCA) system switch indicator light will blink: . When the SNOW mode switch is ON (T o use the DCA system, turn off the SNOW mode switch, then push the dynamic driver assistance switc h.) For det …
-
Infiniti QX50 (2013) — page 378
SSD0746 1. System set display with vehicle ahead 2. System set display without vehicle ahead System operation WARNING The Distance C ontrol Assist system auto- matically decelerates your vehicle to help assist the driver to maintain a following distance from the vehicle ahead. Manually brake when deceleration is required to maintain a safe distance …
-
Infiniti QX50 (2013) — page 379
5-68 Starting and driving WARNING . When the vehicle ahead detection in- dicator light is not illuminated, system will not control or warn the driver. . Never place your foot under the brake pedal. Y our foot may be caught when the system controls the brake. . Depending on the position of the accel- erator pedal, the system may not be able to assis …
-
Infiniti QX50 (2013) — page 380
SSD0284A NOTE: The approach warning c hime may sound and the system display may blink when the sensor detects some reflectors * A which are fitte d on vehicles in other lanes or on the side of the road. This may cause the DCA system to operate inappropriately. The sensor may detect these reflectors when the vehicle is driven on winding roads, hilly …
-
Infiniti QX50 (2013) — page 381
5-70 Starting and driving . When driving into a strong light (for example, sunlight) Action to take: When the conditions listed above are no longer present, turn the system off with the dynamic driver assistance switc h. Turn the DCA system back on to use the system. SSD0772 Condition B: When the sensor window is dirty, making it impossible to dete …
-
Infiniti QX50 (2013) — page 382
conditions, have the vehicle chec ked at an INFINITI retailer. Sensor maintenance How to handle the sensor: The sensor for the DCA system is common with Intelligent Cruise Control and is located below the front bumper. T o handle the sensor, see “ Intelligent Cruise Control (IC C) system (FULL SPEED RANGE) ” earlier in this section. The Forward …
-
Infiniti QX50 (2013) — page 383
5-72 Starting and driving SSD1156 Warning syst ems switch The FCW system uses the distance sensor * A located below the front bumper to measure the distance to the vehicle ahead. When the system judges that your vehicle is getting close to the vehicle ahead in the travel lane, the vehicle ahead detection indicator light on the instrument panel blin …
-
Infiniti QX50 (2013) — page 384
— When abruptly accelerating or de- celerating. — On a steep downhill slope or on roads with sharp curves. — When there is a highly reflective object near the vehicle ahead (for example, being very close to another vehicle, signboard, etc.) . Depending on certain road conditions (curved or beginning of a curve), vehicle conditions (steering p …
-
Infiniti QX50 (2013) — page 385
5-74 Starting and driving SSD1156 Warning syst ems switch FCW system operation The FCW system will function at speeds of approximately 10 MPH (15 km/h) and above, when the system turns on. The FCW system has an automatic setting mode and a manual setting mode to turn the system on. The setting mode can be changed. In the automatic setting mode, the …
-
Infiniti QX50 (2013) — page 386
SSD0701 SSD0749 V ehicle ahead detection indicator light The IBA system uses a distance sensor * A located below the front bumper to measure the distance to the vehicle ahead. When the system judges that your vehicle is getting close to the vehicle ahead in the traveling lane, the vehicle ahead detection indicator light on the instrument panel blin …
-
Infiniti QX50 (2013) — page 387
5-76 Starting and driving road spray. — When visibility is low (such as rain, fog, snow, etc.). — When snow or road spray from traveling vehicles is splashed. — When dense exhaust or other smoke (black smoke) from vehicles reduces the visibility of the sensor. — When excessively heavy baggage is loaded in the rear seat or the luggage room o …
-
Infiniti QX50 (2013) — page 388
system may not detect them. In these instances the system may not be able to warn the driver properly. Be sur e to chec k and clean the sensor regularly . . Excessive noise will interfer e with the warning chime sound, and the c hime may not be heard. . Never place your foot under the brake pedal when the IBA system turns on. Y our foot may be caug …
-
Infiniti QX50 (2013) — page 389
5-78 Starting and driving pushed again, the system will turn on and the IBA OFF indicator light will turn off. The IBA system will remain in the last ON or OFF state it was left in until it is manually changed by pressing the IBA OFF switch. Illumination of the IBA OFF indicator light without the warning chime sound is an indication that the IBA sy …
-
Infiniti QX50 (2013) — page 390
SSD0336 The AWD warning light is located in the meter. The AWD warning light comes on when the ignition switch is pushed to the ON position. It turns off soon after the engine is started. If any malfunction occurs in the AWD system while the engine is running, the warning light will come on. The warning light may blink rapidly (about twice per seco …
-
Infiniti QX50 (2013) — page 391
5-80 Starting and driving the AWD system. Reduce the vehicle speed and have your vehicle checked by an INFINITI retailer as soon as possible. . If the warning light remains on after the above operation, have your vehicle chec ked by an INFINITI retailer as soon as possible. . The power train may be damaged if you continue driving with the warning l …
-
Infiniti QX50 (2013) — page 392
2. Move the selector lever to the P (Park) position. 3. T o help prevent the vehicle from rolling into the street when parked on a sloping drive way, it is a good practice to turn the wheels as illustrated. . HEADED DOWNHILL WITH CURB: * 1 T urn the wheels into the curb and move the vehicle forward until the curb side wheel gently touches the curb. …
-
Infiniti QX50 (2013) — page 393
5-82 Starting and driving during braking. T o dry brakes, drive the vehicle at a safe speed while lightly tapping the brake pedal to heat-up the brakes. Do this until the brakes return to normal. Avoid driving the vehicle at high speeds until the brakes function correctly. P ARKING BRAKE BREAK -IN Break in the parking brake shoes whenever the stopp …
-
Infiniti QX50 (2013) — page 394
. This system will not operate when the vehicle is moving at approximately 20 MPH (32 km/h) or less. . The pre-pressure function ceases when the following conditions are met: — When the driver depresses the accelerator pedal or the brak e ped- al. — If the driver does not operate the accelerator or brak e pedal within approximately 1 second. SS …
-
Infiniti QX50 (2013) — page 395
5-84 Starting and driving — V ehicle position in the lane may cause the sensor to temporarily not detect a vehicle in the same lane or may detect objects or vehicles in other lanes. SSD0471 Warning light and display When the Preview Function is not operating properly, the buzz er sounds and the system warning light (orange) will come on. Action t …
-
Infiniti QX50 (2013) — page 396
ANTI-L OCK BRAKING SYSTEM (ABS) WARNING . The Anti-lock Braking System (ABS) is a sophisticated device, but it cannot pre- vent accidents resulting from careless or dangerous driving techniques. It can help maintain vehicle control during braking on slippery surfaces. Remember that stopping distances on slippery surfaces will be longer than on norm …
-
Infiniti QX50 (2013) — page 397
5-86 Starting and driving Normal operation The ABS operates at speeds above 3 to 6 MPH (5 to 10 km/h). The speed varies according to road conditions. When the ABS senses that one or more wheels are close to loc king up, the actuator rapidly applies and releases hydraulic pressure. This action is similar to pumping the brakes very quickly . Y ou may …
-
Infiniti QX50 (2013) — page 398
flash. The VDC system is automatically reset to on when the ignition switc h is placed in the off position then back to the on position. See “ V ehicle Dynamic Control (VDC) warn- ing light ” in the “ 2. Instruments and controls ” section and “ V ehicle Dynamic Control (VDC) off indic ator light ” in the “ 2. Instruments and controls …
-
Infiniti QX50 (2013) — page 399
5-88 Starting and driving FREEING A FROZEN DOOR LOCK T o prevent a door loc k from freezing, apply deicer through the key hole. If the lock becomes frozen, heat the key before inserting it into the key hole or use the Intelligent Key system. ANTIFREEZE In the winter when it is anticipated that the outside temperature will drop below 32 8 F (0 8 C), …
-
Infiniti QX50 (2013) — page 400
DRIVING ON SNOW OR ICE WARNING . Wet ic e (32 8 F, 0 8 C and freezing rain), very cold snow or ice can be slick and very hard to drive on. The vehicle will have much less traction or “ grip ” under these conditions. T ry to avoid driving on wet ice until the road is salted or sanded. . Whatever the condition, drive with cau- tion. Accelerate an …
-
Infiniti QX50 (2013) — page 401
5-90 Starting and driving result in a fire or electrical shock and cause serious personal injury. …
-
Infiniti QX50 (2013) — page 402
6 In case of emer gency Hazard warning flasher switc h ……………………….. 6-2 Roadside assistance program ………………………… 6-2 Emergency engine shut off ……………………………. 6-3 Flat tire………………………………………………………. 6-3 Tire Pressure Monitoring System (TPMS) …….. 6-3 Cha …
-
Infiniti QX50 (2013) — page 403
6-2 In case of emergency SIC2574 Push the switch on to warn other drivers when you must stop or park under emergency conditions. All turn signal lights will flash. WARNING . If stopping for an emergency, be sure to move the vehicle well off the road. . Do not use the hazard warning flashers while moving on the highway unless unusual circumstances f …
-
Infiniti QX50 (2013) — page 404
T o shut off the engine in an emergency situation, while driving perform the follow- ing procedure: . Rapidly push the push-button ignition switch 3 cons ecutive times in less than 1.5 sec onds, or . Push and hold the push-button ignition switch for more than 2 seconds. TIRE PRESSURE MONITORING SYS- TEM (TPMS) This vehicle is equipped with the Tire …
-
Infiniti QX50 (2013) — page 405
6-4 In case of emergency cause a malfunction of the tire pr essure sensors. CHANGING A FLA T TIRE If you have a flat tire, follow the instruc- tions below. Stopping the vehicle 1. Safely move the vehicle off the road and away from traffic. 2. Turn on the hazard warning flashers. 3. Park on a level surface and apply the parking brake. Move the selec …
-
Infiniti QX50 (2013) — page 406
SCE0724 Getting the spare tire and tools Raise the luggage room floor cover * 1 using the handle * A , then hang it on the edge of the luggage room opening * 2 using the hook * B . SCE0725 Remove jacking tools and the spare tire located under the luggage room as illu- strated. Jacking up the vehicle and remov- ing the damaged tire WARNING . Never g …
-
Infiniti QX50 (2013) — page 407
6-6 In case of emergency SCE0731 Jack -up point 1. Place the jack directly under the jac k-up point as illustrated so the top of the jack contacts the vehicle at the jack -up point. Align the jack head between the two notches in the front or the rear as shown. Also fit the groove of the jac k head between the notches as shown. The jack should be us …
-
Infiniti QX50 (2013) — page 408
SCE0661 Installing the spare tire The T-type spare tir e is designed for emergency use. (See specific instructions under the heading “ Wheels and tires ” in the “ 8. Maintenance and do-it-yourself ” section.) 1. Clean any mud or dirt from the surface between the wheel and hub. 2. Carefully put the spare tire on and tighten the wheel nuts fi …
-
Infiniti QX50 (2013) — page 409
6-8 In case of emergency . The T-type spare tire and small size spare tire are designed for emergency use. See specific instructions under the heading “ Wheels and tires ” in the “ 8. Maintenance and do-it-yourself ” section. T o start your engine with a booster battery, the instructions and precautions below must be followed. WARNING . If …
-
Infiniti QX50 (2013) — page 410
SCE0734 WARNING Always follow the instructions below. Failure to do so could result in damage to the charg ing system and cause personal injur y. 1. If the booster battery is in another vehicle * A , position the two vehicles ( * A and * B ) to bring their batteries into close proximity to each other . Do not allow the two vehicles to touch. 2. App …
-
Infiniti QX50 (2013) — page 411
6-10 In case of emergency contaminated with corrosive acid. 9. Put the battery cover on. Do not attempt to start the engine by pushing. CAUTION . Automatic transmission models cannot be push-started or tow-started. Attempt- ing to do so may cause transmission damage. . Three way catalyst equipped models should not be started by pushing since the th …
-
Infiniti QX50 (2013) — page 412
speed. 3. If engine overheating is caused by climbing a long hill on a hot day, run the engine at a fast idle (approximately 1,500 rpm) until the temperature gauge indication returns to normal. 4. Get out of the vehicle. Look and listen for steam or coolant escaping from the radiator before opening the hood. (If steam or coolant is escaping, turn o …
-
Infiniti QX50 (2013) — page 413
6-12 In case of emergency used. . Always attach safety c hains before tow- ing. For information about towing your vehicle behind a recreational vehicle (RV), see “ Flat towing ” in the “ 9. T echnic al and consumer information ” section of this manual. SCE0561 Two-wheel drive models TOWING RECOMMENDED BY INFINITI Two-Wheel Drive (2WD) model …
-
Infiniti QX50 (2013) — page 414
SCE0488 All-wheel drive models All-Wheel Drive (AWD) models INFINITI recommends that towing dollies be used when towing your vehicle or the vehicle be placed on a flat bed truck as illustrated. CAUTION Never tow AWD models with any of the wheels on the ground as this may cause serious and expensive damage to the powertrain. SCE0806 In case of emerg …
-
Infiniti QX50 (2013) — page 415
6-14 In case of emergency VEHICLE REC OVERY (freeing a stuck vehicle) WARNING . Stand clear of a stuck vehicle. . Do not spin your tires at high speed. This could cause them to explode and result in serious injury. Parts of your vehicle could also overheat and be damaged. Pulling a stuck vehicle If your vehicle is stuck in sand, snow , mud, etc., u …
-
Infiniti QX50 (2013) — page 416
7 Appearance and c ar e Cleaning exterior …………………………………………. 7-2 Washing …………………………………………………. 7-2 Waxing …………………………………………………… 7-2 Removing spots ……………………………………….. 7-3 Underbody ……………………………. …
-
Infiniti QX50 (2013) — page 417
7-2 Appearance and car e In order to maintain the appearance of your vehicle, it is important to take proper care of it. T o protect the paint surface, wash your vehicle as soon as you can: . after a rainfall to prevent possible damage from acid rain . after driving on coastal roads . when contaminants suc h as soot, bird droppings, tree sap, metal …
-
Infiniti QX50 (2013) — page 418
. Wax your vehicle only after a thorough washing. Follow the instructions sup- plied with the wax. . Do not use a wax containing any abrasives, cutting compounds or clea- ners that may damage the vehicle finish. Machine compo und or aggressive polish- ing on a base coat/clear coat paint finish may dull the finish or leave swirl marks. REMOVING SPO …
-
Infiniti QX50 (2013) — page 419
7-4 Appearance and care ambient temperature. . Rinse the wheel to completely remove the cleaner within 15 minutes after the cleaner is applied. CHROME P ARTS Clean chrome parts regularly with a non- abrasive chrome polish to maintain the finish. TIRE DRESSING INFINITI does not recommend the use of tire dressings. Tire manufacturers apply a coating …
-
Infiniti QX50 (2013) — page 420
CAUTION . Never use benzine, thinner, or any similar material. . Small dirt particles can be abrasive and damaging to the leather surfaces and should be removed promptl y. Do not use saddle soap, car waxes, polishes, oils, cleaning fluids, solvents, detergents or ammonia-based cleaners as they may damage the leather ’ s natural finish. . Only use …
-
Infiniti QX50 (2013) — page 421
7-6 Appearance and care SAI0039 Floor mat positioning aid This model includes front floor mat brack — ets to act as floor mat positioning aid. NISSAN floor mats have been specially designed for your vehicle model. The front floor mats have grommet holes in them. T o install, simply position the mat by placing the floor mat bracket through the floor …
-
Infiniti QX50 (2013) — page 422
MOST C OMMON FACTORS C ONTRI- BUTING TO VEHICLE C ORROSION . The accumulation of moisture-retaining dirt and debris in body panel sections, cavities, and other areas. . Damage to paint and other protective coatings caused by gravel and stone chips or minor traffic accidents. ENVIRONMENT AL FACTORS INFLU- ENCE THE RA TE OF C ORROSION Moisture Accumu …
-
Infiniti QX50 (2013) — page 423
7-8 Appearance and care MEMO …
-
Infiniti QX50 (2013) — page 424
8 Maintenanc e and do-it-y ourself Maintenance requirement ……………………………… 8-2 Scheduled maintenance ……………………………. 8-2 General maintenance………………………………… 8-2 Where to go for service …………………………….. 8-2 General maintenance …………………………………… …
-
Infiniti QX50 (2013) — page 425
8-2 Maintenanc e and do-it-yourself Some day-to-day and regular maintenance is essential to maintain your INFINITI ’ s fine mechanic al condition, as well as its emis- sion and engine performance. It is the owner ’ s responsibility to make sure that the scheduled maintenance , as well as general maintenance, is performed. As the vehicle owner, …
-
Infiniti QX50 (2013) — page 426
is released. When driving in areas using road salt or other corrosive materials, check lubrica tion frequently. Lights*: Clean the headlights on a regular basis. Make sure that the headlights, stop lights, tail lights, turn signal lights, and other lights are all operating properly and installed securely. Also c heck headlight aim. Road wheel nuts …
-
Infiniti QX50 (2013) — page 427
8-4 Maintenanc e and do-it-yourself seat adjusters, seatback recliner, etc. to ensure they operate smoothly and that all latches loc k securely in every position. Check that the head restraint/headrest moves up and down smoothly and that the locks (if so equipped) hold securely in all latched positions. Steering wheel: Check for c hanges in the ste …
-
Infiniti QX50 (2013) — page 428
those used on icy roads or to control dust. It is very important to remove these substances, otherwise rust will form on the floor pan, frame, fuel lines and around the exhaust system. At the end of winter, the underbody should be thoroughly flushed with plain water, being careful to clean those areas where mud and dirt may accumulate. For addition …
-
Infiniti QX50 (2013) — page 429
8-6 Maintenanc e and do-it-yourself are under high pressur e even when the engine is off. CAUTION . Do not work under the hood while the engine is hot. T urn the engine off and wait until it cools down. . Avoid direct contact with used engine oil and coolant. Improperly disposed engine oil, coolant, and/or other vehicle fluids can damage the enviro …
-
Infiniti QX50 (2013) — page 430
SSI0388 VQ37VHR ENGINE 1. Fuse/fusible link holder 2. Battery 3. Radiator filler cap 4. Engine oil dipstick 5. Engine oil filler cap 6. Brake fluid reservoir 7. Window washer fluid reservoir 8. Power steering fluid reservoir 9. Air cleaner 10. Drive belts 11. Engine coolant reservoir Maintenanc e and do-it-yourself 8-7 ENGINE C OMP ARTMENT CHECK L …
-
Infiniti QX50 (2013) — page 431
8-8 Maintenanc e and do-it-yourself The engine cooling system is filled at the factory with a pre-diluted mixture of 50% Genuine NISSAN Long Life Antifreeze/C ool- ant (blue) and 50% water to provide year- round anti-freeze and coolant protection. The antifreeze solution contains rust and corrosion inhibitors. Additional engine cooling system addit …
-
Infiniti QX50 (2013) — page 432
SDI2198 CHECKING ENGINE COOLANT LEVEL Check the coolant level in the reservoir when the engine is cold. If the coolant level is below MIN * 2 , open the reservoir tank cap and add coolant up to the MAX * 1 level. If the reservoir tank is empty, chec k the coolant level in the radiator when the engine is cold. If there is insufficient coolant in the …
-
Infiniti QX50 (2013) — page 433
8-10 Maintenanc e and do-it-yourself SDI2045 CHECKING ENGINE OIL LEVEL 1. Park the vehicle on a level surface and apply the parking brake. 2. Run the engine until it reaches operat- ing temperature. 3. Turn off the engine. Wait more than 15 minutes for the oil to drain back into the oil pan. 4. Remove the dipstick and wipe it clean. Reinsert it all …
-
Infiniti QX50 (2013) — page 434
SDI2335 Two-wheel drive (2WD) models SDI2047 All-wheel drive (AWD) models Engine oil and filter 1. Place a large drain pan under the drain plug. 2. Remove the oil filler cap. 3. Remove the drain plug * 1 with a wrench and completely drain the oil. CAUTION Be careful not to burn yourself, as the engine oil is hot. . Waste oil must be disposed of pro …
-
Infiniti QX50 (2013) — page 435
8-12 Maintenanc e and do-it-yourself ways use the dipstick to determine the proper amount of oil in the engine. 10. Start the engine and check for leakage around the drain plug and the oil filter. Correct as required. 11. Turn the engine off and wait more than 15 minutes. Chec k the oil level with the dipstic k. Add engine oil if necessary. After t …
-
Infiniti QX50 (2013) — page 436
SDI1765A Check the fluid level in the reservoir. The fluid level should be checked using the HOT range ( * 1 : HOT MAX., * 2 : HOT MIN.) at fluid temperatures of 122 to 176 8 F (50 to 80 8 C) or using the C OLD range ( * 3 : C OLD MAX., * 4 : C OLD MIN.) at fluid temperatures of 32 to 86 8 F( 0t o3 0 8 C). If the fluid is below the MIN line, add Ge …
-
Infiniti QX50 (2013) — page 437
8-14 Maintenanc e and do-it-yourself SDI2025 Check the fluid level in the reservoir. If the fluid is below the MIN line * 2 or the brake warning light comes on, add Genuine NISSAN Super Heavy Duty Brak e Fluid or equivalent DOT 3 fluid up to the MAX line * 1 . If fluid must be added frequently, the system should be chec ked by an INFINITI retailer. …
-
Infiniti QX50 (2013) — page 438
into the window washer reservoir tank. Do not use the window washer reservoir tank to mix the washer fluid concentrate and water. . Keep the battery surface clean and dry . Clean the battery with a solution of baking soda and water. . Make certain the terminal co nnections are clean and securely tightened. . If the vehicle is not to be used for 30 …
-
Infiniti QX50 (2013) — page 439
8-16 Maintenanc e and do-it-yourself DI0137MA Check the fluid level in eac h cell (Remove the battery cover if it is necessary). It should be between the UPPER LEVEL * 1 and LOWER LEVEL * 2 lines. If it is necessary to add fluid, add only distilled water to bring the level to the indicator in each filler opening. Do not overfill. SDI1480C 1. Remove …
-
Infiniti QX50 (2013) — page 440
CAUTION . Do not ground acc essories directly to the battery terminal. Doing so will bypass the variable voltage control system and the vehicle battery may not charge completely . . Use electrical accessories with the en- gine running to avoid discharging the vehicle battery. The variable voltage control system mea- sures the amount of electrical d …
-
Infiniti QX50 (2013) — page 441
8-18 Maintenanc e and do-it-yourself WARNING Be sure the engine and the ignition switch are off and that the parking brake is engaged securely. CAUTION Be sure to use the correct soc ket to remove the spark plugs. An incorrect sock et can damage the spark plugs. SDI2020 REPLACING SPARK PLUGS If replacement is required, see an INFINITI retailer for …
-
Infiniti QX50 (2013) — page 442
SDI2033 Remove the retainers * 1 as illustrated and pull out the filter element * 2 . The filter element should not be cleaned and reused. Replace it according to the maintenance intervals. See “ INFINITI Ser- vice and Maintenance Guide ” for mainte- nance intervals. When replacing the filter, wipe the inside of the air cleaner housing and the …
-
Infiniti QX50 (2013) — page 443
8-20 Maintenanc e and do-it-yourself CLEANING If your windshield is not clear after using the windshield washer or if a wiper blade chatters when running, wax or other material may be on the blade or wind- shield. Clean the outside of the windshield with a washer solution or a mild detergent. Y our windshield is clean if beads do not form when rins …
-
Infiniti QX50 (2013) — page 444
SDI2362 If you wax the surface of the hood, be careful not to let wax get into the washer nozzle * A . This may cause clogging or improper windshield washer operation. If wax gets into the nozzle, remove it with a needle or small pin * B . Be careful not to damage the nozzle. Contact an INFINITI retailer if chec king or replacement is required. If …
-
Infiniti QX50 (2013) — page 445
8-22 Maintenanc e and do-it-yourself occasional brake squeak, squeal or other noise may be heard. Oc casional brake noise during light to moderate stops is normal and does not affect the function or performance of the brake system. Proper brake inspection intervals should be followed. For additional information, see the maintenance log section of y …
-
Infiniti QX50 (2013) — page 446
SDI1754 4. If the fuse is open * A , replace it with a new fuse * B . Spare fuses are stored in the passenger compartment fuse box. 5. If a new fuse also opens, have the electrical system c hecked and repaired by an INFINITI retailer. Fusible links If any electrical equipment does not operate and fuses are in good condition, chec k the fusible link …
-
Infiniti QX50 (2013) — page 447
8-24 Maintenanc e and do-it-yourself SDI2704 Extended storage switch T o reduce battery drain, the extended storage switch com es from the factory switched off . Prior to delivery of your vehicle, the switch is pushed in (switc hed on) and should always remain on. If any electrical equipment does not operate, remove the extended storage switch and …
-
Infiniti QX50 (2013) — page 448
SPA1875 Replace the battery as follows: 1. Release the lock knob at the back of the Intelligent Key and remove the mechan- ical key . 2 . Insert a flat-blade screwdriver * A wrapped with a cloth into the slit * B of the corner and twist it to separate the upper part from the lower part. SDI2285 3. Replace the battery with a new one. Recommended bat …
-
Infiniti QX50 (2013) — page 449
8-26 Maintenanc e and do-it-yourself SDI2192 1. Front parking light 2. Headlight (high-beam) 3. Headlight (low-beam) 4. Map light 5. Rear personal light 6. Fog light 7. Front turn signal light 8. Front side marker light 9. Puddle light 10. Step light 11. High-mounted stop light 12. Back -up light 13. Rear combination light (tail/stop/side marker li …
-
Infiniti QX50 (2013) — page 450
HEADLIGHTS Replacing Fog may temporarily form inside the lens of the exterior lights in the rain or in a car wash. A temperature difference between the inside and the outside of the lens causes the fog. This is not a malfunction. If large drops of water collect inside the lens, contact an INFINITI retailer. Xenon headlight bulb (if so equipped): If …
-
Infiniti QX50 (2013) — page 451
8-28 Maintenanc e and do-it-yourself EXTERIOR AND INTERIOR LIGHTS Item Wattage (W) Bulb No. Headlight* low beams (Xenon) 35 D2S low beams (Halogen) 55 H11 high beams (Halogen) 65 H9 Front turn signal light* 21 WY21W Fog light* 35 H8 Parking light* 5 W5W Front side marker light* 5 W5W Rear combination light* reverse 16 W16W stop/tail/side marker LED …
-
Infiniti QX50 (2013) — page 452
Replacement procedures All other lights are either type A, B, C, D, E or F . When replacing a bulb, first remove the lens and/or cover. SDI1679 SDI2030 Map light SDI2031 Rear personal light Maintenanc e and do-it-yourself 8-29 …
-
Infiniti QX50 (2013) — page 453
8-30 Maintenanc e and do-it-yourself SDI1500B Cargo light SDI1839 V anity mirror light If you have a flat tire, see “ Flat tire ” in the “ 6. In case of emergency ” section. TIRE PRESSURE Tire Pressure Monitoring System (TPMS) This vehicle is equipped with the Tire Pressure Monitoring System (TPMS). It monitors tire pressure of all tires ex …
-
Infiniti QX50 (2013) — page 454
Incorrect tire pre ssure, including under inflation, may adversely affect tire life and vehicle handling. WARNING . Improperly inflated tires can fail suddenly and cause an accident. . The Gross V ehicle Weight rating (GVWR) is located on the F .M. V .S. S./C.M. V .S.S. certification label. The vehicle weight capacity is indicated on the Tire and L …
-
Infiniti QX50 (2013) — page 455
8-32 Maintenanc e and do-it-yourself SDI2703 Tire and Loading Information label * 1 Seating capacity: The maximum number of occupants that can be seated in the vehicle. * 2 V ehicle load limit: See “ V ehicle loading information ” in the “ 9. T ec hnical and consumer informa- tion ” section. * 3 Original size: The size of the tires original …
-
Infiniti QX50 (2013) — page 456
SDI1949 Checking the tire pressure 1. Remove the valve stem cap from the tire. 2. Press the pressure gauge squarely onto the valve stem. Do not press too hard or force the valve stem sideways, or air will escape. If the hissing sound of air escaping from the tire is heard while chec king the pressure, re- position the gauge to eliminate this leakag …
-
Infiniti QX50 (2013) — page 457
8-34 Maintenanc e and do-it-yourself SDI1575 Example TIRE LABELING Federal law requires tire manufac- turers to place standardized informa- tion on the sidewall of all tires. This information identifies and describes the fundamental characteristics of the tire and also provides the tire identification number (TIN) for safety standard certification. …
-
Infiniti QX50 (2013) — page 458
SDI1607 Example * 2 TIN (Tire Identification Number) for a new tire (example: DOT XX XX XXX XXXX) 1. DOT: Abbreviation for the “ Depart- ment of Transportation ” . The sym- bol can be placed above, below or to the left or right of the Tire Identification Number. 2. Two-digit c ode: Manufacturer ’ s identification mark 3. Two-digit code: Tire …
-
Infiniti QX50 (2013) — page 459
8-36 Maintenanc e and do-it-yourself bears white lettering or bears manu- facturer, brand and/or model name molding that is higher or deeper than the same molding on the other side- wall of the tire, or (2) the outward facing sidewall of an asymmetrical tire that has a particular side that must always face outward when mounted on a vehicle. TYPES O …
-
Infiniti QX50 (2013) — page 460
TIRE CHAINS Use of tire chains may be prohibited according to location. Check the local laws before installing tire chains. When instal- ling tire chains, make sure they are the proper size for the tires on your vehicle and are installed according to the chain man- ufacturer ’ s suggestions. Use only SAE Class S chains. Class “ S ” c hains ar …
-
Infiniti QX50 (2013) — page 461
8-38 Maintenanc e and do-it-yourself The wheel nuts must be kept tigh- tened to the specification at all times. It is recommended that wheel nuts be tightened to the specific a- tion at eac h tire rotation interval. WARNING . After rotating the tires, check and adjust the tire pressure. . Retighten the wheel nuts when the vehicle has been driven fo …
-
Infiniti QX50 (2013) — page 462
Replacing wheels and tires When replacing a tire, use the same size, tread design, speed rating and load carry- ing capacity as originally equipped. (See “ Specifications ” in the “ 9. T ec hnical and consumer information ” section for recom- mended types and siz es of tires and wheels.) WARNING . The use of tires other than those recommend …
-
Infiniti QX50 (2013) — page 463
8-40 Maintenanc e and do-it-yourself If excessive tire wear is found, it is recommended that all four tires be re- placed with tires of the same size, brand, construction and tread pattern. The tire pressure and wheel alignment should also be chec ked and co rrected as necessary . Contact an INFINITI retailer. Wheel balance Unbalanced wheels may af …
-
Infiniti QX50 (2013) — page 464
. Because the TEMPORARY USE ONL Y spare tire is smaller than the original tire, ground clearance is reduced. T o avoid damage to the vehicle, do not drive over obstacles. Also do not drive the vehicle through an automatic car wash since it may get caught. Maintenanc e and do-it-yourself 8-41 …
-
Infiniti QX50 (2013) — page 465
8-42 Maintenanc e and do-it-yourself MEMO …
-
Infiniti QX50 (2013) — page 466
9 T ec hnic al and c onsumer information Capacities and recommended fuel/lubricants……. 9-2 Fuel recommendation ……………………………….. 9-3 Engine oil and oil filter recommendation ……… 9-5 Air conditioning system refrigerant and lubricant recommendations ……………………….. 9-6 Specifications …………………. …
-
Infiniti QX50 (2013) — page 467
9-2 T echnical and consumer information The following are approximat e capacities. The actual refill capacities may be a little differ ent. When refilling, follow the pro cedure instructed in the “ 8. Maintenance and do-it-y ourself ” section to determine the proper ref ill capacity. Capacity (Approximate) Rec ommended specifications US measure …
-
Infiniti QX50 (2013) — page 468
FUEL REC OMMENDA TION Use unleaded premium gasoline with an octane rating of at least 91 AKI (Anti-Knoc k Index) number (Research octane number 96). If premium gasoline is not available, unleaded regular gasoline with an octane rating of 87 AKI number (Researc h octane number 91) may be temporarily used, but only under the following precautions: . …
-
Infiniti QX50 (2013) — page 469
9-4 T echnical and consumer information 15%.) . E-15 fuel contains more than 10% oxygenate. E-15 fuel will adversely affect the emission control devic es and systems of the vehicle and should not be used. Damage caused by such fuel is not covered by the INFINITI new vehicle limited warranty . . If a methanol blend is used, it should contain no more …
-
Infiniti QX50 (2013) — page 470
above symptoms are encountered, have your vehicle check ed at an INFINITI retailer or other competent service facility. However, now and then you may notice light spark knock for a short time while accelerating or driving up hills. This is no cause for concer n, because you get the greatest fuel benefit when there is light spark knock for a short t …
-
Infiniti QX50 (2013) — page 471
9-6 T echnical and consumer information Oil which may contain foreign matter or has been previously used should not be used. Oil viscosity The engine oil viscosity or thickness changes with temperature. Because of this, it is important that the engine oil viscosity be selected based on the temperatures at which the vehicle will be operated before t …
-
Infiniti QX50 (2013) — page 472
ENGINE Model VQ37VHR Type Gasoline, 4-cycle Cylinder arrangement 6-cylinder, V-slanted at 60 8 Bore 6 Stroke in (mm) 3.760 6 3. 385 (95.5 6 86.0) Displacement cu in (cm 3 ) 225. 54 (3,696) Firing order 1-2-3-4-5-6 Idle speed rpm No adjustment is necessary. Ignition timing (B. T .D. C.) degree/rpm Spark plug Standard FXE24HR-11 Spark plug gap (Norma …
-
Infiniti QX50 (2013) — page 473
9-8 T echnical and consumer information WHEELS AND TIRES Road wheel Type Size Offset in (mm) Conventional 18 6 8J 1.85 (47) 19 6 8J Spare 17 6 4T 1.18 (30) Tire Type Size Pressure PSI (kPa) [Cold] Conventional P225/55R18 33 (230) P245/45R19 Spare (T-type) T165/80R17 60 (420) T165/80D17 …
-
Infiniti QX50 (2013) — page 474
DIMENSIONS Overall length (with front license plate) in (mm) 182.5 (4,636) Overall width in (mm) 71.0 (1,803) Overall height (without roof rack) in (mm) 62.1 (1,577)*1*3 62.1 (1,578)*4 62.2 (1,579)*2 (with roof rack) 63.0 (1,599)*1 63.0 (1,601)*2 62. 9 (1,598)*3 63.0 (1,600)*4 Front tread in (mm) 60.4 (1,535)*1*2 60.6 (1,540)*3*4 Rear tread in (mm) …
-
Infiniti QX50 (2013) — page 475
9-10 T echnical and consumer information If you plan to travel in another country , you should first find out if the fuel available is suitable for your vehicle ’ s engine. Using fuel with too low an octane rating may cause engine damage. All gasoline vehicles must be operated with unleaded gasoline. Therefore, avoid taking your vehicle to areas …
-
Infiniti QX50 (2013) — page 476
STI0509 ENGINE SERIAL NUMBER The number is stamped on the engine as shown. STI0493 F .M. V .S.S./C.M. V .S.S. CERTIFICA- TION LABEL The Federal/Canadian Motor V ehicle Safety Standards (F .M. V .S.S./C.M. V .S.S.) certifica- tion label is affixed as shown. This label contains valuable vehicle information, such as: Gross V ehicle Weight Ratings (GVW …
-
Infiniti QX50 (2013) — page 477
9-12 T echnical and consumer information STI0567 TIRE AND LOADING INFORMA TION LABEL The cold tire pressure is shown on the Tire and Loading Information label affixed to the pillar as illustrated. STI0495 AIR C ONDITIONER SPECIFICA TION LABEL The air conditioner specification label is attached as shown. …
-
Infiniti QX50 (2013) — page 478
STI0569 Use the following steps to mount the license plate. Before mounting the license plate, confi rm that the following parts are enclosed in the plastic bag. . License plate brac ket . J-nut 6 2 . Screw 6 2 . Screw grommet 6 2 Only use the recommended mounting position, otherwise an Intelligent Cruise Control (IC C) sensor obstruction (if so eq …
-
Infiniti QX50 (2013) — page 479
9-14 T echnical and consumer information 6. Insert a flat-blade screwdriver into the grommet hole to add 90 8 turn onto the part * E . 7. Insert a J-nut into the license plate bracket before placing the license plate bracket on the fascia. 8. Install the license plate bracket with screws. 9. Install the license plate with bolts that are no longer t …
-
Infiniti QX50 (2013) — page 480
of the load (passengers and ca r- go) for the vehicle. This is the maximum combined weight of occupants and c argo that can be loaded into the vehicle. If the vehicle is used to tow a trailer, the trailer tongue weight must be included as part of the cargo load. This information is located on the Tire and Loading Information la- bel. . Cargo capaci …
-
Infiniti QX50 (2013) — page 481
9-16 T echnical and consumer information 3. Subtract the combined weight of the driver and passengers from XXX kg or XXX lbs. 4. The resulting figure equals the available amount of cargo and luggage load capacity . For exam- ple, if the XXX amount equals 1400 lbs. and there will be five 150 lb. passengers in your vehi- cle, the amount of available …
-
Infiniti QX50 (2013) — page 482
MEASUREMENT OF WEIGHTS Secure loose items to prevent weight shifts that could affect the balance of your vehicle. When the vehicle is loaded, drive to a scale and weigh the front and the rear wheels sepa- rately to determine axle loads. In- dividual axle loads should not exceed either of the gross axle weight ratings (GAWR). The total of the axle l …
-
Infiniti QX50 (2013) — page 483
9-18 T echnical and consumer information DOT (Department Of T ransportation) Qual- ity Grades: All passenger car tires must conform to federal safety requirements in addition to these grades. Quality grades can be found where applic- able on the tire sidewall between tread shoulder and maximum section width. For example: T readwear 200 T raction AA …
-
Infiniti QX50 (2013) — page 484
Y our INFINITI is cov ered by the following emission warranties. For USA: . Emission Defects Warranty . Emissions Performance W arranty Details of these warranties may be found with other vehicle warranties in your Warranty Information Bookl et that comes with your INFINITI. If you did not receive a Warranty Information Booklet , or it has become l …
-
Infiniti QX50 (2013) — page 485
9-20 T echnical and consumer inform ation www.saferc ar.gov . Y ou may notify INFINITI by contacting our Consumer Affa irs Department, toll-free, at 1-800-662-6200. For Canada If you believe that your vehicle has a defect which c ould cause a crash or could cause injury or death, you should immediately inform Transport Canada in addition to notifyi …
-
Infiniti QX50 (2013) — page 486
condition ” . Before taking the I/M test, chec k the vehicle ’ s inspection/mainte- nance test readiness condition. Place the ignition switch in the ON position without starting the engine. If the Malfunction Indicator Light (MIL) comes on steady for 20 seconds and then blinks for 10 seconds, the I/M test condition is “ not ready ” . If the …
-
Infiniti QX50 (2013) — page 487
9-22 T echnical and consumer inform ation Genuine INFINITI Service Manual for this model and prior models can be purc hased. A genuine INFINITI Service Manual is the best source of service and repair informa- tion for your vehicle. This manual is the same one used by the factory trained technicians working at an INFINITI retailer. Genuine INFINITI …
-
Infiniti QX50 (2013) — page 488
10 Index A ABS (Anti-lock Braking System) ……………………. 5-85 Adaptive front lighting system (AFS) ……………… 2-37 Advanced air bag system ……………………………. 1-42 Aiming control, Adaptive front lighting system (AFS) …………………………………………….. 2-37 Air bag system Advanced air bag system . …
-
Infiniti QX50 (2013) — page 489
10-2 Cargo cover…………………………………….. ……….. 2-50 Cargo light ……………………………………………….. 2-59 Catalytic converter, Three way catalyst ……………. 5-3 CD/CF/USB memory care and cleaning …………. 4-89 Center multi-function control panel ………………… 4-3 Child restraints …. …
-
Infiniti QX50 (2013) — page 490
Event Data Recorders (EDR) …………………………. 9-21 Exhaust gas (carbon monoxide) …………………….. 5-3 F F .M. V .S.S./C.M. V .S.S. certification label …………. 9-11 Filter Air cleaner housing filter ………………………… 8-19 Changing engine oil and filter …………………. 8-10 Flashers (See hazard warning …
-
Infiniti QX50 (2013) — page 491
10-4 Lights …………………………………………………. 2-16 INFINITI V ehicle Immobilizer System ……………… 2-30 INFINITI voice recognition system ……………….. 4-118 INFO button ……………………………………………… 4-10 Inside mirror …………………………………………….. 3-23 Inspect …
-
Infiniti QX50 (2013) — page 492
Low tire pressure warning system (See tire pressure monitoring system (TPMS)) ………………. 5-4 Low washer fluid warning …………………………… 2-23 Luggage hooks …………………………………………. 2-49 M Maintenance Battery …………………………………… …………… 8-15 General maintenance ……… …
-
Infiniti QX50 (2013) — page 493
10-6 Preview Function warning light …………………….. 2-15 Push starting ……………………………………………. 6-10 “ PUSH ” warning ……………………………………….. 2-22 Push-button ignition switch ………………….. 5-9, 5-10 R Radio ………………………………………………………. 4 …
-
Infiniti QX50 (2013) — page 494
Storage ……………………………………………………. 2-45 Sun visors ……………………………………………….. 3-22 Sunglasses holder …………………………………….. 2-46 Supplemental air bag warning labels ……………. 1-50 Supplemental air bag warning light ……… 1-50, 2-15 Supplemental restrai …
-
Infiniti QX50 (2013) — page 495
10-8 V oice command (Bluetooth ® Hands-Free Phone System) ………………………………… ……… 4-110 V oice command (INFINITI voice recognition system) ……………………….. 4-125, 4-134 V oice recognition system ………………………….. 4-118 V oice recognition, Alternate command mode … 4-131 V oice recognition, Sta …
-
Infiniti QX50 (2013) — page 496
MEMO 10-9 …
-
Infiniti QX50 (2013) — page 497
FUEL REC OMMENDA TION: Use unleaded premium gasoline with an octane rating of at least 91 AKI (Anti-Knoc k Index) number (Research octane number 96). If premium gasoline is not available, unleaded regular gasoline with an octane rating of 87 AKI number (Researc h octane number 91) may be temporarily used, but only under the following precautions: . …
-
Infiniti QX50 (2013) — page 498
2013 Infiniti EX Owner’s M anual Printing: July 2012 (14) / OM3E 0J50U0 / Print ed in U.S.A. For y our safety , read carefu lly and k eep in this vehicle. 2013 Infiniti EX 1184806 EX OM EN.indd 1 6/26/12 7:44 AM …
Видеообзоры и инструкции
Инструкция INFINITI QX50 2020
Major Auto
Видеообзоры и инструкции
Инструкция INFINITI QX50 2020
18 февраля 2020
Получить консультацию, резервировать online, записаться на тест-драйв 7 (495) 153-51-63
Вы спрашивали мы отвечаем. В видеоинструкции мы постарались ответить на часто задаваемые вопросы владельцев INFINITI QX50.
С любовью, ваш Major Auto
Подробности в салоне:
15 отзывов
Major Auto INFINITI
г. Москва, Новорижское ш. 9 км от МКАД
+7 (495) 186-19-55
Заказать звонок
Записаться на визит в отдел продаж
Официальный дилер Инфинити
Смотрите также:

Hyundai Tucson 2020 масс маркет с премиальным оснащением! Подробно о главном
14 февраля 2020
Инновации, стиль, особенности в конструкции кузова, премиальные фишки всё это Hyundai Tucson

Skoda Karoq 2020 премиальный характер! Подробно о главном
14 февраля 2020
Молодой, хитрый, инновационно-современный, впитавший лучшее от старших братьев — всё это Skoda Karoq

Opel Zafira Life 2020 лучшая трансформация салона! Подробно о главном
11 февраля 2020
Вместительный, технологичный, трансформация на не достижимом уровне всё это Opel Zafira Life

Suzuki Vitara Видеоинструкция
9 февраля 2020
Вы спрашивали мы отвечаем. В видеоинструкции мы постарались ответить на часто задаваемые вопросы владельцев Suzuki Vitara.

Subaru Forester Видеоинструкция
8 февраля 2020
Вы спрашивали мы отвечаем. В видеоинструкции мы постарались ответить на часто задаваемые вопросы владельцев Subaru Forester.

INFINITI QX50 самый вместительный в классе!? Подробно о главном
6 февраля 2020
INFINITI QX50 — автомобиль яркий, вместительный, инновационный, мощный, технологичный и просто классный. После просмотра обзора вы найдете ответы, которые не могли найти раньше.

Subaru Forester чистокровный японский лесник! Подробно о главном
6 февраля 2020
Посмотрите и узнаете, насколько SUBARU FORESTER подходит именно вам. В обзоре мы постарались ответить на часто задаваемые вопросы наших покупателей.

Suzuki Vitara 2020 — живи игрой!? Подробно о главном
6 февраля 2020
Посмотрите и узнаете, насколько Suzuki Vitara подходит именно вам. В обзоре мы постарались ответить на часто задаваемые вопросы наших покупателей.

Видеоинструкция УАЗ ПАТРИОТ 2019
1 февраля 2020
Вы спрашивали мы отвечаем. В видеоинструкции мы постарались ответить на часто задаваемые вопросы владельцев УАЗ ПАТРИОТ.

Видеоинструкция VW Teramont 2019
1 февраля 2020
В этом видео вы найдёте ответы на многие вопросы, что появлялись у вас в процессе эксплуатации автомобиля.
Поддержка региональных клиентов технической информацией по Infiniti.
«Инфинити Партс» обладает множеством информации о ремонте, обслуживании, эксплуатации и тюнинге Infiniti . Это не только официальные источники, которые предоставляет Infiniti, но и накопленный опыт наших механиков.
Однако мы убеждены, что в неумелых руках эта информация может нанести большой вред и повлечь за собой лишние траты. По этой причине мы не продаем диски и не распространяем полную информацию такого характера.
Руководство по ремонту и пользовательская инструкция Infiniti
Техническое и общее описание автомобилей Infiniti существует в двух видах:
- для владельца автомобиля – инструкция пользователя (Owner’s manual Infiniti);
- для дилеров Infiniti, специализированных автосервисов – руководство по обслуживанию и ремонту (Service manual Infiniti).
Инструкция по использованию выпускается в виде книги и прилагается к автомобилю. Информация в ней направлена на обеспечение правильной безопасной эксплуатации. В книге содержатся основные сведения об автомобиле Infiniti и правила пользования всеми устройствами в нем.
Руководство по ремонту Инфинити существует на электронном носителе – диске на английском языке. Официально такой диск распространяется среди дилеров Infiniti, он не подлежит продаже и может быть куплен лишь неофициально в интернет-магазинах.
Обращайтесь за помощью в сервис «Инфинити Партс»
Мы понимаем, что дилеры Infiniti не во всех случаях находятся рядом, когда нужна помощь и информационная поддержка. Поэтому готовы поделиться информацией совершенно бесплатно. Однако мы не распространяем полные руководства и инструкции по описанным выше причинам.
Если Вы наш клиент и Вам необходима помощь, мы отправим требующиеся для диагностики, починки или тюнинга пункты Руководства по ремонту Infiniti. Инфинити Партс охотно делится накопленным опытом с покупателями из других городов и регионов России. Чтобы получить полный ответ, отправляйте свои вопросы на наш e-mail адрес: info@infiniti-parts.ru.
Наши специалисты подробно разберутся в проблеме и используют для ответа не только соответствующую литературу, но и профессиональный опыт, навыки, приобретенные за годы работы.
Следующие наши статьи подробно расскажут об особенностях ремонта и обслуживании Infiniti.