

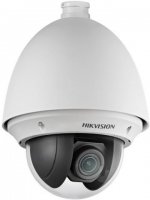
DS-2DE4225W-DE (B)
2MP 25× Network Speed Dome
Hikvision DS-2DE4225W-DE (B) 2MP 25× Network Speed Dome adopts 1/2.8″ progressive scan CMOS chip. With the 25× optical zoom lens, the camera offers more details over expansive areas.
This series of cameras can be widely used for wide ranges of high-definition, such as the rivers, roads, railways, airports, squares, parks, scenic spots, and venues, etc.
Key Features
1/2.8″ progressive scan CMOS
Up to 1920 × 1080@30fps resolution
Min. illumination:
Color: 0.005 Lux @(F1.6, AGC ON) B/W: 0.001 Lux @(F1.6, AGC ON)
25× optical zoom, 16× digital zoom
WDR, HLC, BLC, 3D DNR, Defog, EIS, Regional Exposure, Regional Focus
12 VDC & PoE (802.3 at, class4)
Support H.265+/H.265 video compression

|
Specification |
||
|
Camera Module |
||
|
Image Sensor |
1/2.8″ progressive scan CMOS |
|
|
Min. Illumination |
Color: 0.005 Lux @(F1.6, AGC ON) |
|
|
B/W: 0.001Lux @(F1.6, AGC ON) |
||
|
White Balance |
Auto/Manual/ATW (Auto-tracking White Balance)/Indoor/Outdoor/Fluorescent |
|
|
Lamp/Sodium Lamp |
||
|
Gain |
Auto/Manual |
|
|
Shutter Time |
50Hz: 1/1 s to 1/30,000 s |
|
|
60Hz: 1/1 s to 1/30,000 s |
||
|
Day & Night |
IR Cut Filter |
|
|
Digital Zoom |
16× |
|
|
Privacy Mask |
24 programmable privacy masks, mask color configurable |
|
|
Focus Mode |
Auto/Semi-automatic/Manual |
|
|
WDR |
120 dB WDR |
|
|
Lens |
||
|
Focal Length |
4.8 mm to 120 mm, 25× optical zoom |
|
|
Zoom Speed |
Approx. 3.6 s (optical lens, wide-tele) |
|
|
Horizontal field of view: 57.6° to 2.5° (Wide-Tele) |
||
|
Field of View |
Vertical field of view: 34.4° to 1.4° (Wide-Tele) |
|
|
Diagonal field of view: 64.5° to 2.9° (Wide-Tele) |
||
|
Working Distance |
10 mm to 1500 mm (wide-tele) |
|
|
Aperture Range |
F1.6 to F3.5 |
|
|
PTZ |
||
|
Movement Range (Pan) |
360° endless |
|
|
Pan Speed |
Configurable, from 0.1°/s to 160°/s, |
|
|
Preset speed: 160°/s |
||
|
Movement Range (Tilt) |
From 0° to 90°(auto-flip) |
|
|
Tilt Speed |
Configurable, from 0.1°/s to 120°/s |
|
|
Preset Speed: 120°/s |
||
|
Proportional Zoom |
Yes |
|
|
Presets |
300 |
|
|
Patrol Scan |
8 patrols, up to 32 presets for each patrol |
|
|
Pattern Scan |
4 pattern scans, record time over 10 minutes for each scan |
|
|
Power-off Memory |
Yes |
|
|
Park Action |
Preset/Pattern Scan/Patrol Scan/Auto Scan/Tilt Scan/Random Scan/Frame Scan/Panorama |
|
|
Scan |
||
|
3D Positioning |
Yes |
|
|
PTZ Position Display |
Yes |
|
|
Preset Freezing |
Yes |
|
|
Scheduled Task |
Preset/Pattern Scan/Patrol Scan/Auto Scan/Tilt Scan/Random Scan/Frame Scan/Panorama |
|
|
Scan/Dome Reboot/Dome Adjust/Aux Output |
||
|
Compression Standard |
||
|
Main Stream: H.265+/H.265/H.264+/H.264 |
||
|
Video Compression |
Sub-stream: H.265/H.264/MJPEG |
|
|
Third Stream: H.265/H.264/MJPEG |
||
|
H.264 Type |
Baseline Profile/Main Profile/High Profile |
|
|
H.264+ |
Yes |
|
|
H.265 Type |
Main Profile |
|
|
H.265+ |
Yes |
|
|
Video Bitrate |
32 Kbps to 16384 Kbps |
 Loading…
You can only view or download manuals with
Sign Up and get 5 for free
Upload your files to the site. You get 1 for each file you add
Get 1 for every time someone downloads your manual
Buy as many as you need
|
Код: 125907 Извините, товара сейчас нет в наличии
Бесплатная доставка
Извините, товара сейчас нет в наличии Сравнить Новости интернет-магазина «Лаукар»:28.03.2023 22.02.2023 13.02.2023 Дополнительная информация в категории Камера видеонаблюдения:Таблица Авторизованных сервисных центров по брендам. Описание Инструкция Отзывы (0) В интернет-магазине бытовой техники «Лаукар» Вы можете скачать инструкцию к товару Камера видеонаблюдения Hikvision DS-2DE4225W-DE совершенно бесплатно. Все инструкции, представленные на сайте интернет-магазина бытовой техники «Лаукар», предоставляются производителем товара. Для того чтобы скачать инструкцию, Вам необходимо нажать на ссылку «скачать инструкцию», расположенную ниже, а в случае, если ссылки нет, Скачать инструкцию Смотреть инструкцию
Фирма-производитель оставляет за собой право на внесение изменений в конструкцию, дизайн и комплектацию товара: Камера видеонаблюдения Hikvision DS-2DE4225W-DE. Пожалуйста, сверяйте информацию о товаре с информацией на |


Download or browse on-line these Operation & User’s Manual for HIKVISION DS-2DE4225W-DE Security Camera.
Summary of Contents:
 |
[Page 1] HIKVISION DS-2DE4225W-DE Network Speed Dome User Manual |
 |
[Page 2] HIKVISION DS-2DE4225W-DE User Manual of Network Speed Dome © Hikvision i User Manual © 2019 Hangzhou Hikvision Digital Technology Co., Ltd. All rights reserved. This Manual is the property of Hangzhou Hikvision Digital Technology Co., Ltd. or its affi… |
 |
[Page 3] HIKVISION DS-2DE4225W-DE © Hikvision Regulatory Information FCC Information Please take attention that changes or modification not expressly approved by the party responsible for compliance could void the user’s authority to operate the equipment. FCC compliance: T… |
 |
[Page 4] HIKVISION DS-2DE4225W-DE © Hikvision Safety Instruction These instructions are intended to ensure that the user can use the product correctly to avoid danger or property loss. The precaution measure is divided into ‘Warnings’ and ‘Cautions’: Warnings: … |
 |
[Page 5] HIKVISION DS-2DE4225W-DE © Hikvision Do not aim the lens at the strong light such as sun or incandescent lamp. The strong light can cause fatal damage to the product. The sensor may be burned out by a laser beam, so when any laser equipment is being used, ma… |
 |
[Page 6] HIKVISION DS-2DE4225W-DE © Hikvision Table of Contents CHAPTER 1 OVERVIEW ………………………………………………………………………………………………….. 1 1.1 SYSTEM REQUIREMENT ………………………………………………… |
 |
[Page 7] HIKVISION DS-2DE4225W-DE © Hikvision 5.2.2 Configuring Video Tampering Alarm …………………………………………………………………… 47 5.2.3 Configuring Alarm Input ………………………………………………………………………. |
 |
[Page 8] HIKVISION DS-2DE4225W-DE © Hikvision 6.4.4 User Account………………………………………………………………………………………………… 118 APPENDIX ……………………………………………………………………………….. |
 |
[Page 9] HIKVISION DS-2DE4225W-DE User Manual of Network Speed Dome © Hikvision 1 Chapter 1 Overview 1.1 System Requirement System requirement of web browser accessing is as follows: Operating System: Microsoft Windows XP/Win7/Win8/Win10 CPU: Intel Pentium IV 3.0 GHz or hi… |
 |
[Page 10] HIKVISION DS-2DE4225W-DE © Hikvision In the client software, use the left key of mouse to click on the desired position in the video image and drag a rectangle area in the lower right direction, then the camera system will move the position to the cen… |
 |
[Page 11] HIKVISION DS-2DE4225W-DE © Hikvision 1-8,frame scan, panorama scan, tilt scan, day, night, reboot, PT adjust, Aux Output, etc. Park Action This feature allows the camera to start a predefined action automatically after a period of inactivity. … |
 |
[Page 12] HIKVISION DS-2DE4225W-DE User Manual of Network Speed Dome © Hikvision 4 Chapter 2 Network Connection Notes: You shall acknowledge that the use of the product with Internet access might be under network security risks. For avoidance of any … |
 |
[Page 13] HIKVISION DS-2DE4225W-DE © Hikvision 网络交换机 Network Cable Network Cable or Network Speed Dome Computer Figure 2-2 Connecting via a Switch or a Router 2.1.2 Activating the Camera Purpose: You are required to activate the camera first before you can use… |
 |
[Page 14] HIKVISION DS-2DE4225W-DE © Hikvision Proper configuration of all passwords and other security settings is the responsibility of the installer and/or end-user. 4. Confirm the password. 5. Click OK to activate the camera and enter the live view interface. Acti… |
 |
[Page 15] HIKVISION DS-2DE4225W-DE © Hikvision You can enable the Hik-Connect service for the device during activation. Hik-Connect function varies depending on different speed dome models. 4. Click Activate to start activation. You can check whether the activation is completed… |
 |
[Page 16] HIKVISION DS-2DE4225W-DE © Hikvision Figure 2-6 iVMS-4200 Control Panel 2. Click Device Management to enter the Device Management interface, as shown in Figure 2-7. Figure 2-7 Device Management Interface 3. Check the device status from the device list, … |
 |
[Page 17] HIKVISION DS-2DE4225W-DE © Hikvision For your privacy and to better protect your system against security risks, we strongly recommend the use of strong passwords for all functions and network devices. The password should be something of your own choosing (using … |
 |
[Page 18] HIKVISION DS-2DE4225W-DE © Hikvision 2.2 Setting the Network Camera over the WAN Purpose: This section explains how to connect the network camera to the WAN with a static IP or a dynamic IP. 2.2.1 Static IP Connection Before you start: Apply a … |
 |
[Page 19] HIKVISION DS-2DE4225W-DE © Hikvision 2.2.2 Dynamic IP Connection Before you start: Apply a dynamic IP from an ISP. With the dynamic IP address, you can connect the network camera to a modem or a router. Connecting the network camera via a router… |
 |
[Page 20] HIKVISION DS-2DE4225W-DE © Hikvision 3. Visit the camera via the applied domain name. |
 |
[Page 21] HIKVISION DS-2DE4225W-DE User Manual of Network Speed Dome © Hikvision 13 Chapter 3 Accessing to the Network Speed Dome 3.1 Accessing by Web Browsers Steps: 1. Open the web browser. 2. In the address field, input the IP address of the network camera, e.g., 192…. |
 |
[Page 22] HIKVISION DS-2DE4225W-DE © Hikvision 3.2 Accessing by Client Software The product CD contains the client software. You can view the live video and manage the camera with the client software. Follow the installation prompts to install the client … |
 |
[Page 23] HIKVISION DS-2DE4225W-DE © Hikvision Notes: If you use third party VMS software, contact our technical support for camera firmware. For detailed information about client software of our company, refer to the user manual of the software. This manual mainly in… |
 |
[Page 24] HIKVISION DS-2DE4225W-DE User Manual of Network Speed Dome © Hikvision 16 Chapter 4 Basic Operations In this and the following chapters, operation of the speed dome by the web browser will be taken as an example. 4.1 Power-up Action After power up, the speed dome … |
 |
[Page 25] HIKVISION DS-2DE4225W-DE © Hikvision Figure 4-1 Live View Parameters Record File Settings: Set the saving path of the video files. Record File Size: Select the packed size of manually recorded and downloaded video files. The size can be set to 256M, 512M o… |
 |
[Page 26] HIKVISION DS-2DE4225W-DE © Hikvision Menu Bar Live View Window Live View Parameters Show/hide PTZ control panel PTZ Control Preset/Patrol/Pattern Toolbar Figure 4-2 Live View Page Menu Bar: Click each tab to enter Live View, Playback, Picture, and Configurati… |
 |
[Page 27] HIKVISION DS-2DE4225W-DE © Hikvision the network. Figure 4-3 Start Live View Table 4-1 Descriptions of the Toolbar and Live View Parameters Icon Description Click the button to enable Pixel Counter. Draw an area in live view window, and it shows… |
 |
[Page 28] HIKVISION DS-2DE4225W-DE © Hikvision Click the button to enable quick setup of image/video related parameters, including Specify Display, OSD and Video/Audio parameters. For detailed configuration, refer to Section 0 Smooth Streaming Purpose: This function is use… |
 |
[Page 29] HIKVISION DS-2DE4225W-DE © Hikvision / / / / Click to select from and display live video in 4:3/16:9/ original/original ratio/self-adaptive window size. / / Click to select from and display live video with the main/ sub/third stream. The main strea… |
 |
[Page 30] HIKVISION DS-2DE4225W-DE © Hikvision display and complete functions the camera offers. 4.5 Operating PTZ Control Purpose: In the live view interface, you can use the PTZ control buttons to control panning, tilting and zooming. Note: PTZ functi… |
 |
[Page 31] HIKVISION DS-2DE4225W-DE © Hikvision Table 4-2 Descriptions of PTZ Control Panel Button Name Description PTZ Control Panel Hold and press the directional button to pan/tilt the camera. Click , then the camera keeps panning when the icon turns into . C… |
 |
[Page 32] HIKVISION DS-2DE4225W-DE © Hikvision Table 4-3 Descriptions of Buttons Button Description Start the selected patrol/pattern. Stop current patrol/pattern. Set the selected preset/patrol. Delete the selected preset/patrol/pattern. Start recordi… |
 |
[Page 33] HIKVISION DS-2DE4225W-DE © Hikvision Hold down the left mouse button and drag the mouse to the lower right on the live video. The corresponding position will be moved to the center of the live video and zoomed in. Hold down the left mo… |
 |
[Page 34] HIKVISION DS-2DE4225W-DE © Hikvision Note: You can configure up to 272 presets. Calling a Preset: In the PTZ control panel, select a defined preset from the list and click to call the preset. Figure 4-7 Calling a Preset For convenient preset selection, ref… |
 |
[Page 35] HIKVISION DS-2DE4225W-DE © Hikvision Figure 4-8 Special Preset Note: You may need to use the OSD (On Screen Display) menu when controlling the camera remotely. To display the OSD menu on the live view screen, you can call the preset number 95. 4.5.4 … |
 |
[Page 36] HIKVISION DS-2DE4225W-DE © Hikvision Name Description Patrol Time It is the duration staying on one patrol point. The camera moves to another patrol point after the patrol time. Patrol Speed It is the speed of moving from one preset to another. 5. Click … |
 |
[Page 37] HIKVISION DS-2DE4225W-DE © Hikvision Figure 4-11 Patrol Path 8 4.5.6 Setting/Calling a Pattern Purpose: A pattern is a memorized series of pan, tilt, zoom, and preset functions. It can be called on the pattern settings interface. There are up to 4 patterns for cus… |
 |
[Page 38] HIKVISION DS-2DE4225W-DE © Hikvision 5. Click to save all the pattern settings. Buttons on the Patterns interface: Buttons Description Start the selected patrol/pattern. Stop current patrol/pattern. Set the selected preset/patrol. Delet… |
 |
[Page 39] HIKVISION DS-2DE4225W-DE © Hikvision Figure 4-13 Playback Interface 2. Select the date and click . Figure 4-14 Search Video 3. Click to play the video files found on this date. The toolbar on the bottom of Playback interface can be used to control playing p… |
 |
[Page 40] HIKVISION DS-2DE4225W-DE © Hikvision Table 4-6 Description of the buttons Button Operation Button Operation Play Capture a picture Pause / Start/Stop clipping video files Stop / Volume up/down Speed down Download Sp… |
 |
[Page 41] HIKVISION DS-2DE4225W-DE © Hikvision Figure 4-19 Video Downloading interface 3. Check the checkbox in front of the video files that you need to download. 4. Click to download the video files. 4.7 Pictures Purpose: This section explains how to view the captu… |
 |
[Page 42] HIKVISION DS-2DE4225W-DE © Hikvision Figure 4-20 Picture Interface 2. Select the file type. 3. Set the start time and end time. Click Search. The corresponding picture files will be listed. 4. Check the checkbox in front of the files that you need to download. 5… |
 |
[Page 43] HIKVISION DS-2DE4225W-DE Chapter 5 System Configuration 5.1 Storage Settings Before you start: To configure record settings, make sure that you have the network storage device within the network or the memory card inserted in your camera. 5.1.1 Configuring Recordi… |
 |
[Page 44] HIKVISION DS-2DE4225W-DE © Hikvision Figure 5-2 Record Parameters Pre-record: The time you set to start recording before the scheduled time or the event. For example, if an alarm triggers recording at 10:00, and the pre-record time is set as 5 seconds, the came… |
 |
[Page 45] HIKVISION DS-2DE4225W-DE © Hikvision Record Triggered by Motion | Alarm: If you select Motion | Alarm, the video will be recorded when the external alarm is triggered or the motion is detected. Besides configuring the recording schedule, … |
 |
[Page 46] HIKVISION DS-2DE4225W-DE © Hikvision (optional). 5. After setting the capture schedule, you can click a capture segment to display the segment capture settings interface to edit the segment capture parameters (optional). Figure 5-4 Segment Snapshot Settings 6. Cl… |
 |
[Page 47] HIKVISION DS-2DE4225W-DE © Hikvision 5.1.3 Configuring Net HDD Before you start: The network disk should be available within the network and properly configured to store the recorded files, log files, etc. Steps: Add the network disk 1. Enter the NAS … |
 |
[Page 48] HIKVISION DS-2DE4225W-DE © Hikvision Figure 5-6 Storage Management Interface 2. If the status of the disk is Uninitialized, check the corresponding checkbox to select the disk and click Format to start initializing the disk. 3. When the initialization completed, t… |
 |
[Page 49] HIKVISION DS-2DE4225W-DE © Hikvision To initialize, refer to the steps of NAS disk initialization 5.1.4 Configuring Cloud Storage Note: Cloud Storage is only supported for certain camera models. Figure 5-9 Cloud Storage configuration Steps: 1. Enter the Cl… |
 |
[Page 50] HIKVISION DS-2DE4225W-DE © Hikvision On the event configuration page, click to show the PTZ control panel or click to hide it. Click the direction buttons to control the pan/tilt movements. Click the zoom/iris/focus buttons to realize lens contro… |
 |
[Page 51] HIKVISION DS-2DE4225W-DE © Hikvision Figure 5-10 Motion Detection Settings-Normal Steps: (1) Click and drag the mouse on the live video image to draw a motion detection area. (2) Click to finish drawing. Note: You can click to clear all of the areas. … |
 |
[Page 52] HIKVISION DS-2DE4225W-DE © Hikvision Figure 5-11 Motion Detection Settings-Expert Steps: (1) Set the Scheduled Image Settings, there are OFF, Auto-Switch and Scheduled-Switch selectable. If the schedule image switch mode is enabled, you can configure the detection… |
 |
[Page 53] HIKVISION DS-2DE4225W-DE © Hikvision Figure 5-12 Arming Schedule (2) Select the timeline of a certain day, and drag the mouse to set the arming schedule (the start time and end time of the arming task). (3) After you set the scheduled task, you can click and co… |
 |
[Page 54] HIKVISION DS-2DE4225W-DE © Hikvision (5) Click to save the settings. Note: The time of each period cannot be overlapped. Up to 8 periods can be configured for each day. 5. Set the Alarm Actions for Motion Detection. Click tab to enter the Linkage Method int… |
 |
[Page 55] HIKVISION DS-2DE4225W-DE © Hikvision White light of the camera flashes when alarm happens. Flashing Duration, Flashing Frequency, and Brightness are configurable on Flashing Alarm Light Output page: Configuration > Event > Basic Event Notes:… |
 |
[Page 56] HIKVISION DS-2DE4225W-DE © Hikvision Figure 5-16 Tampering Alarm 2. Check the checkbox to enable the tampering detection. 3. Set the tampering area. 4. Set Sensitivity level. Higher level means easier to trigger. 5. Click tab to enter the arming sched… |
 |
[Page 57] HIKVISION DS-2DE4225W-DE © Hikvision and NC (Normally Closed). 3. Edit the name in to set a name for the alarm input (optional). Figure 5-17 Alarm Input Settings 4. Click tab to enter the arming schedule setting interface. The arming schedule confi… |
 |
[Page 58] HIKVISION DS-2DE4225W-DE © Hikvision Figure 5-18 Linkage Method 5.2.4 Configuring Alarm Output Note: The function is only supported by certain camera models. Steps: 1. Enter the Alarm Output settings interface: Configuration> Event > Basic Event > Alar… |
 |
[Page 59] HIKVISION DS-2DE4225W-DE © Hikvision Figure 5-19 Alarm Output Settings 6. You can copy the settings to other alarm outputs. 7. Click to save the settings. 5.2.5 Handling Exception The exception type can be HDD Full, HDD Error, Network Disconnected, IP Address… |
 |
[Page 60] HIKVISION DS-2DE4225W-DE © Hikvision Figure 5-20 Exception Settings 3. Click to save the settings. Note: Trigger alarm output is only supported by certain camera models. 5.2.6 Configuring Flashing Alarm Light Output For camera that supports flashing alar… |
 |
[Page 61] HIKVISION DS-2DE4225W-DE © Hikvision 4. Save the settings. 5.2.7 Configuring Audible Alarm Output For camera that supports audible warning as a linkage method, options are open to configure audible alarm parameters. Note: The function is only supported… |
 |
[Page 62] HIKVISION DS-2DE4225W-DE © Hikvision Figure 5-21 Audio Exception Detection 2. Check the checkbox of Audio Loss Detection to enable the audio input exception detection. 3. Check the checkbox of Sudden Increase of Sound Intensity Detection checkbox to enabl… |
 |
[Page 63] HIKVISION DS-2DE4225W-DE © Hikvision 5.3.2 Configuring Face Detection Purpose: After the face detection is enabled, a face appears in the surveillance area, it will be detected and certain actions may be triggered by the detection. Steps: 1. Enter the face detecti… |
 |
[Page 64] HIKVISION DS-2DE4225W-DE © Hikvision Figure 5-23 Configuring Intrusion Area 3. The event triggered and park action related PTZ movement will be locked for 180 seconds after you enter the intrusion detection interface. Optionally, you can click the button to manua… |
 |
[Page 65] HIKVISION DS-2DE4225W-DE © Hikvision region. 7. Click tab to enter the arming schedule setting interface. The time schedule configuration is the same as the settings of the arming schedule for motion detection. Refer to Section 5.2.1 Configuring Motion Detection… |
 |
[Page 66] HIKVISION DS-2DE4225W-DE © Hikvision Figure 5-24 Configuring Line 5. Draw area. 4) Click to draw a line on the image. 5) Click the line to switch to the editing mode. Drag an end to the desired place to adjust the length and angle of the line. And drag the … |
 |
[Page 67] HIKVISION DS-2DE4225W-DE © Hikvision Notify Surveillance Center, Send Email, Upload to FTP/Memory Card/NAS, Trigger Alarm Output, Trigger Recording, Smart Tracking, White Light Flashing, and Audible Warning are selectable. For speed dome, you can also choose to… |
 |
[Page 68] HIKVISION DS-2DE4225W-DE © Hikvision 3. The event triggered and park action related PTZ movement will be locked for 180 seconds after you enter the line crossing detection interface. Optionally, you can click the button to manually activate the movement, or lock the… |
 |
[Page 69] HIKVISION DS-2DE4225W-DE © Hikvision Figure 5-26 Configuring Region Exiting Detection 3. The event triggered and park action related PTZ movement will be locked for 180 seconds after you enter the line crossing detection interface. Optionally, you can click the b… |
 |
[Page 70] HIKVISION DS-2DE4225W-DE © Hikvision For certain models, White Light Flashing and Audible Warning are supported. Refer to Section 5.2.1 Configuring Motion Detection for detailed configuration. 10. Click button to save the settings. 5.3.7 Unattended Baggage D… |
 |
[Page 71] HIKVISION DS-2DE4225W-DE © Hikvision 4. Select the region from the dropdown list for detection settings. 5. Click the button to start the region drawing. 6. Click on the live video to specify the four vertexes of the detection region, and right click to complete… |
 |
[Page 72] HIKVISION DS-2DE4225W-DE © Hikvision 7. Configure the parameters for each defense region separately. Threshold Level: If you set the value as 5, alarm is triggered immediately after the object entering the region. Sensitivity Level: The value … |
 |
[Page 73] HIKVISION DS-2DE4225W-DE © Hikvision Figure 5-28 Basic Settings 2. Configure the following settings: Basic Parameters: Set the basic parameters of PTZ. Proportional Pan: If you enable this function, the pan/tilt speeds change according to th… |
 |
[Page 74] HIKVISION DS-2DE4225W-DE © Hikvision Keyboard Control Speed: Define the speed of PTZ control by a keyboard as Low, Medium or High. Auto Scan Speed: The scan speed can be set from level 1 to 40. Max. Tilt-angle: Set the tilt-angle of the speed dome from … |
 |
[Page 75] HIKVISION DS-2DE4225W-DE © Hikvision Figure 5-29 Configure the PTZ Limit 2. Click the Enable Limit checkbox and choose the limit type as manual stops or scan stops. Manual Stops: When manual limit stops are set, you can operate the PTZ control panel manually o… |
 |
[Page 76] HIKVISION DS-2DE4225W-DE © Hikvision Figure 5-30 PTZ Configuration 2. Click the PTZ control buttons to find a position as the initial position of the speed dome; you can also call a defined preset and set it as the initial position of the speed dome. 3. Click Set … |
 |
[Page 77] HIKVISION DS-2DE4225W-DE © Hikvision Figure 5-31 Set the Park Action 2. Check the Enable Park Action checkbox. 3. Set the Park Time as the inactivity time of the camera before it starts the park actions. 4. Choose Action Type from the dropdown list. 5. If you s… |
 |
[Page 78] HIKVISION DS-2DE4225W-DE © Hikvision 2. Click the PTZ control buttons to find the area you want to set the privacy mask. 3. Click ; drag the mouse in the live video window to draw the area. 4. You can drag the corners of the red rectangle area to draw a polygon mask… |
 |
[Page 79] HIKVISION DS-2DE4225W-DE © Hikvision Figure 5-34 Configure Scheduled Tasks 2. Check the Enable Scheduled Task checkbox. 3. Set the Park Time. You can set the park time (a period of inactivity) before the speed dome starts the scheduled tasks. 4. Select the task … |
 |
[Page 80] HIKVISION DS-2DE4225W-DE © Hikvision 5.4.7 Clearing PTZ Configurations Purpose: You can clear PTZ configurations in this interface, including all presets, patrols, privacy masks, PTZ limits, scheduled tasks and park actions. Steps: 1. Enter the Clearing Configurat… |
 |
[Page 81] HIKVISION DS-2DE4225W-DE © Hikvision 2. Check the Enable Smart Tracking check box to enable smart tracking function. 3. Set Zoom Ratio for tracking. You can set a fixed zoom ratio, or you can let the camera calculates the actual zoom ratio automatica… |
 |
[Page 82] HIKVISION DS-2DE4225W-DE © Hikvision device. Note: Position settings may not be supported by certain camera models. Steps: 1. Enter the Position Settings interface: Configuration > PTZ > Position Settings Figure 5-39 Position Settings 2. Manually find the… |
 |
[Page 83] HIKVISION DS-2DE4225W-DE © Hikvision Figure 5-40 Rapid Focus 2. Check Enable to enable the function. 3. Calibrate the camera. (1) Add scenes for calibration. a. Adjust the camera to a desired scene via PTZ control buttons. b. Click Add to add the scene, … |
 |
[Page 84] HIKVISION DS-2DE4225W-DE © Hikvision Chapter 6 Camera Configuration 6.1 Configuring Network Settings Note: The functions vary depending on different camera models. 6.1.1 Basic Settings Configuring TCP/IP Settings Purpose: TCP/IP settings must be properly confi… |
 |
[Page 85] HIKVISION DS-2DE4225W-DE © Hikvision You can click Test to make sure that the IP address is valid. Notes: If the DHCP server is available, you can check to automatically obtain an IP address and other network settings from that server. The valid value ra… |
 |
[Page 86] HIKVISION DS-2DE4225W-DE © Hikvision (2) In the Domain text field, enter the domain name obtained from the DynDNS website. (3) Enter the Port of DynDNS server. (4) Enter the User Name and Password registered on the DynDNS website. (5) Click to save the settings. … |
 |
[Page 87] HIKVISION DS-2DE4225W-DE © Hikvision For your privacy and to better protect your system against security risks, we strongly recommend the use of strong passwords for all functions and network devices. The password should be something of your own choosing (using … |
 |
[Page 88] HIKVISION DS-2DE4225W-DE © Hikvision 3. Click to save the settings. Configuring NAT (Network Address Translation) Settings Purpose: Universal Plug and Play (UPnP™) is a networking architecture that provides compatibility among networking equipment, software and… |
 |
[Page 89] HIKVISION DS-2DE4225W-DE © Hikvision Figure 6-7 Setting Multicast Steps: 1. Enter the Multicast setting interface. Configuration >Network > Basic Settings > Multicast 2. Set IP Address, Stream Type, Video Port, and Audio Port of the camera. Notes: �… |
 |
[Page 90] HIKVISION DS-2DE4225W-DE © Hikvision Figure 6-8 SNMP Settings 2. Check the corresponding version checkbox (Enable SNMP v1, Enable SNMP v2c, Enable SNMP v3) to enable the feature. 3. Configure the SNMP settings. Note: The configuration of the SNMP software should… |
 |
[Page 91] HIKVISION DS-2DE4225W-DE © Hikvision Figure 6-9 FTP Settings 2. Configure the FTP settings, including server address, port, user name, password, and directory. Note: The server address supports both the domain name and IP address formats. For yo… |
 |
[Page 92] HIKVISION DS-2DE4225W-DE © Hikvision Figure 6-11 Child Directory Upload type: To enable uploading the captured picture to the FTP server. 3. Click to save the settings. 4. You can click Test to confirm the configuration. Note: If you want to upload … |
 |
[Page 93] HIKVISION DS-2DE4225W-DE © Hikvision SMTP Port: The SMTP port. The default TCP/IP port for SMTP is 25. E-mail encryption: None, SSL, and TLS are selectable. When you select SSL or TLS and disable STARTTLS, e-mails will be sent after encrypted by SSL or TLS. T… |
 |
[Page 94] HIKVISION DS-2DE4225W-DE © Hikvision Figure 6-13 Platform Access 2. Check the Enable checkbox to enable the platform access function of the device. 3. Select the Platform Access Mode. If you select Platform Access Mode as Hik-Connect, 1) Click and read «T… |
 |
[Page 95] HIKVISION DS-2DE4225W-DE © Hikvision 2. Create the self-signed certificate or authorized certificate. Figure 6-14 Create Certificate OPTION 1: Create the self-signed certificate (1) Select Create Self-signed Certificate. (2) Click Create to create the following … |
 |
[Page 96] HIKVISION DS-2DE4225W-DE © Hikvision Figure 6-16 Installed Certificate Property Notes: The default port number of HTTPS is 443. The port value ranges from 1 to 65535. When the port number is the default number 443, the format of the URL is https://IP addre… |
 |
[Page 97] HIKVISION DS-2DE4225W-DE © Hikvision When devices connect to this network with IEEE 802.1X standard, the authentication is needed. If the authentication fails, the devices don’t connect to the network. The protected LAN with 802.1X standard is shown in Figure 6-18 … |
 |
[Page 98] HIKVISION DS-2DE4225W-DE © Hikvision Figure 6-19 802.1X Settings 3. Check the Enable IEEE 802.1X checkbox to enable it. 4. Select a preferred protocol. EAP-LEAP, EAP-TLS, and EAP-MD5 are selectable. EAP-LEAP and EAP-MD5 If you use EAP-LEAP or EAP-MD5, the au… |
 |
[Page 99] HIKVISION DS-2DE4225W-DE © Hikvision existing network without entering long passphrases. There are two modes of the WPS connection, the PBC mode and the PIN mode. PCB Mode PBC refers to the Push-Button-Configuration, in which the user simply … |
 |
[Page 100] HIKVISION DS-2DE4225W-DE © Hikvision Figure 6-20 Integration Protocol Settings 2. Check the Enable Hikvision-CGI checkbox and then select the authentication from the dropdown list. Then you can access to the camera through the third party platform. 3. Check the En… |
| Document’s Content and Additional Information | Share Manual |
|---|---|
|
HIKVISION DS-2DE4225W-DE Operation & user’s manual
Pages Preview: Document Transcription:
See Details |


