
Casio Watch Line: Edifice
Module number: 5582
Manual in PDF: Watch 5582 Online → (without downloading, good for mobile);
English Instruction Manual in PDF: Download
Like your watch? Enjoy our recent news about ECB-900 Series


All Edifice ECB-900 News →

Being a fan of CASIO watches since 2009, I strive to share my passion and knowledge with others. Through publishing short notes and curating all listings on this site, I hope to inspire fellow enthusiasts to explore the world of high-quality CASIO watches. A proud owner of GST-B200, GG-1000, GA-110. Remember: Fake Watches are for Fake People.
Часы Casio Edifice ECB 900 представляют собой модель, сочетающую в себе элегантный дизайн и передовые функциональные возможности. Это идеальный выбор для тех, кто ценит стиль и надежность в часах. Однако, иногда может возникать необходимость в настройке часов, чтобы они работали согласно вашим предпочтениям и требованиям. В данной статье мы расскажем вам о том, как правильно настроить часы Casio Edifice ECB 900.
Первым шагом при настройке этих часов является ознакомление с инструкцией, предоставленной производителем. В инструкции подробно описаны все доступные функции и режимы, а также способы их настройки. Рекомендуется внимательно прочитать инструкцию, чтобы правильно понять процесс настройки и избежать лишних ошибок.
Важно помнить, что настройка часов Casio Edifice ECB 900 может отличаться от настройки других моделей. Поэтому, если вы ранее настраивали другие часы Casio, необходимо ознакомиться с инструкцией, специфичной для данной модели.
Одной из наиболее распространенных задач при настройке часов является установка даты и времени. Для этого необходимо нажать на кнопку «Mode» на часах, чтобы войти в меню настроек. Затем, используя кнопки «Up» и «Down», выберите параметры, которые вы хотите настроить, например, дату и время. После выбора параметра нажмите «Adjust» и используйте кнопки «Up» и «Down», чтобы изменить значение параметра. Нажмите «Mode» снова, чтобы сохранить изменения и выйти из меню настроек.
Кроме того, часы Casio Edifice ECB 900 имеют ряд дополнительных функций, которые могут быть настроены по вашему усмотрению. Например, вы можете настроить сигналы с регулярностью, установить таймер обратного отсчета или включить автоматическое переключение на летнее время. Инструкция по использованию этих функций также доступна в инструкции, предоставленной производителем.
Содержание
- Как правильно настроить часы Casio Edifice ECB 900
- Подготовка к настройке часов
- Установка текущей даты и времени
- Настройка дополнительных функций
- Как пользоваться таймером и будильником
- Советы по использованию и уходу за часами
Как правильно настроить часы Casio Edifice ECB 900
Для настройки часов Casio Edifice ECB 900, выполните следующие шаги:
- Переведите часы в режим настройки, нажав и удерживая кнопку «A» до появления мигающего значка.
- Нажмите кнопку «B» для выбора элемента настройки.
- С помощью кнопок «C» и «D» настройте значения выбранного элемента.
- После настройки каждого элемента нажмите кнопку «B» для перехода к следующему элементу.
- После завершения всех настроек нажмите кнопку «A» для выхода из режима настройки.
Вот список элементов, которые можно настроить на часах Casio Edifice ECB 900:
- День месяца
- Месяц
- Год
- Часы
- Минуты
- Секунды
- Формат отображения времени (12-часовой или 24-часовой)
Используя эти инструкции, вы сможете правильно настроить часы Casio Edifice ECB 900 и наслаждаться их функциональностью.
Подготовка к настройке часов
Перед началом настройки часов Casio Edifice ECB 900 необходимо выполнить несколько подготовительных шагов:
1. Убедитесь, что ваши часы полностью заряжены. Подключите часы к компьютеру с помощью специального кабеля и дождитесь, пока на дисплее не появится значок зарядки.
2. Установите приложение «Casio Edifice» на свой смартфон. Данное приложение позволяет управлять функциями часов и осуществлять их настройку с помощью Bluetooth.
3. Включите Bluetooth на вашем смартфоне. Перейдите в настройки Bluetooth и включите его.
4. Убедитесь, что Bluetooth на часах также включен. Для этого нажмите и удерживайте кнопку «Mode» на часах, пока не появится значок Bluetooth на дисплее.
После выполнения этих шагов вы будете готовы начать настройку часов Casio Edifice ECB 900.
Установка текущей даты и времени
Чтобы установить текущую дату и время на часах Casio Edifice ECB 900, следуйте инструкциям ниже:
1. Войдите в режим настройки, нажав и удерживая кнопку «Adjust» (настройка), пока символы «-0A» начнут мигать на дисплее.
2. Переключайтесь между значениями для установки даты и времени, нажимая кнопку «Mode» (режим). Начните с настройки даты.
3. Для установки даты, используйте кнопки «Up» (вверх) и «Down» (вниз), чтобы выбрать нужное значение. Для перехода между днем, месяцем и годом, нажимайте кнопку «Mode». После выбора значения нажмите кнопку «Adjust», чтобы перейти к следующей настройке.
4. После установки даты, перейдите к настройке времени. Для этого снова используйте кнопки «Up» и «Down», чтобы выбрать нужное значение часов, минут и секунд.
5. По окончании настройки времени нажмите кнопку «Adjust», чтобы сохранить изменения и выйти из режима настройки.
Теперь ваше Casio Edifice ECB 900 отображает текущую дату и время в соответствии с вашими настройками.
Настройка дополнительных функций
Помимо основных функций, у Casio Edifice ECB 900 есть ряд дополнительных возможностей, которые могут быть полезными в повседневной жизни.
Чтобы войти в режим настройки дополнительных функций, удерживайте кнопку mode (Режим) нажатой в течение нескольких секунд, пока на дисплее не появится соответствующий символ.
Один из наиболее полезных дополнительных функций — установка нескольких часовых поясов. Вы можете настроить до 3 часовых поясов, чтобы всегда быть в курсе времени в разных городах.
Чтобы настроить дополнительные часовые пояса, следуйте инструкциям, приведенным в руководстве пользователя. Выберите необходимый часовой пояс и установите его значение с помощью кнопок + и -.
Кроме того, вы можете настроить будильник, который будет срабатывать в заданное вами время. Для этого найдите соответствующую функцию в меню и следуйте инструкциям.
Также вам доступна функция остановки времени (хронограф), которая позволяет измерить промежуток времени с точностью до секунды.
У Casio Edifice ECB 900 есть еще множество других функций, таких как таймер обратного отсчета, автоматический календарь, информация о приливах и отливах и другие. Руководство пользователя содержит подробные инструкции по настройке каждой из этих функций.
Пользуясь эти инструкциями, вы сможете настроить все дополнительные функции Casio Edifice ECB 900 и использовать их по своему усмотрению.
Как пользоваться таймером и будильником
Часы Casio Edifice ECB 900 предлагают удобные функции таймера и будильника, которые помогут вам организовать ваше время.
Для использования таймера:
- Нажмите кнопку «Mode» для выбора режима «Timer» (Таймер).
- Нажмите кнопку «Set» для входа в режим настройки таймера. Цифры будут мигать, показывая, что вы можете задать время таймера.
- Используйте кнопки «+» и «-» для настройки желаемого времени таймера.
- Нажмите кнопку «Start/Stop» для запуска или остановки таймера.
Для использования будильника:
- Нажмите кнопку «Mode» для выбора режима «Alarm» (Будильник).
- Нажмите кнопку «Set» для входа в режим настройки будильника. Цифры будут мигать, показывая, что вы можете задать время будильника.
- Используйте кнопки «+» и «-» для настройки желаемого времени будильника.
- Нажмите кнопку «Start/Stop» для включения/выключения будильника.
Теперь вы можете успешно использовать таймер и будильник на часах Casio Edifice ECB 900 для более эффективной организации своего времени.
Советы по использованию и уходу за часами
Для того чтобы ваши часы Casio Edifice ECB 900 служили вам долго и надежно, рекомендуется придерживаться следующих рекомендаций:
1. Не ставьте часы на поверхности, которые могут повредить их ремешок, стекло или корпус. При возможности используйте специальную подставку или храните часы в чехле.
2. Избегайте сильных ударов и падений часов, чтобы не повредить механизм и не поцарапать стекло. Если все же такое произошло, рекомендуется обратиться к специалисту для замены поврежденных деталей.
3. Перед купанием в бассейне или море убедитесь, что часы имеют стойкость к воде и погружению. Если водонепроницаемость до 50 метров, можно спокойно нырять, но если меньше, лучше избегать контакта с водой. После плавания в соленой воде рекомендуется промыть часы пресной водой.
4. Избегайте воздействия химических веществ на часы, таких как крема, духи или спреи для волос. Они могут повредить материалы, из которых изготовлены часы, и вызвать их деформацию или выцветание.
5. При переходе на летнее или зимнее время рекомендуется использовать специальную функцию смены времени на часах, чтобы избежать ошибок в установке и не повредить механизм.
6. Регулярно проверяйте состояние ремешка и его фиксацию, чтобы избежать его поломки или потери. При необходимости замените ремешок на оригинальный или обратитесь в сервисный центр для ремонта.
7. Не забывайте о периодической замене батареи. Если вы заметили, что часы перестали работать или их дисплей стал тусклым, скорее всего, необходимо заменить батарею.
8. Храните часы в специальной коробке или чехле, чтобы защитить их от пыли и повреждений. При хранении в чехле рекомендуется убирать часы в такое положение, чтобы они не отсчитывали время и не тратили энергию.
Следуя этим советам, вы сможете продлить срок службы своих часов Casio Edifice ECB 900 и наслаждаться их работой и стильным дизайном каждый день.
![]()
MA1902-EA © 2019 CASIO COMPUTER CO., LTD.
Operation Guide 5582
Contents
Before Getting Started…
Watch Face and Display Indicators
Navigating Between Modes
Cycling Between Timekeeping Mode Digital
Display Contents
Shifting the Hands
Solar Charging
Useful Features
Using Mobile Link with a Mobile Phone
Getting Ready
AInstall the required app on your phone. B Configure Bluetooth settings.
C Pair the watch with a phone.
Auto Time Adjustment
Viewing Stopwatch Data
Configuring Timer Settings
Setting the Alarm
Configuring World Time Settings
Adjusting Hand Alignment
Phone Finder
Configuring Watch Settings
Changing the Home City Summer Time Setting
Checking the Watch Charge Level
Connection
Connecting with a Phone Disconnecting from a Phone
Using the Watch in a Medical Facility or Aircraft
Unpairing
If you purchase another phone
Stopwatch
Measuring Elapsed Time
Measuring Lap Times
Example: Recording a Race Lap Time
Viewing Measured Data Records
Lap Times
Timer
Setting the Countdown Start Time
Using the Timer
Alarms and Hourly Time Signal
Configuring Alarm Settings
Setting a Schedule Alarm
Enabling/Disabling an Alarm or the Hourly Time Signal
Stopping an Alarm
Determining an Alarm’s On/Off Status
World Time
Checking World Time
World Time City Setting
Swapping Your Home Time and World Time
Adjusting Time Settings
Manually
Setting a Home Time City
Setting the Time/Date
Switching between 12-hour and 24-hour Timekeeping
Changing the Date Display Format
Specifying the Day of the Week Language
Light
Illuminating the Display Manually
Auto Light
Configuring the Auto Light Setting
Specifying the Illumination Duration
Hand Alignment Adjustment
Adjusting Hand Alignment
Other Settings
Enabling the Button Operation Tone
Configuring Power Saving Function Settings
Returning the Watch to Its Factory Default Settings
Moving to Another Time Zone
Other Information
City Table
Summer Time Table
Supported Phones
Specifications
Mobile Link Precautions
Copyrights and Registered Copyrights
Troubleshooting
1

Operation Guide 5582
|
Before Getting |
N |
In the Alarm Mode, the mode hand points |
● Connecting with a Phone |
||
|
Started… |
to [AL]. |
Hold down (C) for at least 1.5 seconds to |
|||
|
O |
In the World Time Mode, the mode hand |
establish a connection with a phone. |
|||
|
This section provides an overview of the watch |
● To disconnect, press any button. |
||||
|
points to [WT]. |
|||||
|
and introduces convenient ways it can be |
Before connection |
After connection |
|||
|
used. |
|||||
|
Note |
Navigating Between Modes |
C |
|||
|
● The illustrations included in this |
Press (D) to cycle between modes. |
||||
|
● |
In any mode, hold down (D) for at least two |
||||
|
operation guide have been created to |
|||||
|
seconds to enter the Timekeeping Mode. |
|||||
|
facilitate explanation. An illustration |
Any button |
||||
|
may differ somewhat from the item it |
|||||
|
Timekeeping Mode |
|||||
|
represents. |
|||||
|
Watch Face and Display |
Cycling Between |
||||
|
Timekeeping Mode Digital |
|||||
|
Indicators |
Display Contents |
DD
|
Mode hand |
Each press of (A) in the Timekeeping Mode |
||
|
toggles between the display information as |
|||
|
World Time Mode |
Stopwatch Mode |
shown below. |
|
|
Month, day, day |
Hour, minute, |
|||
|
of the week |
second |
|||
|
D |
D |
|||
|
A Displayed during p.m. times while 12-hour |
● Displaying the Current Home City |
||
|
In the Timekeeping Mode, pressing (E) will |
|||
|
timekeeping is being used. |
Alarm Mode |
Recall Mode |
|
|
display the name of the currently selected |
|||
|
B Displayed while the watch’s hands are |
Home City for a short while. |
||
|
shifted for easier reading. |
● To return manually to what was shown |
||
|
C Displayed while Auto Light is enabled. |
before the Home City, press (E). |
||
|
Home City |
|||
|
D Moves in sync with the seconds count in |
|||
|
the Stopwatch Mode. |
|||
|
E Displayed while the watch is indicating |
Timer Mode |
||
|
D |
D |
||
|
summer time. |
F When the watch is standing by for connection with a phone, the second hand points to [R].
GWhen the watch is connected with a phone, the second hand points to e.
H Displayed while an alarm is turned on.
IBattery level
In the Timekeeping Mode, the current charge level is indicated by the mode hand.
J Displayed while in the Recall Mode.
KDisplayed while the hourly time signal is enabled.
LIn the Stopwatch Mode, the mode hand indicates speed.
|
M In the Timer Mode, the mode hand points |
|
|
to [TR]. |
2 |

Operation Guide 5582
Shifting the Hands
Hand shift moves the hands out of the way for easy viewing of display information.
1.While holding down (B), press (D).
●This will shift the analog hands to allow easy viewing of display information.
2.To return the hands to their normal timekeeping positions, hold down (B) as you press (D) again, or press (D) to change to another mode.
Note
●If you leave the watch with its hands shifted and do not perform any operation for about one hour, the hands will resume normal timekeeping automatically.
Solar Charging
This watch runs on power supplied from a rechargeable (secondary) battery that is charged by a solar panel. The solar panel is integrated into the face of the watch, and power is generated whenever the face is exposed to light.
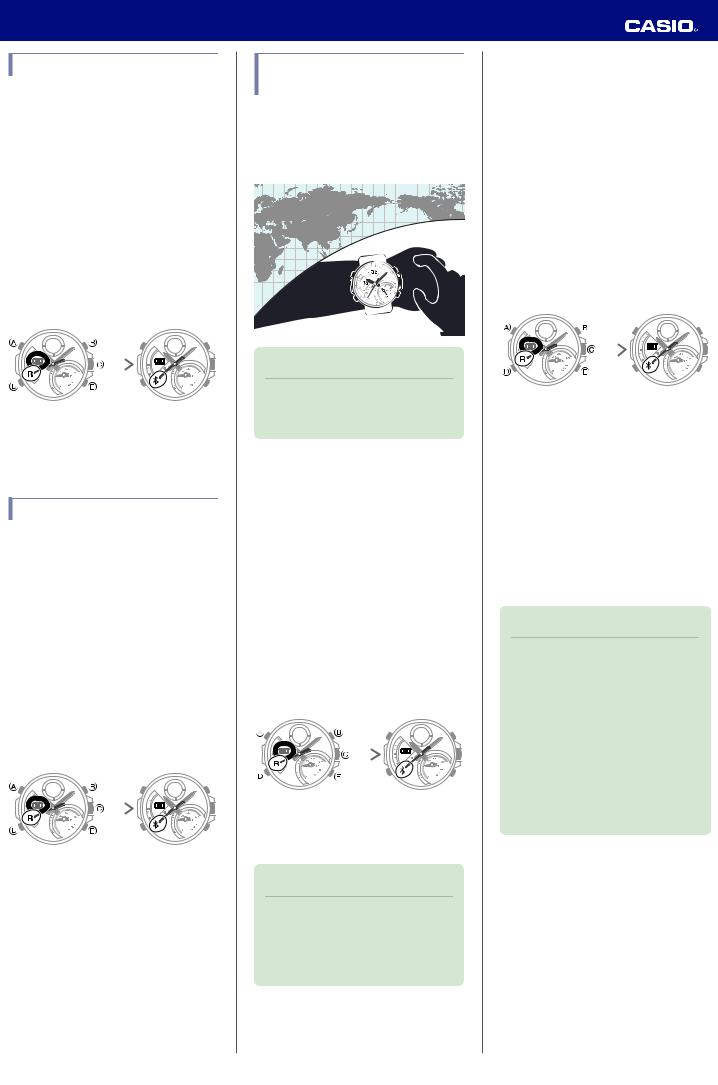
● Charging the Watch
When you are not wearing the watch, put it in a location where it is exposed to bright light.
While you are wearing the watch, make sure that its face (solar panel) is not blocked from the light by the sleeve of your clothing. Power generation efficiency is reduced even when the face of the watch is blocked only partially.
YES NO
Important!
●Depending on light intensity and local conditions, the watch may become hot to the touch when exposed to light for charging. Take care to avoid burn injury after charging. Also, avoid charging the watch under hightemperature conditions like the ones described below.
On the dashboard of a vehicle parked in the sun
Near an incandescent light bulb or other source of heat
Under direct sunlight or in other hot areas for long periods
●Checking the Charge Level
In the Timekeeping Mode, the current charge level is indicated by the mode hand.


A Good (high charge)
B Good (medium charge) C Low Battery
● Remaining Charge and Dead Battery
You can determine if the charge level is low by checking the hand movement. Functions become disabled as battery power goes low.
Important!
●Should the battery go low or go dead, expose the face (solar panel) to light as soon as possible.
Note
●Exposing the watch face to light after the battery goes dead will cause the [CHARGE] indicator to appear and the second hand to rotate counterclockwise until it stops at second 57. This indicates charging has started.
Low Battery Power
The second hand jumps at two-second intervals.
Second hand
Dead Battery
All hands are stopped.
● Charging Time Guidelines
The table below shows guidelines for approximate charging times.
Required Charging Time for 1-day Use
|
Light Level (Lux) |
Approximate |
|
Charging Time |
|
|
50,000 |
8 minutes |
|
10,000 |
30 minutes |
|
5,000 |
48 minutes |
|
500 |
8 hours |
Time Required to Achieve Next Charge Level
● Sunny day, outdoors (50,000 lux)
|
Dead battery nMedium |
2 hours |
|
|
charge |
||
|
Medium charge nHigh |
21 hours |
|
|
charge |
||
|
High charge nFull charge |
6 hours |
● Sunny day, near a window (10,000 lux)
|
Dead battery nMedium |
6 hours |
|
|
charge |
||
|
Medium charge nHigh |
77 hours |
|
|
charge |
||
|
High charge nFull charge |
21 hours |
● Overcast day, near a window (5,000 lux)
|
Dead battery nMedium |
10 hours |
|
|
charge |
||
|
Medium charge nHigh |
125 hours |
|
|
charge |
||
|
High charge nFull charge |
34 hours |
● Indoor fluorescent lighting (500 lux)
|
Dead battery nMedium |
117 hours |
|
|
charge |
||
|
Medium charge nHigh |
— |
|
|
charge |
||
|
High charge nFull charge |
— |
3
Operation Guide 5582
Note
●Actual charging time depends on the local charging environment.
●Power Saving Function
Leaving the watch in a dark location for about one hour between the hours of 10 p.m. and 6 a.m. will cause the display to go blank, and the watch to enter Level 1 power saving. If the watch is left in this condition for six or seven days, the watch will enter Level 2 power saving.
Power Saving Level 1 :
The second hand stops at 12 o’clock and the digital display goes blank to save power. The watch can connect with a phone at this level.
Power Saving Level 2 :
All hands stop and the digital display goes blank to save power. All functions are disabled.
Recovering from Power Saving Operation
Use one of the operations below to exit power saving.
●Press any button.
●Move the watch to a bright location.
●Trigger auto light by angling the watch towards your face.
Note
●The watch will not enter power saving in the cases below.
Alarm Mode
While in the Stopwatch Mode
While in the Timer Mode
●You can enable or disable Power Saving.
lConfiguringSettings Power Saving Function
●Note that the watch also may enter power saving if its face is blocked from light by your sleeve while you are wearing it.
Useful Features
Pairing the watch with your phone makes a number of the watch’s features easier to use.
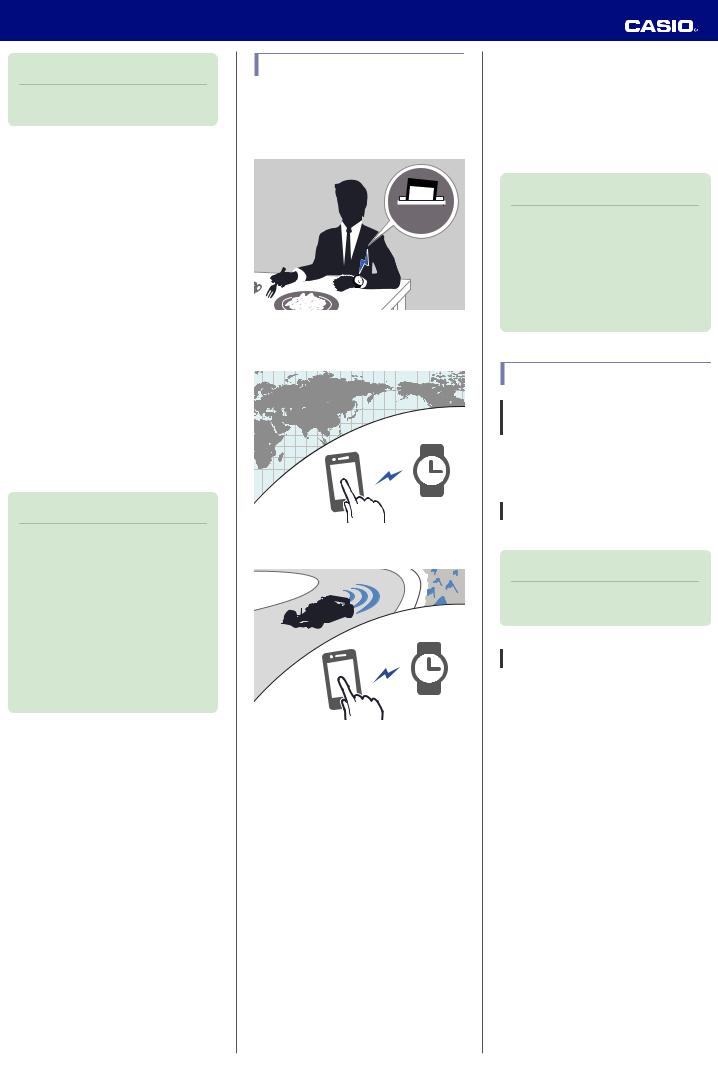
Auto Time Adjustment
lAuto Time Adjustment
12:30
Selection of More Than 300 World Time
Cities
lConfiguring World Time Settings
Stopwatch Data Transfer to the Phone lViewing Stopwatch Data
In addition, a number of other watch settings can be configured using your phone.
For transfer data to a watch and to configure settings, you first need to pair the watch with your phone.
lGetting Ready
●Your phone needs to have the CASIO “EDIFICE Connected” app installed to pair with the watch.
Using Mobile Link with a Mobile Phone
While there is a Bluetooth connection between the watch and phone, the watch time setting is adjusted automatically. You can also change the watch’s other settings.
Note
●This function is available only while EDIFICE Connected is running on the phone.
●This section describes watch and phone operations.
X : Watch operation Y : Phone operation
Getting Ready
A Install the required app on your phone.
In Google Play or the App Store, search for the CASIO “EDIFICE Connected” app and install it on your phone.
B Configure Bluetooth settings.
Enable the phone’s Bluetooth.
Note
●For details about setting procedures, see your phone documentation.
C Pair the watch with a phone.
Before you can use the watch in combination with a phone, you first need to pair them.
1.Move the phone to be paired with close to (within one meter of) the watch.
2.Y On the Home Screen, tap the “EDIFICE Connected” icon.
4
Operation Guide 5582
3.Y Perform the operation shown on the phone screen to be paired with.
●If a pairing prompt message appears, perform the operation shown on the phone screen.
●When pairing starts, the second hand will point to [R]. When pairing is complete, the second hand will move to e.
|
Pairing started. |
Pairing complete. |
|
Auto Time Adjustment
Your watch will connect with a phone at preset times each day and adjust its time settings automatically.
● Using Auto Adjust
Your watch adjusts its time setting four times a day according to a preset schedule. If you leave your watch in the Timekeeping Mode, it will perform the adjustment operation automatically as you go about your daily life, without any operation required by you.
12:30
Important!
●The watch may not be able to perform auto time adjustment under the conditions described below.
While the watch is too far away from its paired phone
While communication is not possible due to radio interference, etc.
While the phone is updating its
system
Note
●If the watch does not indicate the correct time even if is able to connect with a phone, correct the hand and date indicator positions.
lAdjusting Hand Alignment
●If there is a World Time City specified with EDIFICE Connected, its time will also be adjusted automatically.
●The watch will connect with the phone and perform auto time adjustment at around 12:30 a.m., 6:30 a.m., 12:30 p.m. and 6:30 p.m. The connection is automatically terminated after auto time adjustment is complete.
●The watch cannot connect with a phone for time adjustment while a stopwatch measurement or timer operation is in progress.
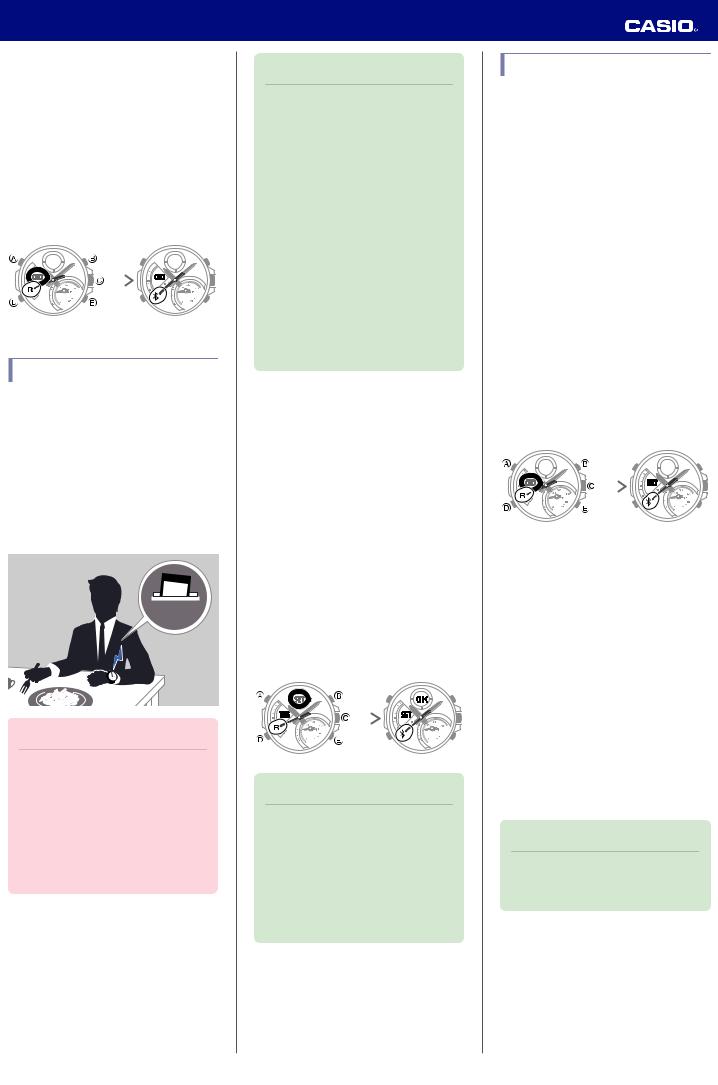
●Triggering Immediate Time Adjustment
The watch’s time setting will be adjusted automatically whenever you establish a connection between the watch and a phone. Whenever you want to adjust the watch’s time setting based on your phone’s time, perform the procedure below to connect with a phone.
1.Move the phone close to (within one meter of) the watch.
2.X Press (C).
[SET] flashes to indicate that the watch has started the connection operation. Once the watch and phone are connected, [OK] will appear, and then the watch will adjust its time setting based on information from the phone.
|
Trying to connect |
Following time |
|
|
adjustment |
||
Note
●You can perform the above operation for time adjustment from any watch mode.
●The connection is terminated automatically after time adjustment is complete.
●If time adjustment fails for some reason, [ERR] will appear.
Viewing Stopwatch Data
This section explains how to send lap times (up to 200 records) that are stored in watch memory, as well as other data to your phone for viewing with EDIFICE Connected.
● Sending Stopwatch Data to a Phone
Use the procedure below to send data from the watch to a phone.
1.Y Tap the “EDIFICE Connected” icon.
2.X Hold down (C) for at least 1.5 seconds until [CNCT] starts to flash.
When a connection is established between the watch and phone, [CNCT] will stop flashing and the second hand will move from [R] to e.
●If connection fails for some reason, [ERR] will appear on the display momentarily and then the watch will return to the mode it was in before you started the connection procedure.
|
Trying to connect |
Connected |
|
3.Y Perform the operation shown on the phone screen to transfer data measured by the watch to the phone.
After data transfer is complete, a list of the measurement data will appear on the phone display.
●Tapping a stopwatch data item displays its details.
● Checking a Lap Time
Use EDIFICE Connected to check the data you sent to the phone.
1.Y Tap the “EDIFICE Connected” icon.
2.Y Perform the operation shown on the phone screen to view the measurement data you want.
Note
●Tapping “Edit” displays a screen that you can use to change the data item title and to delete lap time data.
5
Operation Guide 5582
Configuring Timer Settings
1.Y Tap the “EDIFICE Connected” icon.
2.X Hold down (C) for at least 1.5 seconds until [CNCT] starts to flash.
When a connection is established between the watch and phone, [CNCT] will stop flashing and the second hand will move from [R] to e.
●If connection fails for some reason, [ERR] will appear on the display momentarily and then the watch will return to the mode it was in before you started the connection procedure.
|
Trying to connect |
Connected |
|
3.Y Perform the operation shown on the phone screen to configure the timer time setting.
Setting the Alarm
1.Y Tap the “EDIFICE Connected” icon.
2.X Hold down (C) for at least 1.5 seconds until [CNCT] starts to flash.
When a connection is established between the watch and phone, [CNCT] will stop flashing and the second hand will move from [R] to e.
●If connection fails for some reason, [ERR] will appear on the display momentarily and then the watch will return to the mode it was in before you started the connection procedure.
|
Trying to connect |
Connected |
|
3.Y Perform the operation shown on the phone screen to configure alarm time settings.
Configuring World Time
Settings
Specifying a World Time City with EDIFICE Connected causes the watch’s World Time City to change accordingly. Watch settings can be configured to perform auto summer time switching for the World Time City.
Note
●EDIFICE Connected World Time lets you select from among approximately 300 cities as the World Time City.
●Selecting a World Time City
1.Y Tap the “EDIFICE Connected” icon.
2.X Hold down (C) for at least 1.5 seconds until [CNCT] starts to flash.
When a connection is established between the watch and phone, [CNCT] will stop flashing and the second hand will move from [R] to e.
●If connection fails for some reason, [ERR] will appear on the display momentarily and then the watch will return to the mode it was in before you started the connection procedure.
|
Trying to connect |
Connected |
|
3.Y Perform the operation shown on the phone screen. The World Time setting will be reflected on the watch.
Note
●You can use EDIFICE Connected to select from among World Time cities in addition to those built into the watch. The additional cities can be selected only by using EDIFICE Connected.
●Configuring the Summer Time Setting
1.Y Tap the “EDIFICE Connected” icon.
2.X Hold down (C) for at least 1.5 seconds until [CNCT] starts to flash.
When a connection is established between the watch and phone, [CNCT] will stop flashing and the second hand will move from [R] to e.
●If connection fails for some reason, [ERR] will appear on the display momentarily and then the watch will return to the mode it was in before you started the connection procedure.
|
Trying to connect |
Connected |
|
3.Y Perform the operation shown on the phone screen to select a summer time setting.
●“Auto”
The watch switches between standard time and summer time automatically.
●“OFF”
The watch always indicates standard time.
●“ON”
The watch always indicates summer time.
Note
●While the summer time setting is “Auto”, the watch will switch between standard time and summer time automatically. You do not need to switch between standard time and summer time manually. Even if you are in an area that does not observe summer time, you can leave the watch’s summer time setting as “Auto”.
●For information about summer time periods, refer the “Summer Time Table” or EDIFICE Connected.
6

Operation Guide 5582
●Swapping Your World Time and Home Time
1.Y Tap the “EDIFICE Connected” icon.
2.X Hold down (C) for at least 1.5 seconds until [CNCT] starts to flash.
When a connection is established between the watch and phone, [CNCT] will stop flashing and the second hand will move from [R] to e.
●If connection fails for some reason, [ERR] will appear on the display momentarily and then the watch will return to the mode it was in before you started the connection procedure.
|
Trying to connect |
Connected |
|
3.Y Perform the operation shown on the phone screen to swap your Home Time with your World Time.
Note
●Auto time adjustment does not work for 24 hours after swapping of the Home Time and World Time.
Adjusting Hand Alignment
If the hands are out of alignment even though auto time adjustment is being performed, use EDIFICE Connected to adjust them.
1.Y Tap the “EDIFICE Connected” icon.
2.X Hold down (C) for at least 1.5 seconds until [CNCT] starts to flash.
When a connection is established between the watch and phone, [CNCT] will stop flashing and the second hand will move from [R] to e.
●If connection fails for some reason, [ERR] will appear on the display momentarily and then the watch will return to the mode it was in before you started the connection procedure.
|
Trying to connect |
Connected |
|
3.Y Perform the operation shown on the phone screen to correct hand alignment.
Phone Finder
You can use phone finder to trigger a tone on the phone to make it easy to find. The tone is forced to sound even if the phone is in vibrate mode.
Important!
●Do not use this function in areas where phone call tones are restricted.
●The tone sounds at a high volume. Do not use this function when listening to phone output over earphones.
1.X If the watch is connected with a phone, press any button to terminate the connection.
|
Trying to connect |
Disconnected |
|
2.X If the watch is in any mode besides the Timekeeping Mode, hold down (D) for at least two seconds to enter the Timekeeping Mode.
3.X Hold down (E) for at least 1.5 seconds until the second hand moves to [R].
The phone will sound a tone when it establishes a connection with the watch.
●It will take a few seconds before the phone tone sounds.
|
Searching for phone |
Connected |
|
4.X Press any button to stop the tone.
●You can press any watch button to stop the phone tone only during the first 30 seconds after it starts to sound.
Configuring Watch Settings
You can use EDIFICE Connected to specify the amount of time until a Bluetooth connection is automatically terminated, to enable or disable the watch operation tone, and to configure other settings.
1.Y Tap the “EDIFICE Connected” icon.
2.X Hold down (C) for at least 1.5 seconds until [CNCT] starts to flash.
When a connection is established between the watch and phone, [CNCT] will stop flashing and the second hand will move from [R] to e.
●If connection fails for some reason, [ERR] will appear on the display momentarily and then the watch will return to the mode it was in before you started the connection procedure.
|
Trying to connect |
Connected |
|
3.Y Select the setting you want to change and then perform the operation shown on the phone screen.
7
 Loading…
Функции
5 ежедневных будильников
Будильник напомнит Вам о повторяющихся событиях с помощью звукового сигнала, установленного Вами на определенное время. Вы также можете активировать почасовой сигнал времени, сообщающий о каждом полном часе. Эта модель имеет пять независимых будильников для оповещения о важных встречах.
Безель с IP Finish
Лицевая панель часов тщательно покрыта в соответствии с так называемым «процессом ионного покрытия» и обладает преимуществом повышенной стойкости к царапинам.
Неоновый дисплей
Светящееся покрытие обеспечивает длительную подсветку в темное время суток после короткого воздействия света.
Минеральное стекло
Прочное, устойчивое к царапинам минеральное стекло защищает часы от повреждений.
Память на 200 кругов
Измеренное общее время, прошедшее с начала тренировки или гонки, и промежуточное время можно сохранить с указанием даты и отобразить эти данные позже. Набор данных состоит из даты, общего времени, прошедшего с начала тренировки или гонки, и промежуточного времени. В памяти часов можно сохранить 200 записей.
Отображение скорости
Можно рассчитать среднюю скорость пройденного маршрута. Просто введите расстояние на начало и нажмите на секундомер при достижении пункта назначения — будет отображена средняя скорость.
Функция перемещения стрелок
Нажатие на кнопку обеспечит перемещение стрелок в такое положение, которое позволит Вам легко считать информацию с маленьких цифровых дисплеев – например, дату или показатели секундомера.
Функция поиска телефона
Не помните, куда положили смартфон? При нажатии кнопки на ваших часах смартфон подает звуковой сигнал.
Bluetooth® Smart
Часы оснащены технологией Bluetooth®, которая предлагает энергосберегающую возможность передачи данных нажатием кнопки. С помощью Bluetooth® вы можете подключить часы к смартфону, не используя провод, и получить доступ к целому ряду полезных функций.
Smartphone time
Если часы подключены к смартфону, время устанавливается автоматически и отображается текущее время, так что во всем мире.
Солнечная батарейка
Невидимые солнечные элементы в часах преобразуют свет в энергию и обеспечивают работу всех функций. Аккумуляторная батарея обеспечивает необходимую емкость для работы в условиях плохой освещенности.
Таймер — 1/10 сек. — 24 часа
Для поклонников точности: таймеры обратного отсчета напомнят Вам о текущих или особенных событиях, издав звуковой сигнал в установленное время. Время можно предварительно настроить от 1 секунды и до 100 часов. Часы могут затем автоматически начать отсчет в обратную сторону в установленное время. Идеальное решение для людей, которым необходимо ежедневно принимать лекарства или выполнять промежуточные упражнения (тренировки).
Предохранительная защелка
Всегда надежно: у этих часов есть особая безопасная предохранительная защелка, которая помогает предотвратить случайное расстегивание ремешка.
Размеры
51,5 mm x 48,0 mm x 13,9 mm (В x Ш x T)

EDIFICE
Smartphone Link Model
ECB-900MDC-1A
Support Menu
-
ダイバーズウオッチ(200m潜水用防水時計)ご使用上の注意
Repair
Click here for information on repairs
Inquiry
Click here for inquiries about operation, features, purchasing, etc.
Repair
Click here for information on repairs
Inquiry
Click here for inquiries about operation, features, purchasing, etc.
Notice
Скачать и распечатать инструкцию
- Прочитать и распечатать без рекламы
- Загрузить, чтобы сохранить себе
- Править, переслать или читать оффлайн
Скачать
Похожие

Casio ECB-900DB-1B
Casio
0
Casio ECB-900DB-1B
- Понравилось
- 0
- Скачиваний
- 0
Просмотреть

Casio ECB-900DB-1B
Casio
0
Casio ECB-900DB-1B
- Понравилось
- 0
- Скачиваний
- 0
Просмотреть