2012 CR-V
Owner’s Manual (Unlinked)
This document does not contain hyperlinks and may be formatted for printing instead of web use. This is due to changes in content and specifications of the vehicle that happen throughout the model year. This manual will be replaced with a hyperlinked version at the end of the model year.
|
© 2011 American Honda Motor Co., Inc. — All Rights Reserved |
P/N 00X31-T0A-6000 |

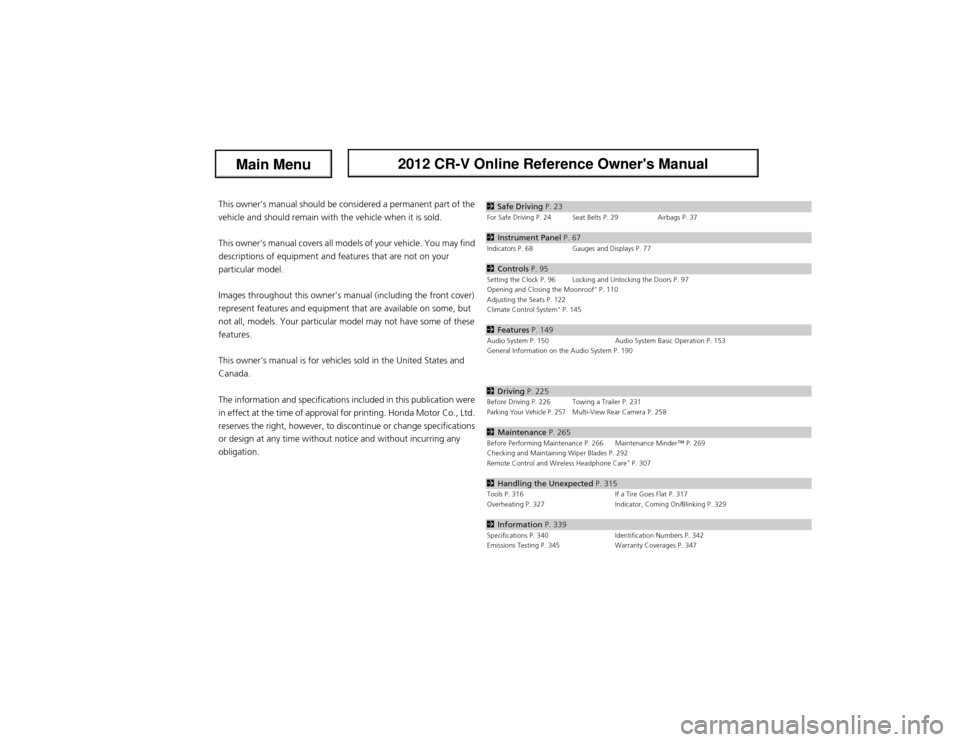
This owner’s manual should be considered a permanent part of the vehicle and should remain with the vehicle when it is sold.
This owner’s manual covers all models of your vehicle. You may find descriptions of equipment and features that are not on your particular model.
Images throughout this owner’s manual (including the front cover) represent features and equipment that are available on some, but not all, models. Your particular model may not have some of these features.
This owner’s manual is for vehicles sold in the United States and Canada.
The information and specifications included in this publication were in effect at the time of approval for printing. Honda Motor Co., Ltd. reserves the right, however, to discontinue or change specifications or design at any time without notice and without incurring any obligation.
|
2 |
Safe Driving P. 25 |
||
|
For Safe Driving P. 26 |
Seat Belts P. 31 |
Airbags P. 39 |
|
|
2 |
Instrument Panel P. 69 |
||
|
Indicators P. 70 |
Gauges and Displays P. 79 |
2 Controls P. 97
Setting the Clock P. 98 Locking and Unlocking the Doors P. 100
Opening and Closing the Moonroof* P. 116
Adjusting the Seats P. 128
Climate Control System* P. 151
|
2 |
Features P. 155 |
||
|
Audio System P. 156 |
Audio System Basic Operation P. 159 |
||
|
General Information on the Audio System P. 210 |
|||
|
2 |
Driving P. 245 |
||
|
Before Driving P. 246 |
Towing a Trailer P. 251 |
||
|
Parking Your Vehicle P. 277 Multi-View Rear Camera* P. 278 |
|||
|
2 |
Maintenance P. 285 |
||
|
Before Performing Maintenance P. 286 |
Maintenance Minder™ P. 289 |
Checking and Maintaining Wiper Blades P. 316
Remote Control and Wireless Headphone Care* P. 331
2 Handling the Unexpected P. 339
|
Tools P. 340 |
If a Tire Goes Flat P. 341 |
|
Overheating P. 351 |
Indicator, Coming On/Blinking P. 353 |
2 Information P. 363
|
Specifications P. 364 |
Identification Numbers P. 366 |
|
Emissions Testing P. 369 |
Warranty Coverages P. 371 |

|
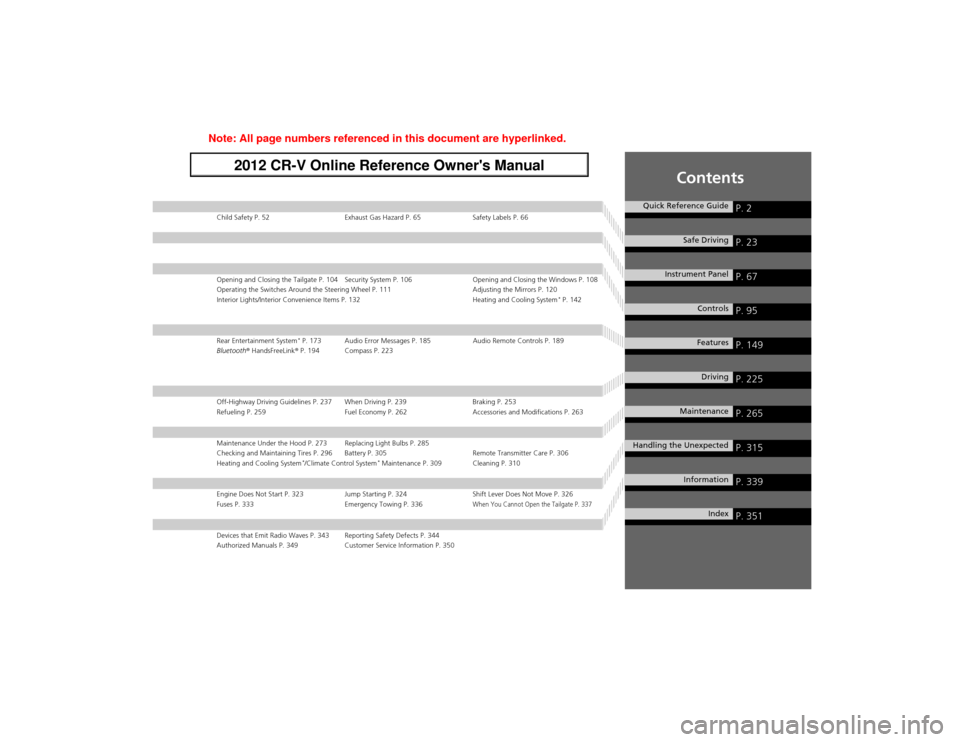
Child Safety P. 54 |
Exhaust Gas Hazard P. 67 |
Safety Labels P. 68 |
|
Opening and Closing the Tailgate P. 110 |
Security System P. 112 |
Opening and Closing the Windows P. 114 |
|
Operating the Switches Around the Steering Wheel P. 117 |
Adjusting the Mirrors P. 126 |
|
|
Interior Lights/Interior Convenience Items P. 138 |
Heating and Cooling System* P. 148 |
|
|
Rear Entertainment System* P. 193 |
Audio Error Messages P. 205 |
Audio Remote Controls P. 209 |
|
Bluetooth® HandsFreeLink®* P. 214 |
Compass* P. 243 |
|
|
Off-Highway Driving Guidelines P. 257 |
When Driving P. 259 |
Braking P. 273 |
|
Refueling P. 279 |
Fuel Economy P. 282 |
Accessories and Modifications P. 283 |
|
Maintenance Under the Hood P. 297 |
Replacing Light Bulbs P. 309 |
|
|
Checking and Maintaining Tires P. 320 |
Battery P. 329 |
Remote Transmitter Care P. 330 |
|
Heating and Cooling System*/Climate Control System* Maintenance P. 333 |
Cleaning P. 334 |
|
|
Engine Does Not Start P. 347 |
Jump Starting P. 348 |
Shift Lever Does Not Move P. 350 |
|
Fuses P. 357 |
Emergency Towing P. 360 |
When You Cannot Open the Tailgate P. 361 |
Contents
Quick Reference Guide P. 2
Safe Driving P. 25
Instrument Panel P. 69
Controls P. 97
Features P. 155
Driving P. 245
Maintenance P. 285
Handling the Unexpected P. 339
Information P. 363
Index P. 375
|
Devices that Emit Radio Waves P. 367 |
Reporting Safety Defects P. 368 |
|
Authorized Manuals P. 373 |
Customer Service Information P. 374 |
Guide Reference Quick
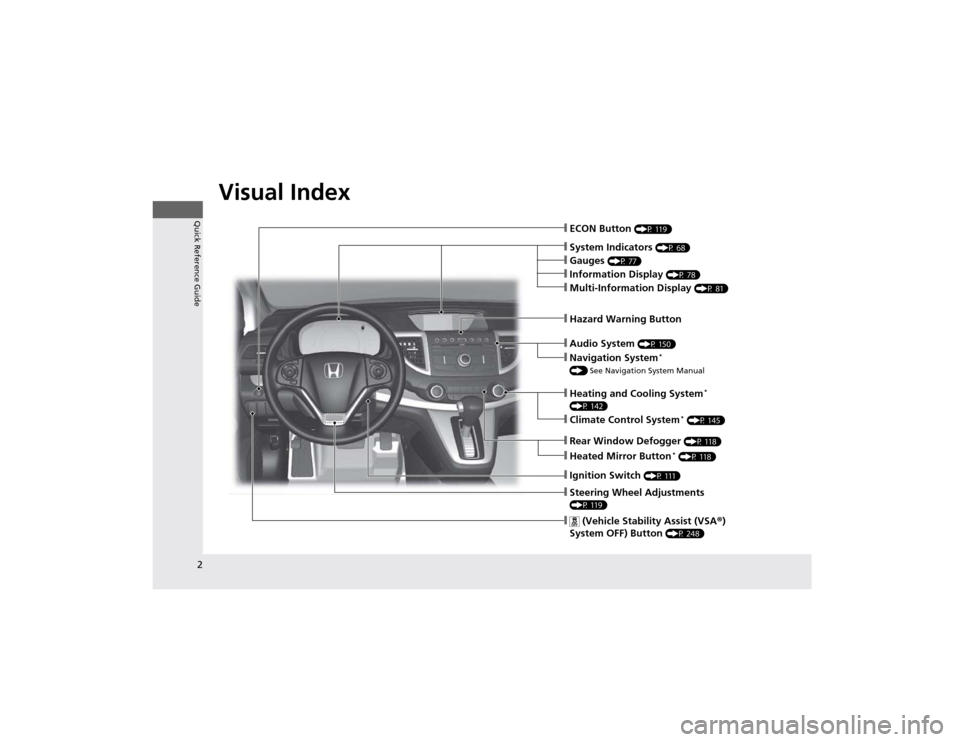
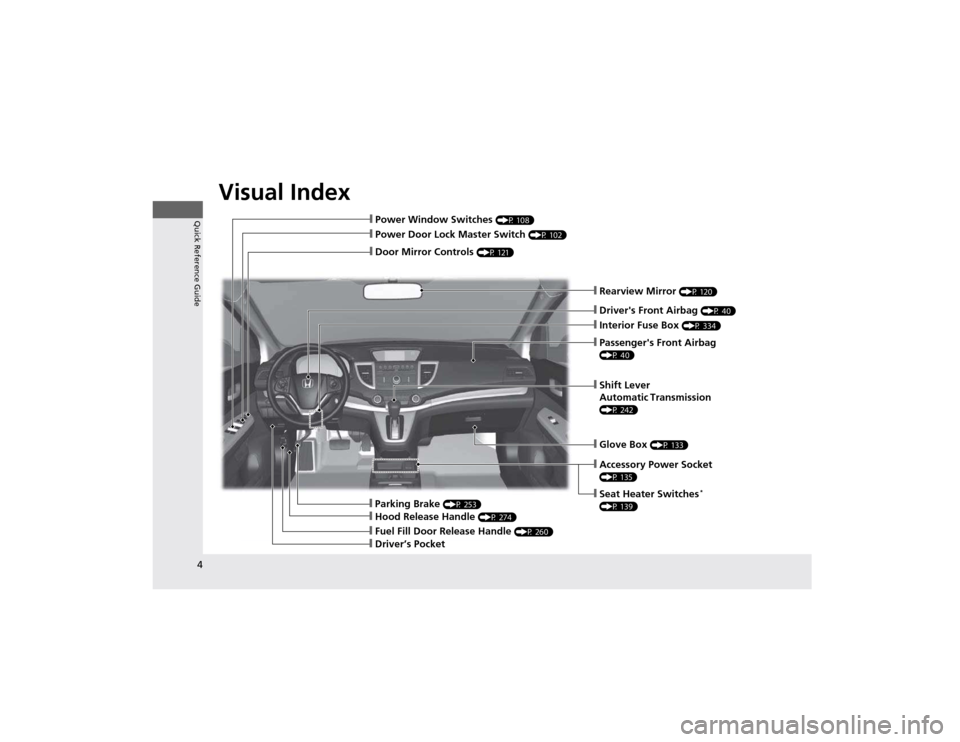
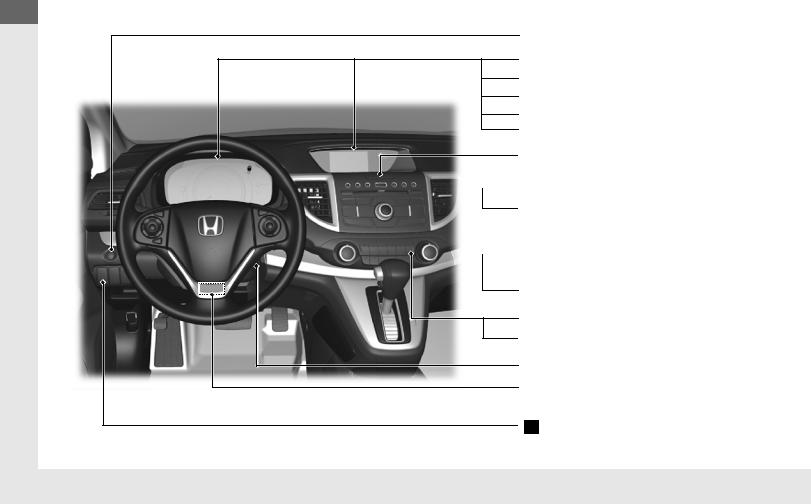
Visual Index
ECON Button (P 125)
System Indicators (P 70)
Gauges (P 79)
Information Display (P 80)
Multi-Information Display* (P 83)
Audio Display*
Hazard Warning Button

Navigation System*
() See Navigation System Manual

(P 148)
|
Climate Control System* (P 151) |
|
Rear Window Defogger (P 124) |
|
Heated Mirror Button* (P 124) |
|
Ignition Switch (P 117) |
|
Steering Wheel Adjustments |
|
(P 125) |
|
(Vehicle Stability Assist (VSA®) |
|
System OFF) Button (P 268) |
2

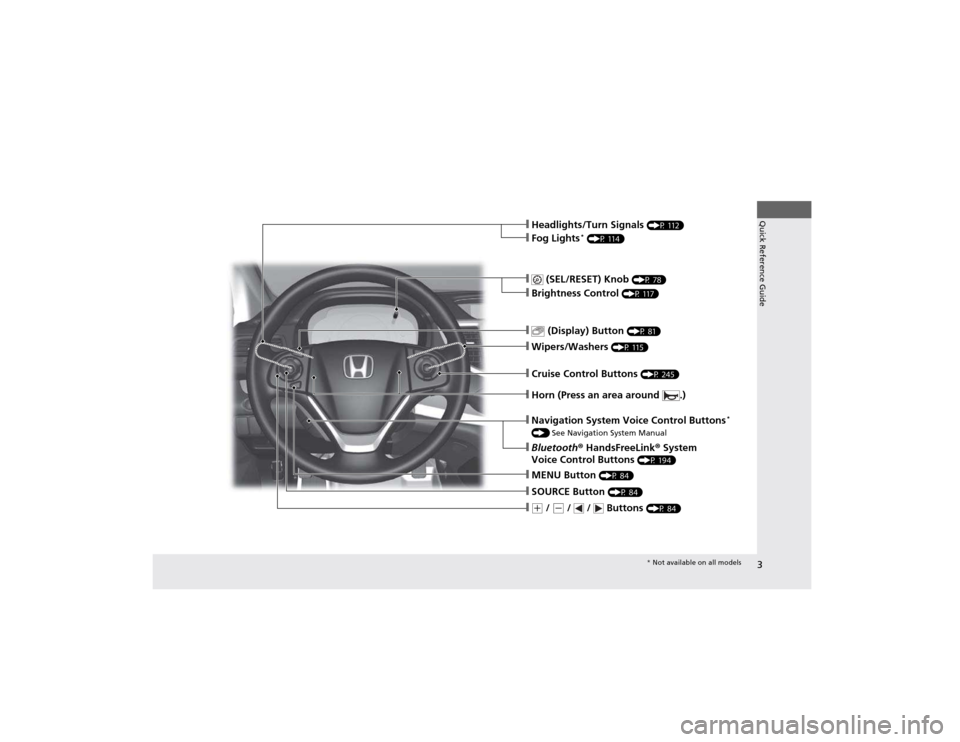
Headlights/Turn Signals (P 118)
Fog Lights* (P 120)

Brightness Control (P 123)
|
(Display) Button* (P 83) |
|||
|
Wipers/Washers (P 121) |
|||
|
Cruise Control Buttons (P 265) |
|||
|
Horn (Press an area around |
.) |
||
|
Navigation System Voice Control Buttons* |
|||
|
() See Navigation System Manual |
|||
|
Bluetooth® HandsFreeLink® System |
|||
|
Voice Control Buttons* (P 214) |
|||
|
MENU Button* (P 86) |
|||
|
SOURCE Button (P 86) |
|||
|
(+ / (— / |
/ |
Buttons (P 86) |
Guide Reference Quick
|
* Not available on all models |
3 |
Visual Index
|
Quick |
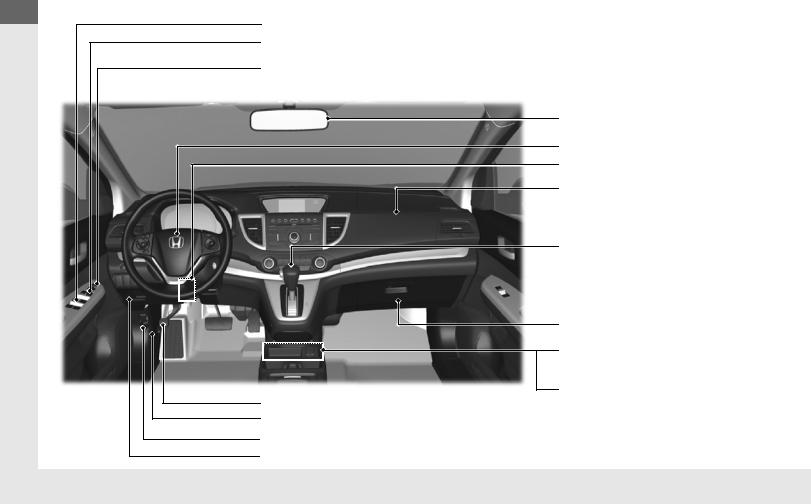
Power Window Switches (P 114) |
|
Power Door Lock Master Switch (P 105) |
|
|
Guide Reference |
Door Mirror Controls (P 127) |
|
Parking Brake (P 273) |
|
Hood Release Handle (P 298) |
|
Fuel Fill Door Release Handle (P 280) |
|
Driver’s Pocket |
Rearview Mirror (P 126)
Driver’s Front Airbag (P 42)
Interior Fuse Box (P 358)
Passenger’s Front Airbag
(P 42)
Shift Lever
Automatic Transmission
(P 262)
Glove Box (P 139)
Accessory Power Socket
(P 141)
Seat Heater Switches*
(P 145)
4
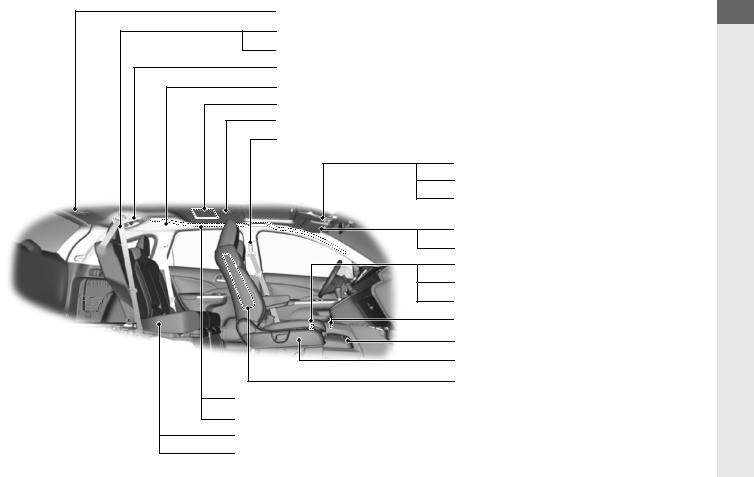
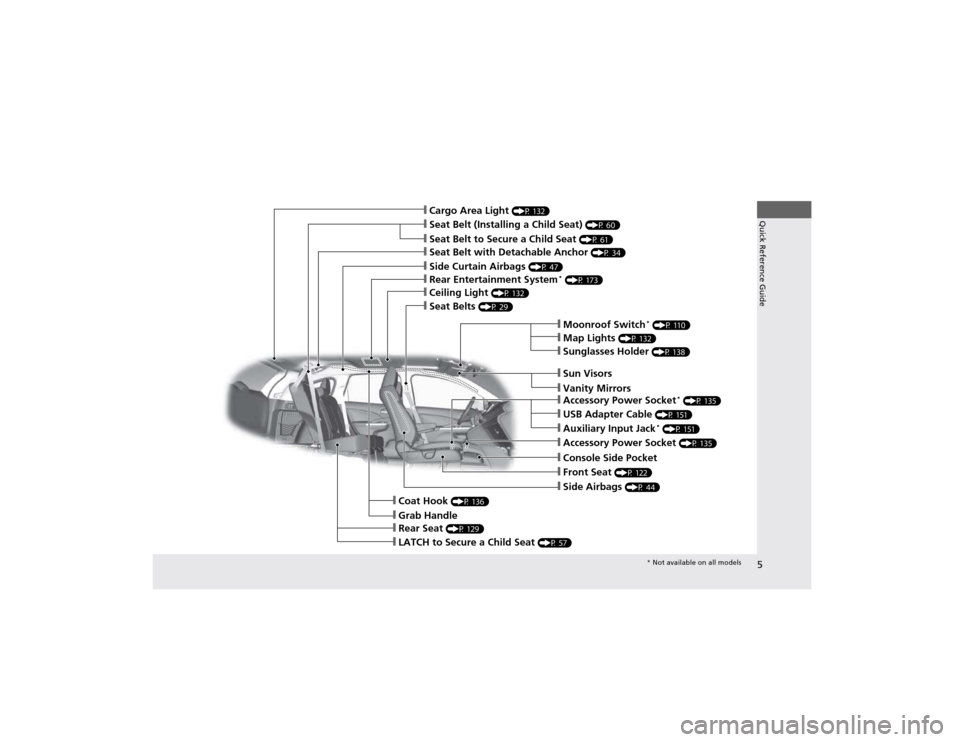
Cargo Area Light (P 138)
Seat Belt (Installing a Child Seat) (P 62)
Seat Belt to Secure a Child Seat (P 63)
Seat Belt with Detachable Anchor (P 36)
Side Curtain Airbags (P 49)
Rear Entertainment System* (P 193)
Ceiling Light (P 138)
Seat Belts (P 31)
Moonroof Switch* (P 116)
Map Lights (P 138)
Sunglasses Holder (P 144)
|
Sun Visors |
|
Vanity Mirrors |
|
Accessory Power Socket* (P 141) |
|
USB Adapter Cable (P 157) |
|
Auxiliary Input Jack* (P 157) |
|
Accessory Power Socket (P 141) |
|
Console Side Pocket |
|
Front Seat (P 128) |
|
Side Airbags (P 46) |
Coat Hook (P 142)
Grab Handle
Rear Seat (P 135)
LATCH to Secure a Child Seat (P 59)
Guide Reference Quick
|
* Not available on all models |
5 |
Guide Reference Quick
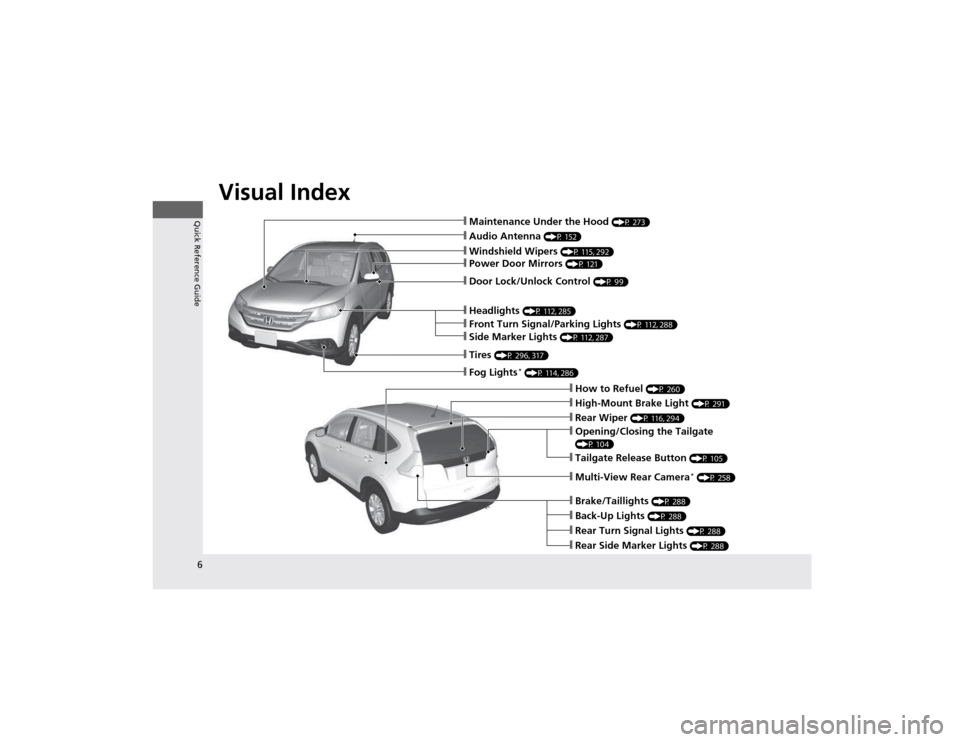
Visual Index
|
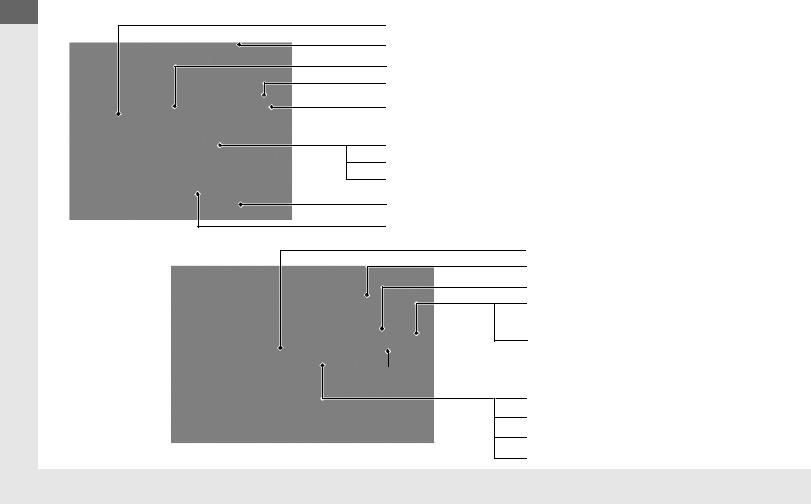
Maintenance Under the Hood (P 297) |
|
Audio Antenna (P 158) |
|
Windshield Wipers (P 121, 316) |
|
Power Door Mirrors (P 127) |
|
Door Lock/Unlock Control (P 102) |
Headlights (P 118, 309)
|
Front Turn Signal/Parking Lights (P 118, 312) |
|
Side Marker Lights (P 118, 311) |
|
Tires (P 320, 341) |
|
Fog Lights* (P 120, 310) |
|
How to Refuel (P 280) |
|
High-Mount Brake Light (P 315) |
|
Rear Wiper (P 122, 318) |
|
Opening/Closing the Tailgate |
(P 110)
Tailgate Release Button (P 111)

Brake/Taillights (P 312)
Back-Up Lights (P 312)
Rear Turn Signal Lights (P 312)
Rear Side Marker Lights (P 312)
6

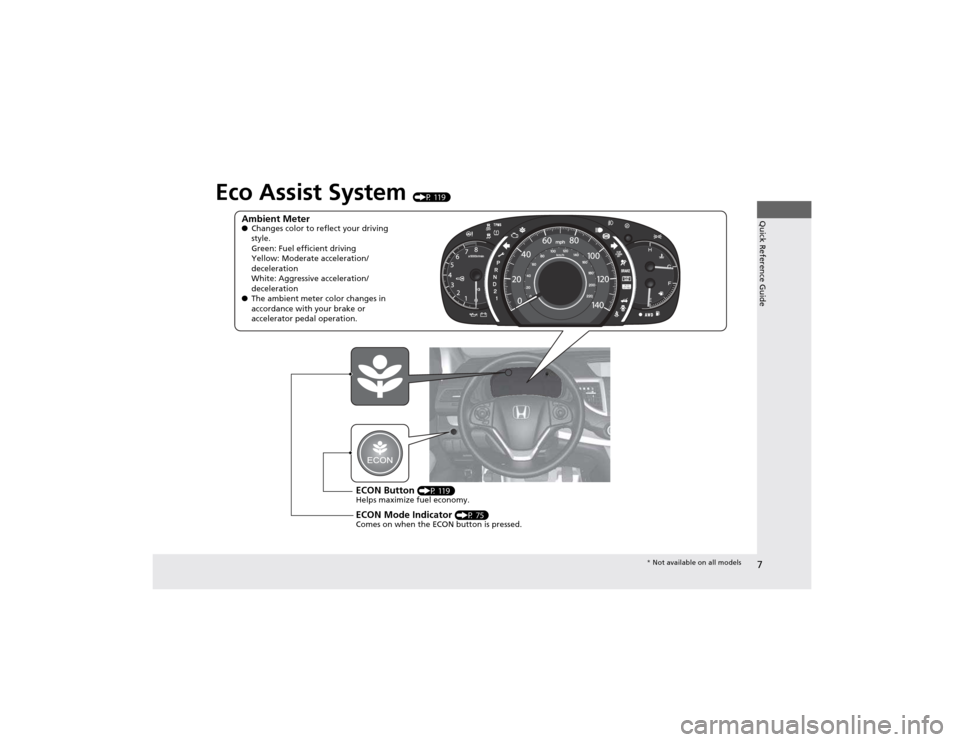
Eco Assist System (P 125)
Ambient Meter
● Changes color to reflect your driving style.
Green: Fuel efficient driving Yellow: Moderate acceleration/ deceleration
White: Aggressive acceleration/ deceleration
● The ambient meter color changes in accordance with your brake or accelerator pedal operation.
ECON Button (P 125)
Helps maximize fuel economy.
ECON Mode Indicator (P 77)
Comes on when the ECON button is pressed.
Guide Reference Quick
|
* Not available on all models |
7 |
Guide Reference Quick
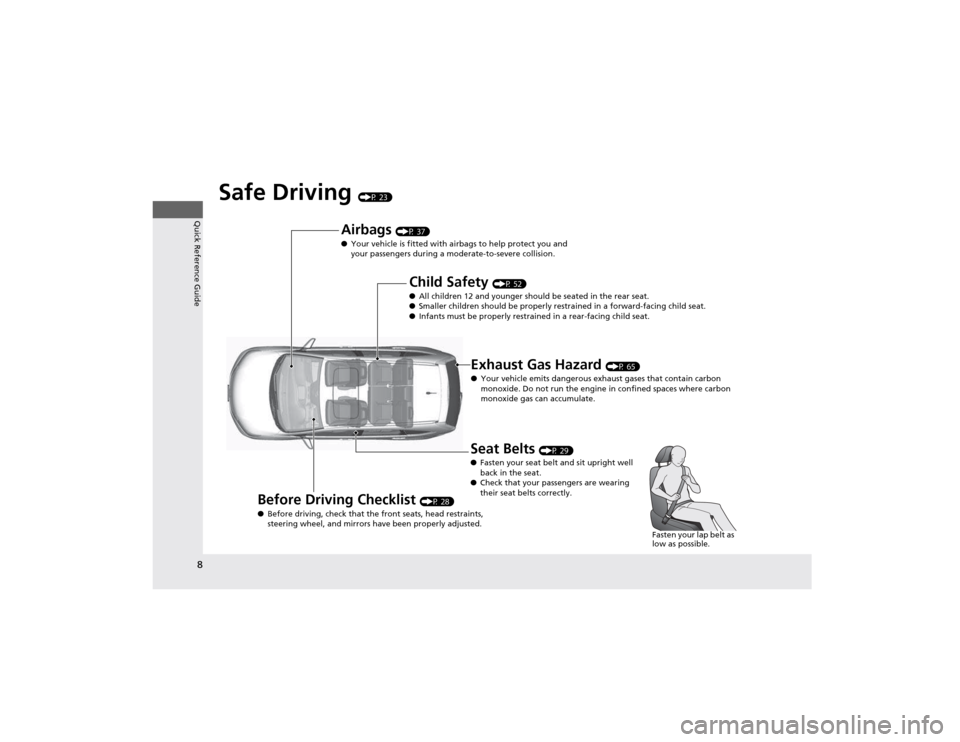
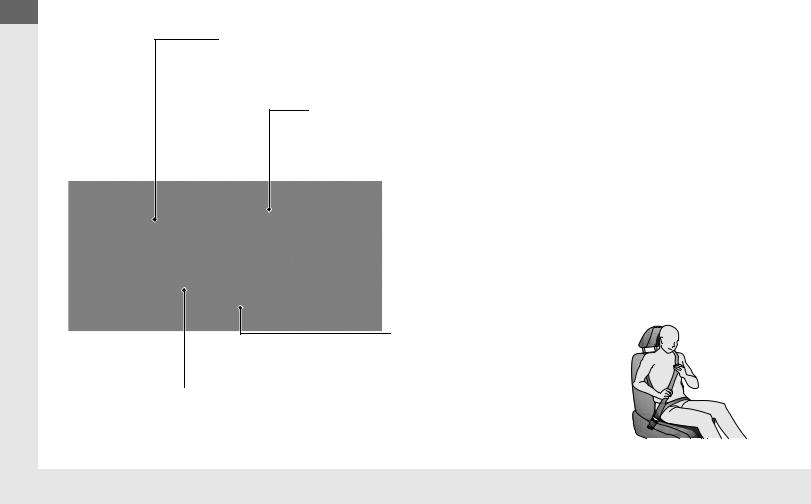
Safe Driving (P 25)
Airbags (P 39)
●Your vehicle is fitted with airbags to help protect you and your passengers during a moderate-to-severe collision.
Child Safety (P 54)
●All children 12 and younger should be seated in the rear seat.
●Smaller children should be properly restrained in a forward-facing child seat.
●Infants must be properly restrained in a rear-facing child seat.

●Your vehicle emits dangerous exhaust gases that contain carbon monoxide. Do not run the engine in confined spaces where carbon monoxide gas can accumulate.
Seat Belts (P 31)
● Fasten your seat belt and sit upright well back in the seat.
● Check that your passengers are wearing
their seat belts correctly.
Before Driving Checklist (P 30)
● Before driving, check that the front seats, head restraints, steering wheel, and mirrors have been properly adjusted.
Fasten your lap belt as low as possible.
8

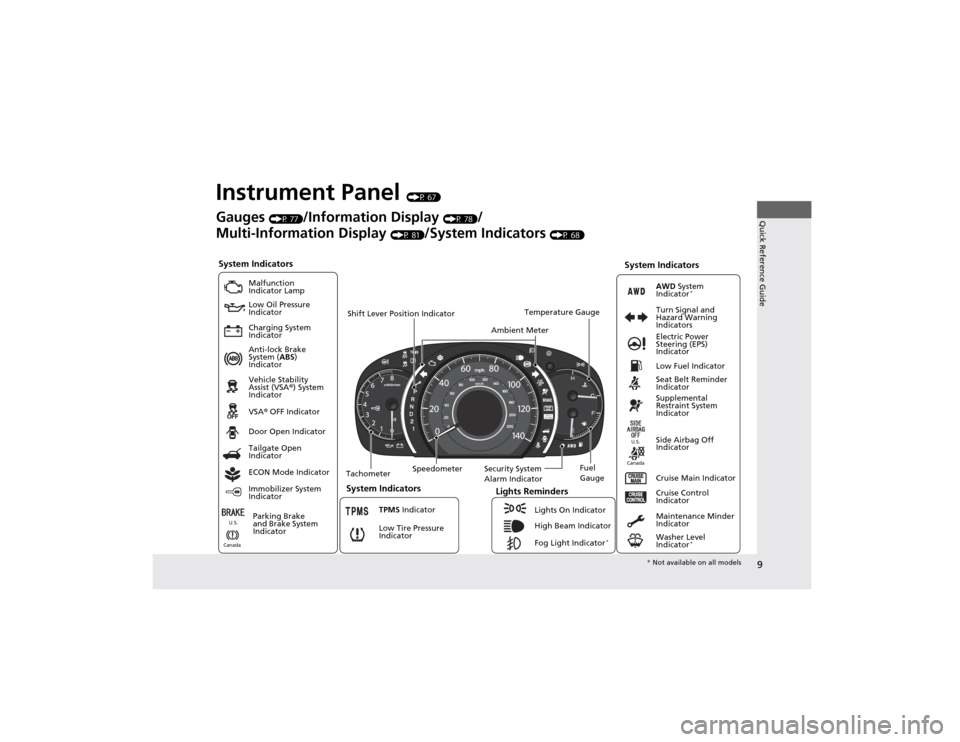
Instrument Panel (P 69)
Gauges (P 79)/Information Display (P 80)/ Multi-Information Display* (P 83)/System Indicators (P 70)
System Indicators
|
Shift Lever Position Indicator |
Temperature Gauge |
Ambient Meter
|
Speedometer |
Security System |
Fuel |
|||||||
|
Tachometer |
|||||||||
|
Alarm Indicator |
Gauge |
||||||||
|
System Indicators |
Lights Reminders |
U.S.
Canada
System Indicators
AWD System
Indicator*
Turn Signal and
Hazard Warning
Indicators
Electric Power
Steering (EPS)
Indicator
U.S.
Canada
Guide Reference Quick
|
* Not available on all models |
9 |
Guide Reference Quick
Controls (P 97)
|
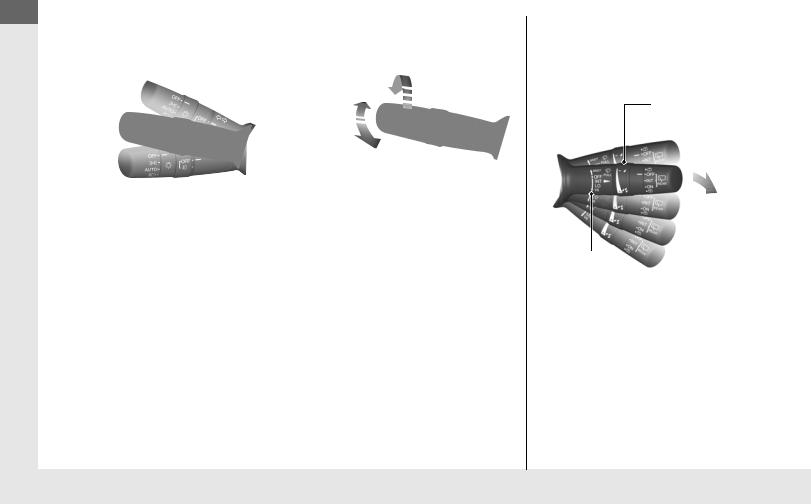
Turn Signals (P 118) |
Lights (P 118) |
|
|
Turn Signal Control Lever |
Light Control Switches |
|
|
Right |
||
|
High Beam |
||
|
Low Beam |
||
|
Flashing |
||
|
Left |
||
Wipers and Washers
(P 121)
Wiper/Washer Control Lever
Adjustment Ring


Pull toward you to spray washer fluid.
MIST
OFF
INT: Low speed with intermittent LO: Low speed wipe
HI: High speed wipe
10
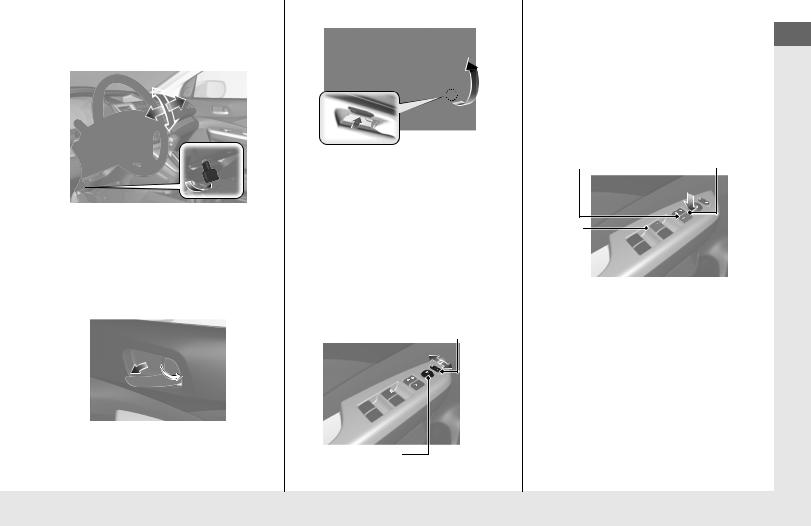
Steering Wheel (P 125)
●To adjust, pull the adjustment lever towards you, adjust to the desired position, then lock the lever back in place.
Unlocking the Front Doors from the Inside
(P 104)
●Pull either front door inner handle to unlock and open it at the same time.
Tailgate (P 110)
●With all the doors unlocked, push the tailgate release button on the tailgate to open it.
Power Door Mirrors
(P 127)
●With the ignition switch in ON w, move the selector switch to L or R.
●Push the appropriate edge of the adjustment switch to adjust the mirror.
Selector Switch
Adjustment Switch
Power Windows (P 114)
●With the ignition switch in ON w, open and close the power windows.
●If the power window lock button is in the off position, each passenger’s window can be opened and closed with its own switch.
●If the power window lock button is in the on position (indicator is on), each passenger’s window switch is disabled.
Power Window Lock Button Indicator
Window
Switch
Guide Reference Quick
11

Guide Reference Quick
Heating and Cooling System* (P 148)
●Rotate the fan control dial to adjust the fan speed.
●Press the Mode buttons (


●Rotate the temperature control dial to adjust the temperature.
●Use the 
●Rotate the fan control dial to OFF to turn the system off.
● Press the 


Fan Control
Dial

A/C (Air Conditioning) Button


Control Dial

Air flows from dashboard vents.
Air flows from floor and dashboard vents.
Air flows from floor vents.
Air flows from floor and windshield defroster vents.
12

Climate Control System* (P 151)
●Press the AUTO button to activate the climate control system.
●Press the 
●Press the 
Models with navigation system
The climate control system is voice operable. See the navigation system manual for complete details.
SYNC (Synchronized) Button
Driver’s Side
Temperature
Control Dial


Defroster) Button

Temperature
Control Dial
AUTO Button


A/C (Air Conditioning)
Button
MODE Control Button
Air flows from dashboard vents.
Air flows from floor and dashboard vents.
Air flows from floor vents.
Air flows from floor and windshield defroster vents.
Clock (P 98)
Models without navigation system
a Press the CLOCK (AUX) button until the displayed time begins flashing.
b Press Preset 4 (Hour) or 5 (Minute) to set the time. Press Preset 6 (Reset) to set the time to the nearest hour.
c Press the CLOCK button again to set the time.
To set the time to the nearest hour:
Press and hold the CLOCK button until the clock display begins to blink, then press the 6 (Reset) button.
Depending on the displayed time, the clock sets forward or backward.
Example:
1:06 will reset to 1:00 1:53 will reset to 2:00
Models with navigation system
The navigation system receives signals from GPS satellites, updating the clock automatically.
Guide Reference Quick
|
* Not available on all models |
13 |
Guide Reference Quick
Features (P 155)
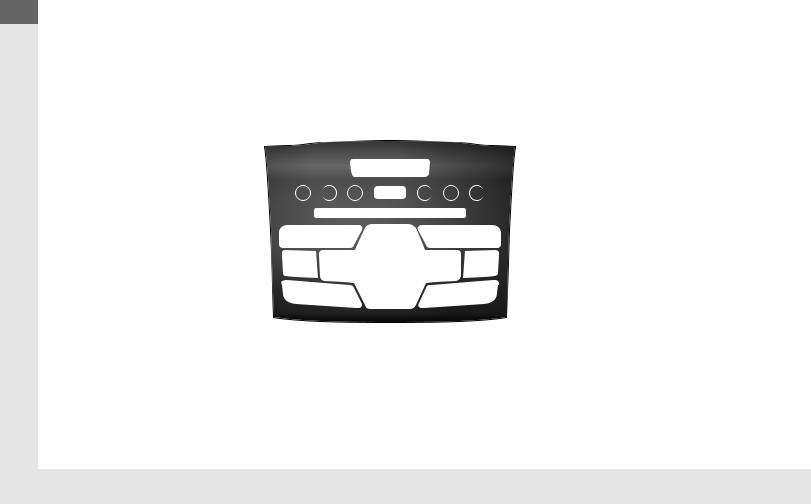
Audio System (P 156) For navigation system operation () See Navigation System Manual
Models without multi-information display (P 159)
SCAN Button

FM Button
AM Button
SKIP/SEEK Button
|
(Power) Button |
|
CD Slot |
|
Preset Buttons (1-6) |
|
(CD Eject) Button |
AUX Button
CD Button
SKIP/SEEK Button
|
(Sound) Button |
SETUP Button |
|||||||||||
|
Selector Knob |
Button |
|||||||||||
14
|
(P 173) |
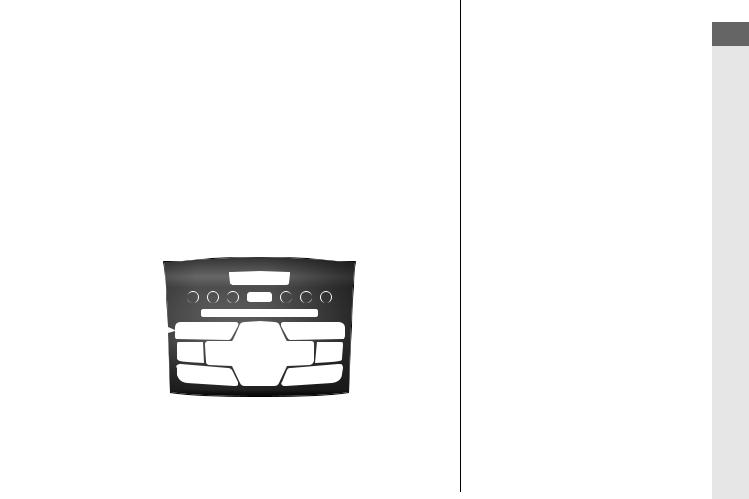
● Audio Remote Controls (P 209) |
||
|
Models with multi-information display |
|||
(+ / (— Button


|
SOURCE |
|||||
|
Button |
|||||
|
(Power) |
● |
+ / — Button |
|||
|
Press and release to adjust the volume up/ |
|||||
|
Button |
|||||
|
down. |
|||||
|
CD Slot |
|||||
|
● SOURCE Button |
|||||
|
Button |
Preset Buttons |
||||
|
Press and release to change the audio |
|||||
|
AM Button |
|||||
|
(1-6) |
|||||
|
mode: FM1/FM2/AM/CD/XM1*/XM2*/AUX. |
|||||
|
SCAN Button |
(CD Eject) |
● |
/ |
Button |
|
|
FM Button |
|||||
|
Radio:Press and release to change the |
|||||
|
Button |
|||||
|
preset station. |
|||||
|
Button* |
CD Button |
Press and hold to select the next or |
|||
|
FM/AM Button* |
AUX Button |
previous strong station. |
|||
|
CD/USB device: |
|||||
|
SKIP/SEEK Button |
SKIP/SEEK Button |
Press and release to skip to the |
|||
|
beginning of the next song or |
|||||
|
return to the beginning of the |
|||||
|
SETUP Button |
current song. |
||||
|
Press and hold to change a folder. |
|||||
|
Button |
|||||
|
PHONE Button |
|||||
|
Selector Knob |
Guide Reference Quick
|
* Not available on all models |
15 |
Guide Reference Quick
Driving (P 245)
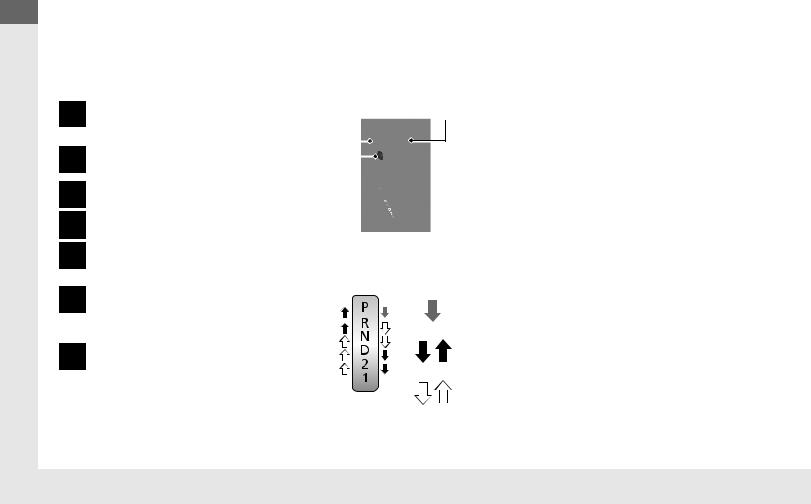
Automatic Transmission (P 263)
●Shift to (P and depress the brake pedal when starting the engine.
●Shifting
|
Park |
Release Button |
||||
|
Turn off or start the engine. |
|||||
|
Transmission is locked. |
|||||
|
Reverse |
|||||
|
Neutral |
|||||
|
Transmission is not locked. |
|||||
|
(d Button |
|||||
|
Drive |
|||||
|
Normal driving. |
|||||
|
Second |
|||||
|
Used to increase engine braking |
|||||
|
(the transmission is locked in 2nd gear) |
First
Used to further increase engine braking (the transmission is locked in 1st gear)
Drive (D3)
Press the (d button while the shift lever is in
(D.
Used when:
•Going up or down hills •Towing a trailer in hilly terrain
Shift Lever
Depress the brake pedal and press the release button to move out of (P.
Press the release button to move the shift lever.
Move the shift lever without pressing the release button.
16
VSA® OFF Button (P 269)
●The vehicle stability assist (VSA®) system helps stabilize the vehicle during cornering, and helps maintain traction while accelerating on loose or slippery road surfaces.
●VSA® comes on automatically every time you start the engine.
●To turn VSA® on or off, press and hold the button until you hear a beep.
Cruise Control (P 265)
●Cruise control allows you to maintain a set speed without keeping your foot on the accelerator pedal.
●To use cruise control, press the CRUISE button, then press –/SET once you have received the desired speed (above 25 mph or 40 km/h).
Tire Pressure Monitoring
System (TPMS) (P 270)
●TPMS monitors tire pressure.
●TPMS is turned on automatically every time you start the engine.
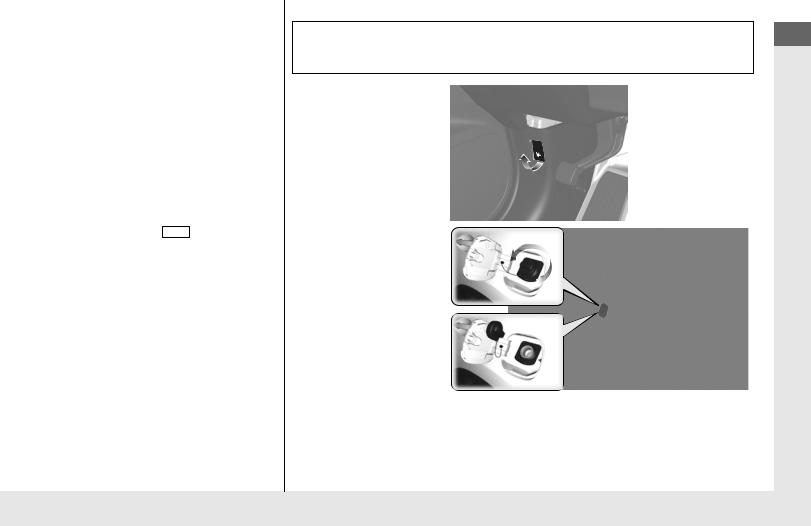
Refueling (P 279)
Fuel recommendation: Unleaded gasoline with a pump octane number 87 or higher required
Fuel tank capacity: 15.3 US gal (58 L)
a Pull the fuel fill door release handle.
b Turn the fuel fill cap slowly to remove the cap.
c Place the cap in the holder on the fuel fill door.
d After refueling, screw the cap back on until it clicks at least once.
Guide Reference Quick
17
Guide Reference Quick
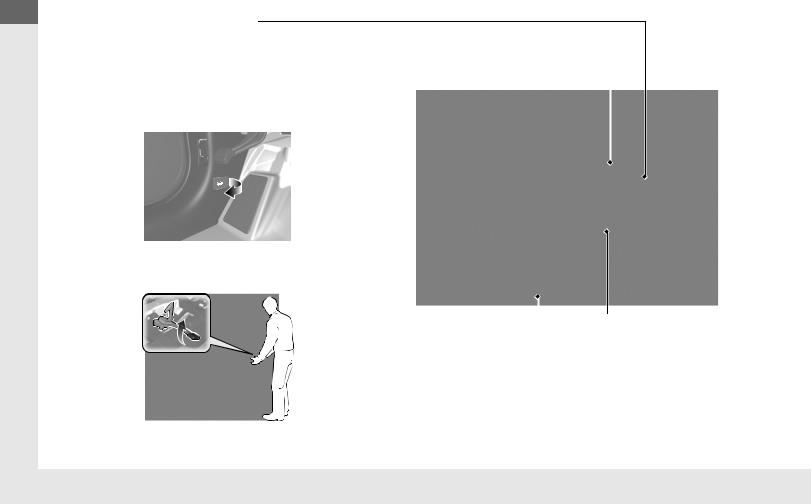
Maintenance (P 285)
Under the Hood (P 297)
|
● Check engine oil, engine coolant, and windshield washer |
Wiper Blades (P 316) |
||
|
fluid. Add when necessary. |
● Replace blades if they leave streaks |
||
|
● Check brake fluid. |
|||
|
across the windshield. |
|||
|
● Check the battery condition monthly. |
|||
|
a Pull the hood release handle under the corner of the |
|||
|
dashboard. |
|||
b Locate the hood latch lever, pull the lever up, and lift up the hood.
|
Tires (P 320) |
Lights (P 309) |
||
|
● Inspect tires and wheels regularly. |
● Inspect all lights regularly. |
||
|
● Check tire pressures regularly. |
|||
|
● Install snow tires for winter |
|||
|
driving. |
c When finished, close the hood and make sure it is firmly locked in place.
18
Handling the Unexpected (P 339)
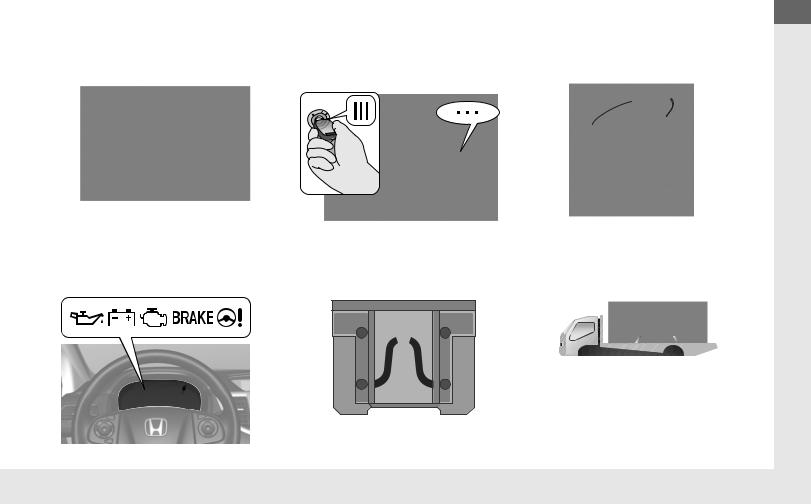
Flat Tire (P 341)
●Park in a safe location and replace the flat tire with the compact spare tire in the cargo area.
Engine Won’t Start
(P 347)
●If the battery is dead, jump start using a booster battery.
Indicators Come On
(P 353)
●Identify the indicator and consult the owner’s manual.
Blown Fuse (P 357)
●Check for a blown fuse if an electrical device does not operate.
Overheating (P 351)
●Park in a safe location. If you do not see steam under the hood, open the hood, and let the engine cool down.
Emergency Towing
(P 360)
●Call a professional towing service if you need to tow your vehicle.
Guide Reference Quick
19
Guide Reference Quick
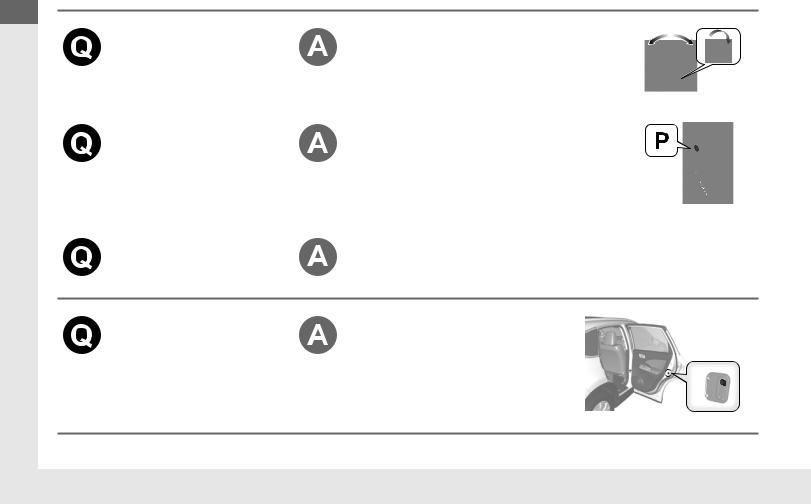
What to Do If
|
The ignition switch does |
● |
The steering wheel may be locked. |
|
not turn from 0 to q. |
● |
Try to turn the steering wheel left and right |
|
Why? |
while turning the ignition key. |
|
|
The ignition switch does |
The shift lever should be moved to P. |
|
|
not turn from q to 0 and |
||
|
I cannot remove the key. |
||
|
Why? |
||
|
Why does the brake pedal |
This can occur when the ABS activates, and does not indicate a |
|
|
pulsate slightly when |
problem. Apply firm, steady pressure on the brake pedal. Never |
|
|
applying the brakes? |
pump the brake pedal. |
The rear door cannot be opened from inside the vehicle. Why?
Check if the childproof lock is in the lock position. If so, open the rear door with the outside door handle. To cancel this function, push the lever to the unlock position.
20

|
Why do the doors lock |
If you do not open the doors within 30 seconds, the doors are |
|
|
after I unlocked the doors |
relocked automatically for security. |
|
|
using a remote |
||
|
transmitter? |
||
|
Why does the beeper |
The beeper sounds when: |
|
|
sound when I open the |
● |
The key is left in the ignition switch. |
|
driver’s door? |
● |
The exterior lights are left on. |
|
Why does the beeper |
The beeper sounds when: |
|
|
sound when I start driving? |
● |
Driver and/or front passenger are not wearing their seat belts. |
|
● |
The parking brake lever is not fully released. |
|
|
Why do I hear a screeching |
The brake pads may need to be replaced. Have your vehicle |
|
|
sound when I apply the |
inspected by a dealer. |
|
|
brake pedal? |
||
Guide Reference Quick
21

Guide Reference Quick
California Proposition 65 Warning
WARNING: This product contains or emits chemicals known to the state of California to cause cancer and birth defects or other reproductive harm.
Event Data Recorders
This vehicle is equipped with an event data recorder (EDR).
The main purpose of an EDR is to record, in certain crash or near crash-like situations, such as an air bag deployment or hitting a road obstacle, data that will assist in understanding how a vehicle’s systems performed. The EDR is designed to record data related to vehicle dynamics and safety systems for a short period of time, typically 30 seconds or less. The EDR in this vehicle is designed to record such data as:
•How various systems in your vehicle were operating;
•Whether or not the driver and passenger safety belts were buckled/fastened;
•How far (if at all) the driver was depressing the accelerator and/or brake pedal; and,
•How fast the vehicle was traveling.
These data can help provide a better understanding of the circumstances in which crashes and injuries occur. NOTE: EDR data are recorded by your vehicle only if a non-trivial crash situation occurs; no data are recorded by the EDR under normal driving conditions and no personal data (e.g., name, gender, age, and crash location) are recorded. However, other parties, such as law enforcement, could combine the EDR data with the type of personally identifying data routinely acquired during a crash investigation.
To read data recorded by an EDR, special equipment is required, and access to the vehicle or the EDR is needed. In addition to the vehicle manufacturer, other parties, such as law enforcement, that have the special equipment, can read the information if they have access to the vehicle or the EDR.
The data belongs to the vehicle owner and may not be accessed by anyone else except as legally required or with the permission of the vehicle owner.
Service Diagnostic Recorders
This vehicle is equipped with service-related devices that record information about powertrain performance. The data can be used to verify emissions law requirements and/or help technicians diagnose and solve service problems. It may also be combined with data from other sources for research purposes, but it remains confidential.
California Perchlorate Contamination Prevention Act
The airbags, seat belt tensioners, and CR type batteries in this vehicle may contain perchlorate materials — special handling may apply. See www.dtsc.ca.gov/hazardouswaste/perchlorate/
As you read this manual, you will find information that is preceded by a NOTICE symbol. This information is intended to help you avoid
damage to your vehicle, other property, or the environment.
22

A Few Words About Safety
Your safety, and the safety of others, is very important. And operating this vehicle safely is an important responsibility.
To help you make informed decisions about safety, we have provided operating procedures and other information on labels and in this manual. This information alerts you to potential hazards that could hurt you or others.
Of course, it is not practical or possible to warn you about all the hazards associated with operating or maintaining your vehicle. You must use your own good judgement.
You will find this important safety information in a variety of forms, including:
●Safety Labels — on the vehicle.
●Safety Messages — preceded by a safety alert symbol 3 and one of three signal words: DANGER, WARNING, or CAUTION. These signal words mean:
3DANGER
3WARNING
3CAUTION
You WILL be KILLED or SERIOUSLY HURT if you don’t follow instructions.
You CAN be KILLED or SERIOUSLY HURT if you don’t follow instructions.
You CAN be HURT if you don’t follow instructions.
●Safety Headings — such as Important Safety Precautions.
●Safety Section — such as Safe Driving.
●Instructions — how to use this vehicle correctly and safely.
This entire book is filled with important safety information — please read it carefully.
Guide Reference Quick
23
24

Safe Driving
You can find many safety recommendations throughout this chapter, and throughout this manual.
|
For Safe Driving |
………………………………..Side Airbags |
46 |
|
|
Important Safety Precautions …………. |
26 |
Side Curtain Airbags …………………….. |
49 |
|
Important Handling Information……… |
28 |
Airbag System Indicators……………….. |
50 |
|
Your Vehicle’s Safety Features………… |
29 |
Airbag Care ………………………………… |
53 |
|
Seat Belts |
Child Safety |
||
|
About Your Seat Belts…………………… |
31 |
Protecting Child Passengers …………… |
54 |
|
Fastening a Seat Belt…………………….. |
34 |
Safety of Infants and Small Children ……. |
56 |
|
Seat Belt Inspection………………………. |
38 |
Safety of Larger Children ………………. |
65 |
|
Airbags |
Exhaust Gas Hazard |
||
|
Airbag System Components…………… |
39 |
Carbon Monoxide Gas………………….. |
67 |
|
Types of Airbags ………………………….. |
42 |
Safety Labels |
|
|
Front Airbags (SRS) ………………………. |
42 |
Label Locations ……………………………. |
68 |
25

For Safe Driving
Driving Safe
The following pages explain your vehicle’s safety features and how to use them properly. The safety precautions below are ones that we consider to be among the most important.
Important Safety Precautions
■ Always wear your seat belt
A seat belt is your best protection in all types of collisions. Airbags are designed to supplement seat belts, not replace them. So even though your vehicle is equipped with airbags, make sure you and your passengers always wear your seat belts, and wear them properly.
■ Restrain all children
Children age 12 and under should ride properly restrained in a back seat, not the front seat. Infants and small children should be restrained in a child seat. Larger children should use a booster seat and a lap/shoulder seat belt until they can use the belt properly without a booster seat.
■ Be aware of airbag hazards
While airbags can save lives, they can cause serious or fatal injuries to occupants who sit too close to them, or are not properly restrained. Infants, young children, and short adults are at the greatest risk. Be sure to follow all instructions and warnings in this manual.
■ Don’t drink and drive
Alcohol and driving don’t mix. Even one drink can reduce your ability to respond to changing conditions, and your reaction time gets worse with every additional drink. So don’t drink and drive, and don’t let your friends drink and drive, either.
1Important Safety Precautions
Some states, provinces and territories prohibit the use of cell phones other than hands-free devices by the driver while driving.
26

■ Pay appropriate attention to the task of driving safely
Engaging in cell phone conversation or other activities that keep you from paying close attention to the road, other vehicles, and pedestrians could lead to a crash. Remember, situations can change quickly, and only you can decide when it is safe to divert some attention away from driving.
■ Control your speed
Excessive speed is a major factor in crash injuries and deaths. Generally, the higher the speed, the greater the risk, but serious injuries can also occur at lower speeds. Never drive faster than is safe for current conditions, regardless of the maximum speed posted.
■ Keep your vehicle in safe condition
Having a tire blowout or a mechanical failure can be extremely hazardous.
To reduce the possibility of such problems, check your tire pressures and condition frequently, and perform all regularly scheduled maintenance.
uuFor Safe DrivinguImportant Safety Precautions
Driving Safe
27

Driving Safe
uuFor Safe DrivinguImportant Handling Information
Important Handling Information
|
Your vehicle has higher ground clearance than a passenger vehicle designed for use |
1Important Handling Information |
|
only on pavement. Higher ground clearance has many advantages for off-highway |
Failure to operate your vehicle correctly might result |
|
driving. It allows you to travel over bumps, obstacles, and rough terrain. It also |
in a crash or a rollover. |
|
provides good visibility so you can anticipate problems earlier. |
2 Precautions While Driving P. 261 |
|
2 Off-Highway Driving Guidelines P. 257 |
These advantages come at some cost. Because your vehicle is taller and rides higher off the ground, it has a higher center gravity making it more susceptible to tripping or roll over if you make abrupt turns. Utility vehicles have a significantly higher rollover rate than other types of vehicles. In a rollover crash, an unbelted person is significantly more likely to die than a person wearing a seat belt. As a reminder, make sure you and your passengers always wear seat belts.
28

uuFor Safe DrivinguYour Vehicle’s Safety Features
Your Vehicle’s Safety Features
8
10
11


6 Seat Belts
7 Front Airbags
8 Side Airbags
9 Side Curtain Airbags
10Door Locks
11Seat Belt Tensioners
12Occupant Position Detection System (OPDS) Sensor
The following checklist will help you take an active role in protecting yourself and your passengers.
1Your Vehicle’s Safety Features
Your vehicle is equipped with many features that work together to help protect you and your passengers during a crash.
Some features do not require any action on your part. These include a strong steel framework that forms a safety cage around the passenger compartment, front and rear crush zones, a collapsible steering column, and tensioners that tighten the front seat belts in a sufficient crash.
However, you and your passengers cannot take full advantage of these features unless you remain seated in the correct position and always wear your seat belts. In fact, some safety features can contribute to injuries if they are not used properly.
Driving Safe

Driving Safe
uuFor Safe DrivinguYour Vehicle’s Safety Features
■ Safety CheckList
For the safety of you and your passengers, make a habit of checking these items each time before you drive.
•After everyone has entered the vehicle, be sure all doors and the tailgate are closed and locked. Locking the doors and the tailgate helps prevent an occupant from being ejected and an outsider from unexpectedly opening a door or the tailgate.
2 Locking/Unlocking the Doors from the Inside P. 104
•Adjust your seat to a position suitable for driving. Be sure the front seats are adjusted as far to the rear as possible while allowing the driver to control the vehicle. Sitting too close to a front airbag can result in serious or fatal injury in a crash.
2 Adjusting the Seats P. 128
•Adjust head restraints to the proper position. Head restraints are most effective when the center of the head restraint aligns with the center of your head. Taller persons should adjust their head restraint to the highest position.
2 Adjusting the Head Restraints P. 131
•Always wear your seat belt, and make sure you wear it properly. Confirm that any passengers are properly belted as well.
2 Fastening a Seat Belt P. 34
•Protect children by using seat belts or child seats according to a child’s age, height and weight.
2 Child Safety P. 54
1Safety CheckList
If the door and/or the tailgate open indicator is on, a door and/or the tailgate is not completely closed. Close all doors and the tailgate tightly until the indicator goes off.
2 Door Open Indicator P. 74
2 Tailgate Open Indicator P. 74
30

Seat Belts
About Your Seat Belts
Seat belts are the single most effective safety device because they keep you connected to the vehicle so that you can take advantage of many built-in safety features. They also help keep you from being thrown against the inside of the vehicle, against other passengers, or out of the vehicle. When worn properly, seat belts also keep your body properly positioned in a crash so that you can take full advantage of the additional protection provided by the airbags.
In addition, seat belts help protect you in almost every type of crash, including:
—frontal impacts
—side impacts
—rear impacts
—rollovers
■ Lap/shoulder seat belts
All five seating positions are equipped with lap/shoulder seat belts with emergency locking retractors. In normal driving the retractor lets you move freely while keeping some tension on the belt. During a collision or sudden stop the retractor locks to restrain your body. The rear seat belts also have a lockable retractor for use with child seats.
2 Installing a Child Seat with a Lap/Shoulder Seat Belt P. 62
1About Your Seat Belts
3WARNING
Not wearing a seat belt properly increases the chance of serious injury or death in a crash, even though your vehicle has airbags.
Be sure you and your passengers always wear seat belts and wear them properly.
Seat belts cannot completely protect you in every crash. But in most cases, seat belts can reduce your risk of serious injury.
Most states and all Canadian provinces and territories require you to wear seat belts.
Driving Safe

Driving Safe
uuSeat BeltsuAbout Your Seat Belts
■ Proper use of seat belts
Follow these guidelines for proper use:
•All occupants should sit upright, well back in the seat, and remain in that position for the duration of the trip. Slouching and leaning reduces the effectiveness of the belt and can increase the chance of serious injury in a crash.
•Never place the shoulder part of a lap/shoulder seat belt under your arm or behind your back. This could cause very serious injuries in a crash.
•Two people should never use the same seat belt. If they do, they could be very seriously injured in a crash.
•Do not put any accessories on the seat belts. Devices intended to improve comfort or reposition the shoulder part of a seat belt can reduce the protective capability and increase the chance of serious injury in a crash.
■ Seat Belt Reminder
Your vehicle monitors front seat belt use. If the ignition switch is turned to ON w before the driver’s seat belt is fastened, a beeper will sound and the indicator will blink. If the driver does not fasten the belt before the beeper stops, the indicator will remain on.
The beeper will also periodically sound and the indicator will blink while driving until the driver’s and front passenger’s seat belts are fastened.
1About Your Seat Belts
If a rear seat passenger moves around and extends the seat belt, the lockable retractor may activate. If this happens, release the retractor by unfastening the seat belt and allow the belt to retract completely. Then refasten the belt.
1Seat Belt Reminder
The indicator will also come on if a front passenger does not fasten their seat belt within 6 seconds after the ignition switch is turned to ON (w.
When no one is sitting in the front passenger’s seat, or a child or small adult is riding there, the indicator will not come on.
This is because the weight sensors in the seat cannot detect their presence.
32

uuSeat BeltsuAbout Your Seat Belts
■ Automatic Seat Belt Tensioners
The front seats are equipped with automatic seat belt tensioners to enhance safety.
The tensioners automatically tighten the front seat belts during a moderate-to- severe frontal collision, sometimes even if the collision is not severe enough to inflate the front airbags.
1Automatic Seat Belt Tensioners
The seat belt tensioners can only operate once.
If a tensioner is activated, the SRS indicator will come on. Have a dealer replace the tensioner and thoroughly inspect the seat belt system as it may not offer protection in a subsequent crash.
During a moderate-to-severe side impact, the tensioner on that side of the vehicle also activates.
Driving Safe
33

Driving Safe
uuSeat BeltsuFastening a Seat Belt
Fastening a Seat Belt
After adjusting a front seat to the proper position, and while sitting upright and well back in the seat:
2 Adjusting the Seats P. 128
Pull out slowly.
Correct
Seated
Posture.
Latch
Plate
Buckle
1. Pull the seat belt out slowly.
2.Insert the latch plate into the buckle, then tug on the belt to make sure the buckle is secure.
u Make sure that the belt is not twisted or caught on anything.
1Fastening a Seat Belt
No one should sit in a seat with an inoperative seat belt or one that does not appear to be working correctly. Using a seat belt that is not working properly may not protect the occupant in a crash. Have a dealer check the belt as soon as possible.
Never insert any foreign objects into the buckle or retractor mechanism.
34

uuSeat BeltsuFastening a Seat Belt
Lap belt as low as possible
3.Position the lap part of the belt as low as possible across your hips, then pull up on the shoulder part of the belt so the lap part fits snugly. This lets your strong pelvic bones take the force of a crash and reduces the chance of internal injuries.
4.If necessary, pull up on the belt again to remove any slack, then check that the belt rests across the center of your chest and over your shoulder. This spreads the forces of a crash over the strongest bones in your upper body.
1Fastening a Seat Belt
3WARNING
Improperly positioning the seat belts can cause serious injury or death in a crash.
Make sure all seat belts are properly positioned before driving.
To release the belt, push the red PRESS button then guide the belt by hand until it has retracted completely.
When exiting the vehicle, be sure the belt is out of the way and will not get caught by closing the door.
■ Adjusting the Shoulder Anchor
The front seats have adjustable shoulder anchors to accommodate taller and shorter occupants.
|
1. |
Move the anchor up and down while |
|||||
|
holding the release button. |
||||||
|
Push |
2. |
Position the anchor so that the belt rests |
||||
|
Push |
||||||
|
across the center of your chest and over |
||||||
your shoulder.
1Adjusting the Shoulder Anchor
The shoulder anchor height can be adjusted to four levels. If the belt contacts your neck, lower the height one level at a time.
After an adjustment, make sure that the shoulder anchor position is secure.
Driving Safe

Driving Safe
uuSeat BeltsuFastening a Seat Belt
■ Seat Belt with Detachable Anchor
Small Latch Plate
Latch Plate
Small Latch Plate
Anchor Buckle
Latch
Plate
1.Pull out the seat belt’s small latch plate and the latch plate from each holding slot in the ceiling.
2.Line up the triangle marks on the small latch plate and anchor buckle. Make sure the seat belt is not twisted. Attach the belt to the anchor buckle.
3.Insert the latch plate into the buckle. Properly fasten the seat belt the same way you fasten the lap/shoulder seat belt.
1Seat Belt with Detachable Anchor
3WARNING
Using the seat belt with the detachable anchor unlatched increases the chance of serious injury or death in a crash.
Before using the seat belt, make sure the detachable anchor is correctly latched.
To unlatch the detachable anchor, insert the latch plate into the slot on the side of the anchor buckle.
Latch Plate
Small Latch Plate
Buckle
36

uuSeat BeltsuFastening a Seat Belt
■ Advice for Pregnant Women
If you are pregnant, the best way to protect yourself and your unborn child when driving or riding in a vehicle is to always wear a seat belt and keep the lap part of the belt as low as possible across the hips.
Wear the shoulder belt across the chest avoiding the abdomen.
Wear
1Advice for Pregnant Women
Each time you have a checkup, ask your doctor if it is okay for you to drive.
To reduce the risk of injuries to both you and your unborn child that can be caused by an inflating front airbag:
•When driving, sit upright and adjust the seat as far back as possible while allowing full control of the vehicle.
•When sitting in the front passenger’s seat, adjust the seat as far back as possible.
Driving Safe
37

Driving Safe
uuSeat BeltsuSeat Belt Inspection
Seat Belt Inspection
Regularly check the condition of your seat belts as follows:
•Pull each belt out fully, and look for frays, cuts, burns, and wear.
•Check that the latches work smoothly and the belts retract easily.
u If a belt does not retract easily, cleaning the belt may correct the problem. Only use a mild soap and warm water. Do not use bleach or cleaning solvents. Make sure the belt is completely dry before allowing it to retract.
Any belt that is not in good condition or working properly will not provide proper protection and should be replaced as soon as possible.
A belt that has been worn during a crash may not provide the same level of protection in a subsequent crash. Have your seat belts inspected by a dealer after any collision.
1Seat Belt Inspection
3WARNING
Not checking or maintaining seat belts can result in serious injury or death if the seat belts do not work properly when needed.
Check your seat belts regularly and have any problem corrected as soon as possible.
38

Airbags
Airbag System Components
h a c k l i h a g j j b e c
|
n |
|
|
d |
|
|
b |
|
|
f |
h |
|
h |
|
|
e |
m |
|
h |
h |
Driving Safe

Driving Safe
uuAirbagsuAirbag System Components
The front, front side, and side curtain airbags are deployed according to the direction and severity of impact. Both side curtain airbags are deployed in a rollover. The airbag system includes:
aTwo SRS (Supplemental Restraint System) front airbags. The driver’s airbag is stored in the center of the steering wheel; the front passenger’s airbag is stored in the dashboard. Both are marked SRS AIRBAG.
bTwo side airbags, one for the driver and one for a front passenger. The airbags are stored in the outer edges of the seatbacks. Both are marked SIDE AIRBAG.
cTwo side curtain airbags, one for each side of the vehicle. The airbags are stored in the ceiling, above the side windows. The front and rear pillars are marked
SIDE CURTAIN AIRBAG.
dAn electronic control unit that continually monitors and records information about the sensors, the airbag activators, the seat belt tensioners, and driver and front passenger seat belt use when the ignition switch is in ON w.
eAutomatic front seat belt tensioners. The driver’s and front passenger’s seat belts incorporate sensors that detect whether or not they are fastened.
fA driver’s seat position sensor. If the seat is too far forward, the airbag will inflate with less force.
gWeight sensors in the front passenger’s seat. The front passenger’s airbag will be turned off if the weight on the seat is 65 lbs (29 kg) or less (the weight of an infant or small child).
hImpact sensors that can detect a moderate to severe front or side collision.
iAn indicator on the dashboard that alerts you that the front passenger’s front airbag has been turned off.
jSensors that can detect if a child or small statured adult is in the deployment path of the front passenger’s side airbag.
kAn indicator on the instrument panel that alerts you to a possible problem with your airbag system or seat belt tensioners.
lAn indicator on the instrument panel that alerts you that the front passenger’s side airbag has been turned off.
mSafing Sensor
nA rollover sensor that detects whether the vehicle is about to roll over.
40

uuAirbagsuAirbag System Components
■ Important Facts About Your Airbags
Airbags can pose serious hazards. To do their job, airbags must inflate with tremendous force. So, while airbags help save lives, they can cause minor injuries, sometimes even fatal ones if occupants are not wearing their seat belts properly and sitting correctly.
What you should do: Always wear your seat belt properly, and sit upright and as far back from the steering wheel as possible while allowing full control of the vehicle. A front passenger should move their seat as far back from the dashboard as possible.
Remember, however, that no safety system can prevent all injuries or deaths that can occur in a severe crash, even when seat belts are properly worn and the airbags deploy.
Do not place hard or sharp objects between yourself and a front airbag.
Carrying hard or sharp objects on your lap, or driving with a pipe or other sharp object in your mouth, can result in injuries if your front airbag inflates.
Do not attach or place objects on the front airbag covers. Objects on the covers marked SRS AIRBAG could interfere with the proper operation of the airbags or be propelled inside the vehicle and hurt someone if the airbags inflate.
1Important Facts About Your Airbags
Do not attempt to deactivate your airbags. Together, airbags and seat belts provide the best protection.
When driving, keep hands and arms out of the deployment path of the front airbag by holding each side of the steering wheel. Do not cross an arm over the airbag cover.
Driving Safe
41

Driving Safe
uuAirbagsuTypes of Airbags
Types of Airbags
Your vehicle is equipped with three types of airbags:
•Front airbags: Airbags in front of the driver’s and front passenger’s seats.
•Side airbags: Airbags in the driver’s and front passenger’s seat-backs.
•Side curtain airbags: Airbags above the side windows.
Each is discussed in the following pages.
Front Airbags (SRS)
The front SRS airbags inflate in a moderate to severe frontal collision to help protect the head and chest of the driver and/or front passenger.
SRS (Supplemental Restraint System) indicates that the airbags are designed to supplement seat belts, not replace them. Seat belts are the occupant’s primary restraint system.
■ Housing Locations
The front airbags are housed in the center of the steering wheel for the driver, and in the dashboard for the front passenger. Both airbags are marked SRS AIRBAG.
1Types of Airbags
The airbags can inflate whenever the ignition switch is in ON (w.
1Front Airbags (SRS)
Dual-Stage, Multiple-Threshold Front Airbags (SRS)
Your vehicle is equipped with dual-stage, multiplethreshold front airbags (SRS).
During a frontal crash severe enough to cause one or both front airbags to deploy, the airbags can inflate at different rates, depending on the severity of the crash, whether or not the seat belts are latched, and/ or other factors. Frontal airbags are designed to supplement the seat belts to help reduce the likelihood of head and chest injuries in frontal crashes.
42

uuAirbagsuFront Airbags (SRS)
■ Operation
Front airbags are designed to inflate during moderate-to-severe frontal collisions. When the vehicle decelerates suddenly, the sensors send information to the control unit which signals one or both front airbags to inflate.
A frontal collision can be either head-on or angled between two vehicles, or when a vehicle crashes into a stationary object, such as a concrete wall.
■ How the Front Airbags Work
While your seat belt restrains your torso, the front airbag provides supplemental protection for your head and chest.
The front airbags deflate immediately so that they won’t interfere with the driver’s visibility or the ability to steer or operate other controls.
The total time for inflation and deflation is so fast that most occupants are not aware that the airbags deployed until they see them lying in front of them.
1How the Front Airbags Work
After a front airbag inflates in a crash, you may see what looks like smoke. This is actually powder from the airbag’s surface. Although the powder is not harmful, people with respiratory problems may experience some temporary discomfort. If this occurs, get out of the vehicle as soon as it is safe to do so.
Although the driver’s and front passenger’s airbags normally inflate within a split second of each other, it is possible for only one airbag to deploy. This can happen if the severity of a collision is at the margin, or threshold, that determines whether or not the airbags will deploy. In such cases, the seat belt will provide sufficient protection, and the supplemental protection offered by the airbag would be minimal.
Driving Safe

Driving Safe
uuAirbagsuFront Airbags (SRS)
■ When front airbags should not deploy
Minor frontal crashes: Front airbags were designed to supplement seat belts and help save lives, not to prevent minor scrapes, or even broken bones that might occur during a less than moderate-to-severe frontal crash.
Side impacts: Front airbags can provide protection when a sudden deceleration causes a driver or front passenger to move towards the front of the vehicle. Side airbags and side curtain airbags have been specifically designed to help reduce the severity of injuries that can occur during a moderate-to-severe side impact which can cause the driver or passenger to move towards the side of the vehicle.
Rear impacts: Head restraints and seat belts are your best protection during a rear impact. Front airbags cannot provide any significant protection and are not designed to deploy in such collisions.
Rollovers: Seat belts and, in vehicles equipped with a rollover sensor, side airbags and side curtain airbags offer the best protection in a rollover. Because front airbags could provide little if any protection, they are not designed to deploy during a rollover.
■ When front airbags deploy with little or no visible damage
Because the airbag system senses sudden deceleration, a strong impact to the vehicle framework or suspension might cause one or more of the airbags to deploy. Examples include running into a curb, the edge of a hole, or other low fixed object that causes a sudden deceleration in the vehicle chassis. Since the impact is underneath the vehicle, damage may not be readily apparent.
■When front airbags may not deploy, even though exterior damage appears severe
Since crushable body parts absorb crash energy during an impact, the amount of visible damage does not always indicate proper airbag operation. In fact, some collisions can result in severe damage but no airbag deployment because the airbags would not have been needed or would not have provided protection even if they had deployed.
44

uuAirbagsuFront Airbags (SRS)
■ Advanced Airbags
Your front airbags have advanced features to help reduce the likelihood of airbag related injuries to smaller occupants.
The driver’s advanced front airbag system includes a seat position sensor.
If the seat is too far forward, the airbag inflates with less force, regardless of the
Driver’s severity of the impact.
Seat Position Sensor
Passenger’s
Seat
Weight
Sensors
The passenger’s advanced front airbag system has weight sensors.
Although Honda recommends against carrying an infant or small child in front, if the sensors detect the weight of a child (up to about 65 lbs or 29 kg), the system will automatically turn off the passenger’s front airbag.
1Advanced Airbags
If there is a problem with the driver’s seat position sensor, the SRS indicator will come on and the airbag will inflate with full (normal) force, regardless of the driver’s seating position.
For both advanced front airbags to work properly:
•Do not spill any liquid on or under the seats.
•Do not put any object under the passenger’s seat.
•Make sure any objects are positioned properly on the floor. Improperly positioned objects can interfere with the advanced airbag sensors.
•All occupants should sit upright and wear their seat belts properly.
•Do not place any cover over the passenger side dashboard.
Driving Safe
45

Driving Safe
uuAirbagsuSide Airbags
Side Airbags
The side airbags help protect the upper torso of the driver or a front passenger during a moderate to severe side impact.
■ Housing Locations
The side airbags are housed in the outside edge of the driver’s and passenger’s seatbacks.
Both are marked SIDE AIRBAG.
Housing
Location
■ Operation
When inflated
Side
Airbag
When the sensors detect a moderate-to- severe side impact, the control unit signals the side airbag on the impact side to immediately inflate.
1Side Airbags
Do not attach accessories on or near the side airbags. They can interfere with the proper operation of the airbags, or hurt someone if an airbag inflates.
If the impact is on the passenger side, the airbag deploys even if there is no passenger in the passenger seat.
Do not cover or replace the front seat-back covers without consulting a dealer.
Improperly replacing or covering front seat-back covers can prevent your side airbags from properly deploying during a side impact.
46

■ When a side airbag deploys with little or no visible damage
Because the airbag systems senses sudden acceleration, a strong impact to the side of the vehicle’s framework can cause a side airbag to deploy. In such cases, there may be little or no damage, but the side impact sensors detected a severe enough impact to deploy the airbag.
■ When a side airbag may not deploy, even though visible damage appears severe
It is possible for a side airbag to not deploy during an impact that results in apparently severe damage. This can occur when the point of impact was towards the far front or rear of the vehicle, or when the vehicle’s crushable body parts absorbed most of the crash energy. In either case, the side airbag would not have been needed nor provided protection even if it had deployed.
uuAirbagsuSide Airbags
Driving Safe

Driving Safe
uuAirbagsuSide Airbags
■ Side Airbag Cutoff System
To reduce the likelihood that a front passenger may be injured by an inflating side airbag, the passenger side airbag is automatically turned off when:
•The height sensors detect a child or short-statured adult is seated in the front passenger seat.
•The position sensor detects that the front passenger is leaning into the deployment path of the side airbag.
When the side airbag cutoff system is activated, the side airbag off indicator comes on.
2Side Airbag Off Indicator P. 52
■Side Airbag Off Indicator
If the side airbag off indicator comes on, have the passenger sit upright. A few seconds after the passenger is sitting properly, the side airbag will automatically be turned on, and the indicator will go off.
If the front passenger is a child, stop when it is safe to do so, and have the child sit properly restrained in a rear seat.
1Side Airbag Cutoff System
Sensor that monitor the passenger’s height.
Sensor that monitor
the passenger’s position.
The sensors that monitor the front passenger’s height and body position may not work if:
•The seat-back is wet
•The passenger is touching a metal or other electrical conductive object
•A seat cushion is on the seat
•The passenger is wearing excessively thick clothing
48


Руководство на английском языке по техническому обслуживанию и ремонту Honda CR-V 1997-2000 годов выпуска.
- Автор: —
- Издательство: Honda Motor Co., Ltd.
- Год издания: 1999
- Страниц: 1395
- Формат: PDF
- Размер: 29,8 Mb
Руководство на английском языке по техническому обслуживанию и ремонту Honda CR-V 2007 года выпуска.
- Автор: —
- Издательство: Honda Motor Co., Ltd.
- Год издания: 2006
- Страниц: —
- Формат: PDF
- Размер: 465,9 Mb
Руководство на английском языке по ремонту Honda CR-V с 2001 года выпуска.
- Автор: —
- Издательство: Honda Motor Co., Ltd.
- Год издания: 2001
- Страниц: —
- Формат: PDF
- Размер: 70,0 Mb

Руководство на английском языке по ремонту автомобилей Honda CR-V 2012-2016 годов выпуска.
- Автор: —
- Издательство: —
- Год издания: —
- Страниц: 10570
- Формат: PDF
- Размер: 241,2 Mb
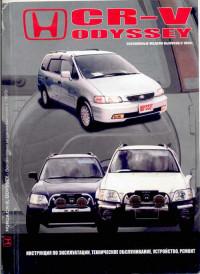
Руководство по эксплуатации, техническому обслуживанию и ремонту Honda CR-V и Honda Odyssey с 1995 года выпуска.
- Автор: —
- Издательство: Лада
- Год издания: 2002
- Страниц: 310
- Формат: PDF
- Размер: 76,1 Mb
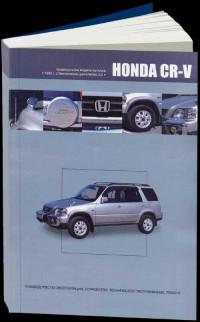
Руководство по эксплуатации, техническому обслуживанию и ремонту Honda CR-V с 1995 года выпуска с бензиновым двигателем объемом 2,0 л.
- Автор: —
- Издательство: Автонавигатор
- Год издания: —
- Страниц: 408
- Формат: —
- Размер: —

Руководство по эксплуатации, техническому обслуживанию и ремонту Honda CR-V 2002-200 годов выпуска с бензиновыми и дизельными двигателями.
- Автор: —
- Издательство: Алфамер
- Год издания: —
- Страниц: 424
- Формат: —
- Размер: —
Мультимедийное руководство по техническому обслуживанию и ремонту Honda CR-V 2002-2004 годов выпуска.
- Автор: —
- Издательство: —
- Год издания: —
- Страниц: —
- Формат: —
- Размер: 16,8 Mb

Руководство по эксплуатации и ремонту Honda Odyssey и Honda CR-V 1995-2000 годов выпуска с бензиновыми двигателями объемом 2,0/2,2/2,3/3,5 л.
- Автор: —
- Издательство: Монолит
- Год издания: —
- Страниц: 406
- Формат: —
- Размер: —
Руководство по эксплуатации и ремонту автомобиля Honda CR-V с 2012 года выпуска с бензиновыми и дизельными двигателями.
- Автор: —
- Издательство: Монолит
- Год издания: —
- Страниц: 696
- Формат: —
- Размер: —

Руководство по эксплуатации и ремонту автомобиля Honda CR-V с 2012 года выпуска с бензиновыми и дизельными двигателями.
- Автор: —
- Издательство: Монолит
- Год издания: —
- Страниц: 696
- Формат: —
- Размер: —

Руководство по эксплуатации, техническому обслуживанию и ремонту Honda CR-V/Odyssey/Shuttle/Lagreat 1994-2000 годов выпуска с 4-х и 6-ти цилиндровыми бензиновыми двигателями.
- Автор: —
- Издательство: Tehnobook
- Год издания: —
- Страниц: 263
- Формат: PDF
- Размер: 232,9 Mb

Подборка руководств по эксплуатации Honda CR-V 2009-2010 годов выпуска.
- Автор: —
- Издательство: Honda Motor Co., Ltd.
- Год издания: —
- Страниц: 547/24/596
- Формат: PDF
- Размер: 21,1 Mb

Руководство по эксплуатации Honda CR-V 2013 года выпуска.
- Автор: —
- Издательство: Honda Motor Co., Ltd.
- Год издания: 2012
- Страниц: 462
- Формат: PDF
- Размер: 26,9 Mb
Руководство по эксплуатации навигационной системы Honda CR-V 2012-2015 годов выпуска
- Автор: —
- Издательство: Honda Motor Co., Ltd.
- Год издания: —
- Страниц: 213
- Формат: PDF
- Размер: 7,0 Mb

Руководство по эксплуатации, техническому обслуживанию и ремонту Honda CR-V 2001-2007 годов выпуска с бензиновыми двигателями объемом 2,0/2,4 л.
- Автор: —
- Издательство: Арго-Авто
- Год издания: —
- Страниц: 384
- Формат: —
- Размер: —
Руководство по эксплуатации, техническому обслуживанию и ремонту Honda CR-V с 2006 года выпуска с бензиновыми двигателями объемом 2,0/2,4 л.
- Автор: —
- Издательство: АНТА-ЭКО
- Год издания: 2009
- Страниц: 518
- Формат: —
- Размер: —
Мультимедийное руководство на эксплуатации, техническому обслуживанию и ремонту Honda CR-V 2002-2007 годов выпуска. Многоязычный интерфейс (русского нет).
- Автор: —
- Издательство: —
- Год издания: —
- Страниц: —
- Формат: —
- Размер: 304,5 Mb
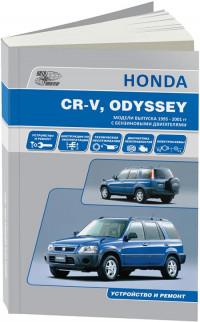
Руководство по эксплуатации, техническому обслуживанию и ремонту автомобилей Honda CR-V и Honda Odyssey 1995-2001 годов выпуска с бензиновыми двигателями.
- Автор: —
- Издательство: Автонавигатор
- Год издания: —
- Страниц: 308
- Формат: —
- Размер: —
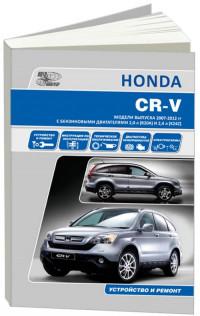
Руководство по эксплуатации, техническому обслуживанию и ремонту автомобиля Honda CR-V 2007-2012 годов выпуска с бензиновыми двигателями объемом 2,0/2,4 л.
- Автор: —
- Издательство: Автонавигатор
- Год издания: —
- Страниц: 624
- Формат: —
- Размер: —
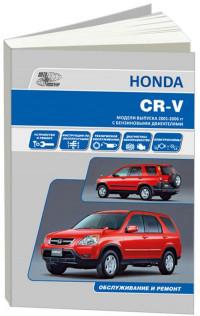
Руководство по техническому обслуживанию и ремонту Honda CR-V с 2001 года выпуска с бензиновыми двигателями объемом 2,0/2,4 л.
- Автор: —
- Издательство: Автонавигатор
- Год издания: —
- Страниц: 544
- Формат: —
- Размер: —

Руководство по эксплуатации, техническому обслуживанию и ремонту Honda CR-V 1995-2001 годов выпуска.
- Автор: —
- Издательство: Мир Автокниг
- Год издания: —
- Страниц: 486
- Формат: PDF
- Размер: 66,6 Mb
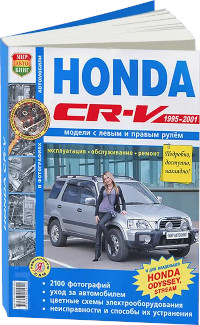
Руководство по эксплуатации, техническому обслуживанию и ремонту автомобилей Honda CR-V 1995-2001 годов выпуска.
- Автор: —
- Издательство: Мир Автокниг
- Год издания: —
- Страниц: 488
- Формат: —
- Размер: —
АВТОМОБИЛЬ
HONDA
CR-V
Руководство по эксплуатации,
ремонту и техническому обслуживанию
ВЫПУСК с 2006 г.
Бензиновые двигатели: 2,0n.(R20A1 / R20A2)
2,4n.(R24Z1)
АНТА-ЭКО
МОСКВА
2009
УДК 629.083
ББК 39.33-08
Автомобиль HONDA CR-V. Руководство по эксплуатации, ремонту и
техническому обслуживанию. М.: АНТА-ЭКО, 2009. -520 с. иля.
Дизайн обложки Щерба А.А.
Подписано в печать 07.05.2009 г.
Формат 60×90 1/8. Печать офсетная. Бумага газетная
Объем 65 п.л. Тираж 1500 экз. Заказ 1901
ООО “АНТА-ЭКО”
119121, Москва, Трифоновская ул. д. 56
Отпечатано с готовых диапозитивов в типографии
ISBN 978-5-9545-0066-0
© АНТА-ЭКО, 2009
HONDA CR-V 2012 RM1, RM3, RM4 / 4.G Owners Manual
Manufacturer: HONDA, Model Year: 2012,
Model line: CR-V,
Model: HONDA CR-V 2012 RM1, RM3, RM4 / 4.G
Pages: 361, PDF Size: 7.25 MB
Trending: window, TPMS, fuel, hood open, engine oil, display, battery
Page 1 of 361
Page 2 of 361
Page 3 of 361
Page 4 of 361
Page 5 of 361
Page 6 of 361
Page 7 of 361
Page 8 of 361
Page 9 of 361
Page 10 of 361
- Load next 10 pages
Trending: automatic transmission, fuses, tow, engine, fuel, wheel, maintenance
View, print and download for free: HONDA CR-V 2012 RM1, RM3, RM4 / 4.G Owners Manual, 361 Pages, PDF Size: 7.25 MB. Search in HONDA CR-V 2012 RM1, RM3, RM4 / 4.G Owners Manual online. CarManualsOnline.info is the largest online database of car user manuals. HONDA CR-V 2012 RM1, RM3, RM4 / 4.G Owners Manual PDF Download.
All product names, logos, and brands are property of their respective owners.
Privacy Policy | About Us & Contact
Honda CR-V (MK 1/2/3) 2001-2018 years of release – a guide to the repair and maintenance, electrical wiring diagrams, operating instructions, owner’s & service manuals free download PDF.
See also:
| Title | File Size | Download Links |
| Engine Block Heater Installation Procedure Honda CRV [PDF] | 132.5kb | Download |
| Honda CR-V (1997-2000) Factory Service Manual [PDF] | 37.1Mb | Download |
| Honda CR-V 1994-2000 Repair Manual [PDF] | 232.8Mb | Download |
| Honda CR-V 1995 Service Repair Manual [PDF] | 80.7Mb | Download |
| Honda CR-V 1995-2001 Maintenance & Service Manual [PDF] | 74Mb | Download |
| Honda CR-V 1997 SYSTEM WIRING DIAGRAMS (Air Conditioning) [PDF] | 1.2Mb | Download |
| Honda CR-V 1997-2000 Service Repair Manual [PDF] | 32.5Mb | Download |
| Honda CR-V 1st Gen Mirror [PDF] | 44.8kb | Download |
| Honda CR-V 2001 Workshop Manual [RAR] | 70Mb | Download |
| Honda CR-V 2002-2004 Multimedia Repair Manual [RAR] | 16.8Mb | Download |
| Honda CR-V 2002-2006 Fuses (fuse box diagram) and Relay [PDF] | 446.3kb | Download |
| Honda CR-V 2002-2007 Multimedia Repair Manual [RAR] | 304.5Mb | Download |
| Honda CR-V 2007 Workshop & Service manual [RAR] | 465.9Mb | Download |
| Honda CR-V 2007-2009 Engine Mechanical Service Manual [PDF] | 50.3Mb | Download |
| Honda CR-V 2012-2016 Workshop Repair Manual [PDF] | 250.2Mb | Download |
| Honda CR-V 2015 Body Side Moldings [PDF] | 155.3kb | Download |
| Honda CR-V 97-00 Factory Service Manual [PDF] | 36.9Mb | Download |
| Honda CR-V EX 2000 Engine Repair Manual [PDF] | 2.1Mb | Download |
| Honda CR-V LX 2009 System Wiring Diagrams [PDF] | 913.3kb | Download |
| Honda CR-V MT-2008 Part Catalog [PDF] | 7.5Mb | Download |
| Honda CR-V Radio Connector Pins [PDF] | 359.1kb | Download |
| Honda CR-V RD1 RD2 RD3 1997 2001 Factory Workshop Manual [PDF] | 37.1Mb | Download |
| Honda CR-V Wiring Diagrams [PDF] | 12.3Mb | Download |
| Honda CRV 2000 Trailer Hitch [PDF] | 1001.9kb | Download |
| Honda CRV RD1/RD2/RD3 Model Years 1997 to 2001 Factory Service Repair Manual [PDF] | 35.6Mb | Download |
| Honda CRV RE Series 2007 to 2011 Factory Service and Workshop Manual [PDF] | 896.1Mb | Download |
| O2 Sensor Wiring [PDF] | 567.7kb | Download |
Honda CR-V Owner’s Manuals PDF
| Title | File Size | Download Links |
| Honda CR-V 2000 Owner’s Manual [PDF] | 4.6Mb | Download |
| Honda CR-V 2001 Owner’s Manual [PDF] | 4.6Mb | Download |
| Honda CR-V 2002 Owner’s Manual [PDF] | 4.5Mb | Download |
| Honda CR-V 2003 Owner’s Manual [PDF] | 4.5Mb | Download |
| Honda CR-V 2004 Owner’s Manual [PDF] | 3Mb | Download |
| Honda CR-V 2005 Owner’s Manual [PDF] | 4.3Mb | Download |
| Honda CR-V 2006 Owner’s Manual [PDF] | 3.6Mb | Download |
| Honda CR-V 2007 Owner’s Manual [PDF] | 5.8Mb | Download |
| Honda CR-V 2008 Owner’s Manual [PDF] | 8.7Mb | Download |
| Honda CR-V 2009 Owner’s Manual [PDF] | 8Mb | Download |
| Honda CR-V 2010 Owner’s Manual [PDF] | 8.1Mb | Download |
| Honda CR-V 2011 Owner’s Manual [PDF] | 8.1Mb | Download |
| Honda CR-V 2012 Owner’s Manual [PDF] | 7.2Mb | Download |
| Honda CR-V 2013 Owner’s Manual [PDF] | 6.6Mb | Download |
| Honda CR-V 2014 Owner’s Manual [PDF] | 18.4Mb | Download |
| Honda CR-V 2015 Owner’s Manual [PDF] | 24.8Mb | Download |
| Honda CR-V 2016 Owner’s Manual [PDF] | 22.9Mb | Download |
| Honda CR-V 2016 Quick Guide [PDF] | 8Mb | Download |
| Honda CR-V 2017 Owner’s Manual [PDF] | 36.9Mb | Download |
| Honda CR-V 2018 Owner’s Manual [PDF] | 36Mb | Download |
| Honda CR-V 2019 Owner’s Manual [PDF] | 34.9Mb | Download |
| Honda CR-V 2020 Owner’s Manual [PDF] | 33.3Mb | Download |
| Honda CR-V 2021 Owner’s Manual [PDF] | 35.7Mb | Download |
| Honda CR-V Hybrid 2019 Owner’s Manual [PDF] | 48.5Mb | Download |
The purpose of these Honda CR-V PDF manuals is to help the owner use the vehicle to its full potential.
This can be achieved in several ways. First of all, you will be able to understand which of the parts of the car requires maintenance or repair and assess the possibility of doing this on your own.
The manuals provide detailed illustrated descriptions of various components and mechanisms of the vehicle. All maintenance and repair procedures are described step by step and illustrated.
The manuals also provide a complete list of periodic routine maintenance procedures.
It also provides the most common Honda CR-V malfunctions and how to find and fix them.
Some procedures take so little time that it is easier to do it yourself than to sign up for a service station, drive the car there, and then pick it up. You can save not only your time but also money.
The Honda CR-V manuals contain colour-coded wiring diagrams.
Operating instructions included.
Service manuals are intended for Honda CR-V car owners, service stations and repair shops.
Here is a little background information about Honda CR-V
Honda CR-V is a compact crossover manufactured by Honda since 1995. The abbreviation CR-V for European markets stands for Compact Recreational Vehicle. For Japan – Comfortable Runabout Vehicle.
Production of the CR-V for international markets began in Sayama (Japan) and Swindon (UK). In 2007, they were joined by a North American plant in East Liberty, Ohio, in 2007 a plant in El Salto, Mexico, and in 2012 in the Canadian province of Ontario. CR-V is also held in China, at the facilities of the joint venture Dongfeng Honda Automobile Company – cars designed for the domestic Chinese market.
The Honda CR-V is located between the compact Honda HR-V and the full-size Honda Pilot in the model range. Currently, the Honda CR-V is sold in the United States, Canada, Ukraine, Europe, Malaysia, Indonesia, Japan, China and Latin America.
First generation (1996-2001)
The Honda CR-V first appeared in Japan in 1995 – the first crossover of the Japanese company of own development. A year later, the creators showed a North American version of the car at a motor show in Chicago. The car is based on the platform of the fifth generation Civic sedan. Drive – front or optional all-connect (4WD Real Time), with a hydraulic clutch in the rear axle, two hydraulic pumps and a transfer case (DPS). Initially, it was equipped with a 128-horsepower 2.0-liter engine of 180 Nm.
Second generation (2001-2006)
The second generation CR-V (chassis code RD4-RD7) went on sale in 2002 and for the first time in the history of the model received a 2.4-liter K24A1 engine with 163 horsepower and 220 Nm of torque. However, it was offered only for the American market – others were equipped with a 2.0-liter, which was soon joined by a 2.2-liter turbodiesel (140 horsepower and 340 Nm). Options were available with front-wheel drive or both axles (the scheme has not changed). From 2002 to 2006, almost 760,000 crossovers were sold on the North American market.
Third generation (2006-2011)
The third generation Honda CR-V was launched in late 2006. Suspension schemes have not changed, but engineers have readjusted them, which should have reduced the beaks when braking. The Japanese installed softer silent blocks, and the rear anti-roll bar added one millimeter in diameter (19 mm in total). The body is brand new. The spatial frame uses more high-strength steel, which increased torsional rigidity by 85%. The most powerful engine was equipped with the American version of the CR-V – P4 2.4 liter 166 hp. and 220 Nm. Only a new five-band “automatic machine” was aggregated with it. In Europe, customers were offered modifications with a 2.0-liter i-VTEC engine (150 hp and 190 Nm, “mechanics” or “automatic”) and a 2.2-liter turbodiesel (140 hp, 340 Nm, manual transmission). The third-generation car was more popular than its predecessors, which led to the establishment of production at additional plants in the United States, Indonesia, Mexico, Vietnam and Thailand. Traditionally, the most important market has become the United States – from 2007 to 2010 there bought 811,367 crossovers.
Fourth generation (2012-2016)
In 2012, the fourth-generation Honda CR-V was introduced. The car became larger in size. The front axle is still equipped with McPherson struts. But springs and shock absorbers with more comfortable characteristics, the strengthened subframe, the increased angle of a caster and the reconfigured geometry that in turns the internal wheel remained in vertical position for the best coupling with road are established. The rear suspension instead of double wishbones is equipped with a compact multi-link (three levers per wheel).
Fifth generation (since 2016)
The fifth generation Honda CR-V debuted in Detroit in October 2016. Sales began on December 21, 2016. The car is based on the 10th generation Honda Civic. The car is equipped with front or all-wheel drive, 2.4-liter gasoline engine Earth Dreams with 186 hp. or a 1.5-liter turbo engine with 193 hp, paired with a CVT variator. Also available is a diesel version of the 1.6-liter i-DTEC with 160 hp, running on 9-speed. ZF 9HP automatic transmission.
The luggage compartment in the test Honda CR-V was one of the largest in its class – 589 liters, with the second row folded and loading on the roof – 1,669 liters.
2012 Honda CR-V
Attention! Clicking on the link “download” you agree, after reading, delete the downloaded file from your computer. All content on the site Carmanualsclub.com is taken from free sources and is also freely distributed. If you are the author of this material, then please contact us in order to provide users with a pleasant and convenient alternative, after reading, buying a quality “original” directly from the publisher. The site administration does not bear any responsibility for illegal actions, and any damage incurred by the copyright holders.


