
-
Page 1
DVR User Manual For H.264 4/8-channel digital video recorder All rights reserved… -
Page 2
DVR User Manual CAUTION Please read this user manual carefully to ensure that you can use the device correctly and safely. There may be several technically incorrect places or printing errors in this manual. The updates will be added into the new version of this manual. The contents of this manual are subject to change without notice. -
Page 3: Table Of Contents
DVR User Manual Table of Contents Introduction ……………………. 1 1.1 DVR Introduction ………………….1 1.2 Main Features …………………… 1 Hardware Installation ………………..3 2.1 Install Hard Drive &DVD Writer ………………. 3 2.1.1 Install Hard Drive ………………….. 3 2.1.2 Install DVD Writer ………………… 3 2.2 Front Panel Descriptions ………………..
-
Page 4
DVR User Manual 4.5.3 Video Loss……………………. 25 4.5.4 Other Alarm………………….. 25 4.5.5 Alarm Out ……………………. 26 4.6 Network Configuration ………………..26 4.6.1 Network ……………………26 4.6.2 Sub Stream …………………… 27 4.6.3 Email ……………………28 4.6.4 Server ……………………29 4.6.5 Other Settings ………………….29 4.7 User Management Configuration ………………. -
Page 5
DVR User Manual Appendix A FAQ ………………….54 Appendix B Calculate Recording Capacity …………..58 Appendix C Compatible Devices ………………. 59 Appendix D 4 CH Specifications ………………. 60 Appendix E 8 CH Specifications………………61… -
Page 6: Introduction
This model DVR (Digital Video Recorder) is designed specially for CCTV system. It adopts high performance video processing chips and embedded Linux system. Meanwhile, it utilizes many most advanced technologies, such as standard H.264 with low bit rate, Dual stream, SATA interface, VGA output mouse supported, IE browser supported with full remote control, mobile view(by phones), etc., which ensure its powerful functions and high stability.
-
Page 7
DVR User Manual • Supports pre-recording and post recording • Supports linked channels recording once motion or alarm triggered on certain channel • Supports linked PTZ preset, auto cruise and track of the corresponding channel PTZ CONTROL • Supports various PTZ protocols •… -
Page 8: Hardware Installation
DVR User Manual Hardware Installation 2.1 Install Hard Drive &DVD Writer 2.1.1 Install Hard Drive Check the unit and the accessories after getting the DVR. Please don’t power up the unit till the physical installation is complete. Notice: 1. This series support two SATA hard drives. Please use the hard drive the manufacturers recommend specially for security and safe field.
-
Page 9: Front Panel Descriptions
DVR User Manual Note: The writer which is for backup only must be the compatible device we recommend. Please refer to “Appendix C Compatible Devices”. 2.2 Front Panel Descriptions Notice: The front panel descriptions are only for reference; please make the object as the standard.
-
Page 10
DVR User Manual Name Description ALARM OUT Alarm outputs; connect to external alarm ALARM IN Alarm inputs for connecting sensors Connect to speed dome Connect to keyboard CVBS CVBS output AUDIO OUT Audio out, connect to sound box MIC IN Talk, connect to microphone AUDIO IN Audio inputs… -
Page 11: Remote Controller
DVR User Manual 2.4 Remote Controller It uses two AAA size batteries. Step 1: Open the battery cover of the remote controller. Step 2: Place batteries. Please take care the polarity (+ and -). Step 3: Replace the battery cover. The interface of remote controller is shown in Fig 2-7 Remote Controller.
-
Page 12: Control With Mouse
DVR User Manual Key points to check in case the remote doesn’t work. 1. Check batteries polarity. 2. Check the remaining charge in the batteries. 3. Check IR controller sensor for any masking. 4. Check the ID of the remote with respect to the DVR. If it still doesn’t work, please change a new remote controller to try, or contact your dealers.
-
Page 13
DVR User Manual In Backup: Click to choose the options. Right click to return to previous picture. In PTZ Control: Click left button to choose the buttons to control the PTZ. Click right button to return to live. Note: Mouse is the default tool for all operations unless an exception, as indicated. -
Page 14: Basic Function Instruction
DVR User Manual Basic Function Instruction 3.1 Power On/Off Before you power on the unit, please make sure all the connection is good. 3.1.1 Power On Step 1: Connect with the source power. Step 2: The device will boot and the power LED would turn blue. Step 3: A WIZZARD window will pop up and show some information about time zone, time setup, network configuration, record configuration and disk management.
-
Page 15: Live Preview
DVR User Manual Fig 3-1 Login Notice: The default user name and password is “admin” and 123456”. For complete operational steps for changing password, adding or deleting users, please refer to section 4.7 User Management Configuration. 3.3 Live Preview Fig 3-2 Live Preview Interface Symbol Meaning Green…
-
Page 16
DVR User Manual Fig 3-3 Live Playback… -
Page 17: Main Menu Setup Guide
DVR User Manual Main Menu Setup Guide Click right mouse or press ESC/Stop button on the front panel and then the control bar will display at the bottom of the screen. Refer to Fig 4-1: Fig 4-1 Main Menu Toolbar Single: Choose a channel from the list to be displayed in the full screen mode.
-
Page 18: Basic Configuration
DVR User Manual 4.1 Basic Configuration Basic configuration includes three sub menus: system, date & time and DST. 4.1.1 System Step 1: Enter into MenuSetupBasic System interface. Refer to Fig 4-3: Fig 4-3 Basic Configuration-System Step 2: In this interface you can setup the device name, device ID, video format, max network users, VGA resolution, language and so on.
-
Page 19: Time & Date
DVR User Manual Show Wizard: If selected, the GUI would launch the startup wizard on every boot, allowing the user to do basic setup. No Image When Logout: If selected, there will be no image showing when logging out. Adjust CVBS Video Out: If selected, the system will automatically log out and adjust the CVBS output.
-
Page 20: Live Configuration
DVR User Manual month/week/date, etc. Step 3: Click “Apply” button to save the setting. 4.2 Live Configuration Live configuration includes three submenus: live, main monitor and mask. 4.2.1 Live In this interface, you can setup camera name. To setup camera name: Step 1: Enter into MenuSetupLive.
-
Page 21: Mask
DVR User Manual Fig 4-7 Live Configuration-Main Monitor 4.2.3 Mask If there is something you don’t want to display in the live image. You can set mask. For a given channel a maximum of three areas can be masked. To setup mask area: Step 1: Enter into MenuSetupLive Mask interface.
-
Page 22: Record Configuration
DVR User Manual Fig 4-9 Setting Mask Area 4.3 Record Configuration Record configuration includes six sub menus: enable, record bit rate, time, recycle record, stamp and snap. Before Configuration, please make sure your DVR has been installed with HDD and has completed its initialization.
-
Page 23: Time
DVR User Manual Step 2: Setup rate, resolution, quality, encode and max bit stream. Step 3: Select “All” to set the same settings for all channels. Step 4: Click “Apply” button to save the setting. Fig 4-11 Record Configuration-Record Bitrate Parameter Meaning Range from: 1-30(NTSC)1-25(PAL)
-
Page 24: Stamp
DVR User Manual begins. Post-alarm Record Time: Set the time in seconds to post-record after the actual recording has finished, five options: 10s, 15s, 20s, 30s, 60s, 120s, 180s and 300s. Expire Time: Set the expiration time for recorded video. If the set date is overdue, the recorded files will be deleted automatically.
-
Page 25: Recycle Record
DVR User Manual 4.3.5 Recycle Record This option is used to recycle the HDD space once it is full. If enabled, the system will automatically delete the old records and recycle the space if it is completely utilized. The setting steps are as follows: Step 1: Enter into MenuSetupRecord Recycle Record interface;…
-
Page 26: Motion Schedule
DVR User Manual to save. Step 2: Select other days and add schedule or copy settings from one schedule to the others under the Apply Settings To item. Fig 4-15 Schedule-Week Schedule 4.4.2 Motion Schedule This tab allows to set schedule for motion based recording. The setting steps are as follows: Step 1: Enter into MenuSetupSchedule Motion tab.
-
Page 27: Sensor Alarm
DVR User Manual 4.5.1 Sensor Alarm Sensor includes three sub menus: basic, alarm handling and schedule. Operate the following steps to configure sensor alarm: Step 1: Enter into MenuSetupAlarm SensorBasic interface. Refer to Fig 4-16: Fig 4-16 Alarm Configuration-Sensor-Sensor Step 2: Enable channels by checking the checkboxes beside the desired channels. Step 3: Set the alarm type according to triggered alarm type.
-
Page 28: Motion Alarm
DVR User Manual Fig 4-18 Alarm Handling-Trigger Buzzer: If selected, the local buzzer would be activated on an alarm. Show Full Screen: If selected, there will pop up the chosen channel on the monitor on an alarm trigger. To Alarm Out: If selected, this would trigger the external relay output on detecting a sensor based alarm.
-
Page 29
DVR User Manual motion. Fig 4-19 Alarm Configuration-Motion Step 3: The setup steps of motion trigger are similar to “Alarm Handling” (See Chapter 4.5.1 Sensor Alarm Handling setting for more details). Step 4: After clicking Area button, a dialog box will pop-up as Fig 4-20: Step 5: In the Area interface, you can drag slide bar to set the sensitivity value (1-8). -
Page 30: Video Loss
DVR User Manual Step 7: Click “Apply” button to save the setting. Step 8: Enter into Schedule tab. The setting steps for schedule for motion based alarm are similar to normal schedule setup (see Chapter 4.4.1 for more details). 4.5.3 Video Loss This DVR can be set up to detect video loss.
-
Page 31: Alarm Out
DVR User Manual choose a threshold value for remaining HDD space. If the threshold value is reached, the system will trigger the Disk Full Alarm. Step 4: Click “Apply” to save the setting. 4.5.5 Alarm Out Alarm out includes three sub menus: alarm out, schedule and buzzer. To setup alarm out: Step 1: Enter into MenuSetupAlarm Out.
-
Page 32: Sub Stream
DVR User Manual Fig 4-24 Network Configuration-Network Step 2: Set HTTP port. The default HTTP port is 80. If the value is changed, you shall add the port number when typing IP address in IE address blank. e.g. If HTTP port is set to 82 and IP address is http://192.168.11.61, you should input the following IP address: http://192.168.11.61 :82 into IE browser.
-
Page 33: Email
DVR User Manual Fig 4-25 Network Configuration-Sub Stream Parameter Meaning Range from: 1-25 Resolution Support CIF The quality of the clients’ image. The higher the value is, the Quality clearer the record image. Six options: lowest, lower, low, medium, higher and highest. Encode VBR and CBR Max bit rate…
-
Page 34: Server
DVR User Manual Step 4: Set receiver’s email address and click “Test” button to test the validity of the mailbox. Attaching image: If selected, the system will attach images when sending emails. 4.6.4 Server This function is mainly used for connecting ECMS/NVMS. The setting steps are as follows: Step 1: In the server interface, select “Enable”…
-
Page 35
DVR User Manual Fig 4-28 Network Configuration-Other Settings Note: The domain name selected by user is a banding domain name of DVR. User should logon the website provided by the server supplier to register a user name and password and then apply for a domain name online. After the successful application, user can access the device from the IE client by inputting that domain name. -
Page 36
DVR User Manual Step 3: After you successfully request your domain name, you will see your domain in the list. DVR Setting Connect DVR to the Network Client. Step 1: Enter into Main menuNetworkOther Settings, checkmark DDNS, select “dvrdydns” at the DDNS Sever pull down list box and input user name and password. Step 2: Enter into configuration interface of the router to map the server port and IP address (if the user enables UPnP function, he can skip this step). -
Page 37: User Management Configuration
DVR User Manual plus HTTP port to access your DVR. DDNS server Website provided by dynamic domain name supplier. The optional: www.meibu.com , DDNS server www.dyndns.com, www.no-ip.com, www.dvrdydns.com, www.autoddns.com and mintdns type. User name User name for log in the website of domain name supplier Password Password for log in the website of domain name supplier Host domain…
-
Page 38: Configuration
DVR User Manual Step 3: In General tab, input username, password and select user type. You can also check “Binding PC MAC Address” and input this address. Step 4: Click “OK” to save the setting. Note: When the default value of binding PC MAC Address is 0, the user is not bound with the specified computer.
-
Page 39
DVR User Manual Fig 4-32 P.T.Z Configuration-Serial Port Parameter Meaning Address The address of the PTZ device Baud rate of the PTZ device. Range form: 110, 300, 600, 1200, 2400, Baud rate 4800, 9600, 19200, 34800, 57600, 115200, 230400, 460800, 921600. Communication protocol of the PTZ device. -
Page 40
DVR User Manual To set up preset: Step 1: In the Advanced interface, click preset “Setting” button to see a dialog box as Fig 4-34: Fig 4-34 Advanced-Preset Setting Step 2: In the preset setting tab, enable preset, set the preset name and then click preset “Setting”… -
Page 41
DVR User Manual Fig 4-36 Cruise Setting Step 2: Click Add button to add cruise line in the list box (8 cruise lines can be added at most). Step 3: Select a cruise line and click Setup button to see a dialog box as Fig 4-37: Fig 4-37 Modifying Cruise Line Step 4: Click Add icon to set the speed and time of preset point. -
Page 42: Advanced
DVR User Manual Fig 4-38 Track Setting 4.9 Advanced Advanced configuration includes three submenus: reset, import/export and Block/Allow list. 4.9.1 Reset Reset all settings the device will reboot. 4.9.2 Import/Export User can export the data files into mobile storage devices as backup function, and then import specified data files from mobile storage device to DVR.
-
Page 43: Search, Playback & Backup
DVR User Manual Search, Playback & Backup Search configuration includes four submenus: time search, event search, file management and image. 5.1 Time Search Step 1: Enter into MenuSearch Time Search. Refer to Fig 5-1: Fig 5-1 Search Configuration-Time Search Step 2: Select date and channels on the right hand side and press the ‘Search’ button. A date with highlighted borderline indicates presence of data.
-
Page 44: File Management
DVR User Manual Fig 5-2 Search Configuration-Event Search Step 2: Select date and channels on the right hand side. A data with highlighted borderline indicates presence of data. Step 3: Checkmark Motion, Sensor or All accordingly. Step 4: Click Search button to display the searched event information in the event list box. Step 5: Double check a certain record file to playback.
-
Page 45: Search By Image
DVR User Manual Step 5: Double click an unlocked item to play. Lock: Select a file and click Lock button to lock this file, after that, that file will not be deleted or covered. Unlock: Select a locked file and click “Lock” button to unlock this file Delete: Select an unlocked file and click “Delete”…
-
Page 46
DVR User Manual Fig 5-5 Backup Configuration Step 3: Select a required file or checkmark “All” to select all data files. Click Backup button to display Backup information window. Step 4: In the backup information interface, you can check the relevant information of backup files, storage type, save file type, etc. -
Page 47: Manage Dvr
DVR User Manual Manage DVR 6.1 Check System Information Check system information includes six submenus: system, event, log, network, online user and record. 6.1.1 System Information In this interface, you can check the hardware version, MCU version, kernel version, device ID, etc.
-
Page 48: Upgrade
DVR User Manual Step 1: Enter into disk management interface Note: please format the hard disk before record. Step 2: Click Refresh button to refresh the disk information in the list box. Step 3: Select a hard disk and click Format button to start format. Note: All recorded files in the hard disk will be lost after formatting.
-
Page 49: Remote Surveillance
DVR User Manual Remote Surveillance 7.1 IE Remote Surveillance In order to view the DVR from a network it must be connected to LAN/WAN or internet. The network setup should be done accordingly. Please refer to 4.6 Network Setup. This DVR supports IE browser, on Windows XP and Vista platform.
-
Page 50: Remote Surveillance Through Apple Pc
DVR User Manual 2. Connect the DVR to internet directly Step 1: Enter into the DVR’s Main MenuSetupNetwork interface to enable PPPoE and then input user name and password received from your ISP. Next, click ‘Apply’. The DVR will connect to the server and would give a confirmation message. Step 2: When accessing the remote interface of DVR, user can input WAN IP to access directly (user can enter into Main menuInformationNetwork interface to check IP address).
-
Page 51
DVR User Manual Step 2: Go into Network interface and then click “Ethernet Connected” to check the internet connection of Apple PC. Step 3: After acquiring the IP address, Subnet Mask and so on, please enter into the DVR’s Main MenuSetupNetwork interface to manually input IP address, Subnet Mask and Gateway according to the configuration of PC. -
Page 52: On Wan
DVR User Manual 7.2.2 On WAN There are also two ways for DVR to connect to Internet. 1. Connect the DVR to internet through router or virtual server Step 1: The network setups are the same as step one to step four of point 1 on WAN of IE remote surveillance.
-
Page 53
DVR User Manual Screen display mode: Click the icon beside the screen display mode to select channels. Snap pictures Click “Snap” icon to automatically capture pictures and save those pictures in the computer. You can set up the save path for those picture in the Remote Preview interface Configuration Local configuration. -
Page 54: Remote Playback & Backup
DVR User Manual Fig 7-2 Right Key Sub Menu Stream: This DVR supports master stream and sub stream. Master stream has higher frame rate, max 25FPS(PAL)/30 FPS(NTSC)for every channel, but it needs higher network bandwidth simultaneously. Sub stream has low frame rate, max 6FPS (PAL)/7FPS (NTSC) for every channel, it requires low network bandwidth.
-
Page 55
DVR User Manual This DVR supports remote time search, event search and file management. By Time Search: Step 1: Enter into SearchTime Search. Refer to Fig 7-4: Step 2: The highlight date in the area② indicates recorded data. Select the date in area ② and record channels in area③. -
Page 56
DVR User Manual Step 1: Enter into SearchEvent Search interface. Refer to Fig 7-6: Step 2: Click the highlight date and select record channels. Step 3: Checkmark the event type: motion and sensor. Step 4: Click “Search” button. Step 5: Double-click certain item to play. Fig 7-6 Event Search Interface File Management Step 1: Enter into SearchFile Management interface. -
Page 57: Remote Backup
DVR User Manual 7.4.2 Remote Backup Click Backup button to enter into backup interface. Please refer to Fig 7-8: Fig 7-8 Remote Backup Interface Step 1: Select channels, set the start and end time and then click “search’ button to display the file information in the file list box.
-
Page 58: Tools
DVR User Manual 7.6 Tools Click on the tool’s tab to access the Disk Management tool. The user can view the status of the hard drive(s), can view/change the read write properties and can also format the hard drive(s). 7.7 Remote Management The Info interface provides a web based interface to access the general information pertaining to the DVR’s settings.
-
Page 59: Appendix A Faq
DVR User Manual Appendix A FAQ Q1. Why the DVR doesn’t turn on after connecting to the power? The power adapter could have gone bad. Please change a new power adapter. The power from the adapter may be not enough for operating the DVR. Please use the power adaptor supplied along with the DVR.
-
Page 60
DVR User Manual b. After connecting the mouse, allow the DVR to detect the mouse for seconds. If not detected, try restarting the DVR. c. The mouse may be incompatible. Please change a mouse. Q8. ActiveX control cannot be downloaded. IE browser blocks ActiveX. -
Page 61
DVR User Manual Q10: How to input password and digital numbers? Click the password or the input box a small keyboard will pop up. Please select characters to be input (the initial password is 123456), or you can use the digital keys on the front panel, or the digital keys on the remote controller. -
Page 62
DVR User Manual Q14. How to play the backup file? Insert your USB device where the backup files are saved in the USB port of PC. If your files are saved in DVR format, you must have already downloaded the backup player box before doing backup. -
Page 63: Appendix B Calculate Recording Capacity
DVR User Manual Appendix B Calculate Recording Capacity Users can calculate the size of hard disk according to the saving time and DVR recording settings. The DVR uses fixed video bit rate. The below are the details at different settings. Resolut Frame Rate…
-
Page 64: Appendix C Compatible Devices
DVR User Manual Appendix C Compatible Devices Compatible USB drive after test. Brand Capacity 512MB, 1G, 2GB Netac Kingston Aigo Smatter vider SanDisk 2. Compatible SATA CD/DVD writers after test Brand Model TECLAST GH22NP20/TL-22XD BENQ DW220S-0K4 LITEON DH—20A6S01C LITEON DH-20A4P02C SAMSUNG TS-H653B 3.
-
Page 65: Appendix D 4 Ch Specifications
DVR User Manual Appendix D 4 CH Specifications Compression format H.264 Main Profile Video output CVBS×1, VGA×1, HDMI×1 Video Input SDI×4 HDMI/VGA Resolution 1080P/1280*1024/ 800*600 Record Resolution 1080P (1920*1080) Display Frame Rate 100FPS (PAL), 120FPS (NTSC) Record Frame Rate 100FPS (PAL),…
-
Page 66: Appendix E 8 Ch Specifications
DVR User Manual Appendix E 8 CH Specifications Compression format H.264 Main Profile Video output CVBS×1, VGA×1, HDMI×1 Video Input SDI×4 HDMI/VGA Resolution 1080P/1280*1024/1280*768/ 800*600 Record Resolution 1080P (1920*1080) Display Frame Rate 200FPS (PAL), 240FPS (NTSC) Record Frame Rate 200FPS (PAL),…
-
Page 67
450011000460 A1…
Main menu
-
Store
-
Products
-
Ships From:
-
Flash Sale
-
App & Smart Client
-
Support
Products
-
100% Wireless Security Camera
-
ColorCam Series
-
PoE Cameras
-
WiFi Cameras
-
2K Security Systems
-
4K Security Systems
-
Security NVR
-
Accessories
-
Terms of Service
-
Refund policy
Follow us
Find us on Facebook
Find us on Youtube
Find us on Email
Welcome to H.VIEW
Can’t find what you are looking for? Email to support@hviewsmart.com
Subscribe
Invite customers to join your mailing list.
Email address
Last update:
Free download and update Firmware Software on H View Avr Ae108
Easy Way To update H View Avr Ae108 Firmware Software new version, supported android 13/10/7/6/11/8/4/12/5/9.
H View Avr Ae108 Firmware
Free download Firmware on a android version: Android 9, Android 7, Android 8, Android 12, Android 6, Android 4, Android 13, Android 10, Android 5, Android 11.
| App Name: | FirmwareAndroid.APK |
| Last Update: | 18 September 2022 |
| Language pack: | English, Persian, Romanian, Hindi, Czech |
| Version: | 2.9 |
| File Size: | 8.68 MB |
| File Type: | application/vnd.android.package-archive |
| Downloads: | 68 760 |
Download Android firmware file
Supported android devices: H View Avr Ae108, Loewe Mimo L 20, E270sksuanf2 Galaxy Grand Shv E270s, Ricoh Pj X6180n, Zte Star Msm8226 S2002, Hisense U989 Pro and many others.
Watching YouTube video — How do I update Firmware Software for H View Avr Ae108?
All rights reserved. Unauthorized reproduction, in whole or in part is strictly prohibited.
POPULAR TODAY
- 10 Solutions to upgrade software on Loewe Mimo L 20
- A New Way To upgrade software on E270sksuanf2 Galaxy Grand Shv E270s
- Upgrade Stock firmware for Ricoh Pj X6180n
- Easy Way To upgrade Stock ROM firmware on a Zte Star Msm8226 S2002
- [SOLVED] upgrade Android firmware with Hisense U989 Pro

Twrp Montana
Top 9 Ways to install TWRP Recovery on a Twrp Montana

Setup your H.view IP camera
There are two connection options in Camlytics smart camera software for Windows PC to login and view your H.view IP camera. Those are automatic discovery (you’ll see your camera in our software) and manual discovery (without camera website).
If you cannot find your H.view CCTV camera in the left section or it isn’t working with Camlytics software app, click «Manual» in Discovery section to setup your H.view cameras with direct RTSP or HTTP stream URL.
H.view compatible software
You can connect H.view to Camlytics to add the following video analytics capabilities to your camera:
- people counter
- customer counter
- car & vehicle counting
- calculate speed
- occupancy monitoring
- retail store traffic counter
- motion detection & alerts
- tailgating security
| Model | Protocol | Path | Port |
|---|---|---|---|
|
C7824WIP |
http:// | img/snapshot.cgi?size=2 | 80 |
|
hd dvr 4ch |
http:// | mjpeg?res=full&x0=0&y0=0&x1=100%&y1=100%&quality=12&doublescan=0 | 80 |
|
HD DVR 4CH |
http:// | cgi-bin/view.cgi?chn=[CHANNEL]&u=[USERNAME]&p=[PASSWORD] | 80 |
|
HD DVR 4CH |
http:// | cgi-bin/snapshot.cgi?chn=[CHANNEL]&u=[USERNAME]&p=[PASSWORD] | 80 |
|
Other |
http:// | cgi-bin/snapshot.cgi?chn=[CHANNEL]&u=[USERNAME]&p=[PASSWORD] | 80 |
|
Other |
http:// | cgi-bin/view.cgi?chn=[CHANNEL]&u=[USERNAME]&p=[PASSWORD] | 80 |
|
Other |
http:// | snapshot | 80 |
|
Other |
http:// | snapshot.jpg | 80 |
|
tp-ip1012 |
http:// | snapshot | 80 |
|
tv-1p1312 |
http:// | snapshot | 80 |
|
TV-CB6010 |
rtsp:// | /onvif1 | 554 |
|
TV-CB6010 |
http:// | videostream.cgi?rate=0&user=[USERNAME]&pwd=[PASSWORD] | 81 |
|
TV-IP1011 |
rtsp:// | /ch0_0.264 | 8085 |
|
TV-IP1011 |
http:// | snapshot | 80 |
|
TV-IP1311 |
http:// | snapshot | 80 |
|
tv-ip1312 |
http:// | snapshot | 80 |
|
poe |
http:// | cgi-bin/snapshot.cgi?chn=[CHANNEL]&u=[USERNAME]&p=[PASSWORD] | 80 |
|
avr-ae108 |
rtsp:// | /onvif1 | 554 |
|
1301 |
rtsp:// | /live/main | 554 |
|
H-400EV |
rtsp:// | /live/main | 554 |
|
HV-500G2 |
rtsp:// | /live/main | 554 |
|
hv-E800A |
rtsp:// | /live/main | 554 |
|
HV-WF800A1 |
rtsp:// | /live/main | 554 |
|
HV-XM502 |
rtsp:// | /onvif1 | 554 |
|
POE |
rtsp:// | /live/main | 554 |
|
Other |
rtsp:// | /live/main | 554 |
|
HV-500E6 |
rtsp:// | /live/main | 554 |
|
IPC-H0817 |
rtsp:// | /live/main | 554 |
|
HV-E3 |
rtsp:// | /live/main | 554 |
|
HV-WF800A5 |
rtsp:// | /live/main | 554 |
|
IPC_NT98566_N8F |
rtsp:// | /onvif1 | 554 |
Other manufacturers starting with H
All manufacturers
Camlytics has no affiliation, connection, or association with H.view products. The connection links can be incomplete, inaccurate or both. We provide no warranty that you will successfully connect using these URLs or that H.view products are compatible with Camlytics.
-
Evgen_zm
- Новичок
- Сообщения: 6
- Зарегистрирован: 09 июл 2016, 15:52
-
Evgen_zm
- Новичок
- Сообщения: 6
- Зарегистрирован: 09 июл 2016, 15:52
Re: Восстановление H.View
Сообщение
Evgen_zm » 09 июл 2016, 16:07
Не влезли все изображения в первое сообщение 
- Вложения
-

- Нутрянка
-
sergvl
- Специалист
- Сообщения: 1376
- Зарегистрирован: 18 янв 2016, 14:09
- Откуда: 符拉迪沃斯托克
- Контактная информация:
Re: Восстановление H.View
Сообщение
sergvl » 09 июл 2016, 16:21
Запроси у производителя http://www.techvision.cn/plus/list.php?tid=20″ onclick=»window.open(this.href);return false; или если имеются знания в данной области, то подключайся по UART и выкладывай лог загрузки, help, printenv.
-

kROOT
- Специалист
- Сообщения: 13362
- Зарегистрирован: 02 сен 2013, 14:25
- Откуда: youcam.pro
- Контактная информация:

Re: Восстановление H.View
Сообщение
kROOT » 11 июл 2016, 08:36
для начала отключи винт
-
Evgen_zm
- Новичок
- Сообщения: 6
- Зарегистрирован: 09 июл 2016, 15:52
Re: Восстановление H.View
Сообщение
Evgen_zm » 11 июл 2016, 15:39
kROOT писал(а):для начала отключи винт
Первое что сделал 
sergvl писал(а):Запроси у производителя http://www.techvision.cn/plus/list.php?tid=20″ onclick=»window.open(this.href);return false; или если имеются знания в данной области, то подключайся по UART и выкладывай лог загрузки, help, printenv.
Прошивку скинули, а как её залить? Скидывал на флешку и потом включал регик — не подхватывается. С подключением по UART проблемы конечно
-
M — 16.
- Специалист
- Сообщения: 214
- Зарегистрирован: 18 июн 2014, 19:08
- Откуда: Сибирь
- Контактная информация:
Re: Восстановление H.View
Сообщение
M — 16. » 11 июл 2016, 15:51
При включении регистратора обращение к флешке есть (лампочка мыргает)? Некоторым регистраторам нужно прошивку не в корень флешки класть, а в папку, например, «upgrade» или вообще переименовывать.
Выложите прошивку, может в ней подсказка есть какая.
-
Evgen_zm
- Новичок
- Сообщения: 6
- Зарегистрирован: 09 июл 2016, 15:52
Re: Восстановление H.View
Сообщение
Evgen_zm » 15 июл 2016, 18:11
M — 16. писал(а):При включении регистратора обращение к флешке есть (лампочка мыргает)? Некоторым регистраторам нужно прошивку не в корень флешки класть, а в папку, например, «upgrade» или вообще переименовывать.
Выложите прошивку, может в ней подсказка есть какая.
Да, флеха подхватывается. Вот файл прошивки
-
sergvl
- Специалист
- Сообщения: 1376
- Зарегистрирован: 18 янв 2016, 14:09
- Откуда: 符拉迪沃斯托克
- Контактная информация:
Re: Восстановление H.View
Сообщение
sergvl » 16 июл 2016, 04:15
Это не полная прошивка, это только обновление прошивки.
-
Evgen_zm
- Новичок
- Сообщения: 6
- Зарегистрирован: 09 июл 2016, 15:52
Re: Восстановление H.View
Сообщение
Evgen_zm » 19 июл 2016, 14:51
sergvl писал(а):Это не полная прошивка, это только обновление прошивки.
Всё что прислал продаван 
-
sergvl
- Специалист
- Сообщения: 1376
- Зарегистрирован: 18 янв 2016, 14:09
- Откуда: 符拉迪沃斯托克
- Контактная информация:
Re: Восстановление H.View
Сообщение
sergvl » 19 июл 2016, 21:21
Тогда только через UART.
-
M — 16.
- Специалист
- Сообщения: 214
- Зарегистрирован: 18 июн 2014, 19:08
- Откуда: Сибирь
-
Контактная информация:
Re: Восстановление H.View
Сообщение
M — 16. » 20 июл 2016, 06:51
http://v.tovi.cn/down/t/DVR%E7%B3%BB%E5 … %9C%AC.zip» onclick=»window.open(this.href);return false;
«Процесс обновления, например, неправильной эксплуатации привело к неудачного обновления не удается запустить методы восстановления, доступные для аварийного восстановления системы конкретных операций:
1. Проверьте файл обновления help.rom был скопирован в корневую директорию U диск, U диск в DVR, DVR питания включен,
Вы услышите «бип» звук после запуска после того, как продолжать ждать около трех минут после перезагрузки система автоматически восстанавливается.» Это перевод с китайского. Если прокатит, потом обновите до актуальной версии.
-
serg68
- Новичок
- Сообщения: 1
- Зарегистрирован: 31 окт 2016, 22:31
Re: Восстановление H.View
Сообщение
serg68 » 31 окт 2016, 22:58
доброго времени суток .достался мне такой же dvr от старого хозяина только 8 канальный работал себе работал входил в него без пароля . А потом начал требовать пароль. Предыдущий хозяин исчез связи с ним нет .Пробовал через программу которая даёт код по дате , выползает меню типа инженерное обслуживание тоже требует какой то пароль . По умолчанию ничего не подходит. КАК сбросить данный dvr на заводские настройки подскажите ?
Вернуться в «Восстановление и настройка»
Перейти
- Правила форума
- Если не зайти на форум
- Видеонаблюдение
- ↳ Общие вопросы по видеонаблюдению
- ↳ IP видеонаблюдение
- ↳ Аналоговые системы видеонаблюдения
- ↳ HD видеонаблюдение по коаксиальному кабелю (HD-SDI, AHD, HD-CVI и т.п.)
- ↳ FAQ. Основы видеонаблюдения.
- Оборудование из Китая (ebay, aliexpress, taobao, 409shop и т.п.)
- ↳ Помогите выбрать
- ↳ Оборудование из Китая — общие вопросы
- ↳ Восстановление и настройка
- ↳ Обзоры оборудования
- ↳ Отправка, доставка, гарантия, возврат
- Охранные и пожарные сигнализации, контроль доступа и прочие системы безопасности
- ↳ Охранные и пожарные сигнализации, пожаротушение и т.п.
- ↳ Контроль доступа, домофоны, учет рабочего времени.
- ↳ Турникеты, шлагбаумы, автоматические ворота.
- ↳ Монтаж
- ↳ Инструкции и нормативные документы.
- Все остальное
- ↳ Работа
- ↳ Предложения и запросы
- ↳ Курилка
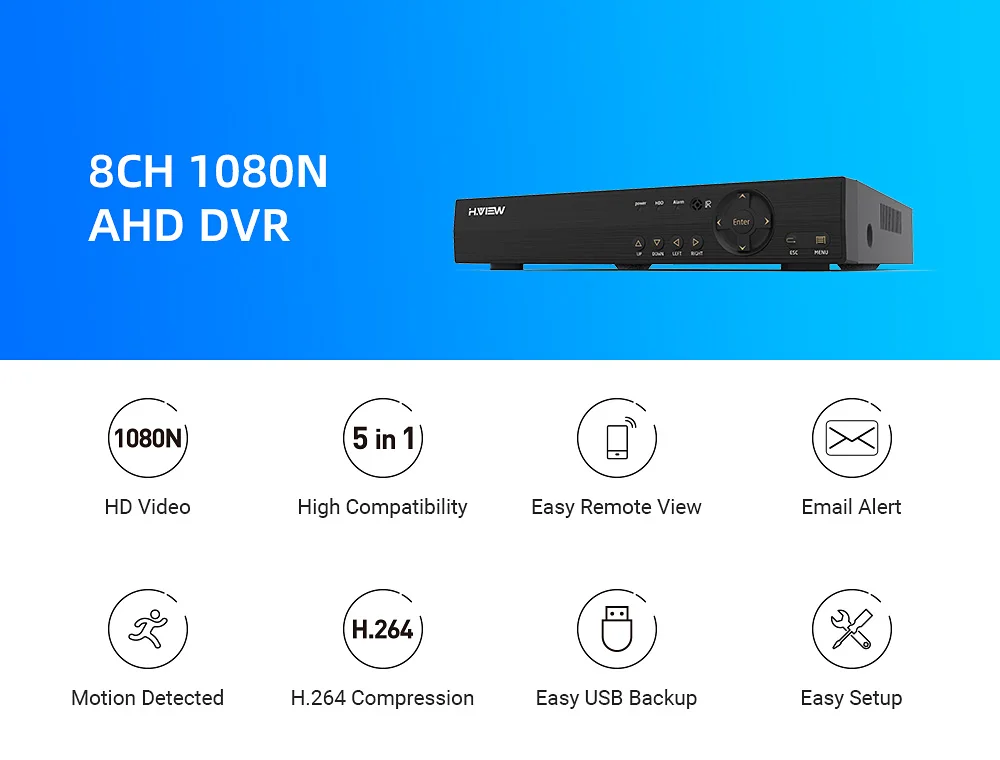
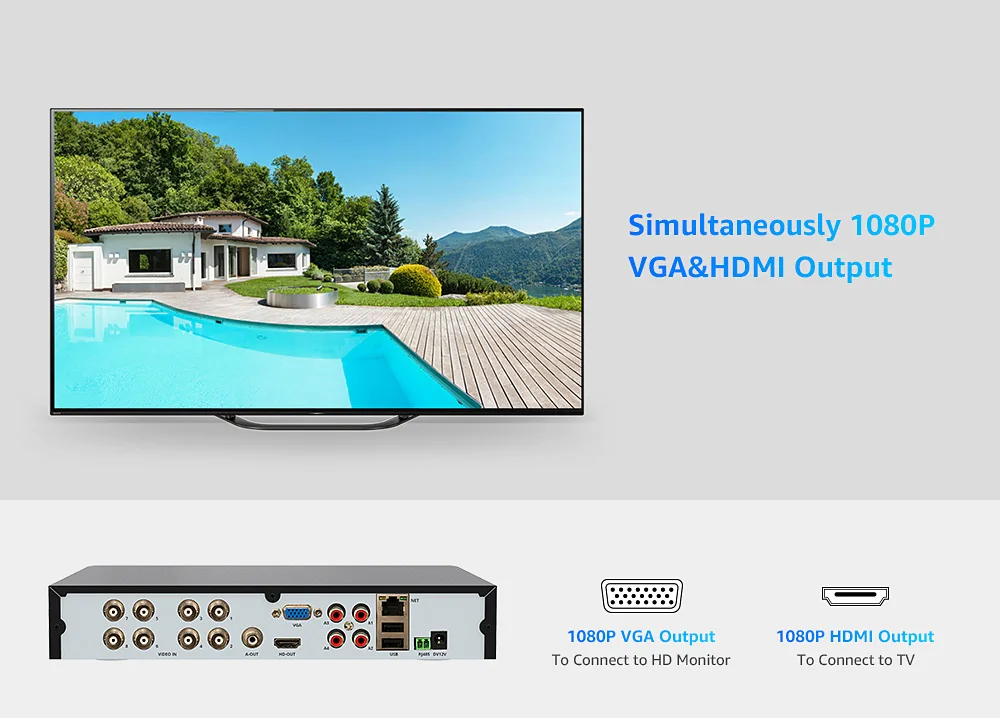
H.VIEW CCTV DVR 8ch H.264 AHD DVR NVR 8ch цифровой видеорегистратор для CCTV 1080P HDMI видео выход Поддержка аналоговой AHD IP камеры
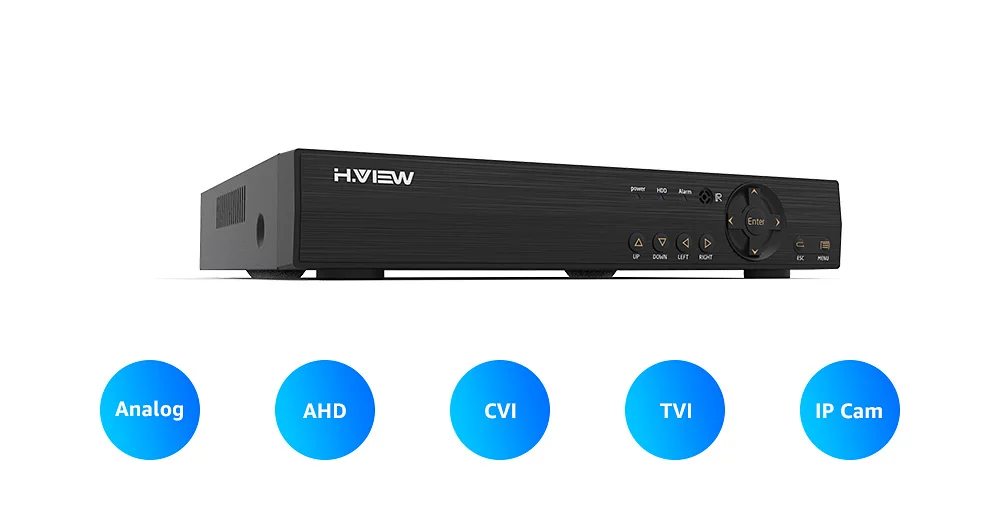
HDMI/VGA видео выход
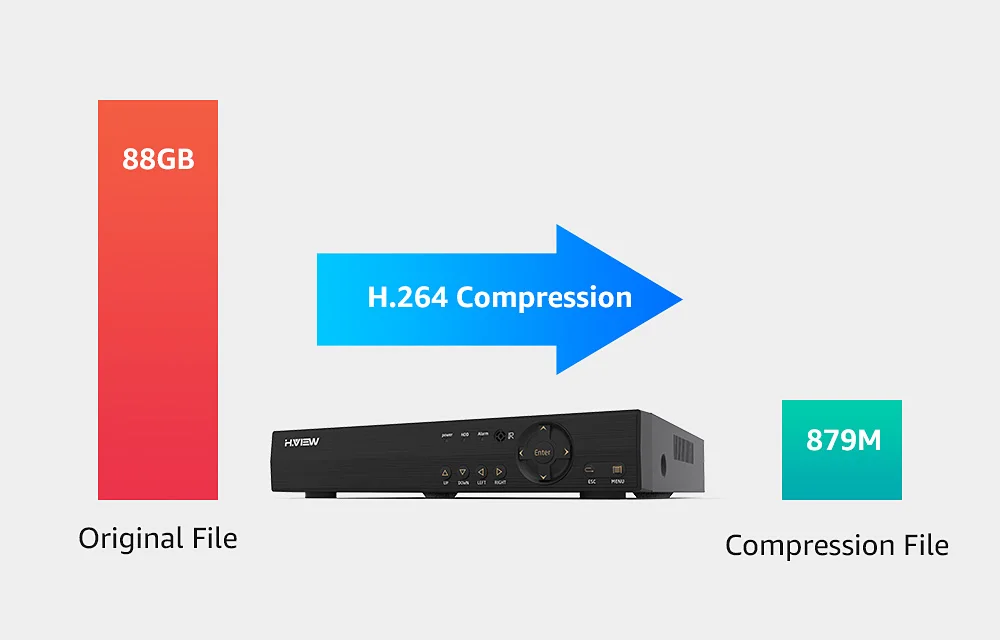
Сжатие H.264
Adavanced сжатие H.264 убедитесь, что вы можете наслаждаться таким же качеством изображения HD в гораздо более маленьком размере файла, сохраняя емкость вашего жесткого диска.
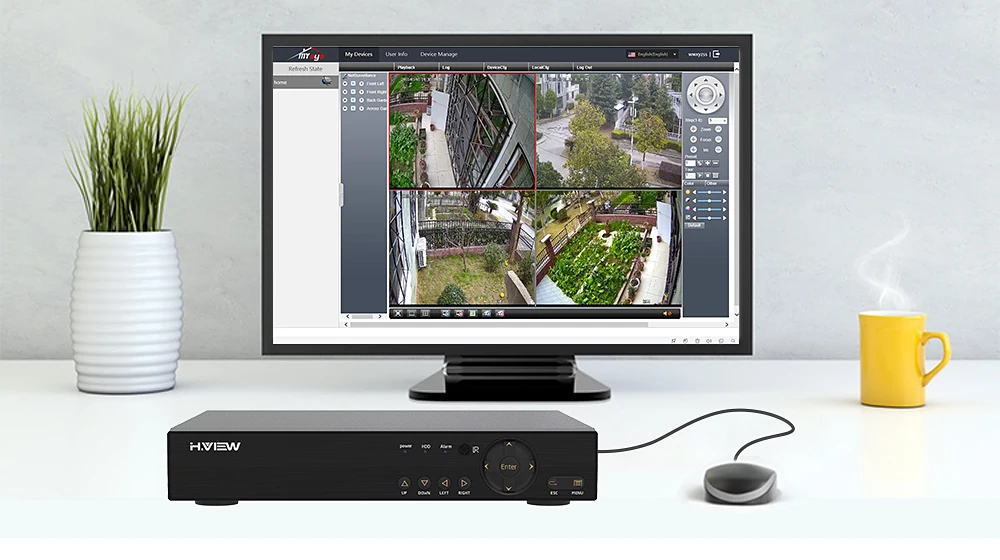
5 в 1 высокопроизводительный гибридный видеорегистратор
Поддержка 5 видов различных камер (аналоговая камера, AHD камера, CVI камера, TVI камера, IP камера), это обеспечивает гибкие варианты комбинации;
Два вида случайной доставки склада
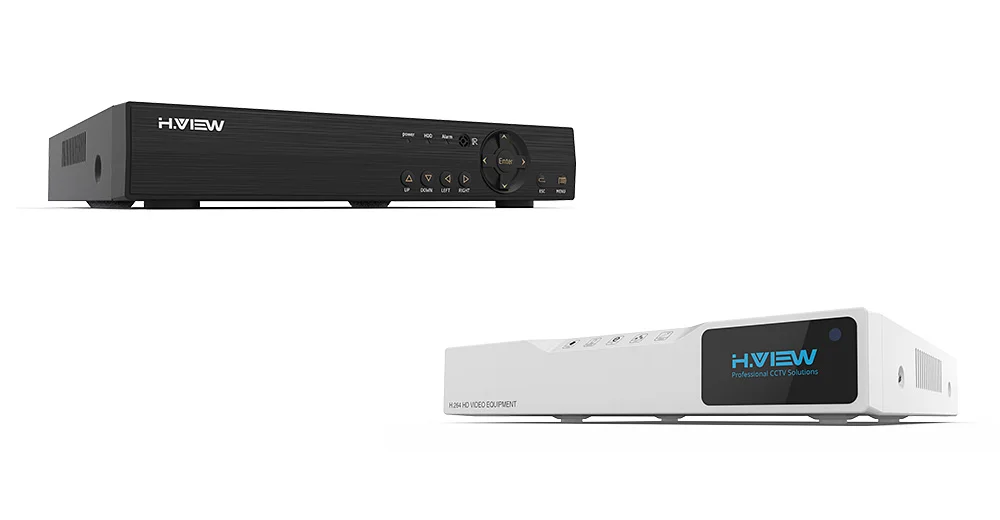
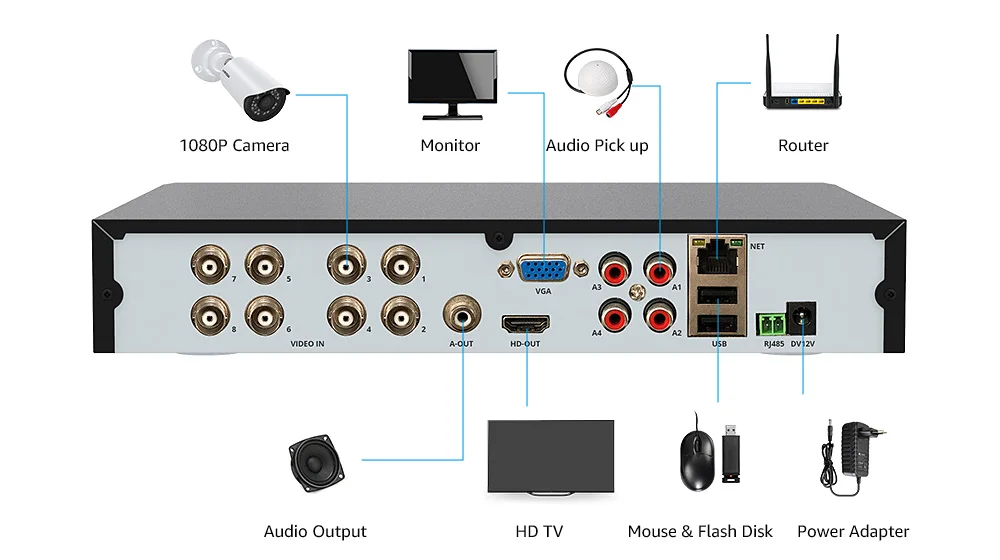
Схема подключения видео хоста
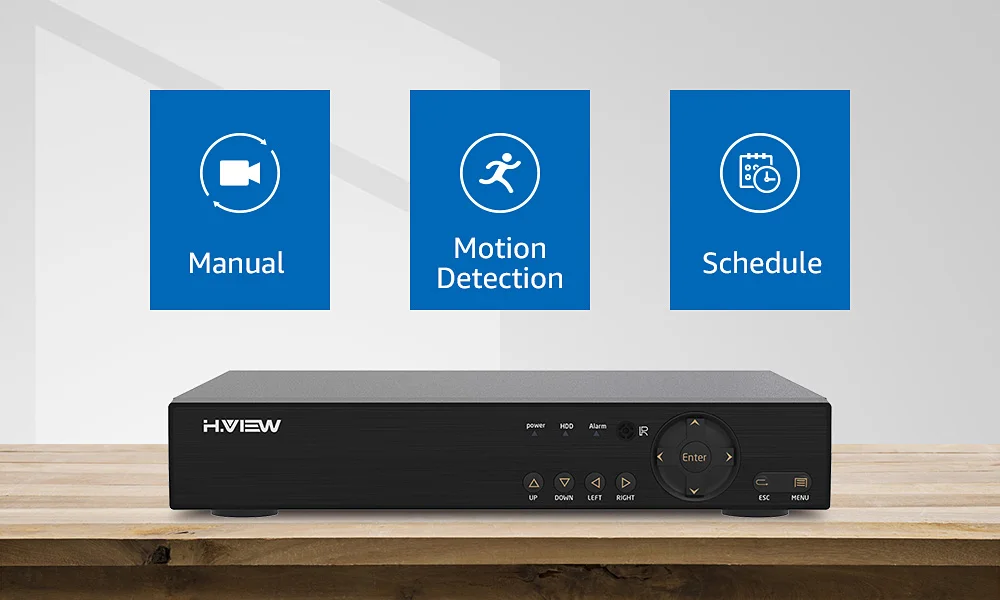
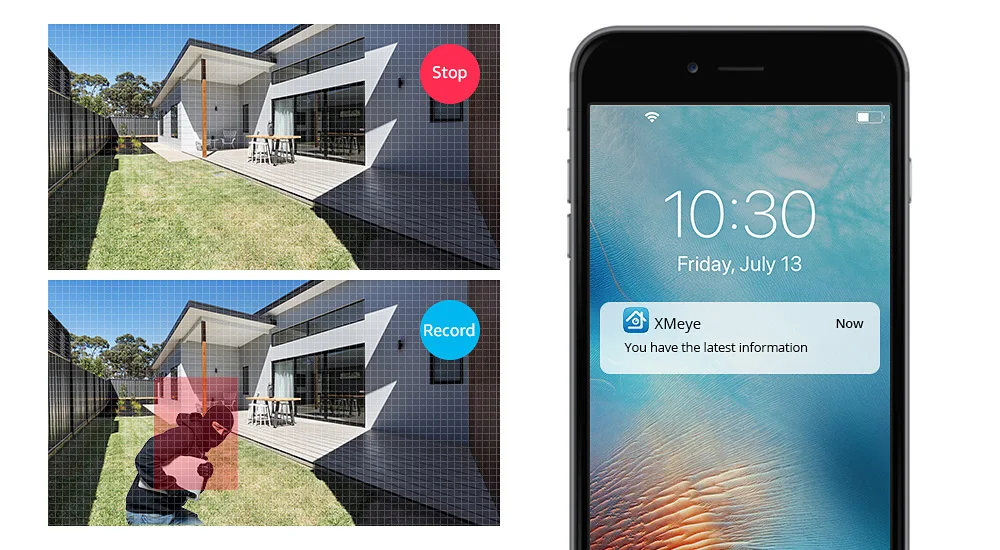
Интеллектуальное обнаружение движения и оповещение по электронной почте
При обнаружении движения в области мониторинга Мгновенная Электронная почта будет отправлена на ваш почтовый ящик и телефон автоматически. Получайте все сведения, даже если вы находитесь вдали от дома.
Видео с умным воспроизведением
H. Просмотр AHD DVR эффективно экономит ваше время в воспроизведении видео. Видеоклипы можно найти и сделать в кратчайшие сроки с функцией интеллектуального воспроизведения. Таким образом, вы можете перейти к видео происшествия непосредственно, пропуская другие.
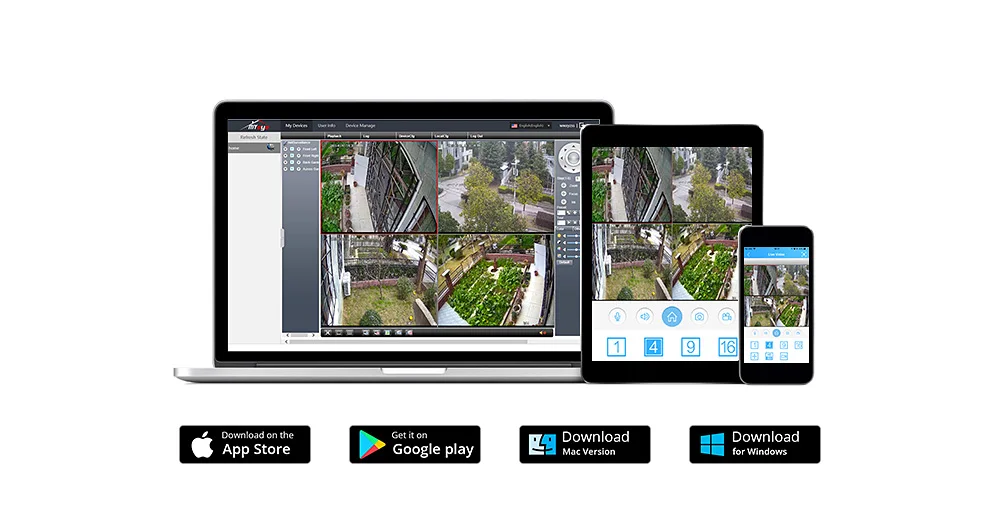
Совместимость с несколькими системами
Поддержка удаленного просмотра через windows PC,iPhone,Android mobile
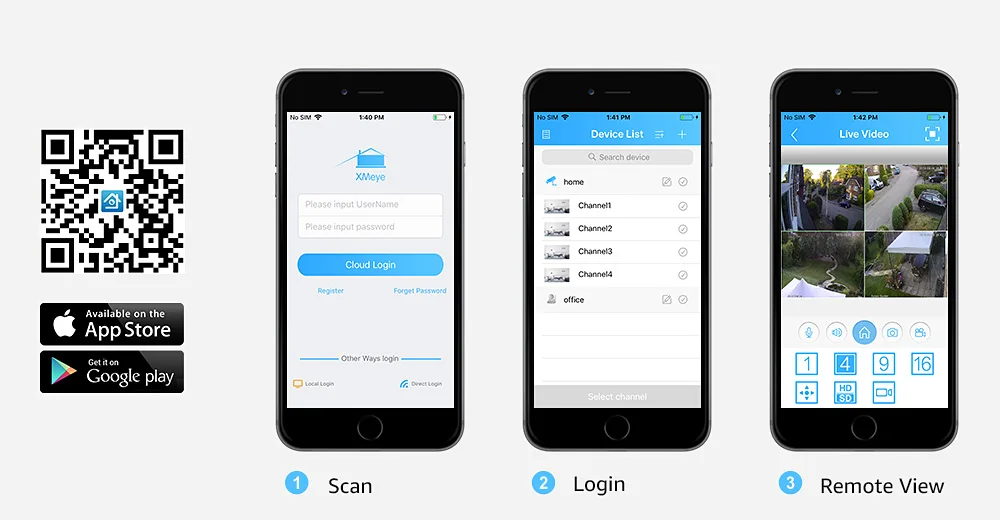
Удаленный просмотр в любое время в любом месте
Благодаря технологии Dual-stream вы можете получить HD локальную запись через основной поток, а также получить более плавное видео на вашем смартфоне через sub-stream.
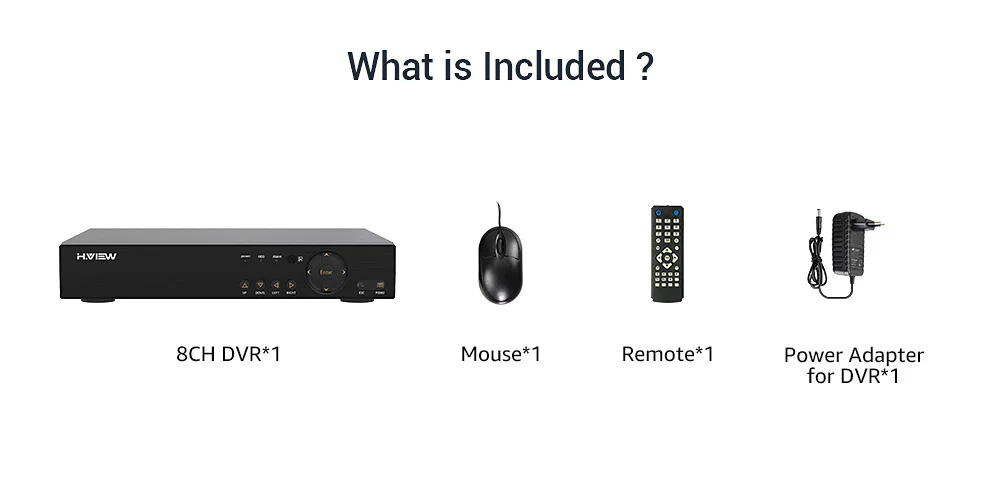
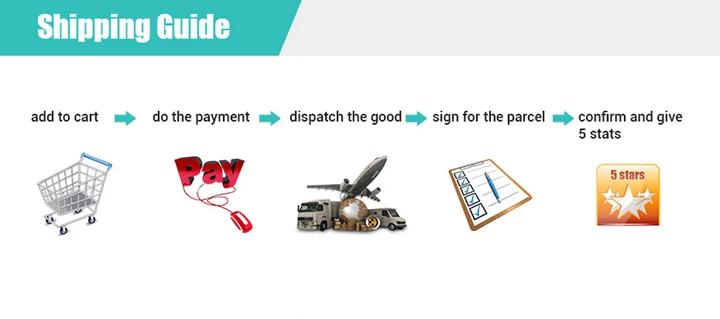
Добавить в корзину-сделать оплату-отправить хороший знак для посылки-подтвердить и дать 5 стартов.

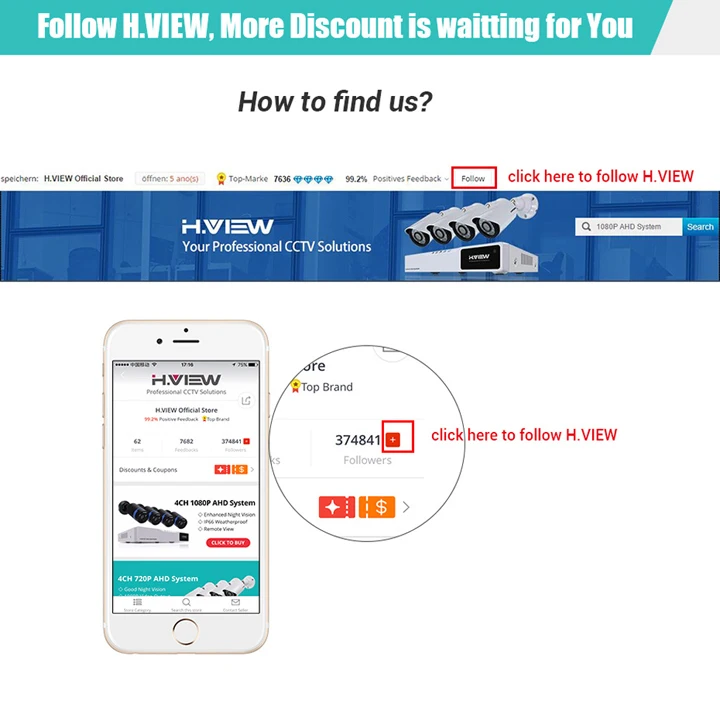
Наш успех зависит от удовлетворенности каждого клиента, поэтому ваши отзывы очень важны для нас.Следуйте H.VIEW, больше скидок ждет вас.Купоны, специальные предложения, которые вы можете найти в H.VIEW Store Club, все, что вам нужно сделать, это нажать и следовать за нами.
Беспошлинная доставка!В настоящее время у нас есть склад в России, Германии, США, откуда мы можем предоставить вам бесплатную и быструю доставку налогов;Заказы на склад в Китае, мы можем улучшить вашу доставку в лучшую сторону, напоминаем, что это может быть связано с налогом на импорт. Возможные сборыДоставка из Китая может быть произведена с дополнительными таможенными сборами, налогами и отдаленными районами. Пожалуйста, ознакомьтесь с таможенной политикой вашей страны. Мы не несем ответственности за эти расходы. ГарантияМы предоставляем 1 год гарантии на видеорегистратор и камеру. При возникновении любых вопросов, пожалуйста, не стесняйтесь обращаться к нам, общение гораздо эффективнее, чем открытие спора.