
Скидка 100₽
на первый заказ от
500₽ в приложении!
Скачать
![]()

Внешний вид упаковки может отличаться от фотографии
Оплата и способы получения
в Москве
Оплата и способы получения
в Москве
Самовывоз
Оплата картой или наличными в аптеке
Доставка
Конкретный срок и стоимость доставки зависят от вашего адреса
Информация о товаре
Количество в упаковке:
1 шт.
Страна:
Сингапур
Страна производства может отличаться, проверяйте при получении заказа
Инструкция на MediCare Lis Глюкометр BG-101 1 шт.
Инструкция
Комплектация
- Прибор для измерения уровня глюкозы в крови Медикеа-Лис (MediCare — Lis) модель BG-101 — 1шт.
- Щелочная батарейка – 1 шт.
- Прокалывающее устройство Медикеа (MediCare) — 1 шт.
- Ланцеты одноразовые стерильные Медикеа (MediCare) 30G – 10 шт.
- Сумочка для переноски — 1шт.
- Руководство пользователя системой — 1 шт.
- Краткое руководство пользователя — 1 шт.
Описание
Глюкометр «Медикеа-Лис» (MediCare-Lis) предназначен для измерения уровня сахара в домашних условиях. Компактный современный аппарат быстро и точно показывает уровень глюкозы в капиллярной крови. Прибор рекомендован для ежедневного контроля уровня глюкозы в крови больных сахарным диабетом, а также для людей с подозрением на данное заболевание.
Глюкометр определяет уровень глюкозы путем смешения образца крови с реагентом на тест-полоске. Для получения результата необходимо несколько секунд и небольшая капля капиллярной крови, процесс анализа полностью автоматизирован. Результат измерений отображается на дисплее в мг/дл или в ммоль/л.
Система измерения уровня глюкозы в крови Медикеа-Лис (MediCare – Lis) использует новейшие технологии, чтобы обеспечить Вам легкое и удобное измерение. Для проведения измерения и получения результата требуется всего 0,3 мкл крови и 6 секунд времени.
Основные сведения
Торговое название
MediCare Lis Глюкометр BG-101
Первичная упаковка
упаковка
Производитель
L-Tac Medicare Pte. Ltd.
Представлено описание активных веществ лекарственного препарата. Описание препарата основано на официально утвержденной инструкции по применению от компании-производителя. Приведенное описание носит исключительно информационный характер и не может быть использовано для принятия решения о возможности применения конкретного лекарственного препарата.
Цены в аптеках на MediCare Lis Глюкометр BG-101 1 шт.

История стоимости MediCare Lis Глюкометр BG-101 1 шт.
Указана средняя стоимость товара в аптеках региона Москва и МО за период и разница по сравнению с предыдущим периодом
Цены MediCare Lis Глюкометр BG-101 и наличие в аптеках в Москве
1 шт.
| Список аптек | Адрес | Часы работы | Цена |
|---|---|---|---|
| 77 Плюс |
Боголюбова пр, 16, Дубна, МО |
09:00-19:00 Пн-Сб |
553 ₽ |
| Аптека 77 плюс |
Победы ул, 10, Воскресенск г, МО |
08:00-20:30 Пн-Вс |
553 ₽ |
| Аптека Плюс |
Михалевича ул, 56, Раменское, МО |
08:00-21:00 Пн-Вс |
553 ₽ |
| АптекиПлюс |
Ленинский пр, 73/8, стр. 2, Москва |
09:00-21:00 Пн-Вс |
553 ₽ |
| Низкие цены |
Центральная ул, 2А/3, Алабушево с, Солнечногорск, МО |
09:00-21:00 Пн-Вс |
553 ₽ |
| Цена красна |
Карла Маркса ул, 88А, Клин г, МО |
09:00-21:00 Пн-Вс |
553 ₽ |
Отзывы о MediCare Lis Глюкометр BG-101
У данного товара ещё нет отзывов
Ваш может стать первым!
Популярные товары в категории
Популярные товары в Ютеке
Купить MediCare Lis Глюкометр BG-101, 1 шт. в Москве с доставкой в аптеку или домой, сделав заказ через Ютеку
Цена MediCare Lis Глюкометр BG-101, 1 шт. в Москве от 553 руб. на сайте и в приложении
Подробная инструкция по применению MediCare Lis Глюкометр BG-101, 1 шт.
Информация на сайте не является призывом или рекомендацией к самолечению и не заменяет консультацию специалиста (врача), которая обязательна перед назначением и/или применением любого лекарственного препарата.
Дистанционная торговля лекарственными препаратами осуществляется исключительно аптечными организациями, имеющими действующую лицензию на фармацевтическую деятельность, а также разрешение на дистанционную торговлю лекарственными препаратами. Дистанционная торговля рецептурными лекарственными препаратами, наркотическими и психотропными, а также спиртосодержащими лекарственными препаратами запрещена действующим законодательством РФ и не осуществляется.
BLOOD GLUCOSE
BLOOD GLUCOSE
MONITORING SYSTEM
MONITORING SYSTEM
METER USER GUIDE
METER USER GUIDE
PLEASE READ THIS BEFORE USING.
The following basic safety precautions should always be taken.
PLEASE READ THIS BEFORE USING.
1. Close supervision is necessary when the device is used by, on, or
The following basic safety precautions should always be taken.
near children and handicapped persons.
2. The meter and lancing device are for single patient use. Do not share
1. Close supervision is necessary when the device is used by, on, or
them with anyone including other family members! Do not use on
near children and handicapped persons.
multiple patients!
2. The meter and lancing device are for single patient use. Do not share
3. All parts of the kit are considered biohazardous and can potentially
them with anyone including other family members! Do not use on
transmit infectious diseases, even after you have performed cleaning
multiple patients!
and disinfection.
3. All parts of the kit are considered biohazardous and can potentially
4. Use the device only for the intended use described in this manual.
transmit infectious diseases, even after you have performed cleaning
5. Do not use test strips and control solutions which are not supplied by
and disinfection.
the manufacturer.
4. Use the device only for the intended use described in this manual.
6. Do not use the device if it is not working properly, or if it has suffered
5. Do not use test strips and control solutions which are not supplied by
any damage.
the manufacturer.
7. Before using any product to test your blood glucose, read all
6. Do not use the device if it is not working properly, or if it has suffered
instructions.
any damage.
8. Thoroughly practice the test. Do all quality control checks as directed
7. Before using any product to test your blood glucose, read all
and consult with a diabetes healthcare professional.
instructions.
9. Before starting measurements, please install battery, and download
8. Thoroughly practice the test. Do all quality control checks as directed
the
app program to set correct time and date,
Smart BGM
and consult with a diabetes healthcare professional.
measurement unit and/or remove memory.
9. Before starting measurements, please install battery, and download
10. Use only Medicare test strip and control solution with your Medicare
the Prodigy iConnect app program to set correct time and date,
LiS Smart meter. Using other test strips and control solutions with this
measurement unit and/or remove memory.
meter can produce inaccurate results.
10. Use only Prodigy test strip and control solution with your Prodigy
11. Keep this user guide with you.
iConnect meter. Using other test strips and control solutions with this
meter can produce inaccurate results.
Intended Use
11. Keep this user guide with you.
The system is intended for use outside the body (in vitro diagnostic use
Intended Use
only). It should be used only for testing blood glucose (blood sugar) and
only with fresh capillary whole blood samples. The system is intended for
The system is intended for use outside the body (in vitro diagnostic use
use in the home and in clinical settings. It should not be used for the
only). It should be used only for testing blood glucose (blood sugar) and
diagnosis of diabetes or for the testing of newborns.
only with fresh capillary whole blood samples. The system is intended for
use in the home and in clinical settings. It should not be used for the
diagnosis of diabetes or for the testing of newborns.
2.App Software
1. Package Contents
1. Your Medicare
blood glucose meter can be connected to
LiS Smart
7.Meter user guide x1
The PBGM meter Complete package:
app program. Through this app, the blood glucose curves can be
BGM
8.App user guide x1
1.PBGM Blood Glucose Meter x1
reviewed in the mobile device.
9.Test strip manual x1*
2.PBGM Blood Glucose Test Strips x10*
10.Control Solution manual x1*
3.Control Solution x1*
2. The Medicare
app supports Andriod and iOS system, please
Smart BGM
11.CR2032 battery x1
4.Lancing Device x1*
download the APP program to your mobile device before use, and read
12.QuckGuidex1*
5.Lancet x10*
the APP instruction manual in the app.
6.Carry bag x1
13.Warranty Cardx1*
3. For Android system user, please go to Google play, download app :
Notes : The simple package version of this product does not cotain the parts
Smart BGM.
marked with an asterisk (*).
4. For iOS system user, please go to Apple store, download app:
Smart BGM.
2. App Software
QR Code :
1. Please download the Medicare program before use and read the manual within the
Medicare.
2. PBGM blood glucose meters can be connected to App, blood glucose curves can be
reviewd in a mobile device.
3. PBGM blood glucose meters can be connected App, the blood sugar value of the mobile
devices, is sent to the family doctor or a cloud device.
4. PBGM support Android and iOS (iphone OS) systems.
5. To know which mobile device it supports, please see the Smart BGM
5. Android system please go to Google Play, download Medicare APP : PBGM.
USER GUIDE- Mobile Compatibility Table for details.
6. iOS system please go to Apple store, download Medicare APP : Connect.
Important:
7. To know which mobile devices it supports, please see the manual description of the
Medicare software — Model Compatibility table.
1. Call your doctor immediately if you experience symptoms that are not consistent
with your blood glucose test results.
2. When the app program displays «This mobile device does not support»
warning, please stop using and contact your customer service.
QR Code :
4. Getting To Know Your System
Important :
Medicare
The
LiS Smart meter system uses the latest technology to provide you with
easy and comfortable testing. The system requires only a 0.3 μL of blood sample to
1. Call your doctor immediately if you experience symptoms that are not consistent with your
complete the testing in only 6 seconds.
blood glucose test results.
2. When the app program displays «This mobile device does not support» warning, Please
1. Display: Shows test results and messages.
stop using than contact your customer service.
3.
2. Headphone plug: Connect your mobile device to use app.
1.
3. Strip slot: Insert the test strip here. The meter will turn
2.
on automatically.
4. Getting To Know Your System
4.
4. Headphone plug Cover: Protect the headphone plug shell.
5. Battery compartment: Holds ONE 3v Lithium battery
(battery type CR2032). Please install battery into meter
before you start to test.
The PBGM meter system uses the latest technology to provide you with easy and
6. Meter label: Each meter has its meter number on it.
comfortable testing. The system requires only a 0.3 μL of blood sample to complete
Do not alter or tear the label off.
the testing in only 6 seconds.
1. Display :Shows test results and messages.
5. Medicare- display
3.
2. Headphone plug: Connect your mobile device to use App.
1.
3. Strip slot :Insert the test strip here. The meter will turn on
2.
automatically.
4. Headphone plug Cover: Protect the headphone plug shell.
4.
1. Blood drop symbol : Flashes when sample should
5. Battery compartment :Holds ONE 3v Lithium battery (battery type
be applied.
CR2032). Please install battery into meter before you start to
1
6
2. Battery symbol : Appears when battery is weak.
test.
3. Strip symbol : Appears when the meter is turned on.
6. Meter label :Each meter has its meter number on it. Do not alter
4. Thermometer symbol : Appears when ambient
or tear the label off.
temperature is above or below the acceptable range
needed for testing.
2
3
4
5
5. Unit of measure : Appears with the test result.
6. Number digits: For showing test results and messages.
5. PBGM- display
6. Test Strip
1. Blood drop symbol : Flashes when sample should beapplied.
1. Absorbent channel : Apply a drop of blood here.
2. Strip symbol : Appears when the meter is turned on.
1 2
3
4
2. Confirmation window : This is where we confirm if
3. Unit of measure : Appears with the test result in.
enough blood is applied for has been drawn into strip.
4. Battery symbol : Appears when battery is weak.
3. Test strip handle : Hold this part to insert the test strip
5. Thermometer symbol : Appears when ambient temperature is
into the meter slot.
4. Contact bars : Insert this end into strip slot.
above or below the acceptable range needed for testing.
6. 8888 : Test result.
SYMBOLS DESCRIPTION
SYMBOLS DESCRIPTION
Smart
Smart
For in vitro diagnostic use.
BG-102
BG-102
Please consult instructions for use.
Do not reuse.
Lot number.
EU representative.
Humidity limitation.
Keep away from sunlight.
L-Tac Medicare Pte Ltd
25 Mandai Estate #07-11
Innovation Place Tower 1
L-Tac Medicare Pte Ltd
Singapore 729930
25 Mandai Estate #07-11
Tel: +65 6334 2273
Innovation Place Tower 1
Fax: +65 6863 8190
Singapore 729930
www.medicare-l-tac.com.sg
Tel: +65 6863 8191
Fax: +65 6863 8190
www.medicare-l-tac.com.sg
Customer Service: +65 6334 2273
Principle of Measurement
Blood glucose is measured by an electrical current that is produced when a
Principle of Measurement
blood samples mixes with the reagent (special chemicals) of the test strip.
Blood glucose is measured by an electrical current that is produced when a
The electrical current changes with the amount of glucose in the blood
sample.
blood samples mixes with the reagent (special chemicals) of the test strip.
The electrical current changes with the amount of glucose in the blood
The meter measures the strength of the electrical current, calculates your
blood glucose level and then displays your result in either milligrams of
sample.
glucose per deciliter (mg/dL) or millimoles of glucose per liter (mmol/L).
The meter measures the strength of the electrical current, calculates your
blood glucose level and then displays your result in either milligrams of
Caution
glucose per deciliter (mg/dL) or millimoles of glucose per liter (mmol/L).
1. The user should not take any decision of medical relevance without first
Caution
consulting his or her medical practitioner.
1. The user should not take any decision of medical relevance without first
2. Call your doctor immediately if you experience symptoms that are not
consulting his or her medical practitioner.
consistent with your blood glucose test results.
2. Call your doctor immediately if you experience symptoms that are not
3. High altitudes above than 3,402 meter (11,161 ft) may affect the test
consistent with your blood glucose test results.
results.
3. High altitudes above than 3,402 meter (11,161 ft) may affect the test
4. Temperatures outside the range of 10°C to 40°C (50°F to 104°F) may
results.
affect the test results. Do not test beyond of temperature range.
4. Temperatures outside the range of 10°C to 40°C (50°F to 104°F) may
5. Do not use this meter near cellular or cordless telephones in a call,
affect the test results. Do not test beyond of temperature range.
walkie-talkies, garage door openers, radio transmitters, or other electrical
5. Do not use this meter near cellular or cordless telephones in a call,
or electronic equipment that are sources of electromagnetic, radiation, as
walkie-talkies, garage door openers, radio transmitters, or other electrical
these may interfere with the proper operation of the meter.
or electronic equipment that are sources of electromagnetic, radiation, as
these may interfere with the proper operation of the meter.
IMPORTANT HEALTH-RELATED INFORMATION
IMPORTANT HEALTH-RELATED INFORMATION
1. Apply only capillary whole blood sample to test your blood glucose.
Applying other substances or plasma, serum will cause wrong results.
1. Apply only capillary whole blood sample to test your blood glucose.
2. Severe dehydration and excessive water loss may cause false low
Applying other substances or plasma, serum will cause wrong results.
results. If you believe you are suffering from severe dehydration,
2. Severe dehydration and excessive water loss may cause false low
consult your healthcare professional immediately.
results. If you believe you are suffering from severe dehydration,
3. Test results below 60 mg/dL (3.3 mmol/L)*1 indicates low blood
consult your healthcare professional immediately.
glucose(hypoglycemia). Test results greater than 240 mg/dL (13.3
3. Test results below 60 mg/dL (3.3 mmol/L)*1 indicates low blood
mmol/L)*2 indicates high blood glucose (hyperglycemia).If your results
glucose(hypoglycemia). Test results greater than 240 mg/dL (13.3
are below 60 mg/dL (3.3 mmol/L) or above 240 mg/dL (13.3 mmol/L),
mmol/L)*2 indicates high blood glucose (hyperglycemia).If your results
repeat the test, and if the results are still below 60 mg/dL (3.3 mmol/L)
are below 60 mg/dL (3.3 mmol/L) or above 240 mg/dL (13.3 mmol/L),
or above 240 mg/dL (13.3 mmol/L), consult your healthcare
repeat the test, and if the results are still below 60 mg/dL (3.3 mmol/L)
professional immediately.
or above 240 mg/dL (13.3 mmol/L), consult your healthcare
4. Inaccurate results may occur in severely hypotensive individuals or
professional immediately.
patients in shock. Inaccurate low results may occur for individuals
3. About Alternative Site Testing (AST)
3. About Alternative Site Testing (AST)
Important
Smart
Important
There are important limitations for doing AST. Please consult
your healthcare professional before you perform AST.
There are important limitations for doing AST. Please consult
your healthcare professional before you perform AST.
What is AST?
What is AST ?
Alternative Site Testing (AST) means you can use parts of
Alternative Site Testing (AST) means you can use parts of
the body other than your fingertips to check your blood
the body other than your fingertips to check your blood
glucose levels. The system allows you to test from the palm,
glucose levels. The system allows you to test from the palm,
forearm, upper arm, calf or thigh, with equivalent results to
forearm, upper arm, calf or thigh, with equivalent results to
fingertip testing.
fingertip testing.
What is the advantage?
What is the advantage ?
Fingertips feel pain more readily because they are full of nerve endings (receptors). At
Fingertips feel pain more readily because they are full of nerve endings (receptors). At
other body sites, nerve endings are not so numerous and you will not feel as much
other body sites, nerve endings are not so numerous and you will not feel as much
pain as you will experience at the fingertip.
pain as you will experience at the fingertip.
When to use AST?
When to use AST ?
Food, medication, illness, stress and exercise can affect blood glucose levels. Capil-
Food, medication, illness, stress and exercise can affect blood glucose levels. Capil-
lary blood at fingertip reflects these changes faster than capillary blood at other sites.
lary blood at fingertip reflects these changes faster than capillary blood at other sites.
Therefore, if you are testing blood glucose level during or immediately after meal,
Therefore, if you are testing blood glucose level during or immediately after meal,
physical exercise or stressful event, take the blood sample from your fingertip only.
physical exercise or stressful event, take the blood sample from your fingertip only.
8. Memory Download
6. Test Strip
The Medicare meter can store 100 test results with time and date. When the memory
is full, the oldest memory value will be overwritten. The memory can only be reviewed
1. Absorbent channel : Apply a drop of blood here.
under the Medicare APP program. If you test blood glucose without connecting mobile
2. Confirmation window : This is where we confirm if enough blood
device, you have to download the meter data to your mobile device followed by below
is applied for has been drawn into strip.
procedure:
3. Test strip handle : Hold this part to insert the test strip into the
Recall the Memory
meter slot.
4. Contact bars : Insert this end into strip slot.
1. Call up Medicare APP on your mobile device, and
connect your meter to mobile device.
Important :
2. After connect, tap the screen icon » » to enter setting
Use only PBGM meter test strips and control solutions with your PBGM meter. Use other
function. Then touching the Screen «Config», to enter
test strips and control solutions with this meter can produce inaccurate results.
meter settings.
3. Touching the screen «download meter records», the
meter will start to download. Wait till you see the display
shows «download OK» message.
8. Memory Recall
Important:
1. Please do not disconnect or remove meter from mobile device during
The PBGM meter automatically stores 100 test results, When the memory is full,
download.
the oldest one memory value will be overwritten.
2. Please refer to your Medicare Mobile APP instruction manual for details
about download, delete and reviewing your meter memory.
■ Recall the Memory
1. Under Medicare software mode, the memory of the meter data is
9. Replacing The Battery
downloaded to the phone, it will automatically remove all records
of blood glucose values.
2. The memory of the meter is downloaded to the phone, then it will
The Medicare meter comes with ONE Lithium battery (battery type CR2032).
be cleared.
Battery life will vary depending on usage, so always keep a spare battery on hand.
3. See detailed Medicare-user guide.
The battery should last about 1000 tests or 12 months when testing 3 times a day.
■ Deleting the Memory
When the battery symbol appears on the meter display, battery is getting low. You
will still be able to test with low battery, but you should replace it as soon as possible.
When battery symbol and Eb shows up in the meter display, the meter will no longer
1. Under Medicare software mode, the memory of the meter
give results and you must replace the battery immediately. Please always have one
entirely.
spare battery with you to ensure that you can replace the battery anytime.
2. See detailed Medicare-user guide.
How to replace the battery
1. Make sure the meter is turned off. Let the front of the meter
rest in the palm of your hand. Slide battery cover open.
9. Replacing The Battery
2. Insert new battery (battery type CR2032), being sure to
The PBGM meter comes with ONE Lithium battery (battery type CR2032) .
align the plus (+) side up.
Battery life will vary depending on usage, so always keep a spare battery on hand. The
battery should last about 1000 tests or 12 months when testing 3 times a day.
When the battery symbol appears on the meter display, battery is getting low. You will still be
able to test with low battery, but you should replace it as soon as possible.
3. Close battery cover.
When battery symbol and E-b shows up in the meter display, the meter will no longer give
results and you must replace the battery immediately. Please always have one spare battery
with you to ensure that you can replace the battery anytime.
Temperature limitation / Store at.
Use by /Expiry date.
Manufacturer.
Caution, consult accompanying
document.
Keep dry.
requirements of Directive 98/79/
EC in vitro diagnostic medical
device.
OK Biotech Co., Ltd.
10-62-6519-0003 V2-JUL15
No. 91, Sec. 2, Gong Dao 5th Road,
30070 Hsinchu City, TAIWAN
MDSS GmbH
Schiffgraben 41, 30175 Hannover,
GERMANY
OK Biotech Co., Ltd.
No. 91, Sec. 2, Gongdao 5th Road,
30070 Hsinchu City, TAIWAN
MDSS GmbH
Schiffgraben 41, 30175 Hannover, GERMANY
10-62-6519-0003
V1-AUG14
1. Package Contents
2. App Software
1. Before You Begin
3. About Alternative Site Testing (AST)
2. App Software
4. Getting To Know Your System
3. About Alternative Site Testing (AST)
5. PBGM- display
4. Getting To Know Your System
6. Test Strip
5. Medicare- display
7. Setting Meter
6. Test Strip
8. Memory Recall
7. Setting Meter
9. Replacing The Battery
8. Memory Recall
10. Prepare For Blood Sampling
9. Replacing The Battery
11. Performing Blood Test
10. Prepare For Blood Sampling
12. Understanding Your Test Result
11. Performing Blood Test
13. Control Solution Testing
12. Understanding Your Test Result
14. Caring For Your Meter And Test Strip
13. Control Solution Testing
14. Caring For Your Meter And Test Strip
15. Performance Characteristics
15. Performance Characteristics
16. System Specifications
16. System Specifications
17. Display Messages And Problem-Solving Guide
17. Display Messages And Problem-Solving Guide
18. Trademark
18. Trademark
experiencing a hyperglycemic-hyperosmolar state, with or without
ketosis. Critically ill patients should not be tested with blood glucose
4. Inaccurate results may occur in severely hypotensive individuals or
meters.
patients in shock. Inaccurate low results may occur for individuals
5. Abnormal red blood cell counts (hematocrit level below 20% or above
experiencing a hyperglycemic-hyperosmolar state, with or without
60%) may cause false results. Please consult your healthcare
ketosis. Critically ill patients should not be tested with blood glucose
professional if you do not know your hematocrit level.
meters.
6. Interference: Reducing substances occurring in the blood naturally
5. Abnormal red blood cell counts (hematocrit level below 20% or above
(uric acid, bilirubin) or from therapeutic treatments (ascorbic acid,
60%) may cause false results. Please consult your healthcare
acetaminophen) will not significantly affect Medicare test results.
professional if you do not know your hematocrit level.
However, elevated concentrations of these substances may affect test
6. Interference: Reducing substances occurring in the blood naturally
results. The compounds listed in the tables were found to have no
(uric acid, bilirubin) or from therapeutic treatments (ascorbic acid,
affect at the concentration indicated.
acetaminophen) will not significantly affect iConnect test results.
However, elevated concentrations of these substances may affect test
Compounds
results. The compounds listed in the tables were found to have no
Highest concentrations
Compounds
tested at which no
affect at the concentration indicated.
≦ 8.0 mg/dL (0.53 mmol/L) Hydroxyurea
interference occured
≦ 5.0 mg/dL (0.28 mmol/L) Ibuprofen
Acetaminophen
Compounds
Highest concentrations
Compounds
≦ 60 mg/dL (3.33 mmol/L) Icodextrin
Ascorbic Acid
tested at which no
≦ 8.0 mg/dL (0.53 mmol/L) Hydroxyurea
≦ 90 mg/dL (1.54 mmol/L) L-dopa
Aspirin
interference occured
≦ 5.0 mg/dL (0.28 mmol/L) Ibuprofen
≦ 500 mg/dL (12.9 mmol/L) Maltose
Bilirubin
Acetaminophen
≦ 60 mg/dL (3.33 mmol/L) Icodextrin
≦ 5.0 mg/dL (0.44 mmol/L) Methyldopa
Cholesterol
Ascorbic Acid
≦ 90 mg/dL (1.54 mmol/L) L-dopa
≦ 2.0 mg/dL (0.11 mmol/L) Pralidoxime Iodide ≦ 25 mg/dL (0.94 mmol/L)
Creatinine
Aspirin
≦ 500 mg/dL (12.9 mmol/L) Maltose
≦ 360 mg/dL (12.3 mmol/L) Salicylate
Dopamine
Bilirubin
≦ 5.0 mg/dL (0.44 mmol/L) Methyldopa
≦ 900 mg/dL (50 mmol/L)
EDTA
Cholesterol
≦ 2.0 mg/dL (0.11 mmol/L) Pralidoxime Iodide ≦ 25 mg/dL (0.94 mmol/L)
≦ 5.0 mg/dL (0.32 mmol/L) Tolbutamide
Galactose
Creatinine
Tolazamide
≦ 360 mg/dL (12.3 mmol/L) Salicylate
≦ 53 mg/dL (1.72 mmol/L)
Gentisic Acid
Dopamine
≦ 900 mg/dL (50 mmol/L)
≦ 500 mg/dL (0.08 mmol/L) Uric Acid
Glutathione
EDTA
Triglycerides
≦ 5.0 mg/dL (0.32 mmol/L) Tolbutamide
≦ 8,000 U/dL
Haemoglobin
Galactose
Tolazamide
≦ 53 mg/dL (1.72 mmol/L)
Heparin
Gentisic Acid
Xylose
≦ 500 mg/dL (0.08 mmol/L) Uric Acid
Glutathione
Triglycerides
≦ 8,000 U/dL
Haemoglobin
Heparin
Xylose
REFERENCE:
REFERENCE:
* 1: Kahn, R. and Weir, G.: Joslinis Diabetes Mellitus,
* 1 : Kahn, R. and Weir, G.: Joslinis Diabetes Mellitus, 13thed Philadelphia : Lea
13thed Philadelphia : Lea and Febiger (1994), 489.
and Febiger (1994), 489.
* 2: Krall, L.P. and Beaser, R. S.: Joslin Diabetes Manual.
* 2 : Krall, L.P. and Beaser, R. S.: Joslin Diabetes Manual. Philadelphia : Lea and
Philadelphia : Lea and Febiger(1989), 261-263.
Febiger(1989), 261-263.
Use AST only :
Use AST only :
1. In a pre-meal or fasting state (more than 2 hours since the last meal).
2. Two hours or more after taking insulin.
1.In a pre-meal or fasting state (more than 2 hours since the last meal).
3. Two hours or more after exercise.
2.Two hours or more after taking insulin.
3.Two hours or more after exercise.
4. During steady state blood glucose conditions.
4.During steady state blood glucose conditions.
Do NOT use AST if :
Do NOT use AST if :
1. You have reason to believe you have hypoglycemia or hyperglycemia.
1.You have reason to believe you have hypoglycemia or hyperglycemia.
2. Your routine glucose results are often fluctuating.
3. You are pregnant.
2.Your routine glucose results are often fluctuating.
3.You are pregnant.
How to increase the accuracy ?
How to increase the accuracy ?
Stimulating blood perfusion by rubbing the puncture site prior to blood extraction
Stimulating blood perfusion by rubbing the puncture site prior to blood extraction has
has a significant influence on the glucose value obtained.
a significant influence on the glucose value obtained.
Blood from the site without rubbing exhibits a measurably different glucose concen-
Blood from the site without rubbing exhibits a measurably different glucose concentra-
tration than blood from the fingertip. When the puncture site was rubbed prior to
tion than blood from the fingertip. When the puncture site was rubbed prior to blood
blood extraction, the difference was significantly reduced.
extraction, the difference was significantly reduced.
IMPORTANT :
IMPORTANT :
To increase the accuracy when using AST, rub the puncture site more than 20
To increase the accuracy when using AST, rub the puncture site more than 20
seconds before extracting blood.
seconds before extracting blood.
7. Setting Meter
7. Setting Meter
Setting time and date : The time and date of Medicare meter can only be
setting through Medicare APP program.
Please install battery first and set correct time and date before you begin to test
Setting Time and Date
SETTING TIME AND DATE
1. Call up Medicare
1. Under Mobile Medicare mode, METER after each inserted
Smart BGM
into the phone, it will do automatic calibration date and
device, and connect your meter to mobile device.
time, display more positive time.
2. After connect, your meter will automatically
2. Correct date and time from the mobile phone to calibrate
calibrate its time and date according to your
the METER time.
3. See detailed Medicare-user guide.
mobile device’s time and date.
3. Please refer to your Medicare
*Set the Unit of Measurement (mg/dL or mmol/L)
GUIDE for details of setting.
1. Unit of measure is set mg/dL in the factory.
2. Set the meter measurement unit followed by the Medicare
Set the Unit of Measurement (mg/dL or mmol/L)
setting function.
3. Medicare measurement units reference blood glucose
Setting the Unit of Measurement : Medicare LiS Smart meter can display
meter settings.
test result in milligram per deciliter (mg/dL) or millimoles per liter (mmol/L).
4. See detailed Medicare-user guide.
Your meter has been preset at the factory with the standard unit measure-
ment used where you live. The measurement unit of Medicare meter can
IMPORTANT :
only be setting through Medicare APP program. When you turn off the
1 . The initial setting of the factory is mg/dL.
meter or replace the battery, the unit will not be changed. Use of the wrong
2 . If you use the wrong unit of measure, probably due to the detection of false values caused by medica-
unit of measure may cause you to misinterpret your blood glucose level,
tion errors, please consult your doctor, and then follow these steps to set up.
and may lead to incorrect treatment. Please always consult with your
healthcare professionals first if you want to reset the unit of measure.
How to replace the battery
1. Call up Medicare
Smart BGM
device, and connect your meter to mobile device.
1. Make sure the meter is turned off. Let the front of the meter
2. After connect, tap the screen icon » » , you will
rest in the palm of your hand. Slide battery cover open.
enter the setting function.
3. Touching the Screen «Config», will enter to meter
settings. Select the unit of mg/dL or mmol/L and
2. Insert new battery (battery type CR2032), being sure to
wait until it complete setting.
align the plus (+) side up.
4. Please refer to your Medicare Mobile APP
instruction manual for details of setting.
3. Close battery cover.
NOTE:
1. Replacing the battery does not affect the test result stored in memory. However the
NOTE:
time and date may need to re-set by app.(Read the Smart BGM User Guide.)
1. Replacing the battery does not affect the test result stored in memory. However the time and date may
2. As with all small objects, the battery should be kept away from small children as a
need to re-set by Medicare.(read the Medicare user guide )
safety precaution. If the battery is swallowed, seek medical assistance immediately.
2. As with all small objects, the battery should be kept away from small children as a safety precaution. If the
3. Batteries might leak chemicals if not used for a long time. Remove the batteries if
battery is swallowed, seek medical assistance immediately.
you are not going to use the device for a long period of time (i.e., 3 months or more).
3. Batteries might leak chemicals if not used for a long time. Remove the batteries if you are not going to
4. Please discard the used or dead batteries properly according to the regulations of
use the device for extended (i.e., 3 months or more ).
your country.
4. Please discard the used or dead batteries properly according to the regulations of your country.
Highest concentrations
tested at which no
≦ 3.0 mg/dL (0.39 mmol/L)
interference occured
≦ 50 mg/dL (2.42 mmol/L)
Highest concentrations
≦ 13 mg/dL (0.01 mmol/L)
tested at which no
≦ 3.0 mg/dL (0.39 mmol/L)
≦ 10 mg/dL (0.51 mmol/L)
interference occured
≦ 50 mg/dL (2.42 mmol/L)
≦ 900 mg/dL (26.3 mmol/L)
≦ 13 mg/dL (0.01 mmol/L)
≦ 3.0 mg/dL (0.13 mmol/L)
≦ 10 mg/dL (0.51 mmol/L)
≦ 900 mg/dL (26.3 mmol/L)
≦ 60 mg/dL (4.34 mmol/L)
≦ 3.0 mg/dL (0.13 mmol/L)
≦ 100 mg/dL (3.21 mmol/L)
≦ 400 mg/dL (14.8 mmol/L)
≦ 60 mg/dL (4.34 mmol/L)
≦ 2,000 mg/dL (22.6 mmol/L)
≦ 100 mg/dL (3.21 mmol/L)
≦ 8.0 mg/dL (0.48 mmol/L)
≦ 400 mg/dL (14.8 mmol/L)
≦ 100 mg/dL (6.66 mmol/L)
≦ 2,000 mg/dL (22.6 mmol/L)
≦ 8.0 mg/dL (0.48 mmol/L)
≦ 100 mg/dL (6.66 mmol/L)
App on your mobile
USER
Smart BGM
on your mobile
BLOOD GLUCOSE
MONITORING SYSTEM
USER GUIDE
Before You Begin
PLEASE READ THIS BEFORE USING.
The following basic safety precautions should always be taken.
1. Close supervision is necessary when the device is used by, on, or near children,
handicapped persons or invalids.
2. Use the device only for the intended use described in this User Guide.
3. Do not use test strips and control solutions which are not supplied by the
manufacturer.
4. Do not use the device if it is not working properly, or if it has suffered any damage.
5. Before using any product to test your blood glucose, read all instructions
thoroughly and practice the test. Do all quality control checks as directed and
consult with a diabetes healthcare professional.
6. KEEP THIS USER GUIDE WITH YOU.
Intended Use
The system is intended for use outside the body (in vitro diagnostic use only).
It should be used only for testing blood glucose (blood sugar) and only with fresh
capillary whole blood samples. The system is intended for use in the home and in
clinical settings. It should not be used for the diagnosis of diabetes or for the testing of
newborns.
Principle of Measurement
Blood glucose is measured by an electrical current that is produced when a blood
1.
Getting To Know Your System
The Medicare Blood Glucose Monitoring System-LiS
The Medicare System-LiS system uses the latest technology to provide you with
easy and comfortable testing. The system requires only a 0.3 μL of blood sample to
complete the testing in only 6 seconds.
STRIP SLOT :
METER LABEL:
Insert the test strip here. The meter will
turn on automatically.
Each meter has its unique number on it. It can be
used when you want to obtain warranty service.
Please do not alter or tear the label off.
DISPLAY :
The large, easy to
read display shows
test results, messages,
test results stored in
memory.
Model Name: BG-101
MC14EL005001
OK Biotech Co., Ltd.
Hsinchu, Taiwan
M BUTTON:
BATTERY COMPARTMENT :
Main button, press button to turn the meter on
Holds one 3V Lithium battery (CR2032).
or perform other functions described in this User
Guide.
Meter
TEST STRIP HANDLE :
Hold this part to insert the test strip
into the meter slot.
A B S O R B E N T
CHANNEL:
Apply a drop of
blood here.
CONFIRMATION WINDOW:
This is where we confirm if enough blood is applied for the
test. Ensure that it is fully covered with blood sample.
Test Strip
2
.
Prepare For Blood Sampling
Adjustable Lancing Device
Your lancing device and lancets are used for obtaining
capillary blood samples from the puncture site.
Depth Selector
Lancing
Release Button
Device Cap
Lancet Holder
Lancet Ejector
For In vitro diagnostic use
Please consult instructions for use
Do not reuse
BG — 101
Lot number
Keep dry
Humidity limitation
This product fulfils the requirements of Directive 98/79/EC in vitro diagnostic medical device.
Performance Characteristics:
Accuracy: ≧ 95% of the individual glucose results fell within ± 15 mg/dL(0.83 mmol/L) at glucose concentration <
75 mg/dL(or 4.2 mmol/L) and within ± 20% at glucose concentration ≧ 75 mg/dL(or 4.2 mmol/L), compared with
glucose analyzer YSI 2300.
PRECISION: CVs (%) of intermediate precision and repeatability were less than 5%.
L-Tac MediCare Pte Ltd
25 Mandai Estate #07-11
Innovation Place Tower 1
Singapore 729930
Tel: +65 6334 2273
Fax: +65- 6863 8190
www.medicare-l-tac.com.sg
samples mixes with the reagent (special chemicals) of the test strip. The electrical
current changes with the amount of glucose in the blood sample. The Medicare System-
LiS meter measures the strength of the electrical current, calculates your blood glucose
level and then displays your result in either milligrams of glucose per deciliter (mg/dL) or
millimoles of glucose per liter (mmol/L).
Caution
1. The user should not take any decision of medical relevance without first consulting
his or her medical practitioner.
2. Call your doctor immediately if you experience symptoms that are not consistent with
your blood glucose test results.
3. High altitudes above than 3,402 meter (11,161 ft) may affect the test results.
4. Temperatures outside the range of 5°C to 45°C (41°F to 113°F) may affect the test
results. Do not test beyond of temperature range.
IMPORTANT HEALTH-RELATED INFORMATION
1. Apply only capillary whole blood sample to test your blood glucose. Applying other
substances or plasma, serum will cause wrong results.
2. Severe dehydration and excessive water loss may cause false low results. If
you believe you are suffering from severe dehydration, consult your healthcare
professional immediately.
3. Test results below 60 mg/dL (3.3 mmol/L)*1 indicates low blood glucose
(hypoglycemia). Test results greater than 240 mg/dL (13.3 mmol/L)*2 indicates high
blood glucose (hyperglycemia).If your results are below 60 mg/dL (3.3 mmol/L) or
above 240 mg/dL (13.3 mmol/L), repeat the test, and if the results are still below
60 mg/dL (3.3 mmol/L) or above 240 mg/dL (13.3 mmol/L), consult your healthcare
professional immediately.
2
10
9
8
7.
UNIT OF MEASURE: Appears with the test result either in mg/dL or mmol/L.
8.
BATTERY SYMBOL: Appears when battery is weak.
9.
BLOOD DROP SYMBOL: Flashes when sample should be applied.
10. STRIP SYMBOL: Appears when the meter is turned on and waiting for inserting a
test strip.
REPLACING THE BATTERY
SET BUTTON:
Located in
1.The meter comes with ONE Lithium battery (battery type CR2032).
the battery
2.Battery life will vary depending on usage, so always keep a spare battery on hand.
compartment; press
button to enter
The battery should last about 1000 tests or 12 months when testing 3 times a day.
10-62-3463-0003
V1-JUL11
meter setting. Refer
3.When the battery symbol appears on the meter display, battery is getting low. You will
to «SETTING YOUR
still be able to test with low battery, but you should replace it as soon as possible.
METER» section of
this user guide for
4.When battery symbol appears together with E-b on the display, the meter will no
details.
longer give results and you must replace the battery immediately. Please always have
J7
one spare battery with you to ensure that you can replace the battery anytime.
How to replace the battery
J7
J7
J7
CONTACT BARS:
Insert this end into strip slot.
NOTE:
1. Replacing the battery does not affect the test result stored in memory. However the
time and date may need to re-set.
2. As with all small objects, the battery should be kept away from small children as a
safety precaution. If the battery is swallowed, see medical assistance immediately.
3. Batteries might leak chemicals if not used for a long time. Remove the batteries if
you are not going to use the device for 3 months or more.
4.
Please discard the product or the batteries properly according to the regulations
of your country.
Lancet
Protective cap
Important Lancing Device and Lancets Information
1.
Lancet is for single use only.
2. Keep lancing device and lancets clean.
Sliding Barrel
3. Use caution when removing the used lancet from the device and when disposing the
used lancet.
The meter and lancing device are for single patient use.
IMPORTANT :
Do NOT share them with anyone including other family members !
Do NOT use on multiple patients !
Temperature limitation / Store at
Use by /Expiry date
Manufacturer
Caution, consult accompanying document
Keep away from sunlight
EU representative.
10-62-3412-0003 V2-JUL15
OK Biotech Co., Ltd.
No. 91, Sec. 2, Gongdao 5th Road,
30070 Hsinchu City, TAIWAN
www.okbiotech.com
MDSS GmbH
Schiffgraben 41, 30175 Hannover, GERMANY
1
1. DATE: Display year, month and date.
2. TIME: The meter is programmed for a 12
hour period format.
3. AVERAGE: Appears when the meter is in the
memory mode while recalling 7/14/28 day test
3
averages.
4
4. MEMORY SYMBOL: Appears when in the
memory mode.
5
5. THERMOMETER SYMBOL: Appears when
6
ambient temperature is above or below the
acceptable range needed for testing.
7
6. CONTROL SOLUTION TEST SYMBOL:
Appears when you are in Control Solution
Mode. Your test result will not be stored in
meter memory.
1. Make sure the meter is turned off. Let the front of the meter
rest in the palm of your hand. Press the buckle on the battery
cover and lift up to open the cover. Remove the battery.
2. With the plus (+) side up, place the battery (battery type
CR2032) in the compartment and slide it upwards until it is
locked into place. You should hear a beep to indicate the
battery installed correctly. If not, please replace the battery
correctly.
3. Close battery cover.
A :
1
. Getting To Know Your System
SIDE
2. Prepare For Blood Sampling
B :
3. Performing Blood Test
SIDE
4. Understanding Your Test Result
5. Memory Recall
6. Control Solution Testing
7. Caring For Your Meter And Test Strip
8. System Specifications
9. Display Messages And Problem-Solving Guide
4. Inaccurate results may occur in severely hypotensive individuals or patients
in shock. Inaccurate low results may occur for individuals experiencing a
hyperglycemic-hyperosmolar state, with or without ketosis. Critically ill patients
should not be tested with blood glucose meters.
5. Abnormal red blood cell counts (hematocrit level below 20% or above 60%) may
cause false results. Please consult your healthcare professional if you do not know
your hematocrit level.
6. Interference: Reducing substances occurring in the blood naturally (uric acid,
bilirubin) or from therapeutic treatments (ascorbic acid, acetaminophen) will
not significantly affect Medicare System-LiS test results. However, elevated
concentrations of these substances may affect test results. The compounds listed
in the tables were found to have no affect at the concentration indicated.
Compounds
Highest concentrations
Compounds
tested at which no
≦ 8.0 mg/dL (0.53 mmol/L)
interference occured
≦ 5.0 mg/dL (0.28 mmol/L)
Acetaminophen
Gentisic Acid
≦ 60 mg/dL (3.33 mmol/L)
Ascorbic Acid
Hydroxyurea
≦ 90 mg/dL (1.54 mmol/L)
Aspirin
L-dopa
≦ 500 mg/dL (12.9 mmol/L) Methyldopa
Bilirubin
Maltose
≦ 5.0 mg/dL (0.44 mmol/L)
Cholesterol
≦ 2.0 mg/dL (0.11 mmol/L)
Creatinine
Tolbutamide
≦ 900 mg/dL (50 mmol/L)
Dopamine
Triglycerides
Galactose
Uric Acid
REFERENCE:
* 1: Kahn, R. and Weir, G.: Joslinis Diabetes Mellitus, 13thed Philadelphia : Lea and Febiger (1994), 489.
* 2: Krall, L.P. and Beaser, R. S.: Joslin Diabetes Manual. Philadelphia : Lea and Febiger(1989), 261-263.
SETTING YOUR METER
Please install battery first and set to correct settings before you begin to test.
STEP 1. Enter Setting Mode
Start with the meter off. Open the battery compartment, and press SET
J7
BUTTON. The meter will turn on and enter the setting mode.
STEP 2. Set the Year
The year appears with the number flashing. Press and release the M
BUTTON to obtain the desired year. Press SET BUTTON to confirm
and move to next MONTH setting.
STEP 3. Set the Month
The month appears with the number flashing. Press and release the M
BUTTON to obtain the desired month. Press SET BUTTON to confirm
and move to next DATE setting.
STEP 4. Set the Date
The date appears with the number flashing. Press and flash the M
BUTTON to obtain the desired date. Press SET BUTTON to confirm
and move to next HOUR setting.
STEP 5. Set the Hour
The hour appears with the number flashing. Press and release the M
BUTTON to obtain the desired hour. Press SET BUTTON to confirm
and move to next minutes setting.
STEP 6. Set the Minute
The minute appears with the number flashing. Press and release the M
BUTTON to obtain the desired minute. Press SET BUTTON to confirm
and the meter will enter to next unit setting.
STEP 7. Set the Unit of Measurement
The existing unit (for example mg/dL) will appear and flash. You can
choose to reset measurement unit. If you do not want to change unit,
press SET BUTTON to skip this step. If you want to change unit, press
and hold the M BUTTON for 3 seconds to change the unit to mmol/L.
Press SET BUTTON to confirm and the meter will enter to next setting.
STEP 8. Delete Memory
When the dEL symbol and the flashing memory symbol appear on the
display, you can choose to clear the memory. If you do not want to clear
the memory, press the SET BUTTON again to skip this step. If you want
to clear ALL memory, press and hold M BUTTON for 4 seconds. The «—
-» image will appear on the LCD screen to indicate that all memory has
been deleted.
STEP 9. Complete Setting
After delete memory, the meter will display «OFF» before shut down.
The meter setting is now completed
IMPORTANT :
1.
The time, date and unit of measurement can ONLY be changed in the setting mode.
Therefore, when you perform a blood glucose testing, it is not possible to change those
parameters.
2.
Your meter displays 7, 14 and 28-day averages which you can access from the meter
memory. These averages are calculated from your latest result obtained during the last 7,
14 and 28 days.
3.
Your meter can display test result in milligram per deciliter (mg/dL) or millimoles per liter
(mmol/L). The mg/dL unit is standard in the United States. The mmol/L unit is standard
in Canada and European countries. Your meter has been preset at the factory with the
standard unit measurement used where you live. When you turn off the meter or replace
the battery, the unit will not be changed.
4.
Use of the wrong unit of measure may cause you to misinterpret your blood glucose
level, and may lead to incorrect treatment. Please always consult with your healthcare
professionals before you reset the unit of measure.
Setting your Lancing Device
1. Screw off the cap of lancing device. Insert a
lancet into the lancet holder and push down until
it is fully seated.
2. Twist off the protective cap until it separates from
the lancet.
3 . Replace the lancing device cap and set the
puncture depth to the desired number.
NOTE: THE DEPTH SELECTOR OFFERS 5 LEVELS OF SKIN
PENETRATION:
1-2 FOR SOFT OR THIN SKIN
3 FOR AVERAGE SKIN
4-5 FOR THICK OR CALLOUSED SKIN
4. Pull back the sliding barrel until it makes a click,
and then release. If it does not click, the device
may have been cocked when the lancet was
inserted.
Highest concentrations tested
at which no interference
≦ 5.0 mg/dL (0.32 mmol/L)
occured
≦ 3.0 mg/dL (0.39 mmol/L)
≦ 10 mg/dL (0.51 mmol/L)
≦ 900 mg/dL (26.3 mmol/L)
≦ 3.0 mg/dL (0.13 mmol/L)
≦ 400 mg/dL (14.8 mmol/L)
≦ 2,000 mg/dL (22.6 mmol/L)
≦ 8.0 mg/dL (0.48 mmol/L)
SIDE
1
2
Before You Begin
PLEASE READ THIS BEFORE USING.
The following basic safety precautions should always be taken.
1. Close supervision is necessary when the device is used by, on, or near children,
handicapped persons or invalids.
2. Use the device only for the intended use described in this User Guide.
3. Do not use test strips and control solutions which are not supplied by the
manufacturer.
4. Do not use the device if it is not working properly, or if it has suffered any damage.
5. Before using any product to test your blood glucose, read all instructions
thoroughly and practice the test. Do all quality control checks as directed and
consult with a diabetes healthcare professional.
6. KEEP THIS USER GUIDE WITH YOU.
Intended Use
The system is intended for use outside the body (
in vitro
diagnostic use only).
It should be used only for testing blood glucose (blood sugar) and only with fresh
capillary whole blood samples. The system is intended for use in the home and in
clinical settings. It should not be used for the diagnosis of diabetes or for the testing of
newborns.
Principle of Measurement
Blood glucose is measured by an electrical current that is produced when a blood
Getting To Know Your System
The Medicare Blood Glucose Monitoring System-LiS
The Medicare System-LiS system uses the latest technology to provide you with
easy and comfortable testing. The system requires only a 0.3 μL of blood sample to
complete the testing in only 6 seconds.
samples mixes with the reagent (special chemicals) of the test strip. The electrical
current changes with the amount of glucose in the blood sample. The Medicare System-
LiS meter measures the strength of the electrical current, calculates your blood glucose
level and then displays your result in either milligrams of glucose per deciliter (mg/dL) or
millimoles of glucose per liter (mmol/L).
Caution
1. The user should not take any decision of medical relevance without first consulting
his or her medical practitioner.
2. Call your doctor immediately if you experience symptoms that are not consistent with
your blood glucose test results.
3. High altitudes above than 3,402 meter (11,161 ft) may affect the test results.
4. Temperatures outside the range of 5°C to 45°C (41°F to 113°F) may affect the test
results. Do not test beyond of temperature range.
IMPORTANT HEALTH-RELATED INFORMATION
1. Apply only capillary whole blood sample to test your blood glucose. Applying other
substances or plasma, serum will cause wrong results.
2. Severe dehydration and excessive water loss may cause false low results. If
you believe you are suffering from severe dehydration, consult your healthcare
professional immediately.
3. Test results below 60 mg/dL (3.3 mmol/L)*1 indicates low blood glucose
(hypoglycemia). Test results greater than 240 mg/dL (13.3 mmol/L)*2 indicates high
blood glucose (hyperglycemia).If your results are below 60 mg/dL (3.3 mmol/L) or
above 240 mg/dL (13.3 mmol/L), repeat the test, and if the results are still below
60 mg/dL (3.3 mmol/L) or above 240 mg/dL (13.3 mmol/L), consult your healthcare
professional immediately.
4. Inaccurate results may occur in severely hypotensive individuals or patients
in shock. Inaccurate low results may occur for individuals experiencing a
hyperglycemic-hyperosmolar state, with or without ketosis. Critically ill patients
should not be tested with blood glucose meters.
5. Abnormal red blood cell counts (hematocrit level below 20% or above 60%) may
cause false results. Please consult your healthcare professional if you do not know
your hematocrit level.
6. Interference: Reducing substances occurring in the blood naturally (uric acid,
bilirubin) or from therapeutic treatments (ascorbic acid, acetaminophen) will
not significantly affect Medicare System-LiS test results. However, elevated
concentrations of these substances may affect test results. The compounds listed
in the tables were found to have no affect at the concentration indicated.
Compounds
Highest concentrations
tested at which no
interference occured
Compounds
Highest concentrations tested
at which no interference
occured
Acetaminophen
≦
8.0 mg/dL (0.53 mmol/L) Gentisic Acid
≦
5.0 mg/dL (0.32 mmol/L)
Ascorbic Acid
≦
5.0 mg/dL (0.28 mmol/L) Hydroxyurea
≦
3.0 mg/dL (0.39 mmol/L)
Aspirin
≦
60 mg/dL (3.33 mmol/L)
L-dopa
≦
10 mg/dL (0.51 mmol/L)
Bilirubin
≦
90 mg/dL (1.54 mmol/L)
Maltose
≦
900 mg/dL (26.3 mmol/L)
Cholesterol
≦
500 mg/dL (12.9 mmol/L) Methyldopa
≦
3.0 mg/dL (0.13 mmol/L)
Creatinine
≦
5.0 mg/dL (0.44 mmol/L) Tolbutamide
≦
400 mg/dL (14.8 mmol/L)
Dopamine
≦
2.0 mg/dL (0.11 mmol/L) Triglycerides
≦
2,000 mg/dL (22.6 mmol/L)
Galactose
≦
900 mg/dL (50 mmol/L)
Uric Acid
≦
8.0 mg/dL (0.48 mmol/L)
REFERENCE:
* 1: Kahn, R. and Weir, G.: Joslinis Diabetes Mellitus, 13thed Philadelphia : Lea and Febiger (1994), 489.
* 2: Krall, L.P. and Beaser, R. S.: Joslin Diabetes Manual. Philadelphia : Lea and Febiger(1989), 261-263.
1.
DATE:
Display year, month and date.
2.
TIME:
The meter is programmed for a 12
hour period format.
3.
AVERAGE:
Appears when the meter is in the
memory mode while recalling 7/14/28 day test
averages.
4.
MEMORY SYMBOL:
Appears when in the
memory mode.
5.
THERMOMETER SYMBOL:
Appears when
ambient temperature is above or below the
acceptable range needed for testing.
6.
CONTROL SOLUTION TEST SYMBOL:
Appears when you are in Control Solution
Mode. Your test result will not be stored in
meter memory.
7.
UNIT OF MEASURE:
Appears with the test result either in mg/dL or mmol/L.
8.
BATTERY SYMBOL:
Appears when battery is weak.
9.
BLOOD DROP SYMBOL:
Flashes when sample should be applied.
10.
STRIP SYMBOL:
Appears when the meter is turned on and waiting for inserting a
test strip.
1.
A
1
. Getting To Know Your System
2. Prepare For Blood Sampling
3. Performing Blood Test
4. Understanding Your Test Result
5. Memory Recall
6. Control Solution Testing
7. Caring For Your Meter And Test Strip
8. System Specifications
9. Display Messages And Problem-Solving Guide
SIDE
A :
SIDE
B :
Test Strip
ABSORBENT
CHANNEL:
Apply a drop of
blood here.
CONTACT BARS:
Insert this end into strip slot.
TEST STRIP HANDLE :
Hold this part to insert the test strip
into the meter slot.
CONFIRMATION WINDOW:
This is where we confirm if enough blood is applied for the
test. Ensure that it is fully covered with blood sample.
For
In vitro diagnostic use
Temperature limitation / Store at
Please consult instructions for use
Use by /Expiry date
Do not reuse
Manufacturer
Lot number
Caution, consult accompanying document
Keep dry
Keep away from sunlight
Humidity limitation
EU representative.
This product fulfils the requirements of Directive 98/79/EC in vitro diagnostic medical device.
Performance Characteristics:
Accuracy:
≧
95% of the individual glucose results fell within ± 15 mg/dL(0.83 mmol/L) at glucose concentration
75 mg/dL(or 4.2 mmol/L) and within ± 20% at glucose concentration
≧
75 mg/dL(or 4.2 mmol/L), compared with
glucose analyzer YSI 2300.
PRECISION: CVs (%) of intermediate precision and repeatability were less than 5%.
1
2
3
4
5
6
7
9 8
10
REPLACING THE BATTERY
1.The meter comes with ONE Lithium battery (battery type CR2032).
2.Battery life will vary depending on usage, so always keep a spare battery on hand.
The battery should last about 1000 tests or 12 months when testing 3 times a day.
3.When the battery symbol appears on the meter display, battery is getting low. You will
still be able to test with low battery, but you should replace it as soon as possible.
4.When battery symbol appears together with E-b on the display, the meter will no
longer give results and you must replace the battery immediately. Please always have
one spare battery with you to ensure that you can replace the battery anytime.
How to replace the battery
J7
1. Make sure the meter is turned off. Let the front of the meter
rest in the palm of your hand. Press the buckle on the battery
cover and lift up to open the cover. Remove the battery.
J7
2. With the plus (+) side up, place the battery (battery type
CR2032) in the compartment and slide it upwards until it is
locked into place. You should hear a beep to indicate the
battery installed correctly. If not, please replace the battery
correctly.
J7
3. Close battery cover.
NOTE:
1. Replacing the battery does not affect the test result stored in memory. However the
time and date may need to re-set.
2. As with all small objects, the battery should be kept away from small children as a
safety precaution. If the battery is swallowed, see medical assistance immediately.
3. Batteries might leak chemicals if not used for a long time. Remove the batteries if
you are not going to use the device for 3 months or more.
4.
Please discard the product or the batteries properly according to the regulations
of your country.
SETTING YOUR METER
Please install battery first and set to correct settings before you begin to test.
J7
STEP 1. Enter Setting Mode
Start with the meter off. Open the battery compartment, and press SET
BUTTON. The meter will turn on and enter the setting mode.
STEP 2. Set the Year
The year appears with the number flashing. Press and release the M
BUTTON to obtain the desired year. Press SET BUTTON to confirm
and move to next MONTH setting.
STEP 3. Set the Month
The month appears with the number flashing. Press and release the M
BUTTON to obtain the desired month. Press SET BUTTON to confirm
and move to next DATE setting.
STEP 4. Set the Date
The date appears with the number flashing. Press and flash the M
BUTTON to obtain the desired date. Press SET BUTTON to confirm
and move to next HOUR setting.
STEP 5. Set the Hour
The hour appears with the number flashing. Press and release the M
BUTTON to obtain the desired hour. Press SET BUTTON to confirm
and move to next minutes setting.
STEP 6. Set the Minute
The minute appears with the number flashing. Press and release the M
BUTTON to obtain the desired minute. Press SET BUTTON to confirm
and the meter will enter to next unit setting.
STEP 7. Set the Unit of Measurement
The existing unit (for example mg/dL) will appear and flash. You can
choose to reset measurement unit. If you do not want to change unit,
press SET BUTTON to skip this step. If you want to change unit, press
and hold the M BUTTON for 3 seconds to change the unit to mmol/L.
Press SET BUTTON to confirm and the meter will enter to next setting.
STEP 8. Delete Memory
When the dEL symbol and the flashing memory symbol appear on the
display, you can choose to clear the memory. If you do not want to clear
the memory, press the SET BUTTON again to skip this step. If you want
to clear ALL memory, press and hold M BUTTON for 4 seconds. The “—
-“ image will appear on the LCD screen to indicate that all memory has
been deleted.
STEP 9. Complete Setting
After delete memory, the meter will display “OFF” before shut down.
The meter setting is now completed
IMPORTANT :
1. The time, date and unit of measurement can ONLY be changed in the setting mode.
Therefore, when you perform a blood glucose testing, it is not possible to change those
parameters.
2. Your meter displays 7, 14 and 28-day averages which you can access from the meter
memory. These averages are calculated from your latest result obtained during the last 7,
14 and 28 days.
3. Your meter can display test result in milligram per deciliter (mg/dL) or millimoles per liter
(mmol/L). The mg/dL unit is standard in the United States. The mmol/L unit is standard
in Canada and European countries. Your meter has been preset at the factory with the
standard unit measurement used where you live. When you turn off the meter or replace
the battery, the unit will not be changed.
4. Use of the wrong unit of measure may cause you to misinterpret your blood glucose
level, and may lead to incorrect treatment. Please always consult with your healthcare
professionals before you reset the unit of measure.
BLOOD GLUCOSE
MONITORING SYSTEM
BG — 101
USER GUIDE
J7
MC14EL005001
Model Name: BG-101
OK Biotech Co., Ltd.
Hsinchu, Taiwan
10-62-3463-0003
V1-JUL11
Meter
DISPLAY :
The large, easy to
read display shows
test results, messages,
test results stored in
memory.
STRIP SLOT :
Insert the test strip here. The meter will
turn on automatically.
METER LABEL:
Each meter has its unique number on it. It can be
used when you want to obtain warranty service.
Please do not alter or tear the label off.
M BUTTON:
Main button, press button to turn the meter on
or perform other functions described in this User
Guide.
SET BUTTON:
Located in
the battery
compartment; press
button to enter
meter setting. Refer
to “SETTING YOUR
METER” section of
this user guide for
details.
BATTERY COMPARTMENT :
Holds one 3V Lithium battery (CR2032).
Protective cap
Lancet
Important Lancing Device and Lancets Information
1. Lancet is for single use only.
2. Keep lancing device and lancets clean.
3. Use caution when removing the used lancet from the device and when disposing the
used lancet.
IMPORTANT :
The meter and lancing device are for single patient use.
Do NOT share them with anyone including other family members !
Do NOT use on multiple patients !
Setting your Lancing Device
1. Screw off the cap of lancing device. Insert a
lancet into the lancet holder and push down until
it is fully seated.
2. Twist off the protective cap until it separates from
the lancet.
4
5
3.Replace the lancing device cap and set the
puncture depth to the desired number.
NOTE: THE DEPTH SELECTOR OFFERS 5 LEVELS OF SKIN
PENETRATION:
1-2 FOR SOFT OR THIN SKIN
3 FOR AVERAGE SKIN
4-5 FOR THICK OR CALLOUSED SKIN
1
2
4. Pull back the sliding barrel until it makes a click,
and then release. If it does not click, the device
may have been cocked when the lancet was
inserted.
Prepare For Blood Sampling
Adjustable Lancing Device
Your lancing device and lancets are used for obtaining
capillary blood samples from the puncture site.
2
.
Lancet Holder
Lancing
Device Cap
Depth Selector
Release Button
Lancet Ejector
Sliding Barrel
OK Biotech Co., Ltd.
No. 91, Sec. 2, Gongdao 5th Road,
30070 Hsinchu City, TAIWAN
www.okbiotech.com
MDSS GmbH
Schiffgraben 41, 30175 Hannover, GERMANY
L-Tac MediCare Pte Ltd
25 Mandai Estate #07-11
Innovation Place Tower 1
Singapore 729930
Tel: +65 6334 2273
Fax: +65- 6863 8190
www.medicare-l-tac.com.sg
10-62-3412-0003 V2-JUL15
ГЛЮКОМЕТР:
,
Назначение
Система измерения уровня глюкозы в крови Медикеа-Лис (MediCare — Lis) ,предназначена для измерения уровня глюкозы в капиллярной крови вне организма (только для диагностики in vitro) в домашних условиях людьми с сахарным диабетом или с подозрением на сахарный диабет, а также медицинскими специалистами в медучреждениях.
Принципы проведения тестирования
Уровень глюкозы в крови измеряется с помощью электротока, который создается путем смешения образца крови с реагентом (специальными химическими веществами) на тест-полоске. Поток электрического тока изменяется в зависимости от содержания глюкозы в образце крови. Прибор измеряет силу электрического тока, подсчитывает уровень содержания глюкозы в крови и далее отображает Ваш результат в мг/дл или в ммоль/л.
О системе
Система измерения уровня глюкозы в крови Медикеа-Лис (MediCare – Lis) использует новейшие технологии, чтобы обеспечить Вам легкое и удобное измерение. Для проведения измерения и получения результата , требуется , всего 0,3 мкл крови и 6 секунд времени.
Состав системы:
1. , , , , , , , , , , , , , , , , , Прибор для измерения уровня глюкозы в крови Медикеа-Лис (MediCare — Lis) модель BG-101 — 1шт.
2. , , , , , , , , , , , , , , , Щелочная батарейка – 1 шт.
3. , , , , , , , , , , , , , , , Прокалывающее устройство Медикеа (MediCare) — 1 шт.
4. , , , , , , , , , , , , , , , Ланцеты одноразовые стерильные Медикеа (MediCare) 30G – 10 шт.
5. , , , , , , , , , , , , , , , Сумочка для переноски — 1шт.
6. , , , , , , , , , , , , , , , Руководство пользователя системой — 1 шт.
7. , , , , , , , , , , , , , , , Краткое руководство пользователя — 1 шт.
,
Всех приветствую!
В последнее время я стала очень заботиться о своем здоровье. Раньше я никогда не интересовала глюкоза. А как начались проблемы, то стала очень часто интересоваться этим и стала очень часто бегать по больницам для того, чтобы измерить уровень глюкозу. И порой я так уставала бегать по больницам и мне в голову пришло приобрести глюкометр. Я взяла себе самый бюджетный глюкометр MediCare BG-101.
Глюкометр MediCare BG-101
Общие характеристики
- Тип прибора — глюкометр
- Время теста — 6 с
- Объем крови на одно измерение — 3 мкл
- Место приобретения — интернет-магазин OZON
- Цена — 552 рубля
- Назначение — для измерения уровня глюкозы
О приборе
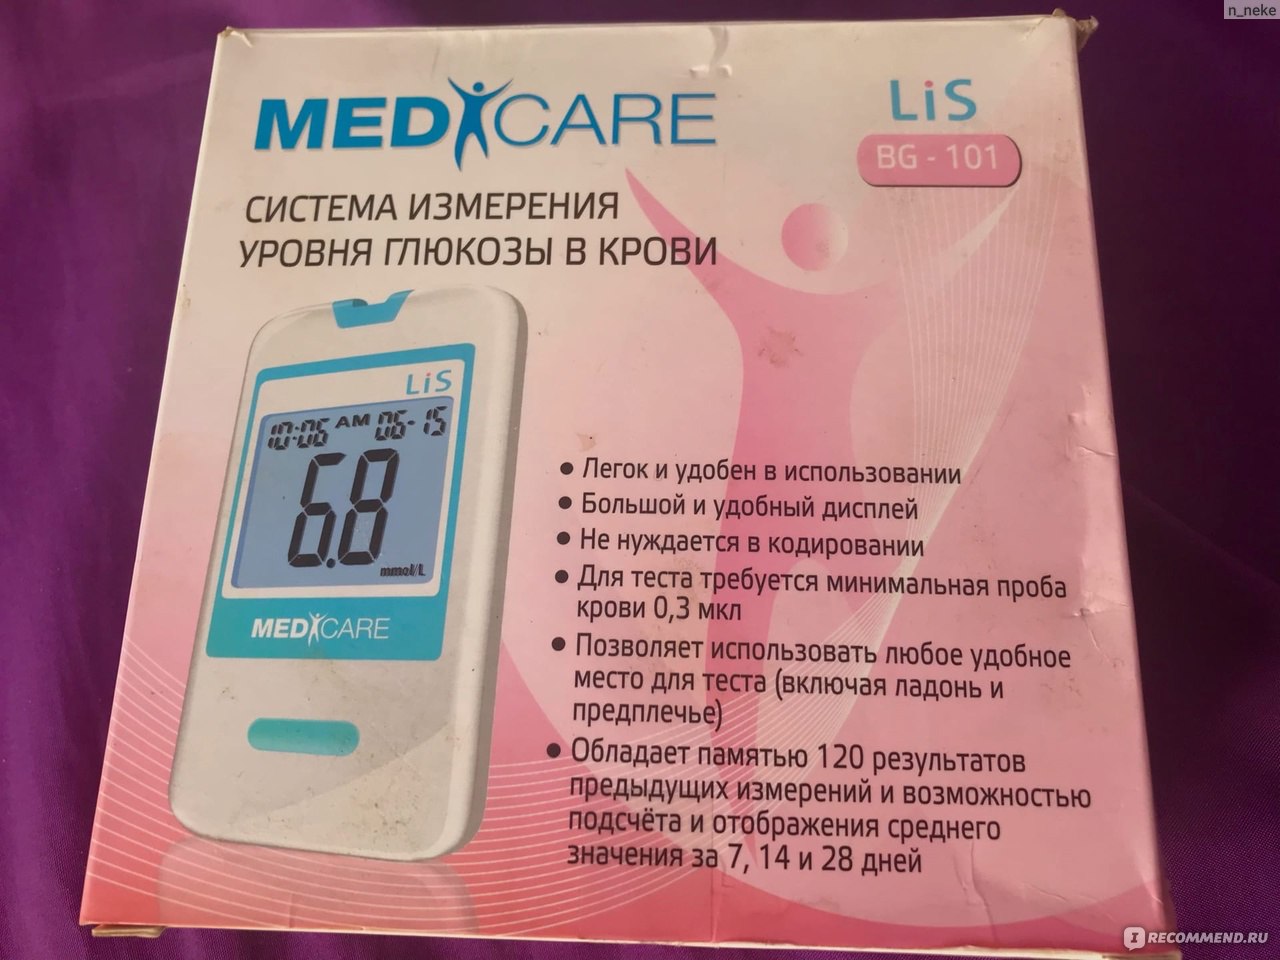
Система измерения уровня глюкозы в крови Медикеа-Лис (MediCare – Lis) использует новейшие технологии, чтобы обеспечить Вам легкое и удобное измерение. Для проведения измерения и получения результата , требуется , всего 0,3 мкл крови и 6 секунд времени.
То есть этот прибор направлен исключительно на измерение глюкозы в крови. Кстати, меня очень удивило, что для определения результата необходимо всего 6 секунд, для меня это очень быстро.
О внешнем виде
Глюкометр находится в коробочке. Коробочка прямоугольная, представлена в розовом цвете. На этом глюкометре находятся его преимущества.

Глюкометр MediCare BG-101
К преимуществам относят:
— легкое и удобное использование
— обладает памятью 120 результатов
— позволяет использовать любое место для теста
— большой и удобный дисплей

Глюкометр MediCare BG-101
Нижняя часть коробки представлена условиями хранения системы, условиями эксплуатациями и условиями утилизации. Вся эта информация указана на желтом фоне.

Глюкометр MediCare BG-101
Боковая часть коробки представлена розовым цветом. На этой части расположена информация о приборах, которые входят в данный глюкометр. А также здесь указаны меры предосторожности этого глюкометра.

Глюкометр MediCare BG-101
А другая боковая часть представлена информацией о производителе этого глюкометра, а также информацией о применении.

Глюкометр MediCare BG-101
При открытии этого глюкометра можно заметить книжечку желтого цвета с инструкцией. Сама по себе крышечка небольшая, прямоугольной формы.
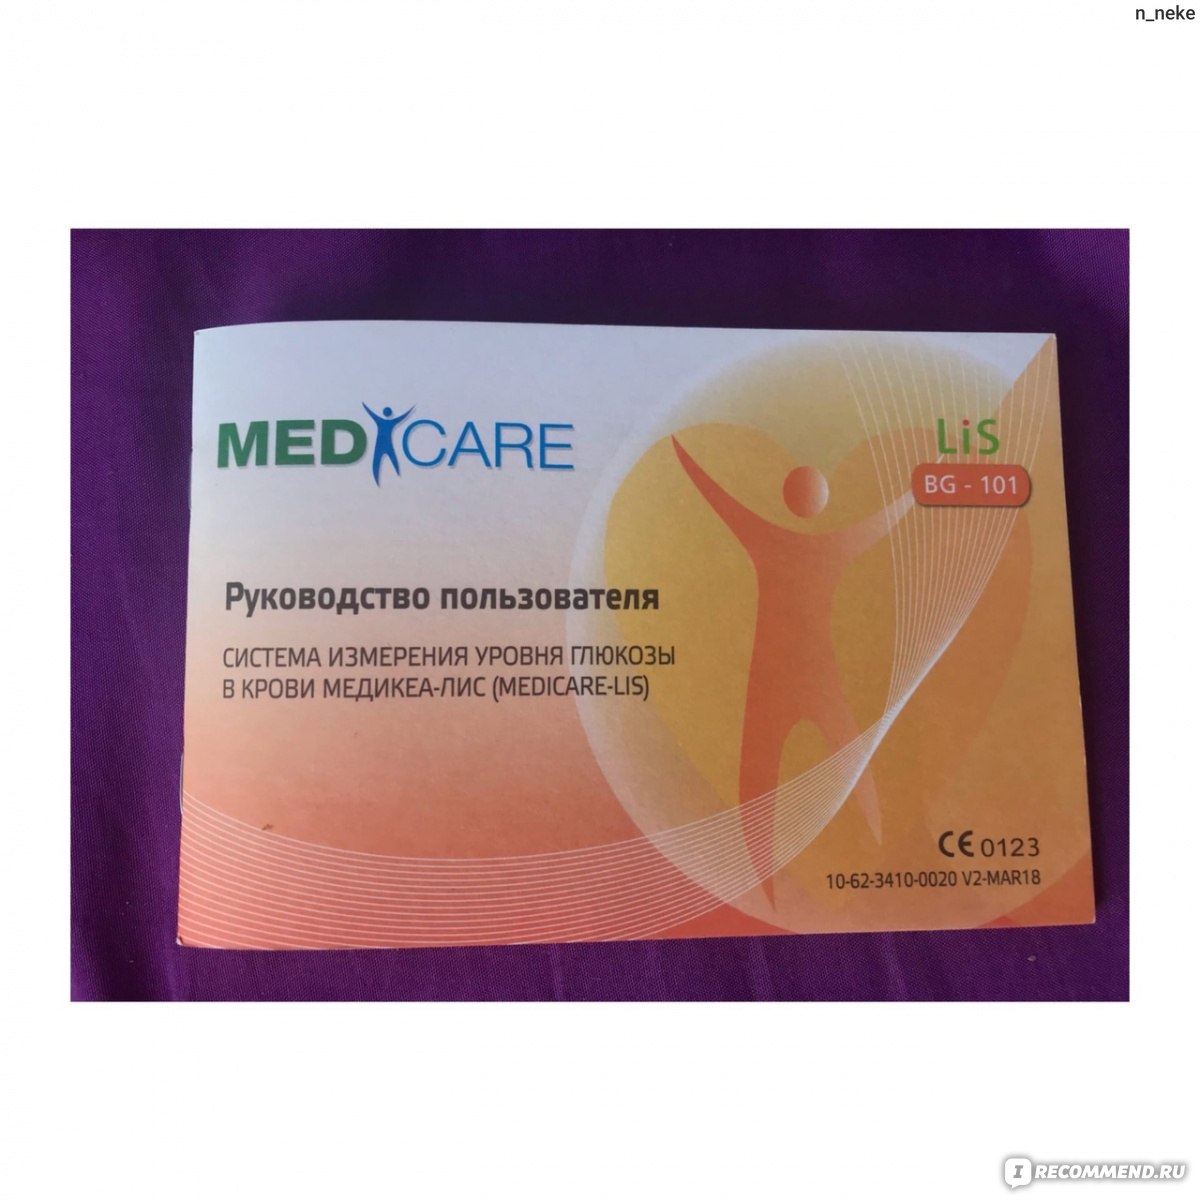
Инструкция
Также можно увидеть небольшой черный чемоданчик, в котором располагаются все составляющие глюкометра. Здесь находится 3 важных составляющих. Сам чемоданчик небольшой, внутри он тоже черный.

Глюкометр MediCare BG-101
Рассмотрим каждую составляющую глюкометра.
Баночка с тест-полосками. Представлена в черном цвете. На самой баночке находится белая этикетка с информацией. Здесь указана информация о названии данных полосок, о мерах предосторожности, а также об утилизации.

Баночка с тест-полосками


Тест-полоски
Шприц. Он представлена в белом и голубом цветах. Сам по себе пластиковый. Выглядит вполне себе стандартно. На этом шприце находятся цифры. Цифры указаны от 1 до 5.

Шприц

Сам глюкометр очень маленький по размеру. Экранчик небольшой, сам он цифровой. А еще на этом глюкометре располагается небольшая зеленая кнопочка. Данный глюкометр очень легко помещается в ладонь.

Глюкометр MediCare BG-101
А еще есть небольшой пакетик с синими штучками внутри.

Что я жду от глюкометра?
- Точного измерения глюкозы в крови
- Отсутствие ошибок
- Быстрый результат
- Долгое использование
- Удобство использования
Как я использую данный глюкометр?
- Перед непосредственным использованием глюкометра я мою руки с мылом. Затем я очень хорошо высушиваю руки и согреваю пальцы для прилива крови.
- После этого я извлекаю тест-полоску из упаковки (обязательно новую) и помещаю эту полоску в разъем глюкометра. После этого прибор сам включается. Хочу отметить, когда начинает мигать символ, то можно начинать работу.
- Затем я беру шприц и выбираю место прокола и нажимаю кнопку спуска ланцета.

- Потом я аккуратно массирую палец (для того, чтобы получить достаточное количество крови)
- Наношу кровь на тест полоску. Результат показывается через 6 секунд.
- На приборе спустя 6 секунд появляется результат.
- После всей процедуры я извлекаю тест-полоску из прибора (чтобы выключить его)
- И, конечно же, утилизирую использованный ланцет.


Уход за прибором, условия хранения и срок службы системы


Мои впечатления от использования
Данный глюкометр показывает результат действительно через 6 секунд после использования. Показывает все с точностью. Чтобы убедиться в точности результата я сначала проверяла в больнице а затем с помощью этого средства и все, конечно же, совпало.
Также мне понравилось удобное использование. Пользоваться этим прибором действительно очень даже удобно, не составляет никакой проблемы.
Вот только само прокалывание для меня было очень больно. Я тот человек, который резко на это реагирует. В первые разы у меня очень сильно кружилась голова и темнело в глазах (это все из-за того, что я пользовалась этим средством на голодный желудок). Даже в больницах у меня частенько был обморок после взятия крови.
А еще у этого глюкометра очень хорошая память, результат держится очень долго. Мне это очень понравилось. Можно сравнивать прежние результаты с нынешними.
Достоинства
- Быстрый результат
- Очень бюджетная цена
- Хорошая и долгая память
- Удобно брать с собой
Недостатки
- Может быть обморок
- Не всем легко будет пользоваться
Вывод
Данный глюкометр влюбил меня с первого применения! Благодаря этому глюкометру я могу узнавать свой результат в домашних результатах. Этот прибор очень экономит время и деньги. Так бы мне пришлось постоянно ездить в больницу и платить деньги за измерение глюкозы. Я считаю, что этот глюкометр самый лучший. У него хорошая память, а также очень бюджетная стоимость. Так что обязательно рекомендую!
3
.
Performing Blood Test
1. Wash Your Hands and the Puncture Site : Wash
your hands in warm, soapy water. Rinse and dry
completely. Warm your fingers to increase blood flow.
2. Insert Test Strip : Remove a new test strip from vial.
Be sure to tightly replace vial cap after removing test
strips. Insert test strip immediately into strip slot as
illustrated. The meter turns on automatically. When the
blood symbol blinking, you are ready to perform a test.
3. Select and Lance a Puncture Site
*For Fingertip
Hold the prepared lancing device firmly against the
side of your fingertip. Press release button.
*For AST
Please refer to the «About Alternative Site Testing
(AST)» Section. Please consult your healthcare
professional before obtaining blood from site other
than your fingertip.
4. Obtain a Blood Sample : Gently massage your finger
or puncture site to obtain the required blood volume.
To perform the test, you need only 0.3 μL of blood
sample. Do not smear the blood sample. To obtain
best accurate result, wipe off the first drop of blood and
gently squeeze another drop of blood.
5. Apply Blood Sample : Apply the blood sample to the
opening of absorbent channel of test strip until the
confirmation window is fully covered with blood. Then
the meter begins to count down.
6. Read Your Result :
The meter will display your blood glucose value after 6
seconds.
6
.
Control Solution Testing
If your Medicare control solution did not come with an Medicare control solution
Instruction, the following information shall take the place of the instruction.
Medicare control solutions contain a pre-set amount of glucose that reacts with
OKmeter test strips. By testing your control solution and comparing the test results
with the expected range printed on the test strip vial label, you can make sure that the
meter and the test strips are working properly together as a system and that you are
performing the test correctly.
Why perform a control solution test?
1. To ensure that your meter and test strip are working properly together.
2. To allow you to practice testing without using your own blood.
When should the control solution test be performed?
1. Whenever you suspect that the meter or test strips are not working properly.
2. When your blood glucose test results are not consistent with how you feel, or
when you think your results are not accurate.
3. When test strips are exposed to extreme environmental conditions.
4. If you drop the meter.
5. After changing the battery.
Important Control Solution Information
1. Check the expiration date on the control solution bottle. Do not use if expired.
2. Control solution, meter, and test strips should come to room temperature (68-
77 ºF/20-25ºC) before testing.
3. Shake the bottle before use, discard the first drop of control solution after
squeezing, wipes off the dispenser tip to avoid contaminations. These steps
ensure you will get a good sample and an accurate result.
4. Record the discard date on the bottle when you open a new bottle of control
solution.
NOTE : 1. There are two levels of control solution (normal and high) available to purchase.
Please contact with your local distributor when required.
2. The control solution range printed on the test strip vial is for Medicare control solution
only. It is used to test meter and strip performance. It is not recommended range for
your blood glucose level.
Composition:
1. D-Glucose
5. Disodium EDTA
2. Polyvinyl acetate (aqueous emulsion)
6. Food Pigment Red No.6
3. Fumed silica
7. Antifoaming agent
4. Sodium Benzoate
(Polyethylene Glycol 4000)
9
.
Display Messages And Problem-Solving Guide
The following is a summary of some display messages and symbols. These messages
help to identify certain problems but do not appear in all cases when a problem has
occurred.
Improper use may cause an inaccurate result without producing an error message.
In the event of a problem, refer to information under »action to take»
DISPLAY
DESCRIPTION
If some parts of the display are not
Display check
working. Contact your local distributor
for help.
The meter is waiting for test strip to be
Moving Strip
inserted.
The meter is ready for blood applying
Blinking Blood
into test strip.
Deleting memory
Deleting is complete.
If this is not confirmed by the way you
feel, review proper testing procedure
Test result is higher than
and perform a control test. Repeat blood
600 mg/dL (33.3 mmol/L).
test, if the display still appears, please
call medical assistance immediately.
If this is not confirmed by the way you
feel, review proper testing procedure
Test result is lower than
and perform a control test. Repeat blood
20 mg/dL (1.1 mmol/L).
test, if the display still appears, please
call medical assistance immediately.
4
.
The normal blood glucose range is below 100 mg/dL (5.6 mmol/L) for a
fasting, non-diabetic adult, but less than 140 mg/dL (7.8 mmol/L) two hours
after meals.* Consult your healthcare professional to find out your target blood
Incorrect
Correct
glucose value.
If your blood glucose result seems unusually high or low, or inconsistent with
your previous results, check the following:
1. Was the blood sample applied immediately to the test strip after removing it
from the vial?
2. Was the volume of the blood sample sufficient?
3. Was the test strip vial cap tightly sealed?
90°
4. Was the test strip used before the expiration date?
5. Were the test strips stored away from extreme temperatures in very cold or
hot weather or from areas of high humidity?
Then run a control test with Medicare control solution. If the control test result
is within the acceptable range, review testing procedure and repeat your blood
glucose test with a new test strip. If your blood glucose value is still inconsistent
with your previous results, glucose trend, or how you feel, contact your doctor
immediately for help.
REFERENCE:
*American Diabetes Association (http://www.diabetes.org/diabetes-basics/prevention/pre-diabetes/diagnosis.html)
How to Perform a Control Test
NOTE :
1. Be sure that you are in Control Solution Mode so that the test result will not be stored
in themeter memory.
2. DO NOT APPLY THE CONTROL SOLUTION DIRECTLY TO THE TEST STRIP!
Overdosed solution may give inaccurate result.
3. Repeat test if test result falls outside the control range stated on the test strip label. If
subsequent test remains to produce unacceptable result, the meter or test strip may
be faulty. DO NOT use the system. Contact us or your local distributor for help.
DISPLAY
Battery is weak.
ACTION TO TAKE
Battery is dead.
Maybe:
1. Used strip or
2. Meter is defective.
Temperature is out of the
operating range.
Maybe:
No responses
1. Battery is dead.
when strip is
2. Wrong strip be
inserted into
the meter
3. Meter is defective.
No responses
Maybe:
when blood
1. Blood sample is not
sample is
applied to the
2. Meter is defective.
strip
7. Remove Strip to Turn Meter Off :
Your blood glucose result is automatically stored in the
meter memory. Turn the meter off by removing the test
strip.
8. Secure the Used Lancet : Twist off the lancing device
cap, and push the exposed tip of the lancet into its
protective cap.
9. Discard the Used Lancet : Slide the lancet ejector
forward and dispose the lancet. Discard the lancet
according to your safety regulations.
* Do not reuse lancets.
1. Insert Test Strip : Insert a new test strip into the strip slot,
the meter will activate.
2. Mark as a Control Solution Test : After the blood
symbol( ) appears, press M BUTTON and a CONTROL
SOLUTION TEST SYMBOL( ) shows up, now you are in
the Control Solution Mode. The meter will not store your
test result in the memory when you preset the test as a
control solution test. If you decide not to perform a control
solution test, press M BUTTON again and the CONTROL
SOLUTION TEST SYMBOL ( ) will disappear.
3. Squeeze a drop of Control Solution : Shake control
solution bottle well. Remove the cap. Squeeze bottle,
discard the first drop and wipe off the dispenser tip with
a clean tissue paper or cotton swab. Squeeze a drop on
clean bottle cap/fingertip /non-absorbent surface.
4. Apply Control Solution : Apply the drop to the opening
of the strip absorbent channel until the confirmation
window is filled. The meter begins to count down.
5. Check if the test result is in range: After the meter
counts down, the test result shows up. Compare the test
result with the range printed on the test strip vial. The
result should fall within the printed range.
DESCRIPTION
ACTION TO TAKE
Replace battery soon.
Replace battery now.
You have to:
1. Repeat test with a new test strip.
moistened strip is
2. Contact your local distributor for
inserted.
help.
The meter is not working. Move to an
area with temperature between 10ºC to
40ºC (50ºF — 104ºF) and wait at least 30
minutes. Do not artificially heat or cool
the meter.
You have to:
1. Replace battery.
2. Insert the test strip correctly.
inserted.
3. Contact your local distributor for
help.
You have to:
1. Repeat test with sufficient
sample.
sufficient.
2. Contact your local distributor for
help.
5
.
Memory Recall
The Medicare System-LiS automatically stores 120 test results, letting you review
them in order from the most recent to the oldest. The meter also calculates and
displays 7, 14 and 28-day averages. You can review the individual or average test
result by entering the memory mode.
STEP 1. Enter the Memory Mode
While the meter is turned off, press M BUTTON to turn on the
meter. When the strip symbol blinks in the display, press M
BUTTON again to enter memory mode.
STEP 2. Recalling Average Test Results
When entering the memory mode, the 7-day average will
appear. If you continue to press the M BUTTON, the 14-day
and 28-day averages will appear in order.
STEP 3. Recalling Individual Test Results
After 28-day average, the most recent test result with date
and time will be shown. Press M BUTTON once and the next
most recent test result will appear. Each time you press and
release the M BUTTON, the meter will recall up to your last
120 test results in order. When the memory is full, the oldest
result is dropped as the newest is added. After reaching the
last set of result, the meter will turn off automatically.
STEP 4. Exit the Memory Mode
If you want to exit the memory mode before reaching the last
result, press and hold M BUTTON for three (3) seconds to
turn off the meter.
NOTE :
1.
The control solution results are NOT stored in the memory if you preset the
control test correctly. (Please refer to the «CONTROL SOLUTION TEST» Section
for details). The list of past results and the result average are for blood glucose
results only.
2.
When using the meter for the first time, »—-» is displayed. When you recall the
test results or review the average result, it means that there is no test result in
memory.
3.
The averages are calculated from your latest result obtained during the last 7, 14
and 28 days.
4.
Anytime in memory mode, you can press M BUTTON for three (3) seconds to
exit and turn off the meter.
5.
While in the memory mode, if you leave the meter alone without any action for
one (1) minute, the meter will turn off automatically.
7
.
Caring For Your Meter And
To avoid the meter and test strips getting dirt, dust or other contaminants, please
wash and dry your hands thoroughly before use.
Cleaning
Your meter does not require special maintenance. As long as no blood or control
solution comes in direct contact with the meter, there is no special cleaning
required.
To clean the meter exterior, wipe with a cloth moistened with tap water or a mild
cleaning agent, then dry the device with a soft and dry cloth. Do not flush with
water.
Do not use organic solvents to clean the meter. Your meter is a precision
instrument. Please handle it with care.
Storage
1. Meter Storage
* Storage condition: -20ºC~50ºC (-4ºF~122ºF), below 90% relative humidity.
* Avoid dropping and strong impact.
* Avoid direct sunlight and humidity.
2. Strip Storage
* Storage condition: 4°C~40°C (39°F~104°F), and 10~85% relative humidity. Do
not freeze.
* Store your test strips in their original vial only. Do not transfer to other
container.
* Store test strip packages in a cool and dry place. Keep away from direct
sunlight and heat.
* After removing a test strip from the vial, immediately replace the vial cap and
close it tightly.
* You may touch the test strip anywhere with clean, dry hands when removing it
from the vial or inserting it into the meter.
* Use each test strip immediately after removing it from the vial.
* Do not bend, cut, or alter a test strip in any way.
* Keep the strip vial away from children since the cap and the test strip can be
a potential choking hazard. If swallowed, please seek medical assistance
immediately.
3. Control solution storage
* Store the control solution in a cool, dry place between 4°C (39°F) and 30°C
(86°F).
8
.
System Specifications
Model Name
BG-101
Assay Method
Electrochemical biosensor
Test Sample
Capillary Whole Blood
Test Result
Referenced to plasma glucose value
Alternative Site Testing
YES (palm, forearm)
Sample Size
0.3 μL
Measuring Time
6 seconds
Measuring Range
20 – 600 mg/dL (1.1 – 33.3 mmol/L)
Acceptable Hematocrit Range 20~60%
Operating Condition
10°C~40°C (50°F~104°F), between 10-85% R. H.
Storage/Transportation Condition 4°C~40°C (39°F~104°F), between 10-85% R. H.
Memory Capacity
120 test results with time and date
Average Calculation
7, 14, and 28 days
Power Supply
One 3-volt Lithium Battery (battery type CR2032)
Battery Life
Approximately 1,000 tests
Automatic shut-off
In 2 minutes
Dimensions
80 mm(L)x 48 mm(W) x 15 mm(H)
Weight
37 g
Test Strip
Этот товар купили 33 раза
Как сделать заказ?
Добавьте выбранный товар в корзину
Проверьте наличие в аптеках
Выкупите в аптеке прямо сейчас!
Информация производителя
Способ применения
Система измерения уровня глюкозы в крови Медикеа-Лис (Medicare — Lis) иепользует новейшие технологии, чтобы обеспечить Вам легкое и удобное измерение.
Для проведения измерения и получения результата требуется всего 0,3 мкл крови и 6 секунд времени.
Полоски для глюкометровЛанцеты для глюкометров
Способ применения и дозировка
1. Вымойте руки и место для анализа: Вымойте руки теплой водой с мылом. Прополощите и высушите хорошо. Согрейте пальцы для прилива крови.
2. Вставьте тест-полоску: Извлеките новую тест-полоску из упаковки. Сразу же поместите полоску в разъем. Прибор включится автоматически. Когда символ крови начинает мигать, можно начать проведение теста.
3. Выбор и прокол места для анализа
- Для кончика пальца: Держите подготовленное прокалывающее устройство, направив строго на боковую поверхность кончика пальца. Нажмите кнопку спуска ланцета.
- Для альтернативных мест (ладонь или предплечье): Проконсультируйтесь с врачом перед альтернативных мест для тестирования.
4. Получите пробу крови:
- Аккуратно помассируйте палец или место для анализа для получения достаточного количества крови.
- Для проведения теста Вам понадобится всего 0.3 мкл крови. Не смазывайте образец крови.
- Для получения точного результата сотрите первую каплю крови и аккуратно выдавите вторую каплю.
5. Нанесите кровь на тест-полоску
- Нанесите кровь на кончик впитывающего канала тест полоски пока окошко подтверждения полностью не заполнится кровью.
- После этого прибор начинает обратный отсчет и показывает результат через 6 секунд.
6. Посмотрите на результат
- Прибор отобразит значение уровня содержания глюкозы в крови через 6 секунд.
7. Извлеките тест-полоску из прибора для его выключения и утилизируйте
- Результат Вашего теста автоматически записывается в память устройства.
- Выключите прибор, вытащив тест-полоску.
- Использованные тест-полоски следует утилизировать надлежащим образом.
8. Защита использованного ланцета
- Отсоедините колпачок прокалывающего устройства и наденьте на острый кончик ланцета защитный элемент.
9. Утилизируйте использованный ланцет
- Протолкните эжектор ланцета вперед и извлеките ланцет.
- Закройте ланцет защитной крыщкой и поместите в контейнер для острых предметов для последующей утилизации.
Описание
Система измерения уровня глюкозы в крови Медикеа-Лис (Medicare — Lis):
- Не нуждается в кодировании; это позволяет сократить время и избежать субъективной ошибки при кодировании.
- Позволяет использовать альтернативное место для теста (ладонь, предплечье).
- Оснащена памятью.
Состав
Комплектация:
- Прибор для измерения уровня глюкозы в крови Медикеа-Лис (MediCare — Lis) модель BG-101 — 1шт.
- Щелочная батарейка – 1 шт.
- Прокалывающее устройство Медикеа (MediCare) — 1 шт.
- Ланцеты одноразовые стерильные Медикеа (MediCare) 30G – 10 шт.
- Сумочка для переноски — 1шт.
- Руководство пользователя системой — 1 шт.
- Краткое руководство пользователя — 1 шт.
Фармакотерапевтическая группа
Медицинские приборы
Показания
Система измерения уровня глюкозы в крови Медикеа-Лис (MediCare — Lis) предназначена для измерения уровня глюкозы в капиллярной крови вне организма (только для диагностики invitro) в домашних условиях людьми с сахарным диабетом или с подозрением на сахарный диабет, а также медицинскими специалистами в медучреждениях.
Условия хранения
При температуре 4°С~40°С (39°Р~104°Р) при относительной влажности воздуха 10-85% .
Срок годности
Срок службы 5 лет
Хранятся в холодильнике
Нет
Содержит спирт
Нет
Кодеинсодержащий
Нет
Наркотический/Психотропный
Нет
Обращаем ваше внимание, что инструкция к товарам может меняться. Для уточнения актуальной информации обратитесь к оригинальной инструкции.
Самовывоз в Курске
АптекаПлюс
Курск, пр-кт Кулакова, 9, пом.4
Аптека
Курск, Воротний 2-й, 21
Низкие цены
Курск, ул. Студенческая, 3, пом.VIII
Низкие цены
Курск, Карла Маркса, 66/2
АптекаПлюс
Курск, пр-кт Победы, 2, пом.24
АптекаПлюс
Курск, ул. Сумская, 36
АптекаПлюс
Курск, ул. Черняховского, 2
АптекаПлюс
Курск, ул. Дзержинского, 40
АптекаПлюс
Курск, пр-кт Энтузиастов, 1А
АптекаПлюс
Курск, ул. Союзная, 18, пом.103
Аптеки в вашем городе 61 аптека
Все сети аптек в вашем городе
Кратко о товаре Глюкометр Медикеа-ЛиС BG-101 в Курске
Купить Глюкометр Медикеа-ЛиС BG-101 в Курске можно в удобной для вас аптеке, сделав заказ на Мегаптека.ру
Цена на Глюкометр Медикеа-ЛиС BG-101 в Курске – от 552,50 рублей
Инструкция по применению для Глюкометр Медикеа-ЛиС BG-101
Цены в других городах
Мегаптека,
Москва, Новосибирск, Екатеринбург, Казань, Нижний Новгород, Челябинск, Самара, Уфа, Ростов-на-Дону, Омск, Красноярск, Воронеж, Пермь, Волгоград, Краснодар, Тюмень, Саратов, Ижевск, Барнаул, Ульяновск, Иркутск, Калуга, Астрахань, Брянск, Кострома, Мурманск, Ставрополь, Саранск, Абакан, Псков
Цена зависит от выбранной аптеки и действительна только при заказе через сервис Мегаптека.ру
Сахара и легкоусвояемых углеводов в пище современного человека стало слишком много, а это – одна из главных причин повышения в крови уровня глюкозы. Последствием все чаще становится сахарный диабет – болезнь века, стремительно набирающая темпы роста. Статистика неумолима – диабет все чаще встречается у людей младше 50 лет.
Для многих высокий уровень сахара в крови становится неприятным сюрпризом – жил человек, ни в чем себе не отказывал, ни на что не жаловался, а теперь выясняется, что у него большие проблемы. У тех, кто пользуется глюкометром периодически, есть шанс снизить риск возникновения сахарного диабета1.
В пользовании глюкометром нет ничего сложного. Конструкция этих приборов для домашнего пользования предусматривает легкое и понятное обращение с ними. Важно соблюдать все инструкции по пользованию и уходу за глюкометром, и он не подведет.
Что такое глюкометр
Глюкометр – это медицинский прибор для измерения уровня глюкозы в крови. Есть глюкометры инвазивные, при использовании которых необходимо проколоть кожу и выдавить капельку крови, и неинвазивные – они определяют уровень сахара без прокола. Последние по причине слишком высокой стоимости в личное пользование покупают редко. А вот инвазивные – прибор массового пользования.
По принципу действия глюкометры различают фотометрические, биосенсорные, электрохимические, однако, принцип их строения всегда одинаковый2.
Глюкометр представляет собой корпус с дисплеем, на котором видны результаты измерения, и кнопками управления. В корпусе есть небольшая прорезь для тест-полосок – тех самых, на которые наносится капля крови. Есть место и для ланцета (иглы). В некоторых моделях прилагается специальная ручка для прокола, в которую тоже надо вставлять иглу.
И набор ланцетов, и тест-полоски, как правило, входят в комплект при покупке глюкометра. Но это одноразовые расходники, запас которых надо постоянно пополнять. Выбирая модель глюкометра, стоит заранее поинтересоваться, сколько они будут стоить, так как это значительная часть затрат, превышающая иногда стоимость самого прибора. Срок годности тест-полосок после вскрытия упаковки – тоже существенный момент.

В аптеках представлены самые разные модели глюкометров – простые, с минимальным набором функций и одной кнопкой, и более современные, с дополнительными опциями. Более дорогие глюкометры позволяют измерять не только уровень сахара в крови, но и холестерина, триглицеридов. Есть компактные модели, помещающиеся в дамской сумочке, для активных людей, которые не сидят подолгу на месте. Для самых продвинутых существуют приборы, которые синхронизируются с компьютером или смартфоном. Глюкометр с голосовым оповещением результата подойдет тем, кто плохо видит. Ланцеты с автоматическим прокалывателем кожи актуальны при измерении уровня глюкозы в крови у детей.
Объем памяти у разных глюкометров может отличаться. Для семьи удобны модели, которые могут запоминать результаты нескольких пользователей.
Полезная информация о глюкометрах
| Принцип работы глюкометра | Фотометрический На тест-полоску нанесен специальный реагент, который меняет цвет при соприкосновении с кровью. На основании интенсивности окраски прибор анализирует уровень сахара |
| Электрохимический На тест-полоски нанесен специальный реактив. При его соприкосновении с кровью возникает импульс, который фиксирует прибор и на основе этого высчитывает результат |
|
| Биосенсорный Из инвазивных глюкометров считается самым точным. На тест-полоску также нанесено определенное соединение, на который реагирует глюкоза. Это приводит к изменению электрического потенциала, что и регистрирует прибор |
|
| Как работает | от батареи |
| Что входит в комплект | корпус, набор ланцетов и тест-полосок, батарея |
| Функция памяти | есть практически во всех современных моделях |
| Дополнительные функции | • звуковое оповещение результата; • измерение уровня холестерина; • предупредительный сигнал при отклонении показателей от нормы; • соединение и синхронизация с компьютером или смартфоном; • измерение артериального давления |
Пошаговая инструкция, как пользоваться глюкометром в домашних условиях
Чтобы получить достоверные результаты измерений, надо четко следовать той последовательности действий, которая указана в инструкции. А перед первым использованием глюкометр надо настроить: установить дату и время, выбрать язык меню экрана, единицы измерения сахара (в основном это ммоль/л) и диапазон измерения с установкой индивидуальной нижней и верхней границы уровня сахара (насчет диапазона этих значений лучше проконсультироваться с врачом).

Завершающий этап настройки – калибровка. Специальная калибровочная жидкость (она включена в комплект большинства современных моделей) наносится на тест-полоску, а результат сверяется со значением, указанным в инструкции. Вот теперь прибором можно пользоваться. Как это делается?
Запуск
Включаем глюкометр. В некоторых моделях это делается одной кнопкой, в некоторых – двумя, запуская одновременно и прибор, и данные из его памяти. О том, что глюкометр готов к работе, он оповестит звуковым сигналом.
Очень удобны глюкометры, которые сами включаются после того, как в них вставили тест-полоску – ничего не надо нажимать.
Гигиенические процедуры и дезинфекция
Моем руки с мылом, вытираем насухо. Палец, который будем прокалывать (средний, безымянный или указательный) дезинфицируем. Для увеличения притока крови можно встряхнуть рукой.
Установка тест-полоски и иглы
Устанавливаем ланцет и тест-полоску в предназначенные для них места. В некоторых моделях предусмотрена кодовая пластинка для тест-полосок. Открыв их новую упаковку, сначала надо заменить пластинку – на ней закодированы свойства тест-полосок. Если этого не сделать, результаты могут быть неверными.
На тест-полоски нанесена подсказывающая разметка, чтобы пользователь мог вставить их правильной стороной. Обращаем на это внимание!
Прокол
Укол делается практически мгновенно, для большинства людей он еле ощутимый. Причем глубину прокола можно отрегулировать. Но надо иметь в виду, что, проколов палец на минимально возможную глубину, можно не дождаться и капельки крови, или ее будет очень мало. А при недостаточном количестве крови показания глюкометра могут исказиться.
Давить на палец в процессе забора крови не надо – так будет выделяться еще и тканевая жидкость, которая разбавит кровь и исказит результат.
Чтобы получить полноценную каплю с первого раза, лучше делать прокол не в середине подушечки пальца, а чуть сбоку.
Нанесение крови на полоску
На месте прокола появляется капелька крови, ее для исследования вполне достаточно. Эту каплю подносят к краю тест-полоски. Достаточно просто коснуться ее, чтобы необходимое количество крови втянулось в индикатор. Размазывать не надо! Через несколько секунд (в зависимости от модели глюкометра – от 5 до 40) на дисплее появляется результат.
Если прибор сообщает об ошибке, процедуру надо повторить заново, предварительно изучив в инструкции, с чем может быть связан сбой.
Завершение
Использованную тест-полоску надо извлечь по окончании процедуры и утилизировать. Руки вымыть, место прокола продезинфицировать. Ланцеты также рекомендуется утилизировать после каждого применения. При всем желании сэкономить надо иметь в виду, что при повторном использовании есть риск попадания инфекции на иглу, к тому же с каждым разом она тупеет, и прокол становится более болезненным. И уж точно категорически нельзя использовать один ланцет разным людям!
Использованные иглы и полоски выбрасывают в мусор, предварительно упаковав их в полиэтиленовый пакет.
Советы врачей по применению глюкометров
– Эксперты ВОЗ считают, что глюкометр может давать отклонения до 20-25%. Это не повлияет на правильность решения о лечении диабета. Ведь важно не единичное измерение (по нему нельзя делать никаких выводов), а динамика показателей сахара в крови в течение дня, недели, месяца. Поэтому нужно оценивать глюкозу крови минимум 5-6 раз в сутки, – отмечает к.м.н., эндокринолог, диетолог Татьяна Гудожникова.

– Своим пациентам я рекомендую использовать бесконтактный глюкометр, в котором не применяются тест-полоски. Он прост и удобен в применении как для пациента, так и для врача. Датчик приклеивается на заднюю часть руки между плечом и локтем и сам автоматически измеряет уровень сахара каждые 15 минут. С ним можно вести обычный образ жизни. Благодаря множеству измерений в течение дня, пациенту будет проще скорректировать свой рацион питания. Для этого, конечно, необходимо вести дневник питания. Это настоятельная рекомендация, так как без дневника будет сложно понять и доктору, и самому пациенту, что он ест правильно, а что – нет, – добавляет врач-эндокринолог Алсу Морозкина.
А вот прибор с тест-полосками, по мнению эксперта, менее удобен. Провести измерение можно не везде и не в любых условиях, для такой процедуры необходимо уединенное место. Это еще и множество проколов, болезненность и неприятные ощущения.
Причиной недоверия к пугающим показаниям глюкометра чаще всего бывает действительная декомпенсация, о которой человек не знал до приобретения прибора. Ведь большинство диабетиков со стажем привыкли сдавать кровь на сахар раз в месяц в поликлинике. К такому анализу человек готовится заранее: за день-два перед ним он садится на строгую диету, приходит в лабораторию натощак – и чаще всего его сахар крови оказывается если не в норме, то близко к ней. Зато весь оставшийся месяц он позволяет себе излишество в пище, и его сахар «подскакивает». Войдя в жизнь такого диабетика, глюкометр просто открывает ему глаза3.
При частых измерениях (5-6 раз в день) рекомендуется менять прибор раз в 1-1,5 года. Производители глюкометров уверяют, что прибор вообще не нуждается в каких-либо поверках и калибровках, так как это уже сделано (откалибровано на заводе). Но! Чем чаще используют глюкометр, тем больше со временем может быть погрешность.
Популярные вопросы и ответы
Глюкометром пользуются, как правило, люди, у которых уже есть проблемы с сахаром в крови. И в измерениях есть много важных нюансов4. Уточнить их нам помогла врач-эндокринолог Алсу Морозкина.
Нужно ли убирать первую каплю крови при измерении глюкометром?
– Да. Первую каплю надо убрать с помощью стерильной ваты. После прокола для получения первой капли требуется некоторое усилие, что может привести к деформации красных кровяных телец в ней, а значит, и к искажению результата. Вторая капля выдавливается уже с минимальным усилием.
Сколько раз в день нужно мерить сахар глюкометром?
– Все зависит от того, насколько скомпенсирован пациент с диабетом. Если терапия подобрана правильно, уровень сахара нормальный, то измерения делают 2-3 раза в день. Если вводим новый продукт в рацион или подбираем сахароснижающую терапию, то важно мерить сахар до 11 раз в сутки. 1-2 раза в месяц сахар можно измерить ночью (если по ночам человек потеет).
Можно ли пить воду перед измерением сахара в крови?
– Если сахар измеряется натощак, то желательно не пить и не есть перед процедурой. Если измерение проводится в течение дня, то пациент может пить воду. Но при этом ему необходимо занести результаты в дневник питания и обозначить, какие напитки и пища употреблялись, для того чтобы врач мог сделать правильные выводы об уровне сахара в данном измерении и скорректировать сахароснижающую терапию.
Источники:
- Алгоритмы специализированной медицинской помощи больным сахарным диабетом/ Минздрав Российской Федерации, ОО «Российская ассоциация эндокринологов», ФГБУ «Национальный медицинский исследовательский центр эндокринологии». Под редакцией И.И. Дедова, М.В. Шестаковой, А.Ю. Майорова.
https://www.endocrincentr.ru/sites/default/files/specialists/science/clinic-recomendations/alg_book_10_final_.pdf - Мониторинг уровня глюкозы крови: возможности современных глюкометров. / Российский журнал телемедицины и электронного здравоохранения./ Зеленский М.М., Грицкевич Е.Ю.
https://jtelemed.ru/article/monitoring-urovnja-gljukozy-krovi-vozmozhnosti-sovremennyh-gljukometrov - Оценка качества гликемического контроля и управление сахарным диабетом: история, основные методы и клинические аспекты эффективного использования в реальной практике/ Журнал «Эндокринология./ О.А. Мишра, А.О. Невольникова, Е.А.Тертычная.
https://endocrinology-journal.ru/ru/jarticles_endo/524.html?SSr=31013461cc01ffffffff27c__07e50118011f29-248f - Новые технологии в управлении сахарным диабетом: от теории — к практике / И.А. Барсуков, А.А. Демина.
https://cyberleninka.ru/article/n/novye-tehnologii-v-upravlenii-saharnym-diabetom-ot-teorii-k-praktike/viewer
210009 г. Витебск, пр-т Фрунзе, 71В
тел./факс +375 212 33-13-66
e-mail: voed@vitebsk.by
info@voedvit.by
Время работы диспансера
Понедельник—пятница: 07:00–20:00
Суббота: 08:00–16:12
Время приема врачей
Понедельник—пятница: 08:00–20:00
Суббота: 08:00–16:00
Время работы лаборатории
Понедельник—пятница: 07:30–20:00 (забор крови 8.00-10.00)
Время забора анализов
Понедельник—пятница: 08:00–10:00
Телефоны для записи на прием
Предварительная запись на приём к врачу по телефону
8-0212-33-13-64 (регистратура)
с 08:00 до 19:00 кроме выходных и праздничных дней.
Предварительная запись на УЗИ (платно) по телефону
8-0212-33-13-67 (касса)
с 13:00 до 16:00 кроме выходных и праздничных дней.
Приём пациентов осуществляется по направлениям из поликлиник.
При обращении пациентов без направления прием и обследования осуществляются платно.
При обращении пациентов в диспансер при себе иметь документ, удостоверяющий личность (паспорт).