
-
Dune HDI HD Duo — page 1
HD Network A Digital Signage Solution User Guide 2013-04-29 …
-
Dune HDI HD Duo — page 2
2 © 2013 Dune HD. All rights reserved. Legal Note Dune HD and Dune HD Network are trademarks or r egistered trademarks of Dune HD GmbH, Germany. Java an d all Java-ba sed marks are trade marks or regist ered trademarks of Oracle and/or its affiliates. Micr osoft, Windows and all Windows-based marks are tr ademarks or registered trademarks of Micos …
-
Dune HDI HD Duo — page 3
© 2013 Dune HD. All rights reserved. 3 Contents Introduc tion ………………………………………………………………………………………….. 4 System Co mponents ………………………………………………………………………………. 4 Capabilit ies …………………………………………….. …
-
Dune HDI HD Duo — page 4
4 © 2013 Dune HD. All rights reserved. Introduction Thank you for your interes t in Dune HD Netw ork—a flexible and powe rful Full HD Digital Signage solution , which allows automated d emonstration of a wide rang e of HD video materials (up to 1080p, includin g H.264) on monitor s, television sets, etc. The solution includes su pport for scr ol …
-
Dune HDI HD Duo — page 5
© 2013 Dune HD. All rights reserved. 5 “HDNetwork” option is purchased, all the basic player functionality remains available. Each Presenter plays video files which ar e located on its local storage —a built-in HDD or a connected USB drive (for clarity , in this manual such local storage is always referred to as HDD). The configuration of a …
-
Dune HDI HD Duo — page 6
6 © 2013 Dune HD. All rights reserved. Supported Media Formats In the Digital Signage mode, the following file formats and codecs are supported: ∙ Video files: T S, M2TS, MPG, VOB, AVI , MOV, MP4, QT, ASF, WMV. ∙ Video codecs: MPEG-2, MPEG-4, DivX, Xvid, WMV9, VC1, H.264. ∙ Audio codecs: AC3 (DD), E AC3 (DD+), DTS, MPEG 1 layer 1/2/3, AAC , …
-
Dune HDI HD Duo — page 7
© 2013 Dune HD. All rights reserved. 7 Automated Playback When a Presenter enters the Digit al Signage mode, it starts perfor ming the automated playback according to its co nfiguration which is stored in the configuration file on the local HDD. T he configuration, among other option s, defines a playlist and optionally a schedule which may assign …
-
Dune HDI HD Duo — page 8
8 © 2013 Dune HD. All rights reserved. Note: In case the synchronized playback for multiple devices is config ured (see a dedicated section of this manual), a black screen may be shown at the beginning of each clip fo r a necessary time period. Scrolling Text The configuration of scrolling text spec ifies a list of messages and a number of options …
-
Dune HDI HD Duo — page 9
© 2013 Dune HD. All rights reserved. 9 Attention: It is the responsibility of the conf iguration author to assure that the graphic logos will never inte rsect with the scrolling text line. Otherw ise, visual artefacts may occur. Updating Configuration File The configuration file may be updated an y time via FTP (as the Control Center application d …
-
Dune HDI HD Duo — page 10
10 © 2013 Dune HD. All rights reserved. Attention: All devices in the same group should have identical synchronizatio n settings, sche dule, playlist, and cont ents of files on the playlist. It is recommended that all devices have identical configuration files. For conveniency, the Control Center applicatio n allows to save the configuration to al …
-
Dune HDI HD Duo — page 11
© 2013 Dune HD. All rights reserved. 11 In this mode it is importan t to specify in the config uration the exact number of devices in the group. In case some device turns off, stops responding or loses the net work, all other devices in the group will w ait until the device is back on, but afte r that the lost- and-found device will continue playb …
-
Dune HDI HD Duo — page 12
12 © 2013 Dune HD. All rights reserved. I f a t i m e p e r i o d i s n o t m e n t i o n e d i n t h e s c h e d u l e , i t i s c o n s i d e r e d t h a t t h e Presenter should stay off for that period. Attention: The “off” state requested b y the schedule is a special mode of a player when the disp lay is turned off, b ut the player softw …
-
Dune HDI HD Duo — page 13
© 2013 Dune HD. All rights reserved. 13 ∙ Windows 2003 has a built-in Time Servic e which supports the NTP protocol. Please refer to Microsoft Window s docume ntation for details, e .g. http://technet.microsoft.com/en-us/library/cc773013.aspx . ∙ For other Microsoft Windows vers ions, the free NTP server from http://www.meinberg.de may be inst …
-
Dune HDI HD Duo — page 14
14 © 2013 Dune HD. All rights reserved. Usage Getting Started In order to start us ing a number of Presente rs in the Digital Sig nage mode, please assure the followi ng steps are taken (see the r est of this manual for details) for each player which is intended to be a Presenter: ∙ Install the latest fi rmware which supports Digital Signage. Pl …
-
Dune HDI HD Duo — page 15
© 2013 Dune HD. All rights reserved. 15 Note: The Setup > Applications > Digital Signage > Enabled option al lows t o show and hide the Digital Signage top-level menu item. To configure the Digital Signage mode au tomatic start, go to the player menu Setup > Applications > Digital Signage and set the Automatic start option. In the D …
-
Dune HDI HD Duo — page 16
16 © 2013 Dune HD. All rights reserved. REW Decrease the playback speed. Press PLAY to return to the normal spe ed. FWD Increase the playback spee d. Press PLAY to return to the normal spe ed. ZOOM Stretch (enlarge) the image. Each p ress sets the zoom factor from the list: 100%, 105%, 111%, 118%, 126%, 134%, 144%, 156%, 170%. This …
-
Dune HDI HD Duo — page 17
© 2013 Dune HD. All rights reserved. 17 To edit these settings, you shoul d use th e IR remote control with the Presenter. ∙ Configuration file «HDNETWORK/config.txt» on the Presenter’s HDD. This file may be accessed by FTP/SM B. The Control Center application reads/changes this file via FTP to a llow the user to view/edit Pres enter …
-
Dune HDI HD Duo — page 18
18 © 2013 Dune HD. All rights reserved. NFS encoding FTP server encoding ∙ Setup > Miscellaneous > Time Synchron ization ∙ Setup > Miscellaneous > Advanced > Remote control type Please refer to the player manual for details on these settings . Local HDD Contents The internal HDD of a Presenter is expected to have a top-level fol …
-
Dune HDI HD Duo — page 19
© 2013 Dune HD. All rights reserved. 19 Local HDD Access Each Presenter device has a local HDD, either i n t e r n a l o r , w h e n i t i s a b s e n t o r t h e device does not su pport it, a USB-connected one. The contents of this hard drive may b e accessed without having to disassem ble the Presenter device. The follo wing means are provided: …
-
Dune HDI HD Duo — page 20
20 © 2013 Dune HD. All rights reserved. To access a Presenter via SMB, open “# .#.#.#internal_hard_disk” in Windows Explorer, e.g. using “Start” menu, “Run” command, or the address bar of any opened folder. Notes: 1. The usage of specialized FTP clients (such as FileZilla ) is recommended for better performance . 2. FTP access typic …
-
Dune HDI HD Duo — page 21
© 2013 Dune HD. All rights reserved. 21 Preparing Logos Logo files should be stored in the «HD NETWORKlogos» folder of the Presenter ’s HDD, and those files should be in the special «.aai» format (proprietary to Dune HD). To prepare logo files, at first a raster im age should be created using any graphics editor. Then it sho …
-
Dune HDI HD Duo — page 22
22 © 2013 Dune HD. All rights reserved. However, there is a possibility to use transparency, moreover, a complete alpha channel support is provide d, that is, for each pixel it s transparency leve l may be specified, and not only th e fact of a transparency. If, for example, Adobe® Photos hop® is used, an image in RGB mode should be created, the …
-
Dune HDI HD Duo — page 23
© 2013 Dune HD. All rights reserved. 23 Control Center The “Dune HD Network” system comes wi th a PC application called Dune HD Network Control Center, which is able to control a number of Presenter devices on a network. This is a cross-platform app lication based on the Java technolog y, so it will run on Windows, Linux, MacOS and other ope r …
-
Dune HDI HD Duo — page 24
24 © 2013 Dune HD. All rights reserved. Device Registration and Tasks To start working with dev ices, their IP addresses shoul d be manually registered in the Control Center using the Register New Device task. The device may be later unregis tered from the list using the Delete Selected Device task. I n o r d e r t o b e a v a i l a b l e o n t h …
-
Dune HDI HD Duo — page 25
© 2013 Dune HD. All rights reserved. 25 when most tasks are pe rformed, includ ing the Refresh Status… tasks. If needed, the application may be configured to automa tically update the device status in the specified intervals us ing the Configuration > Automatic Device Status Update menu. Please note that updating th e status involves download …
-
Dune HDI HD Duo — page 26
26 © 2013 Dune HD. All rights reserved. Device Configuration The corresponding tasks i n the device lis t allow to open a device configuration window which allows to view and edit all options of the device configuration file in a convenient and user-friendly way. Seve ral device windows may be opene d in parallel. Please refer to th e dedicated se …
-
Dune HDI HD Duo — page 27
© 2013 Dune HD. All rights reserved. 27 Clips This page allows to configure the playlist which may include video clips and static images, as well as so me related options. The right pane shows the playlist. The left pane offers the list of files which are located on the local HDD of the Pres enter, in the «HDNETWORK/clips» folder. This l …
-
Dune HDI HD Duo — page 28
28 © 2013 Dune HD. All rights reserved. Options: ∙ Automatically proceed to t he next image after … sec. Defines the show time for static images on the playlist. If checked, each image is shown for the specified pe riod, after which the next playlist item is activated. If not checked, each static image is sh own for an unlimited time, unless t …
-
Dune HDI HD Duo — page 29
© 2013 Dune HD. All rights reserved. 29 Scrolling Text This page offers to define the contents of the scrolling te xt and related opt ions. The left pane defines the list of messag es which is cyclically show n in the order of appearance in this list. Bu ttons below th e list allow to add, delete and re arrange messages. The right pane allows to e …
-
Dune HDI HD Duo — page 30
30 © 2013 Dune HD. All rights reserved. Options: ∙ Message separator Defines the text which is added be tween messages in the list. If empty, the messages are concatenated directly. This text may include multiple leading and trailing spaces. ∙ Text and Background groups Define colors of scrolling text font and backg round stripe, and their lev …
-
Dune HDI HD Duo — page 31
© 2013 Dune HD. All rights reserved. 31 Logos This page defines the graphic l ogos to show over the video. Either one or both logos m ay be turned on. The Logo file list shows the files located on the Presenter’s local HDD in the «HDNETWORK/logos» folder. This list i s not updated automatically , so after changing the set of files on t …
-
Dune HDI HD Duo — page 32
32 © 2013 Dune HD. All rights reserved. Options: ∙ Screen corner Defines the screen corner relative to which the logo position is calculated, called the base screen corner for the logo. ∙ Horizontal distance (min, max), Vertical distance (min, max) Defines the distance from the base scr e en corner to the nearest logo corner. 100 corresponds t …
-
Dune HDI HD Duo — page 33
© 2013 Dune HD. All rights reserved. 33 Schedule This page defines the schedule. The values shown in the screen shot d e fine the default schedule, which prescrib es using the basic config uration all the time. If a certain day of week is unche cked, the Presenter will stay in th e “off” state for this day. Otherwise , the time periods should …
-
Dune HDI HD Duo — page 34
34 © 2013 Dune HD. All rights reserved. Synchronization T h i s p a g e a l l o w s t o t u r n o n t h e s y n c h r o n i z e d p l a y b a c k o f p l a y l i s t i t e m s , a n d provides necessary options. Plea se refer to the corresponding section of this manual for the conceptual description of the synchronized playback, and to the section …
-
Dune HDI HD Duo — page 35
© 2013 Dune HD. All rights reserved. 35 Misc. This page defines mi scellaneous opt ions. ∙ Lock remote control buttons If checked, the IR remote control buttons w ill be locked during the Digital Signage mode. When the buttons are lock ed, the specified s e quence of numeric buttons allows to exit the Digital Signage mode. ∙ Show technical inf …
-
Dune HDI HD Duo — page 36
36 © 2013 Dune HD. All rights reserved. Extra This page offers a text field which may be directly edited by the user. When the configuration file is loaded by the Control Center, all o ptions which were not recognized go to this page. Whe n the configuration is save d, all text written in this page is appended to the configuration file. Attention: …
-
Dune HDI HD Duo — page 37
© 2013 Dune HD. All rights reserved. 37 Programmatic Access This section provides info rmation which is helpful if manual control of Present er devices via the Control Cen ter application is not e nough for your installation. The Dune HD Network sys tem allows a customer to wr ite her own applications/scripts which interact with Presenter de vices …
-
Dune HDI HD Duo — page 38
38 © 2013 Dune HD. All rights reserved. Unicode Support The Unicode is supported for scrolling text, however, the se t of fonts included in the Presenter’s firmware may not include all the Unicode character s. Unsupported characters are displayed as “?”. The char acters from the following code pages are supported: ∙ Central European (1250) …
-
Dune HDI HD Duo — page 39
© 2013 Dune HD. All rights reserved. 39 # List options belonging to the basic configuration clip image1.png clip image 2.png # List option belonging to the «Mo» configuration config «Mo» clip video_for_monday.mpg # List options belonging to the «Mo» configuration config «Mo» message Welcome on Monday! config …
-
Dune HDI HD Duo — page 40
40 © 2013 Dune HD. All rights reserved. message message_tex t List option (may occur mu ltiple times). Defines the list of messages for scrolling text. The list of message s is cyclically shown in the order of appearance of these options. By default (if no such options are spe cified), the scroll ing text is not shown. message_text_color rrggbb (h …
-
Dune HDI HD Duo — page 41
© 2013 Dune HD. All rights reserved. 41 logo_first_corner corner (one of top-left , top-right , bottom_ left , bottom-right ; default is t op-left ) Defines the screen corner relative to which the logo position is calculated, called the base screen corner for the logo. logo_first_space_h orizontal_min percentage ( 0 .. 100 , default is 10 ) logo_f …
-
Dune HDI HD Duo — page 42
42 © 2013 Dune HD. All rights reserved. Global Options Options described in thi s section do not belong to any particular named configuration. schedule_monday schedule_exp ression (default is empty ) schedule_tuesday schedule_ex pression (default is empty) schedule_wednesday schedule_exp ression (default is empty) schedule_thursday schedule_expr e …
-
Dune HDI HD Duo — page 43
© 2013 Dune HD. All rights reserved. 43 sync_enabled flag flag ( 0 or 1 , default is 0 ) If this option is 0, the synchr onized playback is off and other sync_… options are not in effect. sync_status_info_d elay seconds seconds (decimal ≥ 1 , default is 5 ) In case waiting for other devices to report being ready for play back of next playlist …
-
Dune HDI HD Duo — page 44
44 © 2013 Dune HD. All rights reserved. Defines the period the server waits for othe r devices to report being ready for playback on non-first sy nchronization phases. If a device did n ot respond during this pe riod, it is exclude d till the next synchronization phase, and other devices start playback synchr onously with each other. sync_num_devi …
-
Dune HDI HD Duo — page 45
© 2013 Dune HD. All rights reserved. 45 Troubleshooting This section describes t ypical cases of undesired/unexpected bahav ior of a Presenter, and the p ossible reasons for such behavior. Should you ever encounter a problem with Dune HD Network, please consider the options in thi s section before appl ying for customer se rvice. No Display ∙ Th …
-
Dune HDI HD Duo — page 46
46 © 2013 Dune HD. All rights reserved. ∙ The serverle ss synchronization mode is being used. I n this case the schedule is not supported, see the detailed description of synchronized playback fe ature in this manual. ∙ The three parallel activities—play list playback, scr olling text and showing graphic logos—perform configuration switch …
-
Dune HDI HD Duo — page 47
© 2013 Dune HD. All rights reserved. 47 Unable to Access via Control Center, FTP, SMB ∙ The network settings are not configured prop erly in the player menu Setup > Network . ∙ The network is unavailable physically . ∙ You are using a wrong IP address . The IP address of a Presenter can be found in the player menu Setup > Information . …
-
Dune HDI HD Duo — page 48
48 © 2013 Dune HD. All rights reserved. Missing the “Digital Signage” Menu Item ∙ The Presenter has no pr oper license . The “Dune HD Network ” license should be installed. The license type may be checked in the player menu Setup > Information . ∙ The player menu Setup > Applications > Digital Signage has a setting to hide the …
-
Page 1: Dune Duo
English ● Français ● Deutsch ● Nederlands ● Español ● Italiano ● Ру сский ● У країнська ● Polski Manufactured under license from Dolby Laboratories. Dolby and the double-D symbol are trademarks of Dolby Laboratories. Manufactured under license under U.S. Patent #’s: 5,451,942; 5,956,674; 5,974,380; 5,978,762; 6,[…]
-
Page 2: Dune Duo
[…]
-
Page 3: Dune Duo
3 4 12 20 28 36 44 52 60 68 T able of Contents T able of Contents English Quick Start Guide Français Guide de démarrage rapide Deutsch Anweisung für einen schnellen Start Nederlands Snel Start Gids Español Guía de instalación rápida Italiano Guida Rapida Ру сский Кра ткое руково дство У країнська Коро ?[…]
-
Page 4: Dune Duo
4 Dune HD Duo Quick Start Guide Dune HD Duo is an all-in-one solution for up to Full HD (1080p) video playback. Key Features ● The newest Sigma Designs 8642/8643 media processor: enjoy excellent playback and performance of interactive features. ● HDD player: connect an HDD to the player and play content directly from the HDD. ● Network player[…]
-
Page 5: Dune Duo
5 Extra Functions ● High-quality music playback: play very high-quality (up to 192 Khz / 24-bit) music files in various formats (FLAC, Monkey’s Audio APE, W A V/PCM, DTS, etc). ● Playlists: build playlists from your folders, use your own playlists, use repeat and shuffle functions. ● NAS function: access files on storage devices (HDD, optic[…]
-
Page 6: Dune Duo
6 Dune HD Duo Quick Start Guide Package Contents 1. Dune HD Duo media player 2. Remote control (batteries may not be included) 1 4 NOTE: Additional items (optional) may be included into the package, depending on player configuration, region, and distributor . Exterior Front view Rear view 1. On/off button 2. LED indicator 3. HDD rack A 4. Display 5[…]
-
Page 7: Dune Duo
7 English 1. Command indicator — fl ashes in response to RC button pressing. 2. EJECT — open/close the optical drive tray . MUTE — turn the sound on/off. MODE — switch the video output mode; control some other player functions. POWER — toggle the standby mode. 3. A (Red), B (Green), C (Y ellow), D (Blue) — access Blu-ray disc features;[…]
-
Page 8: Dune Duo
8 Dune HD Duo Quick Start Guide Getting Started Remove the transparent protecting film from the front panel of the player to ensure good look of the player . Ensure there is enough space around the player for proper cooling. The space at each side should be not less than 10 cm. Ensure the RC has batteries installed. Connect the player to your TV an[…]
-
Page 9: Dune Duo
9 English Connecting USB Drives T o connect a USB drive, ensure you are on the main screen of the player menu and connect the USB drive to an USB port of the player . The player will recognize the USB drive, and will show an item corresponding to the USB drive on the main screen. When connecting a USB drive requiring signi fi cant power (such as U[…]
-
Page 10: Dune Duo
10 Dune HD Duo Quick Start Guide Switching the Player On and Of f T o switch on the player , ensure the power switch on the rear panel is in “on” state, and press the “POWER” RC button or the “on/off” button on the front panel. T o put the player into the standby mode, press the “POWER” RC button or the “on/off” button on the fr[…]
-
Page 11: Dune Duo
11 English Please check here for more detailed and up-to-date documentation and information on player usage: http://dune-hd.com/manuals/ http://dune-hd.com/support/ Support for Extension Boards The Dune HD Duo player is equipped with two extension slots located at the rear panel of the player . Additional information is available on the Internet si[…]
-
Page 12: Dune Duo
12 Dune HD Duo Quick Start Guide Introduction La Dune Duo est une solution tout-en-un pour la lecture vidéo en Full HD 1080p . Caractéristiques principales ● Nouvelle puce media Sigma Designs 8642/8643: pour une excellente lecture des contenus interactifs. ● Lecteur Disque Dur: connectez un Disque Dur au lecteur et lisez directement son conte[…]
-
Page 13: Dune Duo
13 Fonctions supplémentaires ● Lecture musicale de haute qualité: lecture de fichiers musicaux (jusqu’en 192Khz /24-bit) sous divers formats (FLAC, Monkey’s Audio APE, W A V/PCM, DTS, etc). ● Listes de lecture: Créez des listes de lecture depuis vos dossiers, jouez vos propres listes de lecture, avec fonctions répéter et aléatoire. ?[…]
-
Page 14: Dune Duo
14 Dune HD Duo Quick Start Guide Contenu de la boîte 1. Platine multimédia Dune HD Duo 2. Télécommande (Piles non incluses) 1 4 NOTE: Des accessoires supplémentaires (optionnels) peuvent être inclus dans la boîte en fonction du pays, du distributeur et de la configuration du lecteur . V ues extérieures Face avant Panneau arrière 1. Bouton […]
-
Page 15: Dune Duo
15 Français Télécommande 1. Indicateur de commande — clignote en réponse à la pression de touches sur la télécommande. 2. EJECT — ouverture/fermeture du tiroir du lecteur optique. MUTE — Mise en sourdine du son. MODE — Changement de sortie vidéo; peut s’appliquer à d’autres fonctions du lecteur . POWER — mise en veille du lec[…]
-
Page 16: Dune Duo
16 Dune HD Duo Quick Start Guide Démarrage Retirez le film transparent protecteur de la façade avant du lecteur . Pour la bonne marche du lecteur , assurez-vous d’avoir au moins 10cm d’espace libre de chaque coté du lecteur . Assurez-vous que les piles sont installées dans la télécommande. Connectez le lecteur à votre téléviseur ou à […]
-
Page 17: Dune Duo
17 Connexion de périphériques USB Pour brancher un périphérique USB, assurez-vous d’être sur le menu principal du lecteur et de le con- necter sur l’un des ports USB. Le lecteur va reconnaitre le périphérique USB qui sera symbolisé par une icône sur le menu principal. Lorsqu’un périphérique USB nécessite une alimentation conséque[…]
-
Page 18: Dune Duo
18 Dune HD Duo Quick Start Guide Allumage et extinction du lecteur Pour allumer le lecteur , assurez-vous que l’interrupteur situé sur le panneau arrière est sur la position ‘’ON’’ et appuyez sur la touche ‘’POWER’’ sur la télécommande ou le bouton ‘’ON/OFF’ ’ situé sur la face avant du lecteur . Pour mettre le lecteu[…]
-
Page 19: Dune Duo
19 Mise à jour du lecteur et informations complémentaires Pour rechercher les dernières mises à jour firmware du lecteur (pouvant améliorer le fonctionnement du lecteur et étendre ses capacités), rendez-vous à l’adresse suivante: http://dune-hd.com/firmware/. Note: V ous pouvez également relier le lecteur à Internet afin d’effectuer l[…]
-
Page 20: Dune Duo
20 Dune HD Duo Quick Start Guide Einleitung Der Dune HD Duo ist die umfassende Lösung für volle HD (1080p) Videowiedergabe. Haupteigenschaften ● Modernster Sigma Designs 8642/8643 Prozessor: Gewährleistet eine perfekte Wiedergabe und eine hohe Arbeitsgeschwindigkeit mit interaktiven Möglichkeiten. ● Wiedergabe von der optionalen Festplatte:[…]
-
Page 21: Dune Duo
21 Zusatzfunktionen ● Wiedergabe von Audo-Dateien mit höchster Qualität: Bis 192 kHz/ 24-bit, in Formaten FLAC, Monkey’s Audio APE, W A V/PCM, DTS und anderen. ● Abspiellisten: Formierung von Abspiellisten aus den Dateien, Benutzung von eigenen Abspiellisten, Wiederhohlfunktion und zufällige Wiedergabe. ● NAS-Funktion: Zugang zu den Date[…]
-
Page 22: Dune Duo
22 Dune HD Duo Quick Start Guide Packungsinhalt 1. Abspielgerät Dune HD Duo 2. Fernbedienung (Batterien könnten im Lieferumfang nicht vorhanden sein) 1 4 BEMERKUNG: Andere optionale Zubehörteile können sich je nach Konfiguration des Abspielgerätes, der Region und des Distributors im Lieferumfang befinden Aussenansicht V orderansicht: Rückseit[…]
-
Page 23: Dune Duo
23 1. Funktionsanzeige – blinkt nach Druck auf beliebige T aste 2. EJECT — Öffnet/Schließt die Laufwerksschublade MUTE — Aus- schalten und Einschalten des T ones MODE — Umschalten des Video-Ausgangs sowie Steuerung einiger anderen Funktionen des Abspielgerätes POWER — Ein / Ausschalten und Standby 3. A (rot), B (grün), C (gelb), D (bl[…]
-
Page 24: Dune Duo
24 Dune HD Duo Quick Start Guide Betrieb Entfernen Sie die durchsichtige Schutzfolie von der Front des Abspielgerätes Vergewissern Sie sich, dass um das Abspeilgerät herum ausreichend Platz ist, um eine sichere Belüftung zu gewährleisten. Der Abstand sollte von jeder Seite nicht weniger als 10 cm betragen. V ergewissern Sie sich, dass Batterien[…]
-
Page 25: Dune Duo
25 Anschluss von USB-Speichern V or dem Anschluss eines USB-Speichers vergewissern Sie sich bitte, dass Sie sich auf dem Hauptbild- schirm des Gerätemenüs be fi nden. Schließen Sie den USB-Speicher an einen der USB-Ports an. Das Abspielgerät erkennt den Speicher automatisch und zeigt ein dem USB-Speicher entsprechendes Symbol auf dem Hauptbild[…]
-
Page 26: Dune Duo
26 Dune HD Duo Quick Start Guide V erbinden mit Netzwerklaufwerken V or der Verbindung zu einem Netzwerklaufwerk vergewissern Sie sich bitte, dass Sie sich auf dem Hauptbild- schirm des Gerätemenüs befinden, drücken Sie auf den Knopf „MENU“ der Fernbedienung und wählen Sie den Punkt „Netzdatei schaffen“ aus. T ragen Sie die erforderlich[…]
-
Page 27: Dune Duo
27 WiFi Für einen Anschluss des Abspielgerätes an ein drahtloses (WiFi) lokales Netz kann man einen USB WiFi- Adapter benutzen, welcher mit über einen freien USB Steckplatz angeschlossen wird. Eine ausführliche Information über die unterstützten USB WiFi-Adapter könnten Sie auf der folgenden Seite bekommen: http://dune-hd.com/support/hw_comp[…]
-
Page 28: Dune Duo
28 Dune HD Duo Quick Start Guide Introductie De Dune HD Duo is een alles-in-één oplossing om tot en met Full HD (1080p) video bestanden af te kunnen spelen. Belangrijkste kenmerken ● De nieuwste Sigma Designs 8642/8643 media processor: Deze krachtige processor zorgt voor het ultieme home entertainment genot. ● HDD speler: Sluit een externe Ha[…]
-
Page 29: Dune Duo
29 Extra Functionaliteiten ● Hoge kwaliteit muziek afspeelbaarheid: Speel erg hoge kwaliteit (tot en met192 Khz / 24-bit) musiek bestanden in diverse formaten (FLAC, Monkey’s Audio APE, W A V/PCM, DTS, etc). ● Playlists: genereer playlists uit folders, gebruik eigen playlists, gebruik herhaal en shuffle functies. ● NAS functie: Benader best[…]
-
Page 30: Dune Duo
30 Dune HD Duo Quick Start Guide Inhoud van de verpakking* 1. Dune HD Duo media speler 2. Afstandsbediening (Batterijen mogelijk inbegrepen) 1 4 * Additionele zaken kunnen afhankelijk van de configuratie en distributeur bijgelverd zijn. Aanblik/Buitenkant V oor aanzicht Achter aanzicht 1. Aan/uit knop 2. LED indicator 3. HDD rack A 4. Display 5. EJ[…]
-
Page 31: Dune Duo
31 1. Commando indicator — knippert in reactie als er op een knop van de afstandsbediening gedrukt word. 2. EJECT — open/sluit de optische drive. MUTE — Zet het geluid AAN/UIT . MODE — Schakel tussen TV modus, bedien sommige andere functionaliteiten. POWER — zet in of haal uit stand-by modus. 3. A (Rood), B (Groen), C (Geel), D (Blauw) — […]
-
Page 32: Dune Duo
32 Dune HD Duo Quick Start Guide Eerste gebruik ● V erwijder de transparante beschermende film vanaf het frontpaneel. ● Zorg ervoor dat er genoeg ruimte rondom de speler is voor een goede koeling. De ruimte aan elke kant moet niet minder dan 10 cm bedragen. ● Zorg ervoor dat de afstandsbediening batterijen bevat. ● Sluit de speler aan op uw[…]
-
Page 33: Dune Duo
33 Aansluiten van USB-drives V oor het afspelen van een optische schijf, zorgt u ervoor dat u in het hoofdscherm van de speler staat en sluit u de USB-drive op een vrije USB-poort van de speler aan. De speler herkent het USB-station, en zal de USB drive op het hoofdscherm tonen. Bij het aansluiten van een USB-drive die aanzienlijke capaciteit heeft[…]
-
Page 34: Dune Duo
34 Dune HD Duo Quick Start Guide Afhankelijk van de instellingen van de speler zal de “hardware standby” of “soft-standby” — modus worden gebruikt. In de “hardware standby” modus, zal de speler bijna compleetpower-uitgaan en gebruikt nage- noeg geen stroom. In de “software standby” modus zal de speler alleen geen signaal op de vid[…]
-
Page 35: Dune Duo
35 Ondersteuning voor uitbreiding boards De Dune HD Duo-speler is uitgerust met twee uitbreiding sloten, welke zich aan de achterzijde bevinden. Aanvullende informatie is beschikbaar op de internet site http://www .dune-hd.com Ondersteuning voor uitbreidingsmodulles De functies van Dune HD Duo-speler kan worden uitgebreid met uitbreidingsmodules va[…]
-
Page 36: Dune Duo
36 Dune HD Duo Quick Start Guide Introducción Dune HD Duo es la solución todo en uno, con una reproducción de video Full HD (1080p). Características principales ● El nuevo procesador Sigma Designs 8642/8643: disfrute de la reproducción y un excelente rendimiento con funciones interactivas. ● Reproducción desde el disco duro: conecte un di[…]
-
Page 37: Dune Duo
37 Funciones adicionales ● Reproducción de música en alta calidad: reproducción en muy alta calidad (hasta 192 Khz / 24-bit) archivos de música en varios formatos (FLAC, APE Monkey’s Audio, W A V / PCM, DTS, etc). ● Listas de reproducción: construye listas de reproducción a partir de tus carpetas, utiliza tus propias listas, repita el u[…]
-
Page 38: Dune Duo
38 Dune HD Duo Quick Start Guide Contenido del paquete 1. Reproductor Dune HD Duo 2. Mando a distancia (pilas no incluidas) 1 4 NOT A: Los accesorios opcionales pueden ser incluidos en el paquete, dependiendo de la configuración del reproductor , de la región, y del distribuidor. Exterior V ista frontal V ista trasera 1. Botón ON/OFF 2. Indicado[…]
-
Page 39: Dune Duo
39 Español 1. Indicador de comandos — parpadea en respuesta a la presión del botón RC 2. EJECT — abrir / cerrar la bandeja de la unidad óptica. MUTE – desactiva el sonido de encendido / apagado. MODE – cambiar el modo de salida de video, el control de algunas funciones de otro reproductor . POWER – cambiar el modo de espera. 3. A (roj[…]
-
Page 40: Dune Duo
40 Dune HD Duo Quick Start Guide Primeros pasos Retire la película transparente que protege el panel frontal del reproductor para garantizar buen aspecto del reproductor . Asegúrese de que haya suficiente espacio alrededor del reproductor para una refrigeración adecuada. El espacio a cada lado no deberá ser inferior a 10 cm. Asegúrese de que a[…]
-
Page 41: Dune Duo
41 Español Conexión de las unidades USB Para conectar una unidad USB, asegúrese de que está en la pantalla principal del menú del reproductor y conecte la unidad USB a un puerto USB del reproductor . El reproductor reconocerá la unidad USB, y mostrara el icono que corresponde a la unidad USB en la pantalla principal. Al conectar una unidad US[…]
-
Page 42: Dune Duo
42 Dune HD Duo Quick Start Guide Encendido y apagado del reproductor Para encender el reproductor , asegúrese de el interruptor de encendido en el panel trasero está en «I», y pulse la tecla «Power» del mando a distancia o el «botón on / off» en el panel frontal. Para poner el reproductor en el modo standby , pulse la tecla «Power» del m[…]
-
Page 43: Dune Duo
43 Español Actualización de su reproductor Por favor , pinche aquí para obtener versiones actualizadas del firmware del reproductor (puede mejorar el funcionamiento del reproductor y ampliar sus posibilidades): http://dune-hd.com/ fi rmware/ ( NOT A: T ambién puede conectar el reproductor a Internet y utilizar la función de actualización del[…]
-
Page 44: Dune Duo
44 Dune HD Duo Quick Start Guide Introduzione Dune HD Duo è una soluzione tutto-in-uno per la riproduzione di video Full HD (1080p) . Caratteristiche principali ● Il nuovo processore Sigma Designs 8642/8643: godrai di un’eccellente riproduzione e ottime performance nelle caratteristiche interattive. ● HDD player: connetti un HDD al player e […]
-
Page 45: Dune Duo
45 Funzioni Extra ● Riproduzione di file musicali di alta qualità: riproduzione ad alta qualità (fino a 192 kHz / 24-bit) di file musicali in vari formati (FLAC, Monkey’s Audio APE, W A V/PCM, DTS, etc). ● Playlist: costruisci liste di brani dalle cartelle, utilizza la tua playlist, usa le funzioni di ripetizione e riproduzione casuale ● […]
-
Page 46: Dune Duo
46 Dune HD Duo Quick Start Guide Contenuto della confezione 1. Dune HD Duo media player 2. T elecomando (le batterie possono non essere incluse) 1 4 NOT A: componenti addizionali (opzionali) possono essere inclusi nella confezioni a seconda della configurazione del player , della regione e del distributore. Esterno V ista frontale V ista posteriore[…]
-
Page 47: Dune Duo
47 Italiano 1. Indicatore di comando — lampeggia in risposta alla pressione di un comando. 2. EJECT — apre/chiude il vano del lettore dischi. MUTE — toglie l’audio. MODE — cambia la modalità video in uscita; controlla qualche altra funzione del player . POWER — mette in standby . 3. A (Rosso), B (V erde), C (Giallo), D (Blu) — accede[…]
-
Page 48: Dune Duo
48 Dune HD Duo Quick Start Guide Guida Iniziale Rimuovi il film protettivo trasparente dal pannello frontale per dare un buon aspetto al player . Assicurati che ci sia abbastanza spazio attorno al player per un raffreddamento ottimale. Lo spazio libero per ciascun lato non deve essere meno di 10 cm. Assicurati che il telecomando abbia le batterie i[…]
-
Page 49: Dune Duo
49 Connettere Periferiche USB Per connettere periferiche USB, assicurati di essere nella schermata principale del menu e connetti la periferica USB in una delle porte USB del player . Il player riconoscerà tale periferica e mostrerà l’icona corrispondente alla periferica USB nella schermata principale. Quando connetti una periferica USB che ric[…]
-
Page 50: Dune Duo
50 Dune HD Duo Quick Start Guide Spegnere e Accendere il player Per accendere il player assicurati di aver posizionato su On l’interruttore sul retro e premi il tasto sul tele- comando “POWER” o il tasto “on/off” sul pannello frontale. Per mettere il player in modalità standby , premi il tasto “POWER” sul telecomando o il tasto “on[…]
-
Page 51: Dune Duo
51 Aggiornare il tuo Player e Ottenere Maggiori Informazioni Prego controllare qui per versioni aggiornate del fi rmware (le quali possono migliorare il funzionamento o estendere le funzionalità del player): http://dune-hd.com/ fi rmware/ (Nota: puoi anche connetter il player a Internet e usare la funzione di aggiornamento fi rmware online, ved[…]
-
Page 52: Dune Duo
52 Dune HD Duo Quick Start Guide Вве дение Dune HD Duo предст авляе т собой решение « вс е — в — одном » для воспроизве дения видео вплоть до Full HD (1080p). Основные особенности ● Новейший процессор Sigma Designs 8642/8643: обеспе[…]
-
Page 53: Dune Duo
53 Дополнит е льные функции ● Воспроизв едение ау диофайлов с наивысшим качеств ом : до 192 КГц / 24- бит , в форматах FLAC, Monkey’s Audio APE, W A V/PCM, DTS и других . ● Плейлисты : соз дание плейлистов из папок , и?[…]
-
Page 54: Dune Duo
54 Dune HD Duo Quick Start Guide Со держимое коробки 1. Проигрыва те ль Dune HD Duo 2. Пуль т управления ( ба т арейки могут не вхо дить в комплект ) 4 Внешний вид Вид спере ди : Вид сзади : 1. Кнопка вк лючения / выклю че?[…]
-
Page 55: Dune Duo
55 Русский 1 . Индикат ор команды — мигае т в от вет на нажа тия кнопок пуль та . 2. EJECT — открытие / закрытие лотка оптического привода . MUTE — выклю чение и вклю чение зв ука . MODE — переклю — чение ре?[…]
-
Page 56: Dune Duo
56 Dune HD Duo Quick Start Guide На чало рабо ты У далите прозрачную защитную пленк у с пере дней панели проигрыва те ля для получения хорошего внеш — него вида . Уб едит есь , что в округ проигрыва т е ля доста[…]
-
Page 57: Dune Duo
57 Русский По дклю чение USB- накопите лей Для подклю чения USB- накопите ля убе дитесь , что вы находит есь на главном экране меню прои — грыва те ля , и подключите USB- накопите ль к одному из USB- порт о[…]
-
Page 58: Dune Duo
58 Dune HD Duo Quick Start Guide Включение и выклю чение проигрыв а т е ля Для вклю чения проигрыв ат е ля , у бедит есь , что выключа те ль питания на задней пане ли находится в состоянии « включено », и нажмит?[…]
-
Page 59: Dune Duo
59 Русский Обнов ление плеера и доп . информация Пожалуйста , проверяйт е дост упность обновления программног о обеспе чения проигрывате ля (« про — шивки ») на следующей интерне т — страниц е ( эт[…]
-
Page 60: Dune Duo
60 Dune HD Duo Quick Start Guide Вве дення Dune HD Duo – це “ все в одному ” пристрій для відтворення відео до якості Full HD (1080p). Основні характеристики ● Новітній Sigma Designs 8642/8643 медіапроцесор : насоло джуйтесь від[…]
-
Page 61: Dune Duo
61 Дода тк ові функції ● Високоякісне відтворення музики : відтворюйте музичні файли дуже висок ої як ості ( до 192 кГц / 24 біт ) в різних формат ах (FLAC, Monkey’s Audio APE, W A V/PCM, DTS і т . д .). ● Плейлісти : ств[…]
-
Page 62: Dune Duo
62 Dune HD Duo Quick Start Guide Комплект поставки 1. Dune HD Duo media player 2. Пуль т дистанційного керування ( б а тареї можуть не бути вклю чені в комплект ) 1 4 ПРИМІТКА : Д ода ткові елементи ( опціональні ) можуть бут?[…]
-
Page 63: Dune Duo
63 У країнська 1. Командний індик ат ор — б лимає у відповідь на натискання кнопки ПДК . 2. EJECT — відкрити / закрити ло то к оптичного приводу . MUTE — ввімкнення / вимикання зв уку . MODE — переключити режи?[…]
-
Page 64: Dune Duo
64 Dune HD Duo Quick Start Guide Приступаючи до робо ти Забе зпе чіть доста тнє місце навко ло програвача для належног о охо ло дження . Простору з кожног о боку повинно бути не менше 10 см . Впевніться , що ПДК […]
-
Page 65: Dune Duo
65 Підключення USB- накопичува чів Для підк лючення USB- диска , переконайтеся , що Ви на г о ловному екрані меню програва ча і USB- диск підключений до USB- порту прогава ча . Програвач розпізнає накопи[…]
-
Page 66: Dune Duo
66 Dune HD Duo Quick Start Guide Вмикання та Вимик ання Прогрова ча Щоб увімкнути програвач , переконайтеся , що вимик ач живлення на задній панелі перебуває у ввімкнутому стані , і на тисніть кнопку пуль та […]
-
Page 67: Dune Duo
67 Онов лення Програва ча і Отримання Де т альнішої Інформації Будь ласка , перевірте тут оновлені версії прошивки програвача ( які можуть покращити функціонув ання і розширити можлив ості про[…]
-
Page 68: Dune Duo
68 Dune HD Duo Quick Start Guide Wst ę p Dune HD Duo jest uniwersalnym odtwarzaczem plików wideo FullHD (do 1080p), zdj ęć i muzyki, wyposa ż onym w kiesze ń szybkiej instalacji dysku twardego. G ł ówne cechy ● Najnowszy procesor multimedialny Sigma Designs 8642/8643: ciesz si ę doskona łą jako ś ci ą i wydajno ś ci ą wykorzystuj ?[…]
-
Page 69: Dune Duo
69 Funkcje dodatkowe ● Odtwarzania muzyki wysokiej jako ś ci: odtwarzanie utworów muzycznych bardzo wysokiej jako ś ci (do 192 kHz / 24-bit) w ró ż nych formatach (FLAC, Monkey’s Audio APE, W A V/PCM, DTS, itd). ● Listy odtwarzania: odtwarzaj foldery jak playlist ę , korzystaj z w ł asnych list odtwarzania, wykorzystuj funkcje losowani[…]
-
Page 70: Dune Duo
70 Dune HD Duo Quick Start Guide Zawarto ść zestawu 1. Odtwarzacz Dune HD Duo 2. Pilot (baterie nie s ą za łą czone) 1 4 UW AGA: Dodatkowe przedmioty (opcjonalne) mog ą zosta ć do łą czone do zestawu, w zale ż no ś ci od konfiguracji odtwarzacza, regionu i dystrybutora. Obudowa Widok panelu przedniego Widok z łą cz 1. Przycisk ON/OFF ([…]
-
Page 71: Dune Duo
71 Polski 1. Dioda sygnalizuj ą ca wysy ł anie przez pilota sygna ł ów steruj ą cych do odtwarzacza 2. EJECT — otwiera i zamyka szuflad ę nap ę du optycznego, MUTE — wy łą cza lub w łą cza d ź wi ę k, MODE — prze łą cza tryby wideo i kontroluje inne funkcje odtwarzacza, POWER — prze łą cza odtwarzacz w tryb Stand-by i wybudza urz ?[…]
-
Page 72: Dune Duo
72 Dune HD Duo Quick Start Guide Pierwsze uruchomienie Usu ń prze ź roczyst ą foli ę ochronn ą z panelu przedniego odtwarzacza, aby zapewni ć jego estetyczny wygl ą d. Upewnij si ę , ż e wokó ł odtwarzacza znajduje si ę wystarczaj ą co du ż o miejsca, aby zapewni ć jego prawid ł owe ch ł odzenie. Odtwarzacz powinien mie ć co najmn[…]
-
Page 73: Dune Duo
73 Pod łą czanie pami ę ci USB Aby pod łą czy ć pami ęć USB, przejd ź do menu g ł ównego, a nast ę pnie pod łą cz pami ęć do portu USB. Odt- warzacz rozpozna pami ęć i wy ś wietli odpowiedni ą pozycj ę na ekranie g ł ównym. Pod łą czaj ą c pami ę ci USB maj ą ce wi ę ksze zapotrzebowanie energetyczne (np. dyski twarde U[…]
-
Page 74: Dune Duo
74 Dune HD Duo Quick Start Guide UW AGA: U ż ytkowanie dysków , sformatowanych przez odtwarzacz, na komputerze z systemem Win- dows, mo ż liwe jest po zainstalowaniu dodatkowego oprogramowania takiego jak “EXT2FSD” (http://www . ext2fsd.com/). W łą czanie i wy łą czanie odtwarzacza Aby w łą czy ć odtwarzacz, upewnij si ę , ż e prze […]
-
Page 75: Dune Duo
75 Aktualizacja oprogramowania oraz informacje doda- tkowe Nowe wersje firmware dost ę pne s ą pod adresem: http://dune-hd.com/ fi rmware/ Oprogramowanie mo ż e poprawi ć funkcjonowanie i rozszerzy ć mo ż liwo ś ci odtwarzacza. (Uwaga: Mo ż esz równie ż pod łą czy ć odtwarzacz do sieci internet i skorzysta ć z funkcji aktualizacji fi[…]
-
Page 76: Dune Duo
www .Dune-HD.com[…]
2
DUNE HD DUO 4K
Введение
Dune HD Duo 4K — это полноразмерный 4K сетевой медиаплеер, базирую-
щийся на знаменитом Hi-End чипе SMP8758 от Sigma Designs, с профес-
сиональным качеством изображения, аудиофильскими функциями, про-
двинутым функционалом медиаплеера, расширенными возможностями
подключения и интеграции, поддержкой Умного Дома.
Он оснащен двумя отсеками для жестких дисков формата 3.5” SATA с воз-
можностью горячей замены, каждый с поддержкой жестких дисков объе-
мом до 10ТБ+, тремя USB портами, слотом для карт памяти SD, 1Гбит
Ethernet, двухдиапазонным Wi-Fi 802.11ac 2T2R, встроенным DVB-T/T2/C
тюнером (в не-US версии), встроенным контроллером Z-Wave.
Дополнительно, Dune HD Duo 4K имеет спектр продвинутых аудиофиль-
ских функций, включая знаменитый звуковой процессор (ЦАП) ESS
SABRE32 Reference DAC (ES9018K2M), балансные XLR стерео аудиовы-
ходы, S/PDIF аудиовход.
Этот медиаплеер устанавливает совершенно новый стандарт домашних
развлечений. Он поддерживает большинство цифровых аудио и видео
форматов, включая наиболее современный видеокодек HEVC с поддерж-
кой одного миллиарда цветов (10-битовое кодирования цвета), все со-
временные стандарты 3D видео, такие, как MVC, Side-by-Side и Top-and-
Bottom, аудиофильский HD звук высокого разрешения вплоть до 24-бит /
192 КГц и Super Audio CD вплоть до DSD512, и т.п.
Основные особенности
• Hi-End медиапроцессор: Чип Sigma Designs SMP8758 от знаменитого
производителя Hi-End медиапроцессоров, с новым ARM-процессором с
двумя ядрами (в 4 раза больше мощности, чем ранее)
• Воспроизведение 4K видео: Декодирование 4K контента в различных
популярных форматах (включая H.265 10-bit) (до 4Kp30)
• Вывод 4K видео: Вывод 4K контента с пиксель-в-пиксель точностью
на 4K ТВ
• Преобразование SD/HD в 4K: Автоматическое увеличение разреше-
-
Страница 1
HD Network A Digital Signage Solution User Guide 2013-04-29[…]
-
Страница 2
2 © 2013 Dune HD. All rights reserved. Legal Note Dune HD and Dune HD Network are trademarks or r egistered trademarks of Dune HD GmbH, Germany. Java an d all Java-ba sed marks are trade marks or regist ered trademarks of Oracle and/or its affiliates. Micr osoft, Windows and all Windows-based marks are tr ademarks or registered trademarks of Micos[…]
-
Страница 3
© 2013 Dune HD. All rights reserved. 3 Contents Introduc tion ………………………………………………………………………………………….. 4 System Co mponents ………………………………………………………………………………. 4 Capabilit ies ……………………………………………..[…]
-
Страница 4
4 © 2013 Dune HD. All rights reserved. Introduction Thank you for your interes t in Dune HD Netw ork—a flexible and powe rful Full HD Digital Signage solution , which allows automated d emonstration of a wide rang e of HD video materials (up to 1080p, includin g H.264) on monitor s, television sets, etc. The solution includes su pport for scr ol[…]
-
Страница 5
© 2013 Dune HD. All rights reserved. 5 “HDNetwork” option is purchased, all the basic player functionality remains available. Each Presenter plays video files which ar e located on its local storage —a built-in HDD or a connected USB drive (for clarity , in this manual such local storage is always referred to as HDD). The configuration of a […]
-
Страница 6
6 © 2013 Dune HD. All rights reserved. Supported Media Formats In the Digital Signage mode, the following file formats and codecs are supported: ∙ Video files: T S, M2TS, MPG, VOB, AVI , MOV, MP4, QT, ASF, WMV. ∙ Video codecs: MPEG-2, MPEG-4, DivX, Xvid, WMV9, VC1, H.264. ∙ Audio codecs: AC3 (DD), E AC3 (DD+), DTS, MPEG 1 layer 1/2/3, AAC , […]
-
Страница 7
© 2013 Dune HD. All rights reserved. 7 Automated Playback When a Presenter enters the Digit al Signage mode, it starts perfor ming the automated playback according to its co nfiguration which is stored in the configuration file on the local HDD. T he configuration, among other option s, defines a playlist and optionally a schedule which may assign[…]
-
Страница 8
8 © 2013 Dune HD. All rights reserved. Note: In case the synchronized playback for multiple devices is config ured (see a dedicated section of this manual), a black screen may be shown at the beginning of each clip fo r a necessary time period. Scrolling Text The configuration of scrolling text spec ifies a list of messages and a number of options[…]
-
Страница 9
© 2013 Dune HD. All rights reserved. 9 Attention: It is the responsibility of the conf iguration author to assure that the graphic logos will never inte rsect with the scrolling text line. Otherw ise, visual artefacts may occur. Updating Configuration File The configuration file may be updated an y time via FTP (as the Control Center application d[…]
-
Страница 10
10 © 2013 Dune HD. All rights reserved. Attention: All devices in the same group should have identical synchronizatio n settings, sche dule, playlist, and cont ents of files on the playlist. It is recommended that all devices have identical configuration files. For conveniency, the Control Center applicatio n allows to save the configuration to al[…]
-
Страница 11
© 2013 Dune HD. All rights reserved. 11 In this mode it is importan t to specify in the config uration the exact number of devices in the group. In case some device turns off, stops responding or loses the net work, all other devices in the group will w ait until the device is back on, but afte r that the lost- and-found device will continue playb[…]
-
Страница 12
12 © 2013 Dune HD. All rights reserved. I f a t i m e p e r i o d i s n o t m e n t i o n e d i n t h e s c h e d u l e , i t i s c o n s i d e r e d t h a t t h e Presenter should stay off for that period. Attention: The “off” state requested b y the schedule is a special mode of a player when the disp lay is turned off, b ut the player softw[…]
-
Страница 13
© 2013 Dune HD. All rights reserved. 13 ∙ Windows 2003 has a built-in Time Servic e which supports the NTP protocol. Please refer to Microsoft Window s docume ntation for details, e .g. http://technet.microsoft.com/en-us/library/cc773013.aspx . ∙ For other Microsoft Windows vers ions, the free NTP server from http://www.meinberg.de may be inst[…]
-
Страница 14
14 © 2013 Dune HD. All rights reserved. Usage Getting Started In order to start us ing a number of Presente rs in the Digital Sig nage mode, please assure the followi ng steps are taken (see the r est of this manual for details) for each player which is intended to be a Presenter: ∙ Install the latest fi rmware which supports Digital Signage. Pl[…]
-
Страница 15
© 2013 Dune HD. All rights reserved. 15 Note: The Setup > Applications > Digital Signage > Enabled option al lows t o show and hide the Digital Signage top-level menu item. To configure the Digital Signage mode au tomatic start, go to the player menu Setup > Applications > Digital Signage and set the Automatic start option. In the D[…]
-
Страница 16
16 © 2013 Dune HD. All rights reserved. REW Decrease the playback speed. Press PLAY to return to the normal spe ed. FWD Increase the playback spee d. Press PLAY to return to the normal spe ed. ZOOM Stretch (enlarge) the image. Each p ress sets the zoom factor from the list: 100%, 105%, 111%, 118%, 126%, 134%, 144%, 156%, 170%. This[…]
-
Страница 17
© 2013 Dune HD. All rights reserved. 17 To edit these settings, you shoul d use th e IR remote control with the Presenter. ∙ Configuration file «HDNETWORK/config.txt» on the Presenter’s HDD. This file may be accessed by FTP/SM B. The Control Center application reads/changes this file via FTP to a llow the user to view/edit Pres enter[…]
-
Страница 18
18 © 2013 Dune HD. All rights reserved. NFS encoding FTP server encoding ∙ Setup > Miscellaneous > Time Synchron ization ∙ Setup > Miscellaneous > Advanced > Remote control type Please refer to the player manual for details on these settings . Local HDD Contents The internal HDD of a Presenter is expected to have a top-level fol[…]
-
Страница 19
© 2013 Dune HD. All rights reserved. 19 Local HDD Access Each Presenter device has a local HDD, either i n t e r n a l o r , w h e n i t i s a b s e n t o r t h e device does not su pport it, a USB-connected one. The contents of this hard drive may b e accessed without having to disassem ble the Presenter device. The follo wing means are provided:[…]
-
Страница 20
20 © 2013 Dune HD. All rights reserved. To access a Presenter via SMB, open “# .#.#.#internal_hard_disk” in Windows Explorer, e.g. using “Start” menu, “Run” command, or the address bar of any opened folder. Notes: 1. The usage of specialized FTP clients (such as FileZilla ) is recommended for better performance . 2. FTP access typic[…]
-
Страница 21
© 2013 Dune HD. All rights reserved. 21 Preparing Logos Logo files should be stored in the «HD NETWORKlogos» folder of the Presenter ’s HDD, and those files should be in the special «.aai» format (proprietary to Dune HD). To prepare logo files, at first a raster im age should be created using any graphics editor. Then it sho[…]
-
Страница 22
22 © 2013 Dune HD. All rights reserved. However, there is a possibility to use transparency, moreover, a complete alpha channel support is provide d, that is, for each pixel it s transparency leve l may be specified, and not only th e fact of a transparency. If, for example, Adobe® Photos hop® is used, an image in RGB mode should be created, the[…]
-
Страница 23
© 2013 Dune HD. All rights reserved. 23 Control Center The “Dune HD Network” system comes wi th a PC application called Dune HD Network Control Center, which is able to control a number of Presenter devices on a network. This is a cross-platform app lication based on the Java technolog y, so it will run on Windows, Linux, MacOS and other ope r[…]
-
Страница 24
24 © 2013 Dune HD. All rights reserved. Device Registration and Tasks To start working with dev ices, their IP addresses shoul d be manually registered in the Control Center using the Register New Device task. The device may be later unregis tered from the list using the Delete Selected Device task. I n o r d e r t o b e a v a i l a b l e o n t h […]
-
Страница 25
© 2013 Dune HD. All rights reserved. 25 when most tasks are pe rformed, includ ing the Refresh Status… tasks. If needed, the application may be configured to automa tically update the device status in the specified intervals us ing the Configuration > Automatic Device Status Update menu. Please note that updating th e status involves download[…]
-
Страница 26
26 © 2013 Dune HD. All rights reserved. Device Configuration The corresponding tasks i n the device lis t allow to open a device configuration window which allows to view and edit all options of the device configuration file in a convenient and user-friendly way. Seve ral device windows may be opene d in parallel. Please refer to th e dedicated se[…]
-
Страница 27
© 2013 Dune HD. All rights reserved. 27 Clips This page allows to configure the playlist which may include video clips and static images, as well as so me related options. The right pane shows the playlist. The left pane offers the list of files which are located on the local HDD of the Pres enter, in the «HDNETWORK/clips» folder. This l[…]
-
Страница 28
28 © 2013 Dune HD. All rights reserved. Options: ∙ Automatically proceed to t he next image after … sec. Defines the show time for static images on the playlist. If checked, each image is shown for the specified pe riod, after which the next playlist item is activated. If not checked, each static image is sh own for an unlimited time, unless t[…]
-
Страница 29
© 2013 Dune HD. All rights reserved. 29 Scrolling Text This page offers to define the contents of the scrolling te xt and related opt ions. The left pane defines the list of messag es which is cyclically show n in the order of appearance in this list. Bu ttons below th e list allow to add, delete and re arrange messages. The right pane allows to e[…]
-
Страница 30
30 © 2013 Dune HD. All rights reserved. Options: ∙ Message separator Defines the text which is added be tween messages in the list. If empty, the messages are concatenated directly. This text may include multiple leading and trailing spaces. ∙ Text and Background groups Define colors of scrolling text font and backg round stripe, and their lev[…]
-
Страница 31
© 2013 Dune HD. All rights reserved. 31 Logos This page defines the graphic l ogos to show over the video. Either one or both logos m ay be turned on. The Logo file list shows the files located on the Presenter’s local HDD in the «HDNETWORK/logos» folder. This list i s not updated automatically , so after changing the set of files on t[…]
-
Страница 32
32 © 2013 Dune HD. All rights reserved. Options: ∙ Screen corner Defines the screen corner relative to which the logo position is calculated, called the base screen corner for the logo. ∙ Horizontal distance (min, max), Vertical distance (min, max) Defines the distance from the base scr e en corner to the nearest logo corner. 100 corresponds t[…]
-
Страница 33
© 2013 Dune HD. All rights reserved. 33 Schedule This page defines the schedule. The values shown in the screen shot d e fine the default schedule, which prescrib es using the basic config uration all the time. If a certain day of week is unche cked, the Presenter will stay in th e “off” state for this day. Otherwise , the time periods should […]
-
Страница 34
34 © 2013 Dune HD. All rights reserved. Synchronization T h i s p a g e a l l o w s t o t u r n o n t h e s y n c h r o n i z e d p l a y b a c k o f p l a y l i s t i t e m s , a n d provides necessary options. Plea se refer to the corresponding section of this manual for the conceptual description of the synchronized playback, and to the section[…]
-
Страница 35
© 2013 Dune HD. All rights reserved. 35 Misc. This page defines mi scellaneous opt ions. ∙ Lock remote control buttons If checked, the IR remote control buttons w ill be locked during the Digital Signage mode. When the buttons are lock ed, the specified s e quence of numeric buttons allows to exit the Digital Signage mode. ∙ Show technical inf[…]
-
Страница 36
36 © 2013 Dune HD. All rights reserved. Extra This page offers a text field which may be directly edited by the user. When the configuration file is loaded by the Control Center, all o ptions which were not recognized go to this page. Whe n the configuration is save d, all text written in this page is appended to the configuration file. Attention:[…]
-
Страница 37
© 2013 Dune HD. All rights reserved. 37 Programmatic Access This section provides info rmation which is helpful if manual control of Present er devices via the Control Cen ter application is not e nough for your installation. The Dune HD Network sys tem allows a customer to wr ite her own applications/scripts which interact with Presenter de vices[…]
-
Страница 38
38 © 2013 Dune HD. All rights reserved. Unicode Support The Unicode is supported for scrolling text, however, the se t of fonts included in the Presenter’s firmware may not include all the Unicode character s. Unsupported characters are displayed as “?”. The char acters from the following code pages are supported: ∙ Central European (1250)[…]
-
Страница 39
© 2013 Dune HD. All rights reserved. 39 # List options belonging to the basic configuration clip image1.png clip image 2.png # List option belonging to the «Mo» configuration config «Mo» clip video_for_monday.mpg # List options belonging to the «Mo» configuration config «Mo» message Welcome on Monday! config[…]
-
Страница 40
40 © 2013 Dune HD. All rights reserved. message message_tex t List option (may occur mu ltiple times). Defines the list of messages for scrolling text. The list of message s is cyclically shown in the order of appearance of these options. By default (if no such options are spe cified), the scroll ing text is not shown. message_text_color rrggbb (h[…]
-
Страница 41
© 2013 Dune HD. All rights reserved. 41 logo_first_corner corner (one of top-left , top-right , bottom_ left , bottom-right ; default is t op-left ) Defines the screen corner relative to which the logo position is calculated, called the base screen corner for the logo. logo_first_space_h orizontal_min percentage ( 0 .. 100 , default is 10 ) logo_f[…]
-
Страница 42
42 © 2013 Dune HD. All rights reserved. Global Options Options described in thi s section do not belong to any particular named configuration. schedule_monday schedule_exp ression (default is empty ) schedule_tuesday schedule_ex pression (default is empty) schedule_wednesday schedule_exp ression (default is empty) schedule_thursday schedule_expr e[…]
-
Страница 43
© 2013 Dune HD. All rights reserved. 43 sync_enabled flag flag ( 0 or 1 , default is 0 ) If this option is 0, the synchr onized playback is off and other sync_… options are not in effect. sync_status_info_d elay seconds seconds (decimal ≥ 1 , default is 5 ) In case waiting for other devices to report being ready for play back of next playlist […]
-
Страница 44
44 © 2013 Dune HD. All rights reserved. Defines the period the server waits for othe r devices to report being ready for playback on non-first sy nchronization phases. If a device did n ot respond during this pe riod, it is exclude d till the next synchronization phase, and other devices start playback synchr onously with each other. sync_num_devi[…]
-
Страница 45
© 2013 Dune HD. All rights reserved. 45 Troubleshooting This section describes t ypical cases of undesired/unexpected bahav ior of a Presenter, and the p ossible reasons for such behavior. Should you ever encounter a problem with Dune HD Network, please consider the options in thi s section before appl ying for customer se rvice. No Display ∙ Th[…]
-
Страница 46
46 © 2013 Dune HD. All rights reserved. ∙ The serverle ss synchronization mode is being used. I n this case the schedule is not supported, see the detailed description of synchronized playback fe ature in this manual. ∙ The three parallel activities—play list playback, scr olling text and showing graphic logos—perform configuration switch […]
-
Страница 47
© 2013 Dune HD. All rights reserved. 47 Unable to Access via Control Center, FTP, SMB ∙ The network settings are not configured prop erly in the player menu Setup > Network . ∙ The network is unavailable physically . ∙ You are using a wrong IP address . The IP address of a Presenter can be found in the player menu Setup > Information .[…]
-
Страница 48
48 © 2013 Dune HD. All rights reserved. Missing the “Digital Signage” Menu Item ∙ The Presenter has no pr oper license . The “Dune HD Network ” license should be installed. The license type may be checked in the player menu Setup > Information . ∙ The player menu Setup > Applications > Digital Signage has a setting to hide the[…]
- Техника
- Каталог техники
- HD медиаплееры
- Премиум класс
- Dune HD Duo

Обсуждение Dune HD Duo на форуме
- ROSTIK-1, 5 марта в 13:06
Новоcти о модели Dune HD Duo
- sermak, 22 декабря в 9:28
Модели, похожие на Dune HD Duo
Купить «Dune HD Duo» в Украине и России
* Самые актуальные цены на товар смотрите на сайте интернет-магазина. Стоимость доставки не учтена
** Если стоимость указана как 0 / 1 — это предзаказ или остатки модели под заказ. Цену уточняйте у продавца
Лучшая цена на модель
Пользовательские обзоры техники
Кинотеатры пользователей
Помощь. Сообщить об ошибках
Редакция портала www.hdclub.ua стремится всегда предоставить Вам максимум полезной информации о товарах, но информация от производителей не всегда достоверна и точна. Мы будем признательны Вам за помощь в поддержке актуальности информации на сайте. Если Вы заметили ошибки, опечатки или неточности в описании Dune HD Duo, пожалуйста, сообщите нам.
Все содержание портала «Все о Ultra HD, Full HD, Hi-Fi, Blu-ray, 3D и HDTV», включая идеи оформления и стиль, являются объектом авторского права.
При цитировании документа ссылка на сайт обязательна.
Полное копирование и размещение материалов HDCLUB.ua на других сайтах без письменного разрешения редакции не допускается.
Как изменить язык интерфейса?
Как изменить настройки экранной заставки?
Как установить или исправить текущее время?
Как включить или отключить автоматический переход на летнее время?
Как настроить синхронизацию времени с сервером (NTP)?
Как изменить настройки видео (видео режим) «вслепую»?
Как изменить настройки видео (видео режим) через меню?
Как изменить настройки цифрового выхода звука?
Как изменить тип сигнала на цифровом выходе (PCM/Bitstream)?
Как изменить настройку количества звуковых каналов при
декодировании звука?
Как изменить частоту дискретизации звукового сигнала на цифровых
выходах?
Как включить или отключить звук на выходе HDMI?
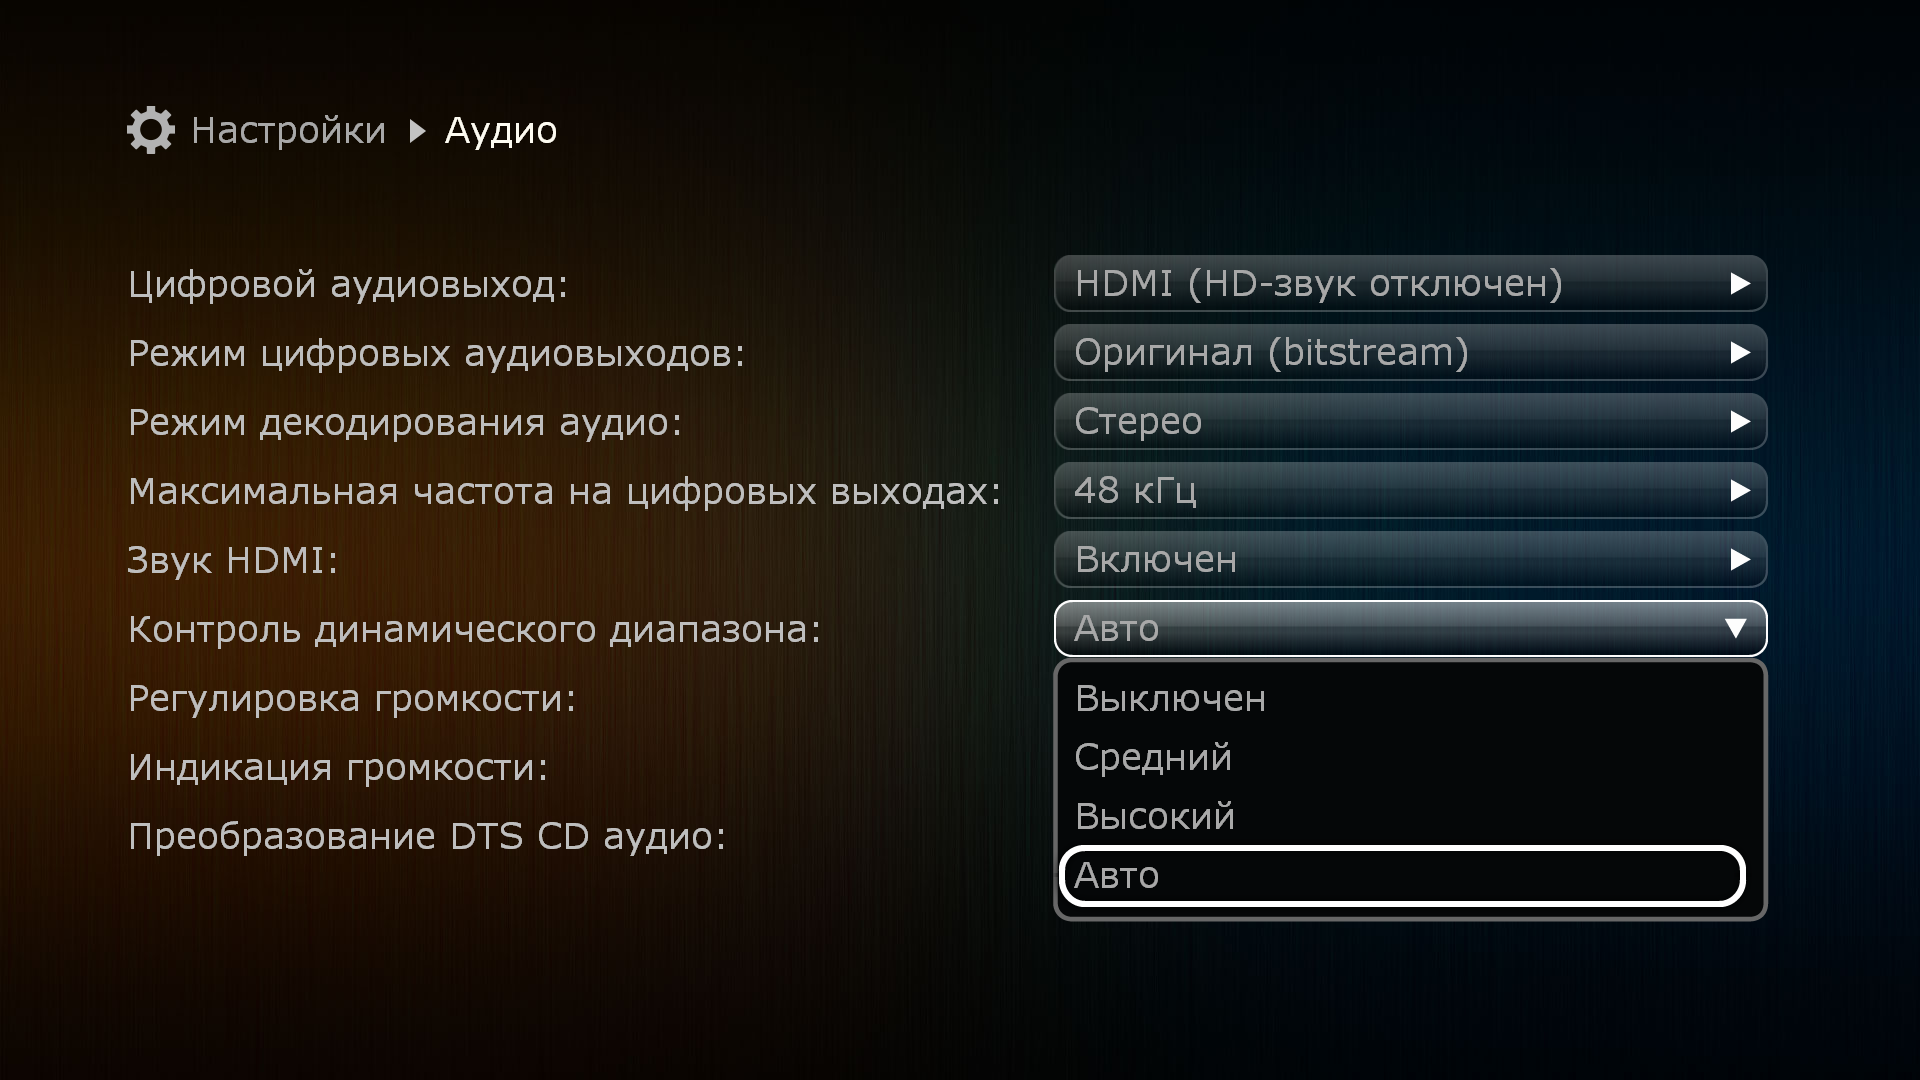
Как изменить настройки динамического диапазона (функция
сглаживания пиков громкости, «ночной режим»)?
Как изменить поведение регулятора громкости звука?
Как изменить режим отображения индикатора громкости звука?
Как изменить настройки частоты дискретизации при воспроизведении
DTS CD аудио?
Как сбросить настройки?
Как настроить сетевой доступ к папкам Windows?
Краткое руководство пользователя DUNE HD SOLO 4K
Руководство пользователя DUNE HD DUO 4K
Инструкция по настройке каналов для Neo 4K T2 и Neo 4K T2 Plus
Как пользоваться пультом дистанционного управления?
Обновление прошивок осуществляется только через встроенный в
плеер механизм онлайн-обновления по сети Интернет. При
появлении новой версии прошивки плеер автоматически предложит
обновиться или вы можете вручную проверить наличие доступной
новой версии прошивки в соответствующем разделе меню
«Настройки». Самостоятельная установка сторонних прошивок
является основанием для отказа в гарантийном ремонте.
Сервиcное обслуживание техники торговой марки Dune HD
осуществляет ООО «Дюна Электроникс». Необходимую информацию
можно получить:
![]() +7 (495) 989-26-95
+7 (495) 989-26-95
![]() support@dune.ru
support@dune.ru
![]() Сообщество Dune HD ВКонтакте
Сообщество Dune HD ВКонтакте
![]() пн-пт с 10:00 до 18:00
пн-пт с 10:00 до 18:00
![]() Москва, ул. Алабяна д.13, корп.1, этаж 3
Москва, ул. Алабяна д.13, корп.1, этаж 3
Для того, чтобы изменить язык интерфейса, необходимо:
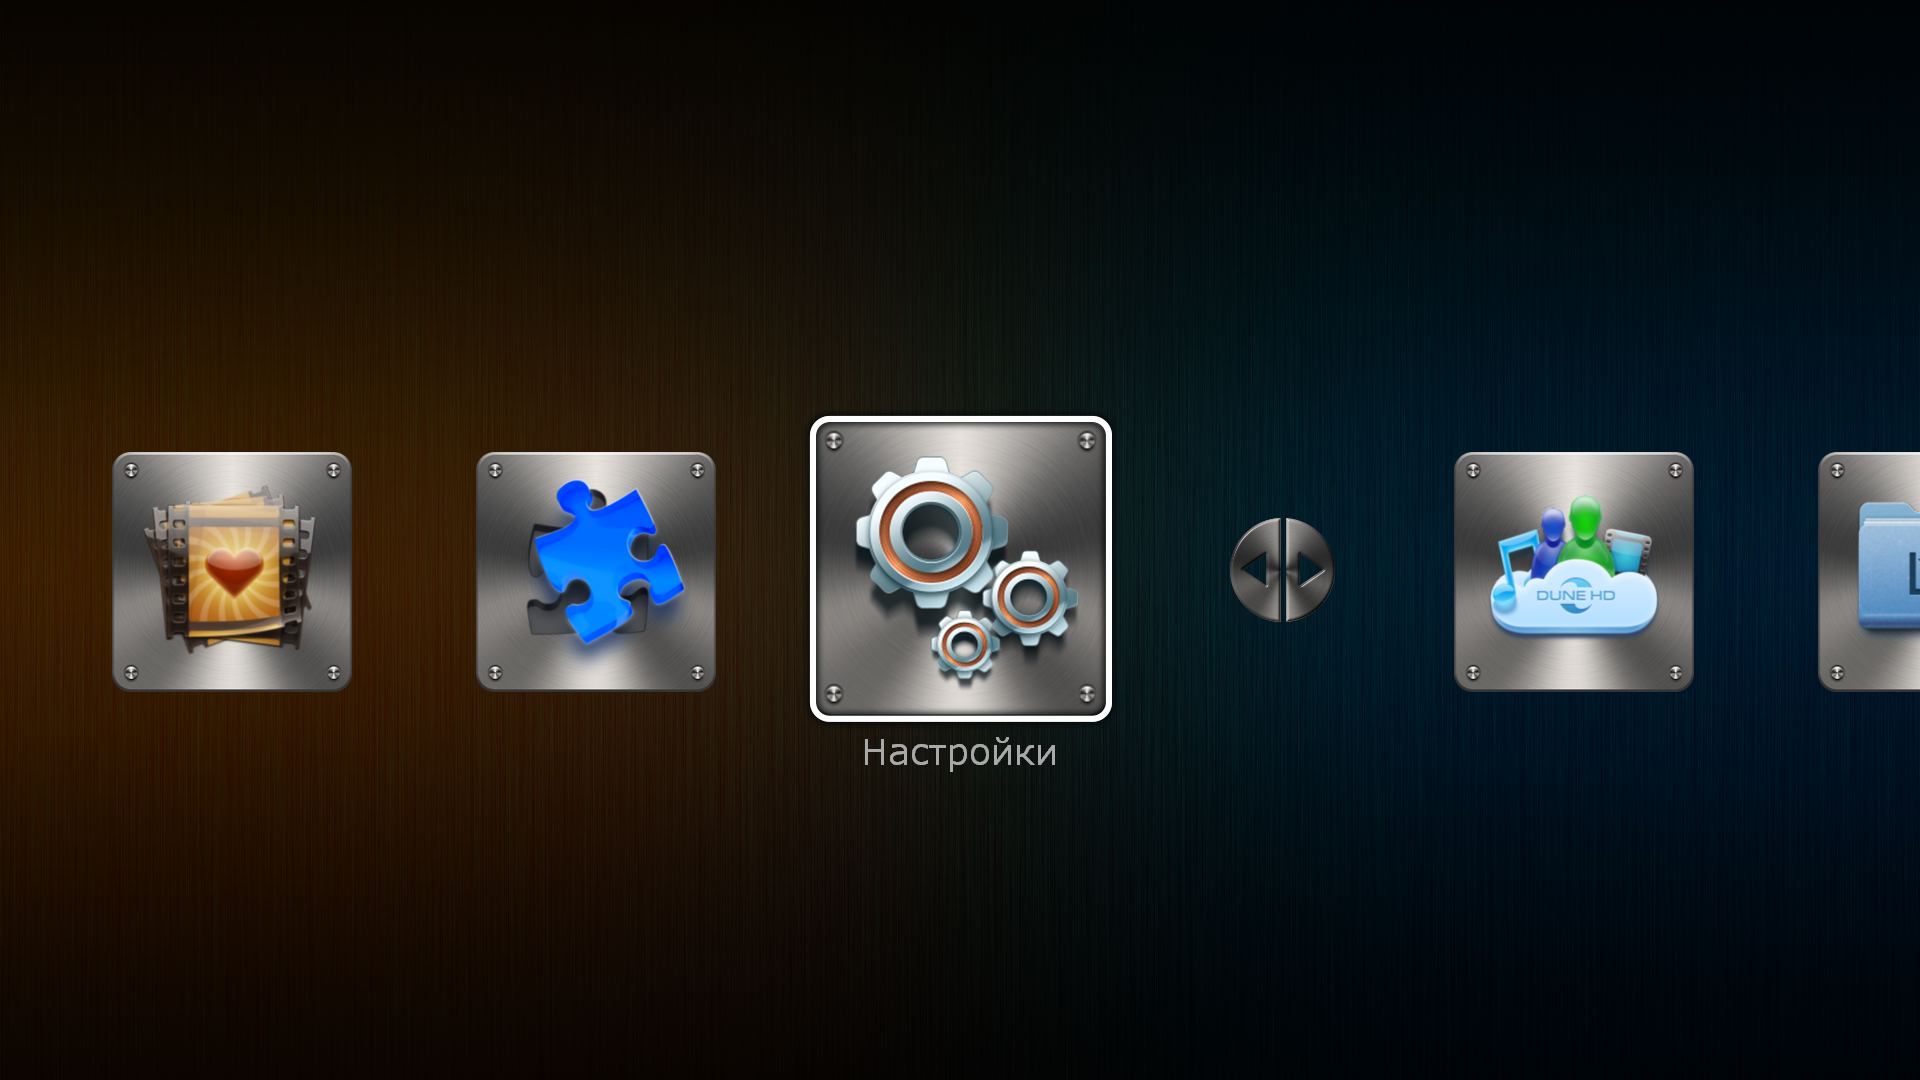
В меню верхнего уровня выбрать раздел «Настройки».
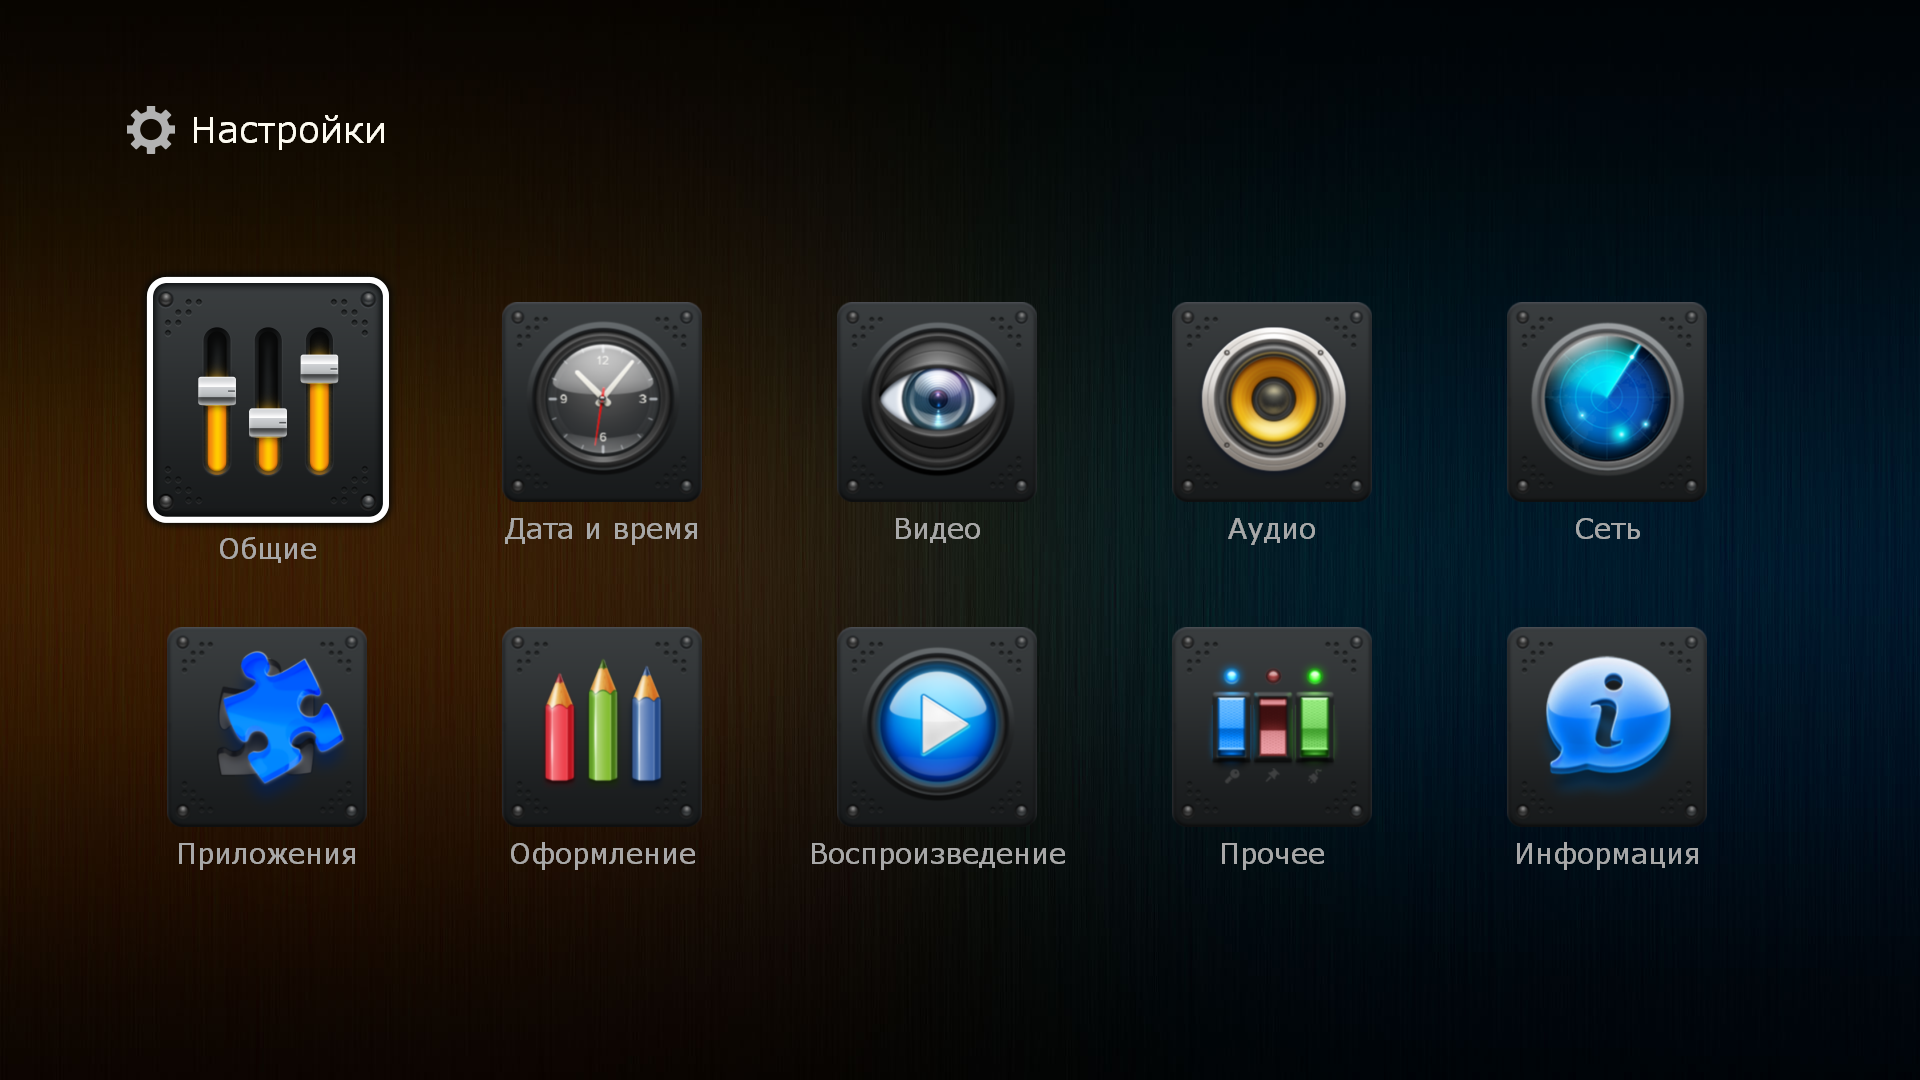
В разделе «Настройки» выбрать подраздел «Общие».
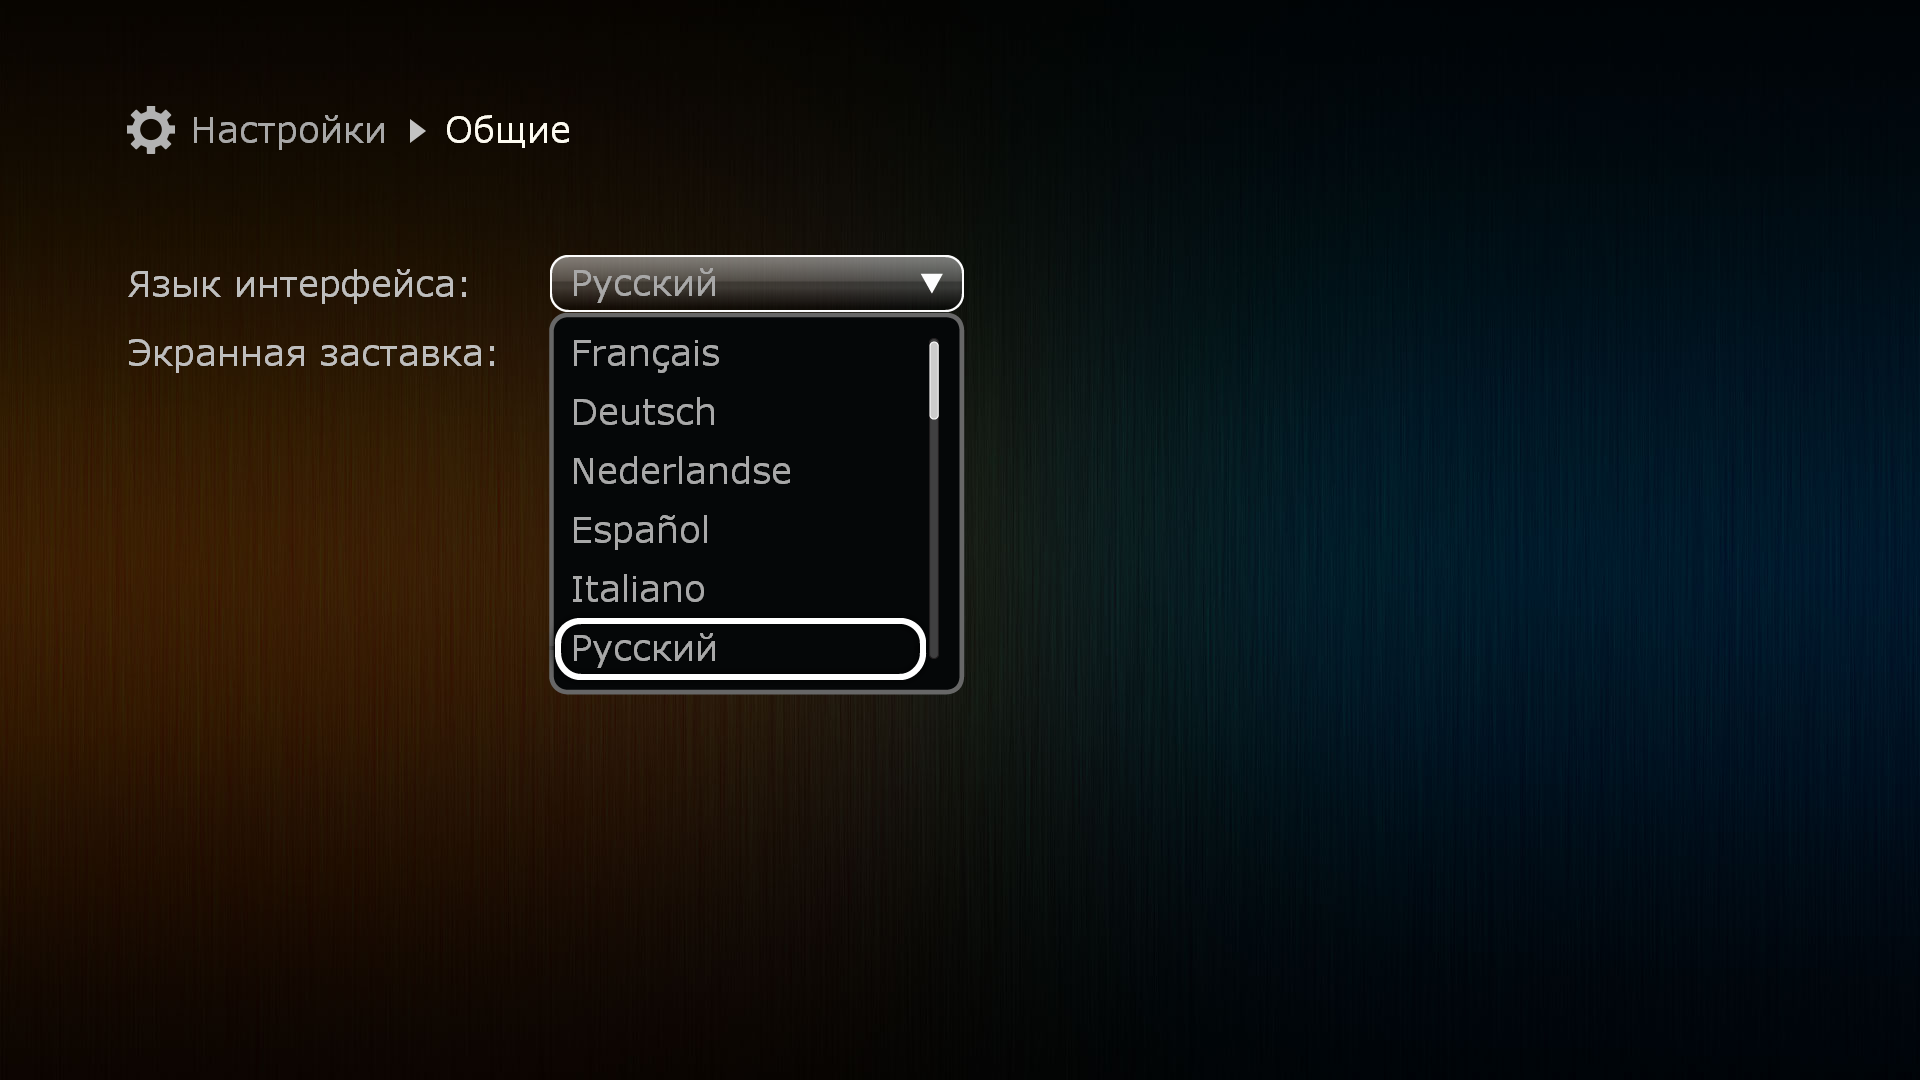
В выпадающем меню пункта «Язык Интерфейса» выбрать предпочтительную локализацию.
Для того, чтобы изменить настройки или убрать экранную заставку необходимо:
В меню верхнего уровня выбрать раздел «Настройки».
В разделе «Настройки» выбрать подраздел «Общие».
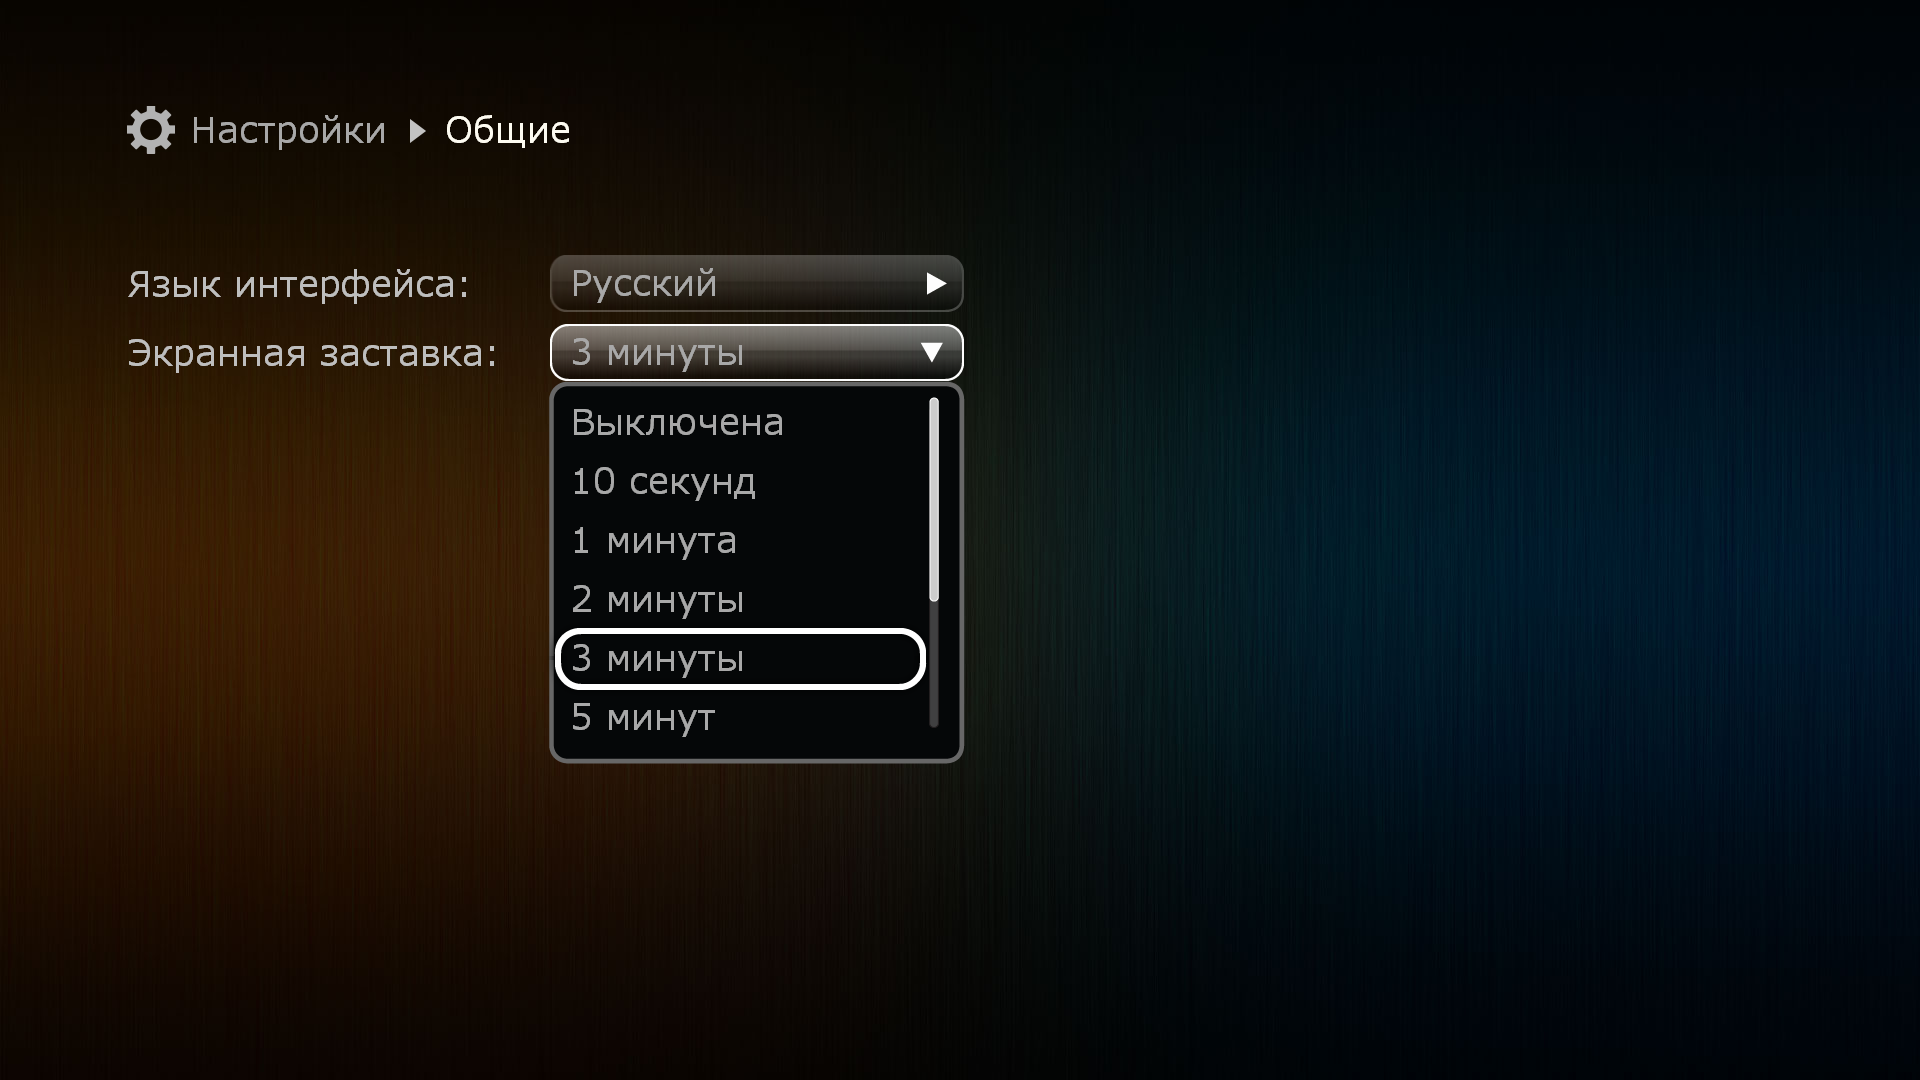
В выпадающем меню пункта «Экранная заставка» можно выбрать время задержки запуска заставки или отключить ее.
Дата и время устанавливаются автоматически. Если же по какой-то причине устройство отображает неверные данные, вы можете их изменить. Для этого необходимо:
В меню верхнего уровня выбрать раздел «Настройки».
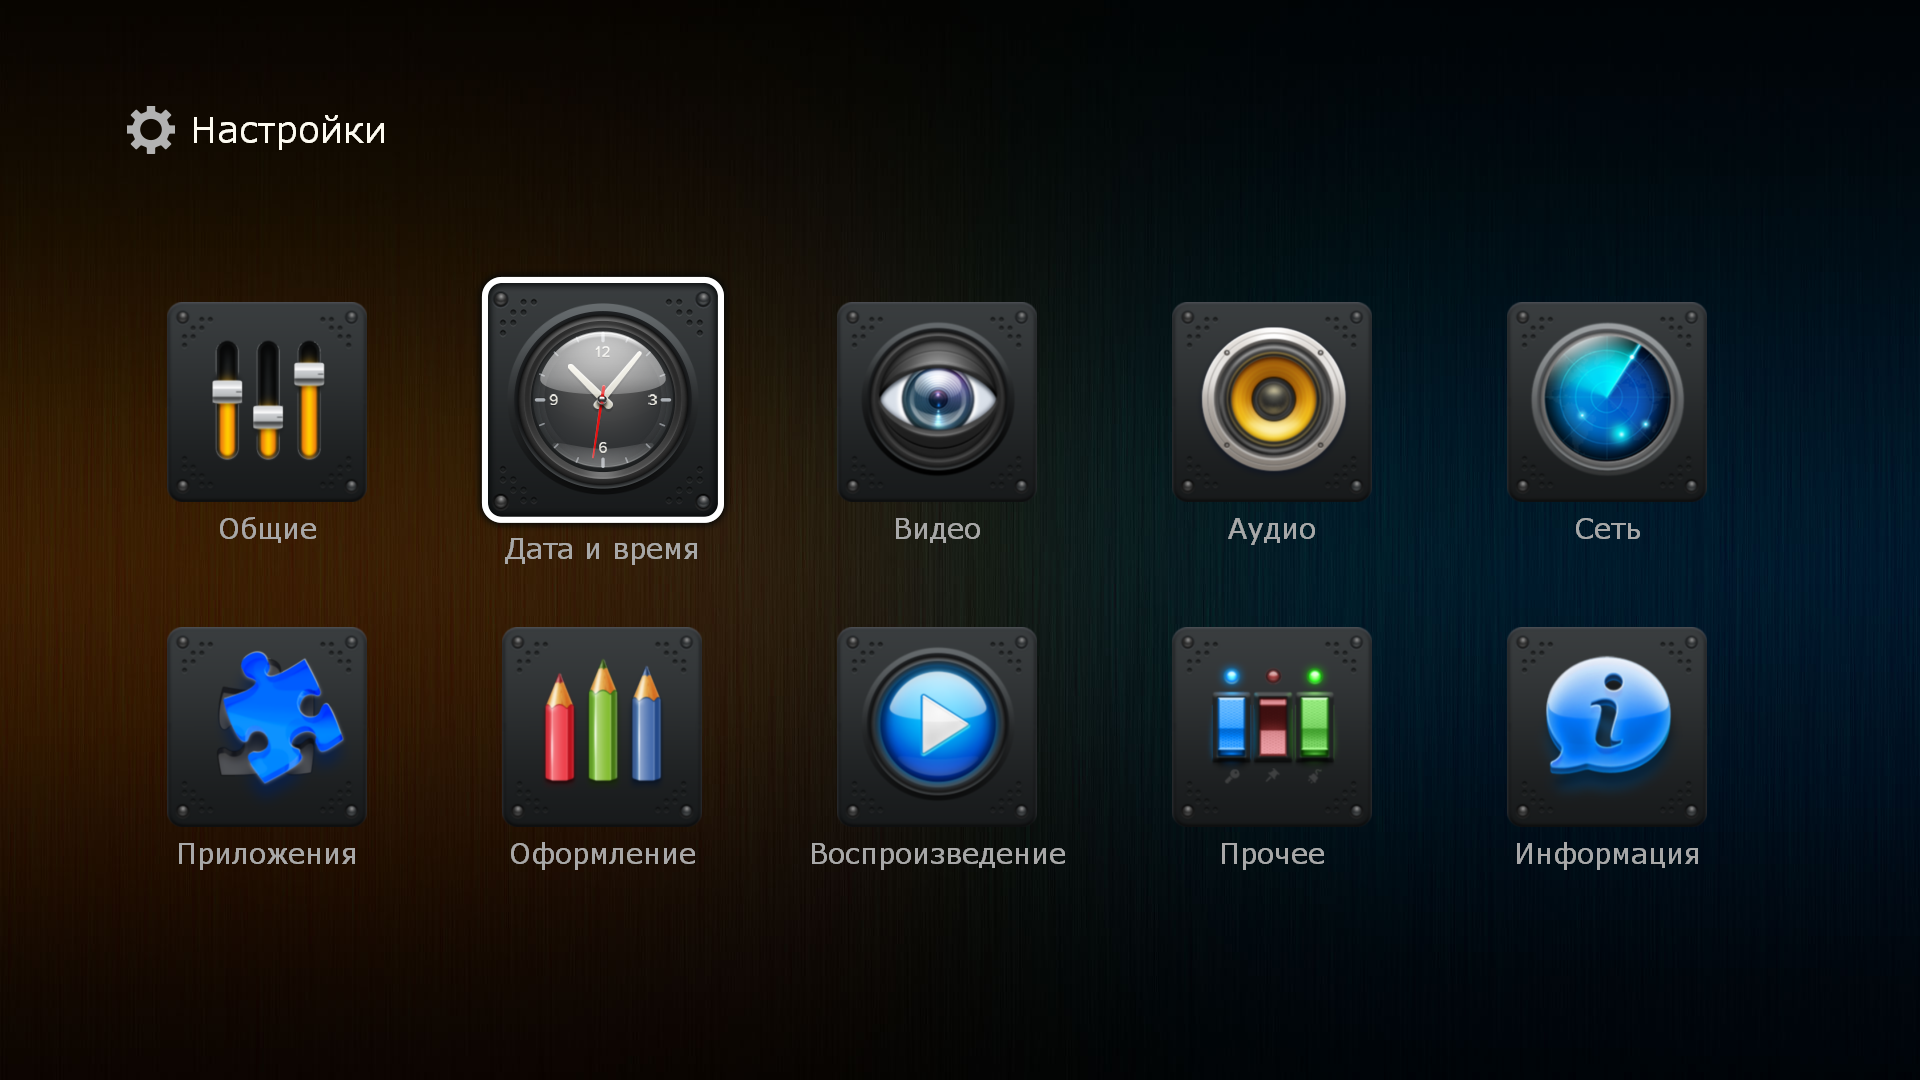
В разделе «Настройки» выбрать подраздел «Дата и время».
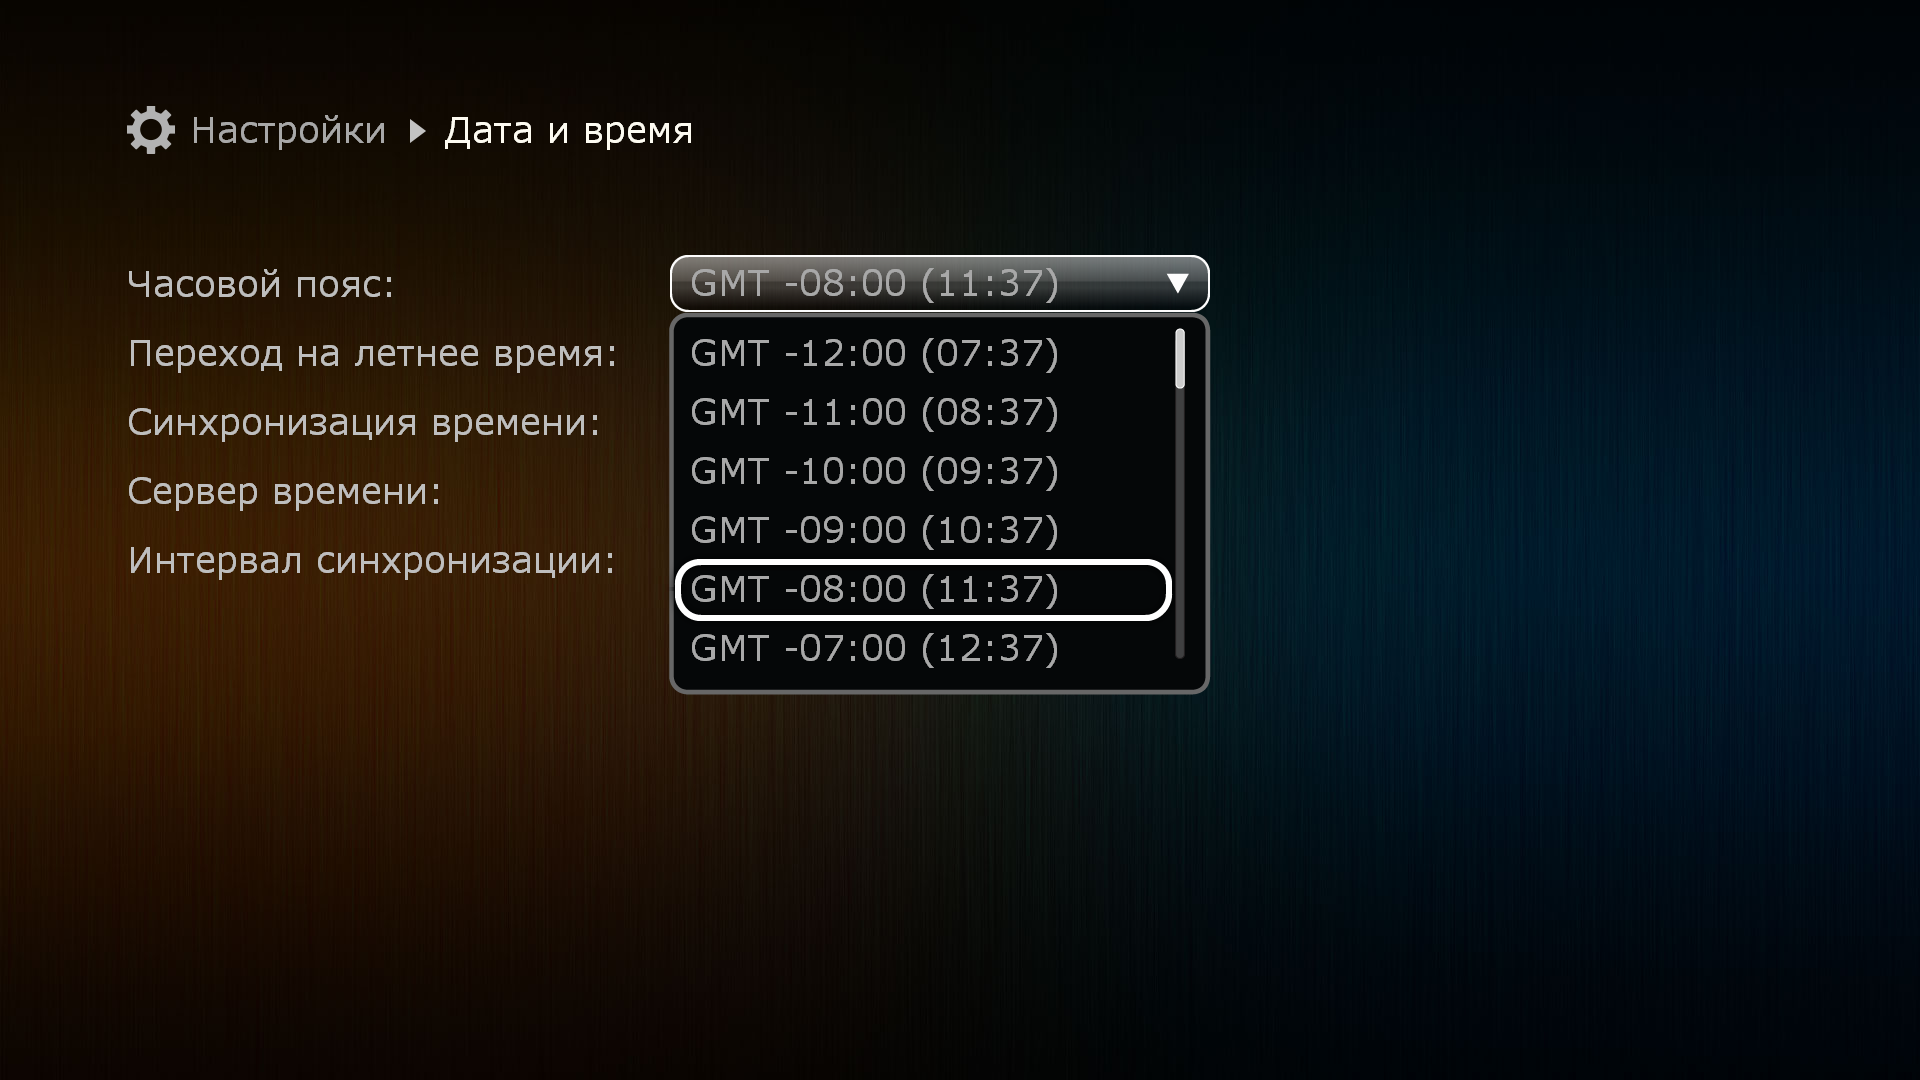
В выпадающем меню пункта «Часовой пояс» выбрать верное для вашего региона значение. Если часовой пояс вам неизвестен, вы можете ориентироваться на текущее время (указано в скобках рядом со значением часового пояса)
Для того, чтобы включить или отключить автоматический переход на летнее время, необходимо:
В меню верхнего уровня выбрать раздел «Настройки».
В разделе «Настройки» выбрать подраздел «Дата и время».
В выпадающем меню пункта «Переход на летнее время» выбрать нужное значение
Для того, чтобы изменить используемый устройством сервер времени (NTP), необходимо:
В меню верхнего уровня выбрать раздел «Настройки».
В разделе «Настройки» выбрать подраздел «Дата и время».
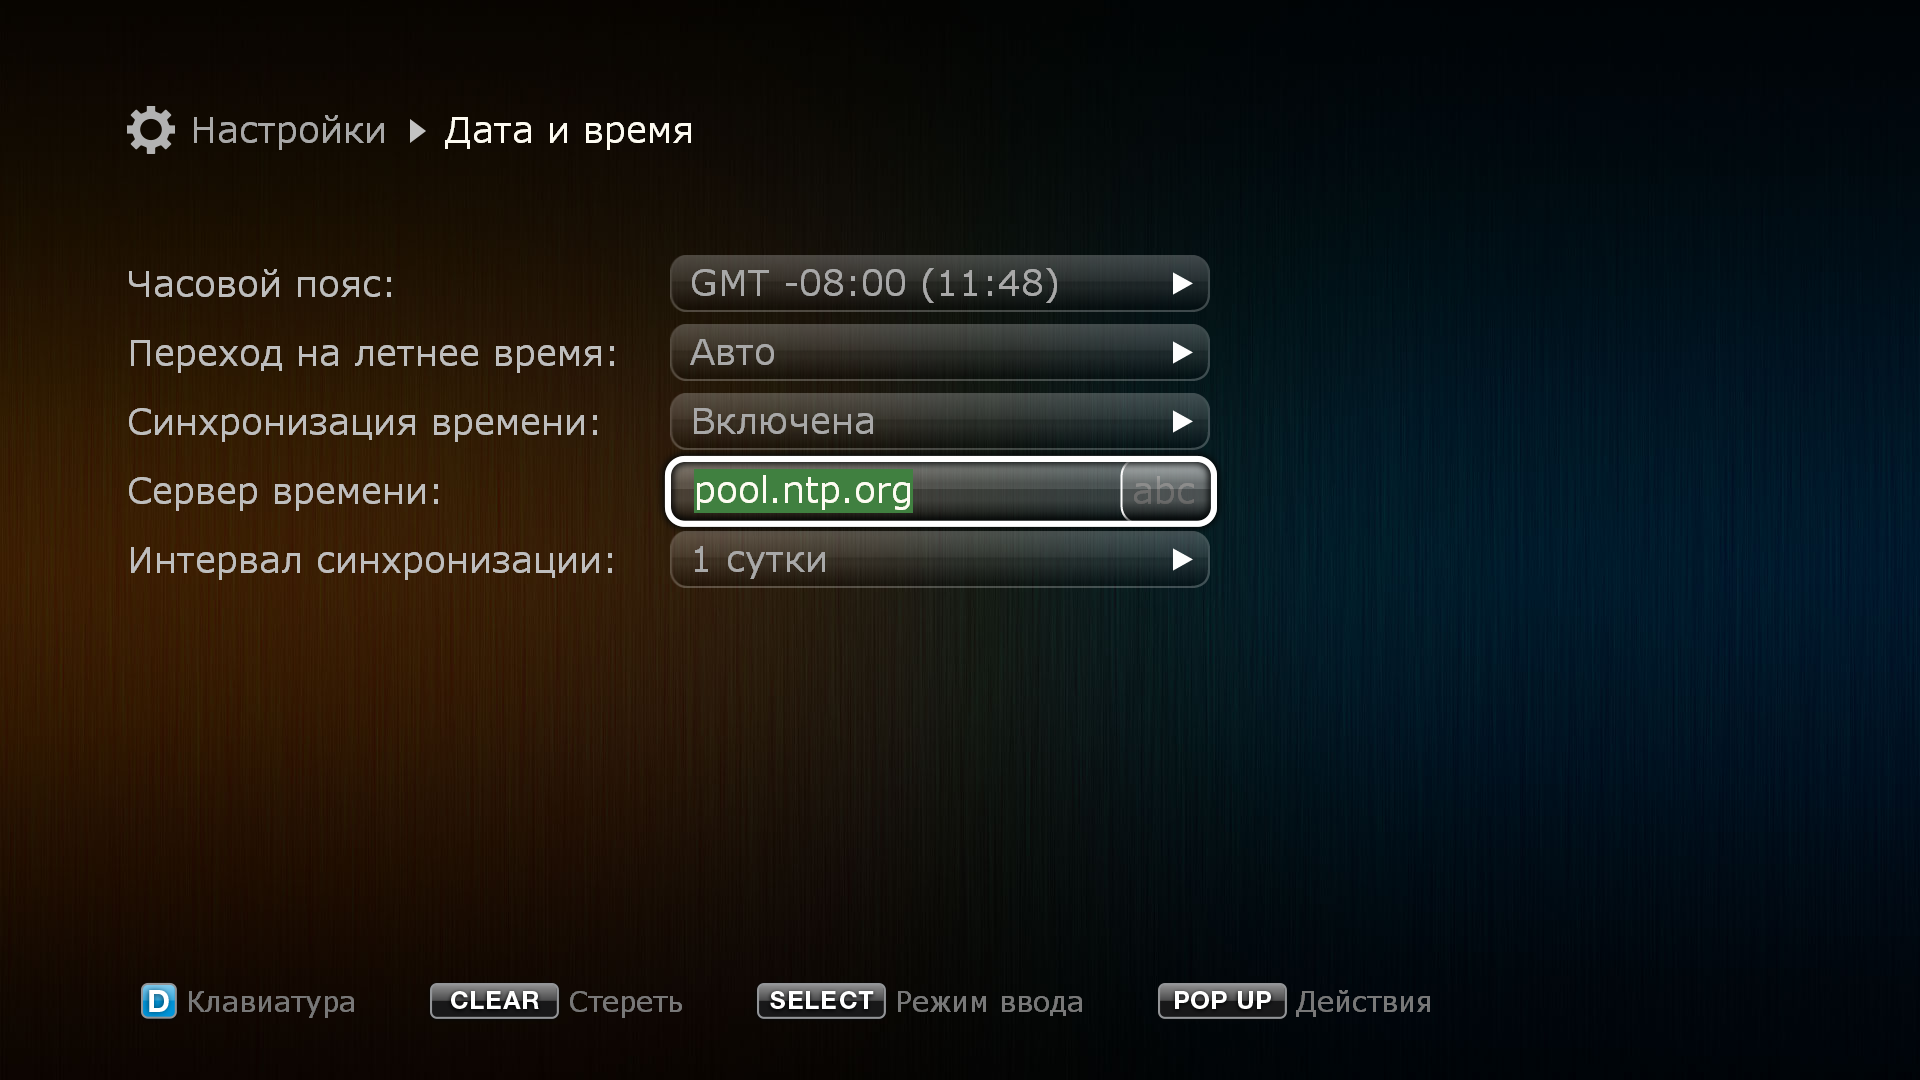
В меню пункта «Сервер времени» ввести имя предпочтительного NTP сервера.
Внимание! По умолчанию установка видеорежима происходит при первом включении в «мастере настроек». Если по какой-то причине видеорежим был выбран неверный, изображение на экране пропало и вы не можете получить доступ к меню устройства для исправления данной настройки, то необходимо сделать следующее:
На пульте дистанционного управления нажать кнопку MODE. При этом светодиодный индикатор на передней панели плеера должен «мигнуть». Далее необходимо нажать одну из цифровых кнопок: 0, 1, 2, 3, 4, 5. Каждая из них соответствует своему видеорежиму. Выберите тот, который ваш телевизор точно поддерживает.
Если выбранный при «слепом» переключении видео режим не будет оптимальным для вашего телевизора, вы можете в любое время выставить предпочтительное разрешение через меню настроек.
Для того, чтобы изменить настройки видеорежима через меню, необходимо:
В меню верхнего уровня выбрать раздел «Настройки».
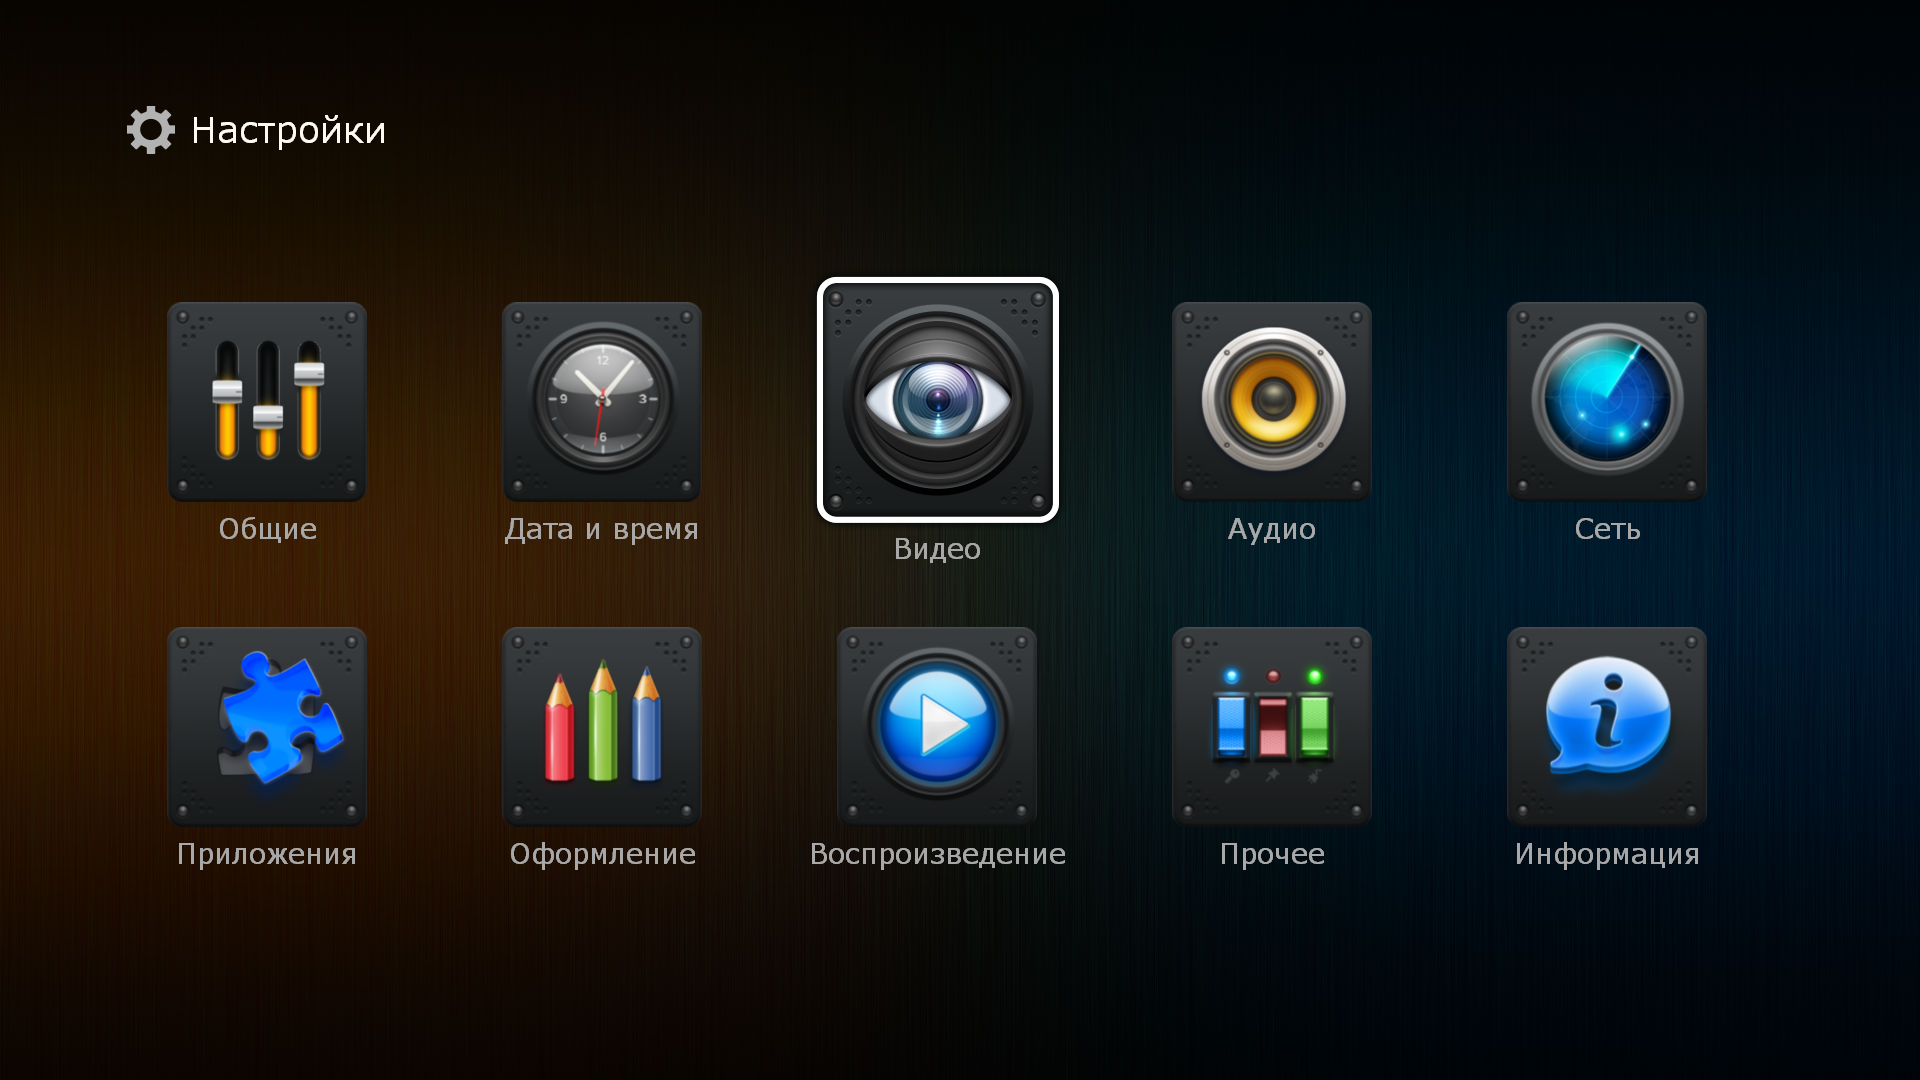
В разделе «Настройки» выбрать подраздел «Видео».
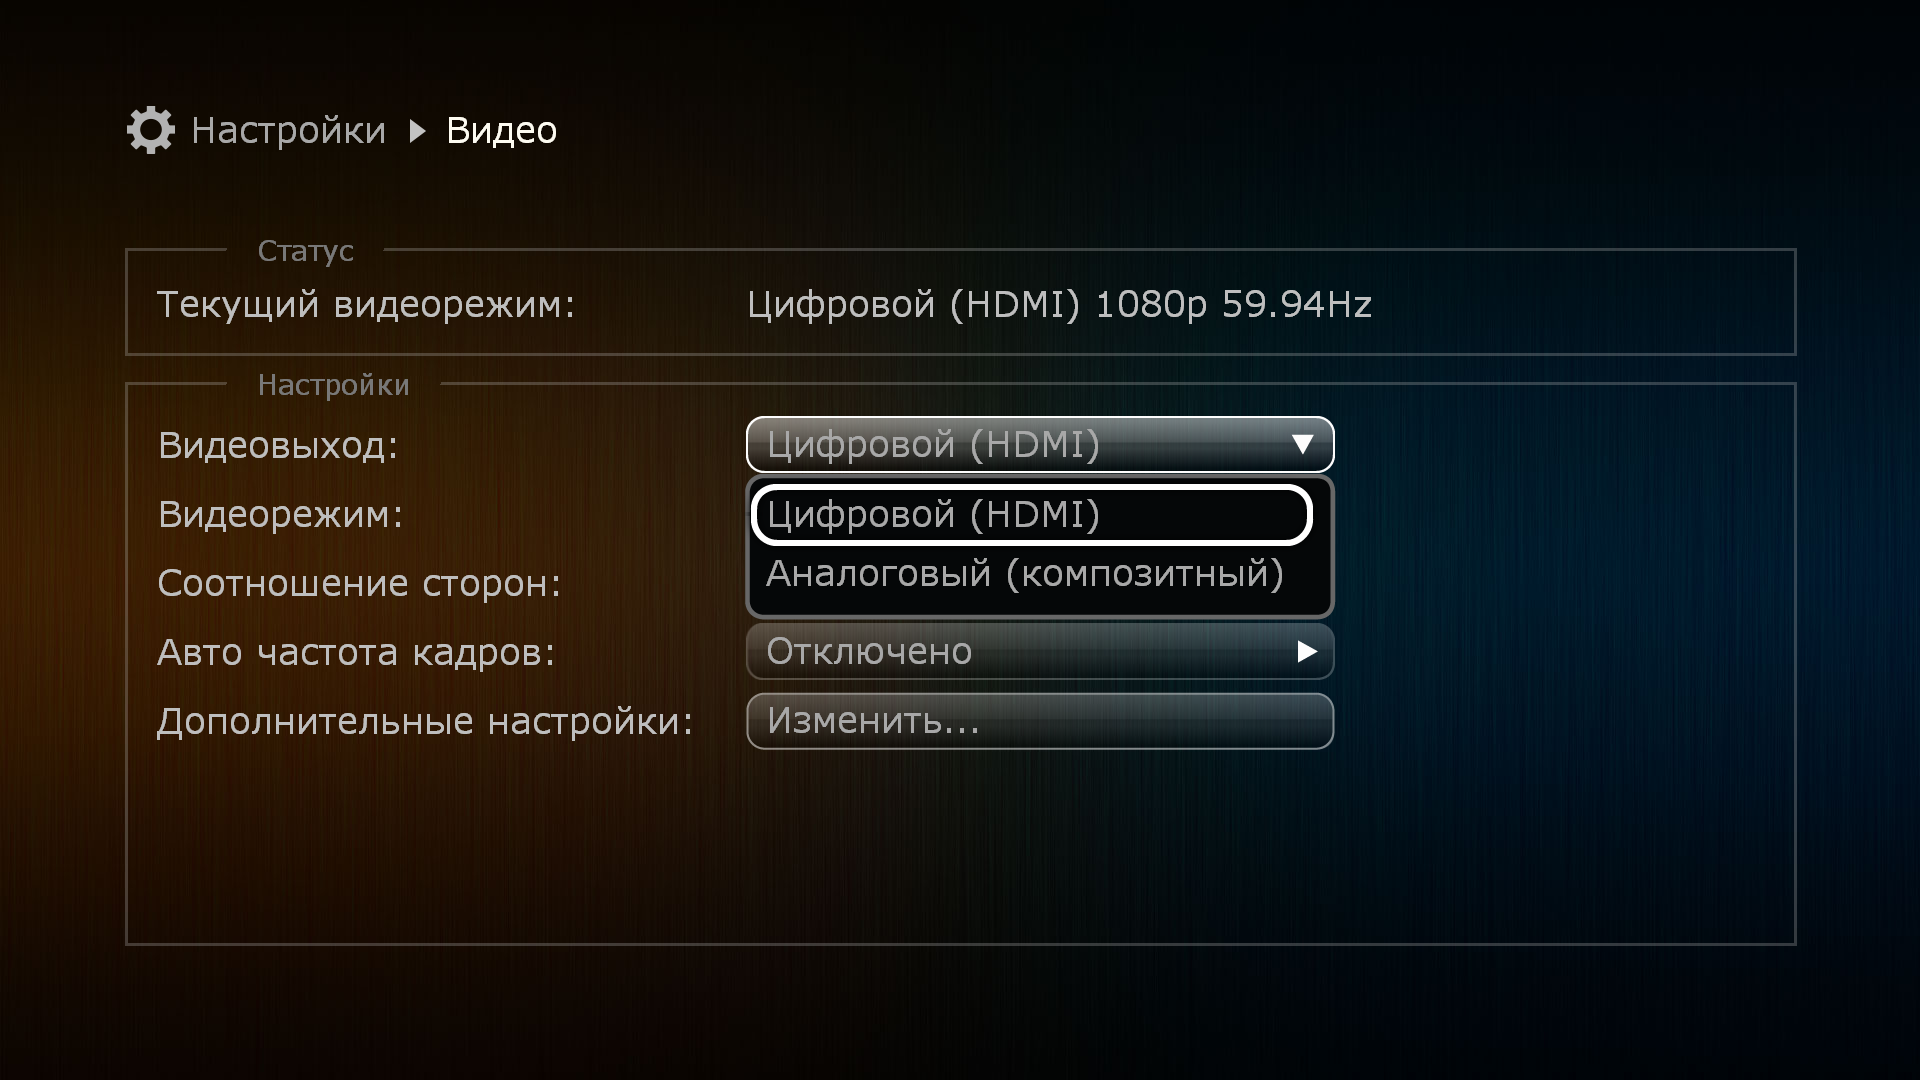
В выпадающем меню пункта «Видеовыход» выбрать тип подключения: цифровое или аналоговое.

В выпадающем меню пункта «Видеорежим» выбрать оптимальное разрешение для вашего телевизора. Для дополнительной информации обратитесь к документации телевизора или в техническую службу компании-производителя оборудования.
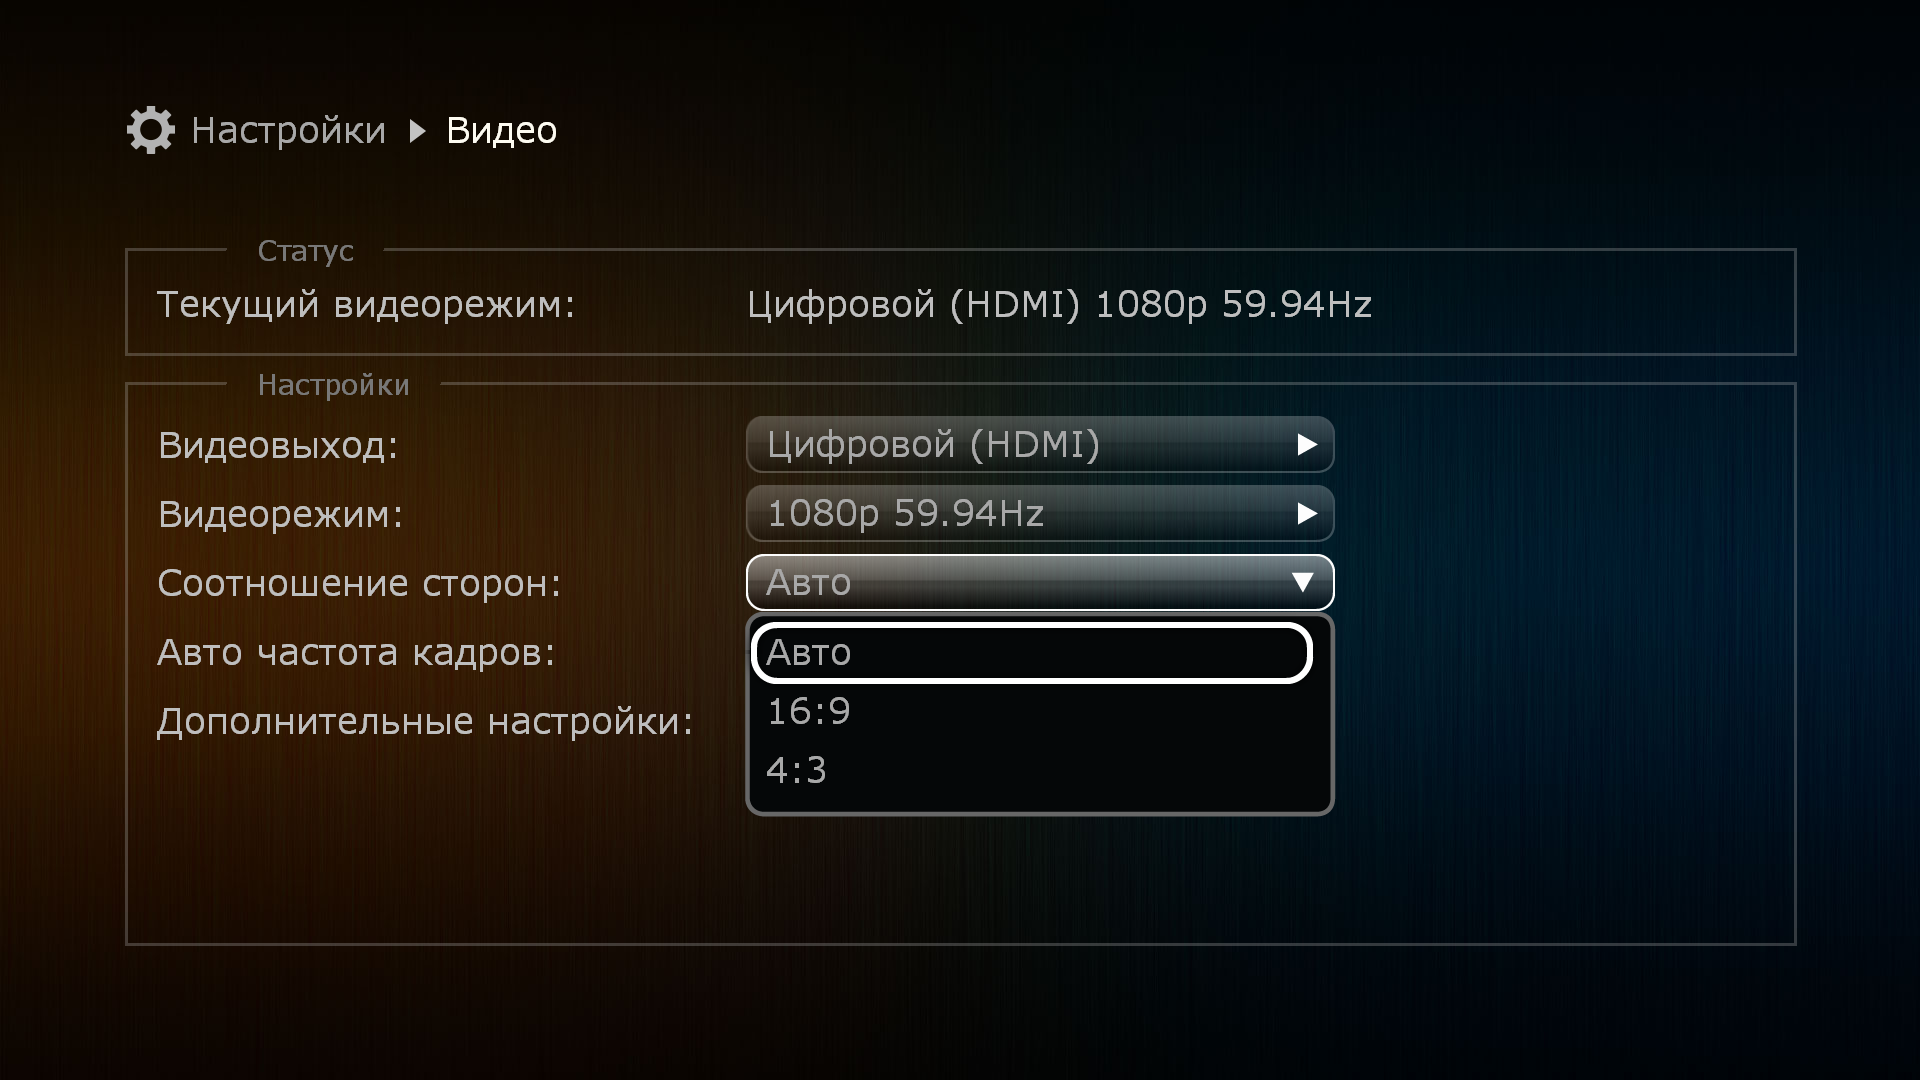
В выпадающем меню пункта «Соотношение сторон» можно принудительно выбрать размерность экрана, если выдаваемое плеером изображение на экране телевизора непропорционально растягивается. В случае отсутствия проблем всегда используйте значение по умолчанию – автоматическое определение.
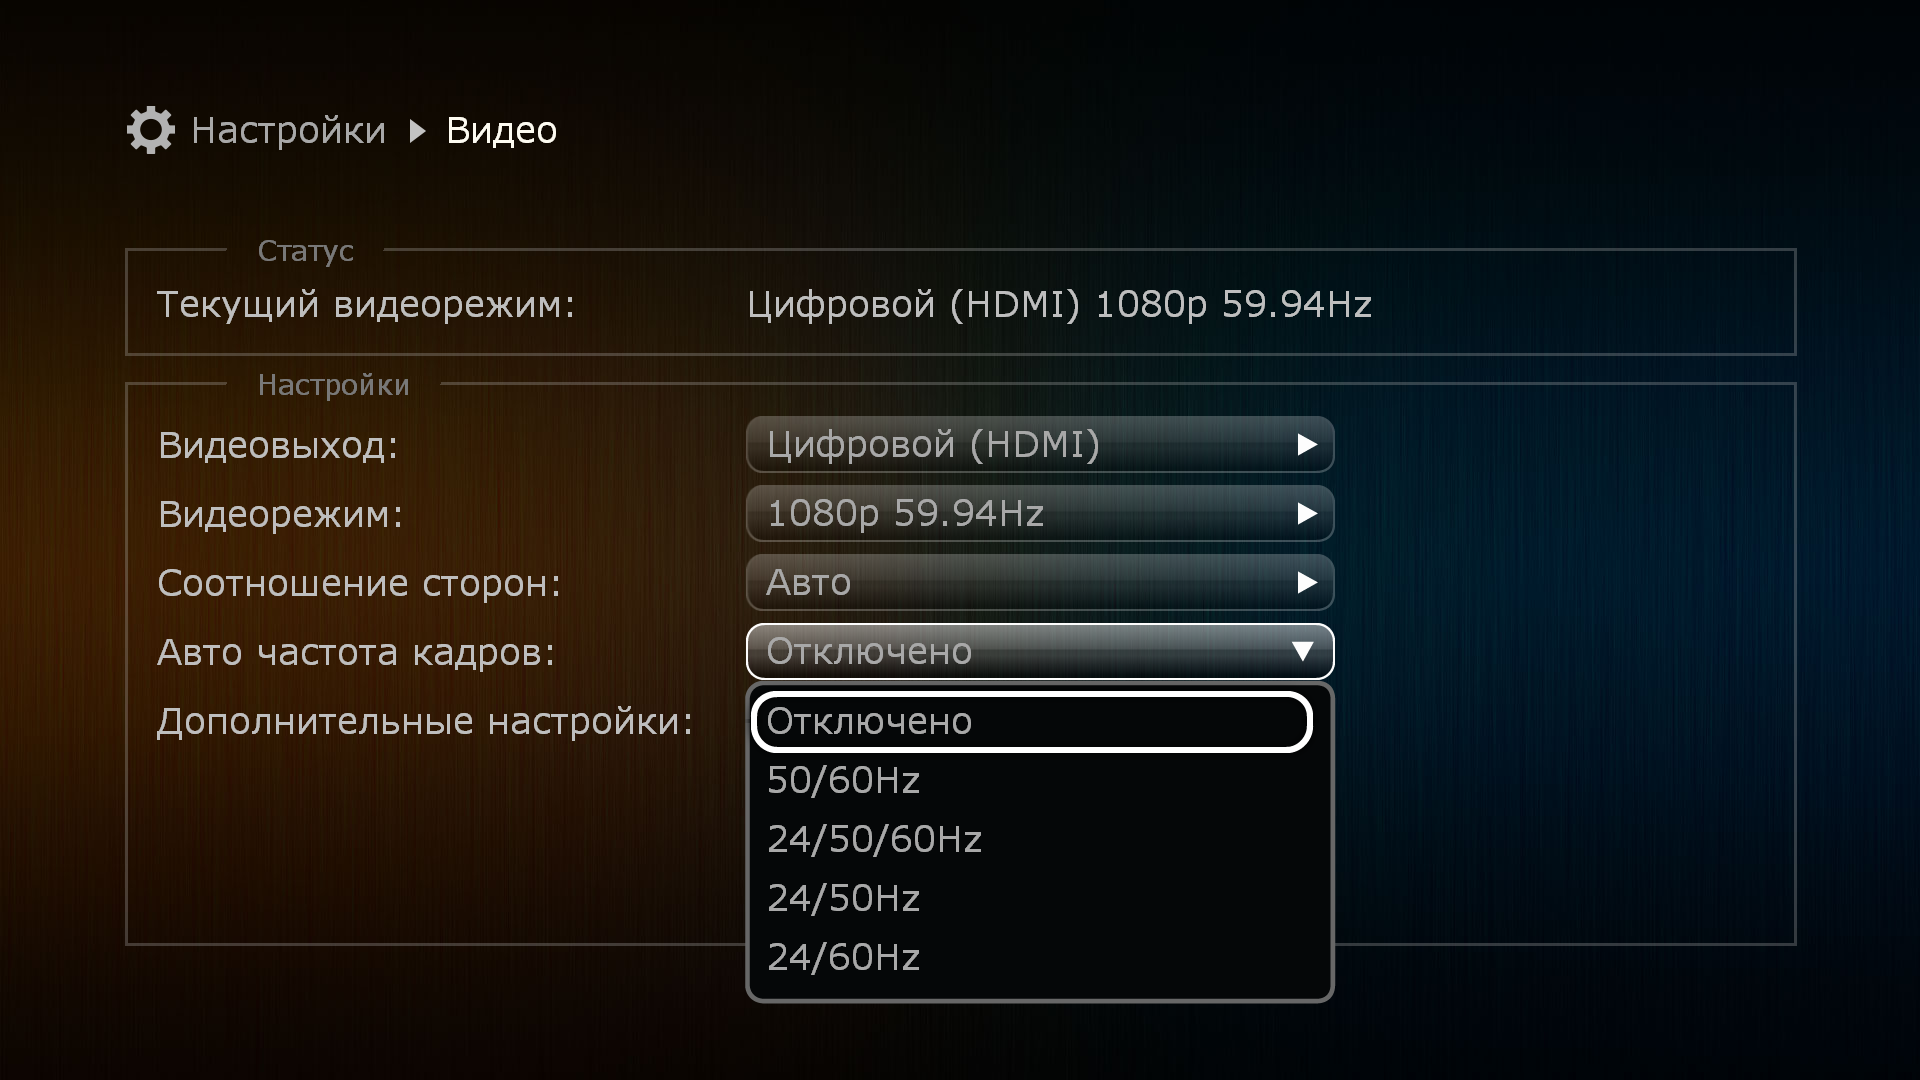
В выпадающем меню пункта «Авто частота кадров» выбрать один из 4 доступных режимов в зависимости от возможностей телевизора. Данная функция позволяет выводить на экран видео с «родной» частотой смены кадров для достижения наилучшего качества изображения. В момент переключения режимов, на 1-2 секунды изображение на экране телевизора может пропадать. Это нормальное поведение.
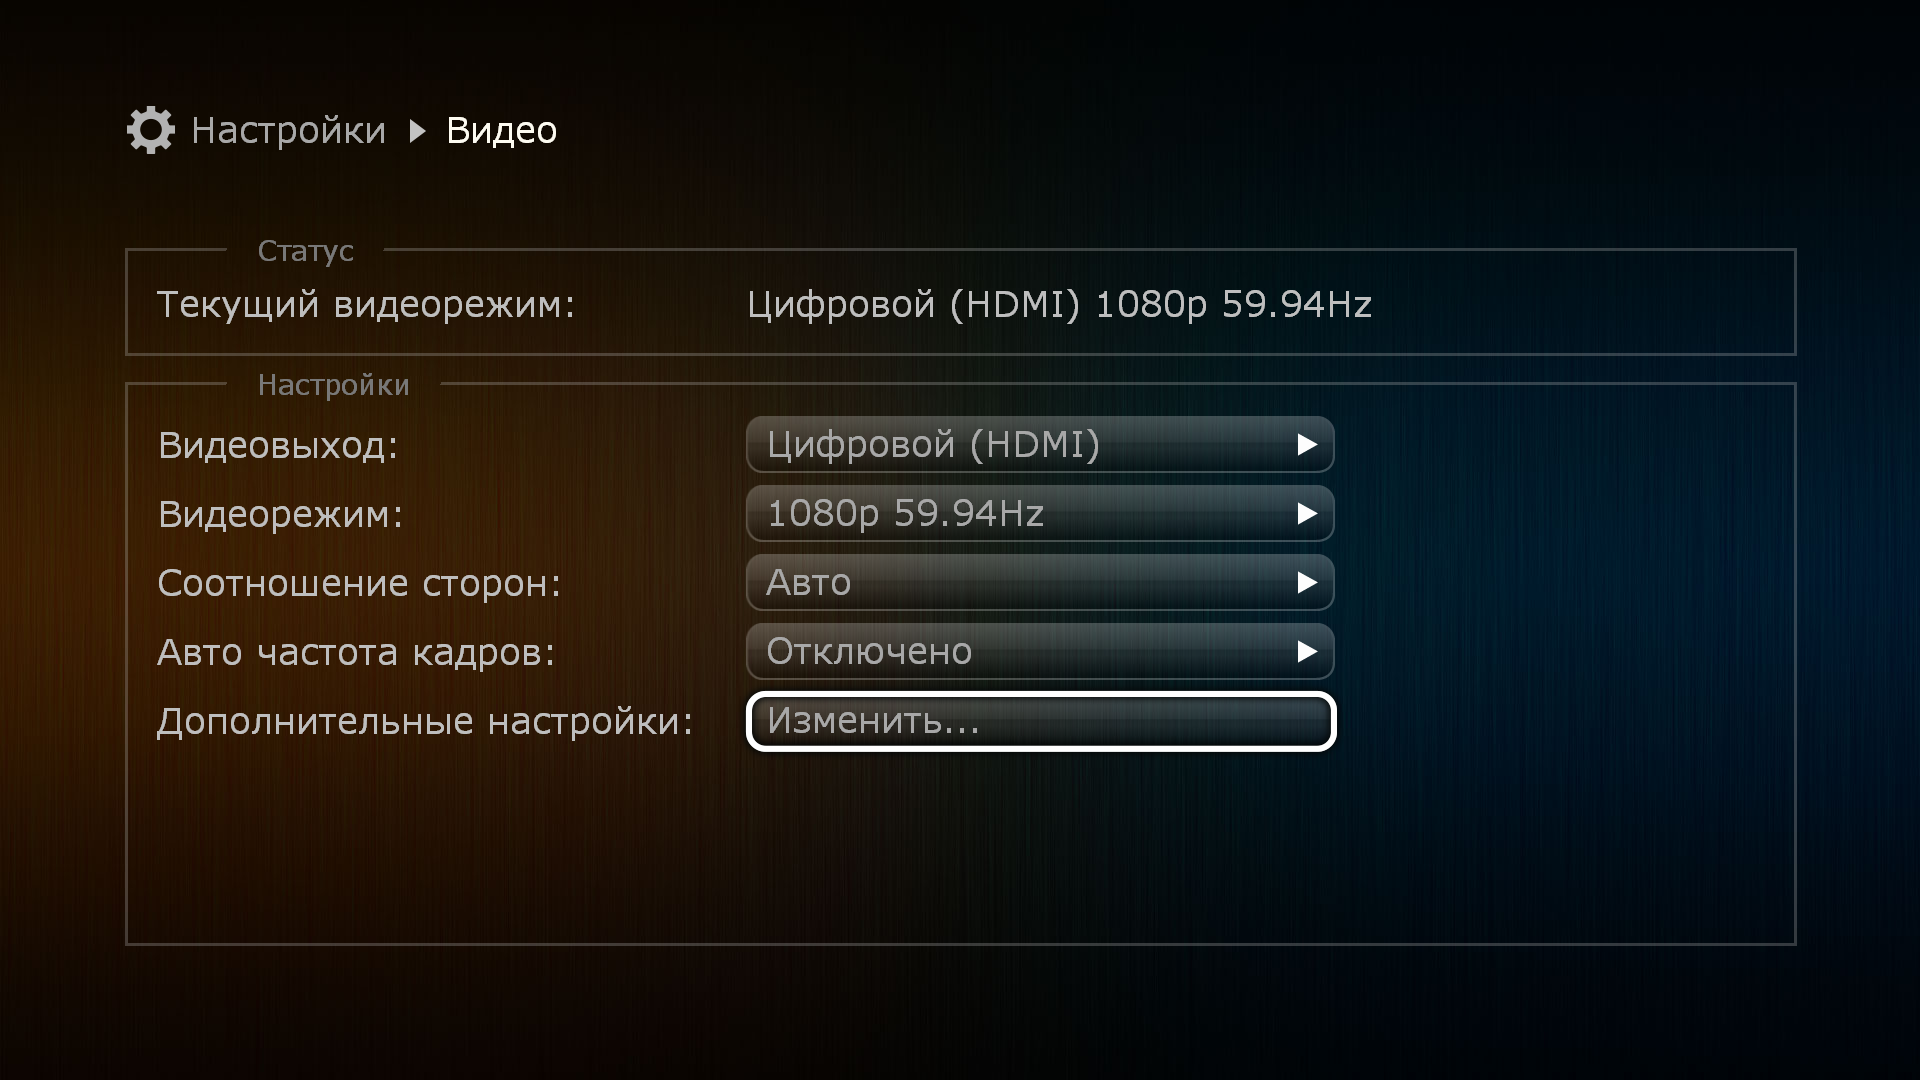
8.В разделе «Дополнительные настройки видео» доступны специфические опции, изменять которые не рекомендуется без необходимости.
Для того, чтобы изменить настройки цифрового выхода, необходимо:
В меню верхнего уровня выбрать раздел «Настройки»
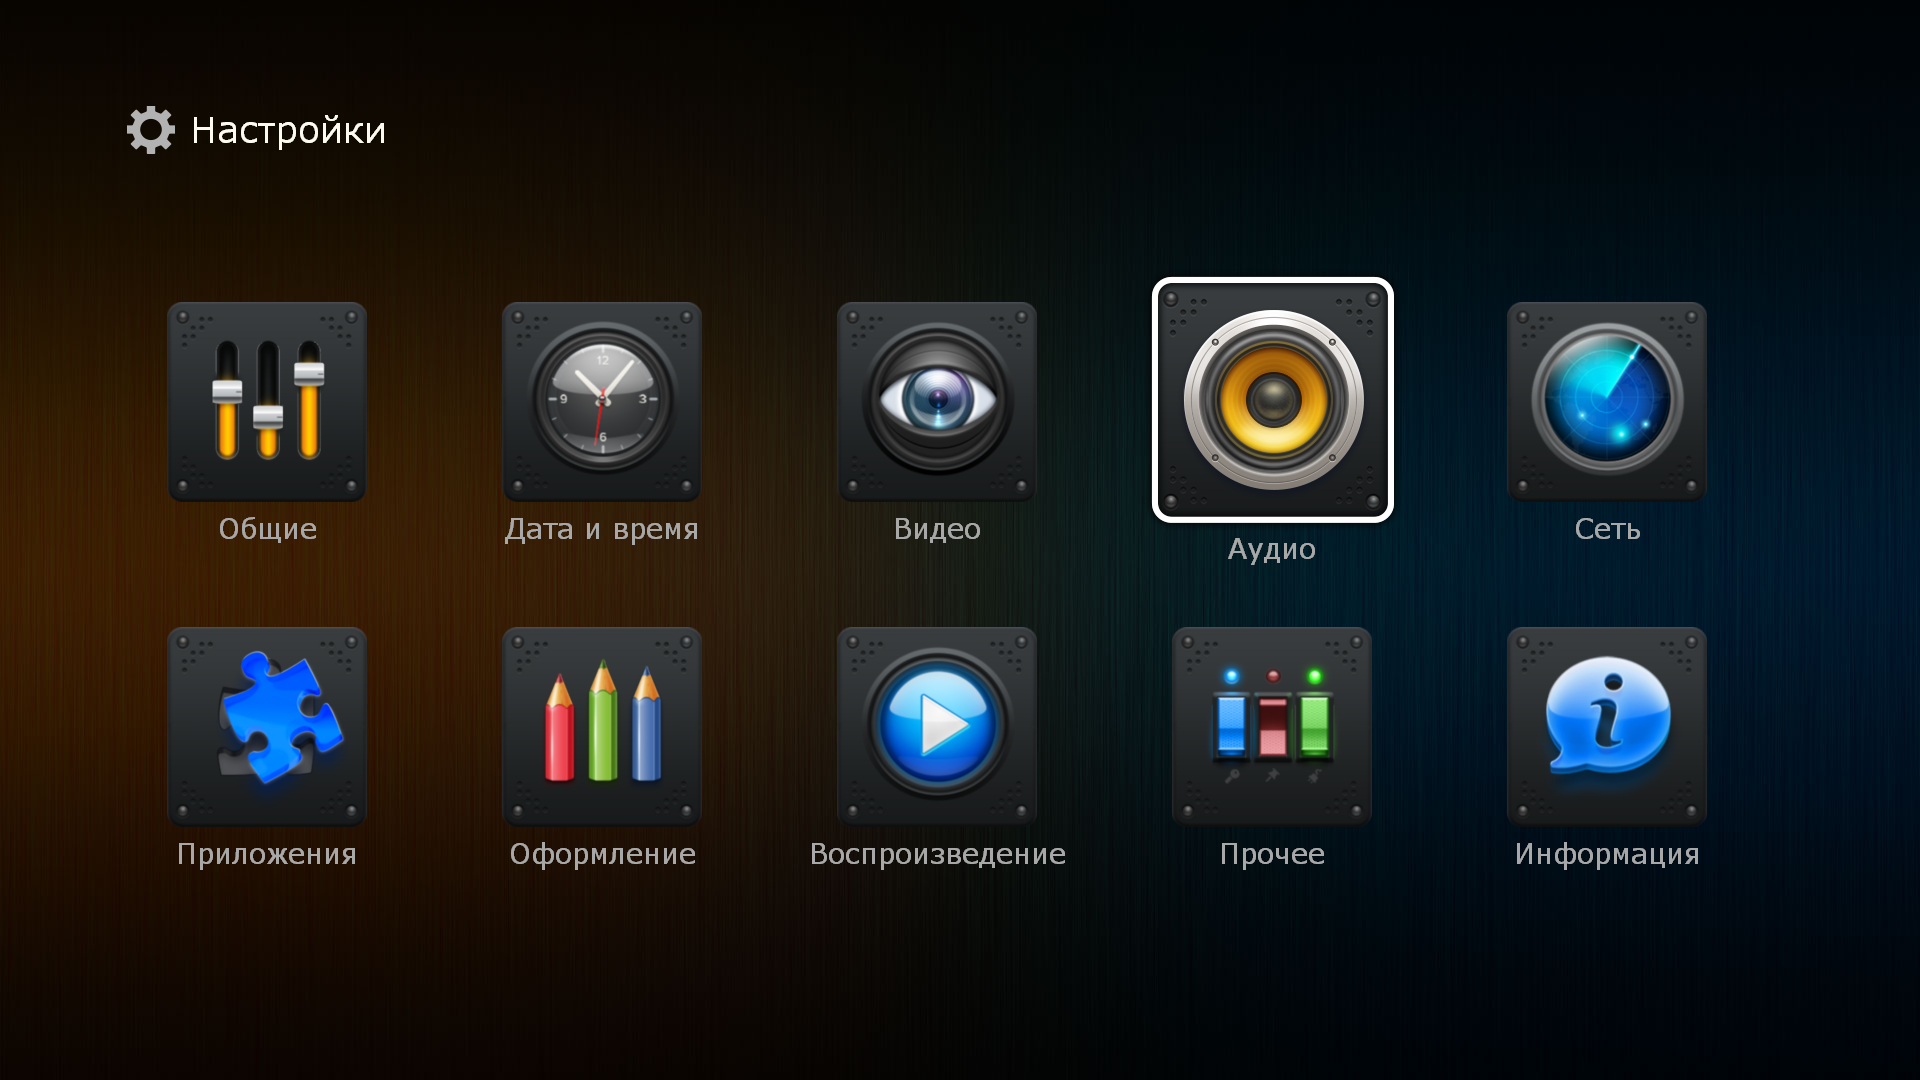
В разделе «Настройки» выбрать подраздел «Аудио».
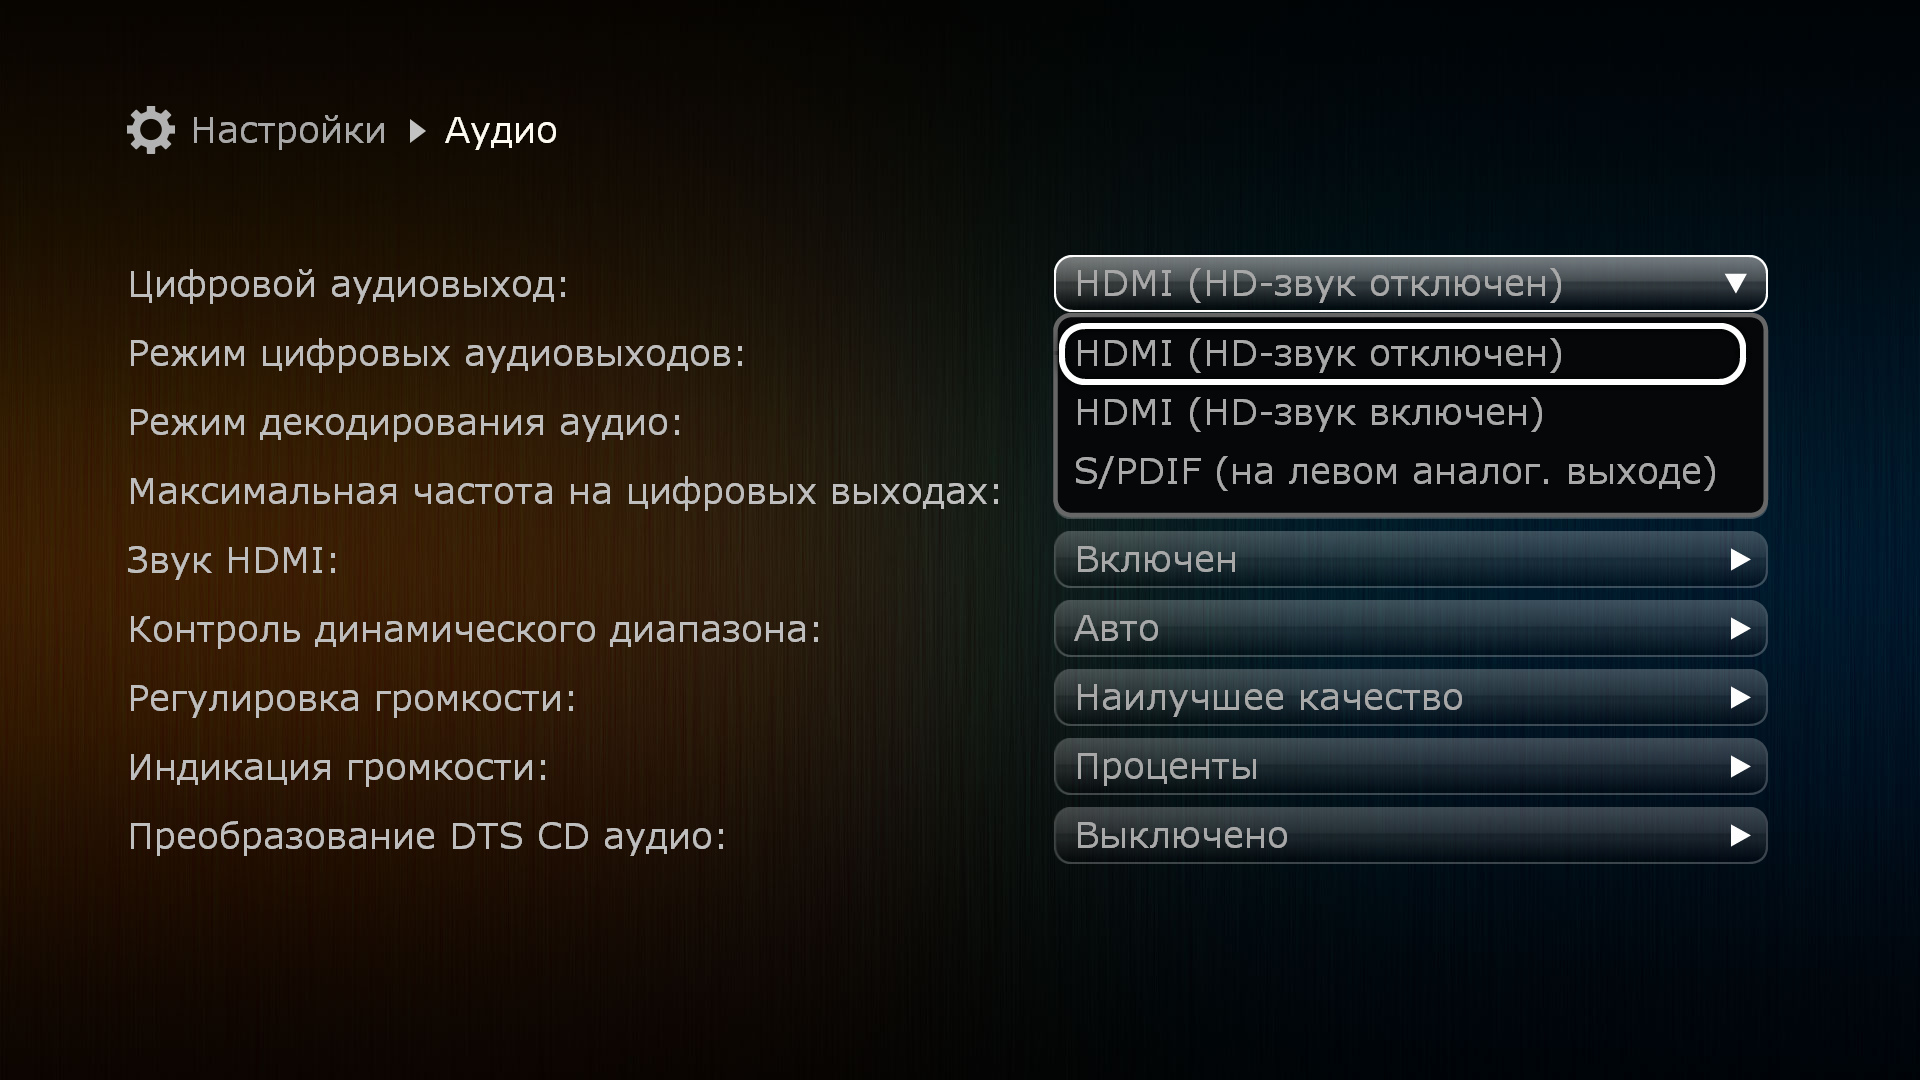
В выпадающем меню пункта «Цифровой аудиовыход» выбрать предпочтительный режим.
— «HDMI (HD-звук отключён)»:оптимальный режим для подключения плеера к телевизору или ресиверу с HDMI-входом, но без поддержки современных форматов звука (Dolby True HD, DTS MA и т.п.).
— «HDMI (HD-звук включён)»: оптимальный режим для подключения плеера к своременному ресиверу с поддержкой современных форматов звука (Dolby True HD, DTS MA и т.п.).
— S/PDIF: оптимальный режим для подключения плеера к ресиверу без HDMI-входа и без поддержки современных форматов звука (Dolby True HD,DTS MA и т.п.).
В меню верхнего уровня выбрать раздел «Настройки».
В разделе «Настройки» выбрать подраздел «Аудио».
В выпадающем меню пункта «Режим цифровых аудиовыходов» выбрать предпочтительный режим.
-PCM (декодирование): наилучший режим для подключения плеера к телевизору или ресиверу, не имеющему поддержки современных форматов звука (Dolby True HD, DTS MA и т.п.).
— Оригинал (bitstream): оптимальный режим для подключения плеера к ресиверу с поддержкой современных форматов звука (Dolby True HD, DTS MA и т.п.).
В меню верхнего уровня выбрать раздел «Настройки».
В разделе «Настройки» выбрать подраздел «Аудио».
В выпадающем меню пункта «Режим цифровых аудиовыходов» выбрать предпочтительный режим.
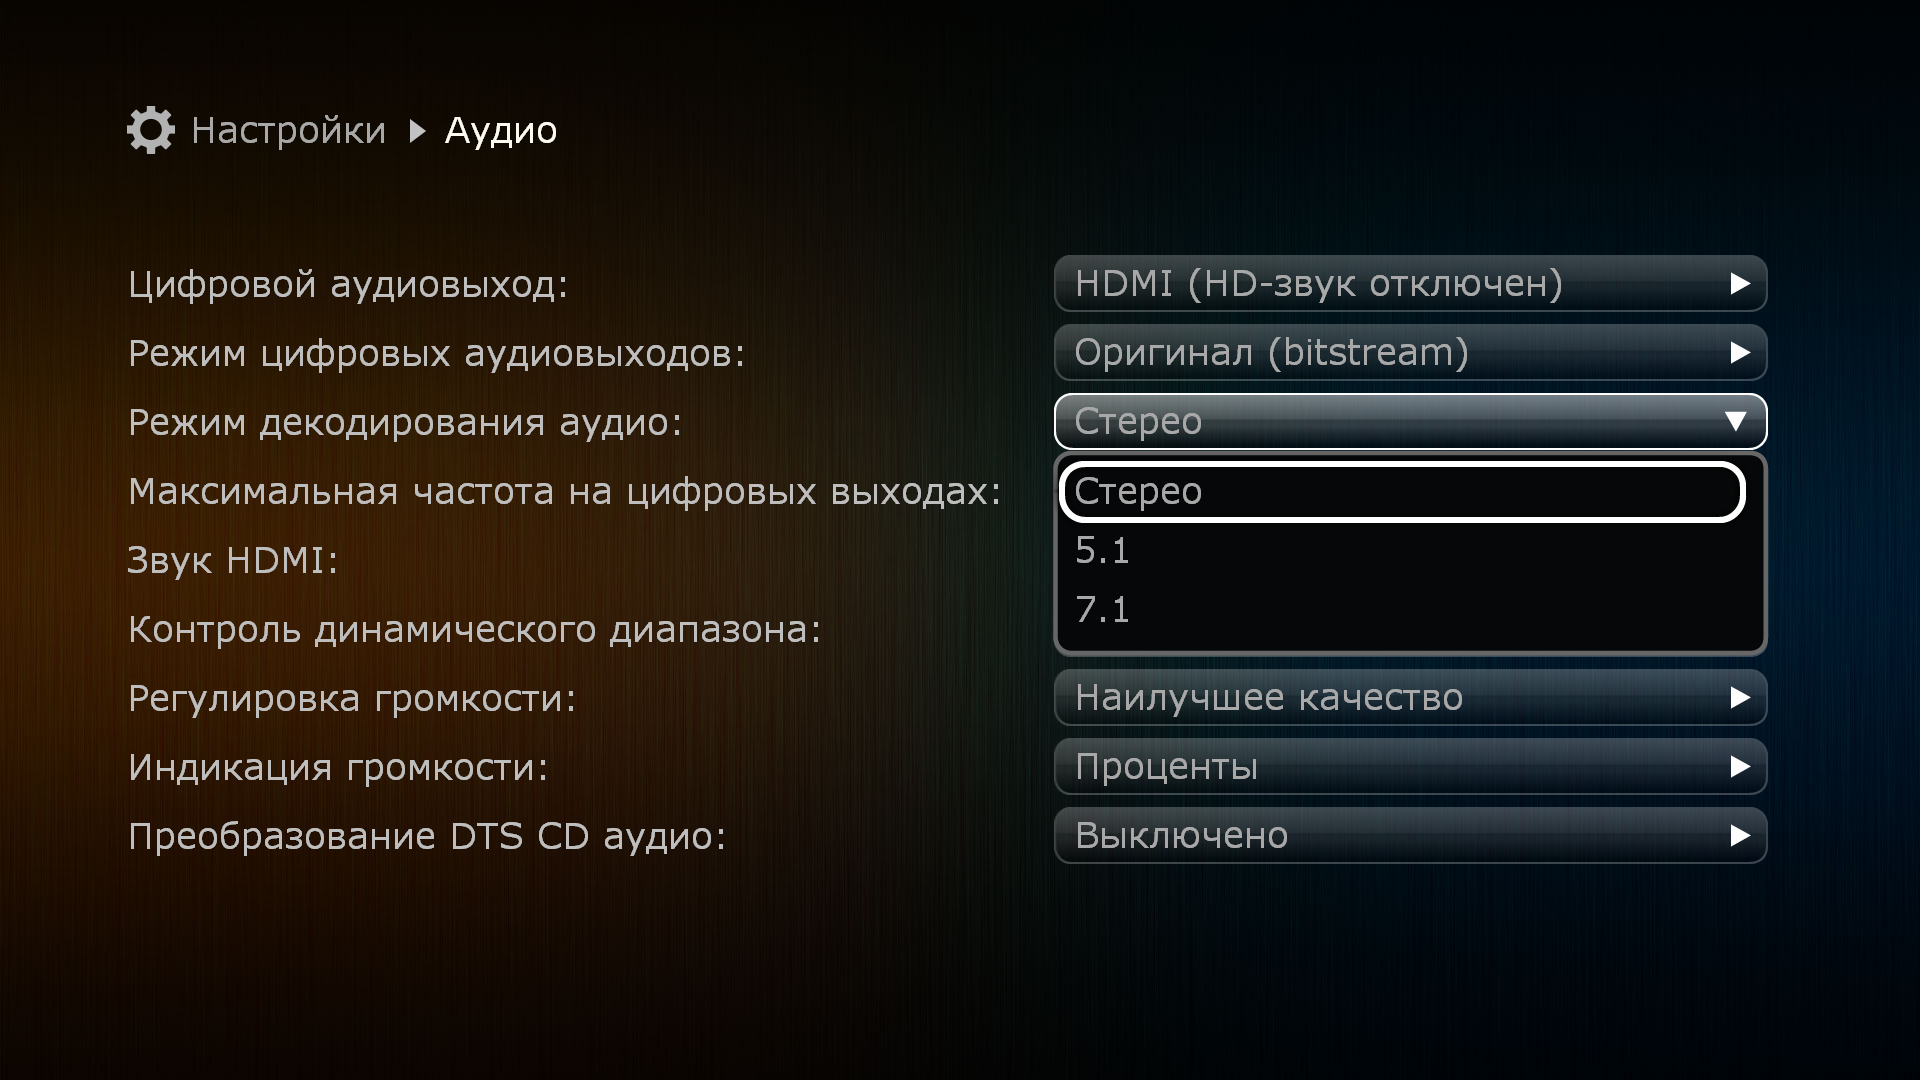
-Режим 2.0 (Стерео) станет оптимальным выбором при подключении к телевизору или к стереофоническому усилителю.
-Режим 5.1 предназначен для подключения к A/V ресиверам, используя цифровой коаксиальный или оптический S/PDIF.
-Режим 7.1 предназначен для подключения к A/V ресиверам с поддержкой форматов HD-аудио и звуковых схем 7.1, используя разъём HDMI.
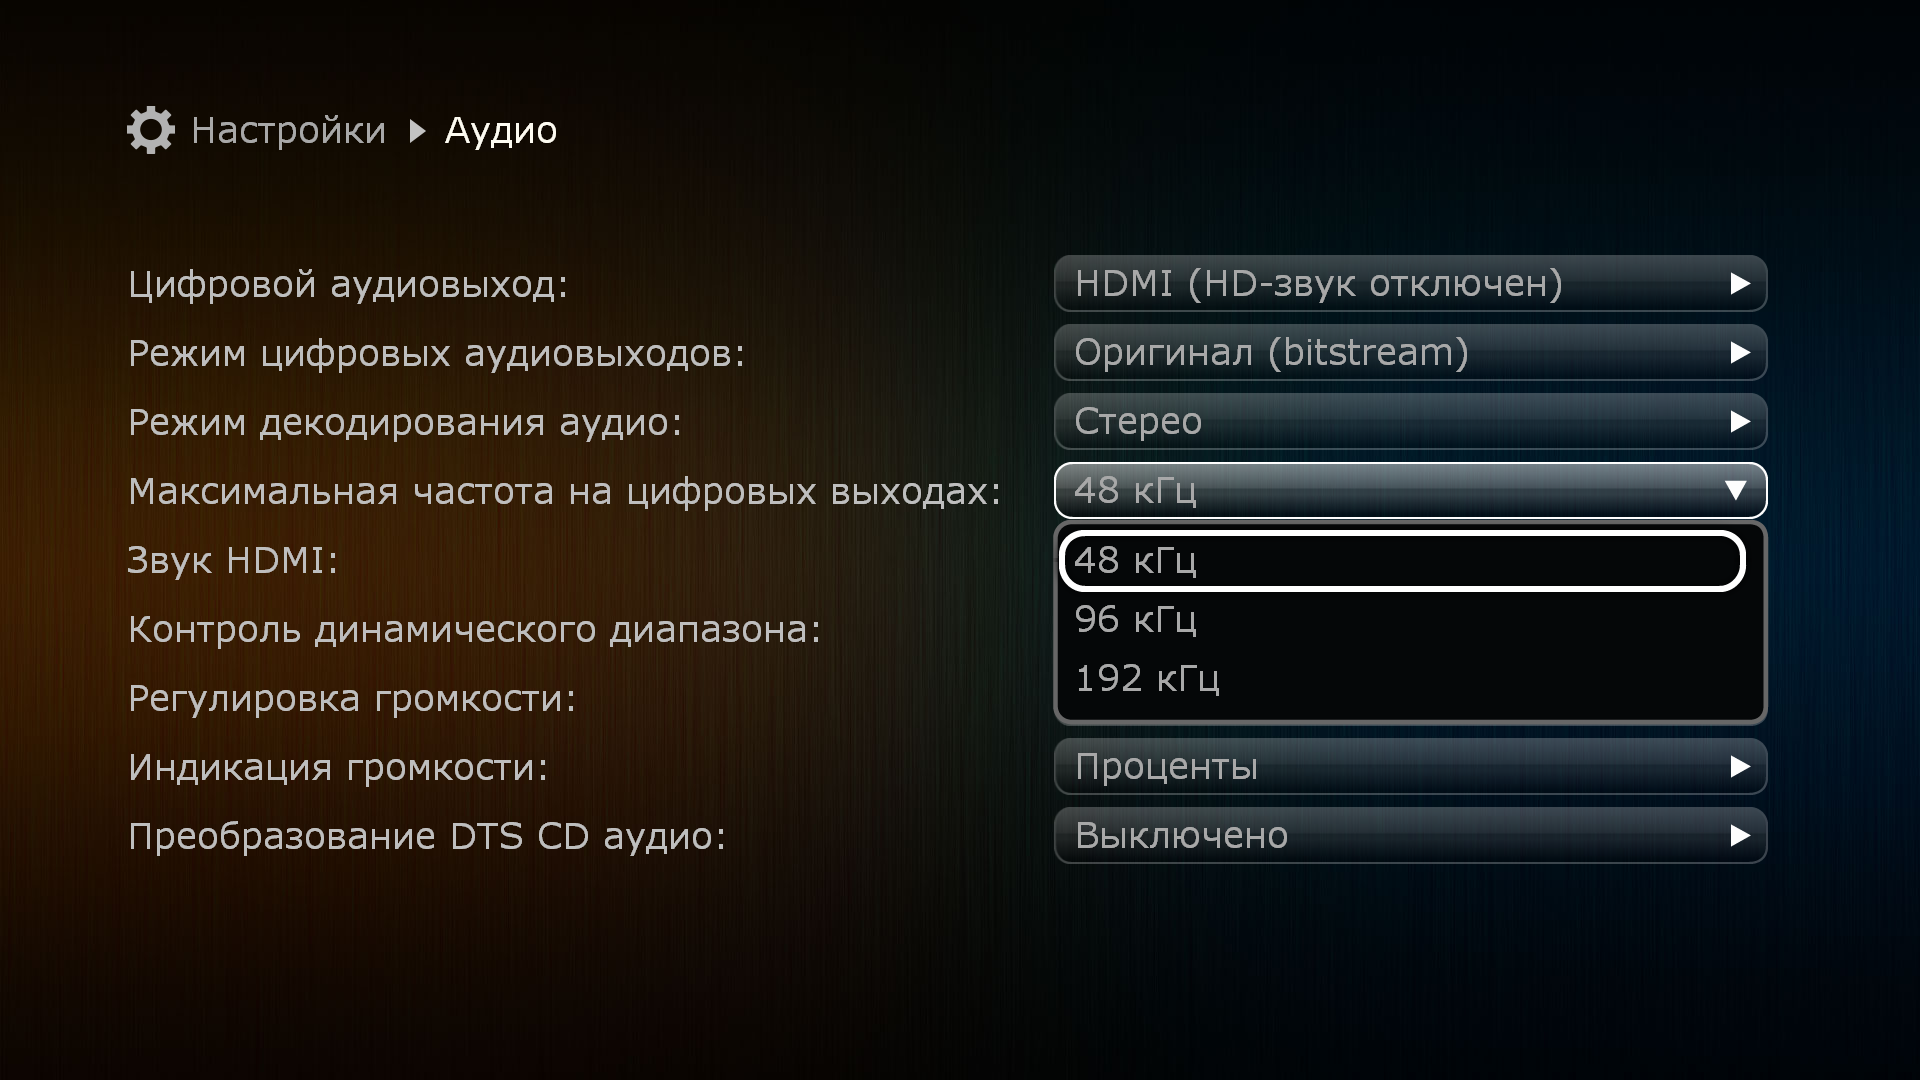
В меню верхнего уровня выбрать раздел «Настройки»
В разделе «Настройки» выбрать подраздел «Аудио»
В выпадающем меню пункта «Максимальная частота на цифровых выходах» выбрать максимальную частоту, поддерживаемую вашим A/V ресивером (48/96/192кГц). Для того, чтобы узнать, какие частоты являются поддерживаемыми, необходимо изучить документацию к вашему ресиверу или позвонить в службу поддержки компании производителя A/V ресивера.
В меню верхнего уровня выбрать раздел «Настройки»
В разделе «Настройки» выбрать подраздел «Аудио»
В выпадающем меню пункта «Звук HDMI» выбрать
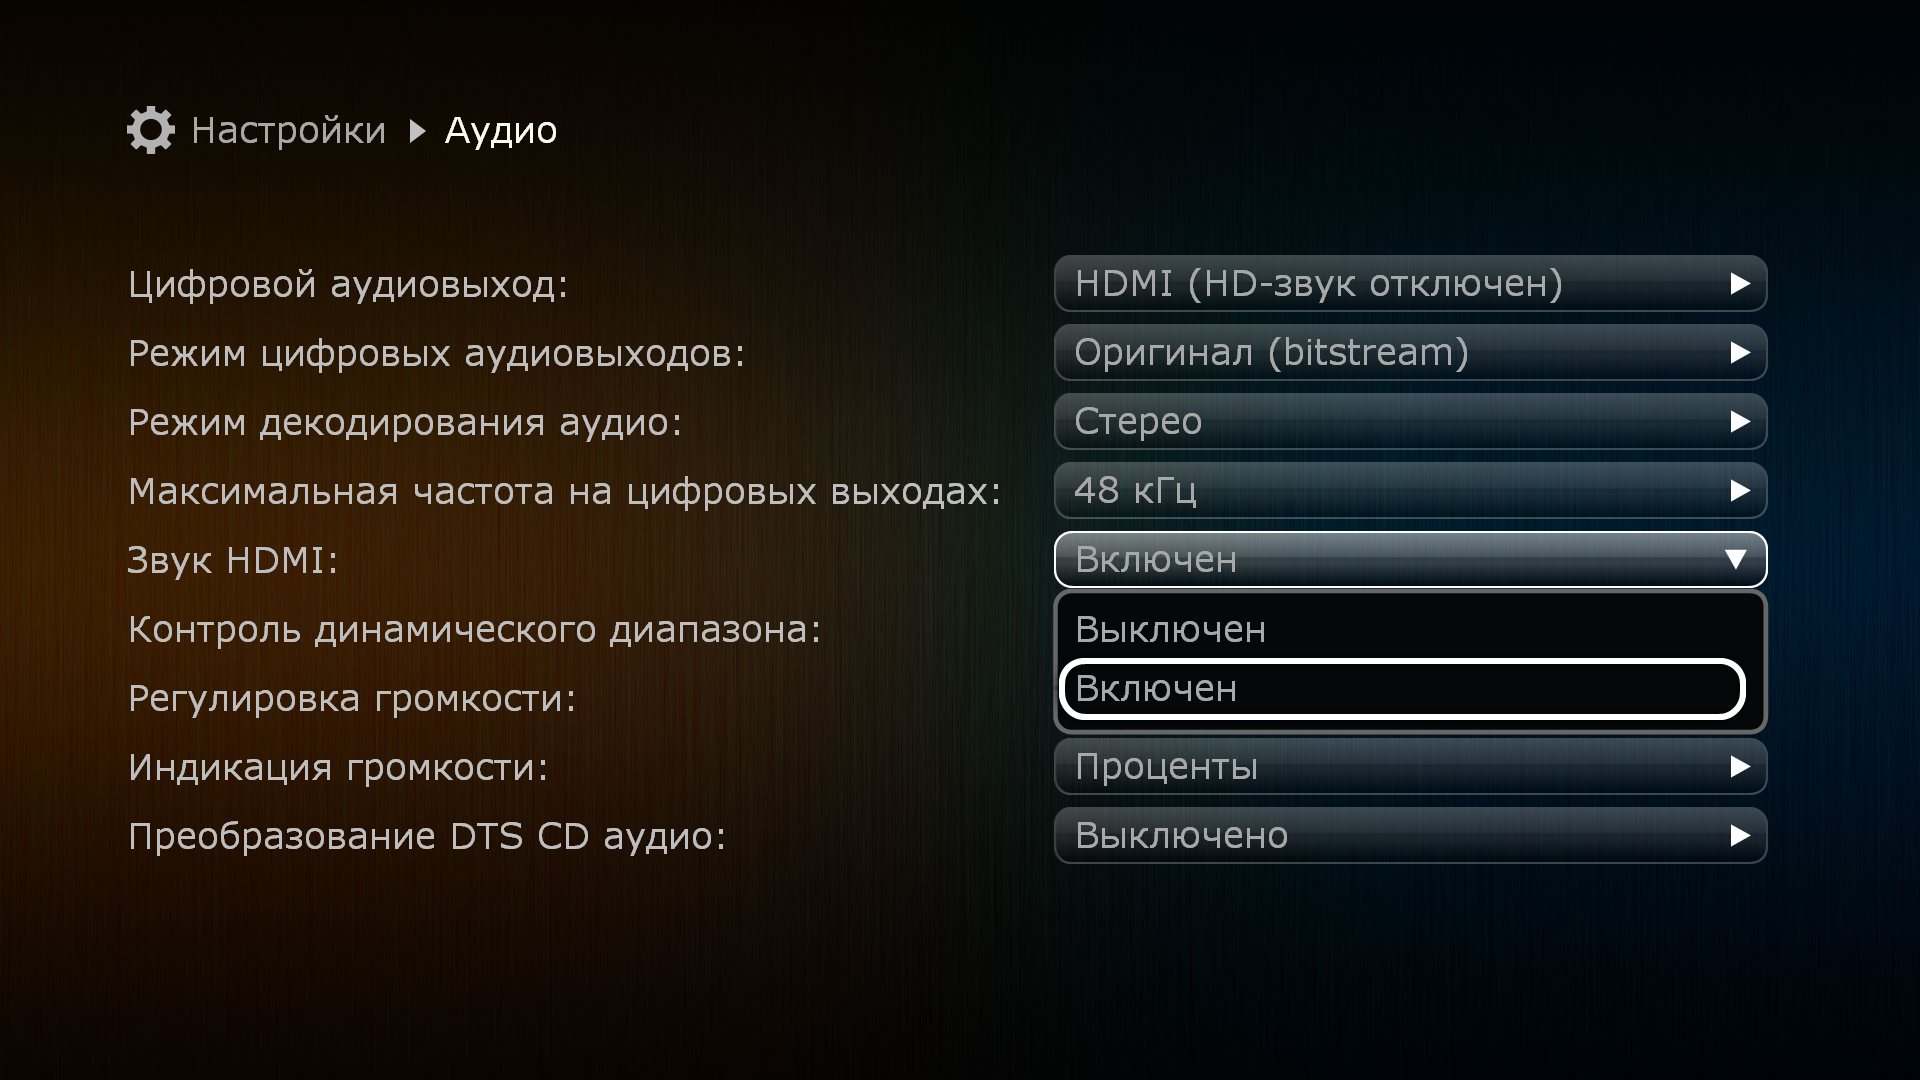
В меню верхнего уровня выбрать раздел «Настройки»
В разделе «Настройки» выбрать подраздел «Аудио»
В выпадающем меню пункта «Звук HDMI» выбрать
В меню верхнего уровня выбрать раздел «Настройки».
В разделе «Настройки» выбрать подраздел «Аудио».
В выпадающем меню пункта «Регулировка громкости» выбрать:
— Режим «Выключена». В этом случае регулировка аудиосигнала с ПДУ будет отключена. Уровень звукового сигнала всегда будет «линейным».
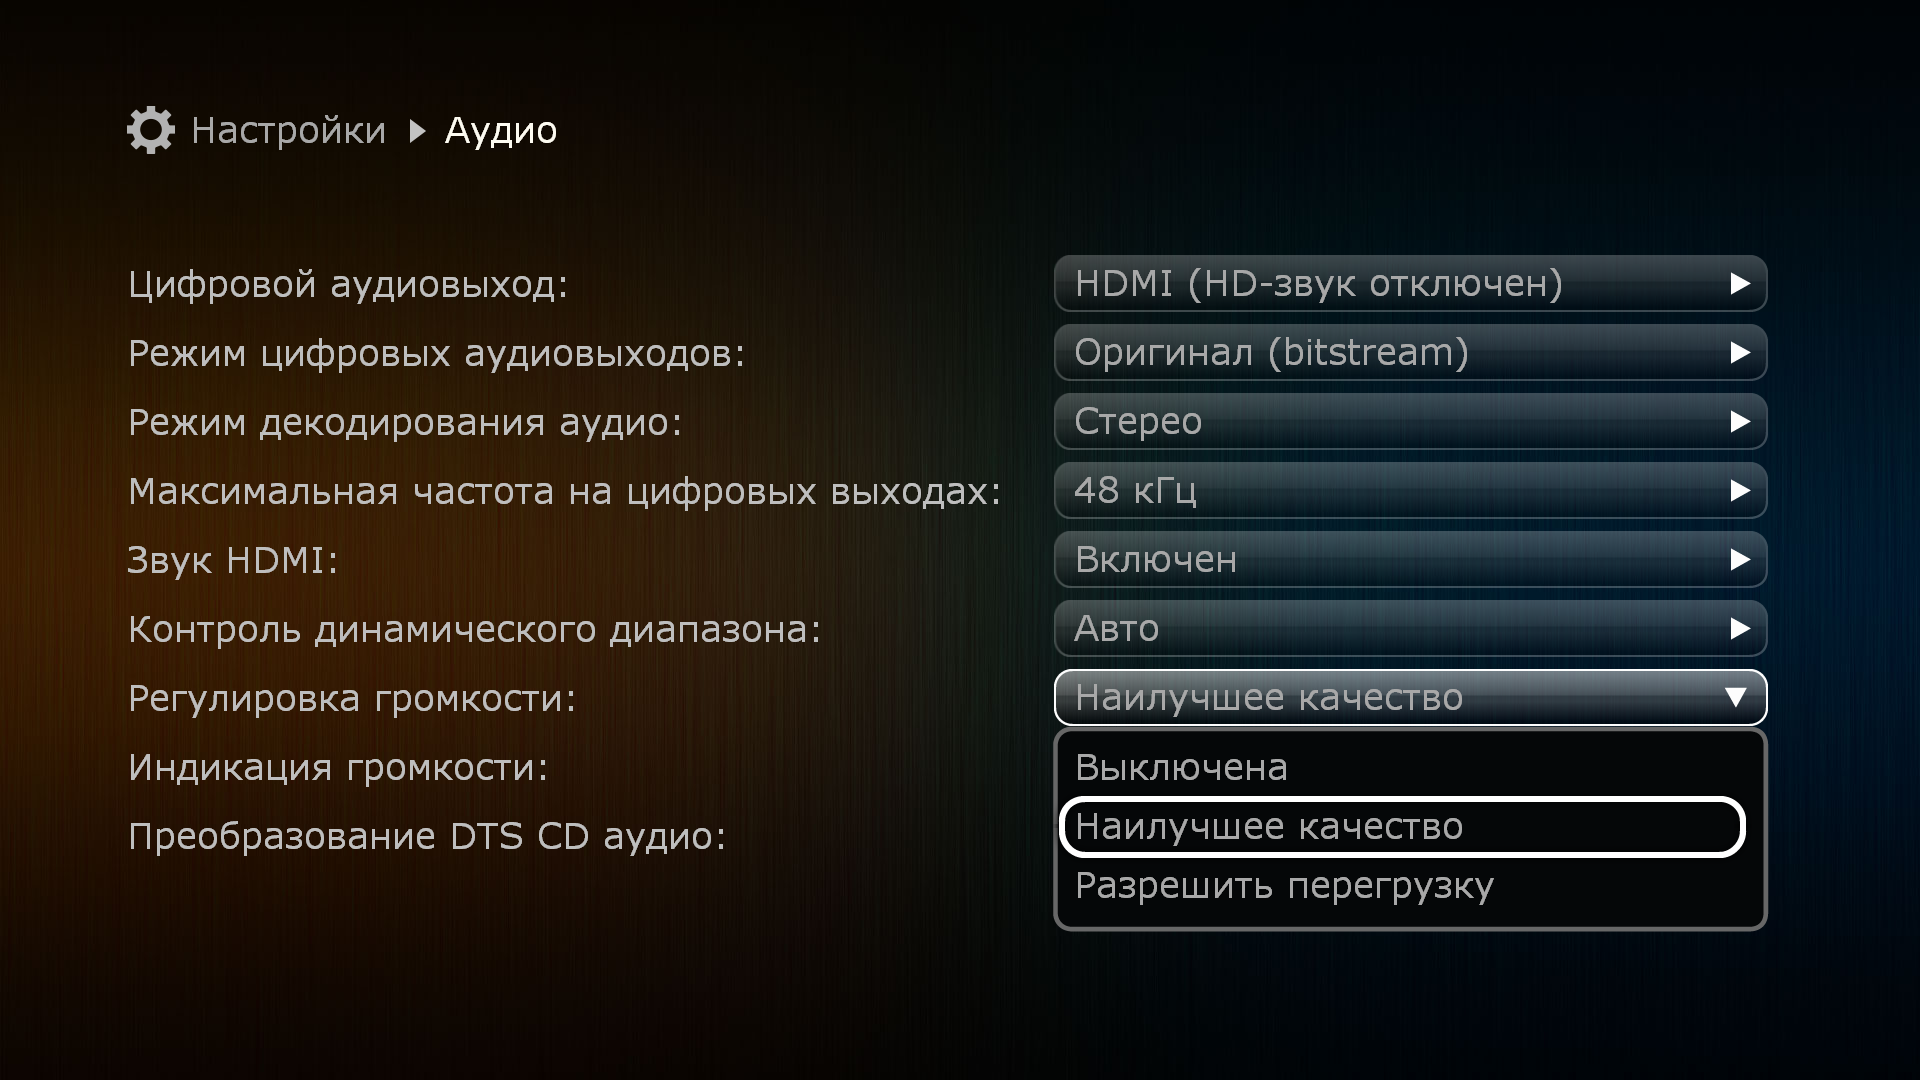
— Режим «Наилучшее качество». При выборе данного режима, регулировка будет разрешена в диапазоне от 0% до 100%. В случае долговременного (3-5 секунд) удержания клавиши V+ после достижения 100% будет активирован режим «перегрузки».
— Режим «Разрешить перегрузку». При выборе данного режима, регулировка будет разрешена в диапазоне от 0% до 100%. Режим «перегрузки» разрешён по-умолчанию.
В меню верхнего уровня выбрать раздел «Настройки».
В разделе «Настройки» выбрать подраздел «Аудио».
В выпадающем меню пункта «Индикация громкости» выбрать:
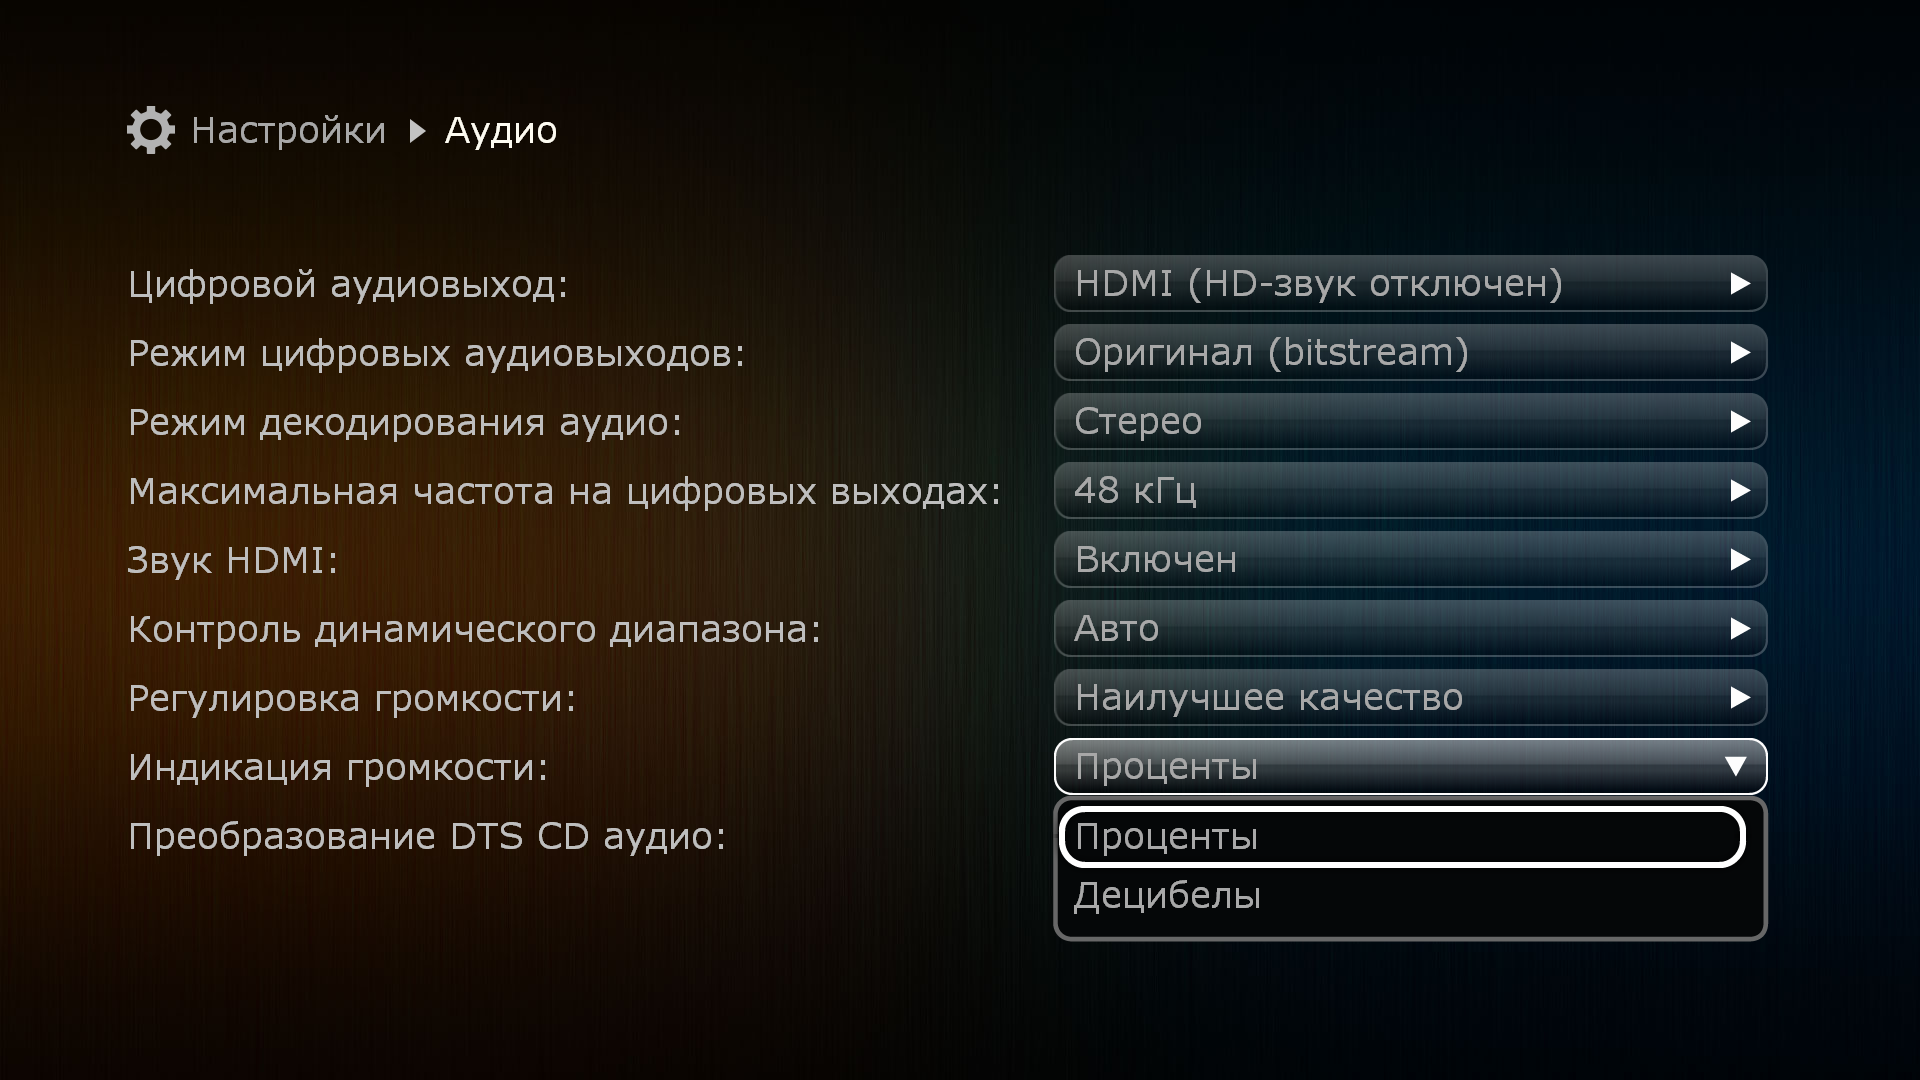
— Режим «Проценты». В данном случае громкость будет измеряться в процентах от 1 до 100 (в случае включения перегрузки, уровень 100% может быть превышен).
— Режим «Децибелы». В данном случае громкость будет измеряться в децибелах в диапазоне от -48 до 0 (в случае включения перегрузки, уровень 0 Дб может быть превышен)
В меню верхнего уровня выбрать раздел «Настройки».
В разделе «Настройки» выбрать подраздел «Аудио».
В выпадающем меню пункта ««Преобразование DTS CD аудио» выбрать:

— Режим «Выключено». Если звук закодирован с разрядностью 14 бит, он воспроизводится без конвертаций до 16 бит.
— Режим «Включено». Если звук закодирован с разрядностью 14 бит, он всегда воспроизводится с конвертаций до 16 бит.
Для того, чтобы сбросить настройки * необходимо:
* — При возникновении проблем c функционированием устройства, рекомендуется произвести мягкий сброс настроек. В случае, если это не решит проблемы, рекомендуется сделать полный сброс.
** — В случае полного сброса настроек плеер полностью удаляет все данные пользователя, приложения и настройки, возвращает устройство к заводским установкам. При мягком сбросе удаляются пользовательские настройки, приложения и данные пользователя остаются нетронутыми
Скачать руководство пользователя в формате PDF
Скачать руководство пользователя в формате PDF
Скачать инструкцию в формате PDF
Описание возможностей пульта дистанционного управления Скачать в PDF