

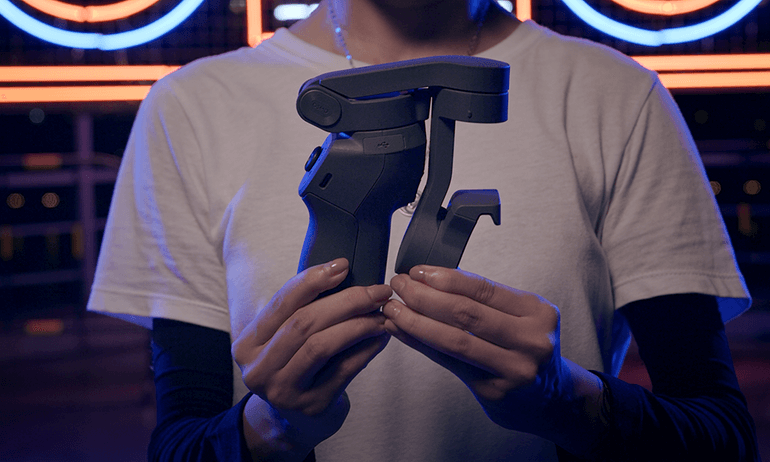
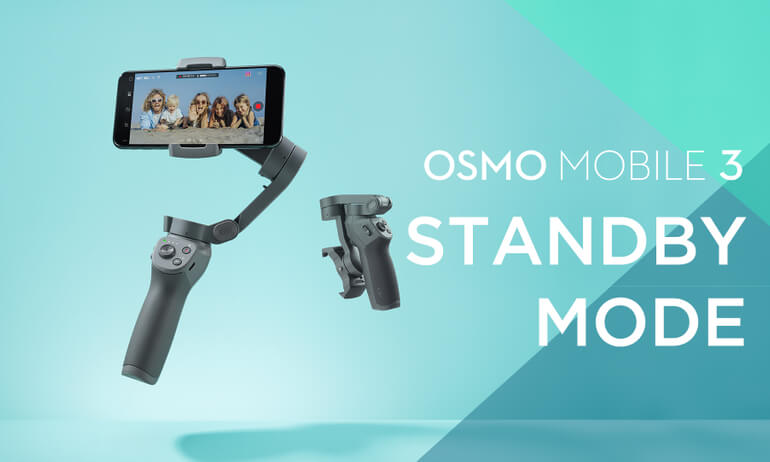
Osmo Mobile 3 — это первый складной кардан от DJI, который является идеальным способом для создания плавных кинематографических кадров на вашем смартфоне. Здесь мы покажем вам, как начать работу с Osmo Mobile 3 в кратчайшие сроки!
Приложение DJI Mimo
В отличие от предыдущих моделей Osmo Mobile, Osmo Mobile 3 теперь подключается к вашему телефону через DJI Mimo. Используя Osmo Mobile 3 с приложением DJI Mimo, пользователи могут воспользоваться новыми функциями, такими как режим «История», который позволяет легко снимать, редактировать и делиться своими повседневными моментами.

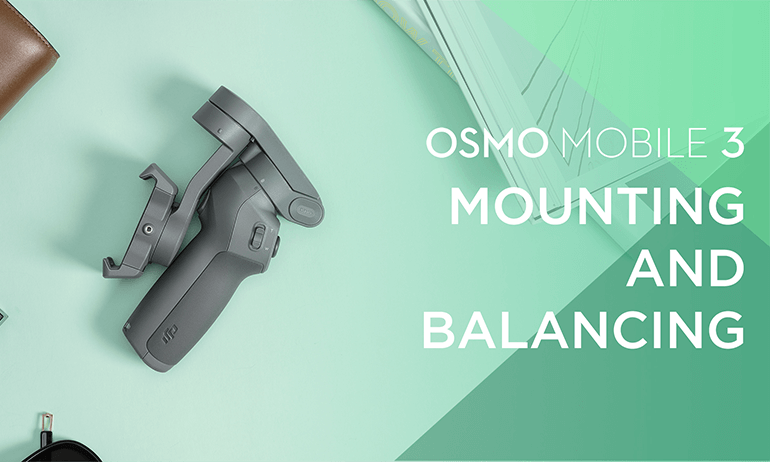
Как отбалансировать Osmo Mobile 3
Ваш смартфон должен быть правильно сбалансирован на Osmo Mobile 3 для записи плавных кадров.
Чтобы сбалансировать Osmo Mobile 3, поместите свой смартфон в держатель телефона, убедившись, что логотип DJI направлен вперед, а камера телефона — слева. Отрегулируйте положение телефона, пока он не останется на месте. Если ваш смартфон падает в одну сторону, отрегулируйте его положение, пока он не останется ровным.
Для получения пошагового руководства о том, как сбалансировать Osmo Mobile 3, ознакомьтесь с нашим удобным руководством ниже.
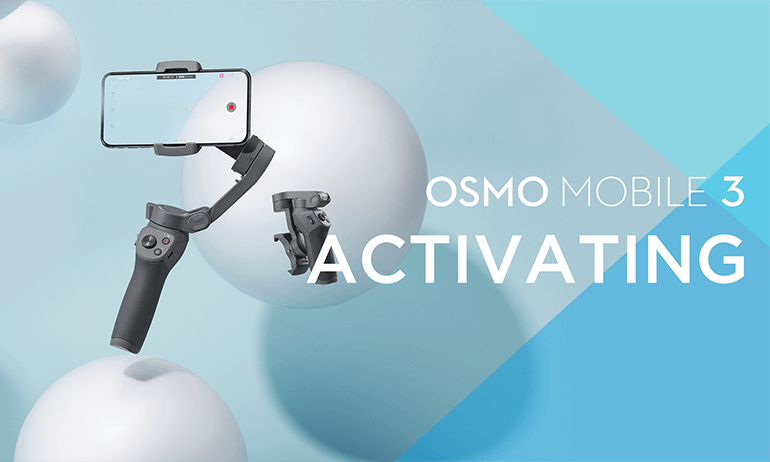
Как активировать Osmo Mobile 3
Перед первым использованием Osmo Mobile 3 вам необходимо активировать устройство. Для этого откройте приложение DJI Mimo и коснитесь значка камеры в верхнем левом углу экрана. Найдите Bluetooth в Osmo Mobile 3 и нажмите «Подключиться». Введите имя своей учетной записи DJI и следуйте инструкциям на экране для завершения активации.
Режим ожидания
Нажмите кнопку M три раза, чтобы войти в режим ожидания. В режиме ожидания светодиодный индикатор будет мигать желтым или зеленым светом, и вы сможете пользоваться смартфоном, когда кардан сложен. Этот режим избавляет вас от необходимости снимать смартфон или балансировать подвес перед каждым использованием.
Кнопка М
Кнопка M на Osmo Mobile 3 имеет несколько функций. Помимо кнопки питания, кнопка M может использоваться для настройки режимов в зависимости от ваших конкретных потребностей. По умолчанию это позволяет пользователям легко переключаться между фотографированием и записью видео. Тем не менее, его также можно использовать для вызова Быстрого Меню, которое позволяет вам изменять функции, не касаясь экрана телефона. Вы также можете дважды нажать кнопку M, чтобы переключиться между книжной и альбомной ориентацией.

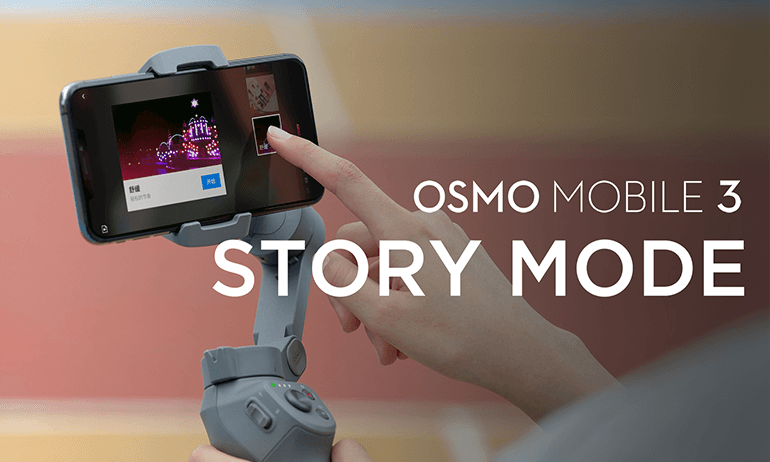
Режим истории
В режиме «История» используются предустановленные творческие шаблоны, которые помогают пользователям создавать короткие кинематографические эпизоды с минимальными усилиями. Чтобы создать видео в режиме «История», выберите шаблон, а затем снимайте каждый клип отдельно. Затем DJI Mimo автоматически разместит снимки вместе с творческими переходами и музыкой для создания уникального видео.
Подробнее о том, как использовать режим Story в Osmo Mobile 3, читайте в нашем полном уроке ниже.
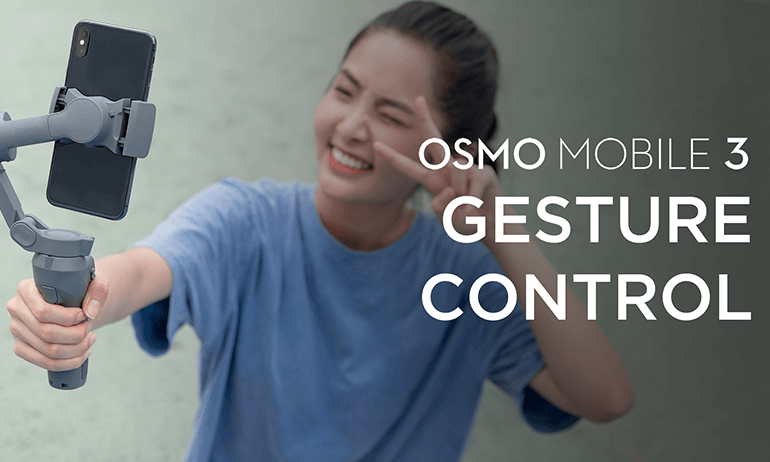
Включить управление жестами
Для управления Osmo Mobile 3 с помощью жестов сначала необходимо включить Gesture Control в меню. Osmo Mobile 3 распознает жесты «ладонь» и «V», чтобы начать запись и начать отслеживание.
Оставайтесь заряженным на ходу
Новый дизайн имеет порт USB на правой стороне рукоятки, что позволяет заряжать смартфон во время съемки. Кроме того, вы можете зарядить Osmo Mobile 3 с помощью аккумулятора, что означает, что у вас никогда не закончится заряд батареи в критический момент.
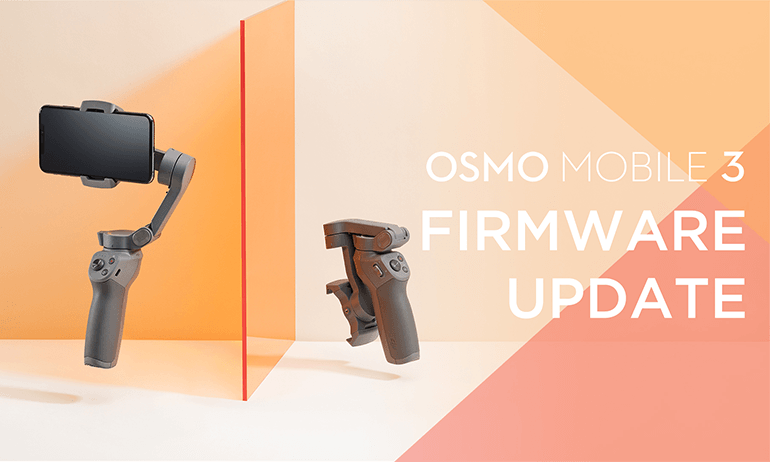
Обновление прошивки
Обновление прошивки Osmo Mobile 3 — лучший способ воспользоваться всеми последними функциями и улучшениями. Если доступно новое обновление прошивки, в приложении DJI Mimo появится приглашение. Просто следуйте инструкциям на экране для обновления.
Для получения дополнительной информации, проверьте процесс ниже!

Творчество без границ
Приложения
![]()
DJI Mimo
Разработанное специально для портативных устройств DJI, DJI Mimo обеспечивает просмотр видео HD в реальном времени, интеллектуальные режимы, которые непросто найти на других портативных стабилизаторах. Все это позволяет вам снимать ролики и редактировать их в несколько нажатий.
v1.11.2
Требуется iOS 12.0 или более поздняя версия.
Просмотр совместимых устройств
iOS v1.11.2
Требуется iOS 12.0 или более поздняя версия.
Совместимость с
v1.11.2
Требуется Android 8.0 или более поздняя версия.
Просмотр совместимых устройств
Android v1.11.2
Требуется Android 8.0 или более поздняя версия.
Совместимость с
Huawei Mate 50 pro、Huawei Mate 50、Huawei Mate 40 pro+、Huawei Mate 40 pro、Huawei Mate 40 、Huawei P60、Huawei P50 Pro、Huawei P50、HONOR Magic 5 pro、HONOR Magic 4、HONOR Magic 3、HONOR 80 Pro、Galaxy S23 Ultra、Galaxy S22 Ultra、Galaxy S22、Galaxy S20 Ultra、Galaxy S20+、Galaxy S20、Galaxy Z FIip 4、Galaxy Note 20 Ultra、Xiaomi 13 Ultra、Xiaomi 13 Pro、Xiaomi 12 Pro、Xiaomi 12x 、Xiaomi 11 Ultra、Xiaomi 11 Pro、Xiaomi 11、Xiaomi 10 Pro、Xiaomi 10、mix4、Redmi K60 Pro、Redmi K40 Pro、OPPO Find X6 Pro、OPPO Find X5 Pro、OPPO Find X2 Pro、OPPO Find N、OPPO Reno6 Pro+ 5G(Qualcomm Snapdragon)、OPPO Reno5 Pro+5G(Qualcomm Snapdragon)、OnePlus 11、OnePlus 10 Pro、OnePlus 9 Pro、OnePlus 8 Pro、VIVO X90 Pro +、VIVO X90 Pro、VIVO X80 Pro、VIVO X80、VIVO X70 Pro、VIVO X60 Pro、VIVO X30 Pro、iQOO 10 Pro.
Ниже Android 8.0, пожалуйста, нажмите, чтобы загрузить.
* Поддержка остальных устройств находится в процессе разработки и доступна в тестовом режиме.Для получения информации о совместимости устройств обратитесь к странице приложения Mimo на сайте DJI.
![]()
DJI Store
Используйте приложение DJI Store для покупки устройств DJI и получения информации о скидках.
v6.8.6
Требуется iOS 12.0 или более поздняя версия.
Просмотр совместимых устройств
iOS v6.8.6
Требуется iOS 12.0 или более поздняя версия.
Совместимость с
iPhone 14 Pro Max、iPhone 14 Pro、iPhone 14、iPhone 13 Pro Max、iPhone 13 Pro、iPhone 13、iPhone 12 Pro Max、iPhone 12 Pro、iPhone 12、iPhone 11 Pro max、iPhone 11 Pro、iPhone 11、iPhone SE 2020、iPhone XS max、iPhone XS、iPhone XR、iPhone X、iPhone 8 Plus、iPhone 8.
v6.8.5
Требуется Android 7.0 или более поздняя версия.
Просмотр совместимых устройств
Android v6.8.5
Требуется Android 7.0 или более поздняя версия.
Совместимость с
Samsung Galaxy S21,Samsung Galaxy S20,Samsung Galaxy S10+,Samsung Galaxy S10,Samsung Galaxy Note20,Samsung Galaxy Note10+ ,Samsung Galaxy Note9,HUAWEI Mate40 Pro,HUAWEI Mate30 Pro,HUAWEI P40 Pro,HUAWEI P30 Pro,HUAWEI P30,Honor 50 Pro,Mi 11,Mi 10,Mi MIX 4,Redmi Note 10,OPPO Find X3,OPPO Reno 4,vivo NEX 3,OnePlus 9 Pro,OnePlus 9,Pixel 6,Pixel 4,Pixel 3 XL
*Поддержка остальных устройств находится в процессе разработки и доступна в тестовом режиме.
Документация
- Osmo Mobile 3 — Руководство пользователя v1.02019-10-31
- Osmo Mobile 3 — Заявление об отказе от ответственности и руководство по технике безопасности v1.02019-08-13
- Osmo Mobile 3 — Краткое руководство v1.02019-08-13
- Osmo Mobile 3 — Пояснительная записка 2021-02-01
- Osmo Mobile 3 — Mobile Phone Compatibility List 2020-05-26

ABOUT DJI
DJI, or Da-Jiang Innovations Science and Technology Co., Ltd., is a Chinese technology company specializing in the manufacturing and development of unmanned aerial vehicles (UAVs), commonly known as drones. DJI is considered one of the world’s leading companies in the drone industry.
Founded in 2006 by Frank Wang, DJI is headquartered in Shenzhen, China, and has grown rapidly to become a global leader in consumer and professional-grade drones. The company’s products range from small consumer drones to advanced commercial and industrial drones used for various applications.
Introduction
Equipped with 3-axis stabilization, OSMOTM Mobile 3 turns your mobile phone into a camera that can deliver a stabilized and super-smooth image. The foldable design makes Osmo Mobile 3 easy to transport and store. Lightweight and ergonomic, Osmo Mobile 3 puts seamlessly smooth video creation at your fingertips.
Osmo Mobile 3 is easy to use and the mobile phone can be manually adjusted by hand in Follow mode. Get creative with features such as Story mode, ActiveTrackTM 3.0, Hyperlapse, Timelapse, and Pano that are available through the DJI Mimo app.
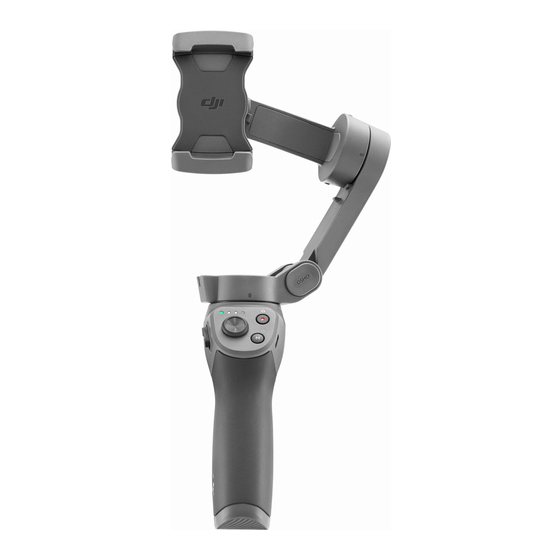
Overview

- Mobile Phone Holder
- M3×0.5 Screw Hole*
- Tilt Motor
- USB-A Port
- Shutter/Record Button
- USB-C Charging Port
- M Button**
- Joystick
- Battery Level Indicators
- LED Status Indicator
- Pan Motor
- Roll Motor
- Zoom Slider
- 1/4”-20 UNC Port
- Lanyard Hole
- Trigger
Getting Started
Charging
- To charge Osmo Mobile 3, connect a USB adapter (not included) to the charging port using the power cable (included). The battery is fully charged when the battery level indicators turn off.
- Charging time: 2.5 hours (when using a 10 W charger)
- Max. runtime: 15 hours*
- Connect your mobile phone to the USB-A port. If Osmo Mobile 3 is powered on, the mobile phone will begin to charge. If Osmo Mobile 3 is powered off, press the M button once to start charging.


* Max. runtime was tested with the gimbal balanced and held steadily. This value should be taken as a reference only.
Mounting and Balancing a Mobile Phone
Only mount and balance a mobile phone while Osmo Mobile 3 is powered off.
Using Osmo Mobile 3
Controls and Operations
The buttons on the handle allow greater control over the gimbal and mobile phone. The gimbal converts joystick movements into smooth pan and tilt transitions and reduces the impact of natural vibrations. In Follow mode, the mobile phone can by adjusted by hand.

- M Button Press and hold to power on. After powering on, press and hold until you hear a beep to enter or exit standby mode. Press and hold until you hear two beeps to power off. When powered off, press once to check the battery level. When powered on, press to switch between photo and video mode or enter or exit the quick menu.
- Press twice to switch between landscape and portrait modes.*
- Press three times to enter or exit standby mode.
- Landscape and portrait mode can also be switched by adjusting the phone holder directly.
- Shutter Button Press once to take a photo or start or stop recording. Press and hold for burst shooting when in photo mode.
- Battery Level Indicators Indicates the battery level of Osmo Mobile 3. With Osmo Mobile 3 powered off, press the M button once to check the battery level.
- System Status LED Indicates the current status of Osmo Mobile 3.
Blinking Pattern Descriptions Solid yellow Bluetooth disconnected Solid green Bluetooth connected Pulses yellow or green Standby mode Blinks red and green alternatively Firmware update required or firmware update failed Solid red Gimbal abnormality (such as temperature is too low or too high, battery is over discharged) - Joystick Move vertically to tilt the mobile phone. Move horizontally to pan the mobile phone. The joystick control direction can be set in DJI Mimo. When using ActiveTrack 3.0, move the joystick to adjust the camera view.
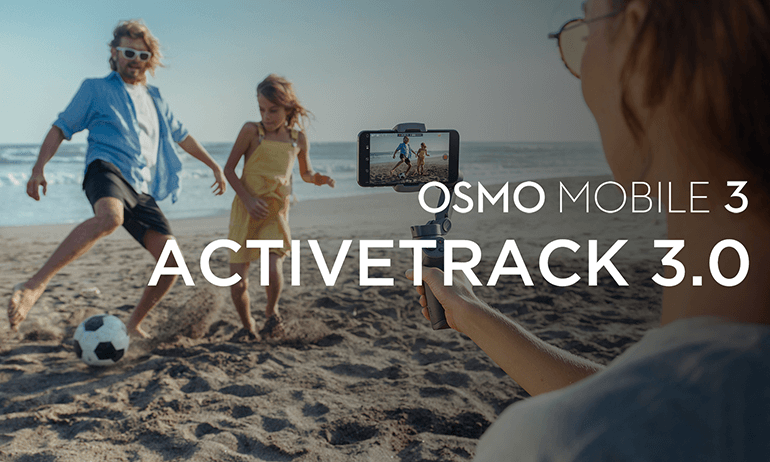
- ActiveTrack 3.0: ActiveTrack 3.0 has been optimized for tracking human subjects with a head and shoulder model along with face detection using deep learning algorithms. The subject will remain in the center of the camera view. The default position is the center of the camera view. Users can also adjust the camera view manually.
There are three ways to use ActiveTrack 3.0: - Drag a box on the screen in the camera view in DJI Mimo. A green box around the subject indicates ActiveTrack 3.0 is successfully enabled. Tap the X icon on the top corner to stop tracking.
- Enable One-press ActiveTrack in DJI Mimo, and press the trigger once to start or stop ActiveTrack 3.0.
- Enable Gesture Control in DJI Mimo, and then perform a palm or V gesture for one to two seconds when facing the camera. The back camera will detect the nearest head and shoulders and start to track the subject. The front camera will detect the nearest face and start to track the subject. The differences between head and shoulder tracking and face tracking are that head and shoulder tracking supports 360° tracking while face tracking does not. Also, the detection range of the camera is different.

The detection range between the back camera and the gesture is 0.5 to 3 m, and the distance between the front camera and the gesture is 0.5 to 2 m.
Note that ActiveTrack 3.0 may increase the power consumption and the temperature of the mobile phone. See the DJI Mimo App section for more information.
- ActiveTrack 3.0: ActiveTrack 3.0 has been optimized for tracking human subjects with a head and shoulder model along with face detection using deep learning algorithms. The subject will remain in the center of the camera view. The default position is the center of the camera view. Users can also adjust the camera view manually.
- Zoom Slider Push up or down to zoom in or out. Push the slider to the T position to enlarge the subject and push the slider to the W position to shrink.
- Trigger Press and hold to enter lock mode. In lock mode, the gimbal will not follow the handle movements. Release to exit lock mode. When ActiveTrack 3.0 is enabled in DJI Mimo, press once to start or stop ActiveTrack 3.0.
- Press twice to recenter the gimbal. When using ActiveTrack 3.0, the gimbal will recenter to the center of the camera view.
- Press three times to switch between the front and back cameras.
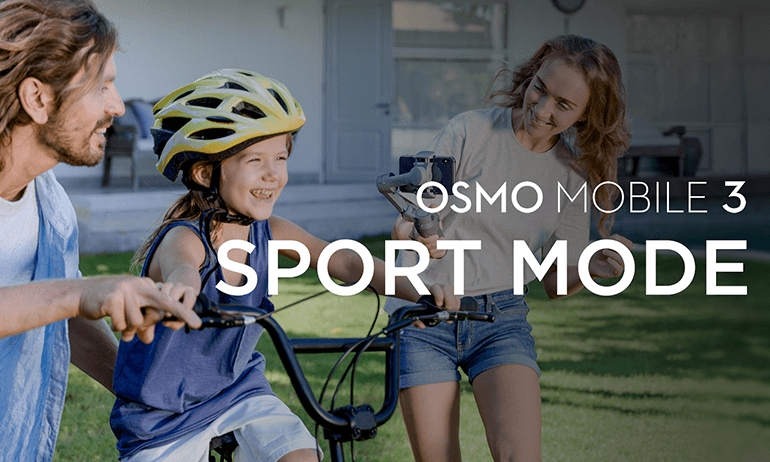
- Press once, and then press and hold to enter Sport mode. Release to exit. In Sport mode, the following speed of the gimbal increases for capturing quick movements.
- USB-C Charging Port Charge Osmo Mobile 3 by connecting a USB adapter to this port. Refer to the Charging section for more information.
- USB-A Port The USB-A port can be used to charge mobile phones.
- 1/4”-20 UNC Port The 1/4″-20 UNC port can be used to attach a tripod.
- Lanyard Hole The lanyard hole can be used to attach a wrist strap.
- Combination Operation Press the M button, shutter button, and trigger simultaneously to reset the Bluetooth connection.

Osmo Mobile 3 will be powered off automatically if there is no operation for 10 minutes in standby mode.
Operation Modes
The figures below depict the operation modes when using Osmo Mobile 3 in landscape mode. The same operation modes apply when used in portrait mode.
- Upright Mode can be used without any further user input. In this mode, press the M button twice quickly to center the mobile phone.
- Underslung Mode Hold Osmo Mobile 3 upside down to enter Underslung mode, in which the mobile phone can easily capture images from a lower position.
- Side Grip Mode Rotate Osmo Mobile 3 to the right or left by 90° to go from Upright to Side Grip mode.

- Upright Mode
- Underslung Mode
- Side Grip Mode
Due to sensor noise, the handle may vibrate slightly when the gimbal is moving. This phenomenon is normal and does not affect shooting stability.
Note that in Follow mode, to make sure the gimbal can be centered quickly and resume tracking, the mobile phone will be within ±3° of the true center after re-centering. The joystick can be used to fine-tune the position of the mobile phone.
DJI Mimo App
Watch a live HD video feed on your mobile screen through the DJI Mimo app. The app also allows you to use Story mode, Hyperlapse, Timelapse, ActiveTrack 3.0, and Pano, or configure camera and gimbal settings in just a few taps.

- Camera View: tap to connect to Osmo Mobile 3. Once connected, DJI Mimo enters the camera view.
- Home: tap to return to home.
- Edit: tap to edit photos or video from Osmo Mobile 3 or import and edit from a mobile device.
- Profile: register or log in to a DJI account. View works and settings, check likes and followers, send messages to other users, and connect with the DJI Store.
- Academy: tap to watch tutorials and manuals.
Connecting to the DJI Mimo App
- Power on Osmo Mobile 3.
- Enable Bluetooth on the mobile phone, and connect the device with an OM3 prefix name in DJI Mimo.
- When using Osmo Mobile 3 for the first time, activation is required using DJI Mimo. Follow the instructions to activate.
- Enter camera view after activation is complete.
When connected via Bluetooth, Osmo Mobile 3 is able to control the camera of the mobile phone without DJI Mimo. This feature is available with a mobile phone which supports camera control using the volume button.
Updating the Firmware
Use the DJI Mimo app to update the Osmo Mobile 3 firmware. It takes approximately three minutes to complete an update.
How to Update
Before starting an update, make sure that the battery level is at least 15% (at least two battery level indicators lit). Connect Osmo Mobile 3 to your mobile device and launch DJI Mimo. You will be prompted if a new firmware update is available. To start updating, connect your mobile device to the internet and follow the on-screen instructions.
Do not exit DJI Mimo while updating the firmware. Pay attention to on-screen prompts. The LEDs status indicator will blink green and red alternatively and become solid green once the firmware update has been completed successfully.
If an update is unsuccessful, restart Osmo Mobile 3 and DJI Mimo, and reconnect the Bluetooth, and then retry.
Maintenance
Osmo Mobile 3 is designed to be folded for easier storage and transportation. Ensure to fold the Osmo Mobile 3 when it is powered off.
Rotate the pan and tilt the axis to align with the marks on the gimbal, and then fold Osmo Mobile 3.
Note that the hole on the pan motor should be matched with the marker on the arm.
press the M button to power off Osmo Mobile 3. Osmo Mobile 3 will enter storage mode and can be folded.

Specifications
| Name | OSMO MOBILE 3 |
| Model | OF100 |
|
Dimensions |
Unfolded: 285×125×103 mm
Folded: 157×130×46 mm |
| Weight | 405 g |
| Consumption | 1.2 W (steady and balanced status) |
|
Mechanical Range |
Pan: -162.5° to 170.3°
Roll: -85.1° to 252.2° Tilt: -104.5° to 235.7° |
| Max Controllable Speed | 120°/s |
|
Compatible Phones |
Weight: 200 ± 30 g Dimension:
Diagonal ≤ 180 mm (or ≤ 7.08 in) Thickness ≤ 9.5 mm Width: 62-88 mm |
| Mode | Bluetooth Low Energy 5.0 |
| Transmitter Power (EIRP) | ≤4 dBm |
| Operation Frequency | 2.400-2.4835 GHz |
| Battery Type | 18650 Li-ion |
| Capacity | 2450 mAh |
| Energy | 17.64 Wh |
| Voltage | 7.2 V |
| Charging Temperature | 5° to 40° C (41° to 104° F) |
| Operating Temperature | 0° to 40° C (32° to 104° F) |
| Charging Time | 2.5 hours (Measured with a 10W charger) |
| Operating Time | 15 hours (Under ideal conditions with the gimbal fully balanced) |
After-Sales Information
Visit https://www.dji.com/support to learn more about after-sales service policies, repair services, and support.
FAQs DJI Osmo Mobile 3 Combo Gimbal
The Osmo Mobile 3 gimbal costs how much?
As of RM498, the DJI Osmo Mobile 3 is a foldable phone gimbal holder with auto tracking.
Is Osmo 4 preferable to 3?
The DJI Osmo Action 3 takes photos and videos at a higher resolution. The Osmo Action 3 actually has somewhat superior specs when it comes to photo and video resolution, despite the Osmo Action 4 having a larger 1/1.3-inch sensor that should boost low-light performance.
Which Osmo mobile is the best?
Up until recently, DJI’s Osmo Mobile gimbals were pretty much unmatched as convenient, portable, and feature-rich gimbals for the typical user. The Osmo Mobile 6 is the best of the lot.
DJI Osmo Mobile 3 is water-resistant?
The waterproof rating of the Osmo Action 3 and its Waterproof Case is IP68. Use caution when using the camera near hot springs or caustic liquids.
Is the DJI Osmo 3 waterproof?
The Osmo 3 is rated to endure pressure 52 feet below the surface and is waterproof without the need for an external case. For recreational divers, the difference between it and the GoPro Hero series (33 feet) can be significant.
What surpasses Osmo in quality?
The top Osmo substitutes include Imagi, Kano, and Bitsbox. If none of these three possibilities appeal to you, we’ve included more than 20 alternatives below.
Is Zhiyun superior to DJI?
Unquestionably one of the most well-liked smartphone gimbals available right now. It delivers a ton of stabilized fun, folds up a little, sets up quickly, and is lightweight. It is not as versatile as the Zhiyun, but its convenience more than makes up for this.
Should I get a gimbal or a tripod?
When a photographer wants stability, they typically use a tripod or monopod. A gimbal head is something that a photographer who wants stability and control should include.
What makes Osmo so unique?
The Osmo is being used in elementary schools to teach coding, basic math, spelling, and art projects. For younger kids, it can be a wonderful at-home activity and educational tool.
Is the DJI gimbal 4 water-resistant?
DJI OM 4 is water resistant. No.
[embeddoc url=”https://manualsdock.com/wp-content/uploads/2023/08/DJI-Osmo-Mobile-3-Combo-Gimbal.pdf” download=”all”]
Osmo Mobile 3 — это первый складной кардан от DJI, который является идеальным способом для создания плавных кинематографических кадров на вашем смартфоне. Здесь мы покажем вам, как начать работу с Osmo Mobile 3 в кратчайшие сроки!
Приложение DJI Mimo
В отличие от предыдущих моделей Osmo Mobile, Osmo Mobile 3 теперь подключается к вашему телефону через DJI Mimo. Используя Osmo Mobile 3 с приложением DJI Mimo, пользователи могут воспользоваться новыми функциями, такими как режим «История», который позволяет легко снимать, редактировать и делиться своими повседневными моментами.
Как отбалансировать Osmo Mobile 3
Ваш смартфон должен быть правильно сбалансирован на Osmo Mobile 3 для записи плавных кадров.
Чтобы сбалансировать Osmo Mobile 3, поместите свой смартфон в держатель телефона, убедившись, что логотип DJI направлен вперед, а камера телефона — слева. Отрегулируйте положение телефона, пока он не останется на месте. Если ваш смартфон падает в одну сторону, отрегулируйте его положение, пока он не останется ровным.
Для получения пошагового руководства о том, как сбалансировать Osmo Mobile 3, ознакомьтесь с нашим удобным руководством ниже.
Как активировать Osmo Mobile 3
Перед первым использованием Osmo Mobile 3 вам необходимо активировать устройство. Для этого откройте приложение DJI Mimo и коснитесь значка камеры в верхнем левом углу экрана. Найдите Bluetooth в Osmo Mobile 3 и нажмите «Подключиться». Введите имя своей учетной записи DJI и следуйте инструкциям на экране для завершения активации.
Режим ожидания
Нажмите кнопку M три раза, чтобы войти в режим ожидания. В режиме ожидания светодиодный индикатор будет мигать желтым или зеленым светом, и вы сможете пользоваться смартфоном, когда кардан сложен. Этот режим избавляет вас от необходимости снимать смартфон или балансировать подвес перед каждым использованием.
Кнопка М
Кнопка M на Osmo Mobile 3 имеет несколько функций. Помимо кнопки питания, кнопка M может использоваться для настройки режимов в зависимости от ваших конкретных потребностей. По умолчанию это позволяет пользователям легко переключаться между фотографированием и записью видео. Тем не менее, его также можно использовать для вызова Быстрого Меню, которое позволяет вам изменять функции, не касаясь экрана телефона. Вы также можете дважды нажать кнопку M, чтобы переключиться между книжной и альбомной ориентацией.
Режим истории
В режиме «История» используются предустановленные творческие шаблоны, которые помогают пользователям создавать короткие кинематографические эпизоды с минимальными усилиями. Чтобы создать видео в режиме «История», выберите шаблон, а затем снимайте каждый клип отдельно. Затем DJI Mimo автоматически разместит снимки вместе с творческими переходами и музыкой для создания уникального видео.
Подробнее о том, как использовать режим Story в Osmo Mobile 3, читайте в нашем полном уроке ниже.
Включить управление жестами
Для управления Osmo Mobile 3 с помощью жестов сначала необходимо включить Gesture Control в меню. Osmo Mobile 3 распознает жесты «ладонь» и «V», чтобы начать запись и начать отслеживание.
Оставайтесь заряженным на ходу
Новый дизайн имеет порт USB на правой стороне рукоятки, что позволяет заряжать смартфон во время съемки. Кроме того, вы можете зарядить Osmo Mobile 3 с помощью аккумулятора, что означает, что у вас никогда не закончится заряд батареи в критический момент.
Обновление прошивки
Обновление прошивки Osmo Mobile 3 — лучший способ воспользоваться всеми последними функциями и улучшениями. Если доступно новое обновление прошивки, в приложении DJI Mimo появится приглашение. Просто следуйте инструкциям на экране для обновления.
Для получения дополнительной информации, проверьте процесс ниже!
- на главную
- Продукция
- Osmo Mobile 3
- Характеристики
Рукоятка
| Размеры | 285×125×103 мм (в разложенном состоянии) 157×130×46 мм (в сложенном состоянии) |
|---|---|
| Масса | 405 г |
| Модель | OF100 |
Стабилизатор
| Энергопотребление | 1,2 Вт *В идеальных условиях при оптимальной балансировке стабилизатора. |
|---|---|
| Рабочий диапазон углов вращения | |
| Механический диапазон углов вращения | Поворот: -162,5°…170,3° Крен: -85,1°…252,2° Наклон: -104,5°…235,7° |
| Макс. контролируемая скорость | 120°/с |
Приложение
| Приложение | DJI Mimo |
|---|
Аккумулятор
| Тип | 18650, литий-ионный |
|---|---|
| Емкость | 2450 мАч |
| Энергия | 17,64 Вт/ч |
| Напряжение | 7,2 В |
| Диапазон температур зарядки | +5°…+40℃ |
| Диапазон рабочих температур | 0°…+40℃ |
| Время работы | 15 ч. *В идеальных условиях при оптимальной балансировке стабилизатора. |
| Время зарядки | 2,5 ч. *При использовании зарядного устройства мощностью 10 Вт. |
Беспроводная связь
| Модель | Bluetooth 5.0 с низким энергопотреблением |
|---|
Intro
DJI — Osmo Mobile 3 — Imagination Unfolded
2019-08-13
Tutorials
Activating Osmo Mobile 3
2019-08-13
Firmware Update
2019-08-13
Balancing Osmo Mobile 3
2019-08-13
Gesture Control
2019-08-13
Activetrack 3.0
2019-08-13
MANUALS
-
Osmo Mobile 3 Quick Start Guide v1.0
2019-08-13
-
Osmo Mobile 3 Disclaimer and Safety Guidelines
2019-08-13
-
Osmo Mobile 3 Release Notes
2019-10-09
-
Osmo Mobile User Manual v1.0
2019-08-13
- Общие
- 1.Совместим ли Osmo Mobile 3 со всеми моделями телефонов?
Osmo Mobile 3 совместим со смартфонами шириной 62–88 мм и толщиной до 9,5 мм. Эти параметры соответствуют практически всем современным моделям. Обратите внимание, что используемые с мобильным устройством аксессуары могут повлиять на совместимость. Также следует учитывать конфигурацию модели: расположение боковых кнопок и т. д.
- 2.Как включить Osmo Mobile 3 в первый раз?
Шаг 1. Сначала убедитесь, что Osmo Mobile 3 заряжается корректно. Кабель для зарядки должен быть подключен к порту USB-C с правой стороны Osmo Mobile 3.
Шаг 2. Закрепите телефон на Osmo Mobile 3 и выполните балансировку. Следуйте инструкциям в обучающих видео для балансировки телефона.
Шаг 3. Нажмите и удерживайте кнопку питания, чтобы включить Osmo Mobile 3. Запустите приложение DJI Mimo и выберите Osmo Mobile 3. Следуйте инструкциям в приложении, чтобы осуществить подключение Bluetooth, регистрацию и активацию.
- 3.Должен ли смартфон соответствовать каким-либо требованиям аппаратного обеспечения для использования Osmo Mobile 3?
Osmo Mobile 3 использует Bluetooth 5.0 с низким энергопотреблением, поэтому качество его работы улучшается, если телефон также оснащен Bluetooth 5.0 (и выше) с низким энергопотреблением. Мы рекомендуем свериться с техническими характеристиками телефона, чтобы проверить его совместимость.
- 4.Поддерживает ли Osmo Mobile 3 управление жестами? Какие жесты можно использовать?
После включения Osmo Mobile 3 откройте приложение DJI Mimo и активируйте функцию управления жестами. Osmo Mobile 3 способен распознавать жесты «Ладонь» и «V».
- 5.Как использовать функцию ActiveTrack 3.0 в Osmo Mobile 3?
ActiveTrack может использоваться тремя способами.
1. Активируйте функцию «Нажатие кнопки блокировки для активации/деактивации ActiveTrack», затем нажмите на кнопку блокировки, чтобы начать автоматическое следование за объектом. расположенным в центре кадра.
2. Вручную выберите цель и начните слежение, используя интерфейс приложения.
3. Активируйте функцию «Управление жестами» и сделайте движение рукой, чтобы начать слежение, сделать фото или видео. - 6.Как переключаться между пейзажной и портретной ориентацией?
Включите Osmo Mobile 3 и нажмите кнопку M дважды, чтобы изменить ориентацию. Также можно переключиться между пейзажной и портретной ориентацией, повернув ось крена вручную.
- 7.Как зафиксировать стабилизатор?
Включите Osmo Mobile 3, затем нажмите и удерживайте кнопку блокировки, чтобы зафиксировать стабилизатор.
- 8.Как активировать спортивный режим?
Включите Osmo Mobile 3, нажмите кнопку блокировки, затем нажмите на нее еще раз и удерживайте, чтобы активировать спортивный режим.
- 9.Как вернуть Osmo Mobile 3 в центральное положение?
Убедитесь, что стабилизатор включен и работает корректно, затем быстро нажмите на кнопку блокировки два раза для центрирования стабилизатора.
- 10.Как переключаться между основной и фронтальной камерами телефона?
Существует два способа:
1) переключиться через приложение DJI Mimo;
2) быстро нажать на кнопку блокировки три раза. - 11.Как приближать и отдалять изображение при помощи Osmo Mobile 3, используя регулятор зума на левой стороне ручки?
Перемещайте регулятор зума вверх для приближения и вниз для отдаления. Учтите, что Osmo Mobile 3 поддерживает только цифровой зум, использование которого может повлиять на качество изображения.
- 12.Сколько режимов панорамы поддерживает Osmo Mobile 3?
Osmo Mobile 3 поддерживает два режима панорамы: 180° и 3×3.
- 13.Поддерживает ли Osmo Mobile 3 соединение Bluetooth?
Да.
- 14.В чем преимущества подключения Bluetooth по сравнению с подключением Wi-Fi?
Подключение Bluetooth быстрее подключения Wi-Fi. После сопряжения устройств через Bluetooth повторное подключение происходит автоматически. Энергопотребление при подключении Bluetooth ниже, чем при использовании Wi-Fi.
- 15.Как узнать, что подключение Bluetooth между Osmo Mobile 3 и мобильным устройством успешно установлено?
При подключении через Bluetooth индикатор состояния становится зеленым, а при отключении – желтым. Подключение Bluetooth также можно проверить в приложении DJI Mimo.
- 16.Как удалить подключенные устройства?
Удалить подключенные устройства можно в настройках Bluetooth вашего мобильного телефона.
- 17.Как получить информацию о статусе обновления программного обеспечения (ПО) Osmo Mobile 3?
Во время обновления ПО индикатор мигает красным и зеленым. После успешного завершения обновления индикатор становится зеленым. При сбое обновления ПО индикатор будет мигать красным и зеленым, вы также получите оповещение в приложении DJI Mimo.
- 18.Способен ли Osmo Mobile 3 идентифицировать мобильные телефоны, как Osmo Mobile?
Нет.
- 19.Можно ли подключить другой стабилизатор или камеру к Osmo Mobile 3?
Нет. Osmo Mobile 3 не предназначен для совместной работы с другими стабилизаторами и камерами.
- 20.Чем отличается Osmo Mobile 3 от Osmo Mobile 2?
Функции
1. Благодаря удобно расположенным кнопкам и интуитивным функциям управление Osmo Mobile 3 удобно осуществлять одной рукой, что обеспечивает свободу движений при съемке любых кадров.
2. Больше интеллектуальных режимов съемки, таких как спортивный режим и управление жестами. ActiveTrack 3.0 обеспечивает плавность кадров при отслеживании.
3. Можно использовать совместно с DJI Mimo.
Внешний вид
1. Складной дизайн и небольшой размер Osmo Mobile 3 позволяют повсюду брать его с собой.
2. Благодаря интеллектуальному эргономичному дизайну рукоятки Osmo Mobile 3 удобно удерживать в течение длительного времени.
3. Osmo Mobile 3 совместим с более широким спектром устройств и может использоваться для зарядки мобильных телефонов. - DJI Mimo
- 1.Можно ли использовать ActiveTrack, таймлапс и панораму при портретной ориентации?
Да.
- 2.Есть ли разница в использовании ActiveTrack 3.0 при съемке фронтальной и основной камерой?
Нет. Разрешение камеры не влияет на способность отслеживания ActiveTrack 3.0.
- 3.В чем разница между режимами таймлапса, динамичного таймлапса и гиперлапса?
Таймлапс подходит для съемки происходящего из одной точки за счет установки Osmo Mobile 3 на штатив или крепление.
Динамичный таймлапс позволяет пользователям снимать таймлапс в движении, используя точки траектории.
Гиперлапс обеспечивает запись происходящего в ускоренном режиме при одновременном движении стабилизатора. Эту функцию рекомендуется совмещать с ActiveTrack 3.0. - 4.Можно ли настроить параметры камеры в приложении DJI Mimo?
Да. Перейдите в меню камеры приложения DJI Mimo для настройки параметров вручную.
*В настоящий момент изменение параметров экспозиции в приложении DJI Mimo недоступно для устройств на базе Android. - 5.Можно ли менять скорость слежения в приложении DJI Mimo?
Нет.
- 6.Можно ли задать скорость зума в приложении DJI Mimo?
Да. Скорость зума можно настраивать путем перемещения регулятора в приложении.
- 7.Можно ли задать скорость движения джойстика?
Да. Вы можете выбрать медленную, среднюю и быструю скорость джойстика в приложении.
- 8.Можно ли задать разрешение в приложении при записи видео?
При записи видео разрешение, установленное в DJI Mimo по умолчанию, составляет 720p. Вы можете изменить разрешение видео в приложении. Однако максимальное разрешение видео зависит от камеры вашего телефона.
- 9.Влияют ли настройки камеры в приложении DJI Mimo непосредственно на разрешение видео моего телефона?
Нет.
- 10.Есть ли в приложении DJI Mimo данные о том, сколько памяти для записи видео осталось в моем телефоне?
Нет.
- 11.Можно ли активировать функции экспозамера, фокуса и масштаба во время съемки в режиме «Динамичный таймлапс»?
Да, но это зависит от телефона. Если телефон позволяет это сделать, настройки в приложении DJI Mimo можно изменить вручную.
- 12.Сколько точек можно выбрать для динамичного таймлапса?
Можно выбрать до четырех точек.
- 13.Можно ли сохранить исходные снимки при панорамной съемке?
Да. В режиме панорамы перейдите в настройки камеры и активируйте функцию «Сохранять исходные фото».
- 14.Где сохраняются фотографии и видео, снятые с помощью Osmo Mobile 3?
На устройствах iOS фото и видео сохраняются в альбом. На устройствах Android фото и видео сохраняются в памяти телефона или на карте памяти microSD.
- 15.Можно ли использовать ретушь для фото и видео?
Да. Наивысшее возможное разрешение видео составляет 720p.
- 16.Доступен ли режим ретуши при использовании основной и фронтальной камер для съемки?
Да.
- 17.Можно ли снимать видео в режиме реального времени, используя приложение DJI Mimo и платформы сторонних производителей?
Нет.
- 18.Можно ли изменить качество изображения в режимах ActiveTrack и панорамы?
Нет.
- 19.Можно ли осуществить подключение Osmo Mobile 3 с помощью приложений DJI GO или DJI GO 4?
Нет. Приложение DJI Mimo предназначено для использования Osmo Mobile 3.
- Аккумулятор
- 1.Сколько длится зарядка и на сколько хватает аккумулятора Osmo Mobile 3? Можно ли заменить аккумулятор?
Чтобы полностью зарядить устройство, потребуется 2,5 часа при мощности 5В/2А. Этого заряда хватает на 15 часов. *Встроенный аккумулятор нельзя заменить.
*В идеальных условиях при оптимальной балансировке стабилизатора. - 2.Как заряжать Osmo Mobile 3? Какова сила тока зарядки?
Вы можете зарядить Osmo Mobile 3, используя порт зарядки USB-С с правой стороны рукоятки. Рекомендуемая сила тока: 2А.
- 3.Как Osmo Mobile 3 заряжает мобильное устройство, при какой силе тока?
Для зарядки других устройств может использоваться порт USB с обратной стороны рукоятки Osmo Mobile 3.
Сила тока: около 1 А. - 4.Можно ли использовать Osmo Mobile 3 во время зарядки от него другого мобильного устройства?
Да.
- 5.Нужно ли активировать аккумулятор перед использованием?
Нет.
- 6.Как определить, что Osmo Mobile 3 заряжается?
По светящимся светодиодным индикаторам.
- 7.Можно ли использовать другие кабели USB для зарядки Osmo Mobile 3?
Да. Однако рекомендуется использовать входящий в комплект стандартный кабель USB для зарядки Osmo Mobile 3.
- 8.Можно ли использовать кабель USB для Osmo Mobile 3, чтобы заряжать другие устройства?
Этого делать не рекомендуется.
- 9.Как можно заряжать другие устройства с помощью Osmo Mobile 3?
1. Osmo Mobile 3 можно использовать для зарядки других электронных устройств путем нажатия кнопки питания один раз, когда Osmo Mobile 3 находится в выключенном состоянии. После успешного подключения устройства к Osmo Mobile 3 и перехода тока зарядки на значение более 300 мА стабилизатор начнет его заряжать, индикаторы аккумулятора замигают. Osmo Mobile 3 автоматически выключится при отсоединении устройства или его полной зарядке.
2. Osmo Mobile 3 можно использовать для зарядки любых электронных устройств, если подключить их к включенному стабилизатору.
3. Osmo Mobile 3 не рекомендуется заряжать во время зарядки от него других устройств.
Примечания:
1. Зарядка других устройств от Osmo Mobile 3 не возможна при температуре ниже +5°C или выше +45°C.
2. Osmo Mobile 3 прекращает зарядку устройств, если ток зарядки превышает 1 A. - Bluetooth
- 1.Как распознать собственный Osmo Mobile 3, если телефон идентифицирует несколько таких устройств?
Со стороны держателя для телефона указан индивидуальный номер каждого устройства. Пользователи могут выбрать устройство в приложении DJI Mimo. Пользователи также могут изменить имя своего устройства в приложении.
- 2.Как подключить Osmo Mobile 3 к другому телефону?
Отсоедините предыдущий телефон и выключите его Bluetooth. Затем подключите Osmo Mobile 3 к другому смартфону.
- Аксессуары
- 1.Каков размер крепежного отверстия в нижней части стабилизатора?
Крепежное отверстие в нижней части Osmo Mobile 3 имеет стандартную резьбу 1/4 – 20 UNC.
- 2.Можно ли присоединить объектив к телефону во время использования Osmo Mobile 3?
Да. Однако дополнительный объектив может нарушить равновесие стабилизатора. Мы не рекомендуем использовать большие и тяжелые объективы. Убедитесь, что общая масса объектива и телефона меньше рекомендуемой для стабилизатора массы.
- 3.Все ли основания Osmo совместимы с Osmo Mobile 3?
Нет.
dji OSMO MOBILE 3 Manual

 Searching for Keywords
Search for keywords such as «battery» and «install» to find a topic. If you are using Adobe Acrobat Reader to read this document, press Ctrl+F on Windows or Command+F on Mac to begin a search. Navigating to a Topic
View a complete list of topics in the table of contents. Click on a topic to navigate to that section. Printing this Document
This document supports high resolution printing.
Using this Manual
Legend
Important Hints and Tips
Download the DJI Mimo App

Scan the QR code or search for «DJI Mimo» on the App Store or Google Play.
The Android version of DJI Mimo is compatible with Android v6.0 and later. The iOS version of DJI Mimo is compatible with iOS v10.0 and later.
Introduction
Equipped with 3-axis stabilization, OSMO™ Mobile 3 turns your mobile phone into a camera that can deliver a stabilized and super-smooth image. The foldable design makes Osmo Mobile 3 easy to transport and store. Lightweight and ergonomic, Osmo Mobile 3 puts seamlessly smooth video creation at your fingertips.
Osmo Mobile 3 is easy to use and the mobile phone can be manually adjusted by hand in Follow mode. Get creative with features such as Story mode, ActiveTrack™ 3.0, Hyperlapse, Timelapse, and Pano that are available through the DJI Mimo app.
Overview


- Mobile Phone Holder
- M3×0.5 Screw Hole*
- Tilt Motor
- USB-A Port
- Shutter/Record Button
- USB-C Charging Port
- M Button**
- Joystick
- Battery Level Indicators
- LED Status Indicator
- Pan Motor
- Roll Motor
- Zoom Slider
- 1/4″-20 UNC Port
- Lanyard Hole
- Trigger
* Used for mounting counterweights.
** Used as the power/function button.
Getting Started
Charging
- To charge Osmo Mobile 3, connect a USB adapter (not included) to the charging port using the power cable (included). The battery is fully charged when the battery level indicators turn off.
Charging time: 2.5 hours (when using a 10 W charger)
Max. runtime: 15 hours* - Connect your mobile phone to the USB-A port. If Osmo Mobile 3 is powered on, the mobile phone will begin to charge. If Osmo Mobile 3 is powered off, press the M button once to start charging.


* Max. runtime was tested with the gimbal balanced and held steadily. This value should be taken as a reference only.
Mounting and Balancing a Mobile Phone
Only mount and balance a mobile phone while Osmo Mobile 3 is powered off.
- Make sure the mobile phone is properly installed and balanced on the holder of Osmo Mobile 3 before each use.
- Mount your mobile phone before powering on Osmo Mobile 3. Osmo Mobile 3 will enter standby mode when no mobile phone is detected.
Using Osmo Mobile 3
Controls and Operations
The buttons on the handle allow greater control over the gimbal and mobile phone. The gimbal converts joystick movements into smooth pan and tilt transitions, and reduces the impact of natural vibrations. In Follow mode, the mobile phone can by adjusted by hand.
- M Button
Press and hold to power on. After powering on, press and hold until you hear a beep to enter or exit standby mode. Press and hold until you hear two beeps to power off.
When powered off, press once to check the battery level. When powered on, press to switch between photo and video mode or enter or exit the quick menu.
Press twice to switch between landscape and portrait mode.*
Press three times to enter or exit standby mode.
* Landscape and portrait mode can also be switched by adjusting the phone holder directly. - Shutter Button
Press once to take a photo or start or stop recording. Press and hold for burst shooting when in photo mode. - Battery Level Indicators
Indicates the battery level of Osmo Mobile 3. With Osmo Mobile 3 powered off, press the M button once to check the battery level. - System Status LED
Indicates the current status of Osmo Mobile 3.
Blinking Pattern Descriptions Solid yellow Bluetooth disconnected Solid green Bluetooth connected Pulses yellow or green Standby mode Blinks red and green alternatively Firmware update required or firmware update failed Solid red Gimbal abnormality (such as temperature is too low or too high, battery is over discharged) - Joystick
Move vertically to tilt the mobile phone. Move horizontally to pan the mobile phone. The joystick control direction can be set in DJI Mimo.
When using ActiveTrack 3.0, move the joystick to adjust the camera view.
ActiveTrack 3.0: ActiveTrack 3.0 has been optimized for tracking human subjects with a head and shoulder model along with face detection using deep learning algorithms. The subject will remain in the center of the camera view. The default position is the center of the camera view. Users can also adjust the camera view manually. There are three ways to use ActiveTrack 3.0:- Drag a box on the screen in the camera view in DJI Mimo. A green box around the subject indicates ActiveTrack 3.0 is successfully enabled. Tap the X icon on the top corner to stop tracking.
- Enable One-press ActiveTrack in DJI Mimo, and press the trigger once to start or stop ActiveTrack 3.0.
- Enable Gesture Control in DJI Mimo, and then perform a palm or V gesture for one to two seconds when facing the camera. The back camera will detect the nearest head and shoulders and start to track the subject. The front camera will detect the nearest face and start to track the subject.
The differences between the head and shoulder tracking and face track are that head and shoulder tracking supports 360° tracking while face tracking does not. Also, the detection range of the camera are different. The detection range between the back camera and the gesture is 0.5 to 3 m, and the distance between the front camera and the gesture is 0.5 to 2 m.
Note that ActiveTrack 3.0 may increase the power consumption and the temperature of the mobile phone. See the DJI Mimo App section for more information.
- Zoom Slide
Push up or down to zoom in or out. Push the slider to the T position to enlarge the subject and push the slider to the W position to shrink. - Trigger
Press and hold to enter lock mode. In lock mode, the gimbal will not follow the handle movements. Release to exit lock mode.
When ActiveTrack 3.0 is enabled in DJI Mimo, press once to start or stop ActiveTrack 3.0.
Press twice to recenter the gimbal. When using ActiveTrack 3.0, the gimbal will recenter to the center of the camera view.
Press three times to switch between front and back cameras.
Press once, and then press and hold to enter Sport mode. Release to exit. In Sport mode, the follow speed of the gimbal increases for capturing quick movements. - USB-C Charging Port
Charge Osmo Mobile 3 by connecting a USB adapter to this port. Refer to the Charging section for more information. - USB-A Port
The USB-A port can be used to charge mobile phones. - 1/4″-20 UNC Port
The 1/4″-20 UNC port can be used to attach a tripod. - Lanyard Hole
The lanyard hole can be used to attach a wrist strap. - Combination Operation
Press the M button, shutter button, and trigger simultaneously to reset the Bluetooth connection.


Osmo Mobile 3 will be powered off automatically if there is no operation for 10 minutes in standby mode.
Operation Modes
The figures below depict the operation modes when using Osmo Mobile 3 in landscape mode. The same operation modes apply when used in portrait mode.
Upright Mode
Upright mode can be used without any further user input. In this mode, press the M button twice quickly to center the mobile phone.
Underslung Mode
Hold Osmo Mobile 3 upside down to enter Underslung mode, in which the mobile phone can easily capture images from a lower position.
Side Grip Mode
Rotate Osmo Mobile 3 to the right or left by 90° to go from Upright to Side Grip mode.
- Due to sensor noise, the handle may vibrate slightly when the gimbal is moving. This phenomenon is normal and does not affect shooting stability.
- Note that in Follow mode, to make sure the gimbal can be centered quickly and resume tracking, the mobile phone will be within ±3° of the true center after re-centering. The joystick can be used to fine-tune the position of the mobile phone.
DJI Mimo App
Watch a live HD video feed on your mobile screen through the DJI Mimo app. The app also allows you to use Story mode, Hyperlapse, Timelapse, ActiveTrack 3.0, and Pano, or configure camera and gimbal settings in just a few taps.
 Camera View: tap to connect to Osmo Mobile 3. Once connected, DJI Mimo enters camera view.
 Home: tap to return to home.
 Edit: tap to edit photos or video from Osmo Mobile 3 or import and edit from a mobile device.
 Profile: register or log in to a DJI account. View works and settings, check likes and followers, send messages to other users, and connect with the DJI Store.
 Academy: tap to watch tutorials and manuals.
Connecting to the DJI Mimo App
- Power on Osmo Mobile 3.
- Enable Bluetooth on the mobile phone, and connect the device with an OM3 prefix name in DJI Mimo.
- When using Osmo Mobile 3 for the first time, activation is required using DJI Mimo. Follow the instructions to activate.
- Enter camera view after activation is complete.
When connected via Bluetooth, Osmo Mobile 3 is able to control the camera of the mobile phone without DJI Mimo. This feature is available with a mobile phone which supports camera control using the volume button.
DJI Mimo App Settings
Camera View
- Home: Tap to return to home page.
- Gimbal Battery Level: Displays the current battery level of the gimbal.
- Mobile Phone Battery Level: Displays the current battery level of the mobile phone.
- Flash: Displays the flash status.
- Gimbal Mode: Displays the current gimbal mode: Follow, Tilt Locked, and FPV.
- Story Mode: Story mode provides several templates for recording video. When you are finished shooting, a video will be generated automatically according to the selected shooting template.
- Front/Back Camera Switch: Tap to switch between the front and back cameras of your mobile phone.
- Shutter Button: Tap to take a photo or to start or stop recording video.
- Shooting Mode
Scroll to select the shooting mode. Choose between Hyperlapse, Timelapse, Slow Motion, Video, Photo, Pano, and Story mode.
Hyperlapse: enable to shoot a Timelapse photo while moving the mobile phone. Tap the shutter button to begin.
Timelapse: there are two types of Timelapse, Position and Path. After selecting the Timelapse, tap the settings at the top of the screen. For Position Timelapse, set the interval and duration time and start to shoot. For Path Timelapse, up to four positions can be selected, and then the gimbal will travel through the positions in order.
Slow Motion: tap to shoot video at 8x slow motion. Only available on iOS devices.
Video: tap to shoot a normal video. Press and hold for burst shooting.
Photo: tap to take a single shot or interval photo.
Pano: tap to take a 3×3 or 180° panorama photo.
Story: Refer to Number 6 for more information about Story mode. - Playback: Tap to preview photos and videos.
- Settings : Shooting Mode Settings
Shooting Mode Settings Hyperlapse Flash, White Balance, Grid, One-press ActiveTrack Timelapse Flash, White Balance, Grid Slow Motion Flash, White Balance, Grid, One-press ActiveTrack Video Flash, White Balance, Grid, One-press ActiveTrack, Gesture Control Photo Flash, White Balance, Grid, One-press ActiveTrack, Gesture Control Pano Flash, White Balance, Grid, Save Unstitched Pano Photos Gimbal Settings
Follow Mode:- Follow: pan and tilt axes follow.
- Tilt Locked: only the pan axis follows.
- FPV: pan, tilt, and roll axes follow.
Sport Mode Switch: tap to enable or disable Sport mode.
Zoom Speed: tap to set the zoom speed when using the zoom slider.
Joystick Speed: tap to set the maximum speed when controlling the joystick. There are Fast, Medium, and Slow options.
Joystick Control Direction: choose from Free and Horiz/Vert. Free enables the gimbal to be controlled in 360°. Horiz/Vert enables the gimbal to be controlled in a horizontal or vertical direction.
Invert Pan Control: after enabling this feature, the pan axis movement direction is the reverse of the joystick direction.
Invert Tilt Control: after enabling this feature, the tilt axis movement direction is the reverse of the joystick direction.
Press M Button: define the feature when pressing the M button once. Select from switching between photo and video mode or enter or exit the quick menu.
Gimbal Auto Calibration: reduces drift caused by nearby magnetic interference or human error. Do not touch the gimbal and hold Osmo Mobile 3 still and upright during calibration.General Settings
Device Management, Device Name, Firmware Version, and SN.
- Camera Settings
Shooting Mode Settings Hyperlapse Resolution and FPS*, Speed, ISO, Shutter, and EV* Timelapse Resolution and FPS*, Speed, ISO, Shutter, and EV* Slow Motion ISO, Shutter, and EV* Video Glamour Effects**, Resolution and FPS*, Speed, ISO, Shutter, and EV* Photo Glamour Effects, Count Down, ISO, Shutter, and EV* Pano 3×3 and 180° Pano, ISO, Shutter, and EV* * FPS, ISO, Shutter, and EV settings are only available for iOS devices.
** When enabling Glamour Effects, the video resolution is set to 720p.
 : Displays the current battery level of the gimbal.
 : Displays the current battery level of the mobile phone.
 : Displays the flash status.
 : Displays the current gimbal mode: Follow, Tilt Locked, and FPV.
 : Story mode provides several templates for recording video. When you are finished shooting, a video will be generated automatically according to the selected shooting template.
 : Tap to switch between the front and back cameras of your mobile phone.
 : Tap to take a photo or to start or stop recording video.
 : Tap to preview photos and videos.
 : Shooting Mode Settings
 Gimbal Settings
 General Settings
Zooming
Place two fingers on the screen and move them apart to zoom in or move them together to zoom out. Note that zooming is only available when using the back camera of your mobile phone.
Updating the Firmware
Use the DJI Mimo app to update the Osmo Mobile 3 firmware. It takes approximately three minutes to complete an update.
How to Update
Before starting an update, make sure that the battery level is at least 15% (at least two battery level indicators lit). Connect Osmo Mobile 3 to your mobile device and launch DJI Mimo. You will be prompted if a new firmware update is available. To start updating, connect your mobile device to the internet and follow the on-screen instructions.
Do not exit DJI Mimo while updating the firmware. Pay attention to on-screen prompts. The LEDs status indicator will blink green and red alternatively and become solid green once the firmware update has completed successfully.
If an update is unsuccessful, restart Osmo Mobile 3 and DJI Mimo, and reconnect the Bluetooth, and then retry.
Maintenance
Osmo Mobile 3 is designed to be folded for easier storage and transportation. Ensure to fold the Osmo Mobile 3 when it is powered off.
Rotate the pan and tilt axis to align with the marks on the gimbal, and then fold Osmo Mobile 3. Note that the hole on the pan motor should be matched with the marker on the arm.
Press the M button to power off Osmo Mobile 3. Osmo Mobile 3 will enter storage mode and can be folded.
Specifications
| Name | OSMO MOBILE 3 |
| Model | OF100 |
| Dimensions | Unfolded: 285×125×103 mm Folded: 157×130×46 mm |
| Weight | 405 g |
| Consumption | 1.2 W (steady and balanced status) |
| Mechanical Range | Pan: -162.5° to 170.3° Roll: -85.1° to 252.2° Tilt: -104.5° to 235.7° |
| Max Controllable Speed | 120°/s |
| Compatible Phones | Weight: 200 ± 30 g Dimension: Diagonal ≤ 180 mm (or ≤ 7.08 in) Thickness ≤ 9.5 mm Width: 62-88 mm |
| Mode | Bluetooth Low Energy 5.0 |
| Transmitter Power (EIRP) | ≤4 dBm |
| Operation Frequency | 2.400-2.4835 GHz |
| Battery Type | 18650 Li-ion |
| Capacity | 2450 mAh |
| Energy | 17.64 Wh |
| Voltage | 7.2 V |
| Charging Temperature | 5° to 40°C (41° to 104°F) |
| Operating Temperature | 0° to 40°C (32° to 104°F) |
| Charging Time | 2.5 hours (Measured with a 10W charger) |
| Operating Time | 15 hours (Under ideal conditions with the gimbal fully balanced) |
After-Sales Information
Visit https://www.dji.com/support to learn more about after-sales service policies, repair services, and support.

For online support, please scan this code with Facebook Messenger
This content is subject to change.
Download the latest version from www.dji.com/osmo-mobile-3

OSMO is a trademark of DJI.
Copyright © 2019 DJI OSMO All Rights Reserved.
Videos
DJI Osmo Mobile 3: SETUP & TUTORIAL VIDEO
Documents / Resources
References
Download manual
Here you can download full pdf version of manual, it may contain additional safety instructions, warranty information, FCC rules, etc.
Download dji OSMO MOBILE 3 Manual
- Manuals
- Brands
- dji Manuals
- Camera Accessories
- OSMO MOBILE 3
- User manual
-
Contents
-
Table of Contents
-
Bookmarks
Quick Links
OSMO MOBILE 3
User Manual
v1.0
2019.08
Related Manuals for dji OSMO MOBILE 3
Summary of Contents for dji OSMO MOBILE 3
-
Page 1
OSMO MOBILE 3 User Manual v1.0 2019.08… -
Page 2: Using This Manual
Scan the QR code or search for «DJI Mimo» on the App Store or Google Play. The Android version of DJI Mimo is compatible with Android v6.0 and later. The iOS version of DJI Mimo is compatible with iOS v10.0 and later.
-
Page 3: Table Of Contents
Download the DJI Mimo App Introduction Overview Getting Started Charging Mounting and Balancing a Mobile Phone Using Osmo Mobile 3 Controls and Operations Operation Modes DJI Mimo App Updating the Firmware Maintenance Specifications After-Sales Information © 2019 DJI OSMO All Rights Reserved.
-
Page 4: Introduction
Lightweight and ergonomic, Osmo Mobile 3 puts seamlessly smooth video creation at your fingertips. Osmo Mobile 3 is easy to use and the mobile phone can be manually adjusted by hand in Follow mode. Get creative with features such as Story mode, ActiveTrack 3.0, Hyperlapse, Timelapse, and Pano…
-
Page 5: Getting Started
Max. runtime: 15 hours* • Connect your mobile phone to the USB-A port. If Osmo Mobile 3 is powered on, the mobile phone will begin to charge. If Osmo Mobile 3 is powered off, press the M button once to start charging.
-
Page 6: Using Osmo Mobile 3
• Hold the tilt motor and move the phone holder left or right until the mobile phone remains balanced when released. Make sure the mobile phone is properly installed and balanced on the holder of Osmo Mobile 3 before each use.
-
Page 7
There are three ways to use ActiveTrack 3.0: a. Drag a box on the screen in the camera view in DJI Mimo. A green box around the subject indicates ActiveTrack 3.0 is successfully enabled. Tap the X icon on the top corner to stop tracking. -
Page 8
Press once, and then press and hold to enter Sport mode. Release to exit. In Sport mode, the follow speed of the gimbal increases for capturing quick movements. 8. USB-C Charging Port Charge Osmo Mobile 3 by connecting a USB adapter to this port. Refer to the Charging section for more information. 9. USB-A Port The USB-A port can be used to charge mobile phones. -
Page 9: Operation Modes
Hold Osmo Mobile 3 upside down to enter Underslung mode, in which the mobile phone can easily capture images from a lower position. Side Grip Mode Rotate Osmo Mobile 3 to the right or left by 90° to go from Upright to Side Grip mode. Upright Mode Underslung Mode Side Grip Mode Due to sensor noise, the handle may vibrate slightly when the gimbal is moving.
-
Page 10: Dji Mimo App
OSMO MOBILE 3 User Manual DJI Mimo App Watch a live HD video feed on your mobile screen through the DJI Mimo app. The app also allows you to use Story mode, Hyperlapse, Timelapse, ActiveTrack 3.0, and Pano, or configure camera and gimbal settings in just a few taps.
-
Page 11
For Position Timelapse, set the interval and duration time and start to shoot. For Path Timelapse, up to four positions can be selected, and then the gimbal will travel through the positions in order. © 2019 DJI OSMO All Rights Reserved. -
Page 12
Gimbal Auto Calibration: reduces drift caused by nearby magnetic interference or human error. Do not touch the gimbal and hold Osmo Mobile 3 still and upright during calibration. General Settings Device Management, Device Name, Firmware Version, and SN. -
Page 13: Updating The Firmware
Note that zooming is only available when using the back camera of your mobile phone. Updating the Firmware Use the DJI Mimo app to update the Osmo Mobile 3 firmware. It takes approximately three minutes to complete an update. How to Update Before starting an update, make sure that the battery level is at least 15% (at least two battery level indicators lit).
-
Page 14: Maintenance
Mobile 3 when it is powered off. Rotate the pan and tilt axis to align with the marks on the gimbal, and then fold Osmo Mobile 3. Note that the hole on the pan motor should be matched with the marker on the arm.
-
Page 15: After-Sales Information
2.5 hours (Measured with a 10W charger) Operating Time 15 hours (Under ideal conditions with the gimbal fully balanced) After-Sales Information Visit https://www.dji.com/support to learn more about after-sales service policies, repair services, and support. For online support, please scan this code with Facebook Messenger…
-
Page 16
This content is subject to change. Download the latest version from www.dji.com/osmo-mobile-3 OSMO is a trademark of DJI. Copyright © 2019 DJI OSMO All Rights Reserved.
![]()
OSMO MOBILE 3
Quick Start Guide
Kurzanleitung
Guía de inicio rápido
Guide de démarrage rapide Guida rapida
Snelstartgids
Guia de início rápido Guia de Início Rápido
Краткое руководство пользователя
v1.0

1
DJI Mimo App

2
 Loading…
You can only view or download manuals with
Sign Up and get 5 for free
Upload your files to the site. You get 1 for each file you add
Get 1 for every time someone downloads your manual
Buy as many as you need
![]()
OSMO MOBILE 3
User Manual
v1.0 2019.08
![]() Searching for Keywords
Searching for Keywords
Search for keywords such as “battery” and “install” to find a topic. If you are using Adobe Acrobat Reader to read this document, press Ctrl+F on Windows or Command+F on Mac to begin a search.
![]() Navigating to a Topic
Navigating to a Topic
View a complete list of topics in the table of contents. Click on a topic to navigate to that section.
![]() Printing this Document
Printing this Document
This document supports high-resolution printing.
Using this Manual
Legend
![]() Important
Important
![]() Hints and Tips
Hints and Tips
Download the DJI Mimo App
Scan the QR code or search for “DJI Mimo” on the App Store or Google Play. https://m.dji.net/mimo
![]() The Android version of DJI Mimo is compatible with Android v7.0 and later. The iOS version of DJI Mimo is compatible with iOS v10.0 and later.
The Android version of DJI Mimo is compatible with Android v7.0 and later. The iOS version of DJI Mimo is compatible with iOS v10.0 and later.
Introduction
Equipped with 3-axis stabilization, OSMOTM Mobile 3 turns your mobile phone into a camera that can deliver a stabilized and super-smooth image. The foldable design makes Osmo Mobile 3 easy to transport and store. Lightweight and ergonomic, Osmo Mobile 3 puts seamlessly smooth video creation at your fingertips.
Osmo Mobile 3 is easy to use and the mobile phone can be manually adjusted by hand in Follow mode. Get creative with features such as Story mode, ActiveTrackTM 3.0, Hyperlapse, Timelapse, and Pano that are available through the DJI Mimo app.
Overview

- Mobile Phone Holder
- M3×0.5 Screw Hole*
- Tilt Motor
- USB-A Port
- Shutter/Record Button
- USB-C Charging Port
- M Button**
- Joystick
- Battery Level Indicators
- LED Status Indicator
- Pan Motor
- Roll Motor
- Zoom Slider
- 1/4″-20 UNC Port
- Lanyard Hole
- Trigger
* Used for mounting counterweights.
** Used as the power/function button.
Getting Started
Charging
- To charge Osmo Mobile 3, connect a USB adapter (not included) to the charging port using the power cable (included). The battery is fully charged when the battery level indicators turn off. Charging time: 2.5 hours (when using a 10 W charger) Max. runtime: 15 hours*
- Connect your mobile phone to the USB-A port. If Osmo Mobile 3 is powered on, the mobile phone will begin to charge. If Osmo Mobile 3 is powered off, press the M button once to start charging.
 * Max. runtime was tested with the gimbal balanced and held steadily. This value should be taken as a reference only.
 * Max. runtime was tested with the gimbal balanced and held steadily. This value should be taken as a reference only.
Mounting and Balancing a Mobile Phone
Only mount and balance a mobile phone while Osmo Mobile 3 is powered off.
Using Osmo Mobile 3
Controls and Operations
The buttons on the handle allow greater control over the gimbal and mobile phone. The gimbal converts joystick movements into smooth pan and tilt transitions and reduces the impact of natural vibrations. In Follow mode, the mobile phone can be adjusted by hand.
- M Button

Press and hold to power on. After powering on, press and hold until you hear a beep to enter or exit standby mode. Press and hold until you hear two beeps to power off.
When powered off, press once to check the battery level. When powered on, press to switch between photo and video mode or enter or exit the quick menu.
Press twice to switch between landscape and portrait mode.*
Press three times to enter or exit standby mode. *
Landscape and portrait mode can also be switched by adjusting the phone holder directly. - Shutter Button
Press once to take a photo or start or stop recording. Press and hold for burst shooting when in photo mode. - Battery Level Indicators
Indicates the battery level of Osmo Mobile 3. With Osmo Mobile 3 powered off, press the M button once to check the battery level.
- System Status LED
Indicates the current status of Osmo Mobile 3.
Blinking Pattern Descriptions Solid yellow Bluetooth disconnected Solid green Bluetooth connected Pulses yellow or green Standby mode Blinks red and green alternatively Firmware update required or firmware update failed Solid red Gimbal abnormality (such as temperature is too low or too high, the battery is over-discharged) -
Joystick Move vertically to tilt the mobile phone. Move horizontally to pan the mobile phone. The joystick control direction can be set in DJI Mimo.
 When using ActiveTrack 3.0, move the joystick to adjust the camera view.
ActiveTrack 3.0: ActiveTrack 3.0 has been optimized for tracking human subjects with a head and shoulder model along with face detection using deep learning algorithms. The subject will remain in the center of the camera view. The default position is the center of the camera view. Users can also adjust the camera view manually. There are three ways to use ActiveTrack 3.0:
a. Drag a box on the screen in the camera view in DJI Mimo. A green box around the subject indicates ActiveTrack 3.0 is successfully enabled. Tap the X icon on the top corner to stop tracking.
b. Enable One-press ActiveTrack in DJI Mimo, and press the trigger once to start or stop ActiveTrack 3.0.
c. Enable Gesture Control in DJI Mimo and then perform a palm or V gesture for one to two seconds when facing the camera. The back camera will detect the nearest head and shoulders and start to track the subject. The front camera will detect the nearest face and start to track the subject. The differences between head and shoulder tracking and face tracking are that head and shoulder tracking supports 360° tracking while face tracking does not. Also, the detection range of the camera is different. The detection range between the back camera and the gesture is 0.5 to 3 m, and the distance between the front camera and the gesture is 0.5 to 2 m. Note that ActiveTrack 3.0 may increase the power consumption and the temperature of the mobile phone. See the DJI Mimo App section for more information.
 -
Zoom Slider Push up or down to zoom in or out. Push the slider to the T position to enlarge the subject and push the slider to the W position to shrink.

-
Trigger
Press and hold to enter lock mode. In lock mode, the gimbal will not follow the handle movements. Release to exit lock mode.
When ActiveTrack 3.0 is enabled in DJI Mimo, press once to start or stop ActiveTrack 3.0.
Press twice to recenter the gimbal. When using ActiveTrack 3.0, the gimbal will recenter to the center of the camera view.
Press three times to switch between front and back cameras. Press once, and then press and hold to enter Sport mode. Release to exit. In Sport mode, the following the speed of the gimbal increases for capturing quick movements.
- USB-C Charging Port
Charge Osmo Mobile 3 by connecting a USB adapter to this port. Refer to the Charging section for more information. - USB-A Port
The USB-A port can be used to charge mobile phones. - 1/4″-20 UNC Port
The 1/4″-20 UNC port can be used to attach a tripod. - Lanyard Hole The lanyard hole can be used to attach a wrist strap.
- Combination Operation Press the M button, shutter button, and trigger simultaneously to reset the Bluetooth connection.


 When using ActiveTrack 3.0, move the joystick to adjust the camera view.
 The differences between head and shoulder tracking and face tracking are that head and shoulder tracking supports 360° tracking while face tracking does not. Also, the detection range of the camera is different. The detection range between the back camera and the gesture is 0.5 to 3 m, and the distance between the front camera and the gesture is 0.5 to 2 m. Note that ActiveTrack 3.0 may increase the power consumption and the temperature of the mobile phone. See the DJI Mimo App section for more information.

![]() Osmo Mobile 3 will be powered off automatically if there is no operation for 10 minutes in standby mode.
Osmo Mobile 3 will be powered off automatically if there is no operation for 10 minutes in standby mode.
Operation Modes
The figures below depict the operation modes when using Osmo Mobile 3 in landscape mode. The same operation modes apply when used in portrait mode.
Upright Mode
An upright mode can be used without any further user input. In this mode, press the M button twice quickly to center the mobile phone.
Underslung Mode
Hold Osmo Mobile 3 upside down to enter Underslung mode, in which the mobile phone can easily capture images from a lower position.
Side Grip Mode
Rotate Osmo Mobile 3 to the right or left by 90° to go from Upright to Side Grip mode.

 Due to sensor noise, the handle may vibrate slightly when the gimbal is moving. This phenomenon is normal and does not affect shooting stability.
- Note that in Follow mode, to make sure the gimbal can be centered quickly and resume tracking, the mobile phone will be within ±3° of the true center after re-centering. The joystick can be used to fine-tune the position of the mobile phone.
DJI Mimo App
Watch a live HD video feed on your mobile screen through the DJI Mimo app. The app also allows you to use Story mode, Hyperlapse, Timelapse, ActiveTrack 3.0, and Pano, or configure the camera and gimbal settings in just a few taps.
![]() Camera View: tap to connect to Osmo Mobile 3. Once connected, DJI Mimo enters the camera view.
Camera View: tap to connect to Osmo Mobile 3. Once connected, DJI Mimo enters the camera view.
![]() Home: tap to return to home.
Home: tap to return to home.
![]() Edit: tap to edit photos or video from Osmo Mobile 3 or import and edit from a mobile device.
Edit: tap to edit photos or video from Osmo Mobile 3 or import and edit from a mobile device.
![]() Profile: register or log in to a DJI account. View works and settings, check likes and followers, send messages to other users, and connect with the DJI Store.
Profile: register or log in to a DJI account. View works and settings, check likes and followers, send messages to other users, and connect with the DJI Store.
![]() Academy: tap to watch tutorials and manuals.
Academy: tap to watch tutorials and manuals.
Connecting to the DJI Mimo App
- Power on Osmo Mobile 3.
- Enable Bluetooth on the mobile phone, and connect the device with an OM3 prefix name in DJI Mimo.
- When using Osmo Mobile 3 for the first time, activation is required using DJI Mimo. Follow the instructions to activate.
- Enter camera view after activation is complete.
![]() When connected via Bluetooth, Osmo Mobile 3 is able to control the camera of the mobile phone without DJI Mimo. This feature is available with a mobile phone which supports camera control using the volume button.
When connected via Bluetooth, Osmo Mobile 3 is able to control the camera of the mobile phone without DJI Mimo. This feature is available with a mobile phone which supports camera control using the volume button.
DJI Mimo App Settings
Camera View

- Home
 : Tap to return to the home page.
 - Gimbal Battery Level
 : Displays the current battery level of the gimbal.
 - Mobile Phone Battery Level
 : Displays the current battery level of the mobile phone.
 - Flash
 : Displays the flash status.
 - Gimbal Mode
 : Displays the current gimbal mode: Follow, Tilt Locked, and FPV.
 - Story Mode S
 : Story mode provides several templates for recording video. When you are finished shooting, a video will be generated automatically according to the selected shooting template.
 - Front/Back Camera Switch
 : Tap to switch between the front and back cameras of your mobile phone.
 - Shutter Button
 : Tap to take a photo or to start or stop recording the video.
 - Shooting Mode
Scroll to select the shooting mode. Choose between Hyperlapse, Timelapse, Slow Motion, Video, Photo, Pano, and Story mode. Hyperlapse: enable to shoot a Timelapse photo while moving the mobile phone. Tap the shutter button to begin. Timelapse: there are two types of Timelapse, Position and Path. After selecting the Timelapse, tap the settings at the top of the screen. For Position Timelapse, set the interval and duration time and start to shoot. For Path Timelapse, up to four positions can be selected, and then the gimbal will travel through the positions in order.
Slow Motion: tap to shoot video at 8x slow motion. Only available on iOS devices.
Video: tap to shoot a normal video.
Photo: tap to take a single shot or interval photo. Press and hold for burst shooting.
Pano: tap to take a 3×3 or 180° panorama photo.
Story: Refer to Number 6 for more information about Story mode. - Playback
 : Tap to preview photos and videos.
 - Settings •••
 : Shooting Mode Settings
Shooting Mode Settings Hyperlapse Flash, White Balance, Grid, One-press ActiveTrack Timelapse Flash, White Balance, Grid Slow Motion Flash, White Balance, Grid, One-press ActiveTrack Video Flash, White Balance, Grid, One-press ActiveTrack, Gesture Control Photo Flash, White Balance, Grid, One-press ActiveTrack, Gesture Control Pano Flash, White Balance, Grid, Save Unstitched Pano Photos  Gimbal Settings
Follow Mode:
a. Follow: pan and tilt axes follow.
b. Tilt Locked: only the pan axis follows.
c. FPV: pan, tilt, and roll axes follow.
Sport Mode Switch: tap to enable or disable Sport mode.
Zoom Speed: tap to set the zoom speed when using the zoom slider.
Joystick Speed: tap to set the maximum speed when controlling the joystick. There are Fast, Medium, and Slow options.
Joystick Control Direction: choose from Free and Horiz/Vert. Free enables the gimbal to be controlled in 360°. Horiz/Vert enables the gimbal to be controlled in a horizontal or vertical direction.
Invert Pan Control: after enabling this feature, the pan axis movement direction is the reverse of the joystick direction.
Invert Tilt Control: after enabling this feature, the tilt axis movement direction is the reverse of the joystick direction.
Press M Button: define the feature when pressing the M button once. Select from switching between photo and video mode or enter or exit the quick menu. Gimbal Auto Calibration: reduces drift caused by nearby magnetic interference or human error. Do not touch the gimbal and hold Osmo Mobile 3 still and upright during calibration. General Settings
Device Management, Device Name, Firmware Version, and SN. - Camera Settings
Shooting Mode Settings Hyperlapse Resolution and FPS*, Speed, ISO, Shutter, and EV* Timelapse Resolution and FPS*, Video Frame Rate, ISO, Shutter, and EV* Slow Motion ISO, Shutter, and EV* Video Glamour Effects**, Resolution and FPS*, Video Frame Rate, ISO, Shutter, and EV* Photo Glamour Effects, Count Down, ISO, Shutter, and EV* Pano 3×3 and 180° Pano, ISO, Shutter, and EV*
* FPS, ISO, Shutter, and EV settings are only available for iOS devices.
** When enabling Glamour Effects, the video resolution is set to 720p.
Zooming
Place two fingers on the screen and move them apart to zoom in or move them together to zoom out. Note that zooming is only available when using the back camera of your mobile phone.
Updating the Firmware
Use the DJI Mimo app to update the Osmo Mobile 3 firmware. It takes approximately three minutes to complete an update.
How to Update
Before starting an update, make sure that the battery level is at least 15% (at least two battery level indicators lit). Connect Osmo Mobile 3 to your mobile device and launch DJI Mimo. You will be prompted if a new firmware update is available. To start updating, connect your mobile device to the internet and follow the on-screen instructions.
Do not exit DJI Mimo while updating the firmware. Pay attention to on-screen prompts. The LEDs status indicator will blink green and red alternatively and become solid green once the firmware update has been completed successfully.
If an update is unsuccessful, restart Osmo Mobile 3 and DJI Mimo, and reconnect the Bluetooth, and then retry.
Maintenance
Osmo Mobile 3 is designed to be folded for easier storage and transportation. Ensure to fold the Osmo Mobile 3 when it is powered off.
Rotate the pan and tilt axis to align with the marks on the gimbal, and then fold Osmo Mobile 3. Note that the hole on the pan motor should be matched with the marker on the arm.
Press the M button to power off Osmo Mobile 3. Osmo Mobile 3 will enter storage mode and can be folded.
Specifications
| Name | OSMO MOBILE 3 |
| Model | OF100 |
| Dimensions | Unfolded: 285x125x103 mm Folded: 157x130x46 mm |
| Weight | 405 g |
| Consumption | 1.2 W (steady and balanced status) |
| Mechanical Range | Pan: -162.5° to 170.3° Roll: -85.1° to 252.2° Tilt: -104.5° to 235.7° |
| Max Controllable Speed | 120°/s |
| Compatible Phones | Weight: 200 ± 30 g Dimension: Diagonal < 180 mm (or < 7.08 in) Thickness < 9.5 mm Width: 62-88 mm |
| Mode | Bluetooth Low Energy 5.0 |
| Transmitter Power (EIRP) | ≤4 dBm |
| Operation Frequency | 2.400-2.4835 GHz |
| Battery Type | 18650 Li-ion |
| Capacity | 2450 mAh |
| Energy | 17.64 Wh |
| Voltage | 7.2 V |
| Charging Temperature | 5° to 40° C (41° to 104° F) |
| Operating Temperature | 0° to 40° C (32° to 104° F) |
| Charging Time | 2.5 hours (Measured with a 10W charger) |
| Operating Time | 15 hours (Under ideal conditions with the gimbal fully balanced) |
After-Sales Information
Visit https://www.dji.com/support to learn more about after-sales service policies, repair services, and support.
![]()
For online support, please scan this code with Facebook Messenger
© 2019 DJI OSMO All Rights Reserved. 15
This content is subject to change.
Download the latest version from
www.dji.com/osmo-mobile-3
OSMO is a trademark of DJI OSMO.
Copyright © 2019 DJI OSMO All Rights Reserved.
![]()
Documents / Resources
References
- User Manual