
Many users around the world are already enjoying the amazing lighting effects delivered by their Vortex RGB HPB 120 Cooling Kit.
To make sure you make the most of this fantastic product, we have prepared this guide to teach you how to install and use it.
Package Contents
Upon opening the box of your brand new COUGAR Vortex RGB HPB 120 Cooling Kit, you will find the following:
- Three Vortex RGB HPB 120 fans
- A COUGAR Core Box or a COUGAR Core Box v2 with its power connector.
- A wireless controller
- 5v addressable RGB adapter/s (three for users with a Core Box, one for users with a Core Box v2).
- Three 4×4 Pin Adapters
- A fan screw pack
- The user manual

Note: The pictures above depict the package contents for a first-batch Vortex RGB HPB 120 Cooling Kit. Second batches will have the Core Box v2 instead of the Core Box, and one 3-pin 5v RGB adaptor instead of three.
Before Starting
- Confirm which version of Core Box is included with your package. The original Core Box has a silver-colored COUGAR logo, while the Core Box v2 has a golden-colored COUGAR logo.
- If you intend to use the RGB lighting motherboard synchronization feature, please make sure your motherboard has a 3-pin 5v RGB addressable header and has addressable RGB synchronization capabilities. It is not possible to use addressable RGB devices such as this cooling kit’s fans with non-addressable 12v 4-pin RGB connections. We have prepared a list of compatible motherboards available here.
- Please note that these instructions refer only to the RGB lighting. Fans have
Note: there are currently
Installation for users with Core Box v2

If your Vortex RGB HPB 120 cooling kit contains a Core Box v2 (with a golden-colored COUGAR logo), the procedure is the same irrespective of whether you plan to control it through the remote controller or your motherboard’s addressable RGB system.
- Connect all your fans to the Core Box v2 as shown in this video:
- Connect your Core Box v2 to your motherboard’s 3-pin 5v Addressable RGB header as shown in this video:
- Connect your Core Box v2 to the appropriate cable of your power supply unit, as shown in this video:
- Then, use your remote controller’s power button to select how to control your COUGAR cooling system’s RGB lighting. Press the power button once to control it with the remote controller; press it again to control it through your motherboard’s addressable RGB control system.
Installation for users with Core Box

If your Vortex RGB HPB 120 Cooling Kit contains a Core Box (you’ll identify it by the silver-colored COUGAR logo on it), there are two different ways of setting up your fans’ RGB lighting according to the method you intend to use to control it.
Mode 1: Fans Connected to Core Box (Remote Controller)
If you intend to use the included remote controller to manage your fans’ lighting, please install your cooling kit according to the following procedure:
- Connect all your fans to the Core Box as shown in this video (this step is the same for Core Box and Core Box v2):
- Connect your Core Box to the appropriate cable of your power supply unit, as shown in this video:
- Enjoy the more than 100 preset dynamic RGB lighting effects that your fans’ addressable LEDs can deliver!
Mode 2: Fans Connected to Motherboard for Synchronization
If you intend to use your motherboard’s 5v addressable RGB lighting ss to manage your fans’ lighting, please install your cooling kit according to the following procedure:
- Connect the fans to each other using the included adaptors. You won’t need to use the Core Box for this purpose. When you’re done, connect the last remaining adaptor to your motherboard.
- Use your motherboard’s addressable RGB system to control it together with your connected COUGAR fans.
Note for All Models with Controller
Please make sure that your controller has a battery installed. For the preinstalled battery that comes with the controller, please make sure the film that protects the battery is removed, as indicated in this video: https://youtu.be/a3hChJN7wv8
Контроллер подсветки Cougar Core Box V3 [3MCOBXV3.0001]
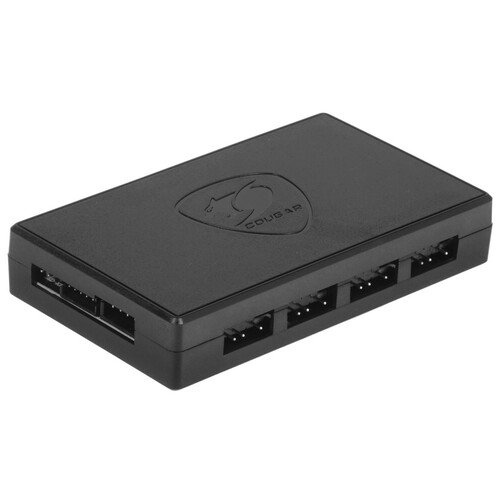
3 pin 5V-D-G (ARGB), 4 pin PWM, SATA Power (15 pin), размещение: внутреннее, разъемы: 3 pin 5V-D-G (ARGB) x6, 4 pin PWM x6
подробнее

73
Код товара: 4725670
Подключение подсветки
PROOF_(42)rus_
Пользователь
Регистрация:
15.01.2012
Сообщения: 897
Рейтинг: 114
![]()
Регистрация:
15.01.2012
Сообщения: 897
Рейтинг: 114
короче купил нью корпус cougar gemini первый провод идет на материнку второй на другие ргб подсветки как я понял а третий идет на какой то cougar core box в компекте нечего не было такого, в итоге у меня только один провод подключен суть в чем? подсветка не меняется и отключается просто горит тускло желтым цветом помогите разобраться
sweet1cherry
Пользователь
Регистрация:
30.09.2020
Сообщения: 29
Рейтинг: 7
![]()
Регистрация:
30.09.2020
Сообщения: 29
Рейтинг: 7
cougar core box — это по сути контроллер. в корпусе он есть?
Или может инструкция имеется к корпусу?
Судя по инструкции есть 3 варианта работы…
1) Подключается только питание от подсветки к БП и идет переключение кнопкой на корпусе
2) Питание в БП и подключение к материнской плате. В таком случае управление подсветкой доступно в софте.
3) Вариант управления через Cougar core box с пульта. При подключении подсветки к нему.
Сам контроллер может и не быть в комплекте или являться комплектным для определенных моделей или регионов.
Также он может быть в комплекте, установленым в корпус, но выглядеть не как для розничной продажи (другая форма или без корпуса)
PROOF_(42)rus_
Пользователь
Регистрация:
15.01.2012
Сообщения: 897
Рейтинг: 114
![]()
Регистрация:
15.01.2012
Сообщения: 897
Рейтинг: 114
sweet1cherry сказал(а):↑
cougar core box — это по сути контроллер. в корпусе он есть?
Или может инструкция имеется к корпусу?
Судя по инструкции есть 3 варианта работы…
1) Подключается только питание от подсветки к БП и идет переключение кнопкой на корпусе
2) Питание в БП и подключение к материнской плате. В таком случае управление подсветкой доступно в софте.
3) Вариант управления через Cougar core box с пульта. При подключении подсветки к нему.
Сам контроллер может и не быть в комплекте или являться комплектным для определенных моделей или регионов.
Также он может быть в комплекте, установленым в корпус, но выглядеть не как для розничной продажи (другая форма или без корпуса)
Нажмите, чтобы раскрыть…
а что за софт? мне второй вариант бы
sweet1cherry
Пользователь
Регистрация:
30.09.2020
Сообщения: 29
Рейтинг: 7
![]()
Регистрация:
30.09.2020
Сообщения: 29
Рейтинг: 7
PROOF_(42)rus_ сказал(а):↑
а что за софт? мне второй вариант бы
Нажмите, чтобы раскрыть…
Если в материнской плате есть разъем для подсветки, то на сайте производителя есть материнской платы должен быть софт для управлению ею.
BoDHbIU
Пользователь
Регистрация:
18.02.2020
Сообщения: 532
Рейтинг: 13
![]()
Регистрация:
18.02.2020
Сообщения: 532
Рейтинг: 13
![]()
sweet1cherry сказал(а):↑
Если в материнской плате есть разъем для подсветки, то на сайте производителя есть материнской платы должен быть софт для управлению ею.
Нажмите, чтобы раскрыть…
Спасибо большое помог работает от софта а от кнопки нет

Тема закрыта
-
Заголовок
Ответов Просмотров
Последнее сообщение
-

Chaiok
28 Nov 2023 в 01:07Сообщений: 3
28 Nov 2023 в 01:07
-
Сообщений: 12
28 Nov 2023 в 00:17Сообщений:12
Просмотров:19
-
Сообщений: 19
28 Nov 2023 в 00:16Сообщений:19
Просмотров:26
-
Сообщений: 8
28 Nov 2023 в 00:04Сообщений:8
Просмотров:13
-
Сообщений: 1
28 Nov 2023 в 00:02


You should upgrade or use an alternative browser.
-
- Oct 3, 2014
-
- 863
-
- 69
-
- 19,840
-
#2
Similar threads
![]()
- Advertising
- Cookies Policies
- Privacy
- Term & Conditions