
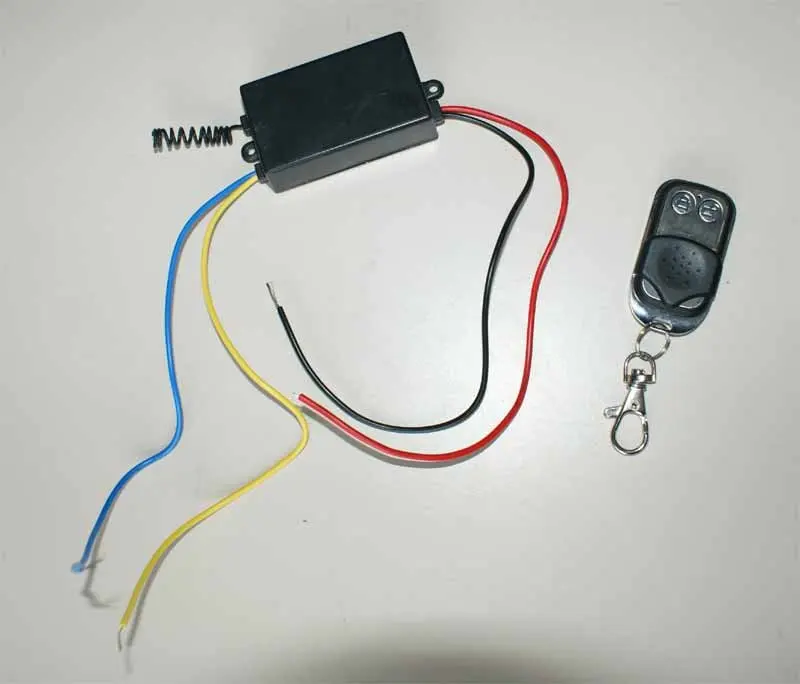
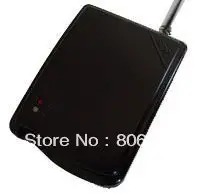
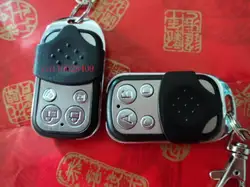
4-канальное беспроводное реле 12В, 2 пульта режимы используется для управления на расстоянии с помощью пульта дистанционного управления и встроенного радио модуля различными приборами с большим входным током. Например, управление освещением, пуском электродвигателей, электронными замками, системами отопления, системами водоснабжения, системами вентиляции и т.п.
Для использования беспроводного реле нужно:
1. Определиться с местом установки. Желательно, чтобы это было место с нормальной температурой и влажностью. Также нужно учитывать отдаленность от места установки коммутируемых устройств и его доступность для радиосигнала.
2. Произвести монтаж релейного блока. Для удобства монтажа плата релейного блока установлена в пластмассовый корпус, на задней крышке которого есть одно подвесное ушко. С помощью подвесного ушка релейный блок можно установить на любой плоской поверхности (стена, пол, потолок). Верхняя часть корпуса имеет вентиляционные отверстия для предотвращения перегрева реле. На торцевой части корпуса есть отверстие для подвода к релейному блоку проводников питания и коммутируемых устройств. Если размеров отверстия будет недостаточно, его можно увеличить или сделать еще несколько отверстий, чему способствует мягкий пластиковый корпус.
3. Подключить к реле питание и коммутируемые устройства. К релейному блоку нужно подвести линию питания. Напряжение питания реле 12 вольт постоянного тока. Линию питания нужно подключить к клеммам-зажимам с обозначением «+» для позитивного полюса и «-» для негативного полюса. Потом к клеммам-зажимам реле нужно подвести и подключить проводники от коммутируемых устройств. Каждое реле имеет 3 контакта A (NO нормально разомкнутый), B (COM общий контакт), C (NC нормально замкнутый).
4. Когда все собрано и подключено, можно приступать к настройке. Реле могут работать в трех режимах:
- режим удержания (реле включено, пока нажата кнопка);
- режим фиксации (нажали кнопку — реле включилось, нажали второй раз – выключилось);
- режим коммутации (каждая последующая команда выключает предыдущую команду).
Выбор режима работы осуществляется с помощью колодки из трех контактов и джампера, который находится на плате модуля.
Обозначение контактов M, без обозначения (назовем его общий), T.
Если замкнуть джампером контакты общий и T, то модуль будет работать в режиме фиксации (в таком положении джампер установлен по умолчанию).
Если замкнуть джампером контакты M и общий, то модуль будет работать в режиме удержания.
Если снять джемпер полностью, то модуль будет работать в режиме коммутации.
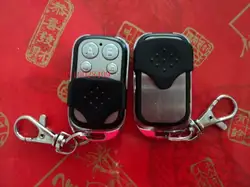
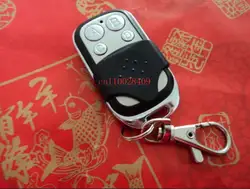
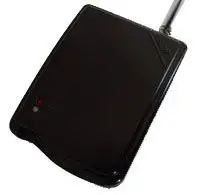
Управление модулем осуществляется с помощью двух пультов дистанционного управления или микроконтроллера, компьютера, или другого микропроцессорного управляющего устройства. Для управления с помощью контроллера нужно демонтировать радио модуль и подключить контроллер. На плате релейного блока установлен радиоприемник модели CHJ – 9921. радиоприемник может одновременно работать на частоте 315 МГц и 433 МГц.
Пульты дистанционного управления оснащены контурными антеннами, четырьмя кнопками A, B, C, D, каждая из которых отвечает за свое реле. При нажатии на любую из кнопок пульта загорается красный светодиод, который находится на верхней плоскости пульта. Дальность работы пульта может достигать 200 метров (на полностью открытом пространстве). Стены, перекрытия, помехи и другие препятствия будут уменьшать дальность приема. Для увеличения дальности приема можно увеличить размер антенны радио модуля.
На плате модуля есть красный светодиод, обозначенный LED. Светодиод LED загорается, когда модуль принимает управляющий сигнал. Для удобства пульты оснащены брелоками с карабинами. На плате модуля есть кнопка, обозначенная K1. Эта кнопка используется для подключения к модулю дополнительных пультов дистанционного управления. Для сопряжения с модулем пульт должен работать на частоте 315 МГц или 433 МГц. Для подключения пульта нужно нажать кнопку K1, чтобы перевести модуль в режим сопряжения. Если модуль будет в режиме сопряжения, то будет гореть красный светодиод LED. Если бездействовать, светодиод LED будет гореть 15 секунд – потом потухнет. Если же, во время горения светодиода, нажать кнопку на новом пульте, то модуль отреагирует, сначала, одиночным миганием, потом выключением светодиода LED. Одна кнопка записана. По такому же принципу нужно подключить остальные кнопки.
На плате релейного блока установлено четыре реле производителя SONGLE модели SRA-12VDC-CL, 20А 14 VDC, 20 А 125 VAC. Как видно из маркировки, реле рассчитаны на нагрузку в 20А (в режиме NO) при напряжении постоянного тока 14В (в режиме NC максимальный ток 15А) или при напряжении переменного тока 125В (режиме NC максимальный ток 10А). При повышении напряжение соответственно будет уменьшаться значение максимальной нагрузки. Эти реле максимально рассчитаны на напряжение 30В постоянного тока или 250В переменного тока. Но при таком напряжении долго работать нельзя.
Питание релейного модуля осуществляется или от управляющего устройства, или от внешних источников питания (блоков питания, батарей). Напряжение питания 12В постоянного тока. Питание пультов осуществляется от элементов питания (батарейки) типоразмера CR2016 (входят в комплект поставки).
Характеристики:
модель: CHJ-C70X;
количество каналов: 4;
напряжение питания: 12В постоянного тока;
модель радиоприемника: CHJ – 9921;
частота работы радиоприемника: 315МГц и 433МГц;
тип антенны в пультах: контурная;
количество кнопок на пультах: 4;
реле: производителя SONGLE модели SRA-12VDC-CL, 20А 14VDC, 20А 125VAC;
максимальный ток нагрузки: 20А;
максимальная дальность приема: 200 м;
размеры пульта: 52 х 30 х 10 мм;
размеры релейного блока: 72 х 53 х 30 мм;
вес комплекта: 112 г.
Комплект поставки:
- 4-канальное беспроводное реле 12В;
- пульт дистанционного управления с предустановленной батарейкой – 2 шт.
Даташит на реле.
Model: CHJ-C70X (allocation white outer covering)
Name: 12 volt four group multi-purpose study wireless teleswitch
(self-locking, interlock, non-lock, interlock non-lock coexists
several kind of working to study choice, 1527.2262 general studies)
Model: CHJ-C70X
First, outline
Our company designs, the manufacture four group wireless
intelligent receive controller, is 4 relay power take-off valve
quantity signal, may enable the equipment which must control to
achieve the electrical machinery, the reverse; Or the switch
passes, breaks the transformation as well as each kind of special
control procedure request. Mainly applies in the electrically
operated gate, the window, hoists up domains and so on equipment,
sluiceway, elevation mechanism, industrial control and peaceful
against profession.
This receives the controller wireless, has the high secrecy, the
stable property, the power loss lowers the characteristic, and the
easy to operate, does not need to use the tradition to jump the
line or dials the code switch code, only need the wireless signal
which launches the remote control let this receive controller
receive and store, then realizes the necessary use.
This controller leaving the plant default may control for only then
a remote control, if studies the good remote control to lose in the
use process, only need select the same type the remote control to
study then cancels the original remote control’s domination and
obtains present’s right of use. Its output mode has four kind of
self-locking, the spot to move, the interlock, interlock non-lock
coexisting separately.
(* like needs other working and the control mode may the custom
make)
Second, output mode
A, the signal self-locking — — corresponds the pressed key study
according to the remote control 2262 chip 10th foot;
B, the signal interlock — — corresponds the pressed key study
according to the remote control 2262 chip 11th foot;
C, the signal non-lock — — corresponds the pressed key study
according to the remote control 2262 chip 12th foot;
D, two group interlock two group non-lock coexisting — — correspond
the pressed key study according to the remote control 2262 chip
13th foot.
Third, study method
Continues to hold down studies the key three seconds, the red
indicating lamp twinkle expression enters the study condition,
according to the remote control random key transmitting message,
the indicating lamp dodges two times extinguishes to the lamp
expressed that studies successfully.
Prompt: * this controller secrecy is high, only allows to study a
remote control, if studies the second first automatic clearing.
* this controller coordination fixed code 2262 remote control uses,
the vibration resistance does not limit, but 4.7M is best.
Fourth, technical parameter
1st, working voltage: DC12V2nd, operating current6mA
3rd, operating temperature: — 20℃ — +804th, received frequency:
315MHz 433MHz
5th, receiving sensitivity: — 105dB6th, output voltage: The
junction, the cocurrent may elect
7th, output current7A8th, size: 68*48*17mm
The operation showed:
1st, to code: Presses down on the receiver the S1 pressed key,
after and so on green LED lighten, loosens this pressed key, enters
to the code condition;
2nd, presses down on remote control’s C key which needs to use, saw
that on receiver’s green LED lamp extinguishes then;
3rd, finished to the code, this remote control might carry on the
operation to it;
Function explanation:
1st, when presses down on remote control’s A key, receives on the
board 1, 2 post separation, 2, 3 post connections;
2nd, when presses down on remote control’s B key, receives on the
board 4, 5 post separations, 5, 6 post connections;
3rd, when presses down on remote control’s C key, receives on the
board 7, 8 post separations, 8, 9 post connections;
4th, when presses down on remote control’s D key, receives on the
board 10, 11 post separations, 11, 12 post connections;
This receiver’s output mode moves (transition condition) for the
spot
The user like needs when many remote controls control this
receiver, only need be many a remote control address forming
equally then. When study to code, only need one of them to the
code, that these code same remote control be possible to control
this receiver.
The user like needs a remote control to control many receivers,
that only need carry on each receiver with this remote control to
the code operation then;
On receiver’s character meaning:
S1: Study to button of the code. Presses down about this button
three seconds, will enter to the code condition. Convenience
necessary remote control;
Green LED: Enters when the study condition indicating lamp;


A-series
Airwheel
www.airwheel.net
MARS ROVER User Manual
Airwheel Intelligent Pioneer
www.airwheel.net
Airwheel
www.airwheel.net
Scan QR Code to
Get Linked to Airwheel.net
About Airwheel
Established in 2004, Airwheel Technology was initiated by a group of pioneers who took constant adventure to reshape the world with edged
technology. With a global view, the U.S.-based enterprise started to build since its establishment R&D centers located in L.A., Beijing, and Changzhou,
a marketing center in Beijing and a manufacturing center in Changzhou. As the leader in global portable intelligent transport industry, we have been
dedicated to extend the fun and benefit of cutting-edge technology to everywhere in the world.
Our Success, Built by Our Customers
Airwheel is keen to exchange opinions and share its fruitful achievements with customers in a simple manner. It is Airwheel's unyielding aim to satisfy and exceed
customers'anticipation. We believe that trust is a pleasure worth passing down via every customer, which in turn challenges us to give genuine responses everyday.
Our Concept, Originated From the Nature and Innovation
The brand name “Airwheel” consists of two elements: Air and Wheel. Air implies the environment, our living space. And wheel symbolizes the spirit
of constant progress and the endless vitality of life. Being an adventurer of science-tech, Airwheel is more of a pilgrim of the nature deep inside. Following
the notion of “Eco-friendly Innovation”, we've always been seeking the balance between science-tech and the nature, which runs through every part of the
design, R&D, manufacturing and sales. It is our ideal to bring our customers back to the nature with Airwheel's portable intelligent transport products.
Our Design, Inspired by Interactions and Experience
Focusing on the development of safe, solid and humanized products, Airwheel is broadly identified with its modern concise design and fresh comfortable user
experience. Airwheel owes its standard-setting products to the care of details and a customer-oriented design concept. We persist with continuous upgrade of user
experience of material, function and safety propelled by customers'opinions and our innovation.
Our Advantage, Contributed by Cooperation and Service
As the leader in global portable intelligent transport industry, Airwheel has built long-term partnership with tech titans like SONY, Panasonic, Google and Qualcomm. A
strong tie with premium business partners will not only bring win-win scenarios, but also create for customers more reliable products with guaranteed user experience.
With advantages in capital and global strategy, Airwheel will continue to provide customers with all-around and interactive service via efficient and humanized resource
integration and cooperation.
About User Manual
This manual includes safety use instructions. Please make sure this manual is read through and fully understood before use.
Packing Details
Airwheel A series (A3) scooter body
1 unit
hexagon wrench
2 pcs
scooter stem, saddle
1 pcs
battery charger
1 unit
remote key
2 pcs
user manual
1 pcs
warranty card
1 pcs
other accessories
1 pcs
Directory
About Airwheel------------------------------------------------------------------------------------------------------------------------------------------------------------About User Manual------------------------------------------------------------------------------------------------------------------------------------------------------Directory--------------------------------------------------------------------------------------------------------------------------------------------------------------------- 01
1. Introduction-------------------------------------------------------------------------------------------------------------------------------------------------------------- 03
2. Installation--------------------------------------------------------------------------------------------------------------------------------------------------------------- 04
2.1 Unpack----------------------------------------------------------------------------------------------------------------------------------------------------- 04
2.2 Check Packing Contents------------------------------------------------------------------------------------------------------------------------------ 05
2.3 Preparation----------------------------------------------------------------------------------------------------------------------------------------------- 06
2.4 Installation------------------------------------------------------------------------------------------------------------------------------------------------ 06
3. Safety--------------------------------------------------------------------------------------------------------------------------------------------------------------------- 08
3.1 Safety Guidelines and Riding Etiquettes---------------------------------------------------------------------------------------------------------- 09
3.2 Initiative Safety Measures---------------------------------------------------------------------------------------------------------------------------- 11
3.3 Warned Scenarios-------------------------------------------------------------------------------------------------------------------------------------- 12
4. Learning Tips------------------------------------------------------------------------------------------------------------------------------------------------------------ 13
4.1 Before Getting Started--------------------------------------------------------------------------------------------------------------------------------- 13
4.2 Learning Tips--------------------------------------------------------------------------------------------------------------------------------------------- 14
4.3 Go Forward and Backward--------------------------------------------------------------------------------------------------------------------------- 15
4.4 Stop and Brake------------------------------------------------------------------------------------------------------------------------------------------ 16
4.5 Make Turns----------------------------------------------------------------------------------------------------------------------------------------------- 17
4.6 Get Off----------------------------------------------------------------------------------------------------------------------------------------------------- 18
4.7 Important Note for Starters--------------------------------------------------------------------------------------------------------------------------- 19
4.8 Download APP -------------------------------------------------------------------------------------------------------------------------------------------- 19
- 01 -
Airwheel Intelligent Pioneer
www.airwheel.net
5. Usage -------------------------------------------------------------------------------------------------------------------------------------------------------------------- 20
5.1 Components--------------------------------------------------------------------------------------------------------------------------------------------- 20
5.2 Get Started----------------------------------------------------------------------------------------------------------------------------------------------- 20
5.3 Kick Stand------------------------------------------------------------------------------------------------------------------------------------------------ 21
5.4 Remote Key---------------------------------------------------------------------------------------------------------------------------------------------- 22
6. Maintenance------------------------------------------------------------------------------------------------------------------------------------------------------------ 23
6.1 Cleaning and Storage--------------------------------------------------------------------------------------------------------------------------------- 23
6.2 Screw Connection-------------------------------------------------------------------------------------------------------------------------------------- 24
6.3 Tire Pressure-------------------------------------------------------------------------------------------------------------------------------------------- 24
6.4 Transportation and Storage-------------------------------------------------------------------------------------------------------------------------- 24
6.5 Remove Battery Pack-------------------------------------------------------------------------------------------------------------------------------- 25
7. Limited Warranty------------------------------------------------------------------------------------------------------------------------------------------------------- 26
8. Specifications----------------------------------------------------------------------------------------------------------------------------------------------------------- 27
9. Appendix----------------------------------------------------------------------------------------------------------------------------------------------------------------- 28
9.1 Drafts------------------------------------------------------------------------------------------------------------------------------------------------------ 28
9.2 Charging Notes----------------------------------------------------------------------------------------------------------------------------------------- 30
9.3 Relation between Range and Load---------------------------------------------------------------------------------------------------------------- 31
9.4 FAQ-------------------------------------------------------------------------------------------------------------------------------------------------------- 32
9.5 Road Test------------------------------------------------------------------------------------------------------------------------------------------------- 34
9.6 Contact Us------------------------------------------------------------------------------------------------------------------------------------------------ 35
- 02 -
Airwheel Intelligent Pioneer
www.airwheel.net
1. Introduction
Airwheel A3 is the state-of-the-art means of transportation adopting aerospace attitude control theory, fuzzy software algorithm,
and gyroscope system to maintain balance by leaning forward and backward. Riders can control the vehicle to go forward, accelerate,
decelerate, brake, etc. by leaning forward or backward. Also, turning A3 is achieved by simply turning the handlebar which will cause the
differential of rotational speed on both wheels, e.g. when the handlebar is turned anti-clockwise, the rotational speed on the right wheel will
be faster than that on the left wheel, thus the unit will turn left. In the meantime, the turning-sensing system will be activated (turn light will
flash).
Being green and eco-friendly, Airwheel A3 can be stowed in the trunk of a car, facilitating a low-carbon travel style.
Forward
Accelerate
Decelerate
- 03 -
Brake
Backward
Airwheel Intelligent Pioneer
www.airwheel.net
2. Installation
2.1 Unpack
After receiving the package, hold the two clasps and place the box vertically on the ground. Open the box and make sure the foam box inside is
placed with the Top side upwards. Open the small cover to take out user manual and charger, then open the big cover to take out the scooter stem.
When taking out the scooter stem, lift it firstly to the height of the scooter body, then move it horizontally through the clasp area. Take out the saddle and
then lift up the foam box. Pull the scooter body carefully towards the ground. When the scooter body tilts to a certain angle, it will roll out.
Charger
Scooter body
TOP symbol
TO
Saddle
User manual
Scooter stem
Clasp
Clasp area
The box includes three main parts: scooter body, scooter stem and saddle. Please follow the
above steps when unpacking so as to avoid potential injuries caused by improper operation.
Given the weight of the scooter body, please lift it upward with care. Better find someone for
necessary help. Please pay attention to the front and rear end of the scooter body, and do not
lift it by the fenders, otherwise your fingers may be caught.
- 04 -
Airwheel Intelligent Pioneer
www.airwheel.net
2.2 Check Packing Contents
After opening the packing box, take out the scooter stem and the saddle. Then take out the scooter body.
Foam box
Scooter stem
Saddle
Scooter body
Given the weight of the scooter body, please lift it upward with care. Better find someone
for necessary help. Please pay attention to the front and rear end of the scooter body, and
do not lift it by the fenders and the tires, otherwise your fingers may be caught.
- 05 -
Airwheel Intelligent Pioneer
www.airwheel.net
2.3 Preparation
Before installation, please find in the standard accessories a set of 2 hexagon wrenches. Please retain this tool kit, it is useful for
maintenance and transportation of the unit. As metric standard tools, you may find replacement at home or in a hardware store.
A pair of work gloves is recommended to protect your hands from dirt and scratches.
2.4 Installation
1. Take out the scooter stem and put down the kick stand (see 5.3) to fix the scooter body. Insert the connector below the stem into the
15-pin plug, then fix them with 5 M6*20 screws and the hexagon wrench. (see I-1)
2. Fix the front and rear supporting plates of the saddle with 2 M6*20 screws. (see I-2)
3. Fix the saddle on the scooter body with 6 M6 screws. (see I-3)
I-1
I-2
I-3
- 06 -
Airwheel Intelligent Pioneer
www.airwheel.net
I-1
I-2
When installing the scooter stem, please check the direction of the 15-pin connector and
make sure the stem is inserted correctly. (see I-1) Also make sure to align the fool-proof
groove properly and then fasten it with 4 exclusive screws. (see I-2)
- 07 -
Airwheel Intelligent Pioneer
www.airwheel.net
3. Safety
There are risks of riding or driving any vehicle. Airwheel A3 is no exception. Please make sure this manual is read through and fully
understood before getting started, and be alert when riding.
Important Note:
1. Sharp acceleration or deceleration or speeding via overly leaning forward or backward are strictly forbidden. When power level
indicators show only one bar left, riding is not recommended. When it happens during the riding, please keep a low speed and
recharge the Airwheel as soon as possible. Use the electronic brake button with special caution before getting proficient control of the
Airwheel or under uncontrollable situation.
6.Drunk or drug riding Airwheel is prohibited.
2. Do not ride Airwheel when risking any accidental falls. Safety goes first.
7.Do not allow persons with high blood pressure,
Attention:
1.Do wear helmet, gloves, elbow/knee pads or other necessary protection gears.
2.Do not ride Airwheel on rough or bumpy surfaces,
such as muddy or gravel roads.
3.Do not ride Airwheel on wet, slippery surafces, especially icy ones.
4.Do not ride Airwheel on slopes of over 15° gradient.
5.Do not allow children under 15 or the aged above 60 to ride Airwheel.
cardiac-cerebral vascular disease, or other high risk
diseases to ride Airwheel.
8.Do not ride Airwheel in extremely cold winter.
9.Do not ride Airwheel in the rain.
10.Do keep slow speed when riding Airwheel on slopes.
11.Do not ride Airwheel in other unadvised situations
caused by either personal or objective reasons.
The user must do a great deal of practice and get full controlling skills before going on
road. Lack of controlling skills or improper operation deviated from user manual may lead
to injuries and damages to the user or the third party. Airwheel is only responsible for
failure and damages of the product, and takes no responsibility for any personal injuries
and property damages.
- 08 -
Airwheel Intelligent Pioneer
www.airwheel.net
3.1 Safety Guidelines and Riding Etiquettes
1. Please learn and abide by local laws and regulations when riding Airwheel A3. Be careful and considerate of others, and take precaution
of accidents and collisions.
2. Please ride at safe and proper speed and make sure your Airwheel is under control.
3. Respect pedestrians and avoid startling pedestrians, especially children. When approaching from behind, announce yourself and slow
down to walking speed when passing.
4. Keep a safe distance from other Airwheel A3 riders and always avert from obstacles. Unless there's ample space for other pedestrians,
please do not ride side by side with fellow Airwheel players.
5. Please avoid riding in poor light unless necessary, and make sure in this scenario you ride at slow, safe speed with care and geared with
mounted driving lights if possible.
6. Please relax your body when riding, bend your knees and elbows slightly and look straight forward.
7. Riding backward can be dangerous. For emergency, ride slowly backward in necessary avoidance of obstacles.
Please accelerate slowly by leaning forward slightly and avoid sharp acceleration. You may
lose balance and get yourself hurt in aggressive acceleration. Ignorance to instructions is
the main cause of accidental falling over.
- 09 -
Airwheel Intelligent Pioneer
www.airwheel.net
This device complies with part 15 of the FCC Rules. Operation is subject to the following two conditions: (1) This device may not cause
harmful interference, and (2) this device must accept any interference received, including interference that may cause undesired operation.
FCC ID:2AHQH-CHJ-C70K2
FCC statement
This equipment has been tested and found to comply with the limits for a Class B digitaldevice, pursuant to Part 15 of the FCC
Rules.These limits are designed to provide reasonable protection against harmfulinterference in a residential installation. This equipment
generates, uses and canradiate radio frequency energy and, if not installed and used in accordance withthe instructions, may cause harmful
interference to radio communications.
However, there is no guarantee that interference will not occur in a particularinstallation.
• If this equipment does cause harmful interference to radio or televisionreception, which can be determined by turning the equipment
off and on, theuser is encouraged to try to correct the interference by one or more of thefollowing measures:
— Reorient or relocate the receiving antenna.
— Increase the separation between the equipment andreceiver.
— Connect the equipment into an outlet on a circuitdifferent from that to whichthe receiver is connected.
— Consult the dealer or an experienced radio/TV technician for help.
RF exposure warning
• The equipment complies with FCC RF exposure limits set forth for an uncontrolled environment.
The equipment must not be co-located or operating in conjunction with any other antenna or transmitter.
NOTE: Any changes or modifications not expressly approved by the granteeof this device
could void the user's authority to operate the equipment.
- 10 -
Airwheel Intelligent Pioneer
www.airwheel.net
3.2 Initiative Safety Measures
Please read through this manual and make sure it is fully understood.
Do not allow others try your Airwheel A3, unless he/she has read through this manual.
Please do wear safely gears while riding Airwheel A3. Make sure your helmet is comfortably fit and qualified for safety protection.
Riders may wear glasses, elbow/knee pads according to their own experiences.
Please do not ride Airwheel A3 when you are feeling unwell or not able to follow the instructions in the manual.
Please stop riding immediately when Airwheel A3 starts alerting for low battery or over speed. Charge your Airwheel in time to ensure
safe and smooth use.
Make sure to power off Airwheel before moving it. Do not lift Airwheel A3 on the wheel in case your fingers get caught between the tire
and case.
Check your Airwheel A3 carefully for any loosened or damaged parts every time prior to use and do not ride before proper
troubleshooting.
The maximum speed of Airwheel A3 is 17km/h. High speed may bring risk to the riding. For safety concern, please ride
with steady speed.
Steering with your body leaning against the scooter stem is very likely to cause accidents
and injuries. Always make sure to keep one-fist distance from the scooter stem and the
handlebar. Do not lean against the scooter stem, this contributes to most of the accidents.
- 11 -
Airwheel Intelligent Pioneer
www.airwheel.net
3.3 Warned Scenarios
Slope Angle > 15°
slippery upward slope
Stand/hands-free riding
Slope Angle > 15°
slippery downward slope
Bumpy Terrains
Staircases
- 12 -
Press power button of the remote key when riding
Airwheel Intelligent Pioneer
www.airwheel.net
4. Learning Tips
4.1 Before Getting Started
For first-timers, be sure to equip yourself with comfortable sportswear and sneakers. Warm up your body and keep your body agile.
Considering the average human athletic skills, the height of pedal is set 247mm from ground only, which guarantees your safety in case of
falling over. A Helmet, gloves, knee and ankle pads are also essential for first-timers. To start, please bring Airwheel A3 to open space and
watch out for obstructions and bumpy terrains.
- 13 -
Airwheel Intelligent Pioneer
www.airwheel.net
4.2 Learning Tips
Learning Airwheel A3 is much easier than learning how to ride a bicycle. Most starters only needs 3 minutes to get a hang of it. You'll
need a learning partner standing in front of Airwheel A3 and holding the handlebar with both hands to help stabilize the handlebar for the
first time.
Turn on power switch, then press A on the remote control. Fold up the kick stand.
Sit on the saddle and put down the paddles at each side. Hold the handlebars and look straight forward.
Keep calm and relaxed and look forward as shown below.
Please keep calm and relaxed, it is much easier than learning how to ride a bicycle. Starters
can stand upright and relaxed and rely on your learning partner to hold on to the handlebar.
After getting used to standing on Airwheel A3, you're good to go. Note: The more relaxed
you are, the better balance you'll get.
- 14 -
Airwheel Intelligent Pioneer
www.airwheel.net
4.3 Go Forward and Backward
Push the handlebar gradually forward to feel the acceleration and stopping of Airwheel A3 and then restore the status quo ante to feel
the acceleration and deceleration. Steer at a slow speed and feel the motion controlled by your center of gravity.
Look back and lean gradually backward to control Airwheel A3 fall back, and then restore the status quo ante to feel the deceleration
and brake. Keep practicing and pay attention to the wall and other obstacles to avoid falling over.
Balance
----------------------------------------------------
----------------------------------------------------
----------------------------------------------------
Backward
Forward
For starters, please steer in a slow and mild manner. Remember that the more relaxed
your body is, the better balance you'll get. Please avoid drastic shakes in the fore-andaft direction or an abrupt shift on your center of gravity, which will probably cause slip or
falling over.
- 15 -
Airwheel Intelligent Pioneer
www.airwheel.net
Stop the unit by shifting your center of gravity to the opposite direction of
travelling:
When the unit is in motion, gradually lean backwards to stop the unit.
•••••••••••••••••••••••••••••••••
Attitude brake
Electronic Brake Button
•••••••••••••••••••••••••••••••••
4.4 Stop and Brake
Electronic brake
During riding, press down the electronic brake button to decelerate or brake.
•
•
Release the button when the unit stops.
Starters can choose an open space to practice stopping unit and keeping balance.
Note: Device may tilt forward or backward when the Electronic Brake button is
pressed down. The user should stay calm, keep balance and be careful.
Standard Brake Manner
Electronic Brake
Please try to stop the unit in a gradual and mild manner, avoid abrupt brakes. When using
the electronic brake, user may be forced to lean backward. The user should stay calm and
keep balance. On the typical asphalt pavement, the braking distance of an Airwheel A3
travelling at top speed is roughly 4 meters. Given this fact, please decelerate beforehand
when expect obstacles or traffic lights. Please do not accelerate or brake on slippery
surface, otherwise you may suffer falling over or even injuries.
- 16 -
Airwheel Intelligent Pioneer
www.airwheel.net
4.5 Make Turns
Airwheel A3 will conduct turns as per the movement of the handlebar. Push the handlebar left or right to make turns on the
corresponding direction.
1. First practice turning on one spot by moving the handlebar gradually towards the direction you wish to turn to. Airwheel A3 will turn
on the spot sufficiently to the desired extent until you restore the handlebar. Keep practicing to get the skills.
2. Turn when in the motion. After getting a hang of going forward, backward and turning on one spot, you may try to make turns while
going slowly forward. Keep your knees slightly bent and prepare to lean toward the turning direction in accordance with the control
----------------------------------------
Turn Right
----------------------------------------
shaft. Keep practicing.
Turn Left
Sharp turns are dangerous whenever on one spot or in the motion. You will probably lose
balance or even get thrown out. In this scenario, please decelerate and steer at a slow
speed when making turns, which will help with better balance during a turn.
- 17 -
Airwheel Intelligent Pioneer
www.airwheel.net
4.6 Get Off
You may ask your learning partner to help hold the handlebar when getting off Airwheel A3 for the first time.
Instructions:
1. Hold onto the handlebar and step on the ground with two feet. Then fold up the pedals and get off the unit. Turn off the power and
put down the kick stand.
2. When moving off the saddle of Airwheel A3, do hold your hands on the handlebars before powering off the unit. Otherwise, Airwheel
A3 will slip forward and cause potential risks.
Please relax when getting off the unit and avoid shifting the handlebar, which will cause
the unit to turn and your panic. As a result, an overly firm grip on the handlebar is not
recommended. Make sure to power off the unit and put down the kick stand.
- 18 -
Airwheel Intelligent Pioneer
www.airwheel.net
4.7 Important Note for Starters
Warnings
1. Starters under 18 or over 45 are supposed to find yourself learning partners.
2. Make sure to check the power level and tire before riding.
3. Please control speed before riding smoothly.
4.8 Download APP
Calibration steps
1. Use App to lock the unit.
2. Please operate according to the tips of APP.
3. After hearing the long beep sound, reboot the unit to complete calibration.
Scan the QR code to download APP
*Support Android 4.3 or higher, iOS 7.0 or higher.
- 19 -
Airwheel Intelligent Pioneer
www.airwheel.net
5. Usage
5.1 Components
(See 9.1)
5.2 Get Started
To get started, adjust the scooter stem of Airwheel A3 to the
1. Handlebar
upright position. Power on the unit before turning on the remote
2. Human-Machine Interface (HMI)
control, and you'll hear a beep prompt to indicate that the unit is
3. Motor
ready to use. Put feet on the pedals and start to ride.
4. Scooter Stem
5. Saddle
In case the scooter stem is biased severely to one side, this
indicates Airwheel A3 is not ready to use. Get the unit in proper
gyro-balanced state before getting on.
Enter into riding state
1. Open the power switch
- 20 -
2. Open remote control
Airwheel Intelligent Pioneer
www.airwheel.net
5.3 Kick Stand
Airwheel A3 comes with a kick stand. To park Airwheel A3, pull the knob at the side to release the kick stand.
Always release the kick stand when the unit is off. To prevent misuse of Airwheel A3 by
others, we strongly suggest you power off the unit when you're not around. In addition, do
not get on and steer Airwheel A3 when the kick stand is released, otherwise the kick stand
can be damaged and may cause accidents.
- 21 -
Airwheel Intelligent Pioneer
www.airwheel.net
5.4 Remote Key
A: Power Button
C:Unspecified
D: Unspecified
B: Headlight Switch
The buttons on the remote key and their functions are shown above. The controlling
distance can reach 10 meters. There're 4 buttons on the remote key: A. Power Button. B.
Headlight Switch. C. Unspecified. D. Unspecified.
- 22 -
Airwheel Intelligent Pioneer
www.airwheel.net
6. Maintenance
6.1 Cleaning and Storage
Please clean your Airwheel A3 timely after usage to keep your Airwheel A3 in top shape.
Use a soft wet cloth dipped with alcohol to wipe the main body of the unit.
Use a wet towel to clean the tires and fenders. Then wipe and dry them in flowing air to avoid rust.
For stubborn stains or scratches, you may apply some tooth paste on it and scrub it with a tooth brush repeatedly.
Store Airwheel A3 in a dry and cool place indoor when it's not in use. Expose to sunlight or freezing outdoor environment will lead
to accelerating aging of the exterior materials.
Make sure to power off Airwheel A3, unplug the charger and seal the charge port cap
before cleaning, otherwise the unit maybe short-circuited by water and damaged. Do not
use a car-washing water cannon to clean Airwheel A3 or submerge the whole unit in water,
this may cause water leakage into the unit and unserviceable damages.
- 23 -
Airwheel Intelligent Pioneer
www.airwheel.net
6.2 Screw Connection
All of the screws on Airwheel A3 have been specifically processed against loose. Yet for safety concerns, please check connections
on the wheel hub, scooter stem, battery case, fender, platform casing and display panel ect. regularly for loosened connection or abnormal
noise. In case of any loosened connection, please check the screws on the connection joint and fasten them.
6.3 Tire Pressure
Generally the tire pressure of Airwheel A3 ranges between 2.0~2.2KG/cm2. High tire pressure contributes to smaller friction force and
longer battery range, yet delivers less damping effect.
6.4 Transportation and Storage
Please handle Airwheel A3 as per the following steps:
1. Please make sure Airwheel A3 is powered off.
2. Please remove the scooter stem before storing Airwheel A3 in the car trunk.
3. Please ask for necessary help when having difficulty with lifting the unit into the car trunk.
- 24 -
Airwheel Intelligent Pioneer
www.airwheel.net
6.5 Remove Battery Pack
Fold up the kick stand and lay flat the unit. Unfasten the four M6*20 hexagon screws with an M5 hexagon wrench. Remove the
battery case and take out the battery pack.
Mail us only the battery case if the battery case needs to repair.
Use a soft cloth or foam chunks to protect the unit against scratches when it's laid flat.
Make sure the battery case is well connected and screws are fastened. Erect the unit
vertically and try to power it on and off to check if the indication panel is working properly.
- 25 -
Airwheel Intelligent Pioneer
www.airwheel.net
7. Limited Warranty
Please retain the warranty and proof of purchase (i.e.receipt). Limited
Warranty Terms (Non-Artificial Damage Only):
After-sales service:
1. 1 year for the main body (one month for wearing parts, i.e. casings and tires).
2. 6 months for the battery.
The following situations will not be covered by the warranty:
1. Malfunction due to misuse.
2. Malfunction caused by unauthorized modifications, disassembling or repair.
3. Accidental damage or malfunction due to improper storage.
4. Discrepant warranty/proof of purchase and product.
5. Exterior damages due to usage.
6. Disassembling parts unspecified by this manual.
7. Damage or malfunction caused by riding on rainy days or dipping in water.
- 26 -
Airwheel Intelligent Pioneer
www.airwheel.net
8. Specifications
Specifications
Parameters
Weight
34kg
Speed
6~ 17km/h
Remark
Standard Accessory
Max. Climbing Angle
~ 15°
Riders weighing 60kg get up to 18°
Battery Capacity
520Wh
Protection board with SOC equalization
Working Temperature
-10° C ~40° C
Best at 20° ~30° C
Max. Load
120kg
Charge Voltage
AC220V 50~60Hz
Charge Time
520Wh: ~ 180min
Size
Height:1134mm, Length: 720mm, Width: 438mm
Wheel Size
16 inches
Pedal Height
247mm
Saddle Height
740mm
Optional:110V/110V-240V
- 27 -
Airwheel Intelligent Pioneer
www.airwheel.net
9. Appendix I
el
Airwhe
A3
9.1 Drafts
The illustration is only for reference,
the item is subject to the material object.
Handlebar
LOGO
Scooter Stem
Fender
Front Light
Tire
Motor
Kick stand
- 28 -
Airwheel Intelligent Pioneer
www.airwheel.net
4-inch Human-Machine Interface(HMI)
Electronic Brake Button
Leather Cushion
Left/Right Turn Light
Shock Absorber
Stoplight
Pedal
Charge Port
Power Button
- 29 -
Airwheel Intelligent Pioneer
www.airwheel.net
9.2 Charging Notes
Charge Note: Plug Airwheel to the charger before connecting the charger to power supply.
- 30 -
Airwheel Intelligent Pioneer
www.airwheel.net
9.3 Relation between Range and Load
Similar to the relations between fuel consumption and cargo load, range per charge is related to rider's body weight. In light of the
conclusion we draw from practical tests (rider's weight: 60kg; riding speed: 7km/h and constant; road condition: smooth and flat), range per
charge falls by 1.5~2.0km for each additional gain of 10kg.
Relation between
Range and Road Condition
Relation between Range and Load
- 31 -
Airwheel Intelligent Pioneer
www.airwheel.net
9.4 FAQ
Q: How to set up the Airwheel?
A: Please refer to the Installation part in this user manual.
Q: How to charge the Airwheel?
A: Please charge the unit with the charger included in standard accessories. The charger is 110V/220V ready chargeable.
Q: My Airwheel tilts backward in motion, is it normal?
A: It's normal when Airwheel is running on low battery. You can simply solve it by powering off the unit and charge it to the full.
In another scenario, the unit may also tilt backward when it's running at a high speed to shift the rider's center of gravity backward and
prevent further acceleration.
Q: Can I customize Airwheel to lift the speed limit?
A: Sorry can't. Over speed protection is designed to ensure player's own safety during usage.
Q: How can I tell whether my Airwheel is fully charged or not?
A: There's a charging indicator light on the charger. A red indicator light indicates that Airwheel is under charging and a green one indicates
that Airwheel is fully charged or not charged.
- 32 -
Airwheel Intelligent Pioneer
www.airwheel.net
Q: Can I ride it on motorways?
A: Please don't unless it has a motor license. In most countries, you're supposed to steer it only on non-motorized vehicle lanes.
Q: Should I power off Airwheel to charge or not?
A: Please power off Airwheel for charging.
Q: What if program crashes?
A: Please restart the program.
- 33 -
Airwheel Intelligent Pioneer
www.airwheel.net
9.5 Road Test
Airwheel's battery range is closely related to ambient temperature, weight, riding manner and battery discharge capacity. Test
condition: environment temperature:30℃ ; tester's weight: 60kg; test venue: indoor stadium. The tester riders Airwheel at a constant speed
of 8km/h using standard riding manner without any tricks.
Test result: 10% battery capacity remained when test finished. However in practice, lithium battery will conduct a discharge restriction
for user's safety and battery life expectancy, which will reserve 30% battery capacity.
8km/h constant speed >>
8km/h constant speed >>
- 34 -
Airwheel Intelligent Pioneer
www.airwheel.net
9.6 Contact Us
Please contact us as per the following info for any inquiries regarding riding, maintenance and safety issues or any problems and
failure during your usage. We'll be glad to offer you prompt assistance.
Scan the official QR code on the back cover with your smart phone and get linked to our official website to learn more about Airwheel's
latest updates and new products.
After-sales Info
Please visit our official website for the address of the service center and other related info.
Authorized by: Airwheel Technology Holding (USA) Co.,Ltd.
Manufactured/Dealed by: Changzhou Airwheel Technology Co., Ltd.
Address: Fl.9 Zhongchuang Building, No.396 Tongjiang Rd (M), Xinbei District, Changzhou, Jiangsu.
Website: www.airwheel.net
E-mail: after-sale@airwheel.net
- 35 -
Facebook
Airwheel.net
APP
Highlight all
Match case
Current View
Current View
Enter the password to open this PDF file:
File name:
—
File size:
—
Title:
—
Author:
—
Subject:
—
Keywords:
—
Creation Date:
—
Modification Date:
—
Creator:
—
PDF Producer:
—
PDF Version:
—
Page Count:
—
Preparing document for printing…
0%
- Каталог
- Безопасность и защита
- Управление доступом
Цена: $68
есть в наличии
Купить сейчас
Управление доступом
-
 Антиклонированная UID карта RFID модуль чтения/записи 13,56 МГц ISO 14443A UART 3 V-5 V YHY502CTG + SDK + 2 метки
$11.65
-
13,56 МГц Rfid модуль чтения/записи UART 3-5 V YHY502CG/антенна YHY1356T + SDK + 2 метки
$14.5
-
Usb-ключ эмуляция клавиатуры 13,56 МГц ISO 14443 A беспроводной считыватель rfid Android iPad Tablet Mobile + 2 метки
$12.47
-
5YOA отпечатков пальцев пароль ключ замок контроля доступа машина биометрический электронный дверной замок RFID считыватель сканер системы
$71.09
-
Автоматический барьер для безопасности дорожного движения и автостоянки
$58.88
-
Высоко качественная техника 90 градусов ворота барьер, прямо бум дорожное заграждение для системы парковки
$128.88
-
2 забор стрелы дорожное заграждение, автоматический барьер Высокая качественная техника
$108.88
-
Ворота автоматические шлагбаум для контроля дорожного движения
$98.88
-
LED барьер
$517.89
-
Автоматическая штатив турникет для контроля доступа. Бесплатная доставка
$814.79
-
Автоматический турникет, турникет
$659
-
Безопасность turnstie, полностью автоматический турникет, штатив турникет
$489.76
-
Одноканальный Индуктивный детектор петли автомобиля для mightymule FAAC BFT пришел хороший барьер ворота operato
$62.89
-
Автоматическая система ворот барьера от производителя
$48.88
-
Высокое качество техники 180 градусов барьер ворота, трафик барьер ворота для транспортного средства контроля доступа и автоматическая
$108.88
-
Barreras vehiculares Высокая качественная техника бесплатная телескопическая стрела
$48.88
-
GSM пульт дистанционного управления для автоматической двери (Quad band с большой памятью) AC2000 типа
$60.75
-
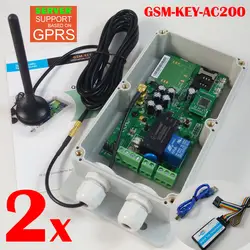
2015 новая версия GPRS версия QUAD band по всему миру дизайн раздвижные пульт дистанционного управления GSM-KEY-AC200
$130
-
GSM-CTL GSM дистанционного управления окна (двойной канал реле большой мощности выход) (Quad Band)
$70
-
Бесплатная доставка GSM дистанционного управления окна (большой мощности) (Quad Band) (два релейных выхода)
$120
-
GPRS сервер поддерживает раздвижные ворота GSM безопасности удаленный доступ открывалка (QUAD band) Поддержка приложения
$42.7
-
USB ВЧ рчит считыватель/Писатель/ISO14443A + B + ISO15693/13,56 M/YW-605UC
$56
-
Семь реле выход GSM Дистанционное управление реле коробка (QUAD band) новая версия поддержка DTMF
$70
-
Фотоэлектрический BRLK29 (отражающей луч) для безопасности ворот
$17
-
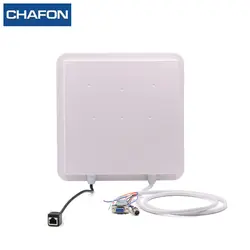
200 шт. 6 ~ 10 м чужой H3 UHF RFID карты используется для системы парковки и управление персоналом
$29.9
-
15 м UHF RFID считыватель 12 дБи Антенна IP65 с RS232/RS485/Wiegand26 интерфейс и светодио дный индикатор для прибор для парковки
$127.79
-
Бесплатная доставка 2 наборы для ухода за кожей заказ GSM Дистанционное управление коробка (двойной канальный релейный выход переключатель)
$110
-
USB13.56Mhz ISO 14443 RFID считыватель, писатель + 2 Карт + SDK + Программное Обеспечение, rfid reader, YW-605UA
$33
-
USB HF RFID reader/писатель + SDK + Программное Обеспечение/13.56 МГц/ISO 14443 A + B/YW-605UB
$40
-
USB ВЧ рчит считыватель, Бесплатный драйвер, Бесплатный SDK, бесплатное программное обеспечение, 2 RFID карты бесплатно
$21
-
USB13.56Mhz ISO 14443 A + B + ISO15693 RFID считыватель/писатель + SDK + Программное обеспечение/HF/YW-605UC/бесплатная доставка
$86
-
ИНДИКАТОР USB RFID reader/writer + 2 Карты + SDK + Программное Обеспечение/13.56 МГц/ISO 14443/8 Цифровой СВЕТОДИОДНЫЙ/YW-608UA
$50
-
USB HF светодиодный RFID считыватель/писатель + SDK + Программное обеспечение/13,56 МГц/ISO 14443 A + B/8 цифровой светодиодный/YW-608UB
$55
-
USB HF СВЕТОДИОДНЫЕ RFID reader/писатель + SDK + Программное Обеспечение/13.56 МГц/ISO 14443 A + B + ISO15693/8 цифровой СВЕТОДИОДНЫЙ/YW-608UC
$63
-
Rfid-тегов, rfid 4 К, Бесконтактных карт, ISO14443A, ПВХ белая карта
$226
-
RFID тег, S50 совместимы, rfid 1 К, Бесконтактные карты, пвх белая карта, 200 шт. в слот
$63.16
-
125 К Долго Звенел Бесконтактные карты/ID-карты/Rfid/LF/Толстая/длинные расстояния до 1 м/YWID3
$64
-
Считыватель 125 K большого радиуса действия/Считыватель RFID + 3 большого радиуса действия 125 K карта/LF ридер управляемый на расстоянии/YW603-1
$129
-
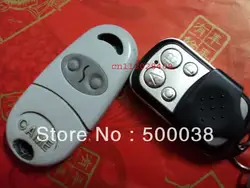
Бесплатная доставка Прямая продажа с фабрики, Дубликатор с CE, пульт дистанционного управления Дубликатор, 4 канала
$156.75
-
Бесплатная доставка завод прямых оптовых продаж, bft дубликатор, 4 канал
$600
-
Дубликатор с одобрением CE, пульта дистанционного управления Дубликатор 99.9999% успешной copy. продавать фабрики
$150.1
-
Бесплатная доставка Прямая продажа с фабрики Оптовые, дубликатор для создания копий facc, пришел, fadini ect пульт дистанционного управления, 4
$150.1
-
Бесплатная доставка фабрики Оптовые, дубликатор для Дубликат CAME, FADINI, FACC ect ЕС основной бренд пульт дистанционного управления, 4 канала
$150.1
-
Дубликатор с CE, для Дубликат CAME Fadini ect ЕС основной мозг remoet контроллер, бесплатная доставка
$150.1
-
5YOA 100 шт. 5YOA 1,8 мм EM4100 TK4100 125 кГц RFID Карточки контроля доступа Стикеры маркер кольцо рабочего времени близость чип
$31.5
-
13,65 мГц rfid настольный считыватель карт 8-значный шестигранной поддержка S50 S70 F1108 карты для управления персоналом
$14.99
-
Оптовая продажа Водонепроницаемый клавиатуры Управление доступом машины
$23
-
Оптовая продажа клавиатура Контроллер доступа-Пластик материал/800 пользователей
$11
-
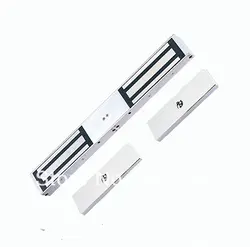
Отказоустойчивый DC12V двойного открытия двери электромагнитный замок с 300Lbs усилие
$29
-
Бесплатная доставка Прямая продажа с фабрики Оптовые продажи, пришел Дубликатор, 4 канала
$1330
-
Бесплатная доставка Прямая продажа с фабрики оптовой цене, все подошло, хороший, море, SEAV, копировальный, 4 канала
$294.5
-
USB RFID считыватель действовать как клавиатура, автоматический выход HF карты серийный номер. к любой активный отредактированы коробка
$17.89
-
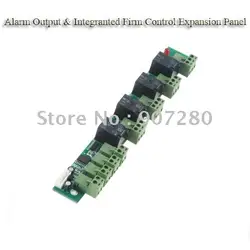
Оптовая продажа повышения сигнализации Выход и огонь Управление расширения Панель
$29.47
-
Оптовая продажа RS485 одной двери Управление доступом Панель
$58
-
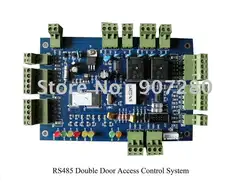
Оптовая продажа RS485 двойная дверь доступа к панели управления
$68.5
-
Оптовая продажа RS485 четыре дверца Управление Панель
$79
-
Оптовая продажа tcp/ip четыре двери Управление доступом Панель
$100
-
Оптовая продажа TCP/IP двойная Дверная панель управления доступом
$80
-
Оптовая продажа tcp/ip одной двери Управление доступом Панель
$68.5
-
WGACCESS 125 кГц EM ID смарт-карт с клавиатурой для контроллера доступа
$42
-
WGACCESS 13.56 мГц M1 IC smart card reader с клавиатурой для контроллера доступа
$47
-
WGACCESS 13.56 Гц M1 IC smart card reader для контроллера доступа
$44
-
WGACCESS 125 кГц EM ID smart card reader для контроллера доступа
$39
-
125 кГц устройство USB назначение карты, 125 кГц читателя USB для Управление доступом и рабочего времени
$10
-
125 кГц RFID wiegand 26 формат Управление доступом Считыватель с тремя LED
$10
-
Водонепроницаемый Дизайн 125 кГц frequecy Управление доступом ведомого карт с клавиатурой дополнительно
$10
-
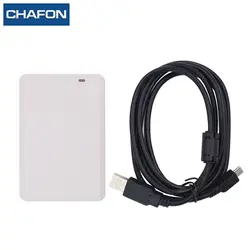
CHAFON usb rfid uhf Настольный ридер писатель обеспечивает английский SDK демо-программное обеспечение с бесплатным образцом тестирования карт для
$46.28
-
CHAFON EPC C1G2 Читатель uhf long range с интерфейсом Ethernet предоставляем бесплатную SDK для склад и парковка управления
$113.15
-
CHAFON uhf rfid reader desktop писатель с RS232 интерфейс считывания до 0 ~ 20 см с бесплатным sdk для контроля доступа
$81.84
-
CHAFON UHF rfid card reader 6 м long range 7dbi антенны RS232 RS485 Wiegand26 читателя с бесплатной SDK для управления парковка
$87.31
-
Дубликатор пульта дистанционного управления для копирования CPS, ADYX, AETERNA, ALLMATIC, CARDIN, CAME, DEA, CASIT, BANDY, brand
$285
-
15 м uhf rfid считыватель большой дальности IP65 с TCP/IP/WG26/RS232/RS485 интерфейс светодио дный индикатор используется для управления парковка
$154
-
Оптовая продажа контроля доступа по отпечаткам пальцев и посещаемости времени
$120
-
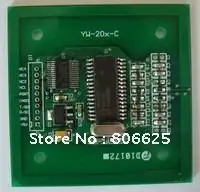
125 К RFID модуль / LF RFID модуль / RFID считыватель + 1 антенны + 3 tags / YW266
$8.95
-
13.56 М RFID модуль/HF rfid модуль/ISO14443A/rfidReader модуль/+ 1 Антенна + 3 теги/YW201
$18
-
13,56 м модуль радиочастотной идентификации/HF RFID модуль/ISO14443A/включают в себя антенна/чтение радиочастотной идентификации модуль + 3 теги/YW201-C
$18
-
13.56 М RFID модуль/HF rfid модуль/ISO14443A + B/включают антенны/rfid считыватель модуль + 3 теги/YW202-C
$25
-
HF RFID модуль/13.56 М/ISO14443A + ISO14443B + ISO15693/включают антенны/rfid считыватель модуль + 3 теги/YW204-C
$38
-
HF RFID модуль/13,56 м/ISO15693/включает антенну/15693 модуль считывания + 3 метки/YW203-C
$31.58
-
HF RFID модуль/13.56 М/ISO14443A + ISO14443B/rfid считыватель модуль + 1 Антенны бесплатно + 3 теги/YW202
$25


Показать ещё Управление доступом
Для покупки товара 12 В в один канал беспроводной переключатель с пульта дистанционного управления CHJ-C10 нажмите кнопку «купить сейчас».
Если вы хотите купить другой товар из категории безопасность и защита или управление доступом то перейдите по ссылкам вверху страницы.
-
0 ₽ 0 товаров
Каталог инструкций по эксплуатации на русском языке
В нашем каталоге более 90.000 инструкций по эксплуатации и руководств пользователя на русском языке к бытовой технике и электронике. Чтобы скачать инструкцию по эксплуатации выберите интересую вас категорию или воспользуйтесь поиском в верхнем правом углу сайта.