

Сеть магазинов «НОВОЕ ВРЕМЯ» с 1997 года представляет в Ростове-на-Дону качественные часы и аксессуары к ним известных зарубежных и российских производителей. Техническое обслуживание часов осуществляется в сервисном центре «НОВОЕ ВРЕМЯ», опытные специалисты помогут разобраться покупателям с любой технической проблемой, связанной с гарантийным и постгарантийным обслуживанием часов. «НОВОЕ ВРЕМЯ» авторизированный дистрибьютор многих часовых марок.
Требуется руководство для вашей Casio G-Shock GA-2000-1A2ER Наручные часы? Ниже вы можете просмотреть и загрузить бесплатно руководство в формате PDF. Кроме того, приведены часто задаваемые вопросы, рейтинг изделия и отзывы пользователей, что позволит оптимально использовать ваше изделие. Если это не то руководство, которое вы искали, – свяжитесь с нами.
Ваше устройство неисправно, и в руководстве отсутствует решение? Перейдите в Repair Café для получения бесплатных ремонтных услуг.
Руководство

Рейтинг
Сообщите нам, что вы думаете о Casio G-Shock GA-2000-1A2ER Наручные часы, оставив оценку продукта. Хотите поделиться вашими впечатлениями от данного изделия или задать вопрос? Вы можете оставить комментарий в нижней части страницы.
Довольны ли вы данным изделием Casio?
Да Нет
5 голоса
Часто задаваемые вопросы
Наша служба поддержки выполняет поиск полезной информации по изделиям и отвечает на часто задаваемые вопросы. Если вы заметили неточность в наших часто задаваемых вопросах, сообщите нам об этом с помощью нашей контактной формы.
Мои механические часы быстро бегают, что мне делать? Проверенный
Это может быть вызвано воздействием магнитного поля. Ее можно решить с помощью процесса размагничивания, выполняемого профессиональным часовщиком.
Это было полезно (620)
Аккумулятор в моем устройстве окислился, могу ли я его безопасно использовать? Проверенный
Ja, устройство все еще можно безопасно использовать. Во-первых снимаем оксидизд АКБ. Никогда не используйте для этого голые руки. Затем протрите батарейный отсек ватным тампоном, смоченным уксусом или лимонным соком. Дайте ему высохнуть и вставьте новые батарейки.
Это было полезно (591)
Что означают AM и PM? Проверенный
AM означает Ante Meridiem и указывает на то, что время еще до полудня. PM расшифровывается как Post Meridiem и указывает на то, что время прошло после полудня.
Это было полезно (546)
Что такое хронограф? Проверенный
Хронограф дословно означает «писатель времени». Этим термином называют наручные и другие виды часов, которые не только показывают который час, но и могут измерить определенный промежуток времени, как секундомер.
Это было полезно (478)
Что такое кварцевый механизм? Проверенный
Наручные и другие виды часов с кварцевым механизмом работают на батарейке. Батарейка посылает электрический ток через кристаллы кварца, заставляя их вибрировать. Эти вибрации приводят часовой механизм в действие. Поскольку кварц вибрирует с фиксированной частотой, часы с кварцевым механизмом чрезвычайно точны.
Это было полезно (325)
Что такое GMT? Проверенный
GMT означает среднее время по Гринвичу (иногда его называют UTC, что означает всемирное координированное время). Это время для долготы 0, которая проходит через Гринвич недалеко от Лондона.
Это было полезно (320)
Под стеклом моих часов Casio появилась влага. Что мне делать? Проверенный
Casio утверждают, что если влага появляется после экстремального изменения температуры и впоследствии относительно быстро исчезает, то в этом нет ничего плохого. Если влага не исчезает, необходимо как можно скорее отремонтировать часы.
Это было полезно (42)

Casio Watch Line: G-Shock
Module number: 5590
Manual in PDF: Watch 5590 Online → (without downloading, good for mobile);
English Instruction Manual in PDF: Download
Like your watch? Enjoy our recent news about GA-2000 Series
All G-Shock GA-2000 News →
GA-2000 Profile / Casio G-Shock
Average Amazon Price: $125 (yes, we may earn a commission on qualifying purchases from our links to Amazon). Check the Price on Amazon →
Year of first release: 2019
Lineup: STANDART ANA-DIGI (This Line includes Digital and Analog displays on G-Shocks that are the best in “price/quality” category. Usually have traditional digital functions, but with beautiful hands. Don’t worry, the hands won’t prevent you from seeing digits, since there is a special Hand Shift technology that moves them to the neutral position) All G-Shock Standart Ana-Digi Watches →
Best for: Teenagers, Top in G-Shock Lookbooks, Artists, Singers, Dancers…
The most distinctive specs:
– 200-meter water resistance (good for swimming but not for deep diving)
– Carbon Core Guard structure (protects the module by enclosing it in a carbon case. The case is made of fine resin embedded with carbon fibers for outstanding strength and crack resistance)
– Dual Back Cover (GA-2000 features a stainless-steel panel back that keeps the watch airtight, as well as a fine resin glass fibre case back that makes it tough against shocks)
Other colors and full specs: GA-2000 Wiki Page
Only Limited Editions: GA-2000 Limited Editions
G-Shock GA-2000 Rating System

| Size | ★★★★ |
| Weight | ★★★★ |
| Functions | ★★★ |
| Materials | ★★★★★ |
| Battery Years | ★★★ |
| Price | ★★★★★ |
-
Tags
GA-2000

Operation Guide 5590
E-9
To do this: Enter this mode: See:
Set an alarm time Alarm Mode E-35
E-8
Mode Reference Guide
The mode you should select depends on what you want to do.
To do this: Enter this mode: See:
x View the current date in the Home City
x Configure Home City and daylight saving time (DST)
settings
x Configure time and date settings
x View the World Time city and time
x Swap Home Time and World Time information
x Change the display illumination duration setting
x Enable/disable the button operation tone
Timekeeping Mode
E-15
View the current time in one of 48 cities (31 time
zones) around the globe
World Time Mode E-25
Use the stopwatch to measure elapsed time Stopwatch Mode E-28
Use the countdown timer Countdown Timer Mode E-32
E-7E-6
Troubleshooting . . . . . . . . . . . . . . . . . . . . . . . . . . . . . . . . . . . . . . . . . . . . . . . . . E-45
Main Indicators . . . . . . . . . . . . . . . . . . . . . . . . . . . . . . . . . . . . . . . . . . . . . . . . . E-47
Specifications. . . . . . . . . . . . . . . . . . . . . . . . . . . . . . . . . . . . . . . . . . . . . . . . . . . E-48
Operating Precautions . . . . . . . . . . . . . . . . . . . . . . . . . . . . . . . . . . . . . . . . . . . E-51
User Maintenance . . . . . . . . . . . . . . . . . . . . . . . . . . . . . . . . . . . . . . . . . . . . . . . E-62
E-5
Using the Alarm . . . . . . . . . . . . . . . . . . . . . . . . . . . . . . . . . . . . . . . . . . . . . . . . . E-35
To enter the Alarm Mode . . . . . . . . . . . . . . . . . . . . . . . . . . . . . . . . . . . . . . . . E-35
To set an alarm time . . . . . . . . . . . . . . . . . . . . . . . . . . . . . . . . . . . . . . . . . . . E-36
To test the alarm . . . . . . . . . . . . . . . . . . . . . . . . . . . . . . . . . . . . . . . . . . . . . . E-37
To turn an alarm and the Hourly Time Signal on and off . . . . . . . . . . . . . . . . . E-38
To stop the alarm . . . . . . . . . . . . . . . . . . . . . . . . . . . . . . . . . . . . . . . . . . . . . E-38
Illumination . . . . . . . . . . . . . . . . . . . . . . . . . . . . . . . . . . . . . . . . . . . . . . . . . . . . . E-39
To turn on illumination . . . . . . . . . . . . . . . . . . . . . . . . . . . . . . . . . . . . . . . . . . E-39
To change the illumination duration . . . . . . . . . . . . . . . . . . . . . . . . . . . . . . . . E-40
Adjusting Hand Positions . . . . . . . . . . . . . . . . . . . . . . . . . . . . . . . . . . . . . . . . . E-41
Button Operation Tone . . . . . . . . . . . . . . . . . . . . . . . . . . . . . . . . . . . . . . . . . . . E-43
To turn the button operation tone on and off . . . . . . . . . . . . . . . . . . . . . . . . . E-44
E-4
Checking the Current Time in a Different Time Zone . . . . . . . . . . . . . . . . . . . E-25
To enter the World Time Mode. . . . . . . . . . . . . . . . . . . . . . . . . . . . . . . . . . . . E-26
To view the time in another time zone . . . . . . . . . . . . . . . . . . . . . . . . . . . . . . E-26
To specify standard time or daylight saving time (DST) for a city . . . . . . . . . . . E-27
Using the Stopwatch . . . . . . . . . . . . . . . . . . . . . . . . . . . . . . . . . . . . . . . . . . . . . E-28
To enter the Stopwatch Mode . . . . . . . . . . . . . . . . . . . . . . . . . . . . . . . . . . . . E-28
To perform an elapsed time operation . . . . . . . . . . . . . . . . . . . . . . . . . . . . . . E-29
To pause at a split time . . . . . . . . . . . . . . . . . . . . . . . . . . . . . . . . . . . . . . . . . E-29
To measure two finishes . . . . . . . . . . . . . . . . . . . . . . . . . . . . . . . . . . . . . . . . E-29
Countdown Timer . . . . . . . . . . . . . . . . . . . . . . . . . . . . . . . . . . . . . . . . . . . . . . . E-32
To enter the Countdown Timer Mode . . . . . . . . . . . . . . . . . . . . . . . . . . . . . . . E-32
To configure the countdown timer . . . . . . . . . . . . . . . . . . . . . . . . . . . . . . . . . E-33
To perform a countdown timer operation . . . . . . . . . . . . . . . . . . . . . . . . . . . . E-34
To stop the alarm . . . . . . . . . . . . . . . . . . . . . . . . . . . . . . . . . . . . . . . . . . . . . E-34
E-3
Contents
About This Manual . . . . . . . . . . . . . . . . . . . . . . . . . . . . . . . . . . . . . . . . . . . . . . . . E-1
Things to check before using the watch . . . . . . . . . . . . . . . . . . . . . . . . . . . . . . E-2
Mode Reference Guide . . . . . . . . . . . . . . . . . . . . . . . . . . . . . . . . . . . . . . . . . . . . E-8
Timekeeping . . . . . . . . . . . . . . . . . . . . . . . . . . . . . . . . . . . . . . . . . . . . . . . . . . . . E-15
To swap your Home City and World Time City . . . . . . . . . . . . . . . . . . . . . . . . E-17
Configuring Home City Settings . . . . . . . . . . . . . . . . . . . . . . . . . . . . . . . . . . . . E-18
To configure Home City settings . . . . . . . . . . . . . . . . . . . . . . . . . . . . . . . . . . E-18
To change the Daylight Saving Time (summer time) setting . . . . . . . . . . . . . . E-20
Adjusting the Digital Time and Date Settings . . . . . . . . . . . . . . . . . . . . . . . . . E-21
To configure the digital time and date settings . . . . . . . . . . . . . . . . . . . . . . . . E-21
E-2
Things to check before using the watch
1. Check the Home City and the daylight saving time (DST) setting.
Use the procedure under “To configure Home City settings” (page E-18) to configure
your Home City and daylight saving time settings.
Important!
x Proper World Time Mode data depends on correct Home City, time, and date
settings in the Timekeeping Mode. Make sure you configure these settings
correctly.
2. Set the current time.
x See “Adjusting the Digital Time and Date Settings” (page E-21).
The watch is now ready for use.
E-1
About This Manual
x Depending on the model of your watch, display text
appears either as dark figures on a light background, or
light figures on a dark background. All sample displays
in this manual are shown using dark figures on a light
background.
x Button operations are indicated using the letters shown
in the illustration.
x Note that the product illustrations in this manual are
intended for reference only, and so the actual product
may appear somewhat different than depicted by an
illustration.
E
ENGLISH
Congratulations upon your selection of this CASIO watch.
To ensure that this watch provides you with the years of service for which it is
designed, carefully read and follow the instructions in this manual, especially the
information under “Operating Precautions” and “User Maintenance”.
MA1902-EA
2019 CASIO COMPUTER CO., LTD.

MA1902-EA
© 2019 CASIO COMPUTER CO., LTD.
Operation Guide 5590
About This Manual
ENGLISH
Congratulations upon your selection of this CASIO watch.
x Depending on the model of your watch, display text
appears either as dark figures on a light background, or
light figures on a dark background. All sample displays
in this manual are shown using dark figures on a light
background.
x Button operations are indicated using the letters shown
in the illustration.
x Note that the product illustrations in this manual are
intended for reference only, and so the actual product
may appear somewhat different than depicted by an
illustration.
To ensure that this watch provides you with the years of service for which it is
designed, carefully read and follow the instructions in this manual, especially the
information under “Operating Precautions” and “User Maintenance”.
E
E-1
Things to check before using the watch
Contents
1. Check the Home City and the daylight saving time (DST) setting.
About This Manual . . . . . . . . . . . . . . . . . . . . . . . . . . . . . . . . . . . . . . . . . . . . . . . . E-1
Use the procedure under “To configure Home City settings” (page E-18) to configure
your Home City and daylight saving time settings.
Important!
x Proper World Time Mode data depends on correct Home City, time, and date
settings in the Timekeeping Mode. Make sure you configure these settings
correctly.
2. Set the current time.
Things to check before using the watch . . . . . . . . . . . . . . . . . . . . . . . . . . . . . . E-2
Mode Reference Guide . . . . . . . . . . . . . . . . . . . . . . . . . . . . . . . . . . . . . . . . . . . . E-8
Timekeeping . . . . . . . . . . . . . . . . . . . . . . . . . . . . . . . . . . . . . . . . . . . . . . . . . . . . E-15
To swap your Home City and World Time City . . . . . . . . . . . . . . . . . . . . . . . . E-17
Configuring Home City Settings . . . . . . . . . . . . . . . . . . . . . . . . . . . . . . . . . . . . E-18
To configure Home City settings . . . . . . . . . . . . . . . . . . . . . . . . . . . . . . . . . . E-18
To change the Daylight Saving Time (summer time) setting . . . . . . . . . . . . . . E-20
x See “Adjusting the Digital Time and Date Settings” (page E-21).
The watch is now ready for use.
Adjusting the Digital Time and Date Settings . . . . . . . . . . . . . . . . . . . . . . . . . E-21
To configure the digital time and date settings . . . . . . . . . . . . . . . . . . . . . . . . E-21
E-2
E-3
Checking the Current Time in a Different Time Zone . . . . . . . . . . . . . . . . . . . E-25
To enter the World Time Mode. . . . . . . . . . . . . . . . . . . . . . . . . . . . . . . . . . . . E-26
To view the time in another time zone . . . . . . . . . . . . . . . . . . . . . . . . . . . . . . E-26
To specify standard time or daylight saving time (DST) for a city . . . . . . . . . . . E-27
Using the Stopwatch . . . . . . . . . . . . . . . . . . . . . . . . . . . . . . . . . . . . . . . . . . . . . E-28
To enter the Stopwatch Mode . . . . . . . . . . . . . . . . . . . . . . . . . . . . . . . . . . . . E-28
To perform an elapsed time operation . . . . . . . . . . . . . . . . . . . . . . . . . . . . . . E-29
To pause at a split time . . . . . . . . . . . . . . . . . . . . . . . . . . . . . . . . . . . . . . . . . E-29
To measure two finishes . . . . . . . . . . . . . . . . . . . . . . . . . . . . . . . . . . . . . . . . E-29
Countdown Timer . . . . . . . . . . . . . . . . . . . . . . . . . . . . . . . . . . . . . . . . . . . . . . . E-32
To enter the Countdown Timer Mode. . . . . . . . . . . . . . . . . . . . . . . . . . . . . . . E-32
To configure the countdown timer . . . . . . . . . . . . . . . . . . . . . . . . . . . . . . . . . E-33
To perform a countdown timer operation . . . . . . . . . . . . . . . . . . . . . . . . . . . . E-34
To stop the alarm . . . . . . . . . . . . . . . . . . . . . . . . . . . . . . . . . . . . . . . . . . . . . E-34
Using the Alarm . . . . . . . . . . . . . . . . . . . . . . . . . . . . . . . . . . . . . . . . . . . . . . . . . E-35
To enter the Alarm Mode . . . . . . . . . . . . . . . . . . . . . . . . . . . . . . . . . . . . . . . . E-35
To set an alarm time . . . . . . . . . . . . . . . . . . . . . . . . . . . . . . . . . . . . . . . . . . . E-36
To test the alarm . . . . . . . . . . . . . . . . . . . . . . . . . . . . . . . . . . . . . . . . . . . . . . E-37
To turn an alarm and the Hourly Time Signal on and off . . . . . . . . . . . . . . . . . E-38
To stop the alarm . . . . . . . . . . . . . . . . . . . . . . . . . . . . . . . . . . . . . . . . . . . . . E-38
Illumination . . . . . . . . . . . . . . . . . . . . . . . . . . . . . . . . . . . . . . . . . . . . . . . . . . . . . E-39
To turn on illumination . . . . . . . . . . . . . . . . . . . . . . . . . . . . . . . . . . . . . . . . . . E-39
To change the illumination duration . . . . . . . . . . . . . . . . . . . . . . . . . . . . . . . . E-40
Adjusting Hand Positions . . . . . . . . . . . . . . . . . . . . . . . . . . . . . . . . . . . . . . . . . E-41
Button Operation Tone . . . . . . . . . . . . . . . . . . . . . . . . . . . . . . . . . . . . . . . . . . . E-43
To turn the button operation tone on and off . . . . . . . . . . . . . . . . . . . . . . . . . E-44
E-4
E-5
Troubleshooting . . . . . . . . . . . . . . . . . . . . . . . . . . . . . . . . . . . . . . . . . . . . . . . . . E-45
Main Indicators . . . . . . . . . . . . . . . . . . . . . . . . . . . . . . . . . . . . . . . . . . . . . . . . . E-47
Specifications. . . . . . . . . . . . . . . . . . . . . . . . . . . . . . . . . . . . . . . . . . . . . . . . . . . E-48
Operating Precautions . . . . . . . . . . . . . . . . . . . . . . . . . . . . . . . . . . . . . . . . . . . E-51
User Maintenance . . . . . . . . . . . . . . . . . . . . . . . . . . . . . . . . . . . . . . . . . . . . . . . E-62
E-6
E-7
Mode Reference Guide
The mode you should select depends on what you want to do.
To do this:
Enter this mode:
Enter this mode:
See:
Set an alarm time
Alarm Mode
E-35
See:
x View the current date in the Home City
x Configure Home City and daylight saving time (DST)
settings
x Configure time and date settings
Timekeeping Mode
x View the World Time city and time
x Swap Home Time and World Time information
x Change the display illumination duration setting
x Enable/disable the button operation tone
E-15
View the current time in one of 48 cities (31 time
zones) around the globe
World Time Mode
E-25
Use the stopwatch to measure elapsed time
Stopwatch Mode
E-28
Use the countdown timer
Countdown Timer Mode
E-32
E-8
To do this:
E-9
Operation Guide 5590
x To return to the Timekeeping Mode from any other mode, hold down C for at
least two seconds.
Selecting a Mode
x Press C to cycle between the modes as shown below.
x In any mode, press L to illuminate the display.
Timekeeping Mode
World Time Mode
C
Stopwatch Mode
Countdown Timer Mode
C
C
Alarm Mode
C
C
E-10
E-11
General Functions (All Modes)
The functions and operations described in this section can be used in all modes.
Auto Return
If you do not perform any operation for about two or three minutes while configuring
settings (setting flashing on the digital display) in any mode, the watch will exit the
setting operation and return to normal display.
1. Press L twice.
x This will cause the hour and minute hands to move to a location where they do
not block your view of the digital display.
Example: When the current time is 8:30
Flashes while the hands are moved out of the way.
Scrolling
The B and D are used on the setting mode to scroll through data on the display.
In most cases, holding down these buttons during a scroll operation scrolls through
the data at high speed.
Moving the Hands Out of the Way for Better Viewing
You can use the procedure below to temporarily move the hour and minute hands
out of the way to better view what is on the display.
x This operation can be performed in any mode. In the case of a setting mode
(setting flashing on the screen), the hands will move out of the way automatically,
even if you do not perform the below operation.
E-12
E-13
2. Pressing L twice again will cause the hands to return to their normal positions
(normal timekeeping).
Timekeeping
Use the Timekeeping Mode to set and view the current time and date.
Note
x Watch button functions are the same regardless of whether the hands are moved
out of the way or at their normal positions.
x Changing to another mode will cause the hands to move back to their normal
positions.
x The hands also will move back to their normal positions automatically if no
operation is performed for about one hour.
Each time you press D, the display will change
as follows.
Minute
Month-Day
Day of week
Hour : Minute
D
D
PM indicator
Hour
Second
D
E-14
E-15
x To view the Home City name (English), press A.
x To view the World Time city code followed by the current time there, press B.
x To swap the Home City and World Time city information, hold down B for at least
three seconds.
To swap your Home City and World Time City
In the Timekeeping Mode, hold down B for at least three seconds.
This will cause SWAP to flash on the display, and then your Home City and World
Time City will be swapped.
Example: To swap the Home City (TYO) and World Time City (NYC)
TYO (Tokyo) time
NYC (New York) time
B, at least
3 seconds
TYO information
NYC information
E-17
E-16
Configuring Home City Settings
There are two Home City settings: actually selecting the Home City, and selecting
either standard time or daylight saving time (DST).
To configure Home City settings
1. In the Timekeeping Mode, hold down A until the
City Code
flashing SET indicator disappears from the display and
the currently selected city code appears on the display.
x This indicates the Home City setting mode.
Note
x After you specify a city code, the watch will use UTC* offsets in the World Time
Mode to calculate the current time for other time zones based on the current time
in your Home City.
* Coordinated Universal Time, the world-wide scientific standard of timekeeping.
The reference point for UTC is Greenwich, England.
2. Use D (+) and B (–) to scroll through city codes until
the one you want is displayed.
x For details about city codes, see the “City Code
Table” at the back of this manual.
3. After the setting is the way you want, press A to
return to the Timekeeping Mode.
E-18
E-19
Operation Guide 5590
To change the Daylight Saving Time (summer time) setting
1. In the Timekeeping Mode, hold down A until the
flashing SET indicator disappears from the display and
the currently selected city code appears on the display.
2. Press C to display the DST setting mode.
3. Press D or B to toggle between Daylight Saving
Time (ON) and Standard Time (OFF).
x Note that you cannot switch between daylight saving
time and standard time while UTC is selected as your
Home City.
DST indicator
Adjusting the Digital Time and Date Settings
Use the procedure below to adjust the digital time and date settings.
To configure the digital time and date settings
1. In the Timekeeping Mode, hold down A until the
flashing SET indicator disappears from the display
and the currently selected city code appears on the
display.
4. After the setting is the way you want, press A to
return to the Timekeeping Mode.
x The DST indicator appears to indicate that Daylight
Saving Time is turned on.
E-20
E-21
2. Press C to move the flashing in the sequence shown below to select the other
settings.
Home City
(page E-18)
C
DST
(page E-20)
C
3. When the timekeeping setting you want to change is flashing, perform the
operation described below.
C
12/24-Hour Format
Screen
Seconds
C
C
Change the hour or minute
C
Minute
Button Operation Tone On/Off
(page E-43)
Day
C
Month
C
Use D (+) and B (–) to
change these settings.
Change the year
C
C
Do this:
Press D.
Reset the seconds to 00
Hour
Illumination Duration
(page E-39)
To do this:
Toggle between 12-hour (12H) and 24-hour
Use D and B.
(24H) timekeeping
Change the month or day
Year
C
4. Press A to exit the setting mode.
E-22
E-23
Note
x Resetting the seconds to 00 while the current count is in the range of 30 to
59 causes the minutes to be increased by 1.
x The watch’s built-in full automatic calendar makes allowances for different month
lengths and leap years. Once you set the date, there should be no reason to
change it except after you have the watch’s battery replaced.
x While 12-hour format is selected for timekeeping, a P indicator will appear for
times from noon to 11:59 p.m. No indicator appears for times from midnight to
11:59 a.m. With 24-hour format, time is displayed from 0:00 to 23:59, without any
P indicator.
x The day of the week changes automatically when the date changes.
Checking the Current Time in a Different Time Zone
World Time City hour and
minute
You can use the World Time Mode to view the current
time in one of 31 time zones (48 cities) around the globe.
The city that is currently selected in the World Time Mode
is called the “World Time City”.
x The hour and minute hands indicate information for the
currently selected Home City.
x When you enter the World Time Mode, the currently
selected city code and city name (English) scroll once
across the digital display. After that, the current time in
the World Time City is displayed.
x You can view the name (English) of your Home City by
pressing A.
Second
E-24
E-25
To enter the World Time Mode
Use C to select the World Time Mode as shown on page E-10.
To view the time in another time zone
In the World Time Mode, use D and B to change the city code.
To specify standard time or daylight saving time (DST) for a city
1. In the World Time Mode, use D and B to display the
city code (time zone) whose Standard Time/Daylight
Saving Time setting you want to change.
DST indicator
2. Hold down A for at least two seconds.
x This toggles the city code you selected in step 1
between Daylight Saving Time (DST indicator
displayed) and standard time (DST indicator not
displayed).
x Note that you cannot switch between standard time/
daylight saving time (DST) while UTC is selected as
the World Time City.
x The standard time/daylight saving time (DST) setting
affects only the currently displayed city. Other cities
are not affected.
E-26
E-27
To perform an elapsed time operation
Using the Stopwatch
The stopwatch measures elapsed time, split times, and two finishes.
x The stopwatch measures elapsed time in units of 1/100 seconds for the first hour,
and in 1-second units after that for up to 24 hours total. After that, elapsed time
reverts to zero and then stops.
Minutes
Seconds
1/100 Second
To enter the Stopwatch Mode
Use C to select the Stopwatch Mode as shown on page E-11.
E-28
D
D
D
D
B
Start
Stop
(Resume)
(Stop)
Reset
To pause at a split time
D
B
B
D
B
Start
Split
(SPLIT flashing)
Split release
Stop
Reset
To measure two finishes
D
B
D
B
B
Start
Split
(SPLIT flashing)
First runner finishes.
Display time of first
runner.
Stop
(SPLIT displayed)
Second runner
finishes.
Split release
Display time of
second runner.
Reset
E-29
Operation Guide 5590
x Elapsed time is shown in 1/100-second units for the first hour of the measurement.
After the first hour, elapsed time is shown in one-second units.
First hour
After first hour
Seconds
Note
x An ongoing elapsed time measurement operation will continue internally even if
you change to another mode. However, if you exit the Stopwatch Mode while a
split time is displayed, the split time will not be displayed when you return to the
Stopwatch Mode.
Minutes
Minutes
Hours
1/100 Second
Seconds
E-30
E-31
Countdown Timer
The countdown timer start time can be set in 1-second
increments up to a maximum of 24 hours. An alarm
sounds when the countdown reaches zero.
Hours
To enter the Countdown Timer Mode
Use C to select the Countdown Timer Mode as shown
on page E-11.
Minutes
To configure the countdown timer
x If a countdown timer operation is in progress, press D
to pause it and then press B to reset the timer to its
start time.
x If a countdown timer operation is paused, press B to
reset the timer to its start time.
1. Hold down A until the flashing SET indicator
disappears from the display and the hour digits start to
flash. Release A after the digits start to flash.
2. Each press of C cause the flashing to move between settings in the following
Minutes
Seconds.
sequence: Hours
x The flashing value is the one that is currently selected for setting.
Seconds
3. Use D (+) and B (–) to change the currently flashing value.
4. Press A to exit the setting mode.
E-32
E-33
To perform a countdown timer operation
Using the Alarm
D
D
D
D
B
Start
Stop
(Resume)
(Stop)
Reset
Alarm number
Countdown in Progress
Alarm time
(Hour : Minute)
To stop the alarm
Press any button.
You can set five independent daily alarms. When a daily
alarm is turned on, an alarm tone will sound for about
10 seconds each day when the time in the Timekeeping
Mode reaches the preset alarm time.
You can also turn on an Hourly Time Signal, which will
cause the watch to beep twice every hour on the hour.
To enter the Alarm Mode
Use C to select the Alarm Mode as shown on page
E-11.
x Alarm screens are numbered AL1 through AL5. The
Hourly Time Signal screen is indicated by SIG.
x When you enter the Alarm Mode, the data you were
viewing when you last exited the mode appears first.
E-34
E-35
x If you do not perform any operation for about two or three minutes in the Alarm
Mode, the watch will automatically return to the Timekeeping Mode.
To set an alarm time
1. In the Alarm Mode, use D and B to display the alarm
whose settings you want to change.
Alarm on indicator
AL1
AL2
AL3
SIG
AL5
AL4
3. Press C to move the flashing between the hour and the minute digits.
x The selected digits are those that are flashing.
4. Use D (+) and B (–) to change the hour and minute settings.
x When setting the alarm time using the 12-hour format, take care to set the time
correctly as a.m. (no indicator) or p.m. (P indicator).
5. Press A to exit the setting mode.
To test the alarm
In the Alarm Mode, hold down D to sound the alarm.
2. Hold down A until the flashing SET indicator
disappears from the display and the alarm time hour
digits start to flash. Release A after the digits start
to flash.
x ALM appears on the display, indicating that alarm
setting is enabled.
E-36
E-37
To turn an alarm and the Hourly Time Signal on and off
In the Alarm Mode, use D and B to select an alarm or
the hourly time signal.
x When the alarm you want or the Hourly Time Signal
is displayed, press A to toggle it between on
(ON displayed) and off (– – displayed).
x The alarm on indicator (when any alarm is on) and the
Hourly Time Signal on indicator (when the Hourly Time
Signal is on) are shown on the display in all modes.
Alarm on indicator
Hourly time signal
on indicator
E-38
To stop the alarm
Press any button.
Illumination
The display of the watch is illuminated for easy reading in the dark.
To turn on illumination
Press L in any mode to illuminate the display.
x You can use the procedure below to select either 1.5 seconds or three seconds as
the illumination duration.
Note
x The LED light will turn off automatically if the alarm starts to sound.
x The LED light is disabled while the hands are moving at high speed.
E-39
Operation Guide 5590
To change the illumination duration
1. In the Timekeeping Mode, hold down A until the flashing SET indicator
disappears from the display and the currently selected city code appears on the
display.
2. Press C ten times to display the illumination duration setting screen.
x The current illumination duration setting (1 or 3) will be flashing in the display.
3. Press D or B to toggle the illumination duration between three seconds
(3 displayed) and 1.5 seconds (1 displayed).
Adjusting Hand Positions
The watch hands can go out of alignment with the time on the digital display if it
is exposed to strong magnetism or impact. If this happens, you should adjust the
hand positions.
1. In the Timekeeping Mode, hold down A for at least
Mode hand
five seconds until SUB starts to flash. Release A after
SUB flashes.
x This enters the mode hand adjustment mode.
4. Press A to exit the setting mode.
2. If the mode hand is not pointed at the adjustment point
mark ( ■ ) at 9 o’clock, use D and B to move it there.
x Holding down either button moves the hands at high
speed.
3. Press C.
x This causes 0:00 to flash to indicate the hour and
minute hand adjustment mode.
Adjustment point mark
E-41
E-40
Hour hand and minute hand
4. If the hour and minute hands are not at 12 o’clock,
use D (+) and B (–) to adjust them until they are.
Button Operation Tone
You can turn the button operation tone on or off as
desired.
x Even if you turn off the button operation tone, alarms,
the Hourly Time Signal, and other beepers all operate
normally.
5. Press A to return to the Timekeeping Mode.
Check to make sure that the time indicated by the
hands matches the time on the digital display. If the
times don’t match, perform the correction procedure
above again.
E-42
To turn the button operation tone on and off
1. In the Timekeeping Mode, hold down A until the flashing SET indicator
disappears from the display and the currently selected city code appears on the
display.
2. Press C nine times to display the button operation tone On/Off screen (page
E-22).
The screen will show either KEY or MUTE.
3. Press D or B to toggle the button operation tone setting between enabled
(KEY ) and disabled (MUTE).
4. Press A to exit the setting mode.
Note
x The mute indicator is displayed in all modes when the button operation tone is
disabled.
E-43
Troubleshooting
Hand Movement and Indications
■ The time indicated by the hands is different from the digital time.
This could indicate that the watch has been exposed to magnetism or strong
impact, which has caused problems with proper hand alignment. Adjust the watch’s
hand home position alignment (page E-41).
Time Setting
■ The current time setting is off by hours.
Your Home City setting may be wrong (page E-18). Check your Home City setting and
correct it, if necessary.
■ The current time setting is off by one hour.
You may need to change your Home City’s standard time/daylight saving time
(DST) setting. Use the procedure under “Adjusting the Digital Time and Date
Settings” (page E-21) to change the standard time/daylight saving time (DST) setting.
E-44
World Time Mode
■ The time for my World Time City is off in the World Time Mode.
This could be due to incorrect switching between standard time and daylight saving
time. See “To specify standard time or daylight saving time (DST) for a city” (page E-27)
for more information.
E-45
Main Indicators
1
2 3
4 5 67
Number
Name
See
1
PM indicator
E-15
2
Split indicator
E-29
3
Hands shifted indicator
E-13
4
Mute indicator
E-43
E-36
5
Alarm on indicator
6
Hourly time signal on indicator
7
DST indicator
E-38
E-20, E-27
E-46
Specifications
Accuracy at normal temperature: ±15 seconds a month
Digital Timekeeping: Hour, minutes, seconds, p.m. (P), month, day, day of the
week
Time format: 12-hour and 24-hour
Calendar system: Full Auto-calendar pre-programmed from the year 2000 to 2099
Other: Home City code (can be assigned one of 48 city codes);
Standard Time/Daylight Saving Time (summer time)
Analog Timekeeping: Hour, minutes (hand moves every 20 seconds)
World Time: 48 cities (31 time zones) and Coordinated Universal Time (UTC)
Other: Daylight Saving Time/Standard Time; Home City/World Time City
switching
E-48
E-47
Stopwatch:
Measuring unit: 1/100 seconds (first hour);
1 second (after first hour)
Measuring capacity: 23:59'59"
Measuring modes: Elapsed time, split time, two finishes
Countdown Timer:
Measuring unit: 1 second
Countdown range: 24 hours
Countdown start time setting range: 1 second to 24 hours (1-second increments)
Alarms: 5 Daily alarms; Hourly time signal
Illumination: Double LED (light-emitting diode); Selectable illumination duration
(approximately 1.5 seconds or 3 seconds)
Other: Button operation tone on/off; Moving the Hands to View the Digital Display
E-49
Operation Guide 5590
Battery: Two silver oxide batteries (Type: SR726W)
Approximate battery operating time: 3 years under the following conditions:
x Alarm: 10 seconds/day
x 1 illumination operation (1.5 seconds) per day
Frequent use of illumination runs down the battery.
Operating Precautions
Water Resistance
x The information below applies to watches with WATER RESIST or WATER
RESISTANT marked on the back cover.
Water
Resistance
Under Daily
Use
Specifications are subject to change without notice.
5
10
20
Atmospheres Atmospheres Atmospheres
No
BAR mark
5BAR
10BAR
20BAR
Yes
Yes
Yes
Yes
Example of Water-related work, swimming
Daily Use
Windsurfing
No
Yes
Yes
Yes
No
No
Yes
Yes
Skin diving
No
No
Yes
Yes
Marking
On watch front or on
back cover
Enhanced Water Resistance Under
Daily Use
Hand washing, rain
x Do not use your watch for scuba diving or other types of diving that requires air tanks.
E-50
OPUM-E
x Watches that do not have WATER RESIST or WATER RESISTANT marked on
the back cover are not protected against the effects of sweat. Avoid using such
a watch under conditions where it will be exposed to large amounts of sweat or
moisture, or to direct splashing with water.
x Even if a watch is water resistant, note the usage precautions described below.
Such types of use reduce water resistance performance and can cause fogging of
the glass.
– Do not operate the crown or buttons while your watch is submersed in water or
wet.
– Avoid wearing your watch while in the bath.
– Do not wear your watch while in a heated swimming pool, sauna, or any other
high temperature/high humidity environment.
– Do not wear your watch while washing your hands or face, while doing
housework, or while performing any other task that involves soaps or detergents.
x After submersion in seawater, use plain water to rinse all salt and dirt from your
watch.
x To maintain water resistance, have the gaskets of your watch replaced periodically
(about once every two or three years).
x A trained technician will inspect your watch for proper water resistance whenever
you have its battery replaced. Battery replacement requires the use of special tools.
Always request battery replacement from your original retailer or from an authorized
CASIO service center.
x Some water-resistant watches come with fashionable leather bands. Avoid
swimming, washing, or any other activity that causes direct exposure of a leather
band to water.
x The inside surface of the watch glass may fog when the watch is exposed to a
sudden drop in temperature. No problem is indicated if the fogging clears up
relatively quickly. Sudden and extreme temperature changes (such as coming into
an air conditioned room in the summer and standing close to an air conditioner
outlet, or leaving a heated room in the winter and allowing your watch to come into
contact with snow) can cause it to take longer for glass fogging to clear up. If glass
fogging does not clear up or if you notice moisture inside of the glass, immediately
stop using your watch and take it to your original retailer or to an authorized CASIO
service center.
x Your water-resistant watch has been tested in accordance with International
Organization for Standardization regulations.
E-52
E-51
E-53
Band
Temperature
x Tightening the band too tightly can cause you to sweat and make it difficult for air
to pass under the band, which can lead to skin irritation. Do not fasten the band too
tightly. There should be enough room between the band and your wrist so you can
insert your finger.
x Deterioration, rust, and other conditions can cause the band to break or come off
of your watch, which in turn can cause band pins to fly out of position or to fall out.
This creates the risk of your watch falling from your wrist and becoming lost, and
also creates the risk of personal injury. Always take good care of your band and
keep it clean.
x Immediately stop using a band if you even notice any of the following: loss of band
flexibility, band cracks, band discoloration, band looseness, band connecting
pin flying or falling out, or any other abnormality. Take your watch to your original
retailer or to a CASIO service center for inspection and repair (for which you will be
charged) or to have the band replaced (for which you will be charged).
x Never leave your watch on the dashboard of a car, near a heater, or in any other
location that is subject to very high temperatures. Do not leave your watch where
it will be exposed to very low temperatures. Temperature extremes can cause your
watch to lose or gain time, to stop, or otherwise malfunction.
x Leaving your watch in an area hotter than +60°C (140°F) for long periods can lead
to problems with its LCD. The LCD may become difficult to read at temperatures
lower than 0°C (32°F) and greater than +40°C (104°F).
Impact
x Your watch is designed to withstand impact incurred during normal daily use and
during light activity such as playing catch, tennis, etc. Dropping your watch or
otherwise subjecting it to strong impact, however, can lead to malfunction. Note
that watches with shock-resistant designs (G-SHOCK, BABY-G, G-MS) can be
worn while operating a chain saw or engaging in other activities that generate
strong vibration, or while engaging in strenuous sports activities (motocross, etc.)
E-54
E-55
Magnetism
Chemicals
x The hands of analog and combination (analog-digital) watches are moved by a
motor that uses magnetic force. When such a watch is close to a device (audio
speakers, magnetic necklace, cell phone, etc.) that emits strong magnetism, the
magnetism can cause timekeeping to slow down, speed up, or stop, resulting in the
incorrect time being displayed.
x Very strong magnetism (from medical equipment, etc.) should be avoided because
it can cause malfunction of your watch and damage to electronic components.
x Do not allow your watch to come into contact with thinner, gasoline, solvents,
oils, or fats, or with any cleaners, adhesives, paints, medicines, or cosmetics that
contain such ingredients. Doing so can cause discoloration of or damage to the
resin case, resin band, leather, and other parts.
Electrostatic Charge
x Exposure to very strong electrostatic charge can cause your watch to display
the wrong time. Very strong electrostatic charge even can damage electronic
components.
x Electrostatic charge can cause the display to go blank momentarily or cause a
rainbow effect on the display.
Storage
x If you do not plan to use your watch for a long time, thoroughly wipe it free of all
dirt, sweat, and moisture, and store it in a cool, dry place.
Resin Components
x Allowing your watch to remain in contact with other items or storing it together with
other items for long periods while it is wet can cause color on resin components
to transfer to the other items, or the color of the other items to transfer to the resin
components of your watch. Be sure to dry off your watch thoroughly before storing
it and make sure it is not in contact with other items.
E-56
x Leaving your watch where it is exposed to direct sunlight (ultraviolet rays) for long
periods or failure to clean dirt from your watch for long periods can cause it to
become discolored.
x Friction caused by certain conditions (strong external force, sustained rubbing,
impact, etc.) can cause discoloration of painted components.
x If there are printed figures on the band, strong rubbing of the printed area can
cause discoloration.
x Leaving your watch wet for long periods can cause fluorescent color to fade. Wipe
the watch dry as soon as possible after it becomes wet.
x Semi-transparent resin parts can become discolored due to sweat and dirt, and if
exposed to high temperatures and humidity for long periods.
x Daily use and long-term storage of your watch can lead to deterioration, breaking,
or bending of resin components. The extent of such damage depends on usage
conditions and storage conditions.
E-58
E-57
Leather Band
x Allowing your watch to remain in contact with other items or storing it together with
other items for long periods while it is wet can cause the color of the leather band
to transfer to the other items or the color of the other items to transfer to the leather
band. Be sure to dry off your watch thoroughly with a soft cloth before storing it
and make sure it is not in contact with other items.
x Leaving a leather band where it is exposed to direct sunlight (ultraviolet rays) for
long periods or failure to clean dirt from a leather band for long periods can cause
it to become discolored.
CAUTION: Exposing a leather band to rubbing or dirt can cause color transfer and
discoloration.
Metal Components
x Failure to clean dirt from metal components can lead to formation of rust, even if
components are stainless steel or plated. If metal components exposed to sweat or
water, wipe thoroughly with a soft, absorbent cloth and then place the watch in a
well-ventilated location to dry.
E-59
Operation Guide 5590
x Use a soft toothbrush or similar tool to scrub the metal with a weak solution of
water and a mild neutral detergent, or with soapy water. Next, rinse with water
to remove all remaining detergent and then wipe dry with a soft absorbent cloth.
When washing metal components, wrap the watch case with kitchen plastic wrap
so it does not come into contact with the detergent or soap.
Note that CASIO COMPUTER CO., LTD. assumes no responsibility for any damage
or loss suffered by you or any third party arising through the use of your watch or
its malfunction.
Bacteria and Odor Resistant Band
x The bacteria and odor resistant band protects against odor generated by the
formation of bacteria from sweat, which ensures comfort and hygiene. In order
to ensure maximum bacteria and odor resistance, keep the band clean. Use an
absorbent soft cloth to thoroughly wipe the band clean of dirt, sweat, and moisture.
A bacteria and odor resistant band suppresses the formation of organisms and
bacteria. It does not protect against rash due to allergic reaction, etc.
Liquid Crystal Display
x Display figures may be difficult to read when viewed from an angle.
E-60
E-61
User Maintenance
Caring for Your Watch
Remember that you wear your watch next to your skin, just like a piece of clothing.
To ensure your watch performs at the level for which it is designed, keep it clean by
frequently wiping with a soft cloth to keep your watch and band free of dirt, sweat,
water and other foreign matter.
x Whenever your watch is exposed to sea water or mud, rinse it off with clean fresh
water.
x For a metal band or a resin band with metal parts, use a soft toothbrush or similar
tool to scrub the band with a weak solution of water and a mild neutral detergent,
or with soapy water. Next, rinse with water to remove all remaining detergent and
then wipe dry with a soft absorbent cloth. When washing the band, wrap the watch
case with kitchen plastic wrap so it does not come into contact with the detergent
or soap.
x For a resin band, wash with water and then wipe dry with a soft cloth. Note that
sometimes a smudge like pattern may appear on the surface of a resin band. This
will not have any effect on your skin or clothing. Wipe with a cloth to remove the
smudge pattern.
x Clean water and sweat from a leather band by wiping with a soft cloth.
x Not operating a watch crown, buttons, or rotary bezel could lead to later problems
with their operation. Periodically rotate the crown and rotary bezel, and press
buttons to maintain proper operation.
Dangers of Poor Watch Care
Rust
x Though the metal steel used for your watch is highly rust-resistant, rust can form if
your watch is not cleaned after it becomes dirty.
– Dirt on your watch can make it impossible for oxygen to come into contact with
the metal, which can lead to breakdown of the oxidization layer on the metal
surface and the formation of rust.
E-62
E-63
x Rust can cause sharp areas on metal components and can cause band pins to fly
out of position or to fall out. If you ever notice any abnormality immediately stop
using your watch and take it to your original retailer or to an authorized CASIO
service center.
x Even if the surface of the metal appears clean, sweat and rust in crevasses can
soil the sleeves of clothing, cause skin irritation, and even interfere with watch
performance.
Premature Wear
x Leaving sweat or water on a resin band or bezel, or storing your watch an area
subject to high moisture can lead to premature wear, cuts, and breaks.
Skin Irritation
x Individuals with sensitive skin or in poor physical condition may experience skin
irritation when wearing a watch. Such individuals should keep their leather band
or resin band particularly clean. Should you ever experience a rash or other skin
irritation, immediately remove your watch and contact a skin care professional.
Battery Replacement
x Leave battery replacement up to your original retailer or authorized CASIO service
center.
x Have the batteries replaced only with the type specified in the User’s Guide. Use of
a different battery type can cause malfunction.
x When replacing the batteries, also request a check for proper water resistance.
x Ornamental resin components may become worn, cracked, or bent over
time when subjected to normal daily use. Note that if cracking or any other
abnormality indicating possible damage is noticed in a watch submitted for battery
replacement, your watch will be returned with an explanation of the abnormality,
without the requested servicing being performed.
Initial Batteries
x The batteries that come loaded in your watch when you purchase it are used for
function and performance testing at the factory.
x Test batteries may go dead quicker than the normally rated battery life as noted in
the User’s Guide. Note that you will be charged for replacement of these batteries,
even if replacement is required within your watch’s warranty period.
E-64
E-65
Low Battery Power
x Low battery power is indicated by large timekeeping error, by dim display contents,
or by a blank display.
x Operation while battery power is low can result in malfunction. Replace the
batteries as soon as possible.
E-66
City Code Table
City Code Table
L
City
Code
PPG
HNL
ANC
YVR
LAX
YEA
DEN
MEX
CHI
NYC
YHZ
YYT
BUE
RIO
City
Pago Pago
Honolulu
Anchorage
Vancouver
Los Angeles
Edmonton
Denver
Mexico City
Chicago
New York
Halifax
St. John’s
Buenos Aires
Rio De Janeiro
UTC Offset/
GMT Differential
–11
–10
–9
–8
–7
–6
–5
–4
–3.5
–3
City
Code
City
UTC Offset/
GMT Differential
FEN
Fernando de
Noronha
Praia
–1
RAI
UTC
LIS
LON
MAD
PAR
ROM
BER
STO
ATH
CAI
JRS
Lisbon
London
Madrid
Paris
Rome
Berlin
Stockholm
Athens
Cairo
Jerusalem
–2
0
+1
+2
L-1
Operation Guide 5590
City
Code
MOW
JED
THR
DXB
KBL
KHI
DEL
KTM
DAC
RGN
BKK
SIN
HKG
BJS
TPE
L-2
City
Moscow
Jeddah
Tehran
Dubai
Kabul
Karachi
Delhi
Kathmandu
Dhaka
Yangon
Bangkok
Singapore
Hong Kong
Beijing
Taipei
UTC Offset/
GMT Differential
+3
+3.5
+4
+4.5
+5
+5.5
+5.75
+6
+6.5
+7
+8
City
Code
SEL
TYO
ADL
GUM
SYD
NOU
WLG
City
Seoul
Tokyo
Adelaide
Guam
Sydney
Noumea
Wellington
UTC Offset/
GMT Differential
+9
+9.5
+10
+11
+12
xThis table shows the city codes of this
watch (As of July 2018).
xThe rules governing global times
(GMT differential and UTC offset) and
summer time are determined by each
individual country.
CASIO COMPUTER CO., LTD.
6-2, Hon-machi 1-chome
Shibuya-ku, Tokyo 151-8543, Japan

Operation Guide 5590
E-9
To do this: Enter this mode: See:
Set an alarm time Alarm Mode E-35
E-8
Mode Reference Guide
The mode you should select depends on what you want to do.
To do this: Enter this mode: See:
x View the current date in the Home City
x Configure Home City and daylight saving time (DST)
settings
x Configure time and date settings
x View the World Time city and time
x Swap Home Time and World Time information
x Change the display illumination duration setting
x Enable/disable the button operation tone
Timekeeping Mode
E-15
View the current time in one of 48 cities (31 time
zones) around the globe
World Time Mode E-25
Use the stopwatch to measure elapsed time Stopwatch Mode E-28
Use the countdown timer Countdown Timer Mode E-32
E-7E-6
Troubleshooting . . . . . . . . . . . . . . . . . . . . . . . . . . . . . . . . . . . . . . . . . . . . . . . . . E-45
Main Indicators . . . . . . . . . . . . . . . . . . . . . . . . . . . . . . . . . . . . . . . . . . . . . . . . . E-47
Specifications. . . . . . . . . . . . . . . . . . . . . . . . . . . . . . . . . . . . . . . . . . . . . . . . . . . E-48
Operating Precautions . . . . . . . . . . . . . . . . . . . . . . . . . . . . . . . . . . . . . . . . . . . E-51
User Maintenance . . . . . . . . . . . . . . . . . . . . . . . . . . . . . . . . . . . . . . . . . . . . . . . E-62
E-5
Using the Alarm . . . . . . . . . . . . . . . . . . . . . . . . . . . . . . . . . . . . . . . . . . . . . . . . . E-35
To enter the Alarm Mode . . . . . . . . . . . . . . . . . . . . . . . . . . . . . . . . . . . . . . . . E-35
To set an alarm time . . . . . . . . . . . . . . . . . . . . . . . . . . . . . . . . . . . . . . . . . . . E-36
To test the alarm . . . . . . . . . . . . . . . . . . . . . . . . . . . . . . . . . . . . . . . . . . . . . . E-37
To turn an alarm and the Hourly Time Signal on and off . . . . . . . . . . . . . . . . . E-38
To stop the alarm . . . . . . . . . . . . . . . . . . . . . . . . . . . . . . . . . . . . . . . . . . . . . E-38
Illumination . . . . . . . . . . . . . . . . . . . . . . . . . . . . . . . . . . . . . . . . . . . . . . . . . . . . . E-39
To turn on illumination . . . . . . . . . . . . . . . . . . . . . . . . . . . . . . . . . . . . . . . . . . E-39
To change the illumination duration . . . . . . . . . . . . . . . . . . . . . . . . . . . . . . . . E-40
Adjusting Hand Positions . . . . . . . . . . . . . . . . . . . . . . . . . . . . . . . . . . . . . . . . . E-41
Button Operation Tone . . . . . . . . . . . . . . . . . . . . . . . . . . . . . . . . . . . . . . . . . . . E-43
To turn the button operation tone on and off . . . . . . . . . . . . . . . . . . . . . . . . . E-44
E-4
Checking the Current Time in a Different Time Zone . . . . . . . . . . . . . . . . . . . E-25
To enter the World Time Mode. . . . . . . . . . . . . . . . . . . . . . . . . . . . . . . . . . . . E-26
To view the time in another time zone . . . . . . . . . . . . . . . . . . . . . . . . . . . . . . E-26
To specify standard time or daylight saving time (DST) for a city . . . . . . . . . . . E-27
Using the Stopwatch . . . . . . . . . . . . . . . . . . . . . . . . . . . . . . . . . . . . . . . . . . . . . E-28
To enter the Stopwatch Mode . . . . . . . . . . . . . . . . . . . . . . . . . . . . . . . . . . . . E-28
To perform an elapsed time operation . . . . . . . . . . . . . . . . . . . . . . . . . . . . . . E-29
To pause at a split time . . . . . . . . . . . . . . . . . . . . . . . . . . . . . . . . . . . . . . . . . E-29
To measure two finishes . . . . . . . . . . . . . . . . . . . . . . . . . . . . . . . . . . . . . . . . E-29
Countdown Timer . . . . . . . . . . . . . . . . . . . . . . . . . . . . . . . . . . . . . . . . . . . . . . . E-32
To enter the Countdown Timer Mode . . . . . . . . . . . . . . . . . . . . . . . . . . . . . . . E-32
To configure the countdown timer . . . . . . . . . . . . . . . . . . . . . . . . . . . . . . . . . E-33
To perform a countdown timer operation . . . . . . . . . . . . . . . . . . . . . . . . . . . . E-34
To stop the alarm . . . . . . . . . . . . . . . . . . . . . . . . . . . . . . . . . . . . . . . . . . . . . E-34
E-3
Contents
About This Manual . . . . . . . . . . . . . . . . . . . . . . . . . . . . . . . . . . . . . . . . . . . . . . . . E-1
Things to check before using the watch . . . . . . . . . . . . . . . . . . . . . . . . . . . . . . E-2
Mode Reference Guide . . . . . . . . . . . . . . . . . . . . . . . . . . . . . . . . . . . . . . . . . . . . E-8
Timekeeping . . . . . . . . . . . . . . . . . . . . . . . . . . . . . . . . . . . . . . . . . . . . . . . . . . . . E-15
To swap your Home City and World Time City . . . . . . . . . . . . . . . . . . . . . . . . E-17
Configuring Home City Settings . . . . . . . . . . . . . . . . . . . . . . . . . . . . . . . . . . . . E-18
To configure Home City settings . . . . . . . . . . . . . . . . . . . . . . . . . . . . . . . . . . E-18
To change the Daylight Saving Time (summer time) setting . . . . . . . . . . . . . . E-20
Adjusting the Digital Time and Date Settings . . . . . . . . . . . . . . . . . . . . . . . . . E-21
To configure the digital time and date settings . . . . . . . . . . . . . . . . . . . . . . . . E-21
E-2
Things to check before using the watch
1. Check the Home City and the daylight saving time (DST) setting.
Use the procedure under “To configure Home City settings” (page E-18) to configure
your Home City and daylight saving time settings.
Important!
x Proper World Time Mode data depends on correct Home City, time, and date
settings in the Timekeeping Mode. Make sure you configure these settings
correctly.
2. Set the current time.
x See “Adjusting the Digital Time and Date Settings” (page E-21).
The watch is now ready for use.
E-1
About This Manual
x Depending on the model of your watch, display text
appears either as dark figures on a light background, or
light figures on a dark background. All sample displays
in this manual are shown using dark figures on a light
background.
x Button operations are indicated using the letters shown
in the illustration.
x Note that the product illustrations in this manual are
intended for reference only, and so the actual product
may appear somewhat different than depicted by an
illustration.
E
ENGLISH
Congratulations upon your selection of this CASIO watch.
To ensure that this watch provides you with the years of service for which it is
designed, carefully read and follow the instructions in this manual, especially the
information under “Operating Precautions” and “User Maintenance”.
MA1902-EA
2019 CASIO COMPUTER CO., LTD.
Содержание
- Как настроить часы G-SHOCK? Универсальная инструкция
- Настройка времени
- Дополнительные функции
- Установка времени в часах G-Shock MRG-G2000 / Casio 5531
- Настройка часов Casio G-Shock: универсальная инструкция
- Выбор функции
- Наручные часы CASIO G-SHOCK DW-5600BBMB-1ER
- Наручные часы CASIO G-SHOCK DW-5600LS-2ER
- Наручные часы CASIO G-SHOCK GMA-S140-2AER
- Наручные часы CASIO G-SHOCK AW-590-1AER
- Наручные часы CASIO G-SHOCK AWG-M100-1AER
- Наручные часы CASIO G-SHOCK DW-5700BBM-2ER
- Наручные часы CASIO G-SHOCK DW-6900SP-1ER
- Наручные часы CASIO G-SHOCK DWE-5600CC-3ER
- Наручные часы CASIO G-SHOCK G-8900GB-1ER
- Наручные часы CASIO G-SHOCK GA-100B-4AER
- Наручные часы CASIO G-SHOCK GA-110LS-7AER
- Наручные часы CASIO G-SHOCK GAW-100B-1A2ER
- Наручные часы CASIO G-SHOCK GBA-800-9AER
- Наручные часы CASIO G-SHOCK GBD-800-8ER
- Наручные часы CASIO G-SHOCK GD-100-1BER
- Наручные часы CASIO G-SHOCK GG-B100-1AER
- Наручные часы CASIO G-SHOCK GM-110G-1A9ER
- Наручные часы CASIO G-SHOCK GM-S5600PG-1ER
- Наручные часы CASIO G-SHOCK GMA-S140MC-1AER
- Наручные часы CASIO G-SHOCK GMD-B800-4ER
- Наручные часы CASIO G-SHOCK GMD-S6900SR-7ER
- Наручные часы CASIO G-SHOCK GMW-B5000GD-9ER
- Наручные часы CASIO G-SHOCK GST-B300WLP-1AER
- Наручные часы CASIO G-SHOCK GW-3000M-4AER
- Наручные часы CASIO G-SHOCK GWG-100-1A3ER
- Наручные часы CASIO G-SHOCK MTG-B2000BD-1A4ER
- Настройка времени
- Если часы оснащены двумя циферблатами — настройка стрелок
- Инструкции по настройке часов на русском языке
- Дополнительные функции и сброс настроек
- Заключение
Как настроить часы G-SHOCK? Универсальная инструкция
Наш блог уже посвящал целую страницу настройкам часов, но в этой статье мы попытаемся предоставить нашим читателям универсальную инструкцию, которая сможет рассказать, как настроить часы G-SHOCK. Дело в том, что принцип настройки часов похож практически для всех моделей, конечно, исключая самые последние экземпляры, где функциональность настолько сложна, что без инструкции разобраться будет практически нереально.
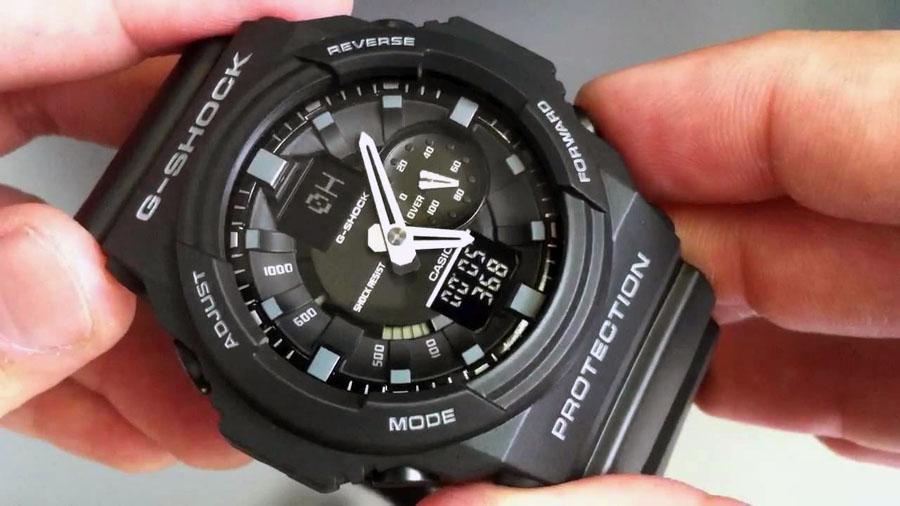
Итак, большинство моделей часов G-SHOCK имеют четыре стандартные кнопки управления функциями. Вот именно эти кнопки нам и нужны, чтобы разобраться, как настроить часы G-SHOCK. Если быть точнее, то мы расскажем о настройке времени и основных функций, которые присутствуют во всех моделях неубиваемых часов.
Настройка времени
Пожалуй, начнем! Ищем на своих часах кнопку «Mode», отвечающую за переключение режимов и ради пробы смотрим, какие режимы мы можем использовать в часах. Как правило, данная кнопка отвечает за переключение между следующими режимами:
Нам нужен последний пункт, который и позволит нам настроить на наших часах правильное время. Переключение режимов посредством кнопки «Mode» сопровождается звуковым сигналом, который поможет сориентироваться, когда нужно будет остановиться.

Итак, если мы имеем дело с часами, оборудованными аналоговым и цифровым циферблатом, то первым делом нужно проверить совпадение времени между двумя значениями. Если время не совпадает, то зажатием кнопки «Forward» нужно перевести стрелки в положение 00:00.
В случае, если погрешность в показаниях времени минимальная, то с помощью кнопок «Forward» и «Reverse» можно отрегулировать время в нужное положение.
Чтобы максимально точно синхронизировать два циферблата, достаточно будет нажать кнопку «Adjust», после чего можно преступать к непосредственной настройке точного времени.
Для настройки времени следуйте следующей инструкции:
- Зажмите кнопку «Adjust» до начала мигания индикатора.
- Кнопкой «Reverse» выберите нужный часовой пояс, для чего в сети нужно поискать аббревиатуры, соответствующие часовым поясам.
- Кнопкой «Mode» выберите режим зимнего или летнего времени. Если функция автоматического переключения между режимами не нужна, то ее отключить можно нажатием кнопки «Forward».
- Далее той же кнопкой «Mode» выбираем режим показа времени в формате 12-ти или 24-х часов. Переключение между форматами осуществляется с помощью кнопки «Forward».
- Опять-таки кнопкой «Mode» доходим до режима настройки секунд, минут и часов, где кнопкой «Forward» выставляем нужное значение времени.
- Последний режим в цепочке переключений кнопки «Mode» — это календарь, который настраивается также, как и время часов.
Когда на циферблате все значения будут верно введены, нужно нажать кнопку «Adjust», которая выставит стрелки часов в соответствии с новыми настройками. В итоге первую часть вопроса, как настроить часы G-SHOCK, можно считать закрытой. Немного практики и дальнейшая настройка времени покажется легкой забавой.
Дополнительные функции
Перечень функций и кнопок для их запуска:
- В рабочем режиме кнопка «Forward» отвечает за вывод функций таймера и секундомера.
- Автоматическая подсветка включается зажатием кнопки «Reverse».
- Настройка будильника запускается все той же кнопкой «Mode» (нажмите несколько раз, чтобы дойти до настроек), а ввод времени срабатывания будильника возможен после зажатия кнопки «Reverse». Пока индикатор будильника мигает, кнопкой «Mode» установите нужное время и запустите будильник повторным нажатием кнопки «Reverse», которая также отвечает за его отключение.

С основными функциями мы разобрались, а если есть желание углубиться в настройки специфических функций ваших часов, то может поискать советы по настройке тут. Очередной раз надеемся, что смогли вам помочь разобраться с вопросом, как настроить часы G-SHOCK, ну а если что-то непонятно, то комментарии специально для этого и открыты.
Источник
Установка времени в часах G-Shock MRG-G2000 / Casio 5531

Чтобы настроить время на ваших часах Casio G-Shock GA-110 нужно вначале ознакомиться с названиями кнопок [смотри буквенные обозначения на картинке]. Только тогда вы сможете правильно понимать дальнейшие действия.

Советуем изучить инструкцию к модулю Casio 5531
- Смотреть онлайн →(без скачивания, удобно на мобильных и планшетах);
- Скачать русскую инструкцию →(типичная “как у всех”, не всегда понятные картинки);
- Скачать английскую инструкцию →(детальная, много фото, более понятная).
Как бы вам не хотелось, но инструкция действительно поможет решить проблемы с настройкой. Важно понимать логику действий.
Режим текущего времени – так называется отображение всех часовых данных, как говорится, “по умолчанию”. Нажимайте кнопку “D” в Режиме Текущего Времени для переключения дисплеев текущей даты и текущего времени.
Установка времени и даты
1. Вытяните заводную головку до 2 щелчка. В окошке индикатора режима отобразится индикатор уста-
новленного города текущего местонахождения.
2. Нажмите и удерживайте кнопку С около 10 секунд. Секундная стрелка переместится к 12-часовой отметке. Это означает, что часы находятся в режиме настройки минут.
3. Поворачивая заводную головку, выполните настройку текущего значения минут.
4. Нажмите кнопку С. Часовая стрелка немного сместится. Это означает, что часы находятся в режиме настройки часов.
5. Поворачивая заводную головку, выполните настройку текущего значения часов.
6. Нажмите кнопку С для перевода часов в режим настройки года.
7. Поворачивая заводную головку, выполните настройку года. Часовая стрелка указывает на
значение десятков года, минутная – единиц года.

8. Нажмите кнопку С для перевода часов в режим настройки месяца.
9. Поворачивая заводную головку, выполните настройку месяца, перемещая секундную стрелку.
10. Нажмите кнопку С. Стрелка дня недели немного сместится. Это означает, что часы находятся в режиме настройки дня.

- Во время настройки значения дня стрелка дня недели будет вращаться.
11. Поворачивая заводную головку, выполните настройку дня, изменяя значение индикатора дня.
12. По сигналу точного времени (с началом отсчета секунд новой минуты), верните заводную головку в исходное положение.
Так и не смогли настроить? Спрашивайте на форуме G-Shock →
Источник
Настройка часов Casio G-Shock: универсальная инструкция
Сегодня мы рассмотрим настройку часов Casio G-Shock.
В частности, узнаем, как устанавливать правильное время и использовать дополнительные функции.
5% скидка Для читателей нашего блога
скидка 5% на весь
ассортимент Ваш промокод: BLOG Смотреть все часы
Выбор функции
Чтобы настроить время на часах G-Shock, нужно, чтобы они находились в режиме «Текущее время» (или «Часы»). За переключение режимов/функций отвечает кнопка MODE. Ее нажатие сопровождается звуковым сигналом, что помогает лучше ориентироваться в процессе.
В инструкциях она обозначается как «C».
Режимы могут быть следующими:

Наручные часы CASIO G-SHOCK DW-5600BBMB-1ER
Наручные часы CASIO G-SHOCK DW-5600LS-2ER
Наручные часы CASIO G-SHOCK GMA-S140-2AER
Наручные часы CASIO G-SHOCK AW-590-1AER
Наручные часы CASIO G-SHOCK AWG-M100-1AER
Наручные часы CASIO G-SHOCK DW-5700BBM-2ER
Наручные часы CASIO G-SHOCK DW-6900SP-1ER
Наручные часы CASIO G-SHOCK DWE-5600CC-3ER
Наручные часы CASIO G-SHOCK G-8900GB-1ER
Наручные часы CASIO G-SHOCK GA-100B-4AER
Наручные часы CASIO G-SHOCK GA-110LS-7AER
Наручные часы CASIO G-SHOCK GAW-100B-1A2ER
Наручные часы CASIO G-SHOCK GBA-800-9AER
Наручные часы CASIO G-SHOCK GBD-800-8ER
Наручные часы CASIO G-SHOCK GD-100-1BER
Наручные часы CASIO G-SHOCK GG-B100-1AER
Наручные часы CASIO G-SHOCK GM-110G-1A9ER
Наручные часы CASIO G-SHOCK GM-S5600PG-1ER
Наручные часы CASIO G-SHOCK GMA-S140MC-1AER
Наручные часы CASIO G-SHOCK GMD-B800-4ER
Наручные часы CASIO G-SHOCK GMD-S6900SR-7ER
Наручные часы CASIO G-SHOCK GMW-B5000GD-9ER
Наручные часы CASIO G-SHOCK GST-B300WLP-1AER
Наручные часы CASIO G-SHOCK GW-3000M-4AER
Наручные часы CASIO G-SHOCK GWG-100-1A3ER
Наручные часы CASIO G-SHOCK MTG-B2000BD-1A4ER
Набор функций и их последовательность могут быть разными, в зависимости от модели. Для выбора нужного пункта нажимаем MODE.
В режиме «Часы» циферблат серий G-2900, GA-100 и GA-120 может выглядеть так:
Выбрав этот пункт, можно начинать настраивать время.
Настройка времени
Универсальная инструкция по настройке времени на часах Casio G-Shock:
1. Для входа в настройку нужно нажать и удерживать 3–5 секунд кнопку ADJUST («А»). Часы «пикнут», замигает индикатор. На нем будет отображаться код города, под который настроено текущее время, например, MOW — Москва.
2. Кнопками REVERSE и FORWARD («В» и «D» соответственно) корректируется/выбирается нужный часовой пояс. Информацию о том, как кратко обозначаются часовые пояса, можно найти в интернете. Для московского времени это может быть Москва (MOW) или Джидд (JED), т. е. UTC+3 — плюс три часа ко всемирному скоординированному времени.
3. Далее для перехода из разряда в разряд следует нажать MODE («С»). Последовательность может быть следующей:
4. После первого нажатия MODE код города сменится выбором автоматического перехода на летнее время. Переход включается/выключается кнопкой FORWARD. Выключенный обозначается как DST OFF.
5. Далее снова нажимаем MODE. Замигает раздел выбора формата времени: 12 часов (12H) или 24 часа (24H). Форматы переключаются кнопкой FORWARD.
6. Последующие три нажатия MODE — настройка секунд, минут и часов. Секунды сбрасываются в значение «00» кнопкой FORWARD. Нужные значения минут и часов устанавливаются кнопками FORWARD (для увеличения значения) и REVERSE (для уменьшения значения).
7. Дальнейшие нажатия MODE — это настройка даты: год, месяц, число выставляются так же, как и время часов.
8. Последний раздел при нажатии MODE — длительность подсветки. LT1 означает продолжительность в 1 секунду. Для увеличения времени нужно нажать FORWARD.
9. При следующем нажатии MODE возвращаемся на исходную позицию кода города.Установив все значения, сохраняем настройки нажатием ADJUST.
Если часы оснащены двумя циферблатами — настройка стрелок
Если Casio G-Shock оснащены двумя циферблатами (аналоговым и цифровым) — например, модели GA-100, GA-110, GA-2100, — то может иметь место разница показаний. В этом случае для синхронизации после настройки точного времени на цифровом табло необходимо перевести стрелки (сначала маленькую, затем большую) в положение «00:00».
Это делается так:
1. На 3–5 секунд зажимаем FORWARD. В ячейке появится пункт меню H-SET и замигает выбор маленькой стрелки скорости Sub. С помощью кнопки FORWARD доводим ее до значения «50», которое совпадает по направлению со значением времени «12:00».
2. Нажимаем MODE и переходим к корректировке часовых стрелок. С помощью FORWARD и REVERSE («В» и «D») их нужно выставить ровно на «00:00» (во время выставления даже мигает соответствующая подсказка — нули).
3. Сохраняем настройки нажатием ADJUST.
Правильные положения для стрелок:
Инструкции по настройке часов на русском языке
Фирма Casio создает руководства пользования не к конкретным изделиям, а к модулям (механизмам), на базе которых создаются модели. Таким образом, в разных модификациях может использоваться один и тот же модуль. Зная его номер, можно легко отыскать нужное руководство к часам на русском языке в сети, в том числе и для моделей Casio F-91, ALARM CHRONO.
Модуль прописывается в виде четырех цифр на задней крышке гаджета или на фирменных бирках.
Пример гравировки модуля на крышке (номер 3459):
Пример модуля на бирке (номер 5062):
Также рекомендации по настройке есть в видео-обзорах.
Дополнительные функции и сброс настроек
Когда часы находятся в рабочем режиме:
1. Кнопкой FORWARD запускаются функции таймера и секундомера.
2. Кнопкой REVERSE включается автоматическая подсветка.
3. Кнопкой MODE вызывается настройка будильников (необходимо несколько нажатий, чтобы дойти до раздела «Будильники»). Время срабатывания выставляется после зажатия REVERSE. Эта же кнопка включает/отключает сигнал.
Возврат к заводским настройкам (он же сброс настроек модуля или RESET) в большинстве моделей линейки G-SHOK осуществляется замыканием на несколько секунд внутреннего контакта, обозначенного как «АС», и батареи. Выполнять данную операцию рекомендуется в сервисном центре, так как самостоятельное вскрытие часов автоматически лишает гарантии.
5% скидка Для читателей нашего блога
скидка 5% на весь
ассортимент Ваш промокод: BLOG Смотреть все часы
Модули 3459/3461 получится сбросить следующим образом:
1. Зажать и удерживать 3–5 сек. ADJUST («А») до начала мигания индикатора.
2. Дважды нажать MODE («С») до начала мигания секунд.
3. Зажать на 7 сек. REVERSE («В») — держать до прекращения мигания индикатора.
Модуль 5513 сбрасывается с помощью приложения G-SHOCK Connected и заводной головки. Последняя вытаскивается до второго щелчка, затем 5 сек. удерживается кнопка MODE (секундная стрелка при этом перемещается в положение «00:00»). После этого головка возвращается в положение блокировки.
Заключение
Логика настройки часов Casio G-Shock примерно одна и та же для разных моделей. Разобравшись с базовыми процессами, получится настроить время на гаджете из любой серии, будь то MT-G, Master of G, G-STEEL, G-SQUAD или Classic.
Источник
G-Shock GA 2000 — это одна из самых популярных моделей часов, которые сочетают в себе высокую прочность и функциональность. Однако, настройка этих часов может вызывать трудности у некоторых пользователей. В данной статье мы подробно рассмотрим, как правильно настроить часы G-Shock GA 2000, чтобы вы могли использовать их в полной мере.
Первым шагом при настройке часов G-Shock GA 2000 является установка текущего времени. Для этого необходимо нажать и удерживать кнопку «Мод» до тех пор, пока на дисплее не появится надпись «TIME». Затем используйте кнопки «Старт/Стоп» и «Ресет» для выбора нужного значения. Нажмите кнопку «Мод», чтобы перейти к следующему полю. Повторите эту процедуру для всех полей времени.
После настройки времени необходимо установить город, в котором вы находитесь, чтобы часы автоматически корректировали время в соответствии с часовым поясом. Для этого нажмите кнопку «Мод» до появления надписи «CITY». Затем используйте кнопки «Старт/Стоп» и «Ресет» для выбора нужного города. Нажмите кнопку «Мод» для подтверждения выбора.
Для активации дополнительных функций и настроек часов G-Shock GA 2000 используйте соответствующие кнопки на корпусе часов. Кнопка «Старт/Стоп» используется для выбора опций и подтверждения выбора, а кнопка «Ресет» – для возврата к предыдущему шагу или выхода из меню. Обязательно ознакомьтесь с инструкцией пользователя, чтобы полностью понимать все возможности часов и правильно настроить их.
Теперь, когда вы знаете, как правильно настроить часы G-Shock GA 2000, вы можете использовать их с удовольствием и без лишних сложностей. Установите время, выберите ваш город и наслаждайтесь функциональностью и надежностью этих замечательных часов!
Содержание
- Подробная инструкция по настройке часов G Shock GA 2000
- Проверьте состояние батареи перед настройкой
- Настройте дату и время на G-Shock GA 2000
- Изучите функции и режимы часов G Shock GA 2000
Подробная инструкция по настройке часов G Shock GA 2000
Часы G Shock GA 2000 предлагают множество функций и настроек, которые могут быть сложными для новых пользователей. В этой подробной инструкции мы расскажем о всех шагах, чтобы вы могли правильно настроить и использовать свои часы G Shock GA 2000.
Шаг 1: Установка даты и времени
Для начала настройки часов G Shock GA 2000 необходимо установить дату и время. Для этого выполните следующие действия:
- Нажмите кнопку MODE (расположена в верхней части часовой стрелки), чтобы перейти в режим настройки.
- С помощью кнопки ADJUST (расположена в нижней части часовой стрелки) выберите пункт «Time» (Время).
- Нажмите кнопку MODE для выбора значения часа, минуты и секунды.
- Используйте кнопки ADJUST и FORWARD/BACK (расположена справа от цифр на циферблате) для изменения значений.
- Нажмите кнопку MODE для перехода к настройке даты.
- Используйте кнопки ADJUST и FORWARD/BACK для выбора дня, месяца и года.
- Нажмите кнопку MODE, чтобы сохранить настройки даты и времени.
Шаг 2: Настройка будильника
Часы G Shock GA 2000 также позволяют настроить будильник. Чтобы настроить будильник, следуйте инструкциям ниже:
- Нажмите кнопку MODE для входа в режим настройки.
- С помощью кнопки ADJUST выберите пункт «Alarm» (Будильник).
- Нажмите кнопку MODE для выбора значения часа и минуты.
- Используйте кнопки ADJUST и FORWARD/BACK для изменения значений.
- Нажмите кнопку MODE для сохранения настройки будильника.
Шаг 3: Настройка мирового времени
Одна из особенностей часов G Shock GA 2000 — это возможность установки мирового времени для разных городов. Чтобы настроить мировое время, выполните следующие действия:
- Нажмите кнопку MODE для входа в режим настройки.
- С помощью кнопки ADJUST выберите пункт «World Time» (Мировое время).
- Нажмите кнопку MODE для выбора города.
- Используйте кнопки ADJUST и FORWARD/BACK для выбора нужного города.
- Нажмите кнопку MODE для сохранения настроек мирового времени.
Шаг 4: Использование дополнительных функций
Часы G Shock GA 2000 имеют множество других полезных функций, таких как секундомер, таймер обратного отсчета и подсветка. Чтобы использовать эти функции, просто нажмите соответствующую кнопку на часах и следуйте инструкциям на дисплее.
Теперь, когда вы ознакомлены с основными функциями и настройками часов G Shock GA 2000, вы готовы воспользоваться ими в повседневной жизни. Наслаждайтесь своими новыми часами G Shock GA 2000 и всеми их возможностями!
Проверьте состояние батареи перед настройкой
Перед тем, как начать настраивать часы G Shock GA 2000, рекомендуется проверить состояние батареи. Это важный шаг, так как низкий заряд батареи может привести к неправильной работе часов.
Чтобы проверить уровень заряда батареи, необходимо зайти в меню настроек часов. Для этого, сначала установите режим настройки, нажав и удерживая кнопку «Mode» в течение нескольких секунд, пока на дисплее не появится «SET». Затем нажимайте кнопку «Adjust», чтобы перейти к пункту меню «Bat» или «Battery».
После выбора пункта меню «Bat» или «Battery», дисплей покажет текущий уровень заряда батареи. Обычно он выражается в процентах или в виде индикатора, например, «HIGH» (высокий уровень заряда), «MID» (средний уровень заряда) или «LOW» (низкий уровень заряда).
Если уровень заряда батареи низкий или падает быстро, то рекомендуется заменить батарею, чтобы часы работали корректно. Для замены батареи обратитесь к руководству пользователя или обратитесь к сервисному центру.
Проверьте состояние батареи перед началом настройки часов G Shock GA 2000, чтобы быть уверенным в правильной работе часов и избежать проблем в дальнейшем.
Настройте дату и время на G-Shock GA 2000
Правильная настройка даты и времени на часах G-Shock GA 2000 важна для того, чтобы они всегда отображали актуальную информацию. Вот пошаговая инструкция, которая поможет вам настроить дату и время на вашем G-Shock GA 2000:
- Нажмите кнопку «Mode» на вашем часах G-Shock GA 2000, чтобы перейти в режим настройки.
- Используйте кнопку «Adjust» для выбора настройки даты и времени.
- Чтобы изменить значение даты или времени, используйте кнопки «Up» и «Down».
- Когда вы добьетесь желаемого значения, нажмите кнопку «Mode», чтобы переключиться на следующую часть настройки.
- Повторите шаги 3 и 4 для настройки оставшихся значений даты и времени.
- Когда вы закончите настройку, нажмите кнопку «Adjust», чтобы сохранить изменения и выйти из режима настройки.
Обратите внимание, что настройка даты и времени на часах G-Shock GA 2000 может закончиться автоматически, если вы не выполняете никаких действий в течение нескольких секунд.
Теперь вы знаете, как правильно настроить дату и время на вашем часах G-Shock GA 2000. Будьте внимательны при выполнении всех шагов и у вас не возникнет проблем с настройкой.
Изучите функции и режимы часов G Shock GA 2000
Часы G Shock GA 2000 имеют множество функций и режимов, которые помогут вам контролировать время и выполнить различные задачи. Вот некоторые из них:
- Отображение времени: Часы G Shock GA 2000 показывают текущее время в часовом, минутном и секундном форматах. Они также могут отображать дату и день недели.
- Будильник: Вы можете установить будильник на часы G Shock GA 2000, чтобы быть уверенным, что вы никогда не опоздаете.
- Хронометр: Часы G Shock GA 2000 имеют встроенный хронометр, который может измерять прошедшее время с точностью до долей секунды.
- Таймер: Часы G Shock GA 2000 позволяют задать таймер на определенное время. Они также могут издавать звуковые сигналы или вибрацию при окончании таймера.
- Водостойкость: Часы G Shock GA 2000 имеют высокую степень водостойкости, что позволяет им быть использованными во время плавания или даже под водой.
- Встроенный компас: Часы G Shock GA 2000 оснащены встроенным компасом, который позволяет ориентироваться в пространстве и находить нужное направление.
- Автоматическая подсветка: Часы G Shock GA 2000 имеют автоматическую подсветку, которая активируется при нажатии на кнопку или при повороте запястья.
Каждый из этих режимов может быть настроен и сконфигурирован с использованием кнопок на часах G Shock GA 2000. Чтобы получить полное представление о функциях и возможностях этих часов, рекомендуется ознакомиться с инструкцией по эксплуатации, прилагаемой к часам. Это поможет вам максимально использовать все возможности часов G Shock GA 2000 и настроить их под ваши личные предпочтения и потребности.
Настройка часов Casio G-Shock GA-2000 может показаться сложной задачей для новых пользователей. Эти часы известны своими многофункциональными возможностями и робким внешним видом. Однако, с помощью подробной инструкции вы сможете легко освоить все настройки и функции этих часов.
Первым шагом в настройке Casio G-Shock GA-2000 является синхронизация с точным временем. Для этого потяните и поверните режимный переключатель, чтобы выбрать экран с временем. Нажмите и удерживайте кнопку Adjust (Настройка), пока секундная стрелка не начнет мигать. Поворачивайте кнопку Mode (Режим), чтобы изменять значения, а кнопку Adjust (Настройка) — чтобы перевести стрелку на нужное вам положение. Когда время установлено, нажмите кнопку Adjust (Настройка) снова, чтобы закончить настройку.
Далее, настройте дату и день недели. Потяните и поверните режимный переключатель, чтобы перейти к экрану настройки дня недели и даты. Нажмите и удерживайте кнопку Adjust (Настройка), пока нужный элемент не начнет мигать. Используйте кнопки Mode (Режим) и Adjust (Настройка), чтобы изменять значения и перевести стрелку на нужную дату и день недели. Когда все установлено, нажмите кнопку Adjust (Настройка) снова, чтобы закончить настройку.
Теперь, когда у вас настроено точное время, дата и день недели, вы можете исследовать и использовать другие функции Casio G-Shock GA-2000, такие как будильник, таймер, хронограф и другие. Навигация по этим функциям осуществляется с помощью режимного переключателя и различных кнопок. Используйте инструкции, прилагаемые к часам, чтобы полностью освоить все их возможности.
Будьте уверены, что вы правильно настроили свои часы Casio G-Shock GA-2000, чтобы извлечь максимальную пользу и удобство из их использования. Следуйте инструкциям, обратитесь к руководству пользователя и не бойтесь экспериментировать с различными функциями. С Casio G-Shock GA-2000 вы будете всегда точно знать время и готовы к любым приключениям и повседневным задачам.
Содержание
- Открытие корпуса
- Установка времени и даты
- Настройка будильника
- Регулировка часового пояса
Открытие корпуса
Для настройки часов Casio G-Shock GA-2000 требуется открыть корпус часов. Следуйте инструкции ниже, чтобы выполнить данную процедуру правильно:
| Шаг 1: | Снимите часы со своей руки и поставьте их на стол перед вами. |
| Шаг 2: | Убедитесь, что часы выключены, нажав кнопку «Mode» (режим) и удерживая ее около 3 секунд, пока цифровой дисплей не выключится. |
| Шаг 3: | Возьмите отвертку и аккуратно вставьте ее между обеими половинками корпуса часов, расположенными по бокам. Поверните отвертку вниз, чтобы открыть корпус. |
| Шаг 4: | Осторожно отделите верхнюю половину корпуса от нижней половины, снимая ее сверху. |
Теперь, когда корпус часов Casio G-Shock GA-2000 открыт, вы можете перейти к настройке и использованию различных функций часов. Обязательно сохраните обе половинки корпуса и остальные компоненты, чтобы впоследствии снова правильно закрыть часы.
Установка времени и даты
Чтобы настроить время и дату на часах Casio G-Shock GA-2000, выполните следующие шаги:
- Нажмите и удерживайте кнопку «Mode» (режим), пока не появятся мигающие индикаторы.
- Нажмите кнопку «Adjust» (настройка), чтобы выбрать значения для настройки времени.
- Нажимайте кнопку «Mode» (режим), чтобы переключаться между значениями «часы», «минуты», «секунды», «год», «месяц» и «день».
- Нажимайте кнопку «Adjust» (настройка), чтобы изменять значения выбранного элемента времени или даты.
- Поворачивайте коронку вправо или влево, чтобы увеличить или уменьшить значения.
- Повторите шаги 3-5 для настройки всех нужных значений времени и даты.
- Нажмите кнопку «Mode» (режим), чтобы сохранить настройки.
После выполнения всех шагов установка времени и даты на часах Casio G-Shock GA-2000 будет завершена. Проверьте правильность настроек, обратив внимание на отображение времени и даты на дисплее.
Настройка будильника
Часы Casio G-Shock GA-2000 оснащены функцией будильника, которая может вам пригодиться, если вам необходимо проснуться или быть в определенное время. Настройка будильника осуществляется следующим образом:
- Нажмите и удерживайте кнопку Mode (Режим) в течение нескольких секунд, пока не появится индикатор «AL» (будильник).
- Используйте кнопку Adjust (Регулировка) для выбора значка будильника.
- Нажмите кнопку Mode (Режим) для перехода к настройке дней недели.
- Используйте кнопку Adjust (Регулировка) для выбора дней недели, когда должен срабатывать будильник.
- Нажмите кнопку Mode (Режим) для перехода к настройке часа. Часы начинают мигать.
- Используйте кнопку Adjust (Регулировка), чтобы установить желаемое время будильника.
- Нажмите кнопку Mode (Режим) для перехода к настройке минут. Минуты начинают мигать.
- Используйте кнопку Adjust (Регулировка), чтобы установить желаемые минуты будильника.
- Нажмите кнопку Mode (Режим), чтобы завершить настройку будильника.
Когда будильник настроен, он будет срабатывать в заданное вами время каждый день или выбранный день недели. Чтобы включить или выключить будильник, просто нажмите кнопку Alarm (Будильник).
Регулировка часового пояса
Часы Casio G-Shock GA-2000 позволяют легко настроить часовой пояс и установить текущее время, соответствующее вашему местоположению. Для регулировки часового пояса выполните следующие шаги:
Шаг 1: Нажмите кнопку «Mode» на часах, чтобы перейти в режим настроек.
Шаг 2: Используйте кнопки «Forward» и «Reverse», чтобы найти настройку «Time Zone» (часовой пояс).
Шаг 3: Нажмите кнопку «Adjust» для выбора настройки «Time Zone».
Шаг 4: Используйте кнопки «Forward» и «Reverse», чтобы выбрать нужный часовой пояс.
Шаг 5: Нажмите кнопку «Adjust», чтобы сохранить выбранный часовой пояс.
Шаг 6: Нажмите кнопку «Mode» для выхода из режима настроек и возвращения к отображению текущего времени в новом часовом поясе.
Обратите внимание, что при перемещении в другой часовой пояс вы также можете изменить дату, если время находится в пределах полуночи.