
Форум РадиоКот • Просмотр темы — Хитро-умный аккумулятор.
Сообщения без ответов | Активные темы
| ПРЯМО СЕЙЧАС: |
| Автор | Сообщение |
|---|---|
|
|
Заголовок сообщения: Re: Хитро-умный аккумулятор.
|
|
Родился
Зарегистрирован: Вт июл 19, 2022 22:01:06 Рейтинг сообщения: 0
|
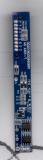
Итак, сегодня я завершил свой МНОГОДНЕВНЫЙ квест по ремонту батареи от своего ноутбука. Описание проблемы – Не заряжалась и не разряжалась батарея, хотя причин поломки банок не было. Возможная причина – разрядилась одна или несколько секций банок ниже нормы и контроллер заблокировался. Описание батареи, которую я чинил: Действие № 1. Урок №2. Урок №3. Урок №4. Действие № 2. Действие № 3 Действие № 4 Заряжаем до общего напряжения 12 Вольт. Далее отключаем данный режим и подключаем по стандарту LiIo в режиме BALANCE с балансировочным проводом (я его сделал из обычных проводов с пинами): Зарядил банки не до конца (примерно по 3,74 на банку). Припаял банки обратно (ПРИПАИВАТЬ НУЖНО ИСКЛЮЧИТЕЛЬНО ОТ «-» К «+»). |
| Вернуться наверх |
Профиль
|

| Реклама | |
|
|
|
|
Alex_PP |
Заголовок сообщения: Re: Хитро-умный аккумулятор.
|
||
Зарегистрирован: Чт авг 20, 2020 19:21:47 Рейтинг сообщения: 0
|
FxTemaK, Вы решили вывалить на бедных форумчан все, что только можно, плюс все свои ошибки в квадрате. Скорее может помешать вот это: Банки вам пора менять: Safety Status: OK FxTemaK писал(а): Вручную через HEX Editor исправил значения с 2673 1712 на 7326 1217 Ну это уже совсем непонятно, зачем. FxTemaK писал(а): нашел коды флажков TCA TDA (2673 1712) Чушь полная. я описал выше, что это. К PF-флагам никакого отношения не имеет. Да (TCA TDA) это и не флаги ошибок. Это состояние АКБ на текущий момент в отношении разрешения зарядки и разрядки. В общем, спасибо вам от всех форумчан, за ваш пост, в большинстве своем, правда, весьма спорный. |
||
| Вернуться наверх | |||

| Реклама | |
|
|
|

|
zevangelz |
Заголовок сообщения: Re: Хитро-умный аккумулятор.
|
|
Зарегистрирован: Вс июл 24, 2022 21:04:31 Рейтинг сообщения: 0
|
Всем Доброго времени суток батарея 3 ячейки Код: DesignCapacity: 6000 mAh Спасибо |
| Вернуться наверх | |
|
DeanDave |
Заголовок сообщения: Re: Хитро-умный аккумулятор.
|
|
Зарегистрирован: Вт июл 26, 2022 12:32:00 Рейтинг сообщения: 0
|
Всем привет! Принимайте новенького)
|
| Вернуться наверх | |

|
mr1DOG |
Заголовок сообщения: Re: Хитро-умный аккумулятор.
|
|
Зарегистрирован: Чт июл 07, 2022 13:25:12 Рейтинг сообщения: 0
|
Доброго времени суток, очередная проблема. Контроллер bq20889 + bq29330, заблокировался, пароль не стандартный. be2works 4.52 c cp2112, при нажатии на «set password to default» ничего не происходит, кроме веселого моргания светодиодами. |
| Вернуться наверх | |
| Реклама | |
|
|
|
| Реклама | |
|
|
Надежное питание для IoT промышленных систем учета от EVE Energy. Тест ионистора SPC с батарейкой ER.
Разберем решение ER + SPC для гибридной энергетики от компании EVE Energy. Для исправной работы IoT-приборов, которым необходим длительный срок службы и большие импульсы тока, важно правильно подобрать источник тока. Подробнее>> |
|
vsuper |
Заголовок сообщения: Re: Хитро-умный аккумулятор.
|
|
Зарегистрирован: Ср ноя 10, 2021 18:46:32 Рейтинг сообщения: 0
|
Доброго времени суток, очередная проблема. Контроллер bq20889 + bq29330, заблокировался, пароль не стандартный. be2works 4.52 c cp2112, при нажатии на «set password to default» ничего не происходит, кроме веселого моргания светодиодами. Вполне вероятно что не поддерживается данной версией. Не факт что он заблокирован, флаги в ппределах нормы. Предохранитель проверяли? |
| Вернуться наверх | |
|
Alex_PP |
Заголовок сообщения: Re: Хитро-умный аккумулятор.
|
||
Зарегистрирован: Чт авг 20, 2020 19:21:47 Рейтинг сообщения: 0
|
vsuper писал(а): Не факт что он заблокирован Заблокирован. bq208x блокируются не так как XXzXX. Там нет PF-ников. Вместо них интересный ход: Установка емкости невероятных размеров 65492. Да еще и ChargingCurrent 39395.Это вводит контроллер в ступор, и он выставляет флаги TCA TDA. Добавлено after 4 minutes 43 seconds: |
||
| Вернуться наверх | |||
| Реклама | |
|
|
|

|
mr1DOG |
Заголовок сообщения: Re: Хитро-умный аккумулятор.
|
|
Зарегистрирован: Чт июл 07, 2022 13:25:12 Рейтинг сообщения: 0
|
Предохранитель прозванивал — целый. Читал данные с замененными банками на резисторы 470 ом, но подавал 11в. При подаче напряжения 9в он сможет поставить стандартный пароль и считать дамп? P.s. На 9в также не дает ничего сделать. Fcc и rc по нулям. |
| Вернуться наверх | |
|
Vovan_sar |
Заголовок сообщения: Re: Хитро-умный аккумулятор.
|
|
Карма: 1 Рейтинг сообщения: 0
|
Предохранитель прозванивал — целый. Читал данные с замененными банками на резисторы 470 ом, но подавал 11в. При подаче напряжения 9в он сможет поставить стандартный пароль и считать дамп? P.s. На 9в также не дает ничего сделать. Fcc и rc по нулям. проверьте места пайки на плате. читали наверно что площадки могут быть из 2-х частей? |
| Вернуться наверх | |
|
Alex_PP |
Заголовок сообщения: Re: Хитро-умный аккумулятор.
|
||
Зарегистрирован: Чт авг 20, 2020 19:21:47 Рейтинг сообщения: 0
|
mr1DOG писал(а): На 9в также не дает ничего сделать. Fcc и rc по нулям Я правильно понял, FCC теперь не 65492, а 0? А ток ChargingCurrent? |
||
| Вернуться наверх | |||
|
Vovan_sar |
Заголовок сообщения: Re: Хитро-умный аккумулятор.
|
|
Карма: 1 Рейтинг сообщения: 0
|
. В новой версии не все прошивки удаётся разлочить, что говорить о старой. |
| Вернуться наверх | |
|
Eger |
Заголовок сообщения: Re: Хитро-умный аккумулятор.
|
||
Карма: 1 Рейтинг сообщения: 1
|
Подскажите, где взать крякнутую РАБОЧУЮ be2works, которой можно победить R2J240. открою секрет, для этого чипа не нужно никакой крякнутой, да и программатор дешевле для тут |
||
| Вернуться наверх | |||

|
Alex_PP |
Заголовок сообщения: Re: Хитро-умный аккумулятор.
|
||
Зарегистрирован: Чт авг 20, 2020 19:21:47 Рейтинг сообщения: 0
|
Eger писал(а): открою секрет, для этого чипа Ну, секрет точно не открыли. |
||
| Вернуться наверх | |||
|
Eger |
Заголовок сообщения: Re: Хитро-умный аккумулятор.
|
||
Карма: 1 Рейтинг сообщения: 0
|
да, это с какого-то сайта дёрнул свой же здешний пост скольки то летней давности. поэтому ссылку на него не привожу |
||
| Вернуться наверх | |||
|
matroskin_kot |
Заголовок сообщения: Re: Хитро-умный аккумулятор.
|
|
Карма: 1 Рейтинг сообщения: 0
|
приветствую! ни кто не ремонтировал такие батареи? где взять элементы на нее? |
| Вернуться наверх | |
 ]
]
|
Vovan_sar |
Заголовок сообщения: Re: Хитро-умный аккумулятор.
|
|
Карма: 1 Рейтинг сообщения: 0
|
приветствую! ни кто не ремонтировал такие батареи? где взять элементы на нее? Как правило, на пленке написаны размеры. |
| Вернуться наверх | |
|
matroskin_kot |
Заголовок сообщения: Re: Хитро-умный аккумулятор.
|
|
Карма: 1 Рейтинг сообщения: 0
|
приветствую! ни кто не ремонтировал такие батареи? где взять элементы на нее? Как правило, на пленке написаны размеры. да так и есть, 3s1p, нашел LP604374, Аккумулятор литий-полимерный (Li-Pol) 2300мАч 3.7В, с защитой. подойдет? или надо li ion? и 43 не поместятся… |
| Вернуться наверх | |
|
Vovan_sar |
Заголовок сообщения: Re: Хитро-умный аккумулятор.
|
|
Карма: 1 Рейтинг сообщения: 0
|
приветствую! ни кто не ремонтировал такие батареи? где взять элементы на нее? Как правило, на пленке написаны размеры. да так и есть, 3s1p, нашел LP604374, Аккумулятор литий-полимерный (Li-Pol) 2300мАч 3.7В, с защитой. подойдет? или надо li ion? и 43 не поместятся… Защиту удалять однозначно, по ширине мерять на месте. Вытаскиваешь свою сборку и укладываешь новые. Есть небольшой шанс что уместятся. А так смотреть, что находится рядом с акб, может удалить какую нить(или обе) из боковых стенок. Как раз их толщина и даст уложиться в ноут. |
| Вернуться наверх | |
|
vsuper |
Заголовок сообщения: Re: Хитро-умный аккумулятор.
|
|
Зарегистрирован: Ср ноя 10, 2021 18:46:32 Рейтинг сообщения: 0
|
CP2112 подешевели на Али, успевайте брать кому нужно. |
| Вернуться наверх | |
|
VincentVega116 |
Заголовок сообщения: Re: Хитро-умный аккумулятор.
|
|
Зарегистрирован: Сб фев 15, 2020 17:38:24 Рейтинг сообщения: 0
|
Всем привет, пытаюсь реанимировать батарею AS10D31 (BQ8030+BQ29330) с помощью Be2works 4.52 и CP2112, дамп с EEPROM считывается, есть такая же батарея с не залоченым контроллером, и вот с нее то и не получается слить дамп EEPROM, может кто подскажет почему? |
| Вернуться наверх | |
Кто сейчас на форуме |
|
Сейчас этот форум просматривают: нет зарегистрированных пользователей и гости: 2 |
| Вы не можете начинать темы Вы не можете отвечать на сообщения Вы не можете редактировать свои сообщения Вы не можете удалять свои сообщения Вы не можете добавлять вложения |


Перепаковка аккумулятора ноутбука оказалась не такой уж и сложной задачей. Самая большая проблема это сбросить контроллер. Если с перепаковкой банок справится практически любой человек, хоть раз державший в руках паяльник, то со сбросом контроллера может не справиться даже профессионал. Для вопросов создал тему на форуме.
В кратце немного теории, если не интересно то пролистайте ее, в конце статьи расскажу чем, и как перепаковать и сбросить аккумулятор.
Все дело в том, что производители аккумуляторов ноутбуков пошли по пути производителей картриджей для принтеров. Отчасти их можно понять — ведь неумелое ковыряние в аккумуляторе может привести к печальным последствиям, пожару или даже взрыву. Но все же я склоняюсь ко мнению, что сделано это все для того, что бы усложнить жизнь тем, кто хочет продлить жизнь старому аккумулятору.
Я не сторонник мер восстановления банок методом выгибания клапана сбрасывающего давление из банки, это на самом деле может быть опасным. Но если хочется поставить новые банки, то почему нет? Я например увеличил емкость аккумулятора в 2 раза, изготовив самодельный аккумулятор большей емкости, который для моего ноутбука никогда не выпускался. Можно было бы собрать 2 аккумулятора, и переставлять их по мере разряда, но это неудобно очень.
Контроллер, который стоит в аккумуляторе ноутбука, выполняет несколько функций. Во первых он следит за напряжением на каждой банке (или группе банок) не позволяя перезарядить или переразрядить ее. То есть он выполняет защитную функцию самих аккумуляторов. Для этого у него есть 2 ключа, которые открываются или закрываются, так как заряд и разряд аккумулятора ведется через одни и те же выводы. Помимо напряжения, контроллер следит еще за зарядным током и температурой банок (чаще всего одной из набора). На случай аварии контроллер может пережечь специальный предохранитель, если например ключ откажет (его пробьет в КЗ) и заряд не прекратится. Но чаще всего контроллер сжигает этот предохранитель просто при любой удобной ситуации, например одна из банок деградировала и ушла в разрыв, или если его сбросили, а ему это не понравилось.
Так же контроллер считает остаточную емкость аккумулятора, и количество цыклов заряда/разряда. Исходя из последних, он может спрогнозировать износ аккумулятора, если он не разряжается до минимума или постоянно не дозаряжается, поэтому важно хотя бы раз в 1 -2 месяца давать высаживать аккумулятор. Да и полностью заряженные аккумуляторы деградируют быстрее, поэтому их длительно хранят на складе с 40-50 процентным остаточным зарядом.
В общем на этом краткая справка окончена.
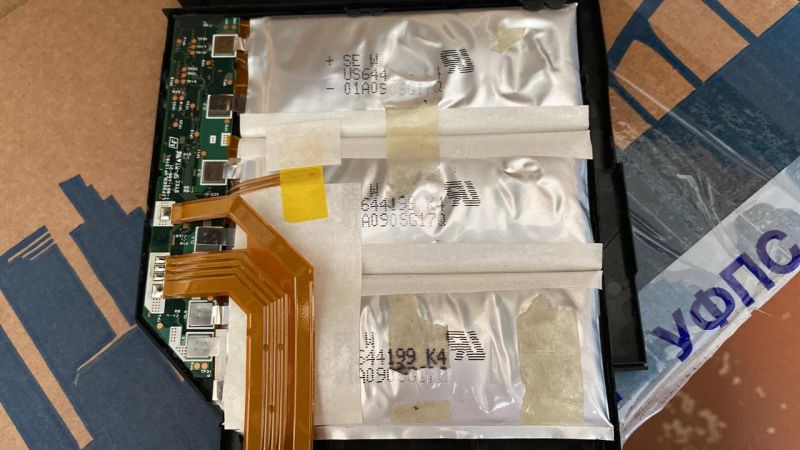
Для ноутбука мне хотелось аккумулятор увеличенной емкости, но такие на мою модель не выпускаются. Так, что я взялся за 3Д моделирование и спроектировал корпус под 8 банок. В моем аккумуляторе было установлено 4 банки. Дальше я распечатал корпус на самодельном 3Д принтере.

3D принтер Cuboid 1.0 на кинематике XY. Описание и сборка.
На нем даже плата управления самодельная!
Самые дешевые 32 бита для 3D принтера. Схема и печатная плата.
Следующим шагом необходимо разобрать старую батарею и отпаять банки аккумуляторов. Но важно! сделать это нужно в определенной последовательности. Банки отпаивать по очереди! вначале отпаивается крайняя со стороны плюса, последняя со стороны минуса. То есть при демонтаже банок напряжение должно падать на сборке. к примеру есть 4 банки, (16 вольт на сборке), при отпайке первой должно остаться 12, при отпайке второй должно остаться 8, при отпайке третьей 4 и последняя отпаивается которая минусом сидит на GND. Монтируются новые банки в обратном порядке — на увеличение напряжения. Это сильно снизит вероятность блокировки контроллера, хотя не исключит ее полностью, что в дальнейшем может добавить хлопот.
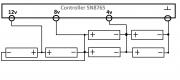
Если контроллер все таки заблокировался или есть деградировавшие банки, то сброс контроллера нужно производить впаяв вместо банок резисторы вот по такой вот схеме.

4 резистора сопротивлением от 100 ом до 1КоМ это резистивный делитель. Нужно установить эти резисторы одинакового сопротивления по одному на каждый отпаянный аккумулятор. Пятый резистор служит ограничителем тока, если контроллеру не понравится, что в нем копаются, и захочет сжечь предохранитель. В моем случае предохранитель выглядит вот так:

У него в подложке установлен нагревательный элемент, который плавит перемычку и предохранитель выгорает.
Затем необходимо сбросить контроллер. В моей батарее была установлена микросхема bq30z55. Но эта микросхема довольно геморройная, ее часто паролят, и не всегда стандартными паролями. Мне повезло и прошивку я с нее скачал и исправил. Выложу ее в конце статьи, для контроллера bq30z55, может пригодится кому-нибудь.
Для общения с контроллером необходим конвертер который из шины USB сделает виртуальную шину i2c. По протоколу i2c и идет общение с контроллером. Данный интерфейс поддерживается кучей разных железок, и он довольно легко реализуем, и требует всего 3 провода.
Я заказал на алиэкспресе вот такой вот модуль:

https://alitems.com/g/1e8d114494de96a90d1816525dc3e8/?ulp=https%3A%2F%2Faliexpress.ru%2Fitem%2F32822439336.html%3Fspm%3Da2g39.orderlist.0.0.39034aa6hV2JeQ%26item_id%3D32822439336%26sku_id%3D64827581249
К нему необходимо подпаять всего 3 провода к выводам SCL, SDA и GND.

Необходимые выводы в разьеме легко найти, вооружившись мультиметром. Даташиты легко гуглятся, и там есть распиновка и схема включения. Схема может отличаться, но в плане подключения сигнальных проводов производители обычно следуют даташиту. Распиновка моего чипа вот такая

Выводы которые нас интересуют под номерами 16, 17, 19. Если взглянуть на схему, то можно увидеть, что они подключены к разъёму ноутбука через резисторы, и просто прозвонкой их можно не найти, у меня мультиметр пищит, если сопротивление менее 100 ом, а на плате у меня стояли суммарно 300 омные, как раз не хватало, что бы он запищал, поэтому искал в режиме измерения сопротивления.

К CP2112 подключается так: SCL->SMBC, SDA->SMBD, GND->GND, Вывод PRES необходимо посадить на землю, в редких случаях на + питания. Можно посмотреть как в ноутбуке сделано, чаще всего ответный штырь в разъёме в ноутбуке соединен с GND. У меня в батарее не заморачивались, и уде на плате его повесили на землю. Но батарея не запустилась, так как схема включения была не из даташита, контроллер брал питание не с аккумулятора, а с разъёма ноутбука, и если ключ был закрыт то контроллер обесточен. Чтобы запустить его необходимо просто бросить + на плюсовой вывод колодки питания контроллера.

После этого контроллер должен без проблем прочитаться. С СР2112 работает программа BE2Works, можно скачать демо версию программы, но если чип запаролен, то придется либо купить ее, что дорого, либо взять в аренду на день за 10 долларов, если память не изменяет.
Как провести разблокировку я рассказывал и показывал в от в этом вот видео:
В итоге у меня получилось увеличить емкость аккумулятора более чем в 2 раза, попутно решив проблему с охлаждением. Выглядит может не сильно эстетично, но работает исправно:

Аккумуляторы я заказывал на aliexpress, емкость и внутреннее сопротивление оказались ровными, и аккумуляторы все оказались пригодные, заказал на 2 больше, для подстраховки. Аккумуляторы, ими я остался доволен: https://alitems.com/g/1e8d114494de96a90d1816525dc3e8/?ulp=https%3A%2F%2Faliexpress.ru%2Fitem%2F32771532107.html%3Fspm%3Da2g39.orderlist.0.0.39034aa6hV2JeQ
Умное зарадное устройство с функцией повербанка и тестирования аккумуляторов: https://alitems.com/g/1e8d114494de96a90d1816525dc3e8/?ulp=https%3A%2F%2Faliexpress.ru%2Fitem%2F1005002383698648.html%3Fspm%3Da2g39.orderlist.0.0.39034aa6hV2JeQ
Как и обещал, выкладываю прошивку слитую с моей батареи с контроллера BQ30z55
Прошивка контроллера BQ30Z55
Новое
![]()
разблокировать АКБ ASUS TF300 (BQ20Z45)
#1
нужно разблокировать контролер АКБ ASUS TF300 (bq20Z45) ,заблокировался по моей ошибке, из китая 2 батареии получил, и обе заблокированы …, клиент скоро тенью моей станет 
вышлю Россия или Украина
Последний раз редактировалось svd-se; 29.09.2015 в 18:48.
29.09.2015, 18:39

Новое
![]()
Re: разблокировать АКБ ASUS TF300 (BQ20Z45)
#2
там же вроде по smbusу все делается, так его можно самому быстро собрать преобразователей с usb куча, а софт родной техасовский под них вроде
29.09.2015, 21:26
Новое
![]()
Re: разблокировать АКБ ASUS TF300 (BQ20Z45)
#3
программируют эти контролеры с помощью EV2300 и Rizal, самопальными приблудами удаётся только считывание 
30.09.2015, 10:55
Новое
![]()
Re: разблокировать АКБ ASUS TF300 (BQ20Z45)
#4
Если актуально еще то попробуй так. Замкни 24 и 29 ножки между собой на bq20Z45 и включи ЗУ. У меня получилось
01.12.2015, 16:16
Новое
![]()
Re: разблокировать АКБ ASUS TF300 (BQ20Z45)
#5
В моем случае было так что акб ( разблокировалось = было ноль на клеймах ) и зарядилось только с родной зарядкой в 12в . Что самое примечательное шнур при подключении к усб т,е 5в выдавал , блок был тому виной или шнур установить не удалось аппарат выдан с китайской зарядкой которая его успешно разблочила и заряжала .
01.12.2015, 19:56
[Sticky] How to Reset, Reprogram and Calibrate BQ20ZXX family chips after battery cells replacement

(@torture)
Member Moderator
This tutorial is about full reprogramming and recalibrating BQ20ZXX family chips after battery recelling.
Before I proceed I would like to mention that you DON’T need to do it if you are not planning to recell (replacing the cells) the battery.
The BQ20ZXX family is impedance tracking gauges that rely on certain parameters in order to calculate FCC properly. The purpose of this tutorial is to show you how this complex system works. It should also be noted that this procedure is for advanced users and it requires an additional adapter EV2300 from Texas Instruments that is used for the chip reprogramming.
STEP 1: ANALYZING WHAT’S WRONG WITH THE BATTERY
As always we need to search for the core of the problem. This battery model is very popular and used in many HP laptops, the model is MU06. In this case, after connecting the battery to NLBA we can see that all 3 cell groups are at 0 volts, Cycle Count is 631, so the cells are completely dead and must be replaced. In addition, the chip is SEALED meaning that it’s password-protected so no actions can be done until the chip is UNSEALED. And there is also a PF condition /locked chip/ indicated by PFStatus = 4031. We can find this information by pressing the Read Chip Info button.


STEP 2: UNSEALING THE CHIP AND CLEARING PF
So the cells have already been replaced with new so now we need to proceed with UNSEALING and clearing PF.
Here we will be able to see the great NLBA capabilities again! We will UNSEAL the chip /hack the password/ with only 1 click. We go to the reset tab, choose the BQ20ZXX family chip from the menu. Read chip info again just to make sure that we still have the same conditions and yes we do. Press UNSEAL/BOOT button after a few seconds we will see them in the log a massage
Operation Status = Unsealed, FAS
PF Status = 0000
So the chip is now UNSEALED /password removed/ and is in FAS / Full Access Mode/ meaning that now we will be allowed to read and edit the DataFlash (EEPROM).
Also PF Status has changed to 0000 meaning that the PF was also automatically cleared. In case it was not cleared you will need to press the CLEAR CHIP ERRORS button.
Now if we go back and read the battery parameters we can see that the charging voltage and charging current have appeared again and the Output Led of NLBA is on so there is the voltage at the battery connector.


IMPORTANT!!! After you press the END RESET button the chip will be SEALED again. Before you proceed to STEP 3 go to reset tab UNSEAL the chip but DO NOT press END RESET button. First disconnect the battery from NLBA device and then you can press END RESET button.
ReplyQuote
Topic starter
Posted : 13/06/2021 5:32 pm
(@torture)
Member Moderator
STEP 3: REPROGRAMMING THE CHIP
As I mentioned earlier in order to reprogram the chip you will need an EV2300 adapter and BqEvsw software. The software is free and can be downloaded from the TI website, the adapter costs around 100 euro.
NOTE: NLBA1 team is working to make bqEVSW working with NLBA1 device. Hope they will manage to do it.
It connects to the battery the same way like NLBA, ground, clock & data lines required.

So we connect the EV2300 adapter to the battery and we start the software. It auto-detects the chip and takes us to the initial screen. On the start screen, we press the REFRESH button and it will read all battery data similar to NLBA.

Next, we need to read the DataFlash so first press DATAFLASH button on the left and then press READ ALL. After a few seconds, we can see the contents of the DataFlash are displayed.
There are many settings that can be adjusted but we will cover only the most important ones that we need.

Press the SBS Configuration tab
Here we can change parameters.
Design Capacity – The original was 4400mah but I’m using 2400mah cells so in 3s 2p configuration the new Design Capacity will be 4800mah.
Also, reset Cycle Count to 0
Change the Manufacture Date
Remaining Capacity Alarm – Should be set to 10% of the Design Capacity so in this case 480mah.

The next step is OPTIONAL.
Here we can change the Charging Current and Charging Voltage value.
I always like to use a charging current that is about half of the design capacity in this case I will reduce it to 2500mah. The Original was 3080mah.
You can also change the charging voltage to increase cells life.
Example: If you change it to 12300mv the cells will charge to 4.1v instead of 4.2v. So if your goal is for the battery to last longer during the years you can do this.
So by undercharging cells to 4.1v, you can increase their life by 20-30%.
But in this case, I will leave it to 12600mv.

Next, go to the Gas Gauging tab.
Here we will change all the Qmax Values to be the same as Design Capacity 4800mah. Also, change Update Status to 00 and reset the Delta Voltage to 1mv.
Now we are almost done with reprograming the chip so press write all button.

The next step is to update the Chemistry information.
Press BqEASY button in the left corner.
Press Yes Enable Chemistry Selection.
In 90% of the cases, you will be fine if you select chemistry id 100, this is the default for 18650 LiCo02 cells. But just to be sure you can check the manufacturer’s datasheet for your cells and choose the right chemistry id from the list.
After the proper chemistry id has been chosen press Update Fuel Gauge Dataflash. The process takes a few seconds to complete.
This is was the last step in reprograming the chip.


ReplyQuote
Topic starter
Posted : 13/06/2021 5:35 pm
(@torture)
Member Moderator
STEP 4: CALIBRATING THE CHIP
First, let’s move the battery back to NLBA so we can check the results so far.
We can see that the programing was successful.
Design Capacity has changed
Manufacturer Date has changed
Remaining Cap. Alarm has changed
Charging Current has changed
FCC has increased but it’s still not what we want because the chip is not calibrated yet.
Max Error is 100% this is what we want because now the chip is learning mode.
But now the NLBA output led is off and you can also see that there is no current flowing from the battery. This is ok. After the chip reprograming the charge and discharge MOSFETs are not active so we need to force them to activate.

We will do this by going to the Reset tab/ SMBus Commands and write the following command write word 0006 to register 46.

After this NLBA output led will be on meaning the MOSFETs have been successfully activated. And we can confirm this by seeing the small current consumption from the output led of NLBA.

The next step will be to discharge the battery to around 3.0v per cell. If you have the option in NLBA to ignore SOC and discharge below %0 you can use it. I don’t have it so I just use discharge until 0%.
The discharge current is your choice but I don’t recommend using more than 2 amps for a 3s 2p battery.

After the discharge is finished we need to do something very important. We need to start the IMPEDANCE TRACKING ALGORITHM.
This is used by the chip for proper self-calibration and accurate SOC readings.
We will do this by going to the Reset/ SMBus commands tab
Enter the following command write word 0021 to register 00
After the command has been sent, all the hard work is finished!
![]()
ReplyQuote
Topic starter
Posted : 13/06/2021 5:40 pm
(@torture)
Member Moderator
After we have enabled the impedance tracking the next step will be to fully charge the battery to 100% and let it REST FOR 2 HOURS! It’s extremely important to wait at least 2 hours after the battery is fully charged!
So after the full charge and 2 hours rest, we check the results.
We can see that FCC has magically increased and it’s very close to what we expect. That’s perfect.
Max Error value has changed to 3%. This means that the first learning cycle was successful! If FCC has not increased and the max error value is still at 100% then you need to wait at least 1 more hour!

The next step would be to fully discharge the battery to 0% and let it rest for 5 hours!
So we check the results after the battery has been fully discharged and rested for 5 hours.
We can see that FCC has been adjusted slightly one last time and the max error value is 1%.
Success! Now the chip is fully calibrated and the battery is ready for normal usage. The SOC readings will be extremely accurate just like from the factory!

Let’s do one final check with BQEvsw just to make sure everything is ok.
We can see that QMAX values have been updated properly, update status has also changed properly.
The delta voltage registered is only 8mv, this result can only be achieved with good quality brand cells!

In the end, you might think that NLBA did very little in the whole process but you are wrong. It did the most important part of the process, UNSEALING the chip. Because if you remember what I told you earlier non of these operations would be possible if the chip was SEALED. Great job NLBA team!
NOTE: As it was mentioned at the beginning, if EV2300 is missing you can contact the admin to offer a solution to use bqEVSW with the NLBA device.
You might also ask why do you need additional hardware and software to do all these settings. The answer is very simple. NLBA is the newest product on the laptop battery repair market so it will take time for the developers to implement different features. But with the speed that it’s moving forward, it’s already more powerful than much other software that is on the market for many years already and I’m confident that soon we will be able to do all these settings with just a few clicks. Keep up the good job guys.
ReplyQuote
Topic starter
Posted : 13/06/2021 5:44 pm

Another great article in the category of How To. Keep it up !
ReplyQuote
Posted : 13/06/2021 7:57 pm

(@aiku)
Active Member Customer
Congratulations on such a detailed tutorial. I have EV2300 and BQEVsw. In software I have support for some chips but I dont have for 20z40r1r1. Do you have some link where I can download support in software for this chips. On Ti.com support formu all links are dead. Thanks.
ReplyQuote
Posted : 10/08/2021 9:05 am
(@torture)
Member Moderator
I have checked just now links on TI website are not working for some reason. They are probably doing site maintenance and will be up and running soon again. If you need it urgent give me your email and i will send you the installer.
ReplyQuote
Topic starter
Posted : 10/08/2021 10:05 am

(@djibattworkshop)
Member Moderator
I have checked just now links on TI website are not working for some reason
TI has changed their software distribution policy.
They removed links for the software which was used for earlier generation of gas gauges and now marked as NRND (Not Recommended for New Design).
To get this software one should sent a request to their technical support with clear explanation and proofs for which purposes the software will be used.
They decline any requests from private emails, it should only be registered company or government or … educational (student) domain email.
Also they change their community forum policy. Accounts created using private email could only read the posts without rights to post or ask a question.
ReplyQuote
Posted : 10/08/2021 10:44 am
(@aiku)
Active Member Customer
@torture I cheked all TI forum and found only working link for 20z45r1 but have some error when reading 20z40. Please, send me link on (EMAIL HIDDEN). Thanks
ReplyQuote
Posted : 10/08/2021 10:45 am
(@torture)
Member Moderator
@aiku
Have sent you the installer. Please check your email.
ReplyQuote
Topic starter
Posted : 10/08/2021 11:13 am

(@kosiko1967)
Eminent Member Customer
(@djibattworkshop)
Member Moderator
It looks like a ev2300 clone.
But if it’s good copy then it costs its money because genuine ev2300 costs 150USD from official distributors.
You should consider for most of the batteries on the market additional payware software could be required.
With free software you could repair only about 1% of available batteries on the market using ev2300 even its genuine.
ReplyQuote
Posted : 13/08/2021 5:14 pm
(@torture)
Member Moderator
Looking at the chip support i would say that it’s pretty much useless and not recommended to buy it.
The most common chip families like BQ20ZXX, BQ304XX, BQ208XX are not supported.

I would recommend to buy the genuine EV2300 to ensure proper functionality.
But still like it was mentioned by @djibattworkshop the hardware is only one small part of the whole picture.
In order to work with certain chip you will need the software that works with it BqEvsw or BqStudio.
This software can be obtained from Texas Instruments only and is different for every chip and it’s almost impossible to get even if you wan to pay for it. They don’t sell it.
They provide it only to certified battery pack makers etc.
A few years ago it was relatevely easy to get it but recently TI have changed the distribution policy.
ReplyQuote
Topic starter
Posted : 13/08/2021 6:56 pm
(@kosiko1967)
Eminent Member Customer
So I added an original to my shopping cart. I will have a good ev2300 but the software is really a problem. The links are dead. EV2300 without software will be like a corpse coat. I only downloaded 6082.bqEVSWSetup00.09.59_bq20z45R1v1.05R1.exe. I did not find the installation for another series BQ20ZXX, BQ304XX, BQ208XX. I can request installation files. I only have it for my own purposes. The battery I refurbished goes, but it shows lasting 104 hours 40 minutes, which is bullshit.
ReplyQuote
Posted : 14/08/2021 10:49 am
(@torture)
Member Moderator
I can request installation files. I only have it for my own purposes.
They will not give you the installation files. This is what i was explaining to you.
The battery I refurbished goes, but it shows lasting 104 hours 40 minutes, which is bullshit.
You can open a dedicatet topic about this battery and we can try to help you.
ReplyQuote
Topic starter
Posted : 14/08/2021 10:56 am
|
sd7wat
Торговец Репутация: +7/-1 Сообщений: 384
Автор объявления |
имеем уставший акб ноутбука на контроллере BQ20z45 банки поменял на новые, чуть подзарядил. при подключении к ноуту пишет акб нерабочая. как я понял контроллер заблочился. по даташиту есть ноги RESET и MSRESET (Reset output), замыкал, толку ноль. Какие советы будут ? из разряда дешево и сердито, сильно возиться уже нет терпения и смысла… |
||
|


|
barbosa75
Родился здесь Репутация: +312/-2 Сообщений: 12 428
Расположение: |
выбрось |
||
|

|
sd7wat
Торговец Репутация: +7/-1 Сообщений: 384
Автор объявления |
думал будут советы в стиле прошей по BE2Works .. а тут раз .. |
||
|
|
barbosa75
Родился здесь Репутация: +312/-2 Сообщений: 12 428
Расположение: |
что шить и чем шить есть? |
||
|
|
sd7wat
Торговец Репутация: +7/-1 Сообщений: 384
Автор объявления |
где то валялся кажись такой Модуль CP2102 |
||
|
|
barbosa75
Родился здесь Репутация: +312/-2 Сообщений: 12 428
Расположение: |
CP2102 это UART, он там не при делах |
||
|
|
sd7wat
Торговец Репутация: +7/-1 Сообщений: 384
Автор объявления |
что бы обнулить чип так много нужно? |
||
|
|
yatsik
Бородатый торговец Репутация: +54/-3 Сообщений: 1 667
|
что бы обнулить чип так много нужно? чтобы обнулить чип нужен молоток |
||
пн-пт. Флудю. Клепаю примусы. |

|
barbosa75
Родился здесь Репутация: +312/-2 Сообщений: 12 428
Расположение: |
люди всю жизнь по крохам собирают инфу, познают нюансы, оттачивают мастерство, а Вам сходу дай кнопку обнуления, да ещё и на халяву, почитайте сколько просят за небольшое время поюзать софт для доступа к контроллеру, правда мозги в придачу они не продают. |
||
|
|
Suhov
Продавец Репутация: +9/-1 Сообщений: 363
|
нужно всего-то собрать филипс адаптер и купить за 15 евро программу на 1 день. Можно купить и на месяц, или годовую подписку, но там цена совсем не гуманная. Кто профессионально занимается батареями- набирают кучу батареек, берут дневную подписку и ресетят за день эту кучу. Но за чуть больше, чем 15 евро, можно купить нормальную китайскую батарею с двухлетней гарантией |
||
|
Общение с батареями от ноутбука.

Offline
Зарегистрирован: 18.08.2018
Наваял на досуге несколько скетчей для общения с батареей ноутбука. Подключать как I2C устройство — SDA SCL GND. Проверял на bq20z955 с дефолтными паролями. Если у Вас другой контроллер — сверяйтесь с данными из даташита.
!!! ВНИМАНИЕ. Всё что Вы делаете — Вы делаете на свой страх и риск !!! Операции 6, 7 и 8 пишут данные в батарею и могут окирпичить её !
Один из скетчей:
/*
 * SmartBattery.ino (https://github.com/dsa-a/Arduino-Smart-Battery)
 * Copyright (C) 2021, Andrei Egorov
 *
 * This program is free software: you can redistribute it and/or modify
 * it under the terms of the GNU General Public License as published by
 * the Free Software Foundation, either version 3 of the License, or
 * (at your option) any later version.
 *
 * This program is distributed in the hope that it will be useful,
 * but WITHOUT ANY WARRANTY; without even the implied warranty of
 * MERCHANTABILITY or FITNESS FOR A PARTICULAR PURPOSE.  See the
 * GNU General Public License for more details.
 *
 * You should have received a copy of the GNU General Public License
 * along with this program. If not, see <http://www.gnu.org/licenses/>.
 */

#include <Wire.h>                 //!!! The WIRE library must be edited to increase the buffer to 34 (0x22) bytes !!!

//#define debug

#define addr 0x0B

#define new_capacity 4400

#define unseal_key_1 0x0414
#define unseal_key_2 0x3672

#define full_access_key_1 0xFFFF
#define full_access_key_2 0xFFFF

#define pf_clear_key_1 0x2673
#define pf_clear_key_2 0x1712

#define year (__DATE__[7]-'0')*1000+(__DATE__[8]-'0')*100+(__DATE__[9]-'0')*10+(__DATE__[10]-'0')
#define month (__DATE__[0] == 'J' && __DATE__[1] == 'a')  ? 1 : \
              (__DATE__[0] == 'F')                        ? 2 : \
              (__DATE__[0] == 'M' && __DATE__[2] == 'r')  ? 3 : \
              (__DATE__[0] == 'A' && __DATE__[1] == 'p')  ? 4 : \
              (__DATE__[0] == 'M' && __DATE__[2] == 'y')  ? 5 : \
              (__DATE__[0] == 'J' && __DATE__[2] == 'n')  ? 6 : \
              (__DATE__[0] == 'J' && __DATE__[2] == 'l')  ? 7 : \
              (__DATE__[0] == 'A' && __DATE__[1] == 'u')  ? 8 : \
              (__DATE__[0] == 'S')                        ? 9 : \
              (__DATE__[0] == 'O')                        ? 10 : \
              (__DATE__[0] == 'N')                        ? 11 : \
              (__DATE__[0] == 'D')                        ? 12 : 0
#define day (((__DATE__[4] >= '0') ? (__DATE__[4]) : '0')-'0')*10+(__DATE__[5]-'0')

byte buff[34];

#if defined (debug)
byte sp;

byte PEC(byte p, byte b) {
  b^=p;
  for (byte i=0; i<8; i++ ) {
    byte t=b&0x80;
    b<<=1;
    if (t!=0) b^=0x07;
  }
  return b;
}
#endif

void CheckWireStatus(byte wire_status) {
  if (wire_status!=0) {
    Serial.print(F("Wire error - "));
    Serial.println(wire_status);
    while (true) ;
  }
}

void SMBCommand(byte comm) {
  Wire.beginTransmission(addr);
  Wire.write(comm);
  CheckWireStatus(Wire.endTransmission(false));
}

void Read(byte n) {
  Wire.requestFrom(addr,n+1);
#if defined (debug)
  byte p=PEC(sp, (addr<<1)+1);
#endif
  byte b=Wire.available();
  for (byte i=0; i<b; i++) {
    buff[i]=Wire.read();
#if defined (debug)
    if (i<(b-1)) p=PEC(p, buff[i]);
    printHEX(buff[i]);
    Serial.print(",");
#endif
  }
#if defined (debug)
  printHEX(p);
  Serial.println();
#endif
}

void ReadSMB(byte comm) {
  SMBCommand(comm);
#if defined (debug)
  sp=PEC(PEC(0, addr<<1), comm);
#endif
  Read(2);
}

void ReadSMB(word comm) {
  Wire.beginTransmission(addr);
  Wire.write(00);
  Wire.write(lowByte(comm));
  Wire.write(highByte(comm));
  CheckWireStatus(Wire.endTransmission());
  ReadSMB(byte(0x00));
}

void ReadBlockSMB(byte comm) {
  SMBCommand(comm);
  Wire.requestFrom(addr,1);
  byte b=Wire.read();
  SMBCommand(comm);
#if defined (debug)
  sp=PEC(PEC(0, addr<<1), comm);
#endif
  Read(b+1);
}

void WriteSMBWord(byte comm, word data) {
  Wire.beginTransmission(addr);
  Wire.write(comm);
  Wire.write(lowByte(data));
  Wire.write(highByte(data));
  CheckWireStatus(Wire.endTransmission());
}

void ReadSMBSubclass(byte id, byte page) {
  WriteSMBWord(0x77, word(id));
  delay(100);
  ReadBlockSMB(page);
}

void WriteSMBSubclass(byte id, byte page) {
  WriteSMBWord(0x77, word(id));
  delay(100);
  Wire.beginTransmission(addr);
  Wire.write(page);
  for (byte i=0;i<=buff[0];i++) Wire.write(buff[i]);
  CheckWireStatus(Wire.endTransmission());
  delay(100);
}

void printHEX(byte b) {
  if (b<16) Serial.print("0");
  Serial.print(b,HEX);
}

void printBlock() {
  for (byte i=1; i<=buff[0]; i++) Serial.print(char(buff[i]));
  Serial.println();
}

void Read123() {
  ReadSMB(word(0x0001)); Serial.print(F("Device Type: ")); printHEX(buff[1]); printHEX(buff[0]); Serial.println(" Hex");
  ReadSMB(word(0x0002)); Serial.print(F("Firmware Version: ")); printHEX(buff[1]); printHEX(buff[0]); Serial.println(" Hex");
  ReadSMB(word(0x0003)); Serial.print(F("Hardware Version: ")); printHEX(buff[1]); printHEX(buff[0]); Serial.println(" Hex");
}

void info() {
  ReadSMB(byte(0x18)); Serial.print(F("DesignCapacity: ")); Serial.print(buff[1]*256+buff[0]); Serial.println(" mAh");
  ReadSMB(byte(0x10)); Serial.print(F("FullChargeCapacity: ")); Serial.print(buff[1]*256+buff[0]); Serial.println(" mAh");
  ReadSMB(byte(0x17)); Serial.print(F("CycleCount: ")); Serial.println(buff[1]*256+buff[0]);
  ReadSMB(byte(0x1B)); Serial.print(F("Date: ")); Serial.print(1980+(buff[1]>>1)); Serial.print("."); Serial.print(((buff[1]&0b00000001)<<3)+(buff[0]>>5));Serial.print("."); Serial.println(buff[0]&0b00011111);
  ReadSMB(byte(0x19)); Serial.print(F("DesignVoltage: ")); Serial.print(buff[1]*256+buff[0]); Serial.println(" mV");
  ReadBlockSMB(0x20); Serial.print(F("ManufName: ")); printBlock();
  ReadBlockSMB(0x21); Serial.print(F("DeviceName: ")); printBlock();
  ReadSMB(byte(0x1C)); Serial.print(F("SerialNumber: ")); printHEX(buff[1]); printHEX(buff[0]); Serial.println(" Hex");
  ReadSMB(byte(0x14)); Serial.print(F("ChargingCurrent: ")); Serial.print(buff[1]*256+buff[0]); Serial.println(" mA");
  ReadSMB(byte(0x15)); Serial.print(F("ChargingVoltage: ")); Serial.print(buff[1]*256+buff[0]); Serial.println(" mV");
  ReadBlockSMB(0x22); Serial.print(F("DeviceChemistry: ")); printBlock();
  ReadSMB(byte(0x08)); Serial.print(F("Temperature: ")); Serial.print(float(buff[1]*256+buff[0])/10-273); Serial.println(" C");
  ReadSMB(byte(0x09)); Serial.print(F("Voltage: ")); Serial.print(buff[1]*256+buff[0]); Serial.println(" mV");
  ReadSMB(byte(0x0A)); Serial.print(F("Current: ")); Serial.print(int(buff[1]*256+buff[0])); Serial.println(" mA");
  ReadSMB(byte(0x0D)); Serial.print(F("RelativeSOC: ")); Serial.print(buff[0]); Serial.println(" %");
  ReadSMB(byte(0x0E)); Serial.print(F("AbsoluteSOC: ")); Serial.print(buff[0]); Serial.println(" %");
  ReadSMB(byte(0x0F)); Serial.print(F("RemainingCapacity: ")); Serial.print(buff[1]*256+buff[0]); Serial.println(" mAh");
  ReadSMB(byte(0x3C)); Serial.print(F("VCELL4: ")); Serial.print(buff[1]*256+buff[0]); Serial.println(" mV");
  ReadSMB(byte(0x3D)); Serial.print(F("VCELL3: ")); Serial.print(buff[1]*256+buff[0]); Serial.println(" mV");
  ReadSMB(byte(0x3E)); Serial.print(F("VCELL2: ")); Serial.print(buff[1]*256+buff[0]); Serial.println(" mV");
  ReadSMB(byte(0x3F)); Serial.print(F("VCELL1: ")); Serial.print(buff[1]*256+buff[0]); Serial.println(" mV");
  ReadSMB(byte(0x1A)); Serial.print(F("SpecificationInfo: ")); printHEX(buff[1]); printHEX(buff[0]); Serial.println(" Hex");
  ReadSMB(byte(0x16)); Serial.print(F("Battery Status: ")); printHEX(buff[1]); printHEX(buff[0]); Serial.println(" Hex");
  if (buff[1]&0b10000000) Serial.print("OCA|");
  if (buff[1]&0b01000000) Serial.print("TCA|");
  if (buff[1]&0b00010000) Serial.print("OTA|");
  if (buff[1]&0b00001000) Serial.print("TDA|");
  if (buff[1]&0b00000010) Serial.print("RCA|");
  if (buff[1]&0b00000001) Serial.print("RTA|");
  if (buff[0]&0b10000000) Serial.print("INIT|");
  if (buff[0]&0b01000000) Serial.print("DSG|");
  if (buff[0]&0b00100000) Serial.print("FC|");
  if (buff[0]&0b00010000) Serial.print("FD|");
  if (buff[0]&0b00001000) Serial.print("EC3|");
  if (buff[0]&0b00000100) Serial.print("EC2|");
  if (buff[0]&0b00000010) Serial.print("EC1|");
  if (buff[0]&0b00000001) Serial.print("EC0|");
  Serial.println();
  ReadSMB(word(0x0054)); Serial.print(F("Operation Status: ")); printHEX(buff[1]); printHEX(buff[0]); Serial.println(" Hex");
  if (buff[1]&0b10000000) Serial.print("PRES|");
  if (buff[1]&0b01000000) Serial.print("FAS|");
  if (buff[1]&0b00100000) Serial.print("SS|");
  if (buff[1]&0b00010000) Serial.print("CSV|");
  if (buff[1]&0b00000100) Serial.print("LDMD|");
  if (buff[0]&0b10000000) Serial.print("WAKE|");
  if (buff[0]&0b01000000) Serial.print("DSG|");
  if (buff[0]&0b00100000) Serial.print("XDSG|");
  if (buff[0]&0b00010000) Serial.print("XDSGI|");
  if (buff[0]&0b00000100) Serial.print("R_DIS|");
  if (buff[0]&0b00000010) Serial.print("VOK|");
  if (buff[0]&0b00000001) Serial.print("QEN|");
  Serial.println();
  if (buff[1]&0b00100000) {
    Serial.println(F("Sealed"));
    Read123();
  } else {
    Serial.println(F("Unsealed"));
    ReadSMB(byte(0x0C)); Serial.print(F("MaxError: ")); Serial.print(buff[0]); Serial.println(" %");
    ReadSMB(word(0x0051)); Serial.print(F("SafetyStatus: "));
    if ((buff[1]==0)&&(buff[0]==0)) {
      Serial.println("OK");
    } else {
      printHEX(buff[1]); printHEX(buff[0]); Serial.println(" Hex");
      if (buff[1]&0b10000000) Serial.print("OTD|");
      if (buff[1]&0b01000000) Serial.print("OTC|");
      if (buff[1]&0b00100000) Serial.print("OCD|");
      if (buff[1]&0b00010000) Serial.print("OCC|");
      if (buff[1]&0b00001000) Serial.print("OCD2|");
      if (buff[1]&0b00000100) Serial.print("OCC2|");
      if (buff[1]&0b00000010) Serial.print("PUV|");
      if (buff[1]&0b00000001) Serial.print("POV|");
      if (buff[0]&0b10000000) Serial.print("CUV|");
      if (buff[0]&0b01000000) Serial.print("COV|");
      if (buff[0]&0b00100000) Serial.print("PF|");
      if (buff[0]&0b00010000) Serial.print("HWDG|");
      if (buff[0]&0b00001000) Serial.print("WDF|");
      if (buff[0]&0b00000100) Serial.print("AOCD|");
      if (buff[0]&0b00000010) Serial.print("SCC|");
      if (buff[0]&0b00000001) Serial.print("SCD|");
      Serial.println();
    };
    ReadSMB(word(0x0053)); Serial.print(F("PFStatus: "));
    if ((buff[1]==0)&&(buff[0]==0)) {
      Serial.println("OK");
    } else {
      printHEX(buff[1]); printHEX(buff[0]); Serial.println(" Hex");
      if (buff[1]&0b10000000) Serial.print("FBF|");
      if (buff[1]&0b00010000) Serial.print("SOPT|");
      if (buff[1]&0b00001000) Serial.print("SOCD|");
      if (buff[1]&0b00000100) Serial.print("SOCC|");
      if (buff[1]&0b00000010) Serial.print("AFE_P|");
      if (buff[1]&0b00000001) Serial.print("AFE_C|");
      if (buff[0]&0b10000000) Serial.print("DFF|");
      if (buff[0]&0b01000000) Serial.print("DFETF|");
      if (buff[0]&0b00100000) Serial.print("CFETF|");
      if (buff[0]&0b00010000) Serial.print("CIM|");
      if (buff[0]&0b00001000) Serial.print("SOTD|");
      if (buff[0]&0b00000100) Serial.print("SOTC|");
      if (buff[0]&0b00000010) Serial.print("SOV|");
      if (buff[0]&0b00000001) Serial.print("PFIN|");
      Serial.println();
    };
    ReadSMB(word(0x0055)); Serial.print(F("Charging Status: "));
    if ((buff[1]==0)&&(buff[0]==0)) {
      Serial.println("OK");
    } else {
      printHEX(buff[1]); printHEX(buff[0]); Serial.println(" Hex");
      if (buff[1]&0b10000000) Serial.print("XCHG|");
      if (buff[1]&0b01000000) Serial.print("CHGSUSP|");
      if (buff[1]&0b00100000) Serial.print("PCHG|");
      if (buff[1]&0b00010000) Serial.print("MCHG|");
      if (buff[1]&0b00001000) Serial.print("TCHG1|");
      if (buff[1]&0b00000100) Serial.print("TCHG2|");
      if (buff[1]&0b00000010) Serial.print("FCHG|");
      if (buff[1]&0b00000001) Serial.print("PULSE|");
      if (buff[0]&0b10000000) Serial.print("PLSOFF|");
      if (buff[0]&0b01000000) Serial.print("CB|");
      if (buff[0]&0b00100000) Serial.print("PCMTO|");
      if (buff[0]&0b00010000) Serial.print("FCMTO|");
      if (buff[0]&0b00001000) Serial.print("OCHGV|");
      if (buff[0]&0b00000100) Serial.print("OCHGI|");
      if (buff[0]&0b00000010) Serial.print("OC|");
      if (buff[0]&0b00000001) Serial.print("XCHGLV|");
      Serial.println();
    };
    ReadSMB(byte(0x46)); Serial.print(F("FETControl: "));
    if (buff[0]==0) {
      Serial.println("OK");
    } else {
      printHEX(buff[0]); Serial.println(" Hex");
      if (buff[0]&0b00010000) Serial.print("OD|");
      if (buff[0]&0b00001000) Serial.print("ZVCHG|");
      if (buff[0]&0b00000100) Serial.print("CHG|");
      if (buff[0]&0b00000010) Serial.print("DSG|");
      Serial.println();
    };
    ReadSMBSubclass(82,0x78);
    Serial.print(F("Update Status: ")); Serial.println(buff[13]);
    Serial.print(F("Qmax Cell0: ")); Serial.println(buff[1]*256+buff[2]);
    Serial.print(F("Qmax Cell1: ")); Serial.println(buff[3]*256+buff[4]);
    Serial.print(F("Qmax Cell2: ")); Serial.println(buff[5]*256+buff[6]);
    Serial.print(F("Qmax Cell3: ")); Serial.println(buff[7]*256+buff[8]);
    Serial.print(F("Qmax Pack : ")); Serial.println(buff[9]*256+buff[10]);
    for (byte i=88; i<=91; i++) {
      ReadSMBSubclass(i,0x78);
      Serial.print("Cell");
      Serial.print(i-88);
      Serial.print(" R_a flag: "); printHEX(buff[1]); printHEX(buff[2]); Serial.println();
    }
    Read123();
    ReadSMB(word(0x0006)); Serial.print(F("Manufacturer Status: ")); printHEX(buff[1]); printHEX(buff[0]); Serial.println(" Hex");
    if (buff[1]&0b10000000) Serial.print("FET1|");
    if (buff[1]&0b01000000) Serial.print("FET0|");
    if (buff[1]&0b00100000) Serial.print("PF1|");
    if (buff[1]&0b00010000) Serial.print("PF0|");
    if (buff[1]&0b00001000) Serial.print("STATE3|");
    if (buff[1]&0b00000100) Serial.print("STATE2|");
    if (buff[1]&0b00000010) Serial.print("STATE1|");
    if (buff[1]&0b00000001) Serial.print("STATE0|");
    Serial.println();
    ReadSMB(word(0x0008)); Serial.print(F("Chemistry ID: ")); printHEX(buff[1]); printHEX(buff[0]); Serial.println(" Hex");
    delay(100);
    ReadSMB(byte(0x03)); Serial.print(F("BatteryMode: ")); printHEX(buff[1]); printHEX(buff[0]); Serial.println(" Hex");
    if (buff[1]&0b10000000) Serial.print("CapM|");
    if (buff[1]&0b01000000) Serial.print("ChgM|");
    if (buff[1]&0b00100000) Serial.print("AM|");
    if (buff[1]&0b00000010) Serial.print("PB|");
    if (buff[1]&0b00000001) Serial.print("CC|");
    if (buff[0]&0b10000000) Serial.print("CF|");
    if (buff[0]&0b00000010) Serial.print("PBS|");
    if (buff[0]&0b00000001) Serial.print("ICC|");
    Serial.println();
  };

}

void setup() {
  Wire.begin();
  Serial.begin(9600);
  Serial.println(F("Arduino Smart Battery"));
  Serial.println(F("Several utilities for working with TI bq20z... IC"));
  Serial.println(F("Press Enter..."));
  while (Serial.available()==0);
  Serial.print(F("Checking communication with the device at address 0x"));
  printHEX(addr);
  Serial.println("...");
  byte st;
  do {
    Wire.beginTransmission(addr);
    st=Wire.endTransmission();
    if (st!=0) Serial.println(F("The device is not responding.")); delay(1000);
  } while (st!=0);
  Serial.println(F("The device was found !!!"));
}

void loop() {
  delay(1);
  if (Serial.available()==0) {
    Serial.println(F("--------------------"));
    Serial.println(F("Select operation:"));
    Serial.println(F("1. Read pack info."));
    Serial.println(F("2. Pack Reset."));
    Serial.println(F("3. Unsealing a pack."));
    Serial.println(F("4. Move pack to Full Access mode."));
    Serial.println(F("5. Clearing a Permanent Failure."));
    Serial.println(F("6. Clearing CycleCount."));
    Serial.println(F("7. Setting current date."));
    Serial.println(F("8. Writing DesignCapacity, QMAX, Update status, Ra_table."));
    Serial.println(F("9. Begin the Impedance Track algorithm."));
    while (Serial.available()==0);
    switch (Serial.read()) {
      case 0x31:
        Serial.println(F("Pack Info..."));
        info();
        break;
      case 0x32:
        WriteSMBWord(0x00,0x0041);
        Serial.println(F("Reseting..."));
        delay(1000);
        break;
      case 0x33:
        WriteSMBWord(0x00,unseal_key_1);
        WriteSMBWord(0x00,unseal_key_2);
        Serial.println(F("Unsealing..."));
        break;
      case 0x34:
        WriteSMBWord(0x00,full_access_key_1);
        WriteSMBWord(0x00,full_access_key_2);
        Serial.println(F("Move to Full Access mode..."));
        break;
      case 0x35:
        WriteSMBWord(0x00,pf_clear_key_1);
        WriteSMBWord(0x00,pf_clear_key_2);
        Serial.println(F("Clearing a Permanent Failure..."));
        break;
      case 0x36:
        WriteSMBWord(0x17,0x0000);
        Serial.println(F("Clearing CycleCount..."));
        break;
      case 0x37:
        WriteSMBWord(0x1B,(year-1980)*512+int(month)*32+day);
        Serial.println(F("Setting current date..."));
        break;
      case 0x38:
        Serial.println(F("Writing DesignCapacity, QMAX, Update status, Ra_table..."));
        WriteSMBWord(0x18,new_capacity);
        delay(100);
        ReadSMBSubclass(82,0x78);
        buff[1]=highByte(new_capacity);
        buff[2]=lowByte(new_capacity);
        buff[3]=highByte(new_capacity);
        buff[4]=lowByte(new_capacity);
        buff[5]=highByte(new_capacity);
        buff[6]=lowByte(new_capacity);
        buff[7]=highByte(new_capacity);
        buff[8]=lowByte(new_capacity);
        buff[9]=highByte(new_capacity);
        buff[10]=lowByte(new_capacity);
        buff[13]=0x00;
        WriteSMBSubclass(82,0x78);
        for (byte i=88; i<=95; i++) {
          buff[0]=0x20;
          buff[1]=0xFF;
          buff[2]=(i<92) ? 0x55 : 0xFF;
          buff[3]=0x00;
          buff[4]=0xA0;
          buff[5]=0x00;
          buff[6]=0xA6;
          buff[7]=0x00;
          buff[8]=0x99;
          buff[9]=0x00;
          buff[10]=0x97;
          buff[11]=0x00;
          buff[12]=0x91;
          buff[13]=0x00;
          buff[14]=0x98;
          buff[15]=0x00;
          buff[16]=0xB0;
          buff[17]=0x00;
          buff[18]=0xCC;
          buff[19]=0x00;
          buff[20]=0xDE;
          buff[21]=0x00;
          buff[22]=0xFE;
          buff[23]=0x01;
          buff[24]=0x3B;
          buff[25]=0x01;
          buff[26]=0xB5;
          buff[27]=0x02;
          buff[28]=0x8B;
          buff[29]=0x03;
          buff[30]=0xE9;
          buff[31]=0x05;
          buff[32]=0xB2;
          WriteSMBSubclass(i,0x78);
        }
        break;
      case 0x39:
        WriteSMBWord(0x00,0x0021);
        Serial.println(F("Begin the Impedance Track algorithm..."));
        break;
    }
  } else Serial.read();
}
Другие скетчи смотрите на github …